

Page 1
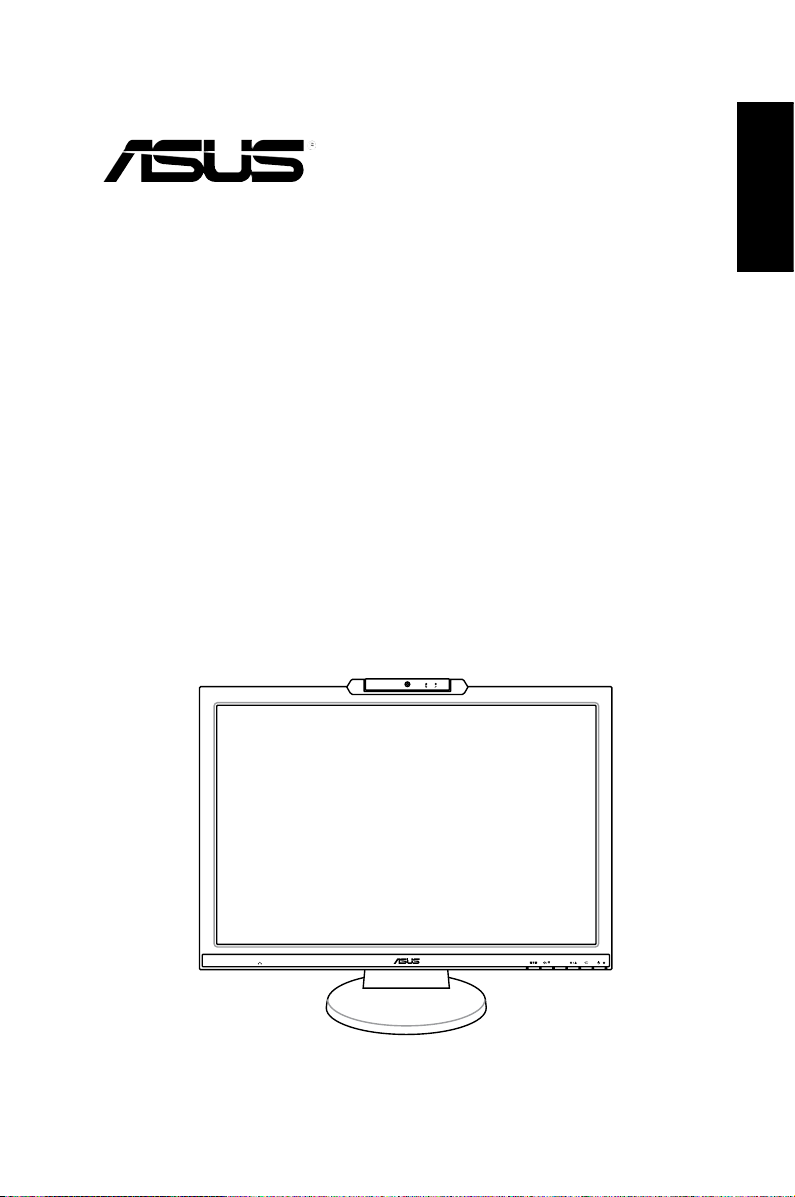
MK241 Series
MIC ARRAY
MENU
LCD Monitor
Quick Start Guide
English
Page 2
Safety information
MIC ARRAY
MENU
MENU
ASUS D.S.PLAY
English
Headphone
jack
Base
• Before setting up the monitor, carefully read all the documentation that came
with the package.
• To prevent fire or shock hazard, never expose the monitor to rain or moisture.
• The monitor should be operated only from the type of power source indicated
on the label. If you are not sure of the type of power supplied to your home,
consult your dealer or local power company.
• Use the appropriate power plug which complies with your local power standard.
• To ensure satisfactory operation, use the monitor only with UL listed computers
which have appropriate configured receptacles marked between 100-240V AC.
• If you encounter technical problems with the monitor, contact a qualified service
technician or your retailer.
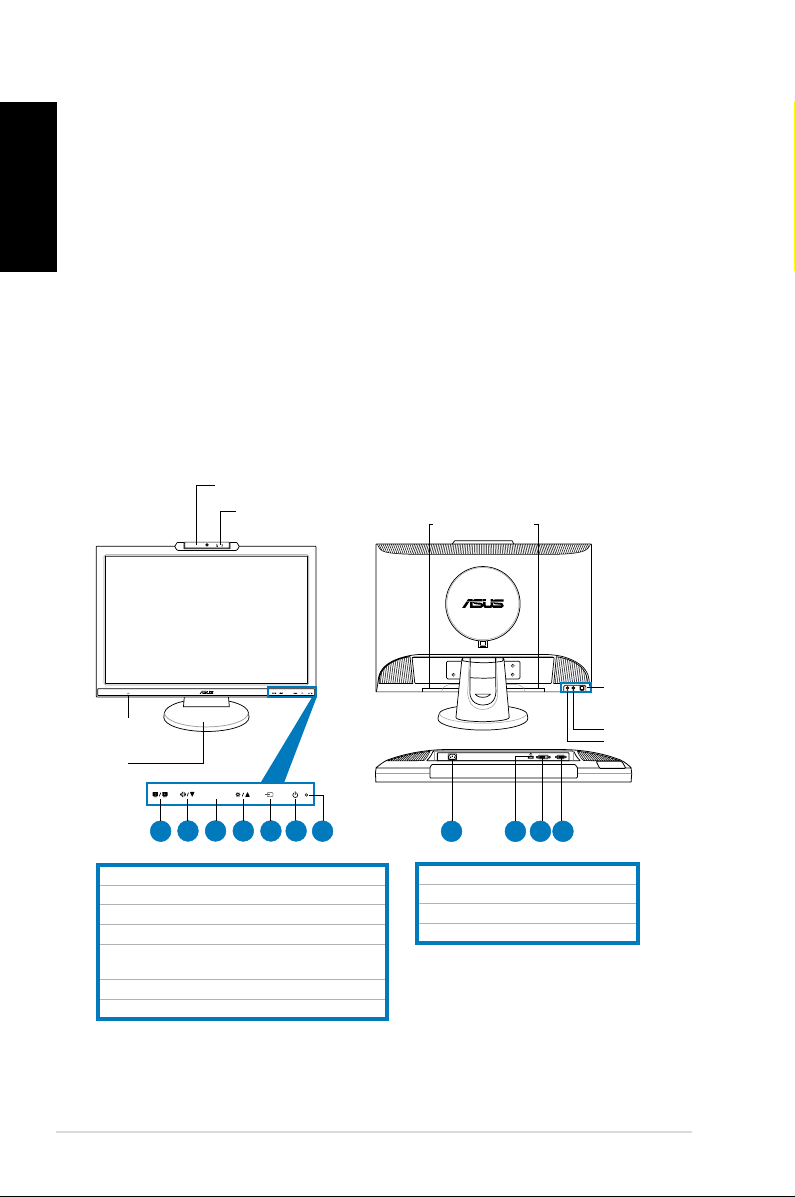
Monitor introduction
Front view Rear view
1.3 megapixel webcam
Mic Array
(microphone x2)
Stereo speakers
(2Wx2)
USB 2.0 port
(upstream, for
webcam and
microphones)
Audio in port
Audio out port
2 3 4 5 6
1
1. SPLENDID™*/Auto-adjust**/Exit MENU button
2. Volume hotkey/Decrease button
3. MENU/Enter/Selection button
4. Brightness hotkey/Increase button
5. Input select switch button (MK241H)
Auto-adjust button (MK241S)
6. Power button
7. LED indicator
* Hotkey for 5 video preset mode selection.
** Adjusts the image automatically by pressing the button for 2–3 seconds (MK241H only).
2 Quick Start Guide
7
8 11
8. AC-in port
9. HDMI port (MK241H only)
10. DVI port (MK241H only)
11. VGA port
10
9
Page 3

Connecting the cables
ASUS D.S.PLAY
Connect the cables as shown:
English
1
1. Power cord
2. HDMI signal cable (MK241H only)
3. DVI signal cable (MK241H only)
4. VGA signal cable
5. Audio-out cable
6. Audio-in cable
7. USB 2.0 cable
The HDMI cable and audio-out cable are purchased separately.
•
To connect the power cord:
3 42
connect one end of the power cord
securely to the monitor’s AC input port, the other end to a power outlet.
Before you connect the cables, ensure that your PC is switched off or the power
cord is unpluged from the wall socket.
•
To connect the signal cables
: connect one end of the signal cable(s) to
the monitor, the other end to your computer or any other video device.
•
When the HDMI, DVI, and VGA cables are connected simultaneously, you can
switch the input source from the
using the hotkey on the front panel (MK241H only).
To connect the audio cable
Input Select
item of the OSD functions, or by
: connect the audio cable from the monitor’s
audio-in port to the computer's audio-out port.
65
7
To connect to speakers:
•
Connect an audio-out cable from the audio-out
port of the LCD monitor to the audio-in port of your speakers.
3 Quick Start Guide
Page 4

English
MIC ARRAY
MENU
Built-in webcam with Mic Array support
The built-in 1.3 megapixel webcam with array microphones (Mic Array support)
allows you to take pictures, have a video conference, or record audio-video clips.
While chatting with friends via Internet-based communication tools, you can directly
show your vivid image and clear voice with this device.
System requirements
• A personal computer with Pentium® III 800 MHz or higher processor
• Microsoft
• Minimum 200 MB free hard disk space to run the program
• 128 MB of RAM or above
• A display card supporting 16-bit high color mode
Using the device
• The device transmits images and sound to your PC through the USB 2.0 port.
Therefore, make sure that the bundled USB 2.0 cable is connected to both the
LCD monitor and your PC before you use the device.
• The webcam is adjustable upward and downward as shown.
®
Windows® Vista / XP Service Pack 2 operating systems
• Make sure that the bundled USB 2.0 cable is connected to both the LCD
monitor and your PC. Otherwise, the webcam will not be activated.
• Make sure that you have installed the Windows
or later versions before using the device.
®
Vista / XP Service Pack 2
-30˚–30˚
Do not turn the webcam upward or downward over 30˚; doing so might damage
the webcam.
LifeFrame 2 software
ASUS MK241 provides the easy-to-use LifeFrame 2 software that can work with
the webcam, allowing users to create their own photos or video clips.
• LifeFrame 2 only supports Microsoft® Windows® Vista/XP Service Pack 2
operating systems.
• The LifeFrame 2 software is bundled in the support CD.
Installation instructions
1. Close all other applications.
2. Insert the support CD into the optical drive and run the LifeFrame 2
program.
3. Follow the on-screen instructions to complete the installation
4 Quick Start Guide
Page 5

Troubleshooting (FAQ)
Problem Possible Solution
Power LED is not ON
The power LED lights amber and there is no
screen image
Screen image is too light or dark • Adjust the Contrast and Brightness settings via
Screen image is not centered or sized properly • Press the button for 2–3 seconds to
Screen image bounces or a wave pattern is
present in the image
Screen image has color defects (white does not
look white)
Screen image is blurry or fuzzy • Press the button for 2–3 seconds to
No sound or sound is low • Ensure that thse audio cable is properly
Webcam or array microphone is not working • Make sure that you have connected the USB 2.0
• Press the button to check if the monitor is in
the ON mode.
• Check if the power cord is properly connected to
the monitor and the power outlet.
• Check if the monitor and the computer are in the
ON mode.
• Make sure the signal cable is properly connected
the monitor and the computer.
• Inspect the signal cable and make sure none of
the pins are bent.
• Connect the computer with another available
monitor to check if the computer is
properly working.
OSD.
automatically adjust the image (VGA input only).
• Adjust the H-Position or V-Position settings via
OSD (VGA input only).
• Make sure the signal cable is properly
connected to the monitor and the computer.
• Move away electrical devices that may cause
electrical interference.
• Inspect the signal cable and make sure that
none of the pins are bent.
All Reset
• Perform
• Adjust the R/G/B color settings or select the
Color Temperature via OSD.
automatically adjust the image (VGA input only).
• Adjust the Phase and Clock settings via OSD
(VGA input only).
connected to the monitor and the computer
• Adjust the volume settings of both your
monitor and computer.
• Ensure that the computer sound card driver
is properly installed and activated.
cable securely to both the LCD monitor and your
computer.
• Make sure that you use the Microsoft® Windows®
Vista / XP Service Pack 2 operating systems.
via OSD.
English
5 Quick Start Guide
Page 6

Supported operating modes
English
Standard
DOS
VGA
SVGA
WVGA
XGA
XGA+
WXGA
QVGA
SXGA
WXGA
WXGA+
UXGA
WSXGA+
WUXGA
(Primary)
Resolution
Frequency
720 x 400 70Hz 31.47KHz 28.32MHz
640 x 480 60Hz 31.47KHz 25.18MHz
640 x 480 72Hz 37.90KHz 31.50MHz
640 x 480 75Hz 37.50KHz 31.50MHz
800 x 600 56Hz
800 x 600 60Hz 37.90KHz 40.00MHz
800 x 600 72Hz 48.10KHz 50.00MHz
800 x 600 75Hz 46.90KHz 49.50MHz
848 x 480 60Hz 31.02KHz 33.75MHz
1024 x 768 60Hz 48.40KHz 65.00MHz
1024 x 768
1024 x 768
1152 x 864 75Hz 67.50KHz 108.00MHz
1280 x 800 60Hz 49.62KHz 83.375MHz
1280 x 720
1280 x 768
1280 x 768
1280 x 960 60Hz 60.00KHz 108.00MHz
1280 x 1024 60Hz 64.00KHz 108.00MHz
1280 x 1024
1360 x 768 60Hz 47.71KHz 85.50MHz
1440 x 900 60Hz 55.94KHz 106.00MHz
1440 x 900 75Hz 70.64KHz 136.75MHz
1600 x 1200 60Hz 75KHz 162.00MHz
1600 x 1200
1600 x 1200
1600 x 1200
1680 x 1050 60Hz 65.29KHz 146.25MHz
1680 x 1050 75Hz 82.30KHz 187MHz
1920 x 1200 60Hz 74.03KHz 154MHz
Vertical
Frequency
70Hz 56.50KHz
75Hz 60.02KHz 78.75MHz
60Hz 44.69KHz 74.375MHz
60Hz 47.78KHz 79.50MHz
75Hz 60.29KHz 102.25MHz
75Hz 80.00KHz 135.00MHz
65Hz 81.25KHz 175.5MHz
70Hz 87.5KHz 189.00MHz
75Hz 93.75KHz 202.5MHz
Horizontal
Frequency
35.16KHz
Pixel
36.00MHz
75.00MHz
* Modes not listed in the table may not be supported. For optimal resolution, we recommend that
you choose a mode listed in the table above.
* This monitor supports full HD (480i/p, 576i/p, 720p, 1080i/p) video contents from game consoles,
DVD players and other consumer video devices.
6 Quick Start Guide
 Loading...