

Page 1

NOTEBOOK PC
DRIVERS & UTILITIES
INSTALLATION & USER’S GUIDE
(WINDOWS 98)
Page 2

User’ s Notice (Support CD)
No part of this manual, including the products and software described in it, may be reproduced,
transmitted, transcribed, stored in a retrieval system, or translated into any language in any form or
by any means, except documentation kept by the purchaser for backup purposes, without the express written permission of ASUSTeK COMPUTER INC. (“ASUS”).
ASUS PROVIDES THIS MANUAL “AS IS” WITHOUT WARRANTY OF ANY KIND, EITHER EXPRESS OR IMPLIED, INCLUDING BUT NOT LIMITED TO THE IMPLIED WARRANTIES OR CONDITIONS OF MERCHANT ABILITY OR FITNESS FOR A PAR TICULAR
PURPOSE. IN NO EVENT SHALL ASUS, ITS DIRECTORS, OFFICERS, EMPLOYEES OR
AGENTS BE LIABLE FOR ANY INDIRECT, SPECIAL, INCIDENTAL, OR CONSEQUENTIAL DAMAGES (INCLUDING DAMAGES FOR LOSS OF PROFITS, LOSS OF BUSINESS,
LOSS OF USE OR DA T A, INTERRUPTION OF BUSINESS AND THE LIKE), EVEN IF ASUS
HAS BEEN ADVISED OF THE POSSIBILITY OF SUCH DAMAGES ARISING FROM ANY
DEFECT OR ERROR IN THIS MANUAL OR PRODUCT.
Products and corporate names appearing in this manual may or may not be registered trademarks or
copyrights of their respective companies, and are used only for identification or explanation and to
the owners’ benefit, without intent to infringe.
• Windows and MS-DOS are registered trademarks of Microsoft Corporation.
• Adobe and Acrobat are registered trademarks of Adobe Systems Incorporated.
• ALPS is registered trademark of Alps Electric Co., Ltd.
• GlidePoint is registered trademarks of Cirque Corporation.
• IBM, IBM PC are registered trademarks of International Business Machines Corporation.
• Microsoft Windows is registered trademark of Microsoft Corporation.
SPECIFICA TIONS AND INFORMA TION CONT AINED IN THIS MANUAL ARE FURNISHED
FOR INFORMA TIONAL USE ONL Y , AND ARE SUBJECT TO CHANGE AT ANY TIME WITHOUT NOTICE, AND SHOULD NOT BE CONSTRUED AS A COMMITMENT BY ASUS. ASUS
ASSUMES NO RESPONSIBILITY OR LIABILITY FOR ANY ERRORS OR INACCURACIES THAT MA Y APPEAR IN THIS MANUAL, INCLUDING THE PRODUCTS AND SOFT WARE DESCRIBED IN IT.
Copyright © 1998 ASUSTeK COMPUTER INC. All Rights Reserved.
Product Name: Support CD
Manual Revision: 1.00 E312/E314
Release Date: December 1998
2
Page 3

Contents
User’s Notice (Support CD)......................................................................2
Using New Hard Disk Drives....................................................................4
Flashing the BIOS .................................................................................... 6
New Operating System ............................................................................7
Microsoft Windows 98.......................................................................... 7
Support CD for Windows 98.....................................................................8
Y AMAHA Audio ........................................................................................9
YAMAHA Software (optional) ................................................................... 11
VGA Driver ...............................................................................................13
Setting the Display ...................................................................................15
Control Panel ...........................................................................................17
Lynx Display Properties .......................................................................18
TouchPad .................................................................................................19
Fast IR Driver ........................................................................................... 21
PC-cillin .................................................................................................... 23
Other Support CD Options ....................................................................... 24
Alps Mouse Utility .................................................................................. 25
3
Page 4

Using New Hard Disk Drives
When you purchase a new hard disk drive, there will not be any partitions on it unless it was preconfigured for your Notebook PC by your dealer . Partitions are necessary for a hard disk drive to
accept data. Booting to W indows requires that the active partition be within the maximum of 2GB,
therefore at least two partitions are necessary for the standard hard disk drive of 3GB. With two
partitions, you will see drive letters “C:\>” and “D:\>”. Because the Suspend-to-Disk partition is
not user-accessible, it does not have a drive letter . Each additional partition will create another drive
letter and the built-in CD-ROM will then add its own drive letter to the end.
NOTE: Formatting will not be allowed on non-partitioned hard disk drives and formatting hard
disk drives will not remove partitions.
Creating a Bootable Diskette
A bootable system diskette is necessary to enter the command prompt when there are no active
system partition on your hard disk drive. T o create a bootable floppy diskette, type “FORMAT A:/
S” from the DOS prompt or use W indow’s format (from “My Computer”) and check “Copy system
files.” Y ou must copy FDISK.EXE and other DOS utilities from the “C:\WINDOWS\COMMAND”
directory of W indows 95 or 98. Do not include AUTOEXEC.BAT or CONFIG.SYS system files
on the boot disk because some utilities cannot be used with memory managers usually loaded
through the AUT OEXEC.BAT and CONFIG.SYS system files.
Creating a Suspend-to-Disk Partition
If you wish to use the Suspend-to-Disk utility any time in the future, you must have a Suspend-toDisk partition. The Suspend-to-Disk partition must be created before other partitions are used because the other partitions will be removed. If you decide in the future that you do not want the
Suspend-to-Disk partition, the Suspend-to-Disk partition may be removed using FDISK.EXE without
affecting other partitions. The Supend-to-Disk partition will occupy its own space on the hard disk
drive that cannot be used for other purposes. The “Suspend-to-Disk” function requires the “Power
Management” mode to be configured for this function in the BIOS setup.
1. Boot from a system diskette with the “PHDISK.EXE” utility.
2. Type “PHDISK/CREATE 165000” then press [Enter].
4
Page 5

Using New Hard Disk Drives (Cont’)
The option “165000” is to tell PHDISK.EXE to create a 165,000 byte partition. The reason why
165MB is required is so that the Notebook PC maximum memory size of 160Mbytes can be supported. The 165MB Suspend-to-Disk partition on the hard disk drive guarantees that all of the data
in the memory can be stored on this partition regardless of your memory upgrades. If you do not
specify “165000,” PHDISK.EXE will create a partition which is a slightly larger than the system’ s
current memory size. Future memory upgrades will not allow the use of the Suspend-to-Disk without recreating the Suspend-to-Disk partition. The problem is that the PHDISK.EXE utility will
remove all other partitions when used.
Using the FDISK.EXE Utility
The FDISK.EXE utility can add or remove partitions on a hard disk drive. This utility is only
required if the hard disk drive is new and has never been formatted or used (remember the ability to
format a hard disk drive means that there is at least one partition). You do not need to use this utility
after formatting a hard disk drive. Be careful not to remove existing partitions that you may need,
you will not be able to recover it!
1. Boot from a system diskette with the “FDISK.EXE” utility.
2. Type “FDISK” from the “A:\>” prompt, then press [Enter].
3. Create a primary partition and set it active by following the on-screen menu, and also
create extended partitions if needed.
Formatting the Hard Disk Drive
Formatting a hard disk drive actually only erases all the data on one partition. In order to erase data
on other partitions, you must specify those drive letters when using the format utility . The /S command will place system files on the partition to allow bootup. T ype “FORMAT /?” for a list of other
options.
1. Boot from a system diskette with the “FORMAT.COM” utility.
2. Type “FORMAT C: /S” from the “A:\>” prompt then press [Enter].
3. Type “Y”, then press [Enter] to confirm format.
4. Enter a Volume label, or press [Enter] to leave blank.
5
Page 6

Flashing the BIOS
The BIOS contains information for the Notebook PC’ s hardware. Newer versions of the BIOS may
include new features and bug fixes. New bug fixes will include all previous fixes so only the newest
version is needed. Each BIOS image file is customized for a specific product and model. Do not try
to use a BIOS image file that was not intended for your Notebook PC. W ith the wrong BIOS, your
Notebook PC may not bootup and will require servicing. Use the utility “PHLASH.EXE” (pronounced “flash”) to update (or “flash”) your Notebook PC’s BIOS. NOTE: Any user-defined changes
in the BIOS configuration will be lost. Write down specific settings that you made in the BIOS
setup before using this utility .
1. Boot from a system diskette with the “PHLASH” utility, PLATFORM.BIN, and BIOS
image (e.g. ls-0103a) files. (If downloading from the internet, you will have to UNZIP
the files to the diskette.)
2. Type “phlash/mode=3 ls-0103a” (use the name of your new BIOS image file) and press
[ENTER].
3. The PHLASH utility will automatically update the BIOS. When the BIOS has been
successfully programmed, you will be asked to press any key to restart the system. If the
system does not restart, power OFF the Notebook PC and then turn ON the power.
4. Assuming that you have successfully flashed the BIOS, press [F2] on system bootup to
enter the BIOS setup. Select the “Load Setup Defaults” on the “Exit” menu and then
[Enter]. Go back to the other menus if you require BIOS configuration changes (previous
BIOS settings will be lost after updating the BIOS). Then select “Exit Saving Changes”
to exit the BIOS setup. If the screen resolution has changed after you restart the Notebook
PC, change your “Screen area” to 1024 by 768 pixels and “Colors” to High Color (16 bit)
through Settings in “Display Properties”.
6
Page 7

New Operating System
CD-ROM Support Under MS-DOS
When installing an operating system on an empty hard disk drive, a DOS real-mode CD-ROM
driver needs to be loaded in the CONFIG.SYS and AUTOEXEC.BAT files in order to use the CDROM drive. The floppy disk drive can be used without any device drivers. PCMCIA cards are not
recommended under DOS but, if necessary , you may consult your PCMCIA card documentation or
dealer for configuration under the DOS environment. The CD-ROM device driver should be preconfigured from the factory as follows (because hardware and software are constantly improved or
customized for a particular market, the examples in the software section may not exactly reflect
your Notebook PC.
CONFIG.SYS: DEVICE=C:\CDROMDRV.SYS /D:0EMCD001
AUTOEXEC.BAT: MSCDEX.EXE /D:OEMCD001 /L:D
Microsoft Windows 98
Microsoft W indows 98 may be pre-installed on your Notebook PC. If installation or configuration
changes are necessary , please refer to the documentation provided with the W indows 98 operating
system. Once Windows 98 is running, you should use the Windows 98 CD-ROM device driver
instead of the DOS real-mode CD-ROM driver . A DOS driver has poor performance, poor memory
management, and may cause conflicts with other devices.
Removing the DOS real-mode CD-ROM driver
Removing the device line or adding “REM” (upper or lower case) in front of the line will disable the
DOS driver and allow Windows 98 to use its own CD-ROM device driver. Windows 98 may
already add the letters “REM” in front of the DOS CD-ROM drivers in AUTOEXEC.BA T such as:
CONFIG.SYS: rem - By W indows Setup - DEVICE=C:\CDROMDRV.SYS /D:0EMCD001
AUTOEXEC.BAT: rem - By Windows Setup - MSCDEX.EXE /D:OEMCD001 /L:D
If running W indows 98 setup, it will automatically check for real-mode drivers and guide you using
a wizard to remove undetected ones. If these two lines exist and do not have “REM” in front, add
them yourself by opening the files with NOTEPAD.EXE provided by Windows or EDIT.COM
provide by DOS or you may simply delete these two lines.
7
Page 8
Support CD for Windows 98
The support CD included with the Notebook PC provides all the necessary drivers and utilities in
order for you to use your Notebook PC. The following pages will give step-by-step installation
procedures for typical system configurations. For application usage, please see the on-line help
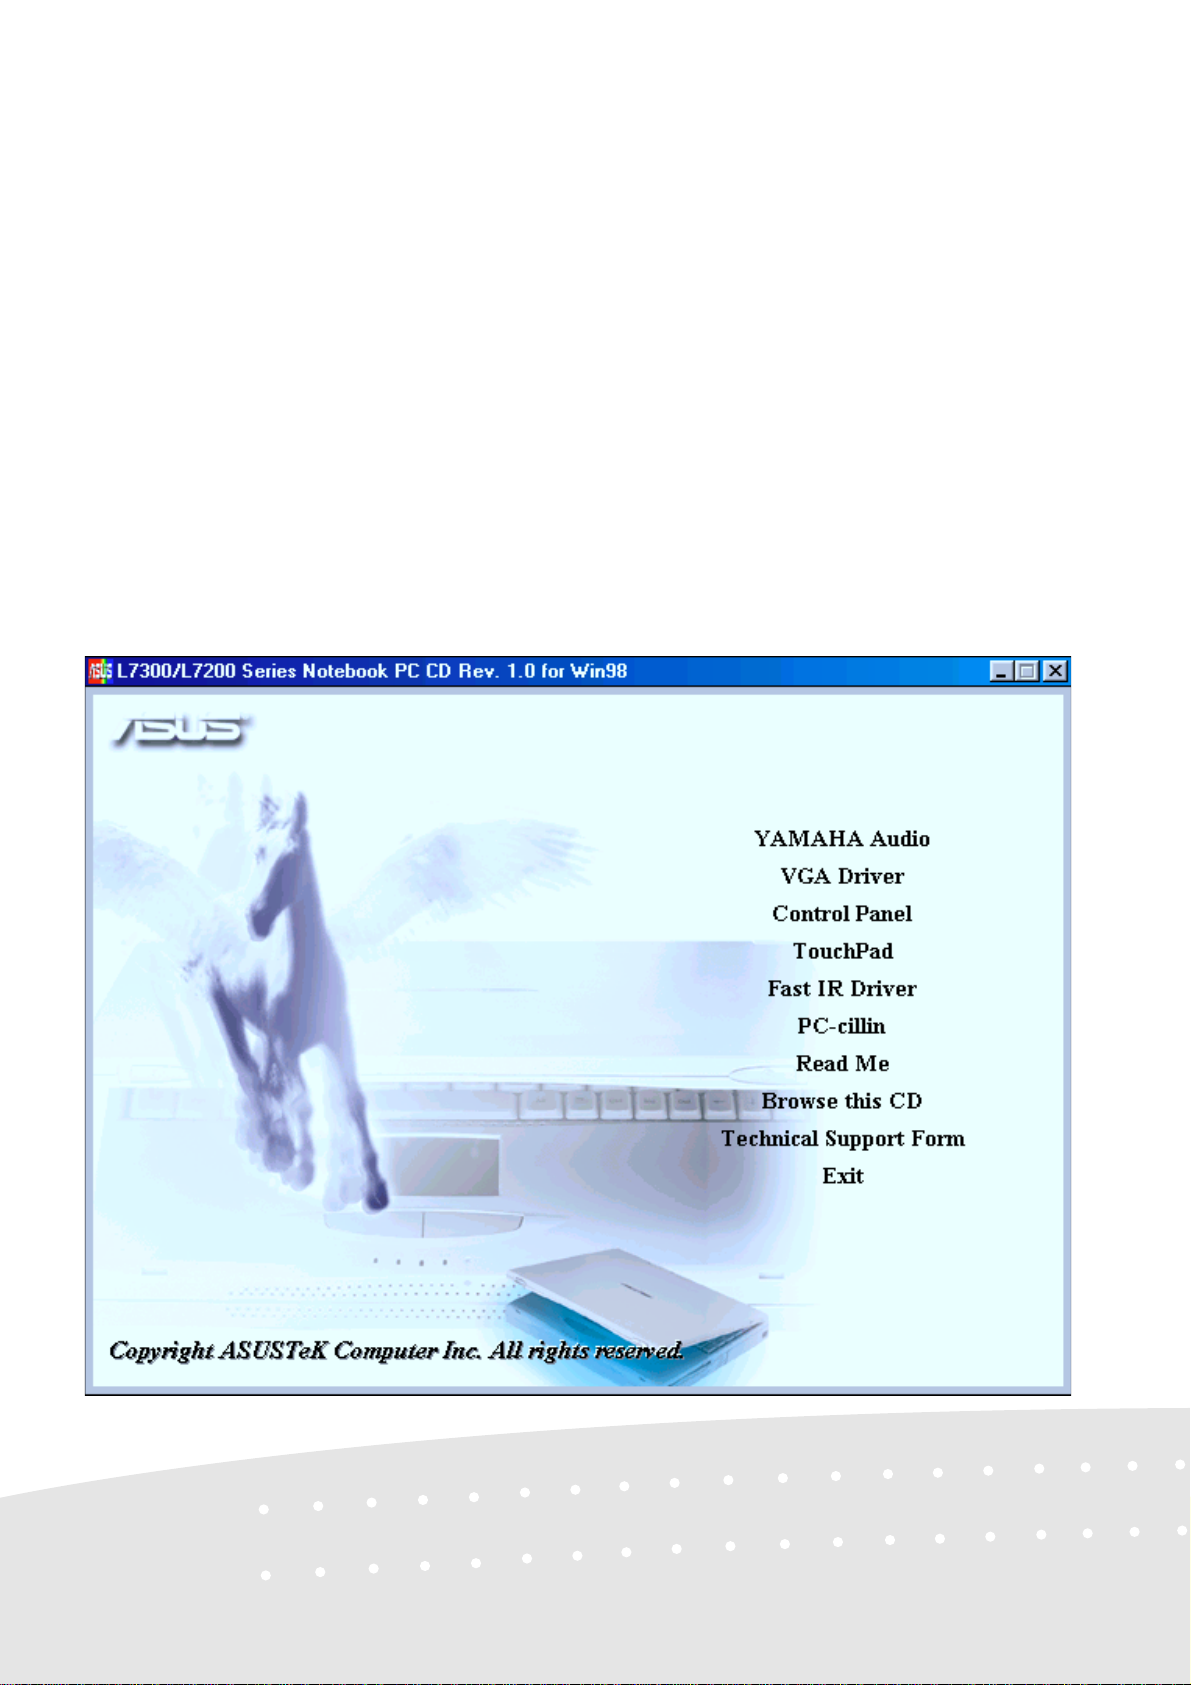
provided with each of the applications after installation. The following is what you will see when
you insert the support CD. If the autorun menu does not appear, double clicking the CD-ROM disc
drive icon (the letter (E:) drive on hard disk drives with two partitions) or running SETUP.EXE
located in the root of the support CD, will bring up the autorun menu.
8
Page 9
Y AMAHA Audio
This is necessary in order for your operating system to have the correct audio drivers for your
Notebook PC’ s built-in audio. Windows 98 cannot contain all the device drivers from every manufacture, with every update; therefore the provided support CD will contain the best driver for your
built-in audio. You may skip this software if your audio drivers were pre-configured at the time of
purchase.
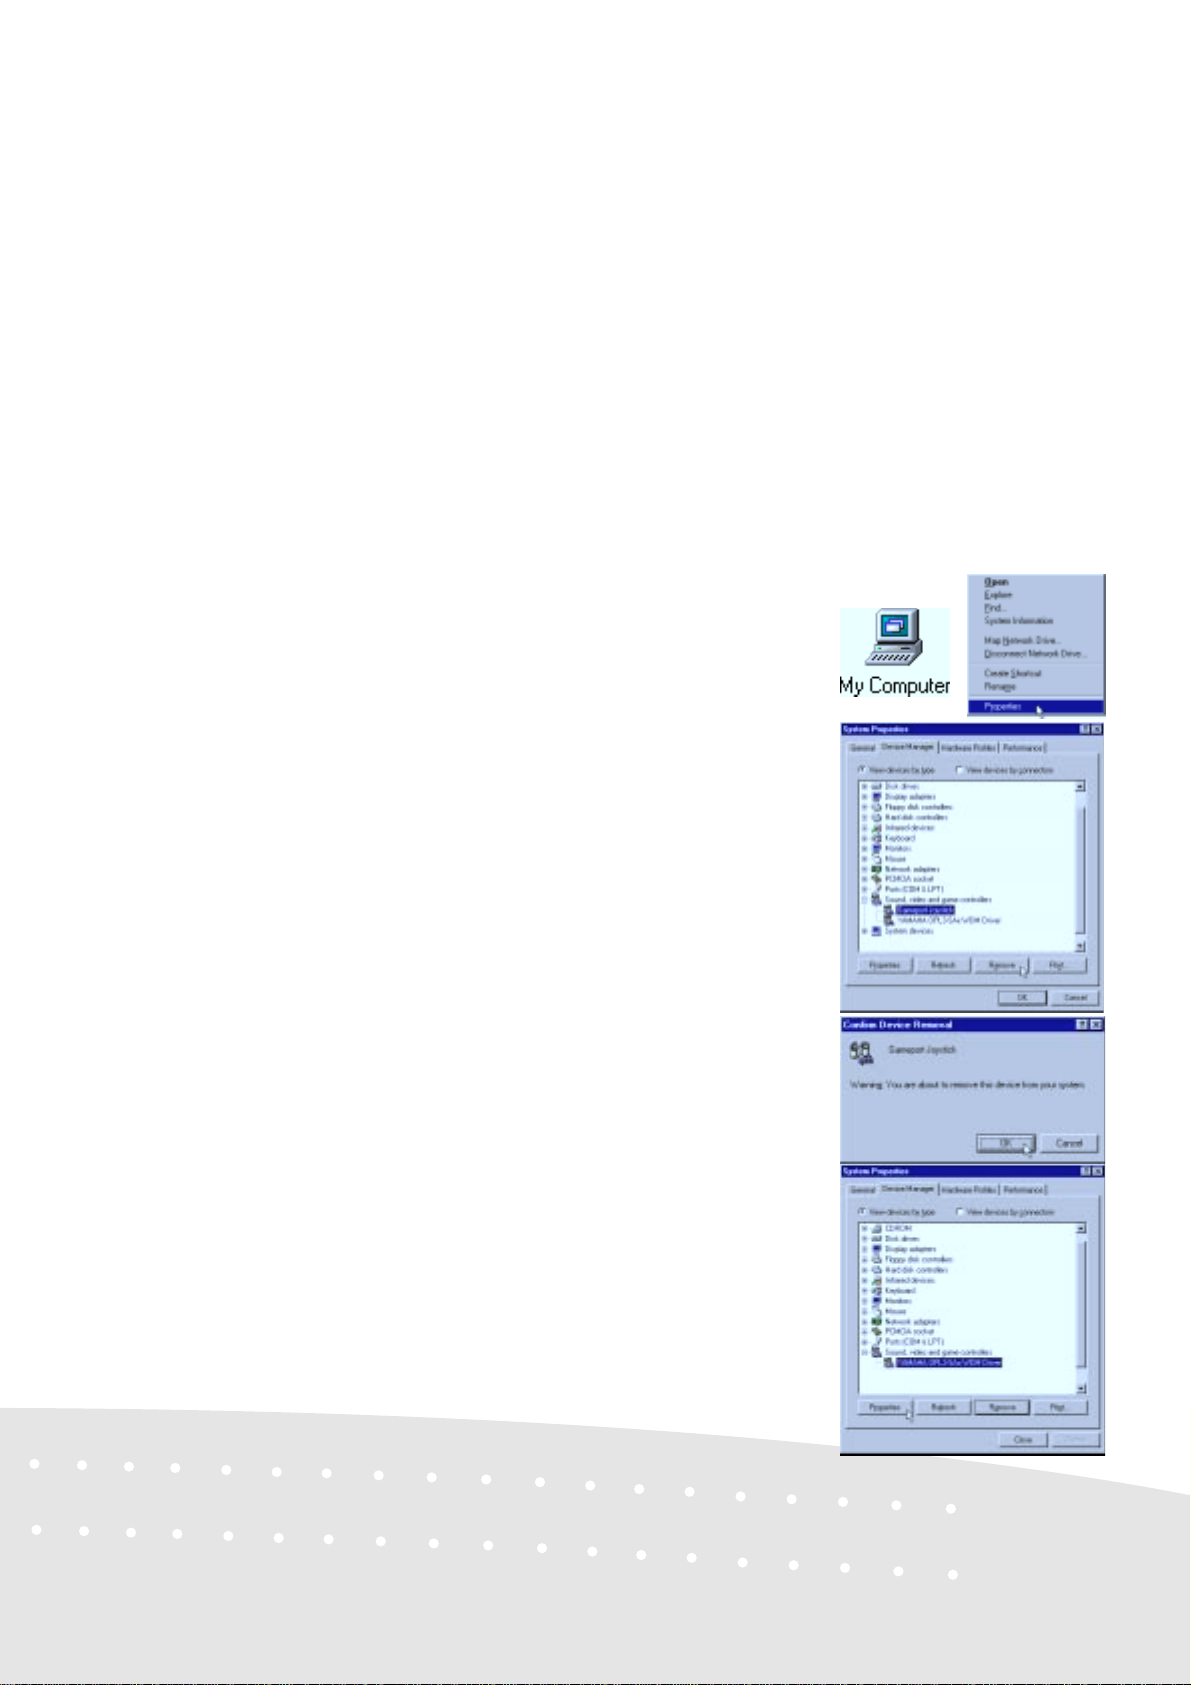
Installation Procedure
1. Insert the support CD. (You may exit the
autorun screen.)
2. Right-click on My Computer icon and
choose Properties.
3. Click the Device Manager tab.
4. Under Sound, video and game control-
lers, select Gameport Joystick. (Click the
plus sign or double click a component
heading to expand the component items.)
5. Click Remove, and then click OK.
6. Double-click YAMAHA OPL3-SAx
WDM Driver, and then click Properties.
9
Page 10
Y AMAHA Audio (Cont’)
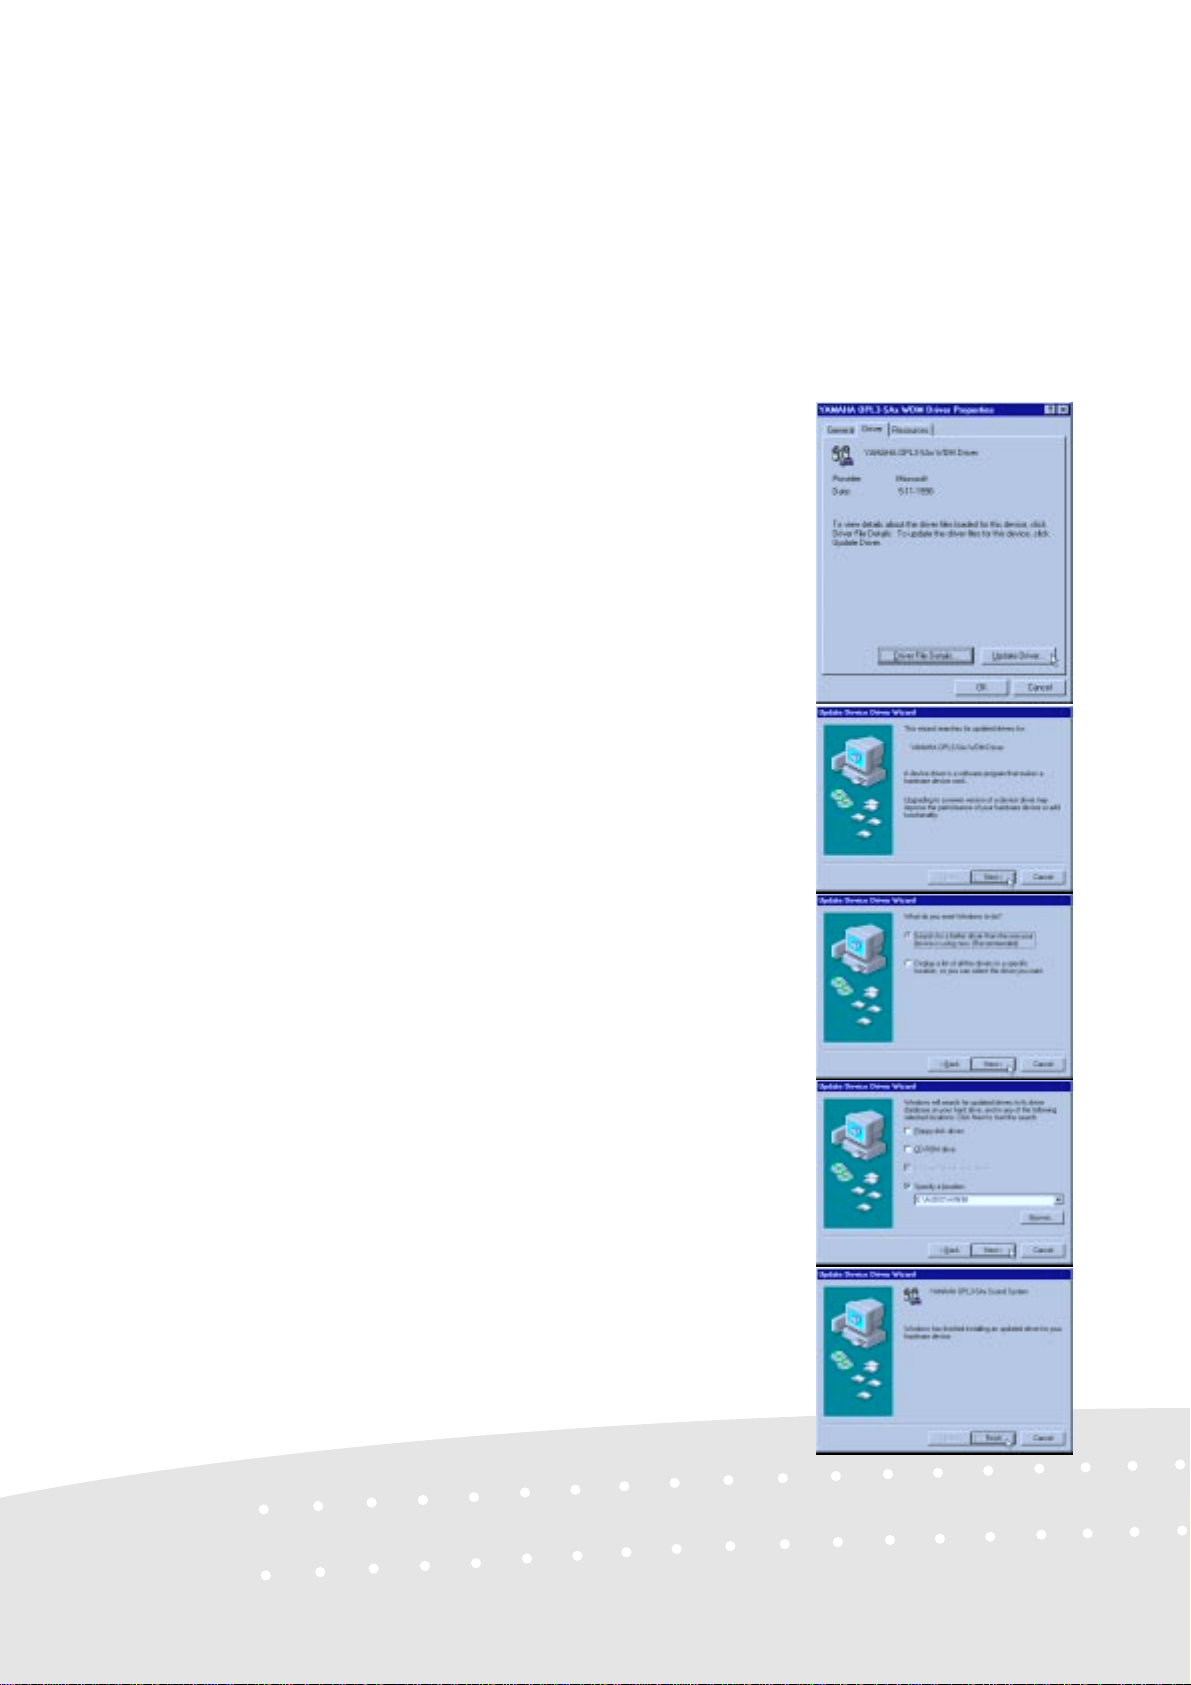
7. Select the Driver tab and click Update Driver.
8. Click Next to search for updated drivers.
9. Click Next again to let Windows search
for you.
10
10.Select Specify a location and type in the
CD path: E:\AUDIO\WIN98.
11.Click Finish, and then click Close twice to
exit.
Page 11
YAMAHA Software (optional)
The YAMAHA YSTA TION32 software, which consists of CD, MIDI, WAVE and MIX players, is
included on your support CD and supports the following languages: English, French, German,
Japanese, Italian, Spanish, Danish, Dutch, Finnish, Norwegian, Swedish, T raditional Chinese, Simplified Chinese, and Brazilian Portuguese.
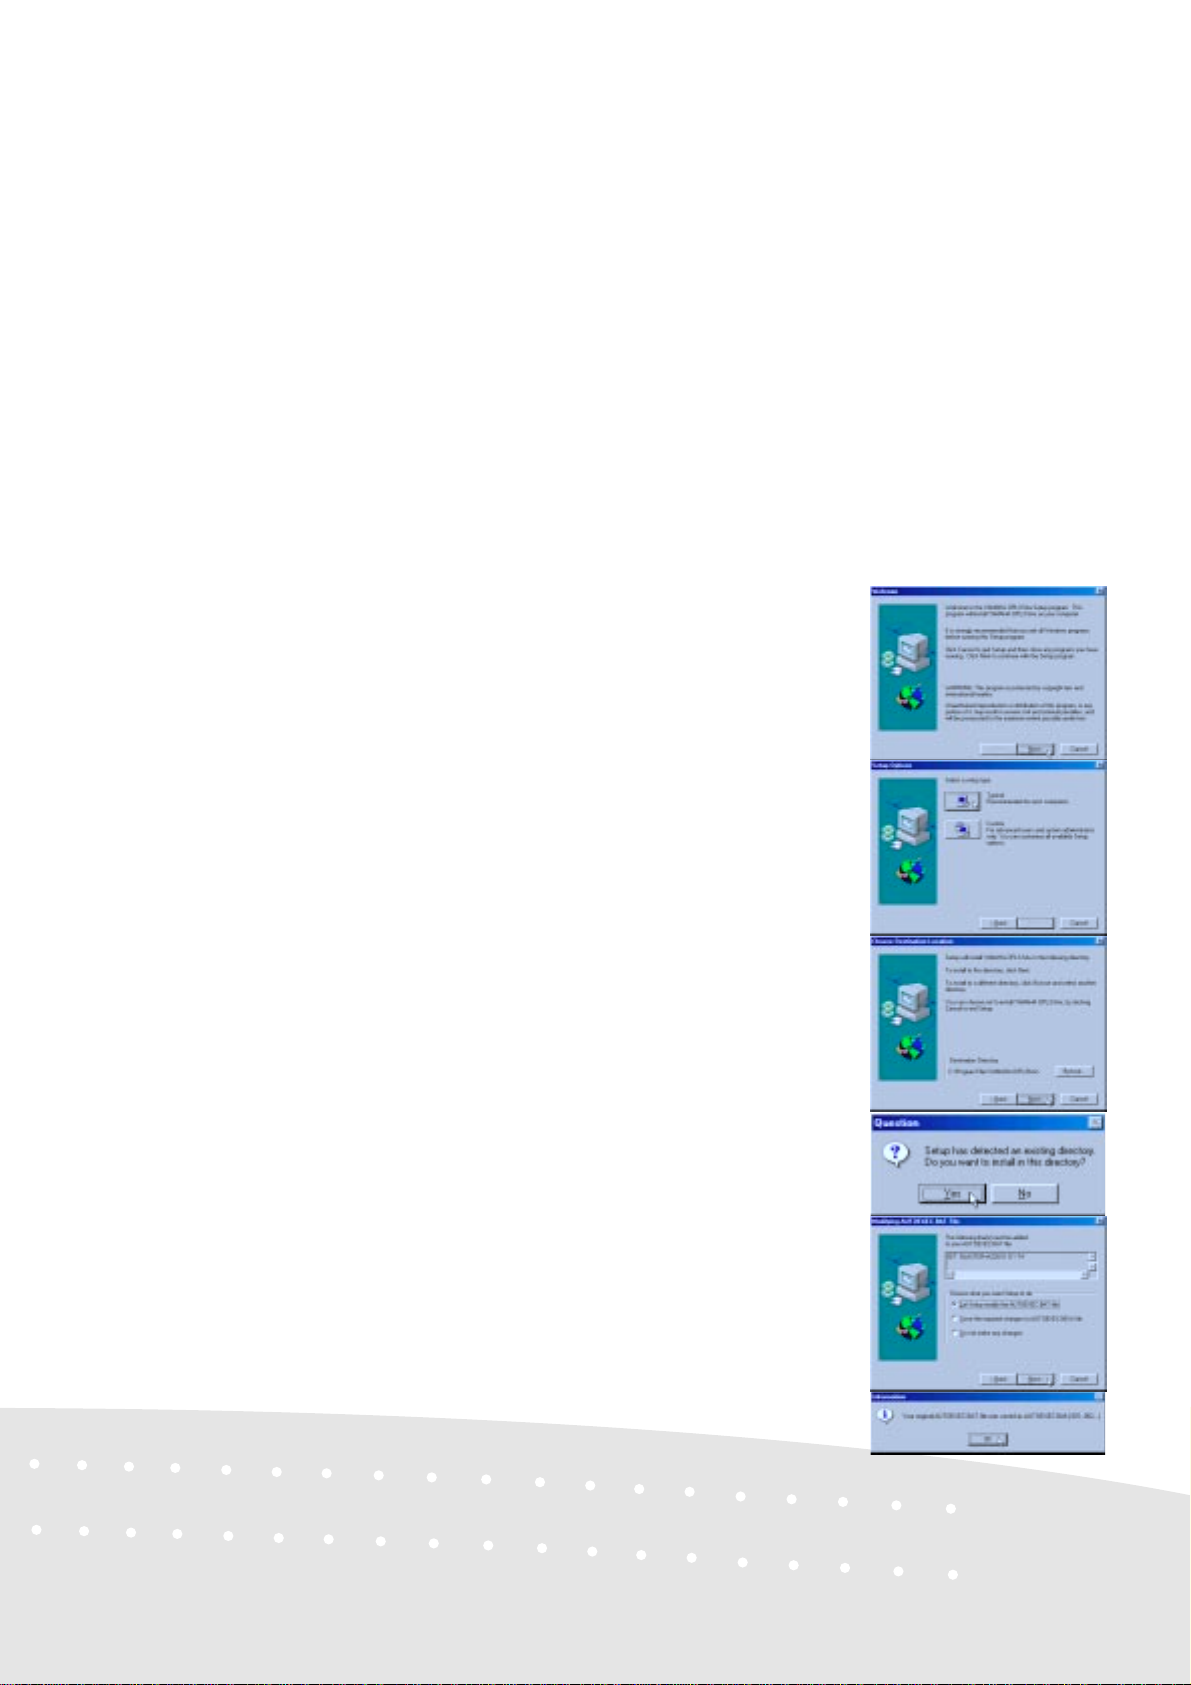
Installation Procedure
1. Insert the support CD.
2. Click Browse this CD from the autorun
menu.
3. Double-click the Audio and the Appli
folders.
4. Double-click SETUP .EXE in the “Appli”
folder.
5. Click Next on the “Welcome” screen.
6. Click Typical on the “Setup Options”
screen.
7. Click Next (or Browse to change the
destination directory) on the “Choose
Destination Location” screen.
8. Click Yes to create a new directory or to
replace an existing directory.
9. Click Next to allow changes to your
AUTOEXE.BAT file. Your original file will
be saved to another name.
10.Click OK on the “Information” window.
11
Page 12
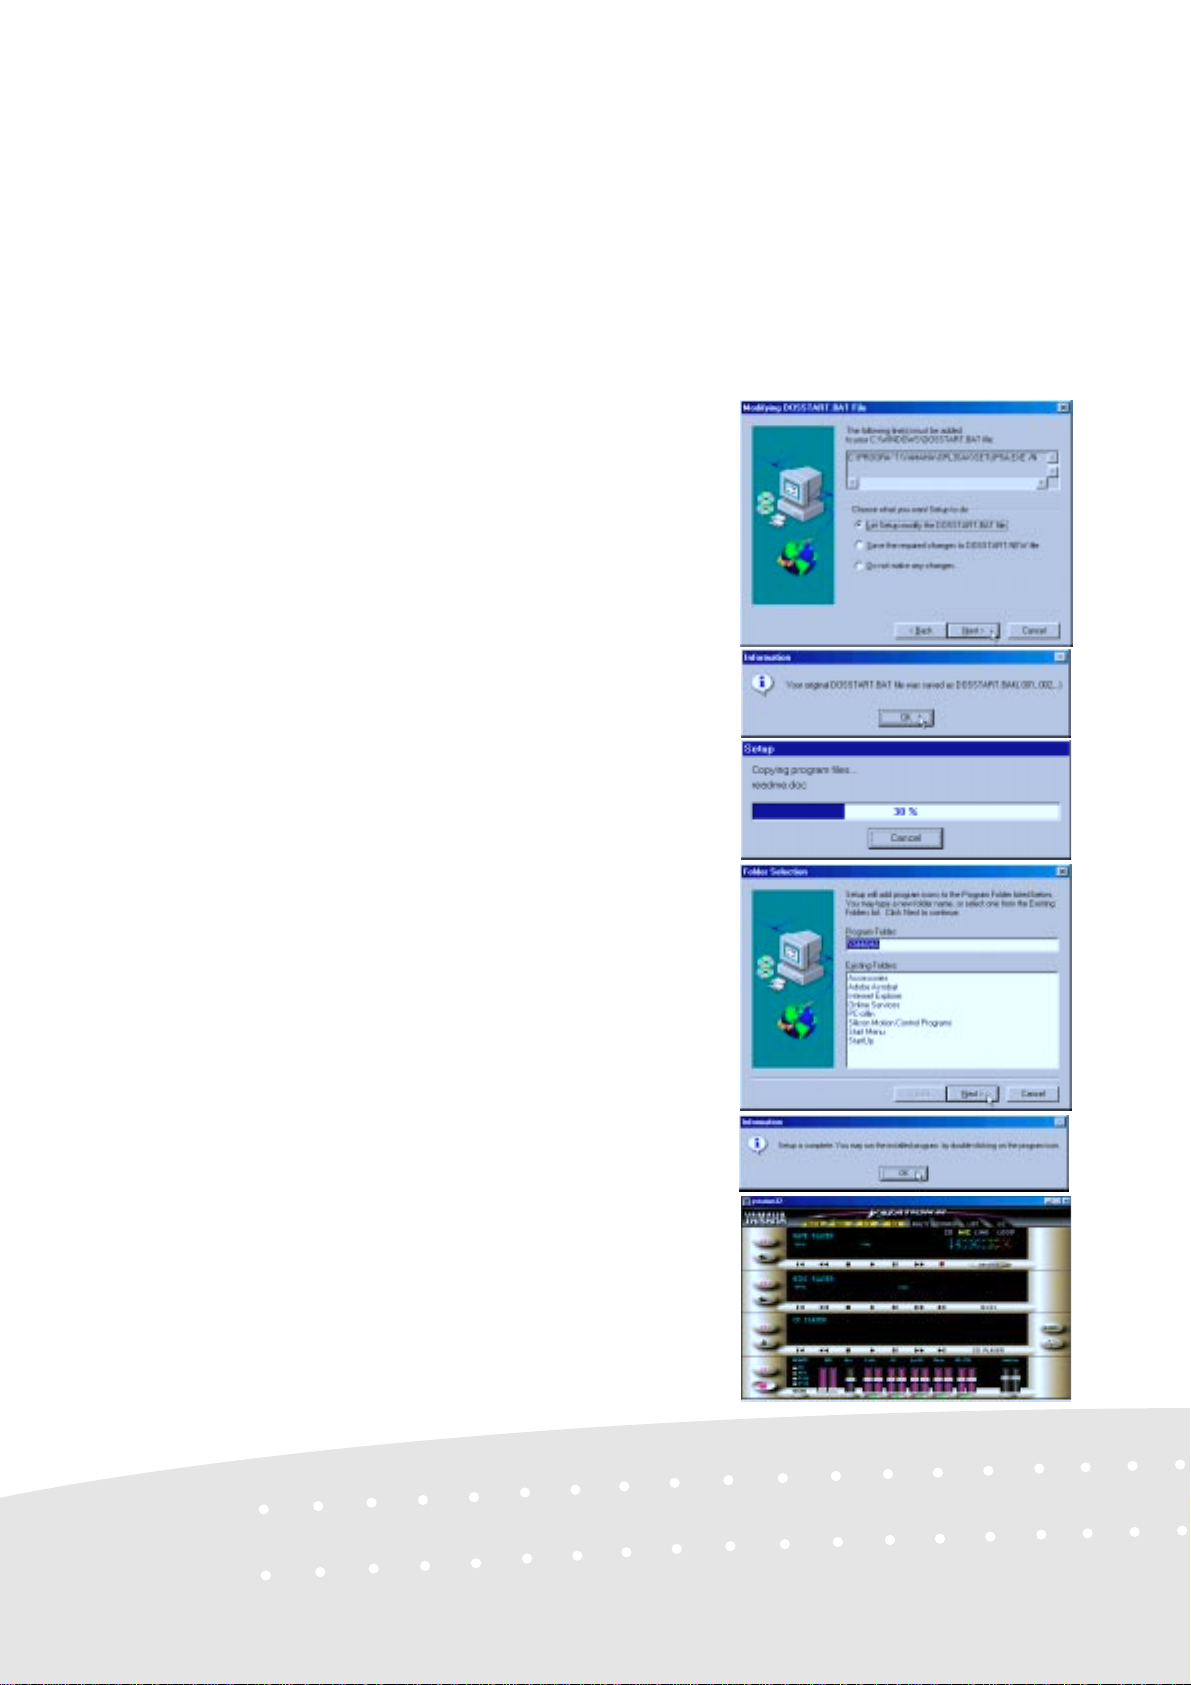
YAMAHA Software (Cont’)
11.Click Next to allow changes to your
DOSSTART.BAT file. Your original file
will be saved to another name.
12.Click OK on the “Information” window.
13.Wait while files are copied to your computer.
14.After copying is finished, click Next to
create a program folder.
12
15.Click OK to exit the installation program.
You may run the YSTATION32 from the newly
created program folder but future W indows sessions require you to run it through Start | Pro-
grams | Accessories | Yamaha | YSTATION32.
Page 13

VGA Driver
This is necessary in order for your operating system to have the correct video drivers for your
Notebook PC’s built-in graphics. Windows 98 cannot contain all the device drivers from every
manufacturer, with every update; therefore the provided support CD will contain the best driver for
your built-in graphics.
Installation Procedure
1. Insert the support CD. (You may
exit the autorun screen.)
2. Right-click on the desktop and
select Properties, then click the
Settings tab, and the
Advanced button.
3. Click the Adapter tab, and then click
Change.
4. Click Next to search for updated drivers.
13
Page 14
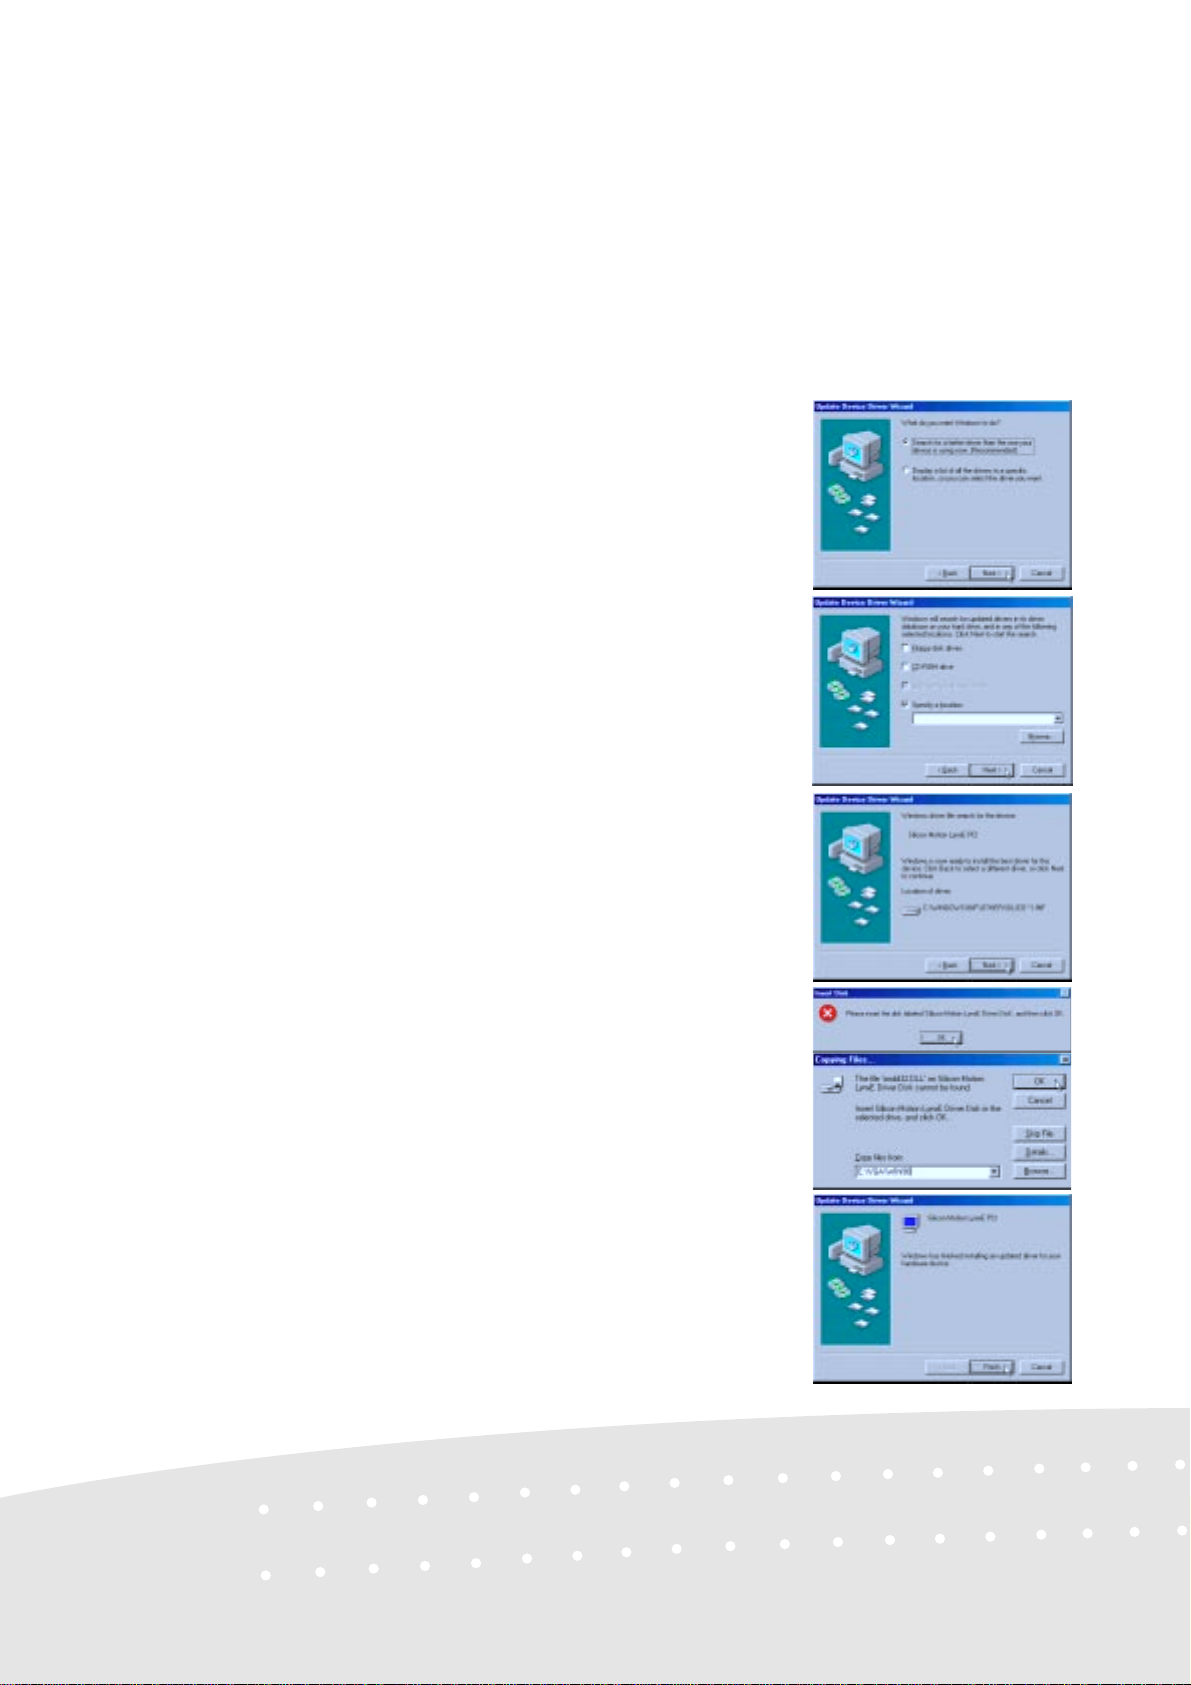
VGA Driver (Cont’)
5. Click Next again to let Windows search
for you.
6. Select Specify a location and type in the
CD path: E:\VGA\WIN98.
7. Click Next when you see “Windows driver
file search for the device”
14
8. You may be asked for the location of the
driver again.
9. Enter the location of the driver in the
support CD: E:\VGA\WIN98 and then
click OK.
10.Click Finish, and then click Yes to restart
Windows.
Page 15

Setting the Display
Procedure
1. Insert the support CD. (You may exit
the autorun screen.)
2. Right-click on the desktop and click
Properties.
3. Click Settings, Advanced, and then
click the Monitor tab.
4. Click Change.
5. Click Next when “This wizard searches
for updated drivers for:” is displayed.
6. Select “Display a list of all the drivers in a
specific location, so you can select the
driver you want.”, then click Next.
7. Select (Standard monitor types) from
Manufacturers and Laptop Display Panel
(1024x768) from Models.
15
Page 16

Setting the Display (Cont’)
8. Click Next when you see “Windows driver
file search for the device”
9. Click Finish when Windows finds “Silicon
Motion Lynx.”
10.Click OK if the Refresh Rate window
appear and Yes to keep the setting.
11.Do not restart your computer yet. Click
Apply and OK to return to Display
Properties.
16
12.Drag the “Screen area” adjustment bar so
that it reads 1024 by 768 pixels and click
OK.
13.Click OK to resize your desktop and Yes
to keep the setting. You should restart your
computer after all the display settings are
configured.
Page 17

Control Panel
The Silicon Motion Control Programs is a utility that provides DualV iew and DualApp support for
your Notebook PC. See the description on the next page.
Installation Procedure
1. Insert the support CD.
2. Click Control Panel on the support CD.
3. Click Next on the Welcome screen.
4. Click Next to accept the default program
folder or choose another.
5. Click Finish when you see the “Setup
Complete” notice.
6. If you restart Windows, an SMI icon will
appear on the task bar each time Windows
starts. You may also run the Control
Program manually through Start -
Programs - Silicon Motion Control
Programs.
Windows Task Bar
17
Page 18

Control Panel (Cont’)
Double-clicking on the SMI icon or right-clicking the desktop and choosing Properties will give
you the Display Properties screen. The Display Properties screen is a standard feature in W indows
but a Lynx tab will be added to the standard tabs.
Lynx Display Properties
Lynx Tab
Graphics and
Display
Information
Turns Notebook PC
display panel ON or
OFF
Turns Dual Application
ON or OFF
Enables or Disables
Hot-Key Switching
Dual Application (DualApp): Allows you to simultaneously display one appliation on the Notebook PC and another application on an external
monitor.
Dual View: Allows you to simultaneously view your
Notebook PC display and a portion of your screen
up to the entire screen for display on an external
monitor.
(not used)
Turns external
display ON or OFF
(not used)
T urns Dual View
ON or OFF
See/Edit Hot-Keys
18
Page 19

TouchPad
The system BIOS fully supports keyboard and PS/2 mouse devices that are built-in or connected to
the Notebook PC externally. The Notebook PC’s integrated TouchPad pointing device is fully
compatible with the two-button PS/2 mouse. However, the provided device driver will provide
enhancements to the touchpad when working with some applications. For detailed information on
these enhancements, please see the Alps Mouse Utility section later in this manual.
Installation Procedure
1. Insert the support CD. (You may exit the
autorun screen.)
2. Right-click on the My Computer icon and
choose Properties.
3. Click the Device Manager tab.
4. Under Mouse, double-click the current
device. (Click the plus sign or double click
a component heading to expand the
component items.)
5. Click the Driver tab, and then click
Update Driver.
19
Page 20

T ouchPad (Cont’)
6. Click Next to search for updated drivers.
7. Click Next again to let Windows search
for you.
8. Select Specify a location if necessary and
type in the CD path:
E:\TOUCHPAD\WIN98.
20
9. Click Next when you see “Windows driver
file search for the device”
10.Click Finish, and then click Close twice to
exit.
Page 21

Fast IR Driver
The fast IR driver allows your Notebook PC to use its infrared port for wireless communication
with a compatible device such as another Notebook PC, PDA, cellular phone, printer, modem, or
infrared ethernet.
Installation Procedure
1. Double-click My Computer,
Control Panel, and System
icons.
2. Select Network adapters, then
double-click on Winbond
Infrared Controller. (Click
the plus sign or double click a
component heading to expand
the component items.)
3. Click the Driver tab, then
double-click Update Driver.
4. Click Next, select Display a
list of all the drivers in a
specific location, so you can
select the driver you want.
5. Click Browse, then specify
the Infrared driver from your
Driver & Utility Support CD
at E:\FIR\WIN98.
6. Click Next, insert your Windows 98 CD and click OK.
7. Specify the path to the Windows 98 files if necessary.
8. Click Finish to complete
installation.
9. Click Yes to reboot your
computer.
21
Page 22

Fast IR Driver (Cont’)
After your computer is r estarted:
10.Right-click the Network icon on the
desktop.
11.Double-click Winbond Infrared Control-
ler (PIO) and click the Advanced tab.
22
12.Change the Infrared Transceiver “Value”
to IBM, then click OK twice.
13.Click Yes to restart your computer.
To use the the infrared port for wireless communication, right click the infrared icon on the task bar and place
check marks beside each option to enable the infrared port.
Page 23

PC-cillin
As software become more and more a part of our daily lives, measures have to be taken to protect
them. When you invest in this Notebook PC, a very important anti-virus software is included on the
support CD. Follow the procedure below to install this software and use the on-line help if you have
any questions. You may skip this software if you have your own anti-virus software.
Installation Procedure
1. Click PC-cillin on the autorun menu.
2. Click Next on the Welcome screen.
3. Wait while your setup checks your system.
4. Type in your name and company (op-
tional), and then click Next on the “Registration” screen.
5. Click Next or choose another destination
directory on the “Choose Destination
Location” screen.
23
Page 24

PC-cillin (Cont’)
6. Click Next for Express Install on the
“Choose Setup Type” screen.
7. Click Start to create a Bootable Emergency
Clean Disk. Otherwise, click Skip on the
“Create Emergency Clean Disk” screen.
8. Click Finish on the “Setup Complete”
screen to exit the installation program.
Other Support CD Options
Read Me: V iew notes concerning this support CD or the Notebook PC.
Browse this CD: Allows you to see the contents of this support CD.
Technical Support Form: View the technical support form which is required when asking for
technical support.
Exit: Closes the autorun menu.
24
Page 25

NOTEBOOK PC
ALPS MOUSE UTILITY
Section Overview
The Alps Mouse Utility is installed from the autorun by clicking “TouchPad”. Alps
is a pointing device driver and utility for W indows systems that can be used on the
Notebook PC. The Alps Mouse Utility can be used with the built-in T ouchpad pointing device as well as any externally connected PS/2 pointing devices.
USER’S MANUAL
Page 26

Contents
Section Overview .....................................................................................25
Changing the Settings..............................................................................28
Mouse Properties................................................................................. 28
Buttons................................................................................................. 28
Functions assigned to buttons .............................................................29
Double Click Speed ............................................................................. 29
Use Wheel Function............................................................................. 29
Options.....................................................................................................29
Options (Cont’) ......................................................................................... 30
Scroll Speed......................................................................................... 30
Scroll Area............................................................................................ 30
Tray Icon ..............................................................................................30
Mouse Compatibility Mode................................................................... 30
Motion ......................................................................................................31
Acceleration .........................................................................................31
Speed................................................................................................... 31
Pointer Trail.......................................................................................... 32
Orientation................................................................................................32
Orientation Settings ............................................................................. 32
Auto Jumps..........................................................................................33
Tapping.....................................................................................................34
Tapping ................................................................................................35
Tapping Speed ..................................................................................... 35
Drag Lock Settings............................................................................... 35
Typing .................................................................................................. 35
26
Page 27

Contents (Cont’)
Gesture ....................................................................................................36
Corner Tap Functions........................................................................... 36
Use Scroll Function.............................................................................. 36
Option .................................................................................................. 36
Sound Feedback ...................................................................................... 37
Easy Launcher .........................................................................................38
Application button(s) ............................................................................38
Easy Launcher Properties.................................................................... 39
Shortcut List.........................................................................................39
New...................................................................................................... 39
Delete................................................................................................... 39
Change ................................................................................................39
Up/Down ..............................................................................................40
Option .................................................................................................. 40
General controls.......................................................................................43
OK........................................................................................................ 43
Cancel.................................................................................................. 43
Apply ....................................................................................................43
Default.................................................................................................. 43
Version Information.............................................................................. 43
Frequently Asked Questions (F AQ).......................................................... 44
27
Page 28

Changing the Settings
Mouse Properties
Mouse Properties is an easy to use application software to change the settings for pointing devices.
The original Windows property sheets for the mouse (found in the control panel) were either added
to or replaced when the Touchpad driver was installed.
NOTE: The Pointers sheet is the same as the Windows standard mouse properties. If any functions
cannot be used, the corresponding tab will not be displayed.
Buttons
Use this feature to adjust the button settings
A preset function can be assigned to each button. The picture of the device varies according to the
device which the driver detects. The third picture is for “Both Buttons” on your Notebook PC
T ouchpad or a two button mouse, the “Central Button” for the middle button on a 3 button mouse,
and the “Wheel Button” for a mouse with a wheel.
NOTE: The Internal Pointing Device in the Advanced Menu of the BIOS Setup Utility must be set
to [Disabled] to allow detection of a wheel mouse by the Mouse Utility . If left [Enabled] the Notebook PC will treat all externally connected pointing devices as a standard 2 or 3 button mouse.
28
Page 29

Changing the Settings (Cont’)
Functions assigned to buttons
The following are functions that can be assigned to the mouse buttons.
• None • Click • Shortcut Menu • Auto Scroll
• Double Click • Easy Launcher
Double Click Speed
Double Click Speed allows the user to vary the time period between clicks in order for Windows
system to register a double click. The user can test their own settings by double clicking in the test
window . When a double click is registered, the dolphin jumps through the hoop.
Use Wheel Function
Check this if you want to use the wheel feature. This check box is displayed only when a wheel
mouse is used on your Notebook PC in place of your Touchpad.
NOTE: The Internal Pointing Device in the Advanced Menu of the BIOS Setup Utility must be set
to [Disabled] to allow detection of a wheel mouse by the Mouse Utility . If left [Enabled] the Notebook PC will treat all externally connected pointing devices as a standard 2 or 3 button mouse.
Options
You can change scrolling related values and other options on this sheet.
29
Page 30

Options (Cont’)
Scroll Speed
This allows you to change the scrolling speed of your pointing device with the scrolling function.
NOTE: The Internal Pointing Device in the Advanced Menu of the BIOS Setup Utility must be set
to [Disabled] to allow detection of a wheel mouse by the Mouse Utility . If left [Enabled] the Notebook PC will treat all externally connected pointing devices as a standard 2 or 3 button mouse.
Scroll Area
Change the width of the scrolling area for the Touchpad.
NOTE: The Internal Pointing Device in the Advanced Menu of the BIOS Setup Utility must be set
to [Disabled] to allow detection of a wheel mouse by the Mouse Utility . If left [Enabled] the Notebook PC will treat all externally connected pointing devices as a standard 2 or 3 button mouse.
Tray Icon
Check this to display the tray icon on the task bar . Part of this Tray icon will change color when you
touch the scrolling area. Also, you can display a menu by right-clicking the icon. Double-clicking
the icon brings up the Mouse Properties.
Mouse Compatibility Mode
Use this feature when the external mouse does not work. When this mode is enabled, you cannot
use the extended functions of the Touchpad.
NOTE: This feature is displayed only when you are using an old-format mouse.
30
Page 31

Motion
Use this feature to adjust the motion of the mouse pointer .
Acceleration
Acceleration allows the cursor to cover more area if the mouse is moved quickly. The check box
will enable or disable acceleration. If acceleration is enabled, you can choose Low, Medium, or
High acceleration using the track bar .
Speed
Sensitivity defines how W indows scales the distance moved by the mouse and the distance moved
on the screen. Low Sensitivity settings can enable the user to position the cursor more precisely,
setting a high sensitivity results in a broader cursor coverage on the screen with relatively small
movements of the pointing device. The check box enables the user to lock or unlock the horizontal
and vertical sensitivity trackbars together. The trackbars allow the user to vary the sensitivity for
both horizontal and vertical directions.
31
Page 32

Motion (Cont’)
Pointer Trail
This feature makes it easier for the user to keep track of the location of the cursor on screen. It does
this by leaving ghost cursors, which slowly disappear whenever the mouse is moved. This leaves a
very noticeable trail on the screen when the cursor moves. The check box will enable or disable the
trails and the trackbar can vary the number of ghost cursors trailing the main cursor .
Orientation
Use this feature to adjust the rotation
of the mouse pointer .
Orientation Settings
This feature is beneficial when the user finds it more efficient to hold or place the pointing device at
an angle. Click the Set Rotation button, when the message “Move the dolphin to the surface to set
the orientation” appears, move the pointing device in the direction the user wants to represent as the
upward movement on the screen. Based on this new upward direction, the on-screen cursor will,
from now on, move relative to this new orientation.
32
Page 33

Motion (Cont’)
Auto Jumps
Use this feature to automatically jump to a specified point.
Auto Jumps moves the cursor to a specified area of a window every time one is opened. There are
currently three different positions that the cursor can jump to with this function.
1. Default Button
2. Control Menu Box (top right hand corner of the W indow)
3. Center of the W indow
33
Page 34

Orientation (Cont’)
In the case where a specific control does not exist (e.g. no default button) The cursor remains in it’ s
current position. The user can however select multiple locations and in this case a priority system is
used. For example, if default push button and system menu box are selected and a window which
contains no default push button is opened then the cursor jumps to the system menu box if it is
present. If not, the cursor remains in it’ s current location. The dialog bitmap to the right of the check
boxes show the location of the current auto Jumps and their associated priorities - one being the
highest, three being the lowest.
NOTE: This feature only moves a cursor to specific position; it does not make click event. This
feature may not work on some application.
Tapping
Use this feature to adjust the tap settings.
NOTE: T apping tab appears only when a Touchpad having tapping setup functions is used. When
the T apping property sheet is not displayed, this function cannot be used with your pointing device.
34
Page 35

T apping (Cont’)
Tapping
When T apping is enabled, you can simulate a mouse click by simply pressing on the surface of the
pointing device. It is set whether to use the Tapping function. When the T apping function is used,
the T apping check box is turned on. When the T apping is not used, the T apping check box is turned
off. NOTE: If this feature is disabled, Drag Lock Setting, T apping Speed, and Typing will also be
disabled.
Tapping Speed
Moving the T apping Speed track bar to the left results in a simulated mouse click to slower tapping.
Moving it to the right results in a simulated mouse click to faster tapping. By tapping in the test box,
you can test the current tapping speed. The animation in the box begins to move when done from
the value to which the Tapping is set fast. The animation does not change when it is slower than
setting.
Drag Lock Settings
Drag Lock
It is a function that keeps the state of dragging even if the finger is separated from the operation side
after drags by the T apping. When the drag lock function is used, the drag lock check box is turned
on. NOTE: When the drag lock check box is disabled, the Auto Release cannot be set.
Auto Release
The Drag Lock will release the cursor after a specified period of time, which starts when the user
raises his or her finger from the surface of the T ouchpad. This time period can be defined by the user
via the Auto Release Delay track bar, just to the right of the auto release radio button.
Tap Release
When the Tap Release is chosen, the drag lock will be released by clicking a left mouse button
mouse or tapping.
Typing
Tap off when typing
With this option selected, you can not tap while typing on the keyboard. This feature will benefit
users in preventing inadvertent tapping while creating a document on a word processor. When
typing is interrupted, tapping becomes acceptable. This time period can be defined by the user via
the “Delay after last key is hit” track bar .
35
Page 36

Gesture
Use this feature to adjust the Gesture settings.
Corner Tap Functions
Left Corner Assign/Right Corner Assign
Y ou can assign a function to the corner tap of the T ouchpad. Click the
Left Corner Assign or Right Corner Assign drop down list and a menu
of available options will appear .
Use Scroll Function
Check this if you want to use the scrolling function. When this feature is enabled, you can scroll by
sliding your finger on the edge of T ouchpad instead of moving the cursor onto the scroll bar. Also,
you can use Zoom and Data Zoom by pressing the “Ctrl” key or “Shift” key while sliding you finger
on the T ouchpad.
Option
Opens “Options” dialog box. In this dialog, you can change scrolling parameter, tray icon status,
and mouse compatibility mode. You can also open this dialog box from the “Gesture” tab.
36
Page 37

Sound Feedback
Sound Feedback enhances the many features of the mouse by giving the user easily discernible
feedback on the operation of the pointing device. Users can assign specific sound files (WAV format) to the various pointing device operations. When audible feedback occurs, users can recognize
the execution of the specific pointing device operation. Users can customize the Sound Feedback
settings by using Sound property sheet.
Events
The operation to which the sound is allocated is displayed. The speaker is displayed to show that the
sound is set.
Name
The sound set in the operation is displayed. Click the down arrow on the name cell to see a list of
the allocated sounds.
Browse
It is possible to refer to the sound of an arbitrary folder . It is possible to refer to other folders when
the sound is not displayed in the sound name cell.
Preview: Play
Plays the sound that the sound is displayed in the name cell.
Preview: Stop
Stops the sound preview .
37
Page 38

Easy Launcher
Easy Launcher is an utility program which allows you to easily operate the W indows system. Users
can execute an arbitrary application program by clicking icon buttons which are located in the
popup window . To start the Easy Launcher, set the Easy Launcher to Left or Right Corner Assign,
then tap the corner .
The following windows open when the Easy Launcher is started.
After installation Easy Launcher has four default icon buttons which consist of the minimize button, the closed button, the start button and the Close Easy Launcher button.
Minimize button
When users click this button, the currently activated window is minimized.
Close button
When users click this button, the currently activated window is closed.
Start button
When users click this button, the W indows start menu is displayed on the task bar .
Close Easy Launcher button
When users click this button, the Easy Launcher is closed.
NOTE: The Easy Launcher can also be closed by clicking the close window button or pressing the
Esc key on the keyboard.
Application button(s)
Application button(s) appear when the short cuts are added in the Easy Launcher . When users click
the application button(s), the application associated with that icon can be started. The application is
added/deleted form Alps Pointing Device Driver property sheet.
Use this feature to adjust the Easy Launcher settings.
38
Page 39

Easy Launcher (Cont’)
Easy Launcher Properties
Use this feature to adjust the Easy Launcher settings.
Shortcut List
The application program registered in the Easy Launcher is displayed. The application icon can be
added to the Easy Launcher when drag and dropping to the short cut list from desktop and the
Explorer.
New
The application program is added to the Easy Launcher .
Delete
The application program is deleted from the Easy Launcher .
Change
The Change Shortcut for Easy Launcher dialog box is opened, and setting the application program
can be changed.
39
Page 40

Easy Launcher (Cont’)
Up/Down
The arrangement of the application button displayed in the Easy Launcher is changed.
Option
The option dialog box opens, and the Easy Launcher can be customized.
Windows style
The window style of the Easy Launcher is selected from Standard, Vertical or Horizontal.
Windows location
The window location of the Easy Launcher is selected from Display center, Pointer position or
Previous position.
Icon-button size
The icon size of the Easy Launcher is selected from Standard buttons, Small buttons or Large
buttons.
Enable Auto close
The Easy Launcher window is automatically closed after a fixed time when this check box is turned
on.
Show Title Bar
The display/non-display of the title bar is switched.
Use Tool Hint
The display/non-display of the tool hint is switched.
40
Page 41

Only Application Shortcut
If this box is checked, the start menu button, the close button and the minimize buttons are hidden.
Enable Auto Grid
When the Easy Launcher opens, the mouse of each icon is moved when this box is checked.
Use Close Easy Launcher button
When this check box is turned off, the button which Close Easy Launcher button becomes nondisplay.
Easy Capture
The Easy Capture is a utility program which enables the user to draw a picture and paste them into
an active application without the need of starting the Paint Brush or similar application.
To start Easy Capture, set the Easy Launcher to Left or Right Corner Assignment, then tap the
corner. If 3 button mode is set, it is also possible to start with one of the mouse buttons. Starting
Easy Capture will open an Easy Capture window which is described below . W ith this window , you
can draw a picture or character and then paste them into an application.
NOTE: Easy capture only support images and may not display other forms of data.
To paste a picture on Easy Capture window in an application
Click on the left button of Touchpad.
To clear a picture on Easy Capture window
Click on both the right and left buttons of Touchpad simultaneously.
41
Page 42

To cancel Easy Capture window
Click on the right button of the T ouchpad, or press the Esc key on the keyboard.
The Easy Capture property sheet allows changing the color, the size of the pen, and the size of the
canvas.
Canvas size
Select the canvas size to be used in Easy Capture: Large, Medium and
Small.
Width (Pen Style)
Select the width of the line to be used from the list.
Color (Pen Style)
Select the line color to be used from the list.
Option
The Option for Easy Capture dialog box opens when this button is clicked. In the option dialog box,
the Application Paste Key and the Preserve Previous Picture is set. When Easy Capture cannot
paste to the application program, change the Application Paste Key .
42
Page 43

General controls
OK
Click the OK button to close the Mouse Properties and save any changes which you have made.
Cancel
Click the Cancel button to close the Mouse Properties without saving any changes which you have
made.
Apply
Click the Apply button to save the changes which you have made without closing the Mouse Properties .
Default
Click the Default button to return the current settings to the initial default values.
Version Information
You can find version of Alps Pointing Device Driver files. To display the About dialog box, click
“ALPS” logo on any Mouse Properties sheet to see “About Alps Pointing-device Driver”.
43
Page 44

Frequently Asked Questions (F AQ)
Here we will list frequently ask questions about Alps Pointing Device Driver.
Q1. How do I use the Windows standard mouse driver instead of the Alps Pointing Device
Driver.
A1. See “To add or change a device driver for hardware” under Windows help files.
Q2. How do I use Tapping?
A2. Open Tapping property page, and then select the Tapping check box.
Q3. I cannot see the Alps Pointing Device Driver Properties.
A3. Restart your Notebook PC. If you connected an external PS/2 mouse, disconnect it from
your Notebook PC.
Q4. I cannot popup the Easy Launcher and the Easy Capture.
A4. If an external mouse is connected, disconnect it. Please confirm whether the Easy Launcher
or Easy Capture is set to the corner tap by the Gesture property sheet.
44
 Loading...