

Page 1
FlexSave+
User Manual
Page 2

E8310
English
Second Edition
April 2013
Copyright © 2013 ASUSTeK Computer Inc. All Rights Reserved.
No part of this manual, including the products and software described in it, may be reproduced,
transmitted, transcribed, stored in a retrieval system, or translated into any language in any form
or by any means, except documentation kept by the purchaser for backup purposes, without the
express written permission of ASUSTeK Computer Inc. (“ASUS”).
Product warranty or service will not be extended if: (1) the product is repaired, modied or altered,
unless such repair, modication of alteration is authorized in writing by ASUS; or (2) the serial
number of the product is defaced or missing.
ASUS PROVIDES THIS MANUAL “AS IS” WITHOUT WARRANTY OF ANY KIND, EITHER EXPRESS
OR IMPLIED, INCLUDING BUT NOT LIMITED TO THE IMPLIED WARRANTIES OR CONDITIONS OF
MERCHANTABILITY OR FITNESS FOR A PARTICULAR PURPOSE. IN NO EVENT SHALL ASUS, ITS
DIRECTORS, OFFICERS, EMPLOYEES OR AGENTS BE LIABLE FOR ANY INDIRECT, SPECIAL, INCIDENTAL,
OR CONSEQUENTIAL DAMAGES (INCLUDING DAMAGES FOR LOSS OF PROFITS, LOSS OF BUSINESS,
LOSS OF USE OR DATA, INTERRUPTION OF BUSINESS AND THE LIKE), EVEN IF ASUS HAS BEEN
ADVISED OF THE POSSIBILITY OF SUCH DAMAGES ARISING FROM ANY DEFECT OR ERROR IN THIS
MANUAL OR PRODUCT.
SPECIFICATIONS AND INFORMATION CONTAINED IN THIS MANUAL ARE FURNISHED FOR
INFORMATIONAL USE ONLY, AND ARE SUBJECT TO CHANGE AT ANY TIME WITHOUT NOTICE, AND
SHOULD NOT BE CONSTRUED AS A COMMITMENT BY ASUS. ASUS ASSUMES NO RESPONSIBILITY OR
LIABILITY FOR ANY ERRORS OR INACCURACIES THAT MAY APPEAR IN THIS MANUAL, INCLUDING THE
PRODUCTS AND SOFTWARE DESCRIBED IN IT.
Products and corporate names appearing in this manual may or may not be registered trademarks
or copyrights of their respective companies, and are used only for identication or explanation and
to the owners’ benet, without intent to infringe.
2
Page 3

License and Warranty Agreement
By using the enclosed Software you indicate your acceptance of all terms and conditions of this
license agreement. If you do not agree with these terms then FNet Co., Ltd. is unwilling to license
the Software to you, in which event you should return the full product with proof of purchase to the
dealer from whom it was acquired within thirty days of purchase for a refund of the purchase price,
or by destroying all copies of the Software and the accompanying documentation.
The Software that accompanies this license (the "Software") is the property of FNet Co., Ltd. or its
licensors and is protected by copyright law. While FNet Co., Ltd. continues to own the Software,
you will have certain rights and obligations to use the Software after acceptance of this license as
follows:
Non-permitted Uses
You may not modify, translate, sublicense, rent or lease any portion of the Software or
accompanying documentation. You may not create any derivative works from the Software.
You may not use or transfer a previous version of the Software after you have received a media
replacement or an upgraded version as a replacement to a prior version.
Limitation of Liability
To the maximum extent permitted by applicable law, in no event shall FNet or its suppliers be
liable for any special, incidental, indirect or consequential damages whatsoever (including, without
limitation, damages for loss of business prots, loss of business or personal information, or any
other monetary loss) arising out of the use of or the inability to use the Software, even if FNet has
been advised of the possibility of damages. Because some states and jurisdictions do not allow the
exclusion or limitation of liability for consequential or incidental damages, the above limitation
may not apply to you. In no event shall FNet liability exceed the purchase price for the Software.
The disclaimers and limitations set forth above will apply regardless of whether you accept the
Software.
DOS, Microsoft, Windows, Windows 3.1, Windows 95, Windows 98, Windows ME, Windows NT,
Windows 2000, Windows XP, Windows VISTA are trademarks of Microsoft® Corporation.
trademarks, product names or images are trademarks or registered trademarks of their
respective companies.
All other
English
3
Page 4

English
Contents
License and Warranty Agreement ................................................3
Non-permitted Uses ........................................................................................ 3
Limitation of Liability ......................................................................................3
Installing ASUS FlexSave+ ............................................................5
Using ASUS FlexSave+ ..................................................................7
ASUS FlexSave+ main screen ....................................................................... 7
Conguring your ASUS FlexSave username and password .............. 8
Searching for your preset username and password ............................9
Transferring data to your external hard drive ........................................9
Backing up your data ....................................................................................10
Restoring your backup plan .......................................................................11
Conguring the ASUS FlexSave+ settings .............................................12
Transferring or backing up data to
your ASUS WebStorage account .............................................13
Notices......................................................................................... 14
4
Page 5
Installing ASUS FlexSave+
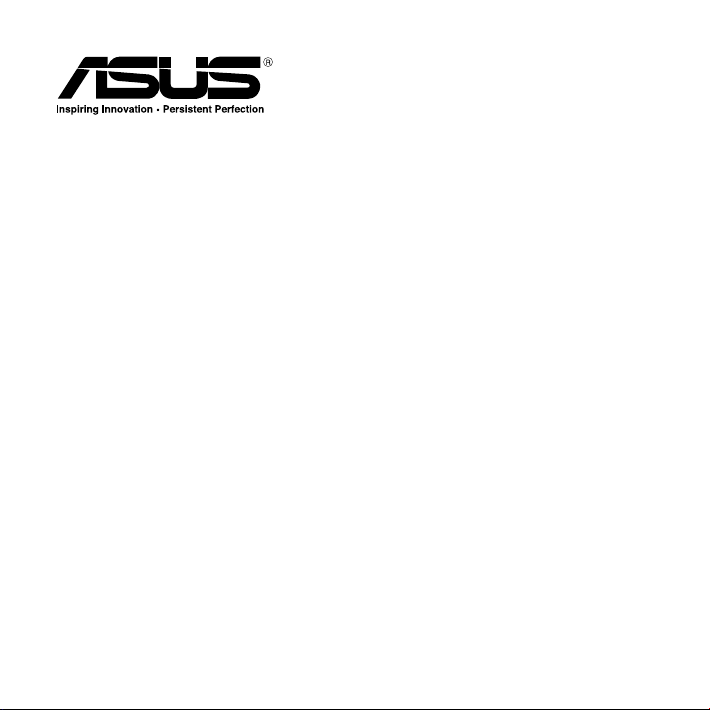
To install ASUS FlexSave+:
1. Connect your external hard drive to your
computer’s USB port. ASUS FlexSave+
automatically launches. If ASUS FlexSave+
does not launch automatically, click >
Computer. Under Devices with Removable
Storage, click the ASUS FlexSave+ icon.
NOTE: Please do not eject or delete the ASUS FlexSave+ virtual optical disc drive, or the software will not
run normally.
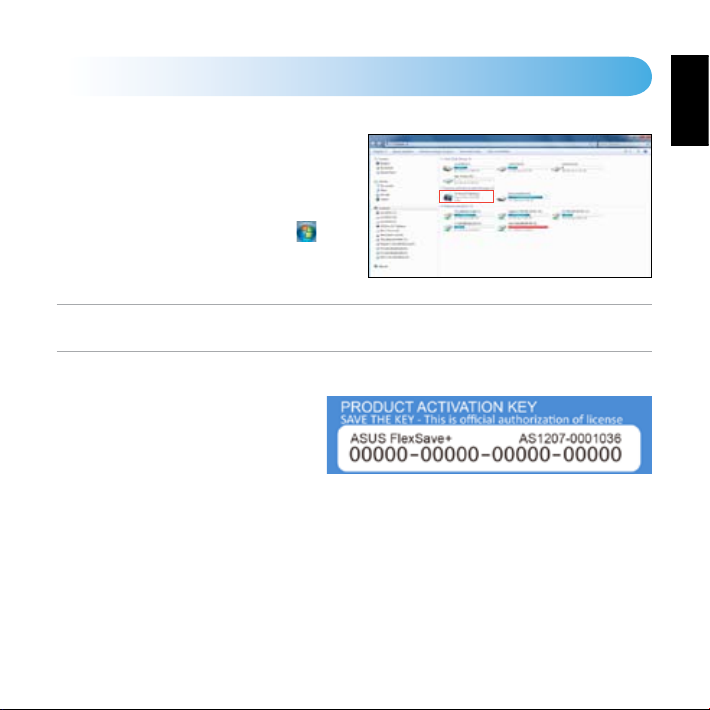
2. Key in the product’s activation key,
which can be found in the Quick Start
Guide.
3. When done, click OK.
English
5
Page 6

English
NOTES:
• After ASUS FlexSave+ activation, a hidden folder named
hard drive.
• The hidden ASUS FlexSave+ folder will be used to store the ASUS FlexSave+ conguration and backup data.
• If the external hard disk is formatted, or the hidden folder is deleted, you will lose the ASUS FlexSave+ backup
data, and the ASUS FlexSave+ conguration will be restored to the default settings.
ASUS FlexSave+ will be created on the external
4. You can now use ASUS FlexSave+. For better
security, set up your login username and
password.
NOTE: For details, refer to the section Conguring
your ASUS FlexSave+ username and password.
6
Page 7

Using ASUS FlexSave+
ASUS FlexSave+ main screen
ASUS FlexSave+ is an application that allows you to easily transfer and back up your data to your
ASUS external hard drive. You can use these three ASUS FlexSave+ functions: Easy Transfer,
Backup, and Advanced Settings.
Click to use the Backup function
Click to use the
Easy Transfer
function
Local pane
containing
les/folders on your
computer
Click to congure the
Advanced settings
External pane to
store les/folders on
your ASUS HDD
English
7
Page 8

Conguring your ASUS FlexSave username and password
English
To congure your ASUS FlexSave username and password:
1. Connect your external hard drive to your computer’s USB
port. ASUS FlexSave+ automatically launches.
2. From the ASUS FlexSave+ main screen, select Advanced
Settings.
3. Select Security.
4. In the Username and Password elds, key in your
username and password.
5. In the Retype Password eld, key in your password
again to conrm.
6. When done, click Apply.
Searching for your preset username and password
If you do not know or you forgot the ASUS Flexsave+ username
and password, you can query for this information.
To search for your preset username and password:
1. Connect the external hard drive to your computer’s USB
port. ASUS FlexSave+ automatically launches.
8
Page 9

2. From the login screen, click Query.
3. Key in the product’s activation key, which can be found in the Quick Start Guide.
4. When done, click OK. The preset username and password is displayed.
Transferring data
To transfer data:
1. Connect the external hard drive to your computer’s USB
port. ASUS FlexSave+ automatically launches.
2. From the ASUS FlexSave+ main screen, select Easy
Transfer.
3. From the Local pane, locate the les or folder that you want
to copy to your external hard drive.
NOTE: You can also use the Easy Transfer function to transfer data to your ASUS WebStorage account. For
details, refer to the section Transferring or backing up data to your ASUS WebStorage account.
English
9
Page 10

4. Drag and drop the les to the External pane to start the le transfer.
English
5. A Cancel Transfer? message appears. Click No to continue with the le transfer. Click Yes to
cancel the le transfer.
6. A File transfer complete message appears when the le transfer process is completed. Click
OK on the message.
NOTE: To delete a le from the Easy Transfer screen, right-click the le that you want to delete then click
Delete. On the conrmation message, click Yes to delete the le or No to cancel the deletion.
CAUTION: Deleted les will be permanently removed from the hard drive and will not be moved to the
Windows® Recycle Bin.
Backing up your data
Creating a Backup Plan
To create a Backup Plan:
1. Connect the external hard drive to your computer’s USB
port. ASUS FlexSave+ automatically launches.
2. From the ASUS FlexSave+ main screen, select Backup.
3. Assign a name for the Backup Plan.
NOTE: If you have not assigned a name for your Backup Plan, the default name would be My Backup.
10
Page 11

4. Select the les or folders that you want to back up. You may select the root directory to select
all les in the external hard drive. Click Reset to cancel the le/folder selection.
5. Select Manual or Scheduled as your Backup Type.
6. If you selected Manual as your backup type, click Backup to start the backup process. A
progress screen appears. Click Pause to pause or click Cancel to cancel the backup process.
7. A Backup complete message appears when the backup process is completed. Click OK to
return to the Backup screen.
Restoring your backup plan
To restore your backup plan:
1. Connect the external hard drive to your computer’s USB
port. ASUS FlexSave+ automatically launches.
2. From the ASUS FlexSave+ main screen, select Backup and
tick Restore.
3. From the backup list, select the backup plan that you want
to restore and click Restore.
4. Select the location where you want to restore the backup
plan and click OK.
5. Wait until the restoration process is completed. During the
process, you can click Cancel or Pause to cancel or pause the process.
English
11
Page 12

Conguring the ASUS FlexSave+ settings
English
Conguring the power setting
You can set the time that your ASUS external HDD will enter the power saving mode after the
specied period of inactivity.
To congure the power setting:
1. Connect the external hard drive to your computer’s USB
port. ASUS FlexSave+ automatically launches.
2. From the ASUS FlexSave+ main screen, select Advanced
Settings.
3. Select General.
4. From the dropdown list, select the time that your ASUS
external HDD will enter the power saving mode.
12
Page 13

Transferring or backing up data to your ASUS WebStorage account
NOTE: Ensure that you have an ASUS WebStorage account. If you do not have an ASUS WebStorage
account, register for one at https://service.asuswebstorage.com
To transfer les to your ASUS WebStorage account:
1. From Advanced Settings, tick ASUS WebStorage.
2. Key in your WebStorage ID and Password, and click Login.
3. You can now start using the Easy Transfer or Backup
function to transfer or back up les to your ASUS
WebStorage account. For details, refer to the previous
sections.
NOTE: ASUS WebStorage transfer speed varies with network environment or Internet connection.
English
13
Page 14

Notices
English
CE Mark Warning
This is a Class B product, in a domestic environment, this
product may cause radio interference, in which case the
user may be required to take adequate measures.
FCC
Compliance
REACH
Complying with the REACH (Registration, Evaluation,
Authorisation, and Restriction of Chemicals) regulatory
framework, we published the chemical substances in
our products at ASUS REACH website at
http://csr.asus.com/english/index.aspx
CAUTION! DO NOT throw the external hard drive in municipal waste. This product has been
designed to enable proper reuse of parts and recycling. This symbol of the crossed out wheeled bin
indicates that the product (electrical and electronic equipment) should not be placed in municipal
waste. Check local regulations for disposal of electronic products.
C-Tick Mark
BSMI
Certication
China RoHS EFUP
Labelling - 10
Years
Manufacturer:
Authorised
representative in Europe:
14
ASUSTeK Computer Inc.
Tel: +886-2-2894-3447
Address: No. 4F, 150, LI-DE RD., PEITOU, TAIPEI 112, TAIWAN
ASUS Computer GmbH
Address: HARKORT STR. 21-23, 40880 RATINGEN, GERMANY
 Loading...