

Page 1

USER MANUAL
_KEYSTEP PRO
Page 2

Special Thanks
DIRECTION
Frédéric Brun Philippe Cavenel Sébastien Colin
ENGINEERING
Yannick Bellance Sébastien Colin Yannick Dannel
INDUSTRIALIZATION
Jérôme Blanc Lionel Ferragut
TESTING
Maxime Audfray
Florian Marin
BETA TESTING
Boele Gerkes
Gert Braakman
Andrew Henderson
Koshdukai
MANUAL
Gert Braakman (Author)
Camille Dalemans
Vincent Le Hen
Benjamin Renard
Jean-Baptiste Arthus
Gustavo Lima
Mark Dunn
Maxime Dangles
Paul Steinway
Jimmy Michon
Rob Stuart
Holger Steinbrink
Victor Morello
Adrien Soyer
Tom Hall
Tony Flyingsquirrel
Chuck Zwicky
Terry Marsden
Charlotte Métais
Minoru Koike
José Rendón
Armin Heinrich
DESIGN
Sébastien Rochard
Edouard Madeuf
© ARTURIA SA – 2021 – All rights reserved.
26 avenue Jean Kuntzmann
38330 Montbonnot-Saint-Martin
FRANCE
www.arturia.com
Information contained in this manual is subject to change without notice and does not
represent a commitment on the part of Arturia. The software described in this manual is
provided under the terms of a license agreement or non-disclosure agreement. The software
license agreement specifies the terms and conditions for its lawful use. No part of this
manual may be reproduced or transmitted in any form or by any purpose other than
purchaser’s personal use, without the express written permission of ARTURIA S.A.
All other products, logos or company names quoted in this manual are trademarks or
registered trademarks of their respective owners.
Product version: 2.0
Revision date: 30 April 2021
Maxime Audfray
Jean-Baptiste Arthus
Glen Darcey
DesignBox
Frédéric Brun
Yannick Bellance
Page 3

Thank you for purchasing the Arturia KeyStep
Pro!
This manual covers the features and operation of Arturia’s KeyStep Pro. KeyStep Pro is
a full-featured standalone keyboard controller complete with four polyphonic sequencers,
three arpeggiators, a wide-ranging set of USB, MIDI and CV connections and our Slimkey
keyboard that provides maximum playability with a minimal footprint.
KeyStep Pro is designed for the electronic musician looking for a reliable hardware product
that will give them fast hands-on control over up to four devices at once. Each device
can be played directly through the keyboard or controlled by one of the four sequencers/
arpeggiators. Devices can also be controlled through USB, two independent MIDI outputs
or four sets of CV and Gate outputs, giving users the ability to control nearly any kind of
electronic musical instrument available today.
In this package you will find:
• One KeyStep Pro controller, with a serial number and unlock code on the bottom.
You will need this information in order to register your KeyStep Pro.
• One "worldwide" power supply with interchangeable leads
• One USB cable
• The Quick Start Guide for KeyStep Pro
Be sure to register your KeyStep Pro as soon as possible! There is a sticker on the bottom
panel that contains the serial number of your unit and an unlock code. These are required
during the online registration process. You may want to record these elsewhere or take a
photo of the sticker in case it becomes damaged.
Registering your KeyStep Pro provides the following benefits:
• Access to the latest version of the MIDI Control Center software
• Special offers restricted to KeyStep Pro owners
Page 4

Special Message Section
Specifications Subject to Change:
The information contained in this manual is believed to be correct at the time of printing.
However, Arturia reserves the right to change or modify any of the specifications without
notice or obligation to update the hardware that has been purchased.
IMPORTANT:
The product and its software, when used in combination with an amplifier, headphones or
speakers, may be able to produce sound levels that could cause permanent hearing loss.
DO NOT operate for long periods of time at a high level or at a level that is uncomfortable.
If you encounter any hearing loss or ringing in the ears, you should consult an audiologist.
NOTICE:
Service charges incurred due to a lack of knowledge relating to how a function or feature
works (when the product is operating as designed) are not covered by the manufacturer’s
warranty, and are therefore the owner's responsibility. Please study this manual carefully
and consult your dealer before requesting service.
Precautions include, but are not limited to, the following:
1. Read and understand all the instructions.
2. Always follow the instructions on the instrument.
3. Before cleaning the instrument, always remove the USB and power cables.
When cleaning, use a soft and dry cloth. Do not use gasoline, alcohol, acetone,
turpentine or any other organic solutions; do not use a liquid cleaner, spray or
cloth that is too wet.
4. Do not use the instrument near water or moisture, such as a bathtub, sink,
swimming pool or similar place.
5. Do not place the instrument in an unstable position where it might accidentally
fall over.
6. Do not place heavy objects on the instrument. Do not block openings or vents
of the instrument; these locations are used for air circulation to prevent the
instrument from overheating. Do not place the instrument near a heat vent at any
location with poor air circulation.
7. Do not open or insert anything into the instrument that may cause a fire or
electrical shock.
8. Do not spill any kind of liquid onto the instrument.
9. Always take the instrument to a qualified service center. You will invalidate your
warranty if you open and remove the cover, and improper assembly may cause
electrical shock or other malfunctions.
10. Do not use the instrument with thunder and lightning present; otherwise it may
cause long distance electrical shock.
11. Do not expose the instrument to hot sunlight.
12. Do not use the instrument when there is a gas leak nearby.
13. Arturia is not responsible for any damage or data loss caused by improper
operation of the instrument.
Page 5

Introduction
Congratulations on your purchase of the Arturia KeyStep Pro!
This fantastic keyboard controller gives you everything you need to quickly and easily
control up to four devices at once: virtual instruments, hardware synthesizers, modular
synthesizers or drum machines. Its standalone design means that you can use it with
or without a computer and its four powerful sequencers/arpeggiators are sure to spark
interesting musical ideas and capture your best performances.
All the essential features of a professional keyboard controller are here, including aftertouch,
pitch and modulation touch-strips, and clearly labeled buttons and knobs that are sensibly
laid out for fast, intuitive access. The Slimkey keyboard features great-feeling keys that are
smaller than standard piano keys but still large enough to allow for maximum playability
across multiple octaves. These keys make the product smaller and more portable but—make
no mistake—KeyStep Pro is built like a tank so that it can be taken on tour with confidence.
We hope the four polyphonic sequencers will unleash your most interesting musical ideas.
The RGB LED indicators above each key give you immediate visual feedback of exactly
what each sequencer is doing. You can specify the exact pitch, length, velocity, timing and
randomness of a sequence step through touch-sensitive knobs with surrounding indicator
LED rings. The dedicated note tie, transposition, overdubbing and hold buttons bring
immediacy and power to the sequencers. You can even set independent lengths for each of
the four sequencers for amazing polyrhythmic fun! Breath new life in your sequences by
playing them in a different key. Transposition is handled intelligently; sequences remain in
key as they are transposed. Invert them, shift them forward or backward in time, then send
it all out on the four Voices to your Modular system.
The arpeggiators have many inspiring modes of operation beyond the basic up/down
modes. The HOLD function lets you easily create complex arpeggiations with up to 16
notes and the step timing can be manipulated in real time. Experiment with Arpeggiators
like you've never done before! Create and mix the output of three arpeggiators playing
simultaneously. Mix arpeggios playing at different speeds. Finally, the scale quantization
and chord memory features will make you seem like even more of a musical monster than
you already are!
Use the Drum track to create complex polyrhythms; rhythms of different lengths playing 24
notes. Or use the first 8 channels to trigger drum units on your modular system. Use the
control track to control filters envelope stages, or reverb times on your external synths.
All of its features are one SHIFT/CLICK away. There's no menu-diving. If you need to change
settings there's a configuration menu, but it's a set-and-forget thing. The real stuff that
makes your music come to life is always at your fingertips. And what features they are!
Four sequencers, that can play huge stacked chords in every step. Advanced step editing;
take the chord stored in a step and change only the notes you want to change in that chord.
In addition to the standard MIDI ports, there is a second MIDI port that you can use to
control more gear or a DMX light controller.
KeyStep Pro has a massive number of uses thanks to its simultaneous USB, MIDI, CV/Gate
connections. Each of the its four tracks can output on USB, MIDI or CV/Gate simultaneously.
Each track on KeyStep Pro has control voltage (CV) outputs for Pitch, Gate and an extra
"modulation" CV output that allows for more creative sound design by letting you control
things like controlling velocity, filter cutoff, or any other parameter of your choosing. The first
track of KeyStep Pro can be set to function as a drum or "trigger" sequencer with 8 separate
CV gate outputs that you can use with analog drum machines or your modular synthesizer.
The powerful synchronization features let you use KeyStep Pro as a master clock source or
to have it synchronize itself to incoming USB, MIDI or CV synchronization signals. KeyStep
Pro can send and receive clock signals and even has a separate clock reset CV output jack
so that your external analog gear always remains firmly synchronized in both tempo
phase (loops and sequences always start on the "one" together).
and
Page 6

Our MIDI Control Center (MCC) software allows you to dive deep into the KeyStep Pro's
features and to reconfigure the product so that it works best for you and your setup. MCC
really opens u p a lot of options and we have dedicated an entire chapter of this guide so
that you can understand all of the powerful options.
The KeyStep Pro is a USB MIDI Class Compliant device. What does that mean and why
is it important? It means you can connect it to any other MIDI class-compliant device
without having to install drivers. Only when connecting to an iPad you will need a camera
connection cable or a USB to lightning cable. Arturia has a great line of iPad synthesizers
such as the iMini, the iSem, the iProphet and the iSpark. It's worth checking them out.
Be sure to visit www.arturia.com. That’s the place to go for the latest firmware and to
download the MIDI Control Center. You’ll also find links to our tutorials and FAQs.
KeyStep Pro is easy to use, so you’ll probably start experimenting with it right out of the box.
However, please be sure to read this manual even if you are an experienced user, as we
describe many useful tips that will help you get the most out of your purchase. We're sure
you will find KeyStep Pro to be a great source of musical inspiration and we hope you'll use
it to its fullest potential.
Happy music making!
The Arturia team
Page 7

Table Of Contents
1. Welcome and introduction .................................................................................................................................... 2
1.1. A fascinating adventure..................................................................................................................................................... 2
1.2. About reading manuals..................................................................................................................................................... 2
1.3. KeyStep Pro 2.0 Updates................................................................................................................................................. 3
1.4. Detailed overview.................................................................................................................................................................. 5
2. Installation...................................................................................................................................................................... 12
2.1. Usage Precautions.............................................................................................................................................................. 12
2.2. Warning.................................................................................................................................................................................... 12
2.3. Register your Instrument.............................................................................................................................................. 12
2.4. Connecting the KeyStep Pro to the World......................................................................................................... 12
3. Basic Operations ........................................................................................................................................................ 13
3.1. Plug and Play......................................................................................................................................................................... 13
3.2. Record and Play a Sequence...................................................................................................................................... 17
3.3. Using the Arpeggiator ..................................................................................................................................................... 19
3.4. Scales & Chords ................................................................................................................................................................ 20
3.5. Creating Splits .................................................................................................................................................................... 20
4. KeyStep Pro Overview............................................................................................................................................ 21
4.1. Making the Connections.................................................................................................................................................. 21
4.2. Front Panel Overview..................................................................................................................................................... 32
4.3. Back Panel Overview...................................................................................................................................................... 57
5. Making Tracks ............................................................................................................................................................. 63
5.1. Sequencer / Arpeggiator (or Drum) Tracks ...................................................................................................... 63
5.2. The Three Arpeggiators................................................................................................................................................. 63
5.3. The Four Sequencers....................................................................................................................................................... 74
5.4. The Drum Sequencer...................................................................................................................................................... 92
5.5. Special Features............................................................................................................................................................... 108
6. What is a Project?................................................................................................................................................... 115
6.1. Managing Projects ............................................................................................................................................................ 115
6.2. All about Tracks.................................................................................................................................................................. 119
6.3. Patterns................................................................................................................................................................................... 121
6.4. Arranging.............................................................................................................................................................................. 125
7. Timing.............................................................................................................................................................................. 132
7.1. Tempo....................................................................................................................................................................................... 132
7.2. Sync.......................................................................................................................................................................................... 135
7.3. Sync/Clock and Reset Outputs ............................................................................................................................... 136
8. Control Mode .............................................................................................................................................................. 137
8.1. What is Control Mode? .................................................................................................................................................. 137
8.2. Control Mode as DAW Automation ...................................................................................................................... 139
8.3. Front Panel Functions................................................................................................................................................... 144
9. KeyStep Pro Configuration ............................................................................................................................... 145
9.1. The Utility Menu................................................................................................................................................................. 145
9.2. MIDI Control Center....................................................................................................................................................... 155
9.3. Project Browser ................................................................................................................................................................. 157
9.4. Store To/Recall From..................................................................................................................................................... 158
9.5. Device Settings................................................................................................................................................................. 160
10. KeyStep Pro and your Modular system ................................................................................................ 167
10.1. The Modular Adventure.............................................................................................................................................. 168
10.2. Hardware or Software?............................................................................................................................................ 168
10.3. Using MIDI to Control Modules in VCV Rack.............................................................................................. 169
10.4. CV/Gate Functions ........................................................................................................................................................ 172
10.5. Voices 1-4: Pitch, Velocity and Gate ................................................................................................................... 172
10.6. Routing Signals................................................................................................................................................................ 173
10.7. Drum Gates........................................................................................................................................................................ 176
11. Declaration of Conformity................................................................................................................................ 178
12. Software License Agreement........................................................................................................................ 179
Page 8

1. WELCOME AND INTRODUCTION
The KeyStep Pro is an advanced third-generation controller and sequencing station. It is
both compact and versatile, with unique features that will spark your imagination and
creativity in a new way. It enables you to connect to all your studio and performance gear
and control it in ways you never thought possible.
Controllers have come a long way. The first generation of controllers could transmit MIDI
pitch and velocity over the 16 MIDI channels, not much more. The second generation
added complex step- and real-time sequencing features and was capable of connecting to
your DAW in special ways, allowing you to control multiple parameters of VSTi's (virtual
instruments, including synths).
This third-generation controller adds control options for modular systems. The KeyStep Pro
has four tracks each with CV, velocity/modulation and gate output. You can employ each of
these tracks as a melodic sequencer, arpeggiator or drum sequencer. It lets you play, record
edit and add to your sequences on the fly, with a clear and easy-to-understand workflow
that encourages your creativity. Each pattern can be up to 64 steps long. You can chain up
to 16 patterns together for live performances or jamming. The Scenes feature enables you to
save and recall configuration states. It's a lifesaver if you need to change quickly from one
setup to another. Couple this with the advanced chord options and scale quantization and
you'll begin to understand why it will soon become your favorite controller.
1.1. A fascinating adventure
As soon as you start experimenting with the KeyStep Pro, you'll be faced with many
questions: How do I make connections? What are the difference between Real-time and
Step recording?
The answers to these questions come slowly: you'll find many of the answers in this manual
and many others by reading online forums, sharing and comparing user experiences and,
most importantly, by diving in and experimenting. Whatever you do, take the time to get to
know the KeyStep Pro inside and out.
To sustain the fascination you feel, learn the functions of the KeyStep Pro one by one and
test your knowledge continuously. The KeyStep Pro is an advanced controller with many
levels of understanding. It offers a unique way to experience the reward that comes with
being able to create the music as you imagine it.
1.2. About reading manuals
Reading manuals can mean much more than familiarizing yourself with an instrument.
Yes, it is excellent for learning, but it serves another purpose that is much less understood:
creating the basis for inspiration.
Inspiration can flourish when you have many little pieces of knowledge 'online' in your
mind, so that you can interconnect and crosslink them; it widens the scope of your creativity.
It also helps to look at the current state of your knowledge as something that needs to be
maintained and expanded. Reading a manual again and again causes a quantum shift in
what you absorb from it. You are building a living model of the controller in your brain.
Reading a manual the first time helps you get acquainted with the parameters of an
instrument; what does a knob do and how does it affect the sound of external modules or
synths? Second and third readings will give you a better understanding of the structure of
the KeyStep Pro. Beyond that, reading becomes a source of creative input that inspires you
to think of new ways to use this unique controller and sequencing station.
2 Arturia - User Manual Keystep Pro - Welcome and introduction
Page 9

1.3. KeyStep Pro 2.0 Updates
Welcome to version 2.0 of the Arturia KeyStep Pro!
The overview below is intended for existing users of the KeyStep Pro.
Update 2.0 adds many new features that will help you develop a personal music style.
Here's a summary of these new features:
1.3.1. Workflow refinements
Workflow refinements:
• Group Transpose now lets you transpose several tracks simultaneously
• Monitor steps in Step Edit (when the KSP is stopped pressing a step will play the
notes stored in it)
• Use 'recall from flash' to instantly recall project settings from memory
• Metronome: The metronome time signature will now act as a reference for bar
size and launch quantize
• Tempo: Changing tempo is more accurate, the KeyStep Pro will make a tempo
estimate after 4 taps or take the average of 8 taps
• Changed 'Shift' behaviour: when holding 'Shift', the steps will dim instead of
turning off
• Simplified entering of Chords in Chord Mode
• The Looper Touch Strip can now be deactivated with Shift + Touch
• Feedback about the status of patterns in a track.
1.3.2. Arpeggiator improvements
• Apply a different swing amount to each arpeggiator in a project
• Add or subtract Velocity to the notes playing in an arpeggiator
• Record an arpeggio into a sequence in real-time recording mode
• Offset an Arpeggiator in time from another arpeggiator while it is on hold.
1.3.3. Sequencer improvements
• Step listen: when the KeyStep Pro is stopped and Step Edit enabled, pressing a
step will play the notes or chords in that step
• Sequencer MONO mode workflow has been refined
• Global offset: change the parameters of all steps in a Pattern simultaneously with
'Shift' + encoder (applies to Pitch, Gate, Velocity, Time Shift and Randomness)
• Quick edit workflow improvements
• Copy/Paste notes workflow improvements
• Copy/Paste pages
Control track: Nudge, Invert and Rand Order functions can now be applied to values stored
in the Control Track
Arturia - User Manual Keystep Pro - Welcome and introduction 3
Page 10

1.3.4. Improved Chord Mode workflow and functionality
Initiate Chord mode by holding 'Shift' + Chord and press notes to add to the chord. As long
as you keep one note down, you can release the Shift and Chord button and continue to
add notes to the chord. Chord mode output can now be recorded in a sequence running in
real-time recording mode.
1.3.5. MIDI Thru
MIDI OUT 2 can now be configured as a MIDI THRU port. When set to Thru, MIDI info
received through the MIDI In or the USB port will be forwarded to MIDI OUT 2. You can set
this in the MIDI control center or from Utility>MIDI Settings.
Note: Information sent on the tracks input MIDI channels will be processed by the KeyStep
Pro tracks. On the other hand, you can disable the tracks input MIDI channels to let the
signal pass through on all channels.
1.3.6. Track and Transpose info
Hold a track button to check which MIDI channel it transmits on. Hold the transpose button
to check how many semi steps the active track is transposed by.
1.3.7. MCC support for pedals
MIDI Machine Control MMC support for pedals: you can now use them to start and stop
sequences.
1.3.8. Metronome
The Time signature you set in Utility>Time Sig will be used by the KeyStep Pro to set bar size.
Changing the Time signature will therefore also affect Launch Quantize. If, for example, you
have set the Time Signature to '6' and Utility>Launch Quantize is set to 1 bar, the KeyStep Pro
will not load the next pattern until all six beats of the bar have played.
1.3.9. Shift function
When holding 'Shift', the steps will dim instead of turning OFF. This allows you to see
the effect of the shift functions when modifying a step's position with Nudge, Invert or
Randomise Order.
1.3.10. Tempo
Tap the Tempo button four times to set an initial tempo. Tap it 8 eight times to further refine
the tempo estimate. The KeyStep Pro will then calculate the average of the eight taps.
4 Arturia - User Manual Keystep Pro - Welcome and introduction
Page 11

1.4. Detailed overview
Read below for a more detailed overview of the major changes.
1.4.1. Project Recall
Use 'Recall from flash' to instantly recall project settings from memory - a great trick to use
during live performances. To give an example:
• Create sequences using the 4 tracks
• Save your project
• Start improvising: make changes to drum gates (using global offset) and
sequence tracks to create tension and then, when the tension is at its peak:
• Hold Project and press Shift to Recall the stored Project from flash and restore
the original groove!
Arturia - User Manual Keystep Pro - Welcome and introduction 5
Page 12

1.4.2. Arpeggiator improvements
1.4.2.1. Record an arpeggio into the sequencer
This new feature enables you to record an arpeggio in the sequencer on the same track. It
works like this:
• Select a track (2, 3 or 4) and set it to Arpeggio mode
• Select an empty pattern in this track
• Set Mode to Poly ('Shift'+ Poly)
• Deselect overdub so it's off (to get a better idea of what's happening)
• Start the Arpeggiator (press Play)
• Press record, hold down a chord to start an arpeggio.
Now, simply press the sequencer button on the same track to activate the sequencer and
start playing back the recorded arp.
All 'Shift' edit options are now available to further edit the sequence.
1.4.2.2. Apply Swing to an arpeggio
Swing can now be applied to arpeggios. Turning the Swing knob will apply swing to all
arpeggios simultaneously. Use 'Shift' + Swing to apply swing to the arpeggio on the active
track only. When you record an arpeggio and quantize is off, Swing is recorded in the
sequencer.
1.4.2.3. Play an arpeggio when the sequencer is stopped
It's no longer necessary to start the sequencer playback to be able to 'Play' an arpeggio. An
arpeggio will run whenever you hold down keys.
1.4.2.4. Arpeggiator Velocity is now bipolar
The velocity value of notes playing in an arpeggio can now be changed in real time. When
the velocity encoder is at '0', all notes in the arpeggio will play with the velocity registered
when you pressed the key. Turning the encoder to the right will add to this velocity until a
maximum of 127 is reached. Turning the encoder to the left will subtract from the registered
velocity value. Until, at the -127 point, the note goes silent.
6 Arturia - User Manual Keystep Pro - Welcome and introduction
Page 13

1.4.3. Sequencer improvements
1.4.3.1. MONO mode refinement
When recording in MONO mode, the KeyStep Pro will only allow you to store one note per
step, whether in Quick Edit, Step Edit or Real Recording mode. This makes it easier to record
bass lines. Any new patterns you create in MONO mode will always record with Overdub
OFF.
1.4.3.2. Global offset: Shift + encoder
Holding 'Shift' and turning one of the five encoders will apply a relative offset to all steps
contained in the sequence for a parameter. The offset can be positive or negative. If for
example you Hold 'Shift' and turn the Velocity encoder to the right, the value you dial in
will be added to the velocity value of all the steps in the sequence. Turning the encoder to
the left will subtract the value dialed-in. The KeyStep Pro will display the amount of added/
subtracted velocity.
Global offset has no effect on the pitches in the drum track, but it will affect Gate, Velocity,
Time Shift and Randomness.
1.4.3.3. Step Listen
Step listen is finally here! When the sequencer is stopped and Step Edit is ON, pressing a
Step selects and triggers it. This enables you to preview and edit the step without having to
wait for the full pattern to cycle. When you press a step, each note recorded in it is played
with its properties (Pitch, Velocity, Gate, Randomness and Time Shift). The note with the
lowest time shift value plays instantly and the others are played based on their timing offset
from this first note. The note with the longest gate in the step determines how long the step
will sound.
Arturia - User Manual Keystep Pro - Welcome and introduction 7
Page 14

1.4.3.4. Copy, Paste & Erase (Notes)
The Step Edit mode has an important new feature: copying and pasting notes!
Copy/Paste notes enables you to select notes in a step and copy them to another location:
• in the same step
• in another step
• in another step on another page.
The notes you Copy/Paste will retain all of their properties: Pitch, Gate, Velocity, TimeShift and Randomness. It's an amazing creative option that you can use to create chord
progressions and dynamic variations in a pattern.
To copy a chord from one step to another:
• Select a step that holds notes
• Hold the Copy button, the notes currently present in the step will light up in the
track color
• Press the notes you want to copy. Notes selected for copy will light up in blue
• Let go of the copy button.
To paste the selected notes into the same step:
• Hold Paste
• Press the key where you want to paste the selected notes.
The notes will be pasted with their original intervals intact.
To paste the selected notes into another step:
• Select the step you want to paste to
• Hold Paste
• Press the key where you want to paste the selected notes.
Again, the notes will be pasted with their original intervals intact.
You can repeat the Paste action as many times as necessary.
♪: It's not possible to copy notes that are OFF.
1.4.3.5. Copy/Paste & Erase (Pages)
You can copy a page (16, 32, 48, 64) to any other page.
Hold 'Copy" and press an active page. The page is now in memory: you can paste it to any
page of any pattern on any track. Paste it by selecting a track and a pattern. Please refer to
Chapter 5 [p.90]
8 Arturia - User Manual Keystep Pro - Welcome and introduction
Page 15

1.4.3.6. Improved quick editing
As long as you hold at least one note down during quick editing, you can continue to add
other notes to the step. While in Quick Edit mode, you can adjust the Pitch, Gate, Velocity,
Time Shift and Randomness of the notes stored in the step. Pressing the Tie/Rest button
increases the gate length of these notes but doesn't move the cursor nor erase the content
of the next step. When all the keys are released, the Quick Editing process is complete.
1.4.4. Group Transpose Function
The 'Transpose Group' feature enables you to group and transpose tracks together. Here's
how to do it:
• Hold the Trans button. It will start to blink to signal that you are now in transpose
mode
• Select other tracks to form a transpose group. The newly selected tracks will light
up in white.
You can now transpose the newly formed grou p. As long as the Trans button is held down,
you can keep adding or removing tracks from the transpose group. Group transpose can be
applied to anything running on a track. You can combine a sequence running in track one
with an arpeggio running in track two and transpose them together.
There are two ways to delete a group:
• Hold 'Erase' and press the 'Transpose' button or
• Hold 'Transpose' and remove Tracks that are part of the group by toggling them
'OFF'.
When you save a Project, a currently active group will be saved with it.
Arturia - User Manual Keystep Pro - Welcome and introduction 9
Page 16

1.4.5. New Chord Mode functionality
Chords can now be recorded in the sequencer:
To record chords in the sequencer in real-time recording mode:
• Select a track (2, 3 or 4) and set it to Sequencer mode
• Select an empty pattern in this track
• Set Mode to Poly ('Shift'+ Poly)
• Press 'Shift' and Tie/Rest (Chord) and hold a chord on the keyboard
• Let go of 'Shift' and Tie/Rest, and check that the model chord has been saved by
playing keys on the keyboard
• Press Record + Play, and play a few notes to record the corresponding chords in
the sequencer.
To record chords in the sequencer in step recording mode:
• Select a track (2, 3 or 4) and set it to Sequencer mode
• Select an empty pattern in this track
• Set Mode to Poly ('Shift'+ Poly)
• Press 'Shift' and Tie/Rest (Chord) and hold a chord on the keyboard
• Press Record when the sequencer is stopped and play keys to record the
corresponding chords in the sequencer. The Sequencer will automatically
advance after each keypress.
To record chords in the sequencer in step edit mode:
• Select a track (2, 3 or 4) and set it to Sequencer mode
• Select an empty pattern in this track
• Set Mode to Poly ('Shift'+ Poly)
• Press 'Shift' and Tie/Rest (Chord) and hold a chord on the keyboard
• Press Record when the sequencer is stopped and record chord directly in
random steps.
To record chords in the sequencer in quick edit mode:
• Select a track (2, 3 or 4) and set it to Sequencer mode
• Select an empty pattern in this track
• Set Mode to Poly ('Shift'+ Poly)
• Press 'Shift' and Tie/Rest (Chord) and hold a chord on the keyboard
• Hold a step and play press a key to add the chord to the step
♪: The Hold button acts as a sustain pedal. Just press Hold and add notes to the chord.
10 Arturia - User Manual Keystep Pro - Welcome and introduction
Page 17

1.4.6. MIDI Thru
Would you rather have a MIDI Thru port instead of a second MIDI port? You now have a
MIDI Thru option for MIDI Out 2. To change the function of the second port, hold 'Shift" and
Project/Utility and select the MIDI setting menu, where you can change the MIDI out setting
from Out to Thru.
♪: Information sent on the tracks in put MIDI channels will be processed by the KeyStep Pro tracks.
On the other hand, you can disable the tracks input MIDI channels to let the signal pass thru on all
channels.
1.4.7. MMC Support for pedals
Firmware update 2.0 and upwards introduce (limited) MIDI Machine Control (MMC) support
for pedals. You can now use a pedal to start and stop sequences.
Arturia - User Manual Keystep Pro - Welcome and introduction 11
Page 18

2. INSTALLATION
2.1. Usage Precautions
The KeyStep Pro uses an external power adapter. Do not use any power su pply or adapter
other than the unit provided by Arturia. Arturia accepts no responsibility for damage caused
by the use of an unauthorized power supply.
2.2. Warning
Do not place this product in a place or position where anyone might walk on, trip over,
or roll anything over power cords or connecting cables. The use of an extension cord is
not recommended. However, if you must use one, make sure that the cord can handle
the maximum current needed by this product. Please consult a local electrician for more
information on your power requirements. This product should be used only with accessories
supplied or recommended by Arturia. When used with any such products, please observe
all safety markings and instructions that accompany them.
2.3. Register your Instrument
Registering your instrument establishes your legal ownership of it, which entitles you to
access the Arturia Technical Su pport service and to be informed of updates. Additionally,
you can subscribe to the Arturia newsletter to be informed of Arturia-related news as well
as promotional offers. Connect to your Arturia account, go to the section My Registered
Products, then add the KeyStep Pro by entering its serial number, as printed on the sticker
located under the controller.
2.4. Connecting the KeyStep Pro to the World
Always power off all audio gear before making any connections. Failing to do so may
damage your speakers, the KeyStep Pro, or the other audio equipment. After completing all
connections, set all volume levels to zero. Power on the various devices, with your audio
amplifier or monitoring system last, then raise the volumes to a comfortable listening level.
Here is an overview of the KeyStep Pro connectors:
Purpose Connector type
MIDI input (1x) 5-pin DIN connector
MIDI outputs (2x) 5-pin DIN connectors
USB Standard USB type B
Power 12V DC input: internal Ø 2.1 mm, external Ø 5.5 mm
12 Arturia - User Manual Keystep Pro - Installation
Page 19
3. BASIC OPERATIONS
3.1. Plug and Play
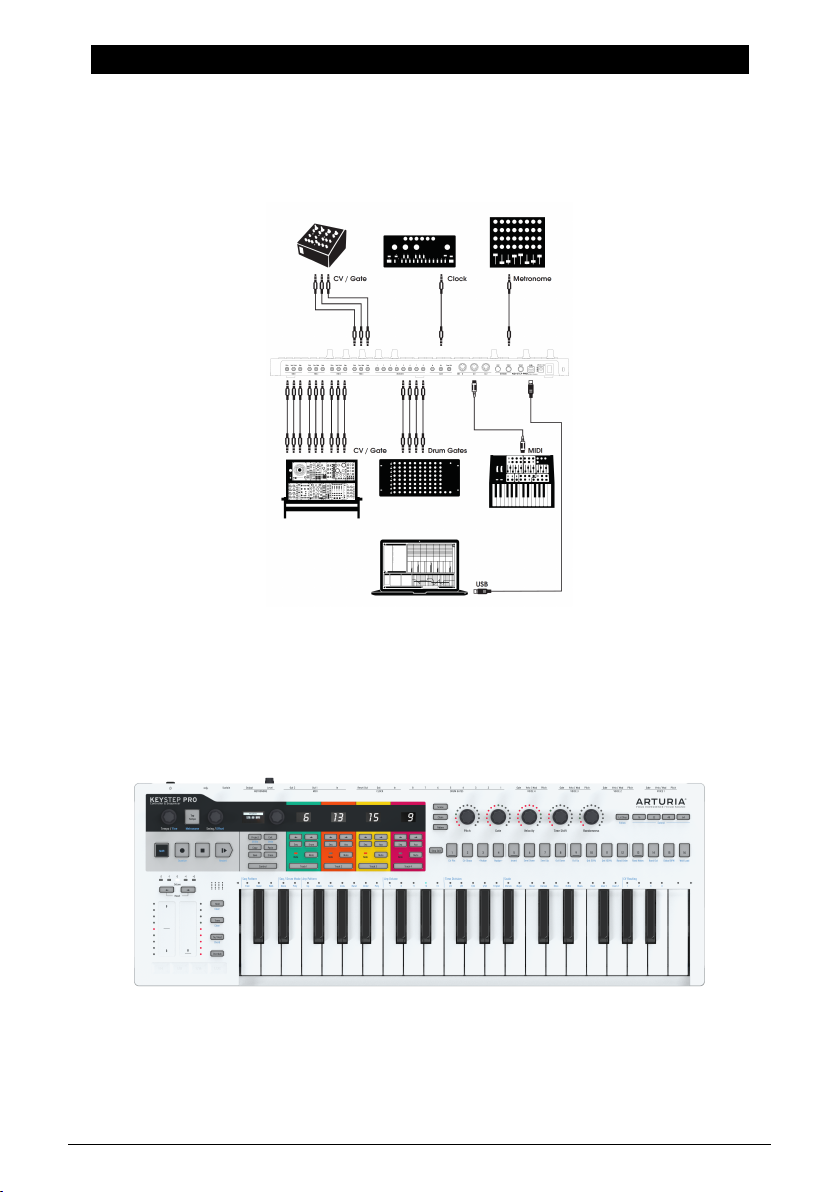
Connect the KeyStep Pro to your computer or an external device as shown in the image
below and you're ready to go! Here are a few pointers to make the most of your first session.
3.1.1. Slimkey Keyboard
The Slimkey keyboard is both velocity- and pressure-sensitive (also called aftertouch). You
can specify the velocity curve and aftertouch response using the MIDI Control Center and
the Utility menu. Refer to Chapter 9 [p.145] for details.
Arturia - User Manual Keystep Pro - Basic Operations 13
Page 20

3.1.2. Keyboard MIDI Channel Selection
The KeyStep Pro can transmit notes and other MIDI messages on 16 channels numbered 1
to 16. Each of the four tracks of the KeyStep Pro transmits on its own channel: Track 1 on
MIDI channel 1, and Tracks 2, 3 and 4 on MIDI channels 2, 3 and 4 respectively. Track 1 is
a special case because it has both a melodic sequencer and a drum sequencer. When in
sequencer mode, Track 1 transmits on MIDI channel 1; when in Drum mode it transmits on
MIDI channel 10. Most MIDI devices default to receiving on MIDI channel 1, so connecting
an external device and playing notes on Track 1 will usually trigger a response from the
external device.
♪: If the external device does not respond, that may be because it is set to a MIDI channel that
doesn't match the current KeyStep Pro MIDI channel. First check the MIDI channel setting of the
external device. If the channels do not match and you want to set the KeyStep Pro to another MIDI
channel, you'll have to go into the Utility menu.
In the Utility menu, you can set all the configuration options of the KeyStep Pro, including
the MIDI transmit functions. Like most fine-tune functions on the KeyStep Pro, you access
it with the 'Shift' key. 'Shift' functions are printed in blue and can usually be found below
buttons. In this case, the Utility function sits under the Project button.
• Hold 'Shift' + Project (Utility); the Utility menu will light up
• Turn the selection encoder to scroll down to 'MIDI channels'
• Now push the selection button, and scroll down to Track 1 output, push once more
and select the MIDI channel you want to transmit on
• Press 'Shift' + Exit repeatedly to exit Utility.
♪: A quick way to assign a MIDI channel to a track is to hold a track button and turn the main
encoder.
14 Arturia - User Manual Keystep Pro - Basic Operations
Page 21

3.1.3. Pitch and Mod Touch Strips
The Pitch and Mod touch strips are similar to standard wheels in how they work, except that
you slide your finger backward or forward along the strip instead of rotating a wheel.
3.1.3.1. The Pitch Strip
The Pitch strip has a center zone in which slight finger movements produce no change.
Moving your finger forward bends the pitch upward, and moving it backward bends the
pitch downward. When you lift your finger, the Pitch bend value snaps back to zero.
3.1.3.2. The Mod Strip
The Mod strip works like a mod wheel: from minimum to maximum. Placing your finger at
the bottom of the Mod strip (the end closest to you) produces no modulation, and moving
your finger all the way up (to the end furthest from you) causes maximum modulation. The
Mod strip differs from the Pitch strip in that it does not snap to zero when you lift your finger.
3.1.4. The HOLD Button
The HOLD button enables the Arpeggiator to keep playing after you take your fingers off the
keys. But there's another way to use it: while HOLD mode is active, you can keep adding
notes to an arpeggio as long as you continue holding down at least one key.
For an in-depth look at the Arpeggiator, refer to chapter 5 [p.63].
3.1.5. Sustain Pedal
If you have a momentary footswitch, plug it into the Sustain jack socket on the rear panel. If
it works backwards, disconnect your KeyStep Pro from its power source and then reconnect
it. KeyStep Pro will sense the polarity of the pedal, and it should work fine after that.
♪: The KeyStep Pro offers limited MIDI Machine Control (MMC) for pedals : you can only use them to
start and stop sequences.
Arturia - User Manual Keystep Pro - Basic Operations 15
Page 22

3.1.6. Octave - / Octave +
Pushing one of the Octave select buttons will transpose the keyboard pitch by as much as
two octaves up or down. To reset the keyboard octave shift back to zero, press both buttons
simultaneously.
16 Arturia - User Manual Keystep Pro - Basic Operations
Page 23
3.2. Record and Play a Sequence
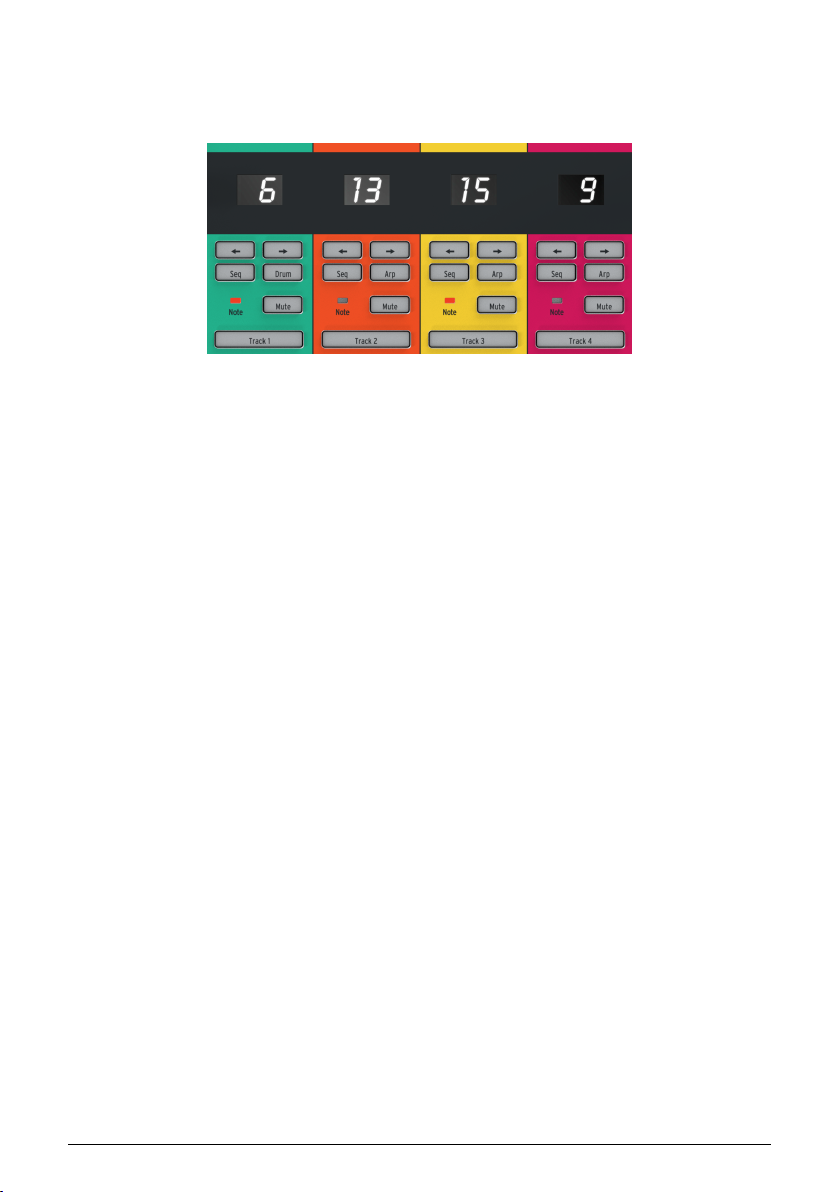
The KeyStep Pro features four (!) sequencers - one on each track. Let's record something on
Track 1:
• Press the Track 1 button; it will light up in green
• Select 'Seq' on this track if it isn't already selected
• Now hold the 'Record' button and press the 'Play' button; the step buttons' LEDs
now become active and cycle from Step 1 to Step 16 continuously. We are about
to create our first sequence pattern. Each track can hold 16 of these patterns.
The sequencer is in loop mode, so press a few keys and they will be added to the loop. The
KeyStep Pro sequencers are polyphonic, so pressing a chord instead of a single note will
enter it into the loop. Notice that all notes are recorded with the velocity at which you play
them.
To hear what you've recorded in a step, press the Step Edit button. The sequencer must be
stopped to make this work.
Select a step to preview the notes stored in it. When you press a step, each one of its notes is
played with its properties (Pitch, Velocity, Gate, Randomness and Time Shift). The note with
the lowest time shift value plays instantly, and the others are played based on their timing
offset from this first note. The note with the longest gate in the step determines how long
the step will sound.
Step Edit mode has many more options. We'll further explain these in Chapter 5 [p.83]
At this point, you can start to 'play around' with your sequence. When you look carefully,
you'll see sequence modifiers printed in blue under the step buttons.
• Hold the 'Shift' key (the leftmost button on the KeyStep Pro) and press 'Semi Up'
or 'Semi Down' to transpose your sequence in half-step increments on the fly.
There are a few other things to try here: 'Shift' + Invert creates a mirror image of your
sequence: the last notes become first, and vice versa. Press 'Shift' + Invert once more to
restore the previous note order.
But it does not stop here: you can shift the entire looping sequence one step to the left or
right. To shift to the right, hold 'Shift' and press Nudge> (step button 4). The first note in the
loop will move to second position; the last note will wrap around to first position.
You can make adjustments to the tempo in quantized 1 BPM increments by turning the
Tempo knob. If you need to make finer adjustments, hold 'Shift' while turning the Tempo
knob : this will increment and decrement the tempo in 0.01 steps.
Arturia - User Manual Keystep Pro - Basic Operations 17
Page 24
3.2.1. Making global changes to the sequence
At this point, you can also make quick global edits to the sequence you've recorded.
Holding 'Shift' and turning one of the five encoders will apply a relative offset to all steps
contained in the sequence for a parameter. The offset can be positive or negative. If for
example you Hold 'Shift' and turn the Velocity encoder to the right, the value you dial in will
be added to the velocity value of all the steps in the sequence. Turning the encoder to the left
will subtract values. The KeyStep Pro will display the amount of added/subtracted velocity.
Global offset has no effect on the pitches in the drum track, but it will affect Gate, Velocity,
Time Shift and Randomness.
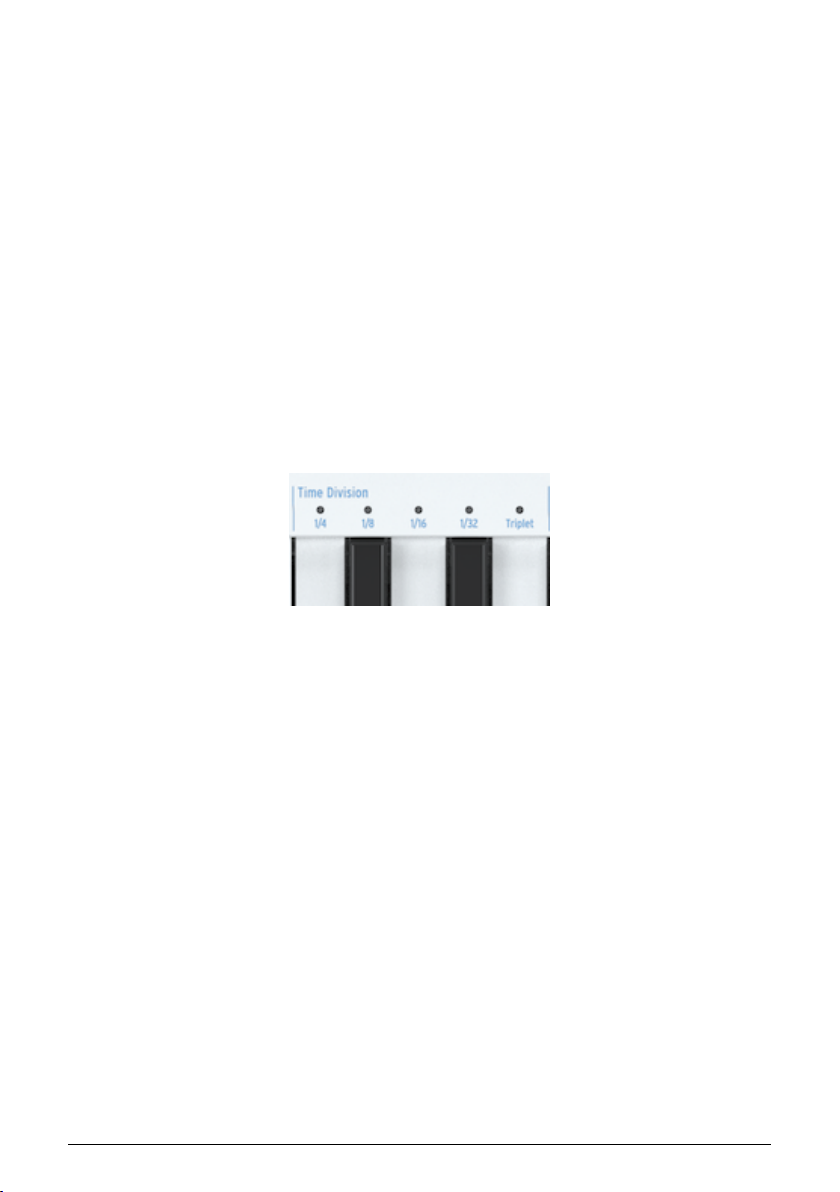
3.2.2. Time Division
There's another row of blue shift modifiers printed above the keys of the keyboard. In the
center, right above the 'middle C' key, you'll find a series of time-division options, ranging
from 1/4 to 1/32. To change the current time division, hold 'Shift' and press the appropriate
key on the keyboard. This changes the rhythm of the sequence relative to the tempo: quarter
notes (one step per beat), eighth notes (two steps per beat), and so on. Triplet values are
also an option (1/4T, 1/8T, etc.); if you're already in 1/8 and press 'Shift' + Triplet, you'll get into
1/8 triplet mode.
There's a lot of potential for creative fun here. In Chapter 5 [p.121] we'll show you how to copy
the pattern of one sequence to another sequence. Imagine starting with a simple pattern,
copying it to the three other sequencers, modifying those copies with Invert, Nudge and
Transpose, then running them simultaneously with the first sequence. You get the idea ...
18 Arturia - User Manual Keystep Pro - Basic Operations
Page 25
3.3. Using the Arpeggiator
An arpeggio is basically an outline of a chord: the notes are played individually, rather than
all at once. It's what you hear when you pluck the strings on a guitar from top to bottom, or
the other way around. A major part of learning to play the guitar is figuring out how to play
different fingerpicking/arpeggio styles. The arpeggiators on the KeyStep Pro do all these
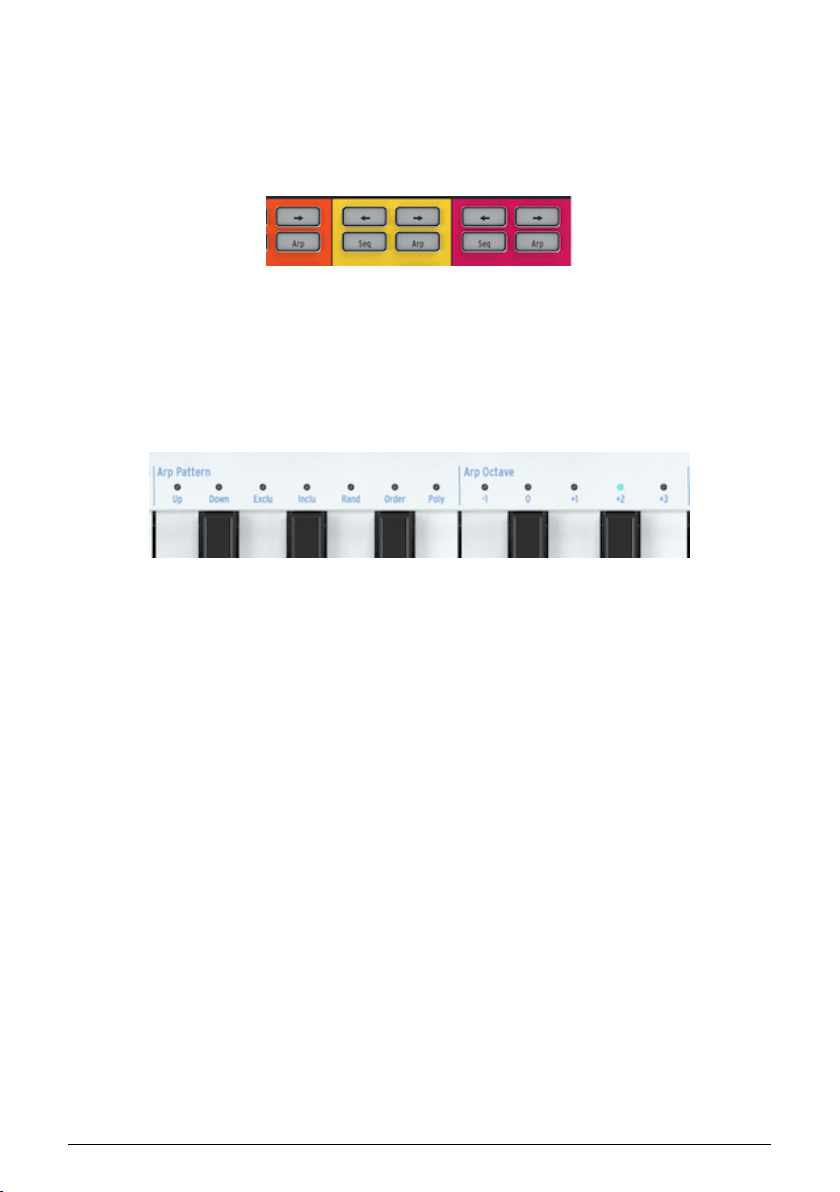
things for you. Each KeyStep Pro track, except Track 1, has an arpeggiator.
To play an arpeggio, activate a track (try Track 2), press the Arp button then hold down a
chord. Now press the 'Play' button and your arpeggio will start. It's rather tiresome to hold
keys down, especially if what you really want is to change your arpeggio, or if you want to
tweak parameters on your modular system or synth that is connected to the KeyStep Pro.
Pressing HOLD lets you lift your fingers off the keys without stopping the arpeggio. What's
more, once HOLD is active, you can add notes to the arpeggio as long you keep at least one
key pressed down; just press more keys and those notes will be added to the arpeggio at
the played velocity. You can add up to 16 notes to an arpeggio.
Again, there's a lot to discover here, so try some of these:
• 'Shift' + Arp to change the 'strum' pattern of your arpeggio
• 'Shift' + Time Division (1/4th, 1/8th, 1/16th, 1/32nd)
• 'Shift' + Scale. Selecting another scale will instantly change the tonal focus of your
arpeggio.
And there's even more: the Gate, Velocity and Randomness encoders! Tweaking the Gate
knob will lengthen or shorten the gate time, Velocity will add or subtract velocity, and
Randomness will inject random notes into your arpeggio. Press the Play/Pause button again
to pause the arpeggio pattern; press it once more to resume playback from where you
stopped.
Arturia - User Manual Keystep Pro - Basic Operations 19
Page 26
3.4. Scales & Chords
Some of the most interesting features of the KeyStep Pro are its scale and chord options,
which we'll cover in more detail in Chapter 5 [p.108]. But to get an idea of the impact they
have on your sequences and arpeggios, try this neat trick while your sequence or arpeggio
is running.
Let's try this in Track 2:
• Activate Track 2 by pressing its button
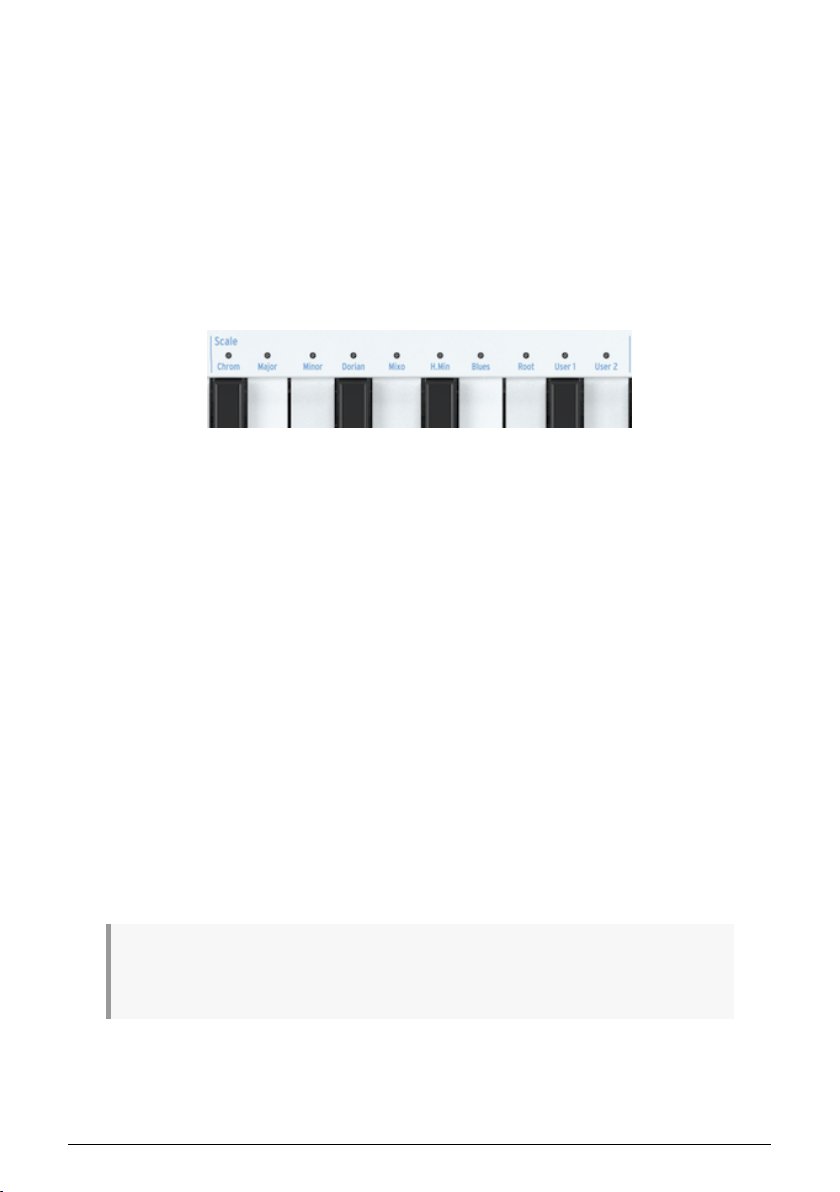
• Hold 'Shift' + (Scale)-minor. The Scale selectors are located just above the
keyboard. For example, you activate the minor scale with 'Shift' + C4 (the third 'C'
from the left). Try some of the other Scale selectors to hear the different types of
scales.
Chord mode is equally fascinating:
• Stop everything that's playing by pressing the 'Stop' button
• Hold 'Shift' + Tie/Rest (Chord) and play a chord
• Release all the keys of the chord
• Let go of the 'Shift' + Chord buttons
• Play any key on the keyboard to hear the chord you entered.
For example, if you have the minor scale selected, any key you play on the keyboard
generates a minor chord. Then if you activate the arpeggiator and hold down a few notes,
you'll hear an arpeggiated minor chord!
3.5. Creating Splits
You could have an arpeggio play on the lower part of the keyboard and a sequence on the
upper part. This is done by creating a keyboard split.
• Hold down the two track buttons of the tracks that you want to be part of the
split. The track button you press first will be assigned to the upper part of the
keyboard, the other one to the lower part. For example, if you want the sequence
on Track 1 to play in the upper part, you need to press the Track 1 button first.
• While holding down both track buttons, press an appropriate key on the
keyboard to select the split point.
♪: If you want to verify where the split point is, press the same two track buttons simultaneously. The
KeyStep Pro will display the ranges in the color of the tracks that are part of the split. Press the same
two track buttons again to deactivate the split.
We'll cover all these features in more depth in Chapter 6 [p.115].
20 Arturia - User Manual Keystep Pro - Basic Operations
Page 27
4. KEYSTEP PRO OVERVIEW
In this chapter we'll guide you through the front and back panels and explain the functions
of all the knobs and connections on these panels. If you're eager to start exploring your
KeyStep Pro and want to dive right in, continue to Chapter 5 [p.63], where you can learn how
to use the sequencers and the arpeggiators. This chapter is mainly for reference; you can
return here if you need to know more about a specific function, knob, strip, connection or
menu.
4.1. Making the Connections
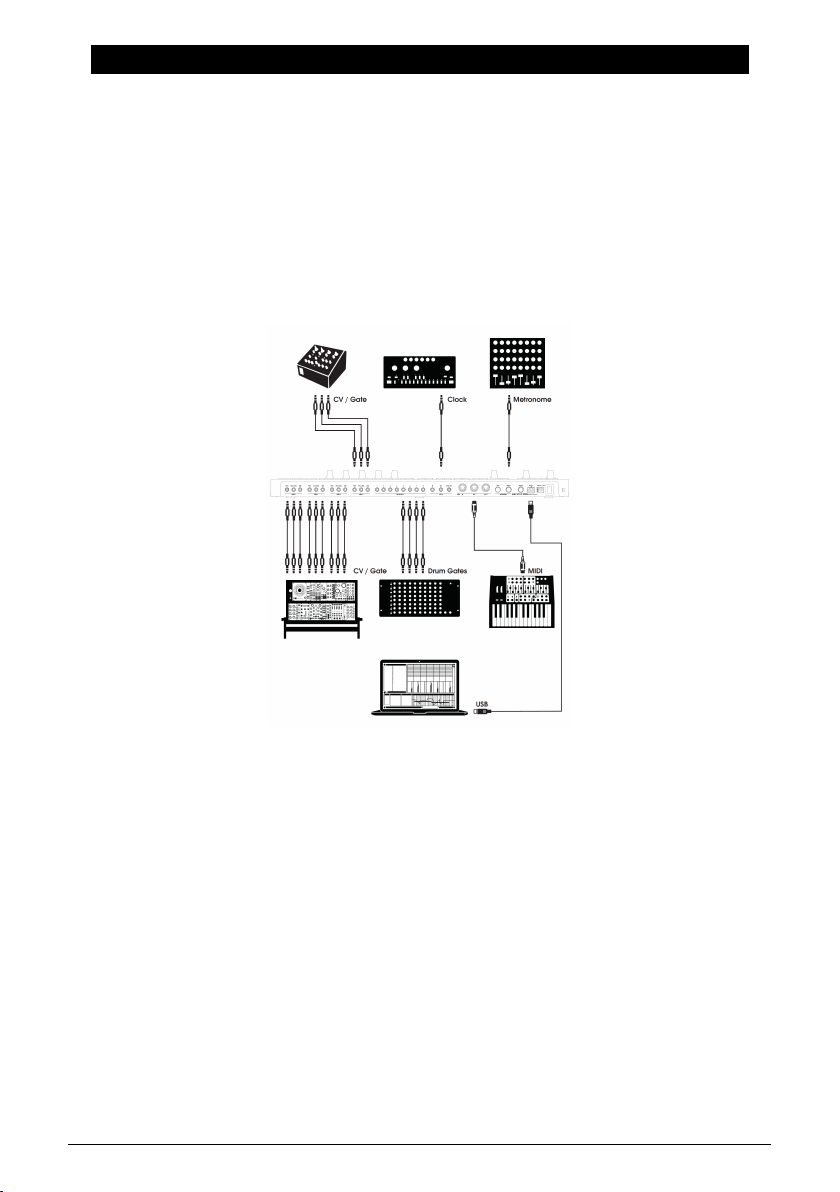
There are countless ways to connect the KeyStep Pro with your music-making gear. It's
impossible to cover every scenario in this guide, but here are some typical setups:
CV Gate outputs
4.1.1. ... with a Computer
The KeyStep Pro is a USB class-compliant controller, so at its most basic level it can be
connected to any computer with a USB port, through which it receives its DC power supply,
and can be used as an in put device for various applications. The downloadable MIDI Control
Center software lets you choose which MIDI messages will be sent by the mod strip and
also enables you to specify global KeyStep Pro parameters.
However, the KeyStep Pro can also be used in standalone mode without a computer
connected! In this case, simply use the provided 12V DC power supply adaptor.
WARNING!: Although the KeyStep Pro might seem to work OK when you power it up with a
power bank, we strongly advise you NOT to power it this way. The KeyStep Pro needs a lot
of current for its LEDs and analog output. Using a defective or partially charged power bank
could damage the KeyStep Pro.
Arturia - User Manual Keystep Pro - KeyStep Pro Overview 21
Page 28

4.1.2. ... with External Devices
As shown above, you can connect the KeyStep Pro to a variety of synths, drum machines
and/or Eurorack modules.
• When connecting to a synth, use one of the two MIDI Out ports. If you need to
connect more than two synths, you can daisy-chain them: connect the KeyStep
Pro to the MIDI In of the first synth and then connect the MIDI Thru of that synth
to the MIDI In of the second synth, etc. Daisy-chaining allows you to connect as
many as 16 synths to one MIDI Out
• An increasing number of modern synths have both MIDI Ins and Analog Ins, for
example the Arturia MiniBrute 2 and MiniBrute 2S. They enable you to use a mix
of MIDI and analog connections
• When connecting to a drum machine such as the Arturia DrumBrute, you have
two options: MIDI Out only or a mix of MIDI and Analog Outs. The KeyStep Pro
has eight analog drum-trigger outputs (Drum Gates) that you can play with the
lower eight keys of the KeyStep Pro keyboard
• If you have a Eurorack system, you can connect the KeyStep Pro's four Voice
outputs to various Eurorack inputs. Please refer to Chapter 10 [p.167] for examples
of how to set up these connections.
4.1.3. ...with an iPad®
Add a camera connection kit and the KeyStep Pro becomes the perfect companion for
an iPad. This enables it to be used as a controller for Arturia's iMini, iSem or iProphet
applications, for example.
If you have an iPad but don't already own those great virtual instruments, please take a
look at them on our website! They are very affordable and live up to Arturia's reputation for
accurately modelling the sound of analog synthesizers with warmth and precision.
As you can see, KeyStep Pro can be the controlling hub of some amazing systems!
22 Arturia - User Manual Keystep Pro - KeyStep Pro Overview
Page 29
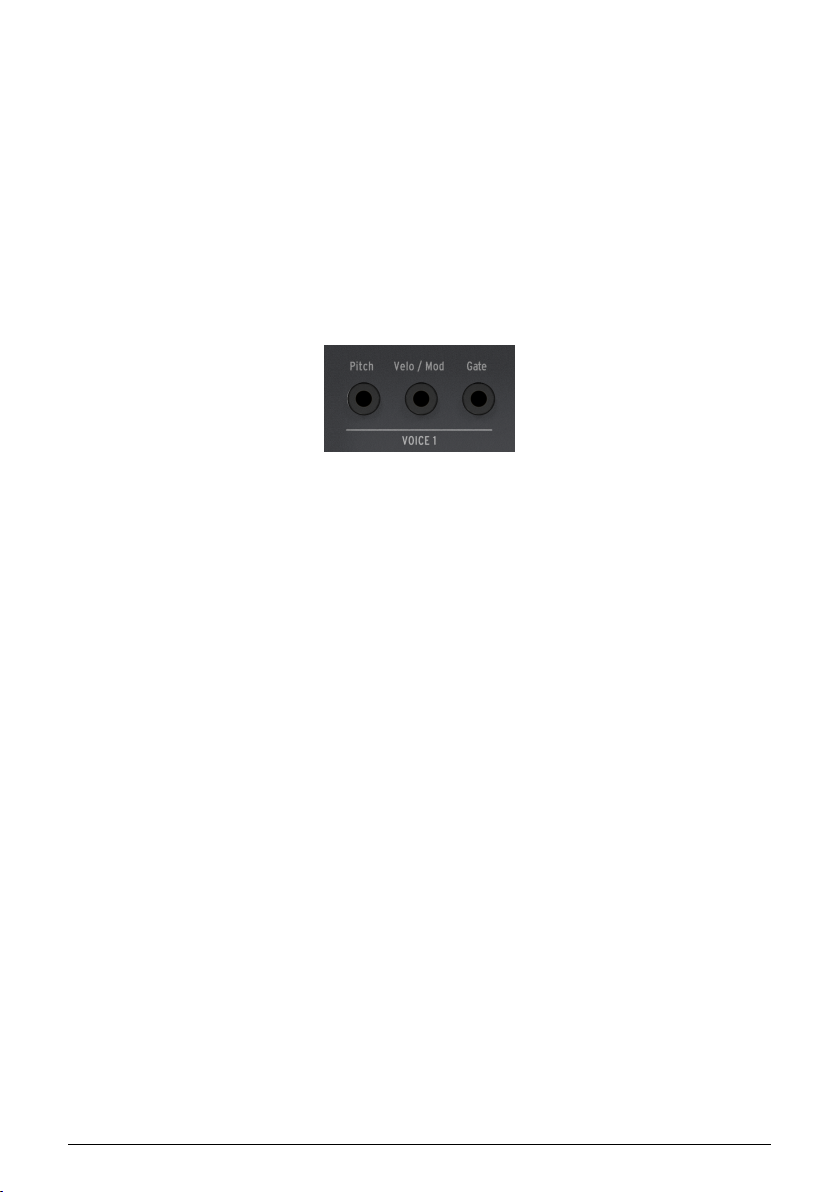
4.1.4. Analog Connections (CV and Gate)
KeyStep Pro can send control voltages (CV) to modular synthesizers and other non-MIDI
devices through its four sets of Pitch, Velo/Mod and Gate connectors on the back panel. Each
of the KeyStep Pro's four tracks has its own dedicated set of connectors, allowing you to
connect and control as many as four devices at the same time!
4.1.4.1. Control Voltages: Pitch, Velo/Mod and Gate
When the sequencers are running or you play a single note or multiple notes on the
keyboard, each note is translated immediately into Pitch, Control Voltage (Velocity or
Modulation) and Gate signals and sent to the four Voice outputs on the back panel. When
you play the keyboard or the sequencers in polyphonic mode, the KeyStep Pro's CV routing
options let you define how the signals from the four voices will be distributed.
CV Gate outputs
For each note, three independent voltages are sent: Pitch, Velo/Mod and Gate. The Velo/Mod
voltage can be either velocity or modulation, depending on what you have selected in the
Utility section or in the MIDI Control Center.
Some analog synthesizers have unusual implementations that are not fully compatible with
the KeyStep Pro's CV and Gate signals. Before purchasing an analog synth, please refer to
its manufacturer's specifications to ensure that the two devices will work together well.
We've designed the KeyStep Pro to be as flexible as possible. The downloadable MIDI
Control Center [p.155], which you can install on your computer, allows you to configure the
response of the CV/Gate jacks in a number of ways. Please refer to the manufacturer's
documentation of your external devices for information about which standards they use.
By default, the transmitted pitch voltage is compatible with the 1.0 V per octave standard,
which means that if you play an octave interval on the KeyStep Pro keyboard, the connected
synth(s) or Eurorack module(s) should also play an octave interval. In other words, the 'pitch
tracking' is correct. However, some synths use a 1.2 V per octave or a Hertz per Volt (Hz/V)
standard. To control these devices, you can change the corresponding setting in the MIDI
Control Center.
For each of the KeyStep Pro's four tracks, the Pitch control voltage (CV) can be set separately
in Utility>CV>Track (1-4) to:
• 1.0 Volt/Octave (0-10V)
• 1.2 Volt/Octave
• Hertz per Volt
Gate signals can also have quite different output ranges (S-Trig, V-Trig 5V or V-Trig 10V).
These too can be set up in the MIDI Control Center.
The four Voice outputs can be set to transmit either velocity or aftertouch modulation. You
can change this in Utility > CV Settings.
Arturia - User Manual Keystep Pro - KeyStep Pro Overview 23
Page 30
4.1.5. MIDI Connections
Much of the 'mid-vintage' music hardware from the 1980s and 1990s had MIDI DIN jacks
but not CV/Gate connectors or USB ports. KeyStep Pro can be plugged directly into such
devices, letting you control them using its powerful sequencers, arpeggiators and other
controls (keys, knobs, touch strips, etc.).
4.1.5.1. Connecting to a DAW
The KeyStep Pro is an ideal controller for your DAW because you can use its four Voice
outputs to simultaneously control separate instruments loaded on four tracks of your DAW.
Below, we give an example of how to set up Ableton if you want to control instruments via
four MIDI channels.
Connect the KeyStep Pro to a USB port on your computer using the supplied USB host cable.
We first have to 'tell' Ableton that we want to use the KeyStep Pro as a controller in Ableton:
• Open 'Preferences' in the 'Live' menu.
• Select 'Link/MIDI'.
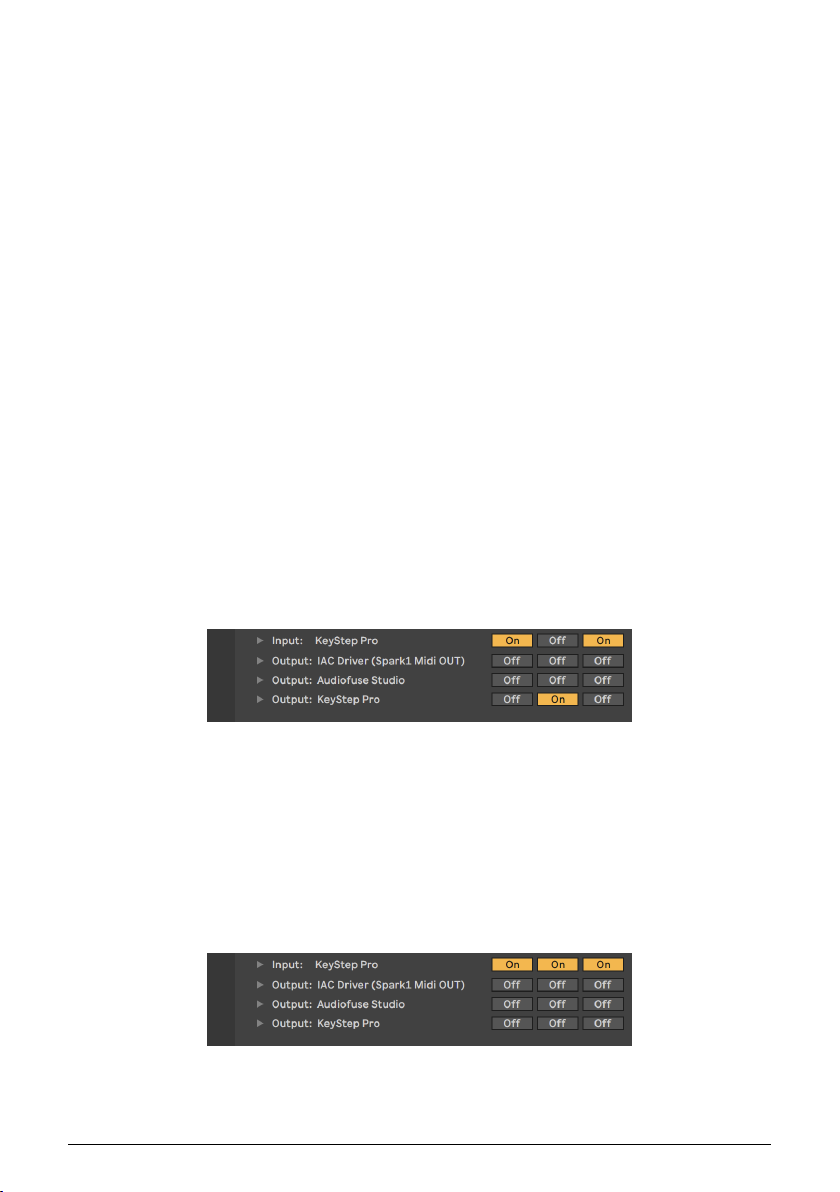
If you want the KeyStep Pro to be slaved to your session:
• In the MIDI ports section:
◦ Enable "Track" for the input, which enables the MIDI from the KeyStep
Pro to be received by Live.
◦ Enable "Remote" for the input, which will allow the mapping of the
control sequencer's encoders via MIDI learn.
◦ Enable "Sync" for the output, for Live to send clock information to your
KeyStep Pro.
Finally, make sure that the KeyStep Pro is set to Auto or USB sync source. This will define
the source of the synchronization of the KeyStep and can be edited from the Utility > Sync >
Source menu.
The KeyStep Pro will then start when launching the playback in Live.
If you want the KeyStep Pro to be the master of the session:
• In the MIDI ports section :
◦ Enable "Track" as well as "Sync" and "Remote" on the input.
24 Arturia - User Manual Keystep Pro - KeyStep Pro Overview
Page 31

• Be sure to enable the external sync next to the BPM display of your session:
From there, pressing play on the KeyStep Pro will launch playback in Live.
We're done; Ableton is now able to correctly interpret the MIDI control signals arriving from
the KeyStep Pro and we're now ready to make some noise!
• Open Ableton and select 'New Live set' to create an empty set.
• Delete the two default audio tracks by selecting them and clicking 'delete' in the
'Edit' menu.
• Select 'Insert MIDI track' from the 'Create' menu and repeat this one more time to
create two empty MIDI tracks. As an alternative, you can right-click in the empty
track space and insert two MIDI tracks.
• Drag a sound from Category > Sounds to Track 1. Repeat this for Tracks 2 to 4.
You should now have four MIDI tracks, each with its own virtual instrument loaded. There's
nothing to hear yet because we haven't made the connection from the KeyStep Pro to
Ableton. Let's do that now:
• Focus on Ableton track 1 and click on the downward arrow in the 'All ins'
dropdown menu listed below 'MIDI From'.
• Select KeyStep Pro from the listed options.
• Select channel 1 if it is not already selected.
• In the monitor menu directly below, select 'In'.
We've now instructed Ableton to listen to what's happening on MIDI channel 1. If your
KeyStep Pro is in its default state, Track 1 will transmit on MIDI channel 1.
Select Track 1 on the KeyStep Pro and play a note on the keyboard. You should now hear the
virtual instrument you dragged to Ableton track 1.
We'll repeat these steps for Ableton track 2:
• Again select KeyStep Pro as the MIDI source.
• Select MIDI channel 2 as the channel that this track should listen to and play
back.
• Select 'In' to monitor directly what is coming in on this channel.
Repeat this for KeyStep Pro Tracks 3 and 4 and select MIDI channel 3 as the input for
Ableton track 3 and MIDI channel 4 as the input for Ableton track 4.
Arturia - User Manual Keystep Pro - KeyStep Pro Overview 25
Page 32
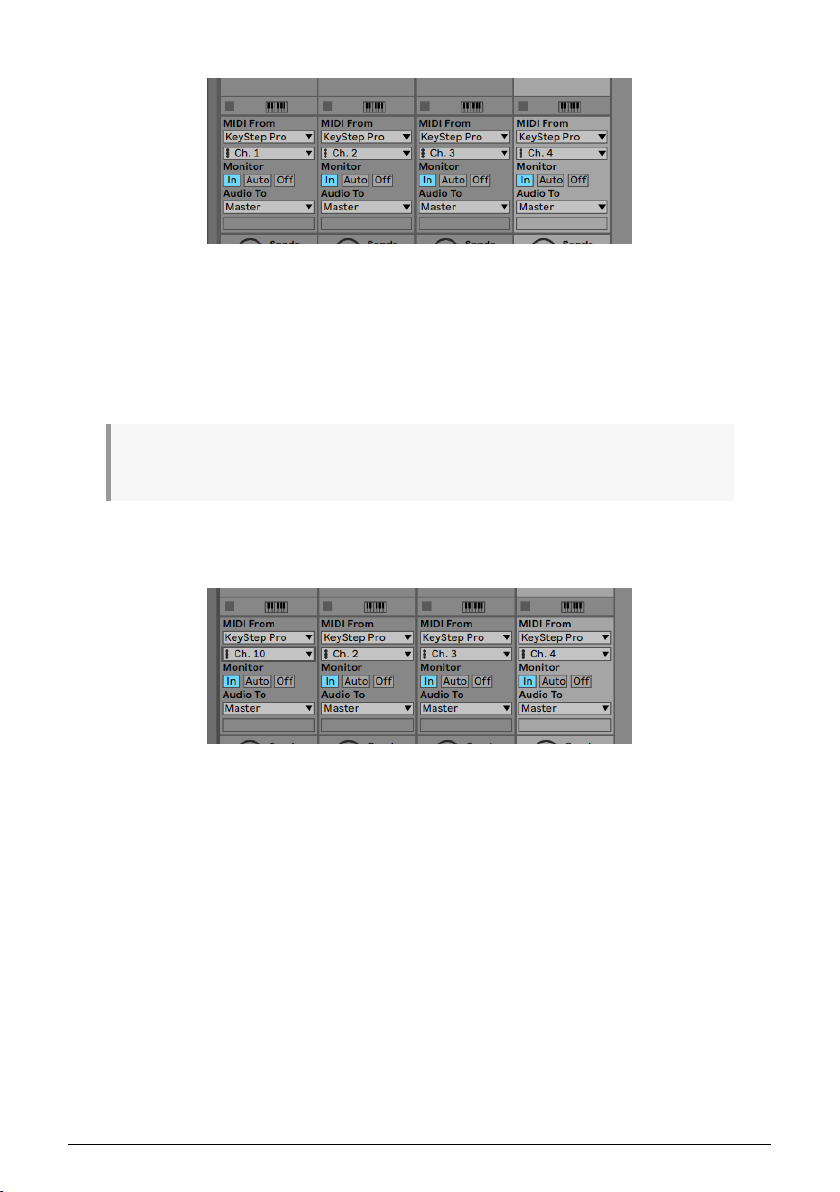
Your screen should now look like this:
In this setup, the four KeyStep Pro tracks will play on the four corresponding Ableton tracks.
To play a drum track in Ableton:
• Drag a drum set into an Ableton track.
• Set the track to MIDI channel 10.
• On Track 1 of the KeyStep Pro, press the Drum button.
♪: By default, the KeyStep Pro's Drum track (only available on Track 1) will always transmit on MIDI
channel 10.
Because you've set the Ableton drum track to listen on MIDI channel 10, the two will match.
Your screen should now look like this:
26 Arturia - User Manual Keystep Pro - KeyStep Pro Overview
Page 33
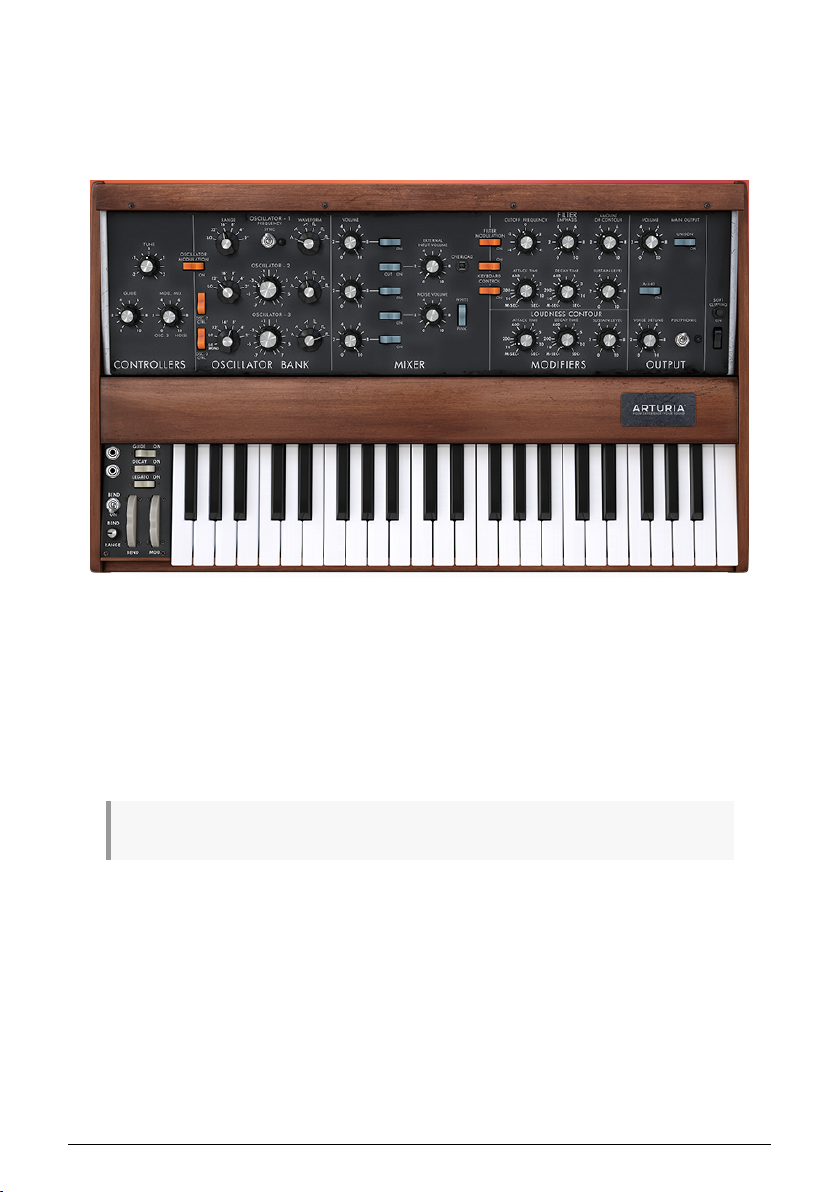
4.1.5.2. Tutorial 1: Using MIDI to Control Arturia's MINI V
VST synth
In this tutorial we will use the KeyStep Pro to control the filter cut-off frequency of Arturia's
MINI V VST synth. The MINI V is part of Arturia's V Collection, a great series of software
emulations of classic hardware synths.
Even if you don't own the MINI V, you can still follow this tutorial. Just download the demo
version from https://www.arturia.com/support/downloads&manuals. Although this tutorial
features the MINI V, it can be used to learn how to control any knob on any VST synth from
Arturia's V Collection that you want to set up to receive MIDI.
• Connect the KeyStep Pro's USB Out to your computer's USB In. Load either the
standalone or the DAW-based VST version of the MINI V
• In the MINI V user interface, open the Arturia system menu in the top left and
select 'Audio Midi Settings'. Under 'MIDI Devices', select the Arturia KeyStep Pro.
♪: 'MIDI Devices' is only visible when a KeyStep Pro is connected to your computer via USB.
• Next, click on the MIDI symbol in the top right of the Main Menu. The knobs on
the MINI V will now be highlighted in red or purple.
• Click on the Cutoff Frequency knob in the Filter section of the MINI V. Tweak the
Filter knob on the KeyStep Pro. The Cutoff Frequency knob of the MINI V should
now respond to your knob movements.
Arturia - User Manual Keystep Pro - KeyStep Pro Overview 27
Page 34
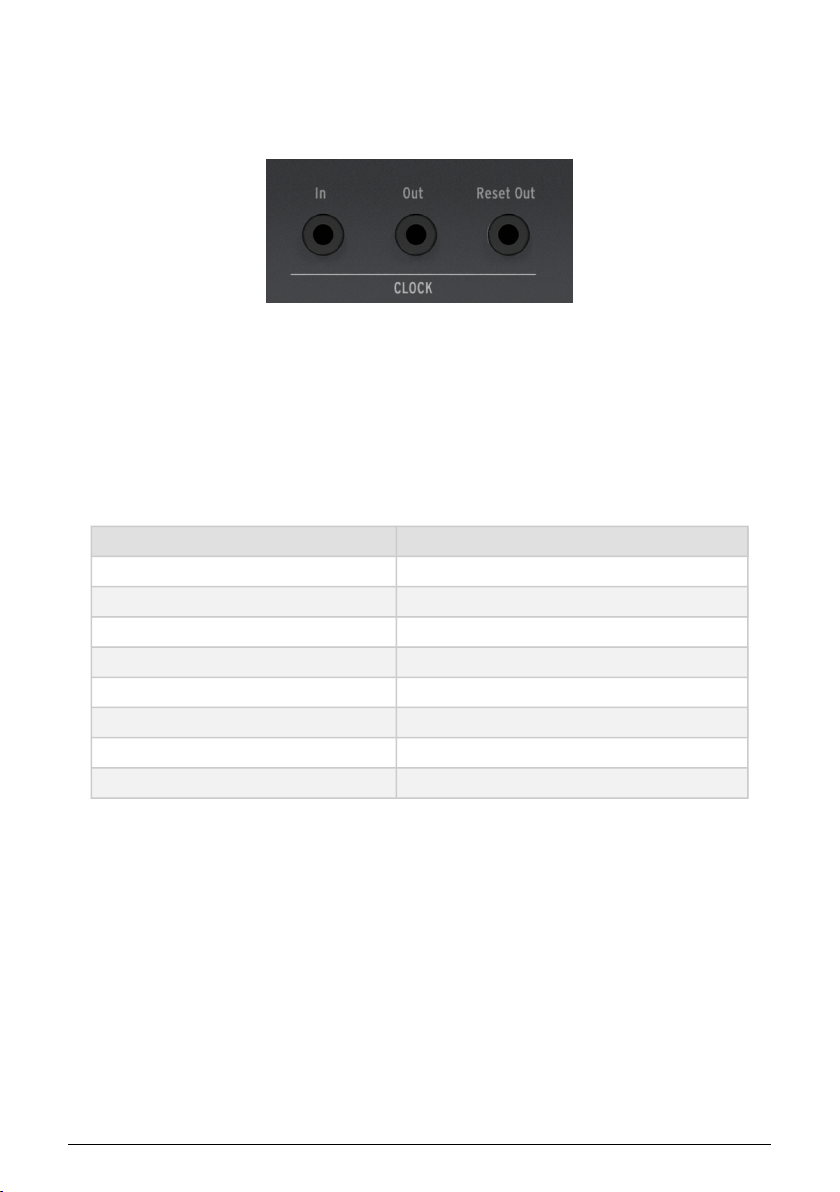
4.1.6. Clock In/Out
The Clock input and output connectors on the back panel allow the KeyStep Pro to
synchronize with many different clock formats. For a list of the formats, see the table in the
next section.
These options enable you to connect and stay synchronized with almost every conceivable
piece of music technology.
4.1.6.1. Clock In/Out Rates
The downloadable MIDI Control Center can also be used to configure the KeyStep Pro
to send and receive one of the following clock signals via the Clock In and Clock Out
connectors.
Clock In settings Clock Out settings
Internal 1 PP16 (one pulse per 1/16th note [clocked])
USB 2 PPQ8 (1 pulse per 1/8th note)
MIDI 1 PPQ (1 pulse per quarter note)
1 PP16 (one pulse per 1/16th note) 1 PP2Q (1 pulse per 2 quarter notes)
2 PPQ (two pulses per quarter note) 1 PPQ4Q (1 pulse per 4 quarter notes)
24 PPQ (24 pulses per quarter note) Korg
48 PPQ (48 pulses per quarter note) 24 PPQ (24 pulses per quarter note)
Auto 48 PPQ (48 pulses per quarter note)
28 Arturia - User Manual Keystep Pro - KeyStep Pro Overview
Page 35

4.1.6.2. Clock In/Out Connectors
Over the past few decades, several types of connectors have been used for musical
synchronization purposes. Here's a table that indicates the best kinds to use when
connecting older devices to KeyStep Pro:
Connector type Signal(s) sent
1/8'' mono (TS) [1] Clock pulse only [1]
1/8'' stereo (TRS) [2] Clock pulse and start/stop [2]
1/8'' stereo (TRS) plus DIN sync adapter [2] Clock pulse and start/stop [2]
You can use a 3.5 mm jack to 5-pin DIN adapter to connect to devices which utilize DIN sync
messages. Check the owner's manual for your device if you are not sure which sort of sync
capabilities it has.
If Sync is set to an external source and a TS connector is used, the sequencer needs to be
armed before it can start when receiving a clock signal. You must press the Play button to
arm the sequencer. For example:
• If the Play button has been pressed but no clock signal has been received, the
unit will wait for a clock signal and only start when it receives one.
• If clock signals are being received but Play is not active, the unit will start as soon
as you press the Play button.
If Sync is set to an external source and a TRS connector is used, the KeyStep Pro will follow
the master and will:
• Play on receiving a high-state signal and clock,
• Pause on receiving a high-state signal and no clock, or
• Stop on receiving a low-state signal, with or without clock.
Arturia - User Manual Keystep Pro - KeyStep Pro Overview 29
Page 36

4.1.7. Master or Slave
KeyStep Pro can be the clock master for an entire MIDI rig, or it can just as happily serve
as a slave to other clock sources. Clock In and Clock Out can synchronize with older clock
types such as 2, 24 or 48 ppqn (pulses per quarter note), or even a single pulse per step.
Whether the KeyStep Pro will send or receive MIDI Clock signals and send or receive
Transport Signals (Start-Stop-Continue) will depend on the corresponding settings in Utility >
MIDI Settings.
♪: While the unit is playing a sequence, the Sync settings cannot be changed.
4.1.7.1. KeyStep Pro as Master
To use the KeyStep Pro as clock master, Utility > MIDI Setting > Clock send must be set to
On. This is the default setting.
You can set the Master sync options in Utility > Sync > Output. To access the utility menu,
hold down 'Shift' and press the Project button.
Sync Setting Description
Output
In this menu, you select how the KeyStep Pro will control the tempo of external modules or
synths:
1 PP16, 2 PPQ8, 1 PPQ, 1PP2Q, 1 PPQ4Q, Korg,
24PPQ, 48PPQ
• The transport section will control the internal sequencers
• MIDI clock messages are sent to MIDI Out 1, MIDI Out 2, USB Out and Clock Out
• The sequence tempo can be set using the Tempo encoder and the Tap Tempo/
Metronome button.
Allows KeyStep Pro to sync with various
clock types
30 Arturia - User Manual Keystep Pro - KeyStep Pro Overview
Page 37

4.1.7.2. KeyStep Pro as Slave
The KeyStep Pro can function as a slave to an external clock source. To use the KeyStep Pro
as a slave, Utility > MIDI Setting > Clock receive must be set to On. This is the default setting.
You can set the Slave sync options in Utility > Sync > Input. To access the utility menu, hold
down 'Shift' and press the Project button.
Sync Setting Description
Input Internal, USB, MIDI, 1 PP16, 2 PPQ, 24PPQ, 48PPQ, Auto Defines tempo source of KeyStep Pro
In this menu, you select how the KeyStep Pro will follow the tempo of external modules or
synths.
When the KeyStep Pro is in Slave mode:
• The Tempo controls will not control the internal sequencer while the external
clock source is running.
• The KeyStep Pro transport section will perform as usual: you can stop, start and
pause the internal sequences, and you can record patterns.
• When the external clock source is not running, the KeyStep Pro will function
according to its internal clock at the last set tempo.
• The KeyStep Pro will pass the synchronization messages it receives from the
external clock source to USB Out, MIDI Out 1, MIDI Out 2 and Clock Out.
Arturia - User Manual Keystep Pro - KeyStep Pro Overview 31
Page 38
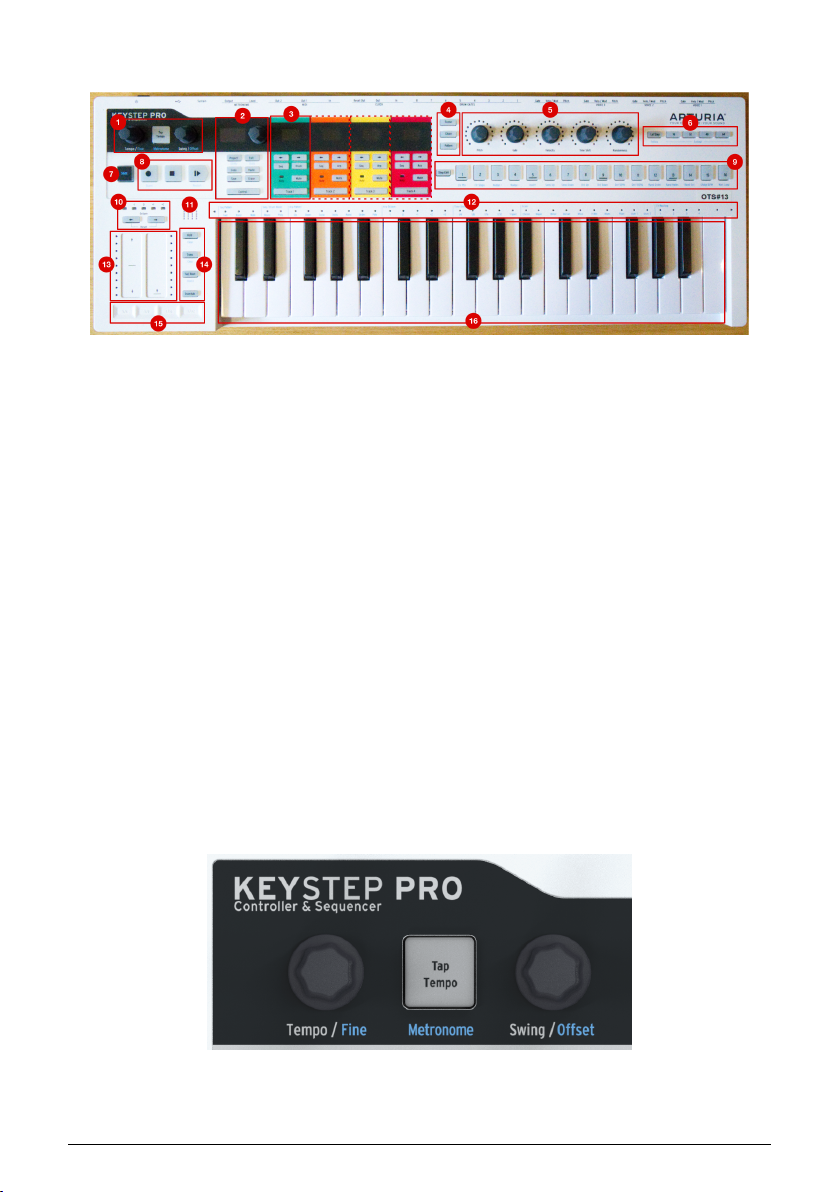
4.2. Front Panel Overview
1. Tempo Section
2. Control Section
3. Track Sections (4x)
4. Scene/Chain/Pattern Buttons
5. Main encoders (5x)
6. Sequence Length Section
7. 'Shift' button
8. Transport Controls
9. Step Buttons
10. Keyboard Transpose Section
11. Built-in Metronome Speaker
12. Keyboard LEDs and Shift functions
13. Pitch / Mod touch strips
14. Keyboard and Sequencer buttons
15. Looper
16. Keyboard
4.2.1. Tempo Section
Here you can find the tempo-related controls of KeyStep Pro. When KeyStep Pro is internally
synchronized, your settings here will affect the internal sequencers/arpeggiators and any
external equipment connected to KeyStep Pro.
32 Arturia - User Manual Keystep Pro - KeyStep Pro Overview
Page 39

The Tempo/Fine knob sets the tempo from 30-240 beats per minute (BPM). As you turn this
knob, the BPM value is automatically rounded off to the nearest whole number and shown
on the KeyStep Pro's OLED display. Holding down 'Shift' while turning this knob gives you
finer BPM control by switching off the whole-number rounding.
The Tap Tempo/Metronome button lets you set the tempo by tapping on this button in time
with the beat you want or are hearing.
To enable or disable KeyStep Pro's built-in Metronome, hold down 'Shift' while pressing the
Tap Tempo/Metronome button.
♪: You can change Metronome time division by holding the Tap Tempo button and pressing one of
the time division keys (value printed above the keyboard).
Turning the Swing/Offset knob lets you adjust the amount of swing or 'shuffle' feel in your
sequences. It affects either the entire project (all four tracks at once) or only the selected
sequencer/arpeggiator, leaving the others unchanged. Holding down the 'Shift' button while
turning the Swing/Offset knob lets you adjust the timing offset for a track.
♪: If the KeyStep Pro is externally synchronized, the master tempo will be determined by an external
clock source and the Tempo/Fine knob and the Tap Tempo button are ignored.
Swing introduces a shuffle feel to the active sequence or arpeggio. If you've listened to a
variety of musical genres (it's unlikely that you haven't), you have heard swing. It's when
musicians play just before or just after the beat. This is very often heard in jazz and Latin
American music. It evokes a feeling of freedom, of not being forced into a fixed, grid-like
rhythm. It is particularly effective when you mix 'straight' notes with 'swung' notes.
25 different settings are available, ranging from fully counterclockwise (no swing, or 50%)
through increasing amounts of swing (51-74%) to fully clockwise (maximum swing, or 75%).
What the Swing setting does is shift the timing of the notes in a sequence, making the first
note of a pair longer and the second note shorter. Assuming the time division is set to 1/8,
here's what will happen:
• With Swing set to 50%, each note gets equal time, resulting in a 'straight 1/ 8th
note' feel
• As the Swing value is increased above 50% the first 1/8th note is held longer and
the second is played later and shorter. You'll notice that the sequence starts to
'shuffle' a bit and hopefully sounds less mechanical to your ear
• The maximum Swing setting is 75%, at which point the 1/8th notes sound more
like a 1/16th-note figure than 'shuffled' 1/8th notes.
♪: Each sequence can have its own Swing setting.
Turning the Swing knob will apply swing to all sequences and arpeggios simultaneously.
Use 'Shift' + Swing to apply swing to the arpeggio on the active track only. When you record
an arpeggio and quantize is off, Swing is recorded in the sequencer.
Turning or pressing the Swing/Offset knob will display the global and current track offset
values.
Arturia - User Manual Keystep Pro - KeyStep Pro Overview 33
Page 40
4.2.2. Transport Section
The three Transport buttons control the sequencers, the arpeggiators and any external MIDI
devices by using MIDI Machine Control (MMC). If your DAW does not respond to MMC
commands, the Transport buttons can be configured to send other MIDI messages. Please
refer to the MIDI Control Center [p.155] to make changes if needed.
♪: In sequencer mode, all three Transport buttons are active. In arpeggiator mode, only Play/Pause
and Stop are active.
All Notes Off
The Stop button has an additional function. If for some reason you end up with a stuck note
playing, just press the Stop button quickly three times in a row. The KeyStep Pro will then
send an All Notes Off command via MIDI.
4.2.3. Built-in Metronome Speaker
The Metronome speaker plays the output of KeyStep Pro's built-in metronome. The
Metronome Level knob on the back panel sets the speaker volume. The metronome can be
switched on or off by holding down 'Shift' while pressing the Tap Tempo button.
Read Chapter 7 [p.132] to learn more about the Metronome and synchronization in general.
4.2.4. Shift Button
The 'Shift' button gives access to secondary functions, all of which are printed in blue on
the front panel. Most of them are printed above the keys of the keyboard or below the step
buttons.
All of these functions are accessed by holding down the 'Shift' button and pressing another
button that has blue text below it or a key of the keyboard that has blue text above it. For
a detailed overview of the Shift functions, refer to the Shift function overview later in this
chapter.
34 Arturia - User Manual Keystep Pro - KeyStep Pro Overview
Page 41
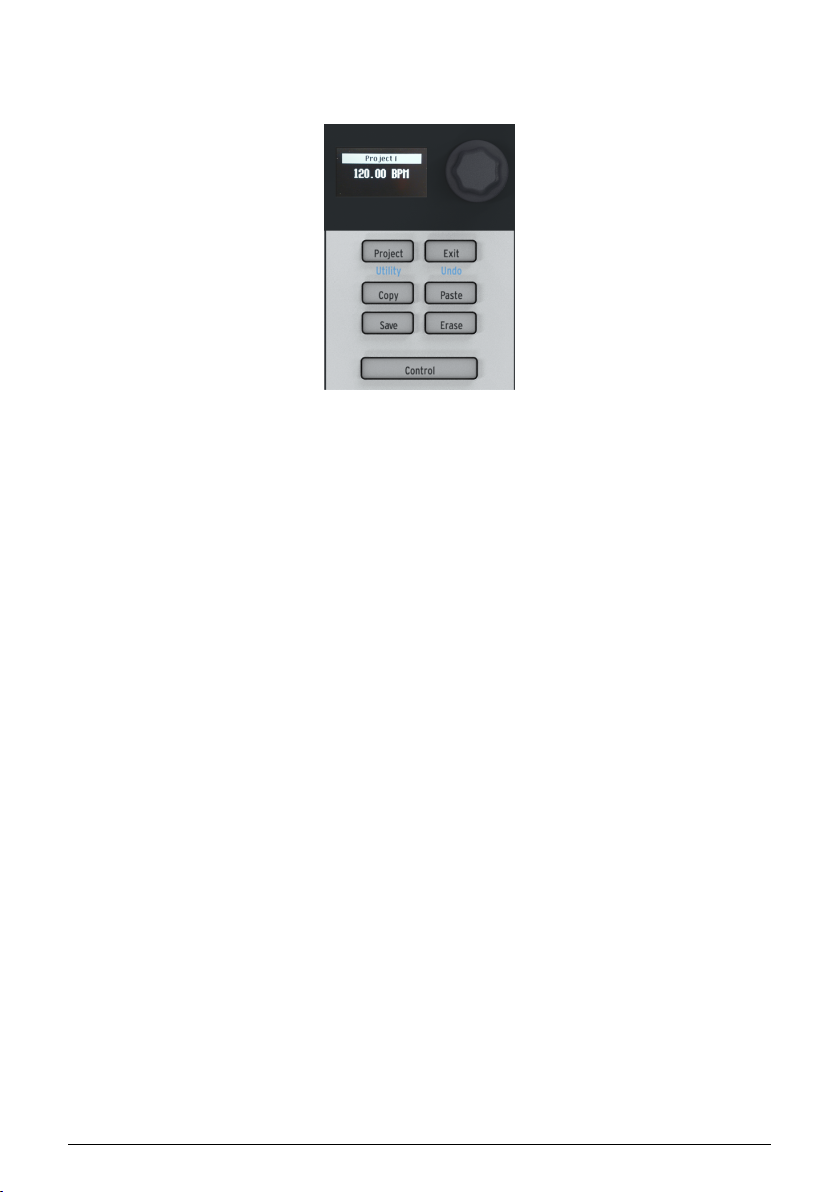
4.2.5. Control Section
In the control section, you'll find Project options, Pattern edit options and the Utility menu.
4.2.5.1. Utility Menu
The KeyStep Pro has many settings that you may want to adjust. The Utility menu is where
you set and change most of the global settings for the KeyStep Pro. 'Global' means that these
settings are shared by all projects. They will be saved as soon as you exit the Utility menu,
which you access by holding down 'Shift' and pressing the Project/Utility button. The Utility
menu will open in the OLED display. To navigate in the Utility menu turn the Control section
encoder and click it to enter a submenu. To back up in a submenu press the Exit button. To
leave the Utility menu, press the Exit button repeatedly. You don't have to save the changes
you make here; they are automatically saved whenever you exit the Utility menu.
4.2.5.2. Exit/Undo
Undo is a Shift function closely related to the other edit functions such as copy/paste and
erase. If you make a mistake during editing, it's good to know that you can undo the last
change you made. If undo is possible, the Exit/Undo button blinks. Pressing 'Shift' + Exit will
undo the mistake.
4.2.5.3. Project Button
KeyStep Pro sequences are organized into Projects. In a Project, you save all your sequence
and drum patterns. Each of the four tracks can store 16 sequences, which can be copied
from one track to another. The Erase button enables you to delete entire projects (as well as
patterns, scenes, steps and notes). The patterns in a project can be chained. This is a handy
feature that will help you to prepare for a performance. Please refer to Chapter 6 [p.115] for
an in-depth overview of these functions.
Arturia - User Manual Keystep Pro - KeyStep Pro Overview 35
Page 42
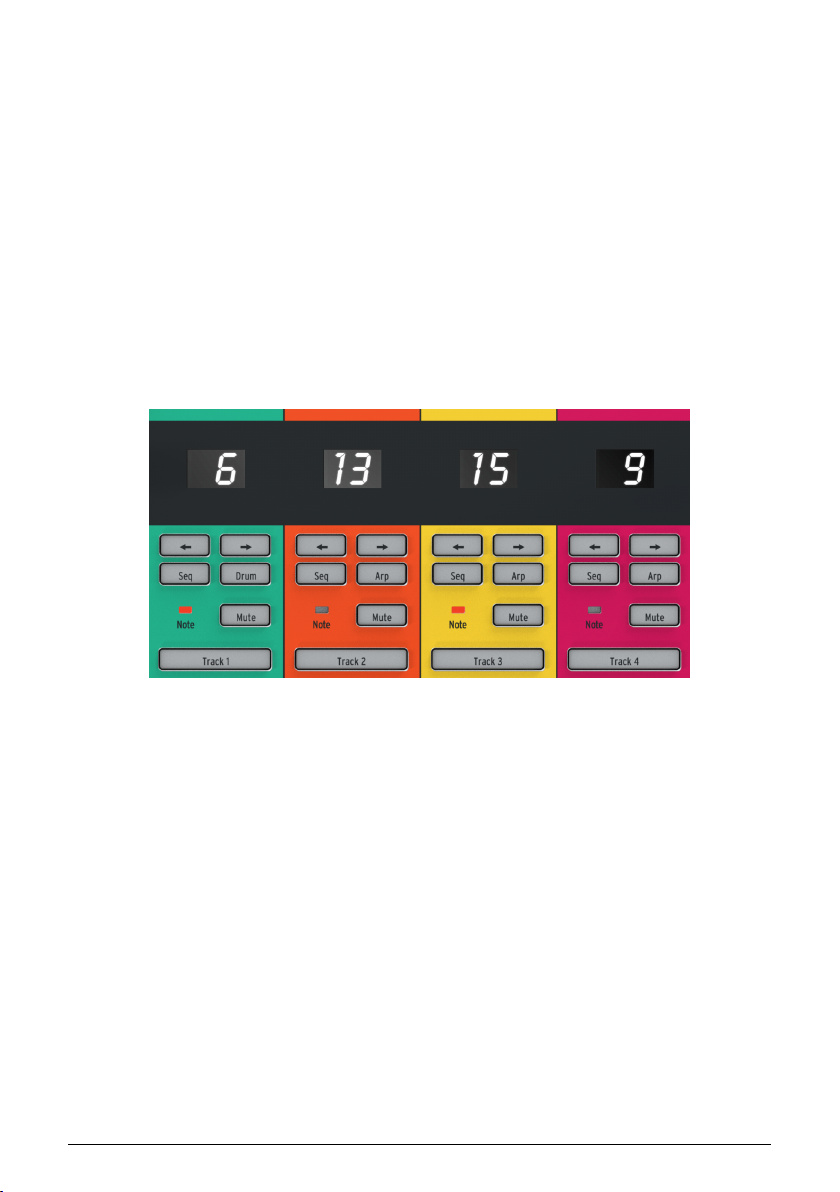
4.2.5.4. Control Mode
The Control button changes the function of the five main encoders. Instead of controlling
pitch, gate, velocity, etc. and the corresponding control voltages (CV) sent to the analog
outputs, in Control Mode they send MIDI control change (CC#) messages, enabling you to
control parameters of external hardware synths or Eurorack modules and, for example,
virtual instruments on your computer.
You enter Control Mode by pressing the Control button. When Control Mode is selected, the
five main encoders send CC# values. For an in-depth explanation of what CC# values are
and what you can use them for, please refer to Chapter 8 [p.137]. The CC# messages to be
sent can be edited using the OLED display in Utility>Controller and in the downloadable MIDI
Control Center.
4.2.6. Track Sections (4x)
The KeyStep Pro has four separate tracks, each of which has its own dedicated set of
buttons to give you instant control over important features.
The track controls are identical exce pt for one button: Track 1 has a Drum button for the
drum sequencer, but Tracks 2, 3 and 4 each have an Arp button for the arpeggiators. The
track controls function as follows:
4.2.6.1. Track Selector
The Track Selector buttons (Track 1, Track 2, Track 3 or Track 4) let you select the currently
active track. The buttons of the active track light up, and the various controls of the KeyStep
Pro (keyboard, encoder knobs, step buttons, etc.) will only affect the currently selected track.
As you work with the KeyStep Pro, you will notice that there is a consistent color-coding
across the entire front panel. For example, Track 1 is green and when it is selected, all of the
Step Buttons and Keyboard LEDs will light up in green. Track 2 is orange and selecting it will
cause the Step Buttons and Keyboard LEDs to light up in orange. These color cues help you
to know what you are editing and to avoid accidentally changing parameters on the wrong
track.
36 Arturia - User Manual Keystep Pro - KeyStep Pro Overview
Page 43
4.2.6.2. Mute Button
The Mute button engages or disengages the track mute function. When this button is
illuminated, its associated track is muted and does not transmit any data. In other words,
devices connected via MIDI, CV or USB will not receive any signals when mute is engaged.
Holding down 'Shift' while pressing the Mute button will engage or disengage Solo mode.
This feature is similar to the 'solo' button found on many mixing boards. When Solo mode is
engaged, the Mute button lights up in blue and you will
Note that the Mute button will only mute the sequences and arpeggios that are running,
possibly including a drum sequence on Track 1. You can still have a muted channel active
and play its sounds on the keyboard.
♪: The Mute and Solo functions can be useful in both composing and performing contexts. For
example, while composing or mixing you may need to solo a certain track to focus on it without
distraction; in a performance context, you may want to mute and unmute sections to build up or
breakdown a song.
only
hear the soloed track (or tracks).
4.2.6.3. Note LED
This LED lights up whenever a track's sequencer or arpeggiator is playing and/or whenever
you are playing notes on the keyboard. This handy feature instantly lets you know what is
happening on all four of your tracks without you having to select a track and look at its Step
Buttons or Keyboard LEDs.
4.2.6.4. Sequencer and Arpeggiator Buttons
The KeyStep Pro has four tracks, each with its own independent sequencer or arpeggiator.
Sequencer Arpeggiator Drum trigger (gates) sequencer
Track 1 Yes No Yes
Track 2 Yes Yes No
Track 3 Yes Yes No
Track 4 Yes Yes No
Each track has a pair of buttons labelled Seq and Arp (or Seq and Drum on Track 1). These
buttons let you set the functions for their associated track. The currently selected option is lit
up, and only one mode (Seq or Arp) can be active at any time.
Arturia - User Manual Keystep Pro - KeyStep Pro Overview 37
Page 44

4.2.6.5. Sequencer
The Sequencer lets you record 16 different sequences, each with u p to 64 steps. You can
create these sequences by playing them on the keyboard or by entering note events directly
(complete with pitch, gate length, velocity and other parameters) using the Step buttons.
These sequences can then be played, transposed and modified in many creative ways.
The Sequencer is covered in detail in Chapter 5 [p.74] of this guide.
4.2.6.6. Arpeggiator
The arpeggiator generates notes based on the keys of the keyboard that you have pressed
or are now pressing and plays them back according to the Arp Mode setting. This is a fun
and interesting way to create new patterns and melodies or to improvise on existing chords.
The Arpeggiator is covered in detail in Chapter 5 [p.63] of this guide.
4.2.6.7. Drum Trigger Sequencer
This is a special drum or 'trigger' sequencer that sends signals to the Drum Gates outputs
on the back panel of the KeyStep Pro. The Drum sequencer has eight gate outputs (labelled
'Drum Gates 1-8'). You can use these outputs to trigger connected drum machines or
synthesizer modules with gate (or 'trigger') signals.
The Drum Gate sequencer is covered in detail in Chapter 5 [p.92] of this guide.
38 Arturia - User Manual Keystep Pro - KeyStep Pro Overview
Page 45
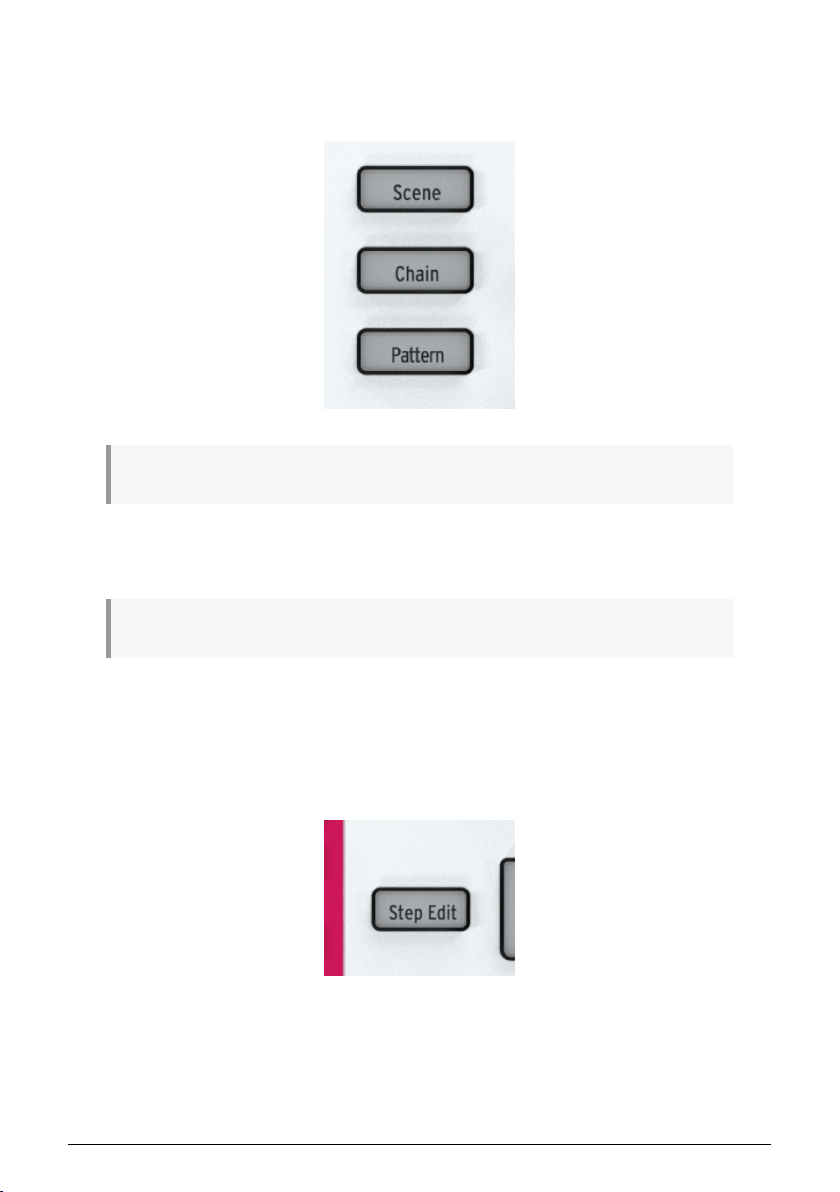
4.2.7. Arrangement Section
Patterns are the basic elements for creating chains. A chain is a pre-programmed series of
patterns that you construct for a performance; it is an automated way of selecting patterns.
♪: A pattern chain can contain up to 16 patterns.
Scenes are snapshots of an interesting combination of active elements: for example, an
arpeggio running on Track 1 plus sequences running on Tracks 2 and 3 with nudged and/or
inverted patterns.
♪:Track mode (Sequence or Arpeggio) is not saved in a Scene.
Please refer to Chapter 6 [p.125] for detailed information on patterns, chains and scenes.
4.2.8. The Step Edit Button
The Step Edit button enables you to edit an individual step of a sequence. By pressing the
Step Edit button you active Step Edit mode.
In Step Edit mode you can use the five main encoders to edit the Pitch, Gate, Velocity, Time
Shift and/or Randomness of the note or notes in the active step. There's much to discover
and learn about how this seemingly simple button works. Please refer to Chapter 5 [p.83] for
details.
Arturia - User Manual Keystep Pro - KeyStep Pro Overview 39
Page 46

4.2.9. Step Buttons
These 16 buttons let you activate or deactivate steps in a sequence and program specific
steps. They provide visual feedback (active steps light u p in the color of the selected track)
and an indication of the currently playing step (which is lit up in white). This is an intuitive
way of programming steps that will be very familiar to anyone who has worked with an
old-school drum machine.
On the KeyStep Pro, these 16 Step buttons can do many other things that just active or
deactivate steps. For example, holding down the Lst Step (Last Step) button while pressing
one of the Step buttons lets you set the sequence's length. Holding down the 'Shift' button
lets you do several different things, including clearing patterns, nudging notes backward or
forward and quantizing sequences. These functions are covered in detail in Chapter 5 [p.63]
of this guide.
One of the most distinctive features of these Step buttons is that they are color-coded to
match the track that is currently selected. So when Track 1 is active, the Ste p buttons light
up in green; for Track 2, they become orange, and so on. This color-coding is consistently
followed across the entire front panel and lets you know what track you are currently editing
in the KeyStep Pro.
40 Arturia - User Manual Keystep Pro - KeyStep Pro Overview
Page 47
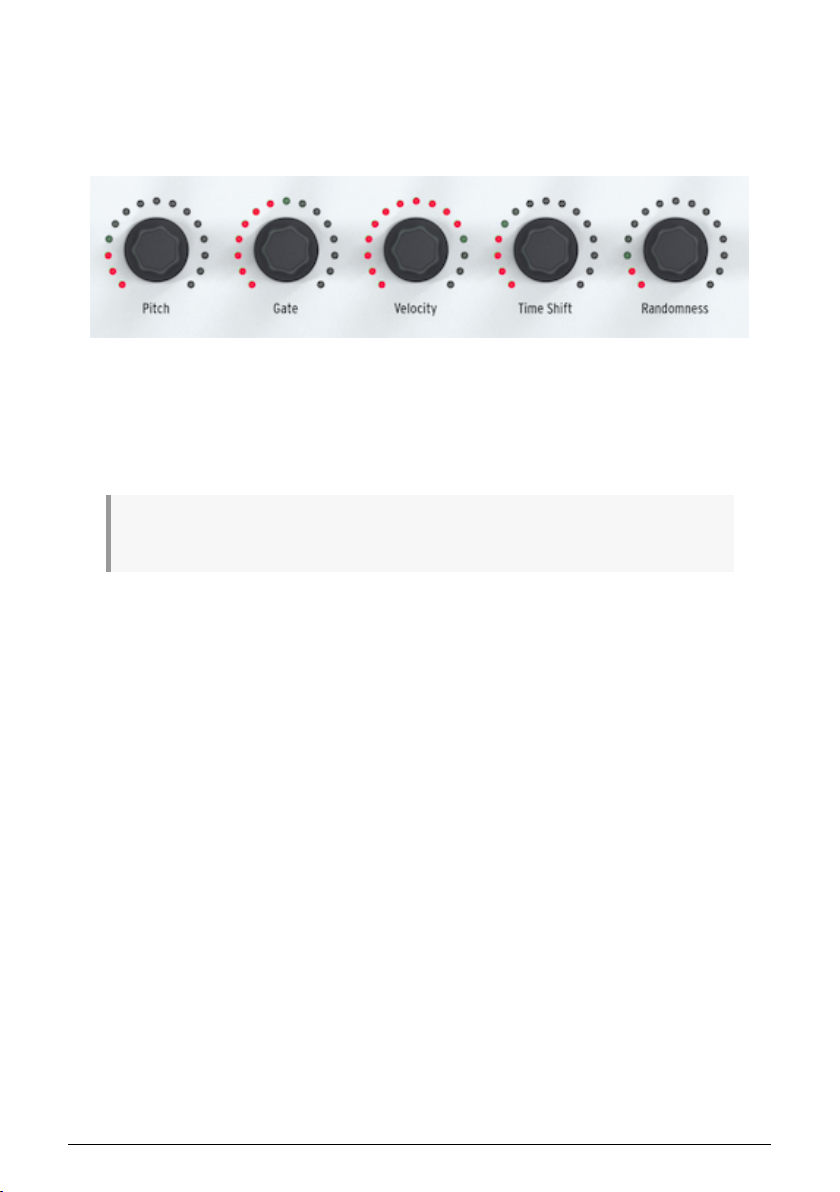
4.2.10. The Main Encoders (5x)
The five main encoders (above Ste p buttons 2 to 10) are key to changing the parameters
of your patterns. They are somewhat different to standard encoders. Turn them slowly
and you'll notice that they have a slight 'detent': you'll feel a small click or series of clicks
whenever you move one.
Each of the five main encoders is surrounded by 15 red LEDs, each of which has eight levels
of brightness from dim red to bright red. If we take the Gate encoder as an example: first
turn it all the way counterclockwise, then turn it slowly to the right. The LED in the first
position will slowly increase in brightness and after eight clicks the second LED will light up
dimly and the dim-to-bright cycle will re peat. All in all, this gives you 128 distinct positions
for each of these encoders!
♪: The encoders are touch-sensitive: the moment you touch them, their current value will be
displayed in the OLED screen.
4.2.10.1. The Pitch Encoder
In Step Edit mode, the Pitch encoder will step through the pitches chromatically or, if you
have selected a scale by holding down the 'Shift' button and pressing the appropriate Scale
key, it will only step through the notes that belong to the scale you've selected.
4.2.10.2. The Gate Encoder
In Step Edit mode the Gate encoder enables you to set the gate length of the selected ste p.
Simply stated, the gate length is the ON time or duration of a note. It's a great feature:
imagine how a fast 12-step piano sequence sounds when steps 3, 6, 9 and 11 are sustained,
while the other steps are all short. This is something that only a very skilled pianist can
accomplish. In Arpeggio (Arp) mode, the Gate encoder functions as a global encoder that
simultaneously affects all gates in the currently activated arpeggio.
4.2.10.3. The Velocity Encoder
Velocity means the strength or force with which you hit a key. In the MIDI specification,
velocity values range from 0-127, where notes with a velocity of 0 to 50 or so are soft,
velocities of about 50 to 100 are medium, and a velocity above 100 is loud. In Utility>MIDI
Settings>Velocity Curve and the downloadable MIDI Control Center you can choose a
suitable velocity scaling.
In Arpeggio (Arp) mode, the Velocity encoder functions as a global encoder that
simultaneously affects all velocities in your arpeggio.
Arturia - User Manual Keystep Pro - KeyStep Pro Overview 41
Page 48

4.2.10.4. The Time Shift Encoder
This encoder enables you to shift a selected note backward or forward in time relative to
the center of that step. The range is -49% to +50% of a step. In the case of two adjacent
steps in a sequence, if you shift the first forward and the second backward they will seem
to almost merge. In Arpeggio (Arp) mode, the Time Shift encoder shifts the entire arpeggio
that is playing in the current track backward or forward in time. Of course, you'll only notice
this if you have two arpeggios running simultaneously on two tracks, both on Hold.
4.2.10.5. The Randomness Encoder
In Step Edit mode, the Randomness encoder lets you choose, for each note, the probability
that it will trigger, from 0% to 100%. If there is more than one note stored in the selected
step, each note will trigger randomly according to the current Randomness setting.
In Arpeggio (Arp) mode, the Randomness encoder does something quite different: it
introduces random notes into your arpeggio.
4.2.10.6. Setting a Track's Default Parameters
To set the parameters for a specific track, select the track using the Track 1, 2, 3 or 4 button
and then turn the main encoders without holding down any Step buttons. This combination
of five encoder positions will become the default parameters for that track.
4.2.10.7. Setting an individual step
To set parameters for a specific ste p, first choose the track you would like to edit using the
Track 1, 2, 3 or 4 button, then hold down a Step button while adjusting one or more of the
main encoders. Doing this will set specific values for that step that are different to the default
parameters (as described above).
42 Arturia - User Manual Keystep Pro - KeyStep Pro Overview
Page 49
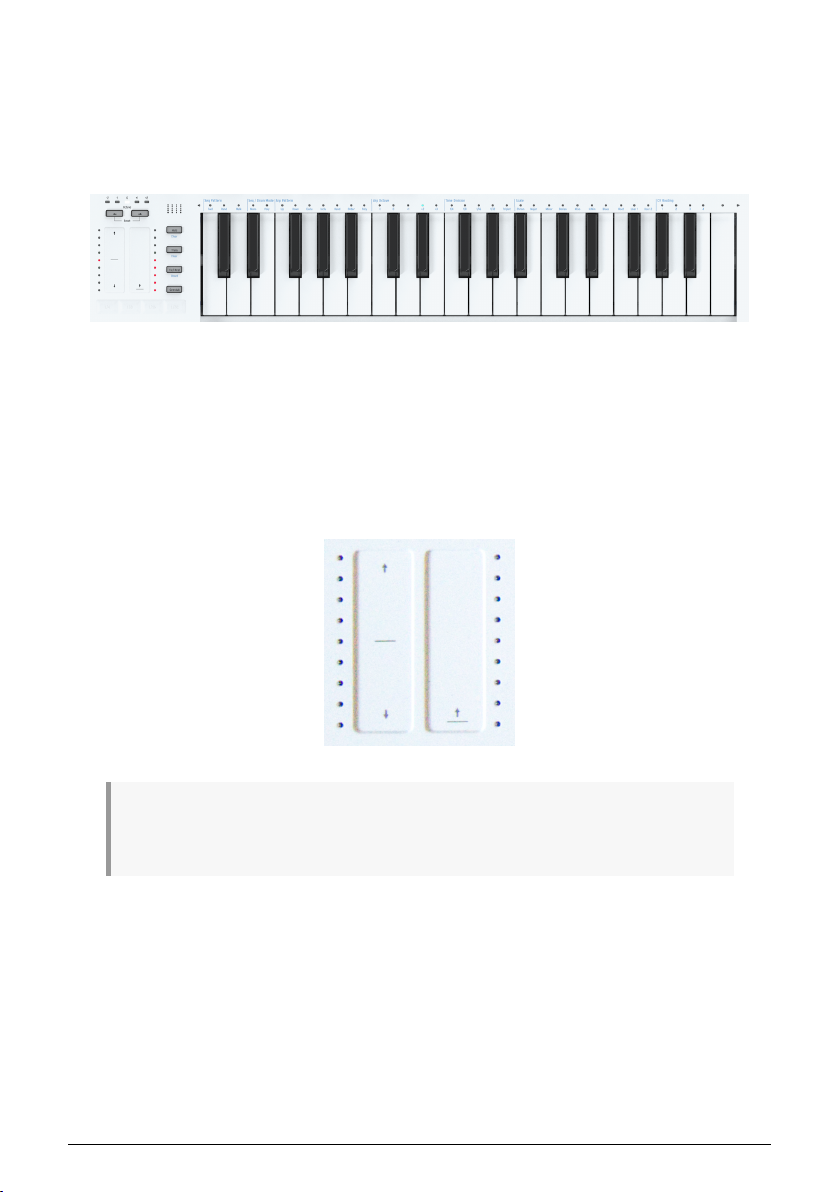
4.2.11. Keyboard Section
In this sub-section, we'll have a look at everything to the left of and directly above the
keyboard; the lower half of the KeyStep Pro. The Keyboard has 37 velocity-sensitive keys
that generate aftertouch signals. 'Velocity-sensitive' means that each key detects the force/
speed with which you press it. The magnitude of aftertouch depends on how hard you press
a key down after it has reached the bottom of its travel.
4.2.11.1. Pitchbend / Mod Touch Strips
These innovative touch-sensitive vertical strips replace the standard 'wheels' you usually
find on a MIDI controller and are used to add expressivity to your performance. Each strip
has a corresponding ladder of nine red LEDS to indicate the position of the control. Like
most traditional wheel controllers, the Pitch touch strip is 'spring-loaded', meaning that it
immediately returns to its center value when released, whereas the Mod touch strip retains
its current value when released.
♪: The KeyStep Pro will remember the last position of the Mod strip of the currently selected track
when you switch to another track. In a sense, you therefore have four modulation strips, one for each
track!
The Pitchbend Strip
Pitch-bending is a technique whereby you bend the pitch of the currently playing note
upward or downward.
The Pitchbend strip is where you perform all your pitch-bending tricks. The middle of the
strip, indicated by a horizontal black stripe, is the neutral point; if you touch the strip there
nothing will happen. If you move your finger up (away from you) or down (toward you), you
will hear the pitch of the currently playing note go up and down. So far it's not much different
to bending with a wheel. Unlike a wheel, however, you can place your finger directly on any
other point of the strip. The pitch will then jump instantly to that value!
Arturia - User Manual Keystep Pro - KeyStep Pro Overview 43
Page 50
!: To the left of the Pitchbend strip you'll see nine red LEDs. They will help you to create more accurate
pitchbends.
By default, the bend range is set to 2 semitones (half steps): 2 from the center u p and 2 from
the center down. In Utility>CV Settings>Pitch Bend Range, you can set the range for the Pitch
CV outs from +/-1 to +/- 24 semitones. The Bend range can be set individually for each voice.
Tapping the Pitchbend strip at two different points in succession enables you to alternate
quickly between two pitches. This playing technique is only possible on pitchbend strips and
makes a pitch wheel look primitive! Whenever you lift your finger off the strip, the pitch
will jump back to the zero center value. Another advantage of this strip is that it is ideal for
applying natural-sounding vibrato to a note by wiggling your finger on the strip.
!: Musical traditions other than western classical music have much richer expressive possibilities
when it comes to pitch-bending. Try listening to some Indian music. Maybe you'll come to appreciate the
complex and very musical pitch-bending techniques used by singers and by performers on instruments
like the sarod and the sitar.
The Mod Strip
This innovative modulation control takes the place of the standard mod wheel. It transmits
the standard MIDI CC# modulation value. To learn more about CC# values, please refer to
Chapter 8 [p.137].
4.2.11.2. The Octave Buttons
Use the Octave arrow buttons (above the touch strips) to transpose the output of the
keyboard up or down by octaves. The range is two octaves up and three octaves down from
the default mid-point.
Knowing this can help you to remember where you are pitch-wise on a poorly-lit stage. The
keyboard itself is three octaves but the whole pitch range is seven octaves, which should
facilitate all but the most extreme musical adventures.
♪: To quickly reset the octave to the default mid-point, hold down both Octave arrow buttons
simultaneously.
You can also use the Octave Buttons to reset the KeyStep Pro to its factory settings:
• Switch the KeyStep Pro off
• Switch the KeyStep Pro on while holding the OCT+ and OCT- buttons.
44 Arturia - User Manual Keystep Pro - KeyStep Pro Overview
Page 51
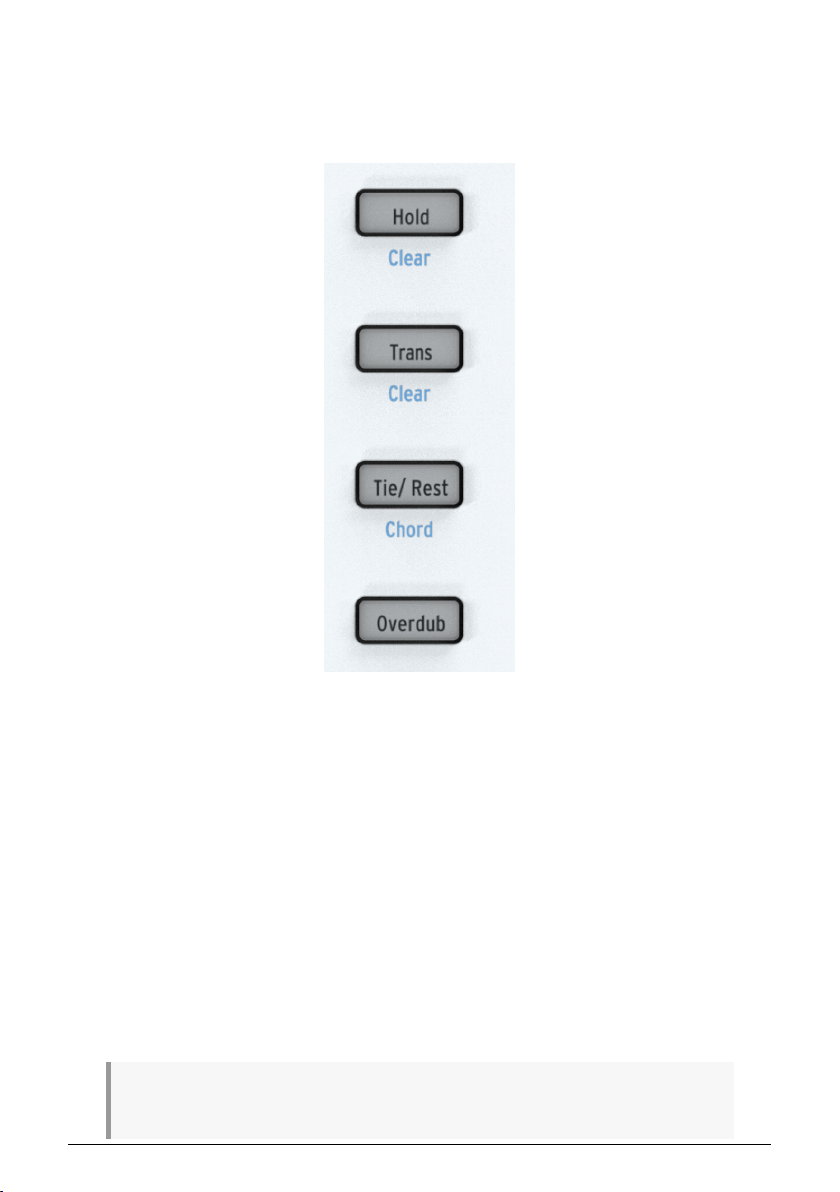
4.2.11.3. The Hold Button
The Hold button has an important function when an arpeggio is playing. When Hold is active
you can lift your fingers from the keyboard and the arpeggio will continue to play. Hold also
enables you to add more notes (up to 16) to an arpeggio while it is running.
4.2.11.4. The Trans (Transpose) Button
The Transpose function lets you shift u p or shift down the pitch of running sequences/
patterns and arpeggios. To transpose, hold down the Trans button and play a note on the
keyboard. Notes below middle C will cause a downward transposition; notes above middle
C will cause an upward transposition.
4.2.11.5. The Tie/Rest/Chord Button
When creating a sequence, this button is used to enter rests or to tie two notes together.
However, when in Step Edit mode, if you press Tie/Rest the current step will be cleared. If
the sequencer is running in Step Edit mode, holding down Tie/Rest is a quick way to clear
the contents of a series of steps.
If you need to shorten a Tie, activate Step Edit mode, select the step where the Tie starts and
reduce the gate length of the step using the gate knob.
♪: Holding down 'Shift' while pressing the Tie/Rest/Chord button switches Chord mode on or off. This
is covered in Chapter 5 [p.111].
Arturia - User Manual Keystep Pro - KeyStep Pro Overview 45
Page 52

4.2.11.6. The Overdub Button
The Overdub button plays an important role in Step Edit mode when you are editing the
content of a specific step.
While overdub is ON, any notes you play on the keyboard will be added to the existing notes
of that step.
Selecting a step in Overdub mode enables you to selectively extend some or all of the
notes in chord: Hold the keys of the chord you want to extend and press Tie/Rest once or
repeatedly to extend the gate length of the selected notes.
Pressing the Tie/Rest button in Overdub without holding any keys down is a quick way to
move forward through the steps of a pattern. Again this only works when Overdub is on.
♪: In Quick Edit mode, the Tie/Rest button does nothing.
When Overdub is OFF, any new notes you play will replace the existing notes in the step.
You can always tell whether you're in add or replace mode: if you are in Quick Edit or Step
Edit mode and the LED above a key blinks the existing notes of the step will be replaced.
To extend a chord/notes in a ste p to the next steps, erasing the content of the step(s)
following it, hold the notes in the step and press Tie/Rest. Repeat this to extend the notes of
the chord over several steps.
With Overdub OFF, pressing the Tie/Rest button is a quick way to delete the steps of a
pattern. The cursor moves to the next step, deleting current step content.
46 Arturia - User Manual Keystep Pro - KeyStep Pro Overview
Page 53

4.2.12. The Looper
The horizontal Looper Touch Strip (under the Pitchbend and Mod vertical touch strips)
enables you to alter the playback of a Project in real-time. It will generate longer or shorter
loops depending on where you touch the Looper Touch Strip and when you do it.
The Looper loops all tracks simultaneously. This includes CC# values that you may have
stored in the Control track.
Press 'Shift' + Touch Strip to disable/enable the Touch Strip.
4.2.12.1. Loop Length
The length of the loop is determined by where you place your finger on the Looper Touch
Strip, 1/4 being the longest loop and 1/32 being the shortest. Changing the placement of your
finger changes the size of the loop.
4.2.12.2. Loop Start Point
The start point of the loop depends on when you touch the Looper strip during playback. You
can jump to a different loop position by holding your finger on the strip and then pressing
one of the Step buttons. With the Looper, you can loop a range of steps in a sequence. The
length of the loop is determined by the indentation you press: 1/4, 1/8, 1/16 or 1/32.
♪: It may not seem such a big deal that the looper strip can be controlled using CC# values, but this
is worth exploring. By sending different CC# 9 values to the KeyStep Pro, you can 'scratch' a sequence
remotely from your DAW.
Can you change the rate of repeat of the Looper strip?
To a certain extent, yes. If you're in time division 1/16 and press 1/4, the sequencer will repeat
four steps. If you want to double this repeat range, set time division to a higher value i.e. 1/
32 and lower the tempo. The KeyStep Pro will now repeat 8 steps instead of 4 when you
press 1/4 on the strip.
Arturia - User Manual Keystep Pro - KeyStep Pro Overview 47
Page 54

4.2.13. Keyboard
The KeyStep Pro's 37-note slim-key keyboard features great-feeling keys that are narrower
than standard piano keys but still large enough to allow for maximum playability across
three octaves. The keys are both velocity and aftertouch sensitive to give your performance
maximum expressivity.
4.2.13.1. Keyboard LEDs
Each key of the KeyStep Pro has a corresponding multi-color LED located directly above it.
These LEDs blink to provide visual feedback on what the four sequencers/arpeggiators are
playing. The color of each LED changes to match the selected track (Track 1 is green, Track
2 is orange, Track 3 is yellow and Track 4 is red).
Also, the two little triangles on either side of the keyboard light up if there is activity outside
the range covered by the keyboard. This may happen when an octave transposition shifts a
sequence or arpeggio outside the visible keyboard range.
4.2.13.2. Keyboard SHIFT Functions
The KeyStep Pro has many secondary or Shift functions that can be accessed by holding
down the 'Shift' button and pressing one of the keys on the keyboard. The blue text above
each key indicates the Shift function associated with that key.
The row of LEDs above the keyboard will give a lot of information about what is going on:
• When you hold down the 'Shift' button, the current ON/OFF state of the Shift
functions will be shown.
• When you turn the Pitch encoder in Ste p Edit mode, it will show which note(s)
you are editing.
48 Arturia - User Manual Keystep Pro - KeyStep Pro Overview
Page 55
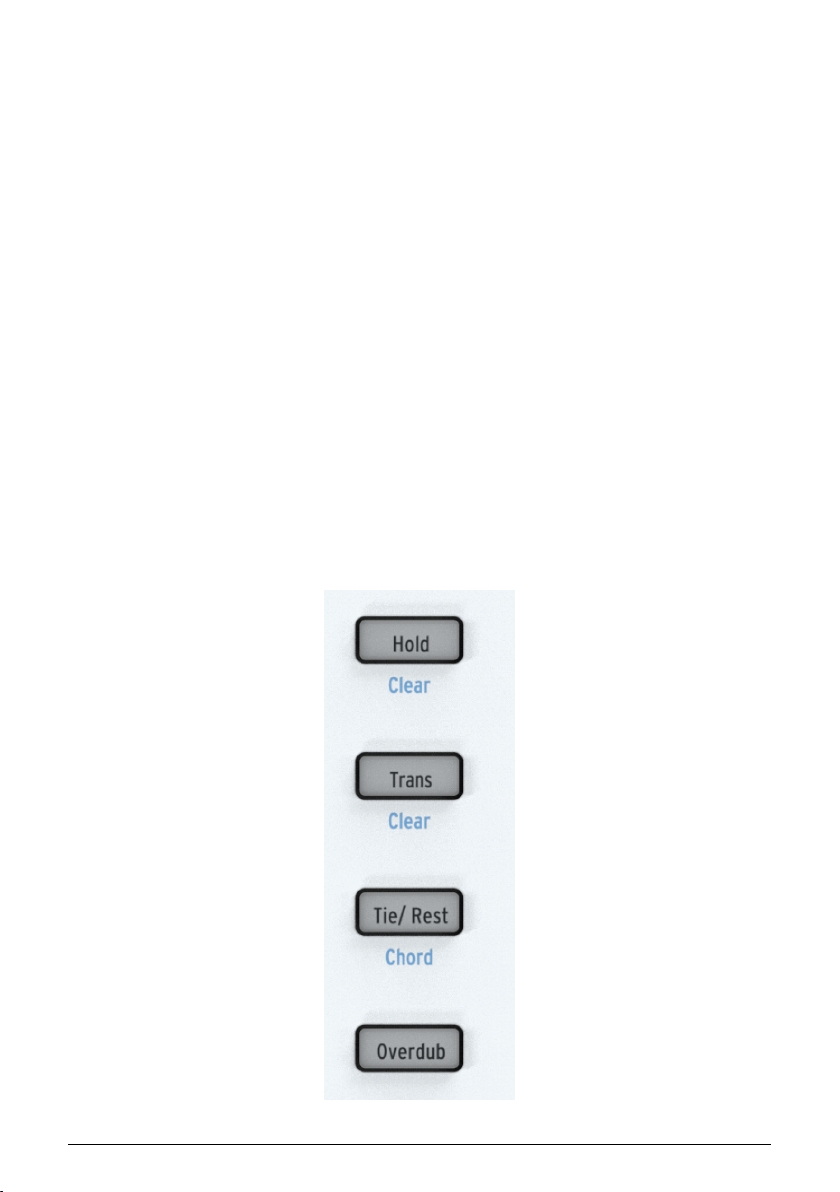
4.2.14. SHIFT Functions
Many of the KeyStep Pro's most interesting functions can be accessed with the 'Shift' button.
It's the leftmost button on the front panel and it's black. The blue 'Shift' text reveals its crafty
secret: it is linked to all KeyStep Pro functions that are printed in blue on the front panel.
Take a good look and you'll find many of them: in the Transport section, to the left of the
keyboard, above the keys of the keyboard (except the highest C), below the 16 step buttons,
and in the Sequence Extend section. That's 63 Shift functions in total!
4.2.14.1. Keyboard Shift Functions
The 'Shift' button has a very helpful feature: if you hold it down, the currently active keyboard
Shift functions will be displayed by lit-up LEDS. From left to right above the keyboard these
are:
• Seq Pattern mode
• Seq/Drum mode (Mono or Poly)
• Arp Pattern and Arp Octave
• Time Division
• Scale
• CV routing
The HOLD/Clear Button
The HOLD/Clear button enables you to hold arpeggios, so that they continue to play until
you release it. You can hold arpeggios on several tracks simultaneously. 'Shift' + HOLD/Clear
will release all currently held arpeggios.
Arturia - User Manual Keystep Pro - KeyStep Pro Overview 49
Page 56

The Trans/Clear Button
By holding down the Trans (Transpose) button and pressing a key on the keyboard, you
can transpose the running sequence to another key signature. The Transpose button is a
toggle button. Once you have applied a transposition to a sequence, the transpose button
will 'remember' that transpose action. If you press it once more, you return to the original
untransposed sequence. Thus you always have an untransposed and a transposed version
of the sequence at hand, and you can toggle between them!
Transposition is linked to the currently selected track. In a live situation, you can for example
transpose Track 1, then select Track 2 and apply a transposition there as well. Holding down
'Shift' and pressing Trans/Clear will clear all active transpositions simultaneously.
50 Arturia - User Manual Keystep Pro - KeyStep Pro Overview
Page 57

The 'Transpose Group' feature enables you to group and transpose tracks together. Here's
how to do it:
• Hold the Trans button. It will start to blink to signal that you are now in transpose
mode
• Select other tracks to form a transpose group. The newly selected tracks will light
up in white. You can now transpose the newly formed group.
As long as the Transpose button is held down, you can keep adding or removing tracks from
the transpose group. Grou p transpose can be applied to anything running on a track. You
can combine a sequence running in track one with an arpeggio running in track two and
transpose them together. There are two ways to delete a group:
• Hold 'Erase' and press the 'Transpose' button or
• Hold 'Transpose' and remove Tracks that are part of the grou p by toggling them
'OFF'.
When you save a Project a currently active group will be saved with it.
♪: Hold the transpose button to check by how many steps the current track has been transposed up
or down.
The Tie/Rest/Chord button
Holding down 'Shift' and pressing the Tie/Rest/Chord button puts the KeyStep Pro into Chord
mode. It will wait for you to play a block or legato chord. As soon as you lift your fingers
off the keyboard, the chord (actually, its stacked intervals) is stored in memory. If you now
press a key on the keyboard, that key will become the root of the stored chord. In other
words, Chord mode will use the stored stack of intervals to build the chord on this new root
note. Please refer to Chapter 5 [p.63] for details.
Seq (Sequence) Pattern
To activate this Shift function, hold down the 'Shift' button and press the appropriate key (C,
C# or D in the lower octave).
This Shift function enables you to change the way the notes stored in the ste p buttons will
play. Fwd (Forward) is the default mode. Rand (Random) plays the steps in random order.
In Walk mode, the sequencer digitally 'throws the dice' to decide whether to go forward or
backward at the end of each step: there’s a 50% chance it will play the next step, a 25%
chance it will play the current step and a 25% chance it will play the previous step. Please
refer to Chapter 5 [p.63] for details.
Seq/Drum Mode
To activate this Shift function, hold down the 'Shift' button and press the appropriate key (D#
or E in the lower octave).
In Sequencer mode, each step can store a maximum of 16 notes. The mode you select here
- Mono (monophonic) or Poly (polyphonic) - will determine whether all the notes stored in
the step will play or just one: the lowest note of the stored chord.
Arturia - User Manual Keystep Pro - KeyStep Pro Overview 51
Page 58
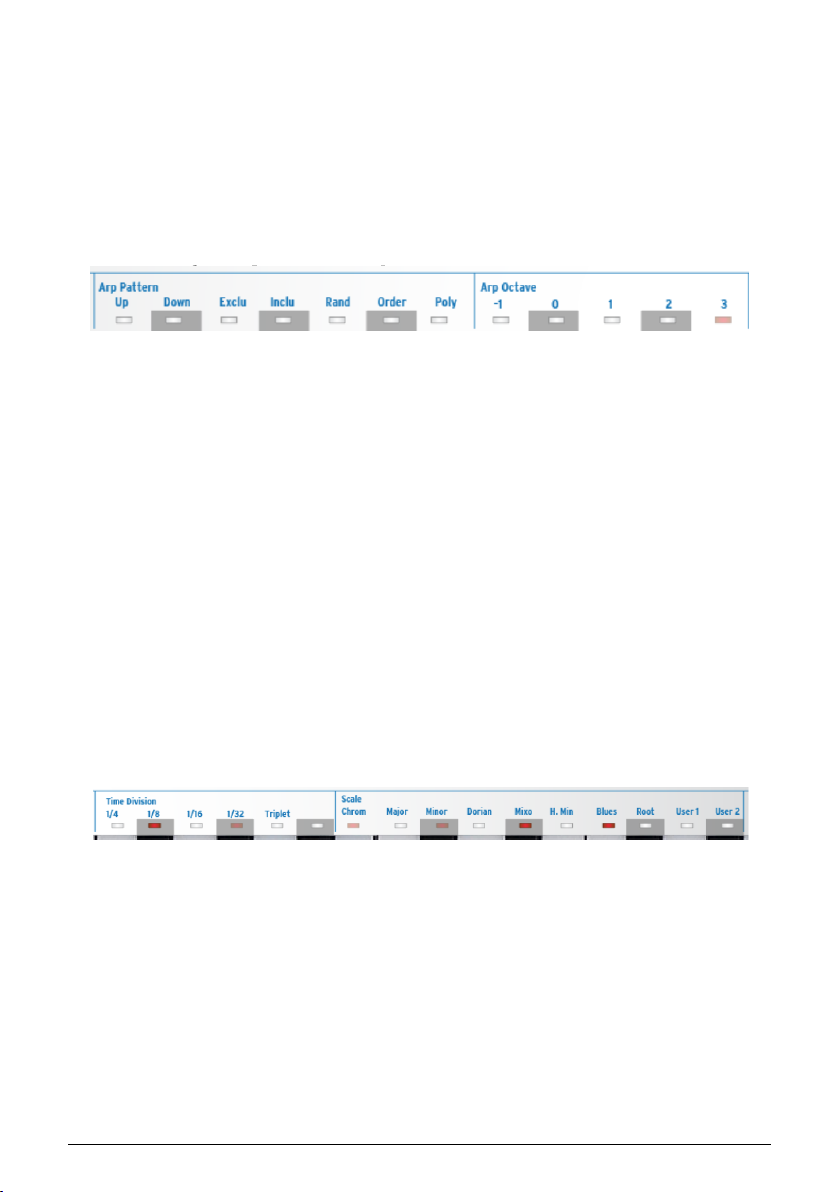
In Drum mode, switching between Mono and Poly has a different effect. In Poly mode, each
of the 24 drum tracks can have a different length. In Mono mode, they share the same
length. Please refer to Chapter 5 [p.92] for details.
Arp (Arpeggio) Pattern
To activate this Shift function, hold down the 'Shift' button and press the appropriate key (F,
F#, G, G#, A, Bb or B in the lower octave).
The KeyStep Pro can transform any chord you are holding down on the keyboard into
an arpeggio. It can arpeggiate your chord in seven ways: up, down, exclusive pendulum,
inclusive pendulum, random, in the order you played them or polyphonically.
There's a lot to be learned about this function, so we have devoted a whole section
[p.63] to the wondrous secrets of arpeggiation and specifically to the KeyStep Pro's unique
arpeggiation features.
Arp Octave
To activate this Shift function, hold down the 'Shift' button and press the appropriate key (C,
C#, D, D# or E in the middle octave).
By default, the arpeggiator will play the notes you are holding down and stay within the
limits of one octave. The Arp Octave -1, 0, +1, +2 and +3 buttons will extend the notes beyond
that range. If you change the octave range, the arpeggiator will also play notes in the
octaves above and below the chord you are playing. Press 'Shift' + an Arp Octave key to
change the range.
Time Division
To activate this Shift function, hold down the 'Shift' button and press the appropriate key (F,
F#, G, G# or A in the middle octave).
Time Division can be applied to both the arpeggiators and the sequencers. Much of the fun
of arpeggios is that they can run at various speeds. If you mix them with sequences and
change speed, it will have a great overall effect. The KeyStep Pro features three arpeggiators
that can run simultaneously and at different speeds!
By default, an arpeggiator will run in 1/16th straight-note speed, but there are four straightnote speeds to choose from: 1/4, 1/8, 1/16 and 1/32. Each of these speeds can also run in
triplet mode, so alltogether there are eight speed options. You can have one arpeggiator
running in 1/16th straight-note speed and another in 1/8th triplets speed. There are lots of
creative options to explore here!
The sequencers (including the drum sequencer) can also run at these different speeds. You
could, for example, run copies of the same pattern in different tracks at different speeds.
There's unlimited potential for discoveries here.
Each pattern can have its own time division, which is stored with the pattern. This allows
you to create chains of the same pattern in different time divisions.
52 Arturia - User Manual Keystep Pro - KeyStep Pro Overview
Page 59

♪: When you change to another pattern while in Arp mode, the time division will not change.
Scale
To activate this Shift function, hold down the 'Shift' button and press the appropriate key
(from Bb in the middle octave to G in the upper octave).
This Shift function enables you to change the scale of an arpeggio or a sequence on the
fly. You can choose from six different scales (major, minor, dorian, mixolydian, harmonic
minor or blues). When you select a scale by pressing 'Shift' + a Scale key, everything in the
currently selected track ‒ the notes you are playing on the KeyStep Pro's keyboard, the active
track's sequence and the active track's arpeggio ‒ will play in that scale. This is a pattern
setting that is stored with the pattern when you save it.
The KeyStep Pro comes with six predefined scales, but you can also create your own
custom scale and store it as User 1 or User 2. Please refer to Chapter 5 [p.108] for additional
information.
Scale Root & User Scales
Holding down 'Shift' and pressing the Root key (F in the u pper octave) gives you the option
to select another root note for the currently playing sequence.
Holding down 'Shift' and pressing the User 1 or the User 2 key (F# or G in the u pper octave)
enables you to store pre-defined scale roots.
For the major, minor, dorian, mixolydian, harmonic minor and blues scales, you can select
a new root note by holding down 'Shift' and pressing the Root key then selecting a new root
in the lower octave of the keyboard. Pressing a key in the lower octave will update the Root
note. This can be repeated multiple times while holding down the Root key. The currently
active root note will be shown by its LED being lit up in blue.
Please refer to Chapter 5 [p.108] for an in-depth explanation of root notes and user scales.
CV Routing
To activate this Shift function, hold down the 'Shift' button and press the appropriate key (G#,
A, Bb or B in the upper octave).
All sequencers and arpeggiators can send their output signals to the four Voice outputs on
the KeyStep Pro's back panel. By default, the output of Track 1 will be sent to Voice 1, the
output of Track 2 to Voice 2, etc. There may be situations where you want more control
of the tracks' routings. That's what CV routing is all about. For example, you can route the
output of Track 1 to all four Voice outputs, or you can route the output of Track 1 to Voices 1
and 2 and the output of Track 2 to Voices 3 and 4.
For each track, you can define any combination of voices. If a voice is already used by
another track, it will be dimly lit. If it is already active for the current track it will be brightly
lit. If you select a voice that is already being used by another track, you will overwrite the
previously assigned voice. When Track 1 is in Drum mode, CV outputs that were assigned to
Track 1 will be freed up.
CV routing is an important skill to master when you use a modular system [p.167] with your
KeyStep Pro.
Arturia - User Manual Keystep Pro - KeyStep Pro Overview 53
Page 60

4.2.14.2. Step Button SHIFT Functions
When you hold 'Shift', the steps will dim. This allows you to see the effect of the Shift
functions when modifying a step’s position with Nudge, Invert or Randomise Order.
Clr Ptn (Clear Pattern)
For the currently active pattern, this function clears all steps, resets the sequence length
to the default 16 steps and restores all other default settings: 1/16th straight-note speed,
Forward seq mode, Poly mode, Chromatic scale. Clearing a Drum pattern clears all 24 drum
tracks simultaneously.
Clr Steps (Clear Steps)
For the currently active pattern, Clr Steps clears all steps but keeps everything else
unchanged. When applied to a Drum sequence, it will clear only the selected drum track.
‹Nudge
‹Nudge shifts the currently active pattern to the left. All steps on all pages of the Pattern will
shift to the left. It works both with sequencer patterns and drum patterns. In Drum mode, it
will only affect the currently selected drum track.
Nudge›
Nudge> shifts the currently active pattern to the right. All steps on all pages of the Pattern will
shift to the right. It works both with sequencer patterns and drum patterns. In Drum mode it
will only affect the currently selected drum track.
Invert
Invert inverts the order of the steps in the current pattern. The last steps in the pattern will
become the first and the first the last. Invert acts on the currently active step groups. If your
pattern is two pages long, the last steps on page two will become the first steps on page
one.
Semi Down
This function is for intelligent semitone (half step) downward transposition of the current
sequence. It's intelligent because the transpose function takes the current scale setting into
account.
Semi Up
This function is for intelligent semitone (half ste p) upward transposition of the current
sequence. Again, it's intelligent because the transpose function takes the current scale
setting into account.
Oct (Octave) Down
Transposes the current pattern one octave down.
Oct (Octave) Up
Transposes the current pattern one octave up.
54 Arturia - User Manual Keystep Pro - KeyStep Pro Overview
Page 61

Qnt (Quantize) 50%
Sets recording quantization to 50%. When in Drum mode, it will only quantize the currently
selected drum track. Please refer to the sequencer section [p.63] for details.
Qnt (Quantize) 100%
Sets recording quantization to 100%. When in Drum mode it will only quantize the currently
selected drum track. Please refer to the sequencer section [p.63] for details.
Rand (Randomize) Order
Randomizes the order of the steps in the current pattern.
Rand (Randomize) Notes
Randomizes the notes (pitch values) in the current pattern.
Rand (Randomize) Octave
Randomizes the octave in which notes in the current pattern will play.
Global BPM
Pressing 'Shift' + Global BPM enables you to switch between the Global tempo set in the MIDI
Control Center and the current Project Tempo. A Project Tempo is stored with a Project when
you save it. When lit (in blue), the Global tempo is active. When unlit, the Project Tempo is
active.
Wait Load (Wait to Load)
This is where you 'tell' the KeyStep Pro how it should continue to the next pattern. For
Patterns, the wait-to-load options can be set directly using the Shift button: hold down 'Shift'
and press Wait Load to switch instant change on or off. Whether the change will occur at the
end of the current bar or at the end of the current pattern is determined by settings made in
Utility or the MIDI Control Center.
It is also possible to change the wait-to-load behavior of Scenes and Projects. Should the
KeyStep Pro wait for 1 bar, 2 bars or 4 bars before switching to the next Scene or Project?
Changing Scene and Project behavior is done in Utility>Launch Quantize or in the MIDI
Control Center. Please refer to Chapter 9 [p.145] for details.
Arturia - User Manual Keystep Pro - KeyStep Pro Overview 55
Page 62

4.2.15. The Sequence Extend Section
These five buttons and their associated Shift functions enable you to view and set the step
groups of your pattern in great detail.
To start with, you can set the length of a pattern or sequence by holding down the Lst Ste p
button and pressing one of the step group buttons (16, 32, 48 or 64). The maximum length is
64 steps. This works whether you are recording in Step mode or Real-time mode.
Within a page, you can further refine the pattern length by holding down the Lst Step button
and pressing a step button.
Pressing 'Shift' + Lst Step / Follow lets you follow the actively playing step while the
sequence is playing.
In Drum mode, when Poly is activated, the individual drum tracks can have different
lengths.
56 Arturia - User Manual Keystep Pro - KeyStep Pro Overview
Page 63
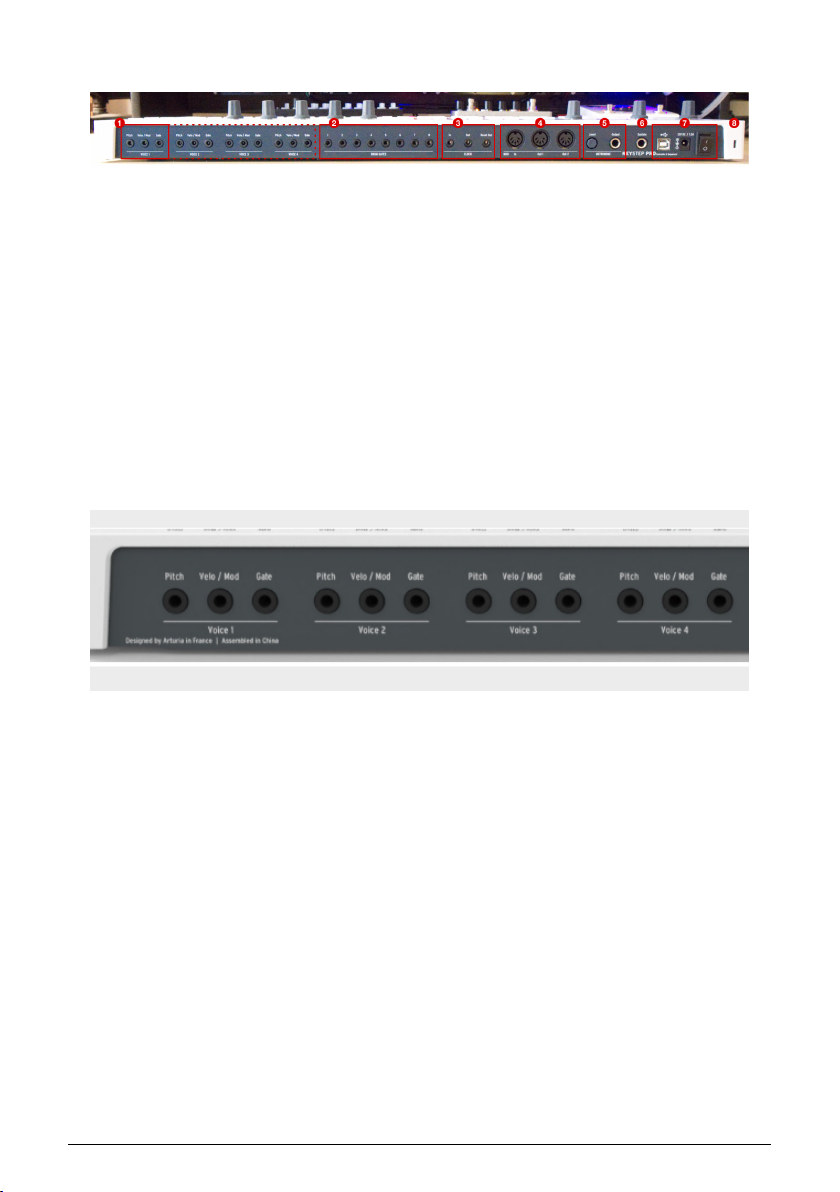
4.3. Back Panel Overview
1. Analog Voice outputs (4x)
2. Drum Gates outputs (8x)
3. Clock In/Out/Reset Out
4. MIDI In/Out 1/Out 2
5. Metronome Level knob and Metronome Output
6. Sustain Pedal input
7. USB, 12V DC / 1.0 A power input, and ON/OFF switch
8. Kensington Lock
4.3.1. Pitch, Velo/Mod & Gate Outputs
For each of the four Voices, these outputs send analog control voltages (CV) and gate/trigger
signals to external devices, for example Arturia's popular analog synthesizers (MiniBrute/SE,
MicroBrute/SE, MatrixBrute) or a Eurorack modular system.
The Pitch CV output is mostly used to control the pitch of an external voltage-controlled
oscillator (VCO).
The Velo/Mod CV output can be routed to a destination such as the cutoff frequency of a
voltage-controlled filter (VCF) or the amplitude/gain of a voltage-controlled amplifier (VCA).
By default, it is mapped to the keyboard velocity, but this can be changed to aftertouch or
the Mod Touch Strip (wheel) in the Utility menu or the MIDI Control Center [p.155].
The Gate output sends gate (trigger) signals with a length determined by the Gate encoder.
A long gate will cause the sustain stage of an envelope generator (EG) to remain high for a
long period of time. It has selectable output ranges, so that you can adjust the output levels
to accommodate different gate standards.
The KeyStep Pro has four tracks, each with its own sequencer or arpeggiator. These tracks
are linked to the four Voice outputs on the back panel. Each voice has its own Pitch, Velo/Mod
and Gate outputs (labelled Voice 1 to Voice 4). This powerful collection of features means that
you can control up to four completely se parate synthesizer voices at the same time using
only your KeyStep Pro! In addition, the KeyStep Pro has powerful voice-routing options.
Arturia - User Manual Keystep Pro - KeyStep Pro Overview 57
Page 64
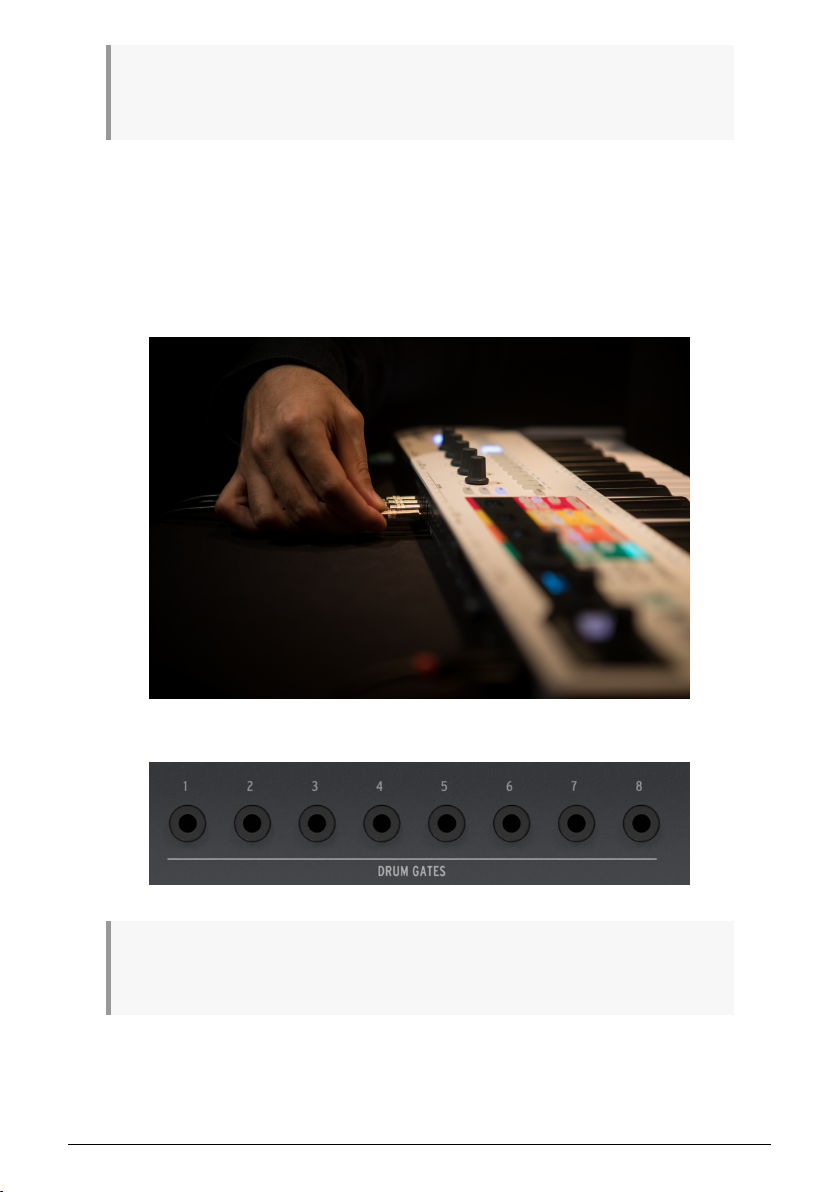
♪: Arturia's MIDI Control Center software and the Utility menu allow you to configure the type of
electrical signals that are generated and sent to each output. See Chapter 9 [p.145] for more information
about this topic.
For more in-depth information about the CV/Gate functions, refer to Chapter 10: KeyStep
Pro and your modular system [p.167].
4.3.2. Drum Gates
KeyStep Pro's Track 1 can be configured to work as an eight-output drum-trigger sequencer
by pressing the Drum button on the top panel. These are the individual gate outputs for that
sequencer.
This mode is described in detail in Chapter 5 [p.92] of this guide.
♪: These gate signals are not limited to triggering drum sounds. You can connect these outputs to
any input that accepts a trigger or gate signal, including an ADSR envelope generator or an LFO reset.
Experiment, and we're sure you'll find some delightful rhythmic uses!
58 Arturia - User Manual Keystep Pro - KeyStep Pro Overview
Page 65
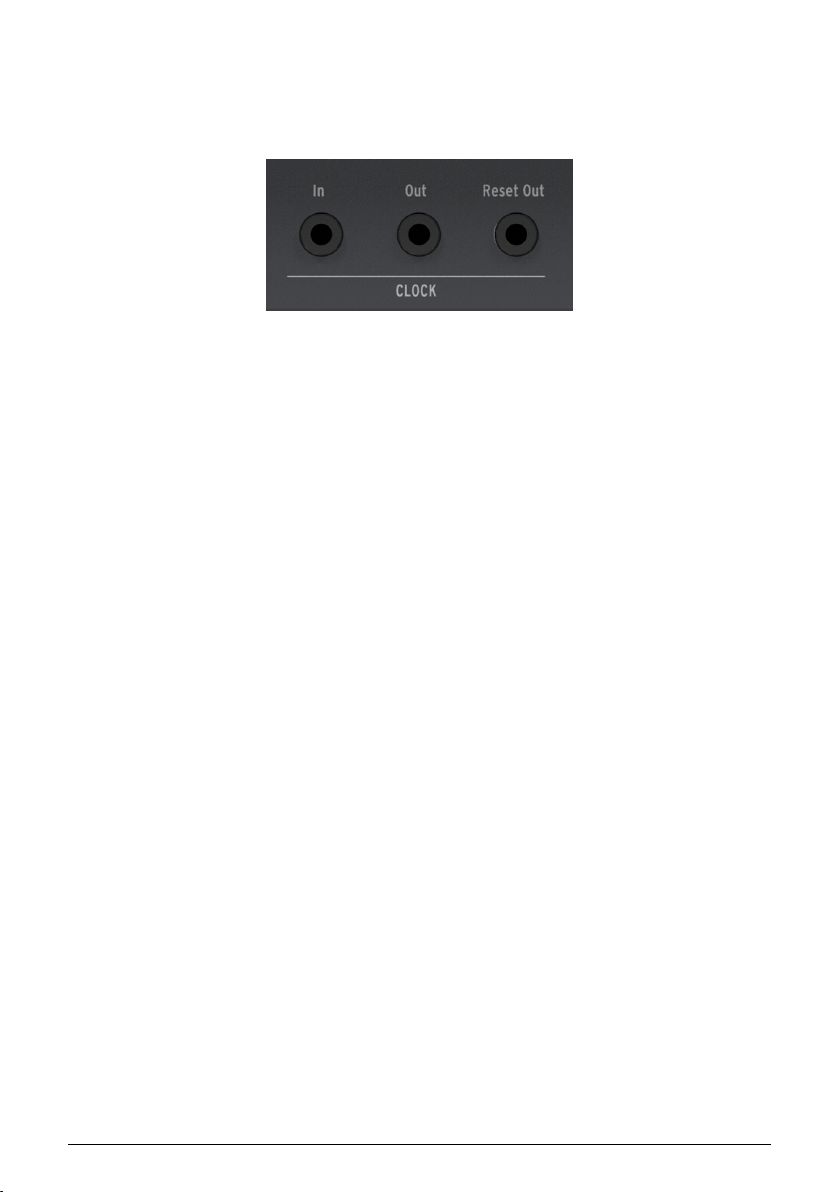
4.3.3. Clock Section
These three jacks (In, Out, Reset Out) allow you to interface with modular synthesizers
and pre-MIDI technology that was capable of clock synchronization (such as early drum
machines produced by Korg and Roland).
The KeyStep Pro is capable of both sending and receiving synchronization signals. It also
has a Reset Out, allowing external sequencers with a reset input to re-start from the
beginning of a sequence whenever a KeyStep Pro sequence is restarted.
Please see Chapter 7 [p.132] for information about clocking and synchronization.
Arturia - User Manual Keystep Pro - KeyStep Pro Overview 59
Page 66
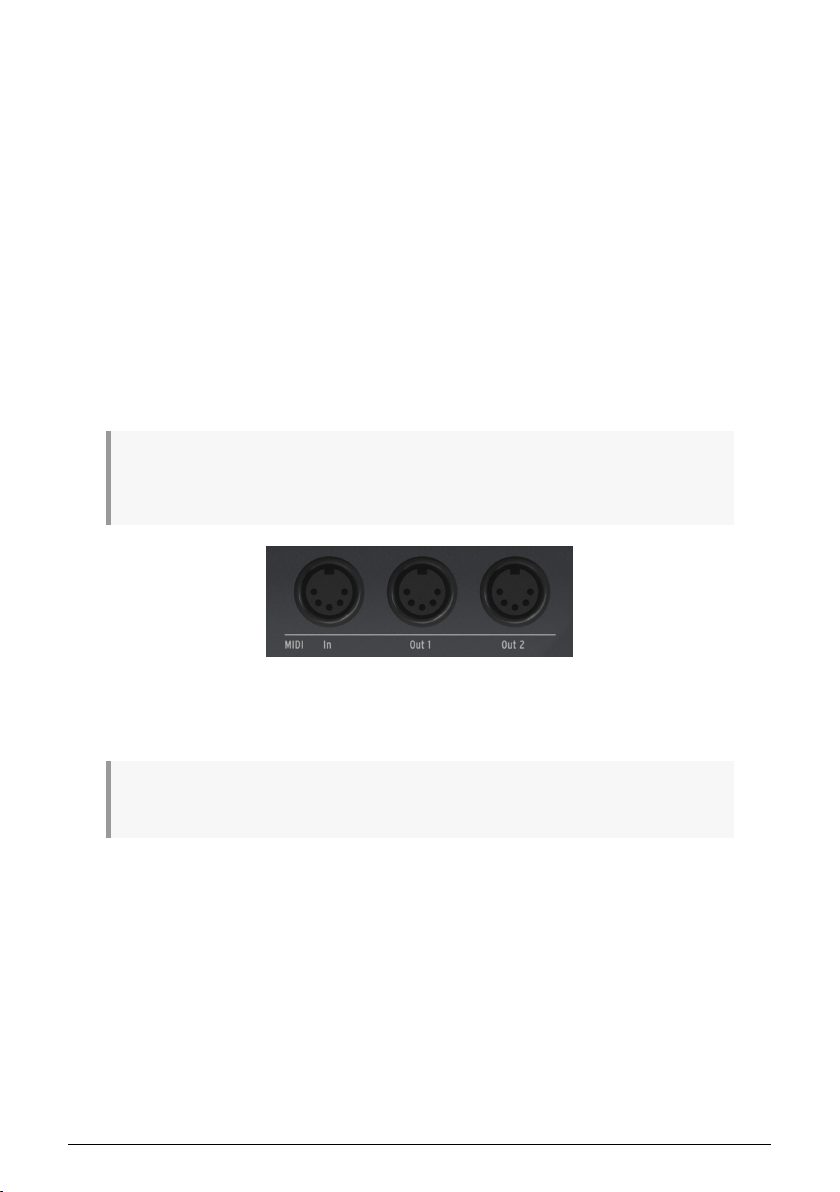
4.3.4. MIDI Section
Three full-sized 5-pin DIN connectors let you send and receive MIDI data to/from external
MIDI-compatible devices. The KeyStep Pro includes one MIDI input and two independent
MIDI outputs to provide maximum flexibility when working with external hardware.
Maybe you would rather have a MIDI thru port instead of a second MIDI port? To change
the function of the second port, hold 'Shift" and Project/Utility and select the MIDI setting
menu, where you can change the MIDI out setting from Out to Thru.
Set to 'Thru' the following MIDI messages will pass thru:
• note on/off
• velocity
• aftertouch
• modwheel
• pitchwheel
• MIDI cc
• program change messages
♪: MIDI Thru does not provide complex routing MIDI functions: it's a simple Thru allowing MIDI data
arriving via the MIDI in port or the USB port to pass unaltered. It is however useful when your KeyStep
Pro is part of a daisy chain setup.
The KeyStep Pro can send not only MIDI note-related data but also MIDI synchronization
signals, so that your external tempo-dependent devices (such as sequencers, arpeggiators,
etc.) remain in sync.
♪: When working with a host computer, these connectors can also be used to send MIDI data from
your music software to your connected hardware.
60 Arturia - User Manual Keystep Pro - KeyStep Pro Overview
Page 67
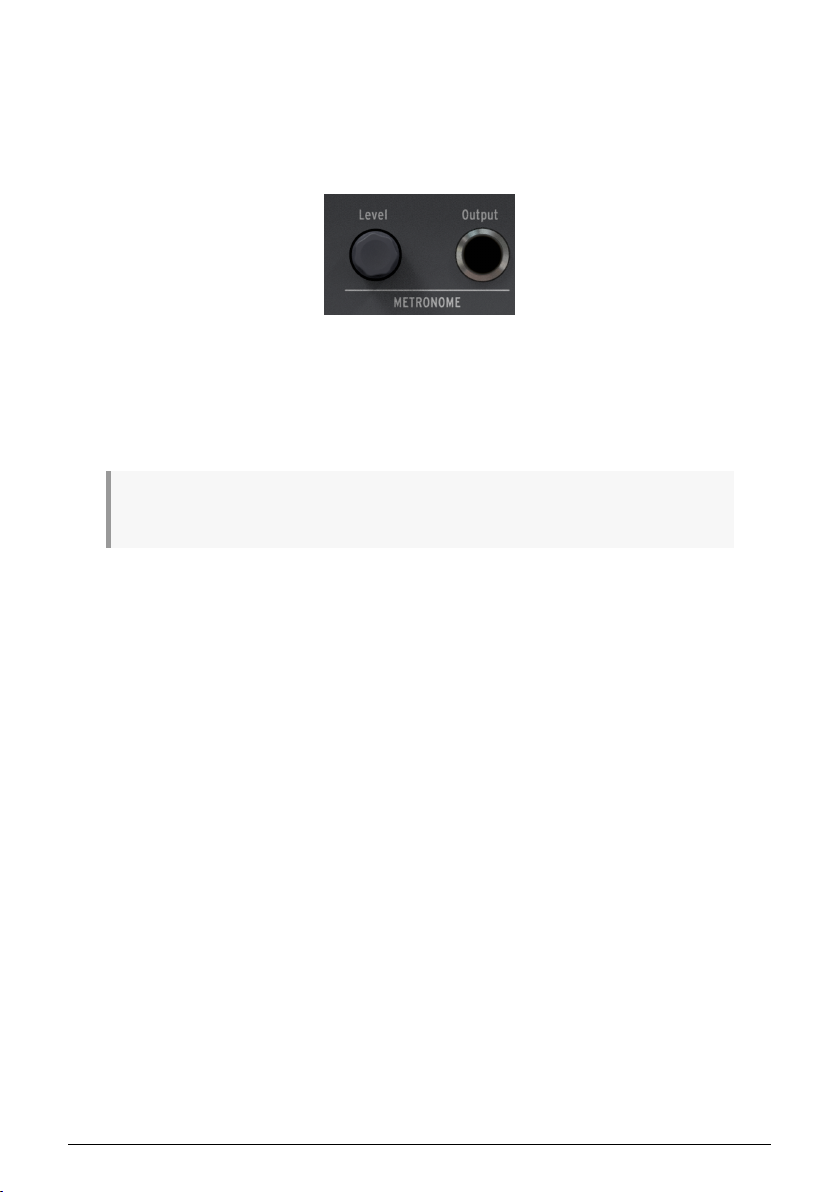
4.3.5. Metronome Section
KeyStep Pro has a convenient built-in metronome, making it easy to build up empty
sequences from scratch without having to use an external rhythmic reference (such as
a metronome or drum machine) as a 'click track'. The internal speaker (located on the
front panel) produces clearly audible metronome ticks, so you don't need to use external
speakers.
The Level knob sets the output level of the metronome. This knob is retractable to prevent
accidental changes to the metronome volume. Press the knob to stow it away and press it
again to bring it back out for adjustment.
The Output jack lets you send the metronome signal to a mixer or headphone distribution
amplifier, so that multiple performers can play to the same metronome.
!: The Level knob only affects the internal speaker's loudness level. It does not affect the signal sent
from the Output jack.
4.3.6. Sustain Pedal Input
Connect an optional sustain pedal to this input. It is best to connect the pedal before
switching on the KeyStep Pro, so that it can correctly sense the pedal's polarity. Be sure to
keep your foot off the pedal when switching on the KeyStep Pro or its operation may be
reversed. If this happens, switch the KeyStep Pro off and start again.
The Sustain Pedal input port supports two MIDI Machine Control (MMC) commands: you can
use a pedal to start and stop sequences.
Arturia - User Manual Keystep Pro - KeyStep Pro Overview 61
Page 68
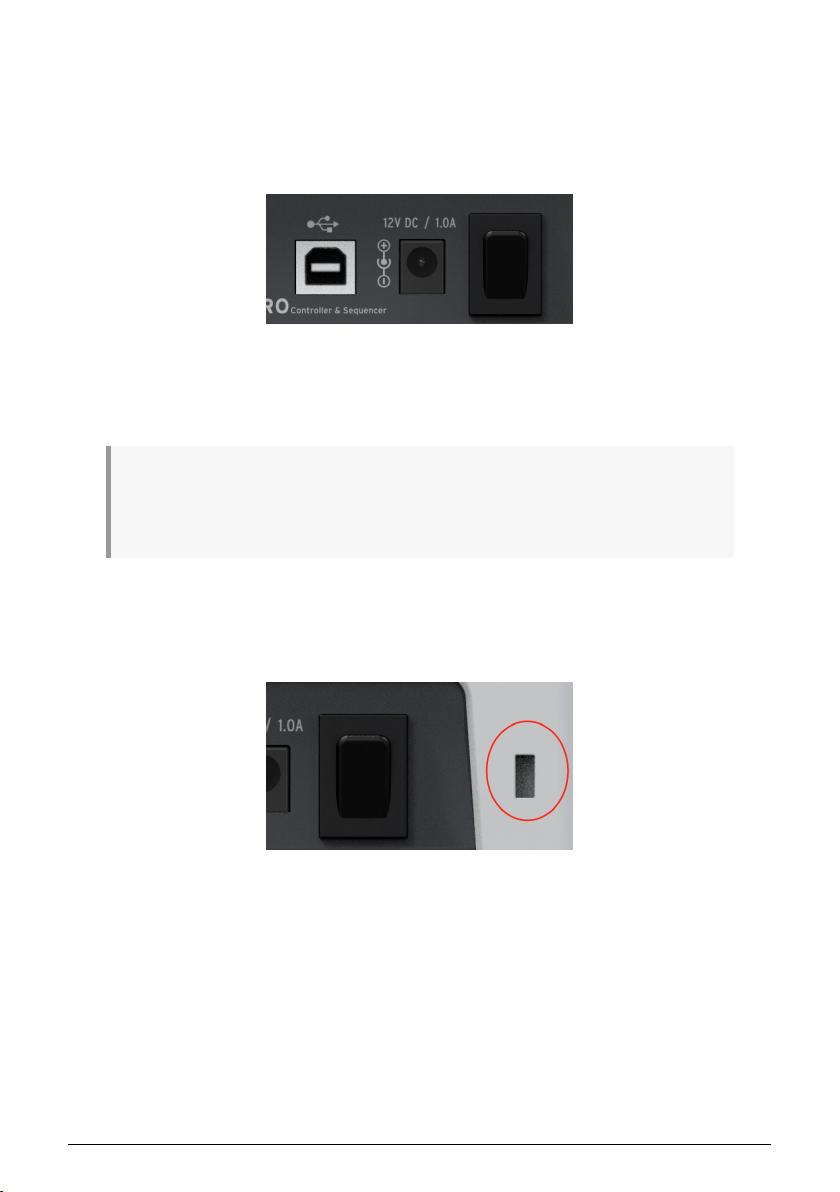
4.3.7. USB and Power Section
The KeyStep Pro is a standalone product and can be used by itself without a host computer.
To do this, simply connect the included 12 V power su pply adaptor to the KeyStep Pro and
switch it on. To make life easier for international travelers, the 'universal' power su pply
adaptor (12V DC, 1.0 A, center positive) includes interchangeable leads, enabling you to use
the KeyStep Pro in most countries of Planet Earth.
The USB connector provides a data connection to your computer or tablet for those
occasions when you want to use the KeyStep Pro with a host device. When working this
way, simply connect the KeyStep Pro to your host device with the su pplied USB cable and
switch it on.
WARNING!: Although the KeyStep Pro might seem to work OK when you power it up with a power
bank, we strongly advise you NOT to power it this way. The KeyStep Pro needs a lot of current for its
LEDs and analog output. Using a defective or partially charged power bank could damage the KeyStep
Pro.
4.3.8. Kensington Lock Port
The KeyStep Pro is highly portable and easy to carry, but it should be carried away only
when you want it to be, and not by a thief!
We've included a Kensington lock slot on the far right edge of the back panel so you can
secure it to the surface of your choice.
62 Arturia - User Manual Keystep Pro - KeyStep Pro Overview
Page 69

5. MAKING TRACKS
In this chapter, we'll have a look at the process of creating (drum) sequences and arpeggios.
What's the use of having tracks if you have nothing to fill them with?
5.1. Sequencer / Arpeggiator (or Drum) Tracks
The KeyStep Pro has four Tracks, each with its own independent sequencer or arpeggiator.
Sequencer Arpeggiator Drum Sequencer
Track 1 Yes No Yes
Track 2 Yes Yes No
Track 3 Yes Yes No
Track 4 Yes Yes No
Each track has a pair of buttons labelled Seq and Arp (or Seq and Drum on Track 1). These
buttons let you set the functionality for their associated track. The currently selected option
is lit up and only one mode can be active at any time.
5.2. The Three Arpeggiators
One of the unique features of the KeyStep Pro is that it has three arpeggiators. What
makes it even more unique is that these arpeggiators can run in different scales and time
signatures simultaneously!
5.2.1. What is an Arpeggiator?
An arpeggiator breaks up a chord into individual notes: hold down a chord on the keyboard
and the arpeggiator will play the notes in the chord one by one at equal time intervals. You
can keep adding notes to the arpeggio: simply holding down more keys will add them to the
arpeggio. If you happen to have 16 fingers you can use all of them to create a maximumlength arpeggio, but a better way to extend arpeggios is to make use of the HOLD key. We'll
explain this in the next sub-section.
To activate the arpeggiator, select a track with an arpeggiator (Track 2, 3 or 4) and press the
Arp button. It lights up in white to show that Arpeggio mode is currently active on that track.
Now hold a chord and hear the arpeggio play.
♪: Pressing 'Play' is optional. However, if you want to record your arpeggio in the sequencer on the
same track, pressing 'Play' is required.
Arturia - User Manual Keystep Pro - Making Tracks 63
Page 70

5.2.2. HOLD and the Arpeggiator
The KeyStep Pro gives you some control over the Patterns that are generated:
• The arpeggiator picks notes within the available octaves as defined by the Arp
Octave function. To change the arpeggio range, hold down 'Shift' and press one
of the Arp Octave keys (-1, 0, +1, +2 or +3).
When you find a particularly interesting Pattern, press the HOLD button and refrain from
touching the keyboard; whatever keys you held down on the keyboard will remain active,
even after you lift your fingers. The arpeggio will continue playing, and you'll have an extra
hand to tweak knobs. As long as you keep at least one note depressed, you can extend an
arpeggio to a maximum length of 16 notes.
After you lift your fingers from the keyboard, playing a new chord will start a new arpeggio
that will replace the arpeggio that was just playing.
!: This feature offers some interesting creative options: if you have set an arpeggio to play in the
order you press the keys of the chord (by using the 'Shift' + Order key), you can repeatedly play the
notes of the same chord in different orders, thus emphasizing different notes in the chord. If you play
with your attention focused on the velocity of the notes in the chord, you can make this effect even
more pronounced.
You can offset an arpeggio on hold in time using the Time Shift encoder.
This feature enables you to delay the active arpeggio compared to other arpeggios. To get a
feel for how this works, create two similar arpeggios in Track 2 and Track 3 with the same
time-division and set them on hold. Now activate Track 3 and turn the Timeshift encoder to
the right: the arpeggio in Track 3 will now shift forward in time.
!: Another thing to try is to combine an arpeggio held in Poly mode with an arpeggio in Exclu
(exclusive pendulum) or Inclu (inclusive pendulum) mode. The polyphonic arpeggiation will re peat all
notes in the arpeggio simultaneously, thus forming a block-chord background for the second arpeggio.
5.2.3. Transposing an Arpeggio
To transpose a running arpeggio press Hold so you can lift your fingers from the keyboard,
hold the transpose button and press keys on the keyboard to transpose the arpeggio.
♪: When adding new notes to the arpeggio, the new notes will be added to the transposed version of
the arpeggio.
64 Arturia - User Manual Keystep Pro - Making Tracks
Page 71

5.2.4. Editing an Arpeggio
While an arpeggio is playing, you can edit Gate length, Velocity, Time Shift and Randomness
with those main encoders.
When you play an arpeggio, the KeyStep Pro will generate notes using the current setting
of the Gate encoder. Once an arpeggio is running, you can adjust the global gate value of
these notes. Turning the encoder to the right will lengthen the initial gate time, turning the
encoder to the left will shorten the gate time.
Editing the velocity of the notes in arpeggio works in a similar way: turning the Velocity
encoder to the right will increase the Velocity of all the notes in the Arpeggio. Turning the
Velocity encoder to the left will decrease the Velocity of all the notes in the Arpeggio. The
value that is added or subtracted is shown in the display.
♪: In other words, velocity is bipolar. When the velocity encoder is at '0', all the notes in the arpeggio
will play with the velocity registered when you pressed the key. Turning the encoder to the right will add
to this velocity until a maximum of 127 is reached. Turning the encoder to the left will subtract from the
registered velocity value. Until, at the -127 point, the note goes silent.
Editing Time Shift only makes sense when you have two or more arpeggios running
simultaneously. It then makes a
will add an additional element of surprise by applying random pitch changes to your
arpeggio. Used sparingly when multiple arpeggios are running, it will add even more depth.
Note that the edits you make will affect the currently active arpeggio only.
Press 'Shift'+ Hold/Clear to clear the arpeggio.
♪: The HOLD state is not saved with the Pattern. ♪: HOLD does not work with external MIDI. If you
need to hold one or more external MIDI notes, send the KeyStep Pro a Sustain message using a sustain
pedal.
lot
of sense: instant Steve Reich/Terry Riley! Randomness
Arturia - User Manual Keystep Pro - Making Tracks 65
Page 72
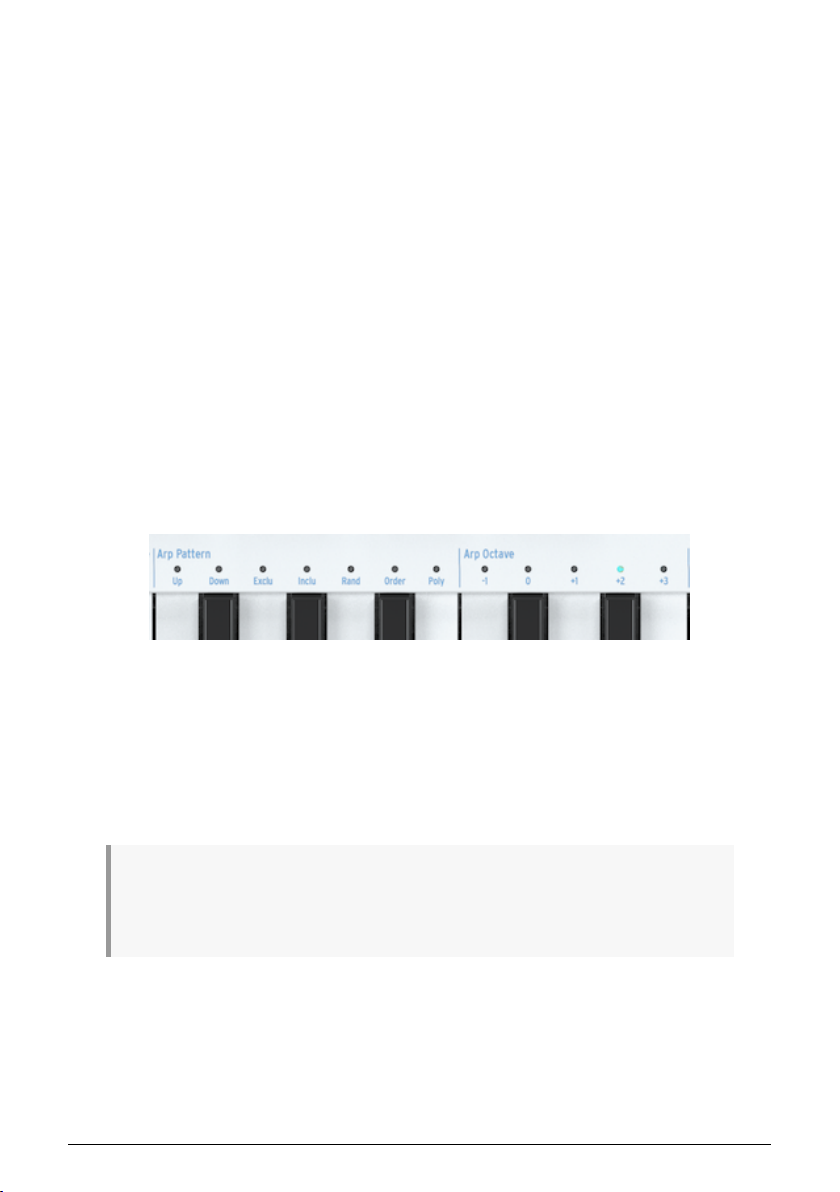
5.2.5. Arpeggiator Features
The KeyStep Pro's arpeggiators have many features not found on other arpeggiators. To
start with, there are three arpeggiators (on Tracks 2, 3 and 4). Imagine the creative options
at your disposal when you have three arpeggiators in HOLD playing simultaneously and you
can transpose each of them individually within its predefined scale — and each arpeggio is
running in a different scale!
When HOLD is active, the arpeggiator will run indefinitely and you can focus on making
changes to the selected arpeggio.
With the exception of Pitch, all main encoders can be used to edit the arpeggio. These edits
are global for that arpeggio: you cannot change the parameters of individual notes within
the arpeggio. You can, however, make the following global edits: change the Gate time,
Velocity, Time Shift and Randomness. To hear the effect of Time Shift, you need to have two
arpeggios on HOLD running simultaneously. Randomness will apply random pitch changes
to the arpeggio.
5.2.5.1. Arp Pattern Directions
Just above the keys, from F to B in the lower octave, you'll find a series of blue Arp Pattern
labels: Up, Down, Exclu, Inclu, Rand, Order and Poly. These are used to select how the
arpeggiator will play the notes of the chord you're currently holding down on the keyboard.
To activate one of these functions, hold down the 'Shift' button and press the appropriate
key.
• 'Up' will play the notes of your chord from left to right or bottom to top, depending
on your point of view. The order in which you press the keys does not matter.
The arpeggiator will always play the individual notes from left to right.
• 'Down' plays the notes of your chord from right to left or top to bottom.
• 'Exclu' plays the chord notes in pendulum motion without repeating the bottom
and top endnotes.
• 'Inclu' plays the chord notes in a pendulum motion, including a repeat of the two
endnotes.
♪: Exclu and Inclu both play your chord notes in pendulum motion; that is, up and down, then up
and down again repeatedly. The difference is what happens at the extreme ends of the arpeggio. Let's
say you have a four-note chord. In 'Exclu' mode it will be arpeggiated as 1,2,3,4,3,2,1,2 .... In 'Inclu' your
arpeggio will be played as 1,2,3,4,4,3,2,1,1,2 ....
• 'Random' will play the notes of your chord in ever-changing random order.
• 'Order' will play the notes of your chord in the order you played them. You can
use this to good effect by repeatedly playing the same chord but changing the
order in which your fingers touch the keyboard.
• 'Poly' will repeat the entire chord as a block chord – all notes at the same time –
instead of arpeggiating its notes in series. The octave of the repeated notes will
depend on the selected Arp Octave parameter, which will transpose the whole
chord into a different octave and then return to the current octave.
66 Arturia - User Manual Keystep Pro - Making Tracks
Page 73

5.2.5.2. Arp Octaves (Running a Multi-Octave Arpeggio)
By default, the arpeggiator will play the notes you hold down and stay within the limits of
that octave. Holding down 'Shift' and pressing one of the Arp Octave keys will extend the
notes beyond that range. When you change the octave range, the arpeggiator will also play
notes in the octave(s) below or above the chord you play.
Octave range settings:
Octave Function
-1 held down notes plus the same notes re peated one octave below
0 only notes held down on the keyboard are played
+1 held down notes plus the same notes repeated one octave above
+2 held down notes plus the same notes repeated two octaves above
+3 held down notes plus the same notes repeated three octaves above
The arpeggiator has another freaky feature that becomes apparent when you press the
Octave Down or Octave Up arrow button (under the 'Shift' button) while an arpeggio
is playing. On most arpeggiators, pressing an octave down/up button will transpose all
currently held notes in the arpeggio one octave down or up. Uniquely, the KeyStep Pro's
arpeggiator will preserve the pitch of your arpeggio. If you shift the octave down or up, the
new notes you play will be added to the existing arpeggio in the new octave range!
When a Scale function is activated (by holding down 'Shift' and pressing one of the Scale
keys), this can have a peculiar effect on your arpeggio: any 'outside notes' you play
that don't belong to the currently selected scale will be forced (quantized) into it, causing
duplicate notes. If, for example, you've set Scale to C major and you play a block or legato
chord including an E and an Eb (which is foreign to the C major scale) the arpeggio will play
the E twice in swift succession, which causes a ratcheting effect.
Arturia - User Manual Keystep Pro - Making Tracks 67
Page 74
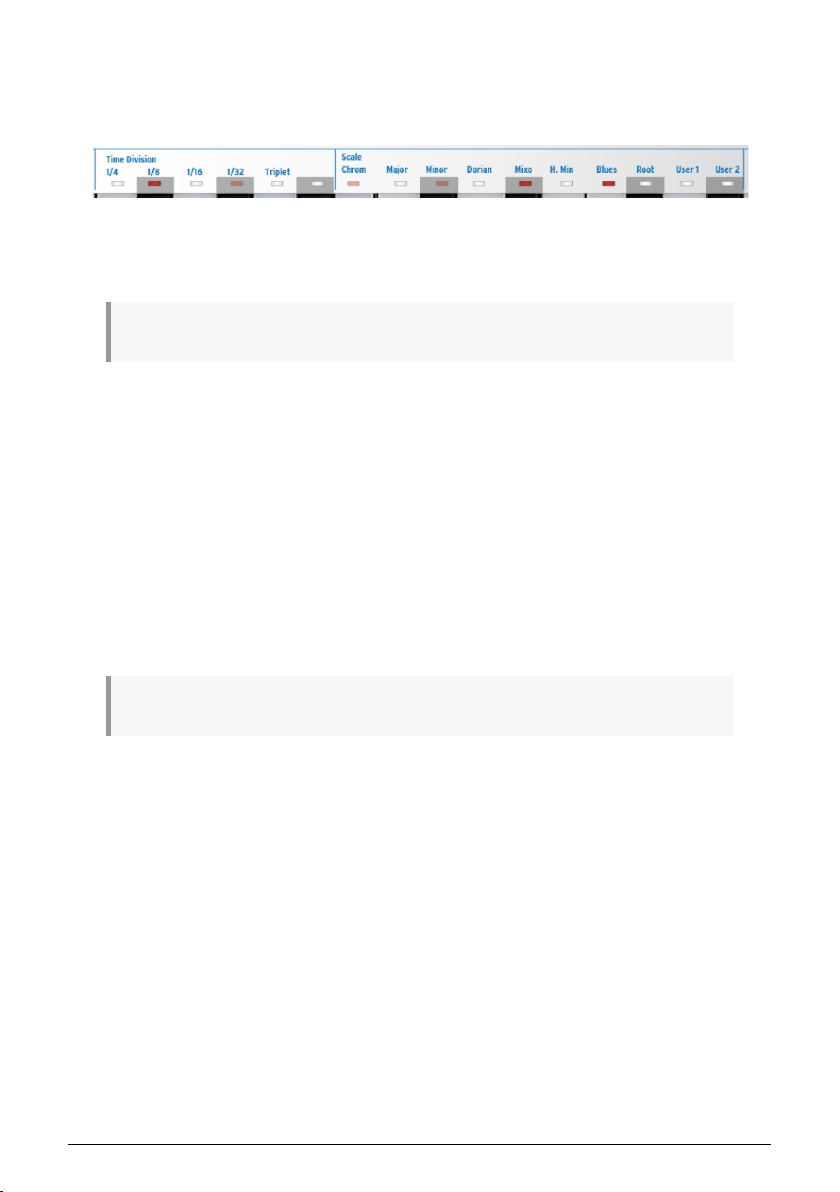
5.2.5.3. Arpeggios and Time Division
The Tempo knob determines the speed of your arpeggio(s). Tempo changes are displayed
as BPM (beats per minute) in the OLED display. The default rate is 120.0 bpm.
By default, the arpeggiator will sync to the internal clock. The Time Division tells you with
what rate the arpeggiator is currently synced to the clock. For example, if you select 1/4
(quarter notes), the arpeggiator plays four notes per bar/measure.
♪: This way of syncing is the same for arpeggios and sequences.
The available time divisions are listed below:
• 1/4 note
• 1/4 note triplet
• 1/8 note
• 1/8 note triplet
• 1/16 note
• 1/16 note triplet
• 1/32 note
• 1/32 note triplet
At this point, you are probably wondering how to create the triplet values in the above list.
It's simple: to create 1/8 triplets, hold down 'Shift' and press the 1/8 key (F# in the middle
octave) plus the triplet key (A in the middle octave).
♪: 1/4 corresponds to a standard metronome tick.
5.2.5.4. Arpeggios: Scale and Root
While an arpeggio is running, you can alter its scale and root on the fly. Please refer to the
Scales [p.108] section later in this chapter for more information.
68 Arturia - User Manual Keystep Pro - Making Tracks
Page 75

5.2.5.5. Arpeggios and Chord Mode
The KeyStep Pro can memorize a chord. You can then play an entire chord simply by
pressing a single key on the keyboard. The chord will transpose automatically as you play
different notes.
It's a feature that adds a new dimension to the concept of an arpeggio. Chord mode enables
you to create blindingly fast and intricate polyphonic scale-quantized arpeggios; you'll hear
arpeggios as you've never heard them before — maybe not even in your wildest dreams!
CAUTION: The following procedure will erase the previous chord and replace it with a new one.
Here's how to memorize a chord:
• Hold down the 'Shift' button and press the Tie/Rest/Chord button. Don't let go!
• Once you've entered the first note of the chord, you can let go of the 'Shift' button
• Now play up to 16 notes on the keyboard. These will become your chord
• When you are done, lift all your fingers off the keyboard and then release the
'Shift' and Tie/Rest/Chord buttons.
Now the Chord button will flash once per second, showing that the KeyStep Pro is in Chord
mode. The next single key you press will play the chord you created.
When creating a chord, the KeyStep Pro does not look at the actual notes you play, it
registers the distance in half steps between the notes you enter and the order in which you
enter the notes. When you play back the chord, it will reconstruct the chord starting at the
first note you play on the keyboard.
Now you're ready to play complex arpeggiated chords:
• Select an arpeggio pattern by holding down 'Shift' and pressing one of the Arp
Pattern keys
• Memorize a chord, as you have just learned to
• Press the Play button.
Other fun things to try:
• Select another Time Division to hear your arpeggiated chord at different speeds.
• Select another Scale to quantize the notes in your arpeggio to a predefined (or
user) scale.
!: Unless you have huge hands that can span half the keyboard, it's a good idea to press HOLD before
attempting the above tips.
Arturia - User Manual Keystep Pro - Making Tracks 69
Page 76

Here are a few more handy things to know about this feature:
• For all the Chord mode functions described above, you can use a sustain pedal
instead of the HOLD button. (The pedal will not flash, of course — but that would
be cool.)
• To enter or exit Chord mode, hold down the 'Shift' button and then tap the Tie/
Rest/Chord button.
CAUTION: Neither the memorized chord nor your arpeggio are saved when the KeyStep Pro is
powered down.
70 Arturia - User Manual Keystep Pro - Making Tracks
Page 77

5.2.6. Making the Most of the Arpeggiators
5.2.6.1. Record an Arpeggio in the sequencer
This feature enables you to record a running arpeggio in the sequencer on the same track.
It works like this:
• Select a track (2,3 or 4) and set it to Arpeggio mode
• Select an empty pattern in this track
• Set Mode to Poly ('Shift'+ Poly)
• Deselect overdub so it's off (to get a better idea of what's happening)
• Start the Arpeggiator (press Play)
• Press record, hold down a chord to start an arpeggio
Now, simply press the sequencer button on the same track to activate the sequencer and
start playing back the recorded arp.
All 'Shift' edit options are now available to further edit the sequence.
Arturia - User Manual Keystep Pro - Making Tracks 71
Page 78

5.2.6.2. Recording Chorded Arpeggios
Arpeggios and the Chord feature are a wonderful match. You can record chorded arpeggios
in real time in a sequence on the same track! Here's how to do it:
• Select a track (2,3 or 4) and set it to arpeggio mode
• Select an empty pattern in this track
• Set Mode to Poly ('Shift'+ Poly)
• Deselect Overdub so it is off
• Press 'Shift' and Tie/Rest (Chord) and hold a chord on the keyboard. Let go of
'Shift' and Tie/Rest and check whether the chord has been registered by playing
keys on the keyboard
• Start the Arpeggiator (press Play).
♪: The Arpeggiator will also arpeggiate without pressing 'Play', but if you want to record an arpeggio
in the sequencer, the Arpeggiator must advance through the steps.
• Press record, hold down a chord to start a chorded arpeggio
You'll see steps lighting u p: each time the Arpeggiator advances, the current state of the
Arpeggiator is recorded in a step.
• Press Record to exit Recording mode
You can now edit the chorded arpeggio with some of the options you normally have in
sequencer mode. This is limited to Nudge>, Nudge< and Invert.
• Press Seq on the same track to activate the sequencer and record the arpeggio
in the sequencer.
Press Play to play the old arpeggio which has now become a sequence.
All 'Shift' edit options are available to further edit the sequence.
72 Arturia - User Manual Keystep Pro - Making Tracks
Page 79

5.2.6.3. Mixing Arpeggios
Mixing arpeggios is one of the most fun creative experiences you can have with the KeyStep
Pro. Here's how to do it:
• Activate Track 2 and press Arp to select arpeggio mode.
• Select the minor scale (or any other scale you like) by pressing 'Shift' + the
appropriate Scale key.
• Hold down a chord on the keyboard and press HOLD.
• Press Play to start the arpeggio.
Repeat this on Tracks 3 and 4.
If all is well, you now have three arpeggios playing simultaneously!
By pressing Mute, you can momentarily silence one of the Arpeggios.
The real magic happens when you change the Time Division of one or two of the arpeggios
with 'Shift' + Time Division. This will only change the Time Division of the active arpeggio; the
others will keep running at their own pace!
!: An external delay is the arpeggiator's best friend.
5.2.6.4. Spicing up your Arpeggios
Use the Pitchbend touch strip to change the pitch of your arpeggio.
♪: In the MIDI Control Center you can set the pitch bend range in semitones (half steps).
Turning the Swing knob will apply swing to all arpeggios simultaneously. Use 'Shift' + Swing
to apply swing to the arpeggio on the active track only. When you record an arpeggio and
quantize is off, Swing is recorded in the sequencer.
!: One of the most overlooked applications of an arpeggiator is just playing one note instead of a
chord. When you set the arpeggio to medium speed, you can create interesting rhythms by sporadically
lifting and pressing a finger on a key. You can take this idea further to create Hoketus. Hoketus is the
name of a technique where you repeat one note over and over, never changing its pitch, though you
do change other parameters of the note: for example, its timbre (LFO→Filter Cutoff), the Attack, Sustain
and Decay stages of the note's amplitude or filter envelope, and its velocity or aftertouch (pressure).
Arturia - User Manual Keystep Pro - Making Tracks 73
Page 80

5.3. The Four Sequencers
The KeyStep Pro has four sequencers, each of which can hold 16 patterns/sequences. And
as each sequence can be up to 64 steps in length, you have 4096 steps to fill! Your actual
sequences can be much longer because you can chain sequences together: for example,
play sequence A three times, followed by sequence B two times and ending with sequence
C once. Don't forget that the sequencers are polyphonic, capable of stacking up to 16 notes
per step.
The KeyStep Pro thus enables you to create and play up to 64 unique sequences wherever
you go. And despite its small footprint, there are lots of ways to modify your sequences
during a performance. We'll cover those later in this chapter.
Sequences can be stored in Projects. A Project is a collection of sequences that you create
for a specific event, such as a recording session or a performance.
5.3.1. Exploring the Sequencers
A sequencer will play a series of notes, stored in steps. Per note, each step can store a pitch
value, a velocity value, a gate time, a time shift and a randomness value. These values will
be transmitted over MIDI (via the USB or 5-pin DIN connectors). They will also be sent to the
Voice outputs corresponding to the tracks; for example, for controlling a modular system.
Once stored, the steps are referred to as a Pattern. Patterns can be modified, copied and
chained together.
The 64 steps are grouped into four pages: page 1 holds steps 1-16, page 2 holds 17-32, page
3 holds 33-48 and page 4 holds 49 to 64.
5.3.1.1. Using the Transport Buttons
You control the sequencers with the three Transport buttons; Record/Quantize, Stop, and
Play/Pause/Restart.
Each button has an additional function when creating a sequence:
• 'Shift' + Play will restart a sequence
• 'Shift' + Record/Quantize will toggle between quantized and unquantized
recording mode
• Pressing Stop repeatedly will clear any stuck notes.
74 Arturia - User Manual Keystep Pro - Making Tracks
Page 81

5.3.1.2. Setting the Sequence Length
You set the length of a sequence by holding Lst Step (Last Step) and pressing one of the
page buttons (16, 32, 48 or 64). To select a length in the middle of a page, first select the
appropriate page and then the last step within it, with Lst Step + a ste p button.
'Shift' + Lst Step/Follow enables you to follow the sequence through the pages while it's
running.
You can copy the steps in a page and paste them to other pages. For this to work, the pages
you want to copy to must be an active part of the pattern. So, to copy steps from page one
to page two, make page two active by holding 'Lst Step' and pressing the '32' button. For
example, if you want to copy the steps in page 1 and paste them to page 2:
• Hold Copy and press Page button 16
• Hold Paste and press Page button 32.
At this stage you can paste what's in the copy buffer again and again: for example, to paste
the steps now in the buffer into pages 48 and 64, hold Paste + 48 and Paste + 64. This will fill
these pages even if you have set sequence length to 16. To view and play these new pages,
lengthen the sequence by re-setting Lst Step.
In a similar way you can copy a number of steps and paste them to another page. When
pasting, if some of your steps do not fit on the current page, they will continue onto the next
page. Please refer to Copy steps [p.89] later in this chapter.
♪: There is a difference between making a pattern longer and extending it. When you extend a
Pattern with 'Shift' + Page button, you copy content to another page. If, for example, your Pattern is 16
steps long and you Hold 'Shift' and press 32, the first 16 steps will be copied to the second 16 steps (16 to
32).
To summarize: to set a new pattern length use Lst Step + Page button, to Extend a pattern
use 'Shift' + Page button.
Arturia - User Manual Keystep Pro - Making Tracks 75
Page 82

5.3.1.3. Mono and Poly
In Mono mode, a sequencer will only play one note per step. In Poly mode, a sequence can
play up to 16 notes per step. To switch modes, hold down 'Shift' and press the Mono key (D#
in the lower octave) or the Poly key (E in the lower octave).
You can use this Shift function in a performance by switching a polyphonic sequence to
monophonic. However, only the lowest note of the chord will survive. You can also do this
the other way around by starting in Mono mode and suddenly re-introducing chords by
switching to Poly mode.
When recording in Mono mode, the KeyStep Pro will only allow you to store one note in a
step, whether it is in Quick Edit, Step Edit or Real Recording mode. This makes it easier to
record bass lines.
New patterns you create in Mono mode will always record with Overdub OFF.
In Drum mode, Mono mode means that all 24 tracks share the same length. In Poly mode,
each track can have a separate length.
♪: When Poly is active, Lst Step operations (copy, extend) only affect the currently selected track.
76 Arturia - User Manual Keystep Pro - Making Tracks
Page 83
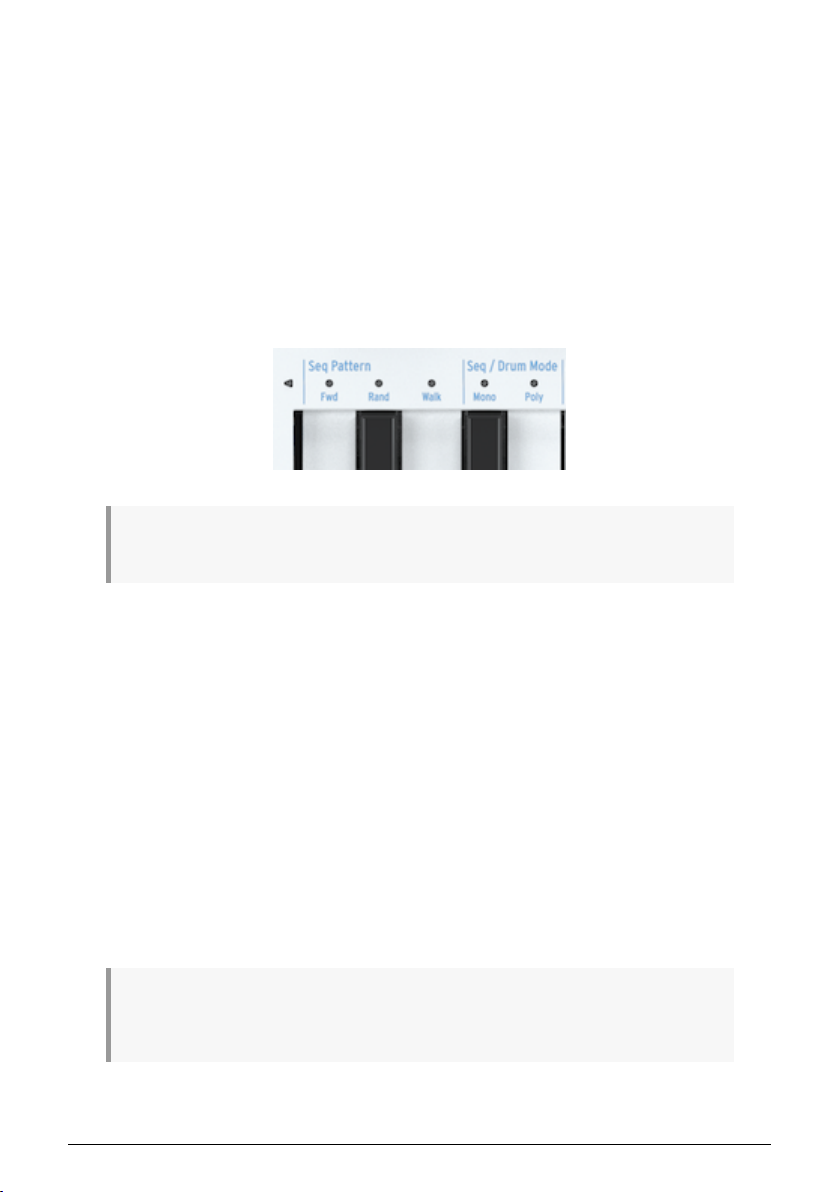
5.3.1.4. Seq Patterns (Directions)
How do you change the playing direction of the sequence? Hold down 'Shift' and press one
of the Seq Pattern keys (C, C# or D in the lower octave).
A sequence that repeatedly runs from beginning to end tends to bore listeners quickly.
Fortunately, the KeyStep Pro sequencers can play steps in three different ways: Fwd
(forward), Rand (random) and Walk.
• Forward is self-explanatory.
• In Random mode, the steps are played in an ever-changing random order.
• In Walk mode, it's as if the sequencer 'threw the dice' at the end of each step:
there's a 50% chance it will play the next step, a 25% chance it will play the
current step again and a 25% chance it will play the previous step.
♪: It's called Walk mode after the way monks would walk during medieval pilgrimages: two steps
forward, one step back.
One question remains: how do you know if the sequence will play the last step when you're
in Random or Walk mode? This is sometimes important to know, for instance, when at
the end of a sequence you want to start another sequence with the Wait Load (Wait to
Load) function activated. It's the number of steps of your sequence – defined by Lst Step
– that determines this: if your sequence is 4 steps long and you run it in Random mode,
the sequence will play 4 random steps from your sequence and then continue to the next
sequence.
5.3.1.5. Transposing a Sequence
To transpose a sequence, hold the transpose button and press a key on the keyboard: the
sequence will be transposed accordingly. You can now use the transpose button to toggle
between the transposed and untransposed versions of the sequence.
Transposing sequences and arpeggios is a temporary thing: transposition states will be lost
when you switch the KeyStep Pro off. If you want to save the transposed state of patterns,
transpose them with the 'Shift' transpose functions (Semi up, Semi down, Oct down and Oct
up) and save them by holding 'Save' and holding the track button.
♪: Note that if you add notes to a transposed sequence, they will sound in their transposed position.
For example: if you add a G to a sequence that is transposed two semi notes up from its original position
it will revert to F when you toggle transpose OFF.
Arturia - User Manual Keystep Pro - Making Tracks 77
Page 84

5.3.1.6. Scales, Chords and the Sequencer
The KeyStep Pro gives you a lot of control over the tonality of your sequence. Once you've
programmed a sequence, you can change its root note and the scale it plays in.
To define a new root note for your sequence, hold down 'Shift' and press the Root key (F in
the upper octave), then press a key in the lower octave of the keyboard. The LED above the
currently active root note will light up.
♪: You will only hear a pitch change when your sequence is already running in a scale other than
chromatic.
78 Arturia - User Manual Keystep Pro - Making Tracks
Page 85

5.3.2. Recording
5.3.2.1. Quick Record
Quick Record mode is the easiest way to create sequence or drum tracks. Quick recording
works whether the sequencer is running or not.
♪: The KeyStep Pro is in Quick Record mode when both the Record and the Step Edit buttons are off.
In Quick Record mode, the 16 ste p buttons turn into simple on/off controls for each step. To
record something into a step just hold down the corresponding step button and play a note
or a chord. As soon as you lift your fingers off the keys, whatever you just played is stored
in that step. If you change your mind and want to store something else in that ste p, hold
down the step button again and play a new note or chord. This will overwrite the currently
stored note(s).
!: There's a secret to know here: the notes you record into a step will use the current setting of the
main encoders. Change the encoder settings to add notes with different values.
At this point, you can add notes to what's already stored in the step by pressing the Overdub
button. It will light up in red to show that Overdub is active. Hold down the appropriate step
button and press the notes on the keyboard that you want to add to the chord.
To hear the result of your step programming so far, press Play to start the sequencer.
The keyboard is still available for playing on top of the running sequence. You can play it
to solo over the currently playing sequence, or press HOLD and add notes that will sustain
indefinitely like a drone or bourdon.
By holding the Trans (Transpose) button and pressing a key on the keyboard, you can
transpose the running sequence to another key. It's an intelligent transpose: it takes into
account the scale that is currently active, so no 'outside notes' will play. Selecting another
scale will instantly change the tonal focus of your sequence. To try this form of transposition,
also called scale-quantized transposition, hold down the 'Shift' button and select one of the
Scale keys (Bb to E in the u pper octave) or User 1 or User 2 (F# or G in the u pper octave) if
you have pre-defined user scales.
There are two other Shift functions available to experiment with your sequence:
'Shift' + Time Division (1/4th, 1/8th, 1/16th, 1/32th).
'Shift' + Mono, which only plays the lowest note of the currently stored chord (the
fundamental) in each step. Pressing 'Shift' + Poly will restore the chords to their former glory.
You can now fine-tune the individual steps in your sequence using the Gate, Velocity and
Randomness encoders. To change the parameters of an individual step, hold the step and
tweak Gate, Velocity or Randomness.
• Gate will shorten or lengthen the gate time
• Velocity will subtract or add (surprise!) velocity
• Randomness will silence random notes in your sequence. Turning the
Randomness encoder counterclockwise will reduce the probability that a note
will be triggered. In the fully clockwise position, the note will always be triggered.
Arturia - User Manual Keystep Pro - Making Tracks 79
Page 86

Press the Play/Pause/Restart button again to pause the sequence; press it once more to
resume playback from where you stopped.
Making Global changes to a sequence
At this point, you can make quick global edits to the pattern you've recorded.
Holding 'Shift' and turning one of the five encoders will apply a relative offset to all the steps
contained in the sequence for a parameter. The offset can be positive or negative. If for
example you hold 'Shift' and turn the Velocity encoder to the right, the value you dial in will
be added to the velocity value of all the steps in the sequence. Turning the encoder to the left
will subtract values. The KeyStep Pro will display the amount of added/subtracted velocity.
Global offset has no effect on the pitches in the drum track, but it will affect Gate, Velocity,
Time Shift and Randomness.
♪: To turn off stuck notes (notes that continue to play after stopping the sequencer) press the Stop
button once more.
To start something new, press Clr Ptn (Clear Pattern) and create a new sequence. This will
clear all parameters of the Pattern.
♪: The previous Pattern – the one you erased – is still in memory. Hold down 'Shift' and press Exit/
Undo to restore it. The Exit/Undo button will blink whenever there is something present in the undo
buffer.
5.3.2.2. Step Record
In Ste p Record mode, the KeyStep Pro can record and play back music data. Originally
popular in the 1960s and '70s, step sequencers have become popular again due to the
increased interest in modular synthesizers.
A step sequencer is usually
The KeyStep Pro sequencer, however, is capable of stacking up to 16 notes per sequence
step.
Step Record mode is the preferred way to quickly record sequences. Unlike Quick Record
(described above), where you have to manually select the steps you want to fill, in Step
Record mode you use the keys of the keyboard to step through the Pattern, advancing
automatically to the next step when you lift your finger from the keyboard. Press RECORD
to activate Step Record mode. The KeyStep Pro will jump to the first step of the Pattern and
wait for you to enter a note or notes. Start playing and notice how the steps fill. At the end
of the Pattern, the KeyStep Pro will loop back to the beginning and overwrite the notes you
played before.
Step Record has one other feature: you can 'backpedal' to a previous step and overwrite
it. To give an example: you've pressed Record and have filled six steps by entering chords
and lifting your fingers from the keyboard to advance a step. You can now backpedal by
pressing step four and restart recording from there. When Overdub is OFF, the new notes
you play will replace the notes you've recorded in steps 4, 5 and 6.
80 Arturia - User Manual Keystep Pro - Making Tracks
monophonic
, meaning that it will only output one note at a time.
Page 87

5.3.2.3. Realtime Record
Holding down Record and pressing Play puts KeyStep Pro into Realtime Record mode.
Realtime recording will give a more fluent, natural feel to your sequence. In Realtime Record
mode, the sequencer will run at the speed you have set with the Tempo knob or the Tap
Tempo knob, and it will store whatever note or notes you are playing at each moment into
the currently active step. That makes it somewhat harder to predict in which step your keypresses will be stored.
♪: In Realtime Record mode, if you hold down 'Shift' and press Record/Quantize, what you play will
automatically be quantized according to the current Time Division setting (see next sub-section).
!: When recording in Realtime Record mode, choosing a longer sequence length gives you more
space. To set the sequence to 64 steps, hold down Lst Ste p and press the 64 button.
There's a small problem with Realtime Record mode: it's difficult to know when you started
playing because you can't hear where the first step is. The solution is to turn on the
Metronome with 'Shift' + Metronome. When you press Play, the Metronome now starts
ticking, with the first step accented by a higher pitch. You can set the desired metronome
level (volume) with the retractable knob next to the Metronome output on the back panel of
the KeyStep Pro. To change the Time Division of the Metronome, hold Tap Tempo and press
one of the Time Division keys on the keyboard.
!: If the accent is not pronounced enough, make the first step louder by changing the metronome
settings in the Utility menu (Shift>Utility>Metronome) or in the MIDI Control Center.
The sequencer is now looping; the notes of any keys you press will be added to the loop.
The KeyStep Pro sequencers are polyphonic, so if you play a block chord instead of a single
note, all the notes of the chord will be entered into the currently active step of the loop. Of
course, if you want to hear all these notes, you must be in Poly mode.
The Tie/Rest button plays a key role in getting the sequence just right; while the sequence is
recording/looping, you can delete notes by holding the Tie/Rest button, while the button is
depressed it will erase the content of steps you're passing over.
♪: When recording in Realtime mode you can select another pattern on the fly to continue Recording
in that pattern.
Notice that all notes are recorded with the velocity at which you play them. Whether played
notes are
the Overdub button to the left of the keyboard. It lights up when Overdub is ON.
How do you edit the individual notes and/or chords you've recorded in real time? It's simple:
press the Step Edit button (to the left of the ste p 1 button) and if you need advanced editing
options, like moving selected notes in a chord, you can also activate Overdub.
Arturia - User Manual Keystep Pro - Making Tracks 81
added
to the existing sequence or
replace
existing notes depends on the status of
Page 88

About Quantized Recording
To activate quantization, hold down 'Shift' and press Record/Quantize.
When recording in Realtime Record mode using the keys or incoming MIDI, there's an
important conce pt you need to know about: the notes will be quantized according to the
Time Division you have selected.
For example, if 1/16 is the current Time Division setting, then the recorded notes will be
quantized forward or backwards to the nearest sixteenth note. As the Pattern loops, you can
replace certain notes by playing new ones within their time range.
!: You will hear the effect of quantization very clearly if you first set Tempo to 30.00 BPM and Time
Division to 1/4 (with 'Shift' + 1/4). Now record a Pattern in real time with lots of very quick notes. Then
press 'Shift' + Qnt 50% (step button 10) to hear how the notes start to cluster around the beats. Pressing
'Shift' + Qnt 100% (step button 11) makes the clustering even stronger so that notes almost turn into
chords.
Hold down 'Shift' and press REC/Quantize to deactivate quantization.
82 Arturia - User Manual Keystep Pro - Making Tracks
Page 89

5.3.3. Editing Steps
We've already explained the basics of step-editing in Chapter 3 [p.13], but there's much more
to learn and discover.
In several ways, the KeyStep Pro sequencer is more advanced than a traditional step
sequencer. One advanced feature is that it lets you transpose the sequence simply by
playing keys on the keyboard. Most early step sequencers could not do this; instead,
the pitch of each note was set with a knob or slider. More importantly, the KeyStep Pro
sequencer lets you edit all parameters of the note or notes stored in a step.
5.3.3.1. Step Edit Mode
Enter Step Edit mode by pressing the Ste p Edit button, which is probably one of the most
important buttons on the KeyStep Pro. You use it to edit the steps of the currently selected
sequence individually.
When the sequencer is stopped and Step Edit is ON, pressing a step button selects that step.
Play a note or a chord (a stack of notes) to store in that step, or if the step already contains
a note or a chord, change it using the keyboard. The note or chord you press will replace
the existing note(s).
When you enter step editing mode, you have two options: you can edit all the notes stored
in a step simultaneously or edit the notes in the step individually.
In Step Edit mode, the keyboard turns into a traditional step editor. When a step is active (its
button is blinking), you can edit all of its parameters: for example, turning the Pitch encoder
will lower or raise the pitch of the note or notes stored in that step; turning the Gate encoder
will shorten or lengthen the gate time of the note or notes stored in that step.
To edit the values of all the notes simultaneously:
• Turn the Pitch encoder to move all the notes in the selected ste p up or down on
the currently selected scale
• Turn the Gate encoder to lengthen or shorten the gates of all the notes in the
selected step.
• Turn the Velocity encoder to change the velocity of all the notes in the selected
step.
• Turn the Time Shift encoder to move all the notes in the selected step forward or
backward in time
• Turn the Randomness encoder to change the probability that the chord stored in
this step will sound.
Arturia - User Manual Keystep Pro - Making Tracks 83
Page 90

5.3.3.2. Quick Edit Mode (Step Edit Button OFF)
When the Step Edit button is OFF, you can simply turn steps on or off by pressing their
step buttons. That might seem trivial, but it can make a big difference to the feel of your
sequence.
To edit the values stored in a step, hold the step and tweak one of the five knobs. The values
stored in the step will appear oin the display.
When you hold an empty ste p and touch or tweak one of it parameters, the value of these
parameters will appear in the display. It's a quick way of adding notes to your sequence.
When your sequence is running, the KeyStep Pro will light u p the buttons of the steps that
are ON in your sequence. You can do several things now:
• Hold down the Trans (Transpose) button and press a key on the keyboard to
transpose your sequence up or down.
• Press 'Shift' + Invert (step button 5) to create a mirror image of your sequence,
and press 'Shift' + Invert once more to restore the natural order of things (;-)
• Nudge the looping sequence as a whole to the left or right (backward or forward
in time). To nudge to the left, hold down 'Shift' and press < Nudge (step button
3); to nudge to the right, hold down 'Shift' and press Nudge > (ste p button 4). The
note or notes in the first step of the loop will move to the second step; the note or
notes in the last step will wrap around to the first step.
There is another interesting option in Quick edit mode we haven't explored yet: by holding
down a step button, you can edit all parameters – Pitch, Gate, Velocity, Time Shift and
Randomness – of the note or notes stored in that step by turning the appropriate encoders.
You can even do this
example, to lengthen the gate time of only two notes of a four-note chord, select them by
pressing the appropriate keys and turn the Gate encoder to the right. How cool is that?
Pressing the Tie/Rest button increases the gate length of the selected notes but doesn’t move
the cursor, nor does it erase the content of the next step.
Quick edit mode is ideal for creating accented velocity values. Remember that in quick edit
mode, any new notes you enter in the sequence will have the current pitch, gate, velocity
time-shift and randomness value. You can use this to your advantage to create accented
steps in a pattern. Here's how to do that:
• Make certain Record mode and Step Edit mode are not active.
Let's create a sequence in which the velocity values alternate between soft and loud. The
even steps are loud, the odd steps soft;
• Select an empty sequence
• Set velocity to 120
• Hold a key and press step 1
• Hold another key and press step 3
• Continue to fill the odd steps with notes of a velocity value of 120
Now set velocity to 60 and fill the even steps with other pitches. Each step you add will have
a velocity value of 60. When you now playback the sequence, the volume will alternate
between loud and soft each time the sequencer advances.
When all keys are released, the Quick Editing process is complete.
selectively
by activating Advanced Edit mode [p.85] with Overdub. For
84 Arturia - User Manual Keystep Pro - Making Tracks
Page 91

5.3.4. Advanced editing (Overdub)
To edit chords that you have recorded in a ste p, press the Overdub button. This gives you
access to a number of advanced edit options specifically designed for chords. With Overdub
ON you can select notes from the chord stored in the current ste p and edit the parameters
of these selected notes only.
You can access advanced editing in Quick Edit mode, in Step Edit Mode and Step Recording
mode.
To enter Advanced Edit mode, press Overdub (if it is not already active) and hold the ste p
you want to edit.
The LEDs above the notes stored in that step will light up. Press the notes of the chord you
want to edit. The steps you did not select will dimm to show that they will not be affected
by the change you're about to make. Edits you make with the encoders will only affect the
selected notes. You can move the selected notes up or down the keyboard with the Pitch
encoder. Notice how only the selected notes move; the unselected notes of the chord remain
in place. The same applies to the Gate and Velocity edits you make: they will only be applied
to the currently selected notes.
♪: In Overdub mode, you can add notes to a chord until the maximum of 16 notes per step is reached.
Any new notes you add when Overdub is ON will automatically be selected for advanced editing.
Press Overdub once more to exit Advanced Edit mode.
Arturia - User Manual Keystep Pro - Making Tracks 85
Page 92
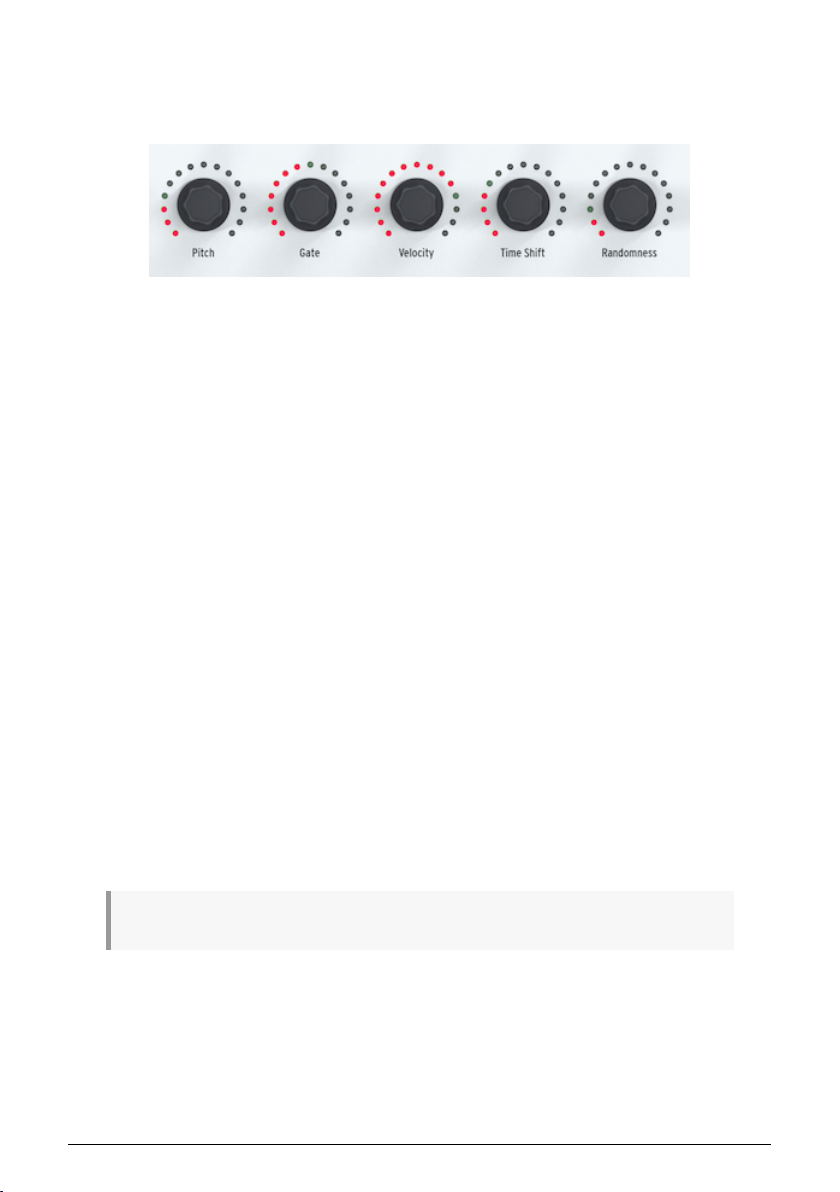
5.3.5. Working with Patterns
5.3.5.1. Using the Main Encoders
When in Seq mode, the five main encoders can be used to edit the parameters of the current
track.
Gate
The Gate parameter is used to adjust the length (ON time) of a note. Possible values are
from 0.06 step (very short) to 64 steps (very long). These values can be set independently
for each step in a Pattern. By default, the Gate time is set to 0.5 step for each note.
Velocity
If a step in the Pattern is too loud or soft, you can edit its velocity using the Velocity
encoder. Just select the step in question by pressing the appropriate step button, then turn
the Velocity encoder to change its value to a new value in the range 0-127.
The default velocity is 100.
Time Shift
The Time Shift encoder can be used to shift the timing of steps backward or forward in
relation to the beat grid. This can help add a more 'human' feel to your patterns. The range
is -49 to +50, where 50 is half of the Time Division value.
Another remarkable option you have is to add a timing offset to individual notes stored in a
step! Just select a note or notes of the chord stored in that step and shift them forward or
backward in time with the Time Shift encoder. Why is this important?
When playing chords live, a musician will never press all the keys of the chord at the
same time; there will always be slight timing differences between the notes of a chord. One
musician will tend to strike a chord with the index finger first; another with the middle finger
first. You might call this the musician's 'signature'. Another use for this Time Shift feature is to
emulate strumming or finger-picking a guitar chord. Used in tandem with copying/pasting
steps as explained in the next paragraph, you can create very intricate sequences.
♪: Touch the Time Shift encoder to check the Time Shift value of a note.
Randomness
The Randomness encoder can be used to randomly mute note events in your sequence. In
other words, it can be used to create automatic variety in the sequence. Per step, you can
set the probability that it will play in the sequence. If you set different values for each step,
every repeat will be unique.
86 Arturia - User Manual Keystep Pro - Making Tracks
Page 93

!: There's another simple way to create variety in your patterns, especially if they are 32 steps or
longer. It's called the Step Ski p feature: hold down a ste p button and then press the sequence page
buttons (16, 32, 48 and/or 64) in which you do not want the KeyStep Pro to play this step. For example, if
you have four identical patterns in the four pages, hold down steps 8 and 16 then press 32 and 64. The
8th and 16th steps will not play in those pages. This works in all note sequences and drum patterns.
5.3.5.2. Using the Default Encoder Settings
We've already hinted at this in a previous paragraph: whenever you add a note or notes
to a (drum)sequence, the KeyStep Pro will read the current values of the Gate and Velocity
encoders and insert the new note or notes with those values. This feature has an enormous
creative potential that you will come to appreciate when you get to know your KeyStep Pro
better. It's a feature that enables you to create intricate gate and velocity patterns. How?
Here's an example to create an accented feel:
• Set the Gate encoder to 0.5 and the Velocity encoder to 100.
• Activate steps in the sequence where you want accents by pressing their step
buttons.
• Now turn the Velocity encoder down to 50 and the Gate encoder down to 0.2
• Enter several other steps with these values.
Play the sequence and notice how the steps with the lower velocity values sound softer, less
pronounced.
This is just the beginning. By carefully exploring the effects of long and short gate times
combined with high and low velocities, you can make many musical discoveries and
explore unknown territory!
The effect of this feature is not limited to monophonic steps: by selectively changing the
individual gate times of the notes in a chord, you can let some notes of the chord sustain for
several seconds while others fade away quickly.
Arturia - User Manual Keystep Pro - Making Tracks 87
Page 94

5.3.6. Copy, Paste & Erase (Notes)
Step Edit mode has one more important feature: copying and pasting notes!
Copy/Paste notes enables you to select notes in a step and copy them to another location:
• in the same step
• in another step
• in another step on another page.
The notes you Copy/Paste will retain all of their properties: Pitch, Gate, Velocity, TimeShift and Randomness. It's an amazing creative option that you can use to create chord
progressions and dynamic variations in a pattern.
To copy a chord from one step to another:
• Select a step that holds notes
• Hold the Copy button, the notes currently present in the step will light up in the
track color
• Select the notes you want to copy in a legato manner, by holding the first note
and adding more notes. Notes selected for copy will light up in blue
• Let go of the copy button
To paste the selected notes into the same step:
• Hold Paste
• Press the key where you want to paste the selected notes.
The notes will be pasted with their original intervals intact.
To paste the selected notes into another step:
• Select the step you want to paste to
• Hold Paste
• Press the key where you want to paste the selected notes.
Again the notes will be pasted with their original intervals intact.
You can repeat the Paste action as many times as necessary.
♪: It's not possible to copy notes that are OFF.
To erase notes: hold the Erase button and press the notes you want to erase.
88 Arturia - User Manual Keystep Pro - Making Tracks
Page 95

5.3.7. Copy, Paste & Erase (Steps)
Copy and paste operations are the core of the creative process. Music of almost any genre
consists of basic patterns and variations of them. In this section, we'll discuss copying and
pasting of steps. To learn how to copy/paste at Pattern level, refer to Chapter 6 [p.115].
5.3.7.1. Copy Steps
Each step in your Pattern holds a lot of data on Pitch, Gate, Velocity, Time Shift and
Randomness. It also holds data on whether this step should be played or skipped in each
of the four pages of the Pattern. When you copy a ste p to a new location, all of this data is
copied with it. The same is true when you nudge a step backward or forward in time.
To copy a step, hold down the Copy button and press one or more step buttons to select it/
them. The step or steps you have selected for copying will light up in blue. The OLED display
will show the message: "Step(s) Copied".
♪: If you copy a range of steps that include one or more steps with data and one or more empty
steps, their precise configuration is retained when you paste them; in other words, the empty steps are
pasted along with the steps that contain data and their
steps with data will systematically be overwritten, even if the steps you paste into them are empty!
5.3.7.2. Paste Steps
Once you've performed a copy operation, you can repeatedly paste the selected step or
steps that you copied.
Holding down Paste and pressing a step button will paste the step or steps you selected
during copy at that location, either in the current Pattern or in another Pattern, including
a Pattern on another track. If you copied multiple adjacent steps, they will be pasted in
the same order, starting from that location. If you copied multiple non-adjacent steps, they
will be pasted with the gap(s) between them retained. In other words, the step or steps in
between them in the destination pattern will not be overwritten.
You can even paste across the boundaries of a page: if the steps you are pasting do not fit
on the current page, the steps that do not fit will extend into the next page. For example, if
you paste 12 steps to the last position of page 1 (step 16), 11 of those steps will be pasted into
steps 17-27 of page 2.
The display will show the message: "Step(s) Pasted"
If Track 1 is in Drum mode, and steps were copied from a drum track, they can be pasted
onto another Drum track. However, it is not possible to paste from Drum to Seq or from Seq
to Drum.
relative
positions are unchanged. Destination
♪: You can repeat paste as many times as you want, as long as you do not perform a new copy
operation. If you do, the old contents of the copy buffer will be overwritten.
Arturia - User Manual Keystep Pro - Making Tracks 89
Page 96

5.3.7.3. Erase Steps
In Quick Erase mode, you simply hold down the Erase button and press the step buttons of
the steps you want to erase.
♪: Erasing steps is immediate: there is no message asking you whether you really want to erase. On
step level this makes sense, as the consequences of an accidental erase are not too serious.
5.3.8. Copy, Paste & Erase (Pages)
The KeyStep Pro has four 'pages' of ste ps: page 1 (steps 1-16); page 2 (ste ps 17-32); page 3
(steps 33-48); page 4 (steps 49-64). These correspond to the four long buttons to the right of
the Lst Step button, under the Arturia brand name.
You can copy all the steps in one page and paste them to other pages. This works regardless
of whether Step Edit is ON or OFF. For example, if you want to copy the steps on page 1 and
paste them to page 2:
• Hold down Copy and press the 16 button (not the step 16 button). It will blink three
times.
• Now hold down Paste and press the 32 button. It will blink three times to indicate
that the content was successfully pasted.
Of course, you can also paste these steps into pages 3 and 4, which will fill with steps even if
you previously set the sequence length to 16. To view and play all these new 'page extends',
lengthen the sequence by holding down Lst Step and pressing the 64 button.
♪: If Track 1 is in Drum mode and steps of one drum track have been copied, they can be pasted
onto any other Drum track. However, it is not possible to paste from Drum to Seq or from Seq to Drum.
Paste always overwrites the existing data in the destination steps. You can paste outside the
current sequence length, but to view and play the out-of-range results, you must extend the
sequence by holding down Lst Step and pressing the 32, 48 or 64 button.
If you keep holding down the Paste button, you can repeat a paste on multiple pages.
If you're in Drum mode on track 1, pressing the Erase button and a Page button will delete
the currently selected drum track.
Erasing pages is simple: hold the Erase button and press the button of the page you want to
erase. The Page button you pressed will blink three times with a blue colour to confirm that
you have indeed erased the page. To erase multiple pages hold the Erase button and press
other page buttons.
90 Arturia - User Manual Keystep Pro - Making Tracks
Page 97

5.3.9. Saving your edits
It's important to understand how the KeyStep Pro handles your Pattern edits. Whenever you
are working on a Pattern, it is held in working memory. If you switched off the KeyStep
Pro during the edit process and restarted it, your project would be empty and all your hard
work would be lost. To store it permanently in internal memory, you need to save it. It's
easy to check which patterns need to be saved: just press Save + Pattern. The step buttons
corresponding to all modified and unsaved Patterns will light up in red.
To save a single Pattern:
• Hold down Save and press Pattern. Previously saved Patterns will blink in blue;
Patterns with unsaved edits will blink in red.
• Press the red-lit step button of the Pattern you want to save.
If there is more than one Pattern with unsaved changes:
• Hold down Save and press Pattern. Previously saved Patterns will blink in blue;
Patterns with unsaved edits will blink in red.
• Keep the Save button held down and press the red-lit step buttons of all the
Patterns you want to save.
• Press Exit to exit the Save process.
A shortcut for saving unsaved Patterns is to hold down Save and press the Track button of
the active track to save all its Patterns in one operation.
!: As you may already have guessed, a quick way to check whether the Patterns you are working
on contain unsaved changes is to hold down the Save button. The step buttons of Patterns that contain
unsaved changes will light up in red.
Arturia - User Manual Keystep Pro - Making Tracks 91
Page 98

5.4. The Drum Sequencer
The Drum sequencer on Track 1 is a special case. It has 24 parallel tracks, but unlike the
other sequencer tracks, each drum track can only trigger one specific drum or percussion
sound.
Also, programming a Drum Pattern is different from programming a melodic sequence. In
sequencer Quick Edit mode, you hold down a step button and then select the notes you want
to include in that step by pressing keys on the keyboard. The Drum sequencer works the
other way around: you hold down a key on the keyboard that triggers a certain drum sound
and then select the step or steps in which that sound will be triggered.
Why then do we have poly(phonic) and mono(phonic) options for a drum track? In Poly
mode, each of the 24 tracks can be different in length. For example, Track 1 could be 8 beats
long; Track 7, 9 beats long and Track 12, 16 beats long. You guessed it: when patterns of
different lengths run in parallel, some very interesting polyrhythmic effects can be created.
That's what Poly means for a Drum Pattern.
In Mono mode, however, all 24 Drum tracks have the same length.
!: Knowing this, you can do some very weird and wonderful things, like creating several tracks with
unequal lengths. Run them until they reach complete chaos, then suddenly switch to Mono mode and
have them all line-up!
5.4.1. Drum vs. Seq Comparison
Seq1/Seq2/Seq3/Seq4 and Drum on Track 1 may seem similar, but the Drum sequencer is
different in many ways:
• Drum mode can record trigger patterns for up to 24 different drum sounds.
• Each of the 24 drum sounds has its own track. When a track is selected, the
step buttons display the Pattern events for that drum. This is similar to the classic
workflow of early drum machines.
• The lower eight keys of the keyboard send gate on/off signals in real time to the
Drum Gates 1-8 outputs on the back panel, as well as any Drum sequencer events
previously entered by those keys. Pressing one of the lower eight keys will select
the corresponding Drum track and generate a trigger. In Drum mode, the higher
keys have no effect. The output from all 24 drum tracks is also sent over MIDI
(Out 1, Out 2 and USB).
• in Drum mode, the Pitch encoder has no effect. The other encoders can be used
to edit gate time and velocity, to shift the timing of drum triggers backward or
forward in relation to the beat grid, and to add randomness of trigger probability
to each drum step.
• The step-mode Shift functions can add many interesting changes to your Drum
sequence:
◦ Invert will reverse the steps of the currently selected Drum instrument
track.
◦ Nudge left and nudge right will shift the position of all steps of the
currently selected Drum instrument track one step to the left or the
right.
◦ Rand Order (Random Order) will mess u p the order of the ste ps in
your drum track.
• The Drum sequencer has a polymeter feature (described in the next section) that
allows each drum track within a Drum Pattern to have its own length.
• Unlike Sequencer tracks, Drum tracks cannot be transposed using the Transpose
button.
92 Arturia - User Manual Keystep Pro - Making Tracks
Page 99

♪: To select a Drum track/sound without generating a trigger, hold down the Track 1 Drum button and
press the appropriate key.
♪: In Drum mode, the Overdub button is always inactive; you cannot overdub on a Drum track.
5.4.1.1. Polymeter
As explained in the Overview chapter, the Drum sequencer can operate in Poly or Mono
mode. In Poly mode, each Drum track can have its own length. This feature enables you to
create complex polymeter rhythms (polyrhythms).
5.4.1.2. Exploring Polymeter
Here's an example:
What if you wanted a Pattern with this crazy mixture of loops, each in a different time
signature:
Instrument: Drum track 1 Drum tr. 2 Drum tr. 3 Drum tr. 4 Drum tr. 5
Time signature 3/16 1/4 5/16 3/8 4/4
Track 5 is the longest, so we'll use that as the timing reference.
Drum track 2 recycles every quarter-note beat (1, 2, 3 and 4), while Drum track 5 recycles
every four beats (that is, only on beat 1).
Drum track 1 recycles every 3 sixteenth notes; Drum track 3 recycles every 5 sixteenth notes;
Drum track 4 recycles every 6 sixteenth notes. Therefore, it will take a long time before they
all recycle at the same moment, as they did in the beginning. In fact, it will be 360 bars of
4/4 time before the first bar is heard again!
Arturia - User Manual Keystep Pro - Making Tracks 93
Page 100

5.4.2. Gates and Triggers
The keyboard, the sequencers (including the Drum sequencer) and the arpeggiators create
gates and triggers. Gates and triggers are needed to start envelope generators (EGs) in
external synths or Eurorack modules. By itself, an envelope generator does nothing; it needs
a gate or trigger to start.
It is essential to understand that gates and triggers are two different things. A trigger is a
very short pulse that can be used to synchronize (sync) modules with each other or, as in the
KeyStep Pro, to start envelopes. A gate is usually longer: anywhere from a few milliseconds
to several seconds.
The KeyStep Pro keyboard is the primary source of gates. When your finger touches a key
on the keyboard and holds it down for a moment, you generate a gate. The gate goes into
the ON state when you press the key down; it goes into the OFF state when you release the
key by lifting your finger off it. When transmitted via MIDI (Out 1, Out 2 and USB) or via one
of the four Voice Gate outputs, this gate signal starts an envelope cycle and the first stage of
the envelope, the attack, begins. The duration of this increase in level depends on the attack
setting (A) of the envelope generator. The envelope then continues through the decay stage,
the duration of which de pends on the decay setting (D), to the sustain stage, which has a
constant level (S). It remains in the sustain stage until you lift your finger off the key. Then
the final stage of the envelope begins: the release, during which the level decreases to zero.
The duration of this decrease depends on the release setting (R) of the envelope generator.
It is important to realise that the KeyStep Pro does not generate ADSR envelopes, nor can it
control their parameters (A, D, S and R). The KeyStep Pro only generates gates and triggers.
94 Arturia - User Manual Keystep Pro - Making Tracks
 Loading...