

Page 1

P1000HANDBOOK/MANUEL/HANDBUCH/HANDLEIDING/MANUAL
Arcam P1000 multi-channel power amplier
Amplicateur de puissance P1000 Arcam
Mehrkanal-Verstarker Arcam P1000
Arcam P1000 eindversterker
Amplicador multi-canal Arcam P1000
Eng lish
Fra nçais
Deu tsch
Ned erlands
Por tuguês
Page 2

P1000
E-2
English
P1000
E-3
English
RISQUE DE CHOC ELECTRIQUE
NE PAS OUVRIR
ATTENTION
CAUTION
RISK OF ELECTRIC
SHOCK DO NOT OPEN
CAUTION: To reduce the risk of electric shock, do not remove cover (or back). No user serviceable parts inside. Refer servicing
to qualied service personnel.
WARNING: To reduce the risk of re or electric shock, do not expose this apparatus to rain or moisture.
The lightning ash with an arrowhead symbol within an equilateral triangle, is intended to alert the user to the presence of uninsulated
‘dangerous voltage’ within the product’s enclosure that may be of sufcient magnitude to constitute a risk of electric shock to persons.
The exclamation point within an equilateral triangle is intended to alert the user to the presence of important operating and maintenance
(servicing) instructions in the literature accompanying the product.
CAUTION: In Canada and the USA, to prevent electric shock, match the wide blade of the plug to the wide slot in the socket
and insert the plug fully into the socket.
Safety guidelines
Important safety instructions
This product is designed and manufactured to meet
strict quality and safety standards. However, you should
be aware of the following installation and operation
precautions:
1. Take heed of warnings and instructions
You should read all the safety and operating instructions
before operating this appliance. Retain this handbook
for future reference and adhere to all warnings in the
handbook or on the appliance.
2. Water and moisture
The presence of electricity near water can be dangerous.
Do not use the appliance near water – for example next to
a bathtub, washbowl, kitchen sink, in a wet basement or
near a swimming pool, etc.
3. Object or liquid entry
Take care that objects do not fall and liquids are not
spilled into the enclosure through any openings. Liquid
lled objects such as vases should not be placed on the
equipment.
4. Ventilation
Do not place the equipment on a bed, sofa, rug or similar
soft surface, or in an enclosed bookcase or cabinet, since
ventilation may be impeded. We recommend a minimum
distance of 50mm (2 inches) around the sides and top of
the appliance to provide adequate ventilation.
5. Heat
Locate the appliance away from naked ames or heat
producing equipment such as radiators, stoves or other
appliances (including other ampliers) that produce heat.
6. Climate
The appliance has been designed for use in moderate
climates.
7. Racks and stands
Only use a rack or stand that is recommended for use with
audio equipment. If the equipment is on a portable rack it
should be moved with great care, to avoid overturning the
combination.
8. Cleaning
Unplug the unit from the mains supply before cleaning.
The case should normally only require a wipe with a soft,
damp, lint-free cloth. Do not use paint thinners or other
chemical solvents for cleaning.
We do not advise the use of furniture cleaning sprays or
polishes as they can cause indelible white marks if the unit
is subsequently wiped with a damp cloth.
9. Power sources
Only connect the appliance to a power supply of the type
described in the operating instructions or as marked on the
appliance.
The primary method of isolating this product from the
mains supply is by disconnecting the mains plug from the
supply. This unit must be installed in a manner that leaves
the mains plug accessible.
This is a Class 1 device and must be connected to a mains
socket outlet with a protective earthing connection.
10. Power-cord protection
Power supply cords should be routed so that they are not
likely to be walked on or pinched by items placed upon
or against them, paying particular attention to cords and
plugs, and the point where they exit from the appliance.
11. Grounding
This is a class 1 product and requires an earth connection.
Ensure that the grounding means of the appliance is not
defeated.
12. Power lines
Locate any outdoor antenna/aerial away from power lines.
13. Non-use periods
If the unit has a stand-by function, a small amount of
current will continue to ow into the equipment in this
mode. Unplug the power cord of the appliance from the
outlet if left unused for a long period of time.
14. Abnormal smell
If an abnormal smell or smoke is detected from the
appliance, turn the power off immediately and unplug the
unit from the wall outlet. Contact your dealer immediately.
15. Servicing
You should not attempt to service the appliance beyond that
described in this handbook. All other servicing should be
referred to qualied service personnel.
16. Damage requiring service
The appliance should be serviced by qualied service
personnel when:
A. the power-supply cord or the plug has been damaged,
or
B. objects have fallen, or liquid has spilled into the
appliance, or
C. the appliance has been exposed to rain, or
D. the appliance does not appear to operate normally or
exhibits a marked change in performance, or
E. the appliance has been dropped or the enclosure
damaged.
Safety compliance
This product has been designed to meet the IEC 60065
international electrical safety standard.
Page 3

English
P1000
E-3
English
Using this handbook
This handbook has been designed to give you all the
information you need to install, connect, set up and use the
Arcam DiVA P1000 multi-channel power amplier.
It may be that the P1000 has been installed and set up
as part of your Hi-Fi or home cinema installation by a
qualied Arcam dealer. In this case, you may wish to skip
the sections of this handbook dealing with installation and
setting up the unit. Use the contents list to guide you to the
relevant sections.
Safety
Safety guidelines are set out on the opposite page.
Many of these items are common sense precautions, but for
your own safety, and to ensure that you do not damage the
unit, we recommend that you read them.
This is a class 1 product and must be earthed.
Contents
Safety guidelines................................................E-2
Using this handbook ...........................................E-3
Getting started with your P1000...........................E-4
Introduction.................................................E-4
Speaker Installation ......................................E-4
Cables.........................................................E-4
Operating your P1000 .........................................E-5
Power..........................................................E-5
Channel-status indicator lights........................E-5
Positioning the unit .......................................E-6
Connecting to a pre-amplier .........................E-6
Installation ........................................................E-6
Connecting to loudspeakers............................E-7
Setting the amplier gain...............................E-8
Connecting to a power supply.........................E-8
Troubleshooting .................................................E-9
Fault status indicators.......................................E-10
Technical specication.......................................E-11
Continual improvement policy....................... E-11
Radio interference....................................... E-11
Guarantee .......................................................E-12
Worldwide Guarantee .................................. E-12
On line registration .....................................E-12
The small print:
<
Lucaslm and THX are trademarks or registered trademarks of
Lucaslm, Ltd.
Copyright © Lucaslm Ltd. & TM.
Page 4
P1000
E-4
English
P1000
E-5
Getting started with your P1000
Introduction
The P1000 multi-channel power ampli er is built to Arcam’s traditional high quality design and
manufacturing standards. It is an extremely high-performance ampli er, offering up to 135W per
channel. While obviously well-suited to multi-channel home cinema ampli cation, additionally it
provides superb stereo performance with two-channel sources. The P1000 is an ideal partner for the
Arcam DiVA AVP700 Pre-amp Processor.
Each of the ampli er modules within the P1000 is identical, so each channel of ampli cation has the
same performance. The P1000 has input and output phono sockets for the signal being fed to each
channel, which allows the signal to be passed on to additional power ampli ers, if required, to drive
loudspeakers in other rooms or to bi-amplify any channels. If the P1000 is being used to drive a vechannel surround sound system, for example, then the spare two modules (‘L surround rear’ and ‘R
surround rear’) could be used in conjunction with the main (‘L front’ and ‘R front’) modules to bi-amplify
suitable front left and right speakers.
We anticipate that the P1000 will give you many years of home cinematic enjoyment.
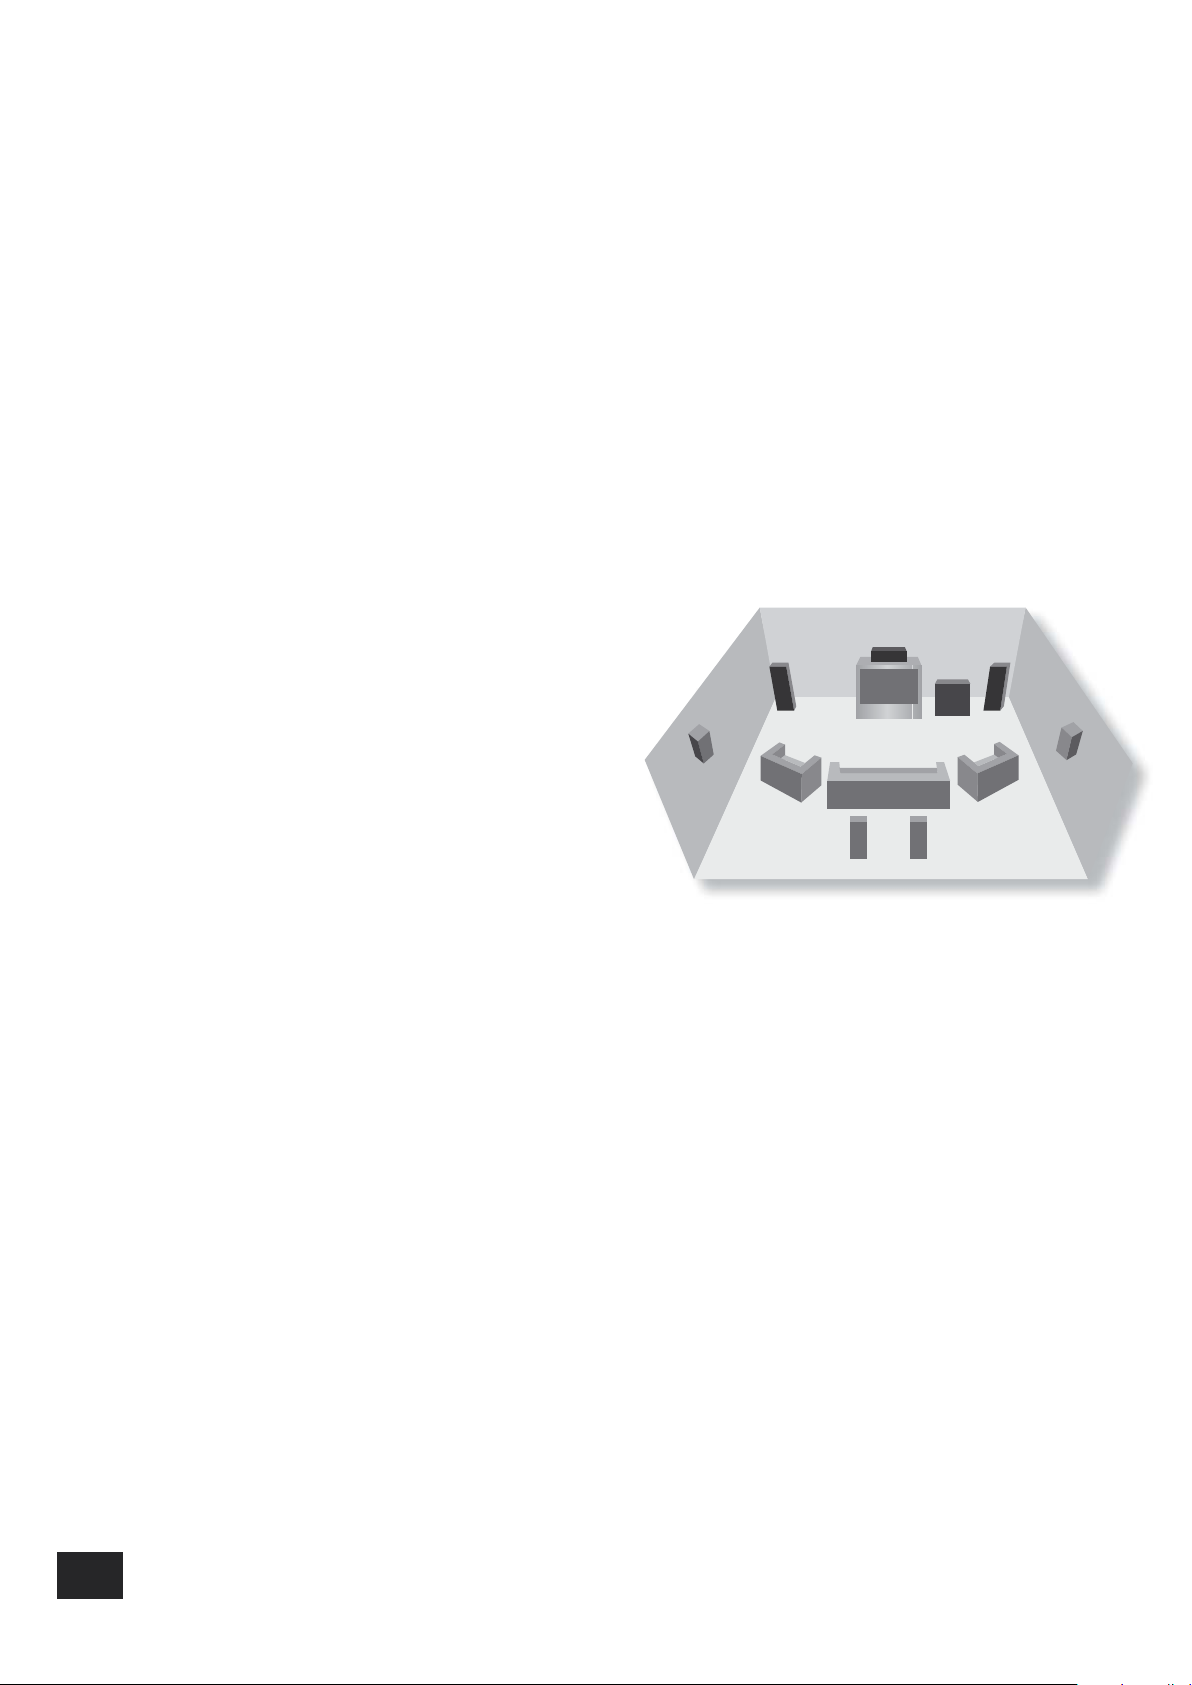
Speaker Installation
The P1000 allows connection of up to seven loudspeakers. All speakers, with the exception of the
subwoofer, should be arranged around your normal viewing/listening position (see diagram). The
subwoofer can be placed almost anywhere and we recommend experimenting with it in various
positions to obtain the best result.
Position your front left and right speakers to achieve a
good stereo image for normal musical reproduction. If
they are placed too close together there will be a lack
of spaciousness. Alternatively if they are placed too far
apart the stereo image will appear to have a large hole
in the middle and will be presented in two halves.
The centre speaker allows for a more realistic
reproduction of dialogue and centre sounds as well
as wider and better imaging for stereo effects and
background sounds for home cinema use. Do not
compromise on the quality of your centre speaker as it
carries all the dialogue for a home cinema system.
The surround left and right speakers reproduce the
ambient sound and effects present in a multi-channel
home cinema system.
The surround back left and surround back right speakers
are used to add extra depth, a more spacious ambience and sound localisation.
A subwoofer will improve the bass performance from your system. It is useful for reproducing special
cinema effects, especially where a dedicated LFE (Low-Frequency Effects) channel is available, as with
Dolby Digital – or DTS Digital Surround–encoded discs.
Cables
We recommend the use of high-quality screened analogue, digital and video cables as inferior-quality
cables will degrade the sound and picture quality of your system. Only use cables that are designed for
the particular application as other cables will have different impedance characteristics that will degrade
the performance of your system (do not use audio cables to carry video, for example). Speaker-cable
length should be a short as practically possible, but pairs of cables (the cables to the front-left and
front-right speakers, for example) should be of similar lengths.
We advise routing the interconnect cables, speaker cables and mains-power cables away from each
other to minimise interference.
If you require help chosing suitable cables, please contact your dealer or installer.
Page 5

English
P1000
E-5
Operating your P1000
Power
The P1000 front panel has a single control: a power on/off button, located on the right.
The power button switches the P1000 in to and out of stand-by. To switch the unit off completely, use
the switch on the rear panel. Conversely, if the P1000 fails to power on when the button on the front
panel is pressed, ensure that the switch on the rear panel is in the ‘on’ position.
When the unit is mains powered but in standby mode, the LED next to the power button is red. In
normal use, the LED is green.
Switching on
It is recommended that you switch on your pre-ampli er or controller before powering up the P1000, as
this will reduce the chance of any ‘thumps’ being fed through to the power amp.
Switching off
To shut down, switch the P1000 off rst, followed by the pre-amp. or controller.
Channel-status indicator lights
Each channel of ampli cation on the P1000 has a unique status-indicator light.
On power-up, the lights change from amber to green, which indicates the change in status from
initialising to active. All lights are switched off in stand-by mode.
If the status lights do not follow this sequence when the P1000 is powered up, or behave abnormally at
any time during use, refer to the table on page 10 to determine the problem.
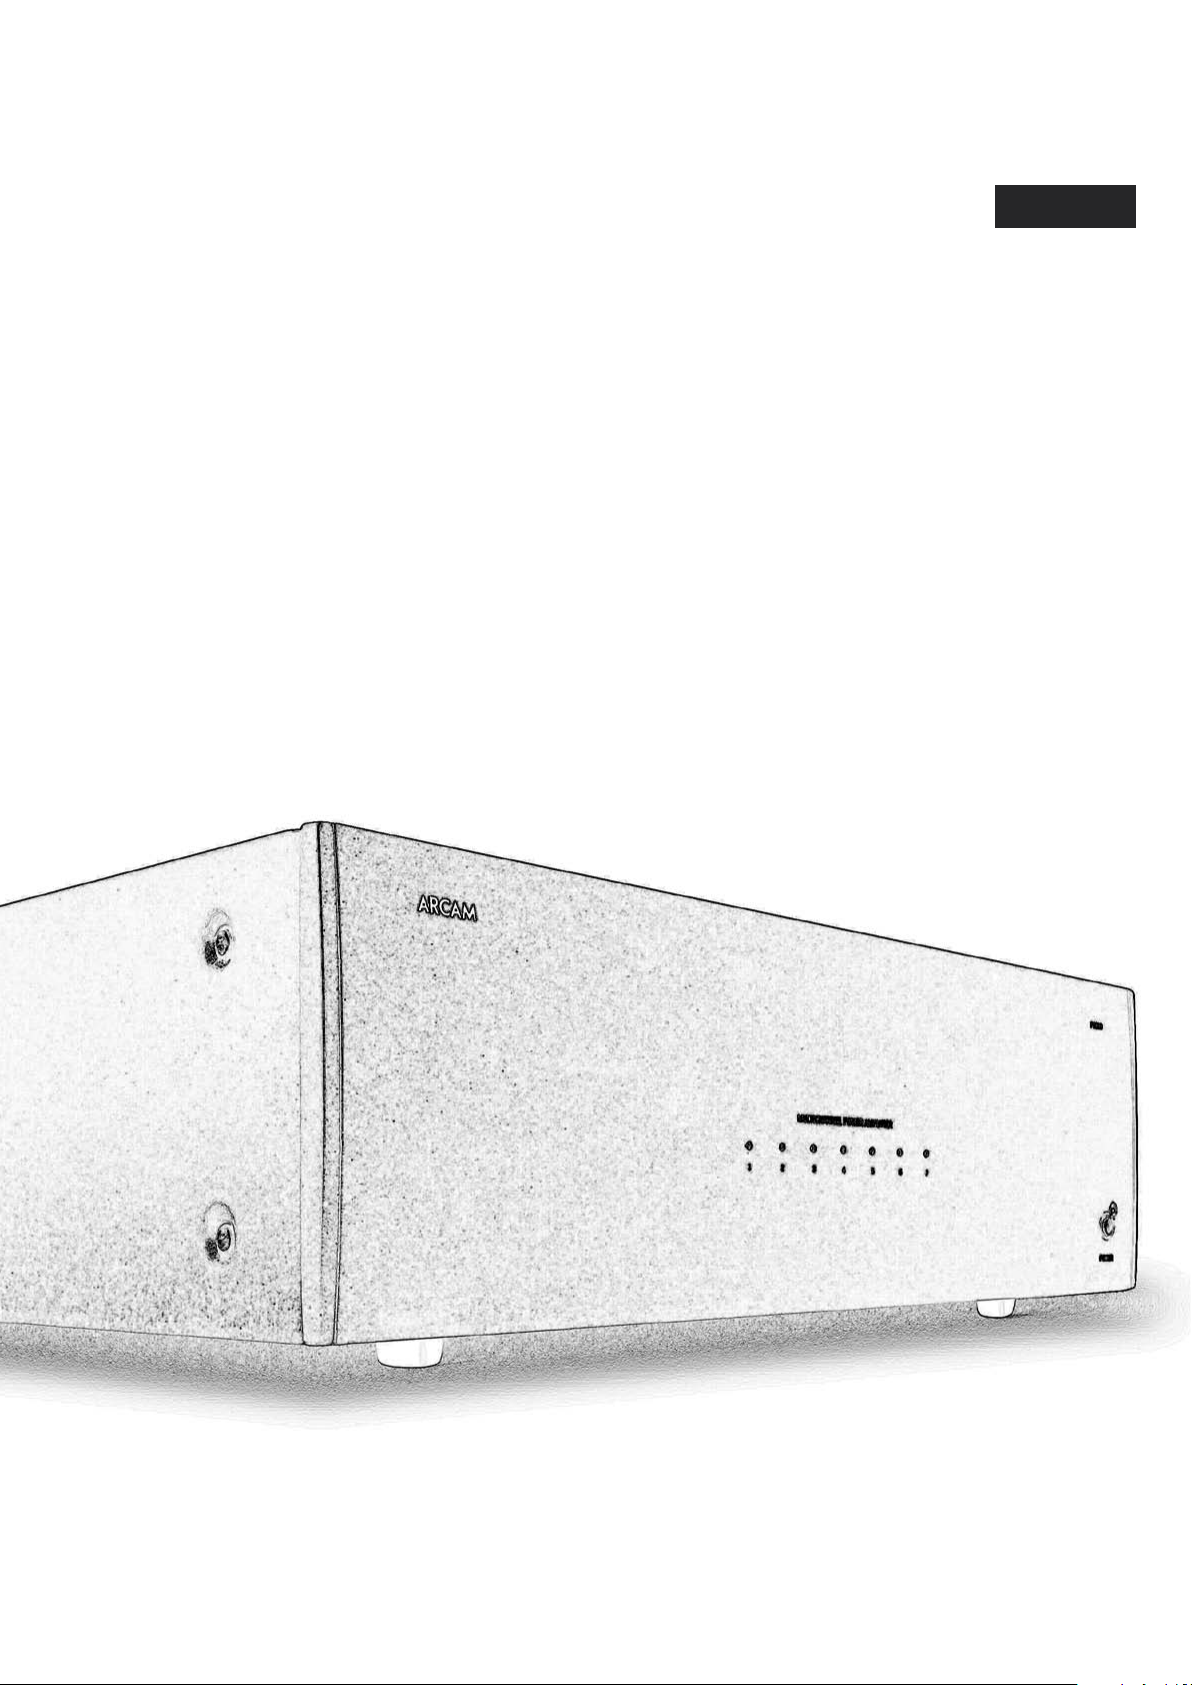
1 2 3 4 5 6 7
P1000
MULTICHANNEL POWER AMPLIFIER
POWER
Page 6

P1000
E-6
English
P1000
E-7
Positioning the unit
<
Place the ampli er on a level, rm surface.
<
Avoid placing the unit in direct sunlight or near sources of heat or damp.
<
Do not place the unit on top of another power ampli er or other sources of heat.
<
Ensure adequate ventilation.
If the unit is placed in an enclosed space, such as a bookcase, equipment rack or cabinet, make
sure that there is adequate space and ventilation in the enclosure for air to ow through the
ventilation slots and cool the ampli er. Inadequate cabinet ventilation may cause the P1000 to shut
down due to thermal overload.
The ampli er will run warm, even during normal operation.
<
Ensure that the equipment rack or stand can support the weight of the P1000.
Connecting to a pre-ampli er
Two different connection types are provided for receiving signals from your pre-ampli er. The
connection type to use depends on the set-up that you have.
1. If the cables to be used to connect your pre-amp. to the P1000 are less than 3m long, we
recommend connecting your pre-amp. to the phono sockets of your P1000.
2. If the cables to be used to connect your pre-amp. to the P1000 are 3m or longer and your pre-amp.
has balanced outputs, we recommend using these instead of the phono connections. Performance
will also be improved in electrically-noisy environments by using these connections.
While it is acceptable to mix balanced and phono connections between your pre-amp. and P1000
(should you wish), do not connect both balanced and phono inputs to any single channel.
General connection advice
The outputs from your pre-amp. should be connected to the AUDIO IN inputs on the P1000. It is helpful
to connect the pre-amp. output for a given channel to the input for that particular channel on the
P1000. For example: connect the left-surround output from your pre-amp. to the left-surround channel
input of the P1000. There is no technical improvement in following this strategy, but it makes life easier.
If you wish to use two modules to bi-amplify a pair of speakers, or would like to bi-amplify using
another power amp., then you can take the signal for that channel (using the AUDIO OUT phono
socket for that channel) and feed it on to the additional module(s). The signal is then fed in to the rst
module, but also fed on to the second module so that both modules can bi-amplify the loudspeaker. See
‘Bi-amping’ on page 8 for more information. Note that bi-amping in this way requires the use of phono
connections between your pre-amp. and the P1000.
12V Trigger input
If your pre-amp. provides a 12V Trigger output, it can be connected to the 12V TRIGGER IN
socket using a 3.5mm jack. This enables the P1000 to be turned on remotely from the pre-amp.
Note that the trigger input is active only when the power button on the rear panel is in the ‘on’
position.
Installation
The 12V-trigger uses
a 3.5mm mono jack
plug, wired as follows:
<
Sleeve: Ground
<
Tip: Active
12V
TRIGGER
IN
SLOBLO FUSE
IN OUTIN OUTIN OUTIN OUTIN OUTIN OUTIN OUT
BALANCED INBALANCED INBALANCED INBALANCED INBALANCED INBALANCED INBALANCED IN
A
B
C
A
B
C
A
B
C
A
B
C
A
B
C
A
B
C
A
B
C
7
RS BACK
6
R SURR
5
RIGHT
4
CENTRE
3
LEFT
2
L SURR
1
LS BACK
POWER ON/OFF
POWER INLET
230V
Page 7
English
P1000
E-7
Connecting to loudspeakers
Wiring strategies
There are three different wiring strategies that can be employed to connect your P1000 to your
speakers. Your choice will be limited by what your speakers can support.
<
Single wiring
Single wiring is the conventional wiring system of running a single cable per channel
between the ampli er and the speaker.
<
Bi-wiring
Bi-wiring is running two separate cables between the ampli er and each speaker, with
one cable carrying the low-frequency information, the other the higher-frequency signals.
Any ampli er can support bi-wiring, but speakers support it only if separate connection
terminals are provided for the two cables (the speaker will have two pairs of terminals
on the back, one pair labelled HF or High Frequency, the other pair labelled LF or Low
Frequency). Bi-wiring improves the sound of your system because the separation of high
and low frequency signal currents into separate speaker cables avoids distortions caused
by the different currents interacting with one-another within a single cable, as occurs in
conventionally wired systems.
Note that some speakers have three pairs of terminals on the back, extending the biwiring principle to tri-wiring.
<
Bi-amping
The performance of your system can be enhanced further by extending the signal-separation
principle to include separate ampli cation for the low- and high-frequency drivers in each speaker.
You will require two ampli ers to do this.
Single wiring
The speaker terminals for any given channel are labelled clearly on the
rear of the P1000. For each channel, connect the positive terminal of
the speaker connection on the P1000 for that channel (coloured red and
labelled with ‘+’) to the positive terminal of your speaker for the channel
(connect, for example, the positive terminal of the centre channel of the
P1000 to the positive channel of your centre speaker). Similarly, connect
the negative terminal of the ampli er (coloured black and labelled with
‘–’) to the negative terminal of your speaker. If your speaker supports
bi-wiring (i.e., it has more than one set of connecting terminals), but
you do not wish to use bi-wiring, connect the P1000 to the terminals
labelled LF or Low Frequency. There should be a strip of metal on the
speakers connecting the low-frequency terminals to those for the higherfrequencies; this must not be removed in a single-wired system.
Follow the above instructions for each speaker in your system, ensuring
that the speakers are connected to the correct output of the P1000. You do
not have to connect speakers to all the channels of the P1000 (e.g., if you
don’t have a centre speaker, it doesn’t matter).
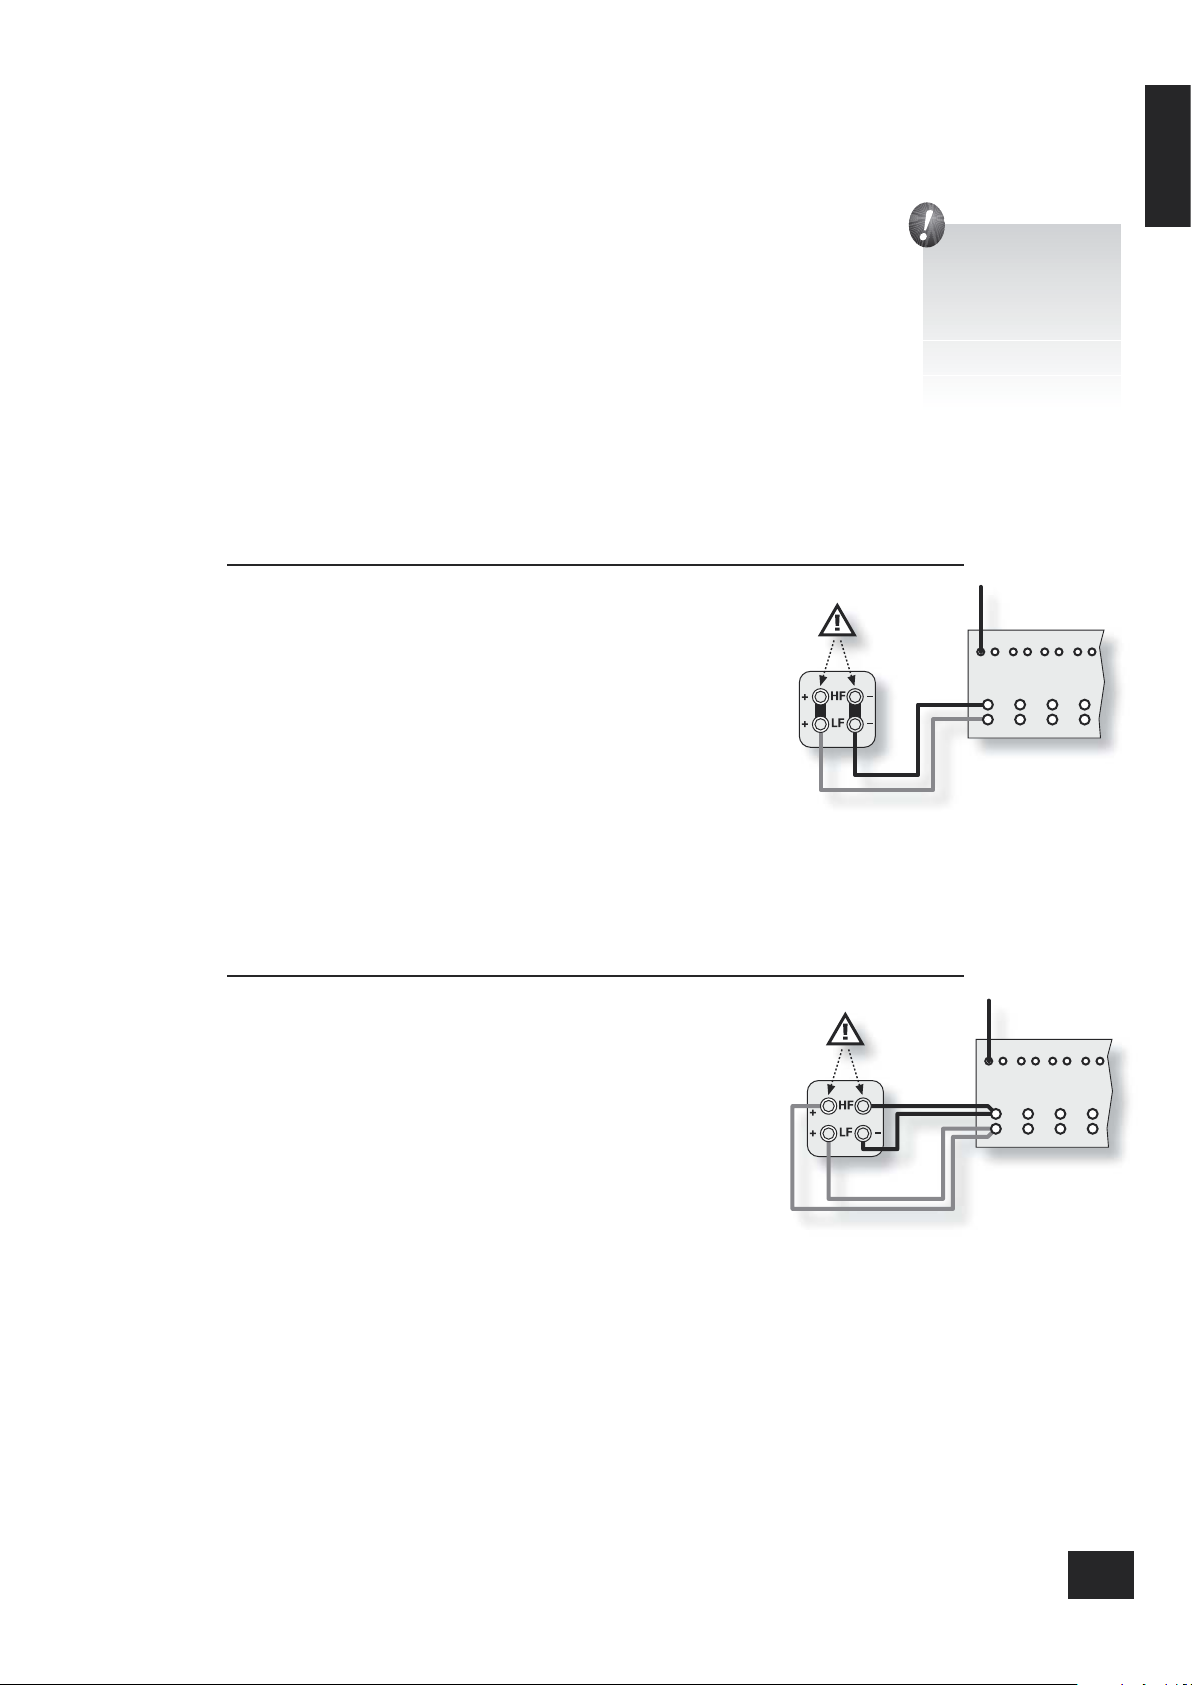
Bi-wiring
Bi-wiring is performed in the same way as single wiring except that, for
each speaker, a pair of cables is used to connect the positive terminal of
the ampli er to the speaker. One of the cables must be connected to the
lower of the two positive terminals on Alto, with the other cable connected
to the higher positive terminal. The negative terminals must be connected
in a similar manner. The connecting strip of metal on the speakers
connecting the lower terminals to the upper terminals must be removed for
bi-wiring.
Before you start!
Ensure that your
P1000 is switched
off and disconnected
from the mains supply
before attempting to
connect speakers.
Failure to do this may
result in both speaker
and ampli er damage.
P1000 bi-wiring illustration (just one
channel shown, for clarity).
P1000 single wiring illustration (just one
channel shown, for clarity).
Page 8

P1000
E-8
English
P1000
E-9
Bi-amping
Bi-amping requires the use of a second ampli er: one ampli er is used to drive
the treble speakers, the other is used for the lower (bass) frequencies.
For the cables, bi-amping is much like bi-wiring. Connect the speaker terminals
from one module (channel) to one pair of terminals on your speaker. Connect
another module, or one channel of a separate power amp., to the other pair
of terminals on the speaker, so that two ampli er channels are connected
to that speaker; one for low frequencies and one for high frequencies. The
treble (higher) terminals of your speaker should be connected to the speaker
terminals of the ampli er module (channel) being used for the high frequencies,
while the bass (lower) terminals of your speaker should be connected to the
speaker terminals of the ampli er or module (channel) being used for the lower
frequencies. The strip of metal on the speakers connecting the lower terminals
to the upper terminals must be removed. Failure to do so will result in damage
to both ampli ers.
Notes on making speaker connections
<
Do not make any connections to your ampli er while it is switched on or connected to the mains
supply.
<
Always ensure that the volume control on your pre-ampli er is set to minimum before starting to
make connections.
<
Before switching your P1000 on for the rst time after connecting to speakers, please check all
connections thoroughly. Ensure that bare wires or cables are not touching the ampli er in the wrong
places (which could cause short circuits), and that you have connected positive (+) to positive and
negative (-) to negative.
<
After making connections, turn the volume down to minimum on your pre-ampli er before
switching the P1000 on. Switch the ampli er(s) on, select a source signal, then gradually increase
the volume to the required listening level.
<
If you are unsure as to how your system should be connected, or need advice on bi-wiring or bi-
amping, please contact your Arcam dealer. Your dealer will be happy to help you.
Setting the ampli er gain
You may have noticed a small switch next to the speaker terminals for each channel on the rear of
the product. This switch allows the gain of the ampli er to be set: move the sliders to the A, B, or C
position, depending on the gain value that you require.
<
A: This position means that the P1000 has a gain of 31.5dB, which is the usual gain for Arcam
ampli ers. Use this setting if the P1000 is to be used either on its own, or in conjunction with other
ampli ers from Arcam.
<
B: This gives the P1000 a gain of 29dB, which is the gain used by THX™-compatible ampli ers. Use
this setting the P1000 is to be used with other ampli ers that have a THX™ gain value, such as the
Arcam P7. Note that the P1000 is not a THX™-rated product.
<
C: This gives the P1000 a gain of 26dB. Use this setting if the P1000 is to be used with other
ampli ers that have this gain.
Although the gain for each channel can be set independently, it is very unusual that different channels
would be set to have different gains. We recommend strongly that you set all ampli er channels
to the same gain setting.
Connecting to a power supply
Mains lead
The P1000 is normally supplied with a moulded mains-plug already tted to the lead. If for any reason
the plug needs to be removed, it must be disposed of immediately and securely, as it is a potential
shock hazard when inserted into the mains socket.
Check that the plug supplied with the unit ts your supply and that your mains supply voltage agrees
with the voltage setting (115V or 230V) indicated on the rear panel of the unit.
Should you require a new mains lead, or the voltage accepted by the unit does not match your supply,
please contact your Arcam dealer.
Plugging in
Push the IEC-plug of the power cable supplied with the unit into the POWER INLET socket in the back of
the unit. Make sure it is pushed in rmly.
Put the plug on the other end of the cable into your power supply socket and switch the socket on
P1000 bi-amping (two ampli er modules
for a single channel).
Page 9

English
P1000
E-9
Troubleshooting
No lights are illuminated
Please check the following items if no lights are illuminated on the P1000 when you think that it should
be switched on.
<
Is the power cord plugged into the P1000? Is the mains socket that it is plugged into switched on?
<
Has the plug fuse failed, or a circuit-breaker earlier in the power supply path opened?
<
Has the fuse in the rear panel (above the power inlet) failed? Note that the fuse must be
replaced with the same type: if you require assitance with this, please contact your dealer.
<
Is the power switch on the rear panel of the P1000 in the “on” position?
Red/amber light on the front panel
The table on page 10 gives details of the fault conditions indicated by different LED patterns, together
with suggestions on correcting the fault.
No sound is produced
Please check the following items if no audio can be heard through your P1000.
<
Are all the channel-indicator LEDs on the front panel green? Refer to the table on page 10 if you see
other colours, or above if nothing is illuminated.
<
Has the correct input been selected on the pre-amp. and is the selected source generating audio
(the disk is playing, for example)? If possible, try plugging headphones into the pre-amp. to ensure
that the audio is present at that point – if you cannot hear any audio through the headphones, then
it is likely that the fault is between the audio source and your pre-amp.
<
Is the volume on the pre-amp. turned up to a reasonable level? Is the pre-amp. muted?
<
Are the connections between your pre-amp. and the P1000 made as described earlier in this
handbook? Check also the connections between the P1000 and the speakers.
Sound is poor or distorted
If the sound coming from your P1000 is distorted, or is weak in some way (lacking in bass), please
check the following items.
<
Ensure that all cables (both interconnects and speaker cable) are making a good connection. Turn
the P1000 off, withdraw each cable from the connector and plug it back in again. Switch the P1000
back on to see if the sound quality has improved.
<
Check that you have selected the correct size of speakers to suit your system in the setup menu
of the processor or pre-amp. Setting speakers to “Small”, for example, may be the cause of weak
bass. See the handbook of your pre-amp./processor for details.
Sound comes only from some of the speakers
If sound is coming from some speakers only (but those speakers are operating normally), please check
the following items.
<
Are all speakers in the system connected to the P1000?
<
Have you congured your pre-amp. to include all the speakers in your system? See the handbook of
your pre-amp./processor for details.
<
Do you have an appropriate surround-sound source selected and playing through the pre-amp?
<
For sources connected digitally to the pre-amp., check that the source is putting multi-channel data
out. Some DVD players (for example) allow selection of the output format and also whether multichannel data is down-mixed to PCM (stereo). See the handbook of your source for details.
<
Ensure that the disc you are playing is a multi-channel recording and that the processor is putting
multi-channel audio out.
<
Check that your speaker balance is correct (see your pre-amp./processor handbook for details).
<
Are all the channel-indicator LEDs on the front panel green? Refer to the table on page 10 if you see
other colours.
Hum on an amplier output
If you have a “hum” coming from one of the speakers, please check the following items.
<
Does the hum originate from a ground loop caused by an aerial, satellite dish or cable supply (if the
aerial is disconnected, does the humming stop)? Please contact your dealer or aerial contractor for
further advice.
<
Ensure that the interconnect and speaker leads are not wrapped around a mains lead.
<
Try switching the ground lift on the pre-amp./processor, if available (see the handbook of your pre-
amp. for details).
See also “Sound is poor or distorted”, above.
There is radio/television reception interference
If you nd that radio or television interference is present when the P1000 is switched on, but disappears
when it is switched off, ensure that the aerial/dish cable to your TV or receiver is routed away from your
P1000 and its cabling, and that the cabling used from the aerial/dish is of a high-quality (screened).
Repositioning the receiving aerial/dish may bring an improvement.
<
If you are unable to rectify the fault after checking the items suggested above, please
contact your dealer for advice.
Page 10

P1000
E-10
English
P1000
E-11
Fault status indicators
The light patterns described below indicate the following fault conditions:
Light pattern Description Amplier action
All lights are green. This is the normal operating state
of the amplier.
None.
The power light is amber
and the channel lights
are off.
A “DC offset” fault has occured. A
DC offset fault can occur if an
excessive DC voltage is present
at the output of the pre-amp.
feeding the P1000. Please see the
note below.
The condition does not clear
automatically.
Simply to clear the fault, turn the
P1000 off for at least 30 seconds
(using the switch on the rear of the
unit), then turn it on again.
If the fault fails to clear using this
method, or to verify excessive DC
offset voltage, turn the P1000 off
using the switch on the rear of the
unit, remove the interconnect leads
(with the P1000 switched off), then
turn the P1000 on again. The fault
should have cleared; if the power
light is still amber then your P1000
has developed a fault. Switch the
unit off and contact your dealer.
One or more channel lights
are ashing amber/green.
A short-circuit fault has occured.
The ashing light(s) represent
the amplier channels with the
short-circuit.
The amplier mutes the channel
with the short-circuit. If the fault is
cleared, the amplier will resume
normal operation.
Note that audio must be fed to the
channel for the short-circuit to be
detected. For example, muting the
output using your pre-amp. will
make the fault appear to clear;
it is likely that the fault condition
will re-occur when the pre-amp. is
unmuted, however, unless further
action is taken.
One or more channel lights
are amber.
An over-temperature fault has
occured on a channel with the
amber light.
The amplifer mutes the channel with
the fault. The amplier stays in this
state until the channel has cooled. If
this fault occurs frequently, ensure
that the amplier has adequate
ventilation.
DC offset faults
A “DC offset fault” is not an amplier fault, but a speaker protection mechanism. If the amplier is
supplied with a DC voltage (rather than the expected AC voltage) for an extended length of time, the
coils in the attached speakers will eventually burn out (or, in extreme cases, catch re). The P1000 can
detect this condition, and cut the current to the speakers.
DC offset faults can occur intermittently in all set-ups, particularly if a tuner or satellite receiver is
connected. If it occurs frequently or predictably, please contact your dealer for advice.
Page 11

English
P1000
E-11
Technical specication
All measurements are with 230V/50Hz mains power
Continuous output power
All channels driven, 20Hz—20kHz, 8Ω 135W per channel; 945W total
All channels driven, 20Hz—20kHz, 4Ω 210W per channel; 1.47kW total
One or two channels driven at 1kHz, 8Ω 190W per channel
One or two channels driven at 1kHz, 4Ω 305W per channel
One or two channels driven at 1kHz, 3.2Ω 325W per channel
Peak output current capability
±20.5A per channel
Total harmonic distortion
At any level up to rated power, into 4 or 8Ω <0.08% maximum (20Hz—20kHz); typically
<0.007% at 1kHz
Frequency response
±0.2dB (2Hz—50kHz)
–1dB at 1Hz and 100kHz
Residual hum and noise
Ref. full power –110dB A weighted, or 100dB CCIR
Voltage gain
User selectable:
A: x31.5dB
B: x29dB
C: x26dB
Input impedance
22kΩ in parallel with 180pF
Output impedance
20mΩ at 20Hz, 1kHz
80mΩ at 20kHz
Power requirements
115V or 230VAC, 50/60Hz, 2.2kW maximum via IEC
mains inlet.
A zero-crossing AC system eliminates large
‘transformer’ in-rush currents at switch on.
Physical
Dimensions: W430 x D400 x H133 mm
Mass: 18kg (40 lb) net; 21kg (46 lb) packed
E&OE
Continual improvement policy
Arcam has a policy of continual improvement for its products. This means that designs and specications
are subject to change without notice.
All specication values are typical unless otherwise stated.
Radio interference
The P1000 is an audio device which has been designed to very high standards of electromagnetic
compatibility.
The unit can radiate RF (radio frequency) energy. In some cases this can cause interference with FM and
AM radio reception. If this is the case, keep the P1000 and its connecting cables as far from the tuner and
its aerials as possible. Connecting the P1000 and the tuner to different mains sockets can also help to
reduce interference.
EC Countries – These products have been designed to comply with directive 89/336/EEC.
USA – These products comply with FCC requirements.
Page 12

P1000
E-12
Guarantee
Worldwide Guarantee
This entitles you to have the unit repaired free of charge, during the rst two years after purchase, at
any authorised Arcam distributor provided that it was originally purchased from an authorised Arcam
dealer or distributor. Arcam can take no responsibility for defects arising from accident, misuse, abuse,
wear and tear, neglect or through unauthorised adjustment and/or repair; neither can Arcam accept
responsibility for damage or loss occurring during transit to or from the person claiming under the
guarantee.
The warranty covers parts and labour costs for two years from the purchase date. After two years you
must pay for both parts and labour costs. The warranty does not cover transportation costs at
any time.
Claims under guarantee
This equipment should be packed in the original packing and returned to the dealer from whom it was
purchased or, failing this, directly to the Arcam distributor in the country of residence. It should be sent
carriage-prepaid by a reputable carrier — not by post. No responsibility can be accepted for the unit
whilst in transit to the dealer or distributor and customers are, therefore, advised to insure the unit
against loss or damage whilst in transit.
For further details contact Arcam at:
Arcam Customer Support Department,
Pembroke Avenue,
Waterbeach,
CAMBRIDGE, CB5 9QR,
England
Problems?
If you have a problem, always contact your dealer in the rst instance. If your dealer is unable to
answer any query regarding this or any other Arcam product please contact Arcam Customer Support
and we will do our best to help you.
On line registration
You can register your Arcam product on line at: www.arcam.co.uk.
Page 13
P1000MANUEL
Amplicateur de puissance P1000 Arcam
Fra nçais
Page 14

P1000
F-2
P1000
F-3
Français
RISQUE DE CHOC ELECTRIQUE
NE PAS OUVRIR
ATTENTION
CAUTION
RISK OF ELECTRIC
SHOCK DO NOT OPEN
ATTENTION : an de réduire les risques de choc électronique, n’ouvrez pas le boîtier de l’appareil. Les pièces internes ne sont
pas réparables par l’utilisateur. Pour tout problème matériel, contactez des techniciens qualiés.
ATTENTION : an de réduire les risques de choc électrique et d’incendie, veillez à ne pas exposer cet appareil à la pluie et à
l’humidité.
Le triangle dans lequel gure un symbole d’éclair alerte l’utilisateur de l’existence dans le boîtier de l’appareil d’une tension dangereuse non
isolée et sufsamment importante pour représenter un risque de choc électrique.
Le triangle dans lequel gure un point d’exclamation alerte l’utilisateur de l’existence d’instructions de fonctionnement et de maintenance
(réparation) importantes dans la documentation accompagnant le produit.
ATTENTION : au Canada et aux États-Unis, an de réduire tout choc électrique, faites correspondre la broche la plus grosse de
la prise à la fente la plus large de la che et insérez entièrement la prise dans la che
Instructions de sécurité
importantes
Cet appareil a été conçu et fabriqué conformément aux
normes de qualité et de sécurité les plus strictes. Vous
devez cependant observer les précautions suivantes lors de
son installation et de son utilisation :
1. Avertissements et consignes
Il est impératif de lire les consignes de sécurité et
d’utilisation avant de mettre cet appareil en marche.
Conservez ce manuel pour pouvoir vous y référer par la
suite et respectez scrupuleusement les avertissements
gurant dans ce manuel ou sur l’appareil lui-même.
2. Eau et humidité
L’installation d’un appareil électrique à proximité d’une
source d’eau présente de sérieux risques. N’utilisez pas
l’appareil à proximité d’un point d’eau, par exemple près
d’une baignoire, d’un lavabo, d’un évier, dans une cave
humide ou à côté d’une piscine.
3. Chute d’objets ou inltration de liquides
Veillez à ne pas laisser tomber d’objets ni couler de liquides
à travers les ouvertures de l’appareil et ne placez pas
d’objet contenant du liquide sur l’appareil.
4. Ventilation
Évitez de placer l’appareil sur un lit, un canapé, un tapis ou
une surface similaire instable ou dans une bibliothèque ou
un meuble fermé. Ceci risquerait de nuire à la ventilation
du système. Pour permettre une ventilation appropriée, il
est conseillé de prévoir un espace minimum de 5 cm de
chaque côté et au-dessus de l’appareil.
5. Exposition à la chaleur
Ne placez pas l’appareil à proximité d’une amme nue ou
de tout dispositif produisant de la chaleur (radiateur, poêle
ou autre). Cette règle s’applique également aux autres
amplicateurs.
6. Conditions climatiques
L’appareil est conçu pour fonctionner dans des climats
modérés.
7. Étagères et supports
Utilisez uniquement des étagères ou des supports pour
appareils audio. Si l’appareil est monté sur un système
portatif, déplacez-le avec précaution an d’éviter tout
risque de chute.
8. Entretien
Mettez l’appareil hors-tension avant de le nettoyer. Pour
l’entretien, utilisez uniquement un chiffon doux, humide et
non pelucheux. N’utilisez pas de diluant pour peinture ni de
solvant chimique.
L’emploi d’aérosols ou de produits de nettoyage pour
meubles est déconseillé, car le passage d’un chiffon humide
risquerait de laisser des marques blanches indélébiles.
9. Alimentation secteur
Branchez l’appareil uniquement sur une alimentation
secteur du type mentionné dans le manuel d’utilisation ou
indiqué sur l’appareil lui-même.
Utilisez principalement l’interrupteur situé à l’arrière de
l’appareil pour l’isoler de l’alimentation électrique générale.
L’appareil doit par conséquent être installé de façon à
pouvoir accéder facilement à l’interrupteur.
Il s’agit un dispositif de classe 1 qui doit être relié à la terre.
10. Protection des câbles secteur
Veillez à ce que les câbles d’alimentation ne se trouvent
pas dans un lieu de passage ou bloqués par d’autres
objets. Cette règle s’applique plus particulièrement aux
prises et câbles d’alimentation et à leurs points de sortie de
l’appareil.
11. Mise à la terre
Assurez-vous que l’appareil est correctement mis à la terre.
12. Câbles haute tension
Évitez de monter l’antenne extérieure de l’appareil à
proximité de câbles haute tension.
13. Périodes de non-utilisation
Si l’appareil possède une fonction de mise en veille, un
courant faible continuera de circuler lorsqu’il sera réglé sur
ce mode. Débranchez le câble secteur de la prise murale
si l’appareil doit rester inutilisé pendant une période
prolongée.
14. Odeur suspecte
Arrêtez et débranchez immédiatement l’appareil en cas
d’émission de fumée ou d’odeur anormale. Contactez
immédiatement votre revendeur.
15. Réparation
N’essayez jamais d’effectuer d’autres opérations que celles
mentionnées dans ce manuel. Toute autre intervention doit
être effectuée par des techniciens qualiés.
16. Entretien par des techniciens qualiés
L’appareil doit être entretenu par des techniciens qualiés
lorsque :
A. la prise ou le câble d’alimentation a été endommagé,
B. des objets sont tombés ou du liquide a coulé dans
l’appareil,
C. l’appareil a été exposé à la pluie,
D. l’appareil présente des dysfonctionnements,
E. l’appareil est tombé ou l’enceinte a été endommagée.
Respect des consignes de
sécurité
Cet appareil a été conçu pour répondre à la norme
internationale de sécurité électrique EN60065.
Consignes de sécurité
Page 15

P1000
F-3
Français
Utilisation de ce manuel
Table des matières
Consignes de sécurité ......................................... F-2
Utilisation de ce manuel ...................................... F-3
Première utilisation de votre P1000.......................F-4
Introduction.................................................F-4
Installation des haut-parleurs.........................F-4
Câbles......................................................... F-4
Fonctionnement de votre P1000 ........................... F-5
Alimentation électrique..................................F-5
Channel-status indicator lights........................ F-5
Installation ........................................................F-6
Installation de l’appareil.................................F-6
Connexion à un préamplicateur.....................F-6
Branchement des haut-parleurs ......................F-7
Dénition du gain de l’amplicateur................. F-8
Connecting to a power supply......................... F-8
Dépannage........................................................F-9
Indicateurs de statut d’erreur............................. F-10
Spécications techniques................................... F-11
Politique d’amélioration continue................... F-11
Interférences radio ..................................... F-11
Garantie.......................................................... F-12
Garantie internationale ................................ F-12
Enregistrement sur Internet ......................... F-12
Ce manuel a été conçu pour vous donner toutes les
informations nécessaires pour installer, connecter, mettre
en place et utiliser l’amplicateur de puissance multicanaux
Arcam FMJ P1000.
Il se peut que le P1000 ait été installé et mis en place dans
le cadre de votre installation Hi-Fi ou home cinéma par un
revendeur Arcam agréé. Dans ce cas, vous pouvez souhaiter
passer les sections de ce manuel qui traitent de l’installation
et de la mise en place de l’unité. Utilisez le Sommaire pour
vous guider vers les sections qui vous intéressent.
Sécurité
Les consignes de sécurité sont énoncées sur la page
suivante de ce manuel.
Il s’agit dans de nombreux cas de précautions logiques
mais, pour votre propre sécurité et pour être sûr de ne pas
endommager l’unité, nous vous recommandons fortement
de les lire.
Cet appareil est un produit de classe 1 qui requiert une
connexion à la terre.
Avertissement
<
Lucaslm et THX sont des marques ou des marques déposées de
Lucaslm, Ltd.
Copyright © Lucaslm & TM
Page 16
P1000
F-4
P1000
F-5
Français
Première utilisation de votre P1000
Introduction
L’ampli cateur de puissance multicanal P1000 répond aux normes de conception et de haute qualité
standard d’Arcam. Cet ampli cateur haute performance fournit jusqu’à 135 W par canal. Outre
l’ampli cation Home Cinema multicanal de qualité supérieure, cet appareil offre également des
performances stéréo exceptionnelles grâce à l’utilisation de sources à deux canaux. Le P1000 est le
partenaire idéal du préampli cateur-processeur Arcam DiVA AVP700.
Tous les modules internes de l’ampli cateur P1000 sont identiques, de sorte que chaque canal
d’ampli cation offre les mêmes performances. Le P1000 dispose de prises phono d’entrée et de sortie
pour la transmission du signal sur chaque canal, a n de transférer ce signal vers des ampli cateurs de
puissance supplémentaires éventuels, d’alimenter les haut-parleurs situés dans d’autres pièces ou de
biampli er un canal. Si vous utilisez, par exemple, l’ampli cateur de puissance P1000 pour alimenter un
système Surround à cinq canaux, les deux modules libres (Surround arrière gauche et Surround arrière
droit) peuvent être utilisés conjointement avec les modules principaux (avant gauche et avant droit)
a n de biampli er les haut-parleurs avant gauche et droit appropriés.
Pro tez au l des années du confort Home Cinema exceptionnel de l’ampli cateur P1000 !
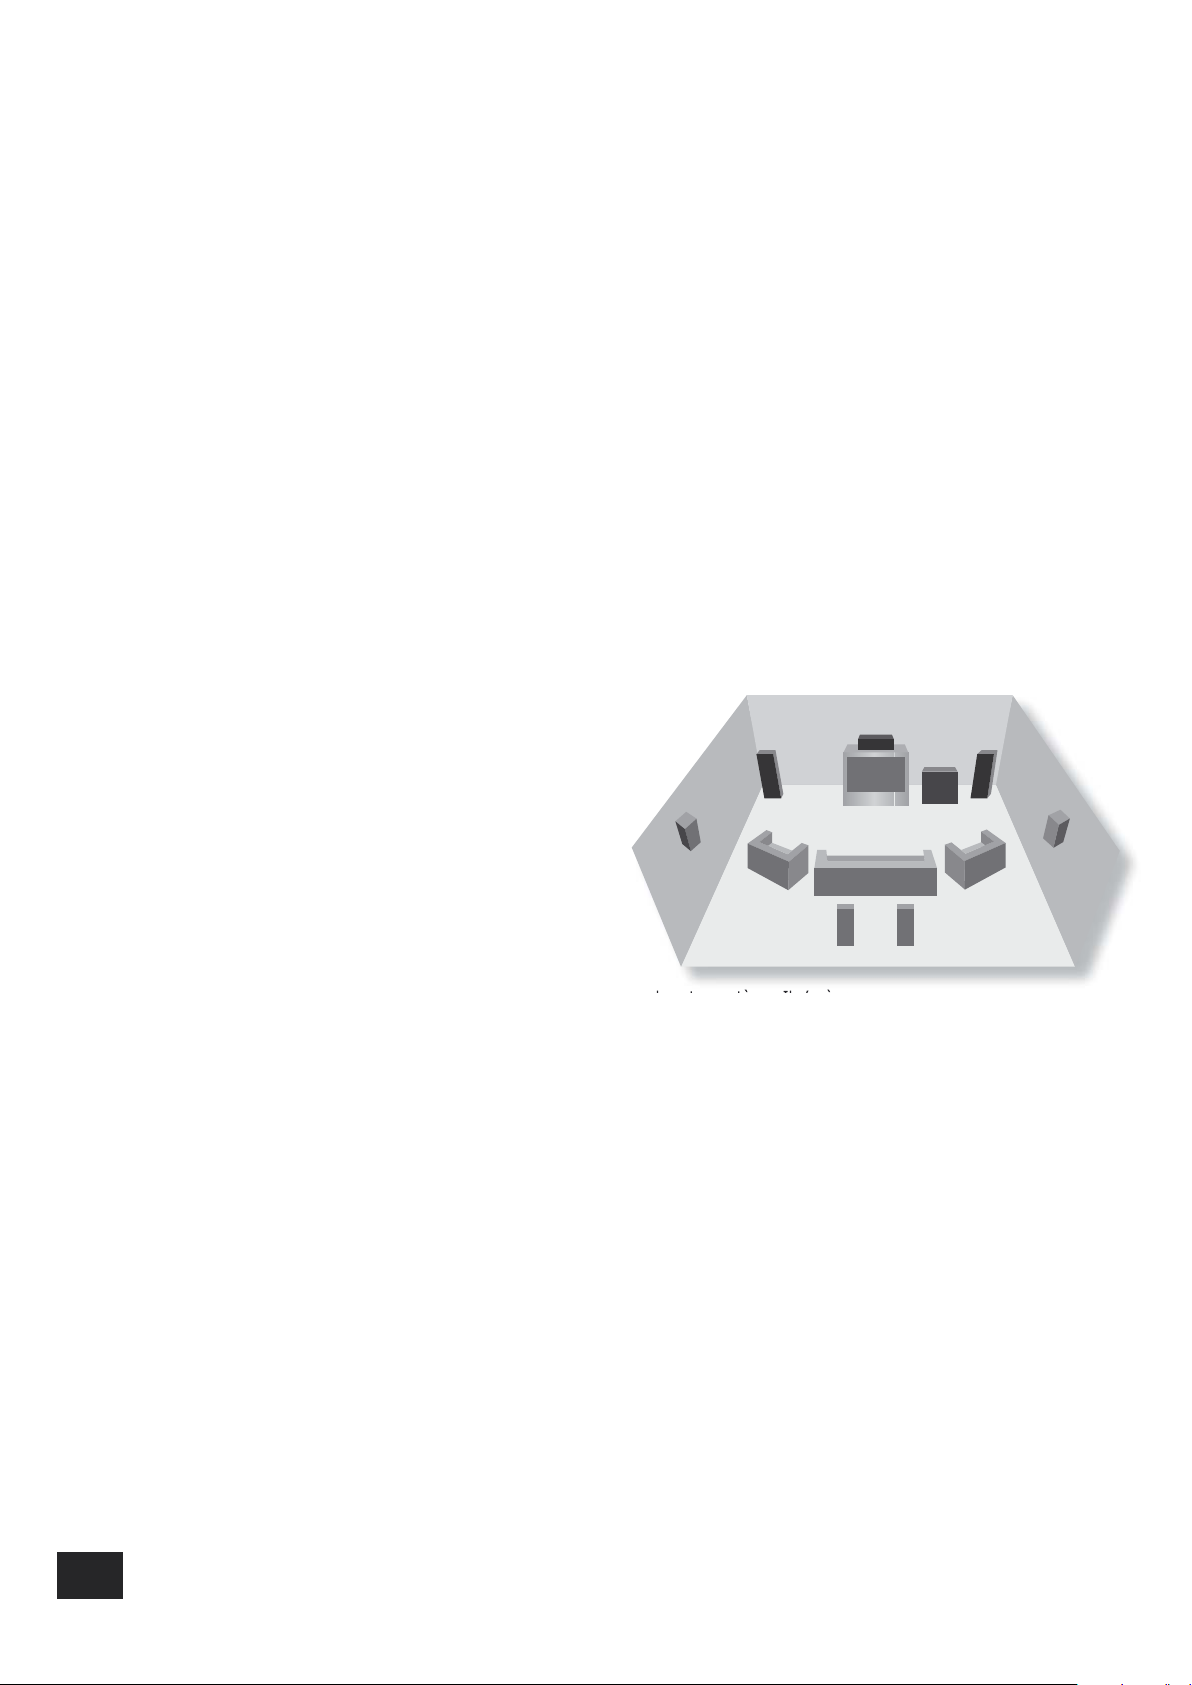
Installation des haut-parleurs
Le P1000 permet de connecter jusqu’à sept haut-parleurs. Tous les haut-parleurs, à l’exception du
caisson de basses, doivent être placés autour de votre position d’écoute ou de visionnement normal
(voir schéma). Le caisson de basses peut être placé à un endroit quelconque de la pièce. Il est toutefois
conseillé de le changer de place jusqu’à obtenir une qualité de son optimale.
Placez les haut-parleurs avant gauche et droit de façon à obtenir une bonne image stéréo pour une
reproduction musicale normale. Si vous les placez trop près les uns des autres, l’espace s’en trouve
trop réduit. A l’inverse, si vous les éloignez trop les uns des autres, l’image stéréo semble comporter un
grand trou en son milieu et est coupée en deux.
Le haut-parleur central permet une reproduction plus
réaliste des dialogues et des sons centraux. Il offre
en outre une imagerie plus étendue et de meilleure
qualité pour les effets stéréo et les fonds sonores
du Home Cinema. Préservez à tout prix la qualité de
votre haut-parleur central, car tous les dialogues d’un
système Home Cinema sont retransmis par ce hautparleur.
Les haut-parleurs Surround gauche et droit
reproduisent le son et les effets ambiants présents
dans un système Home Cinéma multicanal.
Les haut-parleurs Surround arrière gauche et
droit permettent d’ajouter un effet de profondeur
supplémentaire, de créer une ambiance plus spacieuse
et de garantir une meilleure localisation du son.
particulièrement utile pour la reproduction d’effets cinématographiques spéciaux, notamment lorsqu’un
canal LFE (Effets Basses Fréquences) est disponible, ainsi que plusieurs disques codés DTS Digital
Surround.
Câbles
Il est recommandé d’utiliser des câbles vidéo numériques et analogiques blindés de qualité supérieure,
a n de ne pas altérer la qualité visuelle et sonore du système. De même, employez uniquement
des câbles conçus pour ce genre d’application. L’utilisation de câbles inadéquats et possédant des
caractéristiques d’impédance différentes risque de nuire aux performances de votre système (veillez
par exemple à ne pas utiliser de câbles audio pour le transport de signaux vidéo). Utilisez des câbles
de haut-parleurs aussi courts que possible. Les paires de câbles (câbles reliés aux haut-parleurs avant
gauche et droit, par exemple) doivent néanmoins être de même longueur.
Il est conseillé d’éloigner les câbles de branchement, de haut-parleurs et d’alimentation électrique les
uns des autres a n de réduire au maximum le risque d’interférences.
En cas de doute sur le choix des câbles à utiliser, veuillez contacter votre revendeur ou votre
installateur.
Page 17

P1000
F-5
Français
Fonctionnement de votre P1000
Alimentation électrique
Le panneau avant du P1000 ne présente qu’un seul bouton de contrôle : l’interrupteur de mise sous/
hors tension, situé dans l’angle inférieur droit.
Il permet d’allumer et d’éteindre le P1000. Pour mettre l’appareil hors tension, utilisez l’interrupteur
situé sur le panneau arrière. A l’inverse, si le P1000 ne s’allume pas lorsque vous appuyez sur
l’interrupteur du panneau avant, assurez-vous que l’interrupteur du panneau arrière se trouve en
position de marche.
Mise sous tension
Il est conseillé de mettre votre préampli cateur ou contrôleur sous tension avant d’allumer le P1000,
a n de réduire le risque de transmission de bruit à l’ampli cateur de puissance.
Mise hors tension
Éteignez tout d’abord le P1000, puis le préampli cateur ou le contrôleur.
Voyants d’état des canaux
Chaque canal d’ampli cation de l’ampli cateur P1000 possède son propre voyant lumineux.
Lors de la mise sous tension, les voyants passent du orange au vert pour indiquer le changement d’état
(de l’initialisation à l’état actif). Tous les voyants s’éteignent lors de la mise en veille.
Si les voyants lumineux ne suivent pas cet ordre lors de la mise sous tension de l’ampli cateur P1000
ou s’ils présentent un comportement anormal pendant son utilisation, consultez le tableau situé à la
page 10 pour essayer d’identi er le problème.
1 2 3 4 5 6 7
P1000
MULTICHANNEL POWER AMPLIFIER
POWER
Page 18

P1000
F-6
P1000
F-7
Français
12V
TRIGGER
IN
SLOBLO FUSE
IN OUTIN OUTIN OUTIN OUTIN OUTIN OUTIN OUT
BALANCED INBALANCED INBALANCED INBALANCED INBALANCED INBALANCED INBALANCED IN
A
B
C
A
B
C
A
B
C
A
B
C
A
B
C
A
B
C
A
B
C
7
RS BACK
6
R SURR
5
RIGHT
4
CENTRE
3
LEFT
2
L SURR
1
LS BACK
POWER ON/OFF
POWER INLET
230V
Installation
Installation de l’appareil
<
Placez l’ampli cateur sur une surface plane et ferme.
<
Évitez de l’exposer directement aux rayons du soleil ou de le placer à proximité d’une source de
chaleur ou d’humidité.
<
Ne posez pas l’appareil sur un autre ampli cateur de puissance ou toute autre source de chaleur.
<
Assurez-vous que l’appareil est suf samment ventilé. Si vous l’installez dans un espace clos, tel
qu’une bibliothèque, une baie d’équipement ou un meuble, veillez à laisser un espace suf sant pour
la circulation correcte de l’air dans l’appareil (nécessaire à son refroidissement). Une ventilation
incorrecte risque de provoquer la surchauffe du P1000 et sa mise hors tension automatique.
Lors du fonctionnement normal de l’ampli cateur, sa température augmente.
<
Véri ez que la baie d’équipement ou le support est suf samment résistant pour supporter le poids
du P1000.
Connexion à un préampli cateur
Deux types de connexion sont disponibles pour la réception des signaux depuis votre préampli cateur.
Le type de connexion approprié dépend de la con guration matérielle adoptée.
1. Si les câbles à utiliser pour relier votre préampli cateur au P1000 sont inférieurs à 3 m, il est
conseillé de brancher le préampli cateur sur les prises phono du P1000.
2. Si les câbles mesurent 3 m ou plus et si le préampli cateur dispose de sorties symétriques, il est
conseillé de le brancher sur ces dernières au lieu des prises phono. Ces connexions permettent
également d’améliorer les performances générales du système dans un environnement électrique
bruyant.
Bien que vous puissiez parfaitement mélanger connexions symétriques et connexions phono entre
votre préampli cateur et le P1000 (selon vos besoins), ne branchez pas les deux entrées (symétrique
et phono) sur un même canal.
Recommandations générales pour le branchement
Les sorties de votre préampli cateur doivent être connectées aux entrées AUDIO IN du P1000. Il est
particulièrement utile de connecter la sortie du préampli cateur d’un canal spéci que à l’entrée de
ce canal sur le P1000. Connectez par exemple la sortie Surround gauche de votre préampli cateur
à l’entrée du canal Surround gauche du P1000. Cette technique n’améliore pas spécialement les
performances générales du système, mais elle simpli e considérablement les connexions.
Si vous souhaitez utiliser deux modules a n de biampli er une paire de haut-parleurs ou de biampli er
un autre ampli cateur de puissance, captez le signal de ce canal (via la prise phono AUDIO OUT de ce
même canal) et transférez-le à un ou plusieurs modules supplémentaires. Le signal est ensuite transmis
au premier et au second modules, de façon à ce que les deux modules puissent biampli er le hautparleur. Pour plus d’informations, reportez-vous à la section Biampli cation, page 8. Notez que ce type
de biampli cation requiert l’utilisation de connexions phono entre votre préampli cateur et le
P1000.
Entrée du déclencheur 12 V
Si votre préampli cateur fournit une sortie pour le déclencheur 12 V, vous pouvez la connecter
à la prise d’entrée du déclencheur 12 V via une prise jack de 3,5 mm. Ce branchement permet
de mettre le P1000 sous tension à distance, depuis le préampli cateur.
Notez que l’entrée du déclencheur est uniquement active lorsque l’interrupteur d’alimentation
électrique situé sur le panneau arrière est en position de marche.
La mise sous tension
de 12 V nécessite une
prise jack mono de
3,5 mm, branchée
comme suit :
<
Corps : mise à la terre
<
Extrémité : active
Page 19

P1000
F-7
Français
Branchement des haut-parleurs
Techniques de câblage
Il existe trois techniques de câblage différentes que vous pouvez utiliser pour relier votre P1000 aux
haut-parleurs. Le choix dépend principalement de la prise en charge de vos haut-parleurs.
<
Monocâblage
Le monocâblage est le système de câblage traditionnel, consistant à relier un seul câble
par canal entre l’ampli cateur et le haut-parleur.
<
Bi-wiring
Le bicâblage permet de relier deux câbles distincts entre l’ampli cateur et chaque
haut-parleur, l’un transmettant les signaux basse fréquence et l’autre les signaux haute
fréquence. Tout ampli cateur peut prendre en charge le bicâblage, mais il n’est pris en
charge par les haut-parleurs que si des bornes de connexion distinctes sont fournies pour
les deux câbles (le haut-parleur doit disposer de deux paires de bornes à l’arrière, l’une
signalée par la mention HF ou High Frequency et l’autre signalée par la mention LF ou Low
Frequency). Le bicâblage permet d’améliorer le son de votre système en répartissant les
courants des signaux basse et haute fréquence entre des câbles de haut-parleurs distincts.
Il évite ainsi les distorsions générées par l’interaction de courants différents à l’intérieur
d’un même câble, comme cela se produit fréquemment dans les systèmes à câblage
classique. Notez que certains haut-parleurs disposent de trois paires de bornes à l’arrière,
étendant ainsi le principe de bicâblage au tricâblage.
<
Bi-amping
Vous pouvez améliorer les performances de votre système en étendant le principe de séparation
des signaux a n d’utiliser une ampli cation distincte pour les conducteurs basse et haute fréquence
de chaque haut-parleur. Deux ampli cateurs sont nécessaires pour cette con guration.
Monocâblage
Les bornes de haut-parleurs d’un canal spéci que sont clairement signalées
à l’arrière du P1000. Pour chaque canal, reliez la borne positive de la
connexion du haut-parleur du P1000 pour ce canal (signalée en rouge
par le signe +) à la borne positive de votre haut-parleur pour ce canal
(reliez par exemple la borne positive du canal central du P1000 au canal
positif de votre haut-parleur central). De même, reliez la borne négative
de l’ampli cateur (signalée en noir par le signe –) à la borne négative du
haut-parleur. Si votre haut-parleur prend en charge le bicâblage (c’est-àdire si vous utilisez plus d’un jeu de bornes de connexion), mais si vous
ne souhaitez pas avoir recours au bicâblage, reliez le P1000 aux bornes
signalées par la mention LF ou Low Frequency. Une bande métallique située
sur les haut-parleurs permet de connecter les bornes basse fréquence
aux bornes haute fréquence. Cette bande ne doit pas être retirée d’un
système à monocâblage.
Suivez les instructions indiquées ci-dessus pour chaque haut-parleur de
votre système, en veillant à ce que les haut-parleurs soient connectés
à la sortie correcte du P1000. Il n’est pas nécessaire de connecter les
haut-parleurs à tous les canaux du P1000. Cela n’a par exemple aucune
importance si vous ne disposez pas de haut-parleur central.
Bicâblage
Le bicâblage est effectué de façon similaire au monocâblage, à la différence
près qu’une paire de câbles est utilisée pour relier la borne positive de
l’ampli cateur au haut-parleur. L’un des câbles doit être relié à la borne
positive inférieure sur les haut-parleurs Alto et l’autre câble à la borne
positive supérieure. Les bornes négatives doivent être connectées de façon
similaire. La bande métallique de connexion des haut-parleurs, reliant
les bornes inférieures aux bornes supérieures, doit être retirée pour le
bicâblage
Avant de
commencer
Avant de brancher
les haut-parleurs,
assurez-vous que
le P1000 est hors
tension et déconnecté
de l’alimentation
électrique a n d’éviter
d’endommager à la fois
les haut-parleurs et
l’ampli cateur.
Bicâblage du P1000 (un seul canal af ché
pour des raisons de clarté)
Monocâblage du P1000 (un seul canal af ché
pour des raisons de clarté)
Page 20

P1000
F-8
P1000
F-9
Français
Biampli cation
La biampli cation requiert l’utilisation de deux ampli cateurs : le premier
permet d’alimenter les haut-parleurs des aigus, et le second est utilisé pour les
basses fréquences (graves).
Pour ce qui est des câbles, la biampli cation ressemble considérablement au
bicâblage. Reliez les bornes de haut-parleurs d’un module (canal) à une paire
de bornes de votre haut-parleur. Reliez un autre module (ou l’un des canaux
d’un ampli cateur de puissance distinct) à l’autre paire de bornes du hautparleur, de façon à ce que deux canaux de l’ampli cateur soient connectés
à ce haut-parleur, à savoir : un premier canal pour les basses fréquences et
un second pour les hautes fréquences. Les bornes (supérieures) des aigus
de votre haut-parleur doivent être reliées aux bornes de haut-parleurs du
module de l’ampli cateur (canal) utilisé pour les hautes fréquences. Les bornes
(inférieures) des graves de votre haut-parleur doivent être reliées aux bornes
de haut-parleurs de l’ampli cateur ou du module (canal) utilisé pour les basses
fréquences. La bande métallique des haut-parleurs reliant les bornes inférieures
aux bornes supérieures doit être retirée a n d’éviter d’endommager les deux
ampli cateurs.
Remarques sur le branchement des haut-parleurs
<
N’effectuez aucun branchement sur l’ampli cateur si ce dernier est mis sous tension ou relié au
secteur.
<
Assurez-vous toujours que le réglage du volume de votre préampli cateur est à son minimum avant
de procéder aux branchements.
<
Avant de mettre le P1000 sous tension pour la première fois après le branchement des haut-
parleurs, véri ez soigneusement toutes les connexions. Assurez-vous qu’aucun câble nu ou autre
câble n’entre en contact avec l’ampli cateur (ce qui risquerait de produire des court-circuits) et que
vous avez connecté la borne positive (+) à la borne positive correspondante et la borne négative (-)
à la borne négative correspondante.
<
Après le branchement, réglez le volume de votre préampli cateur au minimum avant de mettre le
P1000 sous tension. Mettez le ou les ampli cateurs sous tension, sélectionnez un signal source,
puis augmentez progressivement le volume jusqu’au niveau d’écoute désiré.
<
Si vous n’êtes pas sûr du type de connexion requis par votre système ou pour en savoir plus sur le
bicâblage ou la biampli cation, veuillez contacter le distributeur Arcam le plus proche de chez vous,
qui vous aidera avec plaisir.
Dé nition du gain de l’ampli cateur
Vous avez peut-être déjà remarqué un petit interrupteur situé à proximité des bornes de haut-parleurs
pour chaque canal à l’arrière du produit. Cet interrupteur permet de dé nir le gain de l’ampli cateur :
déplacez les curseurs en position A, B ou C, selon la valeur de gain désirée.
<
Position A : le gain du P1000 est dé ni sur 31,5 dB, qui correspond au gain habituel utilisé pour
les ampli cateurs Arcam. Sélectionnez ce réglage si le P1000 doit être utilisé seul ou conjointement
avec d’autres ampli cateurs Arcam.
<
Position B : le gain du P1000 est dé ni sur 29 dB, qui correspond au gain utilisé pour les
ampli cateurs compatibles THX™. Sélectionnez ce réglage si le P1000 doit être utilisé avec d’autres
ampli cateurs ayant une valeur de gain THX™, tels que l’ampli cateur Arcam P1000. Notez que
l’ampli cateur de puissance P7 n’est pas un produit de type THX™.
<
Position C : le gain du P1000 est dé ni sur 26 dB. Sélectionnez ce réglage si le P1000 doit être
utilisé avec d’autres ampli cateurs ayant le même gain.
Bien que le gain de chaque canal puisse être dé ni séparément, il est rare de dé nir différents canaux
sur différents gains. Il est fortement conseillé de dé nir tous les canaux de l’ampli cateur sur
le même réglage de gain.
Raccordement secteur
Cordon secteur
Normalement, l’appareil est livré avec une che secteur moulée déjà montée sur le cordon. Si vous
devez, pour une raison quelconque, retirer la che, jetez-la immédiatement avec précaution. Son
branchement sur une prise murale risquerait de provoquer une électrocution.
Véri ez que la che fournie avec l’appareil correspond à votre prise secteur et que la tension secteur
correspond au réglage (115 V ou 230 V) indiqué sur le panneau arrière de l’appareil.
Si votre tension secteur ou votre prise secteur est différente ou si vous avez besoin d’un nouveau
cordon, contactez votre revendeur Arcam.
Branchement
Enfoncez la che (prise IEC) du cordon secteur fourni dans la prise POWER INLET située à l’arrière de
l’appareil. Véri ez qu’elle est complètement enfoncée.
Introduisez la che située à l’autre extrémité du cordon dans votre prise murale.
Biampli cation du P1000 (deux modules
de l’ampli cateur pour un seul canal).
Page 21

P1000
F-9
Français
Dépannage
Aucun voyant ne s’allume
Si aucun voyant du P1000 ne s’allume comme espéré, veuillez procéder aux vérications suivantes :
<
Le câble d’alimentation est-il relié au P1000 ? La prise secteur sur laquelle il est branché est-elle
sous tension ?
<
Le fusible de la prise a-t-il fondu, ou un disjoncteur du circuit d’alimentation électrique a-t-il sauté
auparavant ?
<
Le fusible situé sur le panneau arrière (au-dessus de l’arrivée de l’alimentation électrique) a—t-il
fondu ? Notez que le fusible doit être remplacé par un fusible de même type. En cas de
besoin, n’hésitez pas à contacter votre revendeur.
<
L’interrupteur d’alimentation situé sur le panneau arrière du P1000 est-il en position de marche ?
Voyant rouge/orange du panneau avant
Le tableau de la page 10 décrit les erreurs signalées par les différents voyants et offre quelques conseils
pour résoudre les éventuels problèmes.
Aucun son n’est audible
Si aucun son n’est audible sur votre P1000, veuillez procéder aux vérications suivantes :
<
Tous les voyants de canaux du panneau avant sont-ils verts ? Si les voyants sont d’une autre couleur,
reportez-vous au tableau de la page 10, ou à la section antérieure si aucun voyant ne s’allume.
<
L’entrée sélectionnée sur le préamplicateur est-elle correcte, et la source sélectionnée génère-elle
de l’audio (lecture des disques, par exemple) ? Si possible, essayez de brancher le casque sur le
préamplicateur an de vérier que l’audio est bien généré à ce stade. Si ce n’est pas le cas, il est
probable que le problème se situe entre la source audio et votre préamplicateur.
<
Le volume du préamplicateur est-il réglé sur un niveau raisonnable ? Le son du préamplicateur
a-t-il été coupé ?
<
Les connexions entre votre préamplicateur et le P1000 ont-elles été effectuées comme décrit
antérieurement dans ce manuel ? Vériez également les branchements entre le P1000 et les hautparleurs.
Le son est étouffé ou de mauvaise qualité
Si le son provenant de votre P1000 est déformé ou de mauvaise qualité (absence de graves, par
exemple), veuillez procéder aux vérications suivantes :
<
Assurez-vous que tous les câbles (câbles de branchement et de haut-parleurs) ont été correctement
connectés. Mettez le P1000 hors tension, retirez chaque câble du connecteur et branchez-le à
nouveau. Remettez-le sous tension an de vérier si une amélioration de la qualité du son est
perceptible.
<
Vériez que vous avez sélectionné une taille de haut-parleurs adaptée à votre système, dans le
menu de conguration du processeur ou préamplicateur. Le réglage des haut-parleurs sur une
petite taille, par exemple, peut être à l’origine de l’absence de graves. Pour plus d’informations,
reportez-vous au manuel de votre préamplicateur ou processeur.
Le son ne provient que de certains haut-parleurs
Si le son n’est émis que par certains haut-parleurs (qui fonctionnent normalement), veuillez procéder
aux vérications suivantes :
<
Tous les haut-parleurs du système sont-ils connectés au P1000 ?
<
Avez-vous conguré votre préamplicateur de façon à inclure l’ensemble des haut-parleurs de votre
système ? Pour plus d’informations, reportez-vous au manuel de votre préamplicateur ou processeur.
<
Avez-vous sélectionné une source de son Surround appropriée et alimentant correctement le
préamplicateur ?
<
Pour les sources connectées de façon numérique au préamplicateur, vériez que la source émet
des données multicanal. Certains lecteurs de DVD, par exemple, permettent de sélectionner le
format de sortie et de spécier si les données multicanal doivent être mixées au PCM (stéréo). Pour
plus d’informations, reportez-vous au manuel de votre source.
<
Assurez-vous que le disque lu est un enregistrement multicanal et que le processeur émet de
l’audio multicanal.
<
Vériez que l’équilibre sonore (balance) de votre haut-parleur est correct. Pour plus d’informations,
reportez-vous au manuel de votre préamplicateur ou processeur.
<
Tous les voyants de canaux du panneau avant sont-ils verts ? Si les voyants sont d’une autre
couleur, reportez-vous au tableau de la page 10.
Un bruit de fond est perceptible à la sortie de l’amplicateur
Si l’un des haut-parleurs émet un bruit de fond, veuillez procéder aux vérications suivantes :
<
Le bruit de fond provient-il d’une boucle de terre générée par une antenne (parabolique ou non) ou
un câblage spécial (si l’antenne est déconnectée, le bruit de fond est-il toujours perceptible) ? Pour
de plus amples informations, veuillez contacter votre revendeur ou le distributeur qui vous a fourni
l’antenne.
<
Assurez-vous que les câbles de branchement et de haut-parleurs ne sont pas emmêlés avec le câble
secteur.
<
Essayez d’activer le commutateur de mise à la terre du préamplicateur ou processeur, si disponible
(pour plus d’informations, reportez-vous au manuel de votre préamplicateur).
Consultez également la section Le son est étouffé ou de mauvaise qualité ci-dessus.
Page 22

P1000
F-10
P1000
F-11
Français
Des interférences se produisent avec la radio ou la télévision
Si vous observez des interférences avec la radio ou la télévision lorsque le P1000 est sous tension,
mais que celles-ci disparaissent lorsque l’amplicateur est mis hors tension, assurez-vous que le câble
de l’antenne (parabolique ou non) de votre téléviseur ou récepteur est éloigné de votre P1000 et de
ses câbles, et que le câblage utilisé pour l’antenne est de haute qualité (blindé). La réorientation de
l’antenne de réception peut améliorer la qualité de réception.
<
Si le problème persiste après vérication des éléments mentionnés ci-dessus, veuillez
contacter votre revendeur.
Indicateurs de statut d’erreur
L’état des voyants décrits ci-dessous signale les erreurs suivantes :
État du voyant Description Action corrective sur
l’amplicateur
Tous les voyants sont
allumés en vert.
L’amplicateur fonctionne en
toute normalité.
Aucune.
Le voyant d’alimentation
électrique s’allume en
orange et les voyants de
canaux sont éteints.
Une erreur de tension continue
de décalage s’est produite. Elle
peut être due à une tension de
courant continu sur la sortie
du préamplicateur alimentant
le P1000 (voir la remarque cidessous).
Cette erreur doit être corrigée
manuellement.
Mettez le P1000 hors tension
pendant au moins 30 secondes
(à l’aide de l’interrupteur situé à
l’arrière de l’appareil), puis remettezle sous tension.
Si le problème persiste ou si la
tension continue de décalage n’a pas
été corrigée, mettez le P1000 hors
tension à l’aide de l’interrupteur situé
à l’arrière de l’appareil, retirez les
câbles de branchement (une fois le
P1000 éteint), puis remettez-le sous
tension. Le problème devrait être
résolu. Si le voyant d’alimentation
électrique s’allume toujours en
orange, votre P1000 présente une
défaillance. Mettez l’appareil hors
tension et contactez votre revendeur.
Un ou plusieurs voyants
de canaux clignotent en
orange/vert.
Un court-circuit s’est produit. Les
voyants clignotants signalent un
court-circuit au niveau des canaux
de l’amplicateur.
L’amplicateur coupe le son du canal
victime du court-circuit. Une fois
le problème résolu, l’amplicateur
reprend son fonctionnement normal.
Notez que l’audio doit être transmis
vers le canal correspondant pour
pouvoir détecter le court-circuit. Si
vous coupez par exemple le son de la
sortie utilisant votre préamplicateur,
le problème apparaîtra comme
résolu. Il est fort probable néanmoins
que l’erreur se reproduise dès que
le son du préamplicateur sera
coupé, à moins que vous corrigiez le
problème en profondeur.
Un ou plusieurs voyants
de canaux s’allument en
orange.
Un problème de surchauffe est
survenu sur le canal dont le
voyant est allumé en orange.
L’amplicateur coupe le son du canal
présentant l’erreur. L’amplicateur
conserve cet état jusqu’au
refroidissement complet du canal. Si
cette erreur se produit fréquemment,
assurez-vous que l’amplicateur
dispose d’une ventilation correcte et
sufsante.
Erreurs de tension continue de décalage
Une erreur de tension continue de décalage n’est pas un problème spécique de l’amplicateur, mais
un mécanisme de protection des haut-parleurs. Si l’amplicateur est alimenté par une tension en
courant continu (au lieu du courant secteur normal) pendant une durée prolongée, les bobines des
haut-parleurs connectés risquent de griller (ou dans des cas extrêmes, de prendre feu). Le P1000 peut
détecter cet état et couper l’alimentation des haut-parleurs.
Les erreurs de tension continue de décalage peuvent se produire dans toutes les congurations,
notamment si un tuner ou un récepteur satellite est connecté. Si l’erreur se produit fréquemment ou de
façon prévisible, veuillez contacter votre revendeur.
Page 23

P1000
F-11
Français
Spécications techniques
Toutes les mesures s’entendent avec une alimentation principale de 230V/50Hz
Puissance continue en sortie
Tous les canaux en fonction, 20Hz—20kHz, 8Ω 135W par canal; 945W total
Tous les canaux en fonction, 20Hz—20kHz, 4Ω 210W par canal; 1,47kW total
Un ou deux canaux en fonction à 1kHz, 8Ω 190W par canal
Un ou deux canaux en fonction à 1kHz, 4Ω 305W par canal
Un ou deux canaux en fonction à 1kHz, 3,2Ω 325W par canal
Capacité de courant de crête en sortie
±25A par canal
Distorsion harmonique totale
A tout niveau jusqu’à la puissance nominale,
dans 4 ou 8Ω
<0,08% maximum (20Hz—20kHz);
en général <0,007% at 1kHz
Réponse en fréquence
±0,2dB (2Hz—50kHz)
–1dB à 1Hz et 100kHz
Soufe et bruit résiduel
Alimentation totale de réf. –110dB A pondérée; 100dB CCIR
Gain de l’amplicateur
x 28,3
(une entrée 1V donne une sortie 100W/8Ω)
Impédance d’entrée
22kΩ en parallèle avec 180pF
Impédance de sortie
50mΩ à 20Hz, 1kHz
120mΩ à 20kHz
Alimentation
100V, 115V ou 230VAC, 50/60Hz,
2,2kW maximum via une prise secteur IEC.
Un système de courant alternatif avec passage
par zéro élimine les courants d’appel importants
de ‘transformateur’ à la mise sous tension.
Physique
Dimensions : L430 x P450 x H180 mm
Poids : 31kg (68 lb) net; 35kg (77 lb) emballé
E&OE
Politique d’amélioration continue
Arcam a une politique d’amélioration continue de ses produits. Cela signie que les schémas et
spécications sont susceptibles de modications sans préavis.
REMARQUE : toutes les valeurs des spécications sont générales sauf mention contraire.
Interférences radio
Le P1000 est un système audio conçu dans le respect de normes de compatibilité électromagnétiques
très strictes.
L’appareil peut émettre des ondes RF (radio fréquence). Dans certains cas, cela peut provoquer des
interférences avec la réception des ondes radio FM et AM. Si cela se produit, éloignez le P1000 et ses
câbles de connexion le plus possible du tuner et de ses antennes. Vous pouvez également réduire les
interférences en raccordant le P1000 et le tuner à des prises d’alimentation différentes.
Pays de la CE – Ces produits ont été conçus pour répondre à la directive 89/336/CE.
Etats-Unis – Ces produits sont conformes aux exigences FCC.
Page 24

P1000
F-12
Garantie internationale
Cette garantie vous autorise à faire réparer gratuitement votre appareil chez un distributeur Arcam
agréé durant les deux premières années suivant l’achat, à condition que l’appareil ait à l’origine été
acheté chez un revendeur ou un distributeur Arcam. Arcam ne peut engager sa responsabilité en
cas de défauts découlant d’un accident, d’une mauvaise utilisation, d’une utilisation intensive, d’une
usure normale, d’une négligence, d’un réglage ou d’une réparation non autorisés. Arcam ne peut en
outre engager sa responsabilité pour tout dommage ou toute perte survenant pendant le transport du
matériel sous garantie.
La garantie couvre le coût des pièces et de la main-d’œuvre pendant les deux ans suivant la date
d’achat. Après deux ans, ces frais incombent au client. La garantie ne couvre en aucun cas les frais
de transport.
Réclamations au titre de la garantie
L’appareil doit être renvoyé dans son emballage d’origine au revendeur auprès duquel il a été acheté
ou au distributeur Arcam dans le pays de résidence du client. Il doit être expédié en port payé par
l’intermédiaire d’un transporteur able, et non par la poste. Aucune responsabilité n’est acceptée
pendant le transport de cet équipement au titre de la garantie ; en outre, il est conseillé aux clients
de prendre les assurances nécessaires contre les pertes et dommages subis lorsque l’appareil est en
transit.
Pour tout renseignement complémentaire, veuillez contacter le service clientèle Arcam à l’adresse
suivante :
Arcam Customer Support Department,
Pembroke Avenue,
Waterbeach,
CAMBRIDGE CB5 9QR,
Grande Bretagne
En cas de problème
En cas de problème, veuillez contacter en premier lieu votre revendeur. Si votre revendeur ne peut
répondre à votre demande pour ce produit Arcam ou tout autre produit Arcam, veuillez contacter le
Service client d’Arcam où nous ferons de notre mieux pour vous aider.
Enregistrement sur Internet
Vous pouvez enregistrer votre produit Arcam à l’adresse suivante : www.arcam.co.uk
Garantie
Page 25

P1000HANDBUCH
Mehrkanal-Verstarker Arcam P1000
Deu tsch
Page 26

P1000
D-2
P1000
D-3
Deutsch
Sicherheitsrichtlinien
Wichtige
Sicherheitsanweisungen
Dieses Gerät wurde unter Berücksichtigung strikter
Qualitäts- und Sicherheitsbestimmungen entworfen und
gefertigt. Sie sollten jedoch bei der Installation und dem
Betrieb folgende Vorsichtsmaßnahmen treffen:
1. Beachten Sie die Warnungen und Anweisungen
Vor der Inbetriebnahme dieses Gerätes sollten Sie die
entsprechenden Sicherheits- und Betriebsanweisungen
lesen. Heben Sie dieses Handbuch gut auf, und beachten
Sie die enthaltenen Warnungen sowie die Hinweise auf dem
Gerät.
2. Wasser und Feuchtigkeit
Das Betreiben von elektrischen Geräten in der Nähe von
Wasser kann gefährlich sein. Verwenden Sie das Gerät
nicht in einer feuchten Umgebung (z.B. in der Nähe von
Badewannen, Waschbecken, Swimming Pools oder in einem
feuchten Keller).
3. Eindringen von Flüssigkeiten oder Schmutz
Achten Sie darauf, dass keine Flüssigkeiten oder Schmutz
in das Geräteinnere gelangen. Sie sollten keine mit
Flüssigkeit gefüllten Behälter (z.B. Blumenvasen) auf dem
Gerät abstellen.
4. Belüftung
Stellen Sie das Gerät nicht auf ein Bett, ein Sofa, einen
Teppich oder eine andere weiche Oberäche, oder in ein
abgeschlossenes Bücherregal bzw. einen Schrank, da
hierdurch die Belüftung beeinträchtigt werden könnte. Es
wird empfohlen, einen Mindestabstand von 50 mm um die
Seiten- und Oberkanten des Gerätes freizuhalten.
5. Wärme
Stellen Sie das Gerät nicht in der Nähe von offenem Feuer
oder Wärme abgebenden Geräten wie Heizkörpern, Herden
oder anderen Elektrogeräten (z.B. anderen Verstärkern)
auf.
6. Klima
Das Gerät wurde für den Betrieb in gemäßigten Klimazonen
ausgelegt.
7. Racks und Regale
Benutzen Sie nur Racks und Regale, die für die Verwendung
mit Audiogeräten geeignet sind. Bewegen Sie die Anlage
sehr vorsichtig, wenn sie sich auf einem fahrbaren Regal
bendet, um ein Umfallen zu vermeiden.
8. Reinigung
Ziehen Sie vor dem Reinigen des Gerätes den Netzstecker.
In den meisten Fällen reicht es aus, wenn Sie das Gehäuse
mit einem weichen, fusselfreien und angefeuchteten Tuch
abwischen. Verwenden Sie keine Verdünner oder andere
chemische Lösungsmittel.
Von der Verwendung von Polituren oder Möbelsprays wird
abgeraten, da diese Substanzen weiße Spuren hinterlassen
können, wenn das Gerät danach mit einem feuchten Tuch
abgewischt wird.
9. Stromversorgung
Verwenden Sie nur eine Stromquelle, die den Hinweisen im
Handbuch oder auf dem Gerät entspricht.
Zum Trennen des Geräts von der Stromversorgung sollte
der Netzschalter auf der Rückseite verwendet werden. Das
Gerät muss so aufgestellt werden, dass dieser Schalter
leicht erreichbar ist.
Es handelt sich um ein Gerät der Klasse 1, das geerdet
werden muss.
10. Schutz der Netzkabel
Verlegen Sie die Netzkabel nicht frei im Raum. Achten Sie
darauf, dass sie nicht geknickt oder gedehnt werden und
dass keine Gegenstände darauf zu stehen kommen. Gehen
Sie besonders sorgfältig mit Kabelenden an Steckern und
Gerätebuchsen um.
11. Erdung
Achten Sie darauf, dass die Erdung des Gerätes nicht
beeinträchtigt wird.
12. Stromleitungen
Bringen Sie Außenantennen nicht in der Nähe von
Stromleitungen an.
13. Nichtnutzung
Ist die Anlage mit einem Standby-Modus ausgestattet,
ießt in diesem Modus ein geringer Strom durch das Gerät.
Ziehen Sie den Netzstecker, wenn Sie das Gerät für längere
Zeit nicht nutzen.
14. Seltsamer Geruch
Sollten Sie einen ungewöhnlichen Geruch bemerken oder
Rauch am Gerät entdecken, schalten Sie es aus und ziehen
Sie den Netzstecker. Wenden Sie sich dann sofort an Ihren
Arcam-Händler.
15. Wartung
Sie sollten nicht versuchen, das Gerät selbst zu warten.
Führen Sie nur die in diesem Handbuch beschriebenen
Maßnahmen aus. Überlassen Sie die Wartung des Gerätes
einem qualizierten Fachmann.
16. Zu behebende Schäden
Das Gerät sollte von einem Fachmann gewartet werden,
wenn:
A. das Netzkabel oder der Netzstecker beschädigt wurde,
oder
B. Gegenstände in das Gerät gefallen oder Flüssigkeiten
eingedrungen sind, oder
C. das Gerät Regen ausgesetzt war, oder
D. das Gerät nicht ordnungsgemäß funktioniert oder
einen erheblichen Leistungsabfall aufweist, oder
E. das Gerät zu Boden gefallen oder das Gehäuse
beschädigt ist.
Einhaltung von
Sicherheitsbestimmungen
Dieses Gerät entspricht der internationalen Sicherheitsnorm
für Elektrogeräte IEC 60065.
RISQUE DE CHOC ELECTRIQUE
NE PAS OUVRIR
ATTENTION
CAUTION
RISK OF ELECTRIC
SHOCK DO NOT OPEN
ACHTUNG: Um das Risiko eines Elektroschocks zu minimieren, sollten Sie die Abdeckung (Rückseite) nicht entfernen. Die
Bauteile im Gerät können vom Benutzer nicht gewartet werden. Überlassen Sie die Wartung des Gerätes einem Fachmann.
WARNUNG: Um das Risiko von Brand oder Elektroschock zu reduzieren, sollten Sie dieses Gerät weder Regen noch
Feuchtigkeit aussetzen.
Das Blitzsymbol in einem Dreieck weist den Anwender auf eine nicht isolierte „gefährliche Spannungsquelle“ im Gehäuse des Gerätes hin, die
stark genug sein kann, um einen Stromschlag auszulösen.
Das Ausrufezeichen in einem gleichschenkligen Dreieck weist den Anwender auf wichtige Anweisungen zum Betrieb und zur Instandhaltung
(Wartung) in der Dokumentation hin.
Page 27

P1000
D-3
Deutsch
Hinweise zum Handbuch
Inhalt
Hinweise zum Handbuch..................................... D-3
Bedienung des P1000 - Erste Schritte .................. D-4
Einführung.................................................. D-4
Aufstellen der Lautsprecher........................... D-4
Kabel ......................................................... D-4
Betrieb des P1000 ............................................. D-5
Betrieb ....................................................... D-5
Channel-status indicator lights....................... D-5
Aufstellen des Geräts ................................... D-6
Anschließen an einem Vorverstärker............... D-6
Installation ....................................................... D-6
Anschließen der Lautsprecher ........................ D-7
Festlegen des Verstärkungswerts des
Verstärkers ................................................. D-8
Connecting to a power supply........................ D-8
Fehlerbehebung ................................................ D-9
Fehlerstatus-LEDs ............................................D-10
Technische Daten .............................................D-11
Laufende Verbesserungen ............................D-11
Störgeräusche............................................D-11
Garantie..........................................................D-12
Weltweite Garantie......................................D-12
Online-Registrierung ...................................D-12
Dieses Handbuch enthält Informationen, die Sie zum
Installieren, Anschließen, Einrichten und Betreiben des
Arcam DiVA P1000 Mehrkanal-Endstufe benötigen.
Es ist möglich, dass der P1000 als Teil Ihrer Hi- oder
Heimkinoanlage bereits von einem qualizierten ArcamHändler installiert und eingestellt wurde. In diesem Fall
können Sie alle Abschnitte dieses Handbuchs überspringen,
die sich mit der Installation und dem Anschluss dieses
Geräts befassen. Die für Sie relevanten Abschnitte nden
Sie anhand der Inhaltsangabe.
Sicherheit
Auf der folgenden Seite dieses Handbuchs nden Sie einige
Sicherheitsrichtlinien.
Vieles davon scheint zwar offensichtlich, Sie sollten die
Hinweise aber trotzdem lesen, um Ihre eigene Sicherheit zu
gewährleisten und Schäden am Gerät zu vermeiden.
Dies ist ein Produkt der Klasse 1 und benötigt einen
Erdanschluss.
Rechtliche Hinweise
<
Lucaslm und THX sind Marken oder eingetragene Marken der
Lucaslm, Ltd.
Copyright © Lucaslm Ltd. &TM.
Page 28

P1000
D-4
P1000
D-5
Deutsch
Bedienung des P1000 - Erste Schritte
Einführung
Arcam P1000 ist eine Mehrkanal-Endstufe, die unter Beachtung der üblich hohen Qualitätsstandards von
Arcam bei Design und Fertigung entwickelt wurde. Es handelt sich um einen besonders leistungsstarken
Verstärker, der bis zu 135 W pro Kanal liefert. Er ist nicht nur für den Einsatz im Mehrkanal-Heimkino
geeignet, sondern bietet außerdem eine überlegene Stereoleistung bei Zweikanal-Quellen. Der P1000
ist ein idealer Partner für den Vorverstärker/Prozessor Arcam DiVA AVP700.
Die einzelnen Verstärkermodule des P1000 sind identisch, damit jeder Verstärkungskanal dieselbe
Leistung bietet. Der P1000 hat Eingangs- und Ausgangsbuchsen für das Signal der einzelnen Kanäle,
damit das Signal ggf. an weitere Endstufen zum Betrieb von Lautsprechern in anderen Räumen oder
zum Bi-Amping beliebiger Kanäle weitergeleitet werden kann. Beispiel: Wird der P1000 zum Betrieb
einer Fünf-Kanal-Surround-Sound-Anlage eingesetzt, könnten Sie die beiden nicht belegten Module
(„L surround rear“ und „R surround rear“) zusammen mit den Hauptmodulen („L front“ und „R front“)
verwenden, um geeignete Frontlautsprecher (links und rechts) im Bi-Amp-Modus zu betreiben.
Wir sind uns sicher, dass Ihnen der P1000 viele Jahre lang erstklassigen Heimkinogenuss bringen wird.
Aufstellen der Lautsprecher
Am P1000 können bis zu sieben Lautsprecher angeschlossen werden. Gruppieren Sie alle Lautsprecher,
mit Ausnahme des Subwoofers, um die übliche Sitzposition (siehe Abbildung). Den Subwoofer können
Sie fast beliebig aufstellen und wir empfehlen, mit verschiednen Positionen zu experimentieren, bis Sie
den besten Klang erhalten.
Stellen Sie die vorderen Lautsprecher links und
rechts so auf, dass für die Wiedergabe von Musik ein
gutes Stereoklangbild entsteht. Stehen die beiden
Lautsprecher zu dicht zusammen, klingt es nicht
räumlich genug, stehen Sie zu weit auseinander,
entsteht in der Mitte des Klangbilds ein „Loch“ und
die beiden Kanäle werden getrennt voneinander
wiedergegeben.
Der mittlere Lautsprecher ermöglicht eine realistischere
Wiedergabe von Dialogen und anderen allgemeinen
Signalen sowie ein breiteres und besseres Klangbild
für Stereo-Effekte und Hintergrundtöne für den Einsatz
im Heimkino. Gehen Sie beim Kauf des mittleren
Lautsprechers keine Kompromisse ein, da er in einer
Heimkino-Anlage sämtliche Dialoge ausgibt.
Umgebungsgeräusche und -effekte wieder.
Die Aufgabe der Surround-Lautsprecher hinten links und rechts ist es, dem Ton mehr Räumlichkeit und
Richtung zu geben.
Ein Subwoofer verbessert die Wiedergabeleistung von Tiefen. Dies ist für die Wiedergabe von
Kinoeffekten von Vorteil, besonders wenn ein spezieller LFE-Kanal (Low-Frequency Effects, d. h.
Niederfrequenz-Effekte) vorhanden ist, wie dies bei DVDs mit Dolby Digital- oder DTS Digital SurroundCodierung der Fall ist.
Kabel
Wir empfehlen die Verwendung hochwertiger abgeschirmter Analog-, Digital- und Videokabel, da
minderwertige die Wiedergabequalität der Anlage beeinträchtigen. Verwenden Sie nur Kabel, die auf
das jeweilige Einsatzgebiet ausgelegt sind, da andere Kabel eine andere Impedanz aufweisen, die
zu einer Verminderung der Systemleistung führt. Verwenden Sie beispielsweise keine Audiokabel
für Videosignale. Lautsprecherkabel sollten so kurz wie möglich gehalten werden, zumindest sollten
Kabelpaare (z. B. zu den Lautsprechern vorne links und rechts) möglichst gleich lang sein.
Es wird empfohlen, die Verbindungs-, Lautsprecher- und Netzkabel voneinander getrennt zu verlegen,
um Interferenzen möglichst gering zu halten.
Wenn Sie bei der Auswahl der Kabel Hilfe benötigen, lassen Sie sich von Ihrem Fachhändler beraten.
Page 29

P1000
D-5
Deutsch
Betrieb des P1000
Betrieb
Rechts auf der Vorderseite des P1000 be ndet sich das einzige Bedienelement: der Netzschalter.
Drücken Sie den Netzschalter, um den Stand-by-Modus des P1000 ein bzw. auszuschalten. Mit dem
Schalter auf der Geräterückseite können Sie das Gerät vollständig ausschalten. Sollte der P1000 beim
Betätigen des Netzschalters an der Gerätevorderseite nicht eingeschaltet werden, vergewissern Sie
sich, dass sich der Schalter auf der Rückseite in der Position „ON“ be ndet.
Einschalten
Es wird empfohlen, erst den Vorverstärker oder Controller und dann den P1000 einzuschalten, da so
vermieden wird, dass Spannungsspitzen durch die Endstufe geleitet werden.
Ausschalten
Schalten Sie zuerst den P1000 und dann den Vorverstärker oder Controller aus.
Kanal-Betriebsleuchten
Jeder Verstärkerkanal des P1000 hat eine eigene Statusanzeige.
Beim Einschalten des Geräts ändert sich die Farbe von Gelb auf Grün und zeigt damit den Aktivstatus
an. Im Stand-By-Modus sind alle LEDs aus.
Wenn die Statusanzeigen beim Einschalten des P1000 nicht wie hier beschrieben leuchten oder während
des Betriebs Fehler anzeigen, nden Sie weitere Informationen, die Ihnen beim Beheben des Problems
helfen, auf Seite 10.
1 2 3 4 5 6 7
P1000
MULTICHANNEL POWER AMPLIFIER
POWER
Page 30

P1000
D-6
P1000
D-7
Deutsch
Aufstellen des Geräts
<
Stellen Sie den Verstärker auf eine ebene, stabile Ober äche.
<
Sie sollten das Gerät vor direkter Sonneneinstrahlung schützen und von Wärme- bzw.
Feuchtigkeitsquellen fernhalten.
<
Stellen Sie das Gerät nicht auf eine andere Endstufe oder Wärmequellen.
<
Sorgen Sie für eine ausreichende Belüftung. Wird das Gerät in einem abgeschlossenen Raum (z. B.
einem Bücherregal, Rack oder Schrank) aufgestellt, vergewissern Sie sich, dass genügend Platz
um das Gerät ist, damit Luft durch die Lüftungsschlitze strömen und den Verstärker kühlen kann.
Unzureichende Belüftung kann dazu führen, dass der P1000 wegen Überhitzung abschaltet.
Der P1000 wird auch bei normalem Betrieb warm.
<
Vergewissern Sie sich, dass das Rack oder der Ständer das Gewicht des P1000 tragen kann.
Anschließen an einem Vorverstärker
Zum Empfang von Signalen aus einem Vorverstärker sind zwei verschiedene Anschlüsse verfügbar. Der
richtige Anschluss hängt von der Kon guration der Anlage ab.
1. Wenn die Kabel für den Anschluss des Vorverstärkers am P1000 kürzer als drei Meter sind, wird
empfohlen, den Vorverstärker an den Cinch-Buchsen des P1000 anzuschließen.
2. Wenn die Kabel für den Anschluss des Vorverstärkers am P1000 länger als drei Meter sind und der
Vorverstärker mit symmetrischen Ausgängen ausgestattet ist, sollten Sie diese statt der CinchBuchsen verwenden. Außerdem wird in Umgebungen mit starkem elektrischen Hintergrundrauschen
beim Einsatz dieses Anschlusses die Leistung verbessert.
Sie können zwar sowohl symmetrische als auch Cinch-Verbindungen zwischen dem Vorverstärker und
dem P1000 nutzen, dürfen aber nur eine Anschlussart pro Kanal verwenden.
Allgemeine Hinweise zum Anschließen
Die Ausgänge des Vorverstärkers sollten mit den AUDIO IN-Eingängen des P1000 verbunden werden.
Sie sollten möglichst immer den Vorverstärkerausgang eines Kanals mit dem entsprechenden Eingang
des P1000 verbinden. Beispiel: Verbinden Sie den Ausgang für den linken Surround-Kanal des
Vorverstärkers mit dem entsprechenden Eingang des P1000. Diese Vorgehensweise hat zwar keine
technischen Vorteile, sie ist jedoch leichter überschaubar.
Wenn Sie zwei Module für den Bi-Amp-Betrieb eines Lautsprecherpaars oder den Bi-Amp-Betrieb der
Anlage mit einer weiteren Endstufe nutzen möchten, können Sie das Signal des entsprechenden Kanals
(die AUDIO OUT-Cinch-Buchse des Kanals) mit den zusätzlichen Modulen verbinden. Das Signal wird
dann sowohl an das erste als auch an das zweite Modul geleitet, damit ein Bi-Amping der Lautsprecher
möglich ist. Weitere Informationen nden Sie im Abschnitt „Bi-Amping“ auf Seite 8. Beachten Sie, dass
zum Bi-Amping die Cinch-Anschlüsse am Vorverstärker und dem P1000 genutzt werden müssen.
12-V-Trigger-Eingang
Ist der Vorverstärker mit einem 12-V-Trigger-Ausgang ausgestattet, können Sie diesen am
12-V-Trigger-Eingang über einen 3,5-mm-Stecker anschließen. Auf diese Weise können Sie den
P1000 über den Vorverstärker einschalten.
Beachten Sie, dass der Trigger-Eingang nur aktiv ist, wenn der Netzschalter auf der
Geräterückseite in der „ON“-Position steht.
Installation
Der 12-V-Trigger
nutzt einen 3,5-mmMonostecker mit
folgender Belegung:
<
Masse: Erde
<
Spitze: Aktiv
12V
TRIGGER
IN
SLOBLO FUSE
IN OUTIN OUTIN OUTIN OUTIN OUTIN OUTIN OUT
BALANCED INBALANCED INBALANCED INBALANCED INBALANCED INBALANCED INBALANCED IN
A
B
C
A
B
C
A
B
C
A
B
C
A
B
C
A
B
C
A
B
C
7
RS BACK
6
R SURR
5
RIGHT
4
CENTRE
3
LEFT
2
L SURR
1
LS BACK
POWER ON/OFF
POWER INLET
230V
Page 31

P1000
D-7
Deutsch
Anschließen der Lautsprecher
Verkabelungstechniken
Es gibt drei verschiedene Verkabelungstechniken für den P1000 und die Lautsprecher. Welche davon für
Sie in Frage kommt, ist von der Art der Lautsprecher abhängig.
<
Single wiring
Single-Wiring ist die herkömmliche und einfachste Verkabelungstechnik, bei der Verstärker
und Lautsprecher durch ein Kabel pro Kanal verbunden werden.
<
Bi-wiring
Beim Bi-Wiring werden zwei getrennte Kabel zwischen Verstärker und jedem der
Lautsprecher verwendet. Ein Kabel wird für Niederfrequenzsignale und das andere für
Signale mit höheren Frequenzen benutzt. Jeder Verstärker ist für Bi-Wiring geeignet.
Allerdings müssen die Lautsprecher mit zwei getrennten Anschlüssen für die beiden Kabel
ausgestattet sein. In der Regel be nden sich auf der Rückseite solcher Lautsprecher ein
mit „HF“ oder „High Frequency“ und ein mit „LF“ oder „Low Frequency“ gekennzeichnetes
Anschlusspaar. Bi-Wiring verbessert den Klang der Anlage, da durch Verwendung
verschiedener Kabel für hoch- und niederfrequente Signalströme Verzerrungen vermieden
werden, die beim Single-Wiring durch die gegenseitige Beein ussung der Ströme in einem
einzigen Kabel entstehen.
<
Bi-amping
Die Leistung des Systems kann weiter verbessert werden, indem das beim Bi-Wiring bereits
eingesetzte Prinzip der Signaltrennung erweitert und jeweils ein eigener Verstärker für den Niederund den Hochfrequenzschaltkreis in jedem Lautsprecher benutzt wird. Sie benötigen dafür zwei
Verstärker.
Single wiring
Die Lautsprecheranschlüsse für die einzelnen Kanäle sind auf der
Rückseite des P1000 deutlich gekennzeichnet. Verbinden Sie den
positiven Lautsprecheranschluss des Kanals am P1000 (rot und mit
„+“ gekennzeichnet) mit dem positiven Anschluss des entsprechenden
Lautsprechers. Beispiel: Verbinden Sie den positiven Anschluss des
mittleren Kanals am P1000 mit dem positiven Anschluss des mittleren
Lautsprechers. Verbinden Sie ebenso den negativen Anschluss des
Verstärkers (schwarz, mit „–“ gekennzeichnet) mit dem negativen
Anschluss des Lautsprechers. Unterstützt der Lautsprecher Bi-Wiring (d. h.
ist er mit mehreren Anschlusspaaren ausgestattet), Sie aber Bi-Wiring
nicht nutzen möchten, verbinden Sie den P1000 mit den Anschlüssen, die
mit „LF“ oder „Low Frequency“ gekennzeichnet sind. Bei Lautsprecher, die
Bi-Wiring unterstützen, sind Hoch- und Niederfrequenzanschlüsse mit einer
Metallbrücke verbunden. Diese dürfen beim Single-Wiring nicht entfernt
werden.
Folgen Sie den oben genannten Anweisungen für die einzelnen
Lautsprecher und vergewissern Sie sich, dass die Lautsprecher mit den
korrekten Ausgängen des P1000 verbunden sind. Sie müssen nicht an alle
Kanäle des P1000 einen Lautsprecher anschließen (es ist z. B. egal, ob Sie
einen mittleren Lautsprecher haben oder nicht).
Bi-wiring
Bi-Wiring unterscheidet sich von Single-Wiring dadurch, dass jeder
Lautsprecher über ein Kabelpaar mit dem positiven Anschluss des
Verstärkers verbunden wird. Eines der Kabel muss mit dem unteren der
beiden positiven Anschlüsse, das andere mit dem höheren verbunden
werden. Die negativen Anschlüsse müssen auf die gleiche Weise verbunden
werden. Beachten Sie, dass die Metallbrücke, die die unteren und oberen
Anschlüsse am Lautsprecher verbindet, beim Bi-Wiring entfernt werden
muss.
Erste Schritte
Vergewissern Sie
sich, dass der P1000
ausgeschaltet und von
der Stromversorgung
getrennt ist, da sonst
Schäden am Verstärker
und den Lautsprechern
entstehen können.
P1000 Bi-Wiring (zur besseren Übersicht
wird nur ein Kanal gezeigt).
P1000 Single-Wiring (zur besseren Übersicht
wird nur ein Kanal gezeigt).
Page 32

P1000
D-8
P1000
D-9
Deutsch
Bi-Amping
Für Bi-Amping wird ein zweiter Verstärker benötigt: Eine Endstufe betreibt
die Lautsprecher für hohe Frequenzen (Höhen) und die andere ist für niedrige
Frequenzen (Tiefen) zuständig.
Die Verkabelung beim Bi-Amping ähnelt der beim Bi-Wiring. Verbinden Sie die
Anschlüsse eines Moduls (Kanals) mit einem Anschlusspaar des Lautsprechers.
Verbinden Sie ein anderes Modul bzw. einen Kanal einer weiteren Endstufe so
mit dem anderen Anschlusspaar des Lautsprechers, dass zwei Verstärkerkanäle
an einem Lautsprecher angeschlossen sind, einer für niedrige Frequenzen und
einer für hohe. Die Höhen-Anschlüsse (Treble) des Lautsprechers sollten mit
den Anschlüssen des Verstärkermoduls bzw. Kanals, der für hohe Frequenzen
genutzt wird, verbunden werden. Die Tiefen-Anschlüssen (Bass) des
Lautsprechers sollten mit den Anschlüssen des Verstärkermoduls bzw. Kanals,
der für niedrige Frequenzen genutzt wird, verbunden werden. Beachten Sie,
dass die Metallbrücke, die die unteren und oberen Anschlüsse am Lautsprecher
verbindet, beim Bi-Wiring entfernt werden muss, da sonst beide Verstärker
beschädigt werden könnten.
Die Abbildung für Bi-Amping nden Sie auf der nächsten Seite.
Notes on making speaker connections
<
Schließen Sie keine Geräte am Verstärker an, während dieser eingeschaltet oder mit der
Stromversorgung verbunden ist.
<
Der Lautstärkeregler am Vorverstärker muss ganz heruntergedreht sein, bevor Verbindungen
vornehmen.
<
Wenn Sie die Lautsprecher angeschlossen haben, prüfen Sie die Verbindungen sorgfältig, bevor Sie
den P1000 das erste Mal einschalten. Achten Sie darauf, dass keine blanken Kabel einander oder
das Verstärkergehäuse berühren (dies könnte einen Kurzschluss auslösen) und dass die positiven
(+) und negativen (–) Pole richtig angeschlossen wurden.
<
Regeln Sie die Lautstärke des Vorverstärkers auf den niedrigsten Wert, bevor Sie den P1000
einschalten. Schalten Sie die Verstärker ein, wählen Sie das Quellsignal und erhöhen Sie
schrittweise die Lautstärke auf den gewünschten Wert.
<
Wenn Sie nicht sicher sind, wie die Anlage verkabelt werden muss oder wenn Sie Fragen zu Bi-
Wiring oder Bi-Amping haben, wenden Sie sich an Ihren Arcam-Händler, der Ihnen gerne Auskunft
geben wird.
Festlegen des Verstärkungswerts des Verstärkers
Neben den Lautsprecheranschlüssen für jeden Kanal auf der Geräterückseite be ndet sich ein kleiner
Schalter. Mit diesem können Sie den Verstärkungswert des Verstärkers festlegen: Der Schalter hat drei
Positionen. Wählen Sie den gewünschten Verstärkungswert:
<
A: In dieser Position hat der P1000 einen Verstärkungswert von 31,5 dB, den Standardwert für
Arcam-Verstärker. Verwenden Sie diese Einstellung, wenn der Verstärker alleine oder zusammen mit
anderen Verstärkern von Arcam eingesetzt wird.
<
B: In dieser Position hat der P1000 einen Verstärkungswert von 29 dB, der für THX™-kompatible
Verstärker verwendet wird. Verwenden Sie diese Einstellung, wenn der P1000 mit anderen
Verstärkern mit THX-Verstärkung (z. B. Arcam P7) eingesetzt wird. Beachten Sie, dass der P1000
kein THX™-Zerti kat besitzt.
<
C: In dieser Stellung hat der P1000 einen Verstärkungswert von 26 dB. Verwenden Sie diese
Einstellung, wenn der P1000 mit anderen Verstärkern mit diesem Verstärkungswert eingesetzt wird.
Obwohl der Verstärkungswert für jeden Kanal einzeln eingestellt werden kann, ist es unwahrscheinlich,
dass dies erforderlich ist. Es wird daher dringend empfohlen, alle Verstärkerkanäle auf denselben Wert
einzustellen.
Anschließen an das Stromnetz
Netzkabel
Das Gerät wird normalerweise mit einem verschweißten Netzstecker am Stromkabel ausgeliefert. Wenn
der Stecker aus einem bestimmten Grund vom Kabel gelöst wird, muss er umgehend fachgerecht
entsorgt werden, da er sonst in einer Steckdose einen Stromschlag verursachen kann.
Prüfen Sie, ob der Netzstecker zu Ihrer Stromversorgung passt und die Netzspannung mit der
Einstellung auf der Geräterückseite (115 oder 230 V) übereinstimmt.
Wenn die Netzspannung nicht übereinstimmt oder der Netzstecker nicht passt, wenden Sie sich an
Ihren Arcam-Händler.
Anschließen des Geräts
Drücken Sie den IEC-Stecker des mitgelieferten Netzkabels fest in die Netzbuchse an der
Geräterückseite (POWER INLET).
Stecken Sie das andere Ende des Netzkabels in eine Netzsteckdose.
P1000 Bi-Amping (zwei
Verstärkermodule für einen Kanal).
Page 33

P1000
D-9
Deutsch
Fehlerbehebung
Keine der LEDs leuchtet.
Prüfen Sie Folgendes, wenn keine der LEDs am P1000 leuchtet:
<
Das Netzkabel muss am P1000 und an einer Steckdose angeschlossen sein.
<
Ist die Sicherung im Stecker (falls vorhanden) durchgebrannt oder wurde ein Trennschalter in der
Stromversorgung ausgelöst?
<
Ist die Sicherung auf der Geräterückseite (über dem Netzanschluss) durchgebrannt? Beachten Sie,
dass die Sicherung durch eine desselben Typs ausgetauscht werden muss. Wenden Sie sich im
Zweifelsfall an Ihren Fachhändler.
<
Der Netzschalter auf der Rückseite des P1000 muss auf der Position „ON“ stehen.
LEDs auf der Vorderseite leuchten rot oder gelb
Die Tabelle auf Seite 10 beschreibt die Fehlerbedingungen, die durch verschiedene LED-Muster
angezeigt werden, sowie Vorschläge zur Fehlerbehebung.
Es ist kein Ton zu hören
Prüfen Sie Folgendes, falls der P1000 keinen Ton ausgibt:
<
Alle Kanal-LEDs auf der Gerätevorderseite müssen grün leuchten. Lesen Sie die Tabelle auf Seite
10, falls die LEDs andersfarbig leuchten oder den entsprechenden Abschnitt weiter oben, wenn
keine der LEDs leuchtet.
<
Am Vorverstärker muss der richtige Eingang ausgewählt sein und die ausgewählte Quelle muss
ein Signal erzeugen (z. B. eine CD wiedergeben). Schließen Sie falls möglich einen Kopfhörer am
Vorverstärker an, um sicherzustellen, dass an dieser Stelle ein Ton zu hören ist. Ist dies nicht der
Fall, liegt der Fehler wahrscheinlich zwischen Audioquelle und Vorverstärker.
<
Die Lautstärke des Vorverstärkers muss auf einen hörbaren Wert eingestellt sein. Der Vorverstärker
darf nicht stumm geschaltet sein.
<
Die Verbindungen zwischen dem Vorverstärker und dem P1000 müssen wie in diesem Handbuch
beschrieben vorgenommen worden sein. Prüfen Sie außerdem die Verbindungen zwischen dem
P1000 und den Lautsprechern.
Der Ton ist schlecht oder verzerrt
Ist der Ton aus dem P1000 verzerrt oder schwach (wenig Tiefen), prüfen Sie Folgendes:
<
Alle Kabel (Verbindungs- und Lautsprecherkabel) müssen ordnungsgemäß angeschlossen sein.
Schalten Sie den P1000 aus, ziehen Sie die Kabel ab und schließen Sie sie wieder an. Schalten Sie
den P1000 erneut ein, um zu prüfen, ob sich die Tonqualität verbessert hat.
<
Im Setup-Menü des Prozessors bzw. Vorverstärkers müssen auf die Ihrer Anlage entsprechenden
Lautsprechergrößen ausgewählt sein. Der Grund für schwache Tiefen kann z. B. sein, dass die
Lautsprechergröße „Small“ (klein) gewählt wurde. Im Handbuch zum Vorverstärker/Prozessor
nden Sie weitere Informationen.
Nur einige der Lautsprecher geben Ton wieder
Geben nur einige Lautsprecher Ton wieder, funktionieren aber ordnungsgemäß, prüfen Sie Folgendes:
<
Alle Lautsprecher der Anlage müssen am P1000 angeschlossen sein.
<
Der Vorverstärker muss so konguriert sein, dass alle Lautsprecher der Anlage angesprochen
werden. Im Handbuch zum Vorverstärker/Prozessor nden Sie weitere Informationen.
<
Es muss eine passende Surround-Sound-Quelle ausgewählt sein und über den Vorverstärker
wiedergegeben werden.
<
Quellen, die digital am Vorverstärker angeschlossen sind, müssen Mehrkanaldaten ausgeben.
Beispielsweise ist es bei manchen DVD-Spielern möglich, das Ausgabeformat auszuwählen und zu
bestimmen, ob Mehrkanaldaten in PCM (Stereo) abgemischt werden. Im Handbuch zum Quellgerät
nden Sie weitere Informationen.
<
Der wiedergegebene Datenträger muss eine Mehrkanalaufnahme enthalten und der Prozessor muss
Mehrkanalaudio ausgeben.
<
Die Lautsprecherbalance muss korrekt eingestellt sein. Im Handbuch zum Vorverstärker/Prozessor
nden Sie weitere Informationen.
<
Alle Kanal-LEDs auf der Gerätevorderseite müssen grün leuchten. Lesen Sie die Tabelle auf Seite
10, falls die LEDs andersfarbig leuchten.
Brummen an einem analogen Eingang
Gibt ein Lautsprecher ein „Brummen“ aus, prüfen Sie Folgendes:
<
Das Brummen kann von einer Erdungsschleife stammen, die von einer Antenne, einer
Satellitenschlüssel oder einem Kabelanschluss ausgelöst werden. Prüfen Sie, ob das Brummen
verschwindet, wenn Sie das Antennenkabel abziehen. Weitere Informationen erhalten Sie bei Ihrem
Arcam- oder Antennen-Fachhändler.
<
Vergewissern Sie sich, dass die Verbindungs- und Lautsprecherkabel nicht um ein Netzkabel
gewickelt sind.
<
Betätigen Sie den Ground-Lift-Schalter am Vorverstärker/Prozessor, falls vorhanden. Weitere
Informationen nden Sie im Handbuch zum Vorverstärker.
Siehe außerdem „Der Ton ist schlecht oder verzerrt“.
Page 34

P1000
D-10
P1000
D-11
Deutsch
Der Radio- bzw. Fernsehempfang ist gestört
Falls Störungen im Radio- bzw. Fernsehempfang auftreten, wenn der P1000 eingeschaltet ist,
aber verschwinden, wenn er ausgeschaltet ist, vergewissern Sie sich, dass das Antennen- bzw.
Satellitenschüssel-Kabel zum Fernsehgerät oder Empfänger nicht in der Nähe des P1000 und dessen
Kabel verlegt ist und dass ein hochwertiges (abgeschirmtes) Antennenkabel verwendet wurde. Es
könnte helfen, wenn Sie die Antenne/Satellitenschüssel an einer anderen Stelle anbringen.
<
Wenn die oben genannten Vorschläge das Problem nicht beheben, wenden Sie sich an
Ihren Fachhändler.
Fehlerstatus-LEDs
Die in der Tabelle beschriebenen LED-Muster weisen auf folgende Fehlerbedingungen hin:
LED-Muster Beschreibung Verstärker-Vorgang
Alle LEDs leuchten grün. Dies ist der normale
Betriebszustand des Verstärkers.
Keiner
Die Netz-LED leuchtet
gelb und die Kanal-LEDs
leuchten nicht.
Es ist ein „DC-Offset“-Fehler
aufgetreten. Dies kann der
Fall sein, wenn eine zu hohe
Gleichspannung am Ausgang
des Vorverstärkers, der am
P1000 angeschlossen ist, anliegt.
Beachten Sie den Hinweis weiter
unten.
Diese Fehlerbedingung wird nicht
automatisch aufgehoben.
Schalten Sie den P1000 einfach über
den Netzschalter auf der Rückseite
aus, warten 30 Sekunden lang und
schalten ihn wieder ein.
Besteht der Fehler weiterhin oder
möchten Sie bestätigen, dass eine
zu hohe Gleichspannung anliegt,
schalten Sie den P1000 über den
Netzschalter auf der Rückseite aus,
ziehen Sie die Verbindungskabel
ab und schalten Sie den P1000
wieder ein. Der Fehler sollte jetzt
behoben sein. Leuchtet die Netz-LED
immer noch gelb, liegt ein Fehler im
P1000 vor. Schalten Sie das Gerät
aus und wenden Sie sich an Ihren
Fachhändler.
Kanal-LEDs blinken gelb/
grün.
Ein Kurzschluss ist aufgetreten.
Die blinkenden LEDs geben den
Verstärkerkanal an, in dem der
Kurzschluss vorliegt.
Der Verstärker schaltet den Kanal mit
dem Kurzschluss stumm. Wird der
Fehler behoben, stellt der Verstärker
den Normalbetrieb wieder her.
Beachten Sie, dass ein Audiosignal
am Kanal anliegen muss, damit der
Kurzschluss erkannt werden kann.
Beispiel: Wenn Sie den Ausgang
am Vorverstärker stumm schalten,
scheint der Fehler behoben. Es ist
jedoch wahrscheinlich, dass der
Fehler erneut auftritt, wenn die
Stummschaltung des Vorverstärkers
aufgehoben wird, es sei denn,
es werden weitere Maßnahmen
getroffen.
Kanal-LEDs leuchten gelb. Im Kanal mit der gelben LED
ist ein Überhitzungsfehler
aufgetreten.
Der Verstärker schaltet den Kanal
mit dem Fehler stumm. Dieser
Zustand bleibt so lange erhalten, bis
der Kanal abgekühlt ist. Tritt dieser
Fehler häug auf, vergewissern Sie
sich, dass der Verstärker ausreichend
belüftet wird.
DC-Offset-Fehler
Ein „DC-Offset-Fehler“ ist kein Fehler an der Endstufe, sondern ein Mechanismus zum Schutz der
Lautsprecher. Wenn die Endstufe für einen längeren Zeitraum mit Gleichstrom statt Wechselstrom
versorgt wird, können die Spulen in den angeschlossenen Lautsprechern durchbrennen oder im
Extremfall Feuer fangen. Der P1000 kann diese Bedingung feststellen und die Stromversorgung der
Lautsprecher unterbrechen.
DC-Offset-Fehler können in allen Kongurationen von Zeit zu Zeit auftreten, besonders wenn ein Tuner
oder Satellitenempfänger angeschlossen ist. Tritt dieser Fehler häug oder regelmäßig auf, wenden Sie
sich an Ihren Händler.
Page 35

P1000
D-11
Deutsch
Technische Daten
Alle Messungen wurden mit einem Netzstrom von 230V/50Hz durchgeführt
Dauerleistung
Alle Kanäle angetrieben, 20Hz—20kHz, 8Ω 135W pro Kanal; 945W gesamt
Alle Kanäle angetrieben, 20Hz—20kHz, 4Ω 210W pro Kanal; 1,47kW gesamt
Ein oder zwei Kanäle angetrieben, 1kHz, 8Ω 190W pro Kanal
Ein oder zwei Kanäle angetrieben, 1kHz, 4Ω 305W pro Kanal
Ein oder zwei Kanäle angetrieben, 1kHz, 3,2Ω 325W pro Kanal
Spitzenstromleistung
±25A pro Kanal
Gesamtklirrfaktor
Auf jeder Stufe bis Nennleistung, in 4 oder 8Ω <0,08% max. (20Hz—20kHz);
typisch <0,007% bei 1kHz
Frequenzbereich
±0,2dB (20Hz—20kHz)
–1dB bei 1Hz und 100kHz
Restbrumm und Eigengeräusch
Bezugsleistung –110dB A bewertet; 100dB CCIR
Spannungsverstärkung
x 28,3 (1V Eingang ergibt 100W/8Ω Ausgang)
Eingangsimpedanz
22kΩ parallel mit 180pF
Ausgangsimpedanz
50mΩ bei 20Hz, 1kHz
120mΩ bei 20kHz
Leistungsaufnahme
100V, 115V oder 230VAC, 50/60Hz, max. 2,2kW
über einen IEC-Netzeingang
Ein Nulldurchgangs-Wechselstromsystem
verhindert große ‘Transformator’ Stromspitzen
beim Einschalten
Kenndaten
Abmessungen: B430 x T450 x H180 mm
Gewicht: 31kg netto; 35kg mit Verpackung
Irrtümer und Auslassungen vorbehalten
Laufende Verbesserungen
Arcam befolgt eine Politik der ständigen Produktverbesserung. Das Design und die technischen Daten
können sich deshalb ohne weiteren Hinweis ändern.
HINWEIS: Sofern nicht anders ausgewiesen, entsprechen die technischen Daten dem
Serienstandard.
Störgeräusche
Der P1000 ist als Audiogerät auf elektromagnetische Störfreiheit von höchstem Niveau ausgelegt.
Das Gerät kann RF-(Hochfrequenz-)Energie ausstrahlen. In einigen Fällen kann dies zu Störungen mit
dem FM- und AM-Radioempfang führen. Sollte dies der Fall sein, positionieren Sie den P1000 und seine
Verbindungskabel möglichst weit vom Tuner und seinen Antennen. Störungen lassen sich des weiteren
reduzieren, wenn Sie den P1000 und den Tuner an unterschiedliche Netzsteckdosen anschließen.
EG-LÄNDER – Diese Produkte entsprechen der Richtlinie 89/336/EWG.
USA – Diese Produkte entsprechen den Anforderungen der FCC.
Page 36

P1000
D-12
Weltweite Garantie
Sie sind berechtigt, das Gerät während der ersten zwei Jahre nach Kaufdatum bei einem autorisierten
Arcam-Fachhändler kostenlos reparieren zu lassen, unter der Voraussetzung, dass es ursprünglich bei
einem Arcam-Händler erworben wurde. Arcam übernimmt keine Verantwortung für Schäden, die durch
Unfall, Missbrauch, Verschleiß, Vernachlässigung oder unautorisierte Veränderungen bzw. Reparaturen
entstehen. Außerdem wird keinerlei Verantwortung für Schäden oder Verlust des Geräts während des
Transports zum oder vom Garantienehmer übernommen.
Die Garantie deckt Teile- und Arbeitsstundenkosten bis zu zwei Jahre nach dem Kaufdatum ab. Nach
Ablauf von zwei Jahren müssen Sie die vollen Kosten für Ersatzteile und Arbeitsstunden tragen.
Versandkosten werden nicht übernommen.
Inanspruchnahme der Garantie
Das Gerät sollte in der Originalverpackung an den Händler zurückgegeben werden, bei dem es
erworben wurde. Ist dies nicht möglich, können Sie es auch direkt an den Arcam-Vertreter in Ihrem
Land schicken. Der Versand sollte frei Haus durch einen angesehenen Kurier erfolgen – nicht mit
der Post. Da keine Verantwortung für Schäden oder Verlust während des Transports zum Händler
übernommen wird, sollten Sie das Gerät entsprechend versichern.
Weitere Informationen erhalten Sie vom Arcam-Kundendienst:
Arcam Customer Support Department,
Pembroke Avenue,
Waterbeach,
CAMBRIDGE CB5 9QR,
England
Probleme?
Falls ein Problem auftritt, wenden Sie sich immer zuerst an Ihren Arcam-Händler. Kann der Händler
Fragen zu diesem oder einem anderen Arcam-Produkt nicht beantworten, wenden Sie sich bitte an den
Arcam-Kundendienst, und wir versuchen uns Möglichstes, Ihnen zu helfen.
Online-Registrierung
Sie können Ihr Arcam-Produkt online unter folgender Adresse registrieren: www.arcam.co.uk
Garantie
Page 37

P1000HANDLEIDING
Arcam P1000 eindversterker
Ned erlands
Page 38

P1000
N-2
P1000
N-3
Nederlands
Veiligheidsrichtlijnen
Veiligheidsvoorschriften
Dit product is ontworpen en vervaardigd om aan strenge
kwaliteits- en veiligheidsnormen te voldoen. Bij de
installatie en bediening moet u echter op de volgende
voorzorgsmaatregelen letten:
1. Neem waarschuwingen en aanwijzingen in acht
U dient alle veiligheidsvoorschriften en
gebruiksaanwijzingen te lezen alvorens dit apparaat te
gebruiken. Bewaar deze handleiding om later iets in na te
slaan en houd u aan alle waarschuwingen in de handleiding
of op het apparaat.
2. Water en vocht
De aanwezigheid van elektriciteit in de buurt van water kan
gevaarlijk zijn. Gebruik het apparaat niet in de buurt van
water ñ bijvoorbeeld naast een bad, wastafel, gootsteen, in
een vochtige kelder of bij een zwembad.
3. Vreemde voorwerpen en vloeistoffen
Zorg dat er geen voorwerpen via openingen in de behuizing
naar binnen vallen en dat er geen vloeistof in gemorst
wordt. Met vloeistof gevulde voorwerpen zoals vazen
mogen niet op de apparatuur gezet worden.
4. Ventilatie
Plaats de apparatuur niet op een bed, bank, vloerkleed of
ander zacht oppervlak, of in een gesloten boekenkast of
wandkast, aangezien dit de ventilatie kan belemmeren.
Het is raadzaam een minimumafstand van 50 mm rond de
zijden en boven het apparaat te bewaren om voldoende
ventilatie te geven.
5. Hitte
Zet het apparaat niet in de buurt van open vuur of
apparatuur die hitte uitstraalt, zoals radiatoren, kachels of
andere apparaten (inclusief andere versterkers).
6. Klimaat
Het apparaat is ontwikkeld voor gebruik in gematigde
klimaten.
7. Rekken en stellingen
Gebruik alleen rekken en stellingen die aanbevolen zijn
voor gebruik met geluidsapparatuur. Als de apparatuur
op een draagbaar rek staat, dient het heel zorgvuldig
verplaatst te worden zodat de combinatie niet omvalt.
8. Reiniging
Ontkoppel de eenheid van het lichtnet voordat reiniging
plaatsvindt.
De kast hoeft normaal alleen met een zachte, vochtige,
lintvrije doek afgeveegd te worden. Gebruik geen
verfverdunners of andere chemische oplosmiddelen om de
apparatuur te reinigen.
Wij raden het gebruik van meubelwas of -spuitbussen
af, aangezien deze onuitwisbare witte plekken kunnen
achterlaten als de eenheid daarna met een vochtige doek
afgenomen wordt.
9. Stroomvoorziening
Sluit het apparaat alleen op een stroomvoorziening aan
die in de gebruiksaanwijzingen of op het apparaat vermeld
wordt.
De primaire methode om dit product van het lichtnet te
isoleren, is de schakelaar aan de achterkant van de eenheid
te gebruiken. Deze eenheid moet zo geïnstalleerd worden
dat deze schakelaar toegankelijk blijft.
Dit is een klasse 1-apparaat dat geaard moet worden.
10. Netsnoerbescherming
Netsnoeren dienen zo gerouteerd te worden dat er niet
overheen gelopen wordt, en ze niet in de verdrukking
komen door voorwerpen die erop of ertegenaan gezet
worden. Hierbij moet vooral gelet worden op snoeren en
stekkers, en hun uitgangspunt op het apparaat.
11. Aarding
Zorg dat het aardingsmiddel van het apparaat niet
tenietgedaan wordt.
12. Hoogspanningskabels
Installeer buitenantennes weg van hoogspanningskabels.
13. Wanneer niet in gebruik
Als de eenheid een standby-functie heeft, blijft er in deze
modus een kleine hoeveelheid stroom naar de apparatuur
gaan. Haal het netsnoer van het apparaat uit het
stopcontact als het apparaat lange tijd niet gebruikt wordt.
14. Abnormale geur
Als het apparaat een abnormale geur of rook afgeeft, zet u
het dan onmiddellijk uit en haal de stekker van de eenheid
uit de wandcontactdoos. Neem onmiddellijk contact op met
uw leverancier.
15. Onderhoud
U moet niet proberen het apparaat zelf te onderhouden
buiten wat er deze handleiding beschreven wordt, maar
het onderhoud door deskundig onderhoudspersoneel laten
uitvoeren.
16. Schade die reparatie vereist
Het apparaat moet in de volgende gevallen door bevoegd
onderhoudspersoneel nagekeken worden:
A. Het netsnoer of de stekker is beschadigd.
B. Er zijn voorwerpen in het apparaat gevallen of er is
vloeistof in gemorst.
C. Het apparaat werd aan regen blootgesteld.
D. Het apparaat lijkt niet normaal te functioneren of het
prestatievermogen is aanzienlijk veranderd.
E. Het apparaat is gevallen of de kast is beschadigd.
Veiligheidsnaleving
Dit product is ontworpen om aan de EN60065-standaard
voor internationale elektrische veiligheid te voldoen.
RISQUE DE CHOC ELECTRIQUE
NE PAS OUVRIR
ATTENTION
CAUTION
RISK OF ELECTRIC
SHOCK DO NOT OPEN
WAARSCHUWING: Verwijder de behuizing (of achterkant) niet om het risico van een elektrische schok te vermijden. In het
apparaat zitten geen onderdelen die door de gebruiker onderhouden kunnen worden. Laat het onderhoud over aan bevoegd
onderhoudspersoneel.
WAARSCHUWING: Stel dit apparaat niet bloot aan regen of vocht om het risico van brand of elektrische schok te vermijden.
De driehoek met de bliksemschicht is bedoeld om de gebruiker erop attent te maken dat er in de kast van het product een ongeïsoleerd
‘gevaarlijk voltage’ is dat krachtig genoeg is om personen een elektrische schok toe te brengen.
De driehoek met het uitroepteken is bedoeld om de gebruiker attent te maken op belangrijke gebruiksaanwijzingen en onderhoudsinstructies
in de documentatie bij dit product.
WAARSCHUWING: In Canada en de VS moet u ervoor zorgen dat de brede pen van de stekker in de brede opening van het
stopcontact gaat en dat de stekker goed in het stopcontact zit om het risico op een elektrische schok te vermijden.
Page 39

P1000
N-3
Nederlands
Deze handleiding gebruiken
Inhoudsopgave
Veiligheidsrichtlijnen.......................................... N-2
Deze handleiding gebruiken ................................ N-3
Aan de slag met de P1000 .................................. N-4
Inleiding..................................................... N-4
Luidsprekerinstallatie ................................... N-4
Kabels........................................................ N-4
Uw P1000 bedienen ........................................... N-5
Stroom....................................................... N-5
Channel-status indicator lights....................... N-5
Installatie......................................................... N-6
Positioning the unit ...................................... N-6
Aansluiting op een voorversterker .................. N-6
Aansluiten op luidsprekers ............................ N-7
De versterking instellen ................................ N-8
Connecting to a power supply........................ N-8
Problemen oplossen........................................... N-9
Foutstatusindicators..........................................N-10
Technische specicaties.....................................N-11
Beleid gericht op voortdurende verbetering ....N-11
Storing radio-ontvangst...............................N-11
Garantie..........................................................N-12
Universele garantie .....................................N-12
Online-registratie........................................N-12
Deze handleiding is bedoeld om u alle informatie te
verstrekken die u nodig hebt om de Arcam DiVA P1000
Eindversterker voor meerdere kanalen te installeren, aan te
sluiten en in te stellen.
Mogelijk is de P1000 door een gekwaliceerde Arcam-dealer
geïnstalleerd en ingesteld als onderdeel van een hi- of
thuisbioscoopinstallatie. In dat geval kunt u de gedeelten
van deze handleiding overslaan die betrekking hebben op
het installeren en instellen van het apparaat. Gebruik de
inhoudsopgave om na te gaan welke gedeelten van de
handleiding op u van toepassing zijn.
Veiligheid
Op de volgende pagina van deze handleiding vindt u
veiligheidsinstructies.
De meeste van deze instructies kunt u met gezond verstand
ook bedenken, maar ze zijn voor uw eigen veiligheid
toegevoegd. We raden u ten zeerste aan deze instructies
te lezen om te vermijden dat u schade aan het apparaat
toebrengt.
Dit is een product van klasse 1, waarvoor een
aardaansluiting vereist is.
Voorwaarden en bepalingen:
<
Lucaslm en THX zijn handelsmerken of geregistreerde
handelsmerken van Lucaslm, Ltd.
Copyright © Lucaslm Ltd & TM.
Page 40

P1000
N-4
P1000
N-5
Nederlands
Aan de slag met de P1000
Inleiding
De meerkanaals eindversterker P1000 is ontwikkeld met de traditionele hoogwaardige ontwerp- en
fabricagestandaarden van Arcam. De P1000 is een buitengewoon hoogwaardige versterker die tot 135
W per kanaal biedt. Hoewel de P1000 duidelijk geschikt is voor meerkanaals thuisbioscoopversterking,
biedt deze ook uitstekende stereoprestaties met tweekanaals bronnen. De P1000 is een ideale partner
voor de Arcam DiVA AVP700 voorversterker/processor.
Alle versterkermodules in de P1000 zijn identiek, zodat elk versterkingskanaal dezelfde prestaties
levert. De P1000 heeft phono-ingangen en -uitgangen voor het signaal dat naar elk kanaal geleid
wordt, zodat het signaal (indien vereist) naar aanvullende eindversterkers doorgestuurd kan worden om
luidsprekers in andere kamers aan te drijven of bi-ampli cation op kanalen uit te voeren. Als de P1000
bijvoorbeeld gebruikt wordt om een vijfkanaals surroundsound-systeem aan te drijven, kunnen de twee
reservemodules (‘surround linksachter’ en ‘surround rechtsachter’) gebruikt worden in combinatie met
de hoofdmodules (‘linksvoor’ en ‘rechtsvoor’) om bi-ampli cation uit te voeren op geschikte linker- en
rechtervoorluidsprekers.
Wij hopen dat de P1000 u vele jaren thuisbiocoopplezier zal geven.
Luidsprekerinstallatie
Er kunnen zeven luidsprekers op de P1000 aangesloten worden. Alle luidsprekers, met uitzondering
van de subwoofer, moeten rond uw normale kijk-/luisterpositie gerangschikt worden (zie diagram). De
subwoofer kan vrijwel overal geplaatst worden. Het is raadzaam de subwoofer op verschillende plaatsen
te zetten om het beste resultaat te bereiken.
Plaats uw linker- en rechtervoorluidspreker, zodat u een goed stereobeeld voor een normale muzikale
reproductie verkrijgt. Als ze te dicht bij elkaar staan, is er een gebrek aan ruimtelijkheid. Staan ze
echter te ver van elkaar af, dan lijkt het alsof het stereobeeld een groot gat in het midden heeft en
wordt het in twee delen weergegeven.
Met de middenluidspreker verkrijgt u een realistischere reproductie van dialogen en middengeluiden,
evenals een breder en beter beeld voor stereo-effecten en achtergrondgeluiden voor
thuisbioscoopgebruik. Lever niet in op de kwaliteit van uw middenluidspreker omdat deze alle dialogen
voor een thuisbioscoopsysteem overbrengt.
De surround-luidsprekers links en rechts reproduceren het omgevingsgeluid en de sfeereffecten van een
meerkanaals thuisbioscoopsysteem.
De surround-luidsprekers links- en rechtsachter worden gebruikt om extra diepte, een ruimtelijkere
omgeving en geluidslokalisatie toe te voegen.
Een subwoofer verbetert de basprestaties van uw
systeem. Het is nuttig voor het reproduceren van
speciale bioscoopeffecten, met name waar een speci ek
LFE-kanaal (Low-Frequency Effects) beschikbaar is,
zoals met Dolby Digital- of DTS Digital Surroundgecodeerde schijven.
Kabels
Het is raadzaam hoogwaardige afgeschermde analoge,
digitale en videokabels te gebruiken, omdat kabels
van inferieure kwaliteit de geluids- en beeldkwaliteit
van uw systeem aantasten. Gebruik alleen kabels
die voor die speci eke toepassing zijn ontworpen,
aangezien andere kabels andere impedantiekarak
teristieken hebben, waardoor uw systeem slechter
luidsprekerkabel dient zo kort mogelijk te zijn, maar kabelparen (bijvoorbeeld de kabels naar de linkeren rechtervoorluidsprekers) dienen even lang te zijn.
Het is raadzaam de verbindingskabels, luidsprekerkabels en netvoedingskabels bij elkaar uit de buurt te
houden om storing te minimaliseren.
Als u hulp nodig hebt bij het kiezen van geschikte kabels, neemt u contact op met uw dealer of
installateur.
Page 41

P1000
N-5
Nederlands
Uw P1000 bedienen
Stroom
Op de voorkant van de P1000 zit één knop: een aan-uitknop, aan de rechterkant.
De stroomknop zet de P1000 al dan niet in stand-by. Wilt u de eenheid helemaal uitzetten, dan gebruikt
u de schakelaar aan de achterkant. Als de P1000 niet aan gaat wanneer u op de knop aan de voorkant
drukt, controleer dan of de schakelaar aan de achterkant in de ‘aan’-positie staat.
Het apparaat aanzetten
Het is raadzaam uw voorversterker of controller in te schakelen voordat u de P1000 aanzet, omdat de
kans dan kleiner is dat er ‘gedreun’ naar de eindversterker geleid wordt.
Het apparaat uitzetten
Wilt u het apparaat uitzetten, dan schakelt u eerst de P1000 uit en dan de voorversterker of controller.
Lampjes voor kanaalstatus
Alle versterkingskanalen op de P1000 hebben een uniek statuslampje.
Wanneer de stroom ingeschakeld wordt, veranderen de lampjes van oranje naar groen. Dit betekent
dat ze van de initialisatiestatus overgaan naar de actieve status. In standby-modus zijn alle lampjes
uitgeschakeld.
Werken de statuslampjes niet zoals beschreven wanneer de P1000 ingeschakeld wordt, of vertonen ze
abnormaal gedrag, raadpleeg dan de tabel op pagina 10 om de oorzaak van het probleem te bepalen.
1 2 3 4 5 6 7
P1000
MULTICHANNEL POWER AMPLIFIER
POWER
Page 42

P1000
N-6
P1000
N-7
Nederlands
Installatie
Positioning the unit
<
Zet de versterker op een vlakke, stevige ondergrond.
<
Zet de eenheid niet in direct zonlicht of in de buurt van een bron van hitte of vocht.
<
Plaats de eenheid niet boven op een andere eindversterker of andere hittebronnen.
<
Zorg voor voldoende ventilatie. Als de eenheid in een gesloten ruimte wordt geplaatst, zoals
een boekenkast of apparatuurrek of -kast, zorg dan dat er voldoende ruimte en ventilatie is in
die behuizing, zodat er lucht door de ventilatiesleuven kan stromen om de versterker te laten
afkoelen. Onvoldoende kastventilatie kan ertoe leiden dat de P1000 uit gaat vanwege thermische
overbelasting.
De versterker wordt zelfs bij normale werking warm.
<
Zorg ervoor dat het apparatuurrek of de apparatuurhouder het gewicht van de P1000 kan dragen.
Aansluiting op een voorversterker
Er zijn twee verschillende verbindingstypes meegeleverd voor het ontvangen van signalen uit uw
voorversterker. Het verbindingstype dat gebruikt moet worden, is afhankelijk van uw set-up.
1. Als de kabels die gebruikt moeten worden om uw voorversterker met de P1000 te verbinden, korter
zijn dan 3 meter, is het raadzaam uw voorversterker op de phono-aansluitpunten van uw P1000 aan
te sluiten.
2. Als de kabels die gebruikt moeten worden om uw voorversterker met de P1000 te verbinden, 3
meter of langer zijn en uw voorversterker gebalanceerde uitgangen heeft, is het raadzaam deze te
gebruiken in plaats van de phono-aansluitpunten. Wanneer u deze verbindingen gebruikt, worden
de prestaties in omgevingen met elektrische ruis ook verbeterd.
Hoewel u gebalanceerde en phono-aansluitingen tussen uw voorversterker en P1000 kunt mixen
(indien u dat wilt), dient u niet zowel de gebalanceerde als phono-ingangen met één kanaal te
verbinden.
Algemeen verbindingsadvies
De uitgangen van uw voorversterker dienen met de AUDIO IN-ingangen van de P1000 verbonden te
worden. Het is nuttig de voorversterkeruitgang voor een gegeven kanaal te verbinden met de ingang
voor dat speci eke kanaal op de P1000. Bijvoorbeeld: verbind de linker-surrounduitgang van uw
voorversterker met de linker-surroundkanaalingang van de P1000. Deze strategie biedt technisch
gezien geen betere prestaties, maar is wel een eenvoudigere methode.
Als u twee modules wilt gebruiken om bi-ampli cation op een paar luidsprekers uit te voeren, of als
u bi-ampli cation wilt uitvoeren met behulp van een andere eindversterker, dan kunt u het signaal
voor dat kanaal nemen (via het AUDIO OUT-phono-aansluitpunt voor dat kanaal) en het naar de extra
module(s) leiden. Het signaal wordt dan naar de eerste module geleid, maar het wordt ook naar de
tweede module doorgeleid zodat beide modules bi-ampli cation op de luidspreker kunnen uitvoeren.
Zie ‘Bi-amping’ op pagina 8 voor meer informatie. Bi-amping op deze manier vereist het gebruik van
phono-aansluitingen tussen uw voorversterker en de P1000.
12V-trigger-ingang
Als uw voorversterker een 12V-trigger-uitgang heeft, kan hij met behulp van een 3,5mmstekker met de 12V-trigger-ingang verbonden worden. Zo kan de P1000 vanop afstand via de
voorversterker aangezet worden.
De trigger-ingang is alleen actief wanneer de stroomknop aan de achterkant in de ‘aan’-positie
staat.
De 3,5mmmonostekker voor de
12V-trigger heeft de
volgende speci caties:
<
Sleeve: Aarding
<
Tip: Actief
12V
TRIGGER
IN
SLOBLO FUSE
IN OUTIN OUTIN OUTIN OUTIN OUTIN OUTIN OUT
BALANCED INBALANCED INBALANCED INBALANCED INBALANCED INBALANCED INBALANCED IN
A
B
C
A
B
C
A
B
C
A
B
C
A
B
C
A
B
C
A
B
C
7
RS BACK
6
R SURR
5
RIGHT
4
CENTRE
3
LEFT
2
L SURR
1
LS BACK
POWER ON/OFF
POWER INLET
230V
Page 43

P1000
N-7
Nederlands
Aansluiten op luidsprekers
Bedradingsmethoden
Er zijn drie verschillende methoden waarmee u uw P1000 met uw luidsprekers kunt verbinden. Uw keus
wordt beperkt door wat uw luidsprekers kunnen ondersteunen.
<
Single-wiring
Single-wiring is het conventionele bedradingssysteem: Er loopt één kabel per kanaal
tussen de versterker en de luidspreker.
<
Bi-wiring
Bij bi-wiring lopen er twee aparte kabels tussen de versterker en elke luidspreker: De
ene kabel draagt de lagefrequentie-informatie en de andere de signalen met hogere
frequentie. Alle versterkers kunnen bi-wiring ondersteunen, maar dit wordt alleen door
luidsprekers ondersteund als er aparte aansluitpunten zijn om de twee kabels te verbinden
(de luidspreker moet twee paar aansluitpunten aan de achterkant hebben, het ene
paar genaamd ‘HF’ of ‘High Frequency’ en het andere ‘LF’ of ‘Low Frequency’). Bi-wiring
verbetert het geluid van uw systeem, omdat de scheiding van hoog- en laagfrequente
signaalstromen in aparte luidsprekerkabels vervormingen voorkomt die het gevolg zijn van
een wisselwerking tussen de verschillende stromen binnen één kabel, zoals bij singlewiring gebeurt. Sommige luidsprekers hebben drie paar aansluitingen aan de achterkant,
zodat het bi-wiring-principe wordt uitgebreid naar tri-wiring.
<
Bi-amping
U kunt nog betere prestaties met uw systeem bereiken door het signaalscheidingsprincipe verder
door te voeren met aparte versterking van de laag- en hoogfrequente drivers in elke luidspreker. U
hebt hiervoor twee versterkers nodig.
Single-wiring
De luidsprekeraansluitingen voor een gegeven kanaal zijn duidelijk gelabeld
aan de achterkant van de P1000. Voor elk kanaal verbindt u het positieve
aansluitpunt van de luidsprekerverbinding op de P1000 voor dat kanaal
(roodgekleurd met het label ‘+’) met het positieve aansluitpunt van uw
luidspreker voor het kanaal (verbind bijvoorbeeld het positieve aansluitpunt
van het middenkanaal van de P1000 met het positieve kanaal van uw
middenluidspreker). Zo sluit u ook het negatieve aansluitpunt van de
versterker (zwartgekleurd met het label ‘–’) op het negatieve aansluitpunt
van uw luidspreker aan. Als uw luidspreker bi-wiring ondersteunt (dus
meer dan één paar verbindingsaansluitpunten heeft), maar u geen biwiring wilt gebruiken, dan verbindt u de P1000 met de aansluitpunten
genaamd ‘LF’ of ‘Low Frequency’. De luidsprekers zijn voorzien van een
metaalstrook die de aansluitpunten voor lage frequenties met die voor
de hogere frequenties verbindt. Deze metaalstrook moet niet verwijderd
worden in een systeem met single-wiring.
Volg bovenstaande instructies voor elke luidspreker in uw systeem, en zorg
ervoor dat de luidsprekers met de juiste uitgang van de P1000 verbonden
zijn. U hoeft geen luidsprekers op alle kanalen van de P1000 aan te sluiten
(als u bijvoorbeeld geen middenluidspreker hebt, maakt dat niets uit).
Bi-wiring
Bi-wiring wordt op dezelfde manier uitgevoerd als single-wiring, behalve
dat er hierbij voor elke luidspreker een paar kabels wordt gebruikt om het
positieve aansluitpunt van de versterker met de luidspreker te verbinden.
De ene kabel moet met het onderste van de twee positieve aansluitpunten
op Alto verbonden worden, en de andere kabel met het bovenste positieve
aansluitpunt. De negatieve aansluitpunten moeten op dezelfde manier
verbonden worden. De metaalstrook op de luidsprekers die de onderste
aansluitpunten met de bovenste verbindt, moet echter verwijderd worden
voor bi-wiring.
Voordat u
begint!
Zorg ervoor dat uw
P1000 uitgeschakeld
en van het lichtnet
ontkoppeld is voordat
u luidsprekers probeert
te verbinden. Als u dit
niet doet, kunnen zowel
de luidsprekers als de
versterker beschadigd
worden.
Illustratie van P1000 met bi-wiring
(voor de duidelijkheid slechts één kanaal
weergegeven).
Illustratie van P1000 met single-wiring
(voor de duidelijkheid slechts één kanaal
weergegeven).
Page 44

P1000
N-8
P1000
N-9
Nederlands
Bi-amping
Bi-amping vereist het gebruik van een tweede versterker: De ene versterker
wordt gebruikt om de treble-luidsprekers aan te drijven en de andere voor de
lagere (bas)frequenties.
Wat de kabels betreft lijkt bi-amping veel op bi-wiring. Verbind de luidspr
ekeraansluitpunten van één module (kanaal) met één paar aansluitpunten
op uw luidspreker. Verbind de andere module, of één kanaal van een aparte
eindversterker, met het andere paar aansluitpunten op de luidspreker, zodat
er twee versterkingskanalen met die luidspreker verbonden zijn; één voor
lage frequenties en één voor hoge frequenties. De treble-aansluitpunten (de
bovenste) van uw luidspreker dienen verbonden te worden met de luidsprekeraa
nsluitpunten van de versterkermodule (het versterkingskanaal) die voor de hoge
frequenties gebruikt wordt, terwijl de basaansluitpunten (de onderste) van uw
luidspreker verbonden dienen te worden met de luidsprekeraansluitpunten van
de versterker of module (het kanaal) die voor de lagere frequenties gebruikt
wordt. De metaalstrook op de luidsprekers die de onderste aansluitpunten met
de bovenste verbindt, moet echter verwijderd worden. Als u dit niet doet,
kunnen beide versterkers beschadigd worden.
Advies bij het maken van luidsprekerverbindingen
<
Sluit niets op uw versterker aan terwijl hij aanstaat of op het lichtnet aangesloten is.
<
Let er altijd op dat de volumeknop van uw voorversterker op de laagste stand ingesteld is voordat u
verbindingen maakt.
<
Voordat u uw P1000 voor het eerst aanzet nadat u de luidsprekers aangesloten hebt, is het
raadzaam alle verbindingen grondig te controleren. Zorg ervoor dat blanke draden of kabels de
versterker niet op de verkeerde plekken raken (omdat dit kortsluiting zou kunnen veroorzaken), en
dat u positief (+) met positief en negatief (–) met negatief verbonden hebt.
<
Nadat u verbindingen hebt gemaakt, zet u het volume van uw voorversterker op de laagste stand
voordat u de P1000 aanzet. Zet de versterker(s) aan, selecteer een bronsignaal en verhoog het
volume dan geleidelijk naar het gewenste luisterniveau.
<
Als u niet zeker weet hoe uw systeem aangesloten moet worden, of advies nodig hebt over bi-
wiring of bi-amping, neem dan contact op met uw Arcam-leverancier. Uw leverancier zal u graag
terzijde staan.
De versterking instellen
U hebt aan de achterkant van het product wellicht een kleine schakelaar gezien naast de luidsprekera
ansluitpunten voor elk kanaal. Met deze schakelaar kunt u de versterking van de versterker instellen:
Verplaats de schuifregelaars naar de A-, B- of C-positie, afhankelijk van de gewenste versterking.
<
A: Deze positie betekent dat de P1000 een versterking van 31,5 dB heeft, wat de gebruikelijke
versterking voor Arcam-versterkers is. Gebruik deze instelling als de P1000 op zichzelf gebruikt
wordt, of in combinatie met andere Arcam-versterkers.
<
B: Dit geeft de P1000 een versterking van 29 dB, wat door THX™-compatibele versterkers gebruikt
wordt. Gebruik deze instelling als de P1000 gebruikt wordt met andere versterkers die een THX™versterking hebben, zoals de Arcam P7. De P1000 is geen THX™-product.
<
C: Dit geeft de P1000 een versterking van 26 dB. Gebruik deze instelling als de P1000 gebruikt zal
worden met andere versterkers die deze versterking hebben.
Hoewel de versterking voor elk kanaal onafhankelijk ingesteld kan worden, is het zeer ongebruikelijk
om verschillende kanalen op verschillende versterkingen in te stellen. Wij raden ten sterkste aan
alle versterkingskanalen op dezelfde versterkingsinstelling te zetten.
Aansluiting op een lichtnet
Netsnoer
Het apparaat wordt meestal geleverd met een netstekker die al aan het snoer vastzit. Als de stekker
om bepaalde redenen verwijderd moet worden, dient hij onmiddellijk op veilige wijze weggegooid te
worden, omdat er gevaar op een elektrische schok bestaat wanneer de stekker in het stopcontact
gestoken wordt.
Controleer of de meegeleverde stekker in uw contactdoos past en of het voltage van uw lichtnet
overeenkomt met de voltage-instelling (115 V of 230 V) die op de achterkant van de eenheid vermeld
wordt.
Als het voltage of de netstekker afwijkt, of als u een nieuw snoer nodig heeft, neemt u contact op met
uw Arcam-leverancier.
Aansluiten
Duw de stekker (IEC-contactdoos) van de meegeleverde stroomkabel in het aansluitpunt (POWER
INLET) op de achterkant van de eenheid. Zorg ervoor dat de stekker er stevig in zit.
Steek de stekker aan het andere uiteinde van het snoer in het stopcontact.
Illustratie van P1000 met bi-amping
(twee versterkermodules voor één
kanaal).
Page 45

P1000
N-9
Nederlands
Problemen oplossen
Er branden geen lampjes
Als er geen lampjes branden op de P1000 wanneer u denkt dat deze aan staat, controleert u het
volgende:
<
Is het stroomsnoer op de P1000 aangesloten?
<
Is de zekering in de stekker gesprongen, of is er eerder in het stroompad een stroomonderbreker
geopend?
<
Is de zekering aan de achterkant (boven het aansluitpunt voor het netsnoer) gesprongen? De
zekering moet met hetzelfde type vervangen worden; Hebt u hierbij hulp nodig, neem dan contact
op met uw leverancier.
<
Staat de stroomschakelaar aan de achterkant van de P1000 in de ‘aan’-positie?
Rood/oranje lampje aan de voorkant
In de tabel op pagina 10 vindt u details over de foutcondities die door verschillende LED-patronen
worden aangeduid, evenals suggesties voor het corrigeren van de fout.
Er is geen geluid
Als u geen geluid hoort door uw P1000, controleert u het volgende:
<
Branden alle kanaalindicator-LED’s aan de voorkant groen? Raadpleeg de tabel op pagina 10 als u
andere kleuren ziet, of bovenstaande instructies als er niets brandt.
<
Is de juiste ingang geselecteerd op de voorversterker, en genereert de geselecteerde bron geluid
(bijvoorbeeld wanneer de schijf afgespeeld wordt)? Sluit indien mogelijk een koptelefoon op
de voorversterker aan om ervoor te zorgen dat het geluid op dat punt aanwezig is – als u geen
geluid hoort door de koptelefoon, bevindt de fout zich waarschijnlijk tussen de geluidsbron en uw
voorversterker.
<
Staat het volume van de voorversterker op een redelijk niveau? Is de voorversterker gedempt?
<
Zijn de verbindingen tussen uw voorversterker en de P1000 gemaakt volgens de instructies eerder
in deze handleiding? Controleer ook de verbindingen tussen de P1000 en de luidsprekers.
Het geluid is slecht of vervormd
Als het geluid uit uw P1000 vervormd of zwak is (geen bas heeft), controleert u het volgende:
<
Zijn alle kabels (zowel de verbindingskabels als de luidsprekerkabels) goed verbonden? Zet de
P1000 uit, haal elke kabel uit de connector en steek hem er weer in. Zet de P1000 weer aan om te
controleren of de geluidskwaliteit verbeterd is.
<
Hebt u de juiste grootte van de luidsprekers voor uw systeem geselecteerd in het setup-menu van
de processor of voorversterker? Wanneer u de luidsprekers bijvoorbeeld op ‘Small’ instelt, kan dit
de oorzaak zijn van zwakke bas. Zie de handleiding van uw voorversterker/processor voor meer
informatie.
Het geluid komt niet uit alle luidsprekers
Als het geluid niet uit alle luidsprekers komt (maar sommige luidsprekers wel normaal werken),
controleert u het volgende:
<
Zijn alle luidsprekers in het systeem met de P1000 verbonden?
<
Hebt u uw voorversterker zo gecongureerd dat alle luidsprekers in uw systeem erin opgenomen
zijn? Zie de handleiding van uw voorversterker/processor voor meer informatie.
<
Hebt u een toepasselijke surroundsound-bron geselecteerd en wordt die door de voorversterker
afgespeeld?
<
Voor bronnen die digitaal met de voorversterker verbonden zijn, controleert u of de bron
meerkanaals gegevens uitvoert. Zo kunt u op sommige dvd-spelers het uitvoerformaat selecteren,
en ook bepalen of meerkanaals gegevens naar PCM (stereo) gedownmixed worden. Zie de
handleiding van uw bron voor meer informatie.
<
Is de schijf die u afspeelt, een meerkanaals opname en voert de processor meerkanaals geluid uit?
<
Is uw luidsprekerbalans correct (zie de handleiding van uw voorversterker/processor voor meer
informatie)?
<
Branden alle kanaalindicator-LED’s aan de voorkant groen? Raadpleeg de tabel op pagina 10 als u
andere kleuren ziet.
Brom op een versterkeruitgang
Als u ‘gebrom’ uit een van de luidsprekers hoort, controleert u het volgende:
<
Komt het gebrom uit een grondlus die door een antenne, satellietontvanger of kabelaansluiting
veroorzaakt wordt (stopt het gebrom als de antenne ontkoppeld is)? Neem contact op met uw
leverancier of antennemonteur voor verder advies.
<
Zijn de verbindings- en luidsprekerkabels niet om een netsnoer gewonden?
<
Schakel de Ground Lift-schakelaar op de voorversterker/processor om, indien aanwezig (zie de
handleiding van uw voorversterker voor meer informatie).
Zie ook ‘Het geluid is slecht of vervormd’ hierboven.
Page 46

P1000
N-10
P1000
N-11
Nederlands
Storing bij radio-/televisie-ontvangst
Als u storing ondervindt bij radio- of televisie-ontvangst wanneer de P1000 aan staat, maar verdwijnt
de storing wanneer de P1000 uitgeschakeld wordt, controleer dan of de antenne-/schotelkabel naar uw
tv of ontvanger uit de buurt van de P1000 en zijn bekabeling ligt, en dat de bekabeling van de antenne/
schotel van goede kwaliteit (afgeschermd) is. Wanneer u de ontvangende antenne/schotel ergens
anders plaatst, kan dit tot verbetering leiden.
<
Als u de fout niet kunt corrigeren nadat u bovenstaande punten hebt gecontroleerd,
neem dan contact op met uw leverancier voor advies.
Foutstatusindicators
De lampjes die hieronder beschreven worden, geven de volgende foutcondities aan:
Lampje Beschrijving Versterkeractie
Alle lampjes branden
groen.
Dit is de normale werkingsstatus
van de versterker.
Geen.
Het stroomlampje is oranje
en de kanaallampjes zijn
uit.
Er is een ‘DC offset’-fout
opgetreden. Er kan een DCoffset-fout optreden als er een te
hoog DC-voltage is bij de uitgang
van de voorversterker die naar
de P1000 geleid wordt. Zie de
onderstaande opmerking.
De conditie wordt niet automatisch
gewist.
Wilt u de fout wissen, dan zet u de
P1000 minstens 30 seconden uit (via
de schakelaar aan de achterkant van
de eenheid), waarna u hem weer
aanzet.
Als de fout met deze methode
niet wordt gewist, of als u wilt
controleren op buitensporig
DC-offset-voltage, dan zet u de
P1000 uit met de schakelaar aan
de achterkant van de eenheid,
verwijdert u de verbindingskabels
(terwijl de P1000 uitgeschakeld is),
en zet u de P1000 weer aan. De
fout moet nu gewist zijn; als het
stroomlampje nog steeds oranje
brandt, heeft uw P1000 een fout
ontwikkeld. Zet de eenheid uit en
neem contact op met uw leverancier.
Een of meerdere
kanaallampjes knipperen
oranje/groen.
Er is kortsluiting opgetreden. De
knipperende lampjes geven de
versterkingskanalen aan waar de
kortsluiting opgetreden is.
De versterker dempt het kanaal met
de kortsluiting. Als de fout gewist
is, hervat de versterker zijn normale
werking.
Er moet geluid naar het kanaal
geleid worden om de kortsluiting
te kunnen detecteren. Wanneer u
bijvoorbeeld de uitvoer dempt met
uw voorversterker, lijkt de fout
gewist te zijn; waarschijnlijk treedt
de foutconditie echter opnieuw
op wanneer de demping van de
voorversterker opgeheven wordt,
tenzij u verdere actie onderneemt.
Een of meerdere
kanaallampjes branden
oranje.
Er is een te hoge temperatuur
opgetreden op een kanaal met
het oranje lampje.
De versterker dempt het kanaal met
de fout. De versterker blijft in deze
status totdat het kanaal afgekoeld
is. Als deze fout vaak optreedt,
controleer dan of de versterker
voldoende ventilatie heeft.
DC-offset-fouten
Een ‘DC-offset-fout’ is geen versterkerfout, maar een beveiligingsmechanisme van de luidspreker. Als
de versterker langere tijd van gelijkstroomspanning (in plaats van de verwachte wisselstroomspanning)
voorzien wordt, zullen de spoelen in de gekoppelde luidsprekers uiteindelijk doorbranden (of in extreme
gevallen vlam vatten). De P1000 kan dit detecteren en de stroom naar de luidsprekers afsnijden.
DC-offset-fouten kunnen periodiek in alle installaties voorkomen, vooral als er een tuner of
satellietontvanger aangesloten is. Als dit vaak of voorspelbaar gebeurt, vraag uw leverancier dan om
advies.
Page 47

P1000
N-11
Nederlands
Technische specicaties
Alle metingen gelden bij 230V/50Hz netspanning
Continu uitgangsvermogen
Alle kanalen gestuurd, 20Hz—20kHz, 8Ω 135W per kanaal; 945W totaal
Alle kanalen gestuurd, 20Hz—20kHz, 4Ω 210W per kanaal; 1,47kW totaal
Een of twee kanalen gestuurd bij 1kHz, 8Ω 190W per kanaal
Een of twee kanalen gestuurd bij 1kHz, 4Ω 305W per kanaal
Een of twee kanalen gestuurd bij 1kHz, 3.2Ω 325W per kanaal
Piekuitgangsstroom
±25A per kanaal
Totale harmonische vervorming
Op elk niveau tot nominaal vermogen, bij 4 of 8Ω <0,08% maximum (20Hz—20kHz)
doorgaans <0,007% bij 1kHz
Frequentieweergave
±0,2dB (2Hz—50kHz)
–1dB bij 1Hz en 100kHz
Restbrom en eigenruis
Bij vol vermogen –110dB A gewogen, 100dB CCIR
Spanningsversterking
x 28,3 (1V input levert 100W/8Ω output)
Invoerimpedantie
22kΩ in parallel met 180pF
Uitvoerimpedantie
50mΩ bij 20Hz, 1kHz
120mΩ bij 20kHz
Benodigd vermogen
115V of 230VAC, 50/60Hz, 2,2kW maximum via
een IEC-toevoerkabel
Een wisselstroomsysteem met nuldoorgang
elimineert grote inrush-stromen van de
‘transformator’ bij inschakeling.
Fysiek
Afmetingen: B430 x D450 x H180 mm
Gewicht: 31kg netto; 35kg verpakt
E&OE
Beleid gericht op voortdurende verbetering
Arcam stelt zich ten doel haar producten voortdurend te verbeteren. Dit betekent dat ontwerpen en
specicaties zonder kennisgeving onderhevig zijn aan verandering.
N.B.: alle specicatiewaarden zijn standaardwaarden tenzij anders aangegeven.
Storing radio-ontvangst
De P1000 is een audioapparaat dat is ontworpen volgens zeer hoge standaarden op het vlak van
elektromagnetische compatibiliteit. Het apparaat kan RF (radiofrequentie)-energie uitstralen. Soms kan
dit storing veroorzaken in de ontvangst van FM- en AM-radiosignalen. Als dat het geval is, houdt u de
P1000 en de aansluitsnoeren daarvan zo ver mogelijk verwijderd van de tuner en de antennes van die
tuner. U kunt storing ook verminderen door de P1000 en de tuner elk op een eigen stopcontact aan te
sluiten.
EG-LIDSTATEN – Deze producten zijn ontworpen volgens de richtlijn 89/336/EEC.
VS – Deze producten zijn in overeenstemming met de FCC-vereisten.
Page 48

P1000
N-12
Garantie
Universele garantie
Deze garantie geeft u het recht om de eenheid gratis te laten repareren, tijdens de eerste twee jaar na
aankoop, bij elke erkende Arcam-distributeur, mits de eenheid oorspronkelijk bij een geautoriseerde
Arcam-dealer of -distributeur aangeschaft werd. Arcam kan geen verantwoordelijkheid aanvaarden voor
fouten die ontstaan door ongelukken, verkeerd gebruik, misbruik, slijtage, onachtzaamheid of door
ongeoorloofde aanpassingen en/of reparaties, en kan ook geen verantwoordelijkheid aanvaarden voor
schade of verlies, ontstaan tijdens het transport van of naar de persoon die onder de garantie claimt.
De garantie dekt onderdelen en arbeidsloon voor twee jaar vanaf de aankoopdatum. Na twee jaar moet
u zowel voor onderdelen als arbeidsloon betalen. In geen enkel geval worden transportkosten
door de garantie gedekt.
Claims onder garantie
Deze apparatuur dient in de oorspronkelijke verpakking geretourneerd te worden aan de leverancier bij
wie ze aangeschaft werd, of anders rechtstreeks aan de Arcam-distributeur in het land waar u woont.
De eenheid dient, vracht betaald, via een goed bekend staande vrachtvervoerder verstuurd te worden –
niet per post. Tijdens het transport naar de leverancier of distributeur kan er geen verantwoordelijkheid
voor de eenheid aanvaard worden, en het is daarom raadzaam de eenheid tegen verlies of schade
tijdens transport te verzekeren.
Voor meer informatie kunt u contact opnemen met Arcam:
Arcam Customer Support Department,
Pembroke Avenue,
Waterbeach,
CAMBRIDGE, CB5 9QR,
England
Problemen?
Neem bij problemen altijd eerst contact op met uw leverancier. Als uw leverancier uw vragen
betreffende dit of een ander Arcam-product niet kan beantwoorden, neem dan contact op met de
Arcam-klantendienst en we zullen ons best doen om u te helpen.
Online-registratie
U kunt uw Arcam-product on line registreren op: www.arcam.co.uk
Page 49

P1000MANUAL
Amplicador multi-canal Arcam P1000
Por tuguês
Page 50

P1000
P-2
P1000
P-3
Português
RISQUE DE CHOC ELECTRIQUE
NE PAS OUVRIR
ATTENTION
CAUTION
RISK OF ELECTRIC
SHOCK DO NOT OPEN
AVISO: Para reduzir o risco de choque eléctrico, não retire as coberturas. Não existem no interior da unidade quaisquer
componentes que possam ser reparados pelo utilizador. O serviço de manutenção (assistência) deverá ser efectuado por
pessoal qualicado.
AVISO - Para reduzir o risco de incêndio ou choque eléctrico, não exponha o dispositivo à chuva ou à humidade.
O símbolo do relâmpago com extremidade em forma de seta, dentro de um triângulo equilátero, tem por função alertar o utilizador
relativamente à existência de “voltagem perigosa” sem isolamento no interior da caixa de protecção do produto, que poderá ter uma
potência suciente para constituir um risco de choque eléctrico para as pessoas.
O ponto de exclamação dentro de um triângulo equilátero tem por função alertar o utilizador relativamente à existência de instruções de
funcionamento e manutenção (assistência) importantes, constantes da literatura que é fornecida juntamente com o dispositivo.
AVISO: No Canadá e Estados Unidos, para evitar choques eléctricos, a insira a cha correctamente na tomada.
Instruções de segurança
Instruções importantes de
segurança
Este produto foi concebido e produzido em conformidade
com rigorosos padrões de qualidade e segurança. No
entanto, deverá tomar em consideração as seguintes
indicações e precauções de instalação e funcionamento:
1. Respeite todos os avisos e instruções
Deverá ler todas as indicações de segurança e
funcionamento antes de ligar o dispositivo. Guarde este
manual para referência futura e respeite todos os avisos
contidos no manual ou no dispositivo.
2. Água e humidade
A presença de electricidade perto de água pode ser
perigosa. Não utilize esta unidade em locais próximos de
fontes de água - por exemplo, perto de uma banheira,
de um lavatório ou de um lava-loiça, de uma piscina ou
noutros locais semelhantes.
3. Entrada de objectos ou líquidos
Certique-se de que não entram quaisquer objectos ou
líquidos para o interior da unidade através das aberturas
de ventilação. Objectos com líquidos, tais como vasos, não
devem ser colocados sobre o dispositivo.
4. Ventilação
Não instale a unidade sobre uma cama, sofá, tapete ou
outra superfície semelhante ou numa estante ou armário,
dado que poderá impedir a sua ventilação. Recomendamos
uma distância mínima de 50mm à volta e por cima do
dispositivo, de forma a assegurar a ventilação adequada.
5. Exposição ao calor
Não utilize este dispositivo em locais próximos de fontes de
calor, tais como chama nua, radiadores, fogões ou outros
aparelhos (incluindo outros amplicadores) que produzam
calor.
6. Ambiente de funcionamento
O dispositivo foi concebido para utilização em climas
temperados.
7. Racks e suportes
Utilize apenas racks ou suportes recomendados para
utilização de equipamento áudio. Se o dispositivo tiver sido
instalado num suporte ou num móvel de transporte, deverá
ser deslocado com o máximo cuidado, para evitar a sua
queda.
8. Limpeza
Desligue a cha do dispositivo antes de proceder à sua
limpeza.
O dispositivo normalmente apenas necessita de limpeza
com um pano macio, que não liberte pêlo, humedecido com
água. Não utilize diluentes ou outros solventes químicos
para a sua limpeza.
Não aconselhamos a utilização de pulverizadores de
limpeza ou lustro de móveis, dado que podem causar
marcas brancas permanentes se o dispositivo for
subsequentemente limpo com um pano humedecido.
9. Fontes de Alimentação
Ligue o dispositivo apenas a uma fonte de alimentação do
tipo descrito no Manual ou conforme indicado no dispositivo.
O principal método de isolamento deste produto da rede
eléctrica é através do interruptor no painel traseiro.
Este dispositivo terá que ser instalado de forma a que o
interruptor se encontre acessível.
É um dispositivo de Classe 1 e tem que estar ligado à terra.
10. Protecção do cabo de alimentação
Os cabos de alimentação deverão ser posicionados de forma
a que não sejam pisados ou entalados, devendo ser prestada
particular atenção ao local em onde são ligados ao dispositivo.
11. Ligação à terra
Assegure-se que a ligação do dispositivo à terra não é
adulterada.
12. Rede de alta tensão
Posicione qualquer antena exterior afastada de linhas de
alta tensão.
13. Quando não está a ser utilizado
Se o dispositivo incorporar uma função de stand-by
(espera), existe sempre uma pequena quantidade de
energia que continua a ser fornecida ao equipamento neste
modo. Desligue o cabo de alimentação do dispositivo da
tomada se o dispositivo não for utilizado durante um longo
período de tempo.
14. Cheiro anormal
Se for detectado um cheiro anormal ou fumo provenientes
do dispositivo, desligue imediatamente o dispositivo e
retire a cha do cabo de alimentação da tomada. Contacte
imediatamente o seu retalhista.
15. Assistência técnica
Não deverá efectuar quaisquer intervenções no dispositivo
além das descritas neste Manual. Todas as outras
intervenções de assistência técnica deverão ser efectuadas
por técnicos qualicados.
16. Danos que exijam assistência técnica
Deverá dirigir-se a um técnico de assistência qualicado
para que este possa reparar a unidade quando ocorrer
alguma das seguintes situações:
A. o cabo ou cha de alimentação AC tiver sido
danicado, ou
B. caso tenha deixado cair objectos para dentro do
dispositivo ou tenha entornado líquidos sobre o
mesmo, ou
C. caso o dispositivo tenha sido exposto a chuva, ou
D. caso o dispositivo aparente não funcionar
normalmente ou apresente uma alteração signicativa
no seu desempenho, our
E. caso o dispositivo tenha caído ao chão ou a caixa
exterior tenha sido danicada.
Norma de segurança
Este produto foi concebido em conformidade com as
normas internacionais de segurança eléctrica IEC 60065.
Page 51

P1000
P-3
Português
Utilização deste manual
Este manual foi concebido para lhe proporcionar toda
a informação necessária para a instalação, ligação,
programação e utilização do Amplicador multi-canal Arcam
DiVA P1000.
O P1000 pode ter sido instalado como parte do seu sistema
de Hi-Fi ou cinema em casa por um retalhista qualicado
Arcam. Nesta situação, poderá não desejar consultar as
secções deste manual sobre a instalação e posicionamento
do dispositivo. Consulte o índice para aceder às secções
relevantes.
Segurança
As indicações de segurança são apresentadas na página
seguinte.
Muitas destas indicações são precauções comuns mas,
para sua própria segurança e para se assegurar que não
provocará danos ao dispositivo, recomendamos a sua
leitura.
Este é um dispositivo de classe 1 e tem que estar ligado à
terra.
Informação legal:
<
Lucaslm e THX são marcas ou marcas registadas da Lucaslm,
Ltd. Copyright © Lucaslm Ltd. & TM.
Conteúdo
Instruções de segurança .....................................P-2
Utilização deste manual.......................................P-3
Panorâmica de funcionamento do P1000................P-4
Introdução...................................................P-4
Instalação dos Altifalantes .............................P-4
Cabos .........................................................P-4
Funcionamento do P1000 ....................................P-5
Power (Alimentação) .....................................P-5
Channel-status indicator lights........................P-5
Posicionamento do dispositivo ........................P-6
Ligação a um pré-amplicador........................P-6
Instalação ......................................................... P-6
Ligação dos altifalantes..................................P-7
Conguração do ganho do amplicador............ P-8
Ligação à rede de alimentação........................ P-8
Resolução de problemas......................................P-9
Indicadores de condição de falhas/avarias ...........P-10
Technical specication....................................... P-11
Política de melhoramento contínuo................ P-11
Interferência de radiofrequências.................. P-11
Garantia.......................................................... P-12
Garantia Mundial ........................................P-12
Registo on-line ........................................... P-12
Page 52

P1000
P-4
P1000
P-5
Português
Panorâmica de funcionamento do P1000
Introdução
O ampli cador multi-canal P1000 é produzido em conformidade com os tradicionais elevados padrões
de design e de fabrico da Arcam. É um ampli cador de elevado desempenho, disponibilizando até 135W
de potência por canal. Embora seja particularmente adequado à ampli cação multi-canal para cinema
em casa, proporciona igualmente um desempenho soberbo na ampli cação de fontes de dois canais. O
P1000 é o parceiro ideal para o Arcam DiVA AVP700 Pre-amp Processor.
Os módulos de ampli cação do P1000 são idênticos, proporcionando o mesmo desempenho para cada
canal de ampli cação. O P1000 dispõe de chas RCA de entrada e saída para os sinais de cada canal,
o que permite o encaminhamento do sinal para ampli cadores adicionais, se necessário, para accionar
altifalantes noutras salas ou para a bi-ampli cação de quaisquer canais. Se o P1000 for utilizado num
sistema surround de cinco canais, por exemplo, os dois módulos disponíveis (‘L surround rear’ e ‘R
surround rear’) poderão ser utilizados em conjunto com os módulos principais (‘L front’ e ‘R front’) para
a bi-ampli cação de altifalantes compatíveis nos canais frontais esquerdo e direito.
Estamos con antes que o P1000 irá proporcionar grande satisfação de audição durante muitos anos.
Instalação dos Altifalantes
O P1000 permite ligar até sete altifalantes. Todos os altifalantes, com excepção do subwoofer, deverão
ser colocados ao redor da posição normal de audição (consultar diagrama). O subwoofer poderá
ser colocado virtualmente em qualquer posição e recomendamos que ensaie diversas posições para
obtenção de melhores resultados.
Posicione os altifalantes frontais esquerdo e direito
de forma a obter uma boa imagem estéreo para a
reprodução normal de música. Se forem colocados
demasiado perto um do outro, o som reproduzido
apresenta um palco sonoro pouco amplo. Em
alternativa, se forem colocados demasiado longe a
imagem estéreo poderá apresentar um ‘buraco’ no
meio, sendo reproduzida em duas metades.
O altifalante central permite uma reprodução mais
realista de diálogos e sons centrais, bem como uma
imagem mais ampla e de maior qualidade para efeitos
estéreo e som ambiente na reprodução de lmes. Não
utilize um altifalante central de baixa qualidade, dado
que este reproduz todos os diálogos de um sistema de
cinema em casa.
Os altifalantes surround esquerdo e direito reproduzem
o som e os efeitos ambientes, presentes num sistema multi-canal de cinema em casa.
Os altifalantes surround traseiros esquerdo e direito são utilizados para proporcionar maior
profundidade, um palco sonoro mais amplo e melhor posicionamento sonoro.
Um subwoofer melhora o desempenho de graves do seu sistema. É particularmente útil para a
reprodução de efeitos especiais, em especial quando é disponibilizado um canal LFE (Efeitos de Baixa
Frequência) dedicado, como acontece em discos codi cados em Dolby Digital ou DTS Surround Digital.
Cabos
Recomendamos a utilização de cabos blindados de elevada qualidade para o transporte de sinais
analógicos, digitais e de vídeo, dado que a utilização de cabos de qualidade inferior provoca uma
deterioração na qualidade do som e imagem do seu sistema. Utilize apenas cabos concebidos para o m
especí co a que se destinam, dado que outros tipos de cabos dispõem de características diferentes de
impedância que irão provocar a deterioração do desempenho do seu sistema (por exemplo, não utilize
cabos de áudio para o transporte de sinais de vídeo). O comprimento dos cabos dos altifalantes deverá
ser o mais curto possível, mas os pares de cabos (os cabos para os altifalantes frontais esquerdo e
direito, por exemplo) deverão apresentar um comprimento semelhante.
Aconselhamos que os cabos de interligação, dos altifalantes e de alimentação sejam posicionados
afastados entre si, de forma a minimizar as interferências.
Se necessitar de informação adicional sobre cabos ou auxílio na selecção de cabos apropriados, por
favor contacte o seu retalhista ou instalador.
Page 53

P1000
P-5
Português
Funcionamento do P1000
1 2 3 4 5 6 7
P1000
MULTICHANNEL POWER AMPLIFIER
POWER
Power (Alimentação)
O painel frontal do P1000 dispõe de um único controlo: o botão power para ligar/desligar, localizado no
canto inferior direito.
O botão power permite activar e desactivar P1000 a partir de stand-by (em espera). Para desligar
completamente o dispositivo, utilize o interruptor no painel traseiro. Da mesma forma, se não for
possível ligar o P1000 premindo o botão no painel frontal, certi que-se que o interruptor do painel
traseiro se encontra na posição ‘on’ (ligado).
Ligar o P1000
Recomendamos que ligue o pré-ampli cador ou dispositivo de controlo antes de ligar o P1000,
reduzindo assim a probabilidade de quaisquer ruídos de activação serem reproduzidos pelo ampli cador.
Desligar o P1000
Desligue primeiro o P1000, seguido do pré-ampli cador ou dispositivo de controlo.
Page 54

P1000
P-6
P1000
P-7
Português
Posicionamento do dispositivo
<
Coloque o pré-ampli cador numa superfície plana e estável.
<
Evite colocar o dispositivo sob luz solar directa ou próximo de fontes de calor ou humidade.
<
Não coloque o P1000 em cima de outro ampli cador ou sobre outras fontes de calor.
<
Certi que-se de que dispõe de um nível adequado de ventilação. Se o P1000 for colocado num
local fechado como, por exemplo, uma estante, uma rack ou armário de equipamento, certi quese que dispõe de espaço su ciente à sua volta para assegurar uma ventilação e arrefecimento
adequados através das grelhas de ventilação A ventilação insu ciente num armário poderá resultar
na desactivação do P1000 devido sobreaquecimento.
O ampli cador foi concebido para aquecer, mesmo durante o seu funcionamento normal.
<
Certi que-se que a rack ou suporte de equipamento tem capacidade para suportar o peso do
P1000.
Ligação a um pré-ampli cador
São disponibilizados dois tipos de ligações para a entrada de sinais provenientes do pré-ampli cador. O
tipo de ligação a utilizar depende da con guração do sistema.
1. Se os cabos utilizados na ligação do pré-ampli cador ao P1000 tiverem um comprimento inferior a
3m, recomendamos a ligação do pré-ampli cador às chas RCA do P1000.
2. Se os cabos utilizados na ligação do pré-ampli cador ao P1000 tiverem um comprimento de 3m ou
superior e o pré-ampli cador dispuser de saídas balanceadas, recomendamos a utilização destas
saídas em alternativa às ligações RCA. O desempenho do sistema será igualmente maximizado em
ambientes com elevado nível de ruído eléctrico através da utilização destas ligações.
Embora seja aceitável utilizar ligações mistas RCA e balanceadas entre o pré-ampli cador e o P1000
(se assim o desejar), não ligue em simultâneo ambas as entradas balanceadas e RCA de um canal.
Indicações gerais de ligação
As saídas do pré-ampli cador deverão ser ligadas às entradas AUDIO IN no P1000. Para maior
facilidade de ligação, veri cação e funcionamento deverá ligar a saída do canal do pré-ampli cador à
entrada correspondente a esse canal no P1000. Por exemplo: ligue a saída surround esquerda do préampli cador à entrada do canal surround esquerdo do P1000. Não existe qualquer benefício técnico
nesta forma de ligação, mas torna os procedimentos de ligação e veri cação mais simples.
Se desejar utilizar dois módulos para bi-ampli car um par de altifalantes ou se desejar efectuar a
bi-ampli cação utilizando um ampli cador adicional, poderá utilizar o sinal desse canal (utilizando a
cha Audio Out do canal) e direccionar o sinal para o módulo adicional de ampli cação. O sinal é então
direccionado para o primeiro módulo e para o segundo módulo, para que ambos os módulos possam
bi-ampli car o altifalante. Consulte a secção ‘Bi-ampli cação’ na página 8 para informação mais
detalhada. Tenha presente que esta forma de bi-ampli cação obriga à utilização das ligações RCA entre
o pré-ampli cador e o P1000.
Entrada Trigger de 12V
Se o pré-ampli cador utilizado dispuser de uma saída Trigger de 12V, poderá ser ligado à cha
12V TRIGGER IN através de um jack de 3,5mm. Esta função permite a ligação remota do P1000
a partir do pré-ampli cador.
Tenha presente que a entrada trigger apenas se encontra activa quando o interruptor power no
painel traseiro se encontrar na posição ‘on’.
Instalação
O trigger de 12V
utiliza um jack mono
de 3,5mm, ligado da
seguinte forma:
<
Manga: Massa
<
Ponta: Positivo
12V
TRIGGER
IN
SLOBLO FUSE
IN OUTIN OUTIN OUTIN OUTIN OUTIN OUTIN OUT
BALANCED INBALANCED INBALANCED INBALANCED INBALANCED INBALANCED INBALANCED IN
A
B
C
A
B
C
A
B
C
A
B
C
A
B
C
A
B
C
A
B
C
7
RS BACK
6
R SURR
5
RIGHT
4
CENTRE
3
LEFT
2
L SURR
1
LS BACK
POWER ON/OFF
POWER INLET
230V
Page 55

P1000
P-7
Português
Ligação dos altifalantes
Métodos de ligação
Podem ser utilizados três métodos diferentes de ligação do P1000 aos altifalantes. As diferentes opções
são limitadas pelas capacidades dos altifalantes.
<
Cablagem normal
A cablagem normal é o sistema convencional de ligação de altifalante com apenas um
cabo de dois condutores por canal entre o ampli cador e o altifalante.
<
Bi-cablagem
A bi-cablagem consiste em efectuar a ligação entre o ampli cador e cada altifalante com
dois cabos separados, em que um cabo transporta os sinais de baixa frequência e o outro
os de alta. Qualquer ampli cador pode permitir a bi-cablagem, mas os altifalantes apenas
permitem a bi-cablagem se tiverem disponíveis terminais de ligação separados para os
dois cabos (o altifalante terá que dispor de dois pares de terminais no painel traseiro, um
par identi cado como HF ou High Frequency (Alta Frequência) e o outro como LF ou Low
Frequency (Baixa Frequência)). A bi-cablagem proporciona uma melhoria da qualidade
sonora do seu sistema, porque a separação dos sinais de alta e baixa frequência em cabos
especí cos evita a distorção provocada pela interacção das diferentes intensidades de
corrente, que ocorre em sistemas com cablagem convencional. Tenha presente que alguns
altifalantes dispõem de três pares de terminais no painel traseiro, ampliando o princípio da
bi-cablagem para a tri-cablagem
<
Bi-ampli cação
O desempenho do seu sistema pode ser maximizado em relação à bi-cablagem, devido à
maximização do princípio da separação de sinais, que utiliza ampli cação independente para cada
um dos altifalantes de alta e baixa frequência do seu sistema. São necessários dois ampli cadores
para a implementação deste método de ligação.
Cablagem normal
Os terminais dos altifalantes para os canais especí cos encontramse distintamente identi cados no painel traseiro do P1000. Para cada
canal, ligue o terminal positivo do P1000 desse canal (vermelho e
com o símbolo ‘+’) ao terminal positivo do altifalante que se destina
à sua reprodução (ligue, por exemplo, o terminal positivo da saída do
canal central do P1000 ao terminal positivo do altifalante central). Da
mesma forma, ligue o terminal negativo do ampli cador (preto e com o
símbolo ‘–’) ao terminal negativo do altifalante. Se os altifalantes utilizados
permitirem a bi-cablagem (i.e., dispõem de mais um conjunto de terminais
de ligação), mas não desejar utilizar este tipo de ligação, ligue o P1000 aos
terminais identi cados como LF ou Low Frequency (Baixa Frequência). Os
altifalantes deverão dispor de uma ponte metálica que efectua a ligação
entre os terminais de baixa e alta frequência; esta ponte não pode ser
removida na ligação de um sistema de cablagem normal.
Siga as indicações acima para a ligação de cada altifalante do sistema,
certi cando-se que os altifalantes se encontram ligados à saída correcta do
P1000. Não é necessário ligar altifalantes a todas as saídas do P1000 (por
exemplo, não importa se não dispuser de um altifalante central).
Bi-cablagem
O método de ligação de bi-cablagem é semelhante ao método de cablagem
normal, com a excepção de que são utilizados dois cabos para a ligação
do terminar positivo do ampli cador ao altifalante. Um dos cabos terá que
ser ligado ao terminal positivo inferior do altifalante e o outro ao terminal
positivo superior. Os terminais negativos terão que ser ligados da mesma
forma. Tenha presente que as pontes metálicas que efectuam a ligação dos
terminais inferiores aos terminais superiores têm que ser removidas para a
ligação bi-cablagem.
Antes de
começar!
Certi que-se que o
P1000 se encontra
desligado e retire
a cha da tomada
de alimentação
antes de efectuar
qualquer ligação
aos altifalantes. A
não observância desta
precaução poderá resultar
em danos nos altifalantes
e no ampli cador.
Diagrama de ligação do P1000 para
bi-cablagem (para maior clareza é
apresentado apenas um canal).
Diagrama de ligação do P1000 para
cablagem normal (para maior clareza é
apresentado apenas um canal).
Page 56

P1000
P-8
P1000
P-9
Português
Bi-ampli cação
Para efectuar a bi-ampli cação é necessário utilizar um ampli cador adicional:
um ampli cador é utilizado para ampli cação dos altifalantes de agudos e o
outro para as frequências mais baixas (graves).
No que diz respeito aos cabos, a ligação para bi-ampli cação é muito
semelhante à bi-cablagem. Ligue os terminais de saída para altifalantes de
um módulo (canal) a um par de terminais no altifalante. Ligue outro módulo,
ou um canal de um ampli cador externo, ao outro par de terminais do
altifalante, de forma a que os dois canais de ampli cação se encontrem ligados
ao altifalante; um para baixas frequências e outro para altas frequências.
Os terminais de agudos (superiores) do altifalante deverão ser ligados aos
terminais de saída para altifalantes do módulo de ampli cação (canal) destinado
à ampli cação das altas frequências, enquanto que os terminais de graves
(inferiores) do altifalante deverão ser ligados aos terminais de saída para
altifalantes do ampli cador ou módulo de ampli cação (canal) destinado à
ampli cação das baixas frequências. Tenha presente que as pontes metálicas
que efectuam a ligação dos terminais inferiores aos terminais superiores têm
que ser removidas. A não observância desta precaução poderá resultar em danos em ambos os
ampli cadores.
Notas sobre a ligação de altifalantes
<
Não efectue quaisquer ligações ao ampli cador quando este estiver em funcionamento ou ligado à
cha de alimentação.
<
Certi que-se sempre que o controlo de volume do pré-ampli cador se encontra na posição mais
baixa antes de iniciar qualquer procedimento de ligação.
<
Antes de ligar o P1000 pela primeira vez após ter efectuado as ligações, veri que cuidadosamente
todas as ligações. Certi que-se de que não existem cabos descarnados ou os soltos em contacto
com o chassis do ampli cador (que poderiam provocar curto circuitos) e de que ligou o positivo (+)
ao positivo e o negativo (–) ao negativo.
<
Após ter efectuado as ligações, coloque o pré-ampli cador na posição de volume mais reduzido
antes ligar o P1000.
<
Ligue o(os) ampli cador(es), seleccione uma fonte e aumente o volume de forma gradual até ao
nível que desejar para audição.
<
Caso tenha quaisquer dúvidas sobre forma de ligação do seu sistema ou se necessitar de
informação mais detalhada sobre bi-cablagem ou bi-ampli cação, por favor contacte o seu
retalhista Arcam. O seu retalhista Arcam encontra-se à sua inteira disposição para qualquer
esclarecimento.
Con guração do ganho do ampli cador
Poderá já ter veri cado que existe um pequeno interruptor junto aos terminais dos altifalantes
para cada canal no painel traseiro do P1000. Este interruptor permite a con guração do ganho do
ampli cador: desloque o interruptor para a posição A, B, ou C, dependendo do valor de ganho que
desejar.
<
A: Nesta posição o P1000 proporciona um ganho de 31,5dB, que é o valor normal dos
ampli cadores Arcam. Seleccione esta con guração se utilizar o P1000 em exclusivo ou em
conjunto com outros ampli cadores Arcam.
<
B: Nesta posição o P1000 proporciona um ganho de 29dB, que corresponde ao valor de ganho
utilizado por ampli cadores compatíveis com THX™. Seleccione esta con guração se utilizar o
P1000 com outros ampli cadores que proporcionem um valor de ganho THX™, tal como o Arcam
P1000. Tenha presente que o P7 não é um dispositivo THX™.
<
C: Nesta posição o P1000 proporciona um ganho de 26dB. Seleccione esta con guração se utilizar o
P1000 com outros ampli cadores que proporcionem este valor de ganho.
Embora o ganho para cada canal possa ser con gurado de forma independente, não é comum
con gurar canais diferentes com valores de ganho diferentes. Recomendamos vivamente que todos os
canais do ampli cador sejam con gurados com o mesmo valor de ganho.
Ligação à rede de alimentação
Cabo de alimentação
O P1000 é, normalmente, fornecido com uma cha instalada no cabo de alimentação. Se, por qualquer
razão, necessitar de separar a cha do cabo, esta deverá ser imediatamente inutilizada de forma
segura, dado que constitui um risco potencial de choque eléctrico se inserida numa tomada da rede
eléctrica.
Certi que-se que a cha fornecida com o dispositivo é a apropriada para as tomadas de que dispõe
e que a tensão de alimentação corresponde à tensão (115V ou 230V) indicada no painel traseiro do
dispositivo.
Se necessitar de um novo cabo de alimentação ou se a tensão de funcionamento do dispositivo não
corresponder à tensão de alimentação disponível, contacte o seu retalhista Arcam.
Ligação
Coloque a cha IEC (tipo computador) do cabo de alimentação na tomada de alimentação localizada no
painel traseiro do dispositivo. Assegure-se que se encontra rmemente encaixada.
Encaixe a cha do outro extremo do cabo na tomada de alimentação e ligue a tomada.
Diagrama de bi-ampli cação no P1000
(dois módulos de ampli cação para um
único canal).
Page 57

P1000
P-9
Português
Resolução de problemas
Não acende nenhuma luz
Caso não esteja nenhuma luz acesa no P1000 quando considera que deve estar ligado, verique os
seguintes itens.
<
O cabo de alimentação está ligado ao P1000? A cha de alimentação está colocada na tomada e a
tomada encontra-se ligada (se aplicável)?
<
O fusível da cha está fundido (se aplicável) ou um disjuntor desligado?
<
O fusível no painel traseiro do dispositivo (acima da entrada de alimentação) está fundido?
Tenha presente que o fusível terá que ser substituído por outro do mesmo tipo: se necessitar de
informação adicional para este procedimento contacte o seu retalhista.
<
O interruptor power no painel traseiro do P1000 encontra-se na posição “on”?
Luz vermelha/amarela no painel frontal
A tabela na página 10 apresenta informação detalhada sobre as condições de falha/avaria indicadas
pelos padrões diferentes de funcionamento dos LEDs e sugestões para correcção da falha/avaria.
Não é reproduzido som
Verique os seguintes itens se o P1000 não reproduzir qualquer som.
<
Os LEDs dos canais no painel frontal encontram-se acesos verdes? Consulte a tabela na página 10
caso se encontrem acesos com outra cor ou a primeira secção desta página se estiverem apagados.
<
Foi seleccionada a entrada correcta no pré-amplicador e a fonte seleccionada está a reproduzir
sinais de áudio (por exemplo: o disco encontra-se em reprodução)? Se possível, tente ligar os
auscultadores ao pré-amplicador, de forma a assegurar que o sinal de áudio é recebido pelo préamplicador – se não ouvir qualquer sinal de áudio nos auscultadores, a causa provável da falha/
avaria encontra-se entre a fonte de áudio e o pré-amplicador.
<
O controlo de volume do pré-amplicador encontra-se ajustado para um nível razoável de audição?
O pré-amplicador está silenciado (mute)?
<
As ligações entre o pré-amplicador e o P1000 foram efectuadas em conformidade com as
instruções contidas neste manual? Verique também as ligações entre o P1000 e os altifalantes.
O som é de baixa qualidade ou apresenta distorção
Se o som reproduzido pelo P1000 apresentar distorção ou falta de qualidade (com falta de graves), por
favor verique os seguintes itens.
<
Certique-se que todos os cabos (de ligação e para os altifalantes) se encontram correctamente
ligados. Desligue o P1000, retire os cabos das chas e volte a ligá-los. Ligue o P1000 e verique se
a qualidade de som apresenta melhorias.
<
Certique-se que seleccionou as dimensões correctas de altifalantes no menu de conguração do
processador/pré-amplicador. A conguração de altifalantes como “Pequenos”, por exemplo, poderá
provocar uma redução na qualidade dos graves. Consulte o manual do pré-amplicador/processador
para informação mais detalhada.
Apenas alguns altifalantes emitem som
Se apenas alguns altifalantes reproduzem som (mas esses altifalantes estão a funcionar normalmente),
por favor verique os seguintes itens.
<
Efectuou a ligação de todos os altifalantes do sistema ao P1000?
<
Congurou o pré-amplicador para incluir todos os altifalantes do sistema? Consulte o manual do
pré-amplicador/processador para informação mais detalhada.
<
Encontra-se seleccionada e em reprodução através do pré-amplicador uma fonte de áudio
surround apropriada?
<
Para fontes com ligação digital ao pré-amplicador, certique-se que a fonte está a reproduzir sinais
multi-canal. Alguns leitores de DVD (por exemplo) permitem a selecção do formato de reprodução
e do processamento Downmix para PCM (estéreo) da informação multi-canal. Consulte o manual do
equipamento fonte para informação mais detalhada.
<
Certique-se que o disco em reprodução é uma gravação multi-canal e que o processador está a
reproduzir um sinal áudio multi-canal de saída.
<
Certique-se que o balanço (balance) dos altifalantes se encontra correctamente ajustado (consulte
o manual do pré-amplicador/processador para informação mais detalhada).
<
Os LEDs dos canais no painel frontal encontram-se acesos verdes? Consulte a tabela na página 10
caso se encontrem acesas outras cores.
Zumbido numa saída do amplicador
Se vericar a existência de um “zumbido” proveniente de um dos altifalantes, por favor verique os
seguintes itens.
<
O zumbido resulta da realimentação de terra provocada pela ligação de uma antena ou sinal de
TV cabo (se o cabo for desligado o zumbido desaparece)? Por favor contacte o seu retalhista ou
especialista de antenas para informação complementar.
<
Certique-se que os cabos de ligação e de altifalantes não se encontram enrolados num cabo de
alimentação.
<
Se disponível, comute a posição do interruptor “ground lift” no pré-amplicador/processador
(consulte o manual do pré-amplicador/processador para informação mais detalhada).
Consulte também “O som é de baixa qualidade ou apresenta distorção”, acima.
Page 58

P1000
P-10
P1000
P-11
Português
Interferência na recepção de rádio/televisão
Se vericar a existência de interferência na recepção de rádio ou televisão quando o P1000 é ligado
e que deixa de se manifestar quando é desligado, certique-se que os cabos de antena para a sua
televisão e/ou receptor de rádio são posicionados tão afastados quanto possível do P1000 e dos seus
cabos e que os cabos utilizados para a ligação às antenas são de elevada qualidade (blindados). O
reposicionamento da antena/antena parabólica poderá resultar na redução de interferências.
<
Se não conseguir recticar a falha/avaria após vericação dos itens sugeridos acima, por
favor contacte o seu retalhista para esclarecimentos adicionais.
Indicadores de condição de falhas/avarias
Os padrões de luzes descritos abaixo indicam as seguintes condições de falha/avaria:
Padrão de luzes Descrição Acção necessária no amplicador
Todas as luzes verdes. Esta é a condição de
funcionamento normal do
amplicador.
Nenhuma.
A luz power está acesa
amarela e as luzes dos
canais encontram-se
desligadas.
Ocorreu uma falha “DC
offset”. Uma falha “DC offset”
pode ocorrer se estiver presente
uma tensão DC (contínua)
excessiva na saída do préamplicador ligado ao P1000. Por
favor consulte a secção abaixo
sobre este assunto.
Esta condição não é superada
automaticamente.
Para limpar a falha/avaria desligue
o P1000 durante pelo menos 30
segundos (utilizando o botão no
painel traseiro do dispositivo) e volte
a ligar novamente.
Se não for possível limpar a falha/
avaria utilizando o método descrito
acima ou para vericar a presença
de tensão DC offset excessiva,
desligue o P1000 utilizando o botão
no painel traseiro do dispositivo,
retire os cabos de ligação (com o
P1000 desligado) e ligue o P1000
novamente. Após completar o
procedimento acima a falha/avaria
deverá ter desaparecido; se a luz
power ainda permanecer acesa
amarela, então o P1000 tem uma
avaria. Desligue o dispositivo e
contacte o seu retalhista.
Uma ou mais luzes de
canal piscam amarelo/
verde.
Ocorreu uma falha/avaria de
curto-circuito. As luzes que
piscam representam os canais do
amplicador que se encontram
em curto-circuito.
O amplicador silencia os canais
em curto-circuito. Se a falha/
avaria deixar de estar presente,
o amplicador volta a funcionar
normalmente.
Tenha presente que para detectar
um curto-circuito num canal, esse
canal terá que estar a reproduzir um
sinal áudio. Por exemplo, ao silenciar
(mute) a saída no pré-amplicador
poderá parecer que a falha/avaria
deixou de estar presente; no
entanto, quando a função silenciar
do pré-amplicador for desactivada,
é provável que a falha/avaria volte a
ocorrer a menos que sejam tomadas
as medidas necessárias para o evitar.
Uma ou mais luzes de
canal encontram-se acesas
amarelas.
Ocorreu uma falha/avaria de
sobreaquecimento no canal com a
luz acesa amarela.
O amplicador silencia o canal
que apresenta a falha/avaria. O
amplicador permanece nesta
condição até o canal ter arrefecido.
Se esta falha/avaria ocorrer com
frequência, certique-se que o
amplicador dispõe de ventilação
adequada.
Falhas “DC offset”
Uma falha “DC offset” não é uma avaria do amplicador, mas sim um mecanismo de protecção para
os altifalantes. Se o amplicador for alimentado com um componente de corrente directa - DC - (em
vez da tensão normal - AC) durante um período de tempo prolongado, as bobines dos altifalantes
poderão, eventualmente, car queimadas (ou, em situações extremas, começar a arder). O P1000 tem
a capacidade de detectar esta condição e desligar as saídas para os altifalantes.
As falhas “DC offset” podem ocorrer de forma intermitente em todos os sistemas, em particular se
estiver ligado um sintonizador ou receptor de antena parabólica. Se ocorrer com alguma frequência ou
de forma previsível, contacte o seu retalhista para informação mais detalhada.
Page 59

P1000
P-11
Português
Technical specication
Todos os valores medidos com tensão de alimentação de 230V/50Hzr
Saída de potência contínua, 20Hz—20kHz, 8Ω 135W por canal; 945W total
Todos os canais, 20Hz—20kHz, 4Ω 210W por canal; 1.47kW total
Um ou dois canais a 1kHz, 8Ω 190W por canal
Um ou dois canais a 1kHz, 4Ω 305W por canal
Um ou dois canais a 1kHz, 3.2Ω 325W por canal
Capacidade de corrente máxima de saída
±20.5A por canal
Distorção harmónica total
A qualquer nível até à potência nominal, para
4 ou 8Ω
<0.08% máximo (20Hz—20kHz);
tipicamente <0.007% a 1kHz
Resposta em frequência
±0.2dB (2Hz—50kHz)
–1dB at 1Hz em 100kHz
Ruído residual
À potência máxima referenciada –110dB A ponderação; 100dB CCIR
Ganho de tensão
Seleccionado pelo utilizador:
A: x31.5dB
B: x29dB
C: x26dB
Impedância de entrada
22kΩ em paralelo com 180pF
Impedância de saída
20mΩ a 20Hz, 1kHz
80mΩ a 20kHz
Power requirements
115V ou 230VAC, 50/60Hz, 2.2kW máximo através
de cabo de alimentação IEC.
Um sistema de detecção de passagem por zero da
tensão da rede elimina os uxos elevados de corrente
do ‘transformador’ quando o dispositivo é ligado.
Características físicas
Dimensões: W430 x D400 x H133 mm
Peso: 18kg (40 lb) net; 21kg (46 lb) packed
E&OE
Política de melhoramento contínuo
A Arcam segue uma política de melhoramento contínuo dos seus produtos. O que signica que os
desenhos e especicações dos nossos produtos podem ser alterados sem aviso prévio.
Todos os valores de especicações indicados são valores típicos excepto quando for indicado o
contrário.
Interferência de radiofrequências
O P1000 é um dispositivo de áudio que foi concebido em conformidade com elevados padrões de
compatibilidade electromagnética.
O dispositivo pode irradiar energia RF (radiofrequência). Em determinadas situações poderá causar
interferências na recepção de rádio FM e AM. Se tal acontecer, mantenha o P1000 e os seus cabos
tão longe quanto possível do sintonizador e das suas antenas. A ligação do P1000 e do sintonizador a
tomadas diferentes poderá igualmente auxiliar na redução de interferências.
Países da UE – Estes produtos foram concebidos em conformidade com a directiva 89/336/EEC.
EUA – Estes produtos cumprem os requisitos da FCC.
Page 60

P1000
P-12
Garantia
Garantia Mundial
Esta garantia proporciona-lhe a reparação sem custos do dispositivo, durante os dois anos após a sua
aquisição, em qualquer distribuidor autorizado Arcam, desde que tenha sido originalmente adquirido
num retalhista ou distribuidor Arcam. A Arcam não aceita qualquer responsabilidade por defeitos que
resultem de acidentes, má utilização, utilização abusiva, desgaste normal, negligência ou reparações/
anações não autorizadas, nem por danos ou perdas ocorridos no transporte de/para o indivíduo que
efectuou a reclamação de garantia.
A garantia cobre os custos de peças e mão-de-obra durante dois anos, a partir da data de aquisição.
Decorridos os dois anos, o proprietário terá que suportar os custos de peças e mão-de-obra. A
garantia não cobre quaisquer custos de transporte.
Reclamações em garantia
ste equipamento deverá ser acondicionado na embalagem original e devolvido ao retalhista onde foi
adquirido ou, se tal não for possível, deverá ser enviado directamente para o distribuidor Arcam do país
de residência. Deverá ser enviado (pré-pago) através de uma empresa reconhecida de transporte de
mercadorias – não pelo correio. Não será aceite qualquer responsabilidade pela unidade enquanto se
encontrar em trânsito para o retalhista ou distribuidor, sendo o cliente aconselhado a segurar a unidade
contra danos e perdas em trânsito.
Para informação mais detalhada contacte a Arcam:
Arcam Customer Support Department,
Pembroke Avenue,
Waterbeach,
CAMBRIDGE, CB5 9QR,
England
Problemas?
Se ocorrer algum problema, contacte em primeiro lugar o seu retalhista Arcam. Se o seu retalhista
Arcam não conseguir satisfazer qualquer solicitação ou esclarecimento relativos a este ou qualquer
outro produto Arcam, por favor contacte o Arcam Customer Support e envidaremos os nossos melhores
esforços para esclarecer as questões apresentadas.
Registo on-line
Pode registar o seu produto Arcam on-line através do site: www.arcam.co.uk.
 Loading...