

Aprilaire 1953, 1972 Owner's Manual
Safety, Installation and Service Manual
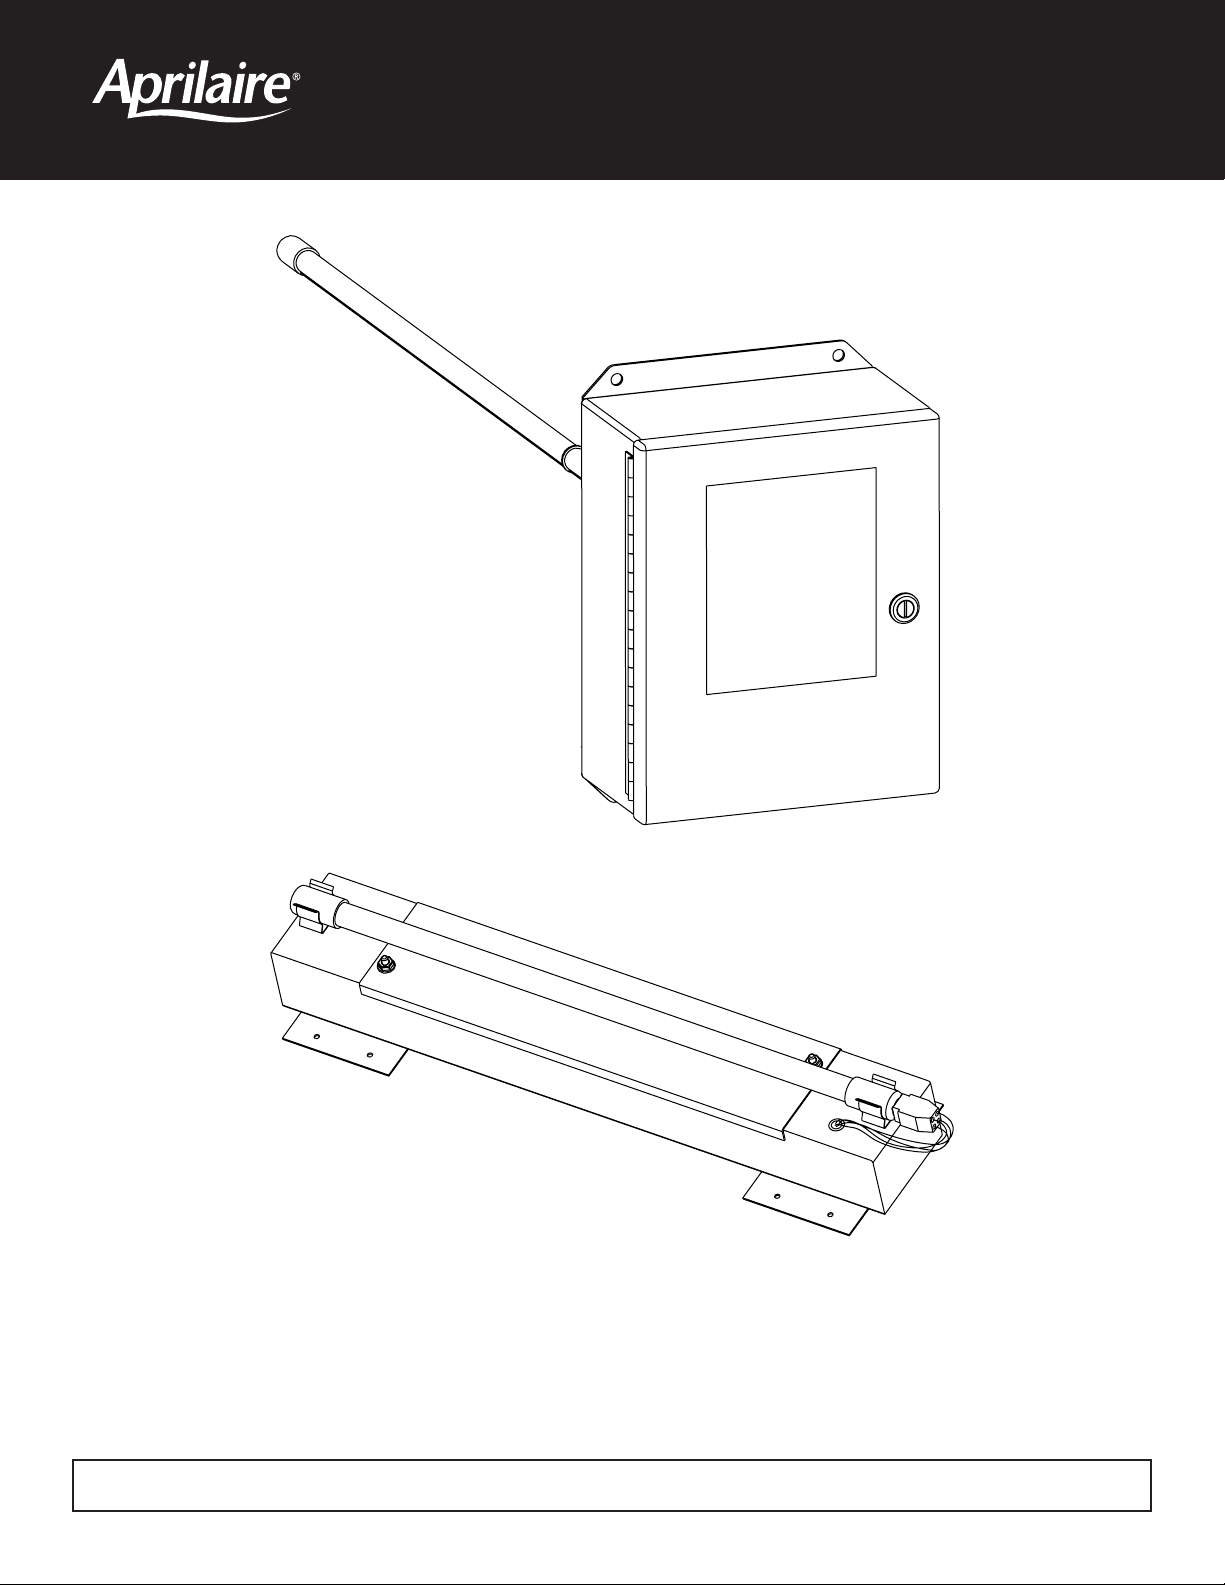
Models 1952, 1953 & 1972
Ultraviolet Germicidal Lamps
READ AND SAVE THIS MANUAL
Model 1952
24” Rooftop Unit
Model 1953
32” Rooftop Unit
Model 1972
Rooftop Unit, Internal Mount
2
I. SAFETY INSTRUCTIONS
WARNING
Ultraviolet light is harmful to eyes
and skin. Never look at light produced
by this lamp. Shut off power to lamp
before servicing.
Electrical shock from 120 - 277 VAC
may cause serious injury. Shut off
power before starting installation and do
not turn power back on until complete.
Sharp edges may cause personal
injury. Use care when cutting and
handling sheet metal.
Lamp may cause personal injury in
the form of burns or cuts. Wear
protective gloves and safety glasses
when handling lamp. To prevent burns,
shut off power to lamp and allow to cool
for several minutes before servicing. If
lamp is broken, refer to lamp disposal
section of this manual.
CAUTION
UV light can cause color changes or structural degradation of
plastics, rubber, paper, and other non-metallic materials used in
the HVAC system.
• Install lamp in location that prevents exposure of plastics, rubber,
paper, and other non-metallic materials to UV light, or shield such
materials with aluminum tape, sheet metal, or metal conduit.
• Shield electrical wires that receive direct or reflected UV radiation
with aluminum tape, sheet metal, or conduit.
• Install lamp at least 8 inches away from equipment or components
made with UV resistant plastic. If equipment or components are not
made with UV resistant plastic – or if the UV resistance of the
material is unknown – shield with aluminum tape or sheet metal.
Water may damage lamp.
• Install lamp at least 3 inches away from evaporator coil.
• Do not install lamp below a humidifier or any source of water.
© Research Products Corp.
Please read the safety and installation instructions carefully to help ensure a correct and SAFE installation of the
Aprilaire Ultraviolet Germicidal Lamp.
TABLE OF CONTENTS
I. Safety Instructions . . . . . . . . . . . . . . . . . . . . . . . . . . . . . .2
II. Application . . . . . . . . . . . . . . . . . . . . . . . . . . . . . . . . . . .3
III. Installation . . . . . . . . . . . . . . . . . . . . . . . . . . . . . . . . . . .3
Installation of External Mount Rooftop Units
(Models 1952 & 1953) . . . . . . . . . . . . . . . . . . . . . . . . . . . .4
Installation of Internal Mount Rooftop Units
(Model 1972) . . . . . . . . . . . . . . . . . . . . . . . . . . . . . . . . . . .7
IV. Annual Lamp Replacement . . . . . . . . . . . . . . . . . . . . .10
V. Lamp Disposal . . . . . . . . . . . . . . . . . . . . . . . . . . . . . . . .11
VI. Troubleshooting . . . . . . . . . . . . . . . . . . . . . . . . . . . . . .11
VII. Lamp Replacement Record . . . . . . . . . . . . . . . . . . . .11
VIII. Limited Warranty . . . . . . . . . . . . . . . . . . . . . . . . . . . .12
3
II. APPLICATION
Models 1952, 1953, and 1972 Aprilaire Ultraviolet Germicidal Lamps are designed for the treatment of evaporator coils used in
rooftop HVAC air handling units or in larger split systems used in the light commercial market. The UV germicidal light emitted from
the lamps will kill microorganisms growing on evaporator coils and drain pans and prevent further growth. The units use 120 -277
VAC / 60 Hz / single phase power, and are designed for continuous lamp operation.
Exter
nal Mount Rooftop Units
Model 1952 24” Rooftop Unit
Model 1953 32” Rooftop Unit
The External Mount Rooftop Units incorporate a NEMA 4 enclosure for protection against the elements.
These units are intended primarily for installation on rooftop air handling units.
Internal Mount Rooftop Unit
Model 1972 Rooftop Unit, Internal Mount
The Internal Mount Rooftop Unit is intended primarily for rooftop applications in which it is preferred to mount the unit entirely within the
air handler rather than penetrating the outer cabinet. This unit is 18” in length and is mounted using supports supplied with the lamp.
III. INSTALLATION
NOTES FOR ALL MODELS
• The installation should be done by a licensed professional
trained in the installation and servicing of HVAC equipment.
Unit must be installed in accordance with all applicable
national and local codes.
• Read all safety instructions at the beginning of this manual.
Failure to do so could lead to personal injury and/or
equipment damage.
• Read the installation manuals for the equipment on which
the lamps are being installed for additional information
and warnings.
• In cases where fungi and/or bacteria are already present on
the evaporator coil, it is recommended that a qualified HVAC
service technician clean the coil before the installation of the
UV Lamp. Because the Aprilaire Ultraviolet Germicidal Lamp
quickly kills fungi and bacteria, there could be an initial period
of temporarily increased levels of airborne decay products if
the coil is not cleaned before installation.
• The tools and equipment required to complete this installation
include: Drill, drill bits (3/32 in. & ‘Unibit’), holecutter (2 in.),
Phillips screwdriver, #10 nut driver, tape measure, sealant,
aluminum tape, multimeter with clamp-on ammeter, alcohol
& wipes, and safety glasses. Some installations may also
require weatherproof conduit and conduit connectors.
• Shut off power to HVAC unit at the main disconnect
switch before starting installation.
Coil Area Model 1972 Model 1952 Model 1953
(sq. in.) (sq. ft.) 18” Lamp 24” Lamp 32” Lamp
750 5.2 1 1 1
1000 6.9 2 1 1
1250 8.7 2 2 1
1500 10.4 2 2 2
1750 12.2 3 2 2
2000 13.9 3 2 2
2250 15.6 3 3 2
2500 17.4 4 3 2
2750 19.1 4 3 3
3000 20.8 4 3 3
3250 22.6 5 4 3
3500 24.3 5 4 3
Model 1972 Model 1952 Model 1953
Coil Area 18” Lamp 24” Lamp 32” Lamp
(sq. in.) 792 1008 1296
(sq. ft.) 5.5 7.0 9.0
IMPORTANT NOTES: The above tables are guidelines only. The most
important requirement for an effective UV Lamp installation is complete
illumination of the coil and drain pan. Install UV Lamps as required to fully
illuminate the coil and drain pan.
The guidelines above are based on the following assumptions:
• UV Lamps to be installed 3 in. – 12 in. from coil
• Coil thickness in the range of 2 in. – 4 in.
GUIDELINES FOR THE NUMBER OF LAMPS REQUIRED
FOR A GIVEN COIL AREA
APPROXIMATE COIL AREA COVERAGE FOR EACH MODEL
4
INSTALLATION OF EXTERNAL MOUNT ROOFTOP UNITS (MODELS 1952 & 1953)
a. The lamps are intended for evaporator coil treatment. See Figure 2 for typical installation. If a single Lamp cannot illuminate the
majority of the evaporator coil, two or more units might be required as shown. To the extent possible, the Lamp(s) should be centered
on the coil (or section thereof) being illuminated.
b. Install lamp in location that prevents exposure of
plastics, rubber, paper, and other non-metallic
materials to UV light, or shield such materials with
aluminum tape, sheet metal, or metal conduit.
See CAUTION statements at beginning of
manual for more details.
c. To protect lamp, do not install lamp below any
source of water.
d. Install units so that Lamp is at least 3 in.,
but not more than 36 in., away from evaporator
coil surface.
e. Install lamp in a location that can be easily
accessed. Allow clearance to slide lamp in and
out of rooftop unit. Model 1952 lamp is 24 in.
and Model 1953 lamp is 32 in.
f. Be certain the area in the equipment where you intend to drill and cut is free of any obstructions or components that would be
damaged by the installation or interfere with the installation.
g. While keeping these guidelines in mind, note that the more direct exposure the coil and drain pan receive, the
greater the benefit the lamps will have.
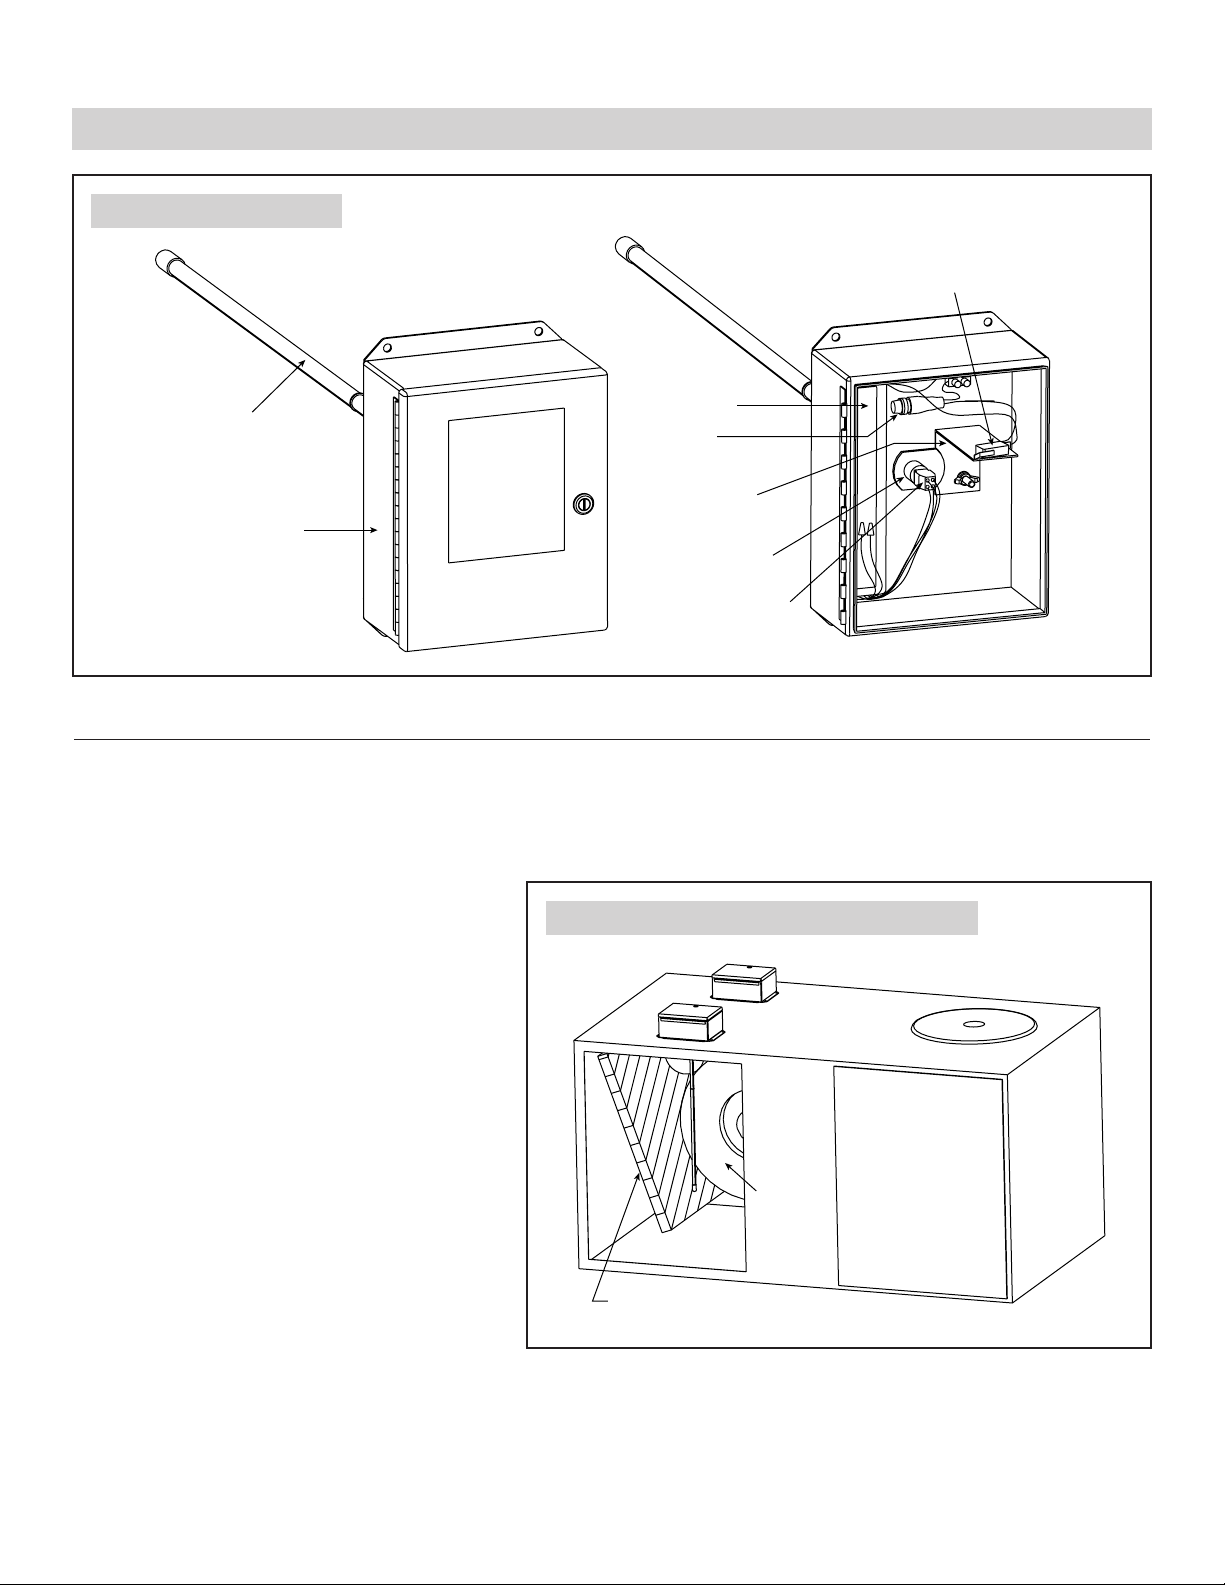
FIGURE 1 – Model 1952/1953
90-745
DETERMINE MOUNTING LOCATION
Determine a mounting location for the lamp. Use the criteria below to select a proper location:
FIGURE 2 – Typical Installation of Model 1952/1953
90-747
Safety Interlock Switch
Lamp
Fuse
Lamp
Retaining
Ballast
Unit Base
Bracket
Lamp Base
Lamp Socket
Blower
Evaporator Coil
 Loading...