

Aprilaire 1700 User Manual
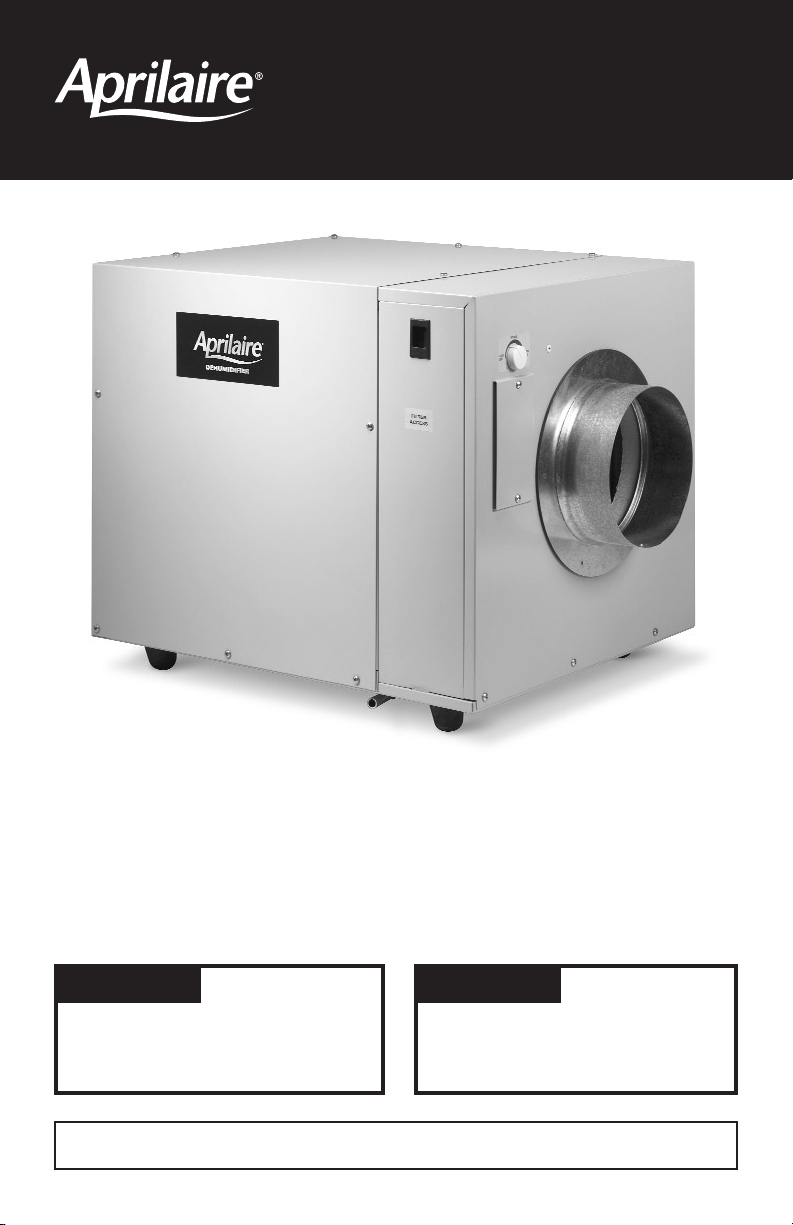
Model 1700 Dehumidifier
Owner’s Manual
Includes Safety & Operating Instructions
and Warranty Information
READ AND SAVE THESE INSTRUCTIONS
WARNING
120 volts may cause
serious injury from electric shock.
Disconnect electrical power before
servicing.
CAUTION
Sudden operation
may cause personal injury or property
damage. Unplug the dehumidifier
before servicing.
Dehumidifier
I. PRINCIPLE OF OPERATION
The purpose of the Aprilaire®Dehumidifier is to keep humidity in the house at acceptable limits to
reduce the unwanted effects of high humidity. The dehumidifier gathers data from the HVAC system
and measures the condition of the house air to decide when to run. An integrated air cycling feature
can activate the HVAC blower to cycle air through the house to balance the indoor conditions. The
dehumidifier can also operate an optional ventilation damper to bring in outside air.
II. OPERATING INSTRUCTIONS
There are three adjustable settings: the dryness setting, the air cycle period and the air cycle time
“LESS DRY” to “7” or “MORE DRY” based on
within that period. The dehumidifier can be set from
desired comfort level. Most installations should be initially set to the “3” or “NORMAL” setting;
however this can be adjusted to your individual needs. Air cycle period is set using the dip switches,
and the potentiometer is used to set the air cycle time which are both located on the control board
under the knob and are set during installation. If the cycle period is set to 1 hour and the cycle time
potentiometer is set to 20 minutes, you will get 20 minutes of air cycling every hour. It is important to
understand that the air cycling requirement – 20 minutes per hour in this example – may be satisfied by
a heating, cooling, or fan call initiated by your thermostat, or if such calls do not satisfy the air cycling
requirement, from a blower call initiated by the dehumidifier itself.
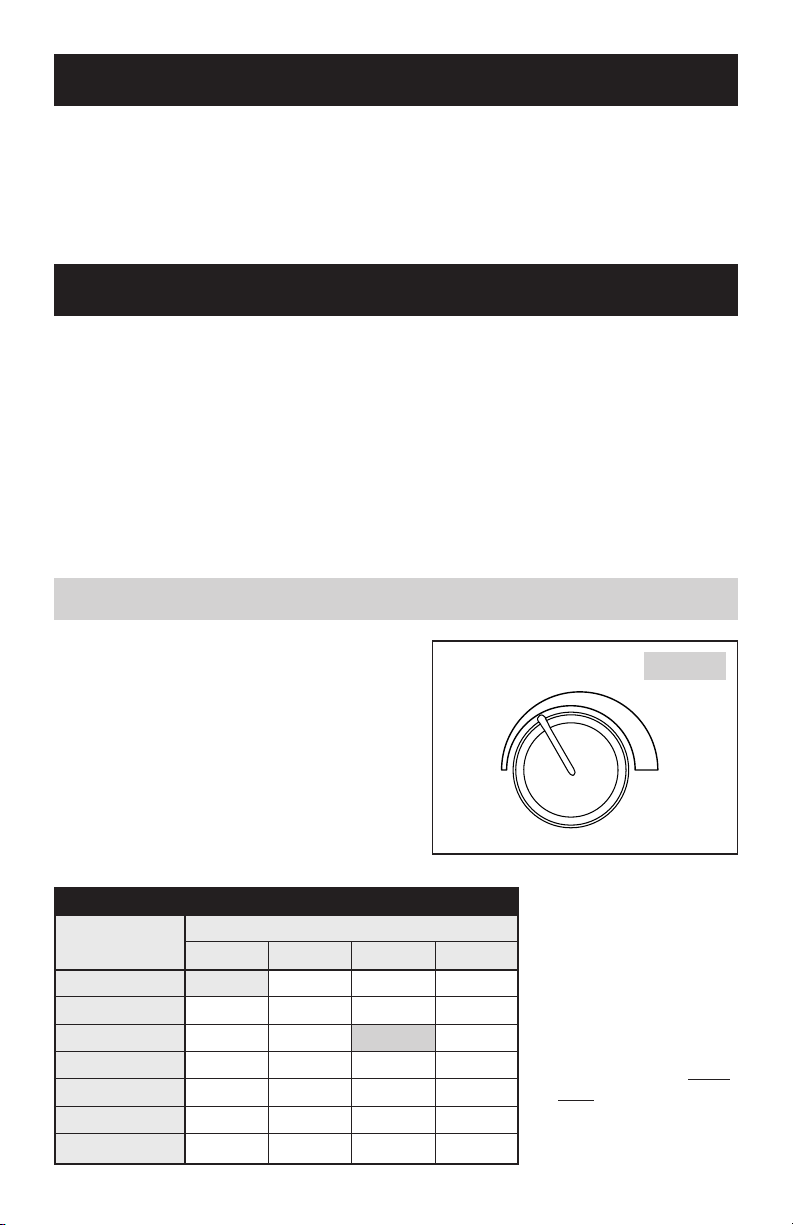
1. ADJUSTING THE DEHUMIDIFIER SET POINT
Use the main control knob (Figure 1) on the outside
of the unit to set the dehumidifier dryness setting.
Start with a “NORMAL” setting for most installations.
Moving the knob clockwise to “MORE DRY” will make
conditions drier. Moving the knob toward “LESS DRY”
allows for higher moisture levels.
Based on the thermostat set point, use the following
table to determine the control knob setting to reach
the desired RH value. The dehumidifier will work to
achieve these values.
“1” or
LESS
DRY
L
A
M
4
R
O
3
N
2
1
O
F
F
5
FIGURE 1
6
T
S
E
T
7
MORE
DRY
B2203436
%RH (± 5%) based on Control Knob Setting and Indoor Temperature
Control Knob
Setting
Indoor Temperature (°F)
65 70 75 80
1 - “LESS DRY” 84% 71% 60%
2 86% 73% 61% 52%
3 - “NORMAL” 74% 63% 53% 45%
4 64% 54% 45% 39%
5 55% 46% 39% 33%
6 47% 39% 33% 28%
7 - “MORE DRY” 40% 34% 28% 24%
EXAMPLE: At an indoor
temperature of 75°F with a
dehumidifier control knob
setting of 3 - NORMAL, the
dehumidifier will work to
achieve an RH value of 53%.
NOTES:
1. %RH values are ±5% and
are to be used as a GUIDE
ONLY for initial set-up.
2. Indoor Temperature is
measured at the inlet to
the Model 1700.
 Loading...