

Page 1
PD-650S
OPERATING
MANUAL
PORTABLE DVD PLAYER
Page 2
Safety Precautions
Safety Precautions
CAUTION
RISK OF ELECTRIC SHOCK
DO NOTOPEN
The lightning flash with an arrowhead symbol within an equilateral
triangle is intended to alert the user of the presence of uninsulated
"dangerous voltage" within the product's enclosure that may be of
s u fficient magnitude to constitute a risk of electric shock to persons.
The exclamation point within an equilateral triangle is intended to
alert the user of the presence of important operating and
maintenance (servicing) instructions in the literature accompanying
the appliance.
THIS DEVICE COMPLIES WITH PA RT 15 OF THE FCC
RULES. OPERATION IS SUBJECT TO THE FOLLOWING
CLASS 1
LASER PRODUCT
WARNING: DO NOT EXPOSE THIS APPLIANCE TO RAIN OR
MOISTURE, DUE TO THE HIGH RISK OF FIRE OR ELECTRIC SHOCK, DO
NOT OPEN THE CABINET DANGEROUS HIGH VOLTAGES A R E
PRESENT INSIDE THE ENCLOSURE. ONLYQUALIFIED SERV I C E
P E R S O N N E LSHOULD ATTEMPT THIS.
CAUTION: DURING PLAYBACK, THE DISC SPINS AT HIGH SPEED, SO DO
NOT LIFT OR MOVE THE PLAYER, DOING SO MAYDAMAGE THE DISC.
C A U T I O N :This Digital Video Disc Player employs a Laser System. Make sure
the device is shut down prior to opening player lid.Visible laser radiation
when open and interlocks defeated.Use of controls or adjustments or
performance of procedures other than those specified herein may result in
hazardous radiation exposure.
TWO CONDITIONS: (1)THIS DEVICE MAY N O T C A U S E
H A R M F U L INTERFERENCE, AND (2) THIS DEVICE MUST
A C C E P T A N Y INTERFERENCE RECEIVED. INCLUDING
INTERFERENCE T H AT M AY CAUSE UNDESIRED
O P E R AT I O N .
1 2
DO NOTS TA R EI N TOB E A M .
To ensure proper use of this product, please read this owner’s manual carefully
and retain for future reference. Should the unit require maintenance, contact an
authorized service location, or contact us.Only qualified service personnel should
remove the cover.
FCC NOTICE: This equipment has been tested and found to comply with
the limits for a Class B digital device. Pursuant with the FCC Rules, Part 1 5 .
These limits are designed to provide reasonable protection against harmful
interference in a residential installation.
This equipment generates,uses and can radiate radio frequency energy
and,if not installed and used in accordance with the i n s t r u c t i o n s , m a y
cause harmful interference to radio communication,However,this is no
guarantee that interference will not occurin a particular installation.If this
equipment does cause harmful interference to radio or television reception,
which can be determinedby turning the equipment off and on,the user is
encouraged to try to correct the interference by one of the following
m e a s u r e s :
- Reorient or relocate the receiving antenna.
- Increase the separation between the equipment and
receiver.
- Connect the equipment into an outlet on a circuit dif-
ferent from that to which the receiver is connected.
- Consult the dealer or an experienced radio/TV techni-
cian for help.
FCC Caution:To assure continued compliance,(example-use only
shielded interface cables when connecting to computer orperipheral
devices).Any changes or modifications not expressly approved by the
party responsible for compliance could void the user’s authority to
operate this equipment.
B AT T E RYWA R N I N G: The DVD player contains a NiMH battery pack.
There is a risk of fire and burns if the battery pack is handled improperly. Do
not disassemble, crush, puncture, short external contacts, or dispose of in
fire or water. Do not attempt to open or service the battery pack. Replace
only with the battery pack designated for this product. Discard used batteries
according to the manufacturer’s instructions.
Page 3

Safety Information
Safety Information
CAUTION: Use of controls or adjustments or performance
of procedures other than those specified herein may
result in hazardous radiation exposure.
Please carefully study this manual and always keep it
available. There are, however, some installation and operation
precautions which you should be aware of.
1.Read Instructions - All the safety and operating instructions
should be read before the product is operated.
2.Retain Instructions - The safety and operating instructions
should be retained for future reference.
3.Heed Warnings - All warnings on the product and in the
operating instructions should be adhered to.
4.Follow Instructions - All operating and use instructions should
be followed.
5.Cleaning - Unplug this product from the wall outlet before
cleaning. Do not use liquid cleaners or aerosol cleaners. Use a
damp cloth for cleaning.
6.Attachments - Do not use attachments not recommended by
the product manufacturer as they may cause hazards.
7.Water and Moisture - Do not use this product near water - for
example, near a bath tub, wash bowl, kitchen sink, or laundry
tub; in a wet basement; or near a swimming pool; and the like.
8.Accessories - Do not place this product on an unstable cart,
stand, tripod, bracket, or table. The product may fall, causing
serious injury to a child or adult, and serious damage to the
product. Use only with a cart, stand, tripod, bracket, or table
recommended by the manufacturer, or sold with the product.
Any mounting of the product should follow the manufacturer’s
instructions, and should use a mounting accessory
recommended by the manufacturer.
9.A product and cart combination should be moved with care.
Quick stops, excessive force, and uneven surfaces may cause
the product and cart combination to overturn.
10.Ventilation - Slots and openings in the cabinet are provided for
ventilation and to ensure reliable operation of the product and to
protect it from overheating, and these openings must not be
blocked or covered. The openings should never be blocked by
placing the product on a bed, sofa, rug, or other similar surface.
This product should not be placed in a built-in installation such as
a bookcase or rack unless proper ventilation is provided or the
manufacturer’s instructions have been adhered to.
11.Power Sources - This product should be operated only from
the type of power source indicated on the marking label. If you are
not sure of the type of power supply to your home, consult your
product dealer or local power company. For products intended to
operate from battery power, or other sources, refer to the
operating instructions.
12.Grounding or Polarization - This product may be equipped with
a polarized alternating-current line plug (a plug having one blade
wider than the other). This plug will fit into the power outlet only
one way. This is a safety feature. If you are unable to insert the
plug fully into the outlet, try reversing the plug. If the plug should
still fail to fit, contact your electrician to replace your obsolete
outlet. Do not defeat the safety purpose of the polarized plug.
Alternate Warnings - This product is equipped with a three-wire
grounding-type plug, a plug having a third (grounding) pin. This
plug will only fit into a grounding-type power outlet. This is a
safety feature, If you are unable to insert the plug into the outlet,
contact your electrician to replace your obsolete outlet. Do not
defeat the safety purpose of the grounding-type plug.
13.Power-Cord Protection - Power-supply cords should be routed
so that they are not likely to be walked on or pinched by items
placed upon or against them, paying particular attention to cords
at plugs, convenience receptacles, and the point where they exit
from the product.
14.Protective Attachment Plug - The product is equipped with an
43
Page 4

Safety Information
Safety Information
attachment plug having overload protection. This is a safety
feature. See Instruction Manual for replacement or resetting of
protective device. If replacement of the plug is required, be sure
the service technician has used a replacement plug specified by
the manufacturer that has the same overload protection as the
original plug.
15.Outdoor Antenna Grounding - If an outside antenna or cable
system is connected to the product, be sure the antenna or cable
system is grounded so as to provide some protection against
voltage surges and built-up static charges. Article 810 of the
National Electrical Code, ANSI/NFPA70, provides information with
regard to proper grounding of the mast and supporting structure,
grounding of the lead-in wire to an antenna discharge unit, size or
grounding conductors, location of antenna-discharge unit,
connection to grounding electrodes, and requirements for the
grounding electrode. See Figure 131.1.
16.Lightning - For added protection for this product during a
lightning storm, or when it is left unattended and unused for long
periods of time, unplug it from the wall outlet and disconnect the
antenna or cable system. This will prevent damage to the product
due to lightning and power-line surges.
17.Power Lines - An outside antenna system should not be
located in the vicinity of overhead power lines or other electric
light or power circuits, or where it can fall into such power lines or
circuits. When installing an outside antenna system, extreme care
should be taken to keep from touching such power lines or circuits
as contact with them might be fatal.
18.Overloading - Do not overload wall outlets, extension cords, or
integral convenience receptacles as this can result in a risk of fire
or electric shock.
19.Object and Liquid Entry - Never push objects of any kind into
this product through openings as they may touch dangerous
voltage points or short-out parts that could result in a fire or electric shock.Never spill liquid of any kind on the product.
2 0.Servicing - Do not attempt to service this product yourself as
opening or removing covers may expose you to dangerous voltage
or other hazards. Refer all servicing to qualified service personnel.
2 1.Damage Requiring Service - Unplug this product from the wall
outlet and refer servicing to qualified service personnel under the
following conditions:
a. When the power-supply cord or plug is damaged.
b. If liquid has been spilled, or objects have fallen into the product.
c. If the product has been exposed to rain or water.
d. If the product does not operate normally by following the
operating instructions. Adjust only those controls that are covered
by the operating instructions as an improper adjustment of other
controls may result in damage and will often require extensive
work by a qualified technician to restore the product to its normal
o p e r a t i o n .
e. If the product has been dropped or damaged in any way, and
f. When the product exhibits a distinct change in performance - this
indicates a need for service.
2 2.Replacement Parts - When replacement parts are required, be
sure the service technician has used replacement parts specified
by the manufacturer or have the same characteristics as the
original part. Unauthorized substitutions may result in fire, electric
shock, or other hazards.
2 3.Safety Check - Upon completion of any service or repairs to this
product, ask the service technician to perform safety checks to
determine that the product is in proper operating condition.
2 4. Wall or Ceiling Mounting - The product should be mounted to a
wall or ceiling only as recommended by the manufacturer.
2 5. Heat - The product should be situated away from heat sources
such as radiators, heat registers, stoves or other products
(including amplifiers) that produce heat.
2 6 . Rechargeable battery - Charge voltage cannot be below 12V.
65
Page 5
Introduction
Introduction
Your new PD-650S Portable DVD
player is designed for you to enjoy all
forms of disc media. Its slim shape
allows you to easily carry it with you
and enjoy movies and music
anywhere. Your player incorporates the
latest digital audio/video (AV )
technologies to give you the ultimate in
listening and viewing pleasure.
Your new player also supports CD,
WMA and MP3. Your player also has
several unique features, including an
S-video output (for greater picture
clarity), large active LCD screen, multiangle and multi-language, Parental
Control (to prevent children from
viewing inappropriate content), and
Kodak Picture CD compatibility (so you
can show photos on your TV). This is
a truly multimedia machine designed
for the multimedia world to enjoy.
UNPACKING
First inventory the contents of your Portable DVD player
package:
Portable DVD Player 1
Audio Cable 1 pair
S-Video Cable 1
Video & Coaxial Cable 1 pair
Ni-MH Battery Pack 1
Remote Control 1
External Power Adapter 1
Power Cord 1
Cigarette Lighter Adapter 1
Operating Manual 1
Stereo Headphone 1
Y-Adapter for Headphone 1
If any item should be damaged or missing, please
contact your dealer without delay.
Keep the packaging materials, you may need them to
transport your player in the future.
WA R N I N G: Changes or modifications made to this equipment, not
expressly approved by us or parties authorized by us will void all
manufacture warranties.
87
Page 6

Table of Contents
Quick Starting Guide
Safety Precautions ................................ 1-6
Introduction ...................................... 7-8
Table of Contents .................................... 9
Quick Starting Guide ............................ 10-11
Connecting to a TV .............................. 12-13
Connecting to Optional Equipment ................ 14-17
Playing Back a Disc .............................. 18-21
KODAK Picture CD .............................. 22-23
JPEG Playback ................................ 24-25
WMA/MP3 Playback .............................. 26
Locating a Specific Title, Chapter or Track ............ 27
Playing Repeatedly .............................. 28-29
Playing in Favorite Order ........................ 30-31
Zooming a Picture .................................. 32
Selecting Subtitles .................................. 33
Using the On-Screen Display ........................ 34
Selecting the Camera Angle.......................... 35
Setting the Parental Lock ........................ 36-37
Rechargeable Battery Installation & Use ............ 38-39
Customizing the Function Settings ................ 40-41
Trouble Shooting Guide ............................ 42
Limited Warranty ................................ 43-44
1. Connecting to an External Power Source
Connect the power adapter (supplied with the player) to
the side input plug and to a wall outlet. Do not use any
other device otherwise specified by your dealer.
2. Open the protective cover
The cover opens to a maximum 135
o
only, so please do not try to open it
any further.
3. Press the open button on the left
to open the disc cover
4. Inserting a DVD disc
Align the center of the DVD disc with
the center of the disc guide. Press
gently down on the DVD to snap the disc into place, then
close the disc cover.
5. Slide the side power switch to ‘ON’.
5
9
10
Page 7
Quick Starting Guide
Connecting to a TV
6. Press the PLAY button on the
player face
In general, the DVD a l r e a d y
inserted into the player will start
reading automatically when power
is turned on.
The DVD player will immediately
start rendering the DVD program.
When you want to stop, press the STOP button, it
will return to the power-on logo. To power off the
unit, slide the ON/OFF switch to the right.
The DVD player will automatically power off in
three minutes after entering screen saver mode.
To reset the unit, first slide power switch to ‘OFF’,
and then slide it to ‘ON’.
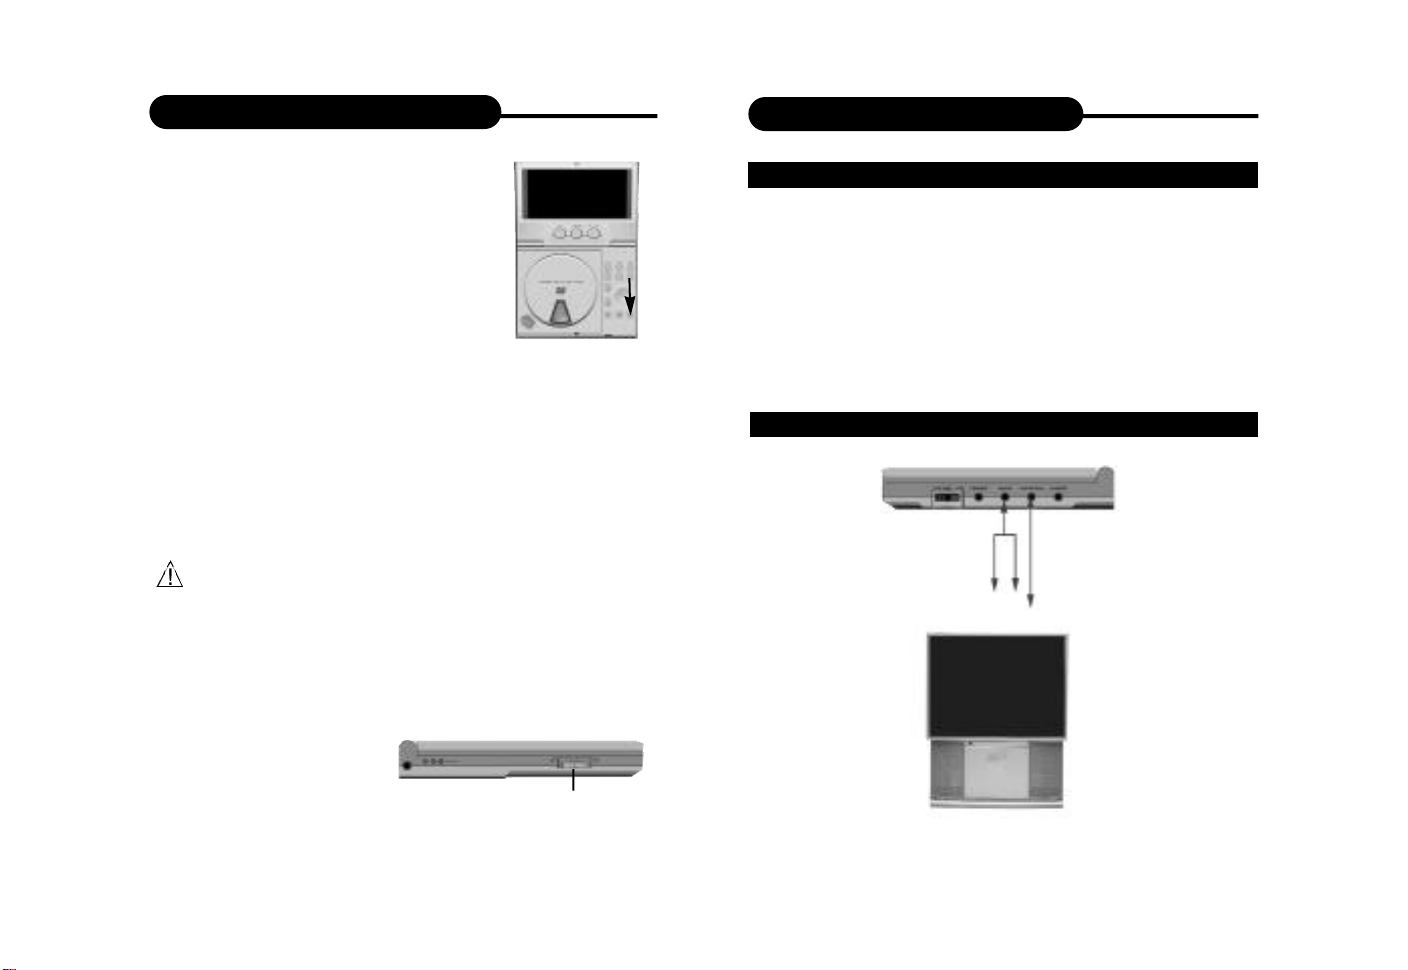
SETTING UP YOUR PLAYER
Step 1:connect the audio cables to AUDIO OUT of the
DVD player..
Step 2:connect the yellow cable to the VIDEO on the
side of your player.
(For TVs that support S-Video Output please follow the
diagram “BETTER” bellow.)
GOOD
RedWhite
TV Video Input
Yellow
TV Audio Input
ON/OFF
1211
Page 8

Connecting to a TV
Connecting to Optional Equipment
BETTER
R e dWhite
TV Audio Input
TV S-Video input
Connect the DVD video player with an
optional S -Video cable, if the TV has an S Video input. Do not connect the yellow video
cable if using the S -Video cable.
• Turn off the power and unplug both units before setting up
any connections.
• Make sure the bar INPUT SELECT on the back is slided
to OUT.
CONNECTING HEADPHONES
Your player allows two people enjoy music at the
same time with a Y-Adapter for headphone.
1. Connect with a Y-Adapter for headphone to the
unit, and then you can connect to two headphones.
Headphones with a 3.5 mm stereo plug can be used.
2. Adjust the volume by turning the dial.
• Avoid listening to sound at levels which may be harmful to
your ears.
1413
Page 9
Connecting to Optional Equipment
Connecting to Optional Equipment
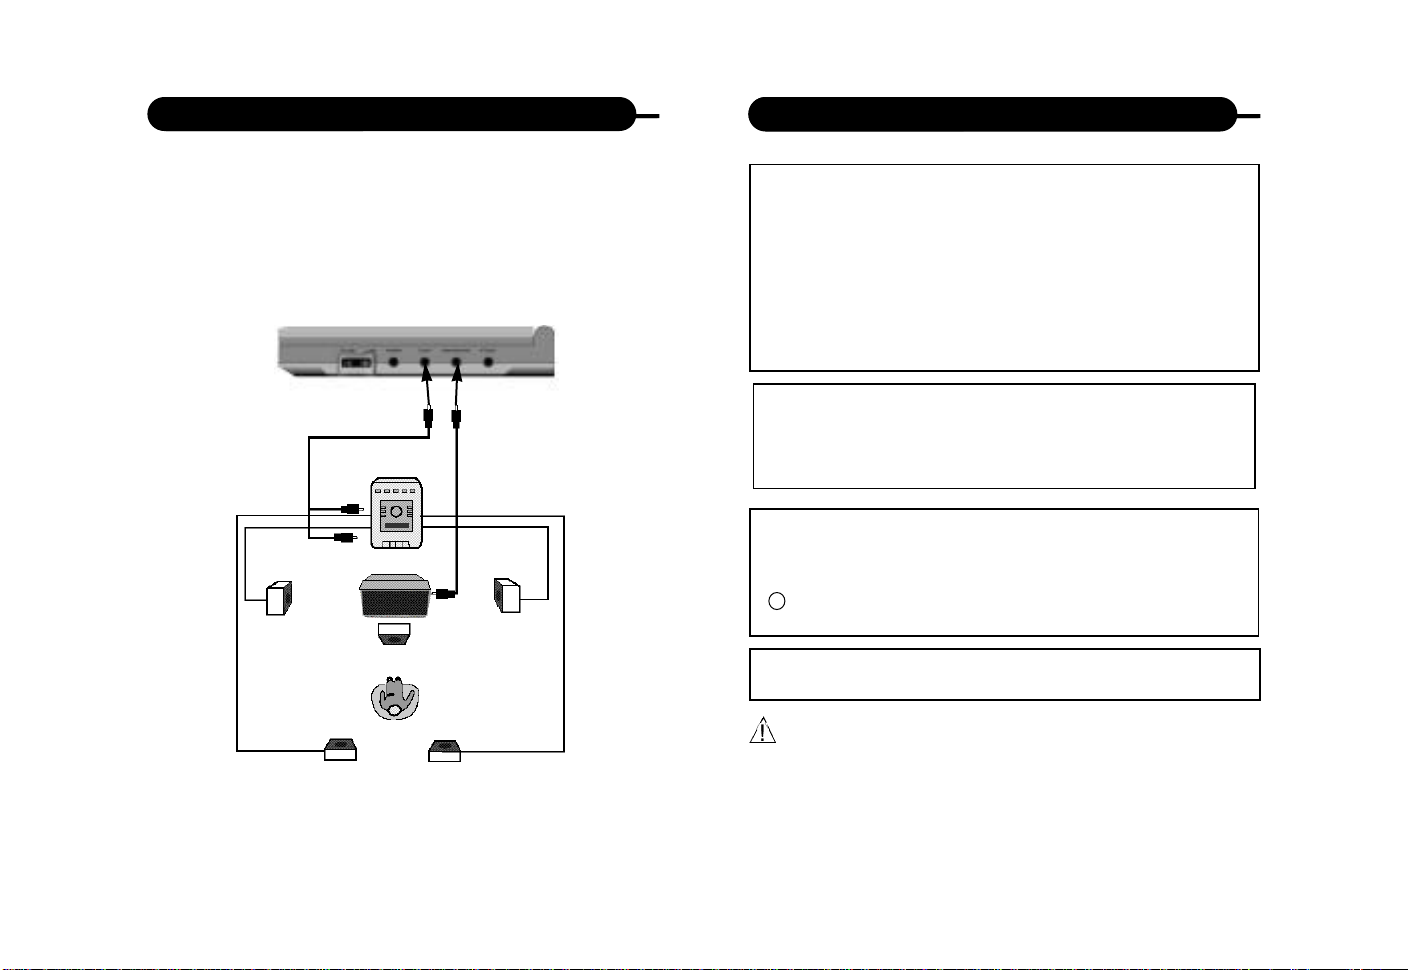
Enjoying Dolby Pro Logic Surround Sound (GOOD)
Dolby Pro Logic Surround
Enjoy the dynamic realistic sound of Dolby Pro Logic
Surround by connecting an amplifier and speaker
system (right and left front speakers, a center speaker,
and one or two rear speakers).
Connection
Example
To audio
Front
speaker
(left)
ToAUDIO
input
OUT
speaker
TV
Center
Yellow
speaker
(right)
To VIDEO
OUT
Amplifier
equipped with
Dolby Pro
Logic Surround
Front
This product incorporates copyright protection
technology that is protected by method claims of
certain U.S. patents and other intellectual property
rights owned by Macrovision Corporation and other
rights owners. Use of this copyright protection
technology must be authorized by Macrovision
Corporation, and is intended for home and other
limited viewing uses only unless otherwise
authorized by Macrovision Corporation. Reverse
engineering or disassembly is prohibited.
It is forbidden by law to copy, broadcast, show, play in
public, and rent copyrighted material without permission.
DVD video discs are copy protected, and any recordings
made from these discs will be distorted.
Manufactured under license from Dolby
Laboratories. “Dolby” and the double-D symbol are
trademarks of Dolby Laboratories. Confidential
Unpublished works.
c
1992-1997 Dolby Laboratories, Inc. All rights
reserved.
“DTS” and “DTS Digital Out” are trademarks of Digital
Theater Systems, Inc.
Rear
speaker
• Adjust the volume of your receiver to a comfortable
listening level to avoid any speaker damage.
• When connecting and disconnecting the DVD video player,
turn off the amplifier to avoid any speaker damage.
1615
Page 10
Connecting to Optional Equipment
Playing Back a Disc
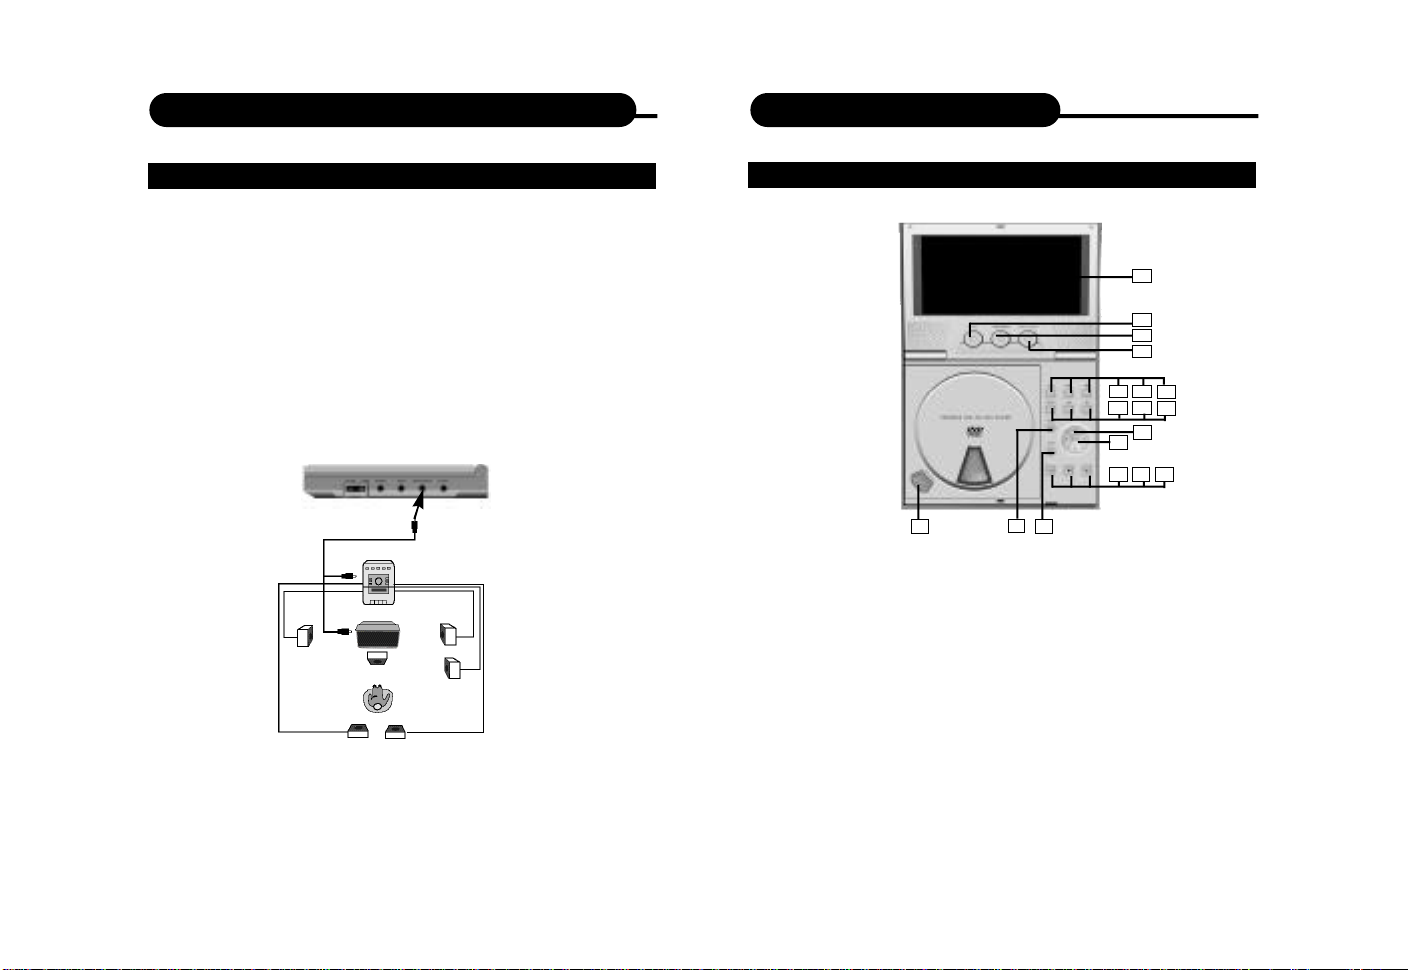
Enjoy Dolby Digital or DTS (BETTER)
Dolby Digital/DTS
Dolby Digital and DTS programming can deliver surround
sound with five discrete full range channels plus a sixth
channel for a subwoofer. You can enjoy your DVD with a
Dolby Digital System. All you need is to connect your
DVD player to a Dolby Digital/DTS receiver or a Dolby
Digital Ready receiver with an external decoder.
DVD SIDE
To PCM/BITSTREAM
Front
speaker
(left)
To VIDEO OUT
TV
Set "SPDIF Output" to "SPDIF/PCM" in "General Setup" from the
Setup Menu.
Front
speaker
(right)
CONTROLS FOR BASIC PLAYBACK
16 18
1. LCD Monitor
2. Color
(for LCD color adjustment)
3. Brightness
(for LCD brightness adjustment)
4. Display Mode
(switch between 16:9 & 4:3)
5. Title
6. Previous
7. Next
8. Menu
17
9. Reverse
10. Forward
11. Direction Keys
(Up/Down/Right/Left)
12. Enter
13. Pause
14. Stop
15. Play
16. Open
17. Setup
18. Zoom
1
2
3
4
65 7
8
9
11
12
13 14 15
10
1817
Page 11
Playing Back a Disc
Playing Back a Disc
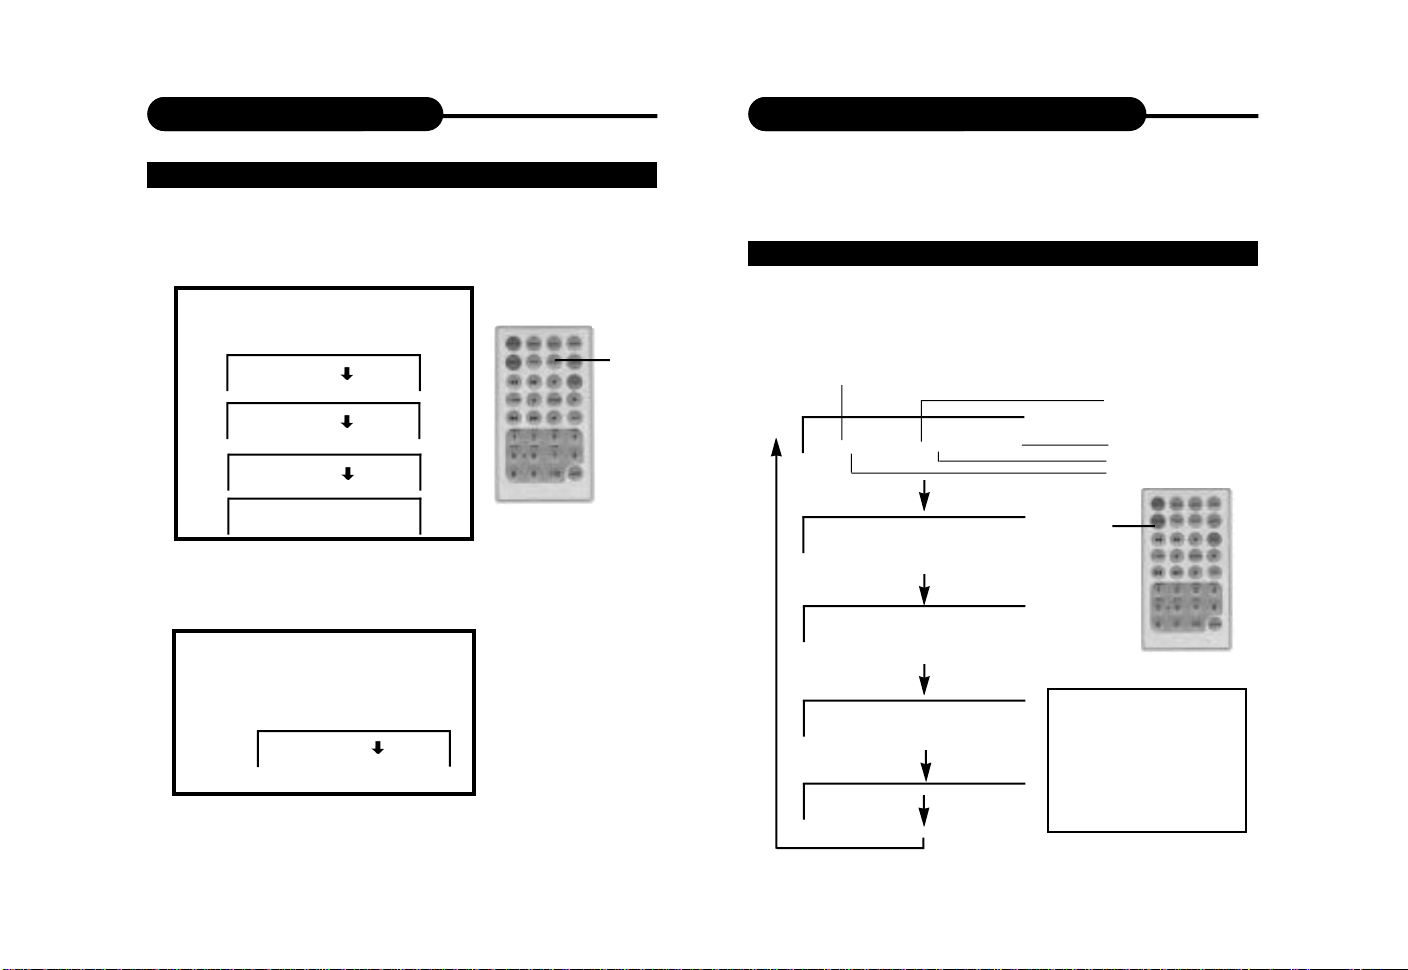
HOW TO START PLAYBACK FROM THE MENU SCREEN
1. Press TITLE/MENU to
access the menu screen.
Title 1
Title 2
2. Press or
the number buttons to
select the title.
Title 3
Title 4
3. Press the ENTER or
PLAY button.
The DVD video player will
start playback from the title
selected.
Note:
ENTER 2x 4x
You also can input the
assigned number of the title
to select it directly.
HOW TO PAUSE PLAYBACK (STILL PLAYBACK)
Press the PAUSE/STEP once
during playback.
Press PAUSE/STEP repeatedly
during playback, the picture
PAUSE/STEP
will advance one frame each
time, then press PLAY button to
resume normal playback.
During the still playback the sound
is muted. MP3 CD, Audio CD and
Picture CD do not have the step
feature.
PLAY
HOW TO STOP PLAYBACK
Press the STOP button.
The player is stopped.
REV
FWD
STOP
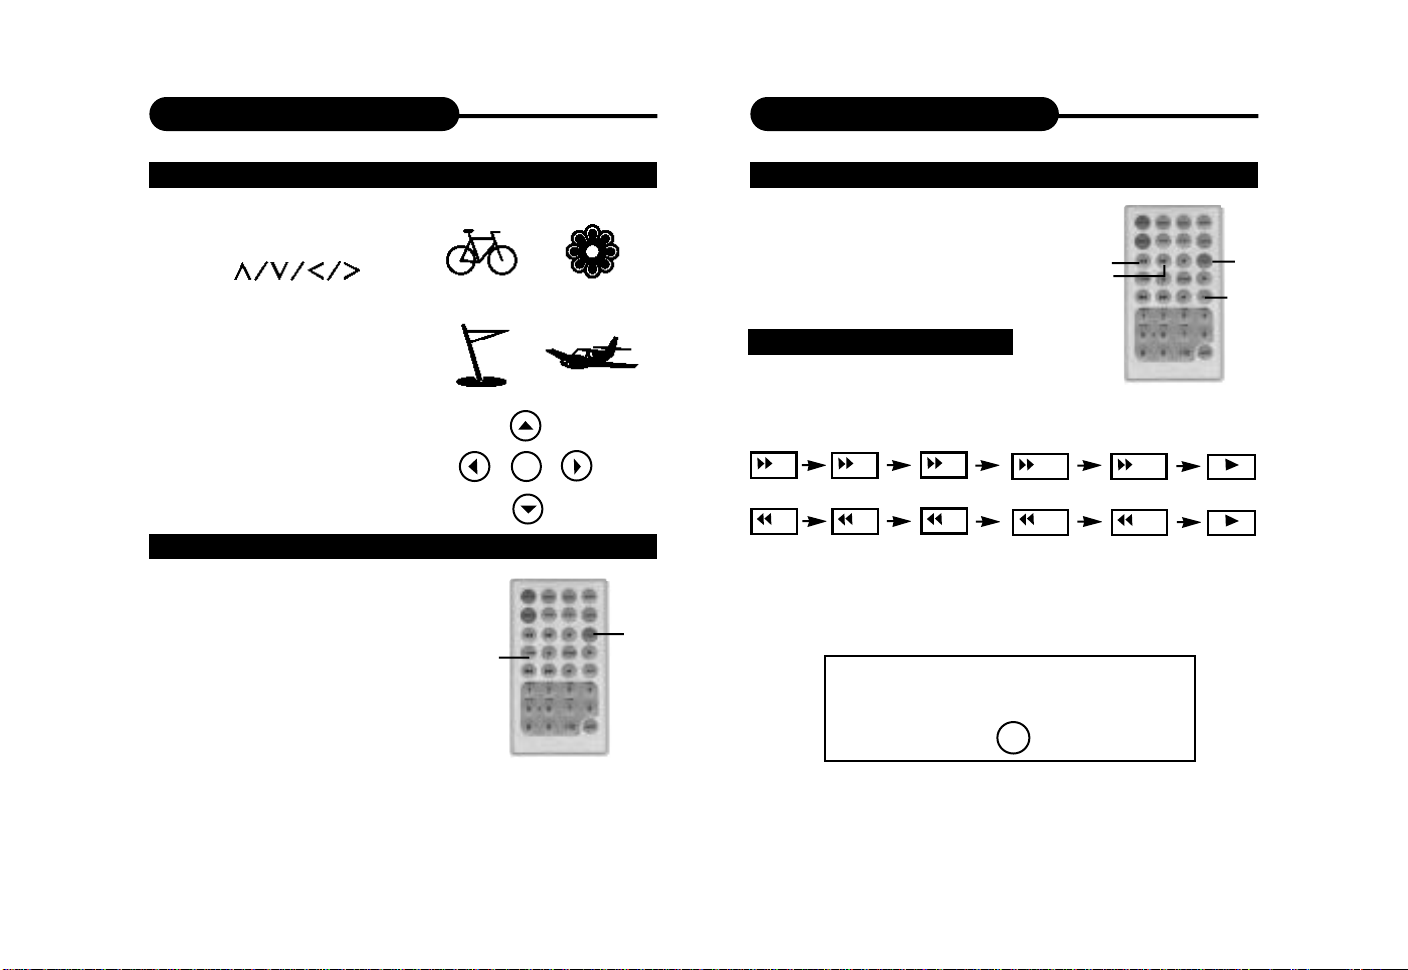
FAST FORWARD & REWIND
You can playback a disc at 2x, 4x, 8x,
16x or 32x the normal speed for fast
forward or rewind.
2x 4x
8x
8x
16x 32x
16x 32x
Press the REV or FWD button during playback.
The playback speed becomes double the normal speed.
The playback speed changes, each time you press the
REV or FWD button.
TO RESUME NORMAL PLAYBACK.
Press PLAY.
PLAY
Note:
The function is invalid on some DVD discs.
PLAY
2019
Page 12
Playing Back a Disc
Playing Back Your KODAK Picture CD
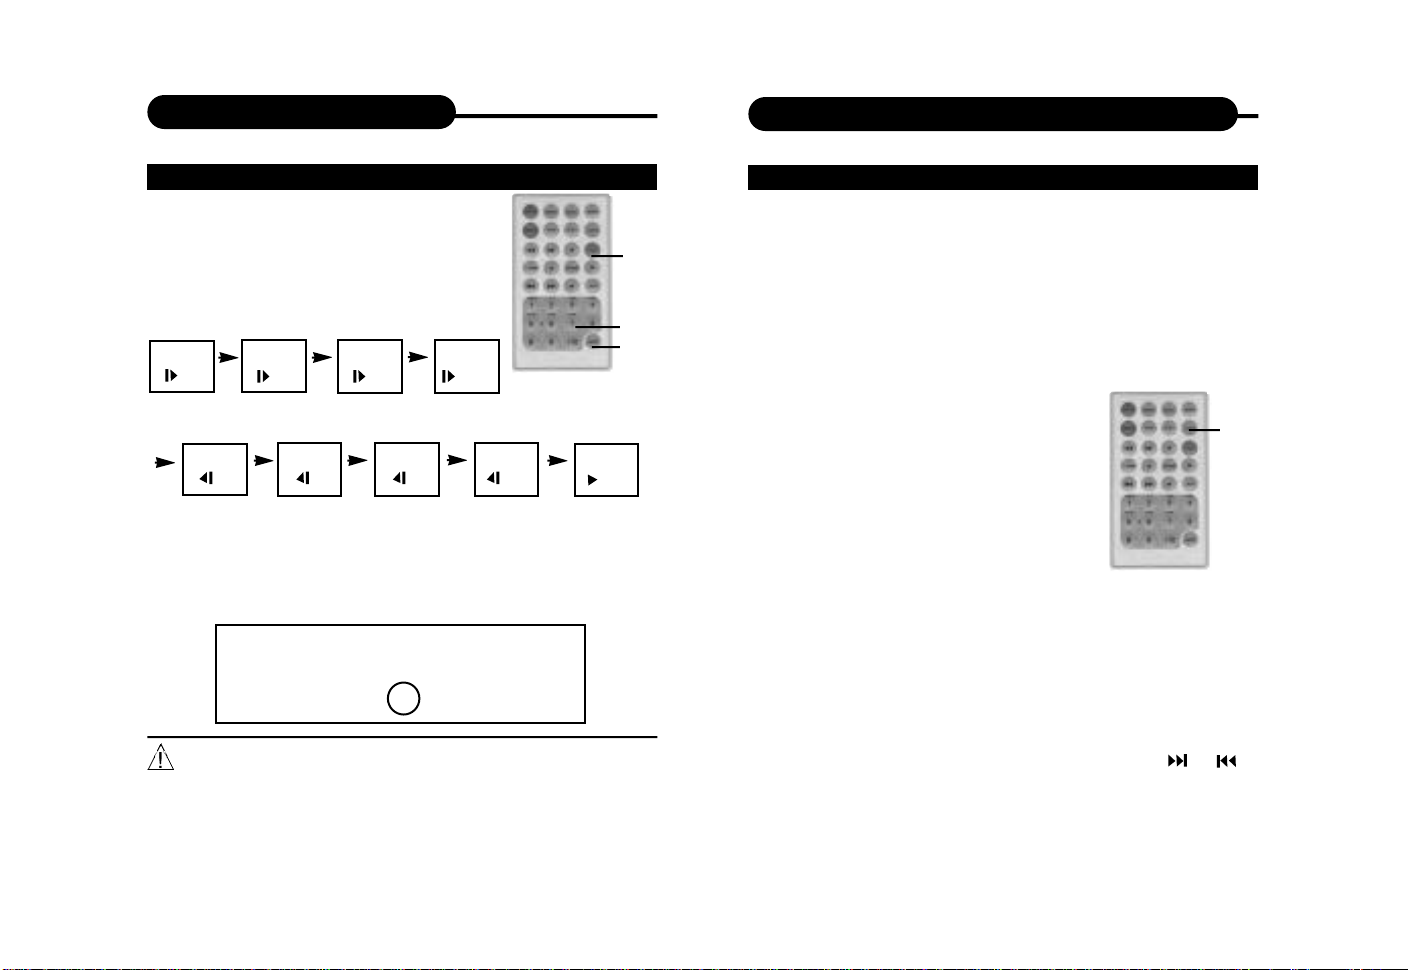
PLAYING IN SLOW-MOTION
A disc can also be played back in
slow-motion.
1. Press SHIFT to set shift on so
as to use the SLOW button.
TV SCREEN
1/2
1/2
1/4
1/4 normal speed1/2 normal speed
1/4
1/8 1/16
1/8 normal speed
1/8
1/16 normal speed
1/16
2. Press the SLOW button during playback
The playback speed becomes 1/2, 1/4, 1/8, or 1/16 of
the normal speed each time you press the SLOW
button.
TO RESUME NORMAL PLAYBACK.
Press PLAY.
PLAY
• During REV, FWD and slow-motion playback, the
sound is muted.
• The function is invalid on some DVD discs.
PLAY
SLOW
SHIFT
21
NORMAL
When a KODAK Picture CD is loaded, an automated slide
show is launched, Each picture in the current directory
will be displayed consecutively in a slide-show fashion
and will be scaled to fit most of the screen. Sixteen
slideshow transition modes are provided. Use “GOTO”
key to select: Customers can set “transition” effects
for every picture at any time during the slideshow.
mode 1: Wipe Top
mode 2: Wipe Bottom
mode 3: Wipe Left
mode 4: Wipe Right
mode 5: Diagonal Wipe Left Top
GOTO
mode 6: Diagonal Wipe Right Top
mode 7: Diagonal Wipe Left Bottom
mode 8: Diagonal Wipe Right Bottom
mode 9: Extend From Center H
mode 10: Extend From Center V
mode 11: Compress To Center H
mode 12: Compress To Center V
mode 13: Window H
mode 14: Window V
mode 15: Wipe From Edge To Center
RANDOM
To display an image indefinitely, press the PAUSE key.
To view the Next or Previous picture press the or
keys. To resume the slideshow press the ENTER key.
22
Page 13
Playing Back Your KODAK Picture CD
JPEG Playback
IMAGE ROTATION
There are four modes to transformation: “Invert”,
“Mirror”, “Left”, and “Right”. These operations are
allowed only when a picture is being displayed normally,
and will be cancelled automatically when a new picture
is displayed. The arrow keys are used to select the
different transformation modes:
UP -Invert/Normal
DOWN -Mirror/Normal
LEFT -Turn left
RIGHT -Turn right
Note: The function is invalid in ZOOM mode.
REPEATING THE SLIDESHOW
At the end of your picture slideshow, each image is
reduced to a “thumbnail” sized display. To view your
slideshow presentation again, press button.
Important: Let the player complete it’s layout of twelve
pictures before pressing button again to view the
next twelve. When at the beginning, press ENTER and
your presentation will begin.
MENU
The MENU key is used to display thumbnail pictures
from the stop position. After it is enabled, up to twelve
scaled-down thumbnail pictures will be displayed on the
screen. The and can be used to display the NEXT
and PREVIOUS twelve pictures in the current directory.
Note: On the thumbnail screen, You can highlight MENU
and enter it to get help information.
23
YOU CAN USE YOUR DVD PLAYER TO VIEW
P H O TOGRAPHS STORED ON A CD-R. T H E
PHOTOGRAPHS ON THE DISC NEED TO BE SAVED IN
THE JPEG FILE FORMAT. FOR MORE INFORMATION
ABOUT JPEGS PLEASE VISIT WWW.JPEG.COM.
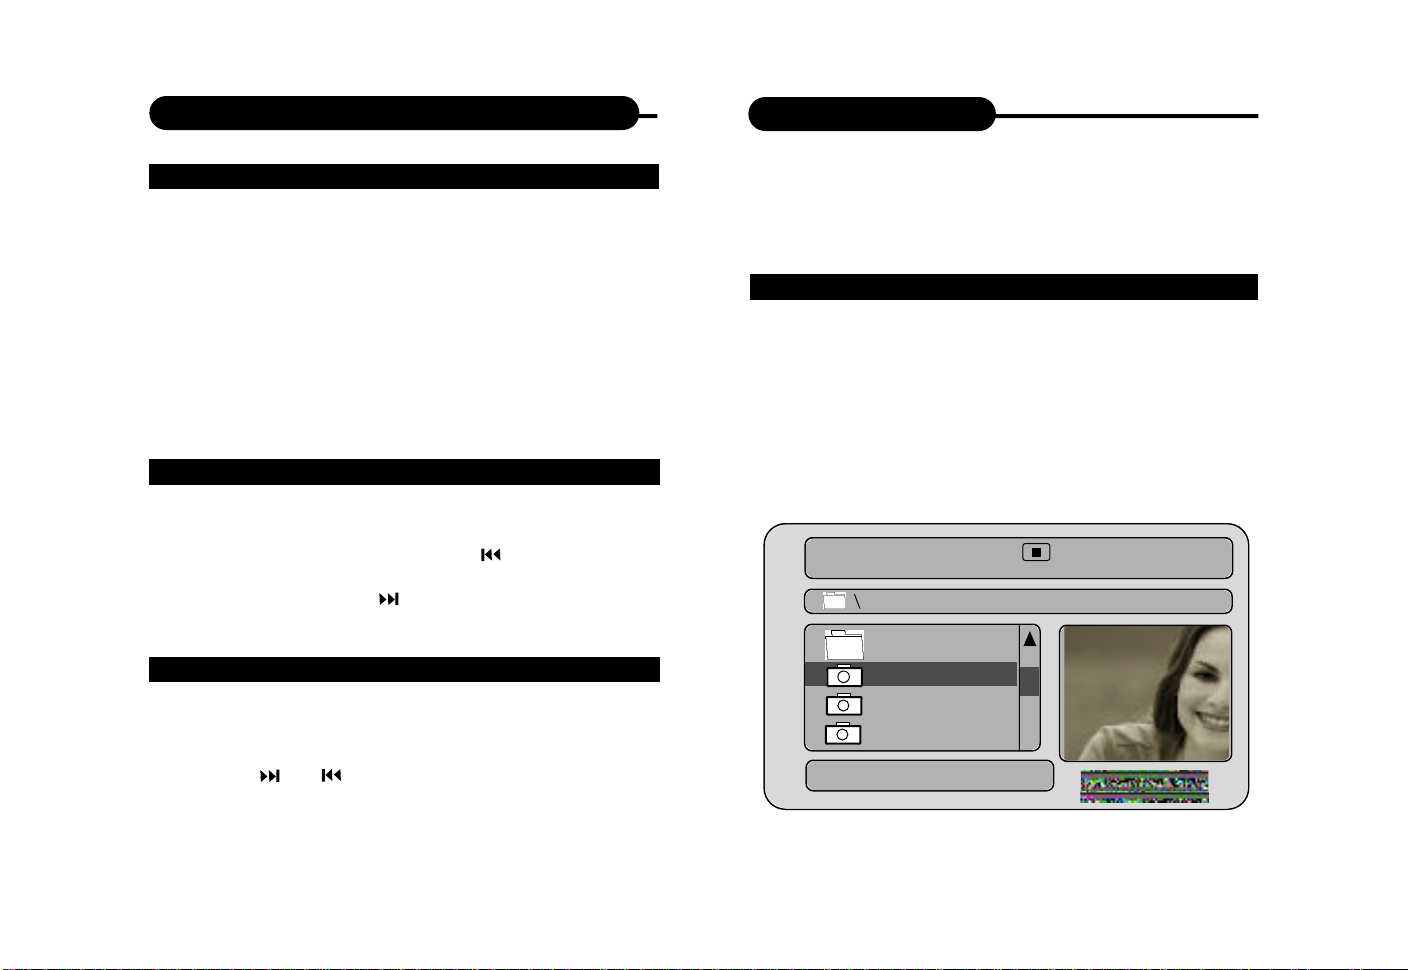
PLAYING BACK JPEG FILES
1. Place the CD on the disc tray.
2. Select a folder or a picture contained on the CD.
After the CD is loaded, a menu will appear on the
screen.
Press UP or DOWN to select a folder, and press
ENTER/PLAY to view folder contents (shown in right
column as below).
00:00 00:00
001\015
GIRL
AAAAAA
BBBBBB
CCCCCC
24
Page 14
JPEG Playback
WMA/MP3 Playback
3. Start playback
Use UP or DOWN to select one image and press
ENTER/PLAY to view the pictures.
The pictures will be displayed in a style of a slideshow,
there are many styles of transition effects such as Wipe
Top (default mode), Wipe Bottom, Wipe Left, Wipe
Right, Diagonal Wipe Left Top, Diagonal Wipe Right Top,
Extend from Centre H, Compress to Centre H, Window
H, etc., use the GOTO button to change the slide style.
4. Rotate an image
During the slide show, you can use arrow keys to rotate
an image:
Press UP to invert an image.
Press DOWN to mirror an image.
Press LEFT to rotate an image to the left.
Press RIGHT to rotate an image to the right.
5. Zoom
This feature allows you to view a picture at 50%, 75%
125%, 150% or 200% in several increments. Press the
ZOOM button. An on screen message (“Zoom On”) will
verify your selection. Use and keys to control the
amount of zoom in and out. Press the direction keys to
shift the zoom point. With Zoom Off, the picture is
scaled to fit most of your TV screen.
6. Menu
During the playback, press MENU to access thumbnail
menu. For previewing JPEG files, press MENU again to
return to JPEG folders.
CREATING YOUR OWN PICTURE CDS
Using your computer save pictures as JPEG format and
burn them on a CD-R disc, then you can watch on your
TV.
WHAT IS WMA?
WMA refers to a new format of music files from
Microsoft available for playback from WMA web sites.
The compression used allows you to record from your
computer up to 22 hours of music on CD-R and play
back through your DVD Player. APEX Digital is the first
company to offer in a home DVD player, the ability to
play back CD-R discs recorded with WMA audio files.
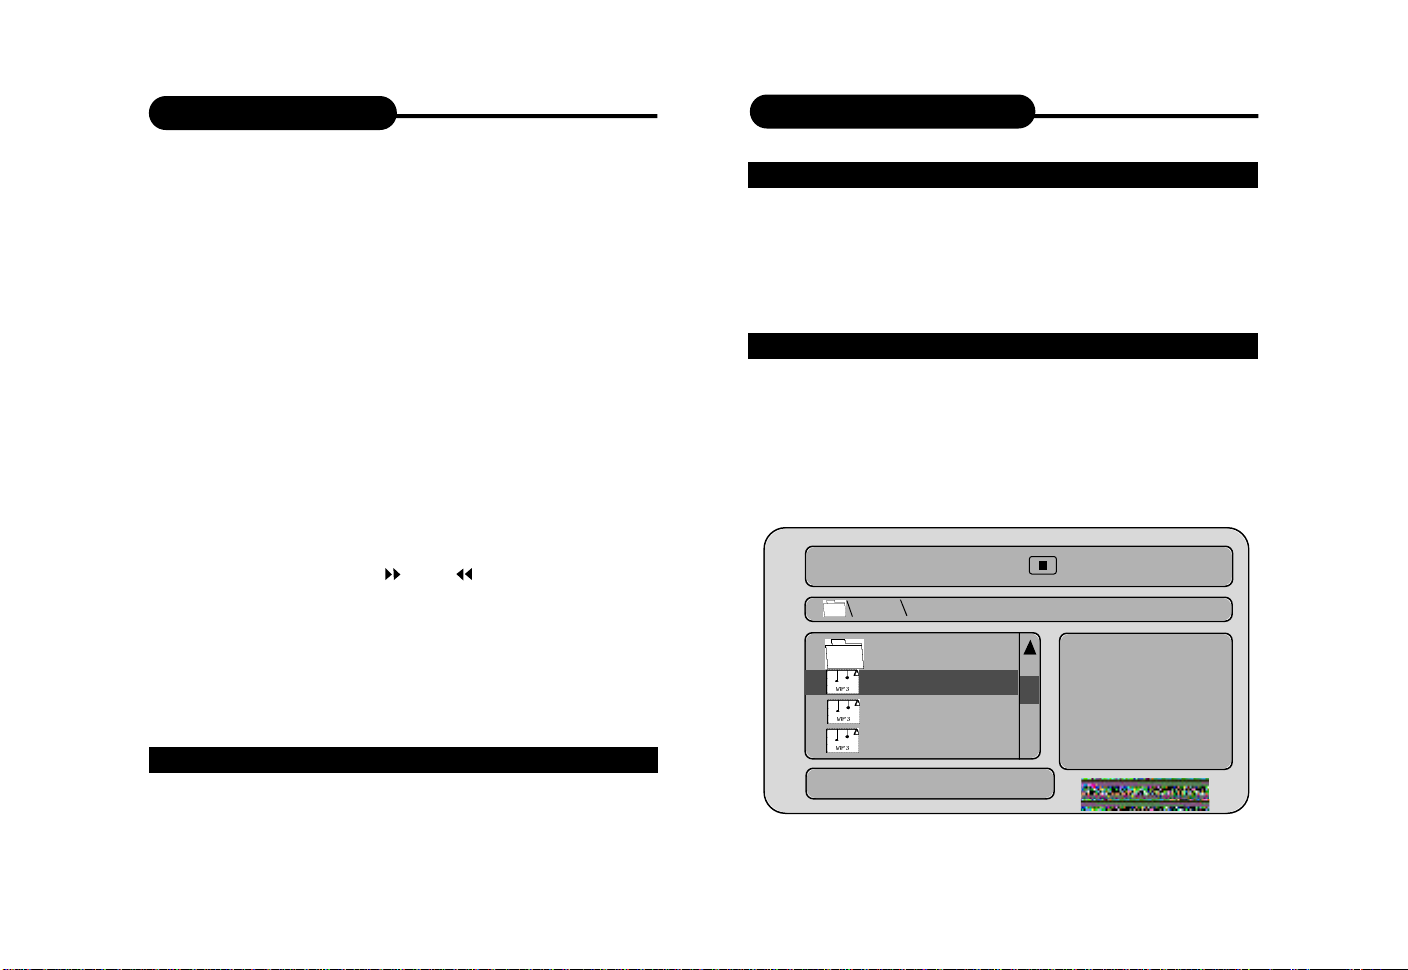
PLAYING AN MP3 FORMAT
1. Insert an MP3 CD, the DVD player will initialize
the disc when the tray is closed and the directory
(folder) will be shown in an MP3 MENU on screen.
2. Press UP/DOWN to select and highlight an MP3
file (song).
3. Press ENTER to play the MP3 file.
00:00 00:00
001\016
MP3
mp3
AAAAAA
BBBBBB
CCCCCC
Note: WMA Playback is same as MP3's.
2625
Page 15
Locating a Specific Title, Chapter or Track
Playing Repeatedly
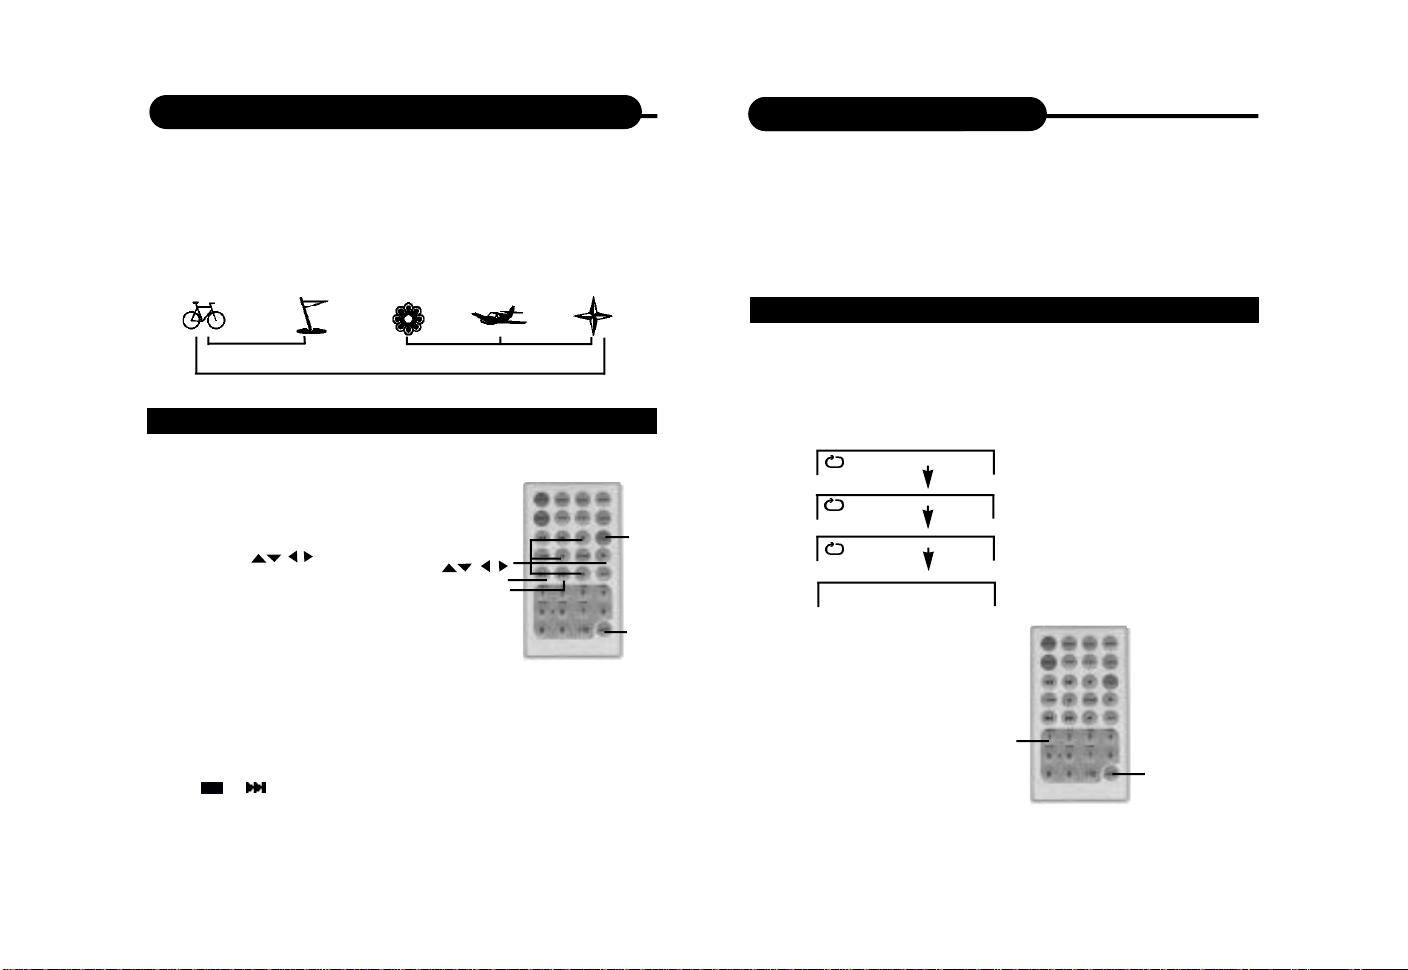
DVD DISCS ARE NORMALLY DIVIDED INTO TITLES
WHICH ARE SUB-DIVIDED INTO CHAPTERS.
MOREOVER, CD AND MP3 CD ARE DIVIDED INTO
TRACKS.
Chapter 1 Chapter 2 Chapter 1 Chapter 2 Chapter 3
TITLE 1
DVD Video Disc
TITLE 2
L O C ATING ATITLE USING THE TITLE MENU
You can locate a specific title using the title menu function, if a
DVD video disc contains a title menu.
1. Press the TITLE button
On the LCD or TV screen, the title menu
will appear.
PLAY
2. Press the button to select
the title you want.
PREVIOUS
NEXT
You can also directly locate a specific
title by pressing its assigned number with
SHIFT
the number buttons.
3. Press the PLAYb u t t o n
This will cause the DVD video player to start playback from
chapter 1 of the title selected.
You also can use skip buttons to select a title or track
d e s i r e d :
Press or button repeatedly till the one displays.
THIS DVD VIDEO PLAYER ALLOWS YOU TO
PLAYBACK A SPECIFIC TITLE, CHAPTER, TRACK,
OR SEGMENT REPEATEDLY. (TITLE REPEAT,
CHAPTER/TRACK REPEAT,A-B REPEAT)
HOW TO REPEAT A TITLE, CHAPTER, OR DISC
During normal playback, press the REPEAT button
(set shift on).
The repeat mode changes, each time you press the
REPEAT button.
CHAPTER
TITLE
ALL
Repeats the same chapter.
Repeats the same title.
Repeats the whole disc
Resumes normal playback.
REPEAT
SHIFT
2827
Page 16
Playing Repeatedly
Playing in Favorite Order
HOW TO REPEAT A SPECIFIC SEGMENT
1. Press the A-B button at the beginning of the
segment in which you want to repeat playback
(point A) (set shift on).
2. Press the A-B button again at the end of the
segment (point B)
The DVD video player will automatically return to point A
and start to repeat playback of the selected segment (AB).
3. Press the A-B button to cancel the A-B
repeat function
The DVD video player will resume to normal playback.
A
AB
Set point A
Set point B
Resumes normal playback.
A-B
SHIFT
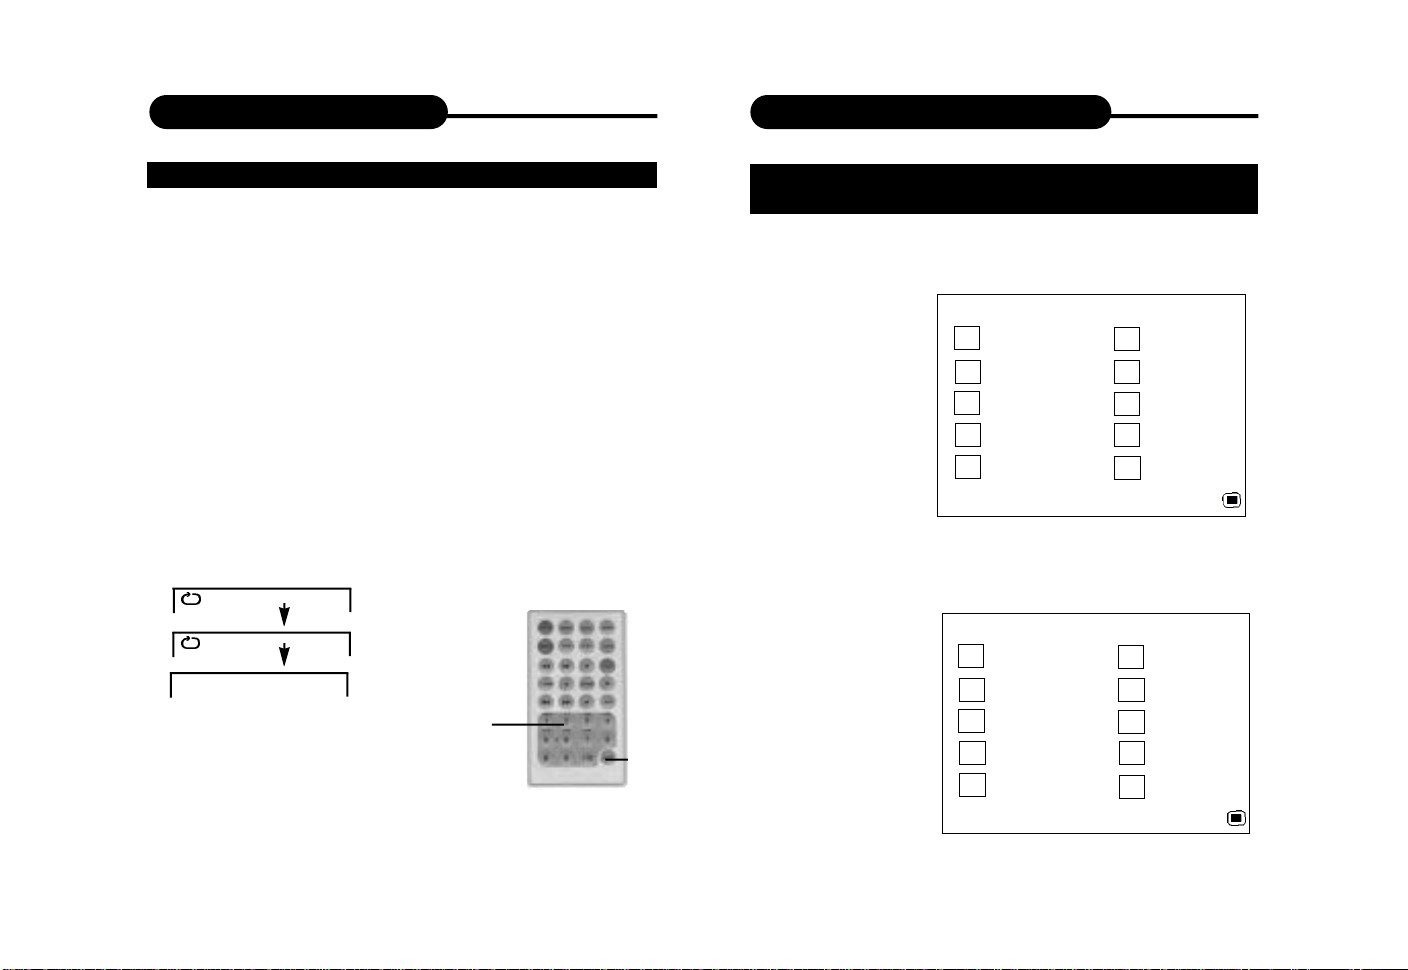
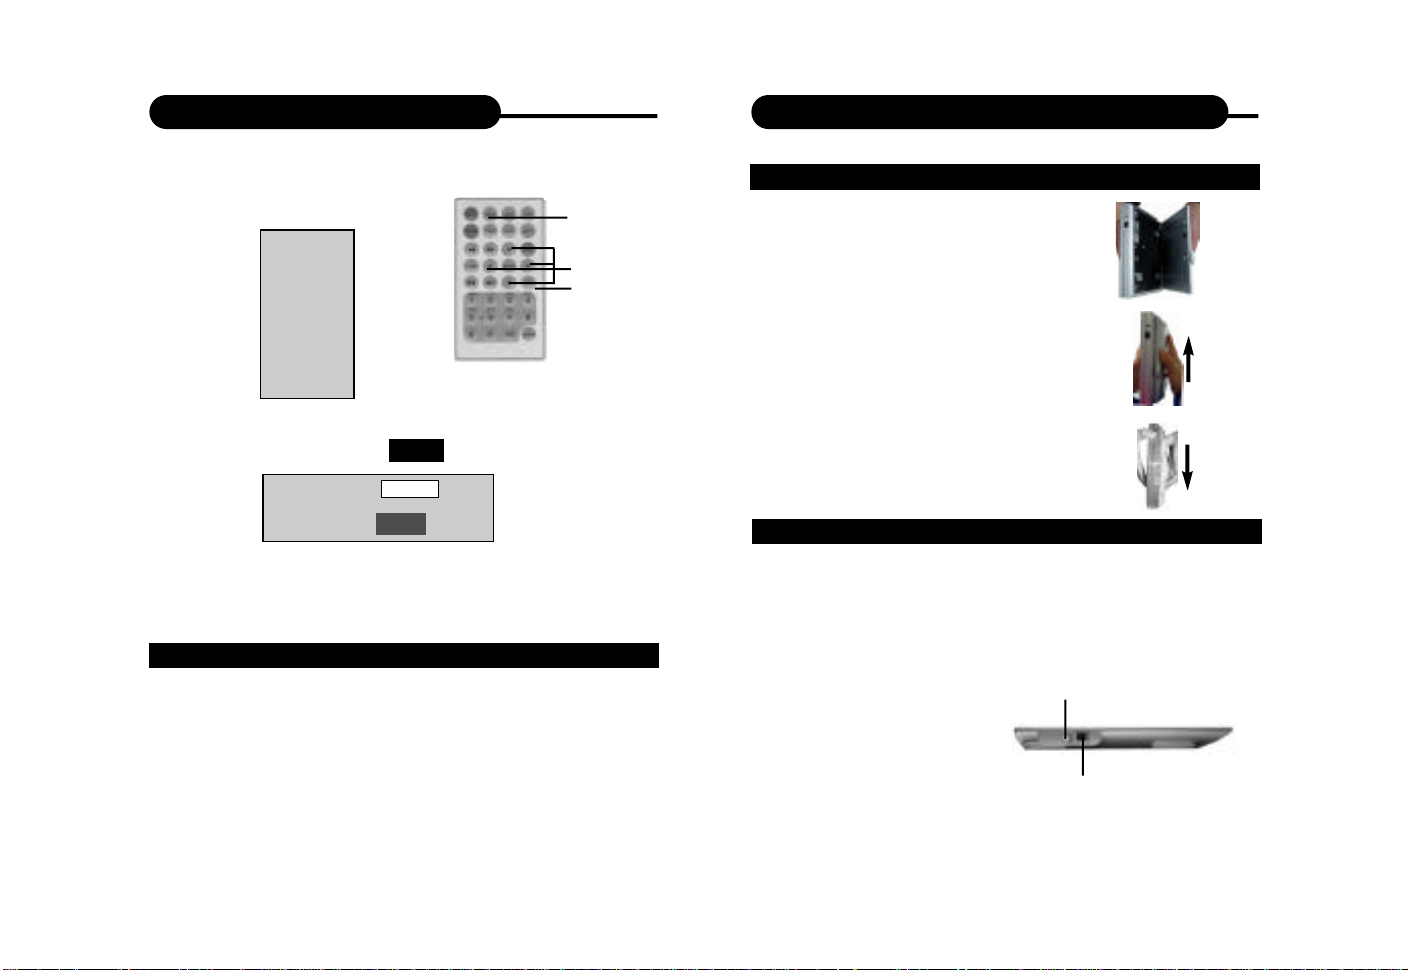
HOW TO SET TITLES, CHAPTERS, OR TRACKS IN A
FAVORITE ORDER
1. Press the PROGRAM button.
PROGRAM MENU displays on the screen.
PROGRAM:TT(01)/CH ( - - )
1 TT: CH: 6 TT: CH:
2 TT: CH: 7 TT: CH:
3 TT: CH: 8 TT: CH:
4 TT: CH: 9 TT: CH:
5 TT: CH: 10 TT: CH:
EXIT NEXT
2. Using the numbered button, select the items you
want in the order you want them programmed in.
The number of the item selected will be input into the
PROGRAM volume.
PROGRAM:TT(01)/CH ( - - )
1 TT: 01 CH: 01 6 TT: CH:
2 TT: CH: 7 TT: CH:
3 TT: CH: 8 TT: CH:
4 TT: CH: 9 TT: CH:
5 TT: CH: 10 TT: CH:
EXIT START NEXT
3029
Page 17

Playing in Favorite Order
Zooming a Picture
3. Highlight START and press ENTER to start
program playback.
4. To clear the programmed, move the cursor to
STOP and then press ENTER to confirm it.
PROGRAM:TT(01)/CH ( - - )
1 TT: CH: 6 TT: CH:
2 TT: CH: 7 TT: CH:
3 TT: CH: 8 TT: CH:
4 TT: CH: 9 TT: CH:
5 TT: CH: 10 TT: CH:
EXIT STOP NEXT
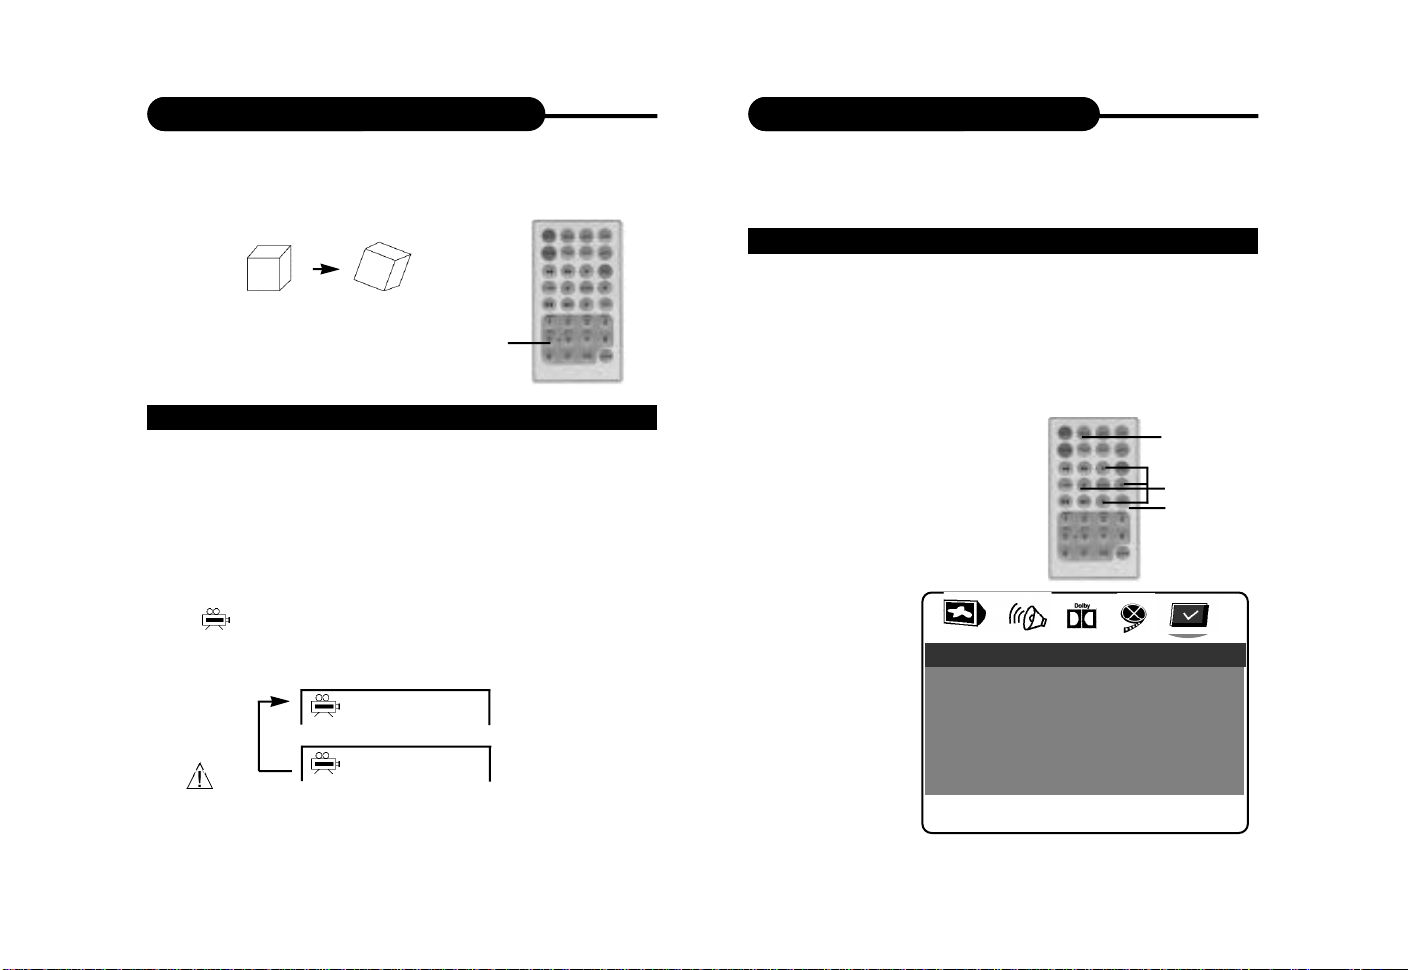
ZOOMING A PICTURE
This DVD video player allows you to zoom into a picture
as well as shift the zoom point.
Press ZOOM during normal playback
or slow - motion. (To use the ZOOM
button, it should be set ‘SHIFT ON’ by
pressing SHIFT.)
ZOOM
The player magnifies in the center of the picture.
If you press during zoom playback, the zoom
point shifts.
2x 3x 4x
Normal
Playback
To cancel the zoom function, press ZOOM again.
3231
Page 18
Selecting Subtitles
Using the On-Screen Display
HOW TO DISPLAY SUBTITLES
You have the option to select a preferred subtitle
from those included on the DVD video disc.
Press the SUBTITLE button
during playback.
SUBTITLE 1
SUBTITLE 3
SUBTITLE OFF
1/03
2/03SUBTITLE 2
3/03
To TURN OFF the subtitles.
Press the SUBTITLE during
playback until the subtitles
disappears.
SUBTITLE OFF
SUB-T
THIS UNIT ALLOWS YOU TO VIEW THE
OPERATIONALSTATUS AND DISC INFORMATION ON
YOUR TV SCREEN.
CHECKING THE OPERAT I O N A LS TAT U S
With this function you can view on your TV the following:
-Current title
-Track number
-Total playing time
Current Title
Current Chapter
Title Elapsed
TT 01/12 CH 006/039 0:02:20
Title Remain
TT 01/12 CH 006/039 0:18:50
Chapter Elapsed
TT 01/12 CH 006/039 0:03:50
Chapter Remain
TT 01/12 CH 006/039 0:10:40
Display Off
Playing time
Total Chapter
Total Title
DISPLAY
Press the DISPLAY
during playback to
turn on the ON
SCREEN DISPLAY
Press it again to turn it
off.
3433
Page 19
Selecting the Camera Angle
Setting the Parental Lock
THIS DVD VIDEO PLAYER ALLOWS YOU TO SELECT
FROM SEVERAL DIFFERENT ANGLES.
ANGLE 1 ANGLE 2
Selecting the camera angle
ANGLE
HOW TO CHANGE THE CAMERA ANGLE
If the DVD video disc was recorded with multiple angles,
you have the option to change the camera angle of the
scene you are watching.
Press the ANGLE button while playing back a scene
recorded with multiple angles (set shift on).
• You may only press the ANGLE button when the angle
icon is flashing on the DVD display.
• Each time you press the ANGLE button, the angle will
change.
2/2
1/2
• The angle function will not work on DVD video discs
that does not contains recorded with multiple angles.
YOU CAN USE THE PARENTAL LOCK FUNCTION
ONLY WITH DVD VIDEO DISCS EQUIPPED WITH THE
PARENTAL LOCK FEATURE.
SETTING THE P A R E N TA LL O C K
DVD video discs equipped with the parental lock function
are rated according to their content. The contents allowed
by a parental lock level and the way a DVD video disc can
be controlled may vary from disc to disc. For example, if the
disc allowed, you could edit out violent scenes unsuitable for
children and replace them with more suitable scenes, or
lock out playback of the disc all together.
1. Press STOP during
SETUP
playback
DIRECTION
2. Press SETUP
STOP
The SETUP MENU appears
on the screen.
3. Select
Preference Page,
press ENTER.
-- Preference Page --
Audio ENG
Subtitle ENG
Disc Menu ENG
Parental
Password
Default
Go To Preference Page
3635
Page 20
Setting the Parental Lock
Rechargeable Battery Installation & Use
4. Select Parental, press ENTER.
5. Select ratings, press ENTER
1 KID
SAFE
2 G
3 PG
4 PG 13
5 PGR
6 R
7 NC17
8 ADULT
OFF
6. Enter your password then press ENTER.
The pre-set password is 3308
Password
OK
7. Press SETUP to exit setup,
press ENTER to start.
TO CHANGE YOUR PA S S W O R D :
1. Follow step 4 to select password change.
2. Enter old password.
3. Enter new password.
4. Re-enter to confirm your new password.
5. Press ENTER.
6. Press SETUP to exit.
SETUP
DIRECTION
STOP
INSTALLING & REMOVING THE BATTERY PACK
1. Make sure the unit is powered off and
1
u n p l u g g e d .
2. Attach the battery pack to the outlet of
the unit as illustration 1, and align them
with each other till you hear a click sound
as illustration 2.
2
Removing the Battery Pack
1. Make sure the unit is powered off and
u n p l u g g e d .
3
2. Press the Battery Release button to
remove the battery pack as illustration 3.
USE AND MAINTENANCE
THIS UNIT IS SUPPLIED WITH HIGHLY- E F F E C T I V E
RECHARGEABLE BATTERY (NI-MH). SUCH BATTERY PACK
A HIGH STORAGE CAPA C I T Y AND LOW LEVEL O F
DEGRADATION. THE LATTER MEANS THAT THE BATTERY
CAN ALSO BE RECHARGED WHEN ONLY PARTLY SPENT.
Plug the AC adapter into
Charging indicator
the battery.
Please fully charge the
battery prior to first use.
AC Adapter/charge input
3837
Page 21
Rechargeable Battery Installation & Use
Customizing the Function Settings
The provided battery can be recharged for about 300 times. It
takes about 5 hours to recharge the battery, then the red
indicator is put out and the green one flashes, please continue
recharging it for about 0.5 hour. Afully charged battery can power
the unit for about 3 hours. Power consumption depends on the
operations of the player such as brightness of the screen,
volume level, etc.
Recharge the battery timely when fully spent in order to
maximize its life.
Never recharge the battery which is already fully charged.
Under no circumstance should you short out the battery, store it
in a metal container, or leave it in a humid or damp environment.
Store the battery in an airtight container if possible. Recharge
e ffectiveness will degrade when environmental temperatures
drop below 10 ºC or exceed 35 ºC.
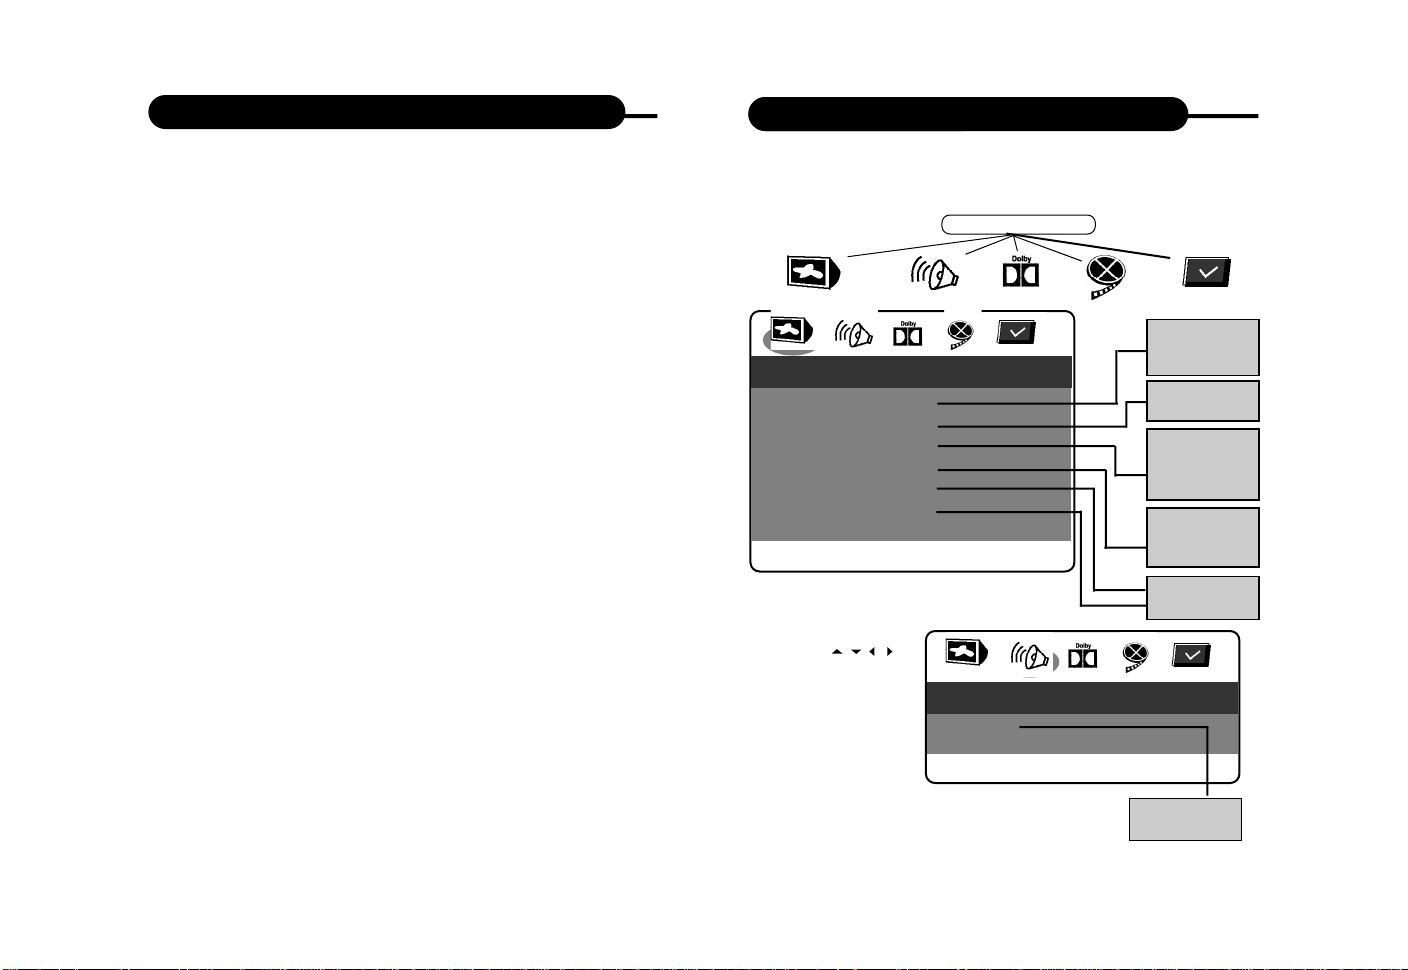
THIS UNIT ALLOWS YOU TO CUSTOMIZE THE
PERFORMANCE TO YOUR PERSONAL PREFERENCE.
SETUPMENU
Normal/PS
Normal/LB
-- General Setup Page --
TV Display Wide
Angle Mark On
OSD Lang ENG
SPDIF Output RAW
Captions Off
Screen Saver On
Go To General Setup Page
1. Press SETUP.
2. Press
to select category
(highlight), then
press ENTER.
3. Press SETUP to
quit the menu.
/ / /
-- Speaker Setup Page --
Downmix
Wide
On
Off
English
中文
French
Spanish
SPDIF Off
SPDIF/RAW
SPDIF/PCM
On
Off
Go To Speaker Setup Page
LT/RT
Stereo
4039
Page 22

Customizing the Function Settings
Trouble Shooting Guide
-- Dolby Digital Setup --
Dual Mono
Dynamic
Go To Dolby Digital Setup
-- Dolby Digital Setup --
Sharpness High
Contrast 00
Go To Video Setup Page
-- Preference Page --
Audio ENG
Subtitle* E N G
Disc Menu ENG
Parental
Password
Default
Go To Preference Page
N o t e :The Subtitle has the "OFF" option,
and none of Audio and Disc Menu has it.
Stereo
L-Mono
R-Mono
MIX-Mono
FULL
3 / 4
1 / 2
1 / 4
OFF
High
Medium
Low
Contrast 0
English
French
Spanish
Chinese
Japanese
Korean
Russian
Thai
Off
1 KID SAFE
2 G
3 PG
4 PG 13
5 PGR
6 R
7 NC17
8 ADULT
9 OFF
Change
RESET
Symptom
No power
No picture/sound
Rolling b/w picture
Black & White
picture
The player does not
start playback
4241
Correction
• Connect the power plug into the power port
securely.
• Check the Input/Output button, make sure it
is slided to Output in playback mode, and
slided to Input in A/V input mode.
• If playback through a TV, verify the
connection between them: audio cable, video
cable or S video cable.
• Make sure it is right in NTSC/PAL, the button
is on the rear panel of the unit.
• Adjust the vertical hold on your TV.
• Damaged S conector (bent pin).
• Insert a playable disc. (Check the disc type
and color system).
• Place the disc with the playback side down
and correctly inside the guide.
• Clean the disc.
• Cancel the parental lock function or change
the parental lock level. (The Pre-set password
is 3308.)
• Reset the portable DVD player.
Page 23

Limited Warranty
Limited Warranty
PLAYERS
90 DAYS LABOR
ONE YEAR REPLACEMENT OF PARTS
WHO IS COVERED?
Proof of purchase is required to receive warranty service such as the
original sales receipt showing original date of purchase from an
authorized APEX Digital, Inc. dealer in N. America. Keep your original
box and packaging in case your unit needs to be shipped to us. You
will need to prepay shipping and APEX will pay the cost of shipping
the unit back to you.
WHAT IS COVERED?
Warranty repair from the original date of purchase: One (1) year
replacement of parts; 90 days limited labor warranty coverage.
If you don’t have proof of purchase, your unit will be considered out-
of-warranty & will be charged at a flat labor rate.
WHAT IS EXCLUDED?
Your warranty does not cover:
- Labor charges for installation or setup of the product, adjustment of
customer controls on the product, and installation or repair of antenna
systems outside of the product.
- Product repair and/or part replacement because of misuse,
accident, unauthorized repair or other cause not within the control of
Apex Digital, Inc.
- A product that requires modification or adaptation to enable it
to operate in any country other than the country for which it was
designed, manufactured, approved and/or authorized, or repair
of products damaged by these modifications.
- Incidental or consequential damages resulting from the
product. (Some states do not allow the incidental or
consequential damages, so the above exclusion may not apply
to you. This includes, but is not limited to, prerecorded material,
whether copyrighted or not.)
- Shipment to the authorized repair facility for warranty repair.
BEFORE REQUESTING SERVICE:
Check your owner’s manual under “Troubleshooting Guide”
and visit our website www.apexdigitalinc.com/support.asp
for the latest updates under FAQ.
ORDERING ACCESSORIES:
You may purchase a remote control ($33 U.S.), owners
manual ($10), and/ or firmware upgrade, if applicable to your
player ($10). Specify model number, name & address with a
cashiers check made out to Apex Digital.
MODEL # ___________ SERIAL # ___________
WHERE IS SERVICE AVAILABLE?
Please contact APEX DIGITAL, INC.
customer service: 2235 E. Francis St., Ontario, CA 91761
(909) 930-1239 Monday-Friday
8:30am-5:00pm (California)
This warranty gives you specific legal rights. You may have
other rights which vary from state/province to state/province.
4443
Page 24

INSTRUCTIONS D'UTILISATION
Page 25

Information de sécurité
Information de sécurité
PRECAUTION
RISQUE DE DECHARGE
ELECTRIEQUE NE PAS OUVRIR
Le symbole de l’éclair dont la pointe finit en flèche dans un
triangle équilatéral est destiné à avertir l’utilisateur de la présence
de « tension dangereuse » non-isolée dans l’enceinte du produit
qui pourrait être d’une magnitude suffisante pour constituer un
risque de décharge électrique pour les personnes.
Le point d’exclamation dans un triangle équilatéral est destiné à
avertir l’utilisateur qu’il est important de consulter le mode
d’emploi et de maintenance (d’entretien) qui se trouve dans la
documentation qui accompagne l’appareil.
Cette appareil est conformée aux normes du
FCC, Section 15.Ses opération conforment à
Produit à
laser
AVIS : N'EXPOSEZ PAS CET A P PA R E I LA L A PLUIE OU L'HUMIDITE, AC A U S E
DU GRAND RISQUE DE FEU OU DE DECHARGE ELECTRIQUE, N'OUVREZ P A S
L ' A P PA R E I L ; ILYADE LAHAUTE TENSION DANGEREUSE AL'INTERIEUR DE
L ' A P PAREIL. CETTE OPERATION EST STRICTEMENT RESERVEE A U
P E R S O N N E LQ U A L I F I E .
Remarque pendant la lecture, le disque se tourne très vite, n’ élevez pas ou ne
remuez pas DVD. Sinon le disque sera nui .
R e m a r q u e Ce lecteur de Vidéo Disques numériques utilise un système Laser. Pour
éviter une exposition directe au rayon laser, n’essayez pas d’ouvrir l’appareil.
La radiation laser est visible en cas d’ouverture et de manipulation du
dispositif de sécurité. Si les réglages de contrôle ou l’exécution des
processus s’utilisent de façon différente de celle qui est spécifiée, il peut en
découler une exposition dangereuse aux radiations.
deux conditions suivantes 1 cette appareil ne
produit pas de broillage nuisible. 2 cette appareil
ne peut pas être influencée par d’autres
brouillages y compris les brouillages imprévues
Pour assurer une utilisation correcte de ce produit, veuillez lire attentivement ce
mode d’emploi et le conserver pour le consulter dans le futur. Si l’appareil avait
besoin d’être révisé, contactez un service de maintenance autorisé ou contacter
APEX . L’ouverture du couvercle est strictement réservée au personne qualifié.
Avis du FCC : Cet appareil a été testé et il a été établi qu’il est conformé aux
limites fixées pour les appareil numériques de classe B. Conformément aux
normes du FCC (Commission Fédérale Américaine aux Communication),
Section 15. Ces limites sont destinées à fournir une protection raisonnable
contre les interférences nocives dans une installation résidentielle.
Cet appareil produit, utilise et émet des ondes de fréquence radio et s’il n’est
pas utilisé en suivant le mode d’emploi, il peut causer des interférences nocives
dans la communication radio. Néanmoins, ceci ne garantit pas que des
interférences n’auront pas lieu.Si cet appareil produit des interférences
dérangeantes dans la réception radio ou télé, ce qui peut être vérifié en allumant
et éteignant l’appareil, nous conseillons à l’utilisateur d’essayer de corriger.
- Réorientez ou déplacez l’antenne réceptrice ;
- Augmentez la distance de séparation entre l’appareil et le récepteur ;
- Brancher l’appareil dans une prise sur un circuit différent de celui où
est branché le récepteur ;
- Demandez conseil à votre fournisseur ou à un technicien radio/TV
e x p é r i m e n t é .
Avis FCC : Assurez une conformité continue, (par exemple : n’utiliser que des
câbles blindés pour l’interface que l’on connectera à l’ordinateur ou aux
périphériques). Tout changement ou modification apporté à cet appareil, non
expressément approuvé par la partie responsable de la conformité peut annuler
l’autorité de l’utilisateur à utiliser cet appareil.
Avis de pile cette appareil est équipée d’une batterie Ni/MH Li ion .si vous
ne traitez pas correctement la batterie, il risque de causer l’incendie . N’essayez
pas de défaire, broyer, percer la batterie , ou de la déposer dans l’eau ou feu, ou
de la mettre en court-circuit. N’essayez pas d’ouvrir ou de réparer la batterie.
Les batterie désignées sont seules à être remplacant. Traitez les batteries
usitées d’après les indications de fournisseurs.
1
2
Page 26

Information de sécurité
Information de sécurité
PRECAUTION : Si les réglages de contrôle ou l’exécution des processus
s’utilisent de façon différente de celle qui est spécifiée, il peut en découler
une exposition dangereuse aux radiations.
Veuillez étudier ce mode d’emploi consciencieusement et gardez-le
toujours à proximité. Il y a, néanmoins, quelques précautions d’installation
et de fonctionnement dont vous devez être informé.
1. Lisez les instructions - Vous devez lire toutes les consignes de sécurité
et le mode d’emploi avant de faire fonctionner l’appareil.
2. Gardez le mode d’emploi - Les consignes de sécurité et le mode d’emploi
doivent être conservés pour leur utilisation dans le futur.
3. Tenez compte des avis - Vous devez suivre tous les avis sur l’appareil et
dans le mode d’emploi.
4. Suivez les instructions - Vous devez suivre toutes les instructions quant au
fonctionnement et à l’utilisation de l’appareil.
5. Nettoyage - Débranchez l’appareil de la prise murale avant de procéder
au nettoyage. N’utilisez pas de nettoyant liquide ou en aérosol. Utilisez
plutôt un chiffon humide.
6. Accessoires - N’utilisez pas d’accessoires non recommandés par le
fabricant du produit car cela peut être dangereux.
7. Eau et humidité– N’utilisez pas cet appareil près de l’eau – par exemple
près d’une baignoire, d’une cuvette, de l’évier de la cuisine ou d’un
banquet ; dans un sous-sol humide ou près d’une piscine ou similaire.
8. Support – Ne placez pas cet appareil sur un chariot, guéridon, trépied,
support ou table qui ne soient pas bien stables. L’appareil pourrait tomber,
ce qui provoquerait des blessures graves sur un enfant ou un adulte et
abîmerait sérieusement l’appareil. N’utilisez cet appareil qu’avec un chariot,
guéridon, trépied, support ou table recommandé par le fabricant ou bien
vendu avec l’appareil. Tout montage de l’appareil sur des supports doit se
faire en suivant les instructions du fabricant et en utilisant les accessoires
de montage recommandés par le fabricant.
9. La combinaison appareil-chariot doit être déplacée avec d’extrême
précaution. Des arrêts brutaux, une trop forte poussée ou des surfaces
inégales peuvent faire renverser l’ensemble appareil-chariot.
10 Ventilation – Les rainures et les ouvertures de l’enveloppe de l’appareil
servent à le ventiler, à assurer son fonctionnement correct et à l’empêcher
de surchauffer, c’est pourquoi ces ouvertures ne doivent pas être bloquées
ni couvertes. Les ouvertures ne doivent jamais être bloquées en plaçant
l’appareil sur un lit, sofa, tapis ou tout autre surface similaire. Cet appareil
ne doit pas être placé dans une installation encastrée comme une
bibliothèque ou un casier à moins qu’il y ait une ventilation adéquate ou
que l’on ait suivi les instructions du fabricant.
11 Alimentation électrique – Ce produit ne doit fonctionner qu’avec le type
d’alimentation électrique indiqué sur l’étiquette. Si vous n’êtes pas sûr du
type d’alimentation électrique de votre maison, consultez votre fournisseur
ou votre compagnie d’électricité. Pour les produits qui doivent fonctionner
avec des piles ou avec d’autres sources d’alimentation, consultez les mode
d’emploi.
12 ise à terre – Cet appareil peut être doté d’une prise de courant alternatif
polarisée (une prise ayant une fiche plus large que l’autre). Cette prise ne
rentrera dans la prise femelle murale que d’une façon. Il s’agit d’un
dispositif de sécurité. Si vous n’arrivez pas à rentrer complètement la prise
dans les trous, essayez de nouveau en tournant la prise. Si la prise ne
rentrait toujours pas, contactez votre électricien pour qu’il remplace cette
ancienne prise murale. N’annulez pas la fonction de sécurité de la prise
polarisée.
Autres avis : Ce produit est muni d’une prise électrique à trois contacts
avec une terre, et d’une prise qui a un troisième fiche (la prise de terre).
Cette fiche ne s’adapte qu’à une prise murale qui accepte un troisième
fiche avec prise de terre. Il s’agit d’un dispositif de sécurité/ s’il vous est
impossible de mettre correctement la prise dans la prise de courant, faites
appel à un électricien pour qu’il procède au changement de votre ancienne
prise de courant. N’annulez pas cette mesure de sécurité de la prise avec
le contact terre.
13 rotection des câbles électriques – Veillez à ce que les câbles électriques ne
soient pas foulés ni piqués par quelque élément à proximité. Prenez soin
des câbles près des prises, des douilles et au point de sortie de
l’équipement.
14 Prise avec connecteur protégé – Le produit est équipé d’un connecteur
protégé contres les surcharges.
3
4
Page 27

Information de sécurité
Information de sécurité
Il s’agit d’un dispositif de sécurité. Vous remportez au manuel
d’instructions pur substituer ou ajuster le dispositif de protection. En cas
de nécessité de changement de la prise, assurez-vous que la prise de
rechange qui doit être mise en place par le technicien dispose de la même
protection que la prise originale en ce qui concerne les surcharges.
15 Prise de terre de l’antenne extérieure – Si l’équipement est connecté à un
système de câble ou antenne, assurez-vous que ledit système dispose
d’une prise de terre afin d’être protégé contre les augmentations de
tension et l’électricité statique. L’article 810 du Code National de
l’Electricité, ANSI/NFPA 70, donne des informations sur les prises de terre
appropriées au mât et à la structure de support, sur les prises de terre du
câble d’entrée à l’unité de décharge de l’antenne, sur la taille et les prises
de terre des conducteurs, sur la situation de l’unité de décharge de
l’antenne, sur la connexion aux électrodes de la prise de terre ainsi que
sur les conditions à remplir par les électrodes de prise de terre. Vous vous
réf érez à onze 131.1
16 oudre – Pour une meilleure protection de cet équipement, ou lorsqu’il ne
va pas être utilisé pendant longtemps, débranchez-le et déconnectez le
système de câble ou l’antenne. Cette mesure évitera que l’appareil soit
endommagé par la foudre ou pare des augmentations de la tension
électrique.
17 âbles électriques – L’antenne extérieure ne devrait pas être placée près
des câbles électriques qui passent au-dessus ou près d’autres circuits
électriques, non plus en des lieux où elle pourrait tomber sur des circuits
ou câbles de ce type. En cas d’installation d’un système d’antenne
extérieure, prenez soin de ne pas toucher les dits câbles ou circuits, le
contact avec eux pourrait provoquer la mort.
18 surcharge – Ne pas surcharger les prises murales, ni les rallonges ainsi
que les douilles ; la surcharge peut provoquer un incendie ou une
décharge électrique.
19 Introduction de liquides et d’objets – Ne jamais introduire des objets
d’aucune sorte à l’intérieur de cet appareil par les couvertures car ils
pourraient toucher un point de haut voltage et provoquer un incendie ou
une décharge électrique. Ne jamais déverser de liquide sur ce produit.
20 évision – Ne tentez pas de réviser vous-même cet équipement car si
vous ouvrez ou enlevez les couvertures, vous risquez de vous
exposer à une tension électrique dangereuse ou à d’autres dangers.
Les révisions ne doivent être effectuées que par du personnel qualifié.
21 Dommages qui nécessitent une révision – Débranchez l’unité et
portez-la à réviser à un service qualifié selon les conditions suivantes :
a. Lorsque le câble électrique ou la prise sont endommagés.
b. En cas de déversement de liquides ou de chute d’objets à l’intérieur
de l’appareil.
c. Si le produit a été exposé à la pluie ou à l’eau.
d. Si l’appareil ne fonctionne pas normalement lorsque les
instructions ci-après sont suivies : ne réglez que les contrôles
mentionnés dans les instructions de manipulation, car un réglage
inadéquat d’autres contrôles pourrait endommager l’équipement et
le technicien aurait à faire plus de tâches de réparation pour que
l’appareil puisse à nouveau fonctionner normalement.
e. Si l’on a fait tomber le produit ou a subi tout autre type de
dommage, et
f. S’il montre un changement notable dans son fonctionnement, c’est
un symptôme évident qu’il nécessite une révision.
22. Pièces de rechange – En cas de nécessité de remplacement de
pièces, veillez à que le technicien de service utilise les pièces de
rechange spécifiées par le fabricant ou qu’elles aient les mêmes
caractéristiques que l’original. Les rechanges non agréés pourraient
provoquer des risques d’incendie, de décharges électriques ou autres.
23. Révision de sécurité – Quand l’appareil est prêt à être livré, demandez
au technicien de service de procéder à une révision de sécurité pour
confirmer que le produit est en bonne condition.
24. Montage sur le mur ou au plafond – Si vous décidez d’installer
l’appareil sur le mur ou au plafond, respectez les instructions fournies
par le fabricant.
25. Chaleur – L’appareil doit être installé loin de toute source de chaleur
(radiateurs, poêles, etc.) y compris les amplificateurs.
26. Le pile chargé —la puissance de chargement ne doit pas être audessous de 12V
5
6
Page 28

Introduction
PD-650S DVD portable est capable de
projeter toutes sortes de disques.Comme
il est petit et portable,vous pouvez
admirer les filmes à tous moments et à
n’import où C’est une appareil de lecture
de technique avancée et qui vous donne
de la jouissance la meilleure.
Votre nouveau lecteur est aussi
compatible CD, MP3 et WMA. Vo t r e
lecteur dispose de plusieurs
caractéristiques uniques, y compris Svidéo et la sortie vidéo de component
(pour obtenir une image plus claire),
verrouillage de parent (pour éviter les
enfants de voir les contenus
inappropriées), et la compatibilité de
KODAK Picture CD (vous donc pourrez
voir des photos sur l’écran du télé).C’est
un véritable appareil multimédia conçue
pour profiter du monde multimédia.
L’accès à l’ère digitale est plus facile
avec APEX Digital.
Introduction
DEBALLAGE
D’abord, faites l’inventaire du contenu de votre lecteur vidéo
DVD, y compris les accessoires. Vous devez avoir :
Lecteur vidéo DVD portable 1
Câble audio 1 pair
Câble du terminal S 1
Câble Vidéo 1 pair
Piles Ni-MH 1
Télécommande 1
adaptateur de courant éxtérieur 1
Câble de courant 1
Allumeur de cigarette 1
Manuel pour l’utilisateur 1
Ecouteur stéréo 1
Adaptateur d’écouteurY 1
En cas de manque d’un élément ou de constatation de
dommages, prenez immédiatement contact avec votre
distributeur.
Si vous devez envoyer votre lecteur DVD, les éléments de
l’emballage peuvent être pratiques. Il est conseillé de les
conserver, au cas où vous auriez besoin de les utiliser.
Pour une meilleure protection, remettez l’appareil dans son
emballage d’origine de l’usine.
Avis : Des changements ou des modifications apportées à cet
appareil, non expressément approuvés par APEX ou par des
organismes autorisés par APEX, annuleront toutes les
garanties de fabrication.
87
Page 29

Table des matières
Manuel de démarrage à grande vitesse
Mesure de sécurité ............................1-6
Introduction ................................7-8
Table des matières ..............................9
Manuel de démarrage à grande vitesse ..............10-11
Connexion du lecteur à un TV ....................12-13
Connexion du lecteur aux équipements facultatifs ........14-17
Lecture d'un disque ..........................18-21
Image CD de KODAK ........................22-23
Lecture JPEG ..............................24-25
Lecture MP3 ..................................26
Repérer un titre, chapitre ou piste spécifique ............27
Lecture répétée ............................28-29
Lecture selon l'ordre choisi ....................30-31
Agrandissement d'image ..........................32
Lecture selon l'ordre choisi ........................33
Utilisation de l'affichage sur l'écran ..................34
Sélection de l'angle de prise de vue ..................35
Régalage de verrouillage de parents ................36-37
Utilisation et installation des piles chargées ............38-39
Personnalisation des réglages des fonctions ..........40-41
Guide pour dépanner ..............................42
Garantie Limitée ............................43-44
1. Connexion à la source de courant éxtérieur
connexion entre le courant de DVD , la prise du mur et l’entrée
d’unité centrale.
Vous ne pouvez pas utiliser les autres équipements que le fournisseur
n’autorise pas.
2. Ouvrir le couvercle d’unité centrale
l’angle d’ouverture est au maximum 135 .
N’essayez pas de l’ouvrir plus grand.
3. Appuyer sur le bouton d’ouverture dans
l’angle droite bas de l’unité centrale.
N’appuyez pas sur ce bouton pendant la
lecture.
4. Posez le disque DVD
quand vous posez le disque, son milieu doit viser le trou milieux du
plateau d’unité
centrale, et appuyer sur le bouton pour fermer .
5. Démarrez l’interrupteur de courant à la position de ON marcher .
5
9
10
Page 30

Manuel de démarrage à grande vitesse
Connexion à un téléviseur
6. Appuyez sur le bouton de lecture
en général , vous posez le disque de
DVD et démarrez l’interrupteur de
courant , et après, cette appariel peut
commencer automatiquement la
l e c t u r e .
La lecteur de DVD commence à lire le programme de DVD
Quand vous voulez arrêter la lecture, vous pouvez
appuyer sur le bouton d’arrêt. L’unité centrale va retourner
l’image originale. Appuyez sur le bouton de lecture à
nouveau, elle peut remettre le lecture en état.
Si vous voulez couper le courant, vous pouvez mettre
l’interrupteur à gauche.
Cette appariel est en état de protectin d’écran, et après
trois minutes, elle peut couperl’interrupteur
automatiquement. Si vous voulez rédémarrer, d’abord vous
pouvez appuyer sur le
bouton de “OFF” et puis
appuyer sur le bouton de
“ON” .
ON/OFF
Configuration de la lecteur
1 Connexion entre la câble audio et la sortie audio de la
lecteur de DVD
2 Connexion entre la câble jaune et la sortie vidéo de la
lecteur.
Si la télévision a la sortie vidéo S, vous pouvez vous référer
à l’étape de“ meilleur” ci-dessous.
BIEN (GOOD)
entrée vidéo du téléviseur
blanc, Rouge, Jaune
sortie audio du téléviseur
11
12
Page 31

Connexion aux autres équipementsConnexion à un téléviseur
MEILLEUR
r o u g eblanc
entrée audio TV
Connectez le lecteur DVD avec le cable de Svidéo (facultatif) si le téléviseur possède une
prise d'entrée de S-vidéo. Ne connectez pas le
cable jaune si vous utilisez le cable de S-vidéo.
Eteignez et débranchez les deux appareils avant de
procéder à la connexion.
Assurez que la barre INPUT SELECT(entrée select) à
l’arrièreon a été glissée à OUT(sortie).
entrée du terminal s TV
Connexion à l’écouteur
Votre appariel peut utiliser l’adaptateur d’écouteur Y, et
touts les deux personnes peuvent admirer le musique en
même temps.
1. connexion entre l’adaptateur d’écouteur Y et l’unité
centrale, puis connexion à deux écouteurs.
Vous pouvez utiliser l’écouteur stéréo de3.5mm.
2. appuyez sur le bouton de volume pour régler la volume.
Faites attention à la volume pour éviter de affaiblir l’audition.
1413
Page 32

Connexion aux autres équipements
Connexion aux équipements facultatifs
Apprécier le Son Dolby Pro Logic Surround (bien) Dolby Pro
Logic Surround
Apprécier le son réaliste dynamique du Dolby Pro Logic Surround
en connectant un système d’amplificateur et haut-parleurs (hautparleurs avant droite, et avant gauche, un haut-parleur central et
un ou deux haut-parleur arrières).
Exemple de
connexion
sortie audio
a l’entrée audio
haut-parleur
avant gauche
TV
jaune
Branchez un ou
deux haut-parleurs.
haut-parleur
arrières
haut-parleur
avant droite
sortie vidéo
l’amplificateur équipé de
Dolby Pro Logic Surround
Ce produit incorpore avec la protection de copyright technologique qui
est protégée de façon de certaines propriétés industrielles et droit
exclusif d'exploitation américains appartenus à Macrovision
Corporation et les autres propriétaires. L'utilisation de cette protection
de copyright technologique doit être autorisée par Macrovision
Corporation et destinée à l'utilisation domicile ou aux autres
utilisations limitées et autorisées par Macrovision Corporation. Il est
interdit de renverser ni de désassembler.
Il est interdit selon la loi de copier, émettre, montrer, et reproduire en
public ou louer les matières de copyright sans autorisation.
Les disques DVD sont protégés par copyright et toute copie à partir
du disque peut cause de distorsion du disque.
Fabriqué sous la licence de Dolby Labs.
" Dolby " et le double D symbole sont toutes marques de Dolby
Laboratories. Travail confidentiel non publiable. © 1992-1997 Dolby
Laboratories, Inc. Tout droit réservé.
“DTS” and “DTS Digital Out” are trademarks of Digital Theqter
Syste, Inc..
Réglez le volume du récepteur pour éviter le dommage
aux haut-parleurs.
Lorsque vous branchez ou débranchez le lecteur vidéo
DVD, éteignez l’amplificateur pour éviter d’endommager
vos haut-parleurs.
15
16
Page 33

Connexion aux équipements facultatifs
Lecture d’un disque
Apprécier le son Dolby Digital ou DTS (mieux)
Dolby Digital/DTS
La programmation en Dolby Digital et en DTS peut délivrer un
son surround avec cinq canaux discrets à plages complète plus
un sixième pour un caisson de graves (subwoofer). Vous
pouvez utiliser votre lecteur DVD APEX Digital avec un système
sonore surround Dolby Digital ou DTS. Tout ce que vous avez à
faire est de brancher votre lecteur DVD à un récepteur Dolby
Digital/DTS ou à un récepteur Dolby Digital Ready avec un
décodeur externe.Connectez la sortie opticienne de votre
lecteur à l’entrée facultatif de l’amplificateur.
DVD
A PCM/BITSTREAM
haut-parleur
avant droite
AVIDEO OUT sortie vidéo
TV
haut-parleur
avant gauche
A partir du menu de configuration, configurer « SPDIF Sortie
» à « SPDIF/PCM » dans le « Configuration générale ».
contrôle de la lecture élémentaire
1
2
3
4
65 7
8
9
11
12
13 14 15
16 18
1 LCD appariel de surveillance 9 Retour
2 Couleur 10 Avance
LCD régler la couleur 11 Bouton de direction
3 Luminosité haut/bas/gauche/droit
LCD régler la luminosité 12 Entrer
4 Mode d'affichage 13 Pause
changer entre 16 9 et 4 3 14 Arrêt
5 Titre 15 Lecture
6 Précédent 16 Ouvrir
7 Suivant 17 Configuration
8 Menu 18 Amplifier
17
10
1817
Page 34

Lecture d’un disque
Lecture d'un disque
Séléctionner la lecture dans le menu
1 Appuyez sur le bouton de
TITLE/MENU titre/menu
Title 1
pour entrer le menu
2 Appuyez sur ou
sur les boutons numériques
Title 3
pour choisir le titre.
3 Appuyer sur le bouton
ENTER/PLAY.
Le lecteur vidéo commencera
la lecture à partir du titre choisi.
Remarque
Vous pouvez entrer le numéno de
titre pour séléctionner directement
LA LECTURE EN PAUSE (LECTURE)
Appuyez sur le bouton PAUSE/ STEP
pendant la lecture , Appuyez sur le
bouton PLAY pour continuer la lecture
normale. Appuyez deux fois sur
PAUSE/STEP
le bouton PAUSE /STEP pour
avancer un pas, appuyez sur le bouton
PLAY pour reprendre la lecture
normale.
DVD n’a pas le son pendant la lecture muette.
MP3 Audio Cd et CD n’ont pas la fonction de
sauter en avant.
ARRETER LA LECTURE
Appuyez sur le bouton de STOP arrêt .
Title 2
DVD s' arrête.
Title 4
MARCHER RAPIDEMENT EN AVANT ET EN A R R I E R E
Cet appariel peut marcher en avant et en
arrière 2 fois 4 fois 8 fois 16 fois 32 fois plus
rapidement que la vitesse normale.
ENTER 2x 4x
2x 4x
Appuyez sur les boutons REV ou FWD pendant la lecture.
La vitesse de lecture devient 2 fois la vitesse normale
La vitesse change, chaque fois que vous appuyez sur les boutons
PLAY
REV ou FWD.
POUR REPRENDRE LALECTURE NORMALE.
Remarque
Cette fonction n'est pas disponible pour toutes sortes de disques.
8x
8x
Appuyez sur le bouton PLAY.
16x 32x
16x 32x
PLAY
REV
FWD
PLAY
STOP
2019
Page 35

Lecture d'un disque
Lecture De Votre KODAK Picture CD
LECTURE LENTE
Cette appariel a une fonction de lecture
lente pour les disques.
1 Appuyez sur le bouton de SHIFT c h a n g e r,
PLAY
démarrez la fonction de change pour
démarrer le bouton de SLOW lecture lente
L'écran du téléviseur
1/2
1/2
1/4
1/4 normal speed1/2 normal speed
1/4
1/8 1/16
1/8 normal speed
1/16 normal speed
1/8
1/16
SLOW
SHIFT
2 Appuyez sur le bouton SLOW pendant la lecture.
La vitesse de lecture devient la moitié, le quart, le huitième ou le
seizième de la vitesse normale chaque fois que vous appuyez sur
le bouton SLOW.
TO RESUME NORMAL PLAYBACK.
Press PLAY.
PLAY
• Cet appariel n'a pas de son pendant la lecture de REV marche
rapide en avant FWD reculer rapidement et la lecture lente.
• Cette fonction n'est pas disponible pour toutes sortes de disques.
21
NORMAL
Lorsque l'on insère un Picture CD (CD d'images), la démonstration
commence automatiquement, chaque picture (image) s'affichant
conséquemment à la manière de projection de diapositives, et
l'image remplira l'écran le plus possible. Vous disposez 16 modes
de transition. Appuyez sur la touche GOTO pour sélectionner :
L'utilisateur peut régler les effets de transition pour chaque
image à n'importe quel moment du diaporama.
mode 1 : VERS LE HAUT
mode 2 : VERS LE BAS
mode 3 : VERS GAUCHE
mode 4 : VERS DROITE
mode 5 : DIAGONALEMENTVERS GAUCHE EN HAUT
mode 6 : DIAGONALEMENTVERS DROITE EN HAUT
mode 7 : DIAGONALEMENTVERS GAUCHE EN BAS
mode 8 : DIAGONALEMENTVERS DROITE EN BAS
mode 9 : DEPUIS LE CENTRE H
mode 10 : DEPUIS LE CENTRE V
mode 11 : COMPRESSER VERS LE CENTRE H
mode 12 : COMPRESSER VERS LE CENTRE V
mode 13 : WINDOW (VOLET) H
mode 14 : WINDOW (VOLET) V
mode 15 : DU BORD AU CENTRE
R A N D O M
GOTO
Pour afficher une image indéfiniment, appuyez sur le bouton PA U S E .
Pour voir l'image suivante ou précédente, appuyez sur les bouton
ou . Pour reprendre le diaporama, appuyez sur la touche E N T R
22
Page 36

Lecture De Votre KODAK Picture CD
Lecture JPEG
ROTATION DE L'IMAGE
Il y a quatre façons de transformation : " inverser ", " miroir ","
gauche " et " droite ". Ces opérations ne sont possibles que
lorsqu'une image est affichée normalement et seront annulées
automatiquement lorsqu'une nouvelle image est affichée. On
utilise les touches de directions
les différents modes de transformation :
Haut -Inverser/Normal
Bas -Miroir/Normal
Gauche
Droite
Remarque : cette fonction n'est pas disponible dans le modèle d'amplification.
-Tourner vers la gauche
-Tourner vers la droite
pour choisir
REPETITION DE LA PROJECTION DE DIAPOSITIVE
A la fin de votre diaporama d'image, chaque image est réduite à un
a ffichage de la taille d'un " oncle de pouce ". Pour voir la
présentation de votre diaporama à nouveau, appuyez sur le bouton
****(sauter en avant) un fois, et puis sur le bouton ENTER(entrée)
pour que la présentatin recommence. Important : Laissez le lecteur
finir sa disposition de 12 images avant d'appuyer sur le bouton ****
(sauter en avant) pour voir les 12 suivantes.
MENU
La touche M E N U est utilisé pour afficher des images en version
réduite (" thumbnail ") en partant de la position d'arrêt. Une fois
cette touche activée, des images en version réduite au nombre de
12 maximum seront affichées sur l'écran. Vous pouvez utiliser les
touche N E X T (suivant) et P R E V I O U S (antérieur) pour afficher les
12 images SUIVANTES et ANTERIEURES du répertoire actif.
LE LECTEUR VIDEO DVD VOUS PERMET DE REGARDER
DES PHOTOS ARCHIVES SUR UN CD-R .LES PHOTOS
DOIVENT ETRE ARCHIVES SOUS LE MODELE DE JPEG.
VISITER LE SITE DE WEB WWW.JPEG.COM POUR VOUS
INFORMER EN DETAIL.
LECTURE DE VOS FICHIERS JPEG
1 poser le CD dans le lecteur.
2 Chosissez un fichier ou une image archivée sur le CD.
Après avoir posé le CD dans le lecteur un menu apparaît sur
l’écran.
Appuyer sur le bouton UP ou DOWN pour sélectionner le fichier, et
puis appuyer sur le bouton ENTER/PLAY pour consulter le contenu.
comme ce que vous indique le colonne droite du tableau ci-dessous
00:00 00:00
001\015
GIRL
AAAAAA
BBBBBB
CCCCCC
Remarque vous pouvez afficher le menu à rebours dans la
fenêtre d'image en zoom, et l'entrer pour recours .
23
24
Page 37

Lecture JPEG
Qu’est-ce que WMA/MP3 ?
3. COMMENCER LALECTURE
appuyer sur le bouton Up ou DOWN pour sélectionner une image
appuyer sur le bouton ENTER/PLAY pour regarder l’image.
L’imge va se présenter. cette appareil a plusieurs modes par exemple
VERS LE HAUT VERS GAUCHE VERS DROITE DIAGONALEMENT
VERS GAUCHE EN HAUT DIAGONALEMENTVERS DROITE EN
HAUT DEPUIS LE CENTREH COMPRESSER VERS LE CENTREH
WINDOW (VOLET) etc. appuyer sur le bouton GOTO pour changer le
mode d’affichage.
4. ROTATION DE L’IMAGE
vous pouvez utiliser les touches de directions pour
choisir les différents modes de transformation pendant l’opération:
appuyer sur le bouton UP vers haut Inverser.
appuyer sur le bouton DOWN vers bas Miroir
appuyer sur le bouton LEFTvers gauche Tourner vers la gauche
appuyer sur le bouton RIGHTvers droite Tourner vers la droite
5. ZOOM
Cette caractéristique vous permet de voir une image à50% , 75%,
125%, 150%, 175%, 200% en plusieurs incréments. Appuyez sur le
bouton ZOOM. Un message sur l’écran (« Zoom On ») vérifiera votre
choix. Appuyez sur les touches ou pour contrôler la quantité de
zoom de rapprochement et d’éloignement. Appuyez sur les touches de
directions pour déplacer l’image dans quelque sens que ce soit. Une
fois le Zoom éteint, l’image est mise à l’échelle de façon à occuper la
plus grande partie de l’écran de votre téléviseur.
6. MENU
La touche MENU est utilisé pour afficher des images en version
réduite pendant la lecture. Appuyez sur le bouton MENU de nouveau
pour retourner le fichier de JPEG
Etablir CD
Vous pouvez utiliser votre propre ordinateur pour sauvegarder les
images, mais il faut mettre en mode de JPEG pour les sauvegarder et
créer une disque de CD Et ensuite , vous pouvez admirer vos images
à la télévision.
QU’EST-CE QUE WMA ?
WMAfait référence à un nouveau format de fichiers de musique
de Microsoft que l’on peut faire jouer sur des sites Web WMA. La
compression utilisée vous permet de enregistrer de votre
ordinateur plus de 20 heures de musique à un CD-R et le faire
jouer par votre lecteur DVD. APEX Digital est la première
entreprise qui offre la possibilité de jouer sur un lecteur DVD
domestique des disques CD-R enregistrables où l’on a enregistré
des fichiers audio WMA.
LECTURE D’UN FORMAT MP3
1. Insérez un CD MP3, le lecteur vidéo DVD initialisera le disque
lorsque le plateau sera fermé et le répertoire (dossier) sera
affiché sur l’écran dans un menu MP3.
2. Appuyez sur le bouton UP/DOWN pour sélectionner et jouer à
rebours le fichier MP3 chanson
3. Appuyez sur le bouton ENTER pour la lecture du fichier MP3.
00:00 00:00
001\016
MP3
mp3
AAAAAA
BBBBBB
CCCCCC
Remarque la lecture deWMAn’est pas pareille celle de MP3.
2625
Page 38

Repérage d’un titre, d’un chapitre ou d’une piste spécifique
La lecture répétée
LES VIDEO DISQUES DVD SONT GENERALEMENT
DIVISES EN TITRES. LES TITRES SONT DIVISES EN
CHAPITRES. CD AUDIO ET CD MP3 SONT, EN PLUS,
DIVISES EN PISTES.
Chapter 1 Chapter 2 Chapter 1 Chapter 2 Chapter 3
TITLE 1
Disque vidéo DVD
REPERAGE D’UN TITRE EN UTILISANT LE MENU DE TITRE (TITLE MENU)
TITLE 2
Vous pouvez repérer un titre spécifique en utilisant la fonction de menu
de titre si toutefois le vidéo disque DVD
contient un menu de titre.
1 Appuyez sur le bouton TITLE (titre).
Le menu de titres apparaîtra sur l’écran.
PLAY
2 Appuyer sur le bouton de directions
pour sélectionner le titre que vous
désirez.
Vous pouvez aussi repérer directement
un titre spécifique en appuyant sur le
PREVIOUS
NEXT
SHIFT
bouton numérique qui lui correspond.
3 Appuyez sur le bouton PLAY.
Le lecteur vidéo DVD commencera la lecture à partir du chapitre 1
du titre choisi.
Vous pouvez appuyer sur le bouton de saute pour sélectionner le
titre ou la piste appuyez deux fois sur le bouton ou pour
sélectionner l’objectif.
CE LECTEUR VIDEO DVD VOUS PERMET DE REPETER LA
LECTURE D’UN TITRE, D’UN CHAPITRE OU D’UNE PISTE OU
BIEN D’UN SEGMENT SPECIFIQUE. (REPETITION DE TITRE,
REPETITION DE CHAPITRE/PISTE, REPETITION A-B)
Lecture répétée de la disque du titre ou de la chapitre
Appuyez sur le bouton REPEAT répeter pendant le lecture
normale
Appuyez chaque fois sur le bouton REPEAT pour changer le
mode de répétition
CHAPTER
TITLE
ALL
Répéter le même chapitre
Répéter le même titre
Répéter la disque totale
Remettre la lecture normale en état
Répéter
changer
27 28
Page 39

La lecture répétée
Lecture dans l’ordre de votre choix
Choisissez le titre, le chapitre ou la piste que vous désirez répéter.
1. Appuyez sur le bouton A-B au commencement du
segment que vous désirez répéter. (point A)
2. Appuyez sur le bouton A-B encore une fois à la fin du
segment. (point B)
Le lecteur vidéo DVD peut retourner automatiquement au
point A et commencer la lecture répétée du segment choisi
A-B.
3. Appuyez sur le bouton A-B pour annuler la fonction de
répétition du segment.
Le lecteur vidéo DVD peur reprendre la lecture normale.
A
AB
Configuration de point A
Configuration de point B
reprendre la lecture normale.
A-B
changer
COMMENT PROGRAMMER DES TITRES, DES CHAPITRES
OU DES PISTES DANS L’ORDRE DE VOTRE CHOIX
1 Appuyez sur le bouton PROGRAM.
A ce moment, apparaîtra le menu ROGRAM MENU
PROGRAM:TT(01)/CH ( - - )
1 TT: CH: 6 TT: CH:
2 TT: CH: 7 TT: CH:
3 TT: CH: 8 TT: CH:
4 TT: CH: 9 TT: CH:
5 TT: CH: 10 TT: CH:
EXIT NEXT
2 A l’aide des touches numériques, introduisez le
chiffre correspondant au chapitre/titre que vous désirez dans
l’ordre de votre choix.
PROGRAM:TT(01)/CH ( - - )
1 TT: 01 CH: 01 6 TT: CH:
2 TT: CH: 7 TT: CH:
3 TT: CH: 8 TT: CH:
4 TT: CH: 9 TT: CH:
5 TT: CH: 10 TT: CH:
EXIT START NEXT
3029
Page 40

Lecture dans l’ordre de votre choix
Amplification d’image
3. Sélectionnez le START (commence) dans le menu, et puis
appuyez sur le bouton ENTER POUR commencer la
lecture de mémoire.
4. Si vous pouvez annuler les éléments programmés ,
Appuyez sur le bouton STOP et puis sur le bouton
ENTER.
PROGRAM:TT(01)/CH ( - - )
1 TT: CH: 6 TT: CH:
2 TT: CH: 7 TT: CH:
3 TT: CH: 8 TT: CH:
4 TT: CH: 9 TT: CH:
5 TT: CH: 10 TT: CH:
EXIT STOP NEXT
Amplification d’image
Ce lecteur vidéo DVD vous permet de zoomer sur une image ainsi
que de changer de point de zoom.
Appuyez sur le bouton ZOOM amplification
pendant la lecture normale et lente.
Appuyez sur le bouton SHIFT changer pour
démarrer la fonction d’amplification avant
d’appuyer sur le bouton d’
amplification
Si vous appuyer sur les boutons de directions pendant la lecture
de zoom, le point de zoom change.
2x 3x 4x
ZOOM
Lecture
Appuyez sur le bouton ZOOM pour annuler l’amplification
3231
Page 41

Choisir Le Sous-Titre
Utilisation de l’affichage sur l’écran
COMMENT AFFICHER LE SOUS-TITRE
Vous avez la possibilité de sélectionner les sous-titres de
votre choix parmi ceux que contient le vidéo disque DVD.
Appuyez sur le bouton SUBTITLE
pendant la lecture.
SUBTITLE 1
SUBTITLE 3
SUBTITLE OFF
1/03
2/03SUBTITLE 2
3/03
SUB-T
pour eteindre les sous-titres
Appuyez sur le bouton SUBTITLE
pendant la lecturejusqu’à ce que
les sous-titrs disparaissent.
eteindre les sous-titres
CE LECTEUR VIDEO DVD VOUS PERMET DE VISIONNER SUR
L’ECRAN DE VOTRE TELEVISEUR LA SITUATION DES
OPERATIONS ET LES INFORMATIONS SUR LE DISQUE.
VERIFICATION DE LASITUATION DES OPERATIONS
Grâce à cette fonction, vous pouvez visionner sur l’écran de votre TV
les coordonnées suivantes :
- Titre actuel
- Numéro de piste
- Temps de lecture totale
Titre actuel
chapitre actuel
Temps de lecture des titres
TT01/12 CH 006/039 0:02:20
Temps de reste du titre
TT 01/12 CH 006/039 0:18:50
Temps de lecture de la chapitre
TT 01/12 CH 006/039 0:03:50
Temps de reste de la chapitre
TT 01/12 CH 006/039 0:10:40
Afficher l’arrête
Temps de
chapitre Totale
Title total
affichage
Appuyez sur le bouton de
DISPLAY affichage pendant
la lecture démarrez la
fenêtre affichage Appuyez
sur le bouton de nouveau
pour fermer la fenêtre
affichage
3433
Page 42

SElection De L’Angle De Prise De Vue
Réglage du verrouillage de parents
CE LECTEUR VIDEO DVD VOUS PERMET DE CHOISIR PARMI DE
DIFFERENTS ANGLES DE PRISE DE VUE ET DE DIFFERENTES
LANGUES.
ANGLE 1 ANGLE 2
Choisir l’angle de prise de vue
ANGLE
COMMENT CHANGER L’ANGLE DE PRISE DE VUE
si la disque de DVD a plusieurs angles de prise de vue vous
pouvez changer l’angle de prise de vue de votre image.
Appuyz sur le bouton ANGLE pour lire les images tournées à
plusieurs angles de prise de vue.
N’appuyez sur le bouton ANGLE que quand le symbol
d’angle***se présente sur l’écran.
L’angle change chaque fois que vous appuyez sur le bouton
ANGLE.
2/2
1/2
• La fonction angle ne marchera pas sur les disques DVD ne
contenant pas différents angles de prise de vue.
VOUS NE POUVEZ UTILISER LAFONCTION DE
VERROUILLAGE DE PARENTS QU’AVEC LES DISQUES VIDEO
DVD QUI OFFRENT CETTE POSSIBILITE.
REGLAGE DU VERROUILLAGE DE PARENTS
Les disques vidéos DVD qui sont dotés de la fonction de
verrouillage de parents sont classés en fonction de leur contenu.
Les contenue permis par un certain niveau de verrouillage de
parents et la façon de contrôler un vidéo disque DVD peuvent
varier d’un disque à l’autre. Par exemple, si le disque le permet,
vous pouvez supprimer les scènes de violence qui ne sont pas
convenables pour les enfant et les remplacer par des scènes plus
convenables, ou bloquer la lecture du
disque en entier.
1 Appuyez sur le bouton STOP
pendant la lecture.
2 ppuyez sur le bouton SETUP.
Le Setup Menu (menu de
configuration)
apparaît sur
l’écran du
téléviseur.
3 Sélectionnez
PREFERENCE, et
appuyez sur le
bouton ENTER.
-- Preference Page --
Audio ENG
Subtitle ENG
Disc Menu ENG
Parental
Password
Default
SETUP
DIRECTION
STOP
Go To Preference Page
3635
Page 43

Réglage du verrouillage de parents
Installation et utilisation de pile chargé
4. Sélectionnez PARENTAL, et appuyez sur le bouton ENTER.
5. Sélectionnez classification, et
appuyez sur le bouton ENTER.
1 KID
SAFE
2 G
3 PG
4 PG 13
5 PGR
6 R
7 NC17
8 ADULT
OFF
6. Introduisez votre mot de passé et appuyez sur le bouton
ENTER.
Le mot de passé pré placé est 3308.
Password
OK
7. Appuyez sur le bouton SETUP pour quitter la configuration, et
appuyez sur le bouton ENTER pour commencer.
SETUP
DIRECTION
STOP
SI VOUS VOULEZ CHANGER LE CODE SECRET:
1)Suivez l’étape 4 pour choisir le mot de passé et changer.
2)Introduisez le vieux mot de passé.
3)Introduisez le nouveau mot de passé.
4)Réintroduisez et confirmez le nouveau mot de passé.
5)Appuyez sur le touche ENTER.
6)Appuyez sur le bouton SETUP.
Installation et sortie des piles
1 Fermez l’appareil et coupez le courant.
2 Mettez le pile chargé dans le trou
correspondant de bas de l’unité central
comme vous indique le tableau 1 , réglez
jusqu’à la position de l’installation comme
vous indique le tableau 2.
Sortie des piles
1 Fermez l’appareil et coupez le courant.
2 Appuyez sur le bouton de “sortie des
piles”, sortez les pilescomme vous
indique le tableau 3.
1
2
3
Utilisation et maintenance
Vous devez utiliser le pile chargé NI-MH fourni par le fournisseur.
Sa caractéristique£∫la capacité est très grande et n’est pas facile
de perdre son efficacité. C’est-à-dire que vous pouvez charger le
pile à tout moment au lieu d’attendre que le pile est épuisé.
Vous pouvez pénétrer
l’interface d’adaptation AC
alternatif dans le pile.
chargez le pile à plein
avant de l’utiliser pour la
première fois
Indication de chargement
interfaced’adaptation alternatif/jack de chargement
3837
Page 44

Installation et utilisation de pile chargé
Personnalisation des réglages des fonctions
Le pile que l’on vous fournit peut être rechargé pour 300
fois. Une opération de chargement dure à peu près 5
heure.Continuez de charger le pile pendant 0.5 heure
quand le feu rouge s’éteint et le feu vert s’allume. Le
pile chargé à plein peut s’effectuer continuellement pour
3 heures.La consommation d’électricité dépend de
l’opération telles que luminosité , volume etc.
Quand le pile est épuisé, chargez –le à temps pour
assurer la durée de service du pile.
Ne chargez pas le pile plein.
Ne mettez pas le pile dans des récipients en métal ou
dans l’humidité. C’est favorable de le conserver dans
des récipients hermétiques. La température favorable
est entre 10 °C et 35 °C.
CE LECTEUR VOUS PERMET DE PERSONNALISER L’EXECUTION
SELON VOS PROPRES PREFERENCES.
MENU DE CONFIGURATION
Normal/PS
Normal/LB
-- General Setup Page --
TV Display Wide
Angle Mark On
OSD Lang ENG
SPDIF Output RAW
Captions Off
Screen Saver On
Go To General Setup Page
1. Appuyez sur le
bouton SETUP.
2. Appuyez sur les
touches de
directions pour
choisir la catégorie ,
ensuite appuyez
sur ENTER.
3. Appuyez sur le
bouton de SETUP
configuration
quittez le menu.
4039
-- Speaker Setup Page --
Downmix
Go To Speaker Setup Page
Wide
On
Off
English
中文
French
Spanish
SPDIF Off
SPDIF/RAW
SPDIF/PCM
On
Off
LT/RT
Stereo
Page 45

Personnalisation des réglages des fonctions
Guide pour dépanner
-- Dolby Digital Setup --
Dual Mono
Dynamic
Go To Dolby Digital Setup
-- Dolby Digital Setup --
Sharpness High
Contrast 00
Go To Video Setup Page
-- Preference Page --
Audio ENG
Subtitle* E N G
Disc Menu ENG
Parental
Password
Default
Go To Preference Page
Remarque il y a une fonctin de “fermer” dans le menu de
sout-titre,mais pas dans le menu audio et le menu de
d i s q u e .
Stereo
L-Mono
R-Mono
MIX-Mono
FULL
3 / 4
1 / 2
1 / 4
OFF
High
Medium
Low
Contrast 0
English
French
Spanish
Chinese
Japanese
Korean
Russian
Thai
Off
1 KID SAFE
2 G
3 PG
4 PG 13
5 PGR
6 R
7 NC17
8 ADULT
9 OFF
Change
RESET
Pannes
Sans source de
courant
Sans image / voix
Image roulante en
noir et blanc
Image en noir et
blanc
Lecteur de disque
Vidéo ne marche
pas
4241
Moyens pour dépanner
• Branchez la prise de courant
• Examinez le bouton ‘Sortie/Entrée’,
confirmez ce que : ‘Sortie’est pour en mode
de lecture, ‘Entrée’ est pour en mode d’entrée
AV.
• Si émis par télévision, examinez les
connexions : ligne de fréquence de son, ligne
de fréquence vidéo ou ligne de l’extrémité S.
• Confirmez si c’est dans ‘NTSC/PAL’, cette
touche est sur le panneau derrière du lecteur.
• Réglez la fréquence d’image synchrone sur
la télévision
• La tête de l’extrémité S est endommagée
(aiguille courbe)
• Entrez le disque lisible (examiner le type de
disque et le mode de couleur).
• Mettez correctement le côté lisible de disque
vers dessous en plateau de disque.
• Nettoyez le disque.
• Supprimez la function de verrouillage
parental ou changer le grade de verrouillage
parental(Mot de passe préfixé est 3308).
• Rouvrez ce lecteur portable de DVD.
Page 46

Garantie Limitée
Garantie Limitée
Main d’œuvre : 90 jours
LECTEURS
Changement de pièces : un an
QUI EST COUVERT ?
Pour bénéficier de la maintenance sous garantie on exige une
preuve d’achat, comme l’original du ticket de caisse qui montre la
date d’achat d’origine chez un fournisseur de Apex Digital Inc.
Autorisé en Amérique du Nord. Conservez la boîte et l’emballage
d’origine au cas où l’envoie de l’équipement s’avérerait
nécessaire.
QUE COUVRE-T-ELLE ?
La garantie de réparation à compter de la date d’achat : un (1) an
pour le changement de pièces ; 90 jours de main d’œuvre
couverture de garantie.
Si vous ne disposez plus de justificatif d’achat, votre équipement
sera considéré comme exclu de la garantie. Il sera alors appliqué
les tarifs normaux pour sa réparation et le changement de pièces.
CE QUI EST EXCLU DE LA GARANTIE ?
Votre garantie ne couvre pas :
- La main d’œuvre pour l’installation et la configuration de produit,
l’ajustement des contrôles personnalisés du produit, ainsi que
l’installation ou la réparation des antennes qui n’accompagnent
pas le produit.
- La réparation du produit ou le changement de pièces dû à une
utilisation inadéquate, un accident, une réparation non autorisée
ou toute autre cause hors contrôle de Apex Digital Inc..
- Tout produit qui nécessite une modification ou une adaptation
pour son éventuelle utilisation dans un autre pays que celui
pour lequel il a été conçu, fabriqué, homologué et/ou autorisé,
ou la réparation de produits endommagés par ces modifications.
- Les dommages-intérêts accessoires ou indirects qui
résulteraient du produit. (Certains états ne permettent pas les
dommages-intérêts accessoires ou indirects, il est alors
possible que l’exclusion ci-dessus ne vous concerne pas. Ceci
inclut le matériel préenregistré, qu’il soit sous copyright ou non,
mais ne s’y limite pas.)
- Au-dessous du temps de garantie, veuillez en apporter aux
entretiens autorisés.
AVANT DE FAIRE APPEL A NOS SERVICES :
Reportez-vous à la section « Guide de dépannage » de votre
mode d’emploi et visitez notre site Web
www.apexdigitalinc.com pour rechercher les dernières
actualisations de la FAQ (questions fréquentes).
OU SE TROUVE LE SERVICE TECHNIQUE ?
Contactez APEX DIGITAL Inc.
Service d’attention à la clientèle : 2235 E . Francis St.Onfario.CA91761
Lundi au vendredi 8h30 à 17h00 (Californie)
Cette garantie vous donne des droits légaux spécifiques. Vous
pouvez posséder d’autres droits qui varient en fonction de
différents états/provinces.
4443
Page 47

MANUAL DE INSTRUCCIONES
Page 48

Precauciones de Seguridad
Precauciones de Seguridad
CUIDADO
PELIGRO DE DESCARGA
ELÉCTRICANO ABRIR
El símbolo del rayo con una flecha en la punta, dentro de
un trángulo equilátero, pretende advertir al usuario de la
existencia de “voltaje peligroso” no aislado en el interior del
producto, de magnitud suficiente como para provocar una
descarga eléctrica a una persona.
El signo de exclamación dentro del triángulo equilátero
pretende advertir al usuario la existencia de instrucciones
importantes para el manejo y el mantenimiento(servicio) en
la información que se incluye junto con el aparato.
El reproductor de vídeo DVD concuerdan con el capítulo
15 de las normas FCC. Hay que obedecer esas dos
CLASS 1
LÁSER PRODUCT
AVISO: NO EXPONGAESTE A PA R ATO AL AL L U V I AO AL A
HUMEDAD, PUES TENDRÍAUN GRAVE RIESGO DE INCENDIO O DE
D E S C A R G AELÉCTRICA; NO A B R AE LA PA R ATO, YAQUE EN SU
INTERIOR SE A L M A C E N AA LTO VOLTAJR TALES OPERACIONES SÓLO
DEBE LLEVARLAS ACABO ELS E RVICIO TÉCNICO CUALIFICADO.
ATECIONES: ELDISCO SE GIRACON GRAN VELOCIDAD DURANTE LA
REPRODUCCIÓN. POR LO T A N TO, NO LEVANTE NI MUEVAE L
R E P R O D U C TOR. DE LO CONTRARIO, HARÁ DAÑAA LD I S C O .
Atenciones: Este reproductor de Disco de Vídeo Digital (DVD) emplea un
sistema láser. Asegure que el reproductor está apagado antes de abrir la tapa
s u p e r i o r. Al abrirla hay radiación láser visible y se inutilizan los circuitos internos
de seguridad. Si se examina la unidad, se usan los ajustes de control o se
maneja la unidad de alguna forma que no se especifique en las instrucciones, el
resultado puede ser una exposición arriesgada a la radiación.
condiciones al manejarlo: (1) El equipamiento no puede
producir interferencias nocivas. (2) Es necesario que el
equipamiento puede recibir cualquier interferencia,
incluyendo las que puedan producir manejos
inesperados.
NO MIRE DIRECTAMENTE A LR A YO LÁSER.
Para asegurarse de que usa correctamente este producto, le rogamos que lea
con atención este manual de usuario y lo guarde para consultas posteriores. Si
la unidad necesita una revisión o reparación, póngase en contacto con un
servicio técnico autorizado o con nuestra compañía. Sólo se permite abrir la
unidad al servicio técnico cualificado.
N O TAFCC : Se ha comprobado y verificado que este equipo se ajusta a los
límites de un aparato digital de Clase B, de acuerdo con el capítulo 15 de las
normas FCC.Dichos límites están diseñados para proporcionar una protección
razonable contra interferencias perjudicales en una instalación doméstica.
Este equipo genera, usa y emite energía de frecuencia de radio, y si no se
instala ni se usa de auerdo con las instrucciones, causará interferencias que
perjudicarán la comunicación por radio. Sin embargo, esto no constituye
garantía alguna de que no aparezcan interferencias en una instalación
determinada. Si este equipo causa interferencias perjudicales para la recepción
de radio o televisión (lo cual puede determinarse encendiendo y apagando el
equipo), se recomienda al usuario que intente corregir la interferencia con
alguna de las siguientes medidas:
-Reorienatr o cambiar de sitio la antena receptora
-Aumente la separación entre el equipo y el receptor
-Conecte el equipo a un enchufe que esté en un circuito que no sea el
mismo al que está conectado el enchufe del receptor.
-Si necesita ayuda, consulte a su distribuidor o a un técnico de radio/TV con
e x p e r i e n c i a
Advertencia FCC: Para asegurar la conformidad constante, (por ejemplo: usar
sólo cables blindados para la interfaz que se conecte al ordenador o a los
periféricos), cualquier cambio o modificación que no haya sido aprobado
expresamente por la parte responsable de la conformidad podría anular la
autoridad del usuario para manejar este equipo.
Aviso de pilas: Este producto está equipado con una serie de pila de Ni/MH. Si
no la trara como es debido, correrá el riesgo de causar incendio o fuego. No
trate de deshacer, destruir o perforar la pila; no la deje en cortocircuito ni las tire
al fuego o agua. No trate de abrir o reparar la pila. Por favor sólo use la pila
designada para nuestro producto al cambiarla. Trate la pila usadas según las
instrucciones de la fábrica.
1
2
Page 49

Precauciones de Seguridad Precauciones de Seguridad
Estudie cuidadosamente este manual y téngalo siempre a
mano. Sin embargo, hay algunas precauciones de
instalación y manejo que usted debería tener en cuenta.
1.Lea las instrucciones – Antes de manejar el producto,
debería leer todas las instrucciones de seguridad y de manejo.
2.Guarde las instrucciones – Guarde las instrucciones de
seguridad y de manejo para consultas posteriores.
3.Preste atención a los avisos – Obedezca todos los avisos
que aparezcan en los aparatos y en su manual de
instrucciones.
4.Siga las instrucciones- Siga todas las instrucciones de
manejo para conseguir un rendimiento óptimo.
5.Limpieza – Antes de limpiar la unidad, desenchúfela de la
pared. No aplique limpiadores líquidos ni aerosol directamente
sobre la unidad. Use un trapo mojado para limpiarla.
6.Accesorios – No use accesorios que no estén
recomendados por el fabricante del producto, pues podrían
causar algún daño.
7.Agua y humedad —No use la unidad cerca del agua; por
ejemplo, baño, lavabo, fregadero o cerca de la lavadora;
tampoco en el sótano húmedo, la piscina o lugares parecidos.
8.Soportes – No coloque este producto sobre carritos,
soportes, trípodes, abrazaderas o mesas con poco equilibrio.
El producto podría caer y causar lesiones graves a un niño o
un adulto, además de los daños que tendría el propio
producto. Sólo debería usar los carritos, soportes, trípodes,
abrazaderas o mesas que recomiende el fabricante o que se
incluyan con el producto. Cualquier montaje con soportes
deberá seguir las instrucciones y usar los accesorios de
montaje recomendados por el fabricante.
9.Cuando se coloque la unidad sobre un carrito con ruedas,
tenga cuidado al moverlo. Si frena demasiado rápidamente, lo
empuja con demasiada fuerza o lo lleva por superficies que no
sean llanas, el carrito podría volcar y la unidad podría sufrir
algún daño.
1 0 .Ventilación – Las ranuras y aberturas de la cubierta sirven para la
ventilación, para asegurar un manejo fiable y para evitar que el aparato se
caliente en exceso; estas aberturas no deberán ser cubiertas ni obstruidas.
Procure no bloquear las aberturas colocando la unidad sobre una cama,
sofá, alfombrilla o superficies similares. Este producto no debería colocarse
en instalaciones empotradas como librerías o estantes, a menos que
tengan la suficiente ventilación o se haya seguido las instrucciones del
fabricante.
11 .Fuentes de energía – Este producto debe usarse sólo co el tipo de
fuentes de energía que se especifican en la etiqueta comercal. Si no está
seguro de la fuente de alimentación de su hogar, consulte a su distibuidor
o a su compañía de electricidad. Para productos que deban funcionar con
pilas u otras fuentes de alimentación, consulte las instrucciones de manejo
de las correspondientes fuentes de alimentación.
1 2 .Toma de tierra o polarización – Este producto puede estar equipado con
un enchufe de corriente alterna polarizado(un enchufe que tiene una patilla
más ancha que la otra). Este enchufe sólo se puede conectar a la toma de
corriente de una forma.Es un dispositivo de seguridad. Si no le es posible
meter bien el enchufe en la toma de corriente, vuelva a probar, girando
media vuelta el enchufe. Si sigue sin poder conectarse bien, póngase en
contacto con un electricista para que le cambie su toma antigua de
corriente. No inutilice esta medida de seguridad del enchufe polarizado.
Otros Casos—Este producto está equipado con un enchufe de tres patillas
con toma de tierra, un enchufe que tiene una tercera patilla£®la toma de
tierra£©. Este conector sólo encajará con un enchufe preparado para
aceptar una tercera patilla con toma de tierra. Es un dispositivo de
seguridad. Si no le es posible meter bien el enchufe en la toma de
corriente, póngase en contacto con un electricista para que le cambie su
toma antigua de corriente. No inutilice esta medida de seguridad del
enchufe con toma de tierra.
1 3 .Protección del cable de corriente – Coloque los cables de corriente de
forma que no puedan ser pisados o pinchados por cualquier elemento
cercano a ellos, teniendo especial cuidado con los enchufes de la pared,
los ladrones y el punto en el que salen del producto para no damnificarlos
y causar descarga eléctrica.
1 4 .Enchufe con conector protegido – El producto está equipado con un
conector que lleva protección contra las sobrecargas.Es un dispositivo de
s e g u r i d a d .
43
Page 50

Precauciones de Seguridad Precauciones de Seguridad
Véase el manual de instrucciones para sustituir o reajustar el
dispositivo protector. Si es necesario cambiar el enchufe,
asegúrese de que el técnico haya usado el enchufe de recambio
que especifica el fabricante, que tiene la misma protección contra
las sobrecargas que el original.
15.Toma de tierra de la antena exterior – Si se conecta al
producto un sistema de cable o antena, asegúrese de que el
sistema de antena o cable esté adecuadamente puesta a tierra
para proveerla protección contra la sobretensión del voltaje y la
acumulación de cargas estáticas. El Artículo 810 del Código
Nacional de Electricidad, ANSI/NPA70, proporciona información
relativa a las tomas de tierra adecuadas para el pástil y la
estructura de soporte, las tomas de tierra del cable de entrada a
la unidad de descarga de la antena, el tamaño y las tomas de
tierra de los conductores, ubicación de la unidad de descarga de
la antena, conexión a los electrodos de toma de tierra, y
requisitos de los electrodos de toma de tierra. Cosulte 131.1
16.Tormenta eléctrica – Para una mayor protección de este
producto, o cuando no se vaya a usar durante mucho tiempo,
desenchúfelo de la corriente y desconecte el sistema de cable o
antena. Esto evitará que el producto pueda sufrir algún daño a
causa de la tormenta eléctrica o de subidas de tensión.
17.Cables de corriente – La antena exterior no debería ubicarse
cerca de cables de corriente que pasen por encima u otros
circuitos eléctricos, ni tampoco en lugares donde pudiera caer
sobre circuitos o cables de este tipo. Cuando se instala un
sistema de antena exterior, se debe llevar el máximo cuidado
para no tocar dichos cables o circuitos, pues el contacto con ellos
podría ser letal.
18.Sobrecarga – No sobrecargue la toma de corriente, ni las
alargaderas, ni los ladrones; si lo hace, existe riesgo de incendio,
descarga eléctrica u otros.
19.Introducción de líquido o de objetos – Nunca introduzca
objetos de ningún tipo en el interior de este producto a través de
las aberturas, ya que podría tocar algún punto de alto voltaje y
provocar un incendio o una descarga eléctrica. Nunca derrame
ningún tipo de líquido sobre el producto.
2 0 .Revisión – No intente revisar este producto usted mismo, ya
que, si abre o quita las cubiertas, se expondrá al riesgo de
descargas eléctricas. Las revisiones deberá efectuarlas sólo el
personal del servicio técnico cualificado.
2 1 .Daños que necesiten revisión – Desenchufe esta unidad y
llévela a revisar a un servicio cualificado de acuerdo con las
siguientes condiciones:
a.Cuando el cable de corriente o el enchufe está estropeado.
b.Si se ha derramado líquido o han caído objetos en el interior del
p r o d u c t o .
c.Si el producto ha sido expuesto a la lluvia o al agua.
d.Si el producto no funciona con normalidad cuando se siguen las
instrucciones de manejo. Ajuste sólo los controles que se
mencionen en las instrucciones de manejo, puesto que los ajustes
inadecuados de otros controles podrían resultar dañinos y por ello
requerirían más trabajo del técnico para su reparación.
e.Si el producto ha sufrido golpes o cualquier tipo de daño, y si el
producto muestra un cambio destacado en su funcionamiento,
esto es un síntoma claro de que necesita revisión.
2 2 .Piezas de repuesto – Cuando se necesiten piezas de repuesto,
aegúrese de que
el técnico del servicio ha utilizado las piezas de repuesto que
especifica el fabricante o que tienen las mismas características
que la pieza original. Los repuestos no autorizados podrían derivar
en riesgo de incendio, descarga eléctrica u otros.
2 3 .Revisión de seguridad – Cuando el producto esté listo para su
entrega, pida al
técnico del servicio que le haga una revisión de seguridad para
confirmar que el producto está en buenas condiciones.
2 4 .Montaje en la pared o en el techo – Si tiene que montar la
unidad en la pared o
en el techo, hágalo sólo tal y como lo recomienda el fabricante.
2 5 .Calor – Esta unidad debe colocarse lejos de fuentes de calor,
como radiadores, estufas u otros elementos que emitan calor
(como amplificadores)
2 6 .pila recargable —La potencia mínina para el cargador es 12V.
65
Page 51

Introducción
Introducción
Su nuevo DVD PORTÁTIL PD-650S
está diseñado para que usted disfrute
de todos los tipos de discos del
mercado. Dicho reproductor es
pequeño en el tamaño y fácil para
llevarse. Usted puede disfrutar de las
películas y los discos cuandoquiera y
dondequiera. Es un equipamiento con
las técnicas avnzadas de Audio y
Vídeo digital, que le proporcionará
disfrutes de audio y vídeo de primera
clase.
Su nuevo reproductor también es
compatible para CD, MP3 y WMA.
Además, el reproductor tiene muchas
otras características únicas, como la
salida S-Vídeo(para una claridad
mayor de imagen ), la gran pantalla
LCD, varios ángulos y varias lenguas,
Control Paterno(Parental Control)
(para evitar que los niños vean
material inadecuado para su edad), y
la compatibilidad con el CD de
imagenes Kodak (Kodak Picture CD)
(con la que podrá ver sus fotos en su
televisor). Esta es una verdadera
máquina multimedia diseñada para
disfrutar el mundo multimedia.
DESEMBALAJE
En primer lugar, haga inventario del contenido de su reproductor
de vídeo DVD Portátil y los accesorios incluidos. Debería
c o n t e n e r :
reproductor de vídeo DVD PORT á T I L 1
Cables de audio 1 serie
Cables de S-Vídeo 1
Cables de audio/ coaxial 1 serie
Pila de Ni-MH 1
Control remoto 1
Adaptador para potencia exterior 1
Cables de potencia 1
e n c e n d e d o r 1
Manual de instrucciones 1
Auricular estereofónico 1
Y adaptador para auricular 1
Si falta algún componente o aparaciera dañado,
comuníque inmediatamente a su distribuidor.
Guarde el material de empaque, es posible que lo
necesite para transportar su reproductor luego.
Aviso: La unidad que se ha reformado sin permisos de
nuestra compañía no está dentro de la garantía.
87
Page 52

Tabla De Contenidos
Guía Para Manejo Rápido
Precauciones de seguridad.......................... 1-6
Introducción ...................................... 7-8
Tabla de Contenidos ................................ 9
Guía para manejo rápido.......................... 10-11
Conexión a un televisor .......................... 12-13
Conexión a un equipo opcional .................... 14-17
Reproducción de discos .......................... 18-21
CD de imágenes Kodak .......................... 22-23
Reproducción de JPEG .......................... 24-25
Reproducción de WMA/MP3 ........................ 26
Encontrar un determinado título, capítulo o pista ........ 27
Reproducción repetida............................ 28-29
Reproducción en el orden deseado ................ 30-31
Ampliar la Zoom sobre una imagen .................. 32
Elegir los subtítulos ................................ 33
Uso de la pantalla .................................. 34
Seleccionar ángulo de enfoque ...................... 35
Ajustar la Protección Paternal(Parental Lock)........ 36-37
Instalar y utilizar la pila recargable ................ 38-39
Personalizar los ajustes de las funciones .......... 40-41
Guía para la resolución de problemas ................ 42
Garantía limitada .............................. 43-44
1. conectar con la potencia exterior
Enchufe la potencia en el agujero en el costado de la
unidad y el enchufe de la pared. No use los equipamientos que no haya designado el vendedor.
2. abrir la tapa del reproductor
El ángulo máximo de abrir la pantella
es 135o. No trate de abrirla más
abierta.
3. pulse el botón de Abrir que está
abajo a la derecha
No pulse este botón durante la
reproducción.
4. insertar el disco de DVD
Por favor apunte el centro del disco con el de la bandeja
de DVD y púlselo suavemente para que coincidan. Luego
cierre la puerta.
5. empujar el interruptor de la potencia hasta
ON(Encedido).
5
9
10
Page 53

Guía Para Manejo Rápido
Conexión A Un Televisor
6. pulsar el botón de reproducir
para empezar la reproducción
Generalmente cuando se inserta el
disco en la bandeja y el repro-ductor
está encendido, la unidad va a
reproducirlo automáticamente.
El reproductor de vídeo DVD
empezará a descodificar el programa del
reproductor inmediatamente.
Si usted quiere pausar la reproducción, pulse el
botón Pausa. En la pantalla se muestra la imagen
del inicio. Si pulsa el mismo botón otra vez, se
volverá a la reproducción desde la enscena donde
ha dejado usted. Si quiere apagar la potencia,
empujar el interruptor de la potencia a la izquierda.
El reproductor va a cortar la corriente automáticamente después de tres minutos del estado de
salvapantallas. Si quiere encenderlo de nuevo,
empujar el interruptor de la potencia hasta OFF
primero y luego hasta ON.
INSTALAR SU REPRODUCTOR
Paso 1 Conecte el cable de audio con AUDIO OUT del
reproductor de DVD.
Paso 2 Conecte el cable amarrillo con VIDEO en un
lado del reproductor.
(Si el televisor tiene salida de S-Vídeo, consulte los
pasos de “Mejor”.)
BUENO
Entrada de vídeo
del televisor
Entrada de audio del
televisor
RojoBlanco
Amarillo
ON/OFF
1211
Page 54

Conexión A Un Televisor
Conexión A Un Equipo Opcional
MEJOR
R o j oBlanco
Salida de audio de Tele
Salida de S de Tele
Conecte el reproductor de vídeo DVD con un cable
de S-vídeo (opcional) si su televisor tiene entrada
de S-vídeo. No conecte el cable amarillo de vídeo si
está usando un cable de S-vídeo.
•Apague y desenchufe todas unidades antes de
conectarlas.
•Asegúrese de que la barra INPUT SELECT en la panel
posterior se deslice a OUT.
CONEXIÓN A AURICULARES
Su reproductor permite que dos personas disfruten
música al mismo tiempo con Y£ adaptador para
auricular.
1.Conecte el adaptador para auricular con su
reproductor y introduzca dos auriculares.
Se puede usar el auricular estereofónico de 3.5mm en su
repreductor.
2.Ajuste el volumen con el botón de volumen.
• Cuide con el vlolumen y evite hacer daño al oído.
1413
Page 55

Conexión A Un Equipo Opcional
Conexión a un Equipo Opcional
Disfrute del sonido Dolby Pro Logic Surround (bueno)
Con sonido Dolby Pro Logic Surround
Disfrute del sonido dinámico y realista del Dolby Pro
Logic Surround, conectando un sistema de Amplificador
y altavoces( altavoces frontales Izquierdo y derecho, un
altavoz central, y uno o dos altavoces traseros.
Ejemplo de
una
conexión:
a entrada
de audio
altavoz
frontal
(izquierda)
salida de
audio
altavoz
central
altavoz
trasera
TV
amaillo
altavoz
frontal
(dereca)
salida de
vídeo
Amplificaador
con sonido
Dolby Pro
Logic Surround
Este producto usa la tecnología de protección de
derechos intelectuales que está protegida por
patentes estadounidenses y otros derechos
intelectuales poseídos por Macrovision Corporation y
otros dueños de derechos.El uso de esta tecnología
de protección de derechos intelectuales tiene que
ser autorizado por Macrovision Corporation, y estar
intentado para familia y otros usos limitados de vista,
a menos que sea autorizado por Macrovision
Corporation. Está prohibido la manipulación reversa
o desmontadura.
Está prohibido legalmente copiar, radiodifundir, representar,
proyectar en público y alquilar el material protegido por
derechos intelectuales sin permisión.
Los discos DVD están protegidos por los derechos
intelectuales, cualquier copia los producirá distorsión.
Fabricado con la licencia de Dolby Labs.
Dolby y el símbolo doble-D son marcas de Dolby
Laboratories. Obras confidenciales sin ser
publicadas
c
1992-1997 Dolby Laboratories, Inc. Todos los
derechos reservados.
“DTS”y“DTS Digital Out”son marcas de
Digital Theater Systems, Inc.
• Ajuste el volumen de su receptor a un nivel de escucha
agradable, para evitar dañs a sus altavoces.
• Cuando conecte y desconecte el reproductor de vídeo
DVD, apague el amplificador para evitar dañr los
altavoces.
1615
Page 56

Conexión A Un Equipo Opcional
Reproducción De Discos
Con Dolby Digital o DTS(mejor )
Dolby Digital/DTS
La codificación Dolby Digital y DTS permite la
distribución del entorno Sonoro en cinco canales de
rango completo, más un sexto canal para el
Subwoofer(altavoz de frecuencias muy bajas). Usted
puede combinar su DVD APEX con su sistema de
entorno sonoro Dolby Digital o DTS. Sólo necesita
conectar su reproductor de DVD a un receptor Dolby
Digital/DTS o a un receptor Dolby Digital Ready con un
decodificador externo.
DVD
con PCM/BITSTREAM
alavoz
frontal
(izquierda)
salida de vídeo
TV
Ajuste "SPDIF OUTPUT" a "SPDIF/PCM" en "General Setup" desde
Setup Menu(Menú de ajuste).
alavoz
frontal
(derecha)
REPRODUCCIÓN BÁSICA
16 18
1. LCD de supervisión
2. Color
(Ajustar LCD color)
3. Brillantez
(Ajustar LCD brillantez)
4. Modo de pantalla
(seleccionar entre 16:9 y 4:3)
5. Título
6. El paso anterior
7. El paso siguiente
8. Menú
1
2
3
4
65 7
10
8
9
11
12
13 14 15
17
9. Hacia atrás
10. Hacia adelante
11. Teclas de dirección
(arriba/abajo/derecho/izquierdo)
12. Introducir
13. Pausa
14. Parar
15. Reproducir
16. Abrir
17. Instalar
18. Ampliar
1817
Page 57

Reproducción De Discos
Reproducción De Discos
CÓMO EMPEZAR LA REPRODUCCIÓN DESDE LA
PA N TA L L A DE MENÚ
1. Pulse TITLE/MENU
(Título/Menú)para entrar en
Título 1
Título 2
el menú.
2. Pulse o los
botones numéricos para
seleccionar el título que
desee.
Título 3
Título 4
3. Pulse el botón
“ENTER/PLAY”.
El reproductor de vídeo DVD
empezará la reproducción
desde el título que haya
seleccionado.
Ateciones:
También puede seleccionar
ENTER 2x 4x
directamente con introducir el
título deseado.
CÓMO HACER UNA PAUSA EN LA REPRODUCCIÓN
(CÓMO REPRODUCIR SIN SONIDO)
Pulse una vez PAUSE/STEP en el
proceso de reproducción y luego
pulse PLAY para volver a reproducir.
Si pulsa PAUSE/STEP
(Pausa/Paso) repetidamente,
PAUSE/STEP
PLAY
la imagen avanzará un fotograma.
Volverá a reproducir normalmente
con PLAY(Reproducir).
No hay sonido durante la
reproducción enmudecida. MP3,
Audio CD y CD no tiene la función
avanzada.
CÓMO DETENER LA REPRODUCCIÓN PULSE
E L BOTÓN ST O P ( PA R A R ) .
Su reproductor deja de reproducir
inmediatamente.
PLAY
STOP
AVANZAR RÁPIDO
RETROCEDER RÁPIDO
REV
FWD
Puede avanzar o retroceder rápido a las
2, 4, 8, 16 o 32 veces que la velocidad
normal.
2x 4x
8x
8x
16x 32x
16x 32x
Pulse el botón REV(retroceso) o FWD(avance)
durante la reproducción
La velocidad de reproducción normal se multiplica por 2.
La velocidad de reproducción cambia cada vez que
pulse el botón REV o FWD.
para restaurar la reprodcción normal.
Pulse el botóm ENTER
PLAY
Ateciones:
Algunos discos no tienen esta posibilidad.
2019
Page 58

Reproducción De Discos
Reproducción De Su Cd De Imágenes Kodak
REPRODUCCIÓN A CÁMARA LENTA
Se puede reproducir los discos a
cámara lenta.
1.Pulse SHIFT(Cambiar) y empece
PLAY
la función de cambio para utilizar
el botón SLOW(A Cámara Lenta).
PANTALLADE TELEVISIÓN
1/2
1/2 la velocidad
normal
1/2
1/4
1/4 la velocidad
normal
1/4
1/8 1/16
1/8 la velocidad
normal
1/16 la velocidad
normal
1/8
1/16
SLOW
SHIFT
2. Pulse el botón“SLOW” (cámara lenta) durante la
reproducción
La velocidad de reproducción disminuye a la mitad, a un
cuarto, a un octavo o a un dieciseisavo de la velocidad
normal cada vez que se pulsa el botón“SLOW”(En la
reproducción hacia atrás a cámara lenta ocurre lo mismo)
para restaurar la reprodcción normal.
Pulse el botóm ENTER
PLAY
• El reproductor de video DVD enmudecerá el sonido durante
el proceso de REV(avancar rápido) , FWD(retroceder rápido)
y a cámara lenta de CD.
• Algunos discos no tienen esta posibilidad.
21
NORMAL
Cuando se inserta un CD de imágenes Kodak, se carga
automáticamente una proyección de diapositivas. Cada una de las
fotos del directorio actual aparecerá consecutivamente, como en
una proyección de diapositivas, y será redimensionada para que
ocupe la mayor parte de la pantalla del televisor. Se dispone de
dieciseis modos de transición para la proyección de diapositivas.
Use la tecla GOTO para escoger: el usuario puede seleccionar
efectos de transición para cada foto en cualquier momento de
la proyección de diapositivas.
MODO 0 (POR DEFECTO)
MODO1:ENJUGAR HACIAARRIBA
MODO2:ENJUGAR HACIAABAJO
MODO3:ENJUGAR A LAIZQUIERDA
MODO4:ENJUGAR ALADERECHA
MODO5:ENJUGAR DIAGONALARRIBA A LA
IZQUIERDA
MODO6:ENJUGAR DIAGONALARRIBA A LA
DERECHA
MODO7:ENJUGAR DIAGONALABAJO A LA
IZQUIERDA
MODO8:ENJUGAR DIAGONALABAJO A LA
DERECHA
MODO9: EXTENDER DESDE CENTRO H
MODO10: EXTENDER DESDE CENTRO V
MODO11: COMPRIMIR ACENTRO H
MODO12: COMPRIMIR ACENTRO V
MODO13: PERSIANA H
MODO14:PERSIANA V
MODO15:AVANZAR DE LADO A CENTRO
RANDOM
GOTO
Pulse el botón PAUSE para mostrar la imagen. Pulse
o para ver la imagen anterior o siguiente. Pulse
ENTER para continuar la reproducción de diapositivas.
22
Page 59

Reproducción De Su Cd De Imágenes Kodak
Reproducir Los Archivos JPEG
ROTACIÓN DE IMAGEN
Hay cuatro modos de transformación “Invertir” “Espejo”
“Izquierda” y “Derecha” Sólo se permiten estas operaciones cuando se ve una foto de modo normal, y se
cancelarán automáticamente cuando se muestre otra
foto. Las teclas de dirección se usan para escoger los
diferentes modos de transformación:
ARRIBA(UP) -INVERTIR/NORMAL
ABAJO(DOWN) -ESPEJO/NORMAL
IZQUIERDA(LEFT) -GIRAR IZQUIERDA
DERECHA(RIGHT) -GIRAR DERECHA
Atenciones: Dicha función no trabaja en el modo ampliado.
REPETIR LA PROYECCI’ON DE DIAPOSITIVAS
Al final de la proyección de diapositivas, cada imagen
queda reducida a tamaño miniatura. Para volver a ver la
proyección de diapositivas, pulse una vez el botón .
Importante: deje que el reproductor termine de dibujar
en pantalla las 12 imágenes, antes de volver a pulsar
para ver las siguientes 12. Cuando esté al principio,
pulse ENTER y la proyección empezará.
MENÚ
La tecla MENU(menú) se usa para mostrar las
imágenes en miniatura desde el modo de parada.
Después de activarse, aparecerán en pantalla un
máximo de 12 imágenes en miniatura. La tecla /
puede usarse para mostrar las 12 imágenes siguientes
y anteriores, alojadas en el directorio actual.
Atenciones: En las imagenes diminutivas puede marcar
MENÚ e introducirlo para tener ayudas.
23
CON EL REPRODUCTOR DE VÍDEO DVD PUEDE VER
LAS FOTOS QUE SE GUARDAN EN UN CD-R. TIENE
QUE GUARDAR EN CD LAS FOTOS EN FORMATO
JPEG. VISITE WWW.JPEG.COM POR LAS INFORMACIONES DETALLADAS, POR FAVOR.
REPRODUCIR LOS ARCHIVOS JPEG
1. Ponga CD en la bandeja de disco.
2. Seleccione una carpeta o guarde una foto en CD.
Después de meter CD, aparecerá el menú en la pantalla.
Pulse UP(Arriba) o DOWN(Abajo) para seleccionar una
carpeta. Luego pulse ENTER/PLAY(Entra/Reproducir)
para ver el contenido(como lo que se muestra en la
columna derecha del esquema).
00:00 00:00
001\015
GIRL
AAAAAA
BBBBBB
CCCCCC
24
Page 60

REPRODUCIR LOS ARCHIVOS JPEG
Operación de WMA/MP3
3. Empezar la reproducción
Seleccione una imagen con UP o DOWN y pulse
ENTER/PLAY para verla.
La imagen se refrescará. Su reproductor tiene varios modos
de transición, como enjugar hacia arriba(modo devalorpok
defecto), enjugar a la izquierda, enjugar a la derecha, enjugar
diagonal arriba a la izquierda, enjugar diagonal arriba a la
derecha, extender desde centro, comprimir a centro, persiana
etc. Use el botón GOTO para cambiar los modos de
transición.
4. ROTACIÓN DE IMAGEN
Al refrescar puede rotar las imagenes con las teclas de
direción:
Pulse UP(Arriba) para rotar las imagenes.
Pulse DOWN(Abajo) para rotar las imagenes.
Pulse LEFT(Izquierda) para que las imagenes giren izquierda.
Puse RIGHT(Derecha) para que las imagines giren derecha.
5. ZOOM
Esta opción le permite ver una imagen al 50%, 75%, 125%,
150%, 175%, 200% en varios incrementos de tamaño. Pulse
el botón ZOOM. Un mensaje sobre la pantalla ZOOM on le
confirmará su selección. Use las teclas y para controlar
cuánto debe acercarse o alejarse el zoom. Pulse las teclas de
dirección para mover la imagen en cualquier dirección. Con el
ZOOM OFF, la imagen se reescala para ocupar la mayor parte
de la pantalla de su televisor.
6. MENÚ
En la reproducción, pulse MENU(Menú) para entrar en el
menú de las imagenes diminutivas. Si quiere ver los archivos
JPEG, pulse MENU otra vez y volverá a la carpeta de JPEG.
CREAR SU PROPIO CD
Guarde las fotos en formato JPEG con su ordenador y
grábelas en un disco CD. Así podrás ver las fotos en el
televisor.
Qué es WMA?
WMA hace referencia a un nuevo formato de archivos de
música que se pueden conseguir de Microsoft y reproducir a
través de web sites de WMA. Su formato de compresión le
permite grabar en el ordenador la música de 22 horas en un
CD-R y reproducirla con este reproductor de vídeo DVD.
APEX Digital Inc. es la primer compañía que ofrece la función
de reproducción de discos CD-R con archivos de WMA en un
reproductor doméstico de vídeo DVD.
REPRODUCIENDO UN FORMATO MP3
1. Inserte un CD MP3, el reproductor de vídeo DVD iniciará el
disco cuando la bandeja se cierre y se mostrará MP3
MENU(Menú) en la pantalla.
2. Pulse UP/DOWN para seleccionar y marcar los archivos
MP3(canciones).
3. Pulse ENTER para reproducir los archivos MP3.
00:00 00:00
001\016
MP3
mp3
AAAAAA
BBBBBB
CCCCCC
Atenciones: La reproducción de los archivos WMA es
igual con la de MP3.
2625
Page 61

Seleccionar Un Determinado Título, Capítulo O Pista
Reproducción repetida
LOS DISCOS DVD SE SUELEN DIVIDIR EN TÍTULOS.
LOS TÍTULOS SE SUBDIVIDEN EN CAPÍTULOS.
ADEMÁS, LOS CDS Y DE MP3 SE DIVIDEN EN
PISTAS GENERALMENTE.
Capítlo 1 Capítlo 2 Capítlo 1 Capítlo 2 Capítlo 3
Título 1
Discos de DVD
Título 2
BUSCAR UN TÍTULO USANDO ELTITLE MENU(MENÚ DE TÍTULOS)
Puede buscar un determinado título usando la función “title menu” (menú de títulos), si el
disco de vídeo DVD contiene un menú de títulos.
1. Pulse el botón TITLE(Título).
En LCD O la pantalla del televisor, aparecerá el
menú de títulos.
PLAY
2. Pulse el botón para seleccionar el
título que desee
PREVIOUS
NEXT
También puede buscar directamente un título
determinado, pulsando el número que tenga
SHIFT
asignado en los botones numéricos.
3. Pulse el botón“PLAY”
Esto hará que el reproductor de vídeo DVD empiece la reproducción desde el
capítulo 1 del título seleccionado.
También puede usar el botón de salto para seleccionar los
títulos o las pistas:
Pulse repetidamente o para seleccionar el objeto.
ESTE REPRODUCTOR DE VÍDEO DVD LE PERMITE
REPETIR LA REPRODUCCIÓN DE UN DETERMINADO
TÍTULO, CAPÍTULO, PISTA O SECCIÓN. (REPETICIÓN
DE TÍTULO, REPETICIÓN DE CAPÍTULO/PISTA,
REPETICIÓN A-B).
REPETIR UN TÍTULO, CAPÍTULO O PISTA
En al reproducción pulse el botón REPEAT(Repetir)
(para instalar el transición.)
Cada vez que usted pulsa el botón REPEAT, cambia el
modo de repetición.
CHAPTER
TITLE
ALL
Repetir el mismo capítulo
Repetir el mismo título
Repetir todo el disco
Cancelar la reproducción repetida
REPETIR
CAMBIAR
27 28
Page 62

Reproducción Repetida
Reproducir En El Orden Deseado
REPETIR UNA SECCIÓN DETERMINADA
1. Pulse el botón A---B(Instalar la transición) al
inicio de la sección que desea repetir (Punto A) .
2. Pulse otra vez el botón A-B al final de la sección.
(punto B)
El reproductor de vídeo DVD volverá automáticamente
al punto A y empezará a repetir la sección
seleccionada.(A-B)
3. Pulse el botón A-B para cancelar la función de
Reproducción repetida de A-B.
El reproductor de vídeo DVD continuará la reproducción
normal.
A
AB
Instalar punto A
Instalar punto B
Volver a la reproducción normal
A-B
CAMBIAR
CÓMO ESTABLECER TÍTULOS, CAPÍTULOS O
PISTAS EN EL ORDEN DESEADO
1. Pulse el botón PROGRAM(Programa).
Aparecerá en la pantalla PROGRAM MENU(Menú de
programa).
PROGRAM:TT(01)/CH ( - - )
1 TT: CH: 6 TT: CH:
2 TT: CH: 7 TT: CH:
3 TT: CH: 8 TT: CH:
4 TT: CH: 9 TT: CH:
5 TT: CH: 10 TT: CH:
EXIT NEXT
2. Con los botones numéricos, seleccione el número
del capítulo/título que usted desea programar.
El número del capítulo/título que usted ha programado se
introducirán en la columna del programa.
PROGRAM:TT(01)/CH ( - - )
1 TT: 01 CH: 01 6 TT: CH:
2 TT: CH: 7 TT: CH:
3 TT: CH: 8 TT: CH:
4 TT: CH: 9 TT: CH:
5 TT: CH: 10 TT: CH:
EXIT START NEXT
3029
Page 63

Reproducir En El Orden Deseado
Ampliar La Zoom Sobre Una Imagen
3. Marque el botón START(Empezar) y pulse
ENTER(Entrar) para reproducir en el orden deseado.
4. Si quiere cancelar el programa, mueva el cursor
hasta STOP(Parar) y pulse ENTER.
PROGRAM:TT(01)/CH ( - - )
1 TT: CH: 6 TT: CH:
2 TT: CH: 7 TT: CH:
3 TT: CH: 8 TT: CH:
4 TT: CH: 9 TT: CH:
5 TT: CH: 10 TT: CH:
EXIT STOP NEXT
AMPLIAR LA ZOOM SOBRE UNA IMAGEN
Este reproductor de vídeo DVD le permite hacer zoom
sobre una imagen y cambiar el punto de
zoom.
Pulse el botón ZOOM(Ampliar) en la
reprodución normal o al reproducir a
cámara lenta.(Antes de utilizar el
botón ZOOM, usted tiene que pulsar
el botón SHIFT para realizar su
ZOOM
función.)
El reproductor de vídeo DVD aumenta el tamaño de la
imagen desde el centro.
Si pulsa durante una reproducción con zoom,
cambiará el punto de zoom.
2x 3x 4x
La reproducción
normal
Si quiere dejar de ampliar la zoom sobre una
imagen, pulse el botón ZOOM otra vez por favor.
3231
Page 64

Seleccionar Los Subtítulos
Uso De La Pantalla
CÓMO MOSTRAR LOS SUBTÍTULOS
Usted tiene la posibilidad de escoger entre los
subtítulos que se incluyen en el disco de vídeo DVD.
Pulse el botón SUBTITLE
durante la reproducción.
SUBTÍTULO 1
SUBTÍTULO 3
SUBTÍTULOS DESACTIV A D O
1/03
2/03SUBTÍTULO 2
3/03
SUB-T
Para desactivar los subtítulos
Pulse el botón SUBTITLE
(Subtítulo) durante la
reproducción hasta que
desaparezca el subtítulo.
SUBTÍTULOS DESACTIVA D O
EL LECTOR DE VÍDEO DVD LE PERMITE VER EL
ESTADO OPERATIVO Y LA INFORMACIÓN DEL
DISCO EN LA PANTALLADE SU TELEVISOR
COMPROBAR ELE S TADO OPERAT I V O
Con esta función puede ver en su televisor lo siguiente:
- Título actual
- Número de pista
- Tiempo absoluto(playing time)
Título actual
Capítulo actual
Tiempo absoluto del título
TT 01/12 CH 006/039 0:02:20
Tiempo restado del título
TT 01/12 CH 006/039 0:18:50
Tiempo abusoluto del capítulo
TT 01/12 CH 006/039 0:03:50
Tiempo restado del capítulo
TT 01/12 CH 006/039 0:10:40
DESACTIVAR LA
PRESENTACIÓN
Tiempo absoluto
Todos los capítulos
Todos los títulos
muestra
Pulse el botón DISPLAY
(visualizar) durante la
reproducción para abrir
“DISPLAY”.
Púlselo otra vez y cierre
“DISPLAY”.
3433
Page 65

Seleccionar ÁNgolos De
Enfoque/Idiomas/Ajustes De A u d i o
Ajustar la Protección Paterna ( Parental Lock)
ESTE REPRODUCTOR DE VÍDEO DVD LE PERMITE SELECCIONAR DIFERENTES ÁNGULOS DE ENFOQUE E IDIOMAS.
ÁNGULO1 ÁNGULO2
Selección del ángulo de enfoque
ÁNGULO
CÓMO CAMBIAR EL ÁNGULO DE ENFOQUE
Si el el disco de vídeo DVD posibilita escenas grabadas
con varios ángulos de enfoque, puede cambiar sus
ángulos de enfoque
Pulse el botón ANGLE cuando se reproduce una
escena grabada con varios ángulos de enfoque.
• Puede pulsar el botón ANGLE(Ángulo) sólo cuando aparece
el icono del indicador de ángulo en la pantalla.
• Cada vez que pulse el botón ANGLE, cambiará el ángulo de
enfoque.
2/2
1/2
• La función de ángulo de enfoque no funcionará en discos
de vídeo DVD que no posibiliten esta opción.
SÓLO SE PUEDE USAR LA FUNCIÓN DE PROTECCIÓN
PATERNA(PARENTAL LOCK) CON DISCOS DE VÍDEO
DVD QUE ESTÉN EQUIPADOS CON ESTA POSIBILIDAD.
A J U S TAR LAPROTECCIÓN PAT E R N A ( PA R E N TA L L O C K )
Los discos de vídeo DVD equipados con la función de
protección paterna(parental lock) están clasificados según su
contenido. Los contenidos que permite un determinado nivel
de protección paterna(parental lock) y la forma en que se
puede controlar un disco de vídeo DVD pueden variar de un
disco a otro. Por ejemplo, si el disco lo permite, usted puede
extraer las escenas violentas que no sean apropiadas para
niños y reemplazarlas con escenas
más adecuadas, o bien bloquear la
SETUP
reproducción de todo el disco.
1. Pulse STOP (parar)
DIRECTION
STOP
durante la reproducción.
2. Pulse SETUP(configurar).
El SETUP MENÚ
aparece en la
pantalla del
televisor.
3. Seleccione
preferences,
pulse ENTER.
-- Preference Page --
Audio ENG
Subtitle ENG
Disc Menu ENG
Parental
Password
Default
Go To Preference Page
3635
Page 66

Ajustar la Protección Paterna ( Parental Lock)
Instalar YUtilizar La Pila Recargable
4. Selecciome PARENTAL, pulse ENTER
5. Seleccione la clasificación,
pulse ENTER
1 KID
SAFE
2 G
3 PG
4 PG 13
5 PGR
6 R
7 NC17
8 ADULT
OFF
SETUP
DIRECTION
STOP
6. Intraduzca su contraseña, luego pulse ENTER. La
contraseña por defecto es 3308
Password
OK
7. Pulse SETUP para salir del menú configuración,
pulse ENTER para empezar.
P A R ACAMBIAR SU CONTRASEÑA:
1.Siga el paso 4 para seleccionar el cambio de
contraseña
2.Introduzca la contraseña vieja
3.Introduzca la contraseña nueva
4.Vuelva a introducirla para confirmar su nueva
contraseña
5.Pulse ENTER(introducer)
6.Pulse SETUP(configurar)
INSTALAR Y QUITAR LAS PILAS
1. Asegure que ha apagado y
1
desenchufado la unidad.
2. Inserte el enchufe en el lado trasero de
pila en la parte correspondiente que está
dedajo de la máquina como el dibujo 1;
déla vuelta como el dibujo 2 hasta la
2
posición correcta.
Quitar la pila
1. Asegure que ha apagado y
desenchufado la unidad.
3
2. Pulse el botón de “sujetar pila” y
quítelas como el dibujo 3.
USO Y REPARACIÓN
EL REPRODUCTOR SE EQUIPA CON LA PILA DE NI-MH
RECARGABLES Y EFICIENTES. LA P I L A T I E N E
CAPACIDADES MUY GRANDES Y ADEMÁS, DURA MUCHO
TIEMPO. NO ES NECESARIO CARGAR LA PILA DESPUÉS
DE AGOTARLA.
Enchufe AC(el transfornador
Indicador de cargador
de corriente alterna) en la
pila.
Asegure que cargue la pila
abundantemente antes de
usarla por la primera vez.
3837
Transfornador de
corriene alterna/enchufe
de cargador
Page 67

Instalar Y Utilizar La Pila Recargable
Personalizar Los Ajustes De Las Funciones
Se puede cargar la pila 300 veces con la máquina. El proceso
de cargar dura aproximadamente cuatro horas y media. Cuando
el indicador rojo se apaga y el indicador verde se encende,
continue cargando media hora más. La pila bien cargada dura 3
horas aproximadamente. La cantidad de electricidad
consumidad depende del manejo de la unidad, como el
brillantez de la pantalla, el volumen ect.
Cuando se agotan la pila, por favor cárguela a tiempo para
alargar la vida de pila.
No cargue la pila cargada otra vez.
No deje la pila en circuitocorto. No las coloque en los
receptáculos metales ni en las condiciones húmedas. Es
recommendable que las coloque en el recipiente cerrado. La
temperatura aducuada es entre 10 y 35 grados.
ESTE REPRODUCCIÓN DE VÍDEO DVD LE PERMITE PERSONALIZAR SU FUNCIONAMIENTO SEGÚN SUS PREFERENCIAS
P E R S O N A L E S .
-- General Setup Page --
TV Display Wide
Angle Mark On
OSD Lang ENG
SPDIF Output RAW
Captions Off
Screen Saver On
Go To General Setup Page
1. Pulse
SETUP(configurar)
2. Pulse para
seleccionar la
categoría(marcar),
luego pulse ENTER
3. Pulse
SETUP(Configurar)
para salir del menú.
/ / /
MENÚ DE CONFIGURACIÓN
Normal/PS
Normal/LB
Wide
On
Off
English
中文
French
Spanish
SPDIF Off
SPDIF/RAW
SPDIF/PCM
On
Off
-- Speaker Setup Page --
Downmix
Go To Speaker Setup Page
LT/RT
4039
Stereo
Page 68

Personalizar Los Ajustes De Las Funciones
Guía para la resolución de problemas
-- Dolby Digital Setup --
Dual Mono
Dynamic
Go To Dolby Digital Setup
-- Dolby Digital Setup --
Sharpness High
Contrast 00
Go To Video Setup Page
-- Preference Page --
Audio ENG
Subtitle* E N G
Disc Menu ENG
Parental
Password
Default
Go To Preference Page
Atenciones: en el subtítulo hay la selección de
“Cerrar”, sin embargo, en el “Audio” y el “Menú del
disco” no existe esa selección.
Stereo
L-Mono
R-Mono
MIX-Mono
FULL
3 / 4
1 / 2
1 / 4
OFF
High
Medium
Low
Contrast 0
English
French
Spanish
Chinese
Japanese
Korean
Russian
Thai
Off
1 KID SAFE
2 G
3 PG
4 PG 13
5 PGR
6 R
7 NC17
8 ADULT
9 OFF
Change
RESET
Síntoma
No se enciende
No hay imagen
/sonido
La imagen rotante
de color
balnco/negro
La imagen en
blanco y negro
El reproductor de
vídeo DVD no
empieza la
reproducción
4241
Solución
• Asegúrese de que el cable está enchufado a
la toma de corriente.
• Revise el botón Entrada/Salida y asegúrese
que en el modo de reproducir es Salida, y en
el modo de AV es Entrada.
• Si se lo conecta con el televisor, revise la
conexión entre ellos: el cable de audio, el de
vídeo o el de S-vídeo.
• Asegúrese que está en NTSC/PAL,ese
botón está en la panel posterior.
• Adjuste el hold vertical en su televisor.
• Conector S dañado(patilla torcida)
• Coloque un disco que se puede
reproducir(revise el tipo y color del disco).
• Coloque bien el disco con el lado de
reprodución por debajo en la bandeja.
• Limpie el disco.
• Cancele la función de protección paterna o
cambie el nivel de protección paterna(La
contraseña por defecto es 3308).
• Reinicie ese reproductor portátil de Vídeo
DVD.
Page 69

Garantía limitada
Limited Warranty
REPRODUCTORES
MANO DE OBRA: 90DÍAS
RECAMBIO DE PIEZA: UN AÑO
QUIÉN CUBRE?
Para recibir el servicio de garantía, es necesaria una prueba de
compra, como el recibo de la venta con la fecha de compra a un
distribuidor de Apex Digital Inc. en Norteamñerica. Guarde la caja y
el envoltorio original, por si fuera necesario enviarnos la unidad.
Usted necesitará pagar por enviarnos la unidad y los portes para
devolversela son de cuenta de APEX.
QUÉ CUBRE?
Garantía de reparación desde la fecha de compra: un (1) año para
recambio de piezas; 90 días de mano de obra
Si no tiene usted ninguna prueba de compra, su unidad se
considerará“fuera del período de garantía” y se le cobrará la tarifa
normal.
QUÉ queda excluido?
La garantía no cubre:
- Mano de obra para la instalación y configuración del producto, ajuste
de controles personalizados en el producto, e instalación o reparación
de sistemas de antenas que no vengan con el producto.
- Reparación del producto o recambio de piezas debido a uso inadecuado, accidente, reparación no autorizada u otra causa que esté
fuera del control de Apex Digital Inc.
- Cualquier producto que necesite modificarse o adaptarse para
que sea posible usarlo en cualquier país que no sea aquél para
el cual fue diseñado,fabricado, sancionado o autorizado, o la
reparación de productos dañados a causa de estas
modificaciones.
- Daños incidentales o consecuentes que resulten del producto.
(Algunos estados no permiten los daños incidentales o
consecuentes, por lo que la exclusión mencionada puede no
ser de aplicación en su caso. Esto incluye, entre otras cosas,
material pregrabado, tanto si tiene derechos de copia
reservados como si no)
- Envie a la fábrica autorizada de reparación dentro del período
de garantía.
ANTES DE SOLICITAR NUESTROS SERVICIOS:
Revise la “Guía de resolución de problemas” en su manual de
usuario y visite nuestro sitio web www.apexdigitalinc.com para
buscar las últimas actualizaciones de la sección FAQ.
DÓNDE ESTÁ EL SERVICIO TÉCNICO?
You may purchase a remote control ($33 U.S.), owners
manual ($10), and/ or firmware upgrade, if applicable to your
player ($10). Specify model number, name & address with a
cashiers check made out to Apex Digital.
Le rogamos que se pomga
en contacto con el servicio
de atención al cliente:
Esta garantía le da derechos legales concretos, pero puede
tener otros derechos que varíen de un estado/provincia a otro.
APEX DIGITAL, INC.
2235E Francis St.
Ontario.CA91761
De lunes a viernes, 8:30
mañanas-5:00 tardes California
4443
 Loading...