

Page 1
DRX-9200 Quick Connection Guide
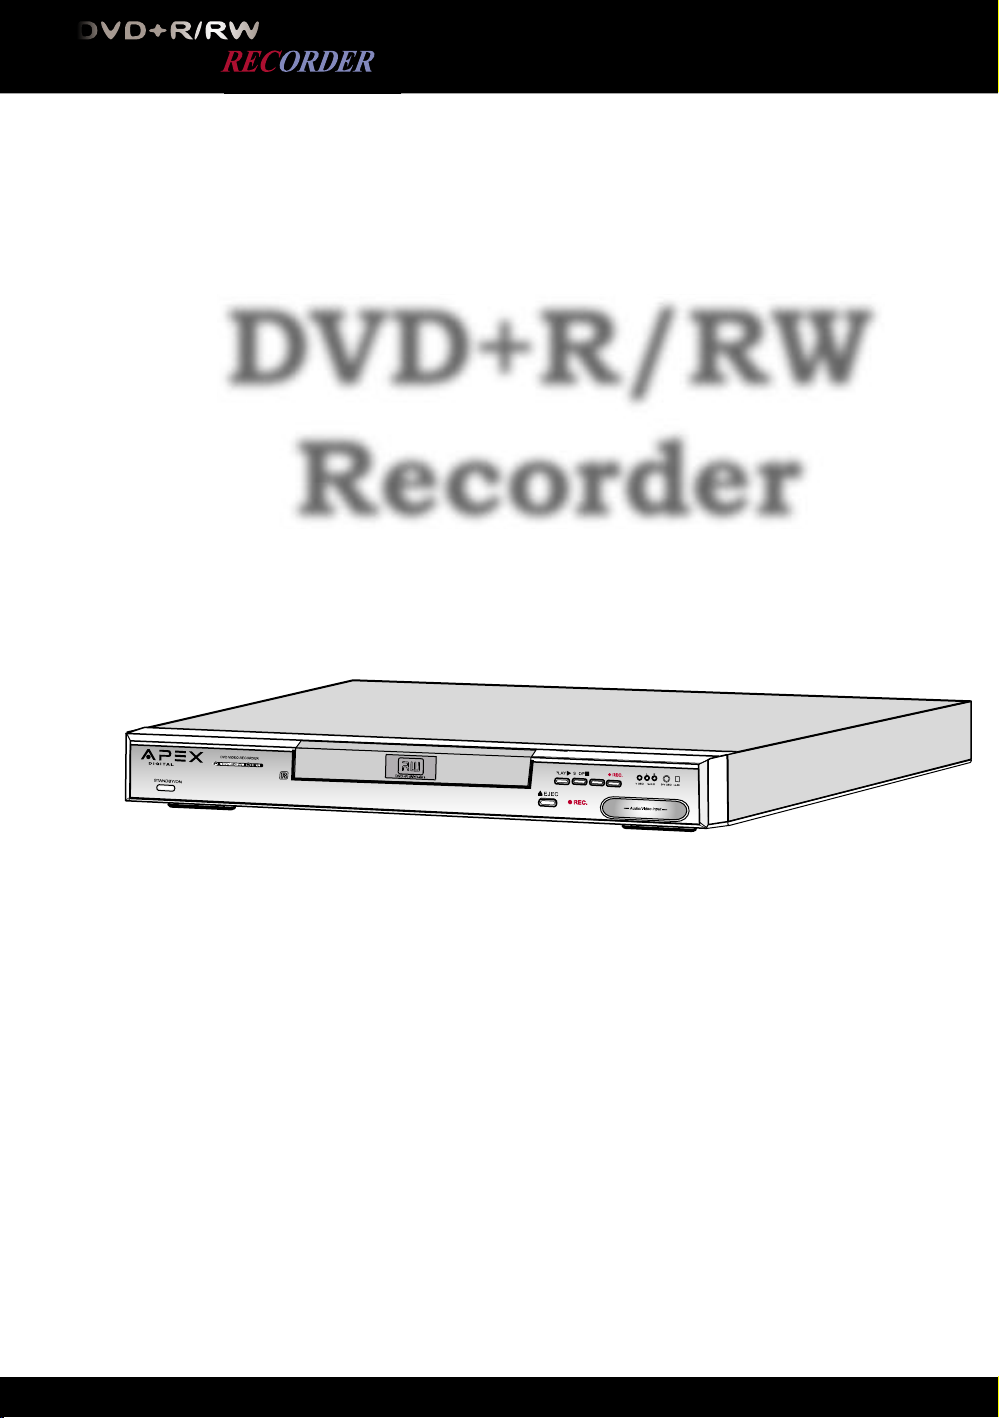
DVD+R/RW
Recorder
82-178-00060
I
N
P
U
T
Page 2
DVD+R/RW RECORDER QUICK GUIDE
2
DVD+R/RW RECORDER QUICK GUIDE
3
Optional
Audio
Con nec tion
Quick
Re cord ing
Guide
Connections
2
Functional
Overview
1
5
4
3
FAQs
= This DVD Recorder/Player incorporates both digital and analog audio output(s). For a superior home entertainment
experience and if your equipment supports it, be sure to use the digital audio and component video outputs. (Please
refer to the enclosed Quick Connection Guide)
TV OUT jack
Transfers Antenna/
Cable signal to
your TV
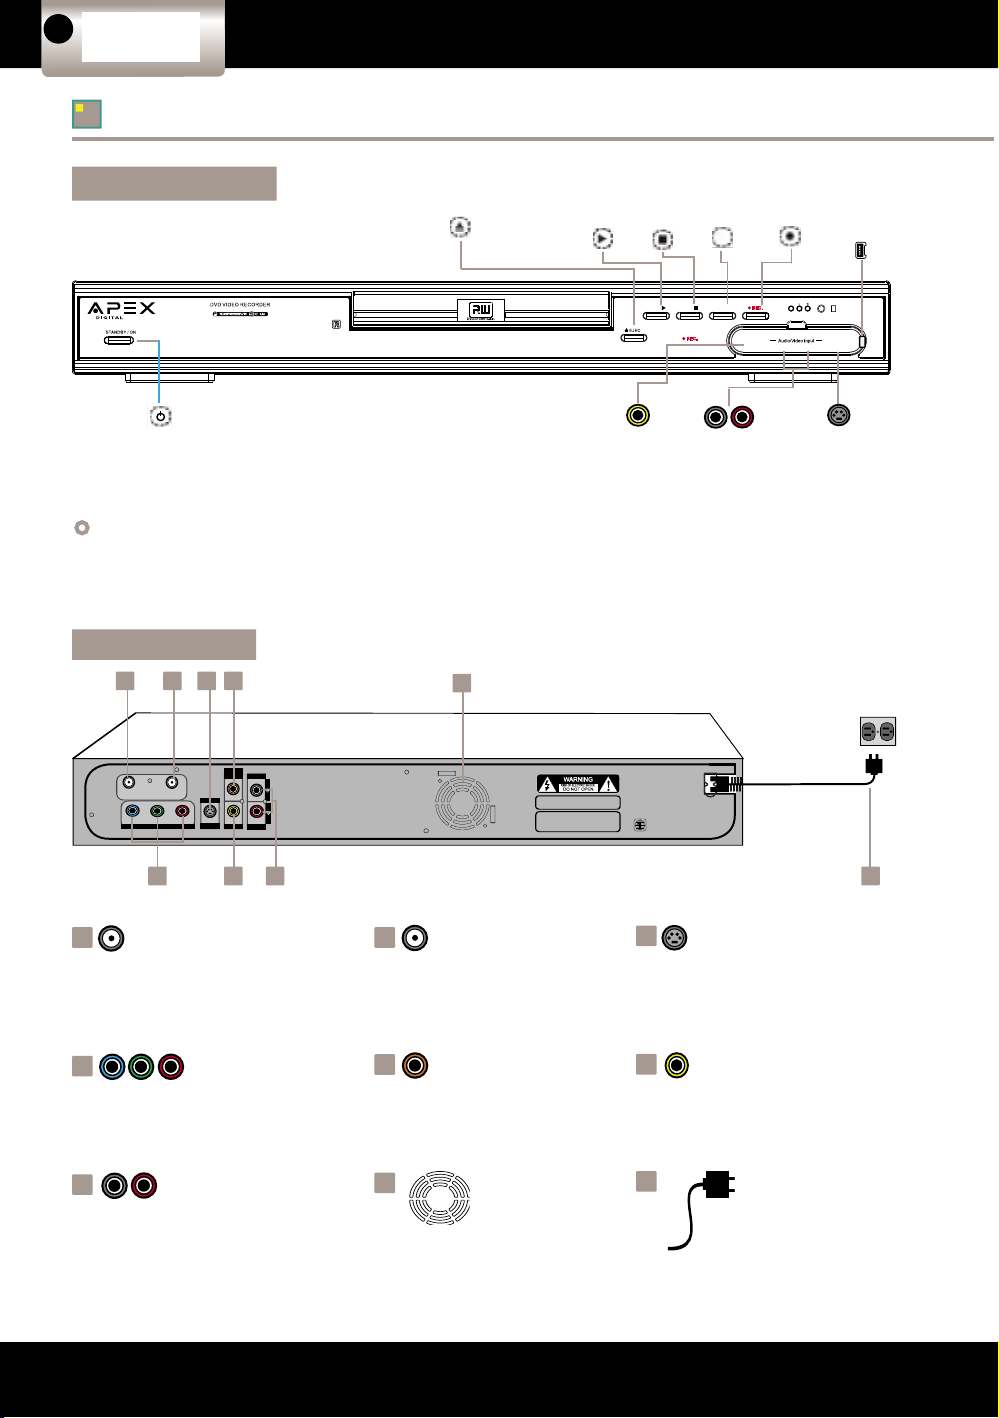
1
ANTENNA IN jack
Input connection for
Antenna/Cable connector
2
3
4
5
6
7
8
Analog Audio-Out jack
Analog audio output
L R
Composite Video-Out jack
Composite video output
Component VideoOut jacks
YUV Component
video output
Pr
Y Pb
S-Video jack
Separated video Y, C
output
9
Digital Audio-Out
Coaxial jack
Digital Coaxial audio
output
Cooling Fan
AC Power cord
Note:
By connecting the RF coaxial cable to ANTENNA IN/TV OUT
jacks of this DVD Re cord er, you can still watch your TV
even if
this DVD Recorder is off.
INPUTPLAY
STOP
VIDEO AUDIO S-VIDEO I-LINK
STANDBY/ON
button
EJECT button
Composite VideoIn S-Video jack
Separated video input
Composite Video-In
jack
Composite video input
Analog Audio-
In jack
Analog audio input
L R
INPUT
button
PLAY
button
STOP
button
RECORD
button
i-Link
In
jack
i-Link input
Back Panel
TV
OUT
ANTENNA
IN
Pb
Y
Pr
P-SCAN OUTPUT
S-VIDEO
OUTPUT
OUTPUT
COAXIAL
VIDEO OUT
AUDIO
Manufactured under license from Dolby Laboratories.
“Dolby”,”Dolby digital”, and the double-D symbol are
trademarks of Dolby Laboratories. Con dential
Unpublished Works.
© 1992-1997 Dolby Laboratories, Inc.
All rights reserved.
Apparatus Claims of U.S. Patent Nos.
4,631,603;4,577,216;4819,098 and 4,907,093
licensed for limited viewing uses only.
31 2
9
5
8
764
OUTPUT
Front Panel
Functional Overview
Page 3
DVD+R/RW RECORDER QUICK GUIDE
3
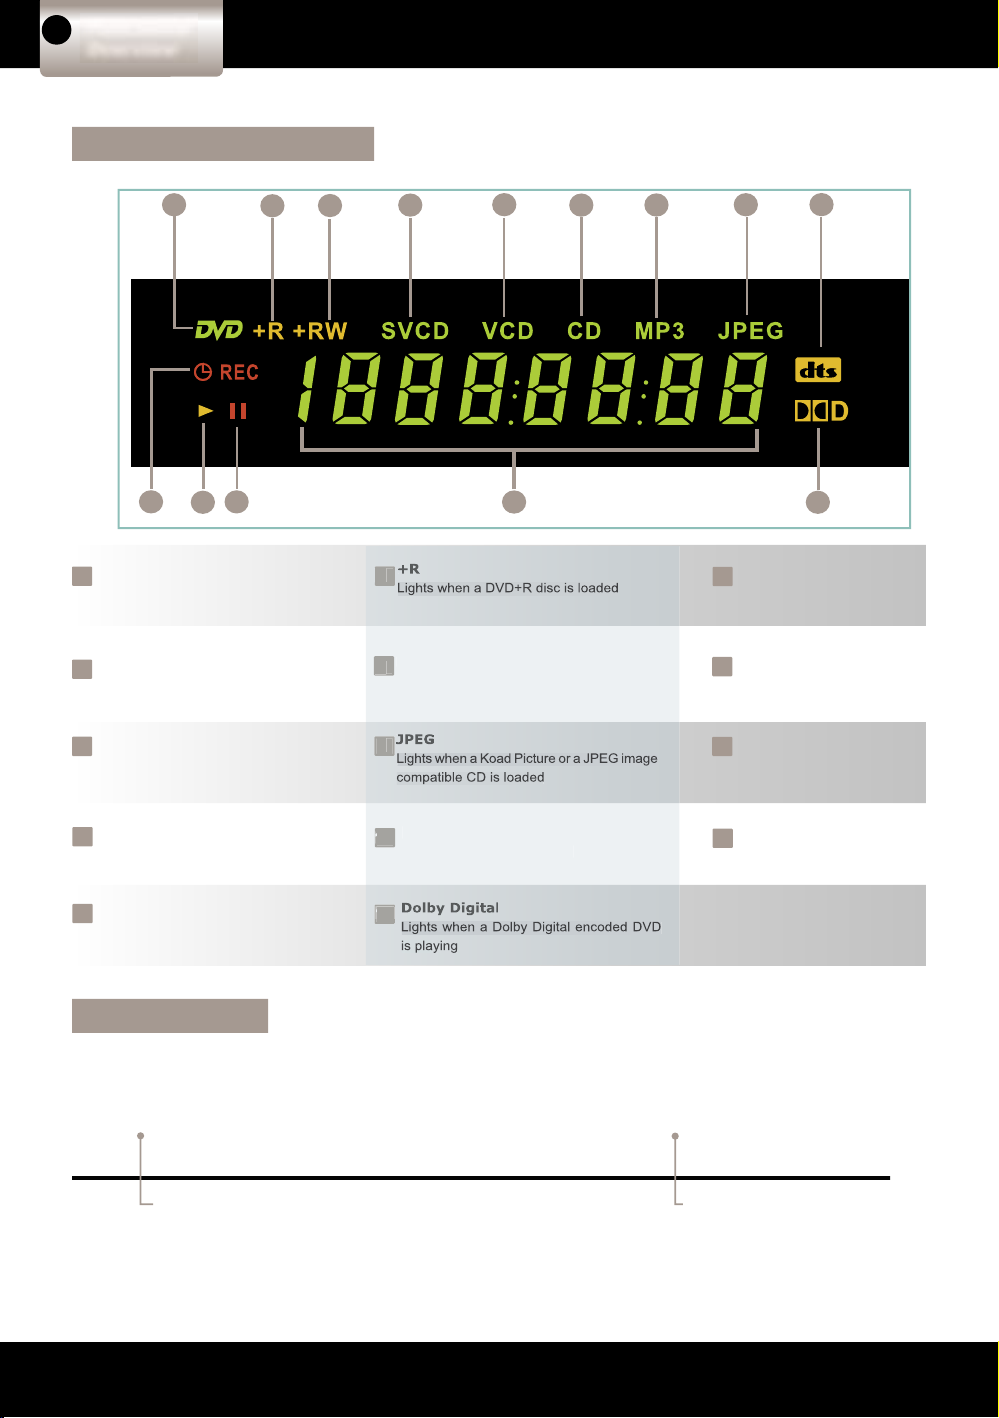
DVD
Lights when a DVD, DVD+R or DVD+RW
disc is loaded
+RW
Lights when a DVD+RW disc
is loaded
4
SVCD
Lights when a SVCD disc is loaded
6
CD
Lights when an audio CD disc
is loaded
7
MP3
Lights when a MP3 disc is loaded
9
dts indicator
Lights when a dts encoded
DVD is playing
10
Schedule REC indicator
Lights when schedule recording is set
12
Pause indicator
Lights when a disc is paused
13
Counter display
Displays the playback time, remaining time,
etc.
3
1
1
9
8
7
6
5
4
3
2
14
13
12
11
10
Front Panel Display
LED Indicator
STANDBY: Red light
ON: Green light
Red light indicateds re-
cording is in progress
Optional
Audio
Con nec tion
3
Quick
Re cord ing
Guide
Connections
2
Functional
Overview
1
5
4
3
FAQs
Page 4

DVD+R/RW RECORDER QUICK GUIDE
4
DVD+R/RW RECORDER QUICK GUIDE
5
Remote Control
36
33
30
27
21
24
15
12
18
9
6
3
REPEAT (1-ALL)
button
GOTO button
MUTE button
F.BWD button
EDIT button
Cursor <(Left),
>(Right), ^(Up),
v(Down) buttons
PROGRAM button
PBC button
EJECT button
NEXT button
INPUT button
I/P button
8
2
29
20
35
32
26
23
14
17
11
5
PAUSE button
CM SKIP button
(Commerical Skip)
REPEAT (A-B)
button
+VOLUME- button
F.FWD button
Play/Sel. button
Number buttons
AUDIO button
ZOOM button
QUALITY button
PREV. button
SETUP buttonPOWER button
MENU button
DISPLAY button
STOP button
SLOW button
CLEAR button
DVD/SOURCE
button
RETURN button
-CHANNEL+ button
SUBTITLE button
RECORD button
ANGLE button
TITLE button
37
31
13
10
25
28
34
22
7
19
16
4
1
Remote Control Operation Range
Point the remote control unit approximately no more than 20 Feet from the remote sensor and approximately within 60° from
the front of the unit.
= The operating distance may vary dependant on the brightness in the room.
NOTE:
= Do not point bright lights at the remote control signal sensor.
= Do not place objects between the remote control unit and the remote control signal sensor.
= Do not use this remote control unit while operating other units at the same time.
Remote
sensor
30°
1
2
3
4
5
6
7
8
9
10
11
12
13
14
15
16
17
36
18
19
20
21
22
25
26
27
24
28
32
33
34
35
37
30
31
29
23
F
I/P button: This button switches the unit’s output from Interlace
NTSC to Progressive. Please see the Troubleshooting section in
the User’s Manual for more information.
Optional
Audio
Con nec tion
Quick
Re cord ing
Guide
Connections
2
Functional
Overview
1
5
4
3
FAQs
Page 5

DVD+R/RW RECORDER QUICK GUIDE
5
= Turn off all devices before you begin.
= Read these instructions thoroughly before attempting to connect any device.
= When connecting, match the colors from the cable ends, to the colors provided on the equipment’s rear panel.
Connections
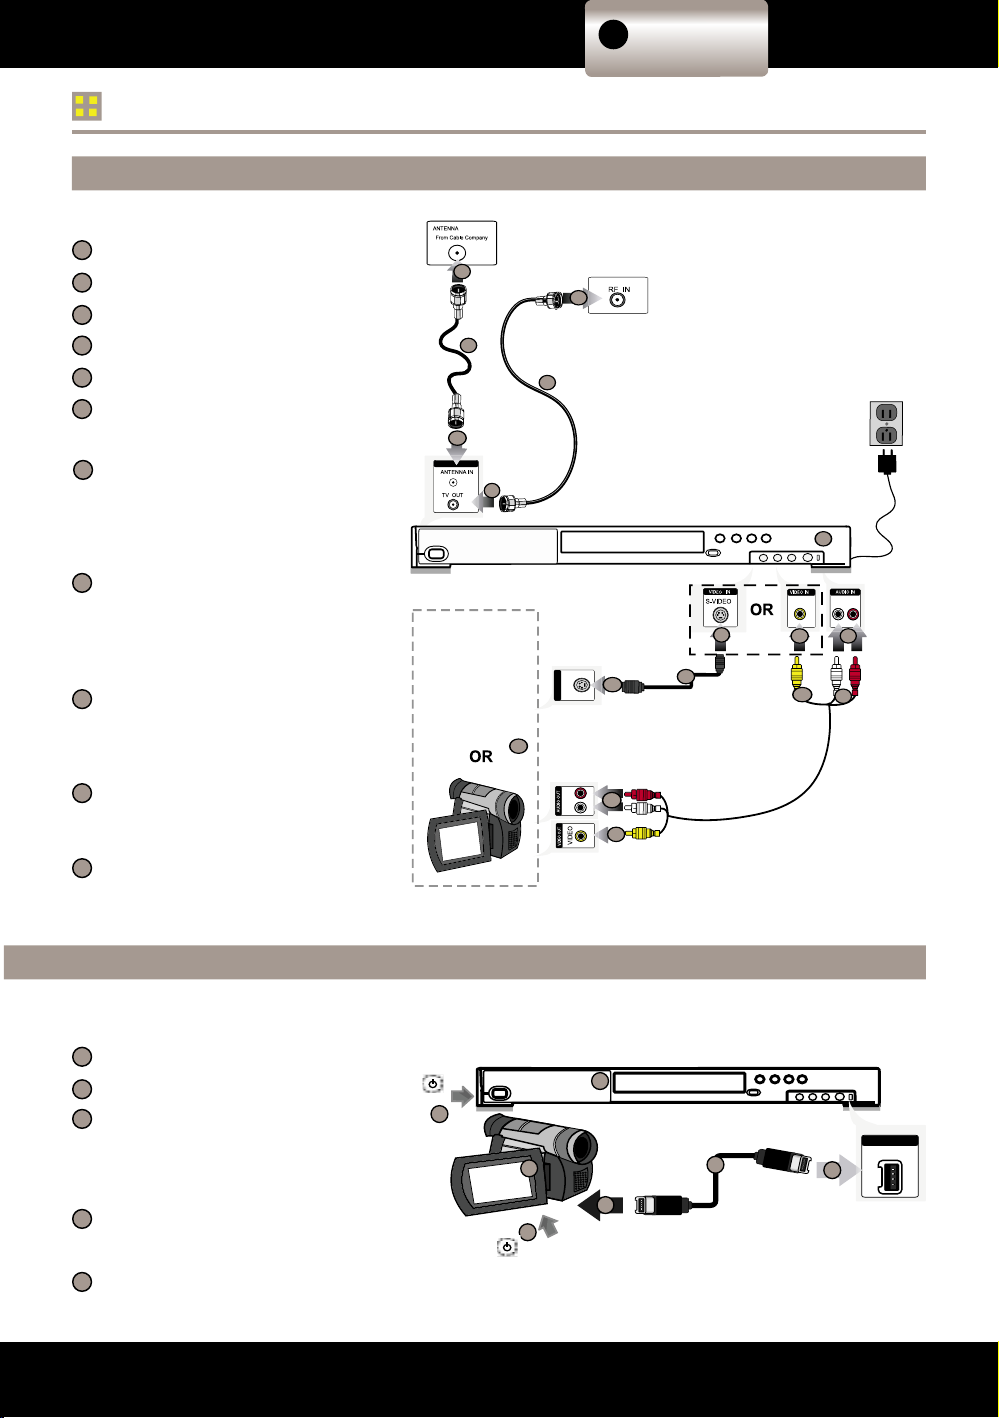
1. Turn off the TV set and the DVD Recorder before connecting. From the rear panel on your TV, connect one end of
the audio/video cords (red, white, yellow) to the DVD Recorder and the other end to the input connector of the TV
set.
2. Connect an S-video cable (optional) to the DVD Recorder if your TV is equipped with S-video input.
F
When using the S-video cable there is no need to connect the yellow video cable or YUV Component Video
cable.
3. Connect Component Video YUV cable (optional) to the DVD Recorder if your TV has newer Component Video
inputs.
F
When using the YUV Component Video cable there is no need to connect the yellow video cable or S-video
cable.
Note: If your ED/HD TV has Progressive Scan, connect this DVD Recorder‘s P-SCAN Y Pb Pr jacks to your TV‘s
Pro gres si ve Scan In jacks. Toggle I/P key on remote control to set video output to progressive.
4. Connect the Recorder‘s power cord to the power outlet.
The TV set (optional)
The DVD Recorder
RF coaxial
To TV OUT connector
To RF IN connector
to ANTENNA IN connector
To Antenna or cable TV
Component Cable (optional)
To Component input connector
Video (yellow) / Audio (red, white)
cord
To audio input connectors
(red,white)
To video input connector (yellow)
S-video cord (optional)
To S-video input connector
AC power cord
To power outlet
Connecting to a Stereo TV Set
10
9
8
7
6
5
4
3
2
1
11
12
13
15
16
ANTENNA
IN
ANTENNA
or CABLE TV
1
9
2
3
10
15
4
16
3
6
5
7
8
12 11 14
13
14
Optional
Audio
Con nec tion
Quick
Re cord ing
Guide
2
1
5
4
3
FAQs
Connections
Functional
Overview
Page 6

DVD+R/RW RECORDER QUICK GUIDE
6
DVD+R/RW RECORDER QUICK GUIDE
7
Optional Audio Con nec tion
Connecting to an ampli er with a digital coaxial output
Concerning the digital audio output
The digital output jack is used to output the digital
audio signal encoded on discs.
Depending on the disc format, either Dolby Digital or
Linear PCM sound will be transferred from the unit’s
digital audio output connector (PCM/Dolby Digital) as
shown in the table below.
For your ref er ence:
= Dolby Dig i tal is a digital sound com pres sion tech nique de vel oped by the Dolby Lab o ra to ries Li cens ing Corporation.
Sup port ing 5.1-channel surround sound, as well as ste reo (2-channel) sound, this technique enables a large quan ti ty of sound data to be ef cient ly encoded on a disc.
= Lin ear PCM is a signal re cord ing format used in audio CDs. While audio CDs are recorded in 44.1 kHz/16 bit, DVDs
are re cord ed in 48 kHz/16 bit up to 96 kHz/24 bit.
= If you have a Dolby Pro Logic Sur round de cod er, you will ob tain the full bene t of Pro Log ic from the same DVD
movies that pro vide full 5.1-channel Dolby Dig i tal soundtracks, as well as from titles labled with the “Dolby Surround”
logo.
Cau tion when connecting the digital audio coaxial output.
= Do not connect an am pli er (with an op ti cal dig i tal in put con nec tor) that does not contain a Dolby Dig i tal decoder.
Otherwise at tempt ing to play a DVD may cause such a high level of noise that it may be harmful to your ears and
dam age your speak ers.
NOTE:
= Discs encoded with 96 KHz sampling rates can be played back
on this unit, their bitstream will be transferred via the digital
coax output. Please note that your decoder/receiver must be
able to accept this signal in order for you to hear the output.
The TV set (optional)
The DVD Recorder
Dolby Digital Processing-compatible
Decoder or Ampli er (optional)
Video (yellow)
Note: Connect the yellow cable only.
To video input connector (yellow)
Digital RCA Coaxial Cable (optional)
6
5
4
3
2
1
A
C
IN
1
3
2
6
5
4
Optional
Audio
Con nec tion
Quick
Re cord ing
Guide
2
1
5
4
3
FAQs
Functional
Overview
Connections
Page 7

DVD+R/RW RECORDER QUICK GUIDE
7
Connecting to Other Audio/Video Equipment
4
5
6
7
Connecting to Standard Home Audio Equipment
5
4
3
2
1
3
2
1
DVD Recorder
Audio Video equipment
Video/Audio cables (yellow,red, white)
TV set
Accessories
Power off all connecting eletronic devices.
Connect Video-In & Audio-In jacks from your
DVD recorder to the Video-out & Audio-out
jacks of your Audio Video equipment using the
Video/Audio cables.
Connect Video-Out & Audio-Out jacks from
your DVD recorder to the Video-in & Audioin jacks on your TV set with another set of
Video/Audio cables.
Procedures
Accessories
DVD Recorder
Standard Home Audio Equipment (Photo may differ from your set)
TV set
Audio cable (red, white)
Video cables (yellow)
6
7
8
Turn off all connecting eletronic devices.
Connect Audio-Out jacks of your DVD recorder to the Audio-In jacks of your Audio
equipment using the audio cables (red,
white) provided.
Connect Video-Out jack on your DVD recorder to the Video-in jack on your TV set
with the Video cable (yellow) provided.
Procedures
TV
OUT
ANTENNA
IN
Pb
Y
Pr
P-SCAN
S-VIDEO
OUTPUT
COAXIAL
VIDEO-OUT
AUDIO-OUT
Apparatus Claims of U.S. Patent Nos.
4,631,603;4,577,216;4819,098 and 4,907,093
licensed for limited viewing uses only.
Manufactured under license from Dolby Laboratories.
“Dolby”,”Dolby digital”, and the double-D symbol are
trademarks of Dolby Laboratories. Con dential
Unpublished Works.
© 1992-1997 Dolby Laboratories, Inc.
All rights reserved.
2
1
4
7
5
7
4
6
5
8
8
Power Off
6
6
Power Off
3
Power Off
(example only)
On Front Panel
1
3
2
5
6
Power Off
5
6
On Back Panel
3
4
7
5
7
Power Off
Power Off
Optional
Audio
Con nec tion
Quick
Re cord ing
Guide
2
1
5
4
3
FAQs
Functional
Overview
Connections
Page 8
DVD+R/RW RECORDER QUICK GUIDE
8
DVD+R/RW RECORDER QUICK GUIDE
9
Quick Recording Guide
Input from Audio/Video Equipment
7
6
5
4
3
2
1
Accessories
DVD Recorder
Audio/Video Output Equipment
RF Coaxial Cable
Audio cable (red, white)
Video cable (yellow)
S-video cord (optional)
11
10
9
8
Procedures
Connect the audio cable (red, white)
to the audio-in jacks from your DVD
Recorder to the audio-out jacks on your
output device (eg. DV, Video Game
Console, etc.).
Connect the video cable (yellow) to the
video-in jack from the DVD Recorder to
the video-out jack on your output device.
Note: If you subsitute the yellow video
cable with S-video, skip this step.
If you decide not to use the supplied
video cable (yellow), instead connect the
S-video to the S-video in jack from your
DVD to the S-video output on your video
source equipment. (Optional)
Connect the RF Coaxial Cable from
your cable box to the Antenna-in jack.
(Optional)
Connect another RF Coaxial Cable from
the TV OUT jack to your TV IN jack.
(Optional)
TV OUT
ANTENN A I N
VIDEORVIDEO
L
V
I
D
E
O
R
L
VIDEO
OUT
S-VIDEO
2
1
4
6
5
3
7
9
8
7
9
8
3
11
10
11
10
Connecting to Record from DV or i-Link
Power off the TV set and the DVD Recorder
before connecting.
Connect one end of the i-LINK input from the
DVD Recorder to the i-Link output of the DV.
The DVD Recorder
The i-LINK cable
DV video equipment (Digital Video
Camera used here as an example)
5
4
3
2
1
Accessories
Procedures
(example only)
VIDEO
I N
I-LINK
4
3
2
1
Power Off
Power Off
4
5
5
The following function is only available for models equipped with i-Link port. (DRX-9200)
Optional
Audio
Con nec tion
Quick
Re cord ing
Guide
2
1
5
3
FAQs
4
Functional
Overview
Connections
Page 9

DVD+R/RW RECORDER QUICK GUIDE
9
You can use this DVD Recorder to record from external sources or TV programs.
Preparations:
1. Connect the DVD Recorder to your TV or other equipment to record from an external source.
2. Remember to use an un nalized and recordable DVD+RW or DVD+R disc.
STEP 1. Turn on STANDBY/ON on the DVD Recorder and TV (or other equipment).
STEP 2. Press
EJECT to open the disc tray.
STEP 3. Place a recordable DVD+RW or DVD+R onto the disc tray. Label side up.
STEP 4. Press
EJECT again to close the disc tray.
STEP 5. Press
DVD/SOURCE on the remote control to switch to REC mode.
STEP 6.
Press INPUT on the remote control to view TV channels through the DVD Recorder or toggle
different external A/V input sources to record from an external source.
STEP 7. Press CHANNEL +/- or the Number buttons to select the channel you wish to record. If you
record from an external source, skip to the next step.
STEP 8. Press RECORD on the remote control.
STEP 9. Press
STOP on the remote control to stop recording.
To view your recording:
STEP 10. Press DVD/SOURCE on the remote control to switch to DVD mode.
STEP 11. Press / to choose the recordings just recorded.
STEP 12. Press
to playback the preferred recordings.
Please refer to the instruction manual for further information.
Enjoy your DVD Recorder!
1. Power on the TV set and select a video input (i.e. video 1, video 2, etc.)
2. Turn on the DVD Recorder and open the disc tray.
3. Place a disc onto the disc tray.
4. Close the disc tray.
5. Press "PLAY" and enjoy your DVD.
W
Step 1
Step 2
Step 3
Step 9Step 8Step 7
Step 5
Step 4 Step 6
Step 10 Step 12
Step 11
Optional
Audio
Con nec tion
Quick
Re cord ing
Guide
2
1
5
3
FAQs
4
Functional
Overview
Connections
Page 10

DVD+R/RW RECORDER QUICK GUIDE
10
Optional
Audio
Connection
Quick
Recording
Guide
2
1
5
3
FAQs
4
Functional
Overview
Connections
FAQs
Need Assistance?
If you still have questions or need assistance, visit our 24 Hour Customer Support Center at www.apexdigitalinc.com
Click on Customer Support, to register your product and gain access to valuable technical customer support services including
email.
Frequently Asked Questions
We’ve put together a number of solutions to the most frequently asked questions for setup and initial use. Keep this
reference guide handy. FAQs are not in any particular order so we recommend reading them and your User Manual
thoroughly before using your Recorder/Player.
NOTE: This Quick Connection Guide is not intended to be a substitute for the User Manual.
Q: Why is my remote control not operating?
A: Check the batteries in the remote. You may need to replace them with new ones making certain polarity (+-) is
correct. Operate the remote about 10-20 ft. and no more than 30º from center. Otherwise, try removing batteries
then hold down one or more buttons for sixty seconds to allow remote to reset itself. Reinstall batteries making
certain polarity (+-) is correct and batteries are in good condition. Never mix old and fresh batteries together.
Q: How do I connect my DVD player if my TV has no video inputs (yellow,red,white connections)?
A: To connect the DVD player to an older TV, use an RF Modulator that can be purchased at a major home
electronics retailer. The modulator will enable you to connect the DVD player to your TV’s coaxial or cable
connection.You can then view your DVD movies on Channel 3 or 4. You may also purchase this on our online
Accessory store at www.apexdigitalinc.com.
Q: I have connected the DVD player to the TV but I get no picture?
A: When using the TV’s input you must change the TV to the correct Video or Input Mode to view the picture. Press
the “Input,” “Source,” or “TV/Video” button located on your TV or TV’s remote control to change the video source
(Video1, Video2, etc.). Some TVs also have a “Menu” button that allows you to change the source using an onscreen menu. Refer to your TV Operating Manual.
Q: Why won’t my Player read my MP3?
A: When burning MP3 format discs, make sure to burn it in an ISO 9960 type format.This option would most likely
be found in the preference or settings section of your burning software. If you’re using ADAPTEC 3.5 or higher
set to mode 1. Make sure you are burning the disc as a data and not a wave le. The player cannot play audio
tracks in MP3PRO format.
Q: Why won’t my Player read my DVD or CD?
A: It’s possible that the disc may have been placed upside down in the tray, it’s scratched, dirty or possibly the
DVD’s laser is having a problem reading the disc. Turn the power off and disconnect AC power plug from the wall
outlet for 30 seconds. Reinsert plug into wall outlet and retry again. If using a UDR (Universal Disc Recording)
format, CD-RWs will not play. If the unit is less than 14 days old, you may be able to exchange it with your
retailer. If the unit is over 30 days old, give us a call to obtain a return authorization number to have the unit sent
in for service (909) 930-1239. Mon-Fri 7am-6pm PST
Q: Why won’t my unit record?
A: The DRX-9200 will only record using DVD +R/RW discs. Do not use DVD-R/RW, DVD-RAM or CDR/RW discs to
record. If your disc capacity is full, the DRX-9200 will not allow you to record until you manually erase previously
recorded material. Even if you have 30 minutes of capacity left on the disc and your recording is an hour long you
will be prevented from recording. Insert a new disc. Recheck your connections and input source used to record.
In other words, if you’re recording TV programs, verify your source is set to “CH” on the DRX-9200.
Q: Why won’t my unit playback DVD recordings I’ve previously recorded on my computer/recording device?
A: When playing back DVD+RW formatted discs, verify that you closed your recording session prior to playing back
on the DRX-9200.
Q: I have connected the DVD player to the TV but I get a discolored or black and white picture that rolls?
A: Press the I/P button on your remote control. This button converts the DVD player from progressive scan to
interlaced scan. If you connected the player using composite video or S-Video connections, you will use the
interlaced mode. If you’ve connected the player using component video connections through an ED/HDTV set,
use progressive scan mode for the best quality picture.
 Loading...