

Page 1
1
WARNING
To reduce the risk of fire or electric shock, do not expose this product to rain or moisture.
The apparatus shall not be exposed to dripping or splashing and that no objects filled with liquids, such as
vases, shall be placed on the apparatus.
Caution: To prevent electric shock, match wide blade of plug to wide slot, fully insert.
Refer to the identification/rating label located on the back panel of your product for its proper operating
voltage.
Caution: Using video games or any external accessory with fixed images for extended periods of
time can cause them to be permanently imprinted on the picture tube (or projection TV picture
tubes). ALSO, some network/program logos, phone numbers, etc. may cause similar damage. This
damage is not covered by your warranty.
Cable TV Installer: This reminder is provided to call your attention to Article 820-40 of the National
Electrical Code (Section 54 of the Canadian Electrical Code, Part 1) which provides guidelines for proper
grounding and, in particular, specifies that the cable ground shall be connected to the grounding system of
the building as close to the point of cable entry as practical.
Customer Record
You will find the model number and chassis number of your TV on the back of your TV set. Record these
numbers in the spaces provided below. Refer to them whenever you call APEX Digital customer service or
your APEX dealer regarding this product.
Model Number:
Chassis Number:
RISK OF ELECTRIC SHOCK
DO NOT OPEN
CAUTION
Caution: To reduce the risk of electric shock, do not
remove cover (or back). No user serviceable parts
inside. Refer servicing to qualified service personnel.
This symbol indicates "dangerous voltage"
inside the product that presents a risk of
electric shock or personal injury.
This symbol indicates important
instructions accompanying the product.
Instruction Manual
Page 2

2
IMPORTANT SAFETY INSTRUCTIONS
1. Read these instructions.
2. Keep these instructions.
3. Heed all warnings.
4. Follow all instructions.
5. Do not use this apparatus near water.
6. Clean only with dry cloth.
7. Do not block any ventilation openings. Install in accordance with the manufacturer's instructions.
8. Do not install near any heat sources such as radiators, heat registers, stoves, or other apparatus
(including amplifiers) that produce heat.
9. Do not defeat the safety purpose of the polarized or grounding-type plug. A polarized plug has two
blades with one wider than the other. A grounding type plug has two blades and a third grounding
prong. The wide blade or third prong is provided for your safety. If the provided plug does not fit into
your outlet, consult an electrician for replacement of the obsolete outlet.
10.Protect the power cord from being walked on or pinched particularly at plugs, convenience receptacles,
and the point where they exit from the apparatus.
11.Only use attachments/accessories specified by the manufacturer.
12.Use only the cart, stand, tripod, bracket, or table specified by the manufacturer, or sold with
the apparatus. When a cart is used, use caution when moving the cart/apparatus
combination to avoid injury from tip-over.
13.Unplug this apparatus during lightning storms or when unused for long periods of time.
14.Refer all servicing to qualified service personnel. Servicing is required when the apparatus has been
damaged in any way, such as power-supply cord or plug is damaged, liquid has been spilled or objects
have fallen into the apparatus, the apparatus has been exposed to rain or moisture, does not operate
normally, or has been dropped.
15.Warning - This TV should only be serviced by an authorized and properly trained technician.
Opening the cover or other attempts by the user to service this TV may result in serious injury
or death from electrical shock, and may increase the risk of fire.
IMPORTANT STAND AND BASE SAFETY INFORMATION
Choose the location for your TV carefully. Place the TV on a stand or base that is of adequate size and
strength to prevent the TV from being accidentally tipped over, pushed off, or pulled off. This could cause
personal injury and/or damage the TV. Refer to the Important Safety Instructions above.
FCC Warning
Class B Computing Device
Information to User
This equipment has been tested and found to comply with the limits for a Class B Digital Device pursuant
to part 15 of FCC Rules. These limits are designed to provide reasonable protection against harmful
interference in a residential installation. This equipment generates, uses, and can radiate radio frequency
energy and, if not installed and used in accordance with the instructions, may cause harmful interference to
radio communications. However, there is no guarantee that interference will not occur in a particular
installation. lf this equipment receives interference while off and on, the user is encouraged to try to correct
the interference by one or more of the following measures:
1) Reorient or relocate the receiving antenna.
2) lncrease the separation between the equipment and TV.
3) Connect the equipment into an outlet on a circuit different from that to which the TV is connected.
4) Consult the dealer or an experienced radio/TV technician for help and for additional suggestions.
The user may find the following booklet prepared by the Federal Communications Commission helpful:
"How to Identify and Resolve Radio - TV Interference Problems". This booklet is available from the US
Government Printing Office. Washington, D.C. 20402, Stock No. 004-000-00345-4.
FCC Warning
The user is cautioned that changes or modifications not expressly approved by the manufacturer could
void the user's authority to operate the equipment.
Note: In order for an installation of the product to maintain compliance with the limits for a Class B Device,
shielded cables must be used.
Instruction Manual
Page 3
3
INTRODUCTION
Safety Instructions ..............................................................................................................................................1
Specifications......................................................................................................................................................3
Feature Descriptions ..........................................................................................................................................4
Front and Rear Unit Profiles ..............................................................................................................................5
Remote Control Features ..................................................................................................................................6
INSTALLATION
Connecting the Antenna ....................................................................................................................................7
Installing the Remote Control Batteries..............................................................................................................7
Connecting A/V Equipment
Input from Device to TV ..............................................................................................................................8
Output from TV to Device ............................................................................................................................8
FUNCTIONS & FEATURES
Turn On/Off ........................................................................................................................................................9
Basic Functions ..................................................................................................................................................9
Function Selection Menus
Picture Menu ................................................................................................................................................9
Audio Menu ..................................................................................................................................................9
Tuner Menu ................................................................................................................................................10
Timer Menu ................................................................................................................................................10
System Menu..............................................................................................................................................10
Useful Remote Control Features ......................................................................................................................12
Programming the Remote Control ................................................................................................13
TROUBLESHOOTING GUIDE.................................................................................................................................17
LIMITED UNITED STATES WARRANTY ................................................................................................................18
TABLE OF CONTENTS
SPECIFICATIONS
Instruction Manual
MODEL
Television System
Channel Coverage
Cable TV Coverage
Channels Preset
Antenna Input
Screen Dimensions
Audio Output
Total Harmonic Distortion
Power Source
Unit Weight
Unit Dimensions
Packaged Dimensions
Power Consumption
AT3208S
NTSC-M
VHF 2-13, UHF 14~69
Mid Band (A-8~A-1, A~I);
Super Band (J~W)
Hyper Band (AA~ZZ, AAA, BBB)
Ultra Band (65~94, 100~125)
181
75 ohm (unbalanced)
25.2 x 18.9 in.
640 x 480 mm
5W + 5W
<7%
~120Vac 60Hz
126 lbs. (57 kg)
33.6 x 26.9 x 22.1 in.
854 x 684 x 560 mm
38.6 x 30.6 x 25.8 in.
980 x 777 x 655 mm
150W
Page 4

Feature Descriptions
181 Channel Tuner - total number of channels the TV can receive: 2-69 in Air mode, or 1-125 in Cable
mode
AV Input (Rear) - input designed for use with A/V devices, such as a VCR or DVD player
AV Input (Front) - input designed for infrequent use, such as with a camcorder or video game unit
AV Output (Rear) - output signals from TV to devices such as a VCR
S-Video Input - input designed for greater clarity and sharpness; also known as S-VHS
AV Stereo Sound - stereo sound for superior TV viewing experience
Channel Recall - instant return to the last channel viewed
Closed Caption Display - feature that displays the closed captions or text of a TV broadcast
Remote Control - A wireless remote control unit for the TV
On/Off Timer - feature that allows the user to set a timer to turn on/off the TV
Parental Control - feature that allow parents to block out selected type of programming
RF IN Jack - standard coaxial antenna jack
Screen Size - the diagonal size of the TV screen
Selectable Picture Modes - preset standards for TV display: User, Normal, Movie, and Sports
Selectable Sound Modes - preset standards for TV sound: User, Normal, Speech, Movie, and Music
Trilingual On Screen Display (OSD) - TV's on screen display, can be either English, French or Spanish
Instruction Manual
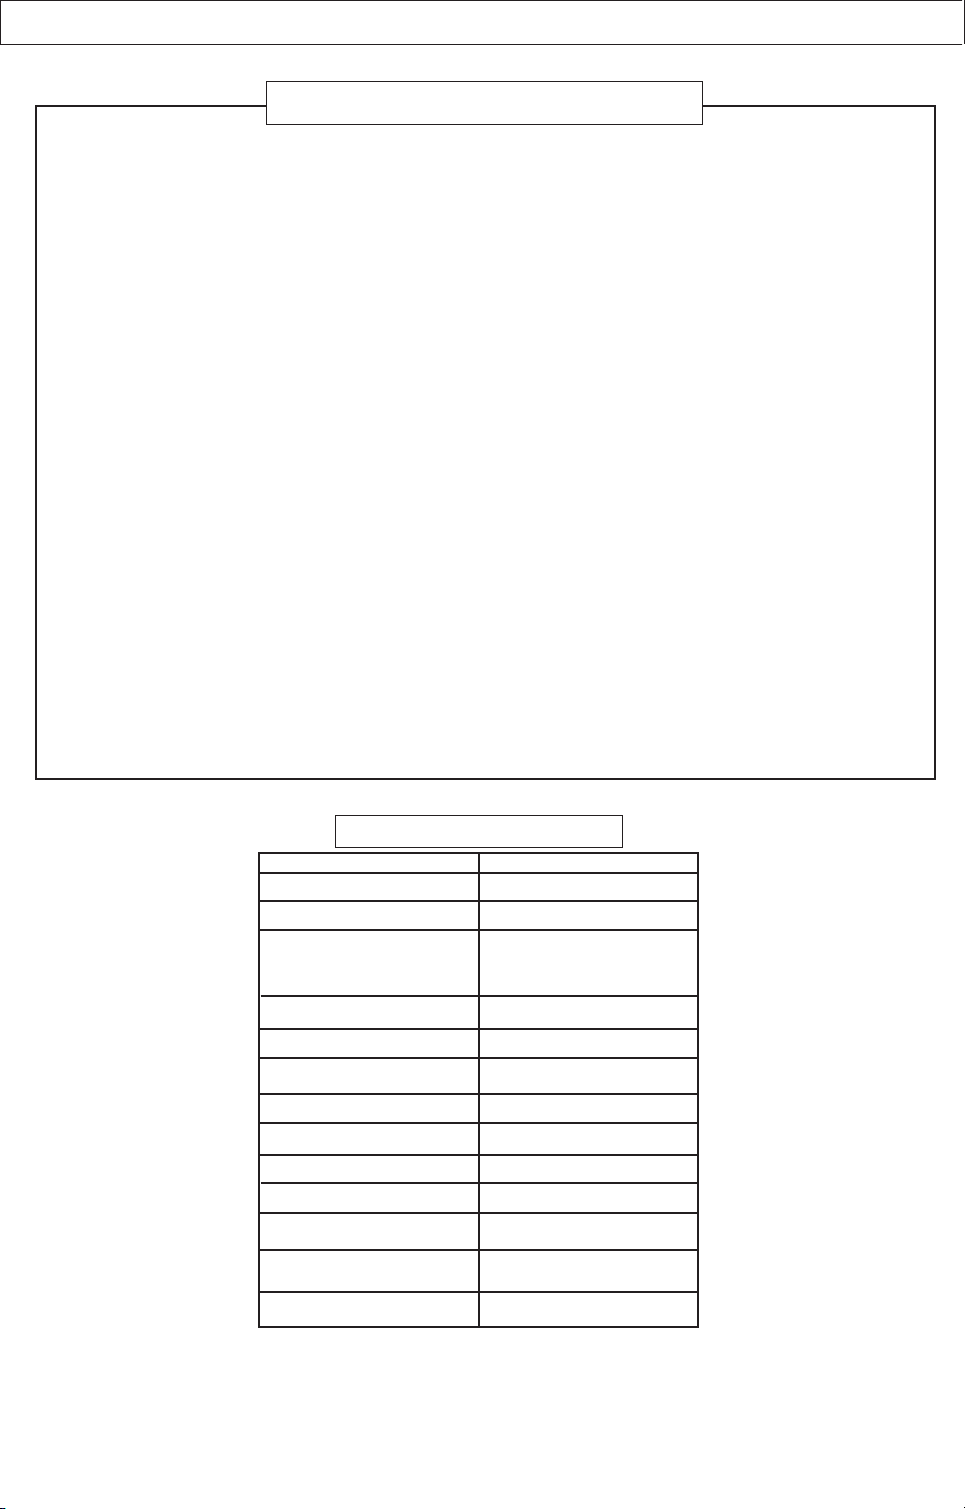
PACKING LIST
Parts
Color TV Receiver
Remote Control
Operation Manual
AAA Alkaline Batteries
QTY
1
1
1
2
FEATURE AT3208S
181 Channel Tuner
l
AV Input (Rear)
3
AV Input (Front)
1
AV Input (Side)
-
AV Output (Rear)
1
S-Video Input 1
Closed Captions
l
Universal Remote Control
l
On/Off Timer
l
Parental Control
l
RF IN Jack
l
Channel Recall
l
Screen Size
32”
Picture Modes
l
Trilingual OSD
l
Sound Modes
l
4
Page 5

Front panel
Rear panel
Front and Rear Unit Profiles
Instruction Manual
TV/VIDEO
SELECT
MENU SELECT
VOLUME
DOWN/UP
CHANNEL DOWN/UP
FRONT A/V INPUT
STANDBY
POWER INDICATOR
INFRARED SENSOR
5
Page 6
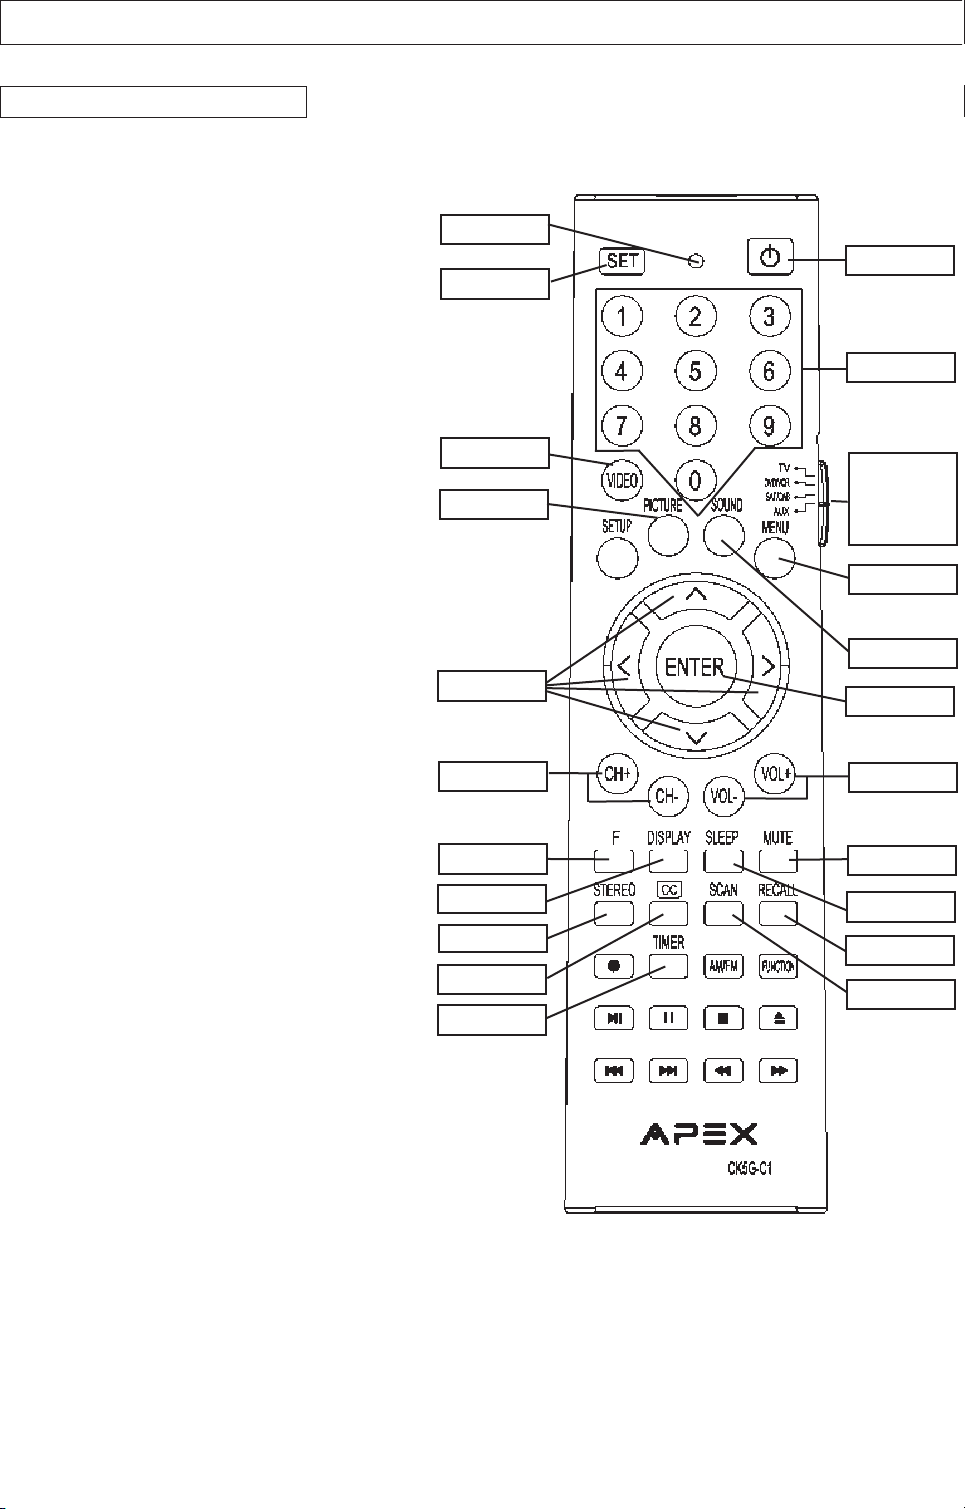
Remote Control Features
Instruction Manual
LED Indicator light
SET Used for programming the
remote control
VIDEO Cycles through the Video/TV
modes
PICTURE Selects the various Picture
Modes
ARROWS Used to navigate the TV
menus
CH + / - Used to change the current
channel
FUNCTION Used for volume control and
childlock
DISPLAY Brings up the TV/Video
display
STEREO Selects the Stereo modes
among R/L/On
CC Activates Closed Captioning
TIMER Accesses the Timer menu
STANDBY Turns on/off the TV
KEYPAD Used to select channels by
number
TV, DVD/VCR, SAT/CAB, AUX switch
Determines the equipment
control by the remote
MENU Brings up the main Menu
SOUND Selects the various Sound
modes
ENTER Accesses the sub menu
VOL + / - Used to adjust the volume
level
MUTE Mutes or restores the TV
volume
SLEEP Activate/ Deactivate the sleep
timer
RECALL Returns to the last channel
viewed
SCAN Scans all the active channels
SET
STANDBY
KEYPAD
VIDEO
DISPLAY
SCAN
SLEEP
SOUND
CH +/-
VOL +/-
ENTER
RECALL
MENU
MUTE
TIMER
CC
STEREO
ARROWS
PICTURE
FUNCTION
LED
TV
DVD/VCR
SAT/CAB
AUX
6
Page 7

7
INST
ALLA
TION
- Please read the safety instructions in this manual completely before installation.
- Install your TV in an area where direct sunlight will not fall upon the screen.
- Soft, indirect light is best for television viewing.
- Allow enough space (at least 4 in.) between the TV and any walls or enclosures for proper ventilation.
- Optimum television viewing distance is 3-5 times the screen's size.
Auto-Degaussing
Color television can be easily affected by magnetism, which shows as color distortion on the screen. If your TV is
affected by nearby magnetic components or appliances, turn it off for a few minutes. The built-in auto-degaussing
circuit will eliminate the magnetic interference.
Auto off when no signal received
The TV set will automatically enter into Standby mode when the following conditions are met.
1.TV is in antenna mode.
2.Current channel has no signal.
3.No key is pressed within 15 minutes.
Connecting the Antenna
Instruction Manual
Notes:
1. It is recommended that a 75 ohm coaxial cable be used in order to eliminate interference and noise which may occur
due to nearby radio transmissions.
2. The antenna cable should not be tied together with other wiring.
3. Set up a lightning rod and check it regularly when an outdoor antenna is used.
1. Remove the battery compartment lid.
2. Insert two AAA batteries (included). Make sure the positive (+) and negative (-) polarities are correctly aligned.
3. Reattach the battery lid.
Notes:
1. Alkaline batteries are recommended for longer life.
2. Always replace both batteries at the same time.
3. Do not expose batteries to fire or break them open.
4. To avoid battery leakage, remove batteries from the remote control when it is not being used for a long period of
time.
Installing the Remote Conrol Batteries
75-ohm coaxial cable (not supplied)
300-ohm twin-lead cable (not supplied)
OR
Antenna adapter
(not supplied)
VHF
UHF
or Cable
VHF
UHF
RF Input
(back of TV unit)
OR
U/V mixer
(not supplied)
Page 8

8
INSTALLATION (continued)
Connecting A/V Equipment
The following are diagrams showing basic instructions for attaching external equipment, like a VCR or
DVD player, to your TV set. Please refer to operation manuals of external audio/video equipment that
will be connected to your set for additional instructions. PLEASE TURN OFF ALL POWER BEFORE
CONNECTING DEVICES TOGETHER.
Connect VCR's RF OUT terminal to the RF IN jack located on the real panel of the TV.
Coaxial Cable
AUDIO/VIDEO OUT
DVD Player
Camcorder
VCR
AUDIO/VIDEO IN
VCR
With S - VIDEO Terminal
VIDEO
Yellow
White
Yellow
White
Yellow
White
Yellow
White
RF IN
Output from TV to Device
Input from Device to TV
The front terminals may be
easier to use with a camcorder.
The connections are identical.
AUDIO
VIDEO
AUDIO
Red
Red Red
Red
DO NOT connect both composite (yellow video terminal) and S-Video terminal. Use only
one of the two. Also, remember to connect the audio cables when using S-Video.
Instruction Manual
Note: Do not use the AV IN(1) terminals on the front panel and AV IN(1) terminals on the rear panel at
the same time.
sxj
VCR
Page 9

9
FUNCTIONS & FEATURES
Turn On/Off
1. Turn On
Plug in the power cord, and the TV should enter into Standby mode. Pressing STANDBY or the CH+/- key
will turn on the TV and its power indicator light.
2. Standby
While the TV is on, press the STANDBY key will put the TV in Standby mode. The power indicator light
on the TV set will turn off.
Changing the Channel
While in Tuner mode, press the CH +/ - keys to change the channel, or use the numeric keypad to enter a
new channel.
Adjusting the V
olume
To adjust the volume, press the VOL +/ - keys. Also, you may press the FUNCTION (F) key along with the
VOL +/ - keys to adjust the volume in increments or decrements of 4.
Muting the V
olume
To mute the volume, press the MUTE key. To restore the volume, press MUTE again or press the VOL + key.
Basic Functions
Function Selection Menus
Features
This menu allows you to adjust the various picture settings. Use the
up or down arrow key to move between the various settings, and the
left or right arrow key to adjust them.
T
int: -31 (more greenish) to +31 (more purplish)
Brightness
: 0 (dimmest) to 63 (brightest)
Contrast:
0 (minimum contrast) to 63 (maximum contrast)
Color: 0 (minimum color) to 63 (maximum color)
Sharpness
: 0 (minimum sharpness) to 63 (maximum sharpness)
Picture Menu
To change the setting of any function, press the MENU key to bring up the main menu. Press the up or down
arrow key to highlight the desired sub-menu and press the left or right arrow key (or ENTER key) to access.
While in the sub-menu, use the up or down arrow key to select the item and the left or right arrow to adjust
the setting. Press the MENU key to return to the main menu and exit.
While in the setup menu, CH-/+ and VOL-/+ keys on the front panel will function as the down/up/left/right
arrow keys on the remote control.
Audio Menu
Features
This menu allows you to adjust the various audio settings. Use the
up or down arrow key to move between the various settings, and the
left or right arrow key to adjust them.
Bass
: 0 (less Bass) to 63 (more Bass)
Treble: 0 (less Treble) to 63 (more Treble)
Balance:
L31 (Left Dominance) to R31 (Right Dominance)
Surround: Off; Low (slight surround effect); High (marked
surround effect)
Bass
Treble
Balance
Surround
31
31
00
Audio
Low
Tint
Brightness
Contrast
Color
Sharpness
00
31
31
31
31
Picture
Instruction Manual
Page 10

10
FUNCTIONS & FEATURES (continued)
Tuner Menu
Note: This menu is only accessible while the TV is in Tuner mode.
Channel: This feature allows you to change the channel displaying on
screen. Use the left or right arrow key or the numeric keypad to change
the channel.
Add/Erase: This feature allows you to add or remove the channel
currently display on screen to the "active channel list" . Active channel list
is the list of channel that is available by pressing the CH+/- keys. Use the
left or right arrow key to add or erase.
Antenna: This feature sets the TV tuner to an Air antenna or a Cable
antenna. Please use Air mode when using an over-the-air antenna; use
Cable mode for a cable hookup. Use the left or right arrow key to select
between the two options.
Auto Program: This feature will setup the Active channel list for the user.
The list will include only the channels with a signal detected. Press the
right arrow key to begin and the left arrow key to stop the process.
Channel
Add/Erase
Antenna
Auto Program
2
Add
Air
Tuner
Stop Start
Press the TIMER key on the remote control to access this menu.
Time
This feature allows you to set the clock on the TV.
On Time
This feature allows you to preset a time when the TV set will turn on.
With On Time set, the power indicator turns on in the Standby mode.
On Channel
This feature allows you to preset the channel on display when the On
Time is activated.
Off Time
This feature allows you to preset a time when the TV set will turn off.
Timer
Timer can be set to Once or Always.
Timer Menu
Time --:-On Time --:-On Channel Off Time --:-Timer Once
Timer
Language
This feature allows you to pick a language used for the on screen display
(OSD). Use the left or right arrow key to select the language of your
choice - English (Eng.), French (Fra.) or Spanish (Esp.).
Blue Back
This feature gives you the option to display a blue background on the TV
screen when there is no signal present. Use the left or right arrow key to
toggle between on and off.
CCD/T
ext
Closed caption is a feature that allows your TV set to display, on screen,
the dialogue, narration, and sound effect of a TV program. It also allows
you to display teletext signal. Text and caption will be displayed at either
the top or the bottom of the screen. There is nine different setting for
closed caption. You can set it to one of the 4 Closed Caption settings
(CC1-4), one of the 4 Text settings (T1-4), or set this feature to off
(CCD/Text Off).
System Menu
System
Language
Blue Back
CCD/Text
Parental Guide
MPAA - X
TV - MA
Eng.
On
Off
On
Instruction Manual
Notes: A Closed Caption signal may not be display under the following conditions:
-When there is no Closed Caption/Text signal to decode
-When the signal is weak or altered (due to interference or poor reception)
-When viewing a dubbed video tape
Page 11

11
Parental Guide
This feature allows parents to block certain programs from being
viewed, based on the programs' rating. In order to access this
menu, you must first enter a pass code. The factory default is 6688.
Enter the pass code while the Parental Guide is highlighted. Now,
with Parental Guide set as On, press the right arrow key to access
the TV Rating grid.
TV Rating
Using the up or down arrow key to navigate between the
ratings, press the MENU key to block out a particular rating
completely. Or, if you wish, press the down arrow key to
highlight an individual rating (anywhere a U is displayed in the
middle of the grid.) Pressing the MENU key with one of these
individual ratings highlighted will block only programs that
feature that particular aspect. See the TV rating diagram at
right for an example. TV ratings are defined in the charts
below:
MPAA
Rating
Press the right arrow key while in the TV Rating grid to
access this grid. Use the up or down arrow key to navigate
between the MPAA ratings. Pressing the MENU key with a
rating highlighted will block that particular rating from being
shown on this TV. A B will show in red next to the blocked
rating. Please note that blocking a lower rating (for example,
PG) will block all higher ratings (PG-13, R, NC-17, X.)
Pass Code Menu
This menu allows you to change the access code for the
Parental Guide functions of the TV set. Press the MENU key
when Pass Code Control is highlighted. This will turn on or off
the Pass Code function. With the Pass Code function ON,
you can also change the Pass Code. Use the down arrow key
to highlight Pass Code, then enter the new Pass Code using
the numeric keypad.
System Menu (continued)
Movie Rating
GU
PG U
PG-13 U
RU
NC-17 U
XU
MPAA - Rating
Age Defined as
TV - Y All Children
TV - Y7 Directed to Older Children (over 7)
TV - G General Audience
TV - PG Parental Guidance Suggested
TV - 14 Parents Strongly Cautioned
TV - MA Mature Audience Only
Contents Defined as
FV Fantasy Violence
D Sexual Dialogue
L Adult Language
S Sexual Situations
V Violence
FUNCTIONS & FEATURES (continued)
Age Based Rating
Language Eng.
Blue Back On
CCD/Text Off
Parental Guide On
MPAA-X TV-MA
System
Enter Pass Code - - - -
Rating FV D L S V
TV-Y U
TV-Y7 U U
TV-G U
TV-PG U U U U U
TV-14 B B B B B
TV-MA B B B B
TV-Rating
Age Based Rating
Enter Pass Code - - - -
Pass Code Menu
Pass Code Control
Pass Code 6688
Instruction Manual
Note: The factory pre-set password is 6688. The initial
password will be replaced when the new one is used.
Please contact the service center in case you forget
the password.
Page 12

12
Useful Remote Control Features
DISPLAY
This key allows you to display the current information of the TV screen on the upper right hand corner of the
screen. (channel, antenna mode, time, video, etc.)
T
IMER
This key allows you to directly access the Timer menu. For an explanation of this menu features, please see
page 10.
S
CAN
Press the SCAN key twice, and the TV will begin to scan through all active channels. To stop the Scan,
pressing any key can interrupt scanning. Please note that Scan will only work in Antenna mode.
PICTURE
Your TV has factory preset picture modes that allow you to optimize your TV viewing. To activate these picture
modes, press the PICTURE key, and you can choose among User, Normal, Movie, and Sports.
S
OUND
Press the SOUND key repeatedly, and you can choose among User, Normal, Speech, Movie, and Music.
STEREO
In the Video mode, press the STEREO key to set Stereo to one of the R/L/On modes.
R
ECALL
This key will allow you to return to the last channel you were viewing. Pressing it again will return you to the
channel you just left.
CC
Pressing the CC key will activate the currently selected Closed Captions or Text under the System Menu.
Pressing it again will turn off the Closed Captions or Text.
VIDEO
This key allows you to toggle between antenna and different video modes.
Child Lock
The Child Lock feature prevents unauthorized viewing of the TV. To activate, press and hold the F key, and
then press MUTE. You should see a key symbol appear on the screen. This will lock out all remote functions
(except for Standby). To unlock the TV, press and hold the F key and press MUTE. This will unlock the TV.
Please note that the only way to activate or deactivate the Child Lock feature is via remote control - please
insure that it is stored securely.
SLEEP
Press this key repeatedly to switch the TV to one of the following modes: 180 150 120 90 60
45 30 15 - -(Unit: Minute). The TV will automatically enter the Standby mode when the preset
Sleep time is up. The TV will display a message one minute before the Sleep timer runs out.
0-9
Press the 0-9 keys to enter channel numbers directly (2-69 in the Air mode or 1-125 in the Cable mode).
1.To choose a one-digit channel number, press the corresponding Number key directly to switch to the
desired channel number in about 3 seconds.
2.To choose a two-digit channel number, enter a first-digit and then a second digit within 3 seconds.
3.To choose a three-digit channel number, enter a first-digit, second-digit and third-digit respectively in the
way mentioned above.
FUNCTIONS &
FEATURES (continued)
Instruction Manual
Page 13

13
Instruction Manual
Programming the Remote Control
FUNCTIONS & FEATURES (continued)
1. Set the TV, DVD/VCR,SAT/CAB, AUX switch to the device you want to control.
2.To program the remote control
1)Press and hold the SET key for over 3 seconds until the LED indicator on the remote control turns off.
Release the key and the LED will light again. The remote control is now in the PROGRAMMING mode.
2)Use the 0-9 keys to enter three-digit code number for your device. If the right code number was entered,
the LED blinks three times. If you enter a code not listed below, or you press any other keys than
STANDBY and ENTER, the LED turns off.
3)"TV": To control TV. "DVD/VCR": To control DVD, VCR, LD and CD. "SAT/CAB": To control satellite
receiver and cable box. "AUX": To control all the above appliances.
3.To search codes
1)Press and hold the SET key for over 3 seconds until the LED indicator on the remote control turns off.
Release the key and the LED will light again. The remote control is now in the PROGRAMMING mode.
2)Press the STANDBY key and code search begins.
3)
4)When the TV, DVD/VCR, SAT/CAB, AUX switch is set to the "AUX" position, the remote control can not
search code.
4.To check the current code number
1)Press and hold the SET key for over 3 seconds until the LED indicator on the remote control turns off.
Release the key and the LED will light again. The remote control is now in the PROGRAMMING mode.
2)Press the ENTER key.
3)You may read the code number according to the LED display status as follows.
5.To use the REC key
The REC key functions only when it is pressed twice continuously.
Press Description
up or down
arrow key
The remote control searches codes upwards or downwards. Each time you press the up or
down arrow key, the code number for the STANDBY key increases or decreases by 1; or the
code number automatically increases or decreases by 1 per 3 seconds. Try each code
separately until you find the one that works. If not after trying all the codes, LED blinks rapidly
eight times and search stops.
ENTER
If the desired code number is found, press the ENTER key to confirm the current searched
code number for your device. Then LED blinks rapidly three times to exit from search.
Other keys LED blinks rapidly eight times and search stops.
Code Number LED Display Status
First-digit Second-digit Third-digit First-digit Second-digit Third-digit
0 0 0 Blinks rapidly once Blinks rapidly once Blinks rapidly once
1 0 6 Blinks once Blinks rapidly once Blinks six times
0 4 3 Blinks rapidly once Blinks four times Blinks three times
1 5 0 Blinks once Blinks five times Blinks rapidly once
Page 14

14
Instruction Manual
TV CODES
Brand Code Number Brand Code Number
APEX 157,158,159,160,161,162
Admiral 001,119
Adventura 120
Aiko 011
Akai 002
Alleron 036
Amtron 030
Anam National 030,133,134,135,154
AOC 003,004,005,136
Audiovox 030
Bell & Howell 001,068,115
Belcor 003
Bradford 030
Brokwood 003
Candle 003,005,006,120
Celebrity 002
Citizen 003,005,006,011,030,084,120,121
Colortyme 003,005,007,139
Concerto 003,005
Contec/Cony 008,009,030
Craig 030
Curtis Mathes 000,003,005,010,084,115
Daewoo 004,005,011,012,098,099,132,141
Daytron 005
Dimensia 000
Dumont 110
Electroband 002
Electrohome 013,014,015,154
Emerson 008,016,017,018,019,020,021,022,023,024,
025,026,027,028,029,030,031,032,033,034,
035,036,037,096,115,121,122,145,154
Fisher 038,039,040,115,123
Fujitsu 036
Funai 036
GE 000,015,041,042,043,072,116,117,118,124,
147,154
Goldstar 004,008,013,014,044,045,046,113
Gibralter 110
Grundy 036
Hitachi 008,009,047,048,049,103,104,105,106,107,
108,109,122,137,138
Infinity 050
Janeil 120
JBL 050
JC Penney 000,004,006,015,041,042,046,051,052,059,
072,084,124,140
JCB 002
JVC 008,009,042,048,053,054,114,125
Kawasho 002
Kenwood 013,014
Kloss Novabeam 055,056,120,126
KTV 057,121
Loewe 050
Logik 068,151
LXI 000,038,050,058,059,060,115,124
Magnavox 006,013,050,055,056,061,062,063,069,073,
100,101,102,126,127,152
Majestic 068
Marants 050
Marantz 050,064
Megatron 047
Memorex 003,067,068,115,151
MGA 004,013,014,015,040,065,067
Midland 042,110,124
Minutz 041
Mitsubishi 004,013,014,015,040,065,066,067,097
Montgomery Ward 068
Motorola 119,154
MTC 004,084
NAD 058,059,128
NEC 004,070,014,139,154
Nikko 011
NTC 011
Optimus 128
Optonica 077,119
Orion 027,145
Panasonic 042,050,148,150,154
Philco 006,008,013,055,056,061,063,069,126,127,
152,154
Philips 006,008,013,055,056,061,062,071,072,073,154
Pioneer 074,075,122,128,149
Portland 011
Price Club 084
Prism 042
Proscan 000,124
Proton 008,076,129
Pulsar 110
Quasar 042,057,148
Radio Shack 000,038,077,115
RCA 000,078,079,080,081,082,124,130,132,141,142
Realistic 038,077,115
Runco 110
Samsung 010,012,014,083,084,140,143
Sansui 145
Sanyo 038,039,065,085,123
Scott 017,027,036
Sears 009,014,036,038,039,040,054,058,059,086,
087,123,124,131
Sharp 022,077,088,089,090,091,095,119
Signature 001,068,151
Simpson 006
Sony 002,144,153
Soundesign 006,036
Squareview 131
Supre-Macy 120
Supreme 002
Sylvania 055,056,061,062,063,069,073,092,126,127,152
Symphonic 131,155
Tandy 119
Ta tung 122
Technics 042
Teknika 009,011,062,067,068,084,151
Te ra 129
Toshiba 038,058,059,084,086,140
Universal 041,072
Victor 054,125
Viking 120
Wards 001,017,041,055,056,061,062,068,069,072,
073,077,093,094,127,155
Zenith 110,111,112,146,151
Page 15

15
Instruction Manual
DVD CODES+A27
Brand Code Number
Brand Code Number
APEX 362,363,364,365,366,367,368,369,370,435,
436,437
Aiwa 351
Hitachi 352
JVC 348,353
Magnavox 347
Mitsubishi 346
Panasonic 354,361
Philips 347,355,356,357
Pioneer 345,350
Proscan 349
RCA 349
Sanyo 358
Sony 344,359,360
Toshiba 343
VCR CODES
Brand Code Number Brand Code Number
Admiral 415
Aiwa 382,427,428
Akai 392,421
Amstrad 382
APEX 438
ASA 399
Audio Dynamics 376,416
Audiovox 418
Broksonic 417,419
Bush 381
Calix 418
Candle 378,418
Canon 403,404
Capeheart 391
Carver 385
CCE 421
Citizen 378,379,418,421
Craig 373,379,418
Curtis Mathes 374,378,403,414
Daewoo 391,405,419,421,422
Daytron 391
DBX 376,416
Dimensia 425
Dynatech 382
Electrohome 372,418,423
Electrophonic 418
Emerson 372,380,382,387,417,418,419,423
Fisher 371,373,382,383,393
Funai 419
GE 374,379,403,414
Go Video 401,402,429
Goldstar 378,418,421
Goodmans 381
Gradiente 420
Grundig 399
Harley Davidson 420
Harman Kardon 406
Hinari 381
Hitachi 382,384,389,392
Instant Replay 426
JC Penney 375,376,379,389,392,403,406,416,418
Jensen 384,392
JVC 375,376,378,392,394,400,416
Kenwood 375,376,378,392,394,400,416
Kodak 418
Lloyd 382,420
Logik 381
LXI 418,430,431,432,433,434
Magnavox 385,386,399,403
Marantz 375,376,378,385,399,403,416
Marta 418
MEI 403
Memorex 373,382,403,415,418,420
MGA 372,387,398,423
Minolta 384,389
Mitsubishi 372,374,387,394,398,400,423
Motorola 415
MTC 382,420
Mutitech 379,381,382,420
NEC 375,376,378,392,394,400,406,416
Nikko 418
Olympus 424
Optimus 415,418
Optonica 388
Panasonic 377,390,403,407,408
Pentax 378,384,389
Perdio 382
Philco 385,386,403
Philips 385,388,399,403
Pilot 418
Pioneer 376,384,394,400,416
Portland 391
Proscan 374,414
Quasar 396,397,403
Radio Shack 371,372,373,383,388,415,418,420,423
Radix 418
Randex 418
RCA 374,379,384,389,407,414
Realistic 382,383,388,403,415,418,420,423
Ricoh 411
Salora 398
Samsung 379,405
Sanky 415
Sansui 376,392,394,395
Sanyo 373
SBR 399
Schneider 381
Scott 380,387,417,419
Sears 371,373,383,384,389,393,418
Sharp 372,378,423
Shintom 381
Sony 409,410,411,412,413
STS 389
Sylvania 382,385,386,387,398,403,420
Symphonic 382,420
Tandy 382
Page 16

16
Instruction Manual
VCR CODES
Brand Code Number Brand Code Number
Tashiko 382,418
Ta tung 375,392,395
Teac 375,382,392,420
Technics 390,403
Teknika 382,403,418,420
Toshiba 380,383,384,387,398,405
Totevision 379,418
Vector Research 376,406
Victor 376,400
Videosonic 379
Video Concepts 376
Wards 372,373,379,380,381,382,384,388,389,403,
415,418,420,423
XR-1000 420
Yamaha 375,376,378,392,406
Zenith 412,413
LD CODES+A112
Brand Code Number Brand Code Number
Magnavox 336
Panasonic 340,341
Pioneer 342
Sony 337,338,339
CD CODES
Brand Code Number Brand Code Number
ADC 317
ADO 318
Aiwa 300,319
Akai 320
Denon 322
Dynatech 301
Emerson 302
Fisher 303,325,326
GE 327
Hitachi 304
Inkel 328
JVC 305,329
Kenwood 306,330,331
Luxman 332
Marantz 308,333
MCS 334
Mitsubishi 335
NEC 307
Onkyo 309
Panasonic 310
Pioneer 311
RCA 312,324
Sears 321
Sony 313,323
Technics 314
Yamaha 315,316
CABLE BOX CODES+A259
Brand Code Number Brand Code Number
ABC 508,509,510,511
ChangHong 500
General Instrument 525
hamiln 541,542,545,546,547
Hytex 508
Jerrold 506,510,511,512,513,520,525,548,549,550
Movie Time 515
NSC 515
Oak 501,508,516
Panasonic 502,507,544
Philips 514
Pioneer 503,504,517
RCA 524
Scientific Atlantic 504,505,518,519
StarCom 511
Tocom 509,512
TV86 515
United Artists 508
Viewstar 514,515
Zenith 504,521,522,523
SATELLITE CODES
Brand Code Number Brand Code Number
GE 528,531,532
Genernal Electric 526
Hitachi 534,535
Hughes 537,538
JVC 533
Magnavox 536
Panasonic 543
Philips 536
Proscan 528,531,532
RCA 528,531,532,540
Sony 529,539
Toshiba 527,530
AMPLIFIER CODES
Brand Code Number Brand Code Number Brand Code Number
Aiwa 702
ChangHong 700,701
Carver 709
Fisher 709
JVC 706,712
Magnavox 708
Memorex 704
Panasonic 710
Pioneer 703,704
Proton 708
Quasar 710
RCA 707,713
Sony 702,705
Techniques 710
Toshiba 711
Victor 706
Page 17

17
Check the following guide for a possible correction to a problem before contacting customer service.
Check FAQ at our website: www.apexdigitalinc.com.
Symptoms Correction
No power
No picture
No sound
No TV signal
Stripe or purple interfe-
rence appears in the
screen.
Picture becomes
snowy.
Picture with multi-image
TV channel not received
Black box appears on
screen.
Remote control
doesn't operate.
Verify the power cables plug into an outlet with power.
Verify the connection from the DVD/VCR video output to the TV video input
is secure.Then switch TV to the appropriate Video mode.
Verify an antenna cable is securely connected to the RF in jack.
Connect the audio cables into the terminals securely.
Verify the connection from the DVD/VCR audio output to the TV audio input.
Then switch to the appropriate mode on the receiver. Refer to your audio
amplifier owner's manual.
Verify the volume is at an appropriate level and the mute feature is not on.
Verify the TV is set to Antenna mode.
Make sure the antenna is securely connected to the RF in jack.
Unplug the TV from the wall for 30 seconds, then plug in and try again.
Unplug the antenna connection from the back of the TV, unplug the TV from
the wall, wait 30 seconds, then try again.
Verify the speakers around the TV set are shielded.
Verify the antenna lead wire is in working condition.
Verify the antenna is connected securely to the RF in jack.
Move the antenna around to minimize multi-images.
Make sure the Air/Cable setting is correct.
Channel may be locked with the block channel feature, such as Parental Control.
Check Add/Erase feature, as channel may have been erased during set up.
Verify Closed Caption feature is off.
Batteries may be weak. Replace batteries.
Make sure nothing is in between the remote and the remote sensor.
TROUBLESHOOTING GUIDE
Instruction Manual
Page 18

18
LIMITED UNITED STATES WARRANTY
AT3208S
Apex Digital, Inc. makes the following limited warranties. These limited warranties extend to the original consumer purchaser
or any person receiving this product as a gift from the original consumer purchaser and to no other purchaser or transferee.
Limited Ninety (90) Days W
arranty
Apex Digital, Inc. warrants this product and its parts against defects in material or workmanship for a period of ninety (90)
days after the date of original retail purchase. During this period Apex Digital, Inc. will repair or replace a defective part or
product at their option, with a new or refurbished part or product, without charge to you. "Authorized" Apex Digital, Inc.
Service Center personnel will come to your home when warranty service is required. Depending on service required it will
either be performed in your home or the set will be taken to the authorized Apex Digital, Inc. Service Center' s repair facility
for repair and then returned to your home at no cost to you.
Limited One (1)
Year Warranty
Apex Digital, lnc. further warrants the parts in this product against defects in material or workmanship for a period of one
(1) year after the date of original retail purchase with exception of the remote control which is guaranteed for ninety (90)
days. During this period Apex Digital,Inc. will replace a defective part with a new or refurbished part without charge to you,
except that if a defective part is replaced after ninety (90) days from the date of original retail purchase, you are responsible
to pay all labor charges involved in the part(s) replacement. You must also deliver the entire product to an Apex Digital, Inc.
Authorized Service Center. You are responsible for all packing, transportation and insurance charges for the set to and from
the Service Center.
Rental Product
The warranty for a rental product begins with the original date of receipt by the rental firm.
Y
our Responsibility
The above warranties are subject to the following conditions:
• You must retain your bill of sale to provide proof of purchase.
• You must retain all packing materials for return shipment.
• All warranty service of this product must be made by an Authorized Apex Digital, Inc. Service Center.
• These warranties are effective only if the product is purchased and operated in the U.S.A.
• Labor service charges for set installation, setup, adjustment of customer controls and installation or repair of any type
of antenna or cable systems are not covered by this warranty. Reception problems caused by inadequate antenna or
cable system are your responsibility.
• Warranties extend only to defects in materials or workmanship as limited above and do not extend to any product
or parts which have been lost or discarded by you or damage to product or parts caused by misuse, accident,
damage caused by Acts of God, such as lightning or fluctuations in electrical power, improper installation,
improper maintenance or use in violation of instructions furnished by us; or to product which has been modified
or had the serial number removed, altered, defaced or rendered illegible.
How to Obtain W
arranty Service
lf after following all the operating instructions in this manual and reading the TROUBLESHOOTING section you find that
service is necessary:
1. Contact our Customer Service Center directly call 866 4 APEXlNC (866-427-3946 ), Mon-Fri 8:30am-5:00pm (California).
2. After obtaining the requested information, you must present your receipt to the Authorized Service Center to obtain
warranty service.
3. "Authorized" Apex Digital, Inc. Service Center personnel will come to your home when warranty service is required.
Depending on service required, it will either be performed in your home or the set will be taken to the Authorized Apex
Digital, Inc. Service Center' s repair facility for repair and then returned to your home at no cost to you, while under the
Limited Ninety (90) Days Warranty.
Limitations
All warranties implied by state law, including the implied warranties of merchantability and fitness for a particular purpose,
are expressly limited to the duration of the limited warranties as set forth above. With the exception of any warranties implied
by state law as hereby limited, the foregoing warranty is exclusive and in lieu of all other warranties, guarantees,
agreements and similar obligations of manufacturers or seller with respect to the repair or replacement of any parts. In no
event shall Apex Digital, Inc. be liable for consequential or incidental damages.
No person, agent, distributor, dealer or company is authorized to change, modify or extend the terms of these warranties in
any manner whatsoever. The time within which action must be commenced to enforce any obligation of Apex Digital, lnc.
arising under this warranty or under any stature, or law of the United States or any state thereof, is hereby limited to ninety
(90 ) days from the date you discover or should have discovered the defect. This limitation does not apply to implied
warranties arising under state law.
This warranty gives you specific rights and you may also have these rights which may vary from state to state. Some states
do not allow limitation on how long an implied warranty lasts, when an action may be brought, or the exclusion or limitation
of incidental or consequential damages, so the above provisions may not apply to you.
Instruction Manual
Page 19

Please read this manual carefully before operation.
AT STEREO COLOR TELEVISION
INSTRUCTION MANUAL
AT3208S
Page 20

APEX Digital, Inc.
Ontario, CA 91761
FOR SERVICE CALL: 866-4-APEX-INC
Website: http://www.apexdigitalinc.com
 Loading...