

Page 1
Page 2

Thank you for choosing this AOC LED TV.
Before installing and turning on your AOC LED TV, please spend a few minutes to read this manual thoroughly and r
Note: This product is subject to continuing improvement,
*The illustrations in the manual may not be exactly the same as those displayed on the screen. In this case, please operate according to the version you
have purchased.
and changes may be made without prior notice.
etain it for future reference.
1
Page 3

Contents
IMPORTANT INFORMATION ............................................................................................................................................................. 3
WARNING............................................................................................................................................................................................................................. 3
CAUTION .............................................................................................................................................................................................................................. 3
Product disposal at end of life ........................................................................................................................................................................................... 3
IMPORTANT SAFETY INSTRUCTIONS ........................................................................................................................................... 3
SAFE USE OF TV ................................................................................................................................................................................ 4
Installation ............................................................................................................................................................................................................................. 4
AC outlet ............................................................................................................................................................................................................................... 4
LCD screen ........................................................................................................................................................................................................................... 4
Wiring .................................................................................................................................................................................................................................... 5
Electric shock ....................................................................................................................................................................................................................... 5
Lightning storms .................................................................................................................................................................................................................. 5
When not in use ................................................................................................................................................................................................................... 5
Overloading .......................................................................................................................................................................................................................... 5
Optional equipment ............................................................................................................................................................................................................. 5
Small accessories ............................................................................................................................................................................................................... 6
Antennas ............................................................................................................................................................................................................................... 6
Disposal of used batteries ................................................................................................................................................................................................. 6
Cleaning ................................................................................................................................................................................................................................ 6
Magnetic interference ......................................................................................................................................................................................................... 6
Sound .................................................................................................................................................................................................................................... 6
Ventilation ............................................................................................................................................................................................................................. 7
Moisture ................................................................................................................................................................................................................................ 7
Volume Adjustment ............................................................................................................................................................................................................. 7
Servicing ............................................................................................................................................................................................................................... 7
PACKAGE CONTENTS ....................................................................................................................................................................... 8
LOCATING CONTROLS AND INPUT IN THE TV ............................................................................................................................ 9
Inserting batteries into the remote control .................................................................................................................................................................... 10
INSTALLATION ................................................................................................................................................................................... 11
Installing the table-top stand............................................................................................................................................................................................ 11
Wall-mounting .................................................................................................................................................................................................................... 11
CONNECTING THE TV ..................................................................................................................................................................... 12
Cable System or VHF/UHF Antenna System ............................................................................................................................................................... 12
HD Cable Box/HD Satellite Box ...................................................................................................................................................................................... 12
Connection with HDMI ...................................................................................................................................................................................................... 12
Connection with Component Video ................................................................................................................................................................................ 13
Connection with Composite Video ................................................................................................................................................................................. 13
Connection with PC .......................................................................................................................................................................................................... 13
PC INPUT SIGNAL REFERENCE TABLE ...................................................................................................................................... 14
HDMI INPUT SIGNAL REFERENCE TABLE .................................................................................................................................. 14
VIDEO INPUT SIGNAL REFERENCE TABLE ............................................................................................................................... 14
VIDEO COMPONENTS SUPPORTING TV, VIDEO AND S-VIDEO ........................................................................................... 14
USING AOC TV ................................................................................................................................................................................... 15
Turning the TV on and off ................................................................................................................................................................................................ 15
Setting Language .............................................................................................................................................................................................................. 16
Search Channels ............................................................................................................................................................................................................... 17
Select a Source ................................................................................................................................................................................................................. 18
Channel switch/return ....................................................................................................................................................................................................... 19
Volume adjustment and muting ...................................................................................................................................................................................... 19
Screen settings .................................................................................................................................................................................................................. 20
Sound settings ................................................................................................................................................................................................................... 21
Channel Settings ............................................................................................................................................................................................................... 22
PC Settings ......................................................................................................................................................................................................................... 23
Function settings ............................................................................................................................................................................................................... 24
TROUBLESHOOTING ....................................................................................................................................................................... 25
DIMENSIONS AND SPECIFICATIONS ........................................................................................................................................... 26
2
Page 4
Important Information
WARNING
Important Safety Instructions
1) Read and keep these instructions.
2) Heed all warnings.
3) Follow all instructions.
4) Connect the TV only to the appropriate power source.
un-insulated dangerous voltage that may cause risk of electric shock to
persons.
operating and maintenance (servicing) instructions in the printed
information that comes with the TV.
To reduce the risk of fire or electric shock, do not expose this TV to
rain or moisture and do not place objects filled with liquids, such as
vases, on the TV.
This symbol is intended to alert the user to the presence of
This symbol is intended to alert the user to important
CAUTION
To prevent electric shock, do not use the polarized AC plug of this TV
with an extension cord. Fully insert the prongs into the plug to prevent
blade exposure.
AOC strongly recommends that users use the wall-mount bracket or
table-top stand designed for your ACO LCD TV. Contact your dealers
for details.
Use of wall-mount brackets or table-top stands designed for other LCD
TVs may result in instability and cause injury.
Product disposal at end of life
AOC is concerned about environmental protection. This LCD TV
contains recyclable materials.
At the end of life, professional waste disposal companies can
disassemble the recyclable materials of this product and minimize the
quantity of materials needing processing. The LCD used in this product
contains no mercury. Please dispose of this product properly at the end
of its useful life according to the local laws.
technology is incorporated under license from SRS Labs, Inc.
TruSurround XT
with rich bass and clear dialog from only two speakers.
is a trademark of SRS Labs, Inc. TruSurround XT
®
creates a truly immersive surround sound experience
5) Do not install the TV in places with high temperatures or
humidity or places with excessive dust or mechanical vibration.
6) Do not block any ventilation vents to protect the TV from
overheating. Install in accordance with the manufacturer’s
instructions.
7) Do not install near any heat sources, such as radiators, heat
registers, stoves, or other apparatus (including amplifiers), that
produce heat.
8) Do not use this apparatus near water.
9) If the provided plug does not fit into your outlet, consult an
electrician for replacement of the obsolete outlet.
10) Protect the power cord from being walked on or pinched,
particularly at plugs, convenience receptacles and the point where
it exits from the apparatus
11) Use only the accessories/attachments approved by the
manufacturer.
12) Use only with the cart, stand, tripod, bracket or table
manufactured or specified by the manufacturer, or sold with the
apparatus. When a cart is used, use caution when moving the cart
and apparatus together to avoid injury from overturn.
13) Unplug this apparatus during lightning storms or when unused for
long periods of time.
14) Refer all servicing to qualified service personnel. Servicing is
required when the apparatus has been damaged in any way, such
as when a power-supply cord or plug is damaged, liquid has been
spilled on or objects have fallen into the apparatus or when the
apparatus has been exposed to rain or moisture and does not
operate normally, or has been dropped.
15) When any liquid or solid object enters the enclosure, unplug the
TV from the outlet and call to have it serviced before using again.
16) Do not use the TV under 0°C.
17) When moving the TV from a cooler place to a hotter place or
from and to places with dramatic temperature changes, blurred
images or abnormal colors may occur due to vapor condensation.
Please wait for a few hours to let the vapor clear before turning on
the TV again.
3
Page 5
Safe use of TV
Installation
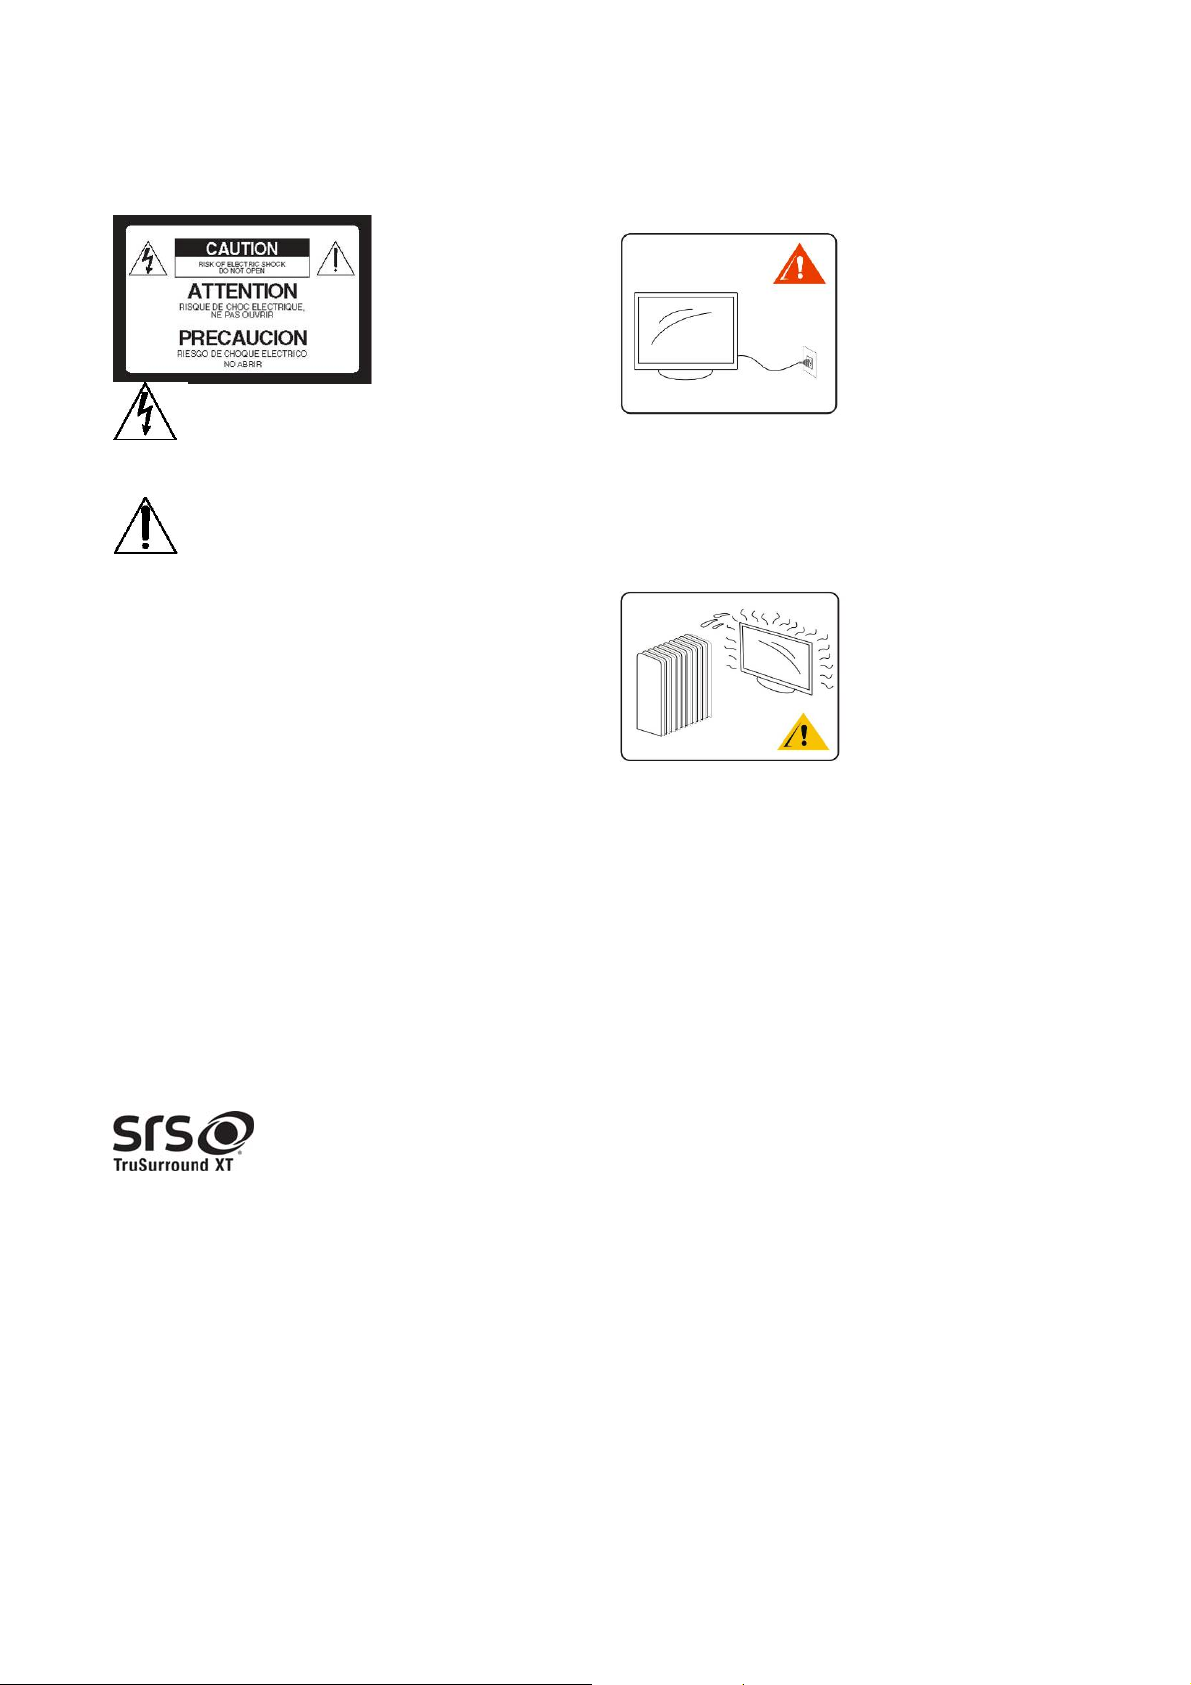
Placement for viewing
When watching TV, users are recommended to maintain at a distance of
3-7 times the screen height and watch in moderately bright
surroundings. Watching TV for too long or in a dark environment may
cause eye fatigue. In order to obtain a clear picture, do not project the
screen to direct illumination. Users are recommended to use spot
lighting directed down from the ceiling and block the screen with an
opaque cloth. I
materials on the floor and walls.
Take actions to prevent the TV from toppling over and causing injury
by securing the TV to a wall or stand.
The TV should be installed near an easily accessible AC power outlet.
Follow the instructions below to place the TV to prevent the TV from
falling off the stand or wall-mount bracket. This may cause damage or
serious injury.
y Place the TV on a stable, level surface.
y Do not hang anything on the TV. Never allow children to climb on
the TV.
y Do not install the TV in places producing extreme temperatures,
such as under direct sunlight, near a radiator, near a heating vent, or
in the direct line of air-conditioning vents.
y Never place the TV in hot, oily, humid or excessively dusty places.
y Do not install the TV where insects may enter.
y Do not install the TV in places that may be exposed to mechanical
vibration.
y Do not install the TV in places where it may protrude, such as on or
behind a pillar, or where you may bump your head on it. This may
result in injury.
Outdoor use
Do not install this TV outdoors. If the TV is exposed to rain, it may
cause a fire or electric shock. Never expose the TV to direct sunlight to
prevent damage as a result of high temperatures.
Vehicles, ships and other vessels
y Do not install this TV in a vehicle.
y Bumping of the vehicle may cause the TV to fall and cause injury.
y Do not install this TV in a ship or vessel. If seawater enters the TV,
it may cause a fire or damage the TV.
Medical institutions
y Do not place this TV in places where medical equipment is in use.
y Interference may cause malfunction of both the TV and medical
equipment.
Attachments
Do not use attachments not recommended by the manufacturer to
prevent potential hazards.
Wall-mount installation
Wall mount installation requires the use of a wall-mount bracket. When
installing or removing the TV on or from the wall-mount bracket, make
sure that it is done by qualified contractors. The TV may fall and cause
serious injury if it is not securely installed on properly removed from
the wall-mount bracket.
Please follow the instructions below to install the TV on a wall-mount
bracket.
t is best to install the TV in a r
oom without reflective
y Follow the installation instructions that come with the wall-mount bracket
exactly when installing the TV on the bracket.
y Make sure to install the brackets that come with the Wall-mount Bracket.
y Do not hang the TV from the ceiling. It may fall and cause serious injury.
AC outlet
y Use the AC power cord specified by AOC and suitable for the
voltage of the local area.
y If you are unable to insert the plug fully into the outlet, contact your
dealer.
y If you will not use the TV for several days, unplug the power cord
from the outlet. Do not pull on the cord, but only on the plug itself.
y The outlet should be easily accessible.
y Do not place the TV where the power cord is subject to wear or
damaged.
y Do not pinch, bend, or twist the cord excessively. The core lines
may be peeled off and cut, thus causing a short circuit and resulting
in fire or electric shock.
y Do not modify or damage the power cord.
y Do not put objects on or roll objects over the power cord.
y Do not move the TV while it is connected to a power supply.
y Keep the power cord away from heat sources.
y When unplugging the power cord from the outlet, unplug it from the
wall outlet first.
y Always unplug a power cord from the plug.
y Do not pull on the cord.
y Do not use the power cord coming with your AOC LCD TV on
other equipment.
y Always use the authentic power cord from AOC.
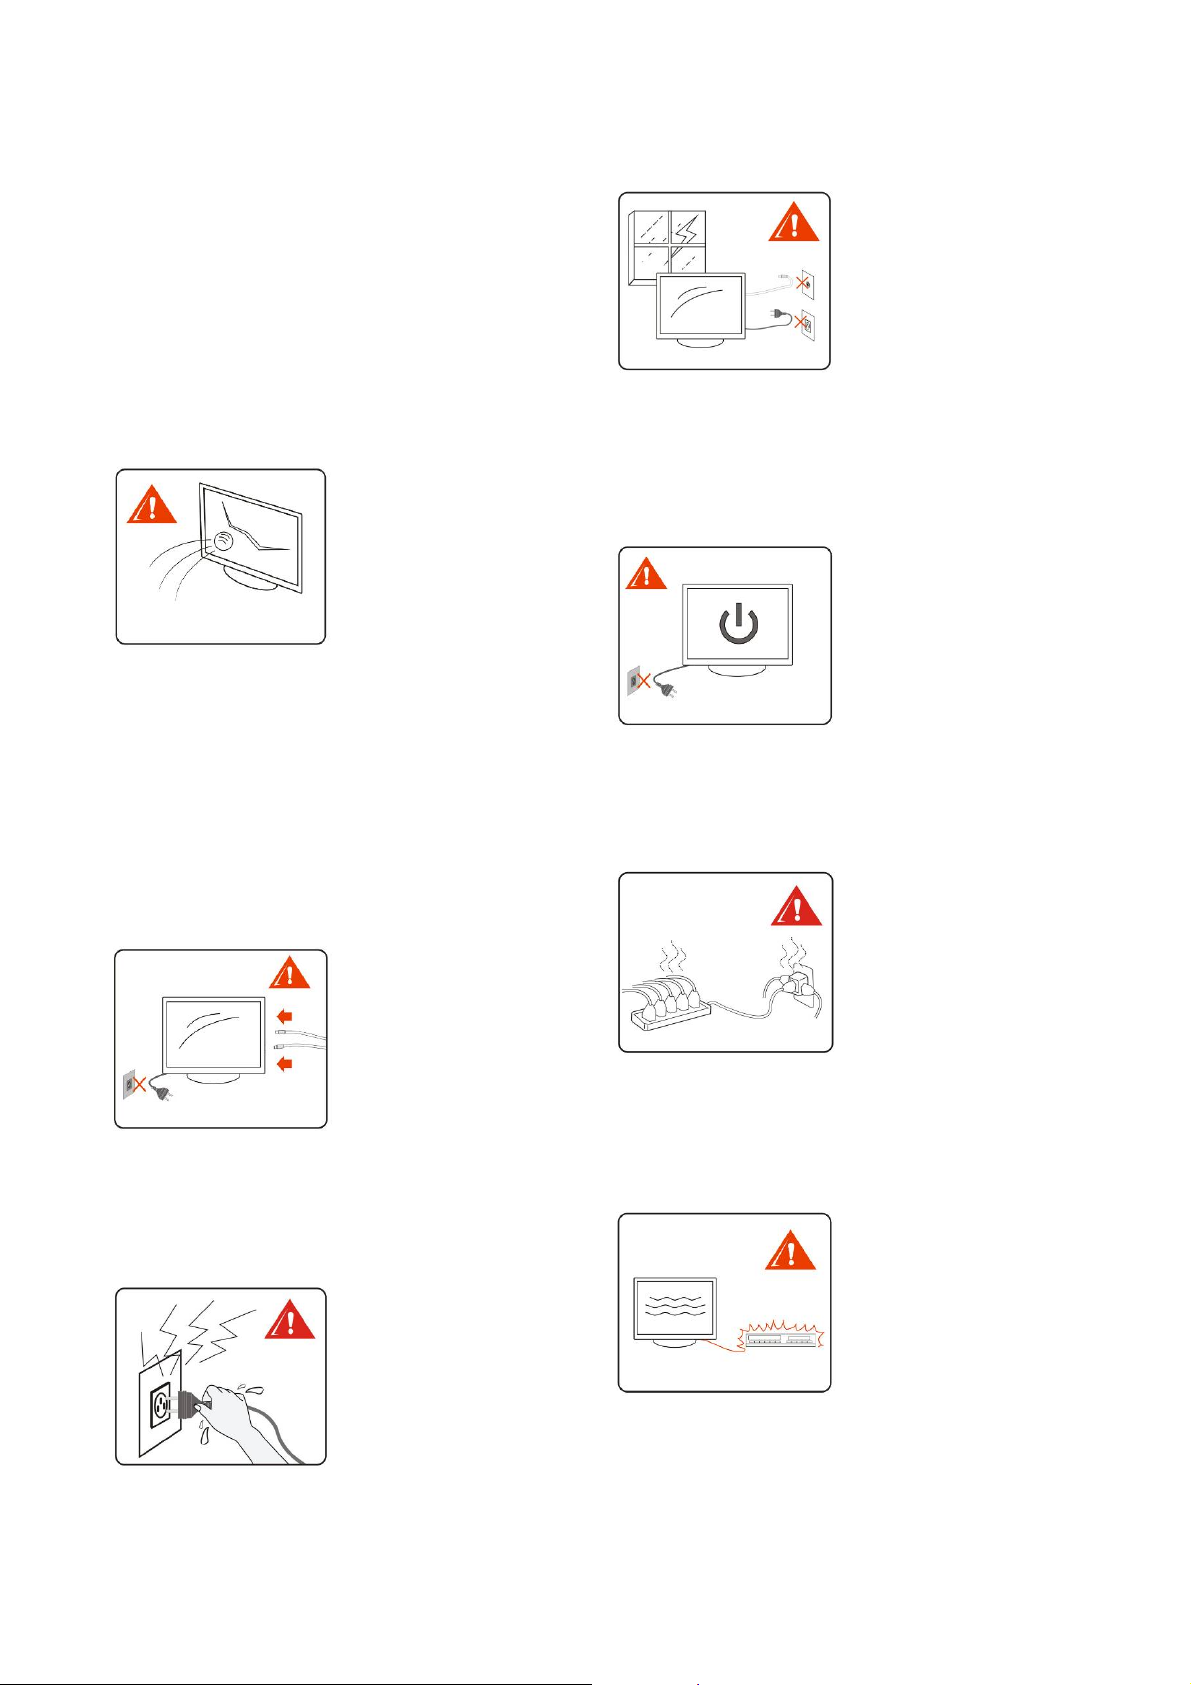
The TV should be installed near an easily accessible AC power outlet.
Do not connect the TV to an outlet with poor contact. Make sure that
the plug can be fully inserted into the outlet. Surge may occur and
cause a fire if the plug is poorly connected to the outlet. If the outlet has
poor contact, have it replaced by an electrician.
Follow the instructions below to prevent the power cord from being
damaged. A damaged power cord may cause a fire or electric shock. If
this happens, stop using the power cord and call your dealer or the
AOC Service Center to have it replaced.
LCD screen
y Although the LCD screen is made with high-precision technology
and delivers over 99.99% of effective pixels, black or white sports
(RGB) may appear continually on the LCD screen. Either black or
white spots are the structural property of the LCD panel and not a
malfunction.
y The LCD screen is made with high-precision technology to deliver
high performance and picture quality. Although the backlight of this
TV is to maximize the brightness of the TV, the brightness of the
screen may be uneven in the absence of any input signal or when
the screen is blank when viewed in a dark environment. This is
normal and not a malfunction of the TV. Changing the Backlight
Control from the Function Setting can improve this condition.
y Avoid exposing the LCD screen in direct sunlight. This will damage
the LCD panel.
y Do not press on or scratch the LCD screen nor put objects on the
TV. This may make the image display uneven or damage the LCD
panel.
4
Page 6
y Although smears may appear on the screen or the screen may turn
dark when using the TV in a cold environment, it is not a sign of
failure. As the temperature rises, the condition will improve.
y Ghosting may occur on the screen when still pictures are displayed
for a long time. It should disappear after some time.
y Both the screen and the enclosure will turn warm when the TV is in
use. This is not a malfunction.
y Avoid spraying insecticides containing volatile substances on the
screen .
y Avoid prolonged contact with rubber or plastics.
Broken pieces
Do not throw anything at the TV. The screen glass may break as a result
of impact and cause serious injury.
If the TV screen cracks, do not touch it before disconnecting the TV
from the power source. Doing so may cause electric shock.
Handling broken glass and liquid crystal leakage
Broken glass will fall off and crystalline liquid may leak out when the
LCD panel is damaged. Do not touch the broken glass and toxic
crystalline liquid with bare hands to prevent cuts, poisoning or
infection. Also, avoid contact of the broken glass or crystalline liquid
with the eyes or mouth. If this happens, rinse with a large amount of
drinking water immediately and consult your physician.
Wiring
Unplug the power cord from the outlet before connecting cables to
ensure personal safety. Avoid stepping on the cables to prevent
damaging the TV.
lightning storms or when unused for long periods of time in order to
prevent damage to the TV as a result of lightning or power line surges,
and thereby enhance the protection for the TV.
When not in use
If you will not use the TV for several days, unplug the power cord from
the outlet for environmental and safety reasons. Even when the TV is
turned off, it is still connected to a power source. Therefore unplug the
power cord from the outlet to disconnect the TV from the power
supply.
Overloading
This TV is designed to operate at 220VAC. Avoid connecting too many
appliances to the same receptacle to avoid fire or electric shock.
Electric shock
Do not touch the AC power cord or the TV with wet hands. Plugging in
or unplugging the AC power cord in or from the outlet with wet hands
may cause electric shock.
Lightning storms
Unplug the TV from the outlet and disconnect the antenna during
Optional equipment
Do not install optional equipment too close to the TV. Keep equipment
at least 30cm from the TV. If the VCR is connected in front of or next
to the TV, the picture quality may be distorted. When placing
equipment with EMI near the TV, picture distortion or noise may occur.
5
Page 7
Small accessories
Keep small accessories out of children’s reach.
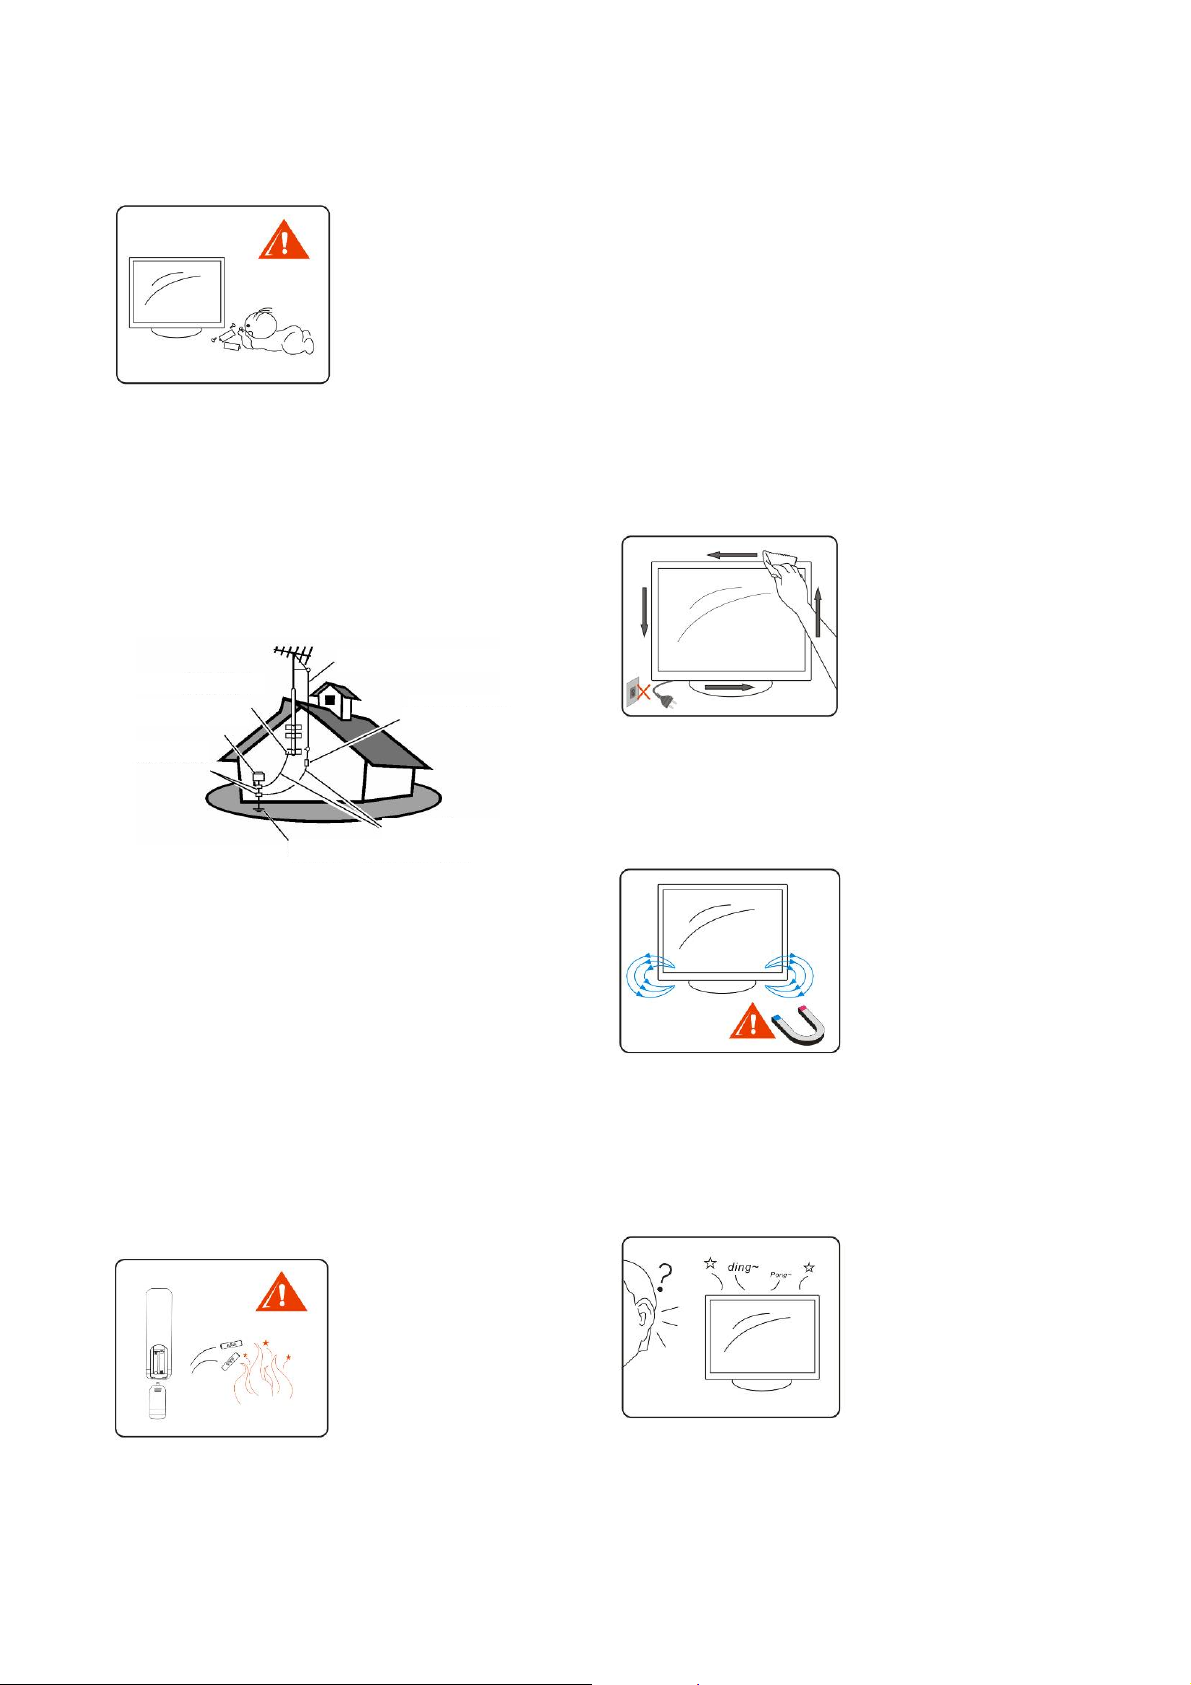
Antennas
If an outdoor antenna is installed, follow the precautions below. Keep
an outdoor antenna away from high-voltage feeder lines or other
streetlamp or power circuits or in places that may come in contact with
power lines or circuits of such kind.
When installing an outdoor antenna system, do not touch these power
lines or circuits. The consequence may be fatal.
The antenna system must be grounded to prevent surges or built-up
static charges.
Antenna lead-in wire Antenna
Grounding clamps
Electric service equipment
Grounding clamps
Power service grounding electrode system
Antenna grounding according to the National Electrical Code
Caution for CATV system providers: CATV system providers shall
follow the NEC Section 820-40 where the proper grounding principles
are specified; particularly that cables must be grounded to the
building’s grounding system and kept as close as possible to the
antenna lead-in point.
Antenna discharge unit Antenna
Ground conductors
Batteries
y Do not dispose of batteries in the fire.
y Dot not short-circuit, disassemble or overheat batteries.
y Incorrect replacement of batteries may cause the risk of battery
explosion. Always replace with batteries of the same or equivalent
type.
Disposal of used batteries
Dispose of used batteries according to local laws and regulations to
protect our environment.
Cleaning
Cleaning the AC power plug
Unplug the AC power cord to clean the plug regularly. If too much dust
is deposited on the plug, it will absorb moisture, which reduces
insulation performance and may lead to a fire.
Clean the TV screen and enclosure
y Unplug the AC power cord from the outlet to prevent electric shock
during the cleaning process.
y Clean the TV enclosure with a soft dry cloth. Wipe off the dust on
the screen gently with a soft cloth. Remove stubborn stains with a
soft cloth dampened with mild soapy water. Never use strong
solvents, such as thinner or benzene to clean the screen or
enclosure.
y When cleaning with a chemically pretreated cloth, follow the
instructions on the package .
y Dust may accumulate at the ventilation vents over time. Therefore,
users are recommended to remove the dust at ventilation vents with
a vacuum cleaner regularly (once a month) to ensure good
ventilation.
Magnetic interference
The speakers equipped on this TV contain a strong magnet which
generates a magnetic field. Keep objects that may interfere with
magnetic fields away from the TV speakers.
Sound
If a snapping or popping sound is often heard from the TV when in use,
disconnect the power supply of the TV and consult your dealer or
service personnel. It is normal that snapping or popping sounds are
heard occasionally from the TV, particularly when turning the power on
and off.
6
Page 8
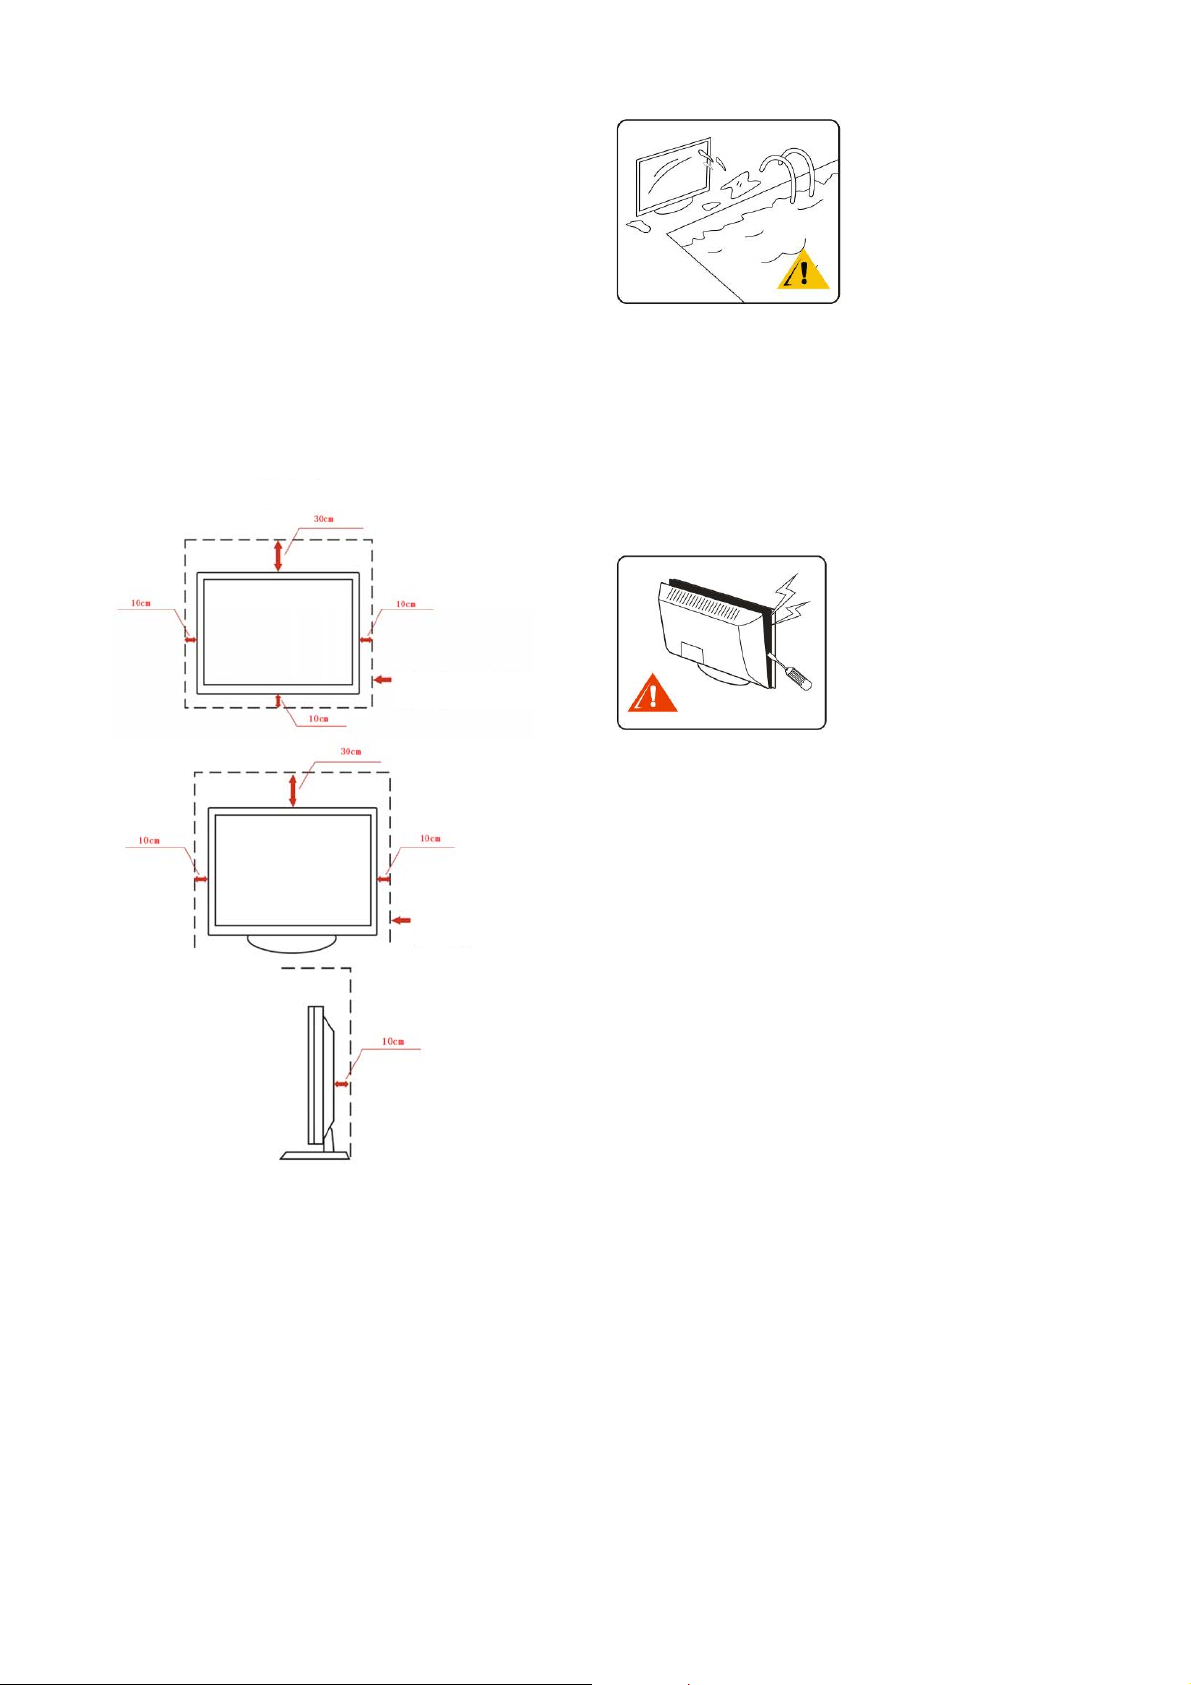
Ventilation
The vents on the TV enclosure are intended for ventilation. Do not
block or cover these vents to ensure reliable TV operations and prevent
it from overheating.
Dust and dirt deposits will accumulate in the TV in case of poor
ventilation. Follow the instructions below to ensure good ventilation.
y Do not install the TV with the screen facing upwards, downwards or
to either side.
y Do not install the TV turned over or upside down.
y Do not cover the ventilation vents with cloth or any materials.
y Do not place the TV on a bed, coach, rug or surface of similar
nature to that may block the ventilation vents.
y Unless proper ventilation is available, do not put the TV inside a
bookshelf or cabinet.
Always leave some space around the TV as shown below to promote
air circulation and thereby prevent the TV from overheating, which
may cause a fire or damage the TV.
Wall Installation with the Wall-mount Bracket
Volume Adjustment
Adjust the volume so as not to disturb your neighbors. Sound carries,
especially at night. Users are recommended to close the window or use
headphones when watching TV at night.
When using headphones, adjust the volume appropriately to prevent
hearing damage.
Servicing
Do not attempt to service your TV on your own. There is high voltage
and other hazards inside the TV. Call for service by qualified personnel.
Leave at least this much
space around the TV.
Installation with the
Table-top Stand
Do not install the TV in places with poor ventilation.
Objects and ventilation vents
Do not insert objects into the TV through the ventilation vents on the
enclosure. They may touch the high voltage points inside the TV or
cause short circuit to the TV and finally result in a fire or electric shock.
Do not put any object on the TV.
Leave at least this much
space around the TV.
Moisture
Moisture and flammable objects
y Do not put objects containing liquid on the TV, this includes vases,
to prevent liquid from dripping or splashing into the TV.
y Do not use AC-operated TVs near water, such as a bathtub,
washbowl, kitchen sink, laundry tub, swimming pool or wet
basement, to prevent a fire or electric shock due to short circuit.
y Do not expose the TV to water. Never spray liquid of any kind on
the TV. When liquids or solid objects enter the enclosure, stop using
the TV immediately to prevent electric shock or damage to the TV.
Call for service by qualified service personnel.
y Keep flammable objects or open flames (e.g. candles) away from
the TV to prevent a fire.
Replacement parts
When it is necessary to replace a part, make sure that the service
personnel give you a written guarantee that the replacement part is the
one specified by the manufacturer with the same technical
characteristics of the original one.
Use of unauthenticated replacement parts may cause a fire, electric
shock or other hazards.
Safety check
After the service, ask the service personnel to run a routine safety
check specified by the manufacturer to ensure that the TV is operated in
a safe condition. Always ask for service from qualified service
personnel.
Thank you for purchasing the AOC high-definition television. The
picture quality on the screen varies according to the TV signals
received. If you want to experience perfect picture quality of the AOC
high-definition television, you should choose HD programs . The AOC
high-definition television can receive and display HD programs
through the following ways:
y Use of an HD antenna to receive HD program broadcasts.
y Subscription to HD cable TV service.
y Subscription of HD satellite TV service.
y Use of Blue-ray Disc player or other external equipment.
Contact your cable or satellite TV service provider for more
information about upgrading to HD programs.
7
Page 9
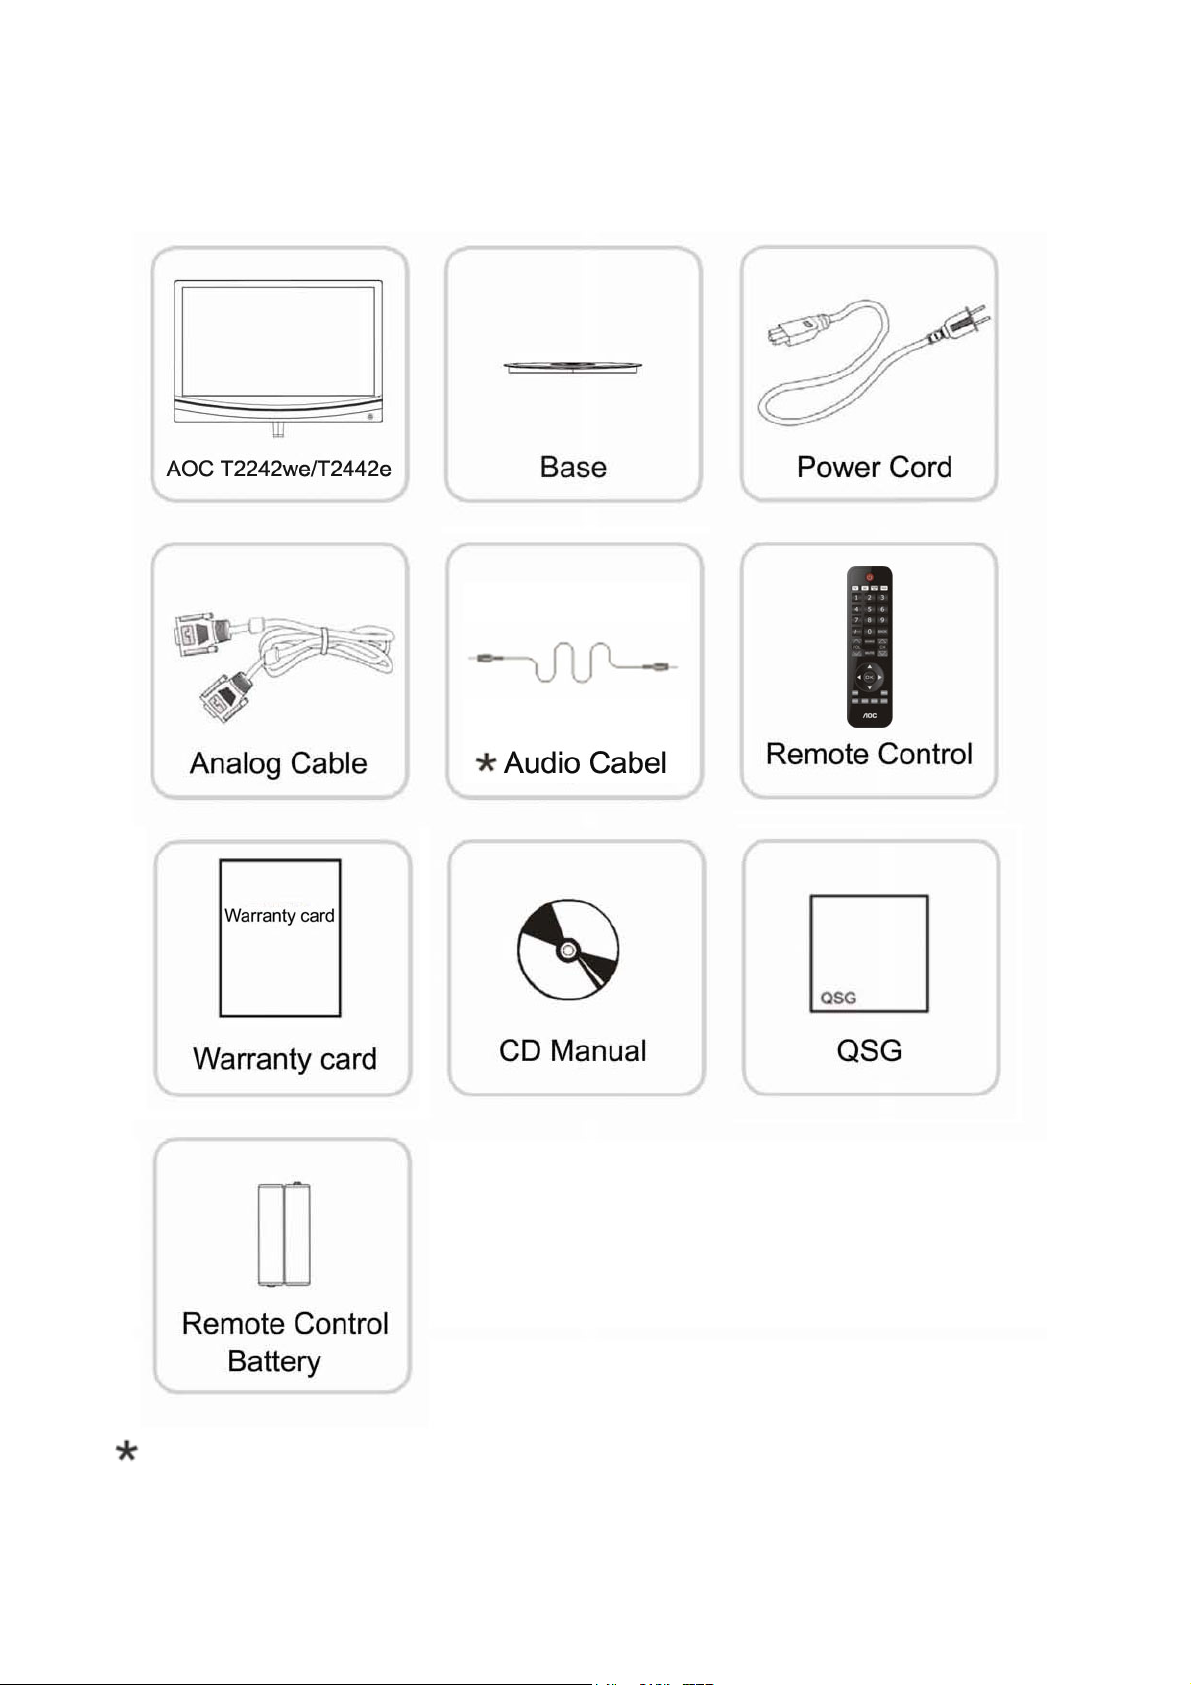
Package Contents
After opening the TV package , check if the TV and all accessories are in good condition and free from damage.
Not all signal cables (Analog, USB, DVI, and HDMI cables) will be provided for all countries and regions. Please check with the local dealer or
AOC branch office for confirmation.
8
Page 10

Locating controls and input in the TV
Vo l um e +
Vo l um e -
Channel +
Channel -
Menu
Source
HDMI Input VGA Input
HDMI
Component Video
Input (YPbPr)
Y Pb Pr
CV IN
Item Description
For users to connect the headphones. If the size of the headphones connector is incorrect, please use an adaptor (not supplied by
Headphone Jack
AOC).
The TV speakers will be muted after connecting the headphones to the TV.
The Composite Video Input (yellow) is designed for connecting with composite video out on video equipment. The composite
Composite Video Input
audio inputs (L (white)/R (red)) next to the Composite Video Input are designed for connecting with the audio out of the video
equipment.
The Composite Video Output (yellow) is designed for connecting with the component composite video input on video
Composite Video Output
equipment. The composite audio outputs (L (white)/R (red)) next to the Composite Video Output are designed for connecting
with the TV audio input. This function is effective in TV, video and S-video modes.
S-video Input
The S-video Input is designed for connecting with webcams or any video equipment with the S-video output. The picture quality
of S-video is better than that of the composite video. The audio input is shared with the composite audio input.
The HDMI (High Definition Multimedia Interface) provides an uncompressed, all-digital audio/video interface between this TV
and any audio/video equipment equipped with the HDMI (e.g. STB, DVD player, Blue-ray Disc player, A/V receiver and PC).
The HDMI supports enhanced or high-definition video and digital audio as well.
If the equipment is equipped with the DVI (Digital Video Interface) rather than the HDMI, connect the equipment to this TV
with a DVI-HDMI cable or DVI-HDMI adaptor. In this case, you will need to connect the audio of the equipment to the PC
Audio Input of this TV.
PC Audio Input
VGA AUDIO
R
L
Service
L RVideo
AV
OUT
Composite Video Output
Tuner
Power Button
R
L
Video
AV IN
S-VIDEO
Headphone Jack
Composite Video Input
S-video Input
HDMI Input
VGA Input
Component Video Input (YPbPr)
Antenna Input (Tuner)
DVI-HDMI cable
DVI-HDMI adaptor
If you want to view a program in 480im, 480p, 720p, 1080i, and 1080p modes, you will need to connect the equipment to this
TV with the HDMI.
Make sure to use HDMI cables carrying the HDMI logo.
When using this TV as a PC monitor, connect the VGA out of the PC to the VGA Input on this TV with a HD15-HD15 cable
(analog RGB). You can also connect other RGB video sources to this TV from this port. Refer to VGA Input Signal Reference
Table on p.14 for details.
For some Apple Macintosh computers, you may need to use an adaptor (not supplied). If this happens, connect the adaptor to an
Apple Macintosh computer before connected the Apple Macintosh computer to this TV with a HD25-HD15 cable.
If the screen has noise, is flickering or blurred, adjust the Pitch and Phase from the function menu.
This allows you to connect the video and audio of a video component with component video output. When compared with the
S-video and composite video, the component video delivers better picture quality.
The RF input allows you to connect the cable TV or VHF/UHF antenna to this TV.
9
Page 11

Buttons located on the right hand side of the TV operate the same way as these buttons on the remote control.
Button
Power button
TV/Video/HDMIP
C/Component
0-9
- / --
Return
Vo l u m e
Source
Mute
Program
/ / /
OK
escription
D
Press this button to turn the TV on and off. When the TV is turned
off, it will enter the energy-saving mode instead of disconnecting the
power unless the AC supply is turned off or the power cord is
unplugged from the outlet.
Press this button to directly launch to the corresponding mode,
including TV/Video/HDMIPC/Component.
Press the 0-9 buttons to select a channel. After pressing the number,
the TV will switch to that channel in about 2 seconds.
Press the 0-9 buttons and this button to select a channel with 3 digits.
Press this button to return to the previous channel or exit from the
OSD (On Screen Display) menu when displaying the menu items or
settings.
Press this button to adjust volume .
Press this button to display the input source list.
Press this button to mute the sound. Press the button again or the
Volume button (
Press this button to scan channels. Press to quickly change
from one channel to another.
Press the arrow buttons to select an item or adjust the settings in the
OSD function menu .
Press this button to select or confirm an item or setting.
) to restore sound.
Press this button repeatedly to toggle from one display mode to
Zoom
Menu
Display
Picture
Sound
Sleep
another. In general, there are Wide, 4:3, Zoom-in 1, Zoom-in 2,
Movie 1, and Movie 2 modes. In the HDMI mode, no display mode
is available. In the PC mode, only 4:3 and Wide are available.
Press this button to display various hotkey functions and function
menu hotkeys. The items in the OSD function menu vary according
to the input mode and contents.
Press this button to display the information of the channel or
program, if any. The OSD will disappear in a few seconds. Press
the button again to turn off the display.
Press this button repeatedly to toggle from one picture mode to
another, including Standard, Vivid, Movie, Energy-saving and
Custom. The picture mode is also adjustable from the screen settings.
Refer to Screen Settings in p. 20.
Press this button repeatedly to toggle from one sound mode to
another, including Standard, Music, Voice and Custom. The sound
mode is also available from the Sound Settings in p.22.
Press this button to select the time to turn off the TV (ineffective in
the PC mode). The sleep timer is also available from the OSD. Refer
to Screen Settings in the TV function menu.
Inserting batteries into the remote control
Insert two “AAA” batteries (supplied) into the removed control as shown in the diagram.
10
Page 12

Installation
Refer to the illustrations in the “Safe Use of TV.”
Installing the table-top stand
Take out the TV set and the table-top stand from the box and assemble them together with the screws in the attachment box as shown below.
1. Place the TV screen downward on a table covered with a soft cloth or cushion. Put the table-top stand on a firm surface.
2. Insert the table-top stand into the hole at the bottom of the TV set.
Place the TV on a firm surface.
1. Make sure that the TV is placed in an area with good ventilation and the vents on the back cover are not blocked.
2. Make sure that at least 15cm of space is maintained around the TV to ensure good ventilation.
3. Do not place the LCD TV near a radiator or other power sources.
4. Do not use candles and other fire sources to prevent danger.
5. Avoid exposing the TV to high temperature, direct sunlight and rain. Keep the TV away from splashes.
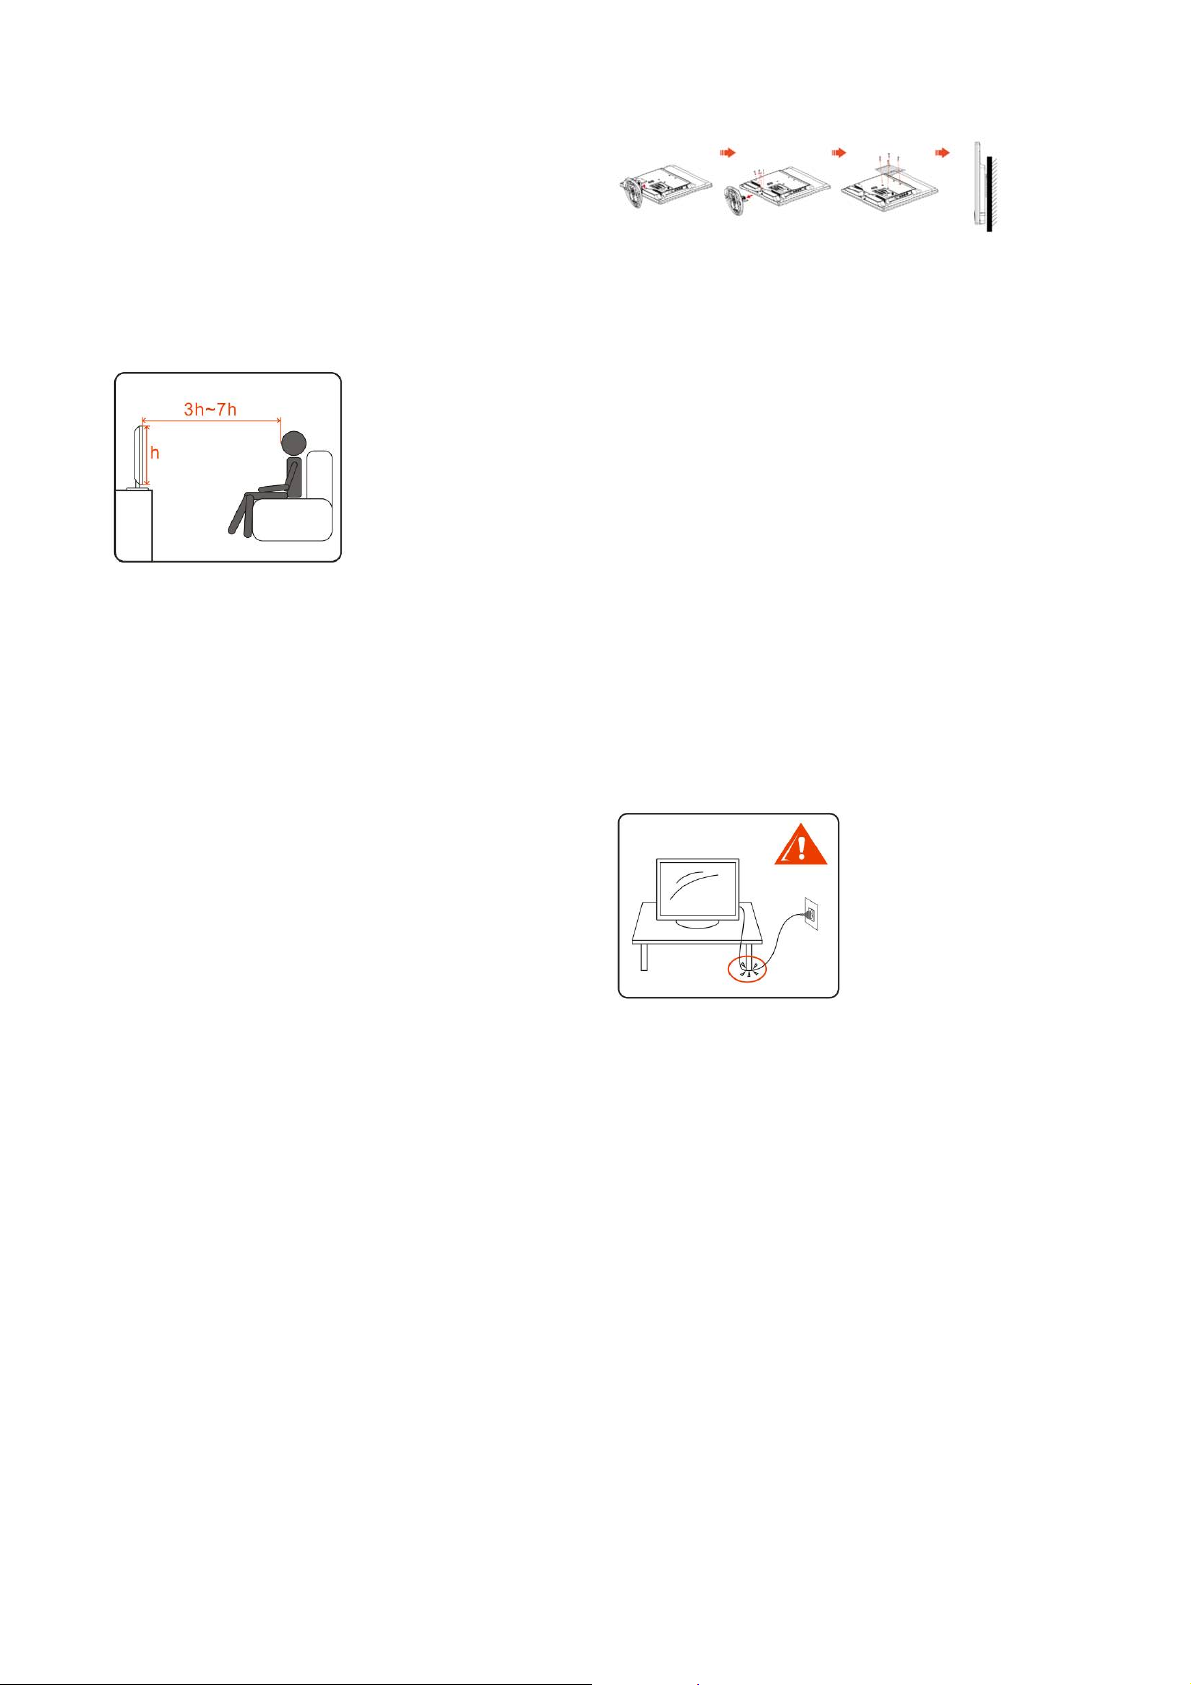
Wall-mounting
Install the TV on a wall by using the wall-mount bracket (sold separately). Before mounting the TV on a wall, remove the table-top stand from the TV
according to the following simple steps:
1. Disconnect all cables from the TV.
2. Gently lay the TV screen downward on a firm table covered with a thick and soft cloth. Make sure that the table-top stand is hanging over the
edge.
3. Remove the screws as shown in the illustration for your model, pull the table-top stand out, and secure the screws back in their positions.
4. Do not remove other screws from the TV.
y Do not remove the table-top stand for any reason, except for installing the TV to a wall.
y Keep properly the screws removed from the TV and the table-top stand for re-installation of the TV on the table-top stand. Also, keep the screws
out of children’s reach.
y Refer to the instruction guide of the Wall-Mount Bracket for your model to install the wall-mount bracket. It needs special know-how to install
this TV, particularly for judging the strength of the wall to support the TV’s weight.
For product protection and safety reasons, AOC strongly recommends you to use the wall-mount bracket designed for your TV model and have your
TV installed on a wall by an AOC dealer or licensed contractor.
11
Page 13

t
TUNER
TUNER
TUNER
P
HDMI
CV IN
AV
OUT
VGA
AUDIO
Service
Y b Pr
L
Tuner
L RVideo
R
HD Multimedia Interface
P
HDMI
CV IN
AV
OUT
VGA AUDIO
Service
Y b Pr
L
Tuner
L RVideo
R
Connecting the TV
Cable System or VHF/UHF Antenna System
Apart from the standard-definition programs, you can watch high-definition programs with this TV (if they are available in your area).
This TV supports the reception of unscrambled digital programming for both cable and VHF/UHF antennas.
As 300 twin lead cables are easily affected by radio frequency interference and this will downgrade the signals; we strongly recommend that users
connect the antenna/cable input with 75 coaxial cables to obtain the optimal picture quality.
Cable or VHF/UHF (or VHF only)
75 coaxial cable
(Supplied)
VHF/UHF Inpu
Rear of TV
HD Cable Box/HD Satellite Box
By subscribing to HD cable service or HD satellite service, you can enjoy HD programs . Make sure to connect the HD cable or HD satellite box to
this TV via the HDMI I or component video (with audio) input for the best picture quality.
Connection with HDMI
If the HD cable or HD satellite box is equipped with DVI rather than HDMI , connect the HD cable or HD satellite box to this TV from the DVI out
on the HD cable or HD satellite box to the HDMI in of this TV with a DVI-to-HDMI cable or adaptor and connect the audio out of the HD cable or
HD satellite box to the PC Audio of this TV.
12
Page 14

Connection with Component Video
L R
L R
L R
Audio
Component Video Input
P
HDMI
CV IN
AV
OUT
VGA
AUDIO
Service
Y b Pr
L
Tuner
LRVideo
R
P
HDMI
CV IN
AV
OUT
VGA
AUDIO
Service
Y b Pr
L
Tuner
LRVideo
R
L
Video
R
Audio
AV IN
L
Video
R
L
Video
R
P
HDMI
CV IN
AV
OUT
VGA AUDIO
Service
Y b Pr
L
Tuner
LRVideo
R
AVI
N
S-
V
ID
E
O
R
L
V
id
eo
LVideo R
Audio
AV OUT
L
Video
R
L
Video
R
P
HDMI
CV IN
AV
OUT
VGA
AUDIO
Service
Y b Pr
L
Tuner
LRVideo
R
Audio
S-VIDEO
S-VIDEO S-VIDEO
L
R
S-VIDEO
L R
AV
IN
S-VID
EO
R
L
Vid
eo
A
V IN
S-V
ID
E
O
R
L
Vid
eo
VGA Audio
Audio
PC
A
VIN
S
-V
I
DEO
R
L
V
i
deo
Connection with Composite Video
Connection with PC
As shown below, you can use this TV as a PC monitor by connecting the PC to the TV with a VGA cable. This TV also supports PCs with DVI or
HDMI video.
y Connect the PC to the TV with a ferrite core VGA cable and audio cable.
y If the PC is connected to the TV and no signal is detected after 30 seconds, the TV will automatically enter standby mode.
13
Page 15

PC Input Signal Reference Table
After connecting the PC to the TV with the VGA port, set the PC output signal according to the table below.
Default PC mode
Standard Resolution H. Sync. (kHz) V. Sync. (kHz)
VESA 640 x 480 31.469 59.94
VESA 800 x 600 37.879 60.317
VESA 1024 x 768 48.363 60.004
VESA 1360 x 768 47.72 59.799
WXGA+ 1400 x 900 59.887 55.935
WSXGA 1680 x 1050 59.884 64.674
FHD 1920 x 1080 60 67.5
HDMI Input Signal Reference Table
When connecting the PC to this TV with HDMI, set the PC output signal according to the table below.
Default HDMI mode
Standard Resolution H. Sync. (kHz) V. Sync. (kHz)
VESA 640 x 480 31.469 59.94
VESA 800 x 600 37.879 60.317
VESA 1024 x 768 48.363 60.004
VESA 1360 x 768 47.72 59.799
WXGA+ 1400 x 900 59.887 55.935
WSXGA 1680 x 1050 59.884 64.674
HD 1920 x 1080 60 67.5
Video Input Signal Reference Table
1. After connecting video equipment to this TV with component video or HDMI, set the output signals of the video equipment according to the table
below.
2. If the graphic card of the PC supports video out, you can also set the PC output signals according to the table below.
Default Component Video or HDMI mode
SD 720 x 480i 15.734 60
SD 720 x 480P 31.5 60
SD 720 x 576i 15.625 50
SD 720 x 576P 31.25 50
HD 1280 x 720P 37.5 50
HD 1280 x 720P 45 60
HD 1920 x 1080i 28.125 50
HD 1920 x 1080i 33.75 60
FHD 1920 x 1080P 56.3 50
FHD 1920 x 1080p 67.5 60
Video Components Supporting TV, Video and S-video
PAL D/K B/G I ; NTSC M/N
HD Interface
You can also play back traditional programs with a DVD player or VCR player by connecting these video components to the TV from the video or
S-video terminals on the side of the TV.
14
Page 16

Using AOC TV
Turning the TV on and off
Press the Power button on the TV or remote control to turn on the TV.
15
Page 17

Setting Language
1
2
3
4
5
Press the Menu button to open the menu.
Press the
Press the
Press the
Press the Menu button to exit.
/ buttons to select [Function] and press the OK button.
/ buttons to select [Menu Language].
/ button to select a language : 简体中文, English, Français, Español, Português, ,
16
Page 18

Search Channels
1
2
3
4
Press the Menu b
Press the
Press the
Press the
utton to open the menu.
/ buttons to select [Channel] and press the OK button.
/ buttons to select [Auto Search] and press the OK button.
/ buttons to select [Ye s ] and press the OK button.
17
Page 19

Page 20

Channel switch/return
On the AOC TV, you can directly switch to another channel using the remote control or press the CH / buttons on the side of the TV to switch
to another channel.
1) Press the number buttons to switch to another channel .
2) Press the Program button to switch to another channel.
3) Press the Return button to return to the previous channel.
Volume adjustment and muting
1) Press the Volume button to adjust the TV volume.
2) Press the Mute button to mute the T
Press the Sound button to select a sound mode: Standard , Music,
Refer to Sound Settings on p.21 for more details.
V.
Voice, Custom.
19
Page 21

Screen settings
1
2
3
4
5
Item Description
Picture Mode
Brightness Adjusts screen brightness.
Contrast Adjust screen contrast.
Color Adjust screen color.
Sharpness Adjust screen sharpness.
Noise Reduction Reduces the noise level of connected equipment and VHF/UHF/CABLE input.
Color Temperature
Screen Ratio
• All screen modes are switchable from the Picture button on the remote control.
Press the Menu
Press the
Press the
Color Temperature or Screen Ratio and press the OK button to enter.
Press the
Press the Menu button to exit.
Standard Standard picture settings recommended for home entertainment.
Vivid Enhanced picture contrast and sharpness.
Movie For viewing movie-based contents, suitable for viewing in a cinema-like environment.
Energy Saving Mode Saves energy by reducing backlight strength.
Custom User-defined mode.
Neutral Gives the white colors a neutral tint.
Cool Gives the white colors a bluish tint.
Wa rm
Screen ratio modes: 4:3, Wide, Zoom-in 1, Zoom-in 2, Movie 1 and Movie 2 for general input sources.
No screen aspect is available in the HDMI mode.
In the PC mode only 4:3 and 16:9 are available. Users can press the Zoom button on the remote control to change the screen
ratio.
button to open the menu.
/ buttons to select [Video] and press the OK button.
/ buttons to select an item: Picture Mode , Brightness, Contrast, Color, Sharpness, Noise Reduction ,
/ button to adjust.
Gives the white colors a reddish tint.
20
Page 22

Sound settings
1
2
3
4
5
Item Description
Sound Mode
Bass Increases or decreases bass.
Treble Increases or decreases treble.
Balance Emphasizes left or right speaker balance .
MTS Selects sound effect mode: Mono or NICAM.
Surround Sets surround.
AVL Enables or disables Auto Volume.
Press the Menu
Press the
Press the
button to enter.
Press the
Press the Menu button to exit.
/ buttons to select [Audio] and press the OK button.
/ button to select an item: Sound Mode, Bass, Treble, Balance , MTS, Surround, AVL, and press the OK
/ buttons to select.
Voice: Enhances treble and maintains bass at a medium level.
Custom: Enhances bass and maintains treble at a medium level.
Standard: Suitable for spoken dialog.
Music: Enhanced treble and bass.
• Sound Mode is also accessible from the Sound button on the remote control.
button to open the menu.
21
Page 23

Channel Settings
The channel settings are available only in the TV mode.
1
2
3
4
5
Item Description
Auto Search
Add Channel Adds a new channel to the channel list.
Manual Search
Lock Channel Locks a channel so that it cannot be modified.
Skip Channel
Channel Exchange Exchanges from one designated channel to another designated channel.
Press the Menu button to open the menu.
Press the
Press the
or Channel Exchange and press the OK button to enter.
Press the
Press the Menu button to exit.
Automatically sets up the channel list on the TV for all receivable channels.
1. Select Auto Search.
2. Press the OK (confirm) button or the
3. Press the OK (confirm) button or the Menu button to end auto search.
4. If you run Auto Search again, the previously found channels will be overwritten with the newly searched channels.
Press the
The channel searched for will be stored by its default channel number and exit the manual search mode.
When it is enabled, the current channel will be skipped with pressing the
/ buttons to select [Channel] and press the OK button.
/ buttons to select an item: Auto Search, Add Channel , Manual Search, Lock Channel , Skip Channel
/ buttons to adjust.
button to start auto channel search. After the auto search is completed, the
channels found will be stored .
for 3 seconds to enter the manual search mode.
/ button.
22
Page 24

PC Settings
These settings are available only in the PC mode.
1
2
3
4
5
Item
Auto Adjustment
H. Sync Adjusts the horizontal position of the picture.
V. Sync Adjusts the vertical position of the picture.
Pitch Adjusts the pitch frequency of signals.
Phase Adjusts the phase frequency of signals.
Press the Menu button to open the menu.
Press the
Press the
button to enter.
Press the
Press the Menu button to exit.
/ buttons to select [PC] and press the OK button.
/ buttons to select an item: Auto Adjustment., H. Sync, V. Sync, Pitch and Phase and press the OK
/ buttons to adjust.
Description
Automatically adjusts the resolution for full-screen display of an input signal the TV receives from the connected
PC.
Please refer to the PC Input Signal Reference Table for more about the resolutions supported by this TV.
23
Page 25

Function settings
1
2
3
4
5
Item Description
Menu Language Selects the TV language .
Menu Display Time Sets the menu display time.
Sleep Timer
Advanced Contrast Sets contrast to the maximum value.
Dynamic Contrast Allows the TV to automatically adjust the contrast according to the brightness of screen.
Backlight Control
Channel Block
System Reset Reset all items to their default values.
Press the Menu button to open the menu.
Press the
Press the
Contrast, Backlight Control ,Channel Block or System Reset and press the OK button to enter.
Press the
Press the Menu button to exit.
Sets the time to enter the standby mode (ineffective in the PC mode). Users can also set the timer from the Sleep button on
the remote control.
Adjusts the brightness of the backlight (when the brightness of backlight is too low, the white screen may flicker when
turning on the TV; this is normal).
When it is turned on, users will need to input a 4-digit password to
1. Enter the Channel Search menu;
2. Watch the blocked channel; and
3. Enter the Channel Block Sub-menu.
When the TV is turned on, users only need to input the 4-digit password once to unlock all functions.
/ buttons to select [Function] and press the OK button.
/ buttons to select an item: Menu Language , Menu Display Time, Sleep Timer, Advanced Contrast, Dynamic
/ buttons to adjust.
24
Page 26

Troubleshooting
Condition Explanation/Solution
No picture
No picture Check the Power Saving settings.
Cannot receive any channels Make sure the power cord is correctly connected. Turn on the TV. Check the antenna/cable connections.
The TV is locked to one channel Run Auto Program to add receivable channels that are not present in the TV’s memory.
Cannot receive select channels Run Auto Program to add receivable channels that are not present in the TV’s memory.
The TV turns off automatically Check if the Sleep Timer is enabled or confirm the duration setting of timer.
No picture is displayed from some
video sources
Condition Explanation/Solution
Poor picture quality
The quality of images is not as good
as seen at the store
Double images or ghosts Check the antenna/cable connections. Check the antenna location and direction.
Only snow and noise are displayed
on the screen
Dotted lines or strips Keep the TV away from noise sources, such as cars, motorcycles or hairdryers.
No color/Dark picture/Incorrect
colors/Too bright picture
Noisy picture Make sure that the antenna is connected with a 75 coaxial cable. Keep the antenna cable away from other
Condition Explanation/Solution
No sound/Noisy sound
Good picture, no sound Check the volume control. Press the Mute or Vol+ button on the remote control until the muting symbol
Make sure the Cable setting is correct for your TV signal source.
Check if the antenna is connected to the TV at the rear of TV. This may be a problem of the TV station. Try
another channel. Adjust contrast and brightness.
Check PC Power Management in General Settings.
Check the connection between the optional equipment and the TV. Press the Source (input) on the remote control.
Select the desired input from the External Inputs list.
Picture quality depends on the signal quality.
Check if the antenna is broken or bent.
Check if the antenna has reached the end of its serviceable life. (3-5 years in normal, 1-2 years at the seaside.)
If using 300 twin lead, move the excess lead away from the TV or try using 75 coaxial cable instead.
Press Picture to select the desired Picture Mode.
Adjust the Picture Mode item in the Picture Settings .
connecting cords.
To avoid TV interference, make sure to use an undamaged antenna cable.
disappears from the screen.
Disconnect your headphones.
For HDMI equipment, confirm that the audio output setting of the connected equipment is set to PCM. This TV’s
Audio Noise Make sure that the antenna is connected with a 75 coaxial cable. Keep the antenna cable away from other
Condition Explanation/Solution
PC Input
No picture/No signal Confirm the PC is correctly connected to the TV from either the PC OUT (with an HD15 cable) or HDMI out.
Poor picture quality Adjust the resolution. Adjust Pitch and Phase.
Wide Mode changes automatically If the 4:3 Default in the Screen settings is set to other options than Off, the current Wide Mode setting is
Picture size reduces suddenly The picture size reduces during the commercials. This is because of the way the provider broadcasts the
Black bands appear at the edges of
the screen
Some details are lost when displayed
in certain programs on DVD or other
digital sources display, particularly in
scenes with fast motion or a darker
tone
Remote control does not operate Check the polarity of the batteries or replace the batteries.
HDMI inputs support PCM 32, 44.1 and 48 kHz.
connecting cords.
To avoid TV interference, make sure to use an undamaged antenna cable.
Ensure the output from the PC is one of the formats listed on p.18.
Turn off the PC. Confirm the PC connection and restart the PC. Plug and play will automatically detect the TV
and correctly set up PC resolution.
Verify if the Power Management on the PC is activated.
automatically replaced with the 4:3 default setting when you change the channel or video input. If you want to
select the Wide mode from the Zoom on the remote control, set the 4:3 Default to Off in the Screen settings.
Check the Wide options in the Screen settings.
commercial content. When HD content channels switch to SD contents (commercials), the picture size will reduce
and will be surrounded by a black border.
Some wide screen programs are filmed in aspect ratios that are greater than 16:9 (particularly for theatrical
releases). When displaying these programs, black bands will appear at the top and bottom of the screen .
Programs in 4:3 aspect ratio will have bands on the left and right sides of the screen.
This is because the digital compression of the source content used by certain digital broadcasts and DVDs may
cause your TV screen to display fewer details than usual or artifacts (small blocks or dots, pixilation) on the
screen. These signal compressions are more visible and depend on the clarity and resolution of the television.
Point the remote control at the remote control sensor located at the front of the TV.
Fluorescent lamps can interfere with the operations of your remote control. Turn off fluorescent lamps and try
again.
Remove obstacles within effective range of the remote control sensor.
25
Page 27

Dimensions and specifications
Model T2242we
Panel size
Resolution
Viewing angle
Brightness
Dynamic contrast
Speakers
Video System
Audio System
Antenna impedance
Input Voltage
Power consumption
Standby power consumption ≤1W ≤1W
Dimensions (WxHxD)
(with stand and support) (mm)
Wall-mounting Accessories
Wall-mounting bracket dimensions
Equipment
Operating temperature
Operating humidity
Storage temperature
Storage humidity
54.6cm (21.5”) 60.9cm (24”)
1920 x 1080 1920 x 1080
Horizontal: 170°
Vertical: 160°(Typ.)
2
250cd/m
20,000,000:1 20,000,000:1
5W x 2 5W x 2
PAL DK/BG/I PAL DK/BG/I
DK/BG/I DK/BG/I
75 75
220V, 50/60Hz 220V, 50/60Hz
45W 45W
521x401.5x179.4 581.4x435.6x194.4
Optional Optional
75 x75mm
M4x4 pcs (screws)
0ºC~35ºC
20~80%
-20ºC~50ºC
10~90%
250cd/m2
T2442e
Horizontal: 170°
Vertical: 160°(Typ.)
100 x100mm
M4x4 pcs (screws)
0ºC~35ºC
20~80%
-20ºC~50ºC
10~90%
26
 Loading...