

Page 1

HZ-500 USER MANUAL
English • Deutsch • Français • 中 文
Antari Lighting and Effects Ltd.
Page 2

A rubber cork was added as the picture shows below on the left.
When in use, just leave the rubber cork on the left attached to the fixation.
After use or before moving, remove the cap and fix it on the left and use rubber cork as stopper for the
fluid tank as below picture shows.
By doing this, users now are allowed to rotate the machine after fixing the rubber cork to the fluid tank.
Page 3

ANTARI HZ-500 DMX512 Settings
The HZ-500 is equipped with a DMX512 system. The machine uses one control channel
for adjusting the output volume.
250 - 255 = on (maximum output)
0 - 249 = off (no output)
ANTARI HZ-500 DMX512-Einstellungen
Das HZ-500 Dunstnebelgerät verfügt über ein DMX512-System. Das Gerät kann über
einen Steuerkanal imAusstoß reguliert werden.
250 - 255 = an (maximaler Ausstoß)
0 - 249 = aus (kein Ausstoß)
Page 4

Congratulations on the purchase o f your new
ANTARI HZ-50 0 HAZE MACHINE
-Int roduction
Thank you for choosing Antari HZ-500 Haze Machine. You now own a rugged
and state-of-the-art machine. Prior to use, we suggest that you carefully read
all of the instructions. By following the suggestions found in this user manual,
you can look forward to the best, virtually invisible haze effect and reliable,
satisfactory performance of your Antari HZ-500 Hazer for years to come.
Please follow these operational and safety instructions to ensure a long and
-Dan ger of Electr ic S hock
▪Keep this device dry
▪Use grounded electrical outlet. Prior to use take care to determine that the
unit is installed at the rated voltage.
▪Always unplug the hazer before filling its tank.
▪Turn off or unplug when not in use.
▪This machine is not water-proof. If moisture, water, or hazer fluid gets inside
the housing, immediately unplug the unit and contact a service technician or
your ANTARI dealer before using it again.
-Dan ger of Burn
▪No user serviceable and modifiable parts inside. Do not disassemble the
housing and do any modification; otherwise damage of the device or danger
of burn may be caused.
▪For adult use only. Hazer must be installed out of the reach of children.
Never leave the unit running unattended.
▪Position the haze machine in well-ventilated area. Please leave about 20cm
spaces surrounding the machine.
▪Never aim the machine at open flames or close to flammable items.
▪Never add flammable liquids of any kind (oil, gas, perfume) to the hazer
liquid.
▪Use only dealer recommended Antari high-quality hazer liquid (HZL).
Please do not use any other liquid which may cause erosion of inner parts.
▪If your Antari HZ-500 Hazer fails to work properly, stop using immediately.
Drain all hazer liquid from the tank, pack the unit securely (preferably in the
original packing material), and return it to your ANTARI dealer for service.
▪Please note before sending the machine for transporting purpose, make sure
the haze fluid tank is empty.
safe life for your hazer.
English 01
Page 5

▪Never drink haze liquid. If it is ingested, call a doctor immediately. If hazer
liquid comes in contact with skin or eyes, rinse thoroughly with water.
Pay attention to all warning labels and instructions printed on the exterior
of your Ant ari Hazer
-Unp acking & Insp ec tion
Open the shipping carton and verify that all equipment necessary to operate
the system has arrived intact. Before beginning initial setup of your ANTARI
HZ-500 Hazer, make sure that there is no evident damage caused by
transportation. In the event of that the unit's housing or cable is damaged, do
not plug it in and do not use it until contacting your Antari dealer for
assistance.
-Ope ration & Fillin g Haze Liquid
1.Place the unit on a flat surface. Plug power cord into a grounded electrical
outlet.
2.Remove the fluid tank cap and pour the Antari Haze Liquid into the tank
slowly and carefully to avoid overfilling. (Filling Suggestion: Please add 2
litres haze liquid in the first time of refill.Since second refill, add 1 litre
haze liquid for every refill.) Make sure the liquid level does not does not
exceed the mark on the tank.
3.Please refill haze liquid slowly. Otherwise, the haze liquid may overfill and
damage machine.Basically, every refill process of 1-litre haze liquid must
be separated into 5 times. It means after refilling about 200c.c. haze liquid
you have to stop refilling and check the tank. Please make sure that the last
200c.c haze liquids go through the filter inside the tank properly before
pouring next 200c.c. haze liquids into the tank.
(Usually it takes about 10 senconds for 200c.c. haze liquid to go through
the filter)
4.Please use only dealer-recommended high-quality haze liquid . Any other
types of fluids may cause health hazard and damage the unit. Use of any
other liquids may void warranty.
5.Please open the square door on the top of the flightcase before operation in
order to let the haze come out smoothly.
6.Set the power switch to “ON” on the control panel of the machine. Make
sure that the red indicator light is on.
7.There is an intake hole in the back of the flightcase. There are a metal net
and a filter attached on the intake, which can avoid the unit from clogging
problem. Please inspect and clean the metal net and filter periodically.
-Cau tion
1.Always monitor and make sure that there is sufficient haze liquid inside the
tank during operation.
2.When the machine is operated for a longer period of time under open-air
conditions, falling dust/debris might attach to the metal net and filter on the
intake hole. The metal net and filter is serviceable, which means those can
be detached easily by screw driver. Please use water to clean the metal net
and filter periodically. By doing this can avoid dust going into the hazers
02 English
Page 6
and prevent the clogging problem of hazers.
3.If you have followed the above operation steps, and you still experience low
output, mechanical noise or no output at all, unplug the unit immediately
from the mains. Check the fluid level, the external fuse, the remote control
connection, and the power cable from the wall. If all of the above appears to
be O.K., plug the unit in again. If the hazer still does not function,
discontinue operation or it may result in permanent damage to the unit.
Return the machine to your Antari dealer. Always drain tank before mailing
or transporting this unit.
4. Please detach the cap on the tank if you want to clean the cap.
Do not wipe it directly when the cap is attached on the tank.
By doing this you can avoid the dust fall into the fluid tank and contaminate
the haze liquids.
5.Please do not allow magnetic equipments to be close to the haze outlet door
of hazer. Magnetic equipment could cause wrong action of the door sensor.
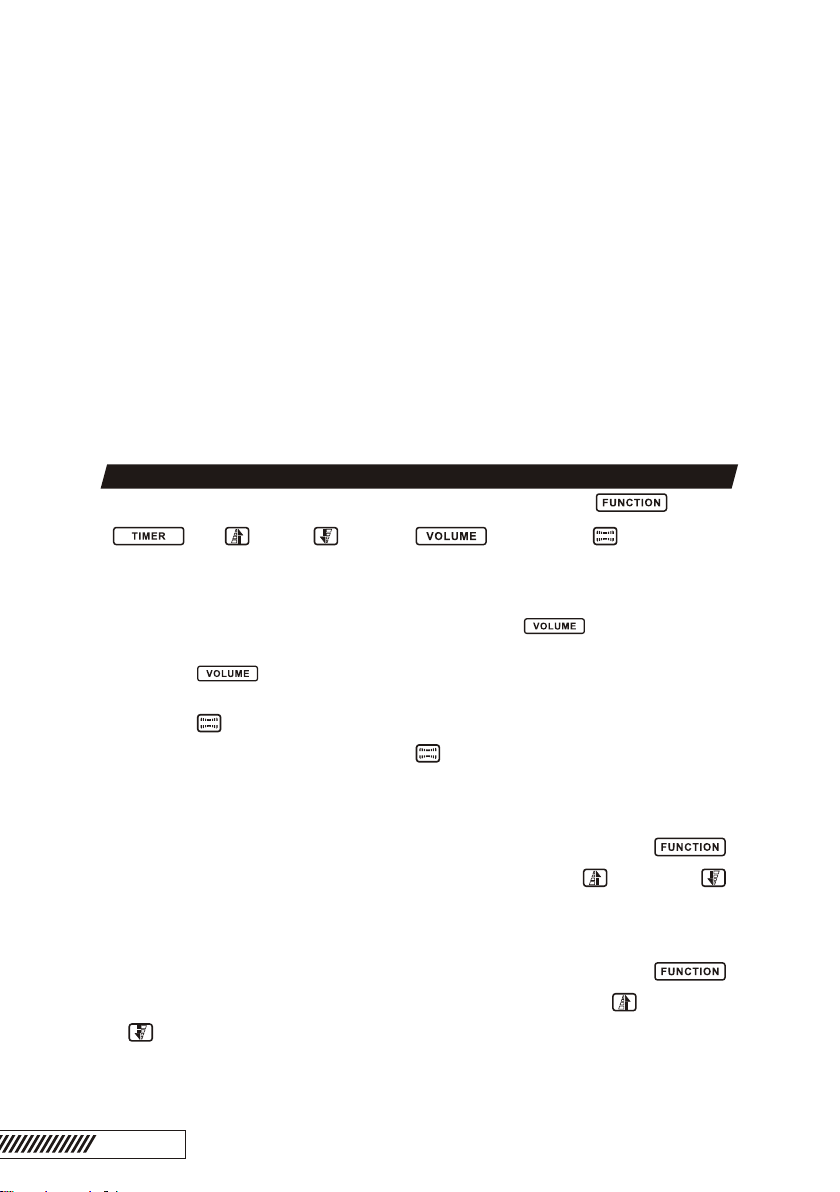
-Con trol Panel Oper ation
There are 6 buttons on the control panel. They are Function , Timer
, Up , Down , Volume and Manual respectively.
MANUAL
The function and operation of the controller is as following:
1.When switching the HZ-500 on, the characters, Ready To Haze, will be
displayed on the LCD screen. Pressing Volume button once can
activate the hazer and the LCD screen will display “Working”. Press the
Volume button again will cease hazing and the LCD screen will
display “Ready To Haze”. Under Ready To Haze mode, to keep pressing
Manual button can make the hazer produce haze(LCD screen shows
“Working”) while releasing Manual button will stop hazing(LCD screen
MANUAL
MANUAL
shows “Ready To Haze”). Finally, under this mode, press Timer button, the
timer will be triggered.
2.When the unit is under Ready To Haze state, press the Function
button once, the LCD screen shows Interval Set. Use Up and Down
button to adjust the interval of timer, which can be set from 1 to 200
seconds.
3.When the unit is under Ready To Haze state, press the Function
button twice, the LCD screen shows Duration Set. Use Up and Down
button to adjust the duration of timer, which can be set from 1 to 200
seconds.
English 03
Page 7
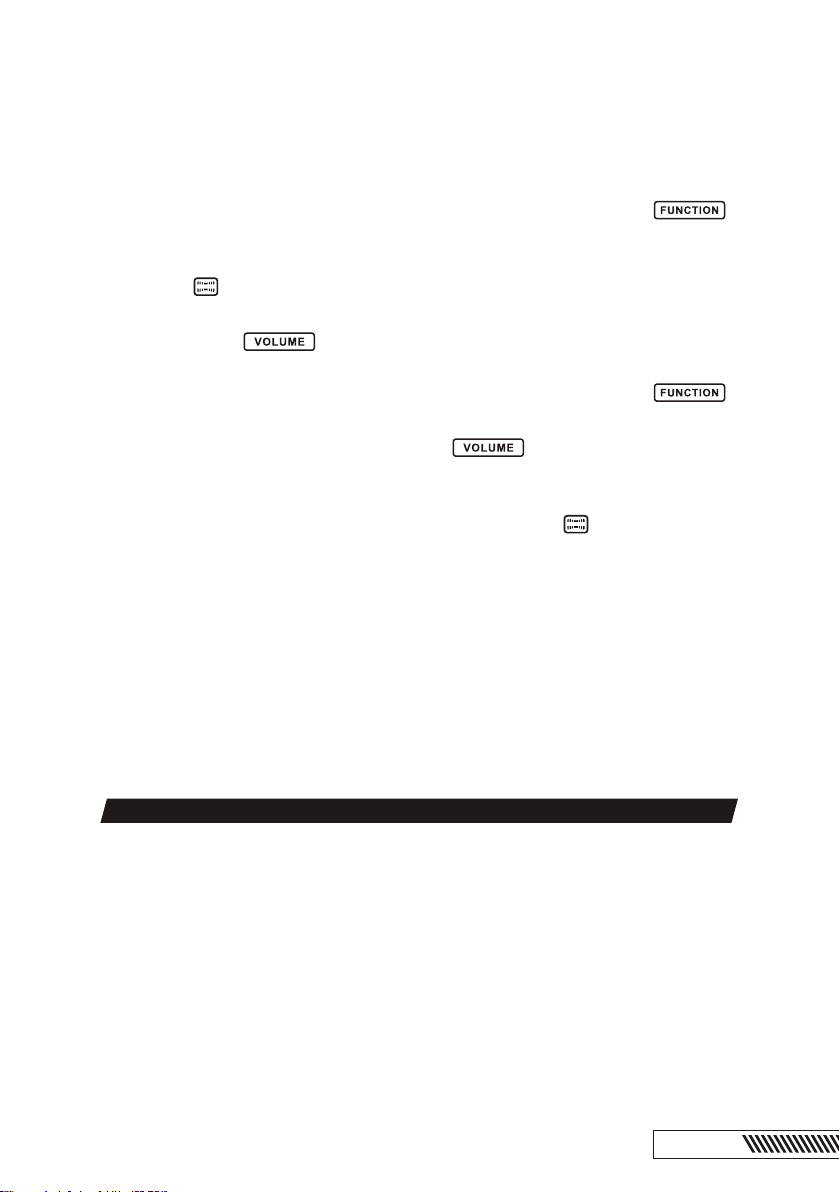
4.When the unit is under Ready To Haze state, press the Function button three
times, the LCD screen shows DMX 512. Use Up and Down button to adjust
the DMX address, which can be set from 1 to 512. (Note 1)
5.When the unit is under Ready To Haze state, press the Function
button four times, the LCD screen will show DOOR SENSOR ON. It means
that the sensor on the hazer outlet door is activated. At this state, press
Manual button to switch off the function of this sensor. After switching
MANUAL
off the door sensor, DOOR SENSOR OFF will be shown on the LCD screen.
Press Volume button to switch on the sensor again. (Note 2)
6.When the unit is under Ready To Haze state, press the Function
button five times, the LCD screen shows Direct Haze. The unit can enter
Direct Haze mode by pressing Volume button once. Under this
mode, hazer can start to produce haze directly by switching on the power.
When the unit is in this mode, the LCD screen will flicker slowly.When
LCD Screen shows Direct Haze by pressing Manual button once can
MANUAL
leave Direct Haze mode. After leaving this mode, the LCD screen will stop
flickering.
Note 1: The control of the master unit will override the control of the panel
controller when connecting the haze machine via DMX
Note 2: When hazer is under “DOOR SENSOR ON” mode, if the haze outlet
door is not opened properly, and user try to make the hazer work, the buzzer
will beep to warn and “DOOR CLOSED!!” will be shown on the flickering
LCD screen and hazing working will be stopped until the door is open firmly.
On the other hand, if hazer is under “DOOR SENSOR OFF” mode, above
situation will not occur.
-Haz er Liquid
Antari HZL-1 haze liquid was designed for the use with Antari HZ-500.
Antari HZL-1 is a non-toxic solution that produces a pure, translucent haze
with extremely long hang time and low moisture, perfect for HZ-500.
Important: Never mix oil-based and water-based hazer liquids. Before
switching the kind of hazer liquid in use, completely drain the hazer's tank to
avoid mixing.
04 English
Page 8

-Technica l Specifica tions
Model
Power Supply
Nominal Power Consumption
Output Volume
Tank Capacity
Fluid Consumption
Weight
Dimensions(LxWxH)mm
HZ-500
110/240V AC,
50/60Hz~
400W
2,800cu ft / min
2.5 liters
20hrs / liter
31.5Kg
510x375x350
Plea se save this us er m anual caref ully
English 05
Page 9

Antari HZ-500 Haze Machine
Herzlic hen Glückwunsch zum Kauf I hres neuen ANTARI
Dunstnebelgerätes.
-Ein führung
Vielen Dank, dass Sie sich für ein Antari HZ-500 Dunstnebelgerät entschieden
haben. Damit besitzen Sie nun ein robustes und leistungsstarkes Gerät mit
modernster Technik. Bitte lesen Sie vor dem Gebrauch des Gerätes alle
Anweisungen sorgfältig durch. Wenn Si e die Anweisungen in di eser
Bedienungsanleitung befolgen, können Sie sich in den nächsten Jahren auf
ein e zuv e rläss ige u nd übe rzeuge nde L eistu n g Ihre s Antar i HZ- 5 00
Dunstnebelgerätes mit einem praktisch unsichtbaren Dunstnebeleffekt freuen.
Bitte halten Sie sich an diese Bedienungs- und Sicherheitsanweisungen, um
eine lange und sichere Lebensdauer Ihres Dunstnebelgerätes
sicherzustellen.
-Str omschlagg ef ahr
▪ Vor Nässe schützen.
▪ Verwenden Sie eine geerdete 3-polige Steckdose. Vor Inbetriebnahme darauf
achten, dass das Gerät an die richtige Spannung angeschlossen wird.
▪ Trennen Sie das Antari Dunstnebelgerät vor dem Befüllen des
Flüssigkeitsbehälters immer vom Netz.
▪ Wird das Gerät außer Betrieb genommen, ist das Gerät auszuschalten oder
vom Netz zu trennen.
▪ Dieses Gerät ist nicht wasser- oder spritzwassergeschützt. Sollte
Feuchtigkeit, Flüssigkeit oder Nebelfluid in das Geräteinnere eindringen,
trennen Sie bitte das Nebelgerät sofort vom Netz und verständigen Sie einen
Servicetechniker oder Ihren Antari-Händler, bevor Sie das Gerät wieder in
Betrieb nehmen.
-Bra ndgefahr
▪Im Geräteinnern befinden sich keine vom Benutzer zu wartenden Teile.
Wenden Sie sich an Ihren autorisierten Fachhändler für Wartungs- und
Servicearbeiten. Bitte versuchen Sie nicht, das Gehäuse auseinanderzubauen
oder zu verändern. Bei Nichtbeachtung kann das Gerät beschädigt werden
oder Verbrennungsgefahr bestehen!
▪Nur für Erwachsene. Das Nebelgerät muss außerhalb der Reichweite von
Kindern installiert werden. Betreiben Sie das Gerät niemals unbeaufsichtigt.
06 Deutsch
Page 10

▪Betreiben Sie das Gerät in gut belüfteten Räumen. Um eine ausreichende
Belüftung zu gewährleisten, halten Sie bitte einen Mindestabstand von etwa
20 cm um und über dem Gerät ein.
▪Richten Sie den Auslass niemals auf offenes Feuer oder entflammbare
Gegenstände.
▪Mischen Sie niemals entzündliche Flüssigkeiten jeglicher Art (Öl, Gas,
Duftstoffe) unter das Nebelfluid.
▪Verwen den S ie a u ssch ließl ich d ie v on Ih r em H ändle r emp fohle ne
hochwertige Antari Dunstnebelflüssigkeit (HZL). Bitte verwenden Sie keine
anderen Flüssigkeiten, da dies den Verschleiß von Teilen im Geräteinneren
herbeiführen kann.
▪Für den Fall, dass Ihr Antari HZ-500 Dunstnebelgerät nicht ordnungsgemäß
funktioniert, schalten Sie es bitte sofort ab. Entleeren Sie den Tank
vo lls tän dig , ve rpa cke n Sie d as Gerät sorgfä ltig (a m b esten in der
Originalverpackung) und schicken Sie es zu Ihrem Antari-Händler ein.
▪Entleeren Sie den Tank immer, bevor Sie das Gerät verschicken oder
transportieren.
▪Trinken Sie niemals Nebelfluid. Sollte es dennoch einmal verschluckt
werden, konsultieren Sie bitte sofort einen Arzt. Sollte die Haut oder die
Augen einmal mit Nebelfluid in Berührung kommen, bitte sorgfältig mit
Wasser auswaschen.
Bitte beachten Sie alle auf Ihrem ANTARI Dunstnebelgerät angebrachten
Warnhinweise u nd Anweisungen.
-Aus packen und Pr üf en des Geräte s
Öffnen Sie den Versandkarton und stellen Sie sicher, dass alle Teile, die für
den Betrieb des Systems notwendig sind, in einem einwandfreien Zustand
eingetroffen sind. Wenn Ausrüstungsteile fehlen sollten, nehmen Sie bitte
sofo r t mit Ihrem A n t ari-Hä n d ler K o ntakt a uf. Bev o r Sie mit d e r
Inbetriebnahme Ihres Antari HZ-500 Dunstnebelgeräts beginnen, stellen Sie
sicher, dass kein offensichtlicher Transportschaden vorliegt. Falls das
Gehäuse der Einheit oder das Kabel beschädigt sein sollte, stecken Sie es
nicht in die Steckdose und versuchen Sie nicht, es zu benutzen, bevor Sie
Ihren Antari-Händler kontaktiert haben.
-Inb etriebnah me
1.Entfernen Sie alle Verpackungsmaterialien. Stellen Sie sicher, dass
Schaumstoff- und Plastikfüllmaterialien vollständig entfernt werden.
2.Stellen sie das Gerät auf eine ebene Fläche. Stecken Sie den Netzstecker des
Geräts in eine geerdete Steckdose.
-Bed ienung und Einf üllen der Dun stnebelfl üs sigkeit
1 . E n tf er n e n S i e d ie Ta n k k ap pe u nd f ü l le n S i e d i e A nt ar i -
Dunstnebelflüssigkeit langsam in den Flüssigkeitsbehälter ein, um ein
Überfüllen zu vermeiden. Befüllungsvorschlag: Bitte füllen Sie bei der
ersten Nachfüllung 2 Liter Dunstnebelflüssigkeit ein. Füllen Sie ab der
zweiten Nachfüllung 1 Liter bei jeder Nachfüllung ein. Stellen Sie sicher,
dass der Flüssigkeitspegel nicht die Markierung auf dem Behälter
Deutsch 07
Page 11

überschreitet.
2.Bitte füllen Sie die Dunstnebelflüssigkeit langsam ein. Andernfalls kann
die Dunstnebelflüssigkeit überlaufen und die Maschine beschädigen. Jeder
Befüllungsvorgang von 1 Liter Dunstnebelflüssigkeit ist grundsätzlich in 5
Teile aufzuteilen. Das bedeutet, dass Sie nach dem Auffüllen von etwa 200
cm3 Dunstnebelflüssigkeit mit dem Befüllen aufhören und den Tank
überprüfen müssen. Bitte stellen Sie sicher, dass die letzten 200 cm3 an
Dunstnebelflüssigkeit ordnungsgemäß durch den Filter in den Tank
gelaufen sind, bevor Sie die nächsten 200 cm3 in den Tank einfüllen.
G e w ö h n l i c h d a u e r t e s e t w a 1 0 S e k u n d e n , b i s 2 0 0 c m 3
Dunstnebelflüssigkeit durch den Filter gelaufen sind.
3.Bitte verwenden Sie ausschließlich Antari-Dunstnebelflüssigkeit. Andere
Flüs s i g keiten k ö nnen Ihr e Gesundh e i t gefäh r d e n und d as Gerät
beschädigen. Die Verwendung anderer Flüssigkeiten kann außerdem zum
Verlust der Garantieleistung führen.
4.Bitte öffnen Sie die quadratische Tür oben auf dem Flightcase vor der
Betätigung, damit der Nebel sanft ausströmen kann.
5.Schalten Sie das Gerät über den “Power”-Schalter an der Rückseite des
Geräts auf dem Bedienfeld auf "ON" und vergewissern Sie sich, dass das
rote Kontrolllämpchen aufleuchtet.
6.Auf der Rückseite des Flightcase befindet sich ein Einlassloch. Auf dem
E in la ss i s t e i n M e t a l l n e tz u n d e i n F i l t e r b e f e s t i gt , d ie
Verstopfungsprobleme der Einheit verhindern können. Bitte kontrollieren
und reinigen Sie Metallnetz und Filter regelmäßig.
-Vorsicht smaßnahme n
1.Achten Sie darauf, dass sich während des Betriebs des Gerätes immer
ausreichend Dunstnebelflüssigkeit im Flüssigkeitsbehälter befindet.
2.Wenn das Gerät für eine längere Zeitdauer im Freien betrieben wird, können
sich herabfallender Staub/Rückstände auf dem Metallnetz und dem Filter
auf dem Einlassloch festsetzen. Das Metallnetz und der Filter sind wartbar,
d. h. sie können mit einem Schraubendreher leicht entfernt werden. Bitte
verwenden Sie Wasser zum regelmäßigen Reinigen des Metallnetzes und
de s Gitter s. Dadu rch kan n ve rmieden werden , da ss Stau b in das
Du n s tn eb e lg er ät e i nd ri ng t , u n d d a s Ve rs t op fu ng sp r ob le m v o n
Dunstnebelgeräten kann vermieden werden.
3.Wenn Sie o.g. Bedienungshinweise befolgt haben und Ihr Gerät dennoch
nur einen geringen Dunstnebelausstoß erzeugt, ein mechanisches Geräusch
von sich gibt oder gar keinen Dunst ausstößt, trennen Sie es sofort vom
Netz. Überprüfen Sie das Flüssigkeitsniveau, die externe Sicherung, die
Verbindung mit der Fernbedienung und den Netzstecker. Befinden sich
diese in scheinbar einwandfreiem Zustand, schließen Sie das Gerät erneut
ans Netz an. Funktioniert das Dunstnebelgerät nach wie vor nicht, setzen
Sie es bitte außer Betrieb; andernfalls können bleibende Schäden am Gerät
verursacht werden. Senden Sie das Gerät an Ihren Antari-Händler zurück.
Entleeren Sie immer den Tank vor dem Versand bzw. dem Transport des
Geräts.
4.Nehmen Sie bitte den Deckel des Dunstnebelflüssigkeitbehälters ab, wenn
Sie den Deckel reinigen möchten. Wischen Sie ihn nicht direkt sauber, wenn
08 Deutsch
Page 12

sich der Deckel auf dem Tank befindet. Dadurch können Sie vermeiden,
dass Staub in den Flüssigkeitsbehälter fällt und die Dunstnebelflüssigkeit
verunreinigt.
5.Achten Sie bitte darauf, dass sich keine magnetische Gegenstände in der
Näh e der D unstn e belaus t rittsö ffnung befin d en, d i ese k ö nnten zu
Fehlfunktionen des Türsensors führen.
-Bed ienung des Co nt rollers
Auf dem Controller befinden sich 6 Tasten. Ihre Bezeichnungen lauten wie
folgt: [Fu nktion], [Timer] , [Hoch], [Runt er],
[Volumen] und [Manuell]. Die Funktion und die Betätigung des
MANUAL
Controllers sind wie folgt:
1.Beim Einschalten des HZ-500 wird die Meldung “Ready To H az e” [Bereit
zur Neb elpro dukt ion] auf dem L CD-B ildsc hirm ange zeigt . Dur ch
einmaliges Drücken der Volume-Taste wird das Dunstnebelgerät aktiviert
und der LCD-Bildschirm zeigt “Working” [Nebelproduktion aktiv] an.
Durch erneutes Drücken der -Taste hört die Dunstproduktion auf
und das Gerät befindet sich im Bereitschaftsmodus (der LCD-Bildschirm
zeigt “Ready To Haze” an). Durch Drücken und Halten der -Taste im
MANUAL
Modus Ready To Haze, wird das Dunstnebelgerät zur Produktion von Dunst
veranlasst (der LCD-Bildschirm zeigt “Working” an). Durch Loslassen der
Manual-Taste stoppt das Gerät die Dunstnebelproduktion (der LCDBildschirm zeigt “Ready To Haze” an). Durch Drücken der Timer-Taste in
diesem Modus wird der Timer ausgelöst.
2.Wenn sich das Gerät im Ready To Haze-Status befindet, drücken Sie ein
Mal auf die -Taste, woraufhin der LCD-Bildschirm “Interval Set”
[Intervall einstellen] anzeigt. Verwenden Sie die Up- und Down-Tasten, um
das Intervall des Timers zwischen 1 und 200 Sekunden einzustellen.
3.Wenn sich das Gerät im Ready To Haze-Status befindet, drücken Sie zwei
Mal auf die -Taste, woraufhin der LCD-Bildschirm “Duration Set”
[Zeitdauer einstellen] anzeigt. Verwenden Sie die - und -Tasten, um
die Zeitdauer des Timers zwischen 1 und 200 Sekunden einzustellen.
4.Wenn sich das Gerät im Ready To Haze-Status befindet, drücken Sie drei
Mal auf die -Taste, woraufhin der LCD-Bildschirm “DMX 512”
anzeigt. Verwenden Sie die Up- und Down-Tasten, um eine DMX-Adresse
zwischen 1 bis 512 einzustellen.5.Wenn sich das Gerät im Ready To Haze-
Deutsch 09
Page 13

Status befindet, drücken Sie v ier Mal auf die -Taste, woraufhin der
LCD-Bildschirm “DOOR ON SENSOR” [TÜR SENSOR AN] anzeigt und
sich das Dunstnebelgerät im Modus “Haze Outlet Door Sensor Activated"
[Sensor für Türe vor der Austrittsdüse aktiviert] befindet. Um den Sensor zu
deaktivieren, drücken Sie die -Taste. Drücken Sie die -Taste,
MANUAL
um den Sensor wieder zu aktivieren. (beachten Sie *Hinweis 2).
6.Wenn sich das Gerät im Ready To Haze-Status befindet, drücken Sie fünf
Mal auf die -Taste, woraufhin der LCD-Bildschirm “Direct Haze”
[Direkte Nebelproduktion] anzeigt. Das Gerät kann in den Direct Haze-
Modus eintreten, indem die -Taste ein Mal gedrückt wird. In
diesem Modus beginnt das Gerät direkt nach dem Einschalten mit der
Dunstproduktion. Wenn sich das Gerät in diesem Modus befindet, blinkt der
LCD-Bildschirm langsam. Wenn der LCD-Bildschirm “Direct Haze”
anzeigt, kann der Direct Haze-Modus durch einmaliges Drücken der -
MANUAL
Taste verlassen werden. Nach Verlassen von diesem Modus hört das
Blinken des LCD-Bildschirms auf.
*Hinwei s 1: Die Bedienung des Master-Geräts übergeht alle anderen Bedienungen,
wenn das Gerät DMX-gesteuert wird.*
*Hinwei s 2: Ist der Sensor für die Türe vor der Austrittsdüse aktivier t (der LCD-
Bildschirm zeigt “DOOR O N SENSOR" an) und die Türe ist nicht vollständig geöffnet
wenn der Benut zer versucht, das Gerät i n Betrieb zu setzen, ertö nt ein Warnton und es
wird "DOOR CLOSED!!" [ TÜRE GESCHLOSSEN!!] auf dem blinkenden L CDBildschirm angezeigt. Die Dunstneb elproduktion wi rd angehalten, bis die Tür
vollständig geöffnet ist. Ist der Sensor nicht aktiviert (der LCD-Bildschirm zeigt
"DOOR OFF SENSOR" [TÜR SENSOR AUS] an), wird die obige Situation nicht
auftreten.*
-Dun stnebelfl üs sigkeit
Die Antari HZL-1 Dunstnebelflüssigkeit wurde speziell für das AntariDunstnebelgerät HZ-500 entwickelt. Bei der Antari-Flüssigkeit HZL-1
handelt es sich um eine ungiftige Lösung, die einen reinen, lichtdurchlässigen
D u ns tn e be l m it a u ßer g ew öh n li ch l a nge r D au e r u nd g e ri ng e m
Feuchtigkeitsgrad erzeugt und perfekt auf das HZ-500 abgestimmt ist.
Wichtiger Hinweis: Vermischen Sie niemals Dunstnebelflüssigkeiten auf
Ölbasis mit Dunstnebelflüssigkeiten auf Wasserbasis. Bevor Sie die Art der
Dunstnebelflüssigkeit ändern, entleeren Sie den Flüssigkeitsbehälter des
Dunstnebelgerätes vollständig, um eine Vermischung zu vermeiden.
10 Deutsch
Page 14

-Technisc he Daten
Modell
Spannungsversorgung:
Nominalstromverbrauch:
Ausstoßvolumen:
Tankinhalt:
Fluidverbrauch
Gewicht:
Maße (LxWxH) mm:
HZ-500
110/240V AC,
50/60Hz~
400W
105 m³/min
2.5 liters
20 Stunden/Liter
31.5Kg
510x375x350
Bitt e bewahren Si e diese Anleitun g gut auf.
Deutsch 11
Page 15

Machine à Brouillard Antari HZ-5 00
Nous vous félicitons pour l'achat d e votre nouvelle
machine à brouillard ANTARI.
-Int roduction
Nous vous remercions d'avoir choisi une machine à brouillard Antari HZ-500.
Vous êtes en possession d'un produit robuste et puissant avec la technique la
plus récente. En vue d'utiliser correctement votre nouvel appareil, veuillez
lire attentivement ce mode d'emploi. Si vous respectez les instructions
suivantes dans ce mode d'emploi, vous profiterez d'une performance solide et
convaincan te de votre machine à brouillard Antari HZ -500 pour de
nombreuses années, produisant un effet de brouillard pratiquement invisible.
Pour assurer la longévité et le bon fonctionnement de votre machine à
brouillard, veuillez lire attentivement les instructions suivantes concernant
-Ris que d'élect ro cution
▪Protégez l'appareil de l'humidité.
▪Utilisez uniquement des prises de courant à terre à 3 broches. Avant la
première mise en marche, assurez vous que l'appareil soit branché à
l'alimentation correcte.
▪Toujours débranchez l'appareil de brouillard Antari avant de remplir le
réservoir.
▪Eteignez l'appareil ou débranchez-le du secteur, quand il est mis hors
d'usage.
▪L'appareil n'est pas protégé contre l'eau ou contre les projections d'eau. Si de
l'humidité, du liquide ou du liquide à brouillard devait pénétrer à l'intérieur
de l'appareil, débranchez-le immédiatement et contactez un technicien ou
votre revendeur Antari avant de le réutiliser.
le maniement, la sécurité et l'entretien.
-Dan ger d'incen di e
▪Il n'y pas de pièces échangeables ou nécessitant un entretien à l'intérieur de
l'appareil par l'utilisateur. Les travaux d'entretien sont à faire effectuer par
votre revendeur autorisé. S'il vous plaît, n'essayez pas de démonter le boîtier
ou faire des modifications; sinon danger d'endommager l'appareil ou
d'incendie.
▪L'appareil n'est prévu que pour des adultes. Installez l'appareil à brouillard
hors d'atteinte des enfants. Ne jamais faire marcher l'appareil sans
surveillance.
12 Fran ça is
Page 16

▪Faites marcher l'appareil dans les places bien aérées. Observez une distance
d'environ de 20 cm autour et au-dessus de l'appareil.
▪Ne jamais orienter le bec de sortie directement sur feu immédiat ou sur des
objets imflammables.
▪Ne jamais mélanger des liquides inflammables de n'importe quelle genre (de
l'huile, du gaz, des parfums avec le liquide à brouillard.
▪Utilisez uniquement le liquide à brouillard de haute qualité d'Antari (HZL),
recommandé par votre reventeur. S'il vous plaît, n'utilisez pas d'autres
liquides. Ceux-ci pourraient mener à l'usure des parts à l'intérieur de la
machine.
▪Si vot re m achin e à broui llar d Anta ri H Z-50 0 ne fonc tion ne pl us
correctement, éteignez-la immédiatement. Videz le réservoir completèment,
em ballez l'a ppareil so igneuse men t (d e pr éférence d ans l'e mba llage
d'origine) et retournez-le à votre revendeur Antari pour maintenance.
▪Faites attention à ce que le réservoir soit toujours complètement vidé avant
d'envoyer ou transporter l'appareil.
▪Ne jamais boire le liquide à brouillard. Si c'est le cas néanmoins, consultez
un médecin immédiatement. En cas de contact avec la peau ou les yeux,
rincer à fond avec de l'eau.
Veuillez suivre toutes les instructions de sécurité appliquée s su r le b oî ti er d e
votre machine à brouillard Antari.
-Déb allage & insp ec tion de la mach ine
Sortez la machine à brouillard de son emballage et assurez-vous que tout
l'équipement nécessaire pour la mettre en service soit intact. En cas de
livraison endommagée ou incomplète, toujours contactez immédiatement
votre revendeur Antari. Avant de mettre votre machine à brouillard Antari
HZ-500 en service, assurez-vous qu'elle n'ait subi aucun dommage évident
pendant le transport. Dans le cas où le boîtier ou le câble de l'appareil seraient
endommagés, ne branchez pas l'appareil et n'essayez pas de l'utiliser sans
avoir obtenu l'assistance de votre revendeur Antari.
-Mis e en service
1.Enlevez tous les matériaux d'emballage. Assurez vous d'avoir enlevé toute
la mousse et le rembourrage en plastique.
2.Placez la machine à brouillard sur une surface plane et branchez la fiche
d'alimentation de la machine à brouillard dans une prise de courant avec
terre.
-Man iement et rem pl issage du liq uide à brouil lard
1.Enlevez le couvercle du réservoir, versez le liquide à brouillard Antari
lentement dans le réservoir de la machine, afin d'éviter un remplissage
excessif. Proposition de remplissage: S'il vous plaît ajouter 2 litres de
liquide à brouillard au premier remplissage. A partir du deuxième
remplissage, s'il vous plaît ajouter à chaque remplissage 1 litre de liquide à
brouillard. Assurez vous que le niveau de liquide n'excède pas le marquage
sur le réservoir.
2.S'il vous plaît versez le liquide à brouillard lentement. Sinon, le liquide à
Franç ai s 13
Page 17

brouillard peut déborder et endommager la machine. En principe, chaque
opération de remplissage doit être divisée en 5 parts. Cela siginifit qu'il
faut arrêter le remplissage après avoir rempli environ 200 cm3 de liquide à
brouillard et vérifier le réservoir. S'il vous plaît assurez que les derniers
200 cm3 de liquide à brouillard soient coulés correctement dans le
réservoir à travers du filtre, avant que vous versiez les prochins 200 cm3
dans le réservoir. D'habitude il dure environ 10 secondes, jusqu'à ce que
200 cm3 de liquide à brouillard soient coulés à travers du filtre.
3.S'il vous plaît utilisez uniquement du liquide à brouillard Antari. D'autres
liquides peuvent mettre en danger votre santé et endommager la machine.
En outre, l'utilisation d'autres liquides peut mener à la perte de la garantie.
4.S'il vous plaît ouvres la porte quadratique en haut du Flightcase avant
l'actionnement, afin que le brouillard puisse sortir doucement.
5.Allumez la machine par l'interrupteur “Power” à la face arrière de la
machine sur le tableau de commande sur “ON” et vérifiez que le témoin
lumineux rouge s'allume.
6.Sur la face arrière du Flightcase, il y a une orifice d'entrée. A l'entrée, un
filet en métal et un filtre sont attachés, qui peuvent éviter les problèmes de
colmatage de l'unité. S'il vous plaît contrôlez et nettoyez le filet en métal et
le filtre régulièrement.
-Mes ures de préca ut ion
1.Assurez-vous, qu'il y ait toujours assez de liquide à brouillard dans le
réservoir pendant le fonctionnement de la machine.
2.Si la machine est opérée à long terme en plein air, de la poussière et des
débris peuvent pénétrer dans la machine et causer l'encombrement des
résidus sur le filet en métal et dans le filtre à l'orifice d'entrée. Le filet en
métal et le filtre sont entretenables, ce qui veut dire qu'ils peuvent
facilement être démontés avec un tournevis. S'il vous plaît utilisez de l'eau
pour le nettoyage régulier du filet en métal et de la grille. Ainsi on peut
éviter que de la poussière pénètre dans la machine à brouillard, et le
problème de colmatage de machines à brouillard peut être évité.
3.Si vous avez suivi les instructions mentionnées ci-dessus et votre machine à
quand-même une faible performance, émet du bruit mécanique ou pas de
brouillard du tout, débranchez la machine immédiatement du secteur.
Vérifiez le niveau du liquide à brouillard, le fusible externe, la connexion
avec la télécommande et l'alimentation au secteur. Si tous paraît d'être en
bon état, branchez la machine de nouveau au secteur. Si la machine ne
fonctionne toujours pas correctement, mettez-la hors marche, afin qu'elle
ne soit pas endommagée en permanence. Retournez la machine à votre
revendeur Antari. Toujours videz le ré servoir avant d'envoyer ou
transporter la machine.
4.S'il vous plaît enlevez le couvercle du réservoir de liquide à brouillard, si
vous voulez nettoyer le couvercle. Ne le frottez pas directement, si le
couvercle se trouve sur le réservoir. Ainsi vous pouvez éviter que de la
poussière tombe dans le réservoir de liquide et contamine le liquide à
brouillard.
5.S'il vous plaît faites attention à ce qu'il n'y ait pas d'éléments magnétiques
14 Fran ça is
Page 18

près de l'ouverture de sortie de brouillard. Des éléments magnétiques
pouraient mener à un dysfonctionnement du capteur de porte.
-Act ionnement d u ta bleau de comm ande
Il y a 6 touches sur le tableau de commande. Leurs désignations sont comme
suit : [ F onction] , [ Timer ] , [Aug m e nter],
[Baisser], [Volume] und [Manuel]. La fonction et l'actionnement
MANUAL
du contrôleur est comme suit:
1.Lors de la mise en marche du HZ-500, le message Ready To Haze [Prêt à la
production de brouillard] est affiché sur l'écran LCD. En appuyant une fois
sur la touche Volume, la machine à brouillard est activée, et l'écran LCD
affiche “Working” [Processus en cours]. En appuyent une autre fois sur la
touche , la production de brouillard s'arrête, et se trouve en mode
d'attente (l'écran LCD affiche “Ready To Haze”). En appuyant et tenant la
touche Manual en mode Ready To Haze, la machine à brouillard est incitée
à la production de brouillard (l'écran LCD affiche “Working”). En relâchant
la touche Manual, l'unité arrête la production de brouillard (l'écran LCD
MANUAL
affiche “Ready To Haze”). En appuyant sur la touche Timer dans ce mode,
le est déclanché.
2.Quand l'unité se trouve dans l'état Ready To Haze, appuyez une fois sur la
touche , ce qui est suivi de l'affichage Interval Set [Réglage
d'intervalle] sur l'écran LCD. Utilisez les touches Up- et Down pour
régler l'intervalle du timer, qui est réglable entre 1 et 200 secondes.
3.Quand l'unité se trouve dans l'état Ready To Haze, appuyez deux fois sur la
touche , ce qui est suivi de l'affichage Duration Set [Réglage de
durée] sur l'écran LCD. Utilisez les touches Up- et Down pour régler la
durée du timer, qui est réglable entre 1 et 200 secondes.
4.Quand l'unité se trouve dans l'état Ready To Haze, appuyez trois fois sur la
touche , ce qui est suivi de l'affichage DMX 512 sur l'écran LCD.
Utilisez les touches Up- et Down pour régler l'adresse DMX, qui est
réglable de 1 à 512.
5.Quand l'unité se trouve dans l'état Ready To Haze, appuyez quatre fois sur la
touche , ce qui est suivi de l'affichage DOOR ON SENSOR
Franç ai s 15
Page 19

[PORTE AU CAPTEUR] sur l'écran, et la machine à brouillard émet le
message “Haze Outlet Door Sensor Activated" [Porte de sortie de
brouillard activée par le capteur] modèle. Pour déactiver le capteur, Dans
cet état, appuyez sur la touche Manual. Appuyez sur la touche
MANUAL
pour réactiver le capteur (voir note 2).
6.Quand l'unité se trouve dans l'état Ready To Haze, appuyez trecinq fois sur
la touche , ce qui est suivi de l'affichage Direct Haze [Production
directe de brouillard] sur l'écran LCD. L'unité peut entrer dans le mode
Direct Haze en appuyant une fois sur la touche Volume. Dans ce
mode, la machine à brouillard peut directement commencer avec la
pr odu cti on de brouillar d par l a m ise en marche de l'interr upt eur
d'alimentation. Quand l'unité se trouve dans ce mode, l'écran LCD clignote
lentement. Quand l'écran LCD affiche Direct Haze, il est possible de quitter
le mode Direct Haze en appuyant une fois sur la touche Manual. Après
MANUAL
avoir quitté ce mode, le clignotement de l'écran LCD s'arrête.
*Note 1: La commande Master met hors service toutes les autres commandes
dès que la machine est commandée par DMX*
*Note 2: Quand le capteur pour la porte devant la buse de sortie est activé
(l'écran LCD affiche “DOOR ON SENSOR”) et la porte n'est pas ouverte
complètement, et l'utilisateur tente à mettre la machine en service, un vibreur
sonore donne un signal d'alarme, et "DOOR CLOSED!!" [PORTE
FERMEE!!] est affiché sur l'écran clignotant. La production de brouillard est
arrêtée, jusqu'à ce que la porte soit entièrement ouverte. Quand le capteur
n'est pas activé, l'écran LCD montre "DOOR OFF SENSOR" [CAPTEUR
PORTE DEACTIVEE], la situation mentionnée en haut ne se produira pas.*
-Liq uide à Brouilla rd
Le liquide à brouillard Antari HZL-1 a été conçu particulièrement pour la
machine à brouillard Antari HZ-500. Le liquide Antari HZL-1 est un liquide
non toxique, qui produit un brouillard pure, translucide, une durabilité
extrêmement prolongée, et à faible humidité, qui est parfaitement adapté au
HZ-500.
Important: Ne jamais mélanger les liquides à brouillard à base d'huile avec
des liquides à brouillard à base d'eau. Avant de changer le genre de liquide à
brouillard, toujours videz le réservoir complètement pour que de différents
liquides ne se mélangent pas.
16 Fran ça is
Page 20

-Car actéristi qu es Techniques
Modèle
Alimentation
Consommation nominale de courant
Volume d'émission
Contenu de réservoir
Consommation de liquide
Poids
Dimensions (LxlxH) mm
Gard ez ces instru ct ions.
HZ-500
110/240V AC,
50/60Hz~
400W
105 m³/min.
2.5 liters
20 heures/litre
31.5Kg
510x375x350
Franç ai s 17
Page 21

安特利 HZ-500 HAZER 特 效煙霧 機
感 謝 您 選 擇 安 特 利 HZ-500 Hazer, 此 為 一 堅 固 耐 用 並 能 提 供 乾 燥 的 薄
霧及安靜工作音量的特效機型。在開始使用之前,我們建議您先仔細閱
讀說 明 書 , 依 照 使 用 說 明 書 中 的 說 明 , 讓 您 在 使 用 HZ- 500 專 業 特 效 煙
霧機時非常安全,輕易的達到最滿意的薄透型煙霧效果,也使得機器的
使用壽命更為延長。
-避免觸電的安全使用方式
▪請保持機器乾燥。
▪使用前請小心判定電壓伏特數,並應配合接地型插座使用。
▪填充煙霧油至油桶前,請先拔掉插頭。
▪不使用時請關機,長時間不使用時請拔掉電源插頭。
-避免燃燒的安全使用方式:
▪機 器 內 部 並 無 一 般 使 用 者 可 變 動 之 結 構 , 請 勿 任 意 打 開 上 蓋 及 作 任 何
更改的動作,否則可能造成起火的危險!
▪機 器 僅 限 成 人 使 用 , 安 裝 煙 霧 機 之 地 點 應 避 免 兒 童 可 處 及 之 出 , 請 於
外出離去時關閉電源。
▪請 將 煙 霧 機 放 置 於 通 風 良 好 的 地 方 , 為 確 保 適 度 通 風 , 機 器 的 上 方 及
周圍請預留20cm空 間 。
▪請勿將機器對準火焰或靠近易燃物。
▪請勿將任何 可 燃 性 液 體( 例 如 油 脂, 瓦 斯, 香水),放置於煙霧油槽中, 並
請使用前詳細閱讀說明書。
▪請使 用 代 理 商所 推 薦 的Antari高 品 質HZL煙 霧 油 , 任 意 使 用 其 他 煙 霧 油
產品,可能導致內部零件腐蝕。
▪若 您 的Anta ri 機 器 有 任 何 不 當 運 轉 情 況 時 , 請 即 刻 停 止 使 用 , 倒 出 煙
霧油,仔細包好本產品(建議以原包裝) 送至代理商或經銷商處維修。
▪請 記 得 在 運 送 或 郵 寄 本 產 品 前 , 確 定 完 全 傾 倒 出 所 有 在 油 桶 中 的 煙 霧
油。
▪煙 霧 油 不 能 飲 用 , 誤 飲 時 , 如 有 任 何 不 適 請 立 即 就 醫 , 若 不 甚 接 觸 眼
睛,請即刻以大量清水清洗。
建議: 在 使 用 本 機 之 前 , 詳細的 閱 讀 一 次 印 刷 在 機 器上蓋 板 及 後 背 板 的
警語標示。
18 中 文
Page 22

-拆除包裝及檢視機器
請 打 開 包 裝 確 認 機 器 運 作 的 所 有 設 備 齊 全 , 並 檢 查 是 否 有 任 何 在 運 送
過 程 中 造 成 的 損 傷 , 如 果 有 發 現 損 壞 , 請 勿 插 電 使 用 , 並 請 立 即 向
Anta ri 經銷商聯絡 。
在 開 始 安 裝 與 設 定 機 器 之 前 , 請 先 確 認 本 產 品 是 否 有 因 運 送 過 程 而 造
成 的 損 壞 , 若 機 器 外 殼 、 控 制 器 或 電 源 線 有 任 何 損 壞 , 請 勿 插 上 插
頭,並請勿使用,馬上與Antari 代 理 商 或 經 銷 商 聯 繫 。
-操作機器
1.將 煙 霧 機 平 放 至 一 個 平 坦 的 位 置 , 將 電 源 線 插 在 有 接 地 的 插 座 上 。
2.打 開 油 桶 蓋 , 注 入Antari專 用 的 HZL 煙 霧 油 (請 注 意 機 器 正 面 的 油 量
指 示 刻 度 , 加 油 時 勿 超 過 其 安 全 刻 度 , 第 一 次 加 油 建 議 添 加 兩 公 升
的 煙 霧 油 , 爾 後 每 次 需 加 油 時 添 加 一 公 升 即 可),加 完 油 後 請 仔 細 蓋
上 油 蓋 。 任 意 使 用 其 他 煙 霧 油 可 能 會 造 成 煙 霧 機 的 損 壞 , 甚 至 其 輸
出 的 煙 霧 可 能 會 造 成 人 體 健 康 的 危 害 。 因 使 用 其 他 煙 霧 油 所 造 成 的
損壞不在保固範圍之內。
3.為HZ-500加 煙 霧 油 時 請 慢 慢 添 加 , 否 則 煙 霧 油 可 能 溢 出 並 造 成 機 器
的 損 壞 。 原 則 上 , 每 次 添 加 一 公 升 的 煙 霧 油 的 動 作 必 須 分 為5段 來 進
行 。 也 就 是 是 說 , 每 加200c .c.就 要 停 下 來 目 視 確 定 是 否 煙 霧 油 均 已
經完全經過油箱中的過濾棉,再進行後面的油料添加動作。
(通 常 , 每 次200c.c.煙 霧 油 約 需 要10秒 鐘 的 時 間 完 全 滲 透 過 油 箱 中
的過濾棉)。
4.啟 動 機 器 前 請 確 認 已 經 將 飛 行 箱 上 煙 霧 出 口 上 方的閘門開啟,以利煙
霧釋出。
5.將 機 器 操 作 面 板 上 的 紅 色 電 源 按 鈕 打 開 , 並 確 認 紅 色 電 源 燈 亮 起 。
6.飛 行 箱 背 面 有 一 個 進 氣 口 , 進 氣 口 有 防 塵 金 屬 網 和 過 濾 棉 來 保 護 機
器 , 使 其 內 部 零 件 免 於 堵 塞 而 損 壞 , 請 定 期 檢 示 並 用 清 水 清 潔 防 塵
金屬網和過濾棉。
-請注意
1.使 用 煙 霧 機 時 , 請 定 時 檢 視 油 桶 中 的 HZL 油 量。
2.煙 霧 油 在 添 加 時 不 要 超 過 油 桶 標 示 線 , 油 桶 須 預留空間做為空氣對流
之 用 , 添 加 太 多 的 煙 霧 油 , 壓 力 將 會 導 致 煙 霧 油 流 至 壓 縮 機 造 成 壓
縮機的損壞。
3.如 果 完 成 所 有 的 準 備 動 作 , 發 現 煙 霧 機 發 出 雜 音或是完全無法輸出動
作 , 請 立 即 將 電 源 插 頭 拔 出 停 止 操 作 。 檢 查 油 桶 中 的 油 量 、 外 部 保
險 絲 、 控 制 器 的 連 接 以 及 外 部 的 電 源 供 應 , 若 以 上 部 分 均 無 問 題 ,
再 重 新 插 上 插 頭 。 如 您 無 法 確 認 問 題 的 所 在 , 請 勿 繼 續 使 用 , 以 避
免 造 成 更 嚴 重 的 損 壞 與 危 險 , 請 連 繫 Antari 經 銷 商 。 將 機 器 寄 出 或
運送前,請先將油桶中的煙霧油清空。
4.需 要 清 潔 油 箱 上 的 出 煙 口 蓋 時 , 請 先 將 該 蓋 以 逆時針方向轉卸下來。
5.請 勿 在 未 取 下 前 直 接 擦 拭 清 潔 , 以 免 灰 塵 掉 落 進 油 桶 污 損 煙 霧 油 。
6.機 器 出 煙 口 門 蓋 周 圍 嚴 禁 置 放 有 磁 性 類 或 電 磁 類之物品以避免出煙口
蓋之感測器發生誤動作。
中文 19
Page 23

-控制面板的操作
HZ-5 00的 控 制 面 板 上 共 有 六 個 按 鍵 , 分 別 為 Func tion ,
Tim er , Up , Down , Volume 和 Manu al 其功能
MANUAL
與操作方式如下:
1.當 打 開HZ-5 00電 源 開 關 時 , 液 晶 螢 幕 會 顯 示 Re ady To Haze, 此 時
按 一 下 Volume 鍵, 機 器 會 開 始 動 作 , 且 液 晶 螢 幕 會 顯 示Working,
而再按一下 Volume 鍵, 機 器 便 會 停 止 動 作 , 且 液 晶 螢 幕 會
顯 示R eady To Haze。 在 Ready To Haze 的 模 式 下 , 壓 著 Manual
MANUAL
鍵 機 器 會 產 生 煙 霧 , 且 液 晶 螢 幕 會 顯 示Working, 放 開 Manual 鍵 則
可以 停 止 噴 煙 , 且 液 晶螢 幕 會 顯 示R eady To Haze。最 後 , 在 此 模 式
下按一下 Timer 鍵 , 定 時 器 的 功 能 會 被 啟 動 。
2.當 機 器 在Ready To Haze的情況 下 , 按 一 下 Fun ction 鍵 ,液
晶 螢 幕 會 顯 示 Interva l Set 字 樣 , 此 時 可 以 使 用 Up 和 Down
鍵來調整定時器的機器動作間 隔 時 間 , 可 以 將 其 設 定 在1至200秒 的 範
圍內。
3.當 機 器在Ready To Haze的 情 況 下 , 按 兩 下 Functi on 鍵 , 液
晶 螢 幕 會 顯 示Duration Set 字 樣 , 此 時 可 以 使 用 Up 和 Down
鍵 來 調 整 定 時 器 的 機 器 動 作 持 續 時 間 , 可 以 將 其 設 定 在1至200秒 的
範圍內。
4.當 機 器 在R eady To Haz e的 情 況 下 , 按 三 下 Fun ction 鍵 , 液
晶 螢 幕 會 顯 示DMX 512 字 樣 , 此 時 可 以 使 用 Up 和 D own 鍵來
設定機器DMX5 12位址。(註1 )
5.當 機 器 在R eady To Haze的 情 況 下 , 按 四 下 Functio n 鍵,
液 晶 螢 幕 會 顯 示 DOOR SEN SOR ON字 樣 , 此 表 示 Haze Machi ne是
處於 出 煙 口 門 蓋 偵 測器 啟 動 模 式 , 此 時 可 以 使 用 M anual 鍵來關
MANUAL
閉 此 偵 測 器 功 能 , 關 閉 此 功 能 後 , 液 晶 螢 幕 會 顯 示D OOR S ENSOR
OFF。要再次讓其啟動時需在這模式下按Volum e 鍵。(註2)
6.當 機 器 在R eady To Haze的情況下, 按五 下 Function 鍵,液
晶螢幕 會 顯 示Direc t Haze 字樣, 此 時 按 一 下Volu me 鍵, 機
器 會 進 入 直 接 動 作 模 式 , 在 此 模 式 下 , 只 要 一 開 啟 電 源 開 關 , 機 器
就 會 直 接 噴 煙 動 作 , 此 時 液 晶 螢 幕 的 背 光 燈 會 緩 慢 閃 爍 。 當 液 晶 螢
幕顯示 Direc t Haze 時, 按 一 下Manua l 鍵,可以離開 直 接 動 作 模
MANUAL
式,離開此模式後,液晶螢幕背光燈恢復恆亮。
20 中 文
Page 24

註1: 當 機 器 連 結 到DMX控 制 台 時 ,DMX的 訊 號 控 制 會 覆 蓋 機 器 本 身 控
制面板的控制。
註2: 當 機 器 為DOOR SENS OR ON模式 下 時 , 如 果 出 煙 口 門 蓋 未 確 實
打 開 , 而 欲 啟 動 機 器 使 其 動 作 機 器 會 發 出 警 報 聲 且 液 晶 顯 示 幕 會
顯 示 ”D OOR CLOSED!!” , 且 閃 爍 液 晶 螢 幕 背 光 燈 同 時 關 閉 噴
煙 動 作 , 一 直 到 出 煙 口 門 蓋 確 實 打 開 後 機 器 才 會 回 復 正 常 動 作 。
反之 如 機 器 為D OOR SENSO R OFF模 式 下 時, 便 不 會 有 以 上情 況
發生。
-煙霧油
Anta ri HZ-500 特 效 機 器 使 用HZL-1專 用 煙 霧 油
Anta ri HZL-1 為 高 效 能 油 性 煙 霧 油 , 搭 配 HZ-500 Ha ze Machin e使 用 以
輸出高感光度薄透型煙霧。
-請注意
請勿將油性和水性的煙霧油混合使用,而更換另 一 種 煙 霧 油 使 用 前 請 徹
底將油桶中的煙霧油清空。
-機器規格
型號
額定電壓
標準消耗功率
煙霧輸出量
油桶容量
油量消耗速率
重量
尺寸 (長x寬x高) mm
請妥善保存此份操作說明書
HZ-500
110/240V AC,
50/60Hz~
400W
2,800cu ft / min
2.5 liters
20hrs / liter
31.5Kg
510x375x350
中文 21
Page 25

Note :
Page 26

For c ur ren t pro du ct in for mat io n vis it Ant ar i at:
For i nf orm ati on r equ est s ple as e con tac t us a t: sa les @an ta ri. com
www.an tar i.c om / w ww.a nta ri.co m.t w
C08HZ5000
 Loading...