

Page 1
Dear Customer: Please keep this warranty for your record.
DO NOT
return it.
It is important that you read
these instructions before
using your new purchase and
we strongly recommend that
you keep them in a safe place
for future reference.
Owner’s Manual
Amcor, Inc. (“Amcor”) warrants the original retail purchaser (“Purchaser”) purchasing in the
Amcor’s sole obligation under this warranty is to replace, or at Amcor’s discretion, to repair,
free of charge, all defective parts, for a period of one (1) year from date of original purchase.
ANY IMPLIED WARRANTY OF MERCHANTABILITY IS SIMILARLY LIMITED TO ONE (1)
YEAR FROM DATE OF ORIGINAL PURCHASE AND NO ACTION BASED UPON ANY
AFTER EXPIRATION OF ONE (1) YEAR FROM DATE OF ORIGINAL RETAIL PURCHASE.
The provisions of this warranty shall not apply to any product which in Amcor’s judgment has
which it was not designed, or (4) repaired or altered in any way that adversely affected its
To obtain warranty service, the defective product or part must be shipped or delivered to:
Amcor’s authorized service center. All postage, insurance and shipping charges are the responsibility
of the Purchaser and are not included in this warranty.
AMCOR NEITHER ASSUMES NOR AUTHORIZES ANY PERSON TO ASSUME FOR IT ANY
WHICH EXTEND BEYOND THE DESCRIPTION ON THE FACE HEREOF. NO RESPONSIBILITY
THE USE OF AN AMCOR PRODUCT, NOR FOR THE DAMAGES DUE TO ACCIDENT, ABUSE,
the exclusion of limitation
of incidental or consequential damages, so these limitations may not
apply to you.
Amcor disclaims all liabilities for defects or damages caused by use of replacement parts obtained
from or by service at any service center other than Amcor’s authorized service center.
This warranty gives you specific legal rights, and you may also have other rights which vary from
AMCOR Portable Air Conditioner
Air Conditioner
Page 2
THANK YOU .....................................................................................................................
Energy Saving Tips .............................................................................................................
..........................................2
Front, Back ....................................................................................................................
.................................................5
Accessories....................................................................................................................
.................................................5
......................................6
...........................................6
Mounting the Exhaust Pipe......................................................................................................
.................................7
............................................7
...............................................8
.....................................8
Auto Mode......................................................................................................................
...............................................8
.....................................8
..........................................9
............................................9
Regulating Airflow Direction ...................................................................................................
...................................9
How to Drain the Unit..........................................................................................................
....................................10
.....................................11
..........................................11
End of Season Storage..........................................................................................................
....................................11
....................................11
TROUBLESHOOTING..............................................................................................................12
WARRANTY.......................................................................................................................
Troubleshooting
To purchase Replacement Filters for this unit, contact AMCOR at
Windows or doors Close doors and windows.
are open.
The filter is dirty Clean or replace filter.
Air inlet or air Remove blockage.
than the selected value.
The overheat protection Wait 3 minutes until temperature
Water container is full. Drain the Unit.
Timer Function Set Deactivate the Timer Function.
at the control panel.
The Unit is Noisy
The Air Conditioner
The Remote
The Unit
Table of Contents
Amcor Inc.
www.amcorgroupusa.com
Page 3
Timer 1-12 hours 1-12 hours
Temperature Set Range 62
Working Temperature Cooling: 62
The cooling capacity of the unit may be affected by the height of the ceiling,
quality of insulation, number of windows, etc.
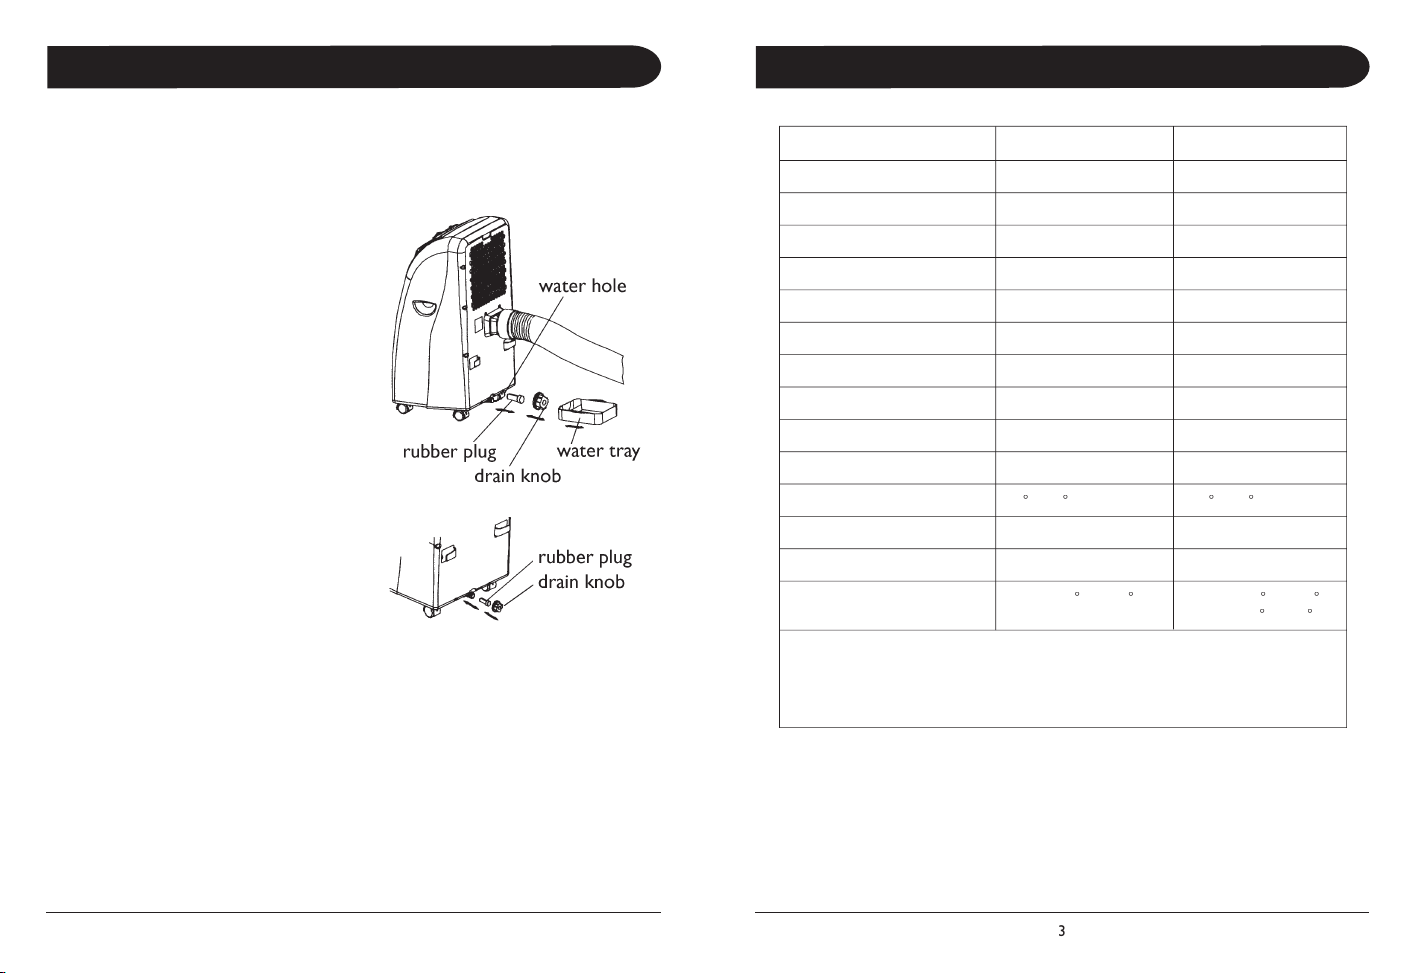
Drainage
2. Position a flat container or dish under the drain hole.
the container, as it might easily overflow.
the drain hole.
The condensed water will drain out automatically.
4. When the container is almost full, replace the
The Full Water indicator should be off now.
8. Turn unit on, the unit will resume working.
Specifications
Page 4

available for AL-10,000EH). The green indicator illustrating your selected mode lights up. It is recommended to select
The indicators of the functions in progress come on at the same time, e.g. Cool and Lo = Cooling mode with Low fan speed.
Auto Mode
When this mode is selected, the unit is preset to the following temperature settings and unit will only start to:
settings cannot be changed.
T
To set your desired temperature, press the Temperature up or down buttons (ranging from 62ºF to 90ºF). Each press
will increase or decrease your set temperature by 1ºF. When pressing the temperature up or down buttons, the
window will change to display your set temperature. At this time, the green indicator will light under ST (Set
Temperature). Once the temperature up or down buttons is released, the window will return to displaying the
ambient temperature after a second.
When unit is in the following modes: Auto, Cool, or Heat - the compressor will cool/heat the room to reach
the set temperature. Once the ambient temperature has reached the set temperature, the compressor will stop and
When compressor first stops after reaching 70ºF, unit will auto-switch to Fan.
When compressor first stops after reaching 72ºF, unit will auto-switch to Fan.
ambient temperature drops below 63ºF.
8
Operation
2. Cooling Air Outlet
4. Castors
8. Cord Hanger
9. Water Stopper (Rubber Plug Inside)
Accessories
air conditioner
(For Models With Heating Options)
Timer Selector
Set Temperature Indicator
Automatic Mode Indicator Cooling Mode Indicator
Timer Operation Indicator
Temperature Up Selector
Compressor Indicator
Temperature Down Selector
Option Selector
On/Off (Power) Selector
2
Parts
Page 5

for mounting. It is recommended that
you use the shortest possible length of Hose.
which will radiate back into the room.
and then rinse them thoroughly under running water (no hotter than 104ºF)
Installation
Window Kit Installation
outside.
the window is easy. Please see
tightening into place by turning
2. Attach Slide Bar Connector,
other end of the Hose by
Then tighten Hose by turning
the (Round Connector)
the window and expand so it
fits tightly.
4. Lower the window.
allows installation in windows up
to 48" in width.
Wall Connection
2. Insert the Round Connector
the Round Connector by
turning clockwise.
4. Extend other end of exhaust
#10) by turning clockwise.
over the opening on the back
of the unit.
** When not in use, cover the
with Cap (part #14).
WARNING!
The length of the Exhaust Pipe is specially
this product.
as this could cause the unit to malfunction.
Installation
Page 6
Before Use
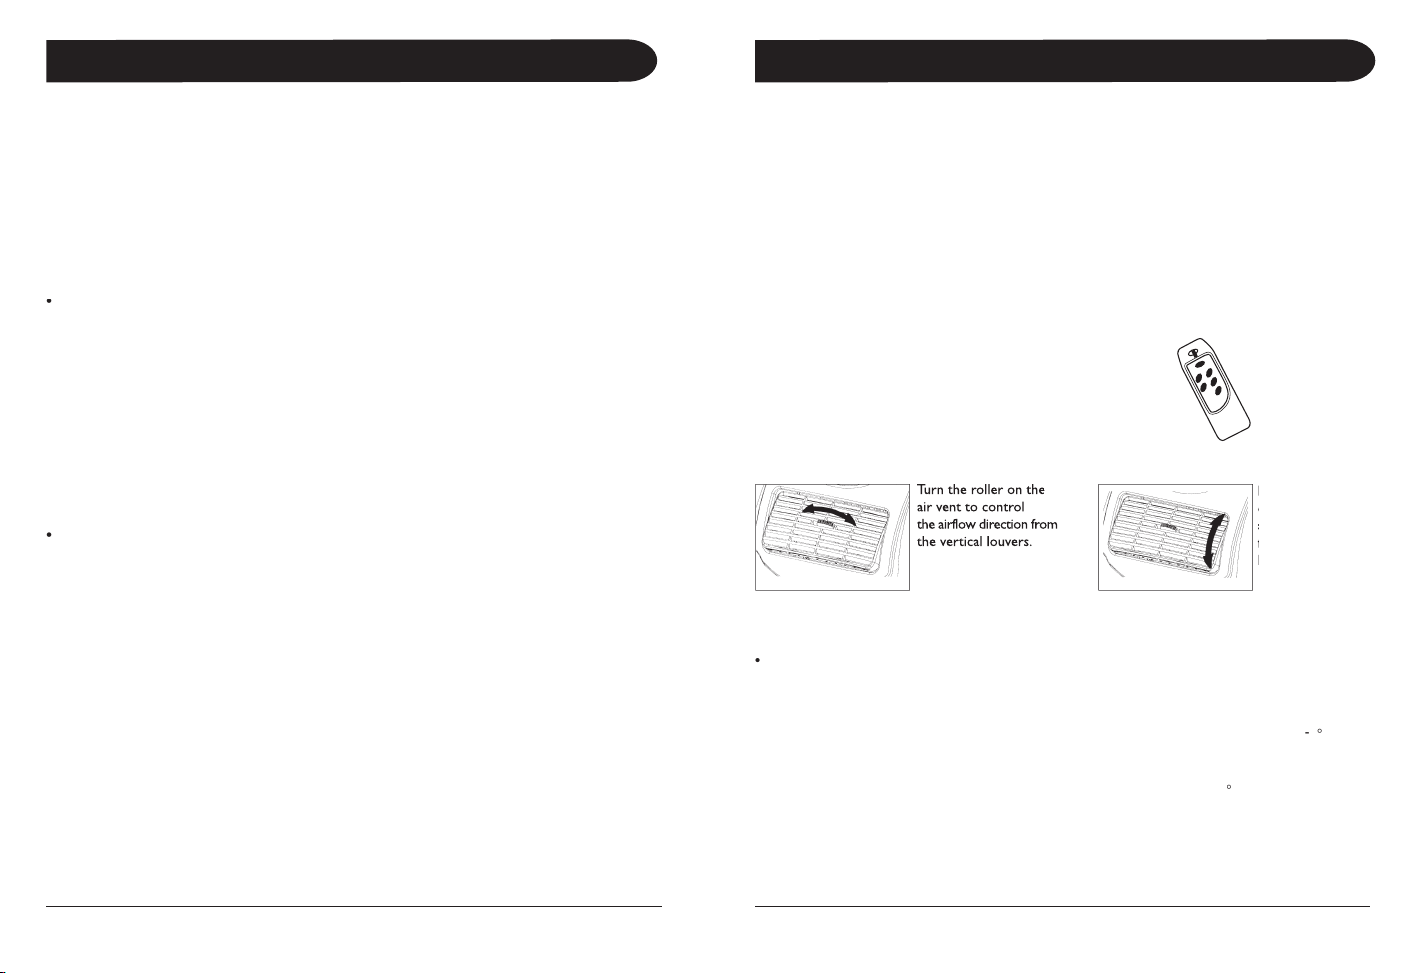
Turn the roller on the
air vent to control
the airflow direction from
the vertical louvers.
airflow direction
from the horizontal
The indicator of high or low fan will light up at the same time.
ambient temperature (the related indicators, cool, fan or heat will light up), at this time the
fan speed switch is invalid.
automatically. The display window will show the hour(s) you set as you press the TIMER button.
the machine to work. For example, if you press the timer to ‘2’,
the unit will come on automatically after 2 hours.
All the above functions can also be performed with the supplied remote
The compressor will start approximately 3 minutes after the unit is turned on (this will
working at the set level. If the ambient temperature rises above the chosen temperature +/
the cooling will resume.
temperature, heating will resume.
wait for heating to resume.
to avoid the possibility of dangerous overheating.
THE MANUFACTURER DISCLAIMS ANY RESPONSIBILITY IF THE ABOVE
Operation
Page 7

Always unplug the unit from the wall outlet before beginning
the cleaning.
When the unit is not in use, please store the power cord away as shown.
Thank You!
Thank you for choosing the portable air conditioner from AMCOR, a leading brand in
that your AMCOR Air Conditioner offers you.
AMCOR has specialized in complete indoor environment control, manufacturing
world-class air conditioners, dehumidifiers and air purifiers with innovative technology.
We wish you many years of enjoyable use.
After reading this manual, please keep it in a safe place for future reference.
the airflow.
to a comfortable setting.
Air Conditioner cooling to a desired level.
Maintenance
 Loading...