

Alpina SF-1302, SF-1303 User Manual [se]
EN SF-1302/SF-1303 Steam Iron Instruction for use
DE SF-1302/SF-1303 Dampfbügeleisen Bedienungshinweise
FR SF-1302/SF-1303 Fer à vapeur Mode d`emploi
IT SF-1302/SF-1303 Ferro a vapore Manuale d´uso
NL SF-1302/SF-1303 Stoomstrijkbout Gebruiksaanwijzing
SW SF-1302/SF-1303 Ångstrykjärn Bruksanvisnin
DK SF-1302/SF-1303 Dampstrygejern Brugervejledning
RU SF-1302/SF-1303 Утюг с отпаривателем Инструкции по эксплуатации
RO SF-1302/SF-1303 Fier de călcat Instrucţiuni de utilizare
HR SF-1302/SF-1303 Parno glačalo Uputa za uporabu
CZ SF-1302/SF-1303 Napařovací žehlička Návod k použití
SK SF-1302/SF-1303 Naparovacia žehlička Návod na použitie
HU SF-1302/SF-1303 Gőzölős vasaló Használati utasítás
PL SF-1302/SF-1303 Żelazko z funkcją pary Instrukcja użycia
SF-1302 / SF-1303
EN: For your own safety read these instructions carefully before using the appliances.
DE: Bitte lesen Sie diese Anleitungen vor Inbetriebnahme des Geräts aufmerksam durch.
FR : Avant que vous utiliser cet appareil, lisez bien ce mode d´emploi pour votre sécurité.
IT: Per garantire la sicurezza personale raccomandiamo leggere attentamente il presente Manuale, ancora prima
dell´uso dell´apparecchio elettrodomestico
NL: Leest u voor het eerste gebruik zorgzaam de gebruiksaanwijzing door.
SW: För din egen säkerhet ska du läsa dessa instruktioner noga innan du använder apparaten.
DK: Af hensyn til din egen sikkerhed skal du læse disse instruktioner nøje, inden du bruger udstyret.
RU: В целях вашей безопасности внимательно прочитайте инструкции прежде, чем приступить к эксплуатации
прибора.
RO: Pentru propria dvs. siguranţă, citiţi cu atenţie aceste instrucţiuni înainte de a utiliza aparatele.
HR: Radi vlastite sigurnosti prije uporabe uređaja pažljivo pročitajte ovu uputu.
CZ: Před použitím spotřebiče si kvůli své vlastní bezpečnosti důkladně přečtěte tento návod.
SK: V záujme vašej bezpečnosti si pozorne prečítajte tieto pokyny skôr, než začnete používať zariadenia.
HU: Kérjük a készülék első üzembehelyezése előtt saját biztonsága érdekében olvassa végig a használati utasítást és
kövesse előírásait.
PL: Dla własnego bezpieczeństwa proszę uważnie przeczytać niniejszą instrukcję przed rozpoczęciem eksploatacji
urządzenia.
PDF created with pdfFactory Pro trial version www.pdffactory.com
2
DE
KOMPONENTEN
1. Sprühdüse
2. Einfüllstutzen
3. Dampfumschalter Dampf-/ Trockenbügeln und
Selbstreinigung
4. Sprühtaste
5. Dampfstrahltaste
6. Handgriff
7. Netzkabelschutz
8. Netzkabel
9. Temperatur-Kontrollanzeige
10. Transparenter Wassertank
11. Thermostat
12. Höchstfüllmenge
13. Bügelfläche mit Dampfaustritt
14. Messbecher
IT
DESCRIZIONE DELLE PARTI
1. Porte spray
2. Porta riempitore
3. Vapore/secco e autopulente
4. Tasto spray
5. Tasto poco vapore
6. Maniglia
7. Cavo
8. Cavo di alimentazione
9. Luce controllo temperatura
10. Serbatoio d’acqua trasparente
11. Manopola termostato
12. Livello massimo riempimento
13. Piastra con ventole a vapore
14. Misura d’acqua
SW
DELAR
1. Sprayorgan
2. Dörr för påfyllning
3. Ånga/torr och självrengöring
4. Sprayknapp
5. Knapp för ångdusch
6. Handtag
7. Sladd bussning
8. Elsladd
9. Kontrollampa för temperatur
10. Transparent vattentank
11. Termostatknapp
12. Maximal vattennivå
13. Platta med ångutlopp
14. Vattenmätare
EN
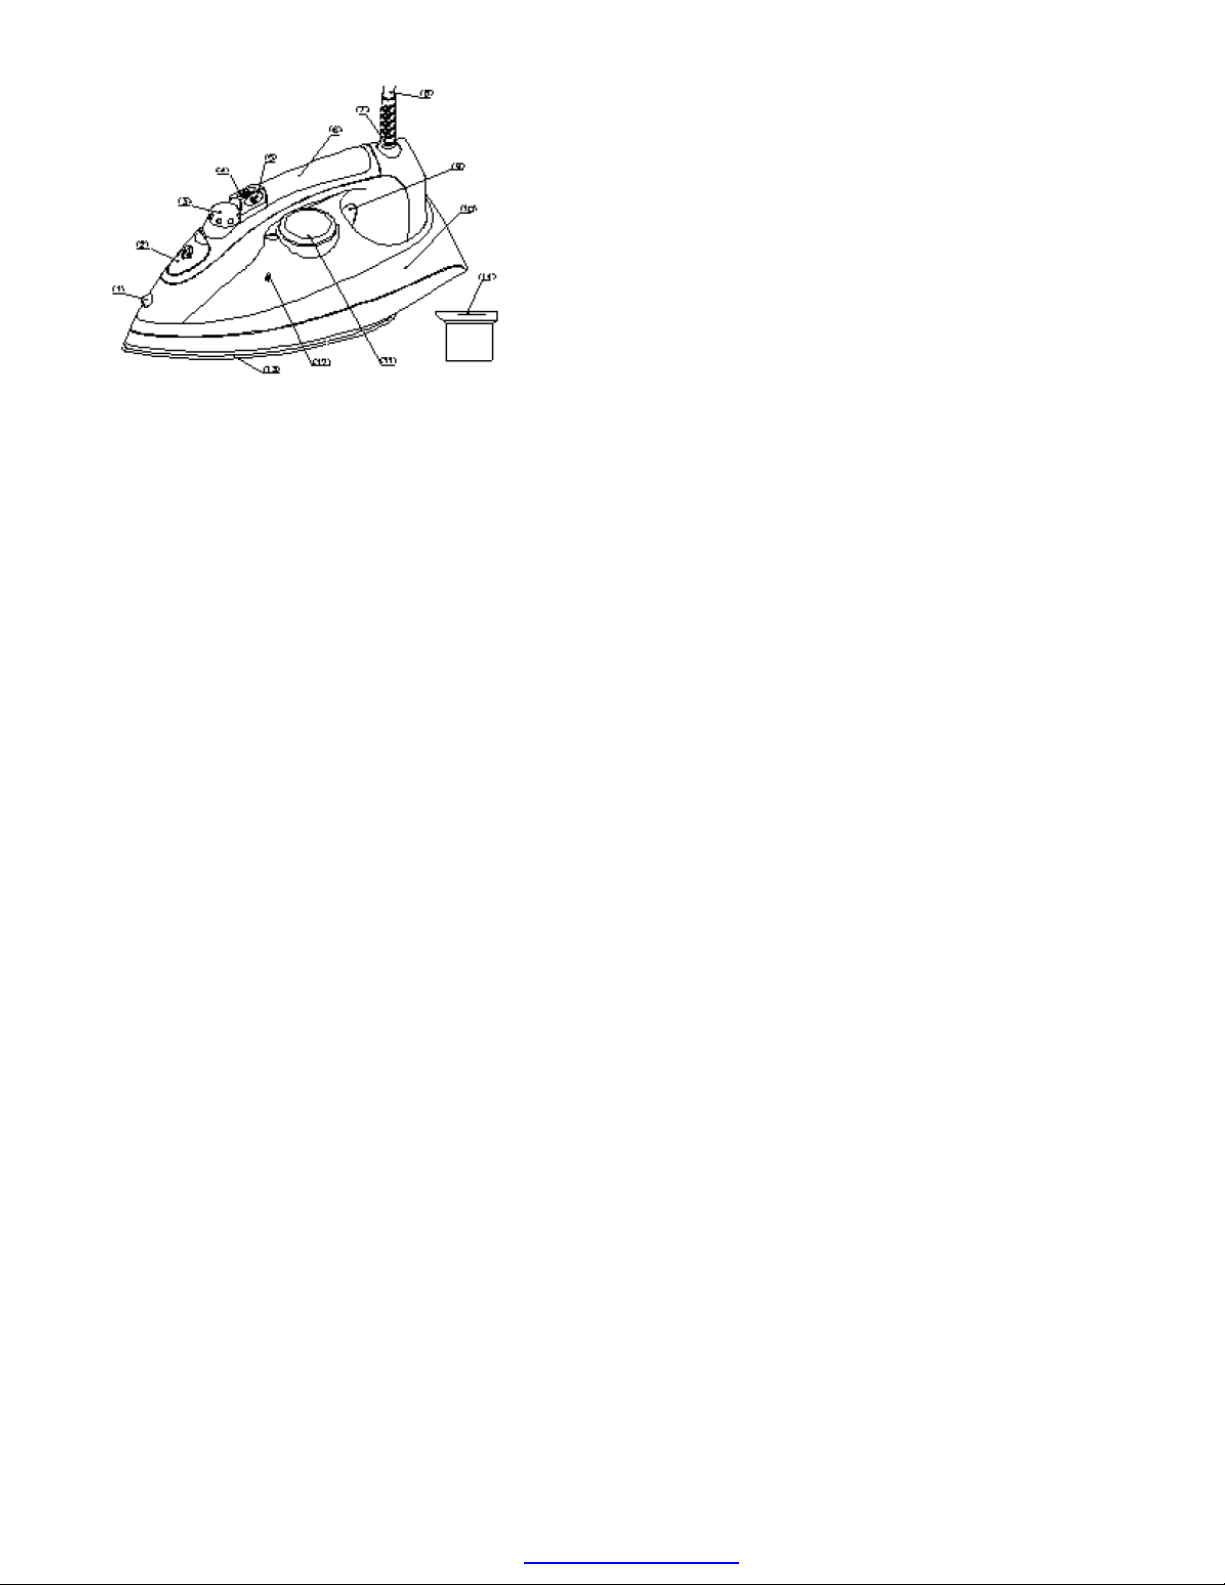
PARTS DESCRIPTION
1. Spray organ
2. Filler door
3. Steam/Dry & Self-cleaning
4. Spray button
5. Shot-steam button
6. Handle
7. Cord bushing
8. Supply cord
9. Temperature control light
10. Transparent water tank
11. Thermostat knob
12. Maximum filling level
13. Plate with steam vents
14. Water measure
FR
DESCRIPTIONS DES ÉLÉMENTS
1. Organe de vaporisation
2. Couvercle de remplissage
3. Vapeur/Sec et auto-nettoyage
4. Bouton vaporisation
5. Bouton vague
6. Poignée
7. Bague cordon
8. Cordon d’alimentation
9. Voyant de contrôle de la température
10. Réservoir d’eau transparent
11. Molette de thermostat
12. Niveau max de remplissage
13. Plateau avec orifices vapeur
14. Mesure d’eau
NL
ONDERDELEN BESCHRIJVING
1. Spuitorgaan
2. Vulgat
3. Stoom/Doog & zelf-reiniging
4. Spuitknop
5. Stoomblaasknop
6. Handvat
7. Draad versterking
8. Stroomkabel
9. Temperatuur controle licht
10. Transparente water tank
11. Thermostaatknop
12. Maximaal vulniveau
13. Plaat met stoomgaten
14. Water meetbeker
DK
BESKRIVELSE AF DELE
1. Sprayenhed
2. Opfyldningsluge
3. Damp/tør & selvrens
4. Sprayknap
5. Dampskudknap
6. Håndtag
7. Ledningsindføring
8. Netledning
9. Lys for temperaturkontrol
10. Gennemsigtig vandbeholder
11. Termostatknap
12. Maksimal vandstand
13. Strygeplade med damphuller
14. Vandmåler
PDF created with pdfFactory Pro trial version www.pdffactory.com

3
RU
ОПИСАНИЕ ДЕТАЛЕЙ
1. Форсунка распылителя
2. Отверстие для заливки воды
3. кнопка вкл./выкл. пара и самоочистка
4. Кнопка включения распылителя
5. Кнопка краткого отпаривателя
6. Ручка
7. Вывод сетевого провода
8. Сетевой кабель
9. Индикатор регулятора температуры
10. Прозрачный резервуар для воды
11. Регулятор термостата
12. Максимальный уровень воды
13. Поверхность с отверстиями для выхода пара
14. Мерный стакан для воды
HR
OPIS DIJELOVA
1. Element za prskanje
2. Otvor za punjenje
3. Para / suho / automatsko čišćenje
4. Gumb za prskanje
5. Gumb za vruću paru
6. Ručka
7. Uvodnica za kabel
8. Kabel za napajanje
9. Signalizacija regulatora temperature
10. Prozirni spremnik za vodu
11. Gumb termostata
12. Maksimalna razina za punjenje
13. Ploča s otvorima za paru
14. Mjera za vodu
SK
POPIS ČASTÍ
1. Rozprašovač
2. Plniaci otvor
3. Para/nasucho a samočistenie
4. Tlačidlo rozprašovania
5. Tlačidlo na horúcu paru
6. Rukoväť
7. Izolácia kábla
8. Napájací kábel
9. Kontrolka teploty
10. Priesvitná nádrž na vodu
11. Regulátor teploty
12. Maximálna hladina
13. Žehliaca plocha s otvormi na paru
14. Odmerka na vodu
PL
OPIS ELEMENTÓW
1. Spryskiwacz
2. Drzwiczki wypełniacza
3. Para/na sucho oraz samo-czyszczenie
4. Przycisk spryskiwacza
5. Przycisk pary
6. Rączka
7. Tuleja kabla
8. Kabel zasilania
9. Lampka kontroli temperatury
10. Przezroczysty pojemnik na wodę
11. Pokrętło termostatu
12. Maksymalny poziom wypełnienia wodą
13. Stopa z otworami pary
14. Miernik wody
RO
PREZENTAREA COMPONENTELOR
1. Element de pulverizare
2. Buşon de umplere
3. Abur/Uscat şi Autocurăţare
4. Buton pulverizare
5. Buton jet abur
6. Mâner
7. Secţiune rigidizată cablu
8. Cablu de alimentare
9. Indicator luminos temperatură
10. Recipient de apă transparent
11. Buton termostat
12. Nivel de umplere maximă
13. Talpă cu orificii de pulverizare
14. Indicator apă
CZ
POPIS ČÁSTÍ
1. Postřikovač
2. Plnicí dvířka
3. Pára/suché & samočištění
4. Tlačítko postřiku
5. Tlačítko horké páry
6. Držadlo
7. Vývod kabelu
8. Napájecí kabel
9. Kontrolní světlo teploty
10. Průhledná nádržka na vodu
11. Knoflík termostatu
12. Maximální hladina naplnění
13. Žehlící plocha s otvory pro páru
14. Odměrka na vodu
HU
AZ ALKATRÉSZEK LEÍRÁSA
1. Permetezőnyílás
2. Töltőajtó
3. Gőzölés/szárítás és öntisztítás
4. Permetező gomb
5. Gőzsugár gomb
6. Fogantyú
7. Kábelhüvely
8. Hálózati csatlakozózsinór
9. Hőfokszabályozó lámpa
10. Átlátszó víztartály
11. Hőfokszabályozó gomb
12. Maximális feltöltési szint
13. Talp a gőznyílásokkal
14. Vízmérő
PDF created with pdfFactory Pro trial version www.pdffactory.com
4
ENGLISH
Dear Customer,
Thank you for choosing this quality ALPINA home appliance. Your Alpina appliance comes with a 2 year warranty and will
provide years of service if looked after properly. The ALPINA name brings you Quality, Reliability and Dependability. We
hope you will continue to make ALPINA your first choice in home appliances.
IMPORTANT SAFEGUARDS
When using electrical appliances, basic safety precautions should be followed:
1. Read all instructions carefully.
2. Make sure the power supply corresponds to one on the rating label.
3. To avoid electrical shock, do not immerse electrical parts in water or other liquid.
4. Do not allow children to operate or play with the appliance.
5. Unplug from outlet when not in use, or before putting on/taking off parts.
6. Do not use with damaged electrical cord or plug.
7. If damaged or malfunction occurs, refer to an authorized service center only.
8. Do not place on or near hot surfaces.
9. Never pull the appliance by the power cord.
10. Do not use the appliance for other than intended household use.
READ THESE INSTRUCTIONS
For first time use, a slight emission of smoke and sounds made by the expanding plastics this is quite normal and it
stops after a short time. We also recommend passing the iron over an ordinary cloth before using it. Both temperature
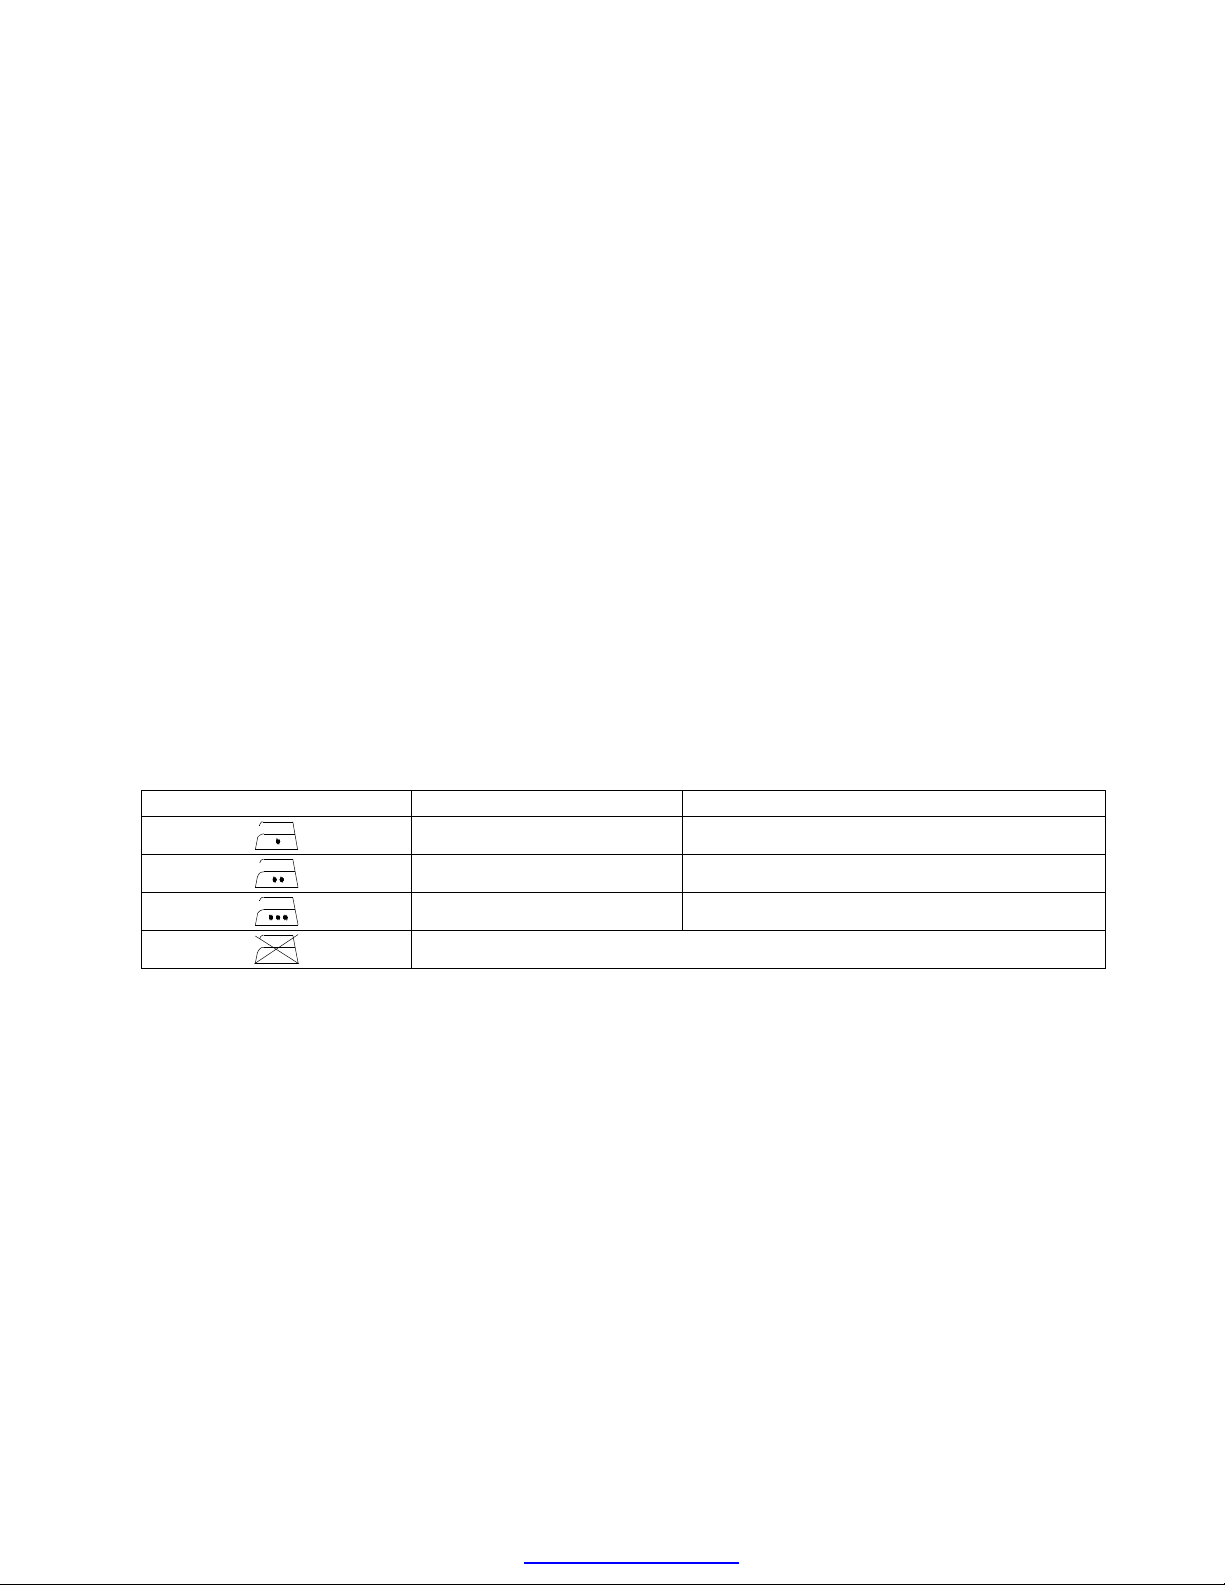
dial and most items of laundry have markings which correspond with this code:
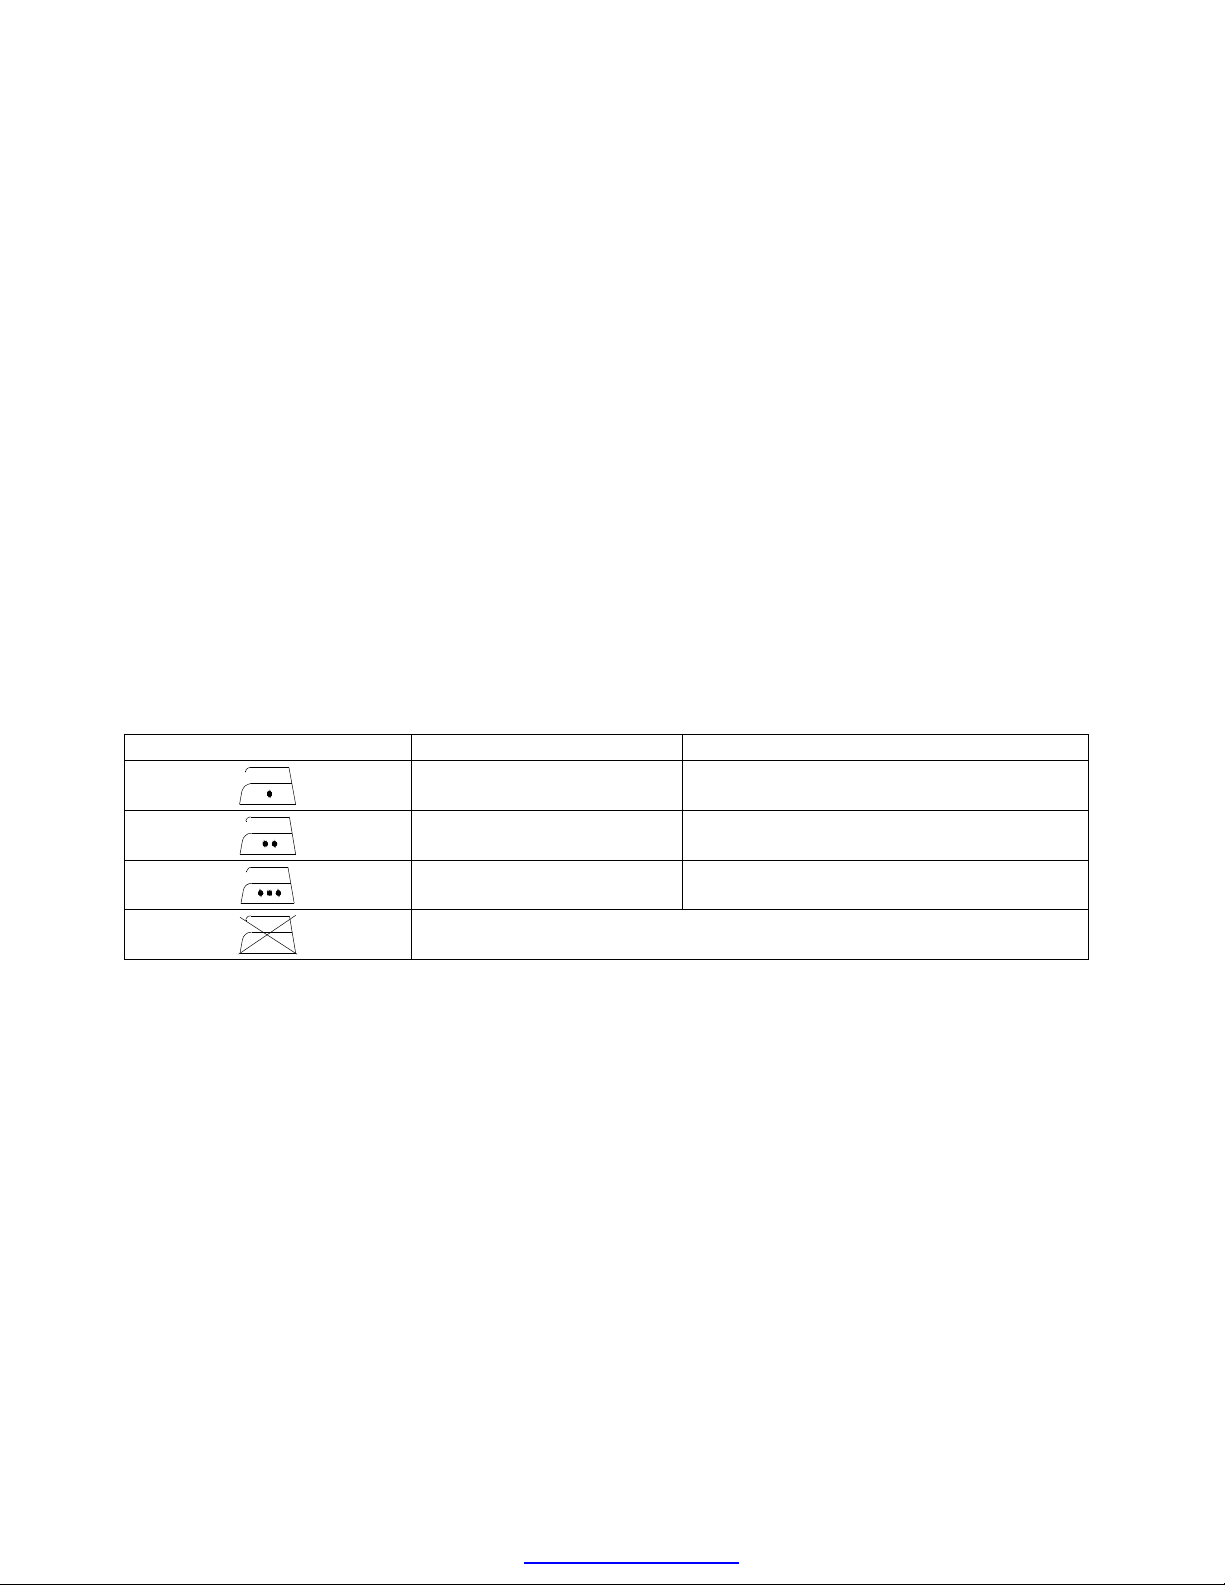
GARMENT LABEL FABRIC TYPE THERMOSTAT REGULATION
synthetic low temperature
silk - wool medium temperature
Cotton - linen high temperature
Fabric not to be ironed
HOW TO USE
1. Place the iron on its heel and turn the temperature dial to minimum and plug in to the mains supply.
2. Set the desired heat temperature suitable for the fabric to be ironed. The indicator lightens up, it means the iron is
heating up and ready to use.
3. Turn the steam selector to position dry to shut off the steam flow. Ensure that there is sufficient water in the water
tank if you wish to use spray facilities.
4. Before re-filling the water tank, ensure the iron is disconnected from the mains supply and set to dry position. Tap
water can be used.
5. For using surge steam, set the iron to the highest temperature within the steam area or linen and wait for the
indicator light goes out.
6. Lift the iron slightly above the surface of the fabric and press the surge steam button firmly and release it during
ironing. For optimum steam quality leave an interval at least 4 seconds.
USEFULL TIPS
1. This iron is designed with anti-calcium filter and anti-drip system to prevent the water from licking to the soleplate
when the iron is too cold.
2. The surge steam provides an extra burst which ideal for removal of stubborn creases and wrinkles.
3. This iron has a vertical steam system for hanging clothes, curtains, wall hangings etc.
PDF created with pdfFactory Pro trial version www.pdffactory.com
5
ENGLISH
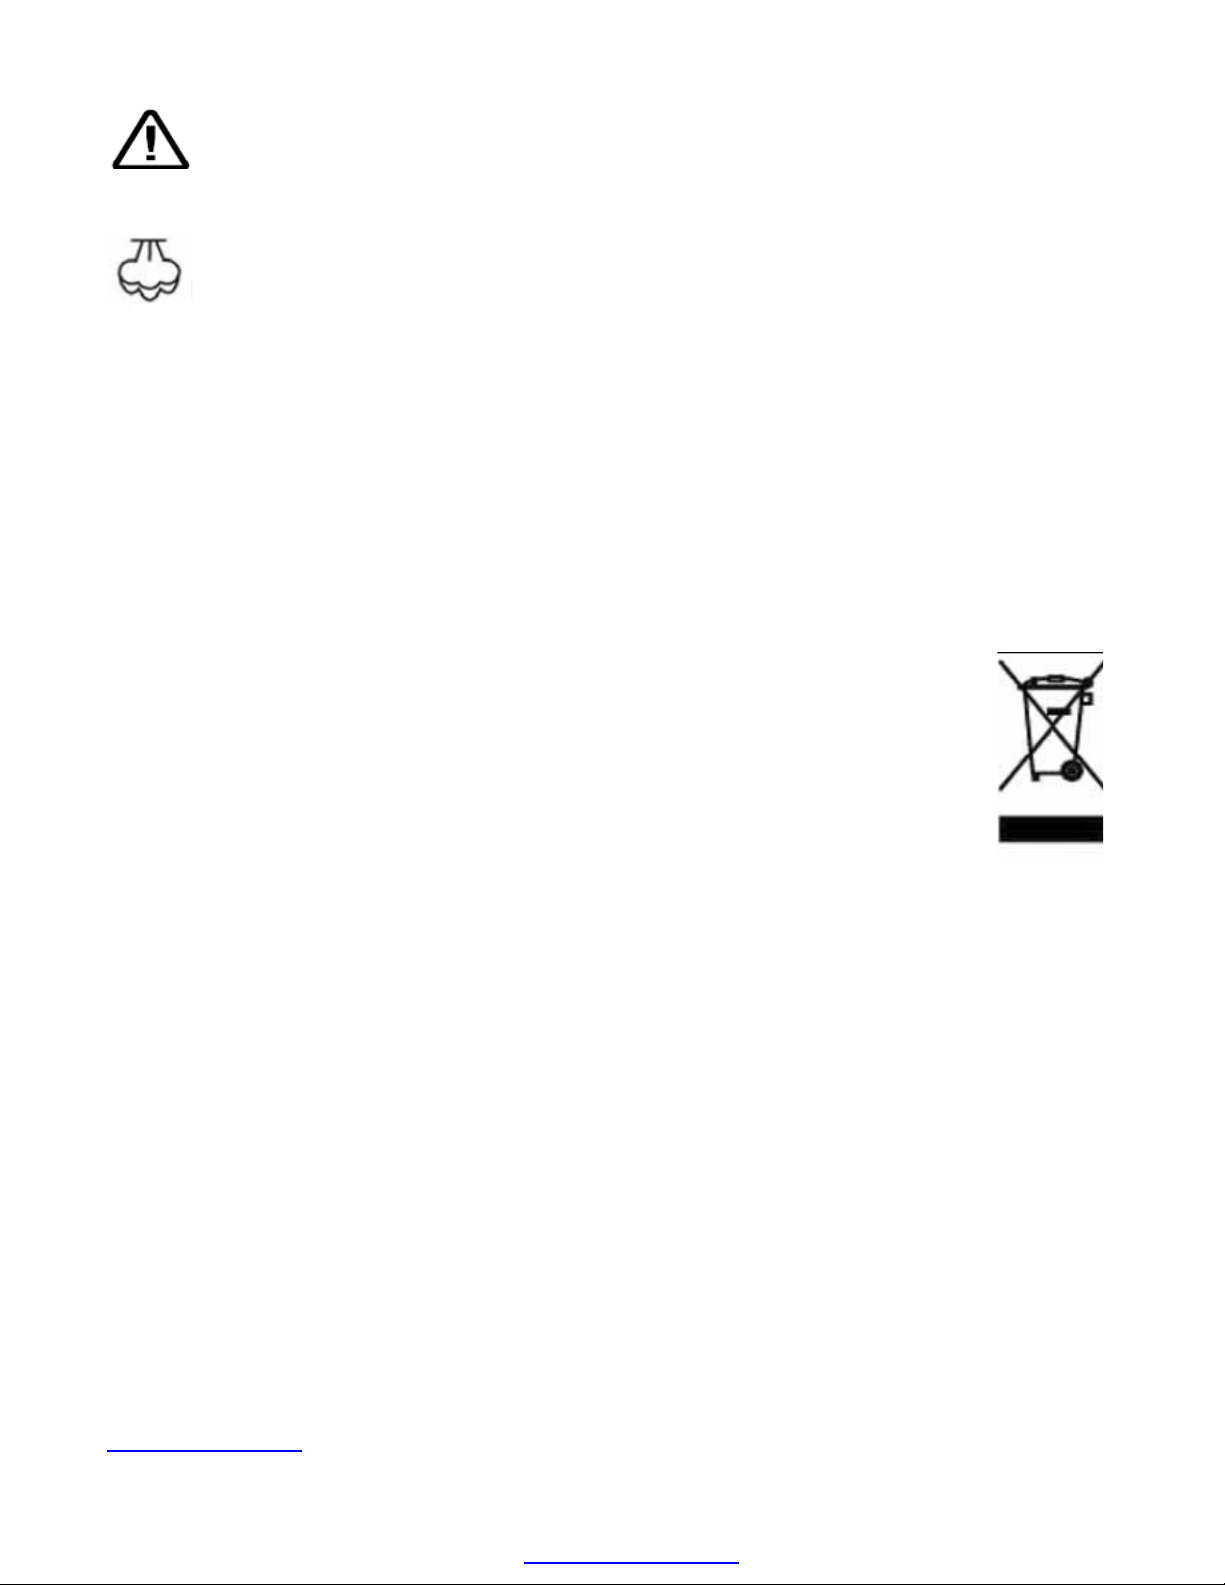
Warning:
This appliance is equipped with a grounded, Type G, 3-pin power supply cord. This is a safety feature. Do not attempt to
defeat the safety purpose of this plug.
Danger of scalding:
Please use caution when using the steam iron. The steam emitted from this aperture can be very hot.
CLEANING AND MAINTENANCE
1. Apply “self-cleaning” function to your iron once or twice a month or remove any scale or fluff.
2. Hold the iron horizontally over the sink and set the steam knob to “clean” press the steam button. Let the water
and steam escape until the anti-drip system cut off the steam.
3. Unplugged the unit before cleaning and wipe with clean, soft damp cloth. Do not use any abrasive or scouring pads
to clean the soleplate.
4. Do not use vinegar or other descaling agents into the water tank.
5. Store the iron in a safe and stable place.
DISPOSAL OF YOUR OLD APPLIANCE
1. When this crossed-out wheeled bin symbol is attached to a product it means the product is covered
by the European Directive 2002/96/EC.
2. All electrical and electronic products should be disposed of separately from the municipal waste
stream via designated collection facilities appointed by the government or the local authorities.
3. The correct disposal of your old appliance will help prevent potential negative consequences for the
environment and human health.
4. For more detailed information about disposal of your old appliance, please contact your city office,
waste disposal service or the shop where you purchase the product.
SPECIFICATION
Model No :SF-1302 & SF-1303
Voltage :220-240v ~50Hz
Wattage :2016-2400W
Water tank capacity :250ml
GUARANTEE
This product is guaranteed for a period of 2 years from the date of purchase against defects in materials and
workmanship. Under this guarantee the manufacturer undertakes to repair or replace any parts found to be defective,
provided the product is brought back to the purchase address. This guarantee is only valid if the appliance has been used
in accordance with the instructions, and that it has not been modified, repaired or interfered with by any unauthorized
person, or damaged through misuse.
This guarantee does not cover wear and tear, or breakables such as ceramic items, etc. If the product fails to operate and
needs to be returned, pack it carefully, enclosing your name and address and the reason for return and bring it to the
address of purchase. If within the guarantee period, please also provide the guarantee card and proof of purchase.
E-mail Service Address:
info@swisselektro.com
PDF created with pdfFactory Pro trial version www.pdffactory.com

6
DEUTSCH
Sehr geehrter Kunde,
Vielen Dank, dass Sie sich für ein ALPINA Haushaltsgerät entschieden haben. Hiermit haben Sie sich für die besten
Haushaltsgeräte mit einer 2-jährigen Garantie und vielen Jahren zuverlässiger Dienste entschieden. Mit ALPINA
entscheiden Sie sich für Qualität, Zuverlässigkeit und Verlässlichkeit. Wir hoffen, dass Sie sich auch weiterhin für ALPINA
Produkte bei der Auswahl Ihrer Haushaltsgeräte entscheiden werden.
WICHTIGE SICHERHEITSHINWEISE
Bei der Benutzung von Elektrogeräten folgen Sie bitte stets diesen allgemeinen Sicherheitshinweisen:
1. Lesen Sie alle Anleitungen aufmerksam durch.
2. Vergewissern Sie sich, dass Ihre Netzspannung mit den Angaben auf dem Typenschild übereinstimmt.
3. Zur Vermeidung von Stromschlag tauchen Sie elektrische Bauteile keinesfalls in Wasser oder sonstige Flüssigkeiten
ein.
4. Lassen Sie Kinder das Gerät nicht bedienen und auch nicht damit spielen.
5. Ziehen Sie vor dem Anbau/Abbau von Zubehörteilen und bei Nichtbenutzung bitte den Netzstecker.
6. Benutzen Sie das Gerät nicht mit beschädigtem Netzkabel oder -stecker.
7. Wenden Sie sich bei Beschädigung oder Fehlfunktion stets an einen autorisierten Kundendienst.
8. Nicht auf oder in unmittelbarer Nähe von heißen Oberflächen aufstellen.
9. Halten und ziehen Sie das Gerät nicht am Kabel.
10. Benutzen Sie das Gerät nur für seinen Bestimmungszweck im Haushalt.
BITTE LESEN SIE ALLE BEDIENUNGSHINWEISE
Bei Erstbenutzung kann es zu leichter Rauch- und Geräuschentwicklung kommen. Lassen Sie sich hiervon bitte nicht
beunruhigen, das gibt sich nach einem Moment. Wir empfehlen, zunächst über ein altes Tuch zu bügeln, bevor Sie das
Bügeleisen das erste Mal benutzen. Sowohl der Thermostatknopf wie auch die meisten Kleidungsstücke sind wie folgt
markiert:
KLEIDUNGSSTÜCK AUFNÄHER MATERIAL THERMOSTAT
Synthetisches Material Niedrige Temperatur
Seide - Wolle Mittlere Temperatur
Baumwolle - Leinen Hohe Temperatur
Nicht bügeln
BEDIENUNGSHINWEISE
1. Stellen Sie das Bügeleisen hochkant auf seine Abstellfläche, stellen Sie den Thermostatknopf auf Minimum und
stecken Sie den Netzstecker in die Steckdose.
2. Stellen Sie nun die gewünschte Temperatur ein. Die Statusanzeige leuchtet auf, das Bügeleisen heizt auf und ist in
Kürze betriebsbereit.
3. Stellen Sie den Dampfumschalter auf Trockenbügeln. Vergewissern Sie sich, dass sich ausreichend Wasser im Tank
befindet, sofern Sie die Sprühdüse benutzen wollen.
4. Vor dem Nachfüllen des Wassertanks ziehen Sie bitte den Netzstecker, der Dampfumschalter muss auf
Trockenbügeln stehen. Benutzen Sie nur Leitungswasser zum Bügeln.
5. Zur Benutzung des Dampfstrahls muss das Bügeleisen auf die höchste Temperatur eingestellt sein. Bitte warten Sie
ab, bis die Statusanzeige nach dem Aufheizen erlischt.
6. Halten Sie das Bügeleisen einige Millimeter über dem Kleidungsstück und drücken Sie den Dampfknopf. Für beste
Dampfentwicklung drücken Sie den Dampfknopf bitte nicht häufiger als alle 4 Sekunden.
HILFREICHE TIPPS
1. Dieses Bügeleisen benutzt einen Kalkfilter sowie ein Anti-Tropfsystem, um ein unerwünschtes Austreten des kalten
Wassers aus der Bügelfläche zu vermeiden.
PDF created with pdfFactory Pro trial version www.pdffactory.com
7
DEUTSCH
2. Mit dem Dampfstrahl bügeln Sie auch hartnäckige Falten kinderleicht.
3. Das Bügeleisen kann ebenfalls aufrecht für Kleidungsstücke auf Kleiderbügeln, Gardinen und Wandbehänge benutzt
werden.
Warnung:
Dieses Gerät ist mit einem geerdeten Stecker ausgestattet und muss an einer geerdeten Steckdose angeschlossen
werden.
Verbrühungsgefahr:
Bitte nehmen Sie den Wasserkocher mit größter Vorsicht in Betrieb. Der aus dem Gerät austretende Dampf kann sehr
heiß sein.
REINIGUNG UND PFLEGE
1. Stellen Sie den Dampfumschalter auf „Selbstreinigung”, hiermit spülen Sie ein- bis zweimal monatlich Ablagerungen
aus dem Bügeleisen heraus.
2. Halten Sie das Bügeleisen waagerecht über einer Spüle, stellen Sie den Dampfumschalter auf „Selbstreinigung” und
drücken Sie die Dampftaste. Lassen Sie Wasser und Dampf austreten, bis sich das System selbst abschaltet.
3. Vor dem Reinigen ziehen Sie bitte den Netzstecker. Wischen Sie das Bügeleisen mit einem feuchten Tuch ab.
Benutzen Sie keine Scheuermittel zum Reinigen, insbesondere nicht für die Bügelfläche.
4. Benutzen Sie weder Essig noch ein Entkalkungsmittel zum Reinigen des Wassertanks.
5. Bewahren Sie das Bügeleisen kindersicher und trocken auf.
Entsorgung von Altgeräten
1. Die durchkreuzte Mülltonne bedeutet, dass dieses Produkt der europäischen Richtlinie 2002/96/EC
unterliegt.
2. Alle elektrischen und elektronischen Geräte müssen getrennt vom Hausmüll über Sammelstellen
entsorgt werden.
3. Die ordnungsgemäße Entsorgung Ihres Altgerätes hilft beim Umweltschutz.
4. Für weitere Informationen zur Entsorgung von Altgeräten wenden Sie sich bitte an Ihre
Ortsverwaltung oder an Ihren Fachhändler.
Spezifikationen
Modelnummer :SF-1302 & SF-1303
Netzspannung :220-240v ~50Hz
Leistung :2016-2400W
Füllmenge :250 ml
Garantie
Dieses Produkt kommt mit einer 2-jährigen Garantie ab Kaufdatum für Material- und Fertigungsfehler auf. Unter dieser
Garantie repariert oder ersetzt der Hersteller fehlerhafte Komponenten, sofern das Gerät bei dem Fachhändler
eingereicht wird, von dem es erworben wurde. Die Garantie gilt nur, sofern das Gerät entsprechend der
Bedienungsanleitung benutzt, nicht verändert oder repariert wurde und auch nicht auf andere Weise, nicht autorisierten
Eingriffen Dritter ausgesetzt war oder zweckentfremdet wurde.
Diese Garantie deckt keine Verschleißteile und keine leicht zerbrechlichen Teile wie Keramik ab. Zeigt das Gerät
Fehlfunktionen und muss umgetauscht werden, so verpacken Sie es bitte ordnungsgemäß und fügen Ihren Namen und
Ihre Anschrift sowie eine Problembeschreibung bei und geben Sie es an Ihren Fachhändler zurück. Bitte legen Sie
während der Garantiezeit auch Garantiekarte und Kaufbeleg bei.
Serviceadresse (E-Mail)
info@swisselektro.com
PDF created with pdfFactory Pro trial version www.pdffactory.com
8
FRANÇAIS
Cher Client,
Merci pour le choix d'un appareil ménager ALPINA. Nous vous en offrons une garantie de 2 ans, un entretien adéquat de
l'appareil garantira plusieurs années d'utilisation. ALPINA vous assure une bonne qualité et une fiabilité pour toujours.
Nous espérons que vous continuez à faire des appareils électroménagers ALPINA votre premier choix.
CONSEILS DE SÉCURITÉ IMPORTANTS
Lors de toute utilisation d’un appareil électrique, il est essentiel de prendre un certain nombre de précautions
élémentaires, notamment :
1. Lisez attentivement toutes les instructions.
2. Vérifiez que votre tension secteur correspond bien à l'un des voltages indiqués sur la plaque signalétique de
l’appareil.
3. Pour éviter tout risque d'électrocution, ne plongez pas les parties électriques dans l'eau ou tout autre liquide.
4. Veillez à ce que les enfants n'utilisent et ne jouent avec l’appareil.
5. Débranchez l’appareil lorsque n’est pas utilisé, avant de le nettoyer et avant tout entretien.
6. Ne pas s’en servir si le cordon ou la fiche sont abîmés.
7. Si l’appareil est endommagé ou ne fonctionne pas, confier toute réparation à un centre de service agréé.
8. Ne pas placer l’appareil au-dessus ou à proximité de surfaces chaudes.
9. Ne tirez jamais sur le cordon.
10. Cet appareil n’est destiné qu’à un usage domestique, ne l’utilisez pas à d'autres fins.
LISEZ CES INSTRUCTIONS
Lors de la première utilisation, le plastique en extension entraîne un léger bruit et une faible émission de fumée ; c’est
tout à fait normal et ce phénomène est de courte durée. Nous recommandons également de passer le fer sur un tissu
ordinaire avant de l'utiliser. La température de la molette et le linge ont des instructions correspondant à ces codes :
ÉTIQUETTE VÊTEMENT TYPE DE TISSU RÉGLAGE THERMOSTAT
synthétique basse température
soie - laine moyenne température
coton - lin haute température
Ne pas repasser
COMMENT UTILISER
1. Déposez le fer sur son talon et régler la molette de température au minimum, puis branchez sur le secteur.
2. Réglez la température correspondent au tissu à repasser. Le voyant s’allume, ce qui signifie que le fer est en train de
chauffer et qu’il est prêt à être utilisé.
3. Réglez le sélecteur de vapeur sur la position « sec » pour couper l’arrivée de vapeur. Vérifiez qu’il y a assez d’eau
dans le réservoir si vous souhaitez utiliser le vaporisateur.
4. Avant de remplir le réservoir d'eau, vérifiez que le fer est débranché du secteur et qu'il est réglé sur la position
« sec ». L'eau du robinet peut être utilisée.
5. Pour envoyer une vague de vapeur, réglez le fer sur la température la plus élevée (ne pas dépasser la température
indiquée pour ce tissu) et attendez que le voyant s'éteigne.
6. Levez le fer légèrement au-dessus de la surface du tissu et appuyez fermement sur le bouton de vague de vapeur et
relâchez-le pendant le repassage. Pour une qualité optimale de vaporisation, laissez un intervalle de 4 secondes.
CONSEILS UTILES
1. Ce fer est conçu avec un filtre anti-calcium et un système anti-goutte pour éviter que l’eau ne coule de la semelle
quand le fer est trop froid.
2. La vague de vapeur est idéale pour s’occuper des plis les plus difficiles à éliminer.
3. Ce fer dispose d’un système vertical de vapeur pour les vêtements accrochés, les rideaux, les draperies, etc.
PDF created with pdfFactory Pro trial version www.pdffactory.com

9
FRANÇAIS
Avertissement :
Cet appareil comprend un cordon muni d’une prise à 3 broches dont une de mise à la terre. C’est une mesure de sécurité.
N’essayez pas de la modifier car elle ne deviendra d’aucune sécurité.
Danger de brûlures :
Utilisez l’humidificateur avec beaucoup de précaution. La vapeur dégagée par l’ouverture peut être très chaude.
NETTOYAGE ET ENTRETIEN
1. Utilisez la fonction « d'auto-nettoyage » du fer une ou deux fois par mois pour éliminer tout résidu.
2. Maintenez le fer horizontalement au-dessus de l’évier et réglez la molette de vapeur sur « clean », puis appuyez sur
le bouton vapeur. Laissez l’eau s'écouler et la vapeur s'échapper jusqu'à ce que le système anti-goutte coupe la
vapeur.
3. Débranchez le fer avant tout nettoyage et essuyez avec un chiffon humide, propre et doux. N’utilisez pas d’agents
abrasifs pour nettoyer la semelle.
4. N’utilisez pas de vinaigre ou d’agent détartrant dans le réservoir d'eau.
5. Rangez le fer dans un endroit sûr et stable.
Se débarrasser de votre appareil usagé
1. Lorsque ce symbole d'une poubelle à roue barrée est attaché à un produit, cela signifie que le produit
est couvert par la Directive Européenne 2002/96/EC.
2. Tous les produits électriques et électroniques doivent être mis au rebut séparément des ordures
ménagères mais dans des centres de collectes prévus à cet effet par les pouvoirs publics et les autorités
locales.
3. La mise au rebut correcte de votre appareil usagé aidera à prévenir les conséquences négatives
potentielles contre l'environnement et la santé humaine.
4. Pour plus d’informations sur le mode d’élimination de votre appareil usagé, veuillez prendre contact
avec les pouvoirs publics locaux, le service de traitement des déchets, ou l’endroit où vous avez acheté
le produit.
Spécifications
N° du modèle :SF-1305 & SF-1306
Tension :220-240v ~50Hz
Puissance :2016-2400W
Capacité du réservoir d'eau : 250ml
Garantie
Ce produit est garanti pour une durée de 2 années à compter de votre date d’achat contre tout défaut de matériel et vice
de fabrication. Pendant cette période de garantie, le fabricant s’engage à réparer le produit défectueux ou le remplacer,
pourvu qu'il soit retourné à l'adresse où il a été acheté. Cette garantie s’applique uniquement au cas où l’appareil a été
utilisé conformément aux consignes d’instructions et à condition qu'il n’ait pas fait l’objet d’une quelconque modification
ou réparation par une personne non habilitée, ou pour toute mauvaise utilisation.
Cette garantie ne s’applique pas en cas d’usure normale du produit, ou dans l’éventualité d’une casse d’accessoires dits
fragiles tels que des composants céramiques. Si le produit ne fonctionne plus, le ranger, l’emballer soigneusement,
ajouter votre nom, adresse et indiquer le motif du retour et retourner le produit défectueux au lieu d’achat. Si le retour
s’opère pendant la période de garantie, joindre la carte de garantie avec la preuve d’achat (facture ou reçu).
Service d'adresses e-mail:
info@swisselektro.com
PDF created with pdfFactory Pro trial version www.pdffactory.com

10
ITALIANO
Gentile utente,
Grazie per aver scelto l’elettrodomestico ALPINA. Il vostro Alpina è fornito di una garanzia di 2 anni e fornirà anni di
servizio se ve ne prederete cura. Il nome ALPINA vi offre qualità, affidabilità e sicurezza. Speriamo che continuerà a
scegliere i prodotti ALPINA come elettrodomestici per la sua casa.
AVVERTENZE IMPORTANTI
Quando si utilizza l’elettrodomestico, è necessario seguire le precauzioni di sicurezza:
1. Leggere le istruzioni attentamente.
2. Assicurarsi che l’alimentazione corrisponda a quella sull’etichetta.
3. Per evitare shock elettrico, non immergere parti elettriche in acqua o altri liquidi.
4. Non consentire ai bambini di giocare o usare l'elettrodomestico.
5. Scollegare dalla presa quando non in uso, o prima di staccare/mettere le parti.
6. Non adoperate la macchina con il cavo elettrico o la spina danneggiati.
7. Se si verifica guasto o danno, fare riferimento ad un centro d’assistenza autorizzato.
8. Non porre su superfici calde o vicine.
9. Non tirare l’apparecchio dal cavo elettrico.
10. Non utilizzare l’apparecchio oltre che per l’uso per il quale è ideato.
LEGGERE LE ISTRUZIONI
Al primo uso, c’è una leggera emissione di fumo e suono fatta dalla plastica in espansione. Questo è normale e termina
dopo poco. Consigliamo anche di passare il ferro su un panno normale prima di usarlo. I tasti della temperatura e altri
elementi hanno segni che corrispondono a questo codice:
Vestito ETICHETTA Tipo tessuto Regolazione termostato
sintetico Bassa temperatura
Seta-lana Temperatura media
Cotone-lino Alta temperatura
Tessuto da non stirare
UTILIZZO
1. Porre il ferro sul gancio e portare la temperatura al minimo e inserirlo nella presa principale.
2. Impostare la temperatura desiderata adatta per il tessuto da stirare. L’indicatore si accende, significa che il ferro si
riscalda ed è pronto per l’uso.
3. Girare il selettore del vapore in posizione secco per spegnere il vapore. Assicurarsi che ci sia abbastanza acqua nel
serbatoio se si vuole utilizzare lo spray.
4. Prima di riempire ancora il serbatoio, assicurarsi che il ferro sia staccato dalla presa e impostare in posizione secco. Si
può utilizzare acqua di rubinetto.
5. Per utilizzare il vapore, impostare il ferro alla temperatura più alta nell'area del vapore o lino e attendere che
l'indicatore di luce si spenga.
6. Sollevare il ferro leggermente sopra la superficie del tessuto e premere il tasto del vapore e rilasciarlo durante la
stiratura. Per vapore ottimale, lasciare un intervallo di almeno 4 secondi.
CONSIGLI UTILI
1. Il ferro è ideato con filtro anti calcio e sistema anti caduta per evitare che l’acqua perda dalla piastra quando il ferro è
freddo.
2. Il vapore fornisce una spinta ulteriore che è ideale per rimuovere le pieghe e pieghette.
3. Il ferro ha un sistema di vapore verticale per appendere panni, tende e agganci, ecc.
PDF created with pdfFactory Pro trial version www.pdffactory.com
 Loading...