

Page 1

Allworx
®
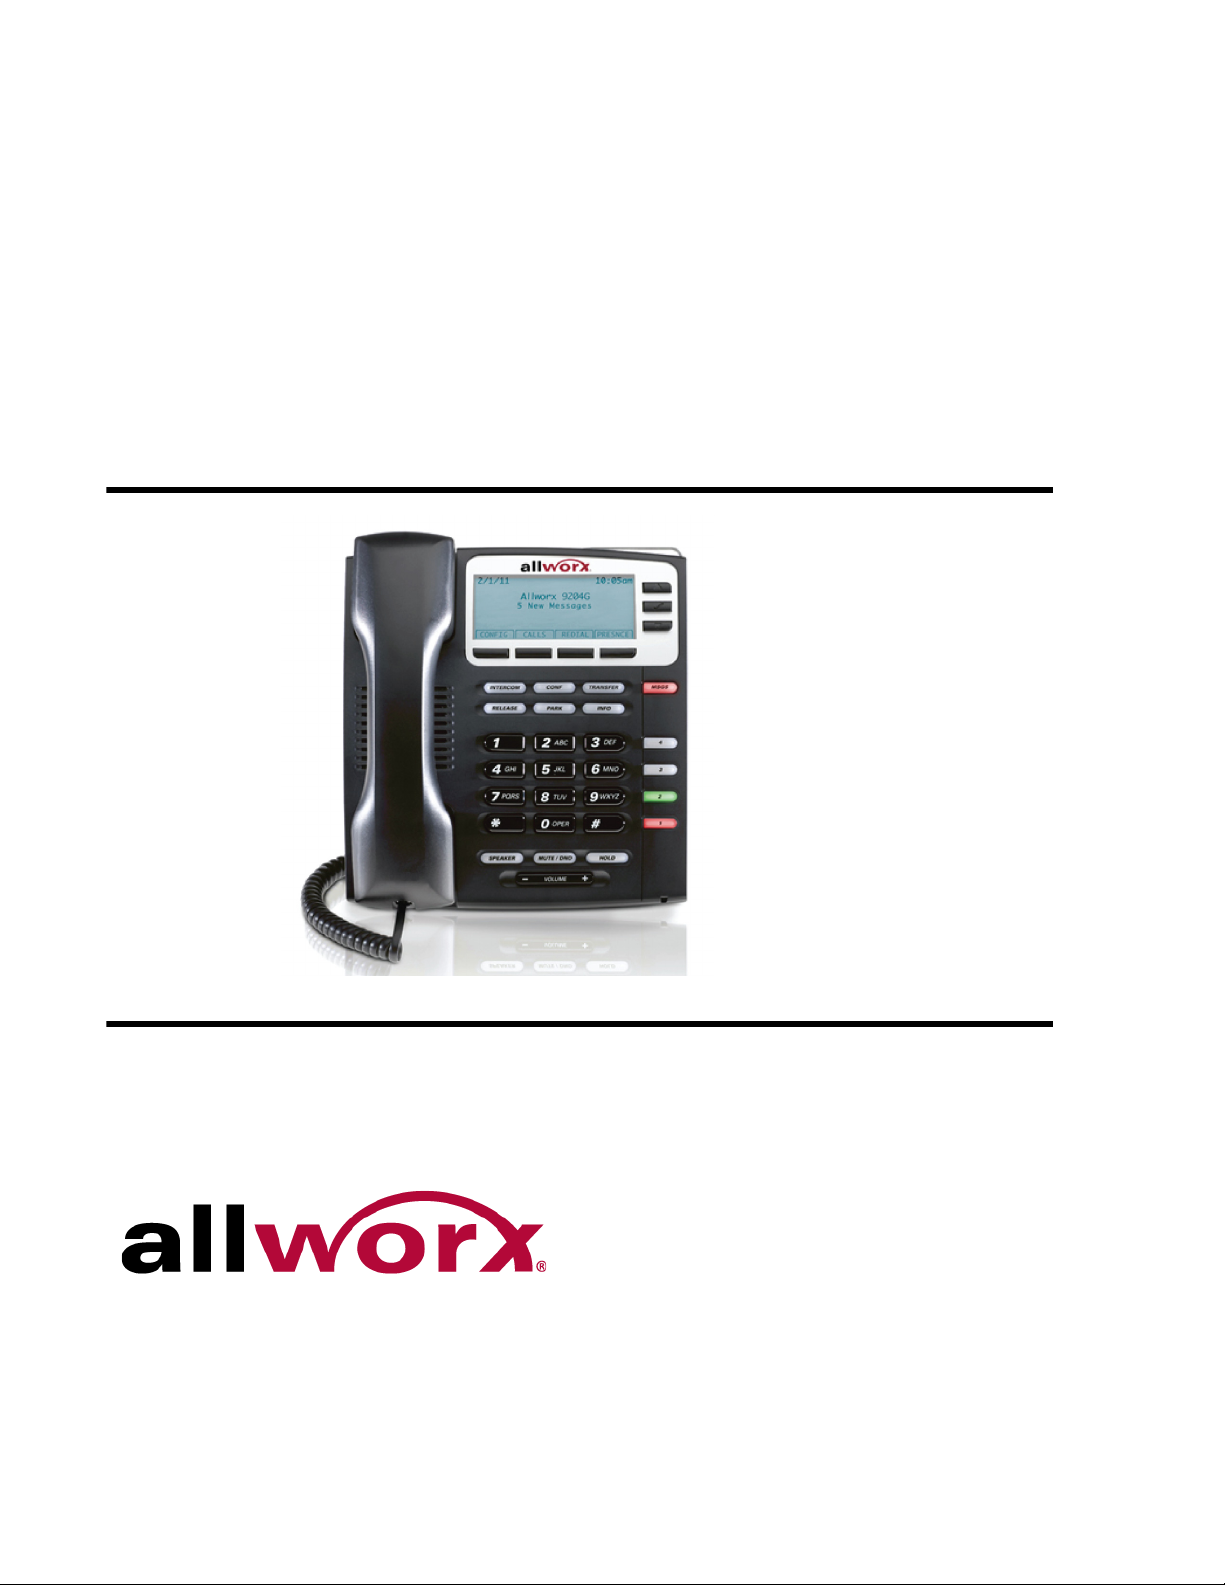
Phone Model 9204/9204G User Guide
Updated May 21, 2014
Page 2

Page 3
Allworx® Phone Model 9204/9204G User Guide
Page 4

Allworx Phone Model 9204/9204G User Guide
©2014 Allworx Corp, a Windstream company. All rights reserved. No part of this publication
may be reproduced, stored in a retrieval system, or transmitted, in any form or by any means,
electronic, mechanical, photocopy, recording, or otherwise without the prior written permission
of Allworx Corp.
Software in this product is Copyright 2014 Allworx Corp, a Windstream company, or its vendors.
All rights are reserved. The software is protected by United States of America copyright laws
and international treaty provisions applicable worldwide. Under such laws, the licensee is
entitled to use the copy of the software incorporated with the instrument as intended in the
operation of the product in which it is embedded. The software may not be copied, decompiled,
reverse-engineered, disassembled, or otherwise reduced to human-perceivable form. This is
not the sale of the software or any copy of the software; all right, title, ownership of the software
remains with Allworx or its vendors.
Page ii +1 866 ALLWORX * +1 585 421 3850
www.allworx.com
Revised: 5/21/14
Page 5

Allworx Phone Model 9204/9204G User Guide
Contents
Introduction .......................................................................................... 1
Setup ..................................................................................................... 3
Connect the Phone .........................................................................................3
Adjust the Phone Angle ...................................................................................4
Volume Adjustment .........................................................................................4
Wall Mounting (Optional) .................................................................................5
Wall Mounting Plate ................................................................................... 5
Handset Retainer Clip ................................................................................ 6
Overview ............................................................................................... 7
Buttons ............................................................................................................8
Feature Keys ...................................................................................................8
Messages .................................................................................................8
Intercom ....................................................................................................9
Conference ................................................................................................9
Transfer ...................................................................................................10
Release ...................................................................................................12
Park .........................................................................................................12
Info ..........................................................................................................13
Speaker ...................................................................................................13
Mute/DND ................................................................................................13
Hold .........................................................................................................14
My Allworx Manager ......................................................................................14
Operation ............................................................................................ 15
Place a Call ...................................................................................................15
Receive a Call ...............................................................................................15
End a Call ..................................................................................................... 16
Headset ........................................................................................................16
Directory Dialing ............................................................................................ 16
Redial a Number ...........................................................................................16
+1 866 ALLWORX * +1 585 421 3850 Page iii
www.allworx.com
Revised: 5/21/14
Page 6

Allworx Phone Model 9204/9204G User Guide
Missed Calls ..................................................................................................17
Presence .......................................................................................................17
Ignore and Silence Soft Keys ........................................................................17
Programmable Function Keys (PFK) .............................................................18
Features ............................................................................................... 21
Operator ........................................................................................................21
User / Resource Extensions ..........................................................................21
Leave Another User a Voicemail ..................................................................21
Business Speed Dial .....................................................................................21
Auto Attendant ...............................................................................................21
Overhead Pages ............................................................................................21
Activate Door Relay .......................................................................................22
Call Queues ...................................................................................................22
Shared Call Appearance ..............................................................................22
Call Routes ...............................................................................................23
Phone LED Indicators ..............................................................................23
Outbound Calls ........................................................................................24
Inbound Calls ...........................................................................................24
Ringing Call Pickup ..................................................................................24
Active Calls ..............................................................................................24
Shared Hold .............................................................................................24
Privacy Hold .............................................................................................25
Bridged Hold ............................................................................................25
Park ..........................................................................................................25
Automatic Call Distribution (ACD) Queuing ...................................................25
Call Forwarding .............................................................................................26
Paging Zones ................................................................................................26
Conference Center ........................................................................................27
Allworx Message Center ................................................................................27
Answer a Ringing Phone Using another Handset .........................................27
Park ...............................................................................................................27
Park a Call on a Line Appearance PFK ...................................................28
Park a Call from the Hold Screen .............................................................28
Page iv +1 866 ALLWORX * +1 585 421 3850
www.allworx.com
Revised: 5/21/14
Page 7

Allworx Phone Model 9204/9204G User Guide
Retrieve a Parked Call .............................................................................28
Call Monitors .................................................................................................29
Busy Lamp Field (BLF) ..................................................................................29
Phone Configuration .......................................................................... 31
Personal Speed Dial .....................................................................................31
Preferences ...................................................................................................32
Reboot the Phone ........................................................................................34
Hot Desk Login ..............................................................................................34
Clear Call History ..........................................................................................35
Refresh Directory .......................................................................................... 35
Network Profiles ............................................................................................35
Regulatory Notices ............................................................................. 37
Abbreviations ..................................................................................... 39
+1 866 ALLWORX * +1 585 421 3850 Page v
www.allworx.com
Revised: 5/21/14
Page 8

Allworx Phone Model 9204/9204G User Guide
Page vi +1 866 ALLWORX * +1 585 421 3850
www.allworx.com
Revised: 5/21/14
Page 9

Allworx Phone Model 9204/9204G User Guide
1 Introduction
Unpack the Allworx phone and applicable accessories, identify each item in the checklist and
inspect for missing items.
• Allworx phone and base: attach the base to the back of the phone. See “Adjust the
Phone Angle” on page 4. for more information.
• Handset with cord: attach the cord to the jack on the back of the Allworx phone.
• Phone Functions Reference Card: slide the quick operating guide between the base
and back of phone.
Additional equipment needed not included in the box:
• Ethernet Cable: connects the phone to the network
• Power Supply: provides power to the Allworx phone - rated 24VDC, 400 mA (or a
network connection with Power over Ethernet).
+1 866 ALLWORX * +1 585 421 3850 Page 1
www.allworx.com
Revised: 5/21/14
Page 10

Allworx Phone Model 9204/9204G User Guide
Page 2 +1 866 ALLWORX * +1 585 421 3850
www.allworx.com
Revised: 5/21/14
Page 11
Allworx Phone Model 9204/9204G User Guide
Caution:
2Setup
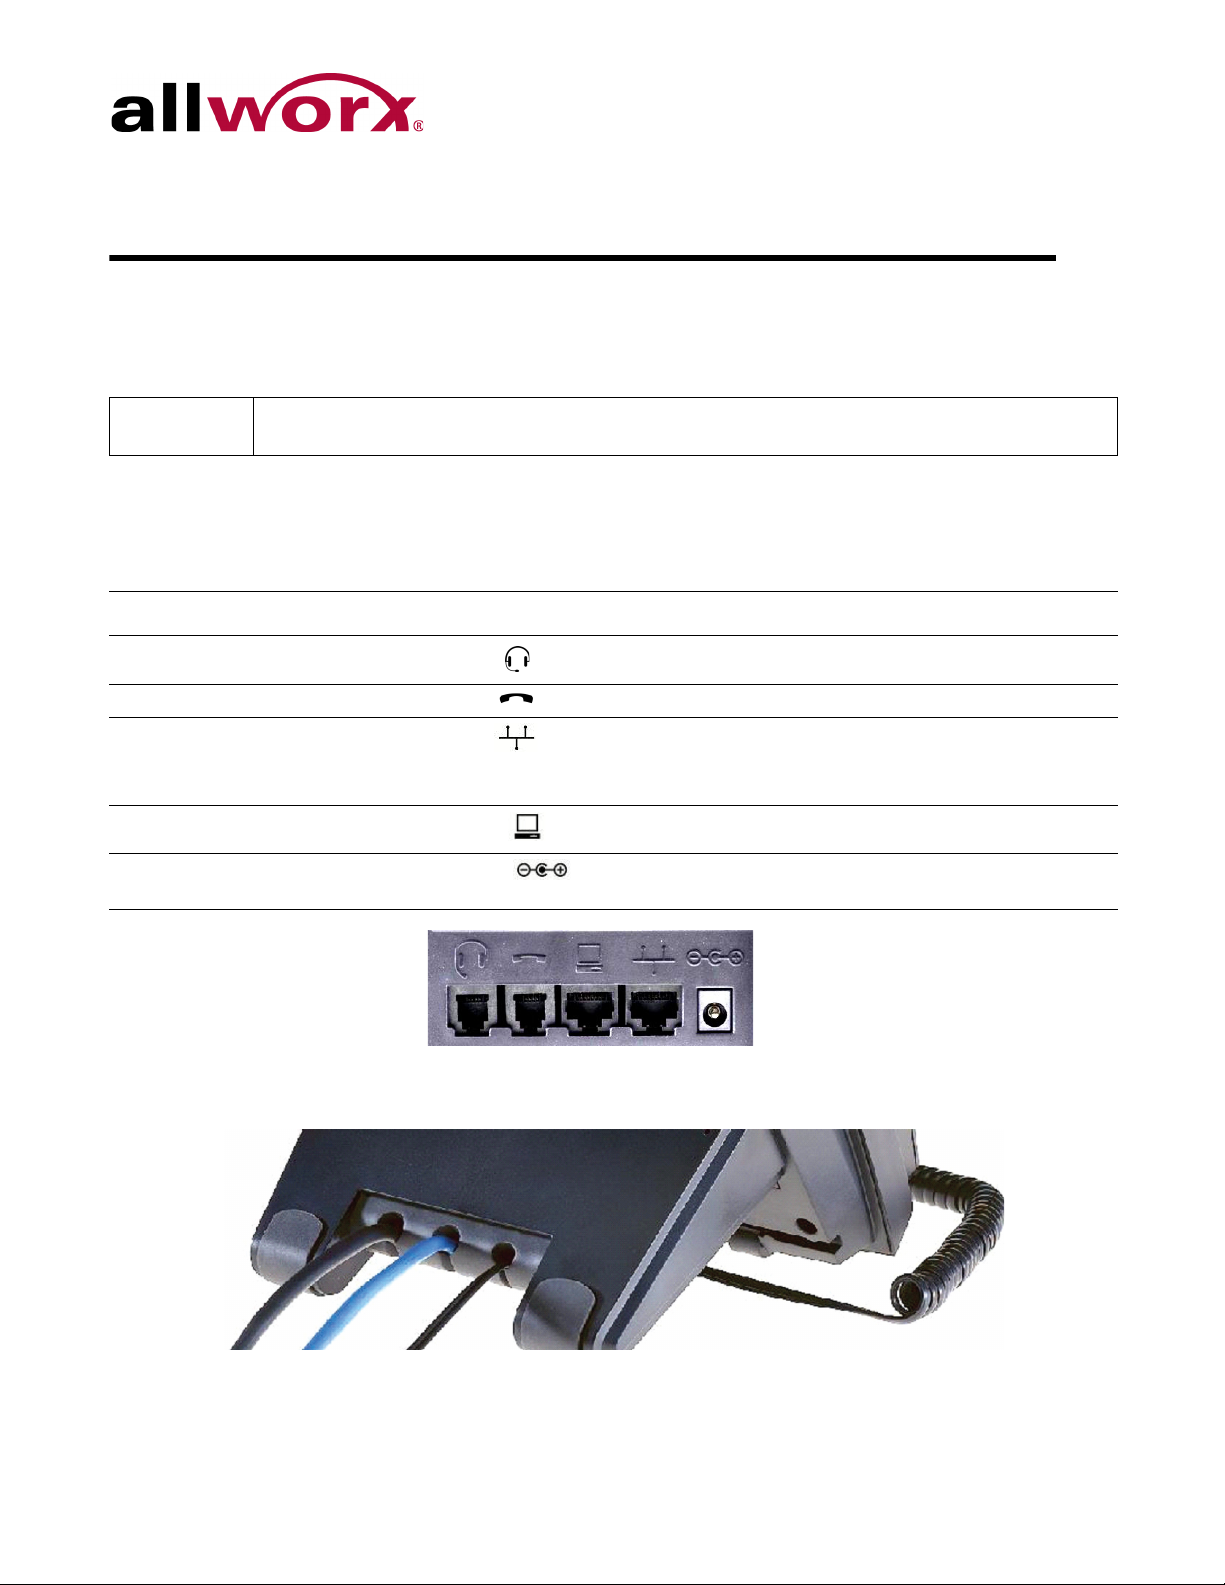
2.1 Connect the Phone
Do not connect the phone to an analog phone line. This may cause damage to the Allworx
phone, which voids the warranty.
To connect the phone:
1. Connect the cables to the jacks on the back of the phone.
Cable Connections
Optional: Headset cord
Handset cord
Ethernet cable
Optional: Ethernet cable
Optional: Power Supply
Back of Phone
Headset jack ( )
Handset jack ( )
Network jack ( ) and Wall Ethernet jack
Power over Ethernet (PoE): provides power to the phone after connecting the
Ethernet cable.
Computer jack ( ) and the computer.
Phone DC jack ( ). Allworx recommends using a surge protector.
Only required if the Ethernet cable does not provide PoE
2. Thread cables through the strain relief guide on the phone base.
+1 866 ALLWORX * +1 585 421 3850 Page 3
www.allworx.com
Revised: 5/21/14
Page 12

Allworx Phone Model 9204/9204G User Guide
3. View the initialization progress on the phone screen. A normal sequence includes:
• Allworx Logo
• Configuring Network
• Starting network
• Loading configuration files
• Station Init complete
After successful startup, the phone displays a combination of the date, time, user
presence, user name, and extension or the phone display may suggest assigning the
handset to a user. If this occurs, follow the on screen directions. If the phone does not
follow this sequence or displays an error, contact the Allworx Server Administrator.
2.2 Adjust the Phone Angle
The phone base angle adjusts for easier phone screen reading.
To adjust the phone base angle:
1. Unplug the phone from the PoE or the power supply. Remove the handset from the hook
and lay the phone face down on a soft surface.
2. Hold the base with the fixed tabs facing the bottom of the phone. Select one of the three
available positions to connect the base to the phone. The set of holes at the bottom of
the phone provides the steepest angle.
3. Place the fixed tabs in the preferred holes on the back of the phone. Rotate the phone
base upwards until the flexible tabs click into place.
To remove the base:
1. Remove the handset from the hook and lay the phone face down on a soft surface.
2. Press down on the flexible tabs and rotate the base towards the phone bottom until the
fixed tabs easily lift out of the holes.
2.3 Volume Adjustment
The volume of the incoming ring, handset, speaker phone, and the headset is adjustable.
Page 4 +1 866 ALLWORX * +1 585 421 3850
www.allworx.com
Revised: 5/21/14
Page 13
Allworx Phone Model 9204/9204G User Guide
Caution:
Leviton 4108W-0SP
To adjust the incoming call volume:
1. Locate the phone volume bar. Do not lift the handset or turn on speaker phone.
2. Press the volume bar – (decrease) or + (increase) to adjust the incoming ring audio level.
The phone plays the audio tone.
To adjust all other volumes:
1. Pick up the handset or turn on the speaker phone or headset. Locate the phone volume
bar. The phone screen displays which audio path is being adjusted.
2. Press the volume bar to – (decrease) or + (increase) the audio level.
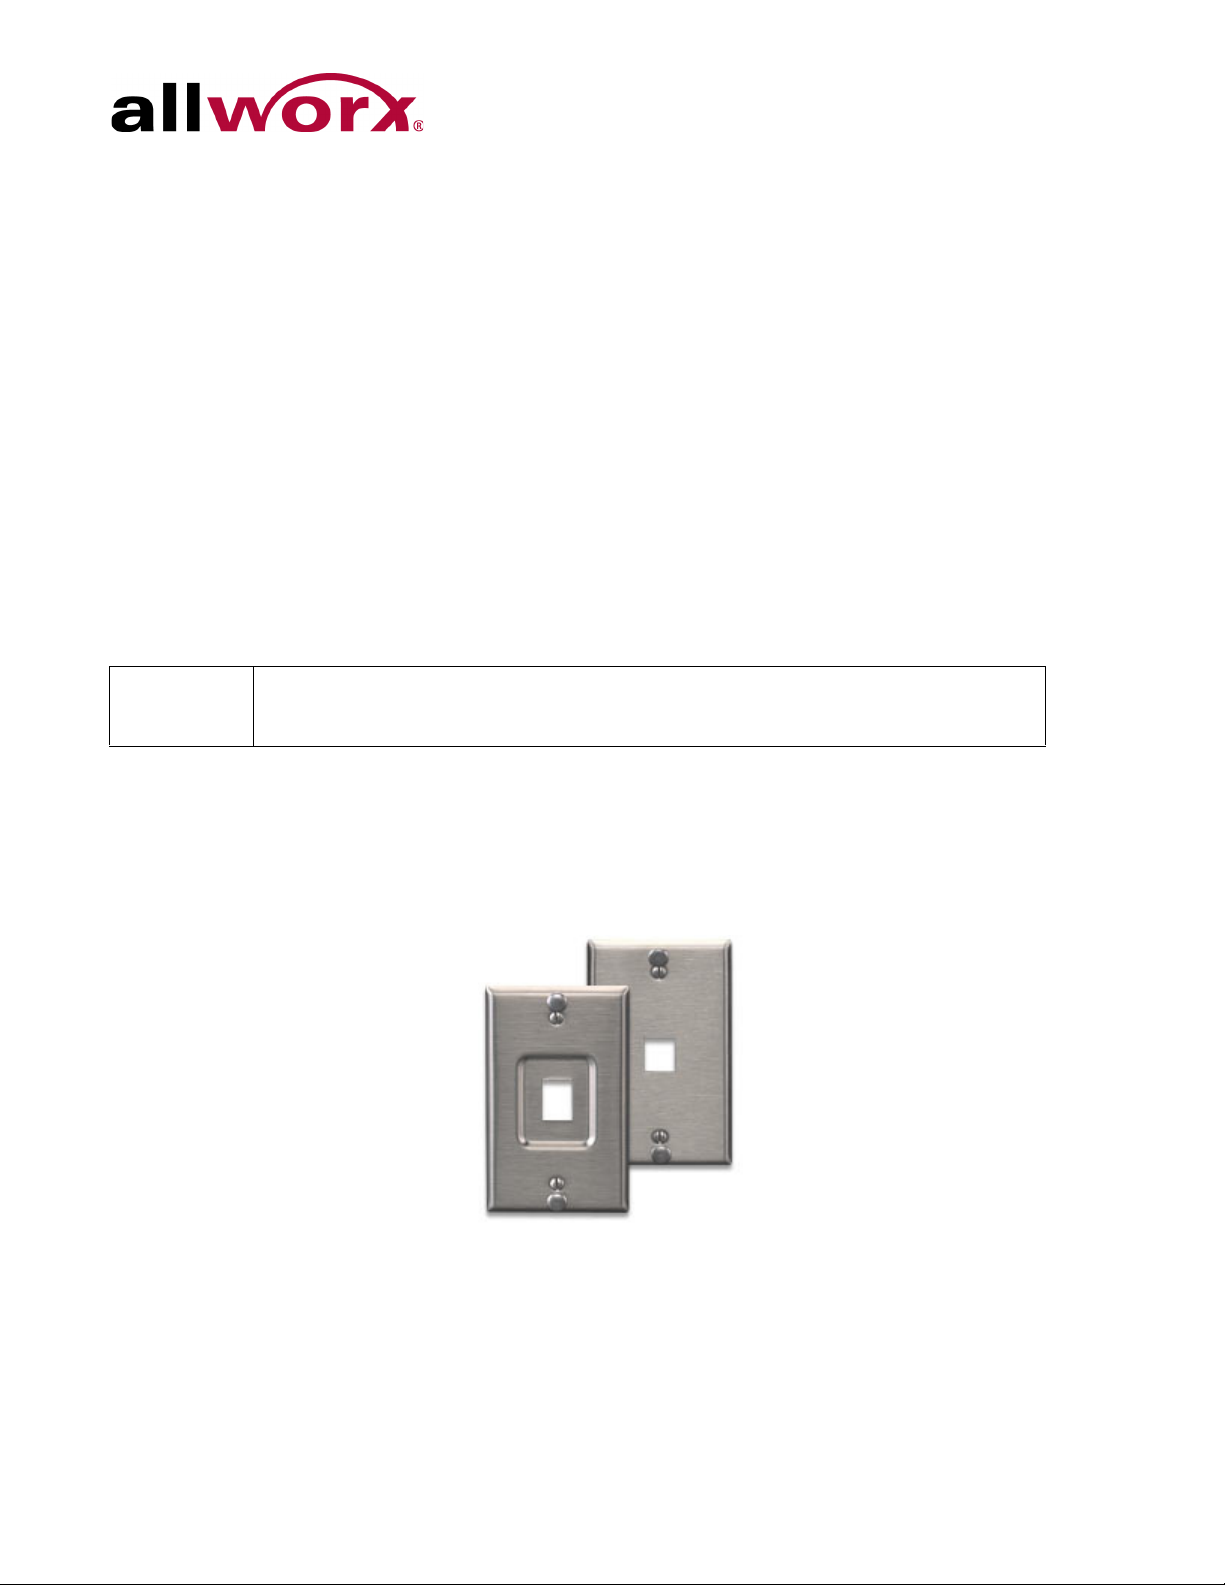
2.4 Wall Mounting (Optional)
If using a standard telephone wall mount plate, DO NOT connect to the RJ-11 jack. This
connection is for analog phones and may cause damage to the Allworx phone, which
voids the warranty.
2.4.1 Wall Mounting Plate
Mounting the Allworx phone on a wall requires a mounting plate that meets the TIA-570-B,
Section standard and is available from a local telephone company or local retailer. The
mounting plate has studs that position the Allworx phone flush to the wall surface.
Remove the Allworx phone base and mount the phone over the mounting plate studs. All power
and RJ-45 cable connections should exit between the phone back and the wall, and then routed
to the network connection and/or a power connection.
+1 866 ALLWORX * +1 585 421 3850 Page 5
www.allworx.com
Revised: 5/21/14
Page 14

Allworx Phone Model 9204/9204G User Guide
2.4.2 Handset Retainer Clip
The handset retainer clip prevents the handset from slipping out of the phone cradle while
hanging on a wall.The Allworx phone ships with the adjustable handset retainer clip in the wall
mount position on the phone cradle.
To adjust the retainer clip for desktop use (for easier handset removal/hang-up) insert a coin in
the retainer clip slot and turn the coin clockwise, 180 degrees. To return the retainer clip to the
wall mount position, insert a coin in the retainer clip slot and turn the coin counter-clockwise,
180 degrees.
Page 6 +1 866 ALLWORX * +1 585 421 3850
www.allworx.com
Revised: 5/21/14
Page 15

3Overview
Scroll and Select keys
Visual ring
indicator
Four
Programmable
Function Keys
(PFKs)
Graphical LCD screen
Soft keys
Higher audio
fidelity
Handset with cord
expandable up to
nine feet
Full-duplex
speakerphone
Volume control
Two 10/100 switched Ethernet ports (9204G)
Headset
jack
Ten feature keys
Multiple position tilt base
(also wall mountable)
Power:
• 802.3af PoE
• 24V DC adapter
Allworx Phone Model 9204/9204G User Guide
The Allworx Server Administrator pre-configures the phone for either PBX (Private Branch
Exchange) or Key System mode of operation. This affects the functionality of each
programmable button on the phone.
For Allworx Server Software Release 7.5 and later, the phone LCD screen backlight turns off
after 2 minutes of inactivity. To turn it on, lift the handset off the hook or press a button.
In addition to English, the Allworx phone supports Canadian French and Castilian Spanish on
the phone display when connected to Allworx servers using software 7.6.3.22 or higher. Contact
+1 866 ALLWORX * +1 585 421 3850 Page 7
www.allworx.com
Revised: 5/21/14
Page 16

Allworx Phone Model 9204/9204G User Guide
Note:
the Allworx Server Administrator to configure the phone to display the preferred language;
users cannot change the phone display language within the phone configuration menu. After
making the change, the preferred language displays during the phone reboot.
3.1 Buttons
• Keypad: dial phone numbers or to enter PIN numbers/ passwords.
• Navigation: the up or down navigation arrows to move through the phone screen
options. Use the center button to Select or Save settings.
• Soft Key Selection: select an option; located below the phone screen.
3.2 Feature Keys
3.2.1 Messages
The number of new messages displays on the LCD screen, and the MESSAGES button
changes to red.
To retrieve messages in Software Release 7.3 or higher:
1. Press the MESSAGES button - once opens the Visual Message Center, twice opens the
Audio Message Center.
2. Log in using the phone keypad, and follow the audio prompts.
3. Hang up to exit.
To retrieve messages in Software Release 7.2 or lower:
1. Press the MESSAGES button to call to the Audio Message Center.
2. Log in using the phone keypad, and listen to the messages.
• Visual Message Center: Displays a list of messages on the screen. Use the UP /
DOWN scroll and SELECT soft keys to play and manage the voicemail messages.
• Audio Message Center: Plays a welcome message and indicates the number of new
voicemail messages. Follow the prompts to manage the voicemail messages.
The Allworx Server Administrator may change the function of the MESSAGES button so pressing
it immediately calls the Audio Message Center making the Visual Message Center unavailable
Page 8 +1 866 ALLWORX * +1 585 421 3850
www.allworx.com
Revised: 5/21/14
Page 17

Allworx Phone Model 9204/9204G User Guide
Note:
3.2.2 Intercom
The Intercom button enables using the phone as an intercommunication system between two
handsets. The discussion broadcasts over the speaker phone over the receiving phone and is
not private. The button is solid green while in use.
To use the Intercom:
1. Lift the handset or press the SPEAKER button. Press the INTERCOM button and dial the
extension. The call connects when the LCD screen displays Active Call.
2. Start talking. The conversation transmits through the speaker on the receiving phone.
3. Press the INTERCOM or SPEAKER button to end the call.
4. Hang up the handset when finished.
To deny an incoming Intercom request, press the IGNORE soft key.
3.2.3 Conference
The Allworx phone provides the ability to set up conferences between three parties (3-way
conferences) or four parties (4-way conferences). To connect a 4-way conference, the system
requires at least three Call Appearance PFKs. The PFK flashes green while making conference
call connections and is solid green during the conference call
If using the Call Assistant recording feature, the PFKs flash red and green.
To connect a conference call:
1. Connect to the first person for the conference call. Press the CONF button.
2. Press another Call Appearance PFK and dial the number of the second person for the
conference call.
3. Press the CONF button. All three callers join in the conference. The CONF button
illuminates solid green.
To add another person to the conference, repeat steps 1 through 4. All four callers are
now able to conference. The CONF button illuminates solid red.
+1 866 ALLWORX * +1 585 421 3850 Page 9
www.allworx.com
Revised: 5/21/14
Page 18

Allworx Phone Model 9204/9204G User Guide
Note:
One party may hang up to exit the conference; the remaining two parties continue to be
connected.
To have a private conversation with one of the parties, split the conference:
a. Use the phone UP / DOWN scroll soft keys, and select the Call Appearance PFK of
the person.
b. Press the HOLD button. The display indicates the two parties involved in the
conference The Call Appearance PFK for the person on hold flashes. Talk privately
to the remaining party.
c. To have the person re-join the conference, press CONF, then select the flashing Call
Appearance PFK. The three-way conference becomes re-established.
3.2.4 Transfer
The TRANSFER button enables sending the active call to another number. After starting the
transfer, the Transfer button is solid red, which indicates transferring a call to another extension
using a Blind or an Attended Transfer. The transfer option works differently, depending on the
Allworx server software version. Users have two transfer options:
• Unannounced (Blind) Transfer: user does not talk to the transfer recipient prior to
transferring a call to that extension.
• Announced (Attended) Transfer: user talks to the transfer recipient prior to
transferring a call to that extension.
Allworx Server Software 7.3 or Lower
To do an Unannounced (Blind) transfer :
The Allworx Server Administrator may configure this method for server 7.4 and greater based on
the phone configuration.
1. Press the TRANSFER button. This places the current call on hold.
• Key System Mode: To transfer a call to an external party, press a free Line
Appearance PFK, and then dial the phone number.
• PBX Mode: Continue to step 2.
2. Wait for the dial tone, and then dial the number to transfer the call.
3. Hang up, press the TRANSFER button, or press the XFER soft key.
Page 10 +1 866 ALLWORX * +1 585 421 3850
www.allworx.com
Revised: 5/21/14
Page 19

Allworx Phone Model 9204/9204G User Guide
Note:
Note:
Note:
To do an Announced (Attended) transfer:
1. Press the TRANSFER button. This places the current call on hold
2. Press an unused Call or Line Appearance PFK, and dial the number of the recipient of
the transfer. Talk to the recipient.
3. Press the TRANSFER button again, and then press the PFK of the original call. This
connects the two parties.
4. Hang up the handset when finished.
To cancel the transfer, press the RELEASE button. To return to the original caller, press the
PFK indicating the held call.
Allworx Server Software 7.4 or Higher
Verify the INTERCOM button or an appearance PFK is free.
To do a one-step transfer:
The Allworx Server Administrator enables the one-step transfer
On an active call, the user must have a BLF or Speed Dial PFK for the recipient of the transfer.
1. Press the BLF or Speed Dial PFK for the recipient of the transfer.
• Unattended (Blind) Transfer: skip to step 2.
• Attended (Announced) Transfer: Talk to the recipient.
2. Hang up, press the TRANSFER button, or press the XFER softkey to complete the
transfer.
The phone configuration may not enable users to stay on the line to announce the transfer. See
“To do an Unannounced (Blind) transfer :” on page 10. for Announced transfers.
To do a two-step transfer:
For use if a PFK is unavailable for the intended recipient:
1. Press the TRANSFER button.
+1 866 ALLWORX * +1 585 421 3850 Page 11
www.allworx.com
Revised: 5/21/14
Page 20

Allworx Phone Model 9204/9204G User Guide
Note:
To transfer a call to an external party while in Key System mode, press a free Line
Appearance PFK and then dial the phone number.
If the system is not in Key System mode, continue to step 2.
2. Wait for the dial tone, and then dial the extension to transfer the call.
• Unattended (Blind) Transfer: skip to step 3.
• Attended (Announced) Transfer only: Talk to the recipient.
3. Hang up, press the TRANSFER button, or press the XFER soft key.
The phone configuration may not enable users to stay on the line to announce the transfer. See
“To do an Unannounced (Blind) transfer :” on page 10. for Announced transfers.
To transfer to voicemail:
1. Press the TRANSFER button, and then press the VMAIL soft key.
2. Dial the extension, press a BLF key, or press the Speed Dial key.
3. Hang up, press the TRANSFER button, or press the XFER softkey.
3.2.5 Release
Use the RELEASE button to end an active call or to abort a new call setup, such as the middle
of a transfer operation.
3.2.6 Park
PBX Behavior on a call appearance: To park an active call, press the PARK button. The phone
briefly displays the parking orbit extension of the call.
Key System Behavior on an outside line: To place an active call in a “system-wide hold”, press
the PARK button. Any phone with a PFK for this outside line can retrieve the call.
Pressing the PARK button on a handset displays a list of currently parked calls (including the
Caller ID and number of the parked caller, the parked call orbit number, duration of the parked
call, and the extension number that parked the call). Users may select a call from the list to
retrieve the parked call. If there are no active calls on the handset, the LCD screen displays No
Calls Parked.
Page 12 +1 866 ALLWORX * +1 585 421 3850
www.allworx.com
Revised: 5/21/14
Page 21

Allworx Phone Model 9204/9204G User Guide
Note:
Note:
If a user parks a Shared Call Appearance call and the Park timeout setting for the system is set
to ring back to the handset that parked the call, the parked call rings back only to the handset
that parked it. It does not ring all handsets in the Shared Call Appearance. The Shared Call
Appearance PFK light goes out and the call is no longer on the Shared Call Appearance.
Using the Call Forwarding option on a phone does not forward Shared Call Appearance calls.
3.2.7 Info
To see a quick description of the phone buttons, use the INFO button. The button is solid green
while in use. For example, use the INFO button to determine the programmed numbers for each
speed-dial button.
To use this feature:
1. Press the INFO button.
2. Press any of the other buttons on the phone. The screen displays a brief description of
the selected button.
3. Press the INFO button a second time or let the LCD screen time out to exit the
description screen.
3.2.8 Speaker
The speaker phone does not work while using a headset. See “Headset ” on page 16. for more
information on using headsets.
Press the SPEAKER button for hands-free use of the phone.
When using the handset, press the SPEAKER button and the button is solid green while in use.
Then place the handset on hook. Take the handset off the hook to continue using it. When
finished with the call, press the SPEAKER button to hang up.
3.2.9 Mute/DND
Mute a Call
During a call, press the MUTE/DND button to turn off the microphone in the handset, speaker
phone, or headset. The MUTE/DND button is solid red while in use.
+1 866 ALLWORX * +1 585 421 3850 Page 13
www.allworx.com
Revised: 5/21/14
Page 22

Allworx Phone Model 9204/9204G User Guide
Do Not Disturb (DND)
When activating DND, the phone does not ring. All incoming calls follow the next step in the
active call route. Users can send calls. The MUTE/DND is solid amber while in use. When not
on a call, press the MUTE/DND button. Press the MUTE/DND button to de-activate the Do Not
Disturb feature.
3.2.10 Hold
If the Allworx Server Administrator enables the Music on Hold feature for the call appearance,
callers on hold will hear music.
For Line Appearance: by default the HOLD button first starts flashing green to indicate a call on
hold. Continue pressing HOLD until it the PFK no longer lights to indicate a Parked call.
To place a call on hold:
1. Press the HOLD button. The HOLD button becomes solid red. Place the handset on the
hook. The Call Appearance PFK for the held call blinks green until the user picks up the
call again.
2. Pick up the handset to take the call off hold. If more than one call is on hold, the most
recent call connects. The caller ID of the call picked up displays.
3. Pick up a different call on hold: press the flashing PFK for that call or use the UP / DOWN
scroll soft keys to display the call on the screen, and then pick up the handset.
If there is a call on hold and a new call comes in, lift the handset to answer the new call.
4. Hang up the handset when finished.
3.3 My Allworx Manager
My Allworx Manager provides access to the business directory, conference scheduling page,
company phone list, distribution lists, phone features chart, and shared folders. Enter the My
Allworx Manager address into a web browser (e.g. Internet Explorer).
The Allworx Server Administrator provides the address: http://ServerLANAddress, and then
enter the log in username and password.
ServerLANAddress is the IP address or domain name of the Allworx server.
Page 14 +1 866 ALLWORX * +1 585 421 3850
www.allworx.com
Revised: 5/21/14
Page 23

Allworx Phone Model 9204/9204G User Guide
4Operation
4.1 Place a Call
To place an outbound call, lift the handset or press the SPEAKER button. Dial the extension or
press the SpDial soft key to automatically dial a programmed number. The phone configuration
enables users to dial without lifting the handset or pressing a button. Dialing automatically
activates the speaker phone or headset.
• Call Appearance PFK: place extension-to-extension calls or obtain an outside line
(must dial 91 first).
• Line Appearance PFK: seizes the outside line without dialing 91 first.
• Speed Dial PFK: automatically dials the programmed number.
• Shared Call Appearance PFK: place extension-to-extension calls or obtain an outside
line (must dial 91 first). If the PFK LED is solid red, the line is in use “remotely” on
another assigned handset of the same Shared Call Appearance.
4.2 Receive a Call
For incoming calls, the audible indicator rings and a Call Appearance or Line Appearance PFK
flashes, unless configured otherwise. Lift the handset, press the SPEAKER button, or press the
flashing PFK to answer the call.
• Call Appearance PFK: receive either an extension-to-extension call or an outside line
directed to an extension assigned to the phone.
• Line Appearance: receive inbound calls from an outside line.
• Shared Call Appearance: receive an incoming call on multiple handsets.
• Call Monitor
• Call Queue
• ACD Appearance
1. Digits may vary. Check the phone functions tab of the My Allworx Manager page or contact the Allworx
Server Administrator.
+1 866 ALLWORX * +1 585 421 3850 Page 15
www.allworx.com
Revised: 5/21/14
Page 24

Allworx Phone Model 9204/9204G User Guide
Note:
4.3 End a Call
• Place the receiver on the hook. If using the speaker phone or headset, press the
SPEAKER button.
• Press another PFK. If a second incoming call is on another PFK, pressing that PFK
ends the current call and answers the incoming call (unless the phone configuration
enables auto on hold).
• Press the RELEASE button to end a call and start a new call.
4.4 Headset
Press the SPEAKER button to activate the headset, and then press the SPEAKER button again
to disconnect the call.
The Allworx Server Administrator can create a PFK to activate the headset instead of using the
SPEAKER button.
4.5 Directory Dialing
1. Press the UP / DOWN scroll soft keys to view a list of all User Extensions, System
Extensions, and Speed Dial numbers by Name or Description. While the handset is off
the hook, the rightmost soft key changes to the directory listing option: PHONEBK. Press
to initiate.
2. Use the UP / DOWN scroll soft keys to highlight the name (or description) and extension
or press the keypad to jump to a specific alphabetic section of the directory. Press
SELECT to dial the number.
4.6 Redial a Number
1. Press the REDIAL soft key on the phone display screen.
2. Press the CALLS softkey. Use the UP / DOWN scroll softkeys to highlight the call in the
display. Press SELECT .
Page 16 +1 866 ALLWORX * +1 585 421 3850
www.allworx.com
Revised: 5/21/14
Page 25

Allworx Phone Model 9204/9204G User Guide
4.7 Missed Calls
After a missed call, a message displays on the phone screen.
To see the details of the missed calls:
1. Press the CALLS soft key, and then press the UP / DOWN scroll soft keys to view the
missed calls.
2. Press the DETAIL soft key to view the date and time of the missed calls. Press SELECT
to call the number, if it is available.
4.8 Presence
The Presence setting identifies which call route the incoming call uses based on the extension
availability. The Presence setting options include In Office, At a Meeting, On Vacation, On
Business Trip, At Home, Away, and Busy.
1. Press the PRESNCE (presence) soft key.
2. Press the UP / DOWN scroll soft keys to view the presence states.
3. Press SELECT to change the presence. The Presence setting changes, the default
LCD screen displays, and all inbound calls follows the call route for this presence state.
The MUTE/DND button flashes amber to indicate a presence setting other than “In
Office”.
4.9 Ignore and Silence Soft Keys
When a call is ringing, the SILENCE and IGNORE soft key options display on the phone screen.
• IGNORE: stops the audible ringing and the PFK continues to flash until the user
answers the call or the caller hangs up.
• SILENCE: stops the audible ringing, the phone screen displays the incoming call
information, and the PFK continues to flash until the user answers the call or the caller
hangs up.
+1 866 ALLWORX * +1 585 421 3850 Page 17
www.allworx.com
Revised: 5/21/14
Page 26

Allworx Phone Model 9204/9204G User Guide
4.10 Programmable Function Keys (PFK)
The Programmable Function Key is a line short cut. The Allworx Server Administrator
configures the PFKs.
Feature Description
Service calls in ACD queues. Users log in and out of ACD queues with this PFK. When
logged in, the user can receive and answer calls from ACD queues.
ACD Appearance
Busy Lamp Field (BLF)
Call Appearance
Call Monitor
Logged in agents can temporarily stop ACD calls from routing to them by pressing the
PFK. The PFK flashes red when it is in this state. Pressing the PFK again enables calls
to route to the agent.
Monitors and dials another phone. The other phone is specified when setting up the BLF
function. When pressing the PFK, the behavior of this function is dependent upon the
Station Mode selection.
When Station Mode is set to PBX Behavior, the phone dials the designated extension.
When Station Mode is set to Key System Behavior, the phone places an intercom
connection to the designated phone.
Maps to one of the Call Appearances available on the phone. This enables placing or
receiving calls. Additionally:
• Enables distinctly using each Call Appearance in call routing and for managing those
calls independently and concurrently on the same phone.
• Mapping more than one PFK to the same Call Appearance enables multiple calls to
that Call Appearance to be active at the same time. The Call Appearance does not
appear busy to the call route until all the PFKs defined for that Call Appearance are in
use. This is similar to call waiting except the system uses the PFKs to alert and select a
new call.
Configuration Example: Busy Receptionist
Requirements: Susan works as a receptionist at a busy office. She gets many phone
calls each hour. She wants to be able to answer each call while minimizing the possibility
of any caller getting a busy signal.
Phone Configuration: She has one Call Appearance defined on her phone. She sets up 8
of her phone PFKs to map to her phone’s Call Appearance. (She wants to use the
remaining PFKs for other functions).
Discussion: When the first phone call comes in, her phone rings and the first of the Call
Appearance PFKs blinks green. While talking with the first caller, a second call comes in.
Her phone rings again and the second Call Appearance PFK blinks green. She puts the
first caller on hold by pressing the Hold button on her phone and picks up the second
caller by pressing the second Call Appearance PFK. She can continue to put callers on
hold and answer new calls. She terminates calls by switching to another Call
Appearance PFK
Map to one of the 10 Call Monitors in the system. A Call Monitor enables live call
answering of any outside line or mapped call route through the associated Call Monitor.
Page 18 +1 866 ALLWORX * +1 585 421 3850
www.allworx.com
Revised: 5/21/14
Page 27

Feature Description
Enables supervisors to monitor calls for designated handsets in three modes:
Call Supervision
Emergency Alert
Function
Hot Desk
Line Appearance
• Barge In
• Silent Monitor,
• Whisper.
Receive audible and visual alerts whenever making an emergency call from any local or
remote handset on the system.
Do one of a specified set of functions:
• Centrex Flash – Enables transferring external calls to external numbers without tying
up CO lines connected to the Allworx server.
• Headset – Turns the Headset on and off (if one is plugged in). When a plugged in
headset and the handset is off-hook, this button toggles the audio between the headset
and the handset.
Note: If using an undefined Headset PFK, use the phone speaker button to operate the
headset.
• Park – Enables programming a PFK to perform the Park operation with a press of a
button. After defining a Park PFK, the user can only use the Hold button for the
dedicated hold function and not the parking operation.
• Personal Speed Dial – Dials a number programmed directly on the phone. The
mapping of the Personal Speed Dial Numbers defined in the handset to the PFK is as
follows. The uppermost Personal Speed Dial PFK is associated to the lowest Speed
Dial entry number on the handset.
• Redial – Redials the last dialed number. Unless the Line Appearance(s) Use of Dial
Plan phone option is enabled, the system only redials Call Appearance-dialed calls.
Enables users to log in to shared phones, receive calls on that phone, and place calls
with the caller ID. Users can initiate the login using a Hot Desk PFK or by selecting the
Hot Desk Login option from the phone’s Config menu.
Use the Hot Desk PFK for logging into the phone that has the PFK. The PFK is normally
solid red but goes off when a user logs in. Users can still log in to phones that do not
have the PFK using the phones Config menu.
Note: The PFKs configured for phones do not change when a new user logs in. The Hot
Desk PFK and all other PFKs remain as originally configured for the phone.
Monitors the status of an outside line, answers incoming calls on that line, and selects
the line for outbound calls. When setting up this function for this PFK, the user specifies
the line.
To enable outside lines available for selection:
• Navigate to Phone System > Outside Lines and go to the Analog (CO) Lines section.
• Select the Analog (CO) Line, and click Modify.
• Go to the Outside Line section, and check the Enable Line Appearance check box.
• Click Update to return to the Outside Lines page.
Unique Allworx Functionality: Allworx has enhanced key-system capabilities relative to
SIP devices and Digital Lines. Any SIP proxy, SIP gateway, or Digital Line (T1) bearer
channel can be made available as Line Appearance selections when enabled on their
respective configuration pages. Through this manner, the Allworx system can present a
common key system use model to all external voice circuit facilities including VoIP trunks
going to an ITSP.
Allworx Phone Model 9204/9204G User Guide
+1 866 ALLWORX * +1 585 421 3850 Page 19
www.allworx.com
Revised: 5/21/14
Page 28

Allworx Phone Model 9204/9204G User Guide
Feature Description
Automatically monitors the status of the designated user’s Message Center voicemail
Messages
Not Used No action. Select this choice to disable a previously defined PFK.
Parking Orbit
Park Set Monitor
Push to Talk
Queue Alarm
Queue Appearance
Schedule
Shared Call
Appearance
Speed Dial
inbox and when pressed, automatically accesses the inbox. The PFK LED turns red
when a new message is in the monitored inbox. The Allworx Server Administrator must
specify the monitored user’s inbox when setting up the PFK.
Assign to any of the Parking Orbits. The PFK lights if there is a call in the parking orbit.
Pressing the PFK retrieves the parked call in that orbit. Do not use the Parking Orbit
PFKs to pick up parked calls in Parking Orbits beyond the first nine. Parking Orbit PFKs
do not function if the server is part of a Multi-site network and configured to enable other
sites to retrieve its parked calls.
Enable a single PFK to monitor a configurable set of parking orbits. The PFK lights if
parking calls in any of the set of orbits. Pressing the PFK displays a list of parked calls in
the orbit along with Caller ID and other information. Users can retrieve one of the parked
calls using the UP/DOWN arrow keys and the SELECT button. For example, users can
use a single PFK to monitor all local park orbits and a single indicator for any call placed
in a parking orbit. This also enables users to monitor the local parking orbits of a remote
server in a multi-site environment. Available in Allworx server software version 7.5 or
later.
Provide a one-way, walkie-talkie-like capability. The configured PFK accesses a specific
handset. The user can speak to the target handset user by holding the PFK down and
speaking. If the user of the target handset wishes to respond, they must place a regular
call back to the originator.
Map to one of the 10 Call Queues in the system. It notifies the user of the queue’s activity
levels (number of calls in the queue and/or longest wait time). It can be configured to
include an audible alarm with the queue’s status displayed on the phone’s LCD.
Map to one of the 10 Call Queues in the system. It automatically monitors the status of a
Call Queue and used to answer calls that are in the queue.
Display the Mode (Day or Night) of the configured Business Schedule. The LED is off
when in Day mode and solid red when in Night mode. Configure to manually switch the
current Mode and Greeting of the Schedule.
Enables handling a set of one or more PFKs by the system as a single appearance
shared across multiple handsets. All handsets in the Shared Appearance have common
access to calls and call operations within the group of handsets.
Choosing this PFK assigns consecutive PFKs, one for each Shared Call Appearance
line. If there are not enough consecutive PFKs available, the PFK assignment fails and
an error message displays. If the Shared Call Appearance PFK assignment would
overwrite existing PFKs, the system displays an error message and enables the Allworx
Server Administrator to cancel the operation. Shared Call Appearance PFKs display
consecutively on the PFK configuration page, the Allworx Server Administrator can move
the assignments to different PFKs limited only by the constraints within the particular
handset model. Available in Allworx server software version 7.5 or later.
Automatically dials an extension. The Allworx Server Administrator specifies the
extension when setting up the Speed Dial function for this PFK.
Page 20 +1 866 ALLWORX * +1 585 421 3850
www.allworx.com
Revised: 5/21/14
Page 29

Allworx Phone Model 9204/9204G User Guide
5 Features
The dialed-digits listed are system defaults, actual dialed-digits may vary. Check the phone
functions tab of the My Allworx Manager page or contact the Allworx Server Administrator for
the actual dialed-digits.
5.1 Operator
Dial (or transferring to) 0 to initiate a call to the company operator.
5.2 User / Resource Extensions
Dial any extension between 100 – 299 (three-digit mode) or 1000 – 2999 (four-digit mode) to
connect a call to another user or to a call route (set up by the System Administrator).
5.3 Leave Another User a Voicemail
Dial 3 + extension to connect to another user’s voicemail. If the Allworx server is running
software release 7.4 or higher, users can transfer a call to a user’s voicemail using a soft key.
See “Allworx Server Software 7.4 or Higher” on page 11.
5.4 Business Speed Dial
The System Administrator specifies extensions 350 – 399 or 34000 – 34999 to ring specific
numbers and programs the extensions to the PFK.
5.5 Auto Attendant
Dial extension 400 or 431 for the default Auto Attendant or extension 431 - 439 for a specific
Auto Attendant.
5.6 Overhead Pages
Overhead paging is a third party plug-in. For systems configured and connected to an Overhead
+1 866 ALLWORX * +1 585 421 3850 Page 21
www.allworx.com
Revised: 5/21/14
Page 30

Allworx Phone Model 9204/9204G User Guide
Paging system, access by dialing extension 402. Once activated, users can make an
announcement through the intercom of each handset or to the overhead paging system.
5.7 Activate Door Relay
Dial extension 403 to activate a Door Relay, if connected and configured.
5.8 Call Queues
For sites that use Ring All Queuing, users can log in to and out of queues. The phone
automatically logs into the Queue after power up. If the Allworx Server Administrator enables
Music on Hold for the queue, queued callers hear music.
To log in to a Queue:
1. Press and hold the corresponding queue PFK on the phone.
2. Wait for the flashing queue PFK light. If calls are waiting, the PFK flashes green. If there
are no calls in the queue, the button does not light.
3. Pick up the call.
• Hands-free mode: press the PFK or SPEAKER.
• Regular mode: use the handset or headset and press the PFK.
To log out of a Queue:
Press and hold the corresponding solid red Queue PFK on the phone.
5.9 Shared Call Appearance
Shared Call Appearances enables handling a set of one or more appearances by the system as
a single appearance shared across multiple handsets. This enables all handsets in the Shared
Appearance to have common access to calls and call operations within the group of handsets.
For example, an incoming call can ring on all handsets using the appearance, have one user
answer the call and place the call on hold, and then another user retrieves the call.
Page 22 +1 866 ALLWORX * +1 585 421 3850
www.allworx.com
Revised: 5/21/14
Page 31

Allworx Phone Model 9204/9204G User Guide
Note:
Shared Call Appearances support three distinct types of hold behavior:
• Shared Hold - any handset using the Shared Call Appearance can retrieve the call on
hold.
The Allworx server software does not support including a call on a shared hold in phone-hosted
conferences.
• Privacy Hold - only the handset that placed the call on hold can retrieve the call.
• Bridged Hold - the handset that placed the call on hold and one other handset that has
the same Shared Call Appearance can retrieve the call. Users initiate a Bridged Hold by
placing an Intercom call to the second party while the original call is active.
5.9.1 Call Routes
After creating Shared Call Appearance, it is selectable as a destination in any extension call
route.
5.9.2 Phone LED Indicators
Color State Description
Off Idle No available calls on the Shared Call Appearance line. Users can
access the PFK for Line Seizure.
Solid Green In Use Locally The handset “owns” the Shared Call Appearance line. For Line Seizure,
dial tone is present and dialing can commence.
Fast Flashing Green Ringing An inbound call to the Shared Call Appearance is occurring. All parties
indicate ringing on the same Shared Call Appearance line.
Fast Flashing Red Ringing An inbound call to the Shared Call Appearance is occurring on a
handset set to Do Not Disturb (DND). User can answer call.
Slow Flashing Green On-hold Active call is on-hold (locally or remotely). Any Shared Call Appearance
participant can retrieve the call.
Slow Alternating
Green and Red
Solid Red In Use
Privacy or
Bridged Hold
Remotely
Active call is on-hold privately, and only the handset that held the call or
a bridged call can retrieve the call
The Shared Call Appearance line is in-use by a remote handset.
Pressing INFO and then the PFK shows who owns the Shared Call
Appearance line. The Shared Call Appearance line releases:
• when pressing the Shared Call Appearance PFK again on the phone
that seized it; or
• completing an active call on the Shared Call Appearance line.
+1 866 ALLWORX * +1 585 421 3850 Page 23
www.allworx.com
Revised: 5/21/14
Page 32

Allworx Phone Model 9204/9204G User Guide
5.9.3 Outbound Calls
To seize a line locally for outbound calls, the press an idle Shared Call Appearance PFK and
the PFK LED changes to solid green. Listen for the dial tone, and place the outbound call. If the
PFK LED is solid red, the line is in use “remotely” on another assigned handset of the same
Shared Call Appearance.
5.9.4 Inbound Calls
A ringing inbound call on a Shared Call Appearance causes the PFK to flash fast green on all
handsets sharing the Shared Call Appearance. Any user of a phone with that Shared Call
Appearance can answer the inbound call.
5.9.5 Ringing Call Pickup
Handsets that do not share the Shared Call Appearance can pick up ringing calls on a Shared
Call Appearance line. Once another call appearance picks up a call, the shared call appearance
returns to its idle state.
If a phone outside the Shared Call Appearance group picks up a call, the call is no longer a part
of that Shared Call Appearance, i.e., a non-Shared Call Appearance phone picks up a call and
places it on hold, it is a “normal” hold and not one of the Shared Call Appearance hold types.
5.9.6 Active Calls
An active inbound call on a Shared Call Appearance line (or connecting an outbound call),
renders the line unavailable to all other phones using the Shared Call Appearance.
While there is an active call on a Shared Call Appearance, other users of the Shared Call
Appearance can view the Caller ID information of each party by pressing the phone INFO
button, and then the red PFK of the in use Shared Call Appearance line.
5.9.7 Shared Hold
To place the active Shared Call Appearance phone call on hold, press the HOLD key. The LED
flashes slow, green on all phones of the Shared Call Appearance; this includes the phone used
to place the call on hold. Handsets that are a part of the Shared Call Appearance can retrieve
the phone call put on hold. When using this hold type, the system delivers Hold Reminders to all
phones in the Shared Call Appearance per the individual phone settings. If no one picks up the
held call, all phones receive a notification per the individual HOLD reminder settings.
Page 24 +1 866 ALLWORX * +1 585 421 3850
www.allworx.com
Revised: 5/21/14
Page 33

Allworx Phone Model 9204/9204G User Guide
Note:
5.9.8 Privacy Hold
A call on Privacy Hold is only retrievable by the handset that places the call on hold. To place
the call on “privacy” hold, press the HOLD button twice quickly. The phone has a slow,
alternating green and red LED. All other phones in the Shared Call Appearance have a solid
red LED for the Shared Call Appearance line. If the user does not pick up the call, the phone
receives a notification per the phone HOLD reminder settings.
5.9.9 Bridged Hold
A Bridged Hold places a Shared Call Appearance call on hold and is retrievable by a second
designated handset that is part of the Shared Call Appearance. Place an intercom call to the
handset within the same Shared Call Appearance. This bridges the hold to the second handset
automatically, and enables the second handset to resume the held call by selecting the flashing
Shared Call Appearance PFK. If neither party resumes the call, the handset placing the call on
hold receives a notification per the individual HOLD reminder settings.
5.9.10 Park
If a user parks a Shared Call Appearance call and the Park timeout setting for the system is set
to ring back to the handset that parked the call, the parked call rings back only to the handset
that parked it. It does not ring all handsets in the Shared Call Appearance. The Shared Call
Appearance PFK light goes out and the call is no longer on the Shared Call Appearance.
The Parking Orbit PFK enables monitoring of any accessible parking orbit.
The Park Set Monitoring PFK enables a single PFK to monitor a configurable set of parking
orbits via both the illuminated PFK button as well as a list of calls parked in the specific orbits.
For example, users can use a single PFK to monitor all local park orbits and a single indicator
for any call placed in a parking orbit. This also enables users to monitor the local parking orbits
of a remote server in a multi-site environment.
Using the Call Forwarding option on a phone does not forward Shared Call Appearance calls.
5.10 Automatic Call Distribution (ACD) Queuing
To login while the ACD Appearance PFK LED is solid red:
1. Press and hold the PFK for five seconds. The login prompt displays on the screen.
Release the button.
+1 866 ALLWORX * +1 585 421 3850 Page 25
www.allworx.com
Revised: 5/21/14
Page 34

Allworx Phone Model 9204/9204G User Guide
2. Use the phone dial pad and soft keys to enter the extension.
3. Use the UP / DOWN and SELECT softkeys to select and log in to queue(s). If the system
assigns the user to only one queue, skip this step.
4. Enter the voicemail password (or PIN) using the phone dial pad and softkeys.
The ACD Appearance PFK turns off after logging in and ready to receive calls. The
amber PFK indicates this is the only agent logged into the queue.
To log out or change queues:
1. Press and hold the PFK for five seconds. The ACD queue list displays.
2. Use the UP / DOWN and SELECT softkeys to deselect queue(s). To log out, deselect all
queues.
3. Enter a password (or PIN). The ACD Appearance PFK is solid red when logging out of all
queues.
To change the phone to a busy state:
1. Press and release the PFK. The busy reasons display.
2. Use the UP / DOWN and SELECT softkeys to select the busy reason. The ACD
Appearance PFK blinks red while in the busy state. To leave the busy state and resume
taking calls, tap the PFK.
5.11 Call Forwarding
Forward incoming calls to another extension by dialing 45 + the extension. Disable Call
Forwarding by dialing dial extension 450.
5.12 Paging Zones
Dialing 46# (# is a Paging Zone number, 0 through 9) to broadcast audio to members of the
Paging Zone (setup by the Allworx Server Administrator).
Page 26 +1 866 ALLWORX * +1 585 421 3850
www.allworx.com
Revised: 5/21/14
Page 35

Allworx Phone Model 9204/9204G User Guide
Note:
5.13 Conference Center
Dial 408 to access the optional Conference Center feature. Refer to the Allworx Server User
Guide.
5.14 Allworx Message Center
If the Allworx server is running software release 7.2 or lower, press the MESSAGES button to
call the Audio Message Center. Users can login and listen to the messages.
If the Allworx server is running software release 7.3 or higher, press the MESSAGES button
once to access the Visual Message Center or twice to access the Audio Message Center. See
“Messages ” on page 8. for more information.
The Allworx Server Administrator may change the function of the MESSAGES button so pressing
it immediately calls the Audio Message Center making the Visual Message Center unavailable.
Users can also access the Audio Message Center by dialing 6 + the extension from any phone
or from the company Auto Attendant.
Visual Message Center Audio Message Center
Listen to new or saved voicemails. Listen to new or saved voicemails.
Send a message to another user. Send a message to another user.
Change presence setting.
Change name recording.
Manage message greetings.
Change password (or PIN).
5.15 Answer a Ringing Phone Using another Handset
To answer another ringing phone, dial 7 + the phone extension.
5.16 Park
Press the PARK button to park a call. The Allworx Server Administrator defines the maximum
wait time of parked call and the subsequent routing.
+1 866 ALLWORX * +1 585 421 3850 Page 27
www.allworx.com
Revised: 5/21/14
Page 36

Allworx Phone Model 9204/9204G User Guide
5.16.1 Park a Call on a Line Appearance PFK
Parking a call on a Line Appearance PFK resembles a system-wide hold. Any phone with a Line
Appearance PFK assigned to the same outside line can retrieve the call.
5.16.2 Park a Call from the Hold Screen
Press the PARK button to park the currently displayed call. This parks the call without retrieving
it from Hold. The HOLD button flashes red.
5.16.3 Retrieve a Parked Call
If the Allworx Server Administrator enabled Music on Hold for the call appearance, the parked
caller hears music while waiting.
There are four ways to retrieve a parked call:
• Dial the parking extension.
• Parking Orbit PFK – enables monitoring any accessible parking orbit.
• Park Set Monitoring PFK - enables a single PFK to monitor a configurable set of
parking orbits via both the illuminated PFK button as well as a list of calls parked in the
specific orbits. For example, users can use a single PFK to monitor all local park orbits
and a single indicator for any call placed in a parking orbit. This also enables users to
monitor the local parking orbits of a remote server in a multi-site environment.
• Press the PARK button, if there are no active calls on the handset.
The Allworx Server Administrator can define a PFK on the Allworx phone as a Parking Orbit
PFK for one or more of the parking extensions and set a reminder to ring the handset after
parking the call beyond a specified time.
Parking Orbit
PFK
Off (not lit) Parking Orbit is idle, no parked call.
Amber The handset parked a call within the last five seconds.
Flashing Green (slow) The handset parked a call for more than five seconds ago.
Flashing Red (slow) The handset did not park the call in the Parking Orbit.
Flashing PFK Any user can pick up the call in the Parking Orbit by pressing the PFK.
Red One or more calls parked in the assigned Parking Orbits.
State
Page 28 +1 866 ALLWORX * +1 585 421 3850
www.allworx.com
Revised: 5/21/14
Page 37

Allworx Phone Model 9204/9204G User Guide
5.17 Call Monitors
The Allworx Server Administrator creates and programs the Call Monitors and defines the PFKs
on each Allworx phone for one or more Call Monitors.
Call Monitor PFK State
Off (not lit) Call Monitor is idle, no incoming call.
Flashing Green (fast) Incoming call while the handset is set to ring.
Flashing Green (slow) Handset placed an active call on hold.
Solid Green Handset has an active call.
Flashing Red (fast) Incoming call while the handset is not set to ring.
Flashing PFK Use the handset or speaker phone and press the PFK to pick up the call.
5.18 Busy Lamp Field (BLF)
Users can link another phone extension to a PFK on the phone, and then press the PFK to dial
the extension automatically.
BLF PFK State
Solid Red User is on the phone.
Flashing Red User has an incoming call.
+1 866 ALLWORX * +1 585 421 3850 Page 29
www.allworx.com
Revised: 5/21/14
Page 38

Allworx Phone Model 9204/9204G User Guide
Page 30 +1 866 ALLWORX * +1 585 421 3850
www.allworx.com
Revised: 5/21/14
Page 39

Allworx Phone Model 9204/9204G User Guide
Note:
6 Phone Configuration
Select the CONFIG soft key to view the following options:
Personal Speed Dial Hot Desk Login** Network Profiles*** Refresh Directory
Preferences Clear Call History Current Status/Info* Save Settings
Reboot Phone Network Settings* Statistics* Set Factory Defaults*
* Only available to the Allworx Server Administrator.
** Only available with Allworx server software release 7.3 or higher.
*** Only available to the Allworx Server Administrator and with Allworx server software release 7.4 or higher.
Check with the Allworx Administrator before making changes.
6.1 Personal Speed Dial
To setup a Personal Speed Dial:
1. Press the CONFIG soft key. A menu displays on the phone LCD screen. Locate the
Personal Speed Dial option and press SELECT .
2. Use the UP / DOWN scroll soft keys to choose a speed dial number, press SELECT .
3. Use the keypad to enter the phone number or extension, press SELECT .
• The DOWN soft key acts as a backspace.
• To add a one-second pause to the dialed number to wait for auto answer systems to
prompt for additional dialing, press the PAUSE soft key (if one displays) or the HOLD
button to add a one-second pause to the dialed number. Add enter multiple pauses,
as necessary.
4. Use the keypad to enter a name for the speed dial, and then press SELECT . The ‘#’
key puts a space between characters. The DOWN soft key acts as a backspace.
To use a Personal Speed Dial
1. Pick up a line, and press the SPDIAL soft key.
2. Enter the speed dial number. This places a call to the speed dial extension.
+1 866 ALLWORX * +1 585 421 3850 Page 31
www.allworx.com
Revised: 5/21/14
Page 40

Allworx Phone Model 9204/9204G User Guide
6.2 Preferences
1. Press the CONFIG soft key button. Press the DOWN scroll soft key to select
Preferences. Press SELECT .
2. Select from the following list using the UP / DOWN scroll soft keys to make the changes:
Preference
Setting
LCD Settings Adjust the LCD display contrast and brightness settings.
Call History Size Adjust the number of calls kept in the History. 0 to 99 (Default: 99)
Clock Mode Display the time mode on the LCD Screen.
Hold Reminder Mode Set the hold reminder functionality.
Redial Memory Store the last number dialed in the phone.
Audible Dialing Hear tones when pressing a key.
Call Timer Display Display the length of a phone call.
Intercom Auto Answer
On Hook Dialing
Visual Ringing
Paging Enable Mode Enable the phone to receive pages.
Off Hook Answer
Mode
Off Hook Ringing
Auto on Hold
Automatically answer an incoming intercom call using
Intercom/Speaker phone.
Enable speaker mode when pressing a number on the
keypad without pressing the SPEAKER button first.
Enable the phone visual ring indicator to flash red for an
incoming call.
Answer incoming calls when taking the phone off the
hook.
Enable the phone to ring when receiving a new call
while in use.
Place the current call on hold automatically when
answering an incoming call.
Description Options
Use the Volume bar or Up /
Down scroll soft keys arrows.
• Off
• 12 Hour
• 24 Hour
• No Reminder
• On Hook
• Timer
• On Hook and Timer
• Until reboot
• 1 minute
• 10 minutes
• 1 hour
• Enabled
• Disabled
• Enabled
• Disabled
• Enabled
• Disabled
• Enabled
• Disabled
• Enabled
• Disabled
• Never
• Always
• On Hook
• Off Hook Will Answer
• Select to Answer
• Enabled
• Disabled
• Enabled
• Disabled
Page 32 +1 866 ALLWORX * +1 585 421 3850
www.allworx.com
Revised: 5/21/14
Page 41

Allworx Phone Model 9204/9204G User Guide
Preference
Setting
Auto Retrieve Calls
Missed Call Tracking Track missed call appearances.
Parking Orbit Pop-ups Display the Parking Orbit after parking the call.
Hold Button Operation Set the HOLD button function.
Force Auto Answer Answer incoming calls automatically.
Sidetone Disable
Call Assistant CLID
Emergency Caller ID
Messages Button
Operation
Visual On Call
Ringtone Family
Server Profile Select Control the network settings used on the phone.
Retrieve the on hold call automatically when taking
handset off call.
Enable turning off the handset or headset microphone
feedback to the speaker.
Display the call information in Call Assistant and
applications using the Allworx TSP driver.
Display the Caller ID when dialing an Emergency
number from the handset.
Set the MESSAGE button function.
Enable the phone visual ring indicator to light red for an
active call.
Play different frequency and cadence variations of the
ringtone. The default is Ringtone Family 1. Ringtone
Family 2 through Family 4 uses the same default
ringtone, but the pitch is different. Ringtone Family 5
uses different ring styles to differentiate between the
call types on the phone (internal/external calls, calls
from specific caller IDs, etc).
NOTE: Allworx Server Administrator configures and
controls the Allworx server settings.
Description Options
• Enabled
• Disabled
• Enabled
• Disabled
• Popup Disabled
• Popup Enabled
• Hold then Park
• Park then Hold
• Hold Calls Park Lines
• Normal Operation
• Auto Answer On
• Normal Operation
• Handset Disabled
• Headset Disabled
• Both Disabled
• Calling Party Info
• DNIS Information
Users must enter the
Emergency Caller ID Number.
• Displays Message List
• Call message Center
• Enabled
• Disabled
• Ringtone Family 1
• Ringtone Family 2
• Ringtone Family 3
• Ringtone Family 4
• Ringtone Family 5
• User Server Selection
• Ignore Server Selection
3. Press SELECT after making changes to the preferences.
4. Press the EXIT soft key twice. Press the YES soft key to save the changes or NO to
cancel the changes.
+1 866 ALLWORX * +1 585 421 3850 Page 33
www.allworx.com
Revised: 5/21/14
Page 42

Allworx Phone Model 9204/9204G User Guide
Note:
Note:
6.3 Reboot the Phone
On occasion, it may be necessary to reboot the phone. For example, when the Allworx Server
Administrator makes changes to the phone configuration.
Do not reboot the phone unless instructed to do so by the Allworx Server Administrator.
1. Press the CONFIG soft key. Use the UP / DOWN scroll soft keys to highlight the Reboot
Phone option. Press SELECT .
If there are any unsaved changes, select the YES soft key to save any changes OR
select NO to cancel changes made.
2. Select the YES soft key on the confirmation prompt to reboot.
6.4 Hot Desk Login
Hot Desking enables temporarily logging in to a shared phone. Then the system directs the
calls to the shared phone and outgoing calls use the new caller ID. Users can initiate the login
using a Hot Desk PFK or by selecting the Hot Desk Login option from the phone Config menu.
Use the Hot Desk PFK for logging into the phone that has the PFK. The PFK is normally solid
red but goes off when a user logs in. Users can still manually log in to phones that do not have
the PFK using the phones Config menu.
The PFKs configured for phones do not change when a new user logs in. The Hot Desk PFK and
all other PFKs remain as originally configured for the phone.
To manually Hot Desk into another phone:
1. Press the CONFIG soft key.
2. Use the UP / DOWN scroll soft keys to highlight the Hot Desk Login option. Press
SELECT .
3. Enter the user extension and press the OK soft key
4. Enter password (or PIN) and press the OK soft key. The phone loads the new
configuration.
Page 34 +1 866 ALLWORX * +1 585 421 3850
www.allworx.com
Revised: 5/21/14
Page 43

Allworx Phone Model 9204/9204G User Guide
6.5 Clear Call History
The Allworx phone retains the history up to 99 calls.
To clear the call history:
1. Press the CONFIG soft key.
2. Use the UP / DOWN scroll soft keys to highlight the Clear Call History option. Press
SELECT .
3. Select the YES soft key to clear call history or NO to cancel the changes.
6.6 Refresh Directory
If new users or extensions have been set up on the Allworx server, the on-phone directory
automatically updates after some delay.
To update the directory immediately:
1. Press the CONFIG soft key, and use the UP / DOWN scroll soft keys to highlight the
Refresh Directory option. Press SELECT .
2. Press the EXIT soft key to exit the Refreshing the Directory screen.
6.7 Network Profiles
The phone stores Network Profiles (Allworx server software 7.4 and later), which are network
and registration settings. Users can select a Network Profiles for use during different situations.
Usage examples include connecting to a second Allworx server for disaster recovery purposes
or temporarily connecting to the Allworx server from home. This avoids the need to manually
change settings on the phone.
To change the Network Profile:
1. Press the CONFIG soft key.
2. Use the UP / DOWN scroll soft keys to highlight the Network Profiles option.
+1 866 ALLWORX * +1 585 421 3850 Page 35
www.allworx.com
Revised: 5/21/14
Page 44

Allworx Phone Model 9204/9204G User Guide
3. User the UP / DOWN scross soft keys to highlight the Network Profile to use. Press
SELECT .
4. Press the EXIT soft key to exit the Refreshing the Directory screen.
5. Reboot the phone. See “Reboot the Phone ” on page 34 for more information.
Page 36 +1 866 ALLWORX * +1 585 421 3850
www.allworx.com
Revised: 5/21/14
Page 45

Allworx Phone Model 9204/9204G User Guide
7 Regulatory Notices
This equipment has been tested and found to comply with the limits for a Class B digital device,
pursuant to Part 15 of the FCC rules. These limits are designed to provide reasonable
protection against harmful interference in a residential installation. This equipment generates,
uses, and can radiate radio frequency energy and, if not installed and used in accordance with
the instructions, may cause harmful interference to radio communications. There is no
guarantee, however, that interference will not occur in a particular installation. If this equipment
causes harmful interference to radio or television reception, which can be determined by turning
the equipment off and on, the user is encouraged to try to correct the interference by one or
more of the following measures:
• Reorient or relocate the receiving antenna.
• Increase the separation between the equipment and the receiver.
• Connect the equipment into an outlet on a circuit different from that to which the
receiver is connected.
• Consult the dealer or an experienced radio/TV technician for help.
The booklet, “How to Identify and Resolve Radio-TV Interference Problems”, which the FCC
prepares, may also be helpful.
Changes and Modification not expressly approved by the manufacturer or registrant of this
equipment can void the authority to operate this equipment under Federal Communications
Commission’s rules.
This product adheres to the IEEE 802.3af standard for Power over Ethernet (PoE).
This equipment is Hearing Aid Compatible (HAC).
This digital apparatus does not exceed the Class B limits for radio noise emissions from digital
apparatus set out in the Radio Interference Regulations of the Canadian Department of
Communications.
Le present appareil numerique n'emet pas de bruits radioelectriques depassant les limites
applicables aux appareils numeriques de la class B prescrites dans le Reglement sur le
+1 866 ALLWORX * +1 585 421 3850 Page 37
www.allworx.com
Revised: 5/21/14
Page 46

Allworx Phone Model 9204/9204G User Guide
Warning:
Caution:
brouillage radioelectrique edicte par le ministere des Communications du Canada.
For use only with:
A Power over Ethernet (PoE) supply – This product adheres to IEEE 802.3af standard for Power
over Ethernet (PoE).
OR:
An Allworx-approved Limited Power Source, 24 VDC, 400 mA – The optional wall mount
switching Power Supply has the following specifications: Input Voltage is 100-240VAC, 50/60Hz,
450mA. Output voltage is 24VDC @ 400mA. UL Listed Limited Power Source. Output connector
size is 5.5 mm x 2.5 mm (inner diameter) x 9.5 mm with center positive.
Do not connect an analog or ISDN phone line.
The ear piece region on the handset can attract and retain small objects.
Page 38 +1 866 ALLWORX * +1 585 421 3850
www.allworx.com
Revised: 5/21/14
Page 47

Allworx Phone Model 9204/9204G User Guide
8 Abbreviations
Abbreviation Definition
ACD Automated Call Distribution
BLF Busy Lamp Field
DND Do Not Disturb
PBX Private Branch Exchange
PFK Programmable Function Key
PoE Power Over Ethernet
VoIP Voice over Internet Protocol
+1 866 ALLWORX * +1 585 421 3850 Page 39
www.allworx.com
Revised: 5/21/14
Page 48

Allworx Phone Model 9204/9204G User Guide
Page 40 +1 866 ALLWORX * +1 585 421 3850
www.allworx.com
Revised: 5/21/14
Page 49

Page 50

Toll Free +1 866 ALLWORX • +1 585 421 3850
www.allworx.com
Revised: May 21, 2014
 Loading...