

Page 1
Bedienungshinweise . . . . . . . . . . . . . . . . . . . . . . S. 2
Bitte vor Inbetriebnahme des Gerätes lesen!
User Instructions . . . . . . . . . . . . . . . . . . . . . . . . . p. 8
Please read the manual before using the equipment!
Mode d’emploi. . . . . . . . . . . . . . . . . . . . . . . . . . p. 14
Veuillez lire cette notice avant d’utiliser le système!
Istruzioni per l’uso. . . . . . . . . . . . . . . . . . . . . . . p. 20
Prima di utilizzare l’apparecchio, leggere il manuale!
Modo de empleo . . . . . . . . . . . . . . . . . . . . . . . . p. 26
Antes de utilizar el equipo, sírvase leer el manual!
Instruções de uso . . . . . . . . . . . . . . . . . . . . . . . p. 32
Favor leia este manual antes de usar o equipamen
to!
CK 55
Page 2
2
1.1 Sicherheitshinweis
Überprüfen Sie bitte, ob das Gerät, an
das Sie das Mikrofon anschließen
möchten, den gültigen Sicherheitsbestimmungen entspricht und mit einer
Sicherheitserdung versehen ist.
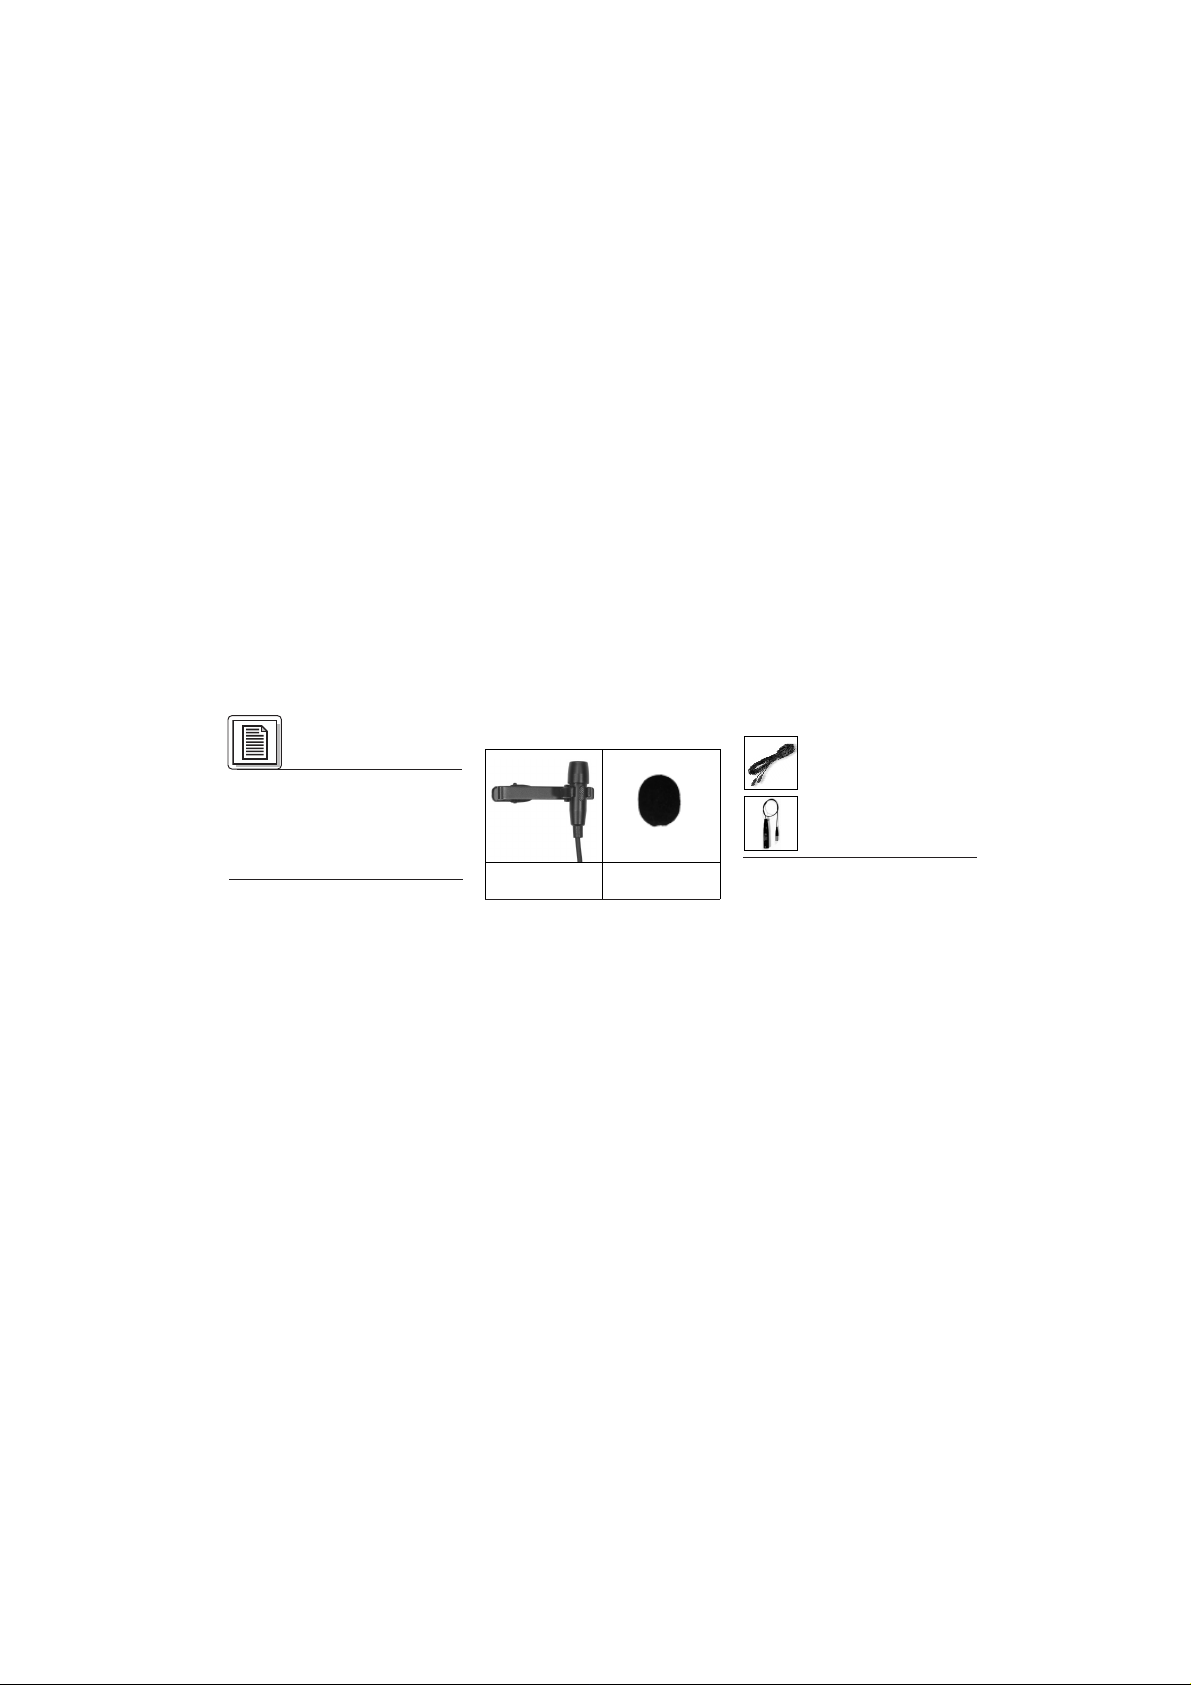
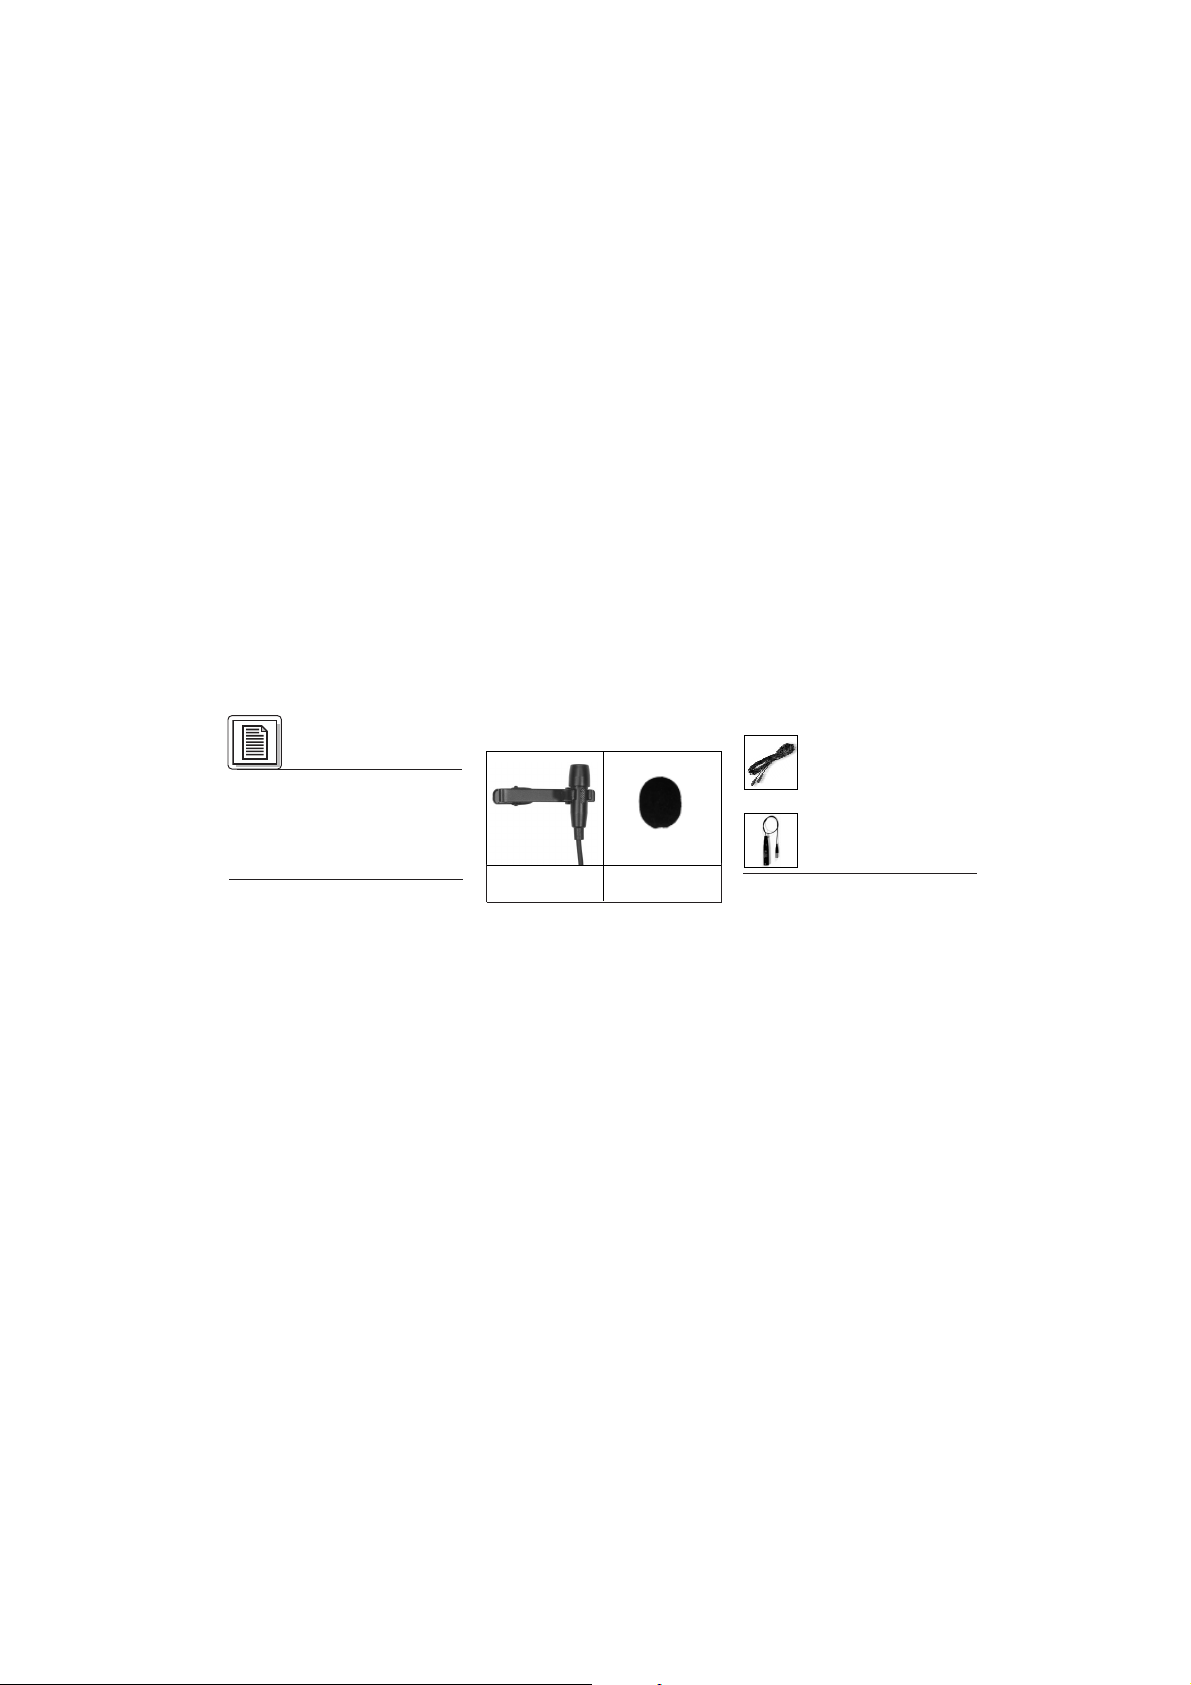
1.2 Lieferumfang
Kontrollieren Sie bitte, ob die
Verpackung alle unten abgebildeten
Teile enthält. Falls etwas fehlt, wenden
Sie sich bitte an Ihren AKG-Händler.
1.3 Empfohlenes Zubehör
• Mikrofonkabel MK 9/10:
10 m 2-polig geschirmtes
Kabel mit XLR-Stecker und
XLR-Kupplung
• Phantomspeiseadapter
MPA III L
1.4 Besondere Merkmale
• Professionelles Miniatur-Ansteckmikrofon.
• Kondensatorwandler mit nierenför-
1 Sicherheit/
Beschreibung
1 x CK 55 mit
Ansteckclip
1 x Windschutz
W 55
Page 3
3
miger Richtcharakteristik für natürlichen Klang.
• Frequenzgang auf Sprachübertragung abgestimmt.
• Geeignet zur Befestigung an der
Kleidung.
1.5 Kurzbeschreibung
Das CK 55 ist ein professionelles
Miniatur-Kondensator-Ansteckmikrofon mit nierenförmiger Richtcharakteristik. Auf Grund der kleinen
Abmessungen eignet sich das
Mikrofon ideal für alle Anwendungen,
wo unauffällige Mikrofontechnik und
große Bewegungsfreiheit der
Anwenderin/des Anwenders gefordert
werden.
Der Frequenzgang des Mikrofons ist
speziell auf Sprachübertragung ausgelegt.
Ein externer Windschutz für die
Dämpfung von Windgeräuschen bei
Einsatz im Freien ist im Lieferumfang
enthalten.
Das Mikrofon ist mit einem 1,6 m langen
Kabel mit verriegelbarem Mini-XLRStecker zum Anschluss an den
Phantomspeiseadapter MPA III L oder
AKG-Taschensender ausgestattet.
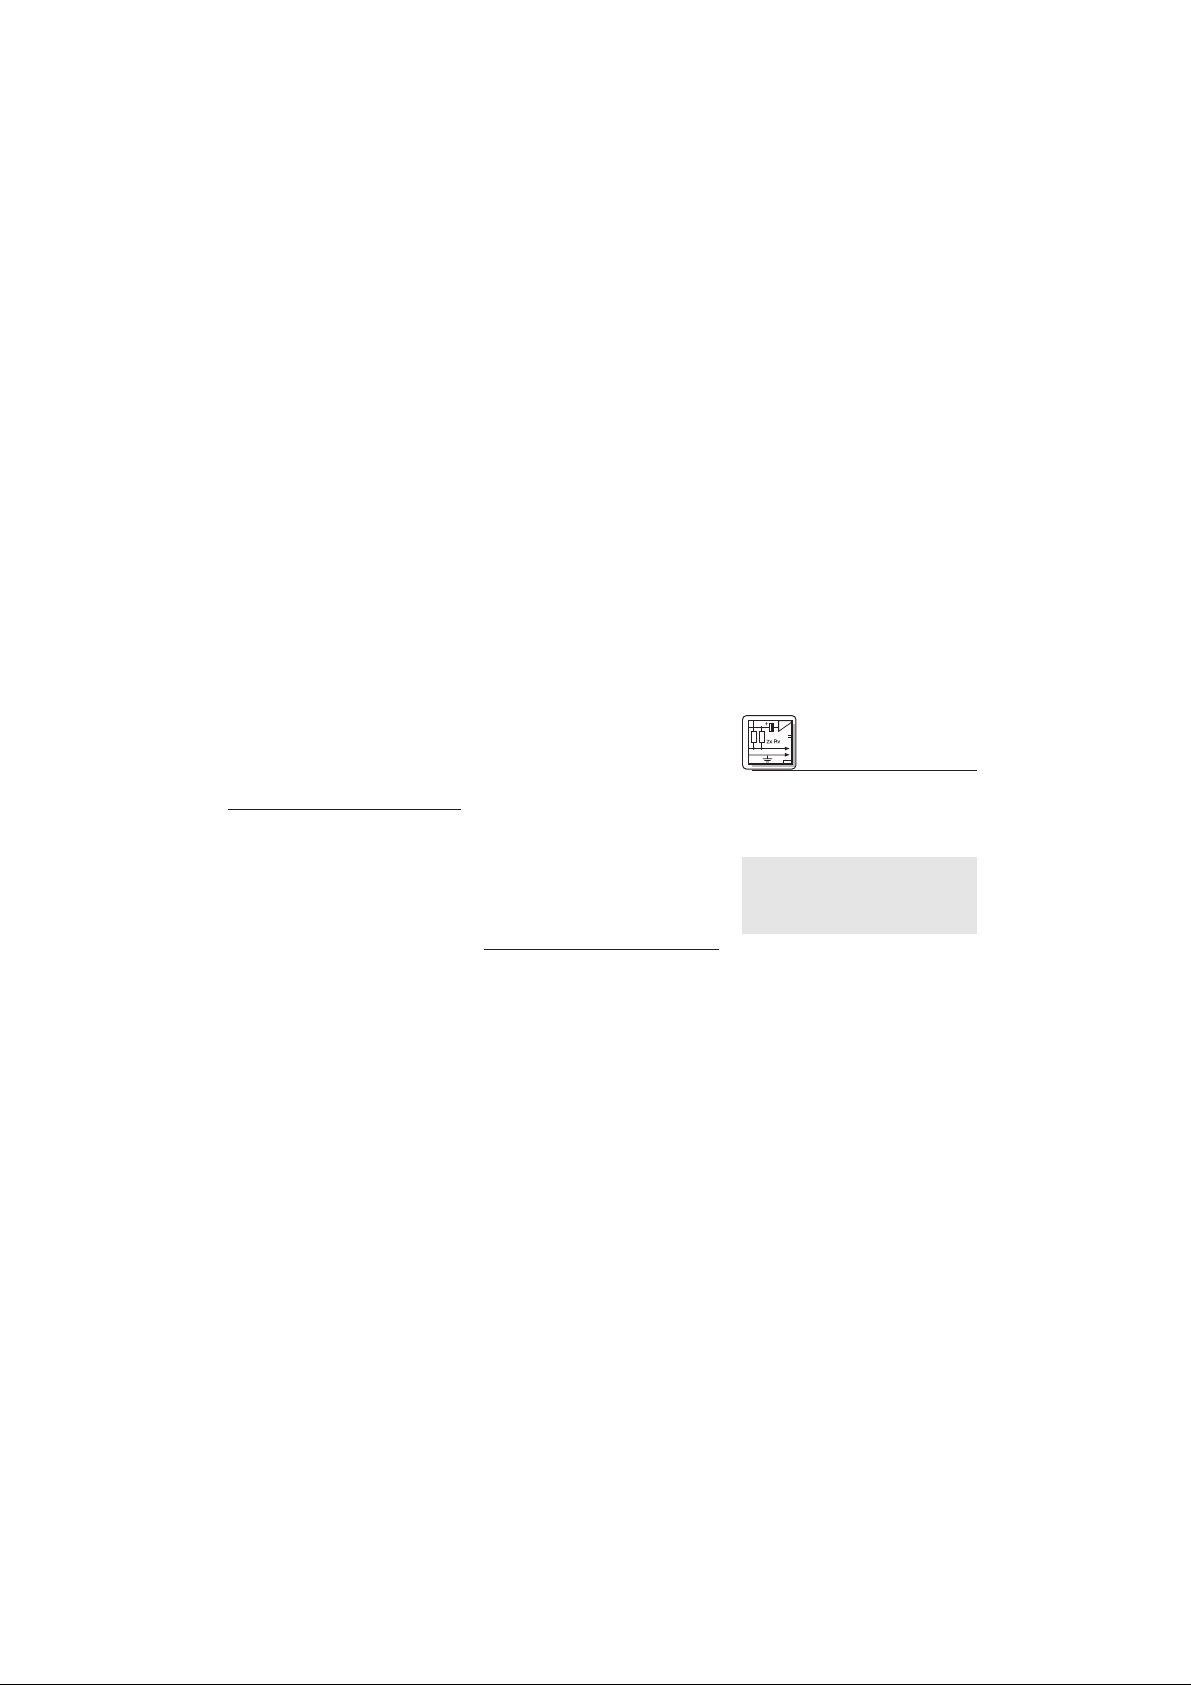
2.1 Einleitung
Das CK 55 ist ein Kondensatormikrofon und benötigt daher eine
Stromversorgung.
Wichtig: Wenn Sie andere als die von
AKG empfohlenen Speisegeräte
verwenden, kann das Mikrofon
beschädigt werden und erlischt
die Garantie.
2 Anschluss
Page 4
4
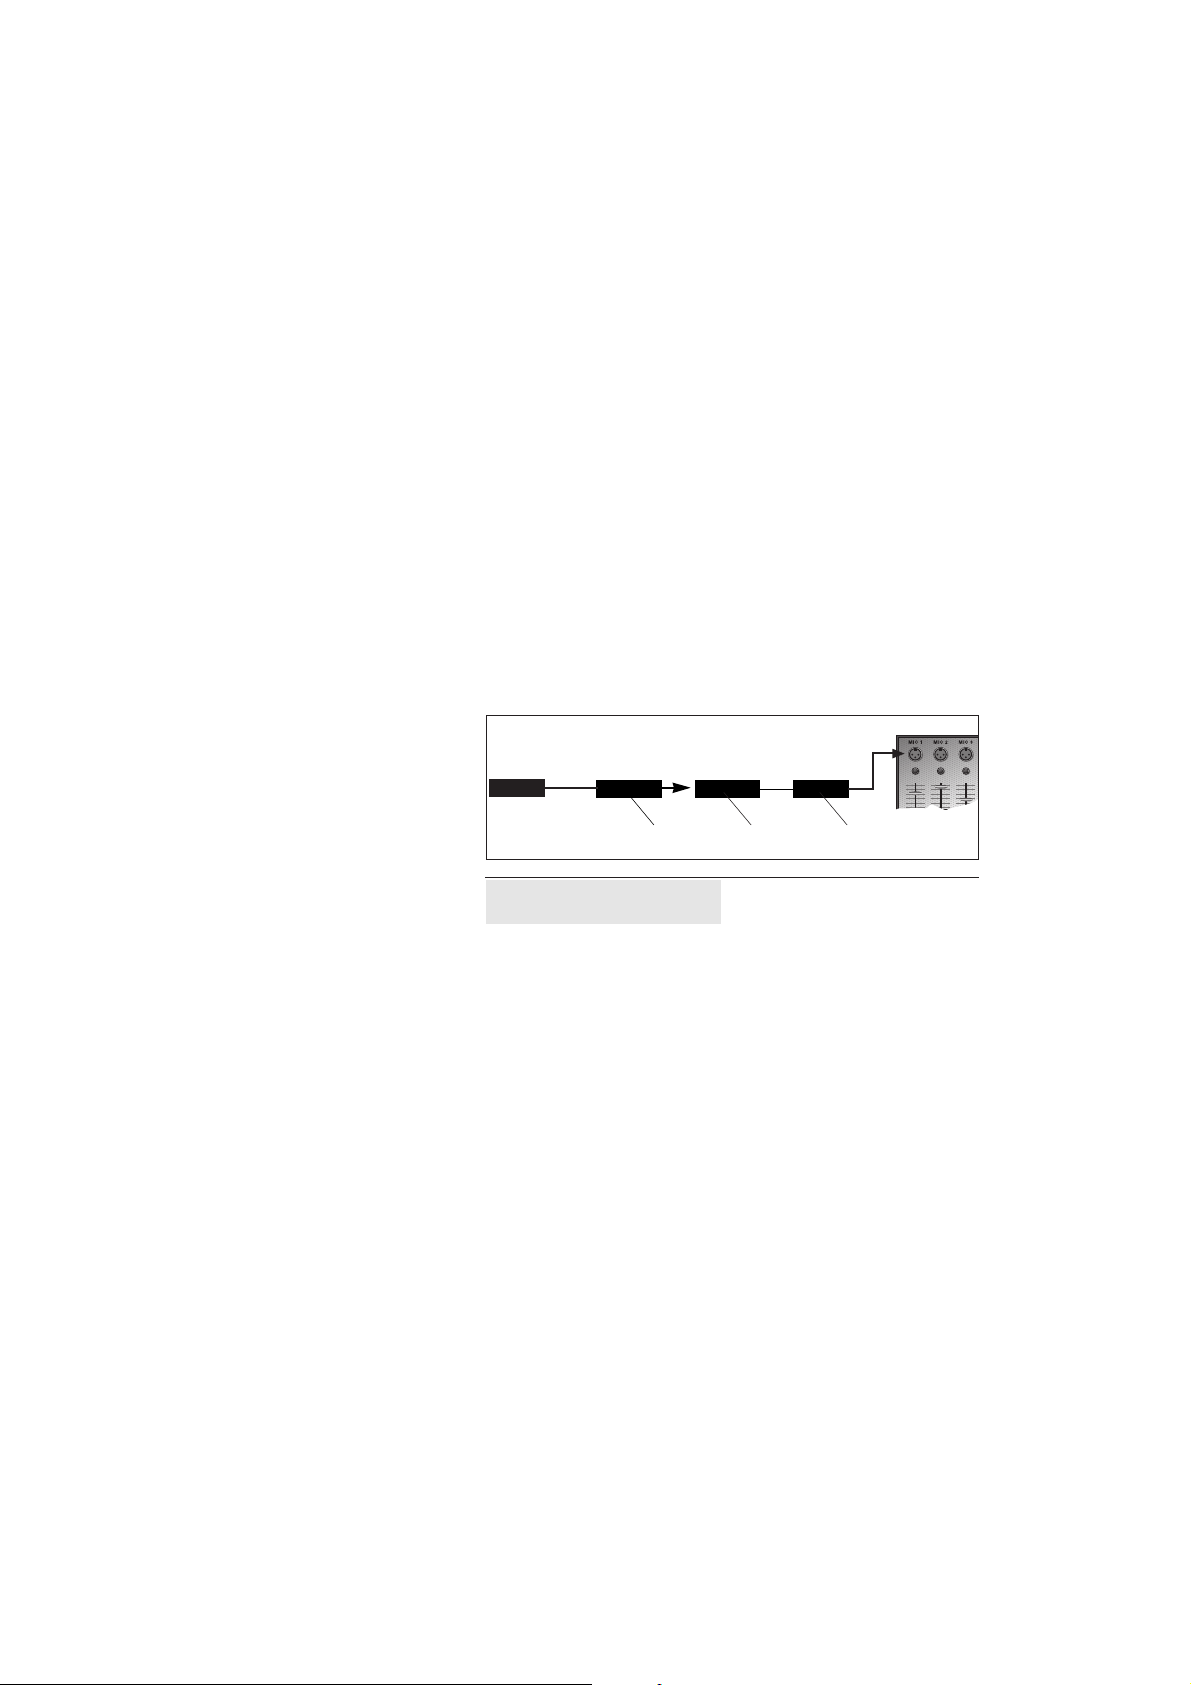
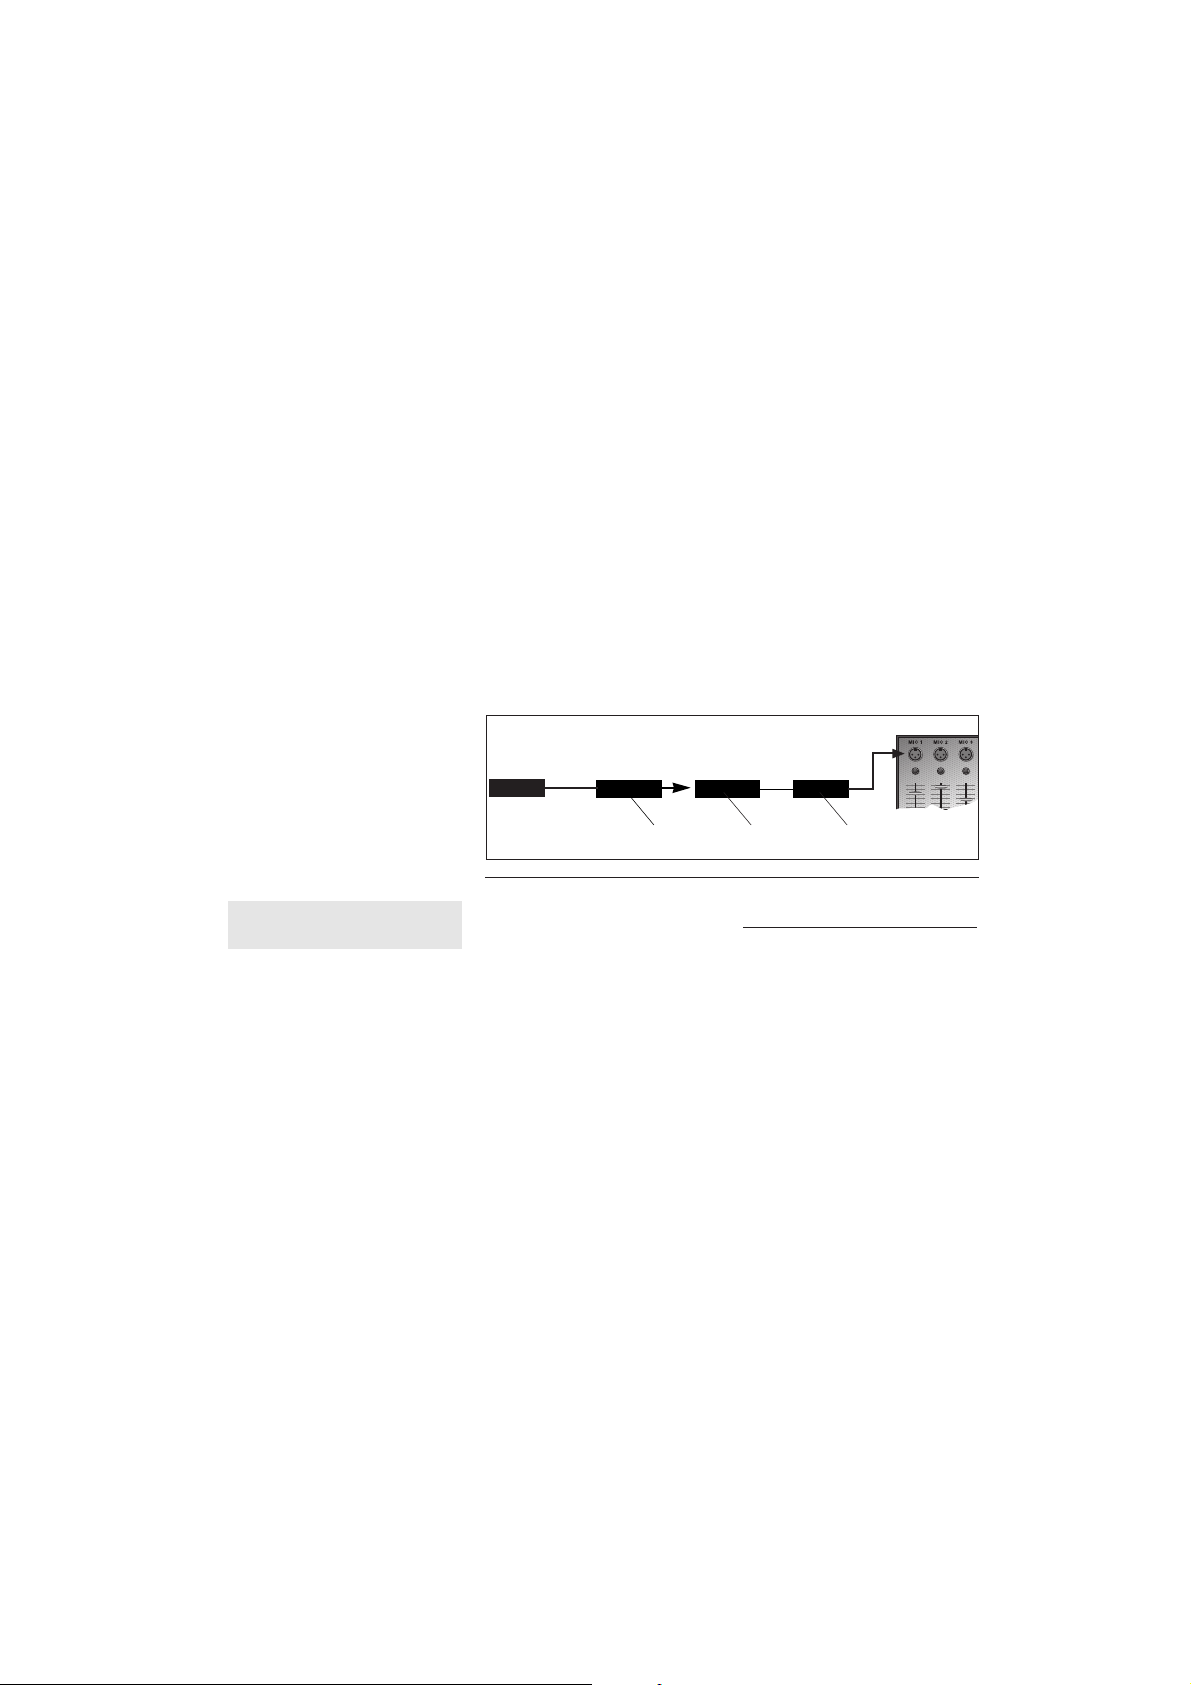
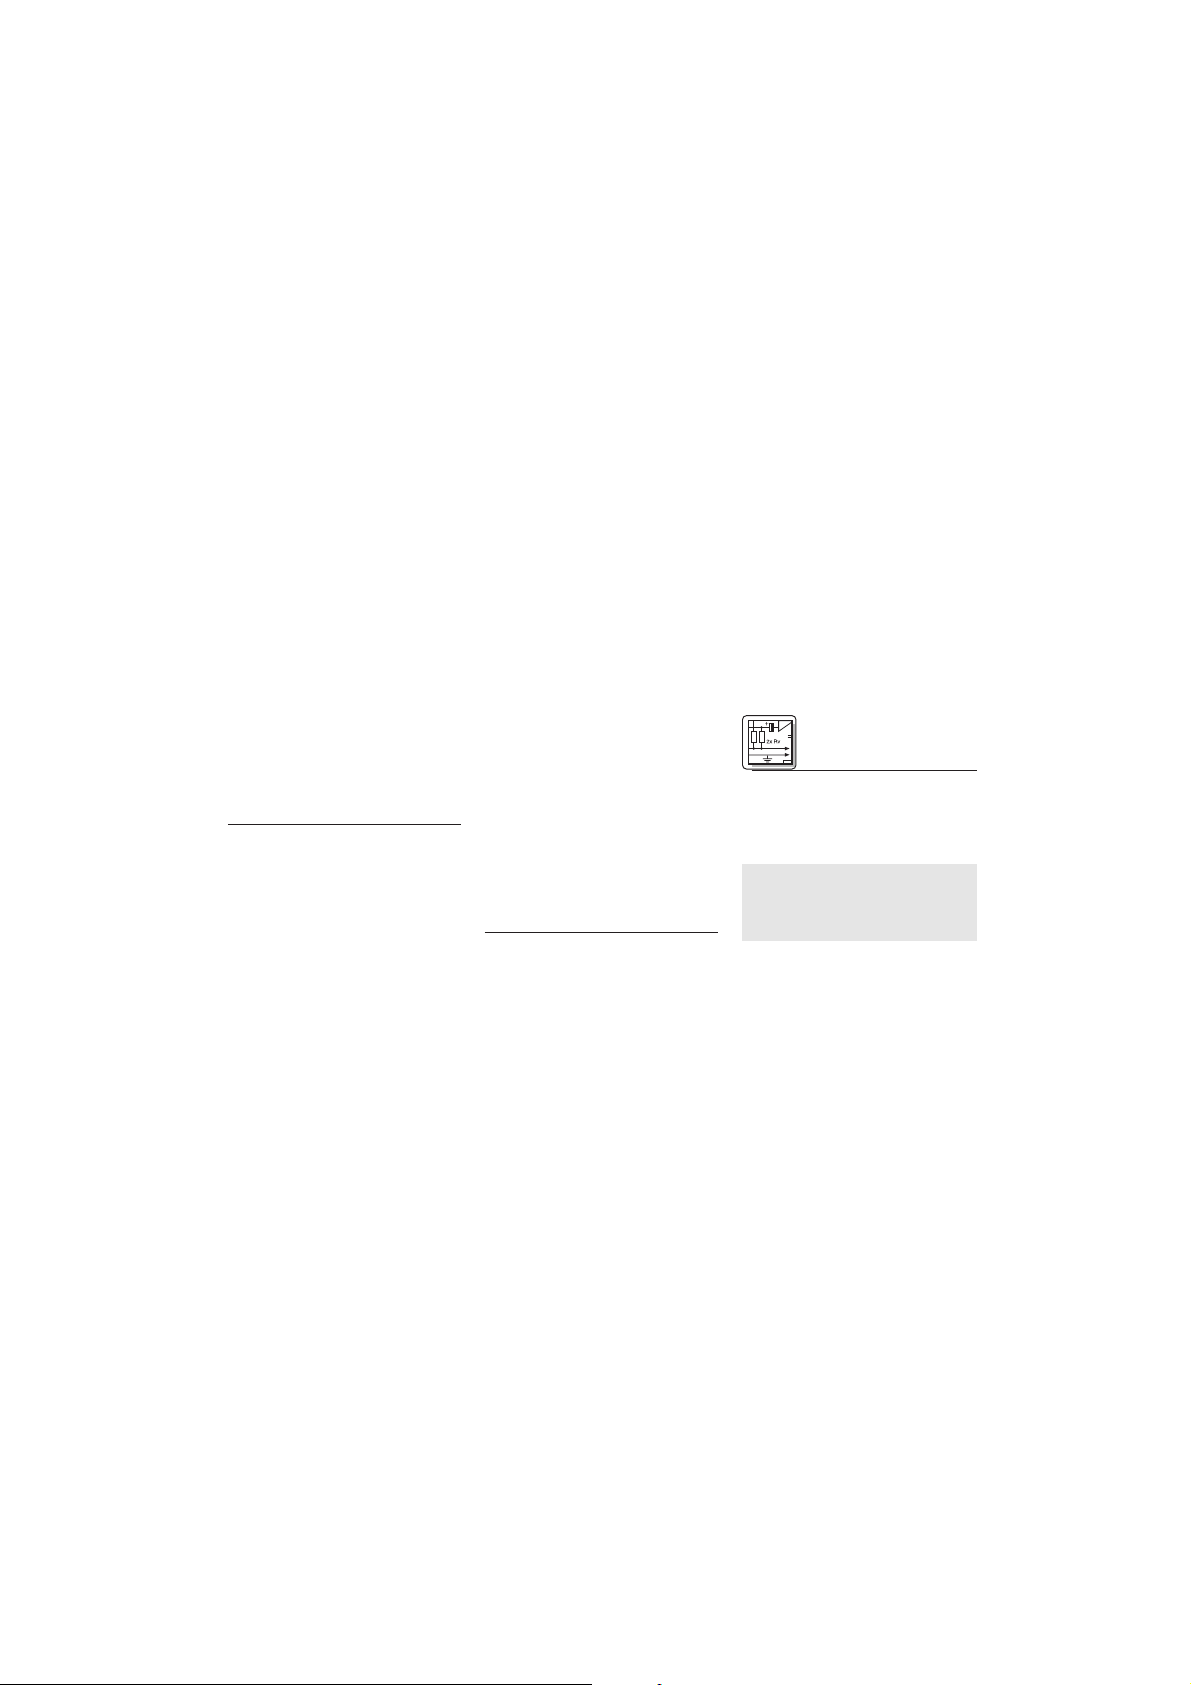
2.2 Anschluss mittels MPA III L
Siehe Abb. 1.
1. Stecken Sie den Mini-XLR-Stecker
(1) am Mikrofonkabel bis zum Anschlag in die Mini-XLR-Kupplung (2)
am Anschlusskabel des MPA III L (3).
Der Stecker (1) verriegelt sich automatisch.
Zum Abziehen des Kabels drücken
Sie auf den Entriegelungsknopf am
Mini XLR-Stecker (1) und ziehen Sie
den Stecker (1) aus der Buchse heraus.
Wichtig: Um das Kabel nicht zu be-
schädigen, ziehen Sie niemals am
Kabel selbst!
2. Stecken Sie den MPA III L (3) an ei-
nen symmetrischen XLR-Mikrofoneingang mit Phantomspeisung an.
3. Schalten Sie die Phantomspeisung
ein. (Lesen Sie dazu in der Betriebs-
Abb. 1: Anschluss mittels MPAIII L (optional)
CK 55
Mini XLR
Mini XLR MPA
1 2 3
Page 5
5
anleitung des jeweiligen Gerätes
nach.)
2.3. Anschluss an Taschensender
Lesen Sie in der Bedienungsanleitung
Ihres Taschensenders nach.
3.1 Einleitung
Der große Vorteil eines an der Kleidung
befestigten Mikrofons besteht darin,
dass die Bewegungsfreiheit der
Anwenderin/des Anwenders erhalten
und die Hände frei bleiben.
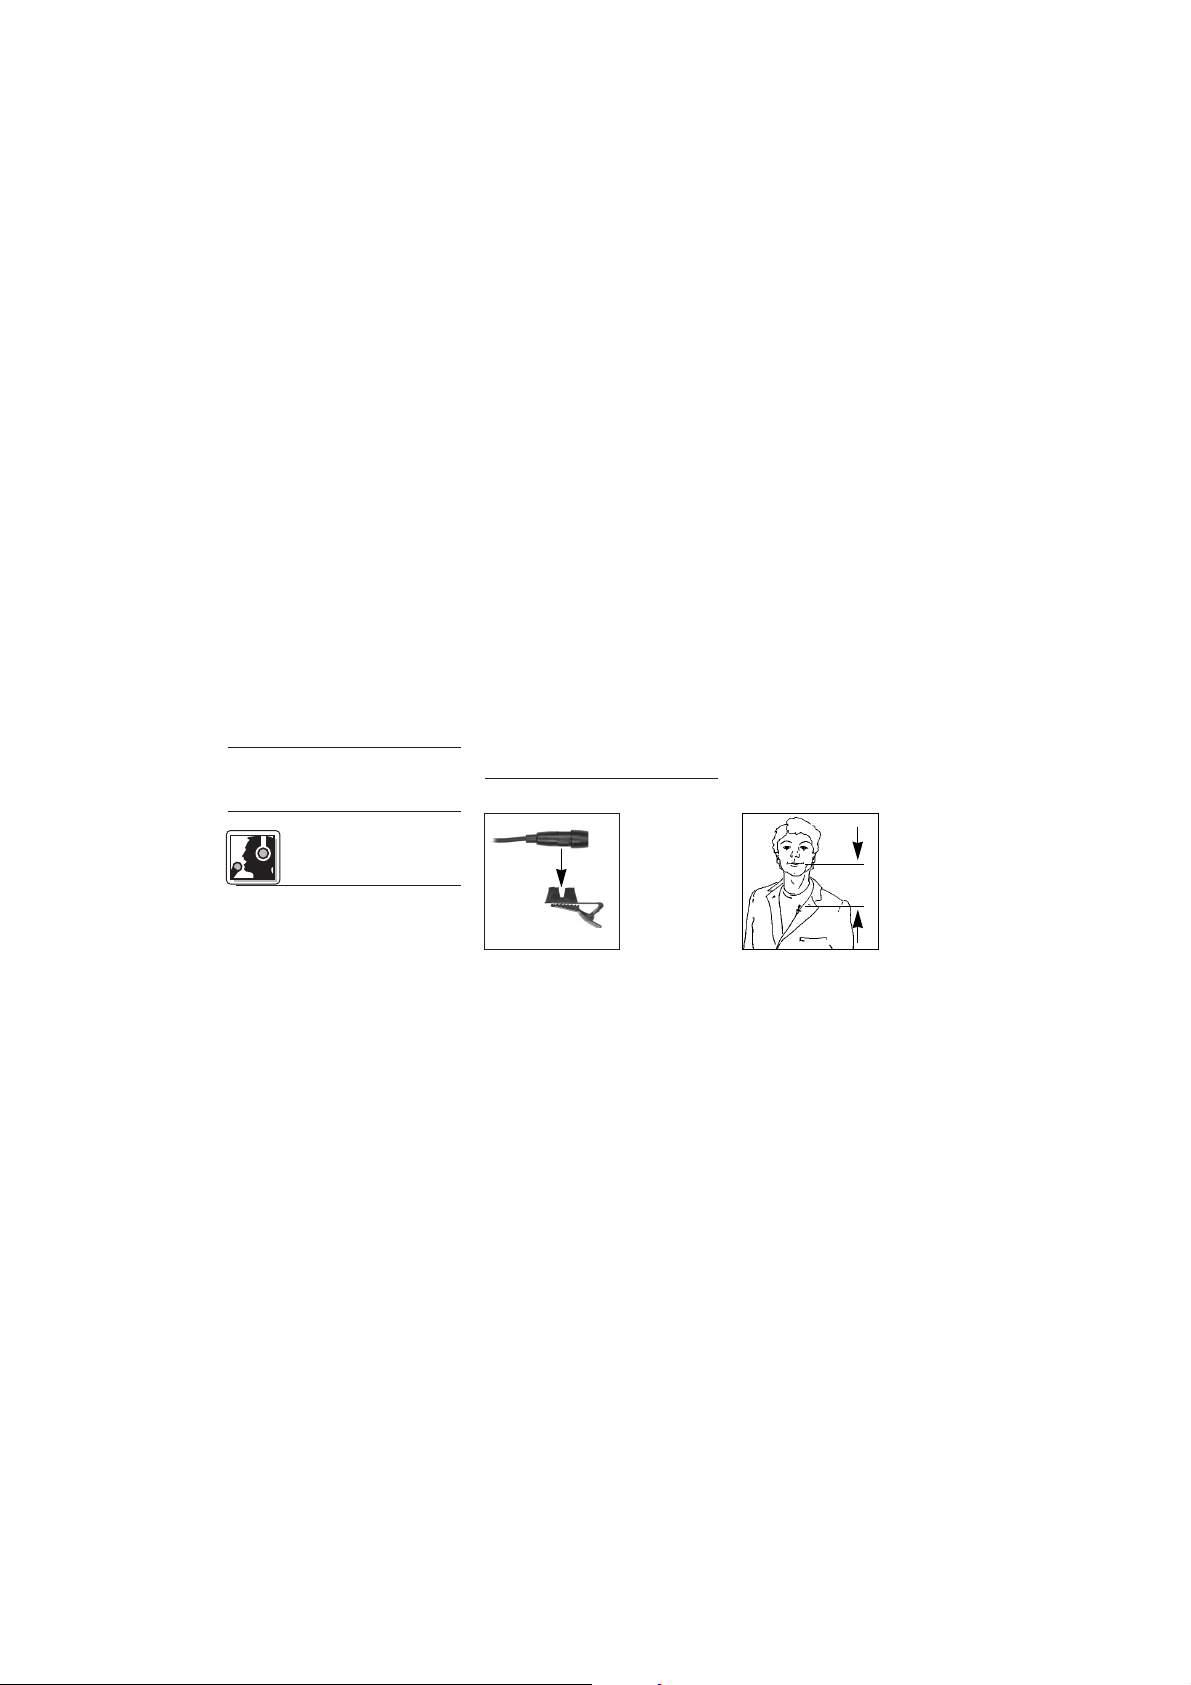
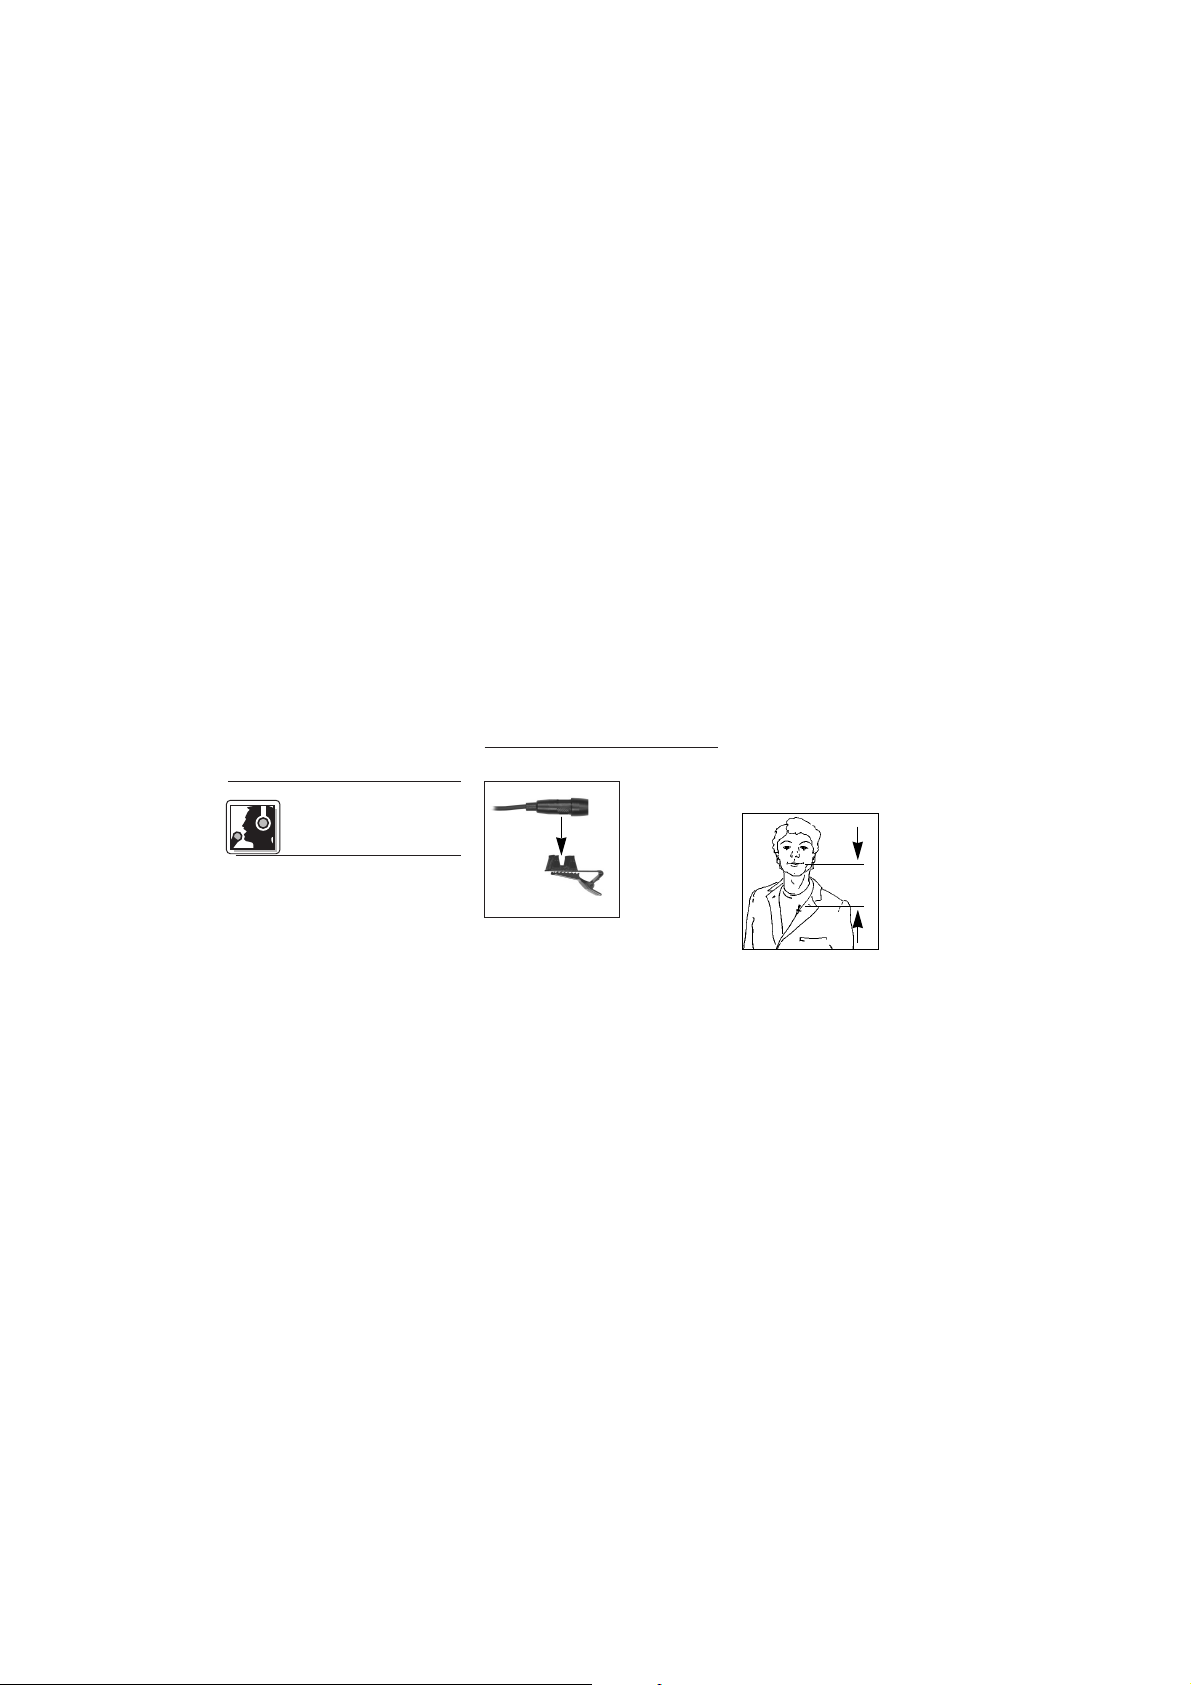
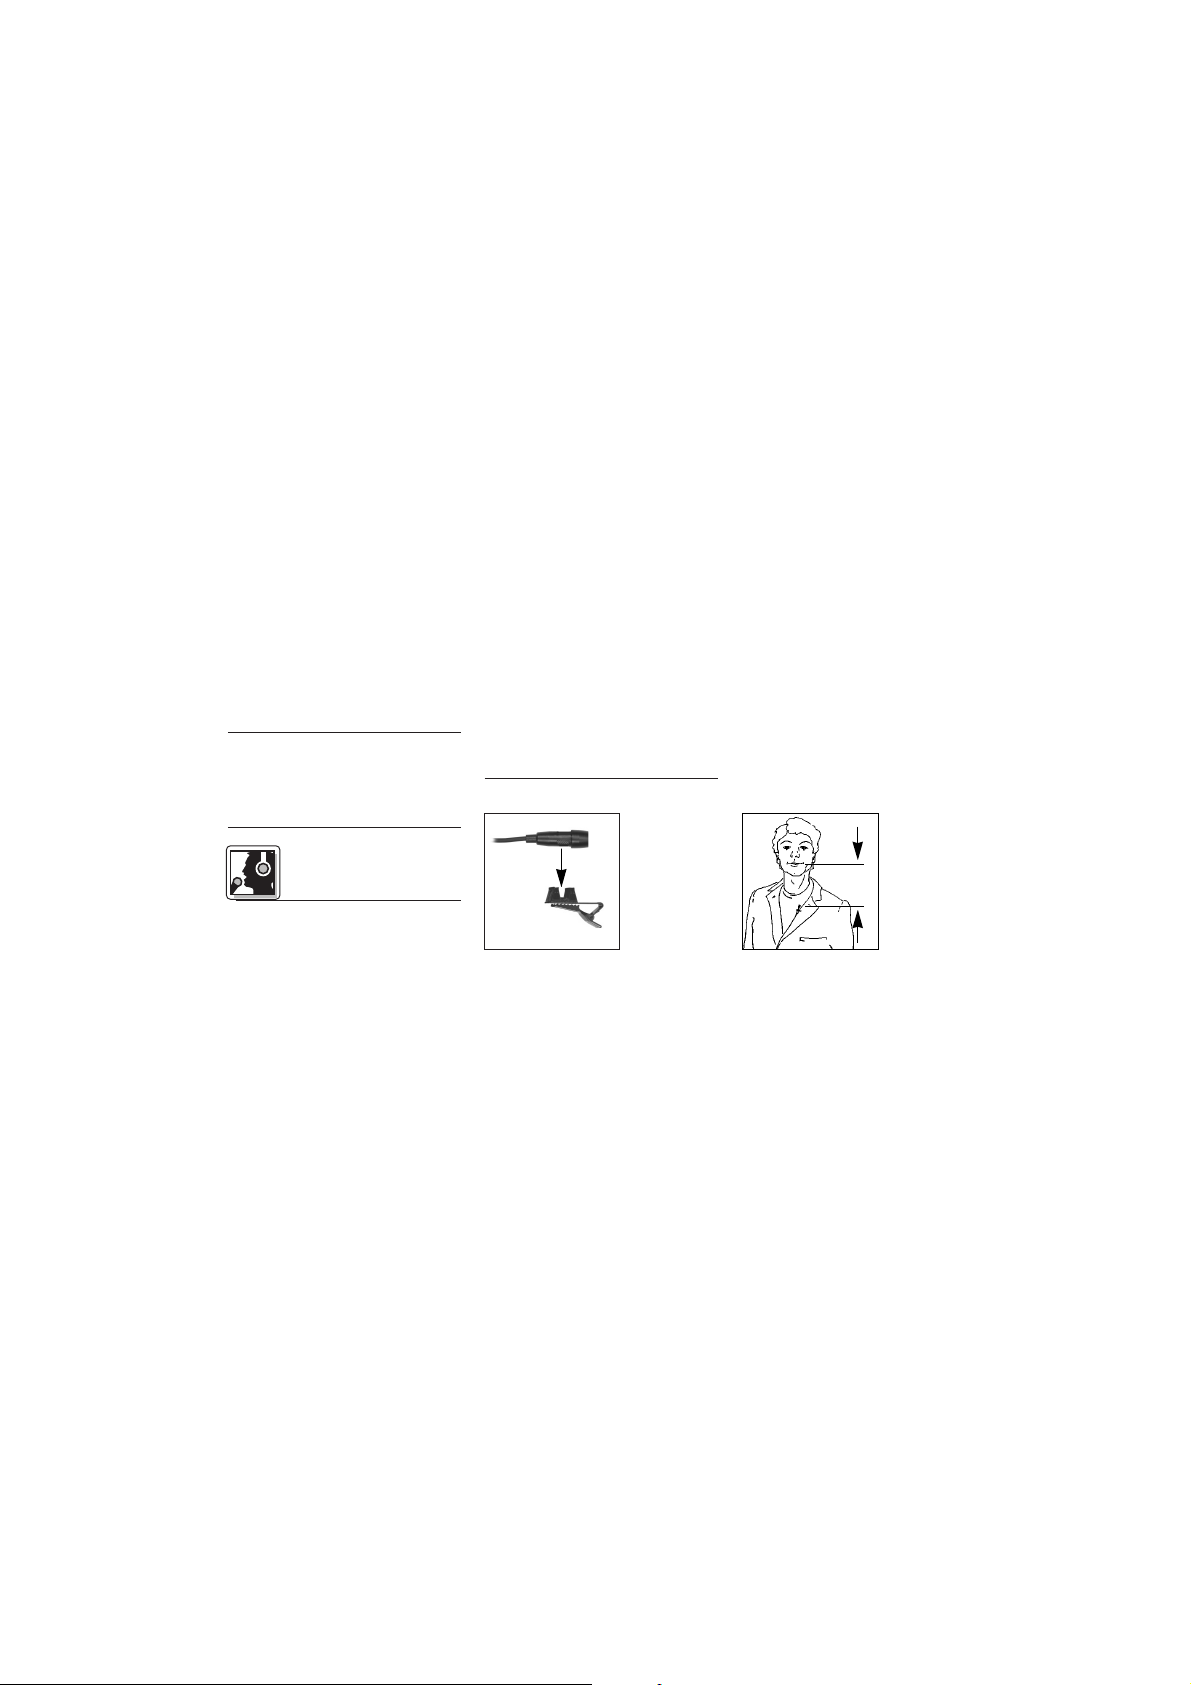
3.2 Anwendungshinweise
Abb. 2:
Mikrofon am
Ansteckclip
befestigen
1. Klemmen Sie das Mikrofon in die
Aufnahme des mitgelieferten Ansteckclips. (Siehe Abb. 2.)
2. Befestigen Sie das Mikrofon so
nahe wie möglich beim Mund der
Rednerin/des Redners an der Klei-
dung, z.B. am
Revers. (Siehe
Abb. 3.)
Abb. 3:
Mikrofon nahe
beim Mund
befestigen
3 Anwendung
min.
Page 6
6
Hinweis: Je geringer der Abstand zwi-
schen dem Mikrofon und der Schallquelle, umso geringer ist die Gefahr
akustischer Rückkopplungen.
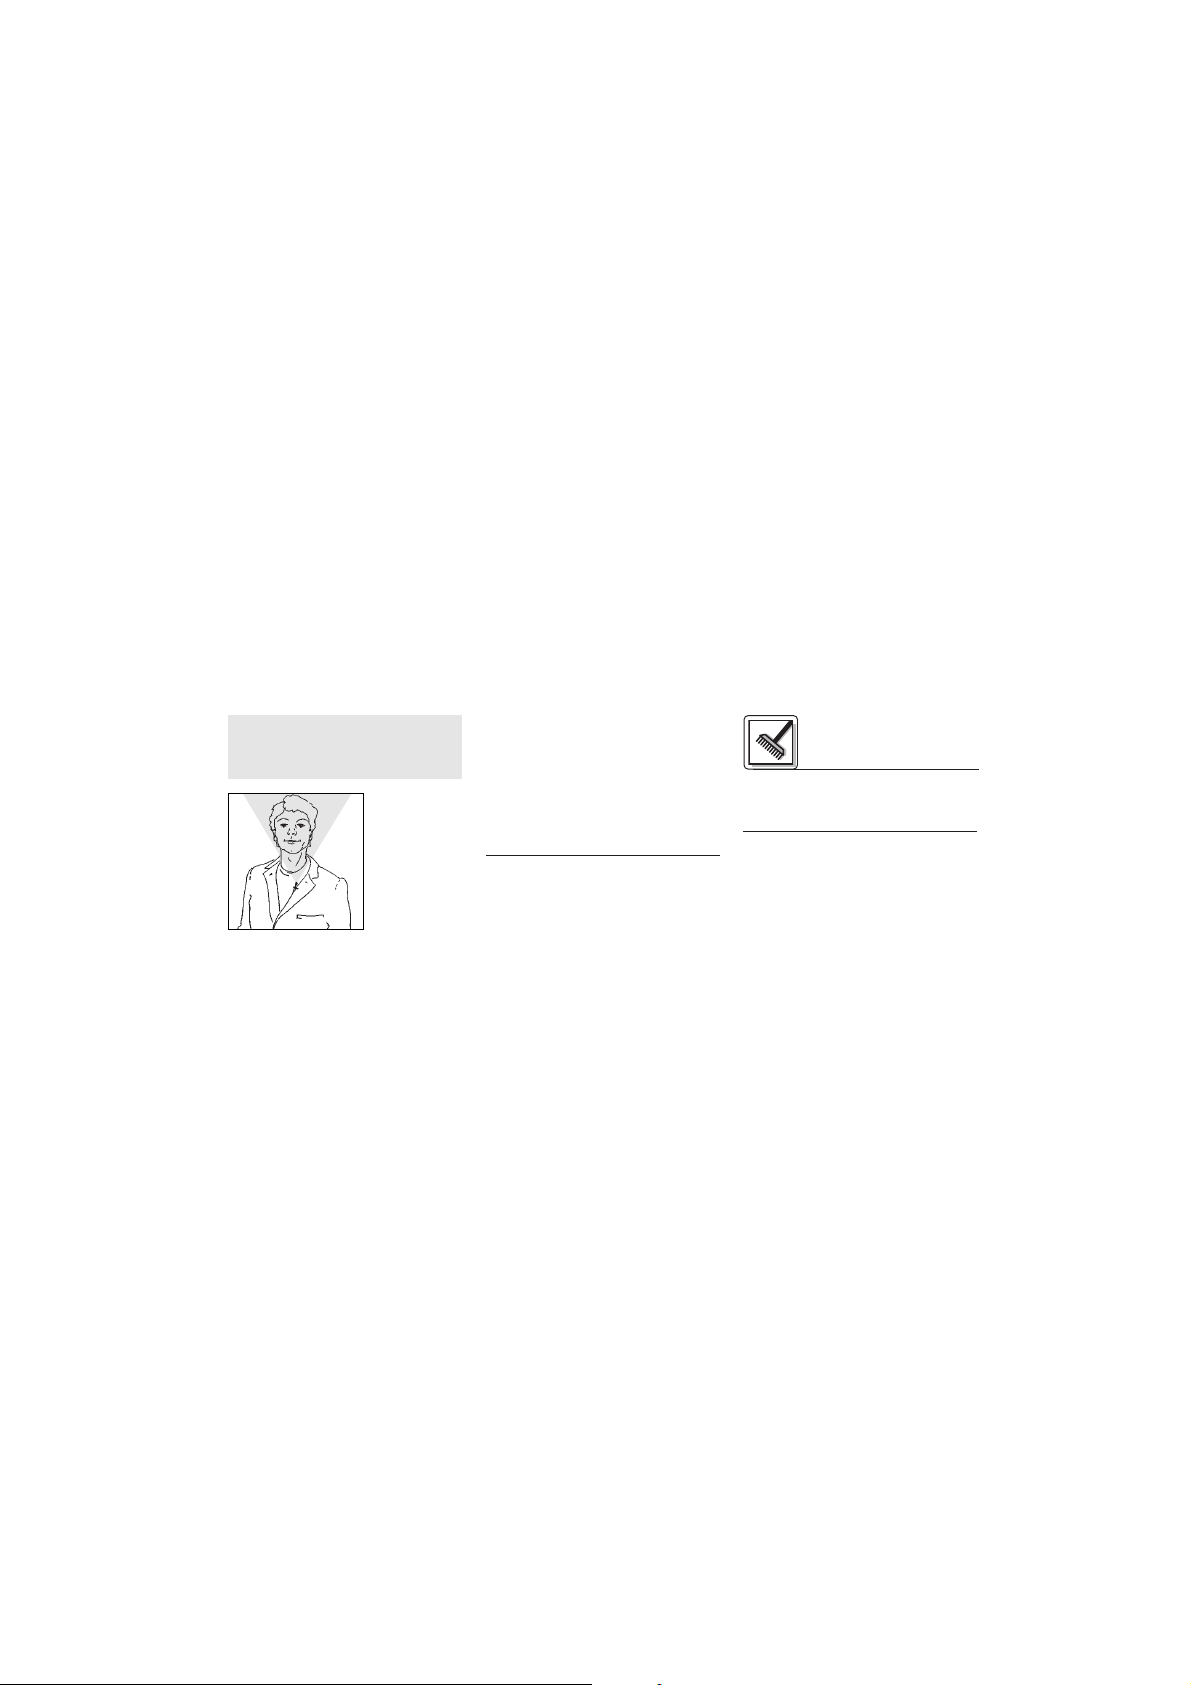
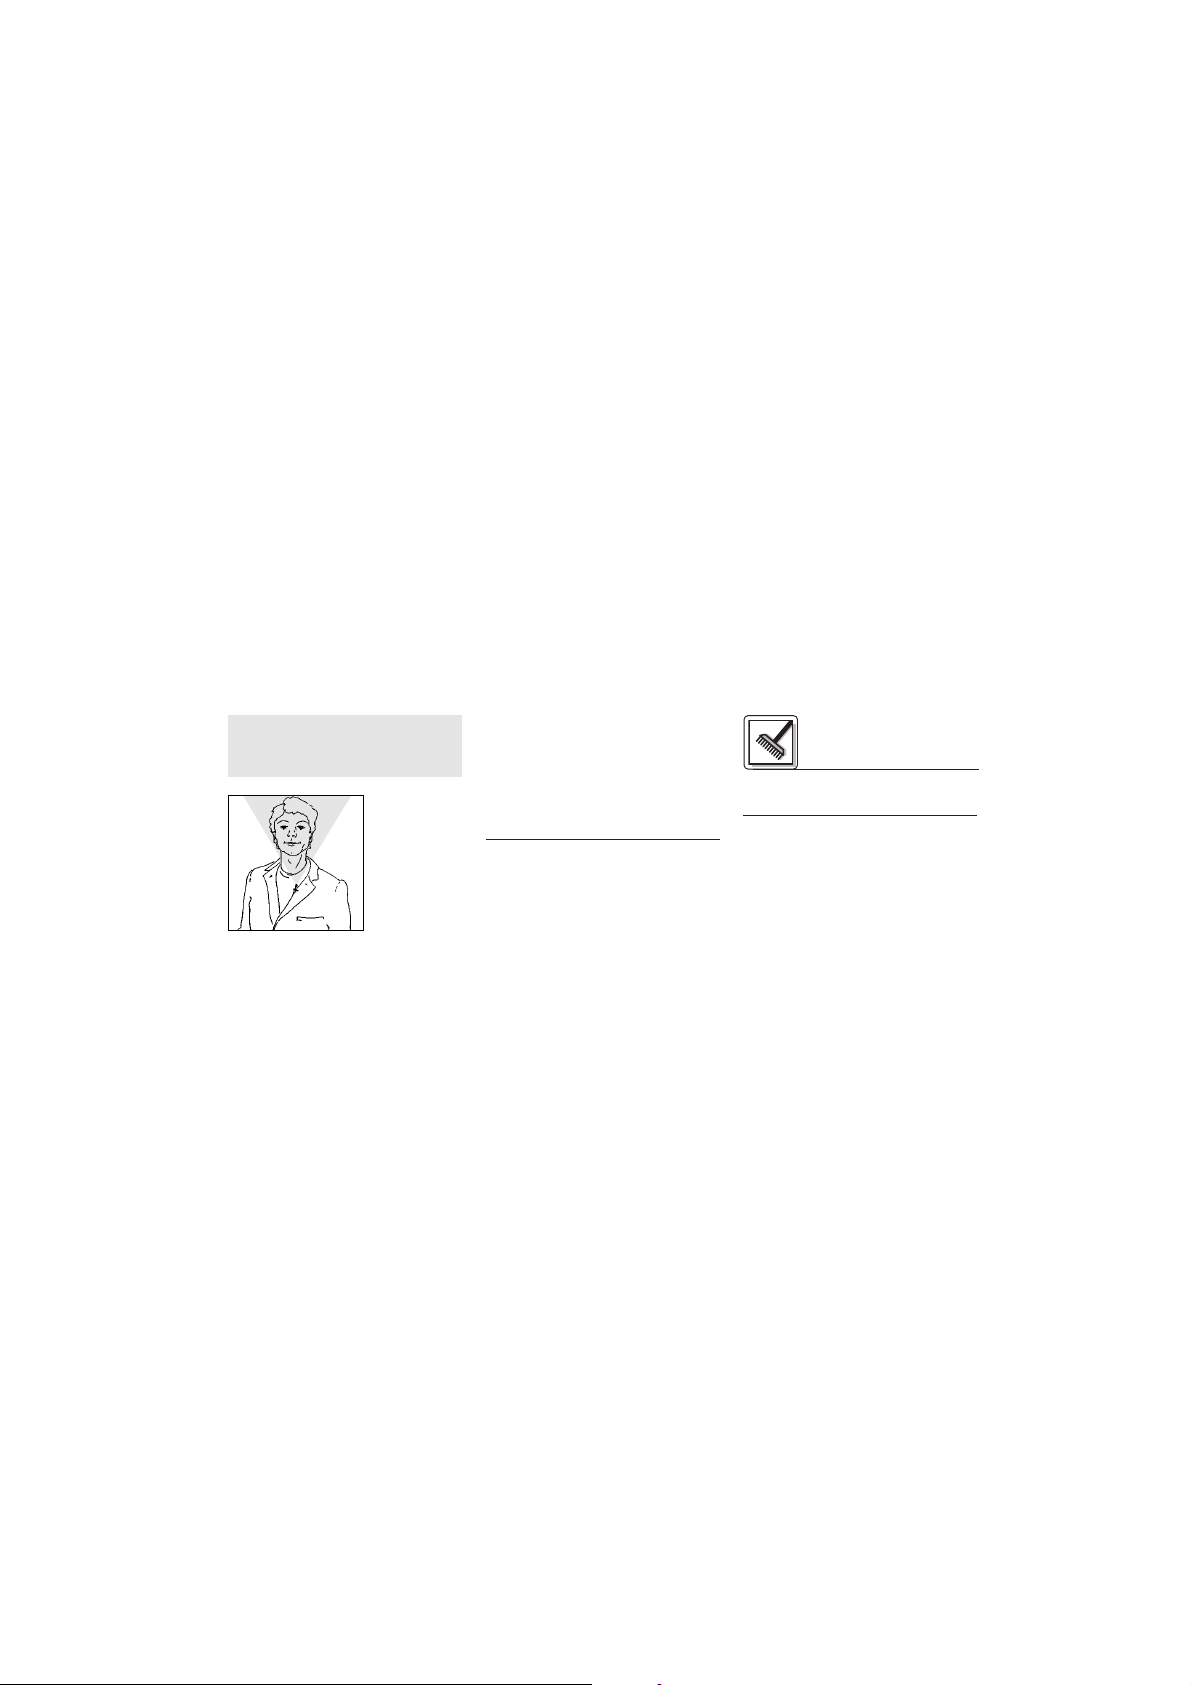
Abb. 4: Aufnahmewinkel
des Mikrofons
3. Ersuchen Sie die Anwenderin/den
Anwender, beim Sprechen den
Kopf nicht weiter als ca. 30° nach
links oder rechts zu drehen. (Siehe
Abb. 4.)
Wenn sich der Mund ausserhalb des
Aufnahmewinkels des Mikrofons befindet, sinkt der Asugangspegel des
Mikrofons stark ab.
Reinigen Sie das Gehäuse des
Mikrofons mit einem mit Wasser
befeuchteten Tuch.
4 Reinigung
Page 7
7
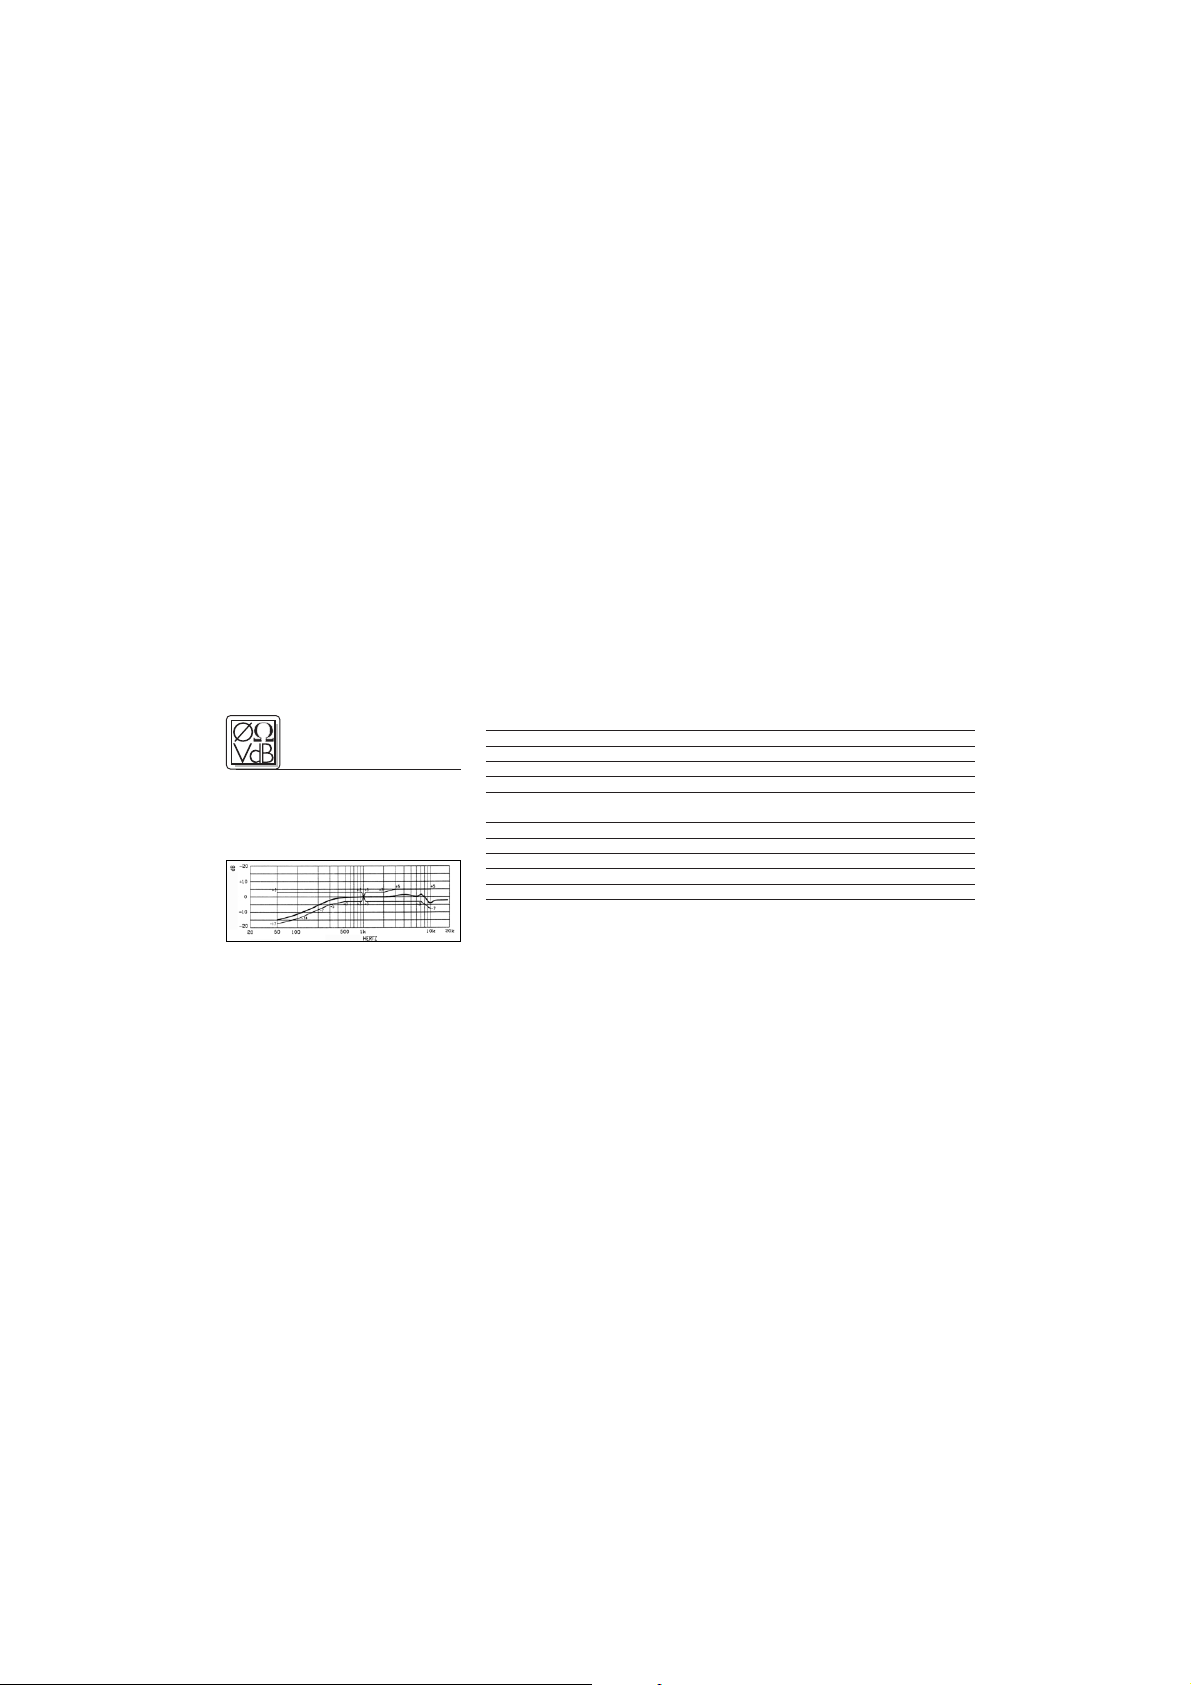
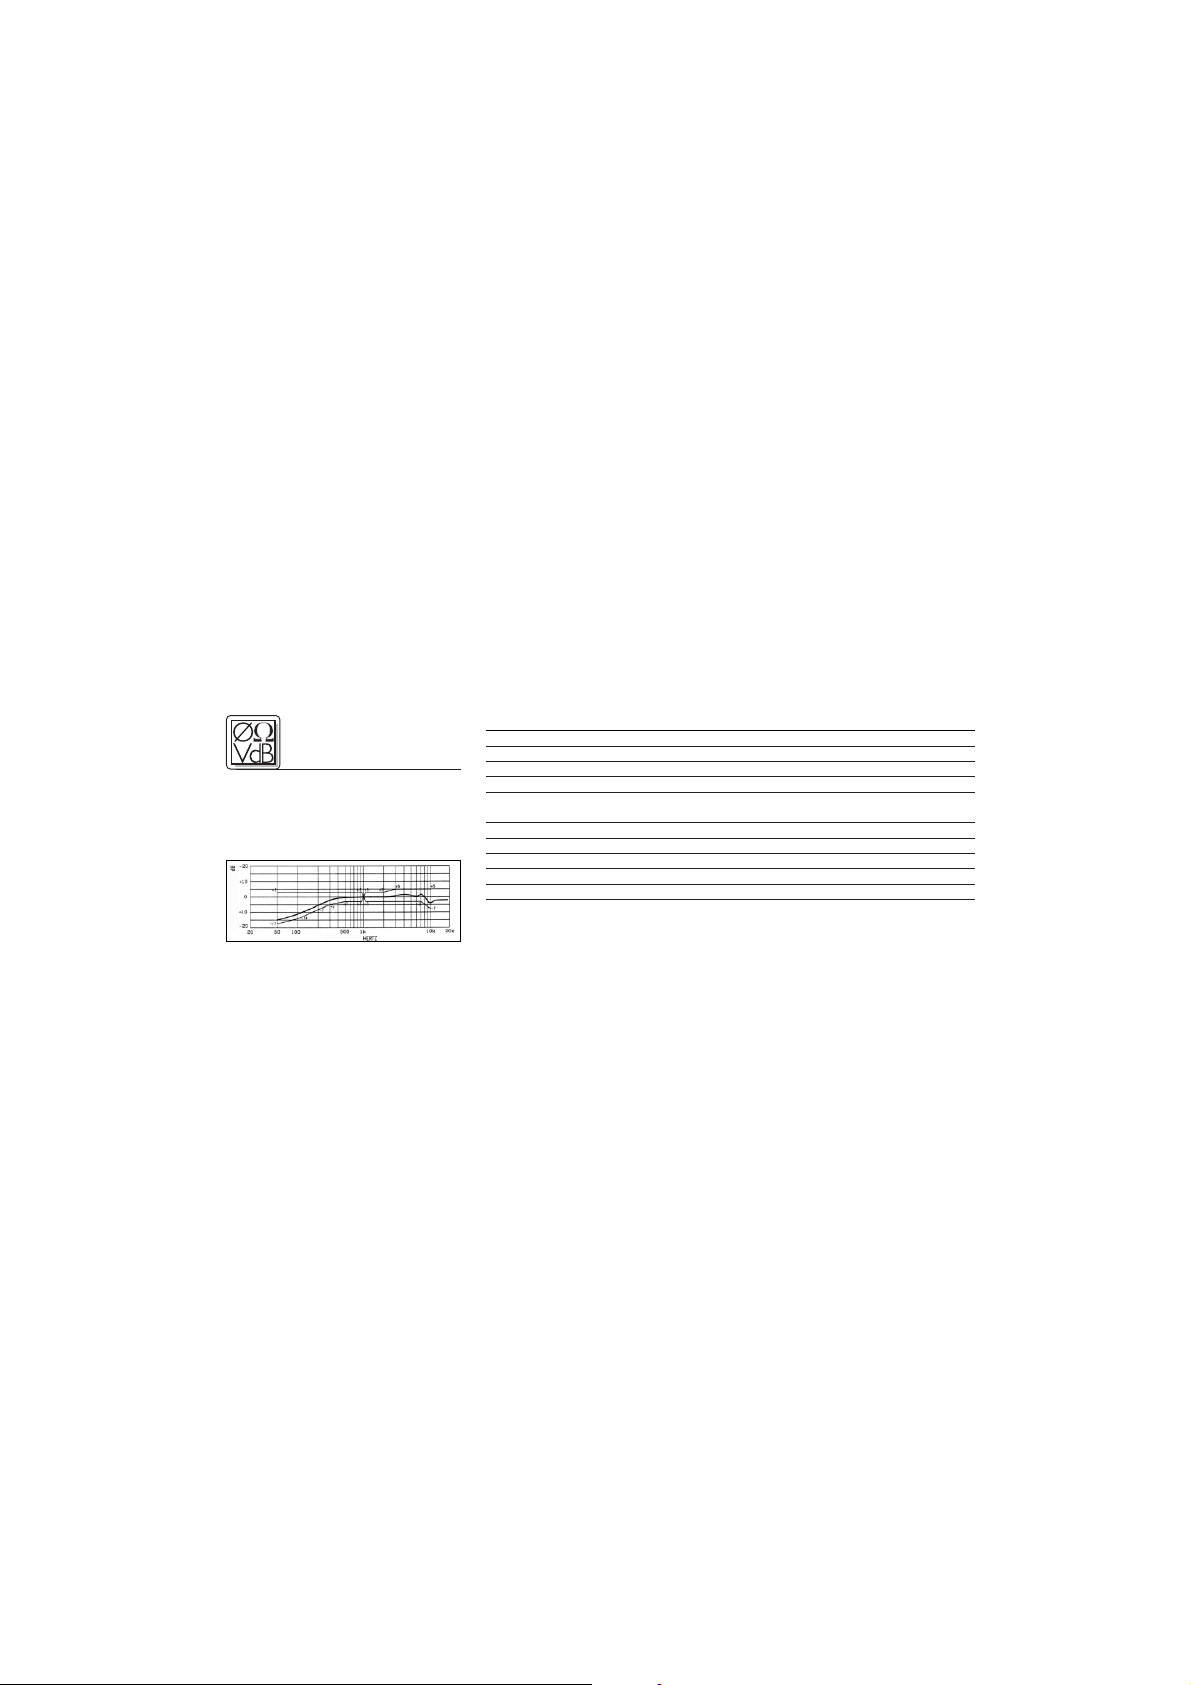
Frequenzgang
Arbeitsweise: Kondensatormikrofon mit Permanentladung
Richtcharakteristik: Niere
Übertragungsbereich: 150 - 18.000 Hz
Empfindlichkeit: 8,8 mV/Pa (-41 dBV bez. auf 1 V/Pa)
Elektrische Impedanz bei 1000 Hz: 200 Ω
Speisespannung: 1,5 bis 10 V DC über Phantomspeiseadapter
MPA III L oder AKG WMS Taschensender
Kabellänge: 1,6 m
Steckerart: Mini-XLR 3-polig
Oberfläche: mattschwarz
Abmessungen: 8 Ø x 22 mm
Gewicht netto (ohne Kabel)/brutto: 2,5 g / 115g
Dieses Produkt entspricht der Norm EN 50 082-1, vorausgesetzt, dass nachgeschaltete Geräte CE-konform sind.
5 Technische
Daten
Page 8
8
1.1 Precaution
Please make sure that the piece of
equipment your microphone will be
connected to fulfills the safety regulations in force in your country and is
fitted with a ground lead.
1.2 Unpacking
Check that the packaging contains all
of the components shown below.
Should anything be missing, please
contact your AKG dealer.
1.3 Optional Accessories
• MK 9/10 microphone
cable: 10-m (30-ft.) 2-conductor shielded cable
w/male and female XLR
connectors
• MPA III L phantom power
adapter
1.4 Features
• Professional miniature clip-on
microphone.
1 Precaution/
Description
1 x CK 55 with
attachment clip
1 x W 55 windscreen
Page 9
9
• Cardioid condenser transducer for
natural sound.
• Frequency response designed for
excellent intelligibility.
• Fastens on the user's clothing.
1.5 Brief Description
The CK 55 is a professional miniature
condenser clip-on microphone with an
cardioid polar pattern. Owing to its
small size, the CK 55 is an ideal choice
for use in any situation requiring an
inconspicuous microphone and maximum mobility for the user.
The microphone’s frequency response
has been designed specifically for
speech reproduction.
An external windscreen supplied with
the microphone reduces wind noise
when using the microphone on an
open-air stage.
The microphone is fitted with a 1.6-m
(5 ft. 3 in.) cable with a locking mini
XLR connector for use with the MPA III
L phantom power adapter or AKG
bodypack transmitters.
2.1 Introduction
The CK 55 is a condenser microphone
and therefore needs a power supply.
Important: Using any power supply
other than those recommended
by AKG may damage your microphone and will void the warranty.
2 Interfacing
Page 10
10
2.2 Connecting via MPA III L
Refer to fig. 1.
1. Push the mini XLR connector (1) on
the microphone cable into the mini
XLR socket (2) on the cable of the
MPA III L (3) to the stop.
The connector will lock automatically.
To disconnect the cable, press the
unlocking button on the mini XLR
connector (1) and pull the connector
(1) out of the socket.
Important: To avoid damaging the
cable, never try to pull out the
cable itself!
2. Connect the MPA III L (3) to a balanced XLR microphone input with
phantom power.
3. Switch the phantom power on.
(Refer to the instruction manual of
the unit to which you connected
your microphone.)
Fig. 1: Connection diagram with optional MPA III L.
CK 55
Mini XLR
Mini XLR MPA
1 2 3
Page 11
11
2.3 Connecting to a Bodypack
Transmitter
Refer to the manual of your bodypack
transmitter.
3.1 Introduction
The principal benefit of a microphone
attached to the user's clothes is that
the microphone allows the user to
move about freely and keeps their
hands free.
3.2 Operating Notes
Fig. 2: Fixing
the microphone on the
clip.
1. Insert the microphone into the fixing
clamp on the supplied attachment
clip.
2. Attach the microphone to the talker's clothes, e.g., on the lapel, placing it as close as possible to the
talker's mouth. (See fig. 3.)
Fig. 3:
Attaching the
microphone
near the
user's mouth.
3 Use
min.
Page 12

12
Note: The smaller the distance be-
tween the microphone and the
sound source, the higher the usable
gain before feedback.
Fig. 4:
Microphone
pickup angle.
3. Ask the user not to turn their head
more than 30 degrees to the left or
right while talking. (Refer to fig. 4.)
Talking outside the pickup angle of
the microphone will reduce the
microphone’s output level considerably.
To clean the microphone case, use a
soft cloth moistened with water.
4 Cleaning
Page 13

13
Frequency Response
5 Specifications
Type: pre-polarized condenser microphone
Polar pattern: cardioid
Frequency range: 150 Hz to 18,000 Hz
Sensitivity at 1 kHz: 8.8 mV/Pa (-41 dBV re 1 V/Pa)
electrical impedance at 1 kHz: 200 Ω
Power requirement:
1.5 to 10 VDC via MPAIII L phantom adapter or
AKG WMS bodypack transmitters
Cable length: 1.6 m (5 ft. 3 in.)
connector: 3-pin mini XLR
Finish: matte black
Size: 8 x 22 mm (0.3 x 0.9 in.)
Net/shipping weight: 2.5 g (0.09 oz. w/o cable / 115 g (4 oz.)
This product conforms to EN 50 082-1 provided it is connected to equipment with
a CE mark.
Page 14

14
1.1 Consigne de sécurité
Vérifiez si l’appareil auquel vous voulez
raccorder le microphone répond aux
prescriptions relatives à la sécurité en
vigueur et s’il possède une mise à la
terre de sécurité.
1.2 Fournitures
Contrôlez si le carton contient bien
tous les éléments énumérés ci-des-
sous. Si ce n’est pas le cas, veuillez
contacter votre distributeur AKG.
1.3 Accessoires optionnels
• Câble de micro MK 9/10 :
câble blindé bipolaire de 10 m,
avec connecteurs XLR mâle
et femelle
• Adaptateur pour alimentation fantôme MPA III L
1.4 Caractéristiques particulières
• Micro-cravate miniature professionnel.
• Transducteur électrostatique à ca-
1 Sécurité /
Description
1 x CK 55 avec
clip de fixation
1 x bonnette antivent W 55
Page 15

15
ractéristique cardioïde pour l’obtention d’un son naturel.
• Réponse en fréquence adaptée
pour la parole.
• Se fixe aux vêtements de l’utilisateur.
1.5 Description
Le CK 55 est un micro-cravate électrostatique miniature cardioïde. Grâce
à sa petite taille, ce microphone professionnel est idéal pour toutes les
applications exigeant une technique du
micro discrète et une grande liberté de
mouvements de l’utilisateur.
La réponse en fréquence est spécialement adaptée à la parole.
Une bonnette antivent externe atténuant les bruits de vent pour l’utilisation en plein air est fournie avec le
micro.
Le microphone possède un câble de
1,6 m de long avec un connecteur type
XLR miniature, verrouillable, pour raccordement à l'adaptateur pour alimentation fantôme MPA III L ou à un émetteur de poche AKG.
2.1 Introduction
Le CK 55 est un microphone électrostatique ; il a donc besoin d’une alimentation.
Important: L’utilisation d’alimentati-
ons autres que celles recommandées par AKG peut provoquer des
dégâts sur le micro et entraîne la
perte de la garantie.
2 Raccordement
Page 16

16
2.2 Raccordement avec MPA III L
Voir Fig. 1.
1. Enfoncez le connecteur mini-XLR
(1) du câble micro jusqu’en butée
dans l’accouplement mini-XLR (2)
du câble de raccordement du MPA
III L (3).
Le connecteur (1) se verrouille automatiquement.
Pour détacher le câble, appuyez sur
le bouton de déverrouillage du
connecteur mini-XLR (1) et sortez le
connecteur de la prise.
Important: Pour ne pas risquer d’abî-
mer le câble, ne sortez jamais le
connecteur en tirant sur le câble.
2. Connectez l’MPA III L (3) sur une
entrée de micro symétrique type
XLR avec alimentation fantôme.
3. Mettez l’alimentation fantôme sous
tension (Veuillez vous reporter à la
Fig. 1: Schéma de raccordement avec MPA III L (optionnel)
CK 55
Mini XLR
Mini XLR MPA
1 2 3
Page 17
17
notice de l’alimentation utilisée).
2.3 Raccordement sur un émetteur de poche
Conformez-vous aux instructions du
mode d’emploi de votre émetteur de
poche.
3.1 Introduction
Le gros avantage d’un micro pouvant
être fixé aux vêtements ou intégré dans
le maquillage est le fait que l’utilisateur
a les mains libres et n’est pas gêné
dans ses mouvements.
3.2 Utiliser le micro
Fig. 2 :
Fixation du
micro au clip
1. Insérez le micro dans le système de
fixation du clip fourni (voir Fig. 2).
2. Fixez le micro aux vêtements, p.ex.
au revers d’une veste, aussi près
que possible des lèvres de l’utilisateur (voir Fig. 3).
Fig. 3 :
Fixation du
micro près
des lèvres
3 Utilisation
min.
Page 18

18
Remarque : Moins le micro est éloigné
de la source sonore, moins il y a de
risques de larsen.
Fig. 4 : Angle
de capture du
microphone
3. Demandez à l’utilisateur de ne pas
tourner la tête de plus de 30° à droite ou à gauche pendant qu’il parle
(voir Fig. 4).
Le niveau de sortie du microphone
s’affaiblit considérablement lorsque
les lèvres se trouvent à l’extérieur
de l’angle de capture.
Le boîtier du micro se nettoie avec un
chiffon légèrement humide (eau claire).
4 Nettoyage
Page 19

19
Réponse en fréquence
5 Caractéristiques
techniques
Fonctionnement:
microphone électrostatique à charge permanente
Directivité: cardioïde
Réponse en fréquence: 150 … 18.000 Hz
Sensibilité : 8,8 mV/Pa (-41 dBV rapp. à 1 V/Pa)
Impédance électrique à 1.000 Hz: 200 Ω
Tension d’alimentation: 1,5 à 10 V c.c. par adaptateur fantôme
MPA III L ou émetteurs de poche AKG WMS
Longueur du câble: 1,6 m
Connecteur: mini-XLR, 3 points
Couleur: noir mat
Dimensions: 8 x 22 mm
Poids net/brut : 2,5 g / 115 g
Ce produit est conforme à la norme EN 50 082-1 à condition que les appareils
en aval soient aux normes européennes.
Page 20

20
1.1 Indicazione per la sicurezza
Controllate per favore se l’apparecchio
che volete collegare al microfono corrisponde alle norme di sicurezza vigenti e se è dotato di una messa a terra di
sicurezza.
1.2 In dotazione
Controllate per favore se la confezione
contiene tutti i componenti di cui sotto.
Se manca qualcosa rivolgetevi al
vostro rivenditore AKG.
1.3 Accessori raccomandati
• Cavo microfonico MK 9/10:
cavo lungo 10 m, schermato, a 2 poli, con connettore
XLR e accoppiamento XLR.
•
Adattatore phantom MPA III L
1.4 Caratteristiche particolari
• Microfono professionale miniaturizzato a clip.
• Trasduttore a condensatore dalla
1 Sicurezza /
Descrizione
1 x CK 55 con
clip di fissaggio
1 x antisoffio
W 55
Page 21

21
direttività cardioide per ottenere un
suono naturale.
• Risposta in frequenza ideata specialmente per la lingua parlata.
• Adatto per essere fissato sull’abbigliamento dell’utente.
1.5 Breve descrizione
Il CK 55 è un professionale microfono
miniaturizzato a condensatore a clip
dalla direttività cardioide. Grazie alle
piccole dimensioni, il microfono è ideale per tutte quelle applicazioni in cui si
rendono necessarie tecnica microfonica poco vistosa e grande libertà di
movimento per gli utenti.
La risposta in frequenza del microfono
è predisposta specialmente per la trasmissione della lingua parlata.
Un’antisoffio esterno per l’attenuazione dei rumori prodotti dal vento durante gli impieghi all’aperto è in dotazione.
Il microfono è dotato di un cavo lungo
1,6 m con un connettore mini-XLR
arrestabile per il collegamento all’adattatore per l’alimentazione phantom
MPA III L o ai trasmettitori da tasca
AKG.
2.1 Introduzione
Il CK 55 è un microfono a condensatore
e ha quindi bisogno di alimentazione.
Importante: Se usate alimentatori di-
versi da quelli raccomandati
dall’AKG, il microfono può subire
danni e la garanzia si estingue.
2 Collegamento
Page 22

22
2.2 Collegamento con MPA III L
Vedi fig. 1.
1. Inserite il connettore mini-XLR (1)
disposto sul cavo microfonico fino
all‘arresto nell‘accoppiamento
mini-XLR (2) disposto sul cavo di
collegamento dell’MPA III L (3).
Il connettore (1) si blocca automaticamente.
Per sfilare il cavo, premete il bottone di sblocco sul connettore miniXLR (1) e sfilate il connettore (1)
dalla presa.
Importante: Per non danneggiare il
cavo, non esercitate mai trazione
direttamente sul cavo!
2. Collegate l’MPA III L (3) disposto sul
cavo microfonico a un ingresso
microfonico XLR simmetrico con
alimentazione phantom.
3. Inserite l’alimentazione phantom.
Fig. 1: Schema di collegamento con MPA III L (opzionale)
CK 55
Mini XLR
Mini XLR MPA
1 2 3
Page 23

23
(Leggete in merito le istruzioni per
l’uso del rispettivo apparecchio.)
2.3 Collegamento ad un trasmettitore da tasca
Leggete al riguardo le istruzioni per
l’uso del vostro trasmettitore da tasca.
3.1 Introduzione
Il grande vantaggio di un microfono fis-
sato sull’abbigliamento consiste nel
fatto che la libertà di movimento non
viene pregiudicata e le mani rimangono
libere.
3.2 Indicazioni per l’uso
Fig. 2: Fissare
il microfono
sul clip di fissaggio
1. Fissate il microfono inserendolo direttamente nella sede disposta sul
clip di fissaggio in dotazione.
2. Fissate il microfono sull’abbigliamento, p.e. sul risvolto della giacca,
il più vicino possibile alla bocca
dell’oratore.
(Vedi fig. 3.)
Fig. 3: Fissare
il microfono
vicino alla
bocca
3 Impiego
min.
Page 24

24
Avvertenza:Più si riduce la distanza tra
microfono e fonte sonora, più si riduce il pericolo di feedback acustici.
Fig. 4: Angolo
di ripresa del
microfono
3. Chiedete all'utente di non girare, nel
parlare, la testa più di 30° circa a sinistra o a destra. (Vedi fig. 4.)
Parlando fuori dell'angolo di ripresa
del microfono, il livello d’uscita del
microfono si abbassa fortemente.
Pulite la scatola del microfono con un
panno inumidito con acqua.
4 Pulizia
Page 25

25
Risposta in frequenza
5 Dati tecnici
Modo di funzionamento:
microfono a condensatore con carica permanente
Direttività: cardioide
Risposta in frequenza: 150 - 18.000 Hz
Sensibilità: 8,8 mV/Pa (-41 dBV rif. a 1 V/Pa)
Impedenza elettrica a 1000 Hz: 200 Ω
Tensione di alimentazione: 1,5 a 10 V c.c., tramite adattatore phantom
MPA III L o trasmettitori da tasca AKG WMS
Lunghezza del cavo: 1,6 m
Connettore: mini-XLR a 3 poli
Superficie: nero opaco
Dimensioni: 8 x 22 mm
Peso netto/lordo: 2,5 g / 115 g
Questo prodotto corrisponde alla norma EN 50 082-1, presupposto che gli apparecchi collegati siano conformi alle norme CE.
Page 26

26
1.1 Indicaciones de seguridad
Sírvase verificar si el aparato al cual
quiere conectar el micrófono cumple
con las disposiciones de seguridad
vigentes y está equipado con una toma
de tierra de seguridad.
1.2 Volumen de suministro
Sírvase controlar si el embalaje contiene todas las piezas indicadas abajo. Si
falta algo, le rogamos dirigirse a su distribuidor AKG.
1.3 Accesorios opcionales
•
Cable de micrófono MK 9/10:
10 m de cable bipolar apantallado con conector y acoplamiento XLR.
• Adaptador de alimentación
fantasma MPA III L
1.4 Características especiales
• Minimicrófono profesional con dispositivo para abrochar
• Transductor de condensador con
1 Seguridad/
Descripción
1 x CK 55 con
clip de fijación
1 x pantalla antiviento W 55
Page 27
27
característica direccional cardioide
para la obtención de un sonido natural.
• Respuesta de frecuencia adaptada
a la transmisión del habla.
• Apto para ser fijado a la ropa de la
persona que lo utiliza.
1.5 Breve descripción
El CK 55 es un minimicrófono profesional de condensador con característica
direccional cardioide. Debido a sus
pequeñas dimensiones, es ideal para
ser utilizado en todos los casos en que
el micrófono debe pasar desapercibido
y la persona que lo utiliza necesita
tener una gran libertad de movimiento.
La respuesta de frecuencia del micrófono está especialmente diseñada para
la transmisión del habla.
En el suministro se incluye una pantalla
antiviento externa para amortiguar los
ruidos del viento cuando se utiliza el
micrófono al aire libre.
El micrófono dispone de un cable de
1,6 m con un conector mini-XLR enclavable para la conexión al adaptador de
alimentación fantasma MPA III L o un
emisor de bolsillo AKG.
2.1 Introducción
El CK 55 es un micrófono de condensador y necesita, por lo tanto, alimentación de corriente.
Importante: Si se utilizan alimenta-
dores diferentes a los recomendados por AKG puede dañarse el
micrófono, cesando con ello la
garantía.
2 Conexión
Page 28

28
2.2 Conexión mediante el MPA III L
Ver Fig. 1.
1. Enchufe el conector mini-XLR (1)
del cable del micrófono, hasta que
llegue al tope, en el acoplamiento
mini-XLR (2) en el cable de conexión del MPA III L (3).
El conector (1) se enclava automáticamente.
Para desconectar el cable, presione
el desbloqueador del conector miniXLR macho (1) y separe el conector
macho del cable del micrófono (1) del
conector hembra del B 29 L (2).
Importante: No tire nunca del cable
para desconectarlo porque lo puede dañar.
2. Conecte el adaptador de alimentación
fantasma del cable del micrófono a
una entrada de micrófono XLR balanceada con alimentación fantasma.
3. Concecte la alimentación fantasma
Fig. 1: Esquema de conexión con MPA III L (opcional)
CK 55
Mini XLR
Mini XLR MPA
1 2 3
Page 29

29
(consulte para ello el Modo de empleo del aparato correspondiente).
2.3 Conexión a un emisor de bolsillo
Consulte las instrucciones de uso de
su emisor de bolsillo.
3.1 Introducción
La gran ventaja de un micrófono que
se fija directamente a la ropa es que se
conservan la libertad de movimiento y
las manos libres.
3.2 Indicaciones para la utilización
Fig. 2: Fijación
del micrófono
en el clip
1. Enganche el micrófono en el soporte previsto para ello en el clip de
fijación incluido en el suministro.
2. Fije el micrófono a la ropa de la persona que va a hablar, de modo que
quede lo más cerca posible de su
boca (por ej.:
en la solapa).
Fig. 3:
Fijación del
micrófono
cerca de la
boca
3 Utilización
min.
Page 30

30
Nota: Cuanto menor sea la distancia
entre el micrófono y la fuente de sonido, tanto menor será el peligro de
retroalimentación acústica.
Fig. 4: Angulo
de toma del
micrófono
3. Solicite a los usuarios a no mover la
cabeza en más de 30° hacia la
izqierda o la derecha mientras que
hablan. (Véase Fig. 4)
Si la boca se encuentra fuera del
ángulo de toma del micrófono, el nivel de salida del micrófono desciende demasiado.
Limpie la caja del micrófono con un
paño humedecido con agua.
4 Limpieza
Page 31
31
Respuesta de frecuencia
5 Datos técnicos
Modo de funcionamiento:
Micrófono de condensador con carga permanente
Característica direccional: Cardioide
Gama de frecuencia: 150 - 18000 Hz
Sensibilidad: 8,8 mV/Pa (-41 dB referido a 1 V/Pa)
Impedancia eléctrica a 1000 Hz: 200 Ω
Tensión de alimentación: 1,5 a 10 V c.c. mediante adaptador fantasma
MPA III L ó emisores de bolsillo AKG WMS
Longitud del cable: 1,6 m
Conector: Mini-XLR de 3 polos
Superficie: Negro opaco
Dimensiones: 8 x 22 mm
Peso neto/bruto: 2,5 g / 115 g
Este producto corresponde a la norma EN 50 082-1, siempre y cuando los aparatos postconectados correspondan también a las normas CE.
Page 32

32
1.1 Aviso de segurança
Certifique-se de que o aparelho ao
qual pretende ligar o microfone está
ligado à terra e que corresponde às
normas de segurança.
1.2 Volume de fornecimento
Verifique se a embalagem contém
todos os componentes abaixo indicados.
Caso falte algo, favor entre em contato
com a concessionária da AKG.
1.3 Acessórios opcionais
•
Cabo de microfone MK 9/10:
cabo blindado a dois polos de
10 m com plugue XLR e tomada XLR.
• Adatador de alimentação
fantasma MPA III L
1.4 Características especiais
• Minimicrofone lavalier profissional.
• Transdutor de condensador com
característica cardióide para a re-
1 Segurança/
Descrição
1 x CK 55 com
prendedor
1 x pára-vento
W 55
Page 33

33
produção de som natural.
• Resposta de freqüência adaptada à
transmissão de fala.
• Concebido para ser fixado na roupa
do usuário.
1.5 Descrição
O CK 55 é um minimicrofone lavalier
profissional com característica cardióide. Devido às suas dimensões
pequenas, o microfone é ideal para
situações em que se exige um microfone discreto e liberdade de movimento
dos usuários.
A resposta de freqüência do microfone
foi concebido especialmente para a
transmissão de fala.
Está incluído na embalagem um páravento externo para amortizar ruídos de
vento durante a aplicação ao ar livre.
O microfone é fixado a um cabo de 1,6
m com um conetor mini-XLR travador
para a ligação ao adatador de alimentação fantasma MPA III L ou emissores
de bolso AKG.
2.1 Introdução
O CK 55 é um microfone de condensador e por isso precisa de uma alimentação de corrente.
Importante: Se usar outros alimenta-
dores senão aqueles recomendados pela AKG, o microfone pode
ser danado e caduca a garantia.
2 Conexão
Page 34

34
2.2 Conexão por meio do MPA III L
Veja fig. 1.
1. Insera até ao encosto o conetor
mini-XLR (1) fixado ao cabo do
microfone na tomada mini-XLR (2)
do cabo de conexão do MPA III L
(3).
O conetor (1) é travado automaticamente.
Para tirar o cabo pressione o botão
de destrava no conetor mini-XLR
(1), tirando o conetor (1) da entrada.
Importante: Para não prejudicar o
cabo, nunca o tire segurando o
próprio cabo!
2. Conete o MPA III L (3) a uma entrada
de microfone XLR com alimentação
fantasma.
3. Ligue a alimentação fantasma. (Veja
as instruções de uso do equipa-
Fig. 1: Connection diagram with optional MPA III L.
CK 55
Mini XLR
Mini XLR MPA
1 2 3
Page 35

35
mento ao qual o microfone está ligado.)
2.3 Ligar a um emissor de bolso
Leia o manual do seu emissor de
bolso.
3.1 Introdução
A grande vantagem de um microfone
fixado na roupa é que não impede a
liberdade de movimento e as mãos
ficam livres.
3.2 Dicas para a utilização
Fig. 2: Fixar o
microfone no
prendedor
1. Insira o microfone no grampo do
prendedor fornecido na embalagem.
2. Fixe o microfone o mais próximo
possível da boca na roupa ou na lapela do locutor/da locutora. (Veja
fig. 3.)
Fig. 3: Fixar o
microfone
próximo da
boca
3 Aplicação
min.
Page 36
36
Aviso: Quanto menor for a distância
entre o microfone e a fonte sonora,
menor será o perigo de realimentações acústicas.
Fig. 4: Ângulo
de captação
do microfone
3. Peça ao utilizador de não virar a cabeça mais de 30° para a esquerda
ou direita enquanto está falando.
(Veja fig. 4.)
Se o utilizador falar fora do ângulo
de captação do microfone, diminuirá fortemente o nível de saída do
microfone.
Limpe a carcaça do microfone com um
pano molhado em água.
4 Limpeza
Page 37

37
Resposta de freqüência
5 Especificações
Tipo:
microfone de condensador com carga permanente
Caraterística direccional: cardióide
Resposta de freqüência: 150 - 18.000 Hz
Sensibilidade: 8,8 mV/Pa (-41 dBV ref. a 1 V/Pa)
Impedância elétrica: 200 Ω
Tensão de alimentação:
1,5 a 10 V c.c., através do adatador fantasma
MPA III L ou emissores de bolso WMS da AKG
Comprimento do cabo: 1,6 m
Tipo de conetor: mini-XLR tripolar
Superfície: preto mate
Dimensões: 8 x 22 mm
Peso líquido/bruto: 2,5 g / 115 g
Este produto corresponde à norma EN 50 082-1 contanto que os equipamentos
conetados correspondam às normas CE.
Page 38

38
Notizen - Notes - Notes - Note - Notas - Notas39Notizen - Notes - Notes - Note - Notas - Notas
Page 39

Page 40

Printed in China. 12/01
Technische Änderungen vorbehalten. Specifications subject to change without notice. Ces caractéristiques sont susceptibles de modifications. Ci riserviamo il diritto di effettuare modifiche tecniche.
Nos reservamos el derecho de introducir modificaciones técnicas. Especificações sujeitas a mudanças sem aviso prévio.
Mikrofone · Kopfhörer · Drahtlosmikrofone · Drahtloskopfhörer · Kopfsprechgarnituren · Akustische Komponenten
Microphones · Headphones · Wireless Microphones · Wireless Headphones · Headsets · Electroacoustical Components
Microphones · Casques HiFi · Microphones sans fil · Casques sans fil · Micros-casques · Composants acoustiques
Microfoni · Cuffie HiFi · Microfoni senza filo · Cuffie senza filo · Cuffie-microfono · Componenti acustici
Micrófonos · Auriculares · Micrófonos inalámbricos · Auriculares inalámbricos · Auriculares con micrófono · Componentes acústicos
Microfones · Fones de ouvido · Microfones s/fios · Fones de ouvido s/fios · Microfones de cabeça · Componentes acústicos
AKG Acoustics GmbH
Lemböckgasse 21–25, P.O.B. 158, A-1230 Vienna/AUSTRIA, Tel: (43 1) 86 654-0*, Fax: (43 1) 86 654-7516,
http://www.akg.com, e-mail: sales@akg.com
AKG Acoustics GmbH
Bodenseestraße 228, D-81243 München/GERMANY, Tel: (089) 87 16-0, Fax: (089) 87 16-200,
http://www.akg-acoustics.de, e-mail: info@akg-acoustics.de
AKG ACOUSTICS, U.S.
914 Airpark Center Drive, Nashville, TN 37217, U.S.A., Tel: (615) 620-3800, Fax: (615) 620-3875,
http://www.akgusa.com, e-mail: akgusa@harman.com
For other products and distributors worldwide visit our website at http://www.akg.com
 Loading...