


Published: 8/31/09
Quick Start Guide
Introduction
This Quick Start Guide provides a basic overview of Ki Pro as well as some basic configuration guidelines. It is not meant as a
substitute for the detailed information found in the Ki Pro Manual, but rather as a supplement to that documentation.
Basic information to get started using Ki Pro
If this is the first time you are removing Ki Pro from the box, we strongly recommend that you first read the full Ki Pro Manual in
addition to this document.
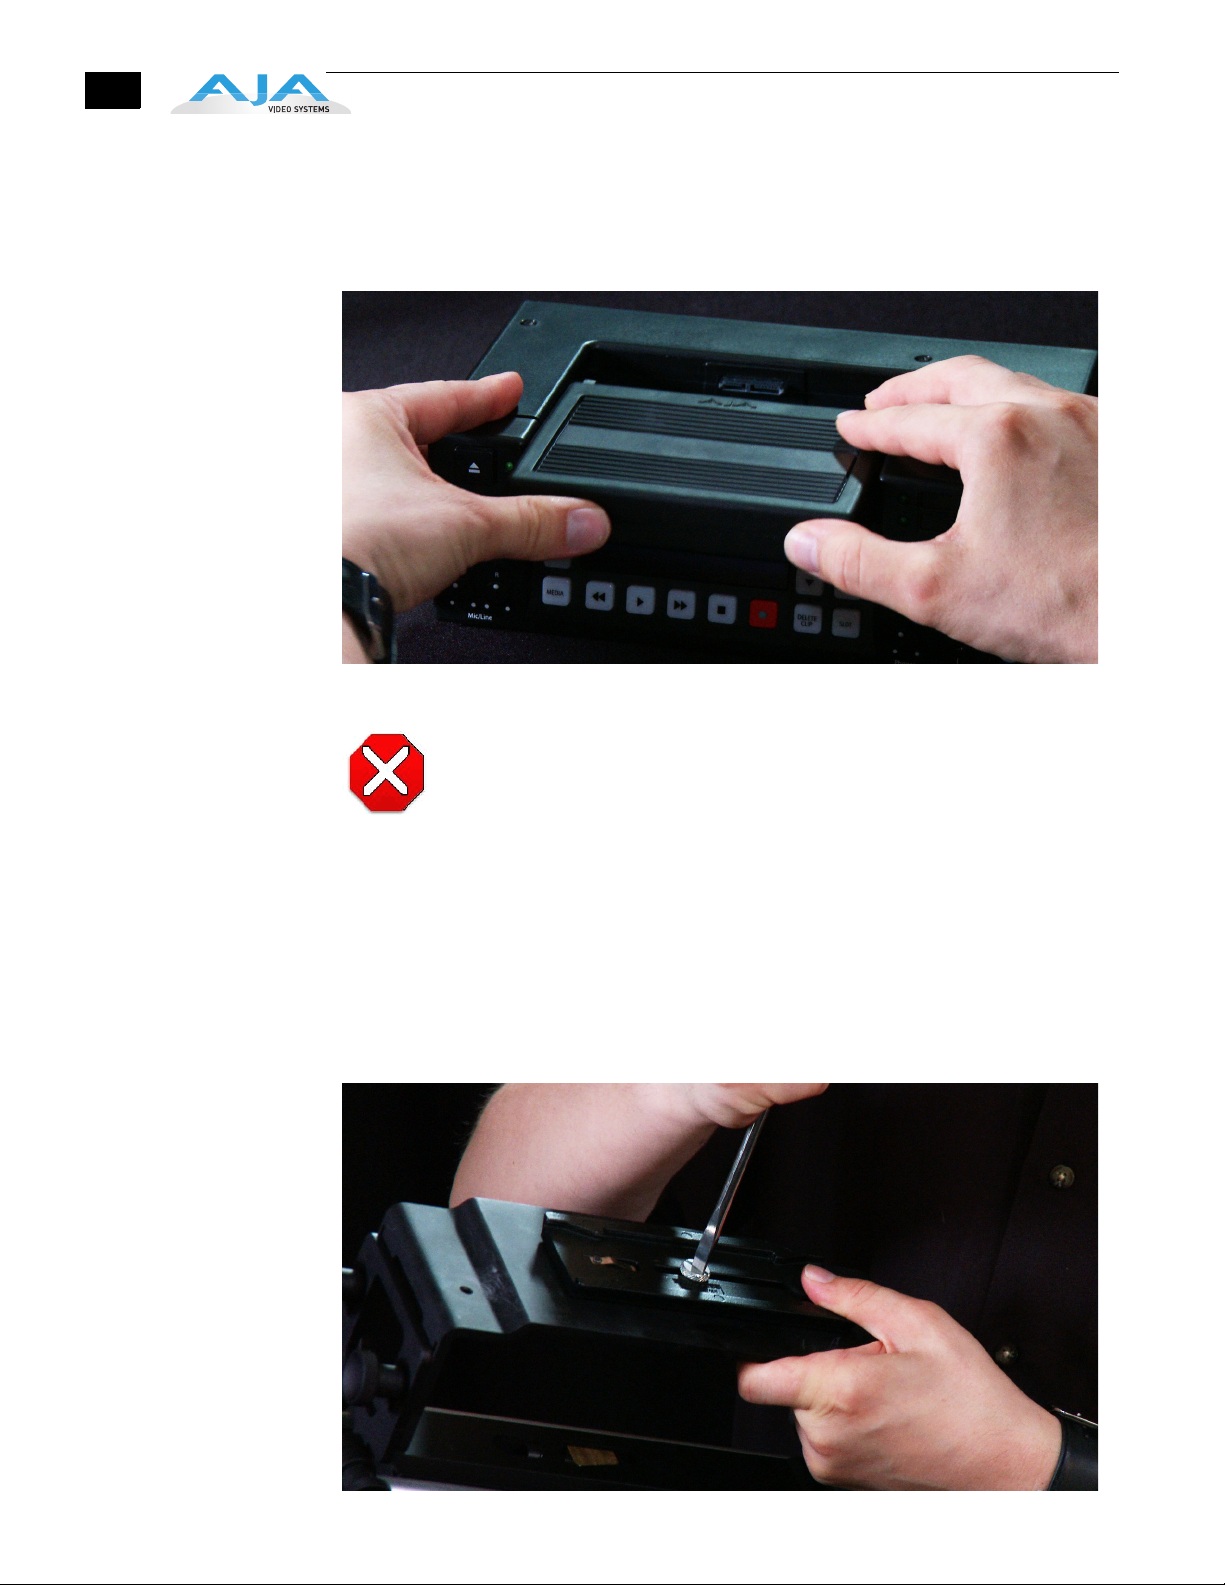
Again, if this is the first time you are removing Ki Pro from the box, locate the Ki Pro Storage Module among the contents. You will
want to insert this media into Ki Pro before continuing with the rest of this Quick Start Guide. To insert the media, simply line up
the media with the information label facing down, and the AJA logo on the case facing up.
www.aja.com
2
To make inserting the media as easy as possible, you might want to first line up the media
with both hands so that the media will slide along the guides inside the Ki Pro, and then use
both thumbs to guide the media into place. You will hear a clicking of the clutch that holds
the media in place when it is fully inserted.
With the media inserted, position Ki Pro near the camera or mount Ki Pro to a camera with
the optional Exoskeleton.
Caution!
Failure to properly mount or dismount media, or an unexpected loss of power
while recording, can result in an unrecoverable data loss.
If you are using the Ki Pro without the Exoskeleton, place it on a stable surface like a table
top or professional a/v cart.
Note: Although Ki Pro comes standard with a removable 250GB HDD Storage Module, an
optional SSD Storage Module is also available. The Ki Pro Solid State Storage Module
(SSD) is recommended for mobile environments where shock-proof sturdiness may be
needed.
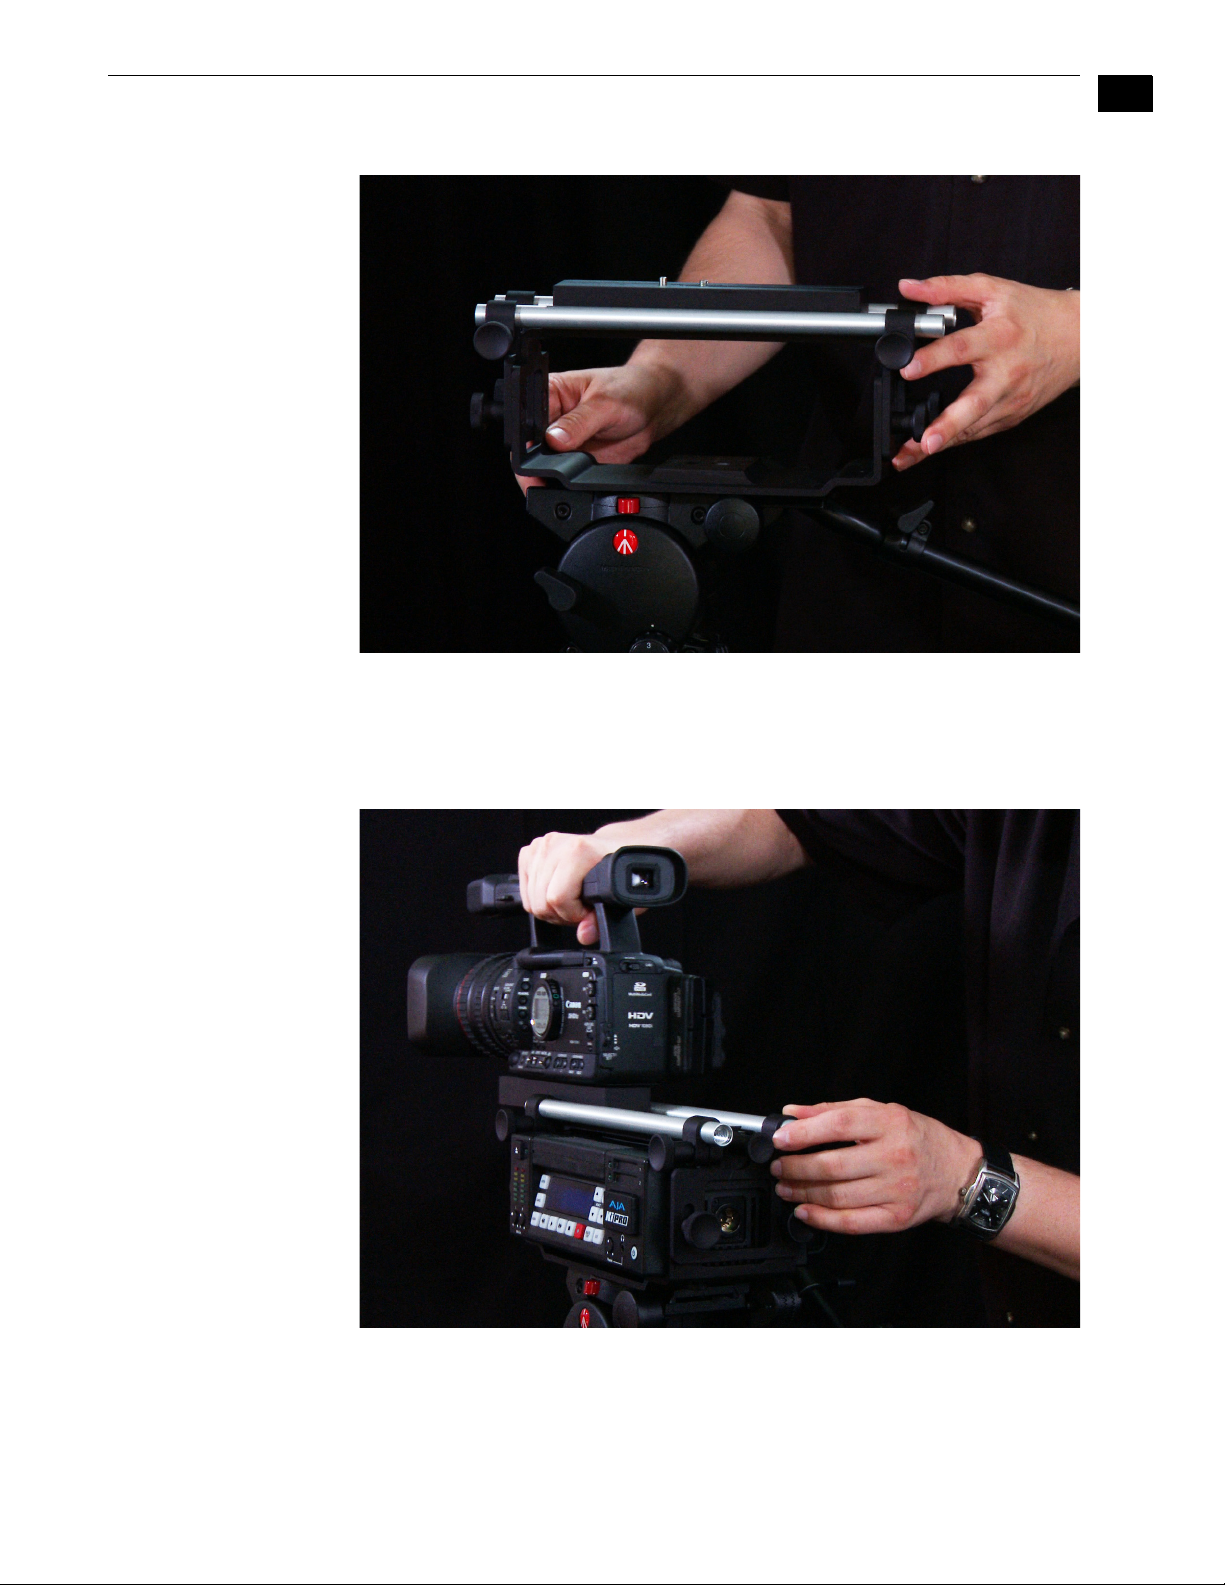
If you are using the Ki Pro with the Exoskeleton and a tripod, first mount the tripod plate to
the bottom of the Exoskeleton, then mount the Exoskeleton to the tripod with the locking
knob for the sliding baseplate faced toward the rear.
Ki Pro Quick Start Guide—
1
Remove the sliding plate from the top of the Exoskeleton by twisting the locking knob
counterclockwise, then slide the plate free. Place the camera on the mount, orienting
the mount’s alignment pin to the camera’s corresponding pin socket. Once aligned,
tighten the mounting screw to secure the camera. Slide the camera and mount back on
the rail and tighten the locking knob.
3
4
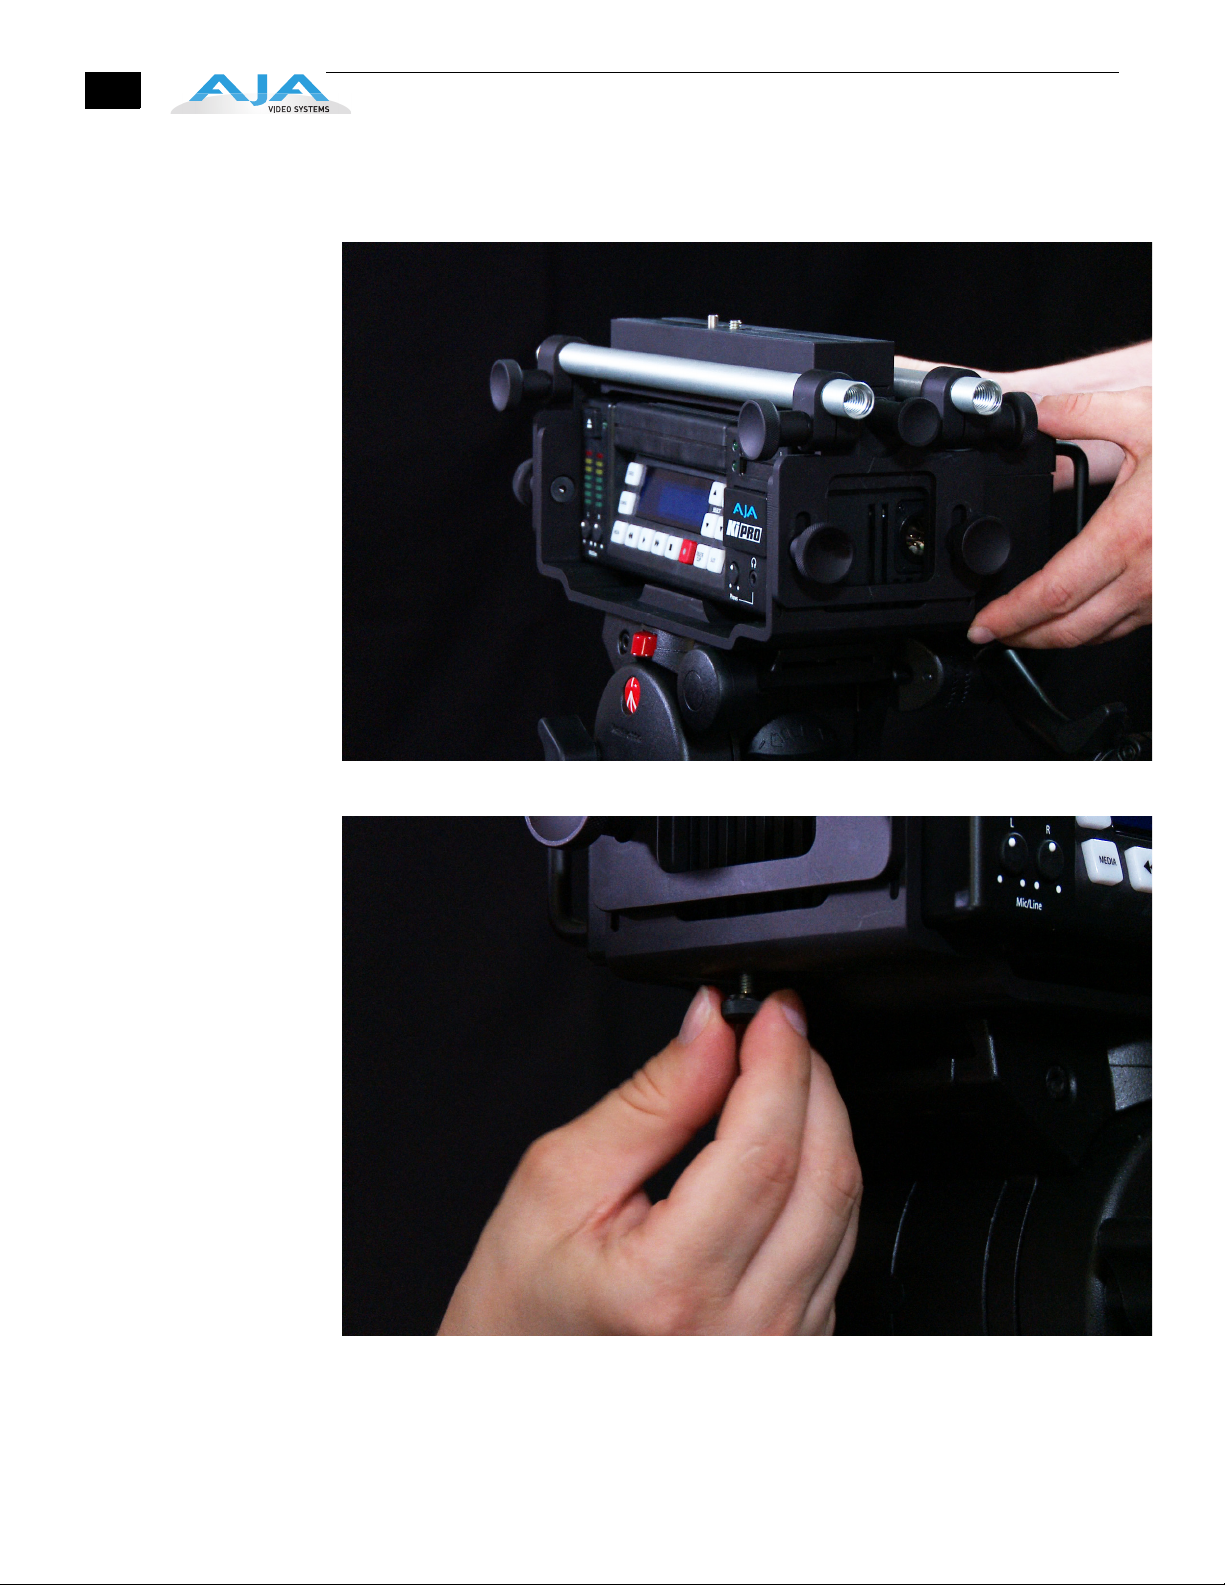
Slide Ki Pro into the Exoskeleton from the right hand side with the locking knob facing the rear.
Center the 4-pin XLR power connector in the rear opening of the Exoskeleton. Anchor the Ki Pro in
the Exoskeleton with the two thumbscrews.

Ki Pro Quick Start Guide— Make audio and video connections to Ki Pro
Make audio and video connections to Ki Pro
Cameras with SDI outputs can provide audio, video - and in some cases - timecode with one
single cable connection to Ki Pro. If your camera has an SDI output, this will likely be the
simplest way to connect to Ki Pro.
If you have a camcorder with an HDMI output, it can also provide audio and video - but not
timecode - with one single cable to Ki Pro.
5
1
Powering Ki Pro
If you have a camera with component analog output, you will need to connect the three cables
that create the Y, Pb, Pr signal to the inputs on Ki Pro. You will need to connect audio to Ki Pro
via the analog audio inputs - XLR balanced or RCA unbalanced.
For all of the possible video inputs - SDI, HDMI and component analog video - analog audio can
be used. Note: You can only select SDI audio if you are using SDI video and you can only select
HDMI audio if you are using HDMI video. You should also be aware that the audio input control
knobs located below the VU meters on Ki Pro only work on analog audio sources; embedded
audio levels cannot be changed via Ki Pro. Adjust digital audio signals at the source.
Ki Pro can accept external timecode from two different sources: the LTC input or the embedded
SDI timecode, RP188 (if present in the SDI signal). If your camera does not have a timecode
output, you can also choose to generate your own timecode value using Ki Pro.
Ki Pro can be powered by the provided AC adapter or by a wide range of batteries. Note: Be sure
to use battery sources that fall within Ki Pro's voltage range; batteries that provide less than 12
volts will not provide sufficient power and batteries that exceed 18 volts are in excess.
Note: In the event of sudden power loss, recordings that are in progress will not be written
properly to the media. Note that there is a "Low Battery" warning prompt that users should take
note of and stop recordings in progress if at all possible before battery failure. Ki Pro can
sometimes manage to close the le before the battery stops providing sufcient power, but this
is not always possible due to the nature of batteries and the duration of some recordings. It is
best to be mindful of remaining battery life. The use of batteries with metering or remaining
power indications is highly recommended. For very long recordings, it is advisable to use the
supplied AC power supply instead of battery power.
 Loading...