

Page 1
®
Overview
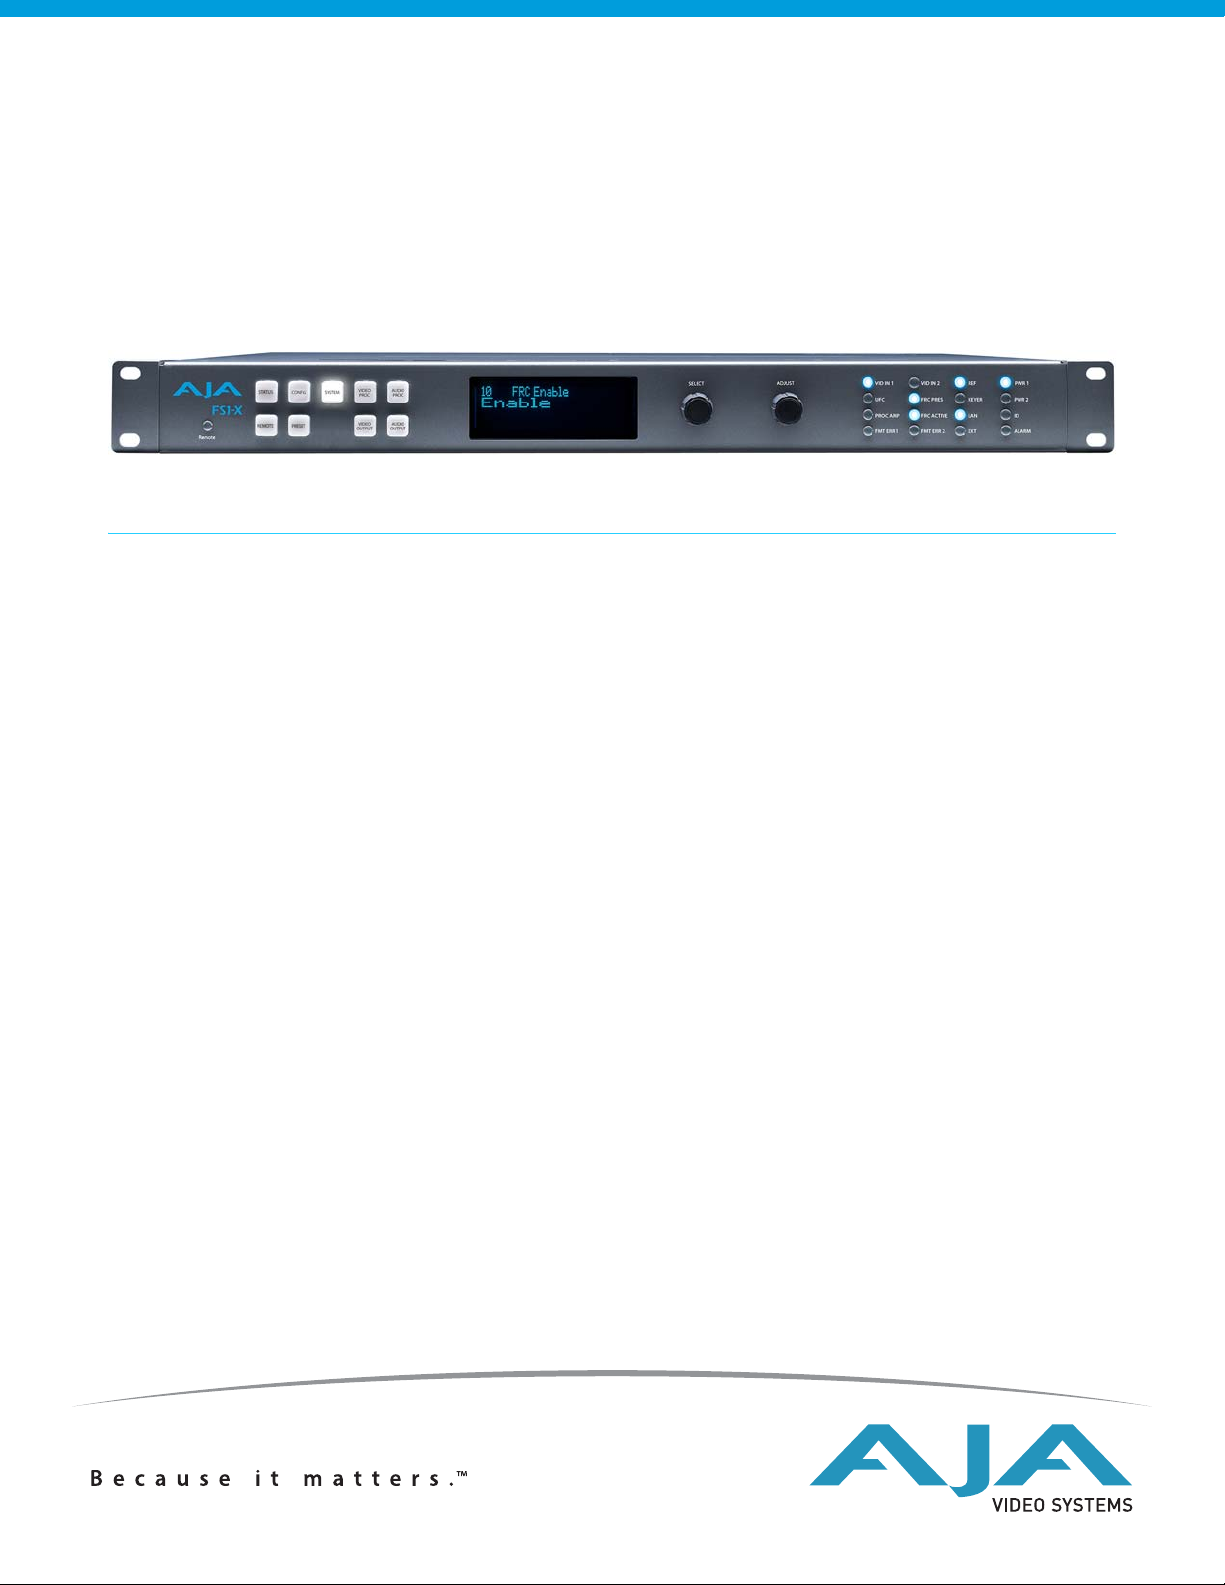
FS1-X
Quick Start Guide
Matching up and synchronizing disparate video and audio formats is a critical part of any
broadcast, mobile or post-production environment. Within its compact 1RU chassis, the
FS1-X integrates an amazing array of video and audio connectivity and processing. The
FS1-X simultaneously works with 3G/HD/SD-SDI 10-bit broadcast quality video and
incorporates embedded audio, AES, MADI, and analog audio. Utilizing AJA’s remarkable
conversion algorithms, FS1-X supports up, down and cross-conversion between SD and
HD signals for the highest quality output possible. An internal 224x224 audio matrix also
allows full routing of MADI and all audio coming from SDI, fiber, AES, HDMI and analog
sources for an incredible amount of audio processing capability in a single box.
Frame Rate Conversion
Option
Two Video Processors The FS1-X is equipped with two Video Processors. Video Processor 1 is fully featured with
Two Operating Modes The FS1-X has two modes of operation: 1 Channel mode and 2 Channel mode.
The factory-installed motion adaptive Frame Rate Converter (FRC) option enables high
quality conversions between different frame rate families for virtually unlimited
international standards support. The three video frame rate families are:
• 59.94/29.97/23.98
•50/25
•24
The standard FS1-X (without FRC) can also perform conversions, but only between frame
rates that are within the same frame rate family, using add/drop frames.
frame sync, proc amp, color correction, and other processing, and is able to receive the
FRC option. Video Processor 2 has a frame sync and can provide sidebar or letterbox
video to Video Processor 2, but does not otherwise perform any video processing.
1 Channel mode is available when the FRC option is present and enabled. In this mode,
the full range of frame rate conversions are available using Video Processor 1. Video
Processor 2 is disabled in this mode.
Version 1.0, April 23, 2014, Copyright © 2014 AJA Video Systems,
Page 2

2 Channel mode is available when the FRC is absent or has been disabled. In 2 Channel
mode frame rate conversions within the same frame rate family are supported on Video
Processor 1, and Video Processor 2 is also available for use.
FSX-1 Control The FS1-X front panel buttons and knobs control menus in the display, allowing you to
fully configure the system. Front panel LEDs report important system statuses. The FS1-X
also has an internal web server that allows remote monitoring and control of parameter
setting via an Ethernet 10/100/1000 network-attached computer running a webbrowser. Firmware updates are also performed from the web browser.
Quick Start Guide Objectives
Stand Alone Tests • "First Power Up"
Computer Setup • "FS1-X Network Setup"
Processing Examples • "SD to Sidebar HD over Matte"
The FS1-X can be extremely simple to use, because of its ability to detect incoming signal
formats and automatically apply the correct video processing for the selected output
format. However, the FS1-X is also extremely powerful and can be flexibly configured to
perform a wide variety of tasks.
This Quick Start Guide is designed to help you get your FS1-X up and running for the first
time, and confirm it is operating properly. It also provides step-by-step instructions that
demonstrate a few FS1-X signal processing examples.
• "Internal Test Signals to All Outputs"
• "HD to Letterbox SD over Video"
• "Conversion Across Frame Rate Families"
For additional information, please see the FS1-X Installation and Operation Guide available
on the AJA website and on the supplied DVD.
Installation Summary
1. Unpack the shipping box, inspect and inventory the contents, and read the late-
2. Install any optional AJA Fiber I/O modules by sliding them into the Fiber slots in the
breaking news sheet, if any.
back. Use only AJA modules.
NOTE: The “Stand Alone Tests” on page 3 can be performed with the FS1-X sitting on a bench to test
system operation before physically installing the unit.
3. Mount the physical chassis: front rack, rear rack, or deskmount—1 RU x 17.5 inches
(44.45 cm) x 16 inches (40.65 cm). Do not block air flow through the side vents.
4. Make signal I/O connections to the FS1-X back panel as shown in Figure 1 on page 3.
5. Connect one or two power cords to the FS1-X and mains AC (100-240 VAC, 50/60 Hz,
55 Watts). For redundancy, use both cords and connect them to separate branch
circuits. The FS1-X power supply is autosensing and adjusts to the available power.
6. Connect your computer to the FS1-X using a CAT5 Ethernet cable to the FS1-X RJ45
10/100/1000 Ethernet LAN connector. You can connect directly or via a network
device such as a switch, hub, bridge, etc. The FS1-X automatically senses and adjusts
to either a straight-through or crossover cable.
NOTE: See “FS1-X Network Setup” on page 5 for more detailed computer configuration instructions.
FS1-X v1.0 www.aja.com
2
Page 3
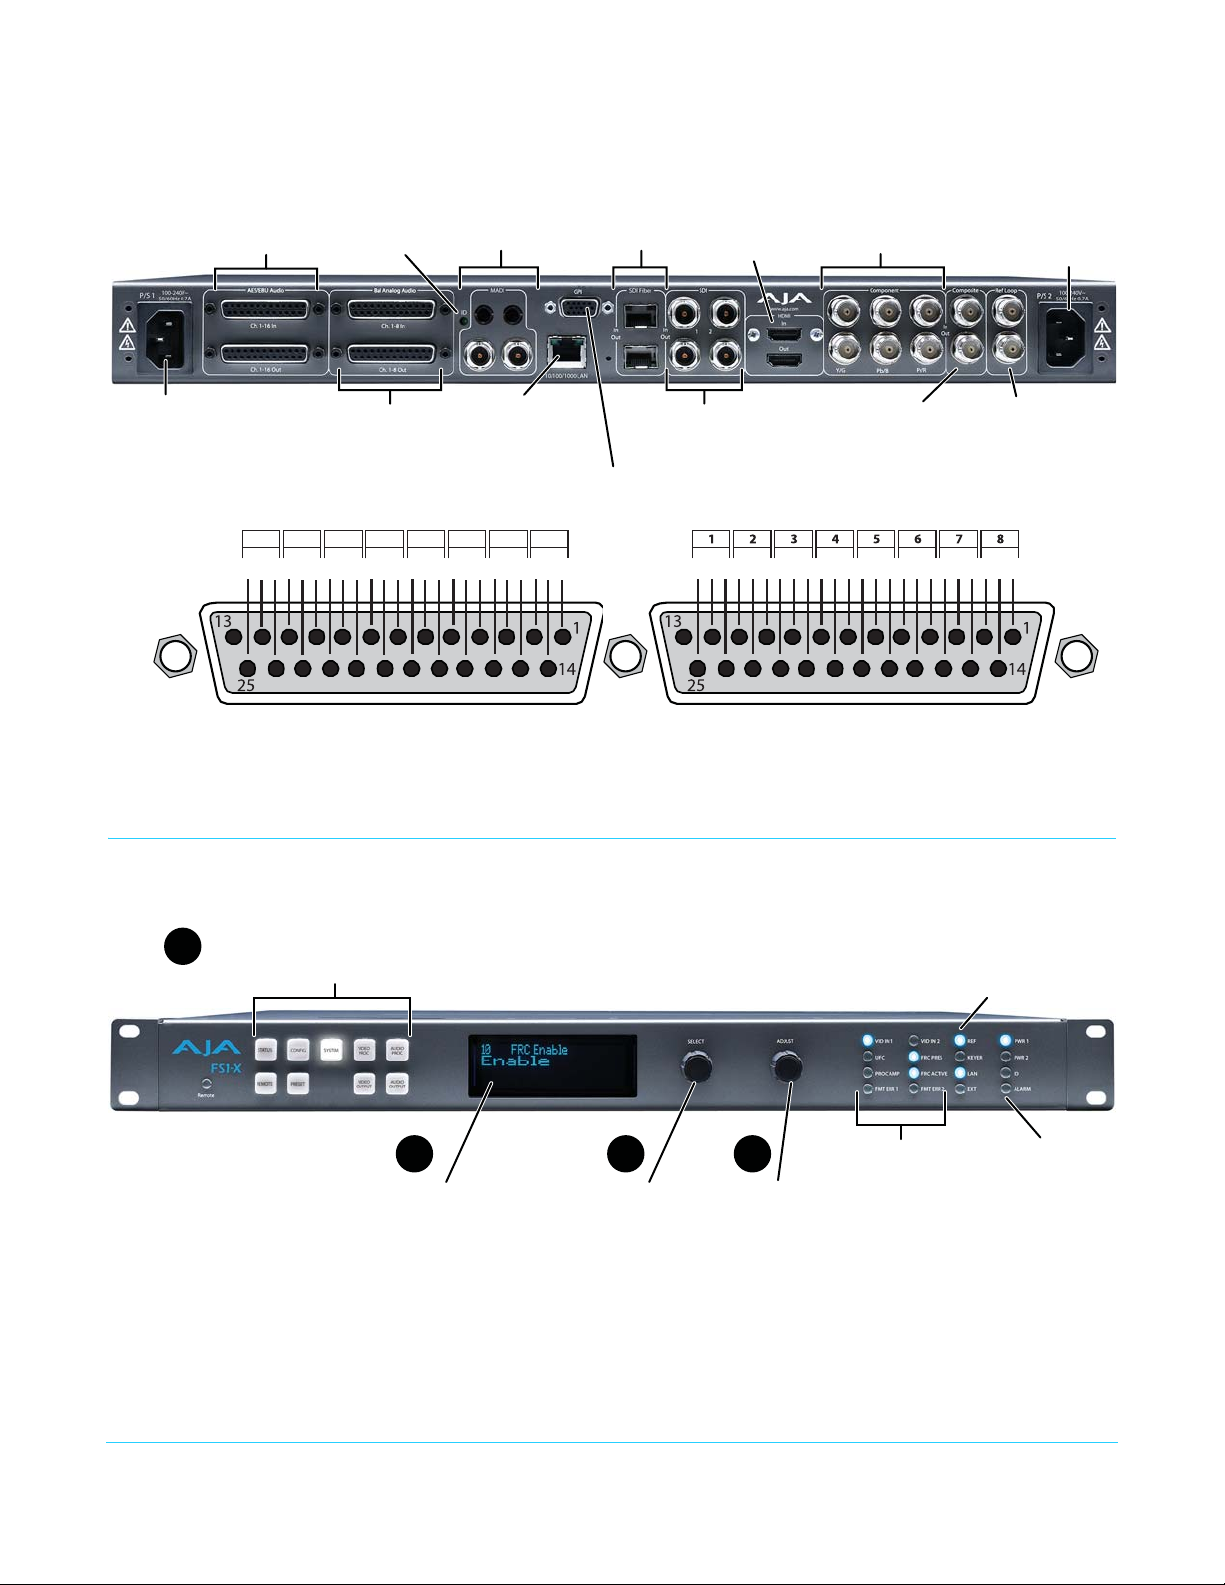
Serial Digital
In/Out BNC
(3G/SD/HD)
Composite
In/Out BNC
10/100/1000
RJ45 Ethernet
LAN Connector
GPI 15-pin
DB-15F Connector
ID
LED
External Reference
I/O with looping
BNC connectors.
AC Power
Socket #2
Autosensing
100 to 240VAC
50/60Hz
AC Power
Socket #1
Autosensing
100 to 240VAC
50/60Hz
MADI Fiber In/Out
and
MADI BNC In/Out
Component
YPbPr and RGB or
Composite
In/Out BNC
Analog Audio In/Out
Channels 1 through 8
DB-25F Connectors
(uses Tascam-style cable)
AES/EBU Digital
Audio In/Out
Channels 1 through 16
DB-25F Connectors
Serial Digital
Fiber In/Out
(3G/SD/HD)
HDMI
In/Out
GGG
15/1613/14
G
5/6
G
1/2
G
9/10 11/12
G
7/8
G
3/4
AES
Channels
G = Ground
To MUX into unbalanced AES BNC connections, use Balun 75 ohm adapter.
110 Ohm Balanced
- + - + - + - + - + - + - + - +
G - + G - + G - + G - + G - + G - + G - + G - +
Analog
Audio
G = Ground -/+ = Balanced Pair
Balanced
Activity
Indicators:
VID In 1/2
UFC, Proc Amp,
FRC Present,
FRC Active
FMT ERR 1/2
Power and
Status Indicators:
Pwr 1
Pwr 2
ID
Alarm
Alphanumeric Display:
Line 1=Parameter
Line 2=Parameter value
Line 3=Status/Legend
Line 4=Status/Legend
Select knob:
Scrolls and
selects menus;
Push to undo
changes.
Adjust knob:
Changes
selected value;
Hold down for
default value.
Menu Group Selection Buttons:
Press a button to select
a Menu Group in the display
3 4
Status Indicators:
Ref, Keyer, LAN, EXT
1
2
Figure 1. FS1-X Rear Panel
Stand Alone Tests
The stand alone tests can be performed without a computer, using the FS1-X front panel
controls and rear connections.
The following procedures assume the FS1-X is at factory defaults (taken from a newly
opened box). If not set to defaults, the FS1-X may behave differently.
FS1-X v1.0 www.aja.com
3
Page 4

First Power Up The following workflow powers up the FS1-X and demonstrates some example alarms.
Setup • Ensure the FS1-X is completely disconnected (all video, audio, network, and power
connector ports are empty).
Procedure 1. Connect both FS1-X power cords to mains AC and allow time for the unit to boot up.
Observe the front panel LEDs.
• If the FRC PRES LED lights blue, your FS1-X is equipped with the FRC option and is
able to operate in either 1
can only operate in 2
• The ALARM LED will light red, indicating an alarm condition, and the REF LED will
be off. By default the F1-X is configured to operate genlocked to an external
reference signal.
2. Press the front panel STATUS button, then turn the SELECT knob to view various
Status menus.
• The Status menus will report No Input for the Video Processor video inputs (the
ports are disconnected), and the GEN (Genlock) parameter will report Ref
(configured for external reference) but will also report No Input or No Ref.
Channel or 2 Channel Mode. If this LED is off, your unit
Channel mode.
Vid 1 Format Status screen Vid 1 Format Alarm Status screen
IN1 SDI 1 No Input
BKGD Black
GEN Ref No Input
OUT1 525i59
3. Connect a 525i color black reference signal to one of the FS1-X Ref Loop BNCs.
• The front panel ALARM LED will go off and the REF LED will light blue, indicating
no alarm exists and the FS1-X is genlocked to an external reference signal.
•The Status menu GEN parameters will report Ref and indicate the format of the
incoming reference signal or OK.
Vid 1 Format Status screen Vid 1 Format Alarm Status screen
IN1 SDI 1 No Input
BKGD Black
GEN Ref 525i59
OUT1 525i59
NOTE: If you connect a 625i25 frame rate color black reference signal, the alarm condition above
persists because the default FS1-X output frame rate setting is 29.97/59.94. To clear this alarm
when using 625i25 reference, press the SYSTEM button, turn the SELECT knob to 9 Output
Frame Rates, and turn the ADJUST knob to choose 50/25.
4. Disconnect one of the power cords, leaving the other attached.
• The ALARM LED will light red, and the PWR LED of the power supply with the
removed cord will turn off.
5. Reconnect the power cable. The ALARM LED will turn off and the PWR LED will light.
IN1 SDI 1 OK
BKGD Black
GEN Ref No Ref
OUT1 525i59
IN1 SDI 1 OK
BKGD Black
GEN Ref OK
OUT1 525i59
This workflow confirms the FS1-X powers up successfully and reports reference and
power supply alarms.
NOTE: FS1-X Reference, Power Supply, and Video Format alarms can be disabled, if desired,
FS1-X v1.0 www.aja.com
4
Page 5

Internal Test Signals to All Outputs
Setup • Connect the FS1-X HDMI output connector to an HDMI display equipped with audio
Procedure 1. Press the VIDEO PROC button.
This workflow generates bars and tone and sends them to all the FS1-X outputs. This
example uses the HDMI output connector for convenient monitoring, but any output can
be used for that purpose. In the following procedures, where the terms select and adjust
are used, turn the front panel SELECT and ADJUST knobs.
monitoring using a standard HDMI cable.
•Select 3 Vid 1 Output Mode, and adjust to Test Pattern.
•Select 21 Vid 1 Test Pattern and adjust to 75% Bars.
2. Press the VIDEO OUTPUT button.
•Select 1.2 SDI2 Video Out and adjust to Vid 1.
•Select 2.2 Fiber2 Video Out and adjust to Vid 1.
•Select 3 HDMI Video Out and adjust to Vid 1.
3. Press the AUDIO OUTPUT button.
•Select 11 Global Audio Out and adjust to Sig Gen 1KHz.
You should now be able to see and hear the test signals on the HDMI display, and on
any other devices connected to the FS1-X outputs.
This workflow confirms the FS1-X generates and outputs video and audio.
FS1-X Network Setup
The following instructions summarizes ways to configure the FS1-X to communicate with
a computer directly or over a network.
Networking Using DHCP or Default Static IP
The FS1-X factory default configuration automatically looks for a DHCP server to issue an
IP address. If your network includes a DHCP server, plug the FS1-X into the network and
connect with the FS1-X as follows:
1. Press the CONFIG button.
2. Turn the SELECT knob to navigate to config parameter 2.2. Note on a piece of paper
3. With your laptop or desktop computer connected to the same LAN as the FS1-X and
If the FS1-X cannot get an address from the network DHCP server, the FS1-X will
automatically use a preset factory static IP address of 192.168.0.2. You can access the
FS1-X using the default static address as follows:
1. Set your computer's IP address to whatever address you prefer.
2. Set the computer’s Subnet mask to 255.255.255.0 (most PCs default to the proper
3. Set the gateway address, if used, to match the FS1-X default: 192.168.0.1.
the DHCP-supplied IP address shown.
DHCP enabled, type the IP address you noted into the browser address field and
press Enter. You should now see the FS1-X’s browser Status screen.
netmask when the address is set).
Alternatively, change the FS1-X gateway address to match your gateway:
A. Press CONFIG, turn SELECT to 2.4 Default Gateway, push and then turn ADJUST to
change the first group of digits.
FS1-X v1.0 www.aja.com
5
Page 6

B. Turn SELECT to advance to the next set of numbers, and turn ADJUST to set these
numbers.
C. Continue using SELECT and ADJUST to set the full address.
D. When finished, push ADJUST momentarily to save the address.
4. Run a browser on the computer and type “192.168.0.2” (the factory static IP address).
You should now see the FS1-X’s browser status screen.
Networking the FS1-X Using Your Own Static IP
Web Browser Menu Summary
If you don’t want to use DHCP or the default static IP address, you can set your own static
IP address:
1. Select the CONFIG button and use the SELECT knob to navigate to parameter 2.1 IP
CONFIG. Use the ADJUST knob to select Static.
2. Turn SELECT to navigate to parameter 2.2 IP ADDRESS. The display shows the default
static IP address: 192.168.0.2.
3. Change the IP address as follows.
A. Push the ADJUST knob momentarily so that the first octet (set of numbers) blinks,
and then turn ADJUST to change the numbers.
B. Turn SELECT to advance to the next set of numbers, and turn ADJUST to set these
numbers.
C. Continue using SELECT and ADJUST to set the full address.
D. When finished, push ADJUST momentarily to save the address.
4. Turn SELECT to advance to 2.3 Subnet Mask. Use the SELECT and ADJUST knobs as in
the previous step to set the desired subnet mask.
5. Turn SELECT to advance to 2.4 Default Gateway. Use the SELECT and ADJUST knobs as
in the previous step to set the desired gateway address.
6. Run a browser on the computer and type in the IP address you set for the FS1-X. You
should now see the FS1-X’s Status screen.
Figure 2 on page 7 summarize web browser menu operation. The settings generally
correspond to the front panel display parameters, providing you two methods of
controlling the FS1-X. To see the equivalent front panel display parameter number, hover
the cursor over a setting.
Drop Down Parameter
Operation
Slider Operation Some screens contain slider controls for setting values. To set a value, you can click on a
Sub-Menus Some parameters, when activated, open sub-menus. The sub-menus are a lighter gray
FS1-X v1.0 www.aja.com
Most FS1-X parameters available on the browser are selected from a drop-down list. The
currently active parameter is displayed. Click on the down arrow symbol next to the
parameter to display the list and select an alternative value. The FS1-X will immediately
operate with the new setting.
slider to select it and then use the mouse to drag the slider to the position you desire. For
fine tuning, while the slider is selected (highlighted by a blue border), use the keyboard
left and right arrow keys to change the value one unit at a time. After setting a slider's
position, click on the page's background area (blue highlight turns off) to ensure the
change is confirmed and saved.
color and have a collapse/expand button on the parent selection. This lets you collapse
the sub-menus to make it easier to configure the system. The collapsed setting only stays
in effect until the user reconnects or refreshes the browser.
6
Page 7

Figure 2. FS1-X Web Interface, Main Status Screen
Menu of FS1-X
Screens:
Click a screen’s
name to display
that screen.
FS1-X Status and Menu Display Area
FS1-X Alarms
System Info
FS1-X Systems
on the network
FS1-X Processing Examples
SD to Sidebar HD over Matte
Setup • Ensure the FS1-X is receiving a valid reference signal.
NOTE: The FS1-X factory default setting routes the output of Video Processor 1 to the SDI1, Fiber 1,
In the following procedures, your exact actions depend on which FS1-X interface you are
using. Where the terms MENU NAME, select and adjust are used:
• On the front panel interface, press the indicated Menu Group Selection button and
then turn the SELECT and ADJUST knobs to choose the parameter and change the
setting. The Front Panel menu numbers are included in the procedures.
• On the web browser interface, use your mouse to select the name of the Menu Screen
and then choose the parameter and setting using the drop down list or slider. Menu
numbers are not present on the FS1-X web pages.
The following workflow demonstrates converting an SD SDI input to an HD SDI output
with a matte sidebar background. If the input, reference, and output signal formats are all
in the same frame rate family, this processing can be performed with or without the FRC
option. This example uses a 525i59.94 input and generates a 1080i59.94 output.
• Connect a 525i59.94 SD SDI signal to the SDI1 input on the rear of the FS1-X. Once
connected the FS1-X front panel VID IN 1 LED will light.
• Connect the FS1-X HDMI output connector to a compatible HDMI display.
• Connect the FS1-X SDI1 video output connector to a compatible monitor.
HDMI, and Analog Video output connectors. All these outputs are active simultaneously.
FS1-X v1.0 www.aja.com
Procedure 1. SYSTEM menu:
•Select 8 Genlock Source, and adjust to Reference.
•Select 9 Output Frame Rates, and adjust to 59.94/23.98.
2. VIDEO OUTPUT menu:
•Select 1.1 SDI 1 Video Out, and adjust to Video Proc 1.
•Select 3 HDMI Video Out and adjust to Video Proc 1.
7
Page 8

3. VIDEO PROC menu:
•Select 1.1 Video Input, and adjust to SDI 1.
•Select 2 Video Output Format, and adjust to 1080i59.94.
•Select 3 Vid 1 Output Mode and adjust to Normal.
•Select 6 Background Fill and adjust to Matte.
•Select 7 Upconvert Mode and adjust to 4x3 Pillar.
You should now see the processed sidebar image on the SDI and HDMI monitors.
Main
Video
Matte
Sidebars
•Select 11.3 Matte Hue and adjust to different degree settings. You should see the
sidebar color hue change as you adjust.
This workflow confirms the FS1-X upconverts incoming video with matting.
HD to Letterbox SD over Video
Setup • Connect a10801i59.94 HD SDI signal to the SDI1 input on the rear of the FS1-X. This
Procedure 1. PRESET menu:
The following workflow recalls the FS1-X to factory preset, downconverts a 1080i SDI
input to 525i SDI letterbox, keys the letterbox over a second 525i SDI video input, and
displays the result on the FS1-X Composite video output. This processing requires
2
Channel mode.
signal will be downconverted and letterboxed.
• Connect a 525i59.94 SD SDI signal to the SDI2 input on the rear of the FS1-X. This signal
will be the background.
• Ensure the FS1-X is receiving a valid reference signal compatible with the SDI2 input.
• Connect the FS1-X Composite video output to an analog video monitor.
•Select 1.0 Factory Preset and recall that preset.
• Front panel interface: Push in the ADJUST knob momentarily.
• Web page interface: Select Factory Preset Recall.
This recall sets the following default values for this procedure:
• SYSTEM 1.1 Vid 1 Input is set to SDI 1
• SYSTEM 1.2 Vid 2 Input is set to SDI 2
• SYSTEM 3 Vid 1 Output Mode is set to Normal
• VIDEO OUTPUT 4 Analog is set to Vid 1.
2. If the FRC option is present, go to the SYSTEM menu:
•Select 10 FRC Enable and adjust to Disable (this sets 2 Channel mode). This menu is
not available on FS1-X units lacking the FRC option.
3. VIDEO PROC menu:
•Select 2 Video Output Format, and adjust to 525i59.94.
•Select 6 Background Fill, and adjust to Vid 2.
FS1-X v1.0 www.aja.com
8
Page 9

•Select 8 Downconvert Mode, and adjust to Letterbox.
NOTE: The H and V Output Timing settings of both Video Processor 1 and 2 must also be identical.
The factory Preset recalls 0 values.
Main
Video
This workflow confirms the FS1-X downconverts incoming video to letterbox, and can
key over another incoming video signal.
Letterbox
Video
Conversion Across Frame Rate Families
Setup • Ensure the FRC is installed. The front panel FRC PRES LED must be lighted blue. The
Procedure 1. SYSTEM menu:
The following workflow converts a 1080i59.94 SDI input to 1080i50 SDI output, using the
optional FRC. This processing requires 1
rate conversion with and without the FRC option is demonstrated.
FS1-X Status web page FRC Option setting must read Present. The web page may also
report Disabled, which is the FRC’s normal state when it is not actively converting video.
• Ensure the FS1-X is using a valid reference. For this example, if an external reference
signal is used for genlock it must be 50 Hz to match the frame rate converted output.
Alternatively the FS1-X can be set to Free Run.
• Connect a10801i59.94 HD SDI signal to the SDI1 input on the rear of the FS1-X. This
signal must be moving video (not a static test pattern) to properly demonstrate frame
rate conversion.
• Connect the FS1-X SDI1 video output connector to a compatible monitor.
•Select 8 Genlock Source.
• If your external genlock signal is 50 Hz, adjust to Reference.
• Otherwise select Free Run.
•Select 9 Output Frame Rates, and adjust to 50/25.
•Select 10 FRC Enable and adjust to Enable (this sets 1 Channel mode). The FRC
ACTIVE LED will light blue because it is converting 59.94 Hz video to 50 Hz.
2. Observe the monitor. Motion will be completely smooth without momentary jumps
or discontinuities, and the FS1-X will not report any alarms.
Channel mode operation. In this example frame
To demonstrate non FRC operation and alarms, do the following:
3. SYSTEM menu:
•Select 10 FRC Enable and adjust to Disable. The FRC ACTIVE LED will go off and the
ALARM LED will light red, because this conversion requires the FRC. FS1-X status
reporting will be as shown below:
FS1-X v1.0 www.aja.com
9
Page 10

.
Vid 1 Format Status screen Vid 1 Format Alarm Status screen
IN1 SDI 1 1080i59.94
BKGD Black
GEN Ref 1080i50
OUT1 1080i50
IN1 SDI 1 incompat
BKGD Black OK
GEN Ref OK
OUT1 1080i50
Figure 3. FRC Option Present and Disabled Alarm Condition
4. Observe the monitor. Motion will have momentary jumps, because the FS1-X is
converting with add/drop frames instead of using the FRC.
5. SYSTEM menu:
•Select 10 FRC Enable and adjust to Enable (this restores FRC operation).
Vid 1 Format Status screen (same) Vid 1 Format Alarm Status screen
IN1 SDI 1 1080i59.94
BKGD Black
GEN Ref 1080i50
OUT1 1080i50
IN1 SDI 1 OK
BKGD Black OK
GEN Ref OK
OUT1 1080i50
Figure 4. FRC Option Present and Active with No Alarm
This workflow confirms an FS1-X equipped with the FRC option can frame rate convert
between frame rate families.
FS1-X v1.0 www.aja.com
10
 Loading...