

Page 1

GPRS PC Card Modem
WPG-1500
Page 2

Table of Contents
INTRODUCTION............................................. 1
FEATURES ........................................................ 2
INSTALLATION............................................ 3
Install the Device,Driver & Utility ... 3
MOBILE PHONETOOLS ................................... 30
Enter the PIN Number....................... 30
Mobile PhoneTools Main Window ...31
Mobile PhoneTools Functions Panel.33
Configure Mobile PhoneTools .......... 35
Main Phone Features......................... 37
GPRS Connection ................... 39
SMS ........................................ 47
E-mail ..................................... 52
Fax .............................................. 57
Phonebook................................ 64
SPECIFICATIONS.........................................68
Page 3

INTRODUCTION
GPRS is a new wireless technology standard,
which improves the data service that can be
added to GSM-based personal communications
service network and enable interoperability
between the Internet and the GSM network.
The GPRS Wireless PC Card is a tri-band Type
II card that lets you connect your notebook to
GSM and GPRS network. It sends and receives
data via mobile telephone networks, so it allows
you to take full advantage to access to your
corporate network, e-mail, and the Internet
worldwide.
Plus, with the network installation simplicity and
flexibility, you can eliminate the need to pull
cable through walls and ceilings and allow the
network to go where wires cannot go.
The GPRS Wireless PC Card is the perfect
solution to connect if you work offsite, visit
customers, or travel.
-
1 -
Page 4

Features
Provides data connectivity at speeds of up to
85.6kpbs.
GPRS/GSM over-air security with built-in
authentication and encryption making it one
of the most secure public wireless systems in
the world.
Uses GPRS/GSM wireless system to connect
your notebook computer to your network or
the Internet.
Supports PC Card hot swap and true Plug &
Play.
Freedom to roam while staying connected
Supports Window 98/2000/ME/XP,
PPC2000, and PPC2002
Lower power consumption
Easy to install and configure
-
2 -
Page 5
INSTALLATION
IInnssttaallll tthhee DDeevviiccee,,DDrriivveerr && UUttiilliittyy
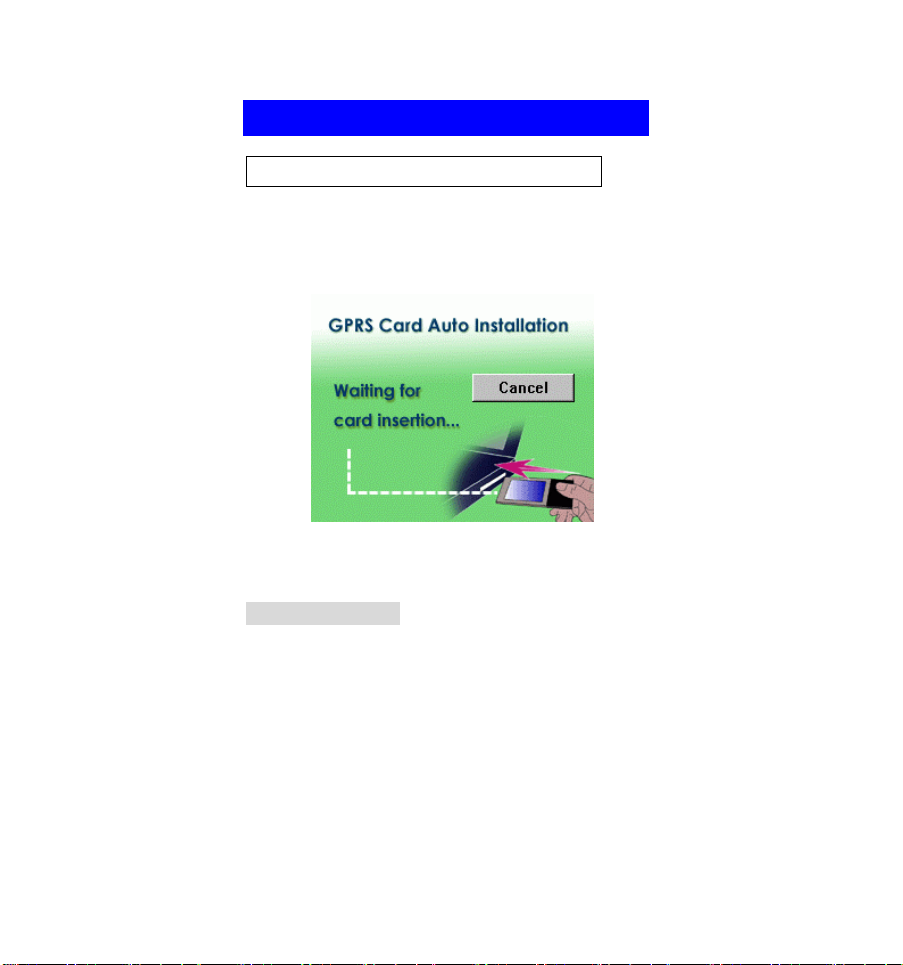
1. Put the supplied CD into the CD-ROM drive ,
then the screen will prompt you to insert the
PC card.
2. Place the SIM card into the card slot of the
PC card and insert the PC card into the
CardBus slot.
For Windows 98
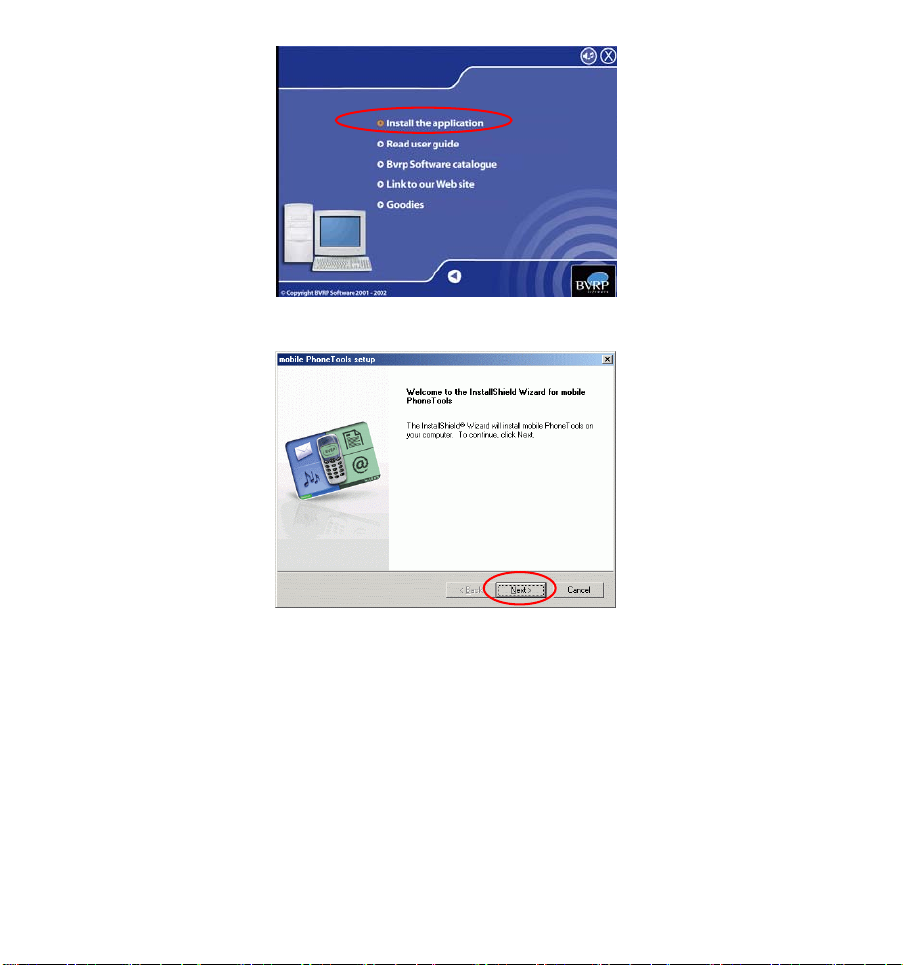
1. Select the language you need.
-
3 -
Page 6
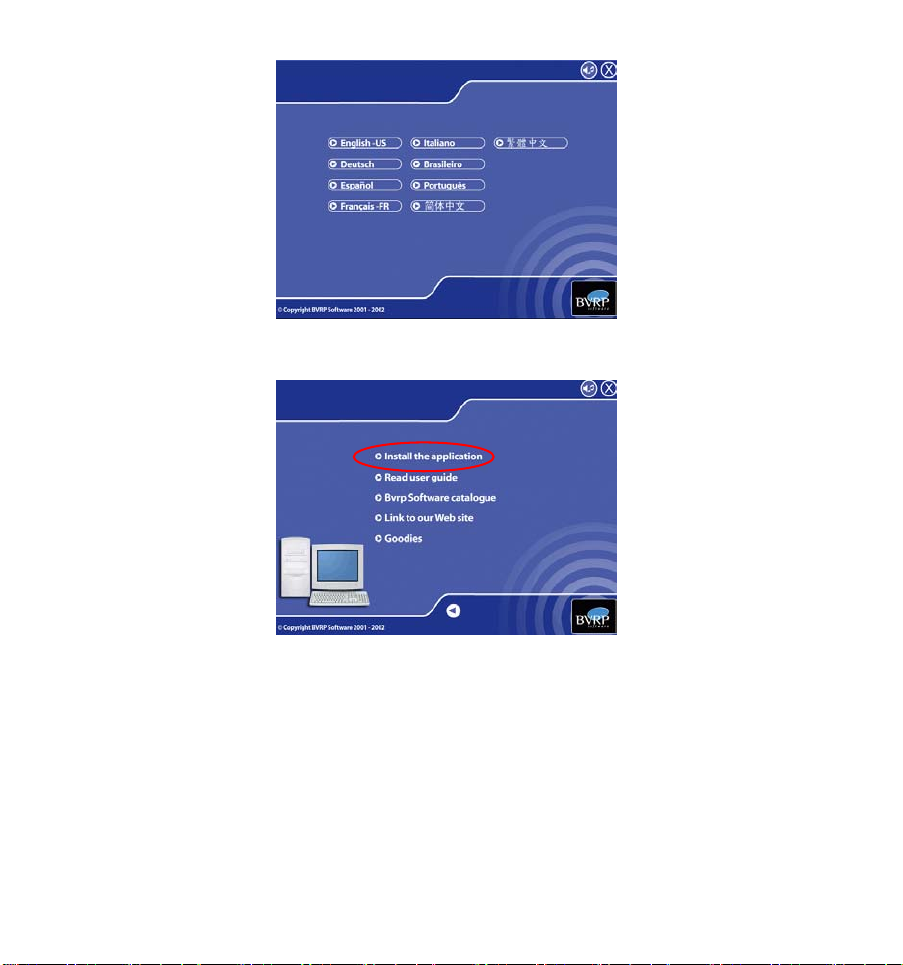
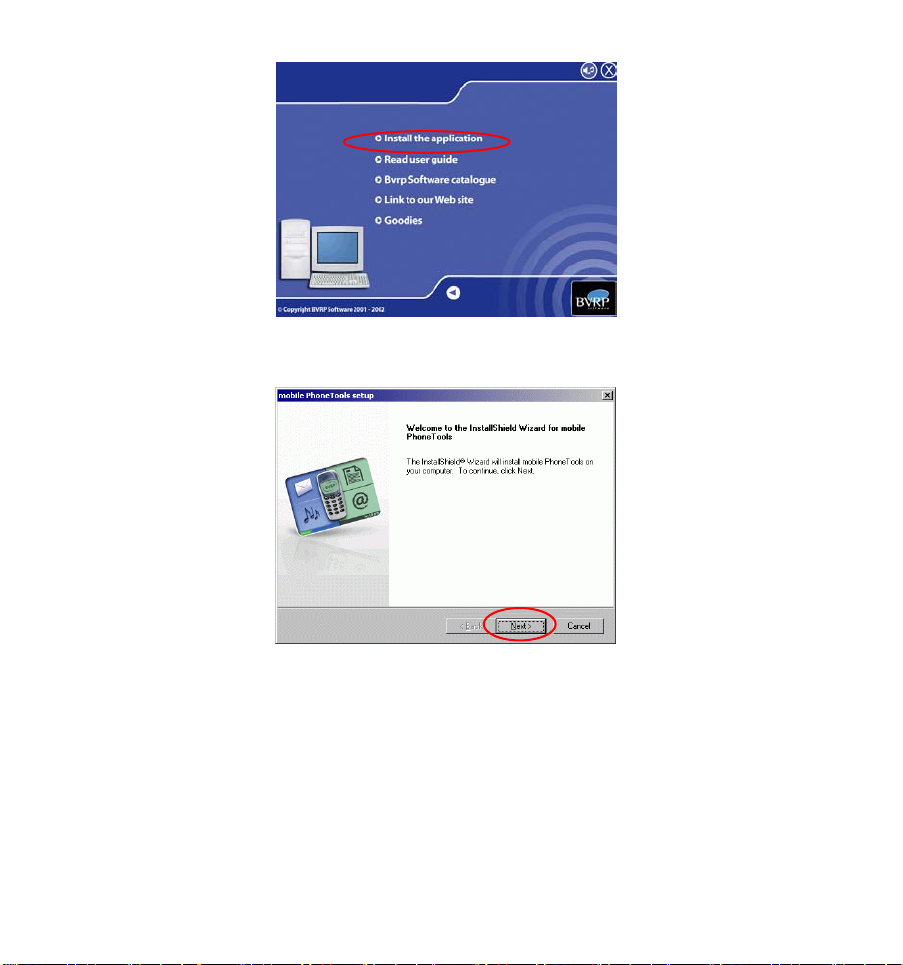
2. Select Install the application.
3. Click Next.
-
4 -
Page 7

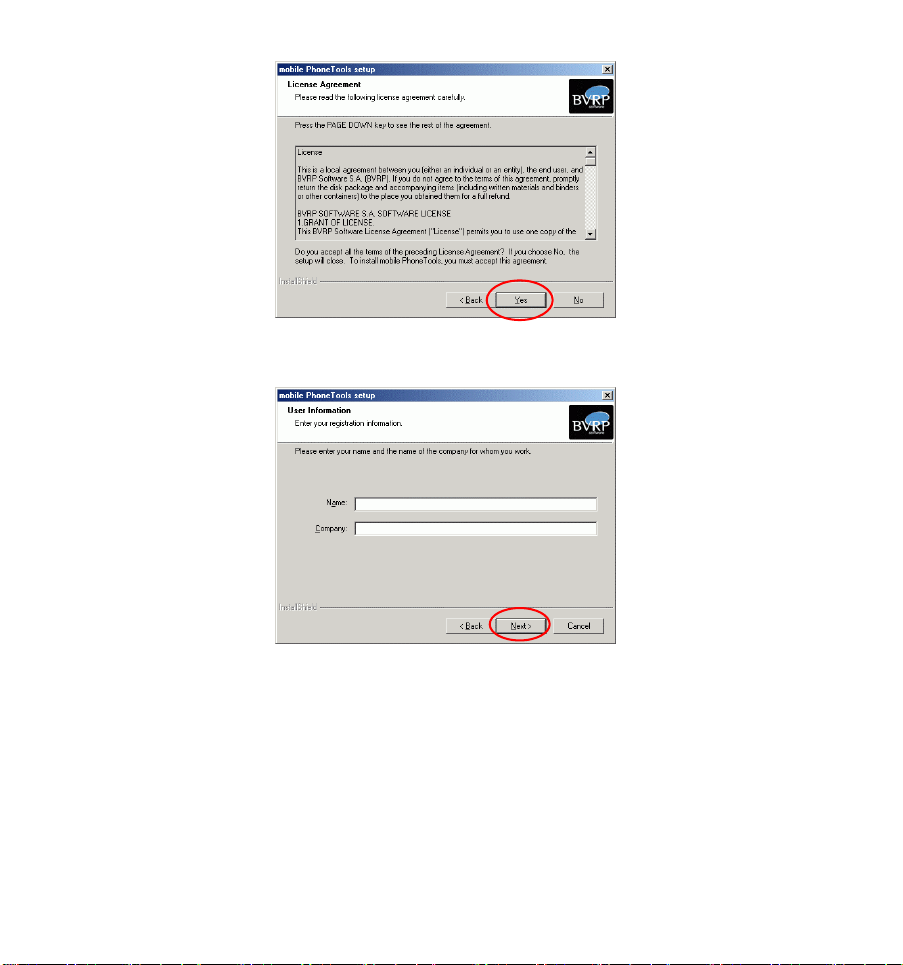
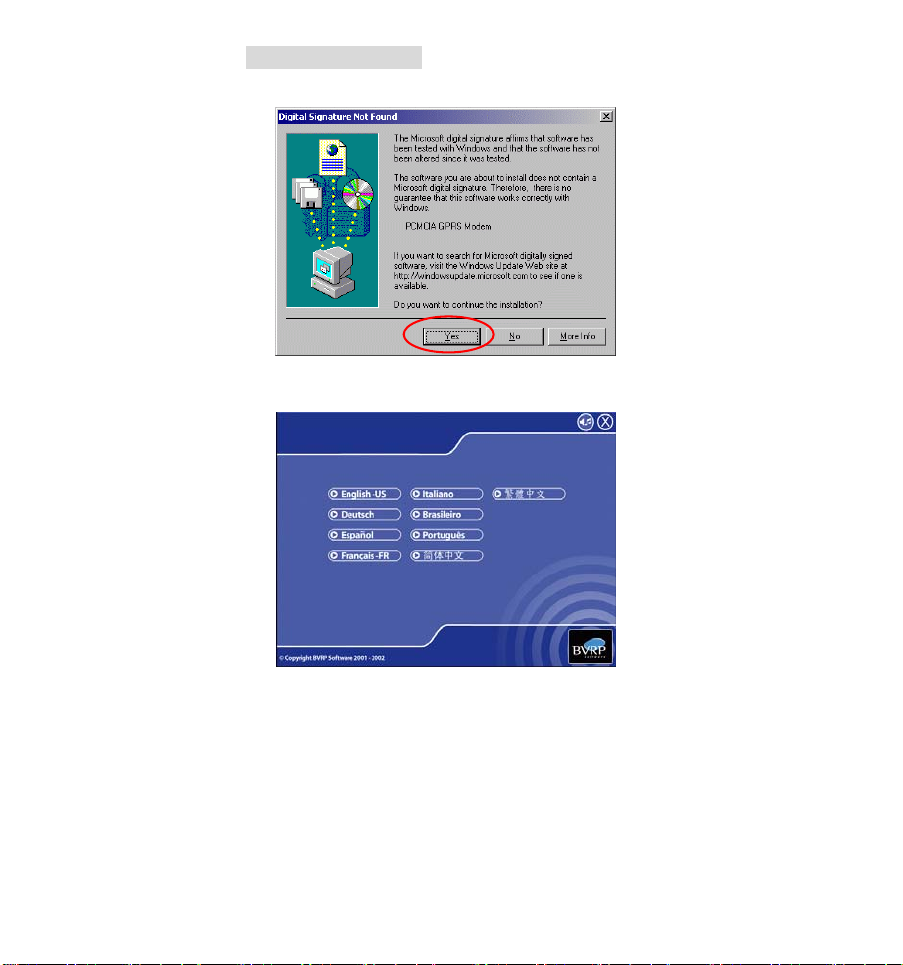
4. Click Yes.
5. Click Next.
-
5 -
Page 8
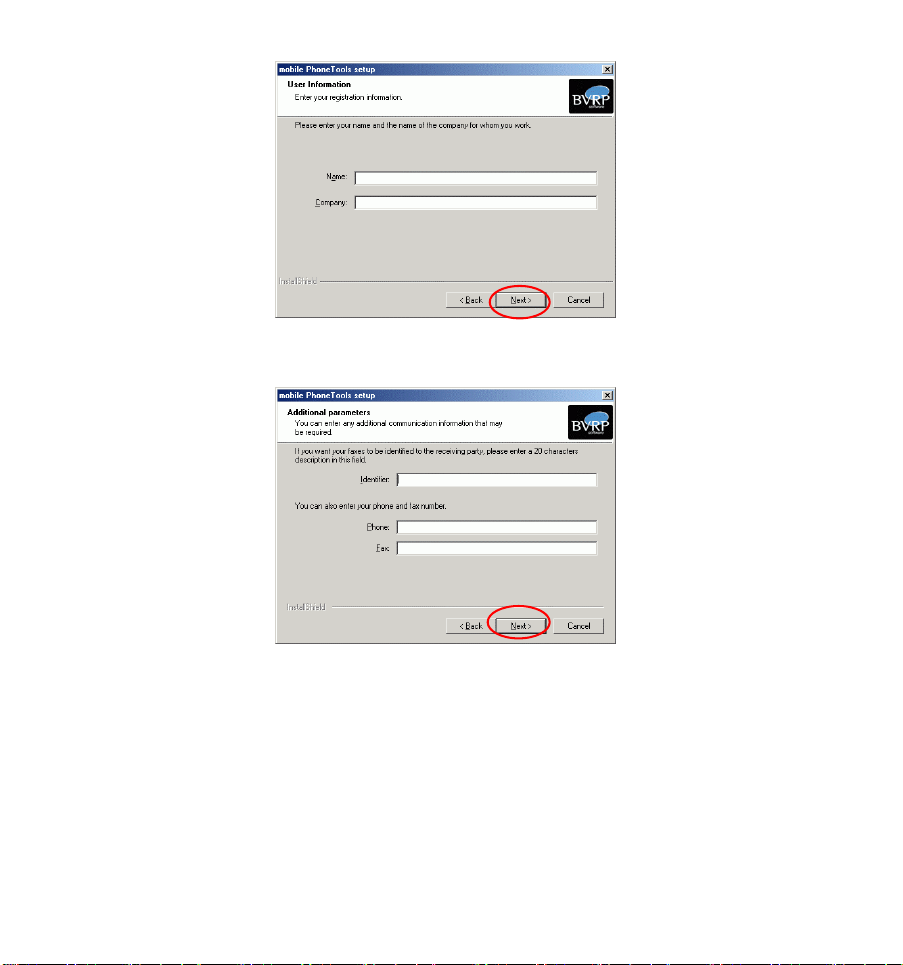
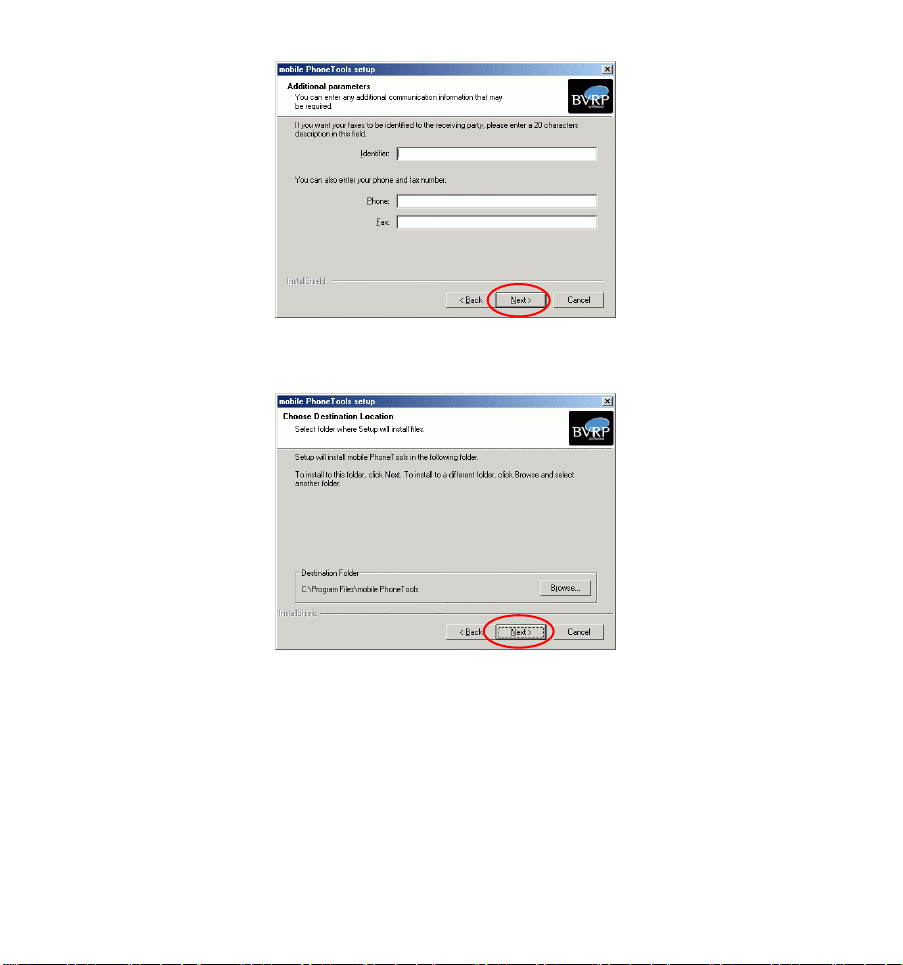
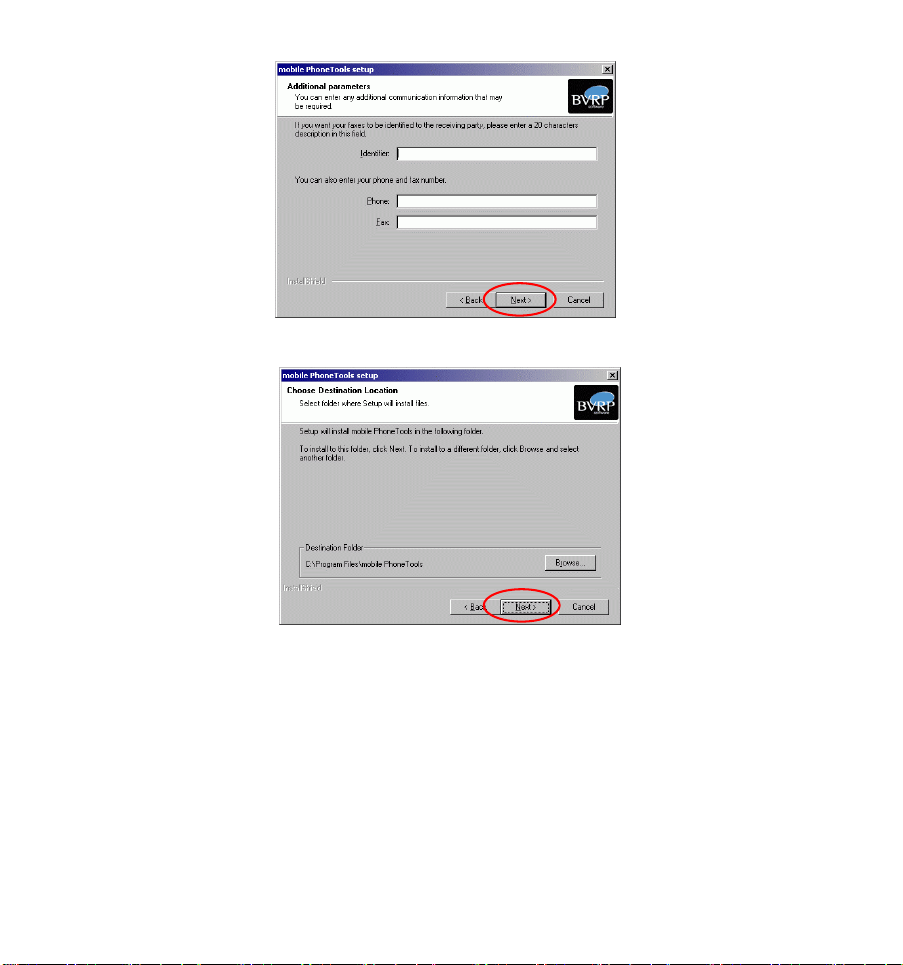
6. Click Next.
7. Click Next.
-
6 -
Page 9

8. Click Next.
9. Click Next.
-
7 -
Page 10

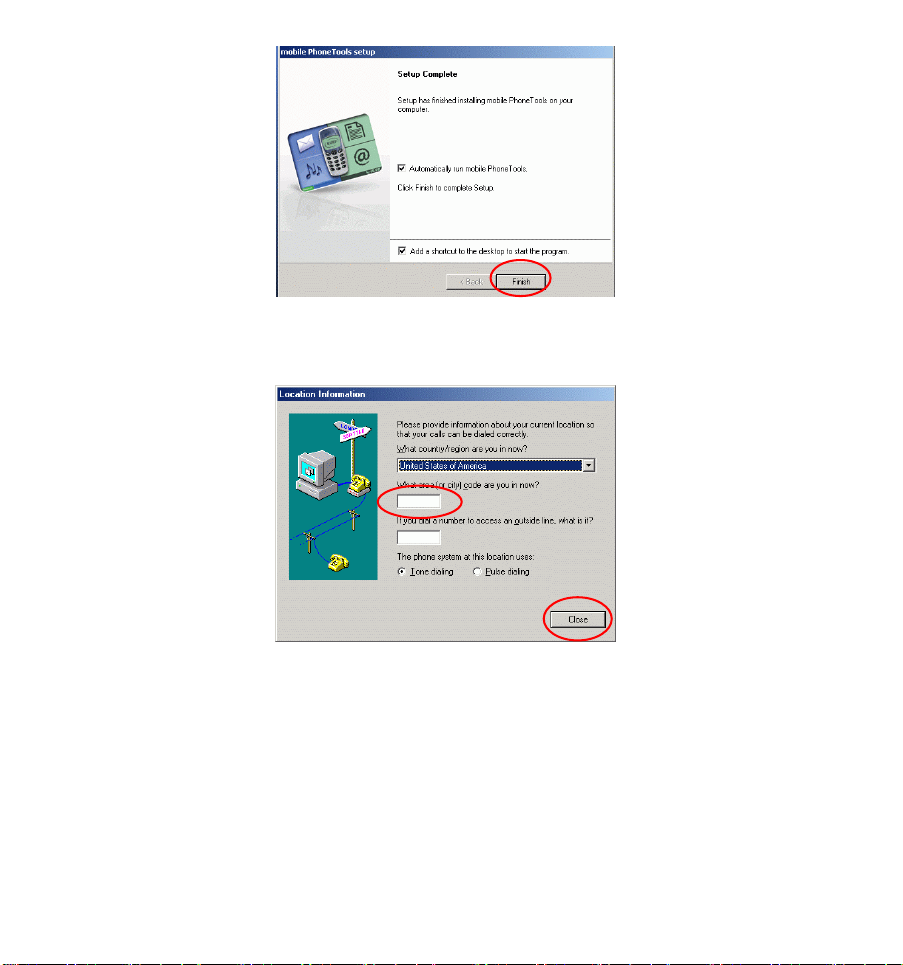
10. Select Yes, I want to restart my computer
now and click Finish.
11. Enter the area code you are in now and
click Close.
-
8 -
Page 11
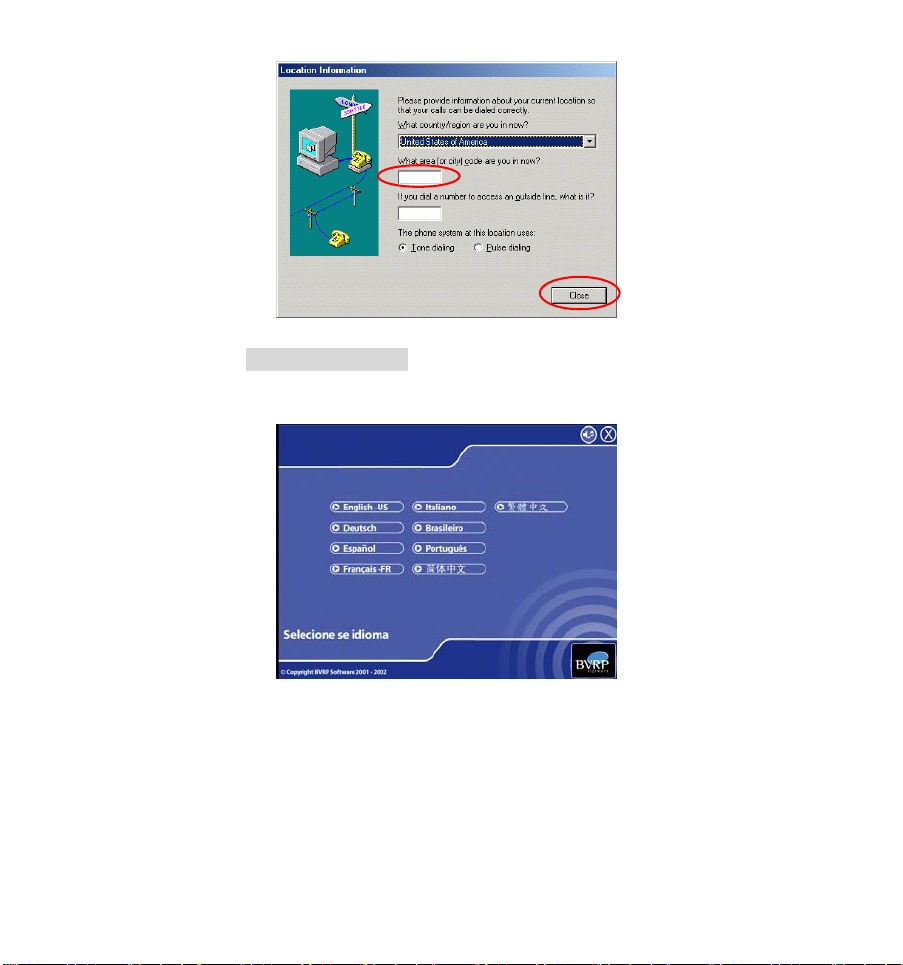
For Windows ME
1. Select the language you need.
2. Select install the application.
-
9 -
Page 12
3. Click Next.
4. Click Yes.
-
10 -
Page 13
5. Click Next.
6. Click Next.
-
11 -
Page 14
7. Click Next.
8. Click Next.
-
12 -
Page 15

9. Click Next.
10. Click Finish.
-
13 -
Page 16
11. Enter the area code you are in and click
Close to continue.
-
14 -
Page 17
For Windows 2000
1. Click Yes to continue
2. Select the language you need.
3. Sleect Install the application.
-
15 -
Page 18
4. Click Next.
5. Click Yes.
-
16 -
Page 19

6. Click Next
7. Click Next.
-
17 -
Page 20
8. Click Next.
9. Click Next.
-
18 -
Page 21

10. Click Next.
11. Click Fnish to complete the setup
-
19 -
Page 22
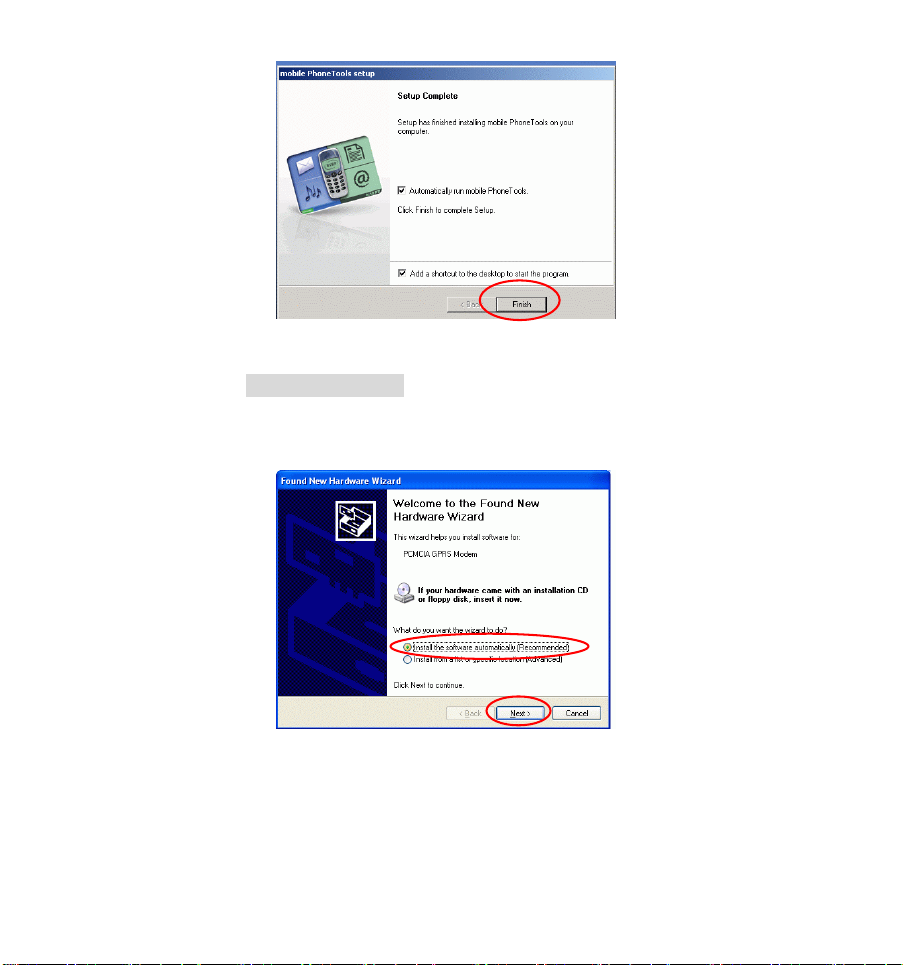
For Windows XP
1. Select Install the software automatically
(recommended), and click Next.
-
20 -
Page 23

3. Click Next
4. Click Continue Anyway.
5. Click Finish.
-
21 -
Page 24

6. Select the language you need.
7. Select Install the application.
-
22 -
Page 25

8. Click Next.
9. Click Yes.
-
23 -
Page 26

10. Click Next
11. Click Next.
-
24 -
Page 27

12. Click Next.
13. Click Next.
-
25 -
Page 28

14. Click Next.
15. Click Finish.
-
26 -
Page 29

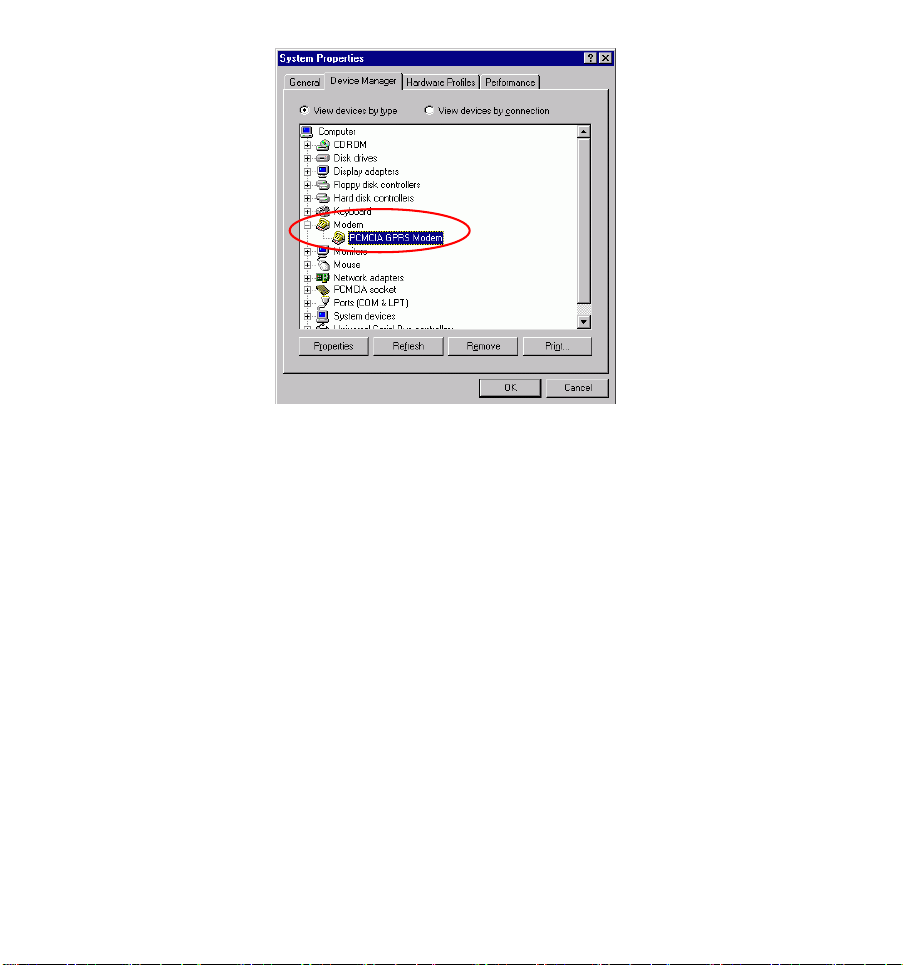
Verify
To verify if the device exists in your computer
and is enabled, go to Start Settings
Control Panel System ( Hardware)
Device Manager.
For Windows 98/ME
Expand the Modem category. If the PCMCIA
GPRS Modem is listed here, it means that your
device is properly installed and enabled.
-
27 -
Page 30
For Windows 2000/XP
Expand the Modem category. If the PCMCIA
GPRS Modem is listed here, it means that your
device is properly installed and enabled.
-
28 -
Page 31

-
29 -
Page 32

Mobile PhoneTools
Note:
The program does NOT support standby mode
under GPRS connection.
To prevent from any unexpected errors, do NOT
eject the GPRS PC Card Modem before closing the
Mobile PhoneTools window.
EEnntteerr tthhee PPIINN NNuummbbeerr
If you have enabled the PIN function, the system
may prompt you to enter your PIN. Enter the PIN
number then click OK.
-
30 -
Page 33

MMoobbiillee PPhhoonneeTToooollss MMaaiinn WWiinnddooww
With mobile PhoneTools you can share the
information contained in your cell phone with
your computer. Once your cell phone is
connected to your computer, the following
operations can be easily processed: place and
receive calls; send and receive faxes, e-mails, and
SMS; launch a GPRS session.
-
31 -
Page 34

-
32 -
Page 35

MMoobbiillee PPhhoonneeTToooollss FFuunnccttiioonnss PPaanneell
Icon Description
Click to launch or end the default
GPRS connection.
Click to open the Send Message
window to write and send SMS
messages.
Click to open the Send E-mail window.
Click to open the Send Fax window.
-
33 -
Page 36

Clcik to Open phonebook..
Click to synchronize phonebook and
SIM card memory
Click to show communication
information.
-
34 -
Page 37

CCoonnffiigguurree MMoobbiillee PPhhoonneeTToooollss
Now that your system has been correctly installed,
it is recommended that you configure your
mobile PhoneTools.
Access the General Configuration Window
1. In the mobile PhoneTools main window, you
can either press F6 on your keyboard or
click the Menu button.
2. If you choose to click the Menu button, in
the menu displayed, select Setup and then
General Setup.
The General Configuration dialog box appears:
3. Set the appropriate parameters in the various
tabs:
-
35 -
Page 38

• Customize :enter your personal data.
• Fax To select your fax reception/transmission
options.
• Communication:set up your communication
functions.
• Location : set up the dialing properties.
• E-mail : configure your e-mail accounts.
• Internet : indicate whether you are using a
LAN (through a local network) or a dial-up
connection (with a modem).
4. Click OK.
-
36 -
Page 39

MMaaiinn PPhhoonnee FFeeaattuurreess
Access the Inbox and the Outbox Windows
1. In the mobile PhoneTools main window,
click the Menu button.
2. In the menu displayed:
• Select Send then Outbox (or press F3 on
your keyboard).
• Select Reception then Inbox (or press F4 on
your keyboard).
These windows also give you access to Pending
emails, Finished transmissions, and Failed
transmissions (SMS, e-mails, faxes).
View Logbooks
1. In the mobile PhoneTools main window,
click the Menu button.
2. In the menu displayed:
• Select Send then Logbook (or press F8 on
your keyboard) to view Transmission Log
Book.
• Select Reception then Logbook (or press F9
on your keyboard) to view Reception
logbook.
View Modem Exchange
1. In the mobile PhoneTools main window,
press F12 on your keyboard or click the
Menu button.
2. If you choose to click the Menu button, in
the menu displayed, select Display then
-
37 -
Page 40

Modem Exchange. The Modem Exchange
window displays the log files between the
modem and mobile PhoneTools.
-
38 -
Page 41

GGPPRRSS CCoonnnneeccttiioonn
GPRS stands for General Packet Radio Service. It
is an extension of the GSM network that enables
high speed packet mode transmission. GPRS
works faster than the Data/Fax option and allows
you to send and receive emails and surf the
Internet at a faster rate. With the GPRS function,
mobile PhoneTools allows you to immediately
connect your computer to the Internet wherever
you are (if the GPRS network is available).
Note: this function depends on your cell phone, your operator network and
requires a GPRS subscription with your cell phone operator.
Configure GPRS Connection
1. In the mobile PhoneTools main window,
click the GPRS icon from the side panel, or
click the Menu button.
2. In the menu displayed, select Setup then
GPRS connections. The GPRS
Connections dialog box appears.
3. When The GPRS connection wizard opens.
It will guide you through to configure your
connection settings.
4. Click Next.
-
39 -
Page 42

Select No and then click Next.
Click Finish to complete making the new
connection.
-
40 -
Page 43

5. Once finished, a new icon appears in the
GPRS Connections dialog box as shown
below:
6. If you want to launch the connection now,
click Yes.
-
41 -
Page 44

Add another service provider
1. If you have another SIM card (another service
provider)to establish GPRS connection, on
the Mobile PhoneTools, click Menu→Setup
→ Internet Connections and then
double-click the Add new Connection icon,
the Internet Connection Wizard will appear,
click Next to continue.
2. Select the Service provider from the
pull-down list and then click Next.
-
42 -
Page 45

3. Click Next.
4. Click Next.
-
43 -
Page 46

5. Click Finish to complete.
6. After finishing the setup steps, the service
provider icon will appear in the Internet
Connection window.
-
44 -
Page 47

7. If you want to launch the new connection you
just establised, click Yes.
Launch a GPRS Connection
1. In the mobile PhoneTools main window,
click the GPRS icon from the side panel, or
click the Menu button→Setup→Internet
connection and then double-click the
connection icon to launch.
Disconnect a GPRS Connection
There are two ways to disconnect the GPRS.
-
45 -
Page 48

1. In the mobile PhoneTools main window,
click the GPRS icon
from the side
panel. Click Yes to disconnect GPRS.
2. Double-click the connection icon on the
taskbar then click Disconnect.
-
46 -
Page 49

SSMMSS
With mobile PhoneTools you can read, send,
reply, and transfer short messages to various
recipients simultaneously. Your messages are
automatically retrieved when you connect.
Note: You can send SMS messages that exceed 160
characters. mobile PhoneTools splits a message that
exceeds 160 characters into several messages and
links them together. To do this, you must have
configured mobile PhoneTools.
Access the Inbox/Outbox Window and View Messages
Access the Inbox/Outbox
You have three choices to access the Inbox/Outbox:
1. In the mobile PhoneTools main window,
click the Menu button. In the menu
displayed:
• To open the Outbox window, select Send then
Outbox.
• To open the Inbox window, select Reception
then Inbox.
2. In the mobile PhoneTools main window,
click the SMS icon
from the side panel
-
47 -
Page 50

3. Double-click the icon on the main window to
open it.
View the Inbox/Outbox
1. Click the message to be viewed in detail. The
selected message is highlighted and its
contents displayed in the detail view.
2. Double-click the message to open it in a new
window.
Create and Send an SMS
1. In the mobile PhoneTools main window,
click the SMS icon on the side panel, or click
the Menu button.
2. In the menu displayed, select Send then
Send SMS. The Send message dialog box
appears:
-
48 -
Page 51

X Y
Item Description
Name/Number Enter your recipient details.
Deferred call Click here if you want to postpone the
Message Type your message here.
Send To send a message, click Send.
Options Click here to edit Options. Those defined here
Import Click here if you want to Import a file to send as
Callback
number
High Priority Check here if you wish the recipient to receive
X Check the number of characters and messages
Y Click here to locate and select a template for
transmission of your SMS.
will have priority over those specified in your
cellular.
an SMS.
Check here if you want to modify the recall
number and type new number below.
your SMS directly is his cell phone display.
when creating a long SMS.
your SMS.
-
49 -
Page 52

Reply to a Received SMS
1. To check for incoming SMS, from the
mobile PhoneTools main window, open the
Inbox dialog by pressing F4 on your
keyboard. Received messages are
automatically downloaded to the Inbox.
2. Select the message you want to reply to and
click on it.
3. Click the Reply icon
. The Send
message dialog box appears with the
recipient fields filled in.
4. Type your message in the Message field
and select the appropriate options where
needed.
5. Click Send.
Transfer a Received SMS As an SMS, Fax or E-mail
1. From the mobile PhoneTools main window,
open the Inbox dialog box by pressing F4 on
your keyboard.
2. Select the SMS message your want to
transfer and right-click on it. A menu
appears.
3. Scroll to the Forward option. A sub-menu
appears.
4. Scroll to one of the following options:
-
50 -
Page 53

• By SMS to have it transferred as an SMS. The
Send message dialog box appears including the
text of the SMS.
• By Fax to have it transferred as a fax. The
Send Fax dialog box appears with the text
copied in the Message text area.
• By E-mail to have it transferred as an e-mail.
The Send e-mail dialog box appears including
the text of the SMS.
17
-
51 -
Page 54

EE--mmaaiill
With mobile PhoneTools you can either send or
receive e-mail messages. To do so, the Data/fax
option must be included in the subscription
contract with your cell phone operator.
Mobile PhoneTools lets you manage multiple
email accounts.
Configure Your E-mail Accounts
1. In the mobile PhoneTools main window,
press F6 on your keyboard (or click the
e-mail icon from the side panel). The
General Configuration dialog box appears.
2. When the first time you click to send e-mail,
the following figure will appear for you to
set up your e-mail account, click OK.
-
52 -
Page 55

3. After finishing e-mail account setting, clcik
the e-mail button on the Mobile PhoneTools,
the following figure will appear for you
choose
4. If you choose Send an e-mail, the following
figure will appear for you to configure.
-
53 -
Page 56

Item Description
Add Click Add and enter an e-mail account name.
You can add several accounts. The one
highlighted in bold is the Sending Account.
Advanced
Setup
Reception
POP Server /
POP Account
/ Password /
Mailbox
Transmission
SMTP Server
/ Return
Address
Real name The real name is the name that will appear in
Click here to configure additional options such
as being notified when receiving e-mail.
These fields must be filled in to enable your ISP
server to identify your account. Please refer to
the information provided by your ISP.
This field is mandatory. Please refer to the
information provided by your ISP.
your correspondents’ message list.
3. To select the Internet connection mode, click
on the Internet tab. You can then choose
Dial-up networking, or LAN as your Internet
connection method.
-
54 -
Page 57

4. When finished, click OK to close the
window. You are now ready to send and
receive E-mail messages.
Note: for each e-mail account you create, you need to
fill in the Incoming and Outgoing group boxes.
You will find the necessary information in the
subscription contract with your Internet Service
Provider (ISP). If you are using a local network
connection, contact your company’s network
administrator.
Send an E-mail
There are two ways to send e-mail:
1. In the mobile PhoneTools main window,
click the Menu button. In the menu
displayed, select Send then Send E-Mail.
2. Click
icon from the side panel.
19
Check for Incoming E-mails
1. Click the Menu button in the mobile
PhoneTools main window.
2. In the menu displayed, select
Reception>E-mail reception. The mail
received is automatically placed in the
Inbox folder of the tree view (accessible by
pressing F4 on your keyboard).
-
55 -
Page 58

Transfer a Received E-mail As an SMS, Fax or E-mail
1. From the mobile PhoneTools main window,
open the Inbox dialog box by pressing F4 on
your keyboard.
2. Select the e-mail message your want to
transfer and right-click on it. A menu
appears.
3. Scroll to the Forward option. A sub-menu
appears.
4. Scroll to one of the following options:
• By Fax to have it transferred as a fax. The Send
Fax dialog box appears with the text of the
e-mail copied in the cover page.
• By E-mail to have it transferred as e-mail. The
Send e-mail dialog box appears including the
text of the e-mail.
• By SMS to have it transferred as an SMS. The
Send message dialog box appears including the
e-mail text.
Note: your SMS messages can exceed 160 characters. mobile
PhoneTools splits a message that exceeds 160 characters into
several messages and links them together.
Configure Automatic Reception
1. In the E-Mail tab from the General Setup
dialog box (F6 keyboard key), click
Advanced Setup.
2. Click the General tab, and in the
Reception group box, check Check for
new messages every (n) minutes and
enter a number for n.
3. Click OK to close windows.
-
56 -
Page 59

FFaaxx
Mobile PhoneTools enables you to send and
receive faxes. To do so, the Data/fax option must
be included in the subscription contract with your
cell phone operator.
Fax configuration options
4. In the mobile PhoneTools main window,
press F6 on your keyboard (or click the fax
icon from the side panel). The General Setup
dialog box appears.
5. Click the Fax tab. From this screen you can
edit the default values of mobile PhoneTools
fax functions:
• Identifier: type in a name that will be used to
“ sign ” documents sent as faxes by the system.
Some hardware systems accept alphanumeric
characters, others accept only digits; the entry
for this line is adapted accordingly.
• Include cover page: check the box to
activate the fax transmission with a cover page.
• Apply outgoing header: check the box to
add an information line containing the sender’s
name, recipient’s name, date and time of
transmission as well as the current page
number and the total number of document
pages to the heading of each page.
• High quality fax transmission: check the
box to have all faxes sent in fine mode (200
points per vertical inch).
-
57 -
Page 60

• Print outgoing faxes: check the box to have
all sent faxes automatically printed (when
mobile PhoneTools is opened).
• Print received faxes: check the box to have
all received faxes automatically printed (when
mobile PhoneTools is opened).
• Do not clear recipients list between
transmissions: check the box to save the list
from one transmission to the next.
• Show fax wizard: check the box to activate
the fax wizard whenever you create a fax.
To send a fax
6. In the mobile PhoneTools main window,
click the Menu button.
7. In the menu displayed, select Send then
Send Fax. The Send Fax dialog box
appears:
21
Note: by default, the fax wizard displays and guides
you through the preparation of your fax. If you have
deactivated the Show fax wizard option, then the
Send Fax window opens.
-
58 -
Page 61

y
Item Description
Name/
Company/ Fax
Message text Type the cover page text here. This Cover Page
Enter your recipient details or click the
PhoneBook icon to select it. Then click Add.
data entr
field appears only when the Include
-
59 -
Page 62

cover page option is checked in the General
Setup > Fax tab.
Send Click Send to send the fax.
Preview Click Preview to view your fax.
Template Choose templates here. The chosen template will
be automatically applied to the fax you are
preparing.
Options
Click Cover page to include a cover page.
Click HQ mode to send the fax in
high-resolution mode.
Click here to access the Logo management.
To receive a fax
Faxes sent to you are automatically received by
mobile PhoneTools. They are placed in the
Inbox folder (accessible by pressing F4 on your
keyboard).
However, for fax reception to be possible, mobile
PhoneTools must be opened.
To transfer a received fax as a fax or e-mail
8. From the mobile PhoneTools main window,
open the Inbox dialog box by pressing F4 on
your keyboard.
9. Select the fax your want to transfer and
right-click on it. A menu appears.
10. Scroll to the Forward option. A sub-menu
appears.
11. Scroll to one of the following options:
-
60 -
Page 63

• By Fax to have it transferred as a fax. The
Send Fax dialog box appears with the fax
included as an attached file.
• By E-mail to have it transferred as e-mail. The
Send e-mail dialog box appears including the
fax as an attached file.
To use the fax wizard
The fax wizard automatically activates and helps
you prepare and send faxes.
To do this, simply follow the instructions
displayed on the screen.
To receive a fax
Faxes sent to you are automatically received by
mobile PhoneTools. They are placed in the
Inbox folder (accessible by pressing F4 on your
keyboard).
However, for fax reception to be possible, mobile
PhoneTools must be opened.
To transfer a received fax as a fax or e-mail
12. From the mobile PhoneTools main window,
open the Inbox dialog box by pressing F4 on
your keyboard.
13. Select the fax your want to transfer and
right-click on it. A menu appears.
-
61 -
Page 64

14. Scroll to the Forward option. A sub-menu
appears.
15. Scroll to one of the following options:
• By Fax to have it transferred as a fax. The
Send Fax dialog box appears with the fax
included as an attached file.
• By E-mail to have it transferred as e-mail. The
Send e-mail dialog box appears including the
fax as an attached file.
To use the fax wizard
The fax wizard automatically activates and helps
you prepare and send faxes.
To do this, simply follow the instructions
displayed on the screen.
22
To activate the fax wizard by default:
16. In mobile PhoneTools main window, click
the Menu button, then select
Setup>General Setup.
17. Click the Fax tab and check the Show fax
wizard box.
18. Click OK.
To deactivate the fax wizard:
19. In the main window of mobile PhoneTools,
click the Menu button, then select
Setup>General Setup.
20. Click the Fax tab, uncheck the Show fax
wizard box and click OK; or directly from
-
62 -
Page 65

the Send Fax wizard dialog box, check the
box check here to bypass this wizard
and go directly to the send fax
window, then click Finish. The Send fax
dialog box opens.
To receive a fax from a server
21. In the mobile PhoneTools main window,
click the Menu button.
22. In the menu displayed, select Reception,
then Automatic reception. The Automatic
dialog box opens.
23. Type in the server number from which you
want to receive a fax.
24. Click OK. The received fax is placed in the
Inbox dialog box (accessible by pressing F4
on your keyboard).
23
-
63 -
Page 66

PPhhoonneebbooookk
Mobile PhoneTools enables you to:
• Manage your mobile PhoneTools, MS Outlook,
or MS Outlook Express phonebooks
(import/export phonebooks; create, edit, delete
entries...).
• Download your cell phone entries and
synchronize them with those of your mobile
PhoneTools phonebook, with the possibility to
restore them at any time.
Open the Default PhoneBook
1. In the mobile PhoneTools main window, you
can either press F5 on your keyboard or
click the Menu button.
2. If you choose to click the Menu button, in
the menu displayed, select Phonebook and
then General Phonebook.
The Phonebook dialog box appears:
-
64 -
Page 67

Open a Phonebook
1. In the mobile PhoneTools main window,
press F5 on your keyboard. The default
Phonebook dialog box appears.
2. From the File menu, select Open. The Open
Phonebook dialog appears.
3. Select the phonebook you want to open and
click Open.
-
65 -
Page 68

Note: the last opened phonebook becomes the default
(It will be automatically opened whenever you access
the phonebook).
Create a Phonebook
1. In the mobile PhoneTools main window,
press F5 on your keyboard. The default
Phonebook dialog box appears.
2. From the File menu, select New. The New
Phonebook dialog box appears.
3. Navigate to the drive and folder where you
wish to place the phonebook.
4. Type a name for the new phonebook.
5. Select a format and type a description.
6. Click Save.
The new phonebook appears in the Group list tree
view. You can now add entries.
Import/Export a Phonebook
• Open the phonebook and from the File menu, select
Export or Import. A wizard displays to guide you
through the export or import steps. Refer to the
written instructions as they show up and to the
related online help for detailed information.
Add an Entry
1. Open the phonebook where you want to
create an entry and click the New button.
2. In the tabs (Identification, Business,
Home, Notes), click in the data entry fields
and fill out at least one of the following
-
66 -
Page 69

fields: Last name, First name, or
Company.
3. Click Save.
Edit an Antry
1. Open the phonebook and highlight the entry
you want to edit.
2. In the lower part of the window, select the
tab (Identification, Business, Home, Notes
where you wish to make the modification.
3. Click in the field you want to edit and make
the necessary modifications.
4. Click Save.25
Delete an Entry
1. Open the phonebook and highlight the entry
you want to delete.
2. Click the Delete button. A popup window
prompts you to confirm deletion.
3. Click YES.
)
-
67 -
Page 70

SPECIFICATIONS
Host Interface PC Card TypeII slot
Antenna Internal Tri-band Antenna
LINK: POWER ON
LED Indicators
Frequency Band
Operation mode
ACT: LINK BASE
STATION
EGSM Tx : 880 ~ 915MHz
EGSM Rx: 925 ~ 960MHz
DCS Tx: 1710 ~ 1785 MHz
DCS Rx: 1805 ~ 1880MHz
PCS Tx: 1850 ~ 1910MHz
PCS Rx: 1930 ~ 1990MHz
GPRS multi-slot class 10 mode
(up to 4 download channels and 2
upload channels)
Coding Scheme
Device Class GPRS mobile station class B
SIM Interface SIM card Holder: Type 3V
Transmission
Power
Receiver Sensitivity
@ARP
BER <2.4%
Supports all coding schemes(1,2,3
and 4)
Class 4(2W) for GSM900
Class 1(1W) for GSM1800 and
GSM1900
-102dBm
-
68 -
Page 71

Data Rate
GPRS data downlink transfer:
85.6 kbps(Max.)
GPRS data uplink transfer:
21.4 kbps(Max.)
SMS: Over CSD or GPRS
connections
Operating Voltage: 4.75V~5.25V
Power
Consumption
Physical
Specifications
Environment
Specifications
Supported OS
Active mode: 600
mA(Max.)
Idle mode: 40
mA(Typical)
Weight: 50g
Dimension: 125.81 (L) x
54.05 (W) x 11.46 (H)
mm
Storage Temperature: -20~70
℃ ambient temperature
Storage humidity: 90%
maximum (non-condensing)
Windows
98/ME/2000/XP/PocketPC 2002
-
69 -
 Loading...