

Page 1
Page 2

WEBCAM E92-Introducción
Gracias por confiar en AIRIS. Esta cámara
funciona conectada al puerto USB del ordenador.
Es la mejor solución “plug and play” para
transmisión de audio y video. Tamaño pequeño,
fácil de llevar, alta resolución y alta velocidad
hacen de esta cámara el dispositivo ideal para las
comunicaciones a larga distancia.
Especificaciones técnicas
* Sensor de color CMOS de alta resolución
z Resolución: 350K Pixel
z Formato de video: 24bit color real
* Interfaz: USB1.1
* Velocidad de transmisión:
320*240 30fotogr./segundo
640*480 15frames/segundo
* Rango dinámico:≥72db
* Distancia:5CM a Infinito
* Compresión de imágenes integrada
* Micrófono integrado en el USB
* Control automático de blancos
* Compensación automática de colores
* Enfoque ajustable manualmente
* Captura instantánea de imágenes
Page 3
Requerimientos del sistema
* PC ó compatible con puerto USB
* Pentium200, compatible ó superior
* Sistema operativo:
WIN98SE/ME/2000/XP/VISTA
* Espacio en disco duro ≥ 20MB
* CD-ROM
* Memoria RAM ≥ 32MB
* Tarjeta VGA compatible DIRECTX
Instalación
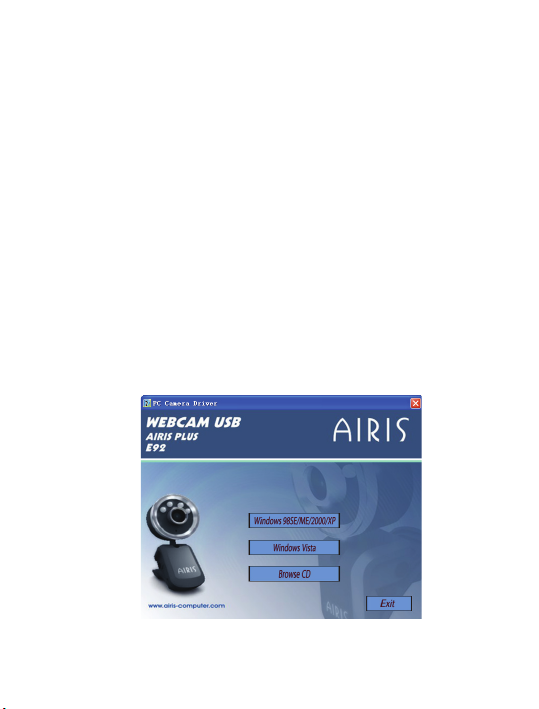
1. Inserte el CD de instalación en el CD-Rom y
abra el archivo “setupnew” y haga doble clic
en “Setup.exe”. Se procederá a la instalación
instantáneamente.
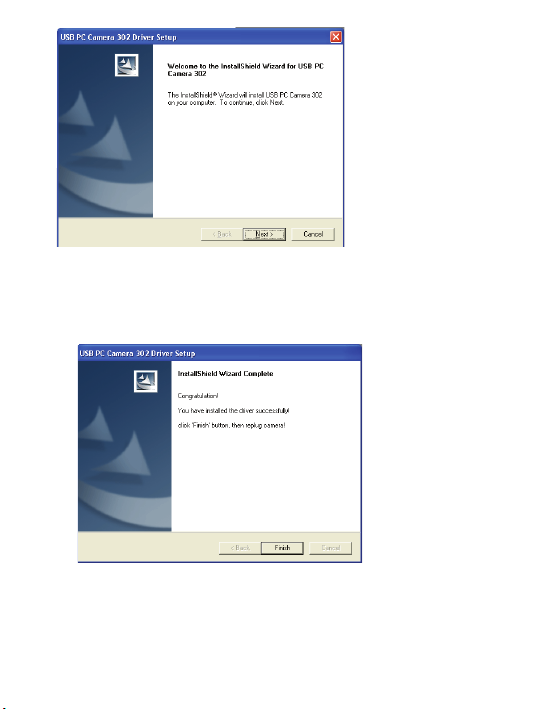
2
Pulse “302 Driver” para continuar.
Page 4
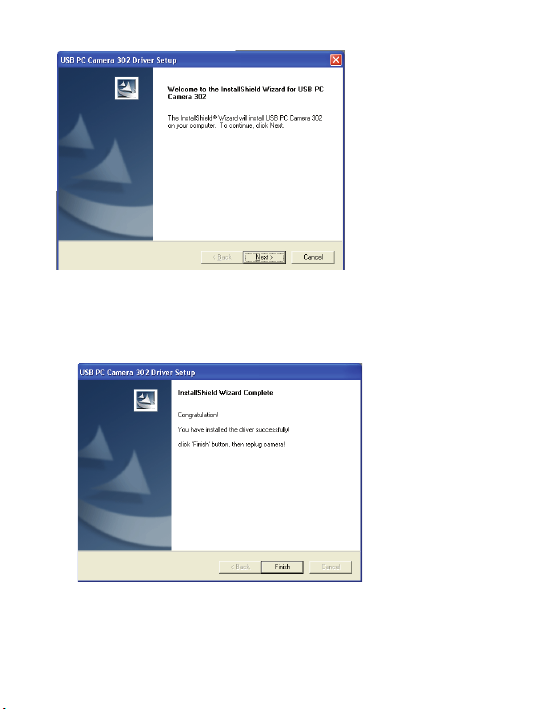
Clic “NEXT”
Pulse “Finish” para finalizar
Clic “Finish”
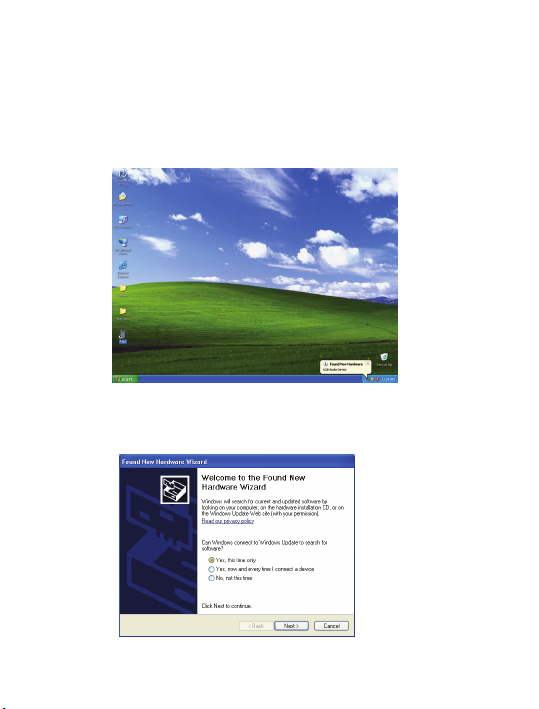
2. Conecte la webcam al puerto USB del PC. El
sistema detectará directamente el nuevo
hardware y automáticamente instalará el
Page 5
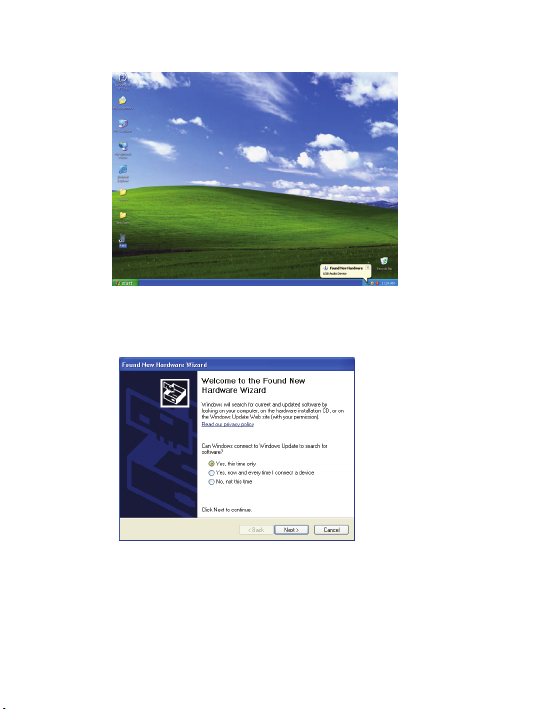
nuevo software como se indica abajo.
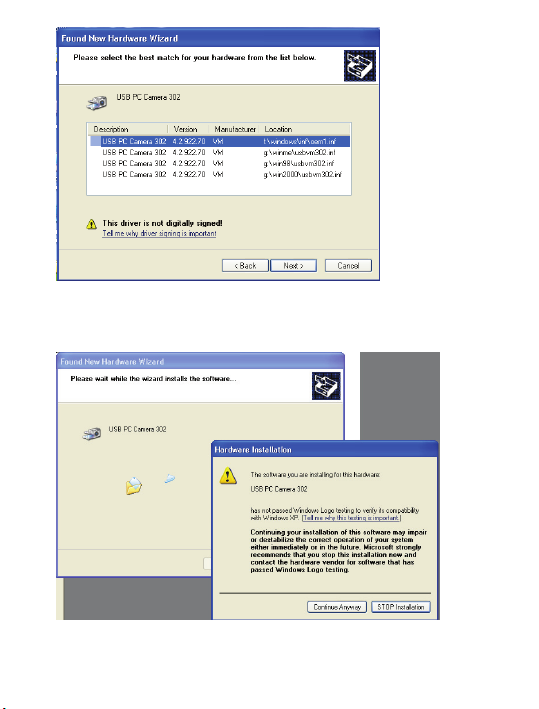
Nuevo hardware detectado.
El sistema procederá como sigue:
Clic “NEXT”
Page 6
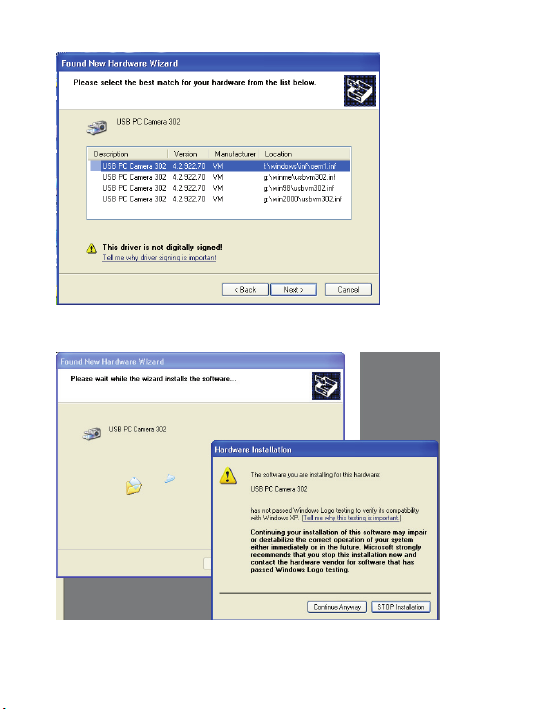
Seleccione el sistema operativo que tenga
instalado su PC.
Clic “Continue”
Page 7
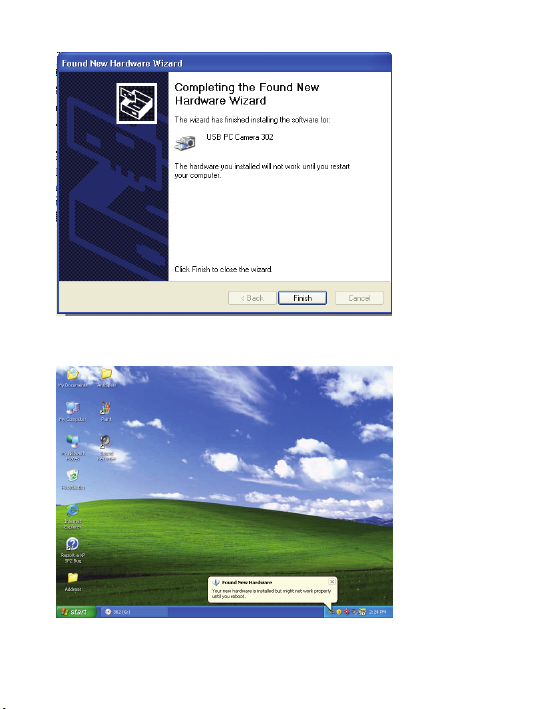
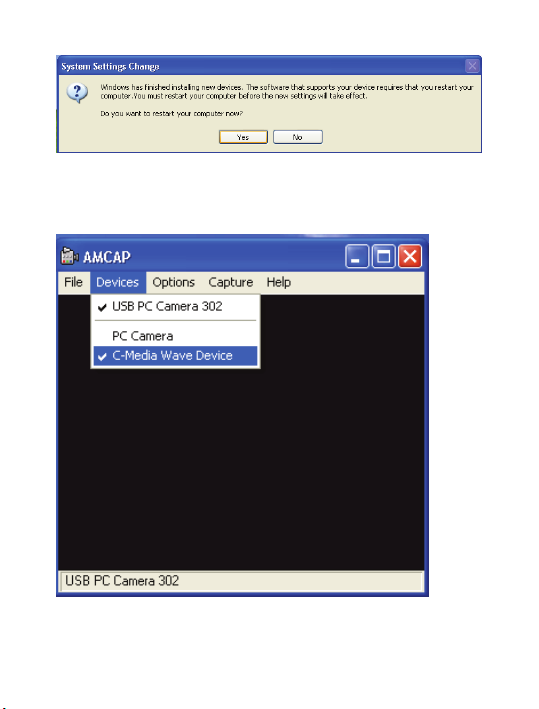
Clic “Finish”
El sistema pedirá reiniciar la computadora.
Page 8

Pulse “Inicio” -- “Programas” -- “PC
Camera32/AMCAP” después de reiniciar el
ordenador.
Seleccione “C-Media Wave Device” para usar el
micrófono integrado
Nota:
Page 9
No toque la cámara con los dedos o con
objetos afilados. Limpie la óptica con
un trapo de algodón suave.
No use el dispositivo en ambientes
extremos.
No deje caer el dispositivo. Puede
causar un mal funcionamiento.
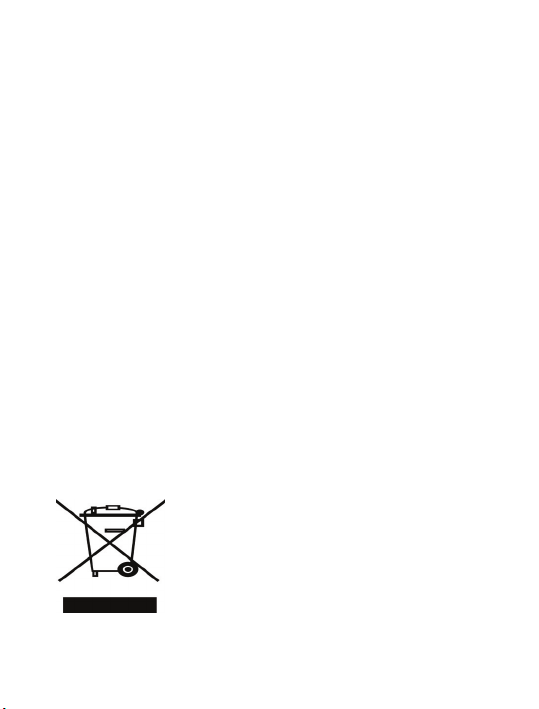
WEEE: Nota explicativa
“ No tire nunca este equipo electrónico
con los desechos domésticos. Pida
información a su ayuntamiento sobre
las posibilidades de una correcta
eliminación que no arruine el medio
ambiente. Respete siempre las
normas vigentes en la materia. Los
transgresores están sujetos a las
sanciones y a las medidas que
establece la ley.”
Page 10

User’s Manual
Page 11

Product Introduction
Thank you for using the new generation digital
webcam.. It is an ideal webcam for its plug and
play and real-time audio&video transmission. Its
mini size, easily carrying, high resolution and
high speed make your life more colorful and make
your long distance communications fresh and
vivid.
Technical Specification
* High Resolution CMOS Color Sensor
z Resolution: 350K Pixel
z Video Format: 24bit True Color
* Interface: USB1.1
*Transmission Speed:
320*240 30frams/second
640*480 15frames/second
* Dynamic Range:≥72db
* Imaging Distance:5CM to Infinity
* Built-in Image Compression
* Built-in Microphone
* Automatic White Balance
* Automatic Colors Compensation
* Manual Adjusting Focus
* Manual Snapshot
Page 12
System Requirement
*IBM PC compatible computer or notebook
with USB port
* Pentium200 or Higher CPU
* WIN98SE/ME/2000/XP System/VISTA
* Hard Drive Remaining Space≥20MB
* CD—ROM Drive
* Internal Storage≥32MB
* VGA Display Card Available for DIRECTX
Driver Installation
3. Put “CD Driver” disk in the CD-Rom and
then open “setupnew” file and double click
“Setup.exe”. Wanted files will be
automatically installed.
System runs further as displayed.
Page 13
Click“NEXT”
Click“Finish”
Page 14
4. Connect webcam to PC by USB port. System
finds the new hardware and will
automatically install the software as indicated
below.
New hardware appears.
System goes further as follow:
Click“NEXT”
Page 15
Choose the pc system that correspond with your
computer.
Click“Continue Anyway”
Page 16

Click“Fnish”
System will automatically remind you to
reboot the computer.
Page 17
Click “Start” -- “Programs” -- “PC
Camera32/AMCAP” after rebooting computer.
Select C-Media Wave Device to use built-in
Microphone
Page 18
Notice:
Don’t use fingers or any other sharp or
coarse items to touch the camera. Soft
cotton cloth is highly recommended to
clean the optics parts.
Don’t use this product when ambience is
too hot or cold or dusty.
Please avoid this product dropping
heavily. Heavily dropping will cause it
not to work well.
WEEE statement
“ This electronic device must not be
dropped with litter. Ask to your council
how about to eliminate correctly in
order to save the environment.
Follow related legislation.
Lawbreakers depend on law penalties”
Page 19

Manuel d’utilisation
Page 20

WEBCAM E92-Introduction
Merci de faire confiance à AIRIS. Cette caméra
fonctionne en la connectant au port USB de
l’ordinateur. C’est la meilleure solution « plug
and play » pour la transmission d’audio et vidéos.
Petit formats, facile à emporter, haute résolution
et grande vitesse, font de cet appareil un dispositif
idéal pour les communications longues distances.
Caractéristiques techniques.
* Capteur de couleur CMOS haute résolution
z Résolution: 350K Pixel
z Format vidéo: 24bit couleur réelle
* Interface: USB1.1
* Vitesse de transmission:
320*240 30Photos./seconde
640*480 15Images/seconde
* Rang dynamique:≥72db
* Distance:5CM à l’infini
* Compression d’images intégrée.
* Micro intégré dans l’USB
* Gestion automatique des blancs
* Compensation automatique des couleurs
* Mise au point réglable manuellement
• Prise instantanée d’images.
Page 21

Besoins du système
* PC ou compatible avec port USB
* Pentium200, compatible ou supérieur
* Système opérationnel :
WIN98SE/ME/2000/XP/VISTA
* Espace du disque dur ≥ 20MB
* CD-ROM
* Mémoire RAM ≥ 32MB
* Carte VGA compatible DIRECTX
Installation
5. Insérer le CD d’installation dans le CD-Rom
et ouvrez le fichier “setupnew”, double
cliquez sur “Setup.exe”. L’installation se fera
instantanément.
Appuyer sur “302 Driver” pour continuer.
Page 22

cliquez “NEXT”
Appuyer “Finish” pour terminer
Cliquez “Finish”
6. Connectez la webcam au port USB du PC.
Page 23

Le système détectera directement le nouveau
hardware et installera automatiquement le
nouveau logiciel comme indiqué ci-dessous.
Nouveau hardware détecté.
Le système procèdera comme suit:
Cliquez “NEXT”
Page 24

Sélectionnez le système opérationnel installé dans
votre PC.
Cliquez “Continue”
Page 25

Cliquez “Finish”
Le système vous demandera de réinitialiser
votre ordinateur.
Page 26

Appuyez “Démarrer” -- “Programmes” -- “PC
Camera32/AMCAP” après avoir réinitialiser
votre ordinateur.
Sélectionnez “C-Media Wave Device” pour
utiliser le micro intégré
Page 27

Remarque:
Ne touchez pas la caméra avec les doigts
ou tout autre objet pointu. Nettoyez
l’objectif avec un chiffon en coton
léger.
Ne pas utiliser le dispositif dans des
environnements extrêmes.
Ne pas laisser tomber le dispositif.
Cela pourrait provoquer un
disfonctionnement.
WEEE: Note explicative
“ Ne jamais jeter cet appareil
électronique avec les déchets
ménagers. Renseignez-vous auprès
de votre mairie sur les possibilités
d’une élimination conforme qui
n’affecte pas l’environnement.
Veuillez toujours respecter les règles
en vigueur en la matière. La
transgression de ces règle peut faire
l’objet de sanctions et mesures
établies par la loi.”
Page 28

Gebrauchsanweisung
Page 29

WEBCAM E92-Einleitung
Danke für Ihr Vertrauen in AIRIS. Diese Kamera
funktioniert durch Anschluss an den USB-Port des
Computers. Es handelt sich um die beste
Plug-and-play-Lösung zur Audio- und
Videoübertragung. Klein, handlich, mit hoher
Auflösung ist diese Kamera das ideale Gerät für
Kommunikation über weite Entfernung.
Technische Spezifikationen
* CMOS-Farbsensor mit hoher Auflösung
z Auflösung: 350K Pixel
z Videoformat: 24bit Real Color
* Interfaz: USB1.1
* Übertragungsgeschwindigkeit
320*240 30fotogr./Sekunde
640*480 15frames/Sekunde
* Dynamikbereich:≥72db
* Tiefenschärfe:5 cm bis unendlich
* integrierte Bildkomprimierung
* Im USB integriertes Mikrophon
* Automatische Zielkontrolle
* Automatische Farbkompensierung
* Manuelle Fokuseinstellung
* Momentbildaufnahme
Page 30

Systemandorderungen
* PC oder kompatibel mit USB-Port
* Pentium200, kompatibel oder höher
* Betriebssystem:
WIN98SE/ME/2000/XP/VISTA
* Speicherplatz ≥ 20MB
* CD-ROM
* RAM ≥ 32MB
* VGA-Karte kompatibel DIRECTX
Installierung
7. Legen Sie die Installations-CD in das
CD-ROM-Laufwerk und öffnen Sie die Datei
“setupnew” und machen Sie Doppelklick auf
“Setup.exe”. Die Installierung wird
umgehend begonnen.
Drücken Sie “302 Driver” um weiterzumachen.
Page 31

Klick auf “NEXT”
Drücken Sie “Finish” zum Beenden
Klick auf “Finish”
Page 32

8. Schliessen Sie die Webcam an den USB-Port
des PCs an. Das System erkennt direkt die
neue Hardware und installiert automatisch die
neue Software wie unten angegeben.
Neue Hardware erkannt.
Das System geht wie folgt vor:
Klick auf “NEXT”
Page 33

Wählen Sie das auf Ihrem PC installierte
Betriebssystem.
Klick auf “Continue”
Page 34

Klick auf “Finish”
Das System fordert Sie zum Restart des
Computers auf
Page 35

Drücken Sie “Anfang” - - “Alle Programme” - -
“PC Camera32/AMCAP” nach dem Restart.
Wählen Sie “C-Media Wave Device”, um das
eingebaute Mikrophon zu benutzen.
Page 36

Anmerkung:
Berühren Sie die Kamera nicht mit den
Fingern oder spitzen Gegenständen.
Säubern Sie das Objektiv mit einem
weichen Baumwolltuch.
Verwenden Sie das Gerät nicht bei
extremen Bedingungen
Lassen Sie das Gerät nicht fallen. Dies
kann zu Fehlfunktionen führen.
WEEE-Hinweis
“Entsorgen Sie dieses elektronische
Gerät niemals zusammen mit dem
Hausmüll. Fordern Sie Informationen
bei Ihrer Stadtverwaltung bezüglich der
Möglichkeiten für eine korrekte
Entsorgung an, die die Umwelt nicht
belastet. Bitte beachten Sie immer die
gültigen Normen bezüglich dieser
Materie. Zuwiderhandlungen sind den
Sanktionen und Maßnahmen
unterlegen, die das Gesetz vorsieht.”
Page 37

Manuale dell’utente
Page 38

WEBCAM E92-Introduzione
Grazie per fidarsi di AIRIS. Questa camera
funziona collegata alla porta USB del computer.
E’ la migliore soluzione “plug and play” per la
trasmissione di audio e video. Piccole misure,
facile da portare, alta risoluzione e alta velocità
fanno di questa macchina il dispositivo ideale per
le comunicazioni a lunga distanza.
Specificazioni tecniche
* Sensore di colore CMOS di alta risoluzione
z Risoluzione: 350K Pixel
z Formato di video: 24bit colore reale
* Interfaccia: USB1.1
* Velocità di trasmissione:
320*240 30fotogr./secondo
640*480 15frames/secondo
* Fascia dinamica:≥72db
* Distanza:5CM all’Infinito
* Compressione di immagini integrata
* Microfono integrato nel USB
* Controllo automatico dei bianchi
* Compensazione automatica di colori
* Messa a fuoco manualmente aggiustabile
* Cattura istantanea di immagini
Page 39

Requisiti del sistema
* PC o compatibile con porta USB
* Pentium200, compatibile o superiore
* Sistema operativo:
WIN98SE/ME/2000/XP/VISTA
* Spazio in hard disk ≥ 20MB
* CD-ROM
* Memoria RAM ≥ 32MB
* Scheda VGA compatibile DIRECTX
Istallazione
9. Inserisca il CD d’istallazione nel CD-Rom e
apra il file “setupnew” e faccia doppio clic su
“Setup.exe”. L’istallazione si eseguirà
istantaneamente.
Prema “302 Driver” per continuare.
Page 40

Clic “NEXT”
Prema “Finish” per finire.
Clic “Finish”
Page 41

10. Colleghi la webcam alla porta USB del PC. Il
sistema detetterà direttamente il nuovo
hardware e automaticamente istallerà il nuovo
software come si indica sotto.
Nuovo hardware detettato.
Il sistema procederà come segue:
Clic “NEXT”
Page 42

Selezioni il sistema operativo che ha sul suo PC.
Clic “Continue”
Page 43

Clic “Finish”
Il sistema richiederà il riavvio del
computer.
Page 44

Prema “Start” -- “Programmi” -- “PC
Camera32/AMCAP” dopo il riavvio della
macchina.
Selezioni “C-Media Wave Device” per utilizzare
il microfono integrato.
Page 45

Nota:
Non toccare la camera con le dita o con
degli oggetti taglienti. Pulisca
l’ottica con un panno di cotone
morbido.
Non usare il dispositivo in ambienti
estremi.
Non permettere che il dispositivo cada.
Può provocare un danno nel
funzionamento.
WEEE: Nota spiegativa
“Non disperda questa apparecchiatura
elettronica insieme ai rifiuti domestici.
Richieda informazione nel suo
municipio sulle possibilità di una
corretta eliminazione affinché il medio
ambiente non venga rovinato. Rispetti
sempre le apposite norme in vigore. I
trasgressori saranno passibili delle
sanzioni e misure che stabilisce la
legge”.
Page 46

Manual do Utilizador
Page 47

WEBCAM E92-Introdução
Obrigado por confiar na AIRIS. Esta câmara
funciona ligada ao porto USB do computador. É a
melhor solução “plug and play” para transmissão
de áudio e vídeo. Tamanho pequeno, fácil de levar,
alta resolução e alta velocidade fazem desta
câmara o dispositivo ideal para as comunicações a
longa distância.
Especificações técnicas
* Sensor de cor CMOS de alta resolução
z Resolução: 350K Pixel
z Formato de vídeo: 24bit cor real
* Interface: USB1.1
* Velocidade de transmissão:
320*240 30fotogr./segundo
640*480 15frames/segundo
* Classe dinâmica:≥72db
* Distância:5CM a Infinito
* Compressão de imagens integrada
* Microfone integrado no USB
* Controlo automático de alvos
* Compensação automática de cores
* Focagem manual
* Captura instantânea de imagens
Page 48

Requerimentos do sistema
* PC ou compatível com porto USB
* Pentium200, compatível ou superior
* Sistema operativo:
WIN98SE/ME/2000/XP/VISTA
* Espaço num disco duro ≥ 20MB
* CD-ROM
* Memória RAM ≥ 32MB
* Cartão VGA compatível DIRECTX
Instalação
11. Introduza o CD de instalação no CD-Rom e
abra o arquivo “setupnew”. Faça duplo clique
em “Setup.exe”. Passar-se-á automaticamente
para a instalação.
Prima “302 Driver” para continuar.
Page 49

Clic “NEXT”
Prima “Finish” para finalizar.
Clique “Finish”
Page 50

12. Ligue a webcam ao porto USB do PC. O
sistema detectará directamente o novo
hardware e instalará automaticamente o novo
software como se indica depois.
Novo hardware detectado.
O sistema procederá da seguinte forma:
Clique “NEXT”
Page 51

Seleccione o sistema operativo que tiver instalado
no seu PC.
Clique “Continue”
Page 52

Clique “Finish”
O sistema pedirá para reiniciar o
computador.
Page 53

Prima “Iniciar” -- “Programas” -- “PC
Camera32/AMCAP”, depois de reiniciar o
computador.
Seleccione “C-Media Wave Device” para usar o
microfone integrado.
Page 54

Nota:
Não toque na câmara com os dedos ou com
objectos afiados. Limpe a objectiva com
um pano de algodão macio.
Não utilize o dispositivo em ambientes
extremos.
Não deixe cair o dispositivo. Pode
causar alguma avaria.
WEEE: Nota explicativa
“Não jogue nunca este equipamento
electrónico com os detritos
domésticos. Peça informação a seu
município sobre as possibilidades de
uma correcta eliminação que não
polua o meio ambiente. Respeite
sempre as normas vigentes na
matéria. Os transgressores estão
sujeitos às sanções e às medidas que
estabelece a lei.”
Page 55

Руководство Пользователя
Page 56

Веб-камера E92-Введение
Благодарим Вас за выбор продукции AIRIS.
Данная камера работает при подключении к
порту USB компьютера. Это – наилучший
способ передачи данных аудио и видео,
реализованный по принципу «plug and play»
(«подключи и работай»). Небольшой размер,
простота в переноске и высокая скорость
работы делают данный прибор идеальным для
передачи информации на дальние расстояния.
Технические
* Цветной сенсор CMOS высокого разрешения
z Разрешение: 350K пикселей
z Формат видео: 24 бит натурального цвета
* Интерфейс: USB1.1
* Скорость передачи:
320*240 30 кадров в секунду
640*480 15 кадров в секунду
* Динамический диапазон:≥72 дБ
* Расстояние:от 5 см до бесконечности
* Внутреннее сжатие изображений
* Микрофон, встроенный в USB
* Автоматический баланс белого
* Автоматическая компенсация цвета
* Ручная настройка фокусировки
данные
Page 57

* Мгновенный захват изображений
Требования к системе
* ПК или совместимый с портом USB
* Процессор: Pentium200, совместимый или
выше
* Оперативная система:
WIN98SE/ME/2000/XP/VISTA
* Свободное пространство на жестком диске
≥ 20MB
* Ус т ро йс тв о CD-ROM
* Оперативная память ≥ 32 Мбайт
* Видеокарта VGA, совместимая с DIRECTX
Ус т ан ов ка
13. Вставьте установочный комп а кт-диск в
привод CD-ROM, откройте папку
«setupnew» и сделайте двойной щелчок на
«Setup.exe». Сразу же начнется установка.
Page 58

Нажмите «302 Driver» («Далее») для
продолжения.
Нажмите «NEXT» («Далее»)
Нажмите «Finish» («Готов о ») для завершения.
Нажмите «Finish» («Гот ов о »)
Page 59

14. Подключите веб-камеру к порту USB ПК.
Система обнаружит новое устройство и
автоматически установит новое
программное обеспечение, как показано
ниже.
Обнаружено новое устройство
Система выполнит следующие действия:
Нажмите «NEXT» («Далее»)
Page 60

Выберите операционную систему,
установленную на Вашем ПК.
Нажмите «Continue» («Продолжить»)
Page 61

Нажмите «Finish» («Готово »)
Система выдаст запрос на перезагрузку
компьютера.
Page 62

После перезагрузки компьютера нажмите на
кнопку меню «Пуск» -- «Программы» -- «PC
Camera32/AMCAP».
Выберите «C-Media Wave Device» для
использования встроенного микрофона.
Page 63

Примечание:
Не прикасайтесь к камере пальцами или
острыми предметами. Протирайте
объектив мягкой хлопчатобумажной
тканью.
Не используйте прибор в экстремальной
внешней среде.
Не допускайте падения прибора. Это
может привести к сбоям в его работе.
Специальное замечание, согласно
Директиве ЕС по утилизации
электрических и электронных приборов
(WEEE):
“ Никогда не выбрасывайте данный
электронный прибор вместе с
домашними отходами. Запросите в
вашем муниципальном совете
информацию о методах правильной
утилизации, позволяющих не
загрязнять окружающую среду.
Всегда соблюдайте действующие
нормы в области охраны
окружающей среды. В отношении
лиц, нарушающих данные правила,
будут применены санкции и меры,
предусмотренные
законодательством”.
Page 64

 Loading...