

Ag Spray TR300, TR500LP User Manual
OWNERS MANUAL
AG 300 or 500 LP TRAILER SPRAYER
HAMILTON # 20, BOOMJET #10, BOOM XT
6 & 8 ROW BOOMS
HYPRO 8 ROLLER PUMP

TR 300 or 500 LP BOOMJET SPRAYER
AG SPRAY EQUIPMENT OWNER’S MANUAL
Congratulations on purchasing your new trailer sprayer. This manual is designed to aid you in operating your new
sprayer. Also enclosed in the HYPRO book is a breakdown & parts list for the 1540 centrifugal pump In this
manual is a parts list for the pressure regulator and calibration on the Spraying Systems boomjet nozzle.
WARRANTY
All Field Sprayers are under warranty by Ag Spray Equipment for a one year period from the date of purchase.
This warranty only applies to defects in workmanship or manufactures defects in their components. This warranty
does not cover any misuse, abuse, or parts that may freeze & break. Owners are responsible for these issues. Parts
proven defective before the one year period will be replaced at no charge.
Ag Spray Equipment must be notified immediately of any defects or broken parts on the sprayer, before the one
year period occurs. Waiting until after the one year period whether the sprayer has been ran once, twice, or none at
all warranty is void. No product will be accepted for return without authorization.
All returned goods must be packaged securely and shipped with transportation charges prepaid.
For further information regarding parts or warranty, contact:
Ag Spray Equipment
1100 New Industry Lane
Hopkinsville, KY 42240
Phone: 1-800-637-7172
Operation & Instructions of New Sprayer
*NOTE: You may need to move the pressure head stand up towards the hitch for it may have been moved for
shipping purposes. This may be done by loosening the 4 - ½” x 3 ½” bolts around the tongue & sliding the plates
forward.
First, back your tractor up to the hitch of the sprayer and use a hitch pin to connect tractor to sprayer. Then, connect
the PTO coupler on the pump to the shaft by depressing the coupler & sliding it on the shaft letting go of the coupler
to allow lock pins to fall into the grooves on the shaft. Wrap chain around draw bar to keep pump from turning.
Next, fill the tank at least ¼ to ½ full of just plain water with no chemicals. Make sure that the suction line shut off
valve is open; handle should be going with the line. Screw the pressure regulator part of the way out (gray knob) &
make sure agitation valve is ¾ of the way open if supplied (55 gallon sprayer does not have agitation valve). This
ensures that you do not peg the gauge & break it. Also, make sure valve under tank is on (handle should be turned
going w/ the line).
You are now ready to try out your sprayer. By engaging PTO lever & pulling throttle to the 540RPM mark on the
RPM gauge turn boom valve on & adjust the desired pressure that you will need to operate at. Adjust pressure with
the pressure regulator (gray knob) & not the agitation valve because you need to keep agitation constant.
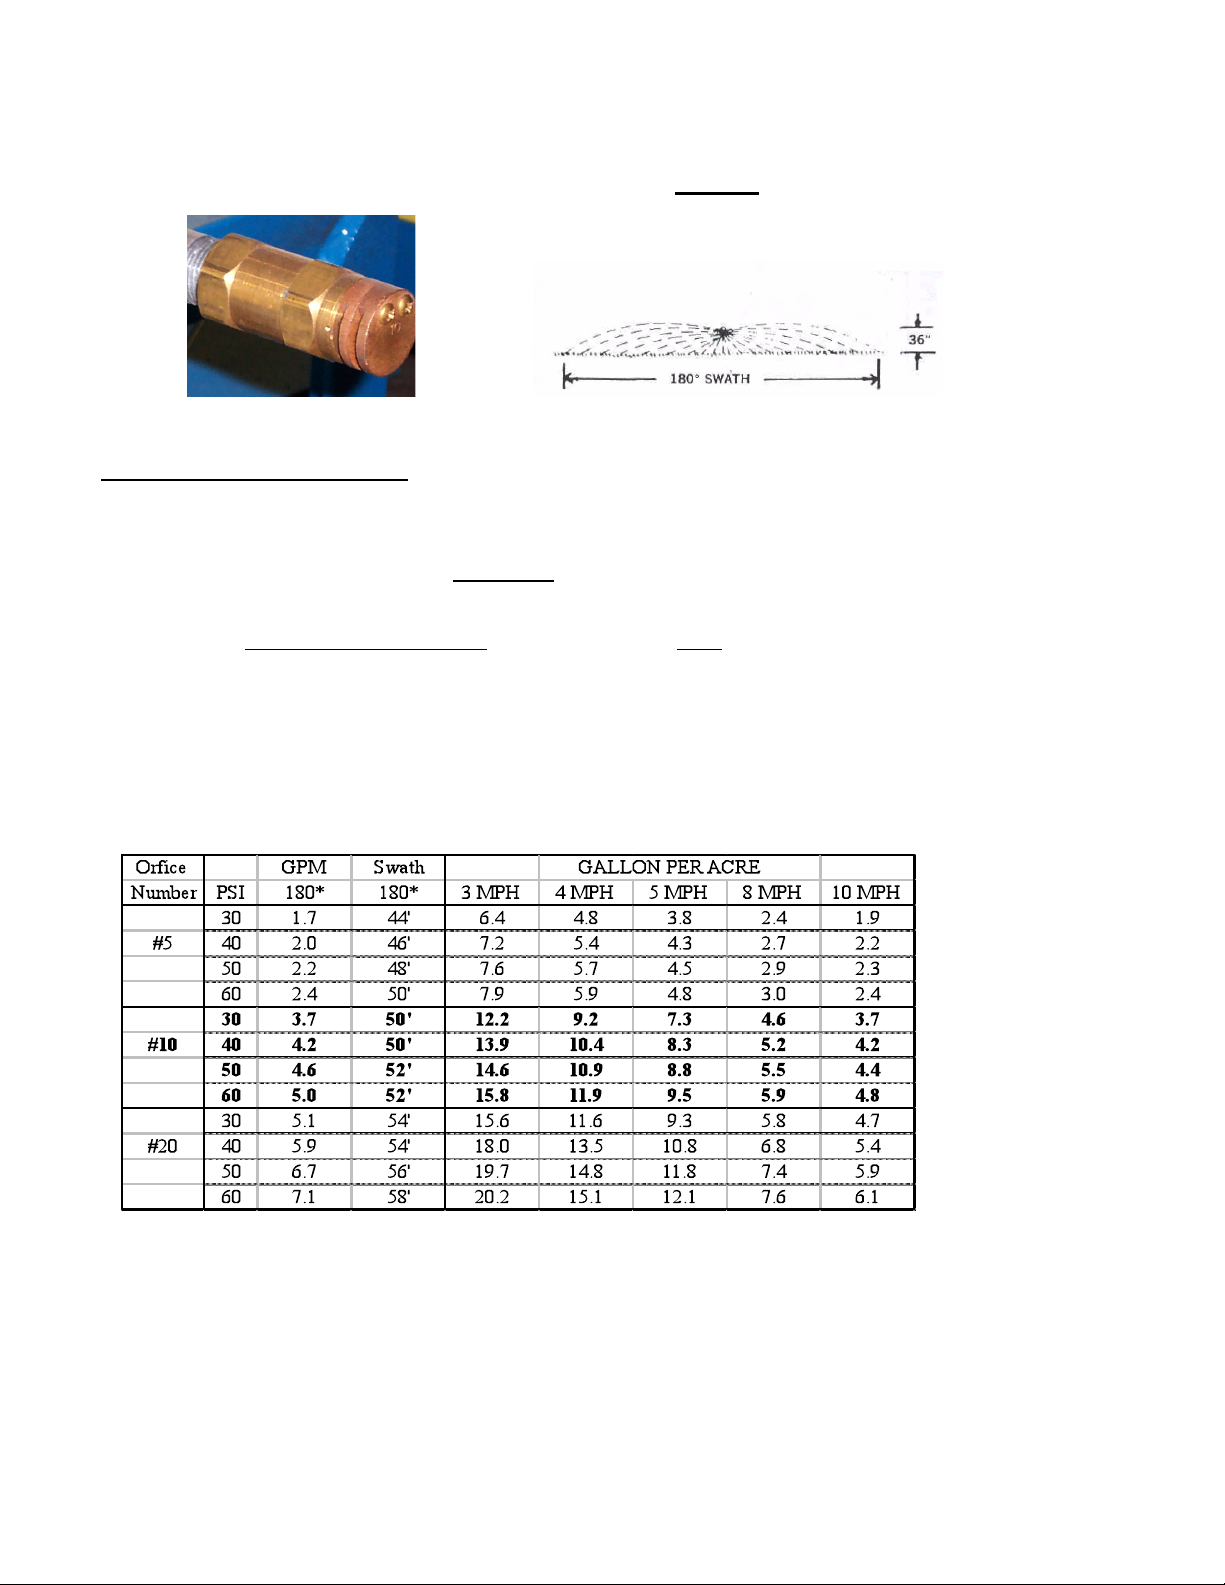
CALIBRATING YOUR SPRAYER
HAMILTON NOZZLE 654201
CALIBRATING YOUR SPRAYER
To determine pressure & GPA with a boomless nozzle use this calibration for it is different than a boom calibration:
GPA = 495 X GPM
MPH x Swath in feet
EXAMPLE: 495(constant) x 4.2gpm=2079 2079 = 10.395 GPA
4mph x 50’swath=200 200
Refer to Chart
OPERATING DATA OF 180* NOZZLES
SPRAYERS ARE SUPPLIED w/ #10
GPM = Gallons per Minute
GPA = Gallons per Acre
MPH = Miles per Hour
PSI = Pressure per Square Inch
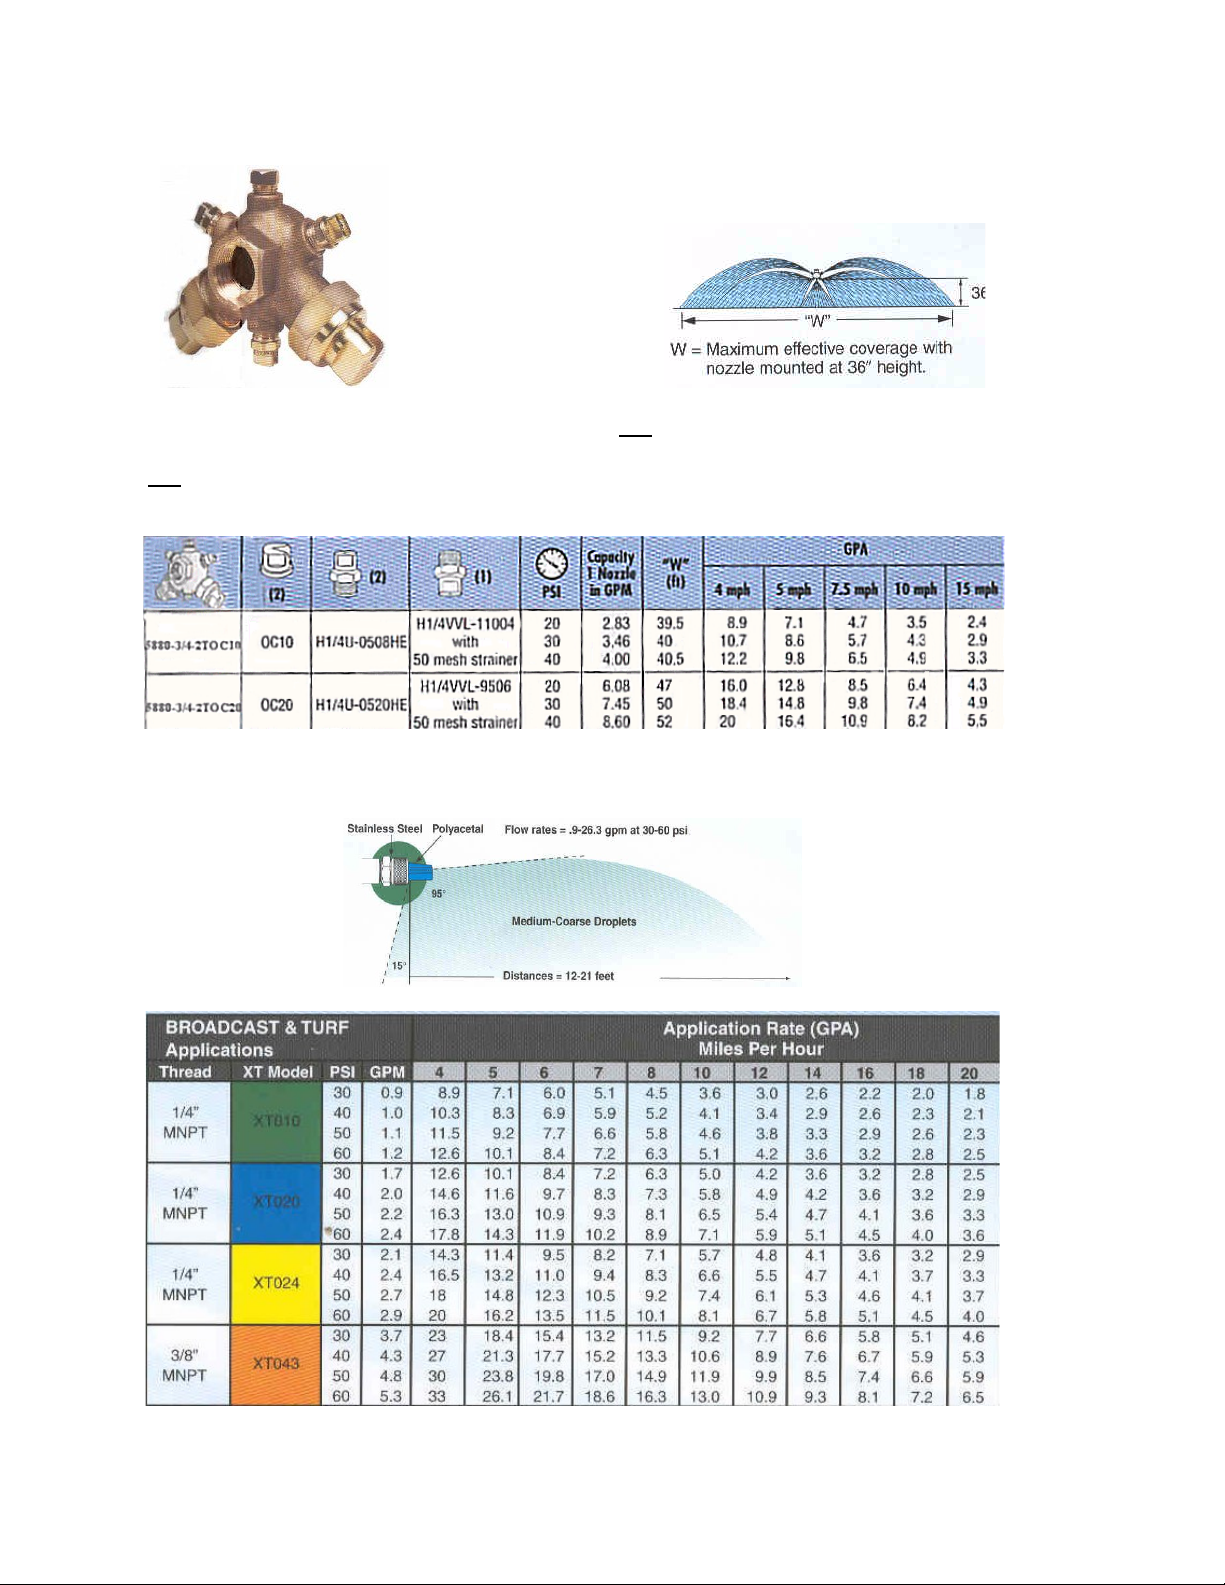
SPRAYING SYSTEMS 5880 BOOMJET NOZZLE
*NOTE: BOOMJET SPRAYERS ARE STANDARD w/ #10 NOZZLES & a HYPRO 6 or 8 ROLLER
PUMP.
IF A #20 NOZZLE IS USED THEN YOU NEED TO GO TO A HYPRO 5 ROLLER PUMP & 1”
PLUMBING BECAUSE OF THE VOLUME NEEDED.
HYPRO BOOM X TENDER TIPS
*NOTE: YELLOW TIP-XT024 IS USED.
 Loading...