


Service Guide
Agilent 86100A/B
Mainframe

© Copyright 2000-2002
Agilent Technologies
All Rights Reserved. Reproduction, adaptation, or translation
without prior written permiss io n
is prohibited, except as allowed
under copyright laws.
Agilent Part No. 86100-90047
Printed in USA
February 2002
Agilent Technologies
Lightwave Division
3910 Brickway Boulevard
Santa Rosa, CA 95403, USA
Notice.
The information contained in
this document is subject to
change without no t ic e. Companies, names, and data used in
examples herein are fictitious
unless otherwise noted. Ag il ent
Technologies makes no warranty
of any kind with regard to this
material, including but not limited to, the implied warranties of
merchantability and fitness for a
particular purpose. Agilent
Technologies shall n o t be liable
for errors contained herein or for
incident al or consequential damages in connection with the furnishing, performance, or use of
this material.
Restricted Righ ts Le gen d.
Use, duplication, or discl osure
by the U.S. Government is subject to restr ictions as set fo rth in
subparagraph (c) (1) (ii) of the
Rights in Technical Data and
Computer Software clause at
DFARS 252.227-7013 for DOD
agencies, and subparagraphs (c)
(1) and (c) (2) of the Commercial Computer Soft wa re
Restricted Rights clause at FAR
52.227-19 for other agencies.
Warranty.
This Agilent Technologies
instrument product is warranted
against defects in material and
workmanship for a period of one
year from date of shipment. During the warranty period, A gil ent
Technologies will, at its option,
either repair or replace pro duc ts
which prove to be defective. For
warranty service or repair, this
product must be returned to a
service facility designated by
Agilent Technologi es. Buyer
shall prepay shipping charges to
Agilent Technologi es and Agilent Technolo gies shall pay s hipping charges to return the
product to Buyer. However,
Buyer shall pay all shipping
charges, duties, and taxes for
products returned to Agilent
Technologies from another
country.
Agilent Technolo g ies warrant s
that its software and firmware
designated by Agilent Technologies for use with an instrument
will execute its programming
instructions when properly
installed on that instrument.
Agilent Technologies does not
warrant that the operation of the
instrument, or software, or firmware will be uninterrupted or
error-free.
Limitati on of Warranty.
The foregoing warranty shall not
apply to defects resulting from
improper or inadequate maintenance by Buyer, Buyer-supplied
software or interfacing, unauthorized modification or misuse,
operation outs ide of the environmental specif ications for the
product, or improper site pr eparation or maintenance.
No other warranty is expressed
or implied. Agilent Technologies
specifically disclaims the
implied warranties of merchantability and fitness for a particular purpose.
Exclusive Remedies.
The remedies provided her ei n
are buyer' s s ole and exclusive
remedies. Agilent Technologies
shall not be li ab le for any direc t,
indirect, special, incid ental, or
consequential damages, whether
based on contract, tort, or any
other legal theory.
Safety Symbols.
CAUTION
Caution denotes a hazard. It
calls attention to a proc ed ure
that, if not co r rectly perfor med
or adhered to, could result in
damage to or destruction of the
product. Do not proceed beyond
a caution note until the indicated
conditions are fully understood
and met.
WARNING
Warning denotes a hazard. It
calls attention to a proc ed ure
which, if not correctly per formed or adhered to, cou ld
result in injury or loss of life. Do
not proceed beyond a warning
sign until the indicated conditions are fully understood and
met.
The instruction documentation symbol. The
product is marked with
this warning symbol
when it is necess ar y for
the user to refer to the
instruction in the documentation.
The AC symbol is used
to indicate the required
nature of the line module input power.
| The ON symbols are
used to mark the positions of the instrument
power line switch.
The Standby symbol is
used to mark the position of the instrument
power line switch.
The OFF symbols
are used to mark the
positions of the instrument power line switch.
The CE mark is a registered trademark of the
European Community.
The CSA mark is a registered tra d emark of the
Canadian Standards
Association.
ISM1-A This is a symbol of an
Industrial Scientific and Medical
Group 1 Class A product..
Typographical Conventions.
The following conv en tions are
used in this book:
key type for keys or text located
on the keyboard or instrument.
softkey type for key names that
are displayed on the instrument’s
screen.
display type for words or
characters displayed on the computer’s screen or instrument’s
display.
user type for words or characters
that you type or enter.
emphasis type for words or char-
acters that emphas ize some point
or that are used as place holders
for text that you type.
ii

Servicing—At a Glance
Servicing—At a Glance
This manual documents the service and repair of the Agilent 86100A/B to the
assembly level. Before servicing the mainframe, you should be aware that amplitude
calibration data can only be installed by the factory.
Servicing requires
special tools
The tools listed below are required to repair all versions of the Agilent 86100A/B.
• T-6 screwdriver p/n 8710-1618
• T-8 screwdriver p/n 8710-1614
• T-10 screwdriver p/n 8710-1623
• T-25 screwdriver p/n 8710-1617
• T-15 screwdriver p/n 8710-1622
• wire cutter p/n 8710-0012
• small pozidrive screwdriver p/n 8710-0899
• long-nose pliers p/n 8710-1107
• Flexure Lock p/n 5022-0115
• 4-mm allen driver
• 5/64 allen driver
iii

General Safety Considerations
General Safety Considerations
This product has been designed and tested in accordance with I EC Publication 1010,
Safety Requirements for Electronic Measuring Apparatus, and has been supplied in
a safe condition. The instruction documentation contains information and warnings
which must be followed by the user to ensure safe operation and to maintain the
product in a safe condition.
WARNIN G If this product is not used as specified, the protection provided by the equipment
could be impaired. This product must be used in a normal condition (in which
all means for protection are intact) only.
WARNIN G No operator serviceable parts inside. Refer servicing to qualified personnel. To
prevent electrical shock, do not remove covers.
iv

Contents
Servicing—At a Glance iii
1 General Information
General Reference 1-3
Cleaning Optical Connectors 1-4
Electrostatic Discharge Information 1-9
Returning the Instrument for Service 1-11
Agilent Technologies Service Offices 1-13
Specifications 1-14
Recommended Test Equipment 1-15
Preventative Maintenance 1-17
2 Performance Verification
Performance Verification 2-2
Time Interval Accuracy Performance Test 2-3
Front Panel Cal Signal 2-11
Jitter Performance Test 2-13
Trigger Verification (Standard and Option 001) 2 -18
Performance T es t Record 2-24
3 Adjustments
86100A/B Mainframe Timebase Adjustment 3-3
4 Assembly Replacement
To Remove the Mainframe Cover 4-4
To Rem ove the Mainframe Front Panel 4-7
LS-120 Disc Drive Modification (86100A Only) 4-12
To Remove the A2 Flat Panel Display 4-14
To Remove the Display Backlights 4-15
To Remove the A8 Touch Screen 4-17
To Remove the A7 Front Panel Keyboard 4-18
To Rem ove the A3 Backlight Inverter 4-20
To Remove the Front Panel Trigger Input 4-23
To Remove the A4 PC Motherboard 4-25
To Remove the A13 Acquisition (Option 001) 4 -32
A13 Acquisition Board PLD Header Modification
(86100A Only) 4-36
To Remove the A1 Power Supply 4-37
To Remove the A6 Distribution Assembly 4-39
5 Replaceable Parts—86100A
Major Assembly and Cable Identification 5-3
Front View Identification 5-6
Front Inside Panel Identifi cati on 5-8
Front View, Front Pa n e l Removed, I de ntification 5-10
Rear View Identification 5-12
Left and Right Side Identification 5-14
Left Side, Cover Removed, Identification 5-16
Right Side, Cover Removed, Identification 5-18
Contents-1

Bottom View Identification 5-20
Bottom View, Cov er Re moved, Identification 5-22
To p View, Cover Removed, Identification 5-24
Rear Panel Identification 5-26
Block Diagrams 5-27
6 Replaceable Parts—86100B
Major Assembly and Cable Identification 6-3
Front View Identification 6-6
Front Inside Panel Identifi cati on 6-8
Front View, Front Panel Remov e d, Iden tification 6-10
Rear View Identification 6-12
Left and Right Side Identification 6-14
Left Side, Cover Removed, Identification 6-16
Right Side, Cover Removed, Identification 6-18
Bottom View Identification 6-20
Bottom View, Cov er Re moved, Identification 6-22
To p View, Cover Removed, Identification 6-24
Rear Panel Identification 6-26
Block Diagrams 6-27
Contents-2

1
General Reference 1-3
Cleaning Optical Connectors 1-4
Electrostatic Discharge Information 1-9
Returning the Instrument for Service 1-11
Agilent Technologies Service Offices 1-13
Specifications 1-14
Recommended Test Equipment 1-15
Preventative Maintenance 1-17
General Information

General Information
General Information
General Information
In this chapter, you will find general information on caring for your optical devices.
Safety first!
Before servicing the mainframe, familiarize yourself with the safety markings on the instrument
and the safety instructions in this manual. This instrument has been manufactured and tested
according to international safety standards. To ensure safe operation of the instrument and the
personal safety of the user and service personnel, the cautions and warnings in this manual must
be heeded. Refer to the summary of safety considerations at the front of this manual.
WA RN IN G These servicing instructions are for use by qualified personnel only. To avoid electrical
shock, do not perform any servicing unless you are qualified to do so.
WA R NI NG The opening of covers or removal of parts is likely to expose dangerous voltages. Disconnect
the instrument from all voltage sources while it is opened.
WA RN IN G The power cord is connected to internal capacitors that may remain live for five seconds
after disconnecting the plug from its power supply.
WA R N I N G The detachable power cord is the instrument disconnecting device. It disconnects the mains
circuits from the mains supply before other parts of the instrument. The front panel switch
is only a standby switch and is not a LINE switch (disconnecting device).
WA RN IN G This is a Safety Class 1 Product (provided with a protective earthing ground incorporated
in the power cord). The mains plug shall only be inserted in a socket outlet provided with a
protective earth contact. Any interruption of the protective conductor inside or outside of
the product is likely to make the product dangerous. Intentional interruption is prohibited.
NOTE The warranty is null and void on instruments that have had the seals broken by the
customer. The instrument should only be disassembled by Agilent Technologies Customer
Engineers.
WA RN IN G Use of controls or adjustment or performance of procedures other than those specified
herein may result in hazardous radiation exposure.
1-2

General Information
General Reference
General Reference
Whenever you contact Agilent Technologies about your mainframe, have the complete serial
number and option designation available. This will ensure you obtain accurate service information.
• Refer to Table 1-1 for a list of internal labels.
Clean the cabinet using a damp cloth only.
Protect against ESD damage
Electrostatic discharge (ESD) can damage or destroy electronic components. All work on electronic assemblies should be performed at a static-safe work station. Refer to “Electrostatic Dis-
charge Information” on page 1-9 for more information on preventing ESD.
Table 1-1. Internal Labels
This label warns you about hazardous voltages
present on the power supply. Use extreme caution.
1-3

General Information
Cleaning Optical Connectors
Cleaning Optical Connectors
Accurate and repeatable measurements require clean connections. Use the following guidelines
to achieve the best possible performance when making measurements on a fiber-optic system:
• Keep connectors covered when not in use.
• Use dry connections whenever possible.
• Use the cleaning methods described in this section.
• Use care in handling all fiber-optic connectors.
• When inserting a fiber-optic connector into a front-panel adapter, make sure that the fiber end
does not touch the outside of the mating connector or adapter.
Because of the small size of cores used in optical fibers, care must be used to ensure good connections. Poor connections result from core misalignment, air gaps, damaged fiber ends, contamination, and improper use and removal of index-matching compounds.
Use dry connections. Dry connectors are easier to clean and to keep clean. Dry connections can
be used with physically contacting connectors (for example, Diamond HMS-10/HP, FC/PC,
DIN, and ST). If a dry connection has 40 dB return loss or better, making a wet connection will
probably not improve, and can actually degrade, performance.
CAUTION Agilent Technologies strongly recommends that index matching compounds not be applied to
their instruments and accessories. Some compounds, such as gels, may be difficult to remove and
can contain damaging particulates. If you think the use of such compounds is necessary, refer to
the compound manufacturer for information on application and cleaning procedures.
1-4

Table 1-2. Cleaning Accessories
Item Agilent Part Number
Pure isopropyl alcohol —
Cotton swabs 8520-0023
Small foam swabs 9300-1223
Compressed dust remover (non-residue) 8500-5262
Table 1-3. Dust Caps Provided with Lightwave Instruments
Item Agilent Part Number
Laser shutter cap 08145-64521
FC/PC dust cap 08154-44102
Biconic dust cap 08154-44105
General Information
Cleaning Optical Connectors
DIN dust cap 5040-9364
HMS10/HP dust cap 5040-9361
ST dust cap 5040-9366
Inspecting Fiber-Optic Cables
Consistent measurements with your lightwave equipment are a good indication that you have
good connections. However, you may wish to know the insertion loss and/or return loss of your
lightwave cables or accessories. If you test your cables and accessories for insertion loss and
return loss upon receipt, and retain the measured data for comparison, you will be able to tell in
the future if any degradation has occurred.
Connector (or insertion) loss is one important performance characteristic of a lightwave connector. Typical values are less than 0.5 dB of loss, and sometimes as little as 0.1 dB of loss with high
performance connectors. Return loss is another important factor. It is a measure of reflection: the
less reflection the better (the larger the return loss, the smaller the reflection). The best physically
contacting connectors have return losses better than 50 dB, although 30 to 40 dB is more common.
Visual inspection of fiber ends
Although it is not necessary, visual inspection of fiber ends can be helpful. Contamination or imperfections on the cable end face can be detected as well as
cracks or chips in the fiber itself. Use a microscope (100X to 200X magnification) to inspect the entire end face for contamination, raised metal, or dents in
the metal as well as any other imperfections. Inspect the fiber for cracks and
chips. Visible imperfections not touching the fiber core may not affect performance (unless the imperfections keep the fibers from contacting).
1-5

General Information
Cleaning Optical Connectors
To clean a non-lensed connector
CAUTION Do not use any type of foam swab to clean optical fiber ends. Foam swabs can leave filmy deposits
on fiber ends that can degrade performance.
1 Apply isopropyl alcohol to a clean, lint-free cotton swab or lens paper.
Cotton swabs can be used as long as no cotton fibers remain on the fiber end after cleaning.
2 Before cleaning the fiber end, clean the ferrules and other parts of the connector.
3 Apply isopropyl alcohol to a new, clean, lint-free cotton swab or lens paper.
4 Clean the fiber end with the swab or lens paper. Move the swab or lens paper back and forth across
the fiber end several times.
Wiping or mild scrubbing of the fiber end can help remove particles when application of alcohol
alone will not remove them. This technique can remove or displace particles smaller than one micron.
5 Immediately dry the fiber end with a clean, dry, lint-free cotton swab or lens paper.
6 Blow across the connector end face from a distance of 6 to 8 inches using filtered, dry, compressed
air. Aim the compressed air at a shallow angle to the fiber end face.
Nitrogen gas or compressed dust remover can also be used.
CAUTION Do not shake, tip, or invert compressed air canisters, because this releases particles in the can into
the air. Refer to instructions provided on the compressed air canister.
7 As soon as the connector is dry, connect or cover it for later use.
1-6

General Information
Cleaning Optical Connectors
To clean an adapter
1 Apply isopropyl alcohol to a clean foam swab.
Cotton swabs can be used as long as no cotton fibers remain after cleaning. The foam swabs listed
in this section’s introduction are small enough to fit into adapters.
Although foam swabs can leave filmy deposits, these deposits are very thin, and the risk of other
contamination buildup on the inside of adapters greatly outweighs the risk of contamination by
foam swabs.
2 Clean the adapter with the foam swab.
3 Dry the inside of the adapter with a clean, dry, foam swab.
4 Blow through the adapter using filtered, dry, compressed air.
Nitrogen gas or compressed dust remover can also be used. Do not shake, tip, or invert compressed air canisters, because this releases particles in the can into the air. Refer to instructions
provided on the compressed air canister.
1-7

General Information
Cleaning Optical Connectors
Cleaning Electrical Connections
The following list includes the basic principles of microwave connector care.
Handling and Storage
• Keep connectors clean
• Extend sleeve or connector nut
• Use plastic endcaps during storage
•Do not touch mating plane surfaces
•Do not set connectors contact-end down
Visual Inspection
• Inspect all connectors carefully before every connection
• Look for metal particles, scratches, and dents
•Do not use damaged connectors
Cleaning
• Try cleaning with compressed air first
• Clean the connector threads
•Do not use abrasives
•Do not get liquid onto the plastic support beads
Making Connections
• Align connectors carefully
• Make preliminary connection lightly
• To tighten, turn connector nut only
•Do not apply bending force to connection
•Do not overtighten preliminary connection
•Do not twist or screw in connectors
•Do not tighten past the “break” point of the torque wrench
1-8

General Information
Electrostatic Discharge Information
Electrostatic Discharge Information
Electrostatic discharge (ESD) can damage or destroy electronic components. All work on electronic assemblies should be performed at a static-safe work station. The following figure shows
an example of a static-safe work station using two types of ESD protection:
• Conductive table-mat and wrist-strap combination.
• Conductive floor-mat and heel-strap combination.
Both types, when used together, provide a significant level of ESD protection. Of the two, only
the table-mat and wrist-strap combination provides adequate ESD protection when used alone.
To ensure user safety, the static-safe accessories must provide at least 1 MΩ of isolation from
ground. Refer to Table 1-4 for information on ordering static-safe accessories.
1-9

General Information
Electrostatic Discharge Information
WA RN IN G These techniques for a static-safe work station should not be used when working on
circuitry with a voltage potential greater than 500 volts.
Table 1-4. Static-Safe Accessories
HP Part
Number
9300-0797
9300-0980 Wrist-strap cord 1.5 m (5 ft).
9300-1383 Wrist-strap, color black, stainless steel, without cord, has four
9300-1169 ESD heel-strap (reusable 6 to 12 months).
Description
3M static control mat 0.6 m
ground wire. (The wrist-strap and wrist-strap cord are not included.
They must be ordered separately.)
adjustable links and a 7 mm post-type connection.
× 1.2 m (2 ft × 4 ft) and 4.6 cm (15 ft)
1-10

General Information
Returning the Instrument for Service
Returning the Instrument for Service
The instructions in this section show you how to properly return the instrument for repair or calibration. Always call the Agilent Instrument Support Center first to initiate service before returning your instrument to a service office. This ensures that the repair (or calibration) can be
properly tracked and that your instrument will be returned to you as quickly as possible. Call this
number regardless of where you are located. Refer to “Agilent Technologies Service Offices” on
page 1-13 for a list of service offices.
Agilent Instrument Support Center . . . . . . . . . . . . . . . . . . . . . . . . . . . . . . . . . . . . (800) 403-0801
If the instrument is still under warranty or is covered by an Agilent maintenance contract, it will
be repaired under the terms of the warranty or contract (the warranty is at the front of this manual). If the instrument is no longer under warranty or is not covered by an Agilent maintenance
plan, Agilent Technologies will notify you of the cost of the repair after examining the unit.
When an instrument is returned to an Agilent Technologies service office for servicing, it must
be adequately packaged and have a complete description of the failure symptoms attached. When
describing the failure, please be as specific as possible about the nature of the problem. Include
copies of additional failure information (such as the instrument failure settings, data related to
instrument failure, and error messages) along with the original calibration data disks and the
instrument being returned.
Preparing the instrument for shipping
1 Write a complete description of the failure and attach it to the instrument. Include any specific
performance details related to the problem. The following information should be included with
the instrument being returned for service:
• Type of service required.
• Date instrument was returned for repair.
• Description of the problem:
• Whether problem is constant or intermittent.
• Whether instrument is temperature-sensitive.
• Whether instrument is vibration-sensitive.
• Instrument settings required to reproduce the problem.
• Performance data.
• Company name and return address.
• Name and phone number of technical contact person.
• Model number of returned instrument.
• Full serial number of returned instrument.
• List of any accessories returned with instrument.
2 Cover all front or rear-panel connectors that were originally covered when you first received the
instrument.
1-11

General Information
Returning the Instrument for Service
CAUTION Cover electrical connectors to protect sensitive components from electrostatic damage. Cover
optical connectors to protect them from damage due to physical contact or dust.
CAUTION Instrument damage can result from using packaging materials other than the original materials.
Never use styrene pellets as packaging material. They do not adequately cushion the instrument
or prevent it from shifting in the carton. They may also cause instrument damage by generating
static electricity.
3 Pack the instrument in the original shipping containers. Original materials are available through
any Agilent Technologies office. Or, use the following guidelines:
• Wrap the instrument in antistatic plastic to reduce the possibility of damage caused by electro-
static discharge.
• For instruments weighing less than 54 kg (120 lb), use a double-walled, corrugated cardboard
carton of 159 kg (350 lb) test strength.
• The carton must be large enough to allow approximately 7 cm (3 inches) on all sides of the
instrument for packing material, and strong enough to accommodate the weight of the instrument.
• Surround the equipment with approximately 7 cm (3 inches) of packing material, to protect the
instrument and prevent it from moving in the carton. If packing foam is not available, the best
alternative is S.D-240 Air Cap™ from Sealed Air Corporation (Commerce, California 90001).
Air Cap looks like a plastic sheet filled with air bubbles. Use the pink (antistatic) Air Cap™ to
reduce static electricity. Wrapping the instrument several times in this material will protect the
instrument and prevent it from moving in the carton.
4 Seal the carton with strong nylon adhesive tape.
5 Mark the carton “FRAGILE, HANDLE WITH CARE”.
6 Retain copies of all shipping papers.
1-12

Agilent Technologies Service Offices
Before returning an instrument for service, call the Agilent Technologies Instrument Support
Center at (800) 403-0801, visit the Test and Measurement Web Sites by Country page at
http://www.tm.agilent.com/tmo/country/English/index.html, or call one of the numbers listed
below.
Agilent Technologies Service Offices
Austria 01/25125-7171
Belgium 32-2-778.37.71
Brazil (11) 7297-8600
China 86 10 6261 3819
Denmark 45 99 12 88
Finland 358-10-855-2360
France 01.69.82.66.66
General Information
Agilent Technologies Service Offices
Germany 0180/524-6330
India 080-34 35788
Italy +39 02 9212 2701
Ireland 01 615 8222
Japan (81)-426-56-7832
Korea 82/2-3770-0400
Mexico (5) 258-4826
Netherlands 020-547 6463
Norway +47 22 73 57 59
Russia +7-095-797-3930
Spain (34/91) 631 1213
Sweden 08-5064 8700
Switzerland (01) 735 7200
Taiwan (886 2) 2-712-0404
United Kingdom 01 344 366666
United States and Canada (800) 403-0801
1-13

General Information
Specifications
Specifications
Refer to the 86100A/B on-line help for information on mainframe, horizontal (time-base), trigger, and front/rear panel input and output specifications. Touch/click Help, Contents, Specifications for a menu of the desired specifications.
1-14

General Information
Recommended Test Equipment
Recommended Test Equipment
The following table is a list of the test equipment required to test performance, calibrate, adjust,
and troubleshoot this instrument. The table indicates the critical specification of the test equipment and for which procedure the equipment is necessary. Equipment other than the recommended model may be used if it satisfies the critical specification listed in the table.
Table 1-5. Recommended Test Equipment
Equipment
Required
DMM 6 1/2 digit, 0.1 mV resolution, DC
Adapter BNC (f) to dual banana (m) Agilent 1251-2277 P
Plug-in Module 54750A, 82480A, or 86100A series
Synthesized CW
Generator
Timing Generator No Substitution Agilent 8133A standard
Function Generator 10 MHz square wave, 120 mV output,
Critical Specifications Recommended Model
Agilent 3458A P
accuracy 0.05% or better
Agilent 54751A, 83483A,
plug-in with dual electrical inputs
No Substitution Agilent 83712B
stability 0.05 ppm/yr
86112A
Required Options:
1E5 High Stability
Timebase
Recommended Options:
1E1— Output Step
Attenuator
1E8 — 1 Hz Frequency
Res.
1E9 — 3.5 mm RF Out
Connector
or Option 002
Agilent 3325B Option
001 or Agilent 33250A
Use
P, A
P, A
P, A
P
a
Attenuator 20 dB, DC to 18 GHz Agilent 33340C
(for Agilent 83712B
without built-in
attenuator)
Power Splitter (2) DC to 18 GHz Agilent 11667B P
Transition Time
Converter
Cable, BNC
Adapter, BNC (m) to
SMA (m)
Cable Assembly, 3.5
mm (m) to 3.5 mm
(m) (2 each)
2000 ps Agilent 15438A P, A
Ω, 122 cm (48 in)
50
50
Ω
61 cm (24 in); Frequency range to DC
to 26.5 GHz
Agilent 10503A P, A
Agilent E9633A BNC
(m) to SMA (m), 50
Agilent 11500E P, A
Ω
P
P, A
1-15

General Information
Recommended Test Equipment
Table 1-5. Recommended Test Equipment
Equipment
Required
Adapter, 3.5 mm (f)
Critical Specifications Recommended Model
DC to 34 GHz Agilent 1250-1749 P
to 3.5 mm (f) (2
each)
a. P = Performance Tests, A = Adjustment Tests, T= Troubleshooting
Use
a
1-16

General Information
Preventative Maintenance
Preventative Maintenance
The following tasks should be performed at the yearly calibration interval.
Perform Mainframe Modification Inspection—86100A
Verify that the following modifications have been installed on your 86100A DCA.
Intermittent Front
Panel Keypads
Intermittent or Slow
Floppy Disk Reads
Service Note 86100A-01
Serial Number: US4032 and below
Early production units had keypad assemblies with carbon ink on the printed circuit boards together with silver contacts on the rubber keypads. Over time resistance builds up on the contacts.
Newer keypads have carbon contacts.
This modification involves replacing the entire A7 Front Panel Assembly with the exchange front
panel assembly (refer to ”Replaceable Parts—86100A” on page 5-1 for the A7 Front Panel As-
sembly part number). The defective assembly must be returned to Agilent for credit.
Refer to ”To Remove the Mainframe Front Panel” on page 4-7 as applicable.
Service Note 86100A-02
Serial Number: US4106 and below
On early DCA mainframes, the LS-120 disk drive would occasionally experience difficulty with
read and write operations.
A new ground connection was added on the A16 LS-120 Adapter Board Assembly. Replace the
A16 (part number 86100-66505) with the newer assemblies. Some DCAs may have already
received this modification; refer to Figure 4-15 on page 4-13. The new board assemblies have a
large ground trace added to the connector.
Refer to ”LS-120 Disc Drive Modification (86100A Only)” on page 4-12 as applicable.
Intermittent Problems
with Vertical
Calibrations or
Vertical Trace
Service Note 86100A-03
Serial Number: US4032 and below
On early DCA mainframes, the PLDs on the A13 Acquisition Assembly would occasionally go
into a write mode on power up. This will cause various symptoms such as vertical cal failure,
vertical trace at top or bottom screen, and loss of control of the vertical trace. Sometimes the
DCA fails to completely boot up leaving just the splash screen and the DCA buttons displayed.
Rebooting the DCA fixes the problem. If the DCA boots up properly, the problem will not
appear again.
Installing a PLD header plug on a connector on the A13 Acquisition Assembly can solve the
PLD lockup problem.
Refer to ”A13 Acquisition Board PLD Header Modification (86100A Only)” on page 4-36 as
applicable.
1-17

General Information
Preventative Maintenance
Plug-in Modules Not
Recognized by the
DCA Mainframe
Service Note 86100A-04
Serial Numbers below US4017:
On early DCA mainframes, some modules are not recognized by the DCA. Usually the problem
occurs when a clock recovery module is installed together with another module.
Various modifications were performed on the A13 Acquisition board assembly to solve this
problem. The modifications are not possible in the field.
To determine whether the A13 Acquisition board assembly has been modified, remove it from
the mainframe and examine U55 (see Figure 1-1). If U55 is a Motorola part, the board assembly
has not been modified and must be replaced.
Figure 1-1. U55 location
Replace the entire A13 Acquisition board assembly with the A13 exchange assembly. DCAs
with option 001 (divided trigger) will need to have the option 001 replacement assembly. Look at
the serial tag on the rear panel to see if option 001 is installed.
Refer to ”To Remove the A13 Acquisition (Option 001)” on page 4-32 as applicable.
Perform a Mainframe
Timebase Adjustment
Perform a Touch
Screen Alignment
Perform Front Panel
Knob and Key Test
Perform Mainframe Maintenance—86100A and 86100B
For users who need pre-data at the yearly calibration interval, a verification process must be done
first. Otherwise, a yearly Horizontal Timebase Adjustment is recommended before performance
verification is started. Refer to “86100A/B Mainframe Timebase Adjustment” on page 3-3.
1 On the DCA screen, click/touch Utilities, Touch Screen Config, Calibration, Calibrate.
2 Using a touch screen stylus, such as Agilent Part Number 1535-5214, follow the on-screen
instructions and click on the three alignment dots.
3 Close the dialog boxes when the tests are complete.
1 On the DCA screen, click/touch Help and About.
2 On the DCA front panel, press the Local hardkey 5 times (until Service Mode enabled is
displayed).
3 On the DCA screen, click/touch Utilities, Service, and Self Test.
4 Perform all self-tests starting with the front panel test. Select Front Panel and press Start Test.
1-18

Run Scan Disk
Mainframe Serial
Number Entry
General Information
Preventative Maintenance
5 Check that all keypads are working properly. If any are intermittent, the keypads will need to be
replaced.
6 Continue with the Screen Test, Touch Screen, and All Non-interactive.
1 On the DCA screen, click/touch Help and About 86100A(or B).
2 On the DCA front panel, press the Local hardkey 5 times (until Service Mode enabled is
displayed).
3 On the DCA screen, click/touch Utilities, Service, Exit Scope.
4 On the DCA screen, click/touch Start, Programs, Accessories, System Tools, Scan Disk.
5 Select Standard Test and click/touch Start.
6 If there are any errors after the completion of the test, select Repair the Errors and press OK.
7 Close the dialog boxes and cycle power.
(Perform this procedure if the hard drive has been replaced)
1 On the DCA screen, click/touch About 86100A(or B) under the Help menu.
2 On the DCA front panel, press the Local hardkey 5 times (until Service Mode enabled is
displayed).
3 On the DCA screen:
a Close the About 86100A(or B) dialog box (Click/touch Close).
b Click/touch Utilities, Service, Frame.
c Click/touch the entry field in the Frame dialog box (the touch screen keypad opens).
d Enter the mainframe serial number (from the rear panel serial tag).
e Click/touch OK.
f Click/touch Save.
4 Check the serial number entered:
a Click/touch Help
b Click/touch About 86100A(or B).
Confirm the new serial number appears in the dialog box.
Clean Display Use a soft cloth and multi-purpose anti static cleaner for computers. Spray cleaner on the cloth
(not directly on the screen), and clean the screen with the cloth.
Clean Fans Remove the cover and vacuum the fans using a small vacuum designed for computer systems.
1-19

General Information
Preventative Maintenance
1-20

2
Performance Verification 2-2
Time Interval Accuracy Performance Test 2-3
Front Panel Cal Signal 2-11
Jitter Performance Test 2-13
Trigger Verification (Standard and Option 001) 2-18
Performance Test Record 2-24
Performance Verification

Performance Verification
Performance Verification
Performance Verification
This chapter documents the performance tests. Equipment required for individual tests is listed in
the test descriptions in this chapter. Equipment satisfying the critical specifications listed may be
substituted for the recommended model.
Performance Testing
Interval
Specifications The specifications that apply to a particular test are listed in chapter 1 of this manual. Refer to the
Performance Test
Record
Before Testing
The performance test procedures may be performed for incoming inspection of the instrument
and should be performed periodically thereafter to ensure and maintain peak performance. The
recommended test interval is yearly or every 2,000 hours of operation.
86100A/B on-line help for specifications.
You may record the results of the performance tests in the Performance Test Record provided at
the end of this chapter. The Performance Test Record lists the performance tests and provides an
area to mark test results. You can use the results recorded at incoming inspection for later comparisons during periodic maintenance, troubleshooting, and after repairs or adjustments.
• Warm up the system for at least 60 minutes prior to beginning the performance tests.
• After sufficient warm up, perform a vertical calibration on the system.
• Avoid damage to plug-in front panel connectors. Use 2.4 mm and 3.5 mm connector savers. These
connector savers are a supplied accessory.
• Minimize connector swapping during the procedures to avoid connector wear. All connectors on
test tools and adapters should be inspected both visually and mechanically every few calibrations.
• All connectors should be clean and undamaged to ensure accurate measurements. All 2.4 mm and
3.5 mm connectors should be mechanically and visually checked before inserting any calibration
test tool into them. Damaged connectors or loose connectors may cause the performance verification tests to fail.
• Avoid sharp bends in 2.4 mm, 3.5 mm, SMA, and optical cables. When mating 2.4 mm to 2.4 mm
or 3.5 mm to 3.5 mm, torque all connections to 8 in/lbs. When mating 3.5 mm to SMA or SMA
to SMA, torque all connections to 5 in/lbs.
CAUTION The module inputs are very sensitive to static discharge. Failure to observe proper antistatic
procedures may damage the gallium arsenide samplers. ESD damage is not covered under the
warranty. All maintenance or operation should be performed with an antistatic mat and wrist strap.
Refer to “Electrostatic Discharge Information” on page 1-9 for further information.
CAUTION Electrostatic discharge can seriously damage the module’s electrical inputs. To eliminate any
electrostatic build up from a cable you’re connecting to the module, connect a female short to
either end of the cable. Touch the short to an input connector hex nut on the module to discharge
any static build up to ground. Remove the short. Use this procedure for all cables before
connecting them to the module.
2-2

Performance Verification
Time Interval Accuracy Performance Test
Time Interval Accuracy Performance Test
The horizontal time interval accuracy of the mainframe and plug-in modules are compared to a
known reference.
Equipment Required
Equipment Critical Specifications Recommended Model/Part
Plug-in Module 54750A, 82480A, or 86100A series
plug-in with electrical input
Synthesized CW
Generator
Timing Generator No substitution Agilent 8133A standard or
Function/Arbitrary
Waveform Generator
Transition Time Converter 2000 ps Agilent 15438A
Cable, BNC
Adapter, BNC (m) to
SMA (m)
No substitution Agilent 83712B
10 MHz square wave, 120 mV output,
stability 0.05 ppm/yr
Ω, 122 cm (48.in)
50
50 Ω
Agilent 54751A, 83483A,
86112A
Required Options:
1E5 High Stability Timebase
Recommended Options:
1E1— Output Step
Attenuator
1E8 — 1 Hz Frequency Res.
1E9 — 3.5 mm RF Out
Connector
Option 002
Agilent 3325B Option 001
or Agilent 33250A
Agilent 10503A
Agilent E9633A BNC (m) to
SMA (m), 50
Ω
Procedure
Cable Assembly, 3.5 mm
(m) to 3.5 mm (m) (2
each)
Adapter, 3.5 mm (f) to 3.5
mm (f) (2 each)
61 cm (24 in); Frequency range of dc
to 26.5 GHz
dc to 34 GHz Agilent 1250-1749
Agilent 11500E
Period Accuracy for Delay Settings
1 Warm up the system for at least 60 minutes, then perform a vertical calibration.
2 Connect the equipment as shown in Figure 2-1.
2-3

Performance Verification
Time Interval Accuracy Performance Test
a Connect the synthesized CW generator’s 10 MHz OUT to the timing generator’s timebase
EXTERNAL INPUT.
b Connect the 2000 ps transition time converter to the timing generator’s CHANNEL 2 output.
c Connect the 2000 ps transition time converter to the DCA front panel trigger input, using the
cable and adapters.
d Connect the synthesized CW generator OUTPUT to the desired module electrical channel.
Figure 2-1. Time Interval Accuracy Setup
3 Set the timing generator controls as follows:
a Turn on the timebase EXT and EXT DIVIDE, and set to divide by one.
b Set the CHANNEL 2 output as follows:
SQUAR ON
AMPL 2.5 V
OFFS 0
DISABLE OFF
4 On the synthesized CW generator, press PRESET, then set the controls as follows:
FREQ 19.98 GHz
POWER LEVEL 0 dBm
RF ON/OFF OFF
5 On the DCA front panel, press the Default Setup hardkey.
6 On the DCA screen, press Time Delay, set the scale to 10 ps/div, and set the Delay From Trigger
to 24 ns. See Figure 2-2.
2-4

Performance Verification
Time Interval Accuracy Performance Test
Figure 2-2. Setting Time and Delay for Measuring Time Interval Accuracy
7 Ensure that the correct channel is enabled.
8 Turn all other channels off.
9 On the DCA screen, press Scale Offset for the channel in use, then set the scale (vertical) to
60 mV/div and the offset to 0 V. See Figure 2-3. Close dialog box.
Figure 2-3. Setting Scale and Offset for Measuring Time Interval Accuracy
10 On the DCA screen, press Setup, Acquisition, Enable Averaging, and set the number of averages
to 64. See Figure 2-4. Close dialog box.
2-5

Performance Verification
Time Interval Accuracy Performance Test
Figure 2-4. Setting Averaging for Measuring Time Interval Accuracy
11 On the Synthesized CW Generator, turn the RF ON/OFF to ON.
Figure 2-5. Setting Period for Measuring Time Interval Accuracy
12 On the DCA screen, press Period. See Figure 2-5.
13 On the 86100A/B, adjust the vertical scale so that the signal is on the screen.
14 On the 86100A/B, press the Clear Display hardkey.
15 Record the current DCA period readout in the Performance Test Record for each delay setting in
Table 2-1.
2-6

Performance Verification
Time Interval Accuracy Performance Test
16 On the DCA screen, press Time Delay to set the Delay. See Figure 2-6. After changing the delay,
press the Clear Display hardkey before making the next measurement.
Table 2-1. Period Accuracy for Delay Settings
Delay Setting in ns
24
27.95
35.95
59.95
Figure 2-6. Delay Settings for Measuring Time Interval Accuracy
Period Accuracy for Scale Settings
17 On the DCA screen, press Time Delay and set Delay From Trigger to 24 ns.
18 On the DCA screen, press Setup, the channel in use, then press Advanced. See Figure 2-7.
2-7

Performance Verification
Time Interval Accuracy Performance Test
Figure 2-7. Setting Best Sensitivity for Measuring Time Interval Accuracy
19 Select the Best Sensitivity Sampler Bandwidth. Close dialog box.
20 On the DCA screen, press Time Delay, then check the period at the scale and synthesized CW
generator settings shown in Table 2-2 and record the results in the Performance Test Record.
a Press the Clear Display hardkey and wait for the averaging to complete before recording the
current results.
b Adjust the vertical scale as necessary to keep the signal on the screen.
Table 2-2. Period Accuracy for Horizontal Scale Settings from 20 ps to 10 ns
Horizontal Scale Setting Synthesized CW Generator Setting
20 ps/div 10 GHz
50 ps/div 5 GHz
100 ps/div 2 GHz
200 ps/div 1 GHz
500 ps/div 500 MHz
1 ns/div 200 MHz
2 ns/div 100 MHz
5 ns/div 50 MHz
10 ns/div 20 MHz
21 On the DCA screen, press Trigger Level and set the Trigger Level to 500 mV. See Figure 2-8.
Alternatively use the Trigger knob and adjust the Trigger Level to 500 mV.
2-8

Performance Verification
Time Interval Accuracy Performance Test
Figure 2-8. Setting Trigger Level for Measuring Time Interval Accuracy
22 Connect the equipment as shown in Figure 2-9.
Figure 2-9. Time Interval Accuracy Setup from 20 ns/div to 20 µs/div
Time Interval Accuracy 20 ns/div to 20µs/div
23 Set the Waveform Generator’s frequency to 10 MHz; set the amplitude to 400 mV pp, offset 0V,
square wave.
24 On the DCA screen, press Time Delay. Ensure that the delay is set to 24 ns, then check the period
at the Function/Arbitrary Waveform Generator and scale settings shown in Table 2-3 and record
them in the Performance Test Record.
25 Press the Clear Display hardkey before recording the new reading.
2-9

Performance Verification
Time Interval Accuracy Performance Test
Table 2-3. Period Accuracy for Scale Settings from 20 ns to 20 µs
Horizontal Scale Setting
20 ns/div 10 MHz
50 ns/div 5 MHz
100 ns/div 2 MHz
200 ns/div 1 MHz
500 ns/div 500 kHz
1.0
µs/div
2.0
µs/div
5 µs/div
10 µs/div
20 µs/div
Function/Arbitrary Waveform Generator
Settings
200 kHz
100 kHz
50 kHz
20 kHz
10 kHz
2-10

Front Panel Cal Signal
Performance Verification
Front Panel Cal Signal
Equipment Required
Procedure
Equipment Critical Specifications Recommended Model/Part
DMM 6 1/2 digit, 0.1mV resolution, dc
accuracy 0.05% or better
Cable BNC Agilent 10503A
Adapter BNC (f) to dual banana (m) Agilent 1251-2277
Agilent 3458A
1 Set the DMM to measure DC volts and use the cable and adapter to connect the DMM to the front
panel CAL output.
2 On the DCA screen, press Calibrate, then press Front Panel Cal Output. See Figure 2-10.
Figure 2-10. Front Panel Cal Output Level
3 Enter 2.0 V and record the first reading.
____________Vdc
4 Enter –2.0 V and record the second reading.
____________Vdc
2-11

Performance Verification
Front Panel Cal Signal
5 Subtract the second reading from the first reading, then divide the result by 4.
For example, if the first reading is +1.980 V and the second reading is -1.970 V, then:
+1.980 V - (-1.970 V)
= 0.9875
4 V
Record the result in the Performance Test Record.
2-12

Performance Verification
Jitter Performance Test
Jitter Performance Test
Jitter is measured at 2.5 GHz with the triggering level adjusted for optimum trigger. The jitter
test measures the oscilloscope’s internal jitter on a 2.5 GHz sine wave. The instrument’s jitter is
less with fast rise time input signals.
A 24 ns delay line is added to delay the input signal so that the trigger point is on screen. The
delay setting is determined and used to calculate the specification limit. A histogram is used to
increase the accuracy of the RMS jitter measurement.
NOTE The 86100A/B DCA has an additional 2 ns of delay compared to the Agilent 83480A or
83750A.
Equipment Required
Equipment Critical Specifications Recommended Model/Part
Plug-in Module 54750A, 82480A, or 86100A/B series
plug-in with electrical input
Synthesized CW
Generator
Delay Line 24 ns Agilent 54008B
Power Splitter Frequency range of dc to 18 GHz Agilent 11667B
Cable, BNC
Adapter, BNC (m) to
SMA (m)
Cable Assembly, 3.5 mm
(m) to 3.5 mm (m) (3
each)
Ω, 122 cm (48.in)
50
50
Ω
61 cm (24 in); Frequency range of dc
to 26.5 GHz
Agilent 54751A, 83483A,
86112A
Agilent 83712B
Required Options:
1E5 High Stability Timebase
Recommended Options:
1E1— Output Step
Attenuator
1E8 — 1 Hz Frequency Res.
1E9 — 3.5 mm RF Out
Connector
Agilent 10503A
Agilent E9633A BNC (m) to
SMA (m), 50
Agilent 11500E
Ω
Procedure
1 Warm up the system for at least 60 minutes, then perform a vertical calibration.
2 Connect the equipment as shown in Figure 2-11.
a Connect the synthesized CW generator’s OUTPUT to the Power Splitter’s INPUT.
b Connect one output port of the Power Splitter to the DCA front panel trigger input.
c Connect the other output port of the Power Splitter to the Delay Line.
d Connect the Delay Line to the desired module electrical channel.
2-13

Performance Verification
Jitter Performance Test
3 Set the synthesizer’s FREQ to 2.5 GHz and POWER LEVEL to 0 dBm. Make sure the RF ON/
OFF is set to ON.
Figure 2-11. Jitter Performance Test Setup
4 On the front panel, press the Default Setup hardkey.
5 Ensure that the correct channel is enabled.
6 Turn all other channels off.
7 On the DCA screen, press Scale Offset for the channel in use, then set the scale (vertical) to
30 mV/div and the offset to 0.0 V.
8 On the DCA screen, press Time Delay, set the Reference to center, set the Scale to 500 ps/div, and
set the Delay From Trigger to 26.5 ns.
9 On the DCA screen, press Setup, Display, then set the persistence to Infinite.
10 On the DCA screen, press Trigger Level and set the Hysteresis to High Sensitivity.
11 Slightly change the frequency of the Synthesized CW Generator above and below 2.5 GHz.
12 Look for a part of the waveform that does not expand or contract as the frequency is varied.
NOTE You may have to adjust the delay setting on the Agilent 86100A/B until you find the trigger
point. Use the horizontal delay knob.
13 Place a marker on this point. Adjust the horizontal delay until the marker is centered on the screen.
Refer to Figure 2-12.
2-14

Figure 2-12. Centered Marker
Performance Verification
Jitter Performance Test
14 Being careful to keep the marker centered on the screen, press Time Delay on the DCA screen and
set the Scale to 50 ps/div.
15 Record the Delay Setting:
Horizontal Delay = ______________ ns
16 Turn the marker off.
17 On the DCA screen, press Time Delay and set the Scale (horizontal) to 10 ps/div.
18 On the DCA screen, press Scale Offset and set the Scale (vertical) to 10 mV/div.
19 On the DCA front panel, slowly rotate the Horizontal Position knob clockwise until the rising
edge of the signal intersects the center of the screen. See Figure 2-13.
2-15

Performance Verification
Jitter Performance Test
Figure 2-13. Rising Signal Intersecting with Center of Screen
20 On the DCA screen, press Measure, Histograms, Histogram Windowing.
21 Adjust the four marker knobs as follows:
Marker 1 Full Left Screen
Marker 2 +300
µV
Marker 3 Full Right Screen
Marker 4 –300
µV
22 Close the Histogram Windowing Dialog Box and set the Histogram State to ON.
23 The display should appear as shown in Figure 2-14.
Figure 2-14. Histogram Setup
2-16

Performance Verification
Jitter Performance Test
24 Record the value of the standard deviation as Jitter RMS.
Jitter RMS = _____________ ps
25 Calculate the test limit:
For 86100A instrument serial prefix numbers below US4051 (without option K10):
Test Limit = <2.5 ps + (Horizontal Delay from Step 15 multiplied by 5*10–5)
Test Limit =
_____________ps
For 86100A instrument serial prefix numbers below US4051 with
option K10:
Test Limit = <1.5 ps + (Horizontal Delay from Step 15 multiplied by 5*10–5)
Test Limit =
_____________ps
For all 86100B serial numbers, and 86100A instrument serial prefix numbers US4051 and
above:
Test Limit = <1.5 ps + (Horizontal Delay from Step 15 multiplied by 5*10–5)
Test Limit = _____________ps
Example for a Delay Setting of 31.67 ns and test limit of <2.5 ps:
Test Limit =≤2.5*10
≤2.5*10
≤4.08 ps
–12
+ (31.67*10–9 x 5*10–5)
–12
+ 1.58*10
–12
26 Compare the results of Jitter RMS to the Test Limit. Record both values in the Performance Test
Record.
2-17

Performance Verification
Trigger Verification (Standard and Option 001)
Trigger Verification (Standard and Option 001)
The sensitivity test measures the high and low frequency sensitivities by applying a 100 MHz
sine wave and a 2.5 GHz sine wave. If the oscilloscope triggers at 2.5 GHz, it will also trigger on
a 200 ps pulse width at 200 mV.
Equipment Required
Equipment Critical Specifications Recommended Model/Part
Plug-in Module 54750A, 82480A, or 86100A/B series
plug-in with electrical input
Synthesized CW
Generator
Function/Arbitrary
Waveform Generator
Power Splitter (2 each) Frequency range of dc to 18 GHz
BNC (male) Termination
Delay Line Agilent 54008B
Adapter, BNC (m) to
SMA (m) (2 each)
Adapter, BNC (f) to BNC
(f) (2 each)
10 MHz to 20 GHz Agilent 83712B
10 MHz square wave, 120 mV output,
stability 0.05 ppm/yr
Ω
50
50
Ω
Ω
50
Agilent 54751A, 83483A,
86112A
Required Options:
1E5 High Stability Timebase
Recommended Options:
1E1— Output Step
Attenuator
1E8 — 1 Hz Frequency Res.
1E9 — 3.5 mm RF Out
Connector
Agilent 3325B Option 001
or Agilent 33250A
Agilent 11667B
Agilent E9633A
Agilent 1250-0080
a
Cable, BNC (2 each)
Cable Assembly, 3.5 mm
(m) to 3.5 mm (m)
(4 each)
a. Testing Option 001 requires an extra power splitter and a dual electrical module
Ω,=122 cm (48 in)
50
61 cm (24 in); Frequency range dc to
26.5 GHz
Agilent 10503A
Agilent 11500E
Low Frequency Trigger Hysteresis
A signal is applied to a power splitter whose outputs are connected to the module’s electrical
channel and the front panel trigger input. The trigger level is adjusted to positive and negative
until it stops triggering. These positive and negative values are subtracted from 100 mV p-p to
give the Trigger Hysteresis value.
2-18

Procedure
Performance Verification
Trigger Verification (Standard and Option 001)
1 Warm up the system for at least 60 minutes, before verifying performance.
2 Disconnect everything from the channel inputs on the DCA.
3 On the DCA screen, press Calibrate, All Calibrations, Vertical (Amplitude), and Calibrate Left
Module.
4 Wait for the completion of the vertical calibration.
5 Set the Function/Arbitrary Waveform Generator as follows:
a Set the Frequency to a 100 kHz sine wave
b Set the output to 180 mV pp
6 Connect the equipment as shown in Figure 2-15.
a Connect the Function/Arbitrary Waveform Generator’s OUTPUT to the Power Splitter’s
INPUT.
b Connect one output port of the Power Splitter to the DCA front panel trigger input.
c Connect the other output port of the Power Splitter to the desired module electrical channel.
Figure 2-15. Trigger Sensitivity Equipment Setup
7 On the front panel, press the Default Setup hardkey.
8 Ensure that the correct channel is enabled.
9 Turn all other channels off.
10 On the DCA screen, press Scale Offset for the channel in use, then set the scale (vertical) to
20 mV/div and the offset to 0.0 V.
11 On the DCA screen, press Time Delay, set the Scale (horizontal) to 1 µs/div.
12 On the DCA screen, press Setup, Acquisition, Enable Averaging.
13 On the DCA screen, press Amplitude then V p-p.
14 On the Function/Arbitrary Waveform Generator, adjust the output level for a 100 mV p-p ± 1 mV
reading on the DCA.
15 Adjust the Trigger Level knob clockwise until the DCA just stops triggering, as indicated by the
Trig’d light going off.
2-19

Performance Verification
Trigger Verification (Standard and Option 001)
16 Record the value of the trigger level as V pos:
V pos ______________ mV
17 Return the trigger level to 0 volts, then slowly adjust the trigger level counterclockwise until the
DCA just stops triggering.
18 Record the value of the trigger as V neg:
V neg ______________ mV
19 Calculate the Hysteresis as follows:
Hysteresis = 100 mV − (V pos − V neg)
20 Record the result in the Performance Test Record as Hysteresis.
Trigger Sensitivity
On the following tests, the 100 MHz and 2.5 GHz signals are used. The trigger level is adjusted
positive and negative as in the preceding test.
100 MHz To perform the Trigger Sensitivity test with a 100 MHz signal, follow these steps.
1 Replace the Function/Arbitrary Waveform Generator with the Synthesized CW Generator.
2 On the DCA front panel, set the trigger level to 0 V.
3 On the DCA screen, press Time Delay, set the Scale (horizontal) to 2 ns/div.
4 Set the Synthesized CW Generator FREQ to 100 MHz and adjust the POWER LEVEL for a
current reading of 150 mV ±1 mV on the DCA.
5 On the DCA front panel, adjust the Trigger Level knob clockwise until the DCA just stops
triggering as indicated by the Trig’d light going off.
6 Record the trigger value below as V pos:
V pos ______________ mV
7 Return the Trigger Level to 0 V.
8 On the DCA front panel, adjust the Trigger Level knob counterclockwise until the DCA just stops
triggering as indicated by the Trig’d light going off.
9 Record the trigger value below as V neg:
V neg ______________ mV
10 Calculate the Sensitivity as follows:
Vsense 100 MHz = 150 mV − (V pos − V neg)
11 Record the result in the Performance Test Record as 100 MHz Sensitivity.
2.5 GHz To perform the Trigger Sensitivity test with a 2.5 GHz signal, follow these steps.
12 On the DCA screen, press Trigger Level and set the Hysteresis to High Sensitivity.
13 On the DCA screen, press Time Delay, set the Scale (horizontal) to 100 ps/div.
14 On the DCA screen, press Scale Offset, set the Scale (vertical) to 50 mV / div.
15 Set the Synthesized CW Generator FREQ to 2.5 GHz and adjust the POWER LEVEL for a current
reading of 200 mV ± 2 mV on the DCA.
16 On the DCA front panel, adjust the Trigger Level to 0 V.
2-20

Performance Verification
Trigger Verification (Standard and Option 001)
17 On the DCA front panel, adjust the Trigger Level knob clockwise until the DCA just stops
triggering as indicated by the Trig’d light going off.
18 Record the trigger value below as V pos:
V pos _____________ mV
19 Return the Trigger Level to 0 V.
20 On the DCA front panel, adjust the Trigger Level knob counterclockwise until the DCA just stops
triggering as indicated by the Trig’d light going off.
21 Record the trigger value below as V neg:
V neg _____________ mV
22 Calculate the sensitivity as follows:
Vsense 2.5 GHz = 200 mV − (V pos − V neg)
23 Record the result in the Performance Test Record as 2.5 GHz Sensitivity.
Gated Trigger
This test verifies the functionality of the gated trigger circuitry by connecting a BNC termination
to the TRIGGER GATE input on the rear panel. The DCA should stop triggering with this termination attached.
1 On the DCA screen, press Trigger Level and set the trigger level to 0 V, Hysteresis to Normal,
and enable the Gated Trigger.
2 Confirm that the DCA is triggered as indicated by the lit Trig’d light.
3 Connect a BNC termination to the TRIGGER GATE input on the DCA’s rear panel.
4 Check that the DCA is not triggered as indicated by the Trig’d light going off.
Option 001 Divided Trigger Sensitivity
NOTE Perform this test only if the Agilent 86100A/B has option 001 installed. To see if option 001
is installed, touch/click Help, About. Option 1: 12.5 GHz will be displayed next to the serial
number.
1 Connect the equipment as shown in Figure 2-16.
a Connect the Synthesized CW Generator’s OUTPUT to the INPUT of a Power Splitter.
b Connect one output port of the Power Splitter to the Delay Line.
c Connect the other output port of the Power Splitter to the INPUT of a second Power Splitter.
d Connect one output port of the second Power Splitter to channel two of the electrical module.
e Connect the other output port of the second Power Splitter to the DCA trigger input.
f Connect the Delay Line to channel one of the electrical module.
2-21

Performance Verification
Trigger Verification (Standard and Option 001)
Figure 2-16. Option 001 Trigger Sensitivity
2 On the front panel, press the Default Setup hardkey.
3 Turn on the electrical channel 2.
4 Turn all other channels off by pressing the corresponding hardkey.
5 On the DCA screen, press Trigger Level and set the Trigger Bandwidth to 2-12 GHz.
6 On the DCA screen, press Time Delay, set the reference to center screen, set the Scale (horizontal)
to 500 ps/div, and set the Delay From Trigger to 26.5 ns.
7 On the DCA screen, press Channel 2 Scale Offset and set the Scale (vertical) to 30 mV/div and
Offset to 0 V.
8 On the DCA screen, press Time then Jitter RMS.
9 On the DCA screen, press Amplitude, V p-p, and select Channel 2 as a source.
10 Set the Synthesized CW Generator FREQ and POWER LEVEL to the settings shown in Table
2-4, Column 1 and Column 2.
11 Make sure Channel 2 ON and that Channel 1 is OFF.
12 On the DCA screen, press Time Delay and temporarily set the Scale (horizontal) to approximately
100 ps/div in order to adjust the power level in the following step.
13 Adjust the Synthesized CW Generator’s POWER LEVEL so that the reading on the DCA Channel
2 is 200 mV p-p ± 1 mV.
14 Turn Channel 2 OFF and turn Channel 1 ON.
15 On the DCA, set the Scale (horizontal) as shown in Table 2-4, Column 3 for the FREQ in Column
1.
16 On the DCA screen, press Scale Offset and set the Channel 1 Scale (vertical) to 5 mV/div.
17 On the DCA screen, press Time Delay and set the Delay From Trigger to 26 ns.
2-22

Performance Verification
Trigger Verification (Standard and Option 001)
18 Adjust the delay knob counterclockwise so that the first rising zero crossing point intersects the
center of the display. Refer to Figure 2-17 below.
Figure 2-17. Divided Trigger Screen
19 Press Clear Display and wait for the reading to finish.
At higher frequencies it can take several seconds before enough data is collected.
20 Record the Jitter RMS in the Performance Test Record.
21 Repeat Step 10 through Step 20 for each Synthesized CW Generator FREQ setting. Set the DCA’s
power level and horizontal scale to the corresponding settings, as shown in Table 2-4, below.
Table 2-4. Synthesizer and DCA Horizontal Scale Settings
Column 1 Column 2 Column 3
Synthesizer FREQ (GHz) Synthesizer POWER LEVEL (dBm) DCA Horizontal Scale (ps/div)
23.8 20
2.5 3.9 20
55.6 5
10 7.3 2
12 7.7 2
2-23

Performance Verification
Performance Test Record
Performance Test Record
Table 2-5. Performance Test Record
Agilent 86100A/B Series Mainframe
Firmware installed at time of calibration
(Software Revision):_________________
Serial Number _______________________
Recommended Test Interval – 1 Year/2000
hours
Recommended next testing _______________
Test Results
Tested by ______________________
Work Order No. __________________
Date __________________________
Calibration temperature (from instrument)
_____________
Time Interval Accuracy
Performance Test
Delay
Position
Settings (ns)
24 41.95 _______________
27.95 41.95 58.05
35.95 41.95 58.05
59.95 41.95 58.05
Period Accuracy
Scale Setting
20 ps/div 10 GHz 91.9 ps ________ 108.1 ps
50 ps/div 5 GHz 191.8 ps ________ 208.2 ps
100 ps/div 2 GHz 491.5 ps ________ 508.5 ps
200 ps/div 1 GHz 0.9910 ps ________ 1.009 ns
500 ps/div 500 MHz 1.99 ns ________ 2.010 ns
1 ns/div 200 MHz 4.987 ns ________ 5.013 ns
2 ns/div 100 MHz 9.982 ns ________ 10.018 ns
5 ns/div 50 MHz 19.972 ns ________ 20.028 ns
Min Actual Max
58.05
_______________
_______________
_______________
Synthesized CW
Generator Setting
Min Actual Max
2-24
10 ns/div 20 MHz 49.942 ns ________ 50.06 ns

Table 2-5. Performance Test Record (Continued)
Test Results
Time Interval Accuracy
Performance Test (cont.)
Period Accuracy
Performance Verification
Performance Test Record
Scale Setting Synthesizer
20 ns/div 10 MHz 99.89 ns ________ 100.11 ns
50 ns/div 5 MHz 199.79 ns ________ 200.21 ns
100 ns/div 2 MHz 499.49 ns ________ 500.51 ns
200 ns/div 1 MHz
500 ns/div 500 kHz
1.0 µs/div
2.0 µs/div
5 µs/div
10 µs/div
20 µs/div
Front Panel Cal Signal Cal Output Level
Final Result 0.998 ______________Vdc 1.002
Jitter Performance Test
(Standard)
Jitter RMS
Min Actual Max
Setting
µs
________
________
________
________
________
________
________
1.00101 µs
2.00201 µs
5.00501 µs
10.01001 µs
20.02001 µs
50.05001 µs
100.10001 µs
Max
0.99899 µs
1.99799
200 kHz
100 kHz
50 kHz
20 kHz
10 kHz
Min Actual Max
4.99499 µs
9.98999 µs
19.980 µs
49.950 µs
99.900 µs
Actual Test Limit,
Trigger Verification
(Standard and Option
001)
Test Limit ______________ ps _________ ps
Low Frequency Trigger Hysteresis
Actual Max
Hysteresis ________ mV 40 mV
100 MHz Trigger Sensitivity
Actual Max
Sensitivity ________ mV 40 mV
2.5 GHz Trigger Sensitivity
Actual Max
Sensitivity ________ mV 200 mV
2-25

Performance Verification
Performance Test Record
Table 2-5. Performance Test Record (Continued)
Test Results
Trigger Verification
(Option 001 Only)
Divided Trigger Sensitivity (Option 001)
Synthesizer
FREQ (GHz)
2 _________________ ps 1.7 ps
2.5 _________________ ps 1.7 ps
5 _________________ ps 1.7 ps
10 _________________ ps 1.7 ps
12 _________________ ps 1.7 ps
Jitter RMS Result Max
2-26

3
Adjustments 3-2
86100A/B Mainframe Timebase Adjustment 3-3
Adjustments

Adjustments
Adjustments
Adjustments
This chapter provides adjustment procedures for the Agilent 86100A/B Infiniium DCA Mainframe. Equipment required for individual adjustments is listed in the adjustment descriptions in
this chapter. Equipment satisfying the critical specifications listed may be substituted for the recommended model.
Adjustment Interval The adjustment procedures should be performed yearly or after every 2,000 hours of operation.
Before Adjusting
• Warm up the system for at least 60 minutes prior to beginning the adjustments.
• Avoid damage to plug-in front panel connectors. Use 2.4 mm and 3.5 mm connector savers. These
connector savers are a supplied accessory.
• Minimize connector swapping during the procedures to avoid connector wear. All connectors on
test tools and adapters should be inspected both visually and mechanically every few calibrations.
• All connectors should be clean and undamaged to ensure accurate measurements. All 2.4 mm and
3.5 mm connectors should be mechanically and visually checked before inserting any calibration
test tool into them. Damaged connectors or loose connectors may cause the performance verification tests to fail.
• Avoid sharp bends in 2.4 mm, 3.5 mm, SMA, and optical cables. When mating 2.4 mm to 2.4 mm
or 3.5 mm to 3.5 mm, torque all connections to 8 in/lbs. When mating 3.5 mm to SMA or SMA
to SMA, torque all connections to 5 in/lbs.
CAUTION The module inputs are very sensitive to static discharge. Failure to observe proper antistatic
procedures may damage the gallium arsenide samplers. ESD damage is not covered under the
warranty. All maintenance or operation should be performed with an antistatic mat and wrist strap.
Refer to “Electrostatic Discharge Information” on page 1-9 for further information.
CAUTION Electrostatic discharge can seriously damage the module’s electrical inputs. To eliminate any
electrostatic build up from a cable you’re connecting to the module, connect a female short to
either end of the cable. Touch the short to an input connector hex nut on the module to discharge
any static build up to ground. Remove the short. Use this procedure for all cables before
connecting them to the module.
3-2

86100A/B Mainframe Timebase Adjustment
86100A/B Mainframe Timebase Adjustment
Adjustments
Equipment Required
Equipment Critical Specifications Recommended Model/Part
Plug-in Module 54750A, 83480A, or 86100A/B Series
plug-in with electrical input
Synthesized CW
Generator
Attenuator
Timing Generator No substitution Agilent 8133A Standard or
Transition Time Converter 2000 ps Agilent 15438A
Cable, BNC
Adapter, BNC (m) to
SMA (m)
a
No substitution Agilent 83712B
10 or 20 dB; Frequency range of dc to
18 GHz
50
Ω, 122 cm (48.in)
50
Ω
Agilent 54751A, 83483A,
86112A
Required Options:
1E5 High Stability Timebase
Recommended Options:
1E1— Output Step
Attenuator
1E8 — 1 Hz Frequency Res.
1E9 — 3.5 mm RF Out
Connector
Agilent 33340C
Option 002
Agilent 10503A
Agilent E9633A BNC (m) to
SMA (m), 50
Ω
Cable Assembly, 3.5 mm
(m) to 3.5 mm (m) (2
each)
a. Not needed if Option 1E1 is installed on the Agilent 83712B.
61 cm (24 in); Frequency range of dc
to 26.5 GHz
Agilent 11500E
CAUTION Before performing this procedure, you must have firmware revision A.02.00 or higher installed
in the Agilent 86100A/B. Refer to the Agilent website (www.agilent.com) for instructions on
obtaining the latest firmware revision).
Trying to adjust the mainframe timebase with older firmware will cause timebase accuracy
failure.
After the DCA mainframe’s timebase is adjusted, you can not install a version of firmware below
A.02.00. Timebase failure will occur.
Procedure
1 Make sure the instrument cover is in place.
2 Set the timing generator controls as follows:
3-3

Adjustments
86100A/B Mainframe Timebase Adjustment
a Turn on the timebase EXT and EXT DIVIDE, and set to divide by one.
b Set the CHANNEL 2 output as follows:
SQUAR ON
AMPL 2.4 V
OFFS 0 (If needed, adjust the offset to center the output around 0 V.)
DISABLE OFF
c Set all other controls to zero or off.
3 On the synthesized CW generator, press PRESET, then set the controls as follows:
FREQ 500 MHz
POWER LEVEL -14 dBm
RF ON/OFF OFF
NOTE If the Synthesized CW Generator does not have Option 1E1 installed, insert a 10 or 20 dB
attenuator at the RF OUTPUT and set the POWER LEVEL so that the power going to the
electrical channel is -14 dBm. (Example: 10 dB attenuator = -4 dBm; 20 dB attenuator =
+6 dBm.)
4 Install the plug-in module into the mainframe left-hand module slot, then tighten both screws.
5 Turn on the mainframe. After the boot-up is complete, press the Default Setup hardkey on the
DCA front panel.
6 Turn on the electrical channel by pressing the CHANNEL 2 hardkey on the DCA front panel.
Turn all other channels off.
7 On the DCA front panel, set the trigger source to Free Run by pressing the Source hardkey until
Free Run is selected.
NOTE Allow all of the equipment to warm up for at least one hour in the settings specified above
before you proceed.
8 Ensure that everything is disconnected from the electrical plug-in input.
9 On the DCA screen, press Calibrate, All Calibrations, Vertical (Amplitude), Calibrate Left
Module, then press Continue.
10 Wait for the completion of the calibration routine.
11 Connect equipment as shown in Figure 3-1.
a Connect the synthesized CW generator’s 10 MHz OUT to the timing generator’s timebase EX-
TERNAL INPUT.
b Connect the 2000 ps transition time converter to the timing generator’s CHANNEL 2 output.
c Connect the 2000 ps transition time converter to the DCA front panel trigger input, using the
cable and adapters.
d Connect the synthesized CW generator RF OUTPUT to the module electrical channel.
3-4

86100A/B Mainframe Timebase Adjustment
Figure 3-1. Timebase Adjustment Setup
12 On the Synthesized CW Generator, set the RF ON/OFF to ON.
Adjustments
13 On the DCA, set the Trigger input to Front Panel.
NOTE If everything is connected properly you should see a sine wave on the DCA screen. Make
sure that the trigger is set to the front panel.
14 On the DCA screen, enable service mode by pressing Help, About 86100A/B, then pressing the
Local hardkey five times, or until the message “Service mode enabled” appears in the message
bar of the DCA screen.
15 On the DCA screen, press Calibrate, All Calibrations, Horizontal (Time base). See Figure 3-2.
Figure 3-2. Horizontal Time Base Calibration
3-5

Adjustments
86100A/B Mainframe Timebase Adjustment
16 On the DCA screen, press Horizontal (Time base), Horizontal (Time base) Calibration (Service
Only).
17 Follow the instructions on screen.
If it is necessary to adjust the tuning capacitor:
a Turn the DCA on it’s side to locate the hole plug at the bottom. See Figure 3-3.
Figure 3-3. Hole Plug Location
b Rotate the hole plug while pulling to remove it from the adjustment hole.
CAUTION Be very gentle while adjusting the capacitor as it is fragile.
c Make the adjustment then pull the adjustment tool away. Be sure to check the readings; they
may have changed.
d After the adjustment is complete, reinstall the hole plug. Wait the full ten minutes before you
proceed.
18 When the “Change source to 2 GHz” prompt appears, set the synthesized CW generator FREQ to
2 GHz.
19 When the “Change source to 16 GHz” prompt appears, set the synthesized CW generator FREQ
to 16 GHz and press continue.
20 On the Synthesized CW Generator, adjust the POWER LEVEL to 400 mV on the DCA screen’s
current reading.
NOTE If the Synthesized CW Generator does not have Option 1E1 installed, remove the
attenuator at the RF OUTPUT.
21 The message “Calibration is complete” is displayed in the message bar when the procedure is
complete.
22 Cycle the instrument power to disable the service mode.
3-6

4
ESD Precautions 4-2
Tools Required 4-2
Returning the Instrument to Agilent for Servicing 4-2
To Remove the Mainframe Cover 4-4
To Remove the Mainframe Front Panel 4-7
LS-120 Disc Drive Modification (86100A Only) 4-12
To Remove the A2 Flat Panel Display 4-14
To Remove the Display Backlights 4-15
To Remove the A8 Touch Screen 4-17
To Remove the A7 Front Panel Keyboard 4-18
To Remove the A3 Backlight Inverter 4-20
To Remove the Front Panel Trigger Input 4-23
To Remove the A4 PC Motherboard 4-25
To Remove the A13 Acquisition (Option 001) 4-32
A13 Acquisition Board PLD Header Modification (86100A Only) 4-36
To Remove the A1 Power Supply 4-37
To Remove the A6 Distribution Assembly 4-39
Assembly Replacement

Replacing Instrument Assemblies
Assembly Replacement
Assembly Replacement
4Replacing Instrument Assemblies
This chapter provides step-by-step procedures to remove the replaceable components of the
86100A/B Series mainframes. Unless specified, the replacement procedures are the reverse of
the removal procedures.
ESD Precautions
When using any of the procedures in this chapter you must use proper ESD precautions. As a
minimum you must place the instrument on a properly grounded ESD mat and wear a properly
grounded ESD wrist strap.
CAUTION Failure to implement proper antistatic measures may result in damage to the instrument.
Too l s Re q ui red
The following tools are required for these procedures.
• Torx drivers: T10, T15
• Medium size (3/16-in) flat-blade screwdriver
• Open-end wrench: 5/16-in.
CAUTION Do not remove or replace any circuit board assemblies in this instrument while power is applied.
The assemblies contain components which may be damaged if the assembly is removed or
replaced while power is connected to the instrument.
CAUTION SHOCK HAZARD!
To avoid electrical shock, adhere closely to the following procedures. Hazardous voltages exist.
Returning the Instrument to Agilent for Servicing
Before shipping the instrument to Agilent, contact your nearest Agilent sales office for additional
details.
1 Write the following information on a tag and attach it to the instrument.
a Name and address of owner
b Instrument model numbers
c Instrument serial numbers
d Description of the service required or failure indications
2 Remove all accessories from the instrument.
Accessories include all cables. Do not include accessories unless they are associated with the
failure symptoms.
3 Protect the instrument by wrapping it in plastic or heavy paper.
4-2

Replacing Instrument Assemblies
Assembly Replacement
4 Pack the instrument in foam or other shock absorbing material and place it in a strong shipping
container.
You can use the original shipping materials or order materials from an Agilent sales office. If
neither is available, place 8 to 10 cm (3 to 4 inches) of shock-absorbing material around the
instrument and place it in a box that does not allow movement during shipping.
5 Seal the shipping container securely.
6 Mark the shipping container as FRAGILE.
In any correspondence, refer to instrument by model number and full serial number.
4-3

Replacing Instrument Assemblies
To Remove the Mainframe Cover
To Remove the Mainframe Cover
CAUTION Electrostatic discharge (ESD) can damage or destroy electrostatic components. All work on
electronic assemblies should be performed at a static-safe work station. See ”Electrostatic
Discharge Information” on page 1-9 for more information on preventing ESD.
1 Disconnect the power cord from the instrument.
WA RN I N G Opening covers or removing parts is likely to expose dangerous voltages. Disconnect the
instrument from all voltages before it is opened.
2 Position the mainframe so that you have access to the back of the instrument, as shown in Figure
4-1.
Figure 4-1. Accessing the Back of the Mainframe
3 Use a T-15 TORX driver to remove the four screws that attach the rubber feet to the back of the
instrument, as shown in Figure 4-2.
4-4

Replacing Instrument Assemblies
To Remove the Mainframe Cover
Figure 4-2. Removing the Rubber Feet
4 Remove the remaining four screws that fasten the cover to the instrument’s rear panel, as shown
in Figure 4-3.
Figure 4-3. Removing Screws from Back of Mainframe
5 Remove the two screws that secure each handle to the side of the mainframe, as shown in Figure
4-4.
4-5
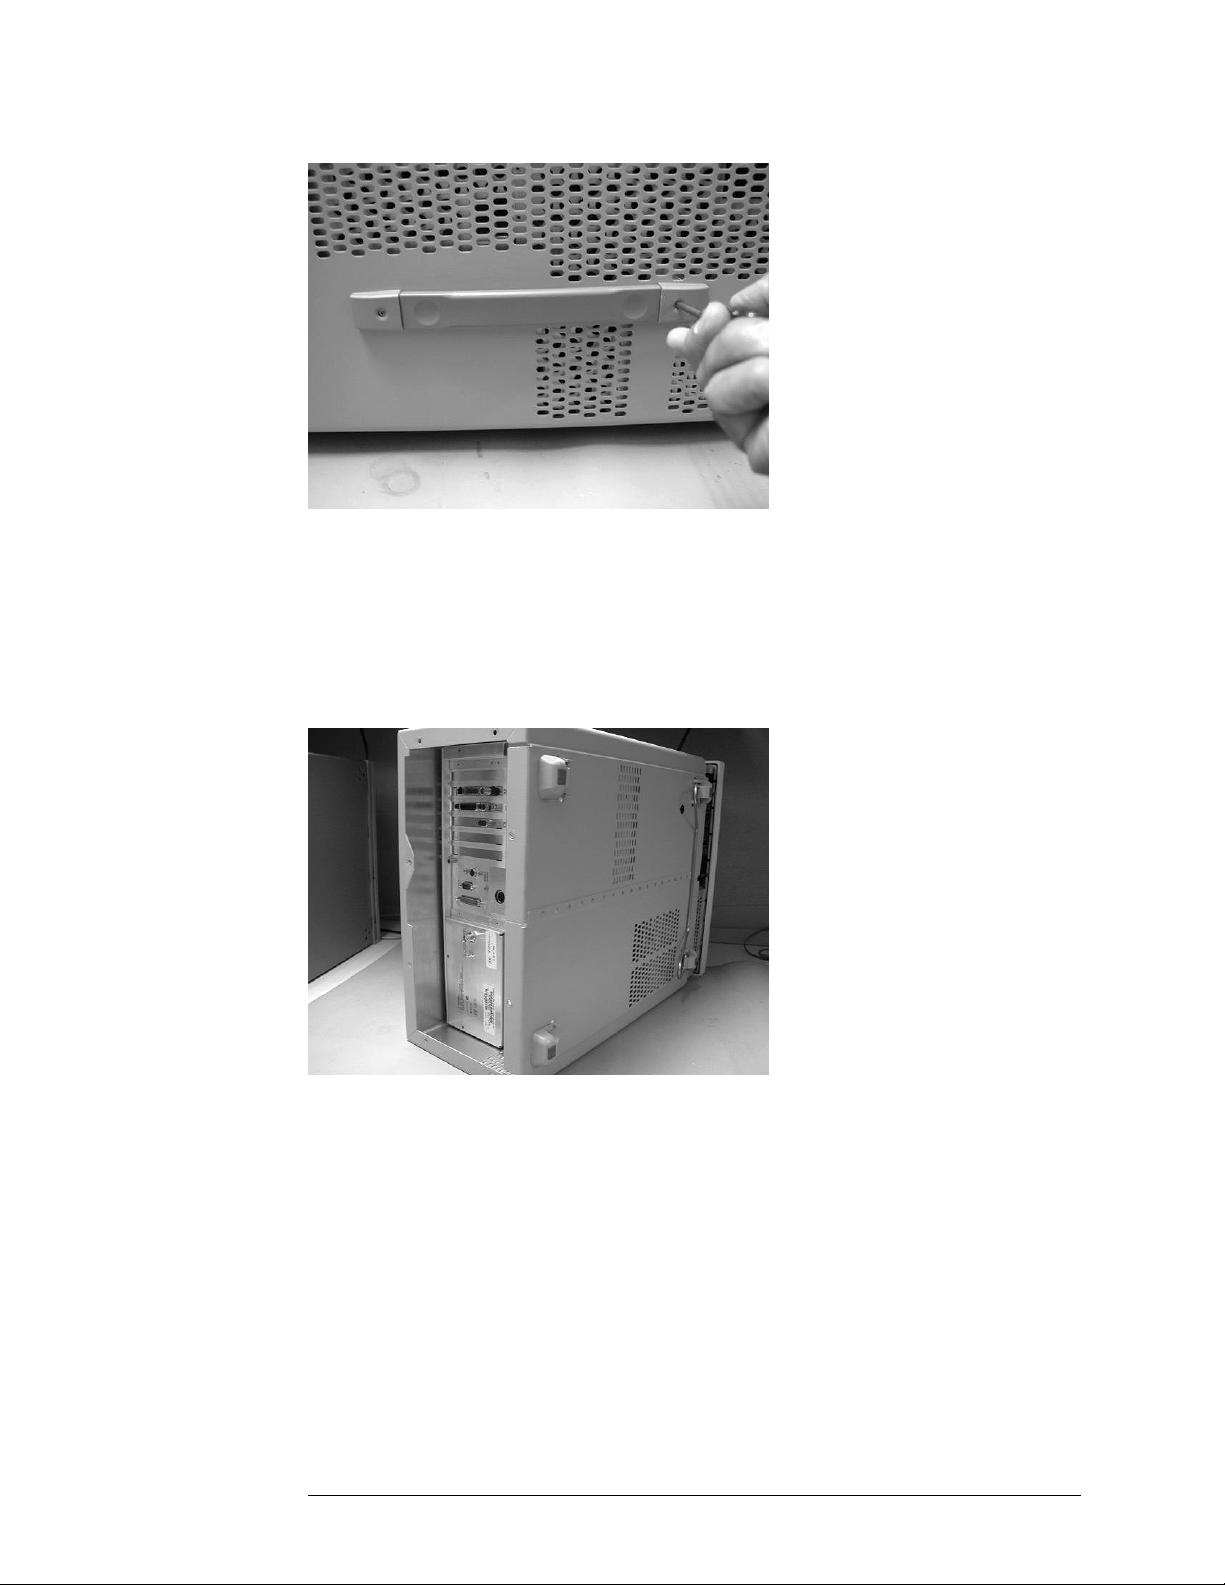
Replacing Instrument Assemblies
To Remove the Mainframe Cover
Figure 4-4. Removing the Side Handles
6 To slide the cover off the mainframe, first turn the mainframe upside down on the bench. Place
your hands on each side of the cover, and using your thumbs, push the instrument out the front of
the cover.
7 Once the mainframe has begun to slide forward, you can then set the instrument on its side (see
Figure 4-5) and slide the cover off completely.
Figure 4-5. Sliding Cover off Mainframe
4-6

Replacing Instrument Assemblies
To Remove the Mainframe Front Panel
To Remove the Mainframe Front Panel
CAUTION Electrostatic discharge (ESD) can damage or destroy electrostatic components. All work on
electronic assemblies should be performed at a static-safe work station. See ”Electrostatic
Discharge Information” on page 1-9 for more information on preventing ESD.
1 Disconnect the power cord from the instrument.
WA RN I N G Opening covers or removing parts is likely to expose dangerous voltages. Disconnect the
instrument from all voltages before it is opened.
2 Remove the trim strips from both sides of the front panel, as shown in Figure 4-6.
Figure 4-6. Removing the Trim Strips
3 Use the T-15 TORX driver to remove the four screws (two on each side) that secure the front panel
to the mainframe, as shown in Figure 4-7.
4-7

Replacing Instrument Assemblies
To Remove the Mainframe Front Panel
Figure 4-7. Removing the Front Panel Screws
4 Slide the front panel a few inches away from the mainframe, as shown in Figure 4-8.
Figure 4-8. Sliding Front Panel Away From Mainframe
5 Use a T-10 TORX driver to remove the two screws that secure the Cal connector to the front panel,
as shown in Figure 4-9.
4-8

To Remove the Mainframe Front Panel
Figure 4-9. Removing Screws that Secure the Cal Connector
6 Disconnect the W5 and W6 ribbon cables, shown in Figure 4-10.
Replacing Instrument Assemblies
W5
W6
Figure 4-10. Removing the W5 and W6 Ribbon Cables
7 Disconnect the W3 mylar flex cable, shown in Figure 4-11. Pry up the retainer slightly at either
end of the connector, using a small flat-blade screwdriver. Do not force the retainer; it should
remain attached to the body of the socket.
4-9

Replacing Instrument Assemblies
To Remove the Mainframe Front Panel
CAUTION Take great care when you disconnect and reconnect the mylar flex cable from the touch screen to
the display board, as the cable is fragile and is only good for a few insertions.
W3
Figure 4-11. Disconnecting the W3 Mylar Flex Cable
8 Disconnect the W4 cable from the A3 Backlight Inverter board, as shown in Figure 4-12.
W4
Figure 4-12. Disconnecting the W4 Cable from the A3 Backlight Inverter Board
9 Use a 5/16 inch wrench to remove the W22 cable from the front panel trigger input, as shown in
Figure 4-13.
4-10

Replacing Instrument Assemblies
To Remove the Mainframe Front Panel
W22
Figure 4-13. Removing the Front Panel Trigger Cable
CAUTION When replacing the front panel, be careful that the two ribbon cables, the front panel trigger cable,
and the Cal cable do not become pinched.
4-11

Replacing Instrument Assemblies
LS-120 Disc Drive Modification (86100A Only)
LS-120 Disc Drive Modification (86100A Only)
1 Follow the instructions for removing the mainframe cover, on page 4-4.
2 Place the instrument so the top is facing up.
3 Using a T-10 TORX driver, remove the two screws that secure the A16 LS-120 board to the rear
of the A10 floppy drive. Refer to Figure 4-14.
4 Remove the ribbon cable, W9. Refer to Figure 4-14.
Figure 4-14. LS-120 and A-10 Floppy Drive
5 Put the new A16 LS-120 board (86100-66505) on the back of the A10 Floppy Drive. Refer to
Figure 4-15.
4-12

Replacing Instrument Assemblies
LS-120 Disc Drive Modification (86100A Only)
Figure 4-15. A16 LS-120 Board shown with Added Ground Strap
6 Secure the A16 LS-120 Board to the A10 Floppy Drive with two, T-10 Torx Screws. Refer to
Figure 4-14.
7 Secure the ribbon cable W9 to the A16 LS-120 Board. Refer to Figure 4-14.
NOTE Ensure that the red stripe on the ribbon cable, W9 is towards the fan assembly when
connection the cable to LS-120.
8 Reassemble the Mainframe Cover.
9 Perform a Read/Write test of the Floppy Drive.
• Power on the instrument, and insert any 3.5 floppy disk into the floppy drive.
• At the touchscreen select the File pull-down menu, and select “Save, Instrument Setup.”
• Select “Look In” 3.5 Floppy (A:), touch/click Save.
• Select “Open Instrument Setup” and recall the file that was just saved.
• The saved setup should be recovered properly.
4-13

Replacing Instrument Assemblies
To Remove the A2 Flat Panel Display
To Remove the A2 Flat Panel Display
1 Follow the instructions for removing the front panel on page 4-7.
2 Use a T-10 TORX driver to remove the four screws that secure the display to the front panel, as
shown in Figure 4-16.
Figure 4-16. Removing the Display Screws
3 Carefully lift the display out of the front panel.
Figure 4-17. Removing the Display
4-14

Replacing Instrument Assemblies
To Remove the Display Backlights
To Remove the Display Backlights
1 Follow the instructions for removing the front panel on page 4-7, and the display on page 4-14.
2 Disconnect the cables from the A3 Backlight Inverter shown in Figure 4-18.
Figure 4-18. Disconnecting the Cables from the A3 Backlight Inverter
3 At the top of the display, push the locking tab to release the top backlight, as shown in Figure 4-19.
Figure 4-19. Release the Backlight Tab
4 Remove the top backlight, as shown in Figure 4-20.
4-15

Replacing Instrument Assemblies
To Remove the Display Backlights
Figure 4-20. Removing the Backlight
NOTE Pay attention to the orientation of the backlight as you remove it, to ensure correct
replacement.
5 Repeat steps 3 and 4 to remove the bottom backlight.
4-16

Replacing Instrument Assemblies
To Remove the A8 Touch Screen
To Remove the A8 Touch Screen
1 Follow the instructions for removing the front panel on page 4-7, and the display on page 4-14.
2 Using a T-10 TORX driver, remove two screws that secure the touch screen board bracket, as
shown in Figure 4-21.
Figure 4-21. Removing the Touch Screen Screws
3 Lift the touch screen out of the display assembly, as shown in Figure 4-22.
Figure 4-22. Lifting out the Touch Screen
4-17

Replacing Instrument Assemblies
To Remove the A7 Front Panel Keyboard
To Remove the A7 Front Panel Keyboard
1 Follow the instructions for removing the front panel on page 4-7, and the display on page 4-14.
2 Turn the front panel face up.
3 Pull off all knobs, as shown in Figure 4-23.
Figure 4-23. Removing the Knobs
4 Turn the panel face down.
5 Use a T-10 TORX driver to remove the two screws from the touch screen board, as shown in
Figure 4-24, then lift bracket out of front panel.
Figure 4-24. Removing the Touch Screen Screws
4-18

Replacing Instrument Assemblies
To Remove the A7 Front Panel Keyboard
6 Remove the eight screws that secure the keyboard to the front panel, as shown in Figure 4-25.
Figure 4-25. Removing the Keyboard Panel Screws
7 Lift the board out of the front panel.
NOTE During reassembly, when replacing the keyboard be sure that all of the buttons come
through the front panel properly. If they are not aligned properly, the buttons may remain
stuck behind the panel.
CAUTION When replacing the front panel, be careful that the two ribbon cables, the front panel trigger cable,
and the Cal cable do not become pinched.
4-19

Replacing Instrument Assemblies
To Remove the A3 Backlight Inverter
To Remove the A3 Backlight Inverter
CAUTION Electrostatic discharge (ESD) can damage or destroy electrostatic components. All work on
electronic assemblies should be performed at a static-safe work station. See ”Electrostatic
Discharge Information” on page 1-9 for more information on preventing ESD.
1 Disconnect the power cord from the instrument.
WA RN I N G Opening covers or removing parts is likely to expose dangerous voltages. Disconnect the
instrument from all voltages before it is opened.
2 Remove the trim strips from both sides of the front panel, as shown in Figure 4-26.
Figure 4-26. Removing the Trim Strips
3 Use the T-15 TORX driver to remove the four screws (two on each side) that secure the front panel
to the mainframe, as shown in Figure 4-27.
4-20

Replacing Instrument Assemblies
To Remove the A3 Backlight Inverter
Figure 4-27. Removing the Front Panel Screws
4 Slide the front panel a few inches away from the mainframe as show in Figure 4-28.
Figure 4-28. Accessing the Inverter Board
5 Disconnect the three cables, as shown in Figure 4-29
Figure 4-29. Removing the Cables from the Inverter Board
4-21

Replacing Instrument Assemblies
To Remove the A3 Backlight Inverter
6 Use a T-10 TORX driver to remove the two screws that secure the board to the display.
Figure 4-30. Removing the Keyboard Panel Screws
CAUTION When replacing the front panel be careful that the two ribbon cables, the front panel trigger cable,
and the Cal cable do not become pinched.
4-22

Replacing Instrument Assemblies
To Remove the Front Panel Trigger Input
To Remove the Front Panel Trigger Input
CAUTION Electrostatic discharge (ESD) can damage or destroy electrostatic components. All work on
electronic assemblies should be performed at a static-safe work station. See ”Electrostatic
Discharge Information” on page 1-9 for more information on preventing ESD.
1 Disconnect the power cord from the instrument.
WA RN I N G Opening covers or removing parts is likely to expose dangerous voltages. Disconnect the
instrument from all voltages before it is opened.
2 Remove the trim strips from both sides of the front panel, as shown in Figure 4-31.
Figure 4-31. Remove the Trim Strips
3 Use the T-15 TORX driver to remove the four screws (two on each side) that secure the front panel
to the mainframe, as shown in Figure 4-32.
4-23

Replacing Instrument Assemblies
To Remove the Front Panel Trigger Input
Figure 4-32. Remove the Front Panel Screws
4 Slide the front panel a few inches away from the mainframe, as shown in Figure 4-33.
Figure 4-33. Slide Front Panel Away From Mainframe
5 Use a 5/16 inch wrench to remove the W22 cable from the front panel trigger input.
6 Use a 9/16 inch wrench to remove the front panel trigger input connector.
4-24

Replacing Instrument Assemblies
To Remove the A4 PC Motherboard
To Remove the A4 PC Motherboard
NOTE The 86100A is used in the following steps. Although some of the components are different
in the 86100B, the removal procedure is virtually identical.
1 Follow the instructions on page 4-4 for removing the mainframe cover.
2 Use a T-10 TORX driver to remove the four screws that secure the fan, as shown in Figure 4-34,
then lift the fan out of the mainframe.
Figure 4-34. Removing the Fan
3 Use a T-10 TORX driver to remove the two screws that secure the bar to the mainframe, as shown
in Figure 4-35.
Figure 4-35. Removing the Bar (86100A only)
4-25

Replacing Instrument Assemblies
A
To Remove the A4 PC Motherboard
4 Use a T-15 TORX driver to remove all of the circuit boards from the PC slots, as shown in Figure
4-36.
NOTE The W10 ribbon cable connecting the A5 SVGA Adapter and the A6 Interface can be left
connected, and the boards pulled out together, as shown in Figure 4-37.
A15 Disk Drive
Interface
A6 Interface
5 SVGA Adapter
A11 GP-IB
A14 LAN
Figure 4-36. Removing the Circuit Boards from the Motherboard
Figure 4-37. Removing the A5 and A6 Boards
5 Use a T-10 TORX driver remove one screw that secures the speaker, as shown in Figure 4-38.
Then disconnect the speaker cable, as shown in Figure 4-39, and remove the speaker.
4-26

Figure 4-38. Removing the Speaker Screw
Replacing Instrument Assemblies
To Remove the A4 PC Motherboard
Figure 4-39. Disconnecting the Speaker Cable
6 Use a T-10 TORX driver to remove nine screws that secure the motherboard, as shown in Figure
4-40.
4-27

Replacing Instrument Assemblies
To Remove the A4 PC Motherboard
Figure 4-40. Removing the Screws from the Motherboard
7 Slide the bottom of the motherboard out to clear the white tab, as shown in Figure 4-41, then pull
the motherboard out the right side, as shown in Figure 4-42.
White tab
Figure 4-41. Slide the Motherboard Down to Clear the White Tab
4-28

Replacing Instrument Assemblies
To Remove the A4 PC Motherboard
Figure 4-42. Pull the Motherboard out the Right Side
CAUTION Ensure that the cables that are routed on the upper right corner can clear the board so that you are
not pulling on the cables as you remove the board.
8 Label any cables that are still connected to the motherboard, then disconnect them.
9 Remove the RAM from the motherboard, as shown Figure 4-43.
Figure 4-43. Removing the RAM
10 Remove any ribbon cables attached to the motherboard.
11 Refer to Figure 4-44 through Figure 4-47 for cable connections.
4-29

Replacing Instrument Assemblies
7
To Remove the A4 PC Motherboard
Figure 4-44. W25, W26, and Power Supply Cables
Figure 4-45. W2 and W27 Cables
W2
W2
4-30

Figure 4-46. W8, W9, W11, and W12 Cables
W10W3W4W13W5
Replacing Instrument Assemblies
To Remove the A4 PC Motherboard
W11
W12
W9
W8
W10
W3 W4 W13
W5
Figure 4-47. W3, W4, W5, W10, and W13 Cables
4-31

Replacing Instrument Assemblies
2
To Remove the A13 Acquisition (Option 001)
To Remove the A13 Acquisition (Option 001)
1 Follow the instructions for removing the mainframe cover, on page 4-4.
2 Use a 5/16 inch wrench to remove the three cables labeled: W30, W31, and W32, shown in Figure
4-48.
W3
W30
W31
Figure 4-48. Removing the Cables from the Coaxial Switch
3 Turn the instrument on its side so that you can access the screws that secure the A13 Acquisition
board, then remove the two screws, as shown in Figure 4-49.
Figure 4-49. Removing the A13 Acquisition Board Screws
4-32

Replacing Instrument Assemblies
To Remove the A13 Acquisition (Option 001)
4 Slide the board to the right to free it from the locking posts.
Figure 4-50. Sliding the Board to the Right
5 Pull the board out a few inches, then disconnect the W24 ribbon cable and the cable from the SW2
Transfer Switch, as shown in Figure 4-51 and Figure 4-52.
W24
Figure 4-51. Removing the W24 Ribbon Cable from P24 SRC_SEL
4-33

Replacing Instrument Assemblies
To Remove the A13 Acquisition (Option 001)
Figure 4-52. Removing the SW2 Cable from P19 Connector
6 Remove the board, as shown in Figure 4-53.
P/O SW2
Figure 4-53. Removing the A13 Acquisition Board
7 Disconnect all of the remaining cables.
8 Refer to Figure 4-54 and Figure 4-55 for cable connections.
NOTE The left and right strobe cables are interchangeable.
4-34

Replacing Instrument Assemblies
To Remove the A13 Acquisition (Option 001)
Figure 4-54. W28, W7, and W15 Cables from the A13 Acquisition Board
W18
W19
W14
W29
P/O SW2
W24
W30
W31
A13A1
W32
Figure 4-55. Cables from the A13 Acquisition Board (option 001)
4-35

Replacing Instrument Assemblies
A13 Acquisition Board PLD Header Modification (86100A Only)
A13 Acquisition Board PLD Header Modification
(86100A Only)
Refer to ”Preventative Maintenance” on page 1-17 in “General Information” for serial prefix
information.
1 Follow the instructions for removing the mainframe cover, on page 4-4.
2 Follow the instructions for removing the A13 Acquisition Board, on page 4-32.
3 Place the jumper, shown in Figure 4-56, on P12 so that the resistors are connected to pins 1, 4, and
5, shown in Figure 4-57. The jumper key should face towards the front panel.
Figure 4-56. Jumper, E2660-01201
Figure 4-57. Placement of the Jumper on P12
4 Reassemble the A13 Acquisition Board in reverse order of removal.
5 Reassemble the Mainframe Cover in reverse order of removal.
4-36

Replacing Instrument Assemblies
To Remove the A1 Power Supply
To Remove the A1 Power Supply
1 Follow the instructions for removing the mainframe cover, on page 4-4.
2 Use a T-15 TORX driver to remove the two screws that secure the mainframe to the top of the A1
Power Supply, as shown in Figure 4-58.
Figure 4-58. Removing the Screws Securing the Power Supply
3 Remove the two screws located on either side of the hard drive, as shown in Figure 4-59.
Figure 4-59. Removing the Screws on Top of the Hard Drive
4 Disconnect all cables from the power supply.
NOTE You may need to remove the cable from the A9P2 Hard Drive connector on the A15 Disk
Drive Interface to access cables on the A4 PC Motherboard.
4-37

Replacing Instrument Assemblies
A
To Remove the A1 Power Supply
5 Rout the cables out of the instrument when you are removing the A2 Power Supply.
6 Refer to Figure 4-60 through Figure 4-62 for cable connections.
12P2
Connection
Figure 4-60. A12P2 Connection
Figure 4-61. Fan Connections
Figure 4-62. A4P6/P7 Connections
4-38

Replacing Instrument Assemblies
To Remove the A6 Distribution Assembly
To Remove the A6 Distribution Assembly
1 Follow the instructions on page 4-4 for removing the mainframe cover.
2 Use a T-10 TORX driver to remove the two screws that secure the assembly, as shown in Figure
4-63.
Figure 4-63. Disconnecting Screws from A6 Board
3 Remove the cables that you can access from this side of the instrument.
Figure 4-64. Disconnecting the Cables
4 Use a T-10 TORX driver to remove four screws from the connectors in the module drawer as
shown in Figure 4-65.
4-39

Replacing Instrument Assemblies
To Remove the A6 Distribution Assembly
Figure 4-65. Removing Screws from Connectors in Module Drawer
5 Pull the A6 Distribution assembly away from the mainframe, as shown in Figure 4-66.
Figure 4-66. Pulling Out the A6 Distribution Assembly Board
6 Access the side of the instrument, and pull the board out far enough so that you can access the
brackets that secure the cables.
7 Remove the two screws that secure each bracket, as shown in Figure 4-67.
4-40

To Remove the A6 Distribution Assembly
Figure 4-67. Removing the Screws from the A6 Bracket
Replacing Instrument Assemblies
4-41

Replacing Instrument Assemblies
To Remove the A6 Distribution Assembly
4-42
 Loading...