

Page 1

HP 4352B VCO/PLL Signal Analyzer
Manual Supplement for HP
Instrument BASIC Users Handbook
SERIAL NUMBERS
This manual applies directly to instruments with serial number prex JP1KE .
For additional important information about serial numbers,
read \Instruments Covered by This Manual" in Appendix A.
HP Part No. 04352-90045
Printed in JAPAN June 1997
First Edition
Page 2

Notice
The information contained in this document is subject to change without notice.
This document contains proprietary information that is protected by copyright. All rights are
reserved. No part of this document may be photocopied, reproduced, or translated to another
language without the prior written consent of the Hewlett-Packard Company.
Hewlett-Packard Japan, LTD.
Kobe Instrument Division
1-3-2, Murotani, Nishi-ku, Kobe-shi,
Hyogo, 651-22 Japan
c
Copyright 1997 Hewlett-Packard Japan, LTD.
Page 3

Manual Printing History
The manual printing date and part number indicate its current edition. The printing date
changes when a new edition is printed. (Minor corrections and updates that are incorporated
at reprint do not cause the date to change.) The manual part number changes when extensive
technical changes are incorporated.
June 1997
::::::: :::::: ::::::: ::::::: :::::: ::::::: ::::::: :::::: ::::::: ::::::: :::::: ::
First Edition
iii
Page 4

Typeface Conventions
Bold
Italics
Computer
4
HARDKEYS
5
NNNNNNNNNNNNNNNNNNNNNNNNNNNNNNNN
SOFTKEYS
Boldface type is used when a term is dened. For example:
icons
are
symbols.
Italic type is used for emphasis and for titles of manuals and other
publications.
Italic type is also used for keyboard entries when a name or a variable
must be typed in place of the words in italics.For example:
lename
type the name of a le such as
means to type the word
file1
copy
, to type a space, and then to
.
copy
Computer font is used for on-screen prompts and messages.
Labeled keys on the instrument front panel are enclosed in45.
NNNNN
Softkeys located to the right of the LCD are enclosed in
.
iv
Page 5

How to Use This Manual
This guide will help you learn how to eectively use HP Instrument BASIC (IBASIC) of the
HP 4352B VCO/PLL Signal Analyzer. It will help you to perform typical operations involving
program creation, editing, and execution. It will also show you how to save and recall
programs, and how to make the best use of the HP Instrument BASIC's front-panel and
keyboard interface. Here is a brief guide to help you locate the necessary information in this
manual.
Chapter 2 introduces the analyzer's HP Instrument BASIC system and describes how to
connect and use a keyboard.
Chapter 3 and Chapter 4 show creating, getting, and saving programs to teach you front
panel and keyboard operation.
Chapter 5 introduces you to the editing environment.
Chapter 6 describes interfacing features for graphics, external connector to trigger
RUN/CONTinue of a program, and I/O port.
Chapter 7 introduces special features for auto loading a program, and the On Key Label
function (softkeys dened in a program). This chapter also describes techniques for speeding
up your programs.
Chapter 8 summarizes the unique features specied for the analyzer
Appendix A contains the information required to adept this manual to earlier versions or
congurations of the analyzer than the current printing date of this manual.
Appendix B provides references for BASIC commands specic to the analyzer's HP
Instrument BASIC.
Appendix C provides a handy reference guide to the analyzer's HP Instrument B
denitions for the mini-DIN keyboard.
Appendix D describes the softkeys that are used for the HP Instrument B
.
ASIC's key
ASIC operations.
v
Page 6

Page 7

Contents
1. Welcome to HP Instrument BASIC
How to Use This Manual . . . . . . . . . . . . . . . . . . . . . . . . . . . 1-1
2. Introduction to the System
Overview of HP Instrument BASIC ...................... 2-1
Connecting the Keyboard .......................... 2-2
Using HP Instrument BASIC for the First Time . . . . . . . . . . . . . . . . . 2-3
Allocating Screen Area for HP Instrument BASIC ...... ...... .. 2-3
Setting the Size of Memory Area for HP Instrument BASIC . . . . . . . . . . 2-3
Using the Keyboard ............................. 2-4
What can the Keyboard be Used for?
....................
Performing Calculations ..........................
Entering Arguments to the Active Analyzer Functions . . . . . . . . . . . .
Entering Titles . . . . . . . . . . . . . . . . . . . . . . . . . . . . . . .
Executing Commands ...........................
Using Softkeys . . . . . . . . . . . . . . . . . . . . . . . . . . . . . . .
Entering BASIC Statements from the Front Panel Keys . . . . . . . . . . . . .
3. Writing and Running Programs
Getting into/out of the EDIT Mode ...... ...... ...... ....
Getting into the EDIT Mode ........................
Getting out of the EDIT Mode .......... ...... ..... ..
Writing Programs ..............................
Controlling the Analyzer . . . . . . . . . . . . . . . . . . . . . . . . . .
Running (Executing) Programs ........................
Listing Programs . . . . . . . . . . . . . . . . . . . . . . . . . . . . . . .
Listing on the Screen ...... ...... ...... ...... ... 3-4
Listing to the Printer . . . . . . . . . . . . . . . . . . . . . . . . . . . . 3-4
2-4
2-4
2-4
2-5
2-5
2-6
2-6
3-1
3-1
3-1
3-2
3-2
3-4
3-4
4. Saving and Getting Programs
Saving Programs (SAVE) ........ ...... ...... ...... . 4-1
Listing File Names (CAT)...... ...... ...... ...... ...
Listing to Screen . . . . . . . . . . . . . . . . . . . . . . . . . . . . . .
Listing to Printer ...... ...... ...... ...... .....
Getting Programs (GET) ...........................
4-2
4-2
4-3
4-3
Contents-1
Page 8

5. Editing Programs
Getting Into/Out of the EDIT Mode ...................... 5-1
Getting Into the EDIT Mode using the Front Panel Keys ...... ..... 5-1
Entering the EDIT Mode from the Keyboard . . . . . . . . . . . . . . . . . 5-1
Getting Out of the EDIT Mode ........ ..... ...... .... 5-1
Editing Programs in the EDIT Mode . . . . . . . . . . . . . . . . . . . . . . 5-2
Deleting Characters .... ...... ...... ...... ...... 5-2
Back Space .... ...... ...... ...... ..... .... 5-2
Deleting Characters ........................... 5-2
Inserting Characters .. ...... ...... ...... ...... .. 5-2
Moving the Cursor . . . . . . . . . . . . . . . . . . . . . . . . . . . . . 5-2
Scrolling Lines and Pages . . . . . . . . . . . . . . . . . . . . . . . . . . 5-2
Scrolling Lines . . . . . . . . . . . . . . . . . . . . . . . . . . . . . . 5-2
Scrolling Pages . . . . . . . . . . . . . . . . . . . . . . . . . . . . . . 5-2
Jumping from the Current Line . . . . . . . . . . . . . . . . . . . . . . . 5-3
Jumping to a Specied Line ....................... 5-3
Jumping to the Top/Bottom of a Program ................. 5-3
Inserting/Deleting/Recalling Lines . . . . . . . . . . . . . . . . . . . . . . 5-3
Clearing Line ............................... 5-3
Renumbering Program Line Numbers .......... ...... ..... 5-3
6. Program I/O
Graphics ...... ...... ...... ...... ...... ....
HP Instrument BASIC Graphics Commands .. ...... ...... ...
Hard Copies . . . . . . . . . . . . . . . . . . . . . . . . . . . . . . . .
PRINT .................................
Initial settings . . . . . . . . . . . . . . . . . . . . . . . . . . . . . . .
Example of Graphics Programming .....................
Using the External RUN/CONT Connector . . . . . . . . . . . . . . . . . . .
File System Exceptions . . . . . . . . . . . . . . . . . . . . . . . . . . . .
Using the I/O Port in BASIC Programs . . . . . . . . . . . . . . . . . . . . .
6-1
6-2
6-2
6-2
6-2
6-2
6-3
6-3
6-4
7. Special Features and Advanced Techniques
Autoloading and Running a Program Automatically (AUTOST) .........
On Key Label Function . . . . . . . . . . . . . . . . . . . . . . . . . . . .
Increasing Program Speed ...... ...... ...... ...... .. 7-2
8. Analyzer Specic HP Instrument BASIC Features
Available I/O Interfaces and Select Codes ...... ...... ...... . 8-1
Storage Unit . . . . . . . . . . . . . . . . . . . . . . . . . . . . . . . . . 8-1
Built-in Flexible Disk Drive . . . . . . . . . . . . . . . . . . . . . . . . .
RAM Disk Memory . . . . . . . . . . . . . . . . . . . . . . . . . . . . .
HP-IB Commands for HP Instrument BASIC .. ...... ...... ....
A. Manual Changes
Introduction . . . . . . . . . . . . . . . . . . . . . . . . . . . . . . . . .
Manual Changes . . . . . . . . . . . . . . . . . . . . . . . . . . . . . . .
Instruments Covered by This Manual .... ...... ...... .....
7-1
7-1
8-2
8-2
8-3
A-1
A-1
A-2
Contents-2
Page 9

B. BASIC Commands Specic to HP 4352B
BASIC Commands Not Implemented . . . . . . . . . . . . . . . . . . . . . . B-1
BASIC Commands Specic to HP 4352B . . . . . . . . . . . . . . . . . . . . B-1
DATE.. ...... ...... ...... ...... ...... .... B-2
DATE$ ................................... B-3
EXECUTE . . . . . . . . . . . . . . . . . . . . . . . . . . . . . . . . . . B-4
READIO . . . . . . . . . . . . . . . . . . . . . . . . . . . . . . . . . . . B-6
SET TIME . . . . . . . . . . . . . . . . . . . . . . . . . . . . . . . . . . B-7
SET TIMEDATE ...... ...... ...... ...... ...... . B-8
TIME ...... ...... ...... ...... ...... ..... . B-9
TIME$ ................................... B-10
WRITEIO .. ...... ...... ...... ...... ...... .. B-11
C. The Keyboard
Character Entry Keys ............................ C-2
Cursor-Control and Display-Control Keys ................... C-2
Numeric Keypad . . . . . . . . . . . . . . . . . . . . . . . . . . . . . . . C-3
Editing Keys ................................ C-3
Program Control Keys ............................ C-3
System Control Keys . . . . . . . . . . . . . . . . . . . . . . . . . . . . . C-4
Softkeys and Softkey Control . . . . . . . . . . . . . . . . . . . . . . . . .
Softkey Control Keys ...........................
Softkeys .................................
Softkeys Accessed from
4
Shift
5-4
5
Key .... ...... ...... ...
F9
IBASIC Menu ..............................
Softkeys Accessed form
Using
4
5
Key in Edit Mode .. ...... ...... ..... .....
CTRL
4
5
Key...... ...... ..... .....
F10
C-4
C-4
C-4
C-5
C-5
C-6
C-6
D. Softkeys Used for HP Instrument BASIC Operation
4
5
System
NNNNNNNNNNNNNNNNNNNN
IBASIC
NNNNNNNNNNNNNNNNNNNNNNNNNNNNNNNNNNNNNNNNNNNNNNNNNN
MEMORY PARTITION
4
Display
...................................
..................................
............................
5
...................................
Run Light Indications ...........................
Index
D-2
D-2
D-5
D-6
D-7
Contents-3
Page 10

Figures
2-1. Conguration Example of the HP Instrument BASIC System ......... 2-2
6-1. Screen Structure . . . . . . . . . . . . . . . . . . . . . . . . . . . . . . 6-1
6-2. RUN/CONT Trigger Signal ......................... 6-3
A-1. Serial Number Plate ............ ...... ..... ..... A-2
C-1. mini-DIN Keyboard ............................ C-1
D-1. System menu .... ...... ...... ...... ...... ... D-2
D-2. Display Menu .... ...... ...... ...... ...... ... D-6
D-3. Display Allocation . . . . . . . . . . . . . . . . . . . . . . . . . . . . . D-7
Tables
A-1. Manual Changes by Serial Number ........ ...... ...... .
A-2. Manual Changes by Firmware Version . . . . . . . . . . . . . . . . . . . .
B-1. HP-IB Commands for EXECUTE .. ...... ..... ...... ...
A-1
A-1
B-4
Contents-4
Page 11

1
Welcome to HP Instrument BASIC
This guide will help you learn how to eectively use HP Instrument BASIC (IBASIC) of the
HP 4352B VCO/PLL Signal Analyzer. It will help you to perform typical operations involving
program creation, editing, and execution. It will also show you how to save and recall
programs, and how to make the best use of the HP Instrument BASIC's front-panel and
keyboard interface.
If you are new to programming or to HP's dialect of BASIC, take the time to read this guide
and perform the exercises.For many users, this will provide all the information that is needed
to create and run programs.
How to Use This Manual
The tasks in each chapter, when performed in sequential order, demonstrate a typical use of HP
Instrument BASIC and cover the most common tasks. Read the overview and try the sample
tasks in each chapter to get you started. F
further into each chapter; otherwise, go to the next exercises and continue the session. Y
can refer back to the individual chapters for more information as necessary
or more background information, you can read
ou
. Here is a brief
guide to help you locate the necessary information in this manual and the other HP Instrument
BASIC manuals.
Chapter 2 introduces the analyzer's HP Instrument BASIC system and describes how to
connect and use a keyboard.
Chapter 3 and Chapter 4 show creating, getting, and saving programs to teach you front
panel and keyboard operation.
Chapter 5 introduces you to the editing environment.
Chapter 6 describes interfacing features for graphics, external connector to trigger
RUN/CONTinue of a program, and I/O port.
Chapter 7 introduces special features for auto loading a program, and the On Key Label
function (softkeys dened in a program). This chapter also describes techniques for speeding
up your programs.
Chapter 8 summarizes the unique features specied for the analyzer.
Appendix A contains the information required to adept this manual to earlier versions or
congurations of the analyzer than the current printing date of this manual.
Appendix B provides references for BASIC commands specic to the analyzer's HP
Instrument BASIC.
Appendix C provides a handy reference guide to the analyzer's HP Instrument BASIC's key
denitions for the mini-DIN keyboard.
Appendix D describes the softkeys that are used for the HP Instrument B
ASIC operations.
Welcome to HP Instrument BASIC 1-1
Page 12
Note
You should become familiar with the operation of the analyzer before
attempting to control it using HP Instrument BASIC. See the following
documents that are better suited to this task.
Function Reference
HP-IB Programming Manual
Note
This manual,
to teach the HP Instrument BASIC programming language; see the following
document which is better suited to these tasks.
HP Instrument BASIC Users Handbook
The handbook consists of the following three parts:
HP Instrument BASIC Programming Techniques
HP Instrument BASIC Interfacing Techniques
HP Instrument BASIC Language Reference
IF you want to port HP 9000 Series 200/300 BASIC programs to HP
Instrument BASIC, see Chapter 10, \Keyword Guide to Porting," in the
Instrument BASIC Programming Techniques.
Using HP Instrument BASIC with the HP 4352B
, is not intended
HP
1-2 Welcome to HP Instrument BASIC
Page 13

Introduction to the System
This chapter introduces the analyzer's HP Instrument BASIC (IBASIC) and describes how to
connect and use a keyboard. Read this chapter before using HP Instrument BASIC with the
analyzer for the rst time. The topics covered in this chapter are:
Overview of HP Instrument BASIC
Connecting the keyboard
Using HP Instrument BASIC for the rst time
Using the keyboard
Entering BASIC Statements from the front panel keys
Overview of HP Instrument BASIC
HP Instrument BASIC (IBASIC) can be used for a wide range of applications from simple
recording and playback of measurement sequences to remote control of other instruments
.
2
HP Instrument BASIC is a complete system controller residing inside your analyzer
communicates with your analyzer via HP-IB commands and can also communicate with other
instruments, computers, and peripherals over the HP-IB interface.
.It
Introduction to the System 2-1
Page 14

Figure 2-1. Conguration Example of the HP Instrument B
The HP Instrument BASIC's programming interface includes an editor and a set of programming
utilities. The utilities allow you to perform disk I/O
your program.
The HP Instrument BASIC command set is similar to the command set of HP 9000 Series
200/300 BASIC. Therefore, HP Instrument BASIC programs can be run on any HP B
workstation with few if any changes.Porting information can be found in the
BASIC Programming Techniques
Connecting the Keyboard
of the
HP Instrument BASIC Users Handbook.
, renumber, secure, or delete all or part of
ASIC System
ASIC
HP Instrument
Note
When you use HP Instrument BASIC, connect the furnished keyboard to the mini-DIN
connector on the rear panel.
2-2 Introduction to the System
Turn OFF the analyzer before inserting or removing the keyboard connector
.
Page 15

Using HP Instrument BASIC for the First Time
Allocating Screen Area for HP Instrument BASIC
Because all of the analyzer's screen is allocated for analyzer operation after power ON, you
must allocate screen area for HP Instrument BASIC when you want to use it. The analyzer
provides four display allocation types.
Let's try
1. Press the following key and softkeys:
NNNNNNNNNNNNNN
4
5
Display
MORE
2. Press the following softkey.
NNNNNNNNNNNNNNNNNNNNNNNNNNNNN
ALL BASIC
The screen is cleared and all of the screen area is allocated for HP Instrument BASIC.
3. Press the following softkey.
NNNNNNNNNNNNNNNNNNNNNNNNNNNNNNNNNNNNNNNNNNNNNNNNNNNNNNNNNNN
ALLOCAT'N ALL INSTR
The total screen area is reallocated as the analyzer display
.
4. Press the following softkey:
NNNNNNNNNNNNNNNNNNNNNNNNNNNNNNNNNNNNNNNNNNNNNNNNNNNNNNNNNNNNNNNNN
HALF INSTR HALF BASIC
The screen area is allocated so that the upper half of the screen is used for the analyzer
operation and the lower half is used for HP Instrument B
ASIC.
5. Press the following softkey:
NNNNNNNNNNNNNNNNNNNNNNNNNNNNNNNNNNNNNN
BASIC STATUS
Three blank lines appear at the display line (lower area of the screen). This area is used by
HP Instrument BASIC to input commands and to display messages.
More information on the display allocations for the HP Instrument B
\
4
5
" in Appendix D.
Display
ASIC area is described in
Setting the Size of Memory Area for HP Instrument BASIC
The size of the memory areas for the RAM disk memory and the variable of HP Instrument
BASIC (excluding common variables) can be changed according to your application.
Caution
When the memory partition is recongured, the analyzer goes to the initial
settings. That is, the RAM disk memory is initialized and all the data saved in
the RAM disk memory is destroyed, and the program on the BASIC editor is
destroyed.
Let's try
1. Press the following key and softkey.
NNNNNNNNNNNNNNNNNNNNNNNNNNNNNNNNNNNNNNNNNNNNNNNNNN
4
5
System
2.
Press the desired softkey and
MEMORY PARTITION
NNNNNNNNNNNNNN
DONE
.
Introduction to the System 2-3
Page 16

NNNNNNNNNNNNNNNNNNNNNNNNNNNNNNNN
3.
CHANGE YES
and
NNNNNNNN
NO
softkey labels are displayed.
NNNNNNNNNNNNNNNNNNNNNNNNNNNNNNNN
Press
CHANGE YES
to change the memory partition.
NNNNNNNN
Press
NO
to cancel changing the memory partition.
Using the Keyboard
What can the Keyboard be Used for?
Furnished keyboard can be used as follows:
Performing calculations
Entering arguments to the active analyzer functions
Entering titles
Executing commands
Using softkeys
The following simple operations show you how to use these functions
.
Performing Calculations
You can perform calculations while in any display allocation type except for ALL
INSTRUMENT.
Let's try
1. Press the following key and softkeys:
4
Display
NNNNNNNNNNNNNN
5
MORE
NNNNNNNNNNNNNNNNNNNNNNNNNNNNN
ALL BASIC
The screen is cleared and a cursor appears at the bottom left of screen.
2. Type the following key from the keyboard:
3*2
4
5
Return
The characters you enter are displayed at the current cursor position. After pressing
the system responds with the following answer at the bottom of screen:
6
For more information, see \Numeric Computation" in the
Techniques
of the
HP Instrument BASIC Users Handbook.
HP Instrument BASIC Programming
Entering Arguments to the Active Analyzer Functions
4
Return
5
,
The numeric keys on the keyboard can be used to input the arguments for an active analyzer
function the same as using the front panel keys.
Let's try
1. Press the following key and softkeys:
4
Display
NNNNNNNNNNNNNN
5
NNNNNNNNNNNNNNNNNNNNNNNNNNNNNNNNNNNNNNNNNNNNNNNNNNNNNNNNNNN
MORE
ALLOCAT'N ALL INSTR
2. Then press the following key:
2-4 Introduction to the System
Page 17

4
DC POWER
5
The current DC Power voltage is displayed on the screen and becomes the active analyzer
function.
3. Type a value to change the frequency from the keyboard. For example, type this:
4
The DC Power value is cleared and the value you typed is displayed.
4. Then press the following key on the keyboard:
4
5
Return
The DC Power value is changed to 100 mV.
5. Next, type the following value and key:
100E-3
After pressing
4
Return
5
4
Return
5
the active function value is changed to 100 mV.You can use the
character \E" and \e" in an exponential expression.
Pressing
pressing
4
BackSpace
4
Back Space
5
on the keyboard deletes the last entry. This performs the same function as
5
on the front panel.
Entering Titles
The character entry keys can be used to enter a title on the screen instead of using front panel
operation.
Let's Try
1. Press the following key and softkey:
4
5
Display
A cursor appears at the top left of the graticule
NNNNNNNNNNNNNN
MORE
NNNNNNNNNNNNNNNNN
TITLE
.
2. Type in characters using the keyboard, the characters you type appear at the top of the
graticule.
3. Press the following key to terminate entry:
4
5
Return
You can enter standard uppercase and lowercase letters for the title, using the
4
Shift
5
key to
access the alternate case as usual. For more information on the character entry keys, see
\Character Entry Keys" in Appendix C.
Executing Commands
You can type in and execute commands from the keyboard at all times except when:
The display allocation is ALL INSTRUMENT.
A command is being executed.
The analyzer is in the EDIT mode.
At all other times, you can type in commands and press
4
Return
5
to present them to the system
for execution. The system parses the command and takes the appropriate action.
Introduction to the System 2-5
Page 18

Let's Try
1. Press the following key and softkey:
4
Display
NNNNNNNNNNNNNN
5
NNNNNNNNNNNNNNNNNNNNNNNNNNNNNNNNNNNNNNNNNNNNNNNNNNNNNNNNNNNNNNNNN
MORE
HALF INSTR HALF BASIC
2. To check the current mass storage, type the following command:
SYSTEM$("MSI")
4
Return
5
3. The system returns:
:,4
Using Softkeys
Pressing
4f15
through
4f85
on the keyboard performs the same function as pressing a softkey on
the front panel.
Entering BASIC Statements from the Front P
anel Keys
The analyzer's HP Instrument BASIC allows you to enter and execute statements from the
front panel keys (if the external mini-DIN keyboard is not connected).
Press the following key and softkeys from the front panel:
4
System
NNNNNNNNNNNNNNNNNNNN
5
IBASIC
NNNNNNNNNNNNNNNNNNNNNNNNNNNNNNNN
MORE [1/3]
NNNNNNNNNNNNNNNNNNNNNNNNNNNNNNNN
MORE [2/3]
NNNNNNNNNNNNNNNNNNNNNNNNNNNNNNNNNNNNNNNNN
COMMAND ENTRY
The Command Entry menu is displayed on the softkey menu area, and the active entry area
displays the letters, the digits 0 through 9, and some special characters including mathematical
,
symbols. Three sets of letters can be scrolled using the step keys
statement, press the step keys for the desired letter set, rotate the knob until the arrow \
points at the rst letter, then press
is entered, then press
NNNNNNNNNNNNNN
DONE
to execute the statement.
NNNNNNNNNNNNNNNNNNNNNNNNNNNNNNNNNNNNNNNNN
SELECT LETTER
. Repeat this until the complete statement
4
5
and
4
5
*
.To enter a
+
"
"
2-6 Introduction to the System
Page 19
3
Writing and Running Programs
This chapter describes how to write, execute (run), and list programs. The example program in
this chapter also describes how to control the analyzer from an HP Instrument BASIC program.
Topics covered in this chapter are:
Getting into/out of the EDIT mode
Writing programs
Running (Executing) programs
Listing programs
Getting into/out of the EDIT Mode
When you write a program, you must be in the EDIT mode
.For more information about the
EDIT mode, see Chapter 5.
Getting into the EDIT Mode
Press the following key and softkeys from the front panel:
4
System
NNNNNNNNNNNNNNNNNNNN
5
IBASIC
NNNNNNNNNNNNNN
Edit
The system enters the EDIT mode.You can also get into the EDIT mode from the keyboard.
Type and press as follows:
EDIT
and press
4
Return
5
Getting out of the EDIT Mode
Press the following softkey from the front panel:
NNNNNNNNNNNNNNNNNNNNNNNNNN
END EDIT
NNNNNNNNNNNNNNNNNNNNNNNNNN
The system exits the EDIT mode.If
4
System
NNNNNNNNNNNNNNNNNNNN
5
IBASIC
from the front panel,
END EDIT
NNNNNNNNNNNNNNNNNNNNNNNNNN
END EDIT
does not appear on the softkey menu, press
will appear at the bottom of the menu.
You can also get out of the EDIT mode from the keyboard as follows:
Press
4
5-4
5-4
5,4
5
,or
4
Shift
Alt
F4
ESC
Home
5
Writing and Running Programs 3-1
Page 20

Writing Programs
Controlling the Analyzer
HP Instrument BASIC can control the analyzer (itself) through the \internal" HP-IB bus. This
means that an analyzer with HP Instrument BASIC includes both a controller and an analyzer
in the same instrument. They are connected through an internal HP-IB bus.
Note
The select code of the internal HP-IB interface is 8, and the HP-IB address of
the analyzer can be any number from 0 to 30. In this manual, we use \800" for
the device selector of the analyzer.
For more information on HP-IB addresses and device selectors, see \Device
Selectors" in the
Instrument BASIC Users Handbook
HP Instrument BASIC Interfacing Techniques
and \Available I/O Interfaces and Select
of the
HP
Codes" in Chapter 8.
Let's Try
The following example program sets the DC Power voltage to 4 V.
1. Turn the analyzer ON.
2. Press the following key and softkeys from the front panel:
4
System
NNNNNNNNNNNNNNNNNNNN
5
IBASIC
NNNNNNNNNNNNNN
Edit
The system enters the EDIT mode. The cursor appears at line number 10, which is the
default line number of the rst program line, as follows:
d a
10 _
3. Press the following softkey:
NNNNNNNNNNNNNNNNNNNNNNNNNNNNNNNNNNNNNNNNNNNN
ASSIGN @Hp4352
The commands are automatically entered at the current cursor position like this:
d a
10 ASSIGN @Hp4352 TO 800_
4. Press the following key:
4
5
2
1
The system reads the entire line.
d a
10 ASSIGN @Hp4352 TO 800
20 _
3-2 Writing and Running Programs
Page 21

5. Press the following softkey:
NNNNNNNNNNNNNNNNNNNNNNNNNNNNNNNNNNNNNNNNNNNN
OUTPUT @Hp4352
The following characters are displayed on the screen:
d a
10 ASSIGN @Hp4352 TO 800
20 OUTPUT @Hp4352;""
Note
\;" preceding the HP-IB command is automatically added, when you write the
program by pressing keys. \;" is a separator to send more than one command in
the same message.
6. Press the following key to sets the DC Power Voltage to 4 V.
4
DC POWER
NNNNNNNNNNNNNNNNNNNNNNNNNNNNNNNNNNNNNNNNN
5
POWER VOLTAGE
NNNNN
4
The program code is automatically generated:
d a
10 ASSIGN @Hp4352 TO 800
20 OUTPUT @Hp4352;";VPOW4"
Then enter
7. To terminate the program, type END and presss
4
5
.
2
1
4
5
Return
key.
d a
10 ASSIGN @Hp4352 TO 800
20 OUTPUT @Hp4352;";VPOW4"
30 END
70 _
8. Press the following softkey to exit the EDIT mode:
4
System
NNNNNNNNNNNNNNNNNNNN
5
IBASIC
NNNNNNNNNNNNNNNNNNNNNNNNNN
END EDIT
The screen returns to the analyzer display.
Writing and Running Programs 3-3
Page 22
Running (Executing) Programs
Press the following key and softkeys from the front panel to execute the program:
4
System
NNNNNNNNNNNNNNNNNNNN
5
IBASIC
NNNNNNNNNNN
Run
The system executes the program. You can execute the
RUN
statement from the keyboard.
Type and press as follows:
RUN
4
5
Return
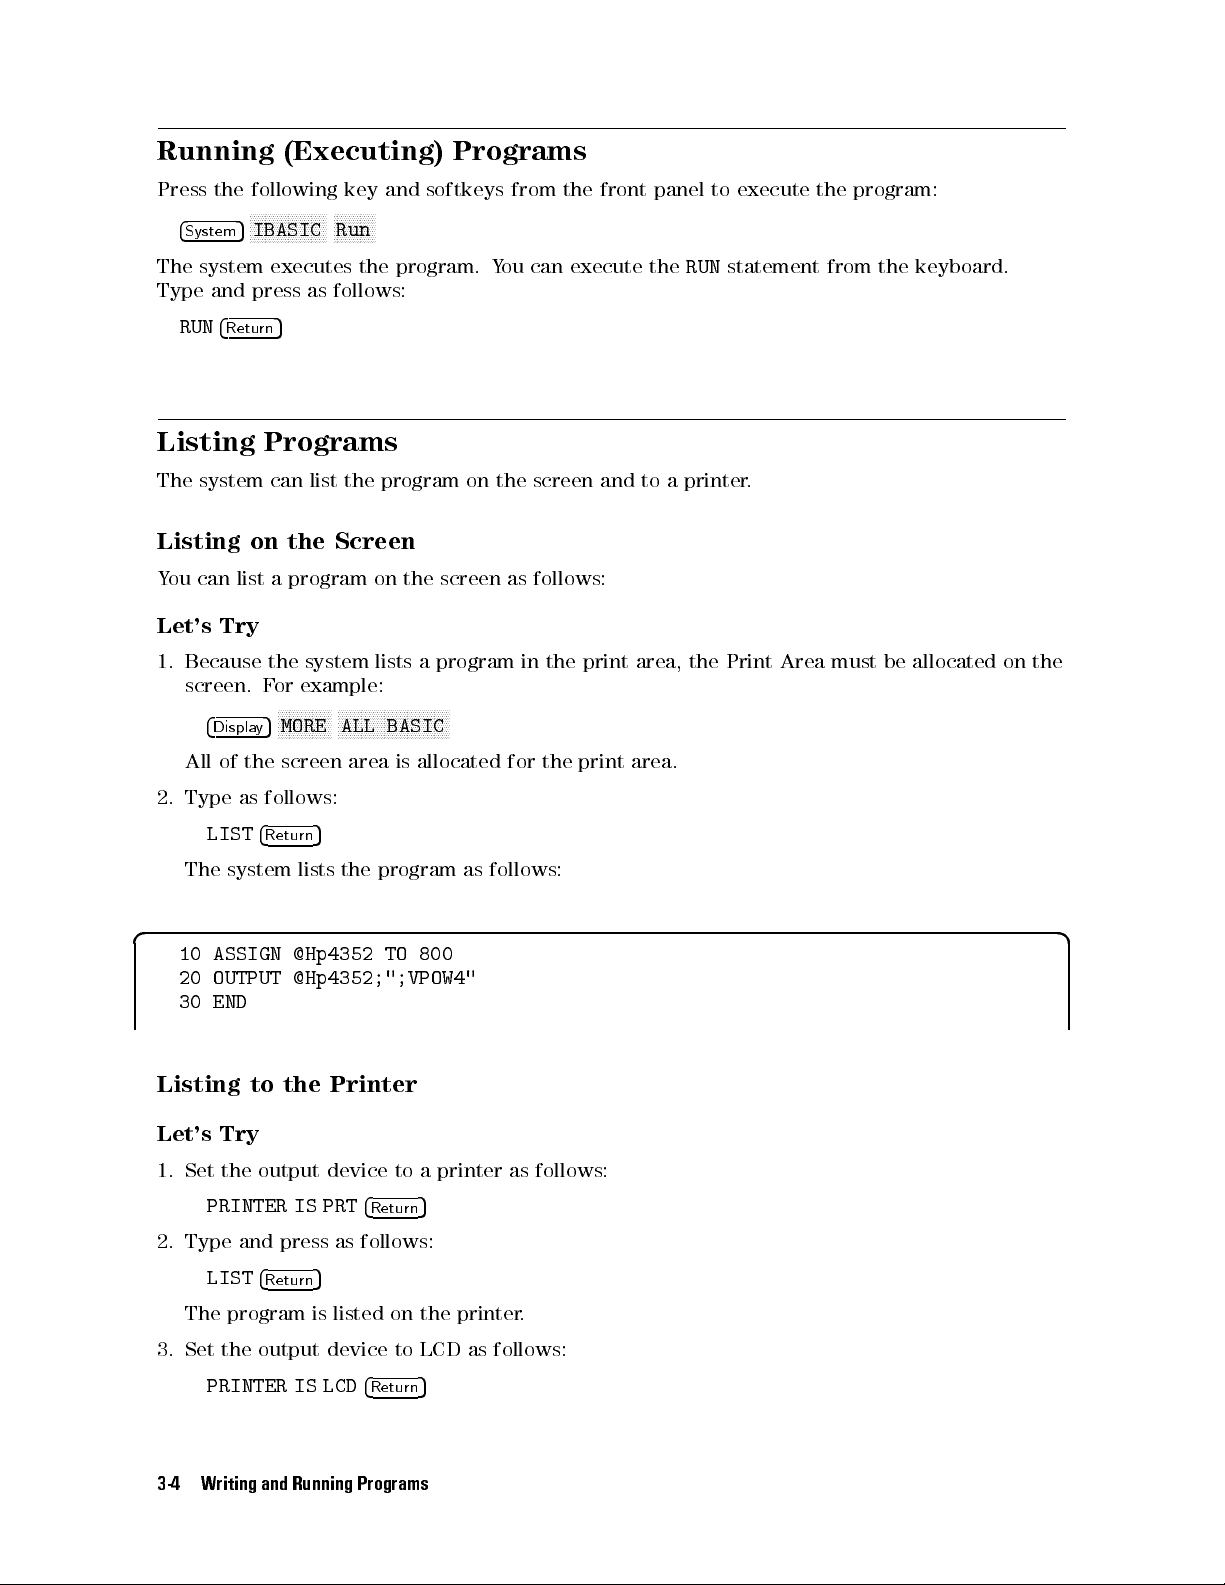
Listing Programs
The system can list the program on the screen and to a printer.
Listing on the Screen
You can list a program on the screen as follows:
Let's Try
1. Because the system lists a program in the print area, the Print Area must be allocated on the
screen. For example:
4
Display
NNNNNNNNNNNNNN
5
MORE
NNNNNNNNNNNNNNNNNNNNNNNNNNNNN
ALL BASIC
All of the screen area is allocated for the print area.
2. Type as follows:
LIST
4
5
Return
The system lists the program as follows:
d a
10 ASSIGN @Hp4352 TO 800
20 OUTPUT @Hp4352;";VPOW4"
30 END
Listing to the Printer
Let's Try
1. Set the output device to a printer as follows:
PRINTER IS PRT
4
Return
5
2. Type and press as follows:
LIST
4
5
Return
The program is listed on the printer.
3. Set the output device to LCD as follows:
PRINTER IS LCD
4
Return
5
3-4 Writing and Running Programs
Page 23
4
Saving and Getting Programs
This chapter describes how to save and get programs to or from the built-in exible disk drive
and RAM disk memory.Topics of this chapter are:
Saving programs (SAVE)
Listing le names (CAT)
Getting programs (GET)
If you are using the disk drive for the rst time, see \To Save and Recall" in Chapter 6 of the
Task Reference.
Note
HP Instrument BASIC on the analyzer cannot communicate with an external
disk drive.
Note
The analyzer can use either LIF (Logical Interchange F
ormat) or DOS (Disk
Operating System) formatted disks. The instrument automatically detects the
disk format. It can use most of the same operations for either disk format.
Saving Programs (SAVE)
1. To use the built-in disk drive, insert a 2DD disk or 2HD disk into the disk drive
2. If you are using a exible disk for the rst time
, set the disk format to LIF or DOS and
initialize the disk.
Note
Note
Floppy disks can be initialized in the 2HD format only.
When the analyzer is turned on, the RAM disk memory is automatically
initialized by the format that is set by
under
4
5
. If you want to change the disk format, initialize it.
Save
NNNNNNNNNNNNNNNNNNNNNNNNNNNNNNNN
FORMAT [ ]
under
NNNNNNNNNNNNNNNNNNNNNNNNNNNNNNNNNNNNNN
FILE UTILITY
.
3. If the display allocation is ALL INSTRUMENT, change the allocation. For example:
N
NNNNNNNNNNNNN
4
Display
5
MORE
NNNNNNNNNNNNNNNNNNNNNNNNNNNNN
ALL BASIC
4. Specify the system mass storage device as follows:
When you want to use the built-in disk drive
then press
4
Return
5
.
, type in
MSI ":INTERNAL,4"orMSI ":,4"
Saving and Getting Programs 4-1
,
Page 24

When you want to use the RAM disk memory, type in
then press
4
Return
5
.
MSI ":MEMORY,0"orMSI ":,0"
,
5. Press the following key among the 3 menus which leads to the
4
Shift
the lename to which you will store the program as follows:
N
NNNNNNNNNNNNN
SAVE
le name
4
Return
5
You can also save the le from the keyboard. Type and press as follows:
SAVE
le name
4
Return
5
The program is stored on the disk.
Note
If you get the error0257, \
File name error
", a le on the disk already has the
name you are trying to use. In this case, you have three choices:
Pick a new le name that doesn't already exist. To determine which le
names are already being used, use the \
Replace an existing le, use the \
Purge the old le using the
RE-SAVE
PURGE
CAT
" command (see below).
" statement.
command, then save the new one.
Listing File Names (CAT)
Listing to Screen
5-4F95
key. And type in
Press the following keys and softkeys:
1. If the display allocation is ALL INSTRUMENT or B
ASIC STATUS, change the allocation to
either HALF INSTRument HALF BASIC or ALL BASIC. For example:
N
NNNNNNNNNNNNN
4
Display
5
MORE
NNNNNNNNNNNNNNNNNNNNNNNNNNNNN
ALL BASIC
2. Press the following key among the 3 menus which leads to the
NNNNNNNNNNN
CAT
4
5
Return
You can list from the keyboard as follows:
Type in
CAT
then press
4
Return
5
.
The le names stored on the disk are listed on the screen.
Note
Because the CAT statement outputs 80 columns to a line and the maximum
number of columns to a screen is 61, each line is wrapped at the 62th column.
If you do not want the list to wrap around, execute the following statement
before executing the CAT command.
PRINTER IS LCD;WIDTH 80
CAT will list the le names with no wrap around, but anything after the 62th
column in the output cannot be seen.
4
Shift
5-4
F9
5
key:
4-2 Saving and Getting Programs
Page 25

Listing to Printer
Note
For hard copy output, a parallel cable must connect the analyzer to the printer.
1. Set the output device to be a printer as follows:
PRINTER IS PRT;WIDTH 80
4
Return
5
2. Type and press as follows:
CAT
4
5
Return
The program is listed on the printer.
3. Get the output device back to CRT:
PRINTER IS LCD
4
Return
5
Getting Programs (GET)
You can retrieve a program from the disk as follows:
1. If the display allocation is ALL INSTRUMENT, change the allocation to either HALF
INSTRument HALF BASIC or ALL BASIC. For example:
4
Display
NNNNNNNNNNNNNN
5
MORE
NNNNNNNNNNNNNNNNNNNNNNNNNNNNN
ALL BASIC
2. Press the following key among the 3 menus which leads to the
lename you want to retrieve:
NNNNNNNNNNN
GET
le-name
4
Return
5
You can get the le from the keyboard. Type and press as follows:
GET
le name
4
Return
5
4
Shift
5-4
5
key and type the
F9
Saving and Getting Programs 4-3
Page 26

Page 27

Editing Programs
This chapter describes how to edit programs using the EDIT mode. The topics covered in this
chapter are:
Getting into/out of the EDIT mode
Editing programs in the EDIT mode
Renumbering program line numbers
Getting Into/Out of the EDIT Mode
5
Getting Into the EDIT Mode using the Front P
Pressing the following key and softkey allows you to enter the EDIT mode immediately
anel Keys
,
irrespective of Display Allocation.
4
System
NNNNNNNNNNNNNNNNNNNN
5
IBASIC
NNNNNNNNNNNNNN
Edit
Entering the EDIT Mode from the Keyboard
Use the following keys to enter the EDIT mode with the cursor positioned at the specied line
number. The
leads to the
line number
4
5-4
Shift
F9
5
can be omitted. Press the following key among the 3 menus which
key.
NNNNNNNNNNNNNN
EDIT
line number
4
Enter
5
or type as follows:
EDIT
line number
To use the keyboard, the Keyboard Input Line must be allocated on the screen. If it is not,
press
4
Display
NNNNNNNNNNNNNN
5
MORE
4
5
Enter
NNNNNNNNNNNNNNNNNNNNNNNNNNNNNNNNNNNNNNNNNNNNNNNNNNNNNNNN
DISPLAY ALLOCATION
and select any allocation except ALL INSTRUMENT.
Getting Out of the EDIT Mode
The EDIT mode is exited by pressing
by pressing the
NNNNNNNNNNNNNNNNNNNNNNNNNN
END EDIT
softkey).
4
Shift
5-4
Alt
5-4
F4
5,4
ESC
5
, and
4
Home
5
from the keyboard (or
Editing Programs 5-1
Page 28

Editing Programs in the EDIT Mode
This section describes how to edit a program while in the EDIT mode, the topics are:
Deleting characters
Inserting characters
Moving the cursor
Scrolling lines and pages
Jumping lines
Inserting/deleting/recalling lines
Clearing lines
See Appendix C for more information on functions of each key.
Deleting Characters
There are two functions you can use to delete characters: \Back space" and \Delete
characters."
Back Space
Pressing
the cursor and moves the cursor left to the position of the erased character
4
Back space
5
on the front panel (or on the keyboard) erases the character to the left of
.
Deleting Characters
Pressing
4
Delete char
5
from the keyboard deletes the character at the cursor's position.
Inserting Characters
The EDIT mode is always in the insert mode
before the current cursor position. (Pressing
. Characters you type at the keyboard are inserted
4
5
performs no function.)
Insert
Moving the Cursor
The following key operations allow you to move the cursor horizontally along a line:
From the front panel From the keyboard
Turning the knob Pressing
465
and
475
Scrolling Lines and Pages
Scrolling Lines
The following key operations enable you to scroll lines up and down:
From the front panel From the keyboard
Pressing
4*5
and
4+5
pressing
Scrolling Pages
Pressing
4
Page Up
5
and
4
Page Down
5
from the keyboard causes the display to scroll up and down in
one page increments.
5-2 Editing Programs
485
and
495
Page 29

Jumping from the Current Line
Jumping to a Specied Line
You can specify a line by using a line number or a label name when jumping from the current
line as follows:
NNNNNNNNNNNNNNNNNNNNNNNNNNNNN
GOTO LINE
line number
4
Enter
5
or
NNNNNNNNNNNNNNNNNNNNNNNNNNNNN
GOTO LINE
label name
4
Enter
5
If the label specied is not dened in the program, an error will occur.
Jumping to the Top/Bottom of a Program
Pressing the following keys allows you to jump to top or bottom of the program:
4
5-485
Shift
4
5-495
Shift
Inserting/Deleting/Recalling Lines
4
Shift
5-4
5
inserts a new line above the current cursor position.
Insert
4
5-4
Shift
NNNNNNNNNNNNNNNNNNNNNNNNNNNNNNNNNN
N
Delete
RECALL LINE
5
deletes the line at which the cursor is
recalls the last deleted line.
.
Clearing Line
Pressing
4
Shift
5-4
5
clears a line from the current cursor position to the end of the line
End
.
Renumbering Program Line Numbers
The
REN
command allows you to renumber the program currently in memory.You should
execute the
menus which leads to the
REN
command after exiting the EDIT mode. Press the following key among the 3
4
Shift
5-4F95
key.
NNNNNNNNNNNNNNNNNNNNNNNNNN
RENumber
4
Enter
5
or
REN
4
5
Enter
You can specify the starting value, increment value, beginning line number, and the ending line
number when renumbering a program as follows:
NNNNNNNNNNNNNNNNNNNNNNNNNN
RENumber
starting value,incrementINbeginning line number,ending line number
4
Enter
5
or type as follows:
REN
starting value,incrementINbeginning line number,ending line number
line label
can be also use instead of
line number
Instrument BASIC Language Reference
of the
4
Enter
.For more information, see the
HP
HP Instrument BASIC Users Handbook.
Editing Programs 5-3
5
Page 30

Page 31

6
Program I/O
This chapter describes how to write programs that use the LCD, the I/O port, the external
RUN/CONT connector in the analyzer, and the DOS le system.
Topics covered in this chapter are:
Graphics
Using the external RUN/CONT connector
File system exceptions
Using the I/O port in BASIC programs
Graphics
HP Instrument BASIC adds graphics capability to the analyzer.You can draw pictures on the
LCD display independent of the grids and traces.
The analyzer has two screens, the instrument screen and the graphics screen. These two
screens are always displayed together on the LCD and are not separately selectable
instrument screen consists of a trace display area and a softkey label area. The HP Instrument
BASIC editor is also displayed on the trace display area. The graphics screen covers the
entire instrument screen as shown in Figure 6-1. The graphics screen is like an independent
transparent overlay in front of the instrument screen. Therefore, you can draw gures in both
the trace display and softkey label areas.
. The
Figure 6-1. Screen Structure
Program I/O 6-1
Page 32

Each point on the graphics screen is addressable using a coordinate address as shown in
Figure 6-1. The bottom left corner is the origin (0,0) and the top right corner is the maximum
horizontal and vertical end points (610,420). The MOVE and DRAW statement parameters are
specied using these coordinate values. Because the aspect ratio of a graphics screen is 1, you
need not adjust the aspect ratio when drawing gures.
HP Instrument BASIC Graphics Commands
The analyzer's HP Instrument BASIC has three graphics commands; MOVE, DRAW, and
GCLEAR.
MOVE
DRAW
GCLEAR
Moves the pen from its current position to the specied coordinates.
Draws a line from the current pen position to the specied coordinates.
Clears the graphics screen, moves the pen from its current position to the
origin (0,0), and selects pen 1.
Note
The total times of executing the
MOVE
and
DRAW
if the pen position is not changed.
Hard Copies
Graphics hard copies can be obtained with the printing function.
PRINT
NNNNNNNNNNNNNNNNN
PRINT
under
4
5
prints a display image on a printer. See \Copy Menu" in Chapter 9 of the
Copy
Function Reference.
Initial settings
When power is turned ON, the default settings are as follows:
MOVE 0,0
commands is up to 1933, even
Example of Graphics Programming
This section describes an example of a simple program for drawing lines on the graphics screen.
Drawing a Straight Line
The following HP Instrument BASIC program will draw a line from coordinate (50,200) to
coordinate (300,200) on the display.
GCLEAR ! INITIALIZE GRAPHICS MODE
MOVE 50,200 ! MOVE PEN TO COORDINATE (50,200)
DRAW 300,200 ! DRAW A LINE TO COORDINATE (300,200)
END
Drawing a Circle
Trying to express all graphical images using only straight lines is tedious, slow, and dicult.
This example describes a subprogram you can use to draw a circle
passing the center coordinates and the radius as arguments to the following subroutine
subroutine can be used as a base for drawing arcs
, setting dierent values for Theta, etc.
. It can draw a circle by
. This
SUB Drawcircle(Centx,Centy,R) !
6-2 Program I/O
Page 33
DEG ! USE DEGREES FOR ANGLE EXPRESSIONS
X=Centx+R !
Y=Centy !
MOVE X,Y ! MOVE PEN TO INITIAL POINT
For Theta=1 to 360 !
X=INT(COS(Theta)*R+Centx) ! NEXT X COORDINATE ON CIRCLE
Y=INT(SIN(Theta)*R+Centy) ! NEXT Y COORDINATE ON CIRCLE
DRAW X,Y ! DRAW LINE TO NEXT POINT ON CIRCLE
NEXT Theta ! UNTIL STARTING POINT IS REACHED
SUBEND !
Using the External RUN/CONT Connector
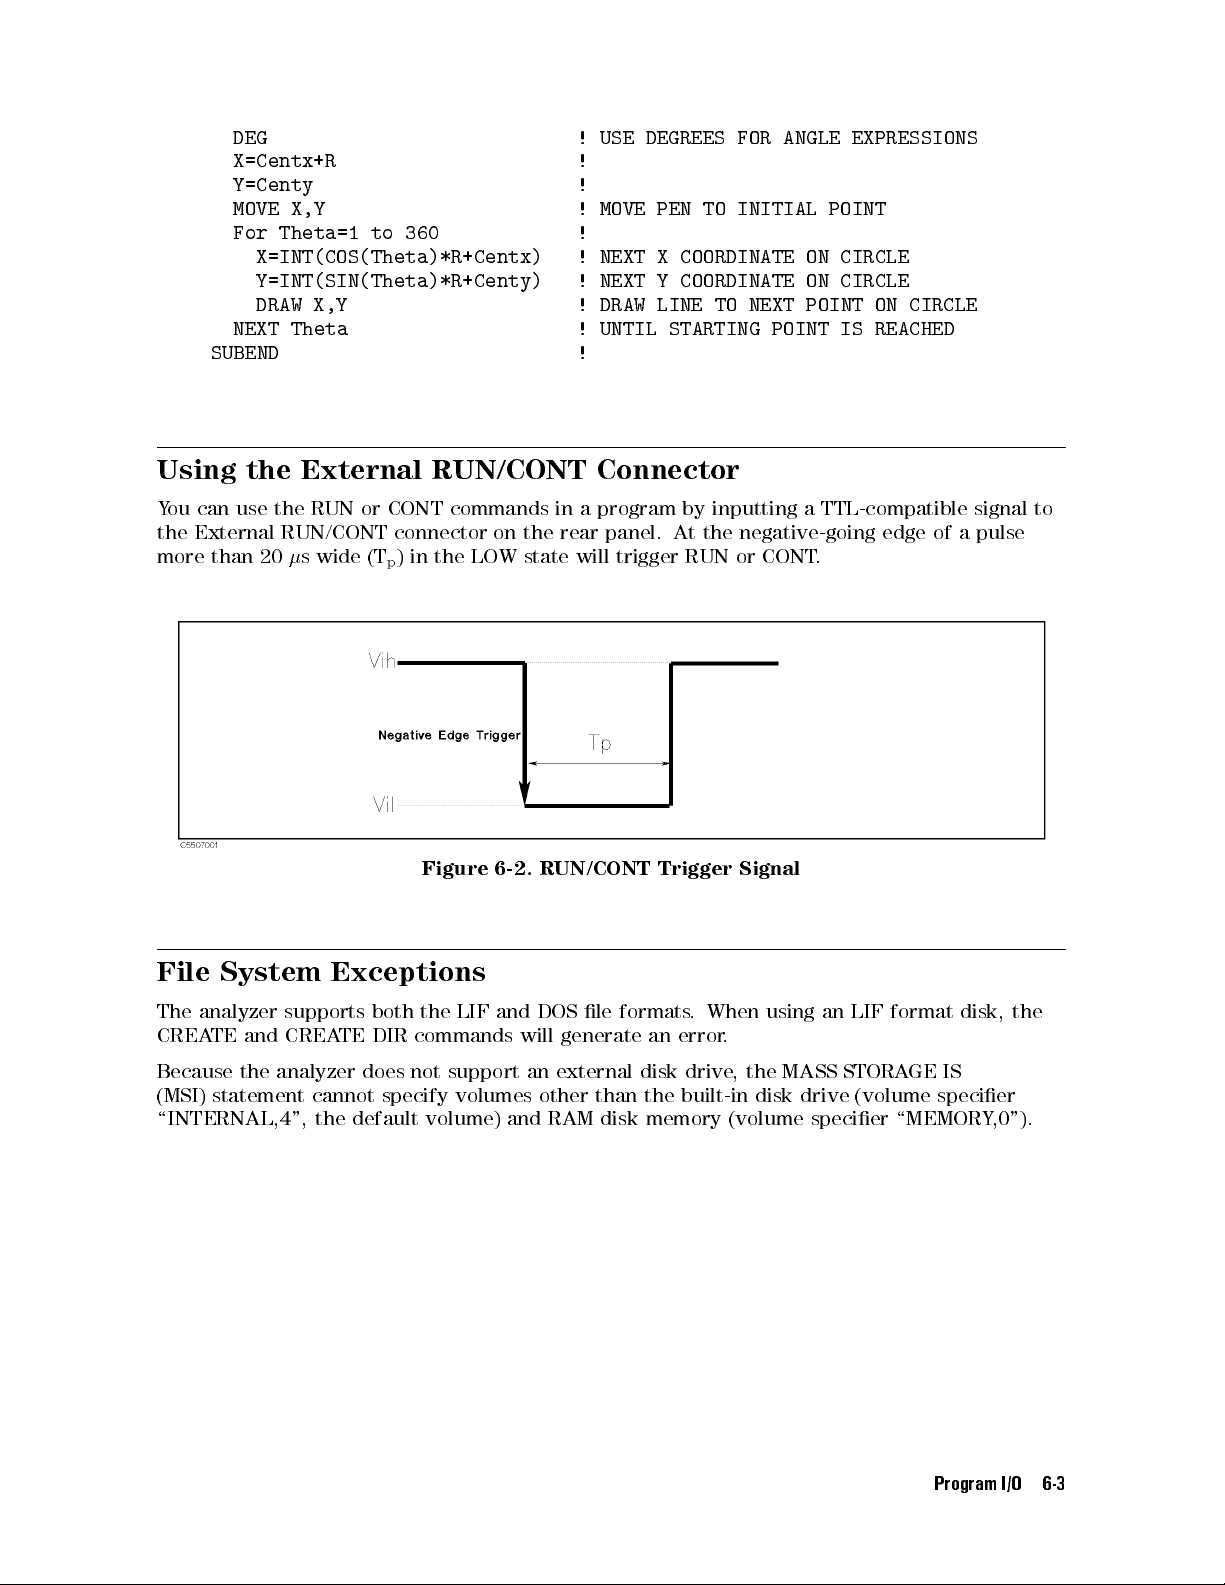
You can use the RUN or CONT commands in a program by inputting a TTL-compatible signal to
the External RUN/CONT connector on the rear panel. At the negative-going edge of a pulse
more than 20s wide (Tp) in the LOW state will trigger RUN or CONT.
Figure 6-2. RUN/CONT Trigger Signal
File System Exceptions
The analyzer supports both the LIF and DOS le formats. When using an LIF format disk, the
CREATE and CREATE DIR commands will generate an error.
Because the analyzer does not support an external disk drive, the MASS STORAGE IS
(MSI) statement cannot specify volumes other than the built-in disk drive (volume specier
\INTERNAL,4", the default volume) and RAM disk memory (volume specier \MEMORY
,0").
Program I/O 6-3
Page 34

Using the I/O Port in BASIC Programs
The HP Instrument BASIC can directly control the I/O port without using HP-IB commands.
This is faster than using the
INP8IO?
and
OUTP8IO
HP-IB commands.
READIO(15,0)
WRITEIO 15,0;
See Appendix B for more information on
For more information on the I/O port, see Appendix B.
data
Reads the 4-bit data from the I/O Port and returns a decimal value.
Outputs the decimal value of the 8-bit data to the OUT 0 to 7 lines of
the I/O port. The OUT 0 signal is the LSB (least signicant bit), while
the OUT 7 signal is the MSB (most signicant bit).
READIO
and
WRITEIO
commands.
6-4 Program I/O
Page 35

Special Features and Advanced Techniques
The topics covered in this chapter are :
Autoloading and running a program automatically (AUTOST)
On Key Label function
Increasing program speed
Autoloading and Running a Program Automatically (AUTOST)
The analyzer allows you to create a special program le called AUTOST. This program is
automatically loaded and run every time the analyzer is turned ON.
7
When you use this capability, the disk on which you saved A
UTOST must be inserted in the
disk drive before the analyzer is turned ON.
The system rst checks to see if there is an A
UTOREC le on the disk. If there is, the system
reads the AUTOREC le to set up the analyzer, and then loads and runs the AUTOST program.
(For more information on AUTOREC, see \Auto Recall Function" in Appendix D of the
Function Reference.)
On Key Label Function
The HP Instrument BASIC allows you to dene softkeys from within a program. The softkey
labels you dene will appear when pressing the
4
Shift
5-4
5
key on the Keyboard. The labels
F10
are displayed while running the program.
The
ON KEY
statement is used to dene the softkeys.For example:
......
100 ON KEY 1 GOTO 150
110 ON KEY 2 LABEL "Print" GOSUB Report
......
You can also use the KEY statement or USKEY command to automatically display the label.
This prevents you to press
program is running. The
4
5-4
5
Shift
KEY
statement is used to display the softkey labels dened. The
keys or the
F10
following set of statements is the same as the key strokes
NNNNNNNNNNNNNNNNNNNNNNNNNNNNNNNNNNNNNNNNN
ON KEY LABELS
NNNNNNNNNNNNNNNNNNNN
4
5
System
softkey while the user
NNNNNNNNNNNNNNNNNNNNNNNNNNNNNNNNNNNNNNNNN
IBASIC
ON KEY LABELS
:
......
200 OUTPUT @Hp4352;"KEY 47" ! SYSTEM key
210 OUTPUT @Hp4352;"KEY 0" ! IBASIC softkey
220 OUTPUT @Hp4352;"KEY 7" ! ON KEY LABELS softkey
......
Note that the same result can be obtained with the program shown below
Special Features and Advanced Techniques 7-1
.
Page 36

......
200 OUTPUT @Hp4352;"USKEY"
......
For more information on the ON KEY statement, see the
Reference
Increasing Program Speed
Because the analyzer's CPU interleaves processing measurements and executing a program,
program execution speed depends on the measurement conditions. The display process also
requires processing time.
To increase program speed (increase throughput), set the analyzer to the following conditions:
If you do not need to measure the
HOLD.
If you need to measure the
DISPLAY ALLOCATION to ALL BASIC.
When you use the I/O port, use the
to the port directly.
Turn the Display Params o.
of the
HP Instrument BASIC Users Handbook.
dut
when executing a program, set TRIGGER MODE to
dut
but do not need to display the traces on the screen, set
READIO
and
WRITEIO
HP Instrument BASIC Language
commands to input or output data
7-2 Special Features and Advanced Techniques
Page 37

Analyzer Specic HP Instrument BASIC Features
This chapter lists and summarizes the HP Instrument BASIC features specic to the analyzer.
Details of each feature are described in the previous chapters and in the appendixes.
This chapter covers the following topics:
Available I/O interfaces and select codes
Storage units
HP-IB commands for HP Instrument BASIC
Available I/O Interfaces and Select Codes
8
Available interfaces and their select codes in the analyzer's HP Instrument B
the following table:
Select Codes Devices
1 LCD
2 Keyboard
7 External HP-IB interface
8 Internal HP-IB interface
15 12 bit I/O port
16 24 bit I/O port
Storage Unit
The analyzer has two types of storage units: the built-in exible disk drive and the RAM disk
memory. Both the disk drive and RAM disk memory support the LIF and DOS formats.
To switch the system's storage units between the disk in the disk drive and the RAM disk under
control of HP Instrument BASIC,
MSI ":INTERNAL,4"orMSI ":,4"
MSI ":MEMORY,0"orMSI ":,0"
for the built-in disk drive
for the RAM disk memory
ASIC are listed in
Analyzer Specic HP Instrument BASIC Features 8-1
Page 38

Note
When you want to manage the storage units using the following HP-IB
commands, use the
STODMEMO
CHAD
CRED
DISF
command (for the RAM disk memory) to specify the storage unit.
STODDISK
INID
PURG
RECD
command (for the built-in disk drive) or the
RESAVD
SAVDASC
SAVDDAT
SAVDGRA
SAVDSTA
To copy a le between the disk and RAM disk, use an
The
FILC
Note
command cannot be used to copy a le if the format (LIF or DOS) of
FILC
command.
the disk in the built-in disk drive is dierent from that of the RAM disk.
Use the front panel key or enter an HP-IB command to initialize the storage unit. When using
an HP-IB command to initialize the storage unit, execute the following procedure:
d a
10 ASSIGN @Hp4352 TO 800
20 OUTPUT @Hp4352;"STODDISK" ! Selects the built-in disk drive
30 OUTPUT @Hp4352;"DISF DOS" ! Selects the DOS format
40 OUTPUT @Hp4352;"INID" ! Initializes the disk
50 END
c b
Built-in Flexible Disk Drive
The analyzer's HP Instrument BASIC has the following disk drive limitations:
ASIC
Disk types which can be initialized by the analyzer's HP Instrument B
INITIALIZE
statement is 2HD (1.4 MB). 2DD disks cannot be initialized.
The only
INITIALIZE
format option is the default (256 byte/sector).
DOS formats supported. The DOS formats supported are:
720 Kbyte, 80 tracks, double-sided, 9 sectors/track
1.44 Mbyte, 80 tracks, double-sided, 18 sectors/track
HFS format is not supported.
External disk drives are not supported.
RAM Disk Memory
A part of the RAM of the analyzer can be used as a virtual disk drive; RAM disk memory
disk memory can be operated in the same way as the internal disk drive.
When the analyzer is turned OFF, the data saved in the RAM disk is lost, and the RAM
disk memory is automatically initialized by the format that is set by
NNNNNNNNNNNNNNNNNNNNNNNNNNNNNNNNNNNNNNNNNNNN
FILE UTILITIES
under
4
Save
5
.
NNNNNNNNNNNNNNNNNNNNNNNNNNNNNNNN
FORMAT [ ]
under
8-2 Analyzer Specic HP Instrument BASIC Features
. RAM
Page 39

HP-IB Commands for HP Instrument BASIC
The PROGram subsystem commands of the analyzer's HP-IB commands are used to control HP
Instrument BASIC. The PROGram subsystem commands do the following:
Download the program from an external controller to the analyzer
Upload the program from the analyzer to an external controller
Delete the program on the BASIC editor of the analyzer
Execute the program on the BASIC editor of the analyzer
Set or query the variables and arrays in the program on the BASIC editor of the analyzer
Set or query the state of the program on the BASIC editor of the analyzer
See the
Note
HP-IB Programming Manual
The PROGram subsystem commands can be used from an external controller
only.
for more information.
Analyzer Specic HP Instrument BASIC Features 8-3
Page 40

Page 41

A
Manual Changes
Introduction
This appendix contains the information required to adapt this manual to earlier versions or
congurations of the analyzer than the current printing date of this manual. The information
in this manual applies directly to the HP 4352B VCO/PLL Signal Analyzer serial number prex
listed on the title page of this manual.
Manual Changes
To adapt this manual to your HP 4352B, see T
able A-1 and Table A-2, and make all the manual
changes listed opposite your instrument's serial number and rmware version.
Instruments manufactured after the printing of this manual may be dierent from those
documented in this manual. Later instrument versions will be documented in a manual
changes supplement that will accompany the manual shipped with that instrument. If your
instrument's serial number is not listed on the title page of this manual or in T
be documented in a
yellow MANUAL CHANGES
supplement.
able A-1, it may
In additions to change information, the supplement may contain information for correcting
errors (Errata) in the manual. To keep this manual as current and accurate as possible
Hewlett-Packard recommends that you periodically request the latest
MANUAL CHANGES
,
supplement.
For information concerning serial number prexes not listed on the title page or in the
MANUAL CHANGES
Turn on the line switch or execute the
version. See the
supplement, contact the nearest Hewlett-Packard oce.
*IDN?
HP-IB Programming Guide
command by HP-IB to conrm the rmware
manual for information on the
*IDN?
command.
Table A-1. Manual Changes by Serial Number
Serial Prex or Number Make Manual Changes
Table A-2. Manual Changes by Firmware Version
Version Make Manual Changes
Manual Changes A-1
Page 42

Instruments Covered by This Manual
Hewlett-Packard uses a two-part, nine-character serial number that is stamped on the serial
number plate (see Figure A-1) attached to the rear panel. The rst four digits and the letter are
the serial prex and the last ve digits are the sux.
Figure A-1. Serial Number Plate
A-2 Manual Changes
Page 43

BASIC Commands Specic to HP 4352B
BASIC Commands Not Implemented
B
The following commands are listed in the
Instrument Users Handbook
, but are not implemented in the analyzer's HP Instrument BASIC.
HP Instrument BASIC Language Reference
OFF CYCLE
ON CYCLE
Note
GCLEAR
and
ON TIMEOUT
commands are available, but the following
supplementary items are added.
GCLEAR
Moves the pen to (0,0).
OFF TIMEOUT and ON TIMEOUT
The interface select code is 7 only.
BASIC Commands Specic to HP 4352B
The following commands are
the
HP Instrument BASIC Users Handbook
not
listed in the
HP Instrument BASIC Language Reference
, but are available in the analyzer's HP Instrument
BASIC.
DATE
DATE$
EXECUTE
READIO
SET TIME
SET TIMEDATE
TIME
TIME$
WRITEIO
of the
HP
of
BASIC Commands Specic to HP 4352B B-1
Page 44

DATE
Keyboard Executable Yes
Programmable Yes
In an IF . . . THEN . . . Yes
This command converts data formatted as (DD MMM YYY) into the numeric value used to set
the clock.
Item Description Range
formatted date string expression (see drawing and text)
day integer constant 1 to end-of-month
month Literal (letter case ignored) JAN, FEB, MAR, APR, MAR,
APR, MAY, JUN, JUL, AUG,
SEP, OCT,NOV, DEC
year integer constant 1900 to 2079
Example Commands
PRINT DATE("21 MAY 1991")
SET TIMEDATE DATE("1 Jan 1991")
Days=(DATE("1 JAN 1991")-DATE("11 NOV 1990")) DIV 86400
Semantics
Using a value from the
to midnight on the date specied. The results from the
DATE
command as the argument for SET TIMEDATE will set the clock
DATE
and
TIME
commands must be
combined to set the date and time of day.
If the
DATE
command is used as an argument for SET TIMEDATE to set the clock, the date
must be in the range: 1 Mar 1900 to 4 Aug 2079.
Specifying an invalid date, such as the thirty-rst of February, will cause an error.
Leading blanks or non-numeric characters are ignored. ASCII spaces are recommended as
delimiters between the day, month, and year. However, any non-alphanumeric character
except the negative sign (0), may be used as the delimiter.
B-2 BASIC Commands Specic to HP 4352B
Page 45

DATE$
Keyboard Executable Yes
Programmable Yes
In an IF . . . THEN . . . Yes
This command formats the number of seconds into a date (DD MMM YYY).
Item Description Range
seconds numeric expression
Example Commands
PRINT DATE$(TIMEDATE)
DISP DATE$(2.111510608E+11)
Semantics
The date returned is in the form: DD MMM YYYY
is the month, and YYYY is the year.
The day is a blank lled to two character positions
month, and year.
The rst letter of the month is capitalized and the rest are lowercase charters
Years less than the year 0 are expressed as negative years
, where DD is the day of the month, MMM
. Single ASCII spaces delimit the day,
0
4.623683256E+12 to
4.6534263350399E+13
.
.
BASIC Commands Specic to HP 4352B B-3
Page 46

EXECUTE
Keyboard Executable Yes
Programmable Yes
In an IF . . . THEN . . . Yes
This command executes specic HP-IB commands faster than the
OUTPUT
statement.
Item Description Range
HP-IB command string expression refer to Table B-1
Table B-1. HP-IB Commands for EXECUTE
SING
OUTPDATA?
OUTPMEMO?
INPT?
Example Commands
(1) Commands with no parameter and no query
EXECUTE "SING"
Semantics
(1) Measurement Trigger and Getting Data
The HP 4352B executes
EXECUTE "SING"
to sweep once. Execution of the next statement
is suppressed until the sweep is completed. Therefore, the completion of the sweep need
not be supervised using a status register.
When
EXECUTE "SING"
is executed,
C=READIO(8,0)
gets measurement data.
Example
100 EXECUTE "SING"
110 C=READIO(8,0)
Note
When both an external controller and HP instrument BASIC are used at the
same time, the
EXECUTE
command occasionally does not terminate normally.If
the external controller queries the instrument while the HP 4352B is sweeping
when triggered by
EXECUTE "SING"
, the
EXECUTE
command does not terminate
normally (In the worst case, a system halt occurs).
B-4 BASIC Commands Specic to HP 4352B
Page 47
To avoid this problem, it is necessary to use an SRQ interrupt technique that
uses the status register. In this case, the external controller waits to send query
commands until HP Instrument BASIC completes the execution of the
command.
EXECUTE
Trigger mode must be HOLD mode when
(2) Check INPUT1 of the 24 bit I/O port using
100 REPEAT
110 EXECUTE "INPT?"
120 C=READIO(8,0)
130 UNTIL C=1
(3) Using
OUTDATA?
100 EXECUTE "OUTPDATA?"
200 C=READIO(8,0)
and
OUTPMEMO?
INP?
EXECUTE "SING"
command
is executed.
BASIC Commands Specic to HP 4352B B-5
Page 48

READIO
Keyboard Executable Yes
Programmable Yes
In an IF . . . THEN . . . Yes
This command reads the contents of the register used for an I/O port or EXECUTE command.
Item Description Range
select code numeric expression 8: EXECUTE register
15: 12 bit I/O port
16: 24 bit I/O port
register number numeric expression 0 to 800 (Select code 8)
0: 12 bit I/O port
2 to 4: 24 bit I/O port
Example Commands
Ioport=READIO(16,2)
100 EXECUTE "INPT?"
110 C=READIO(8,0)
Semantics
The EXECUTE command stores the query command's return values in registers. The
command reads a return value from one of these registers. Return values are sequentially
stored in registers.
READIO
B-6 BASIC Commands Specic to HP 4352B
Page 49

SET TIME
Keyboard Executable Yes
Programmable Yes
In an IF . . . THEN . . . Yes
This command resets the time-of-day given by the real-time clock.
Item Description Range
seconds numeric expression, rounded to the nearest
hundredth
Example Commands
SET TIME 0
SET TIME Hours*3600+Minutes*60
Semantics
This command changes only the time within the current day
setting is equivalent to (TIMEDATE DIV 86400)286400 plus the specied setting.
0 to 86399.99
, not the date. The new clock
BASIC Commands Specic to HP 4352B B-7
Page 50

SET TIMEDATE
Keyboard Executable Yes
Programmable Yes
In an IF . . . THEN . . . Yes
This command resets the absolute seconds (time and day) given by the real-time clock.
Item Description Range
seconds numeric expression, rounded to the nearest
hundredth
Example Commands
SET TIMEDATE TIMEDATE+86400
SET TIMEDATE Strange_number
Semantics
The clock values represent Julian time, expressed in seconds.
2.08662912E+12 to
2.143252224E+11
B-8 BASIC Commands Specic to HP 4352B
Page 51
TIME
Keyboard Executable Yes
Programmable Yes
In an IF . . . THEN . . . Yes
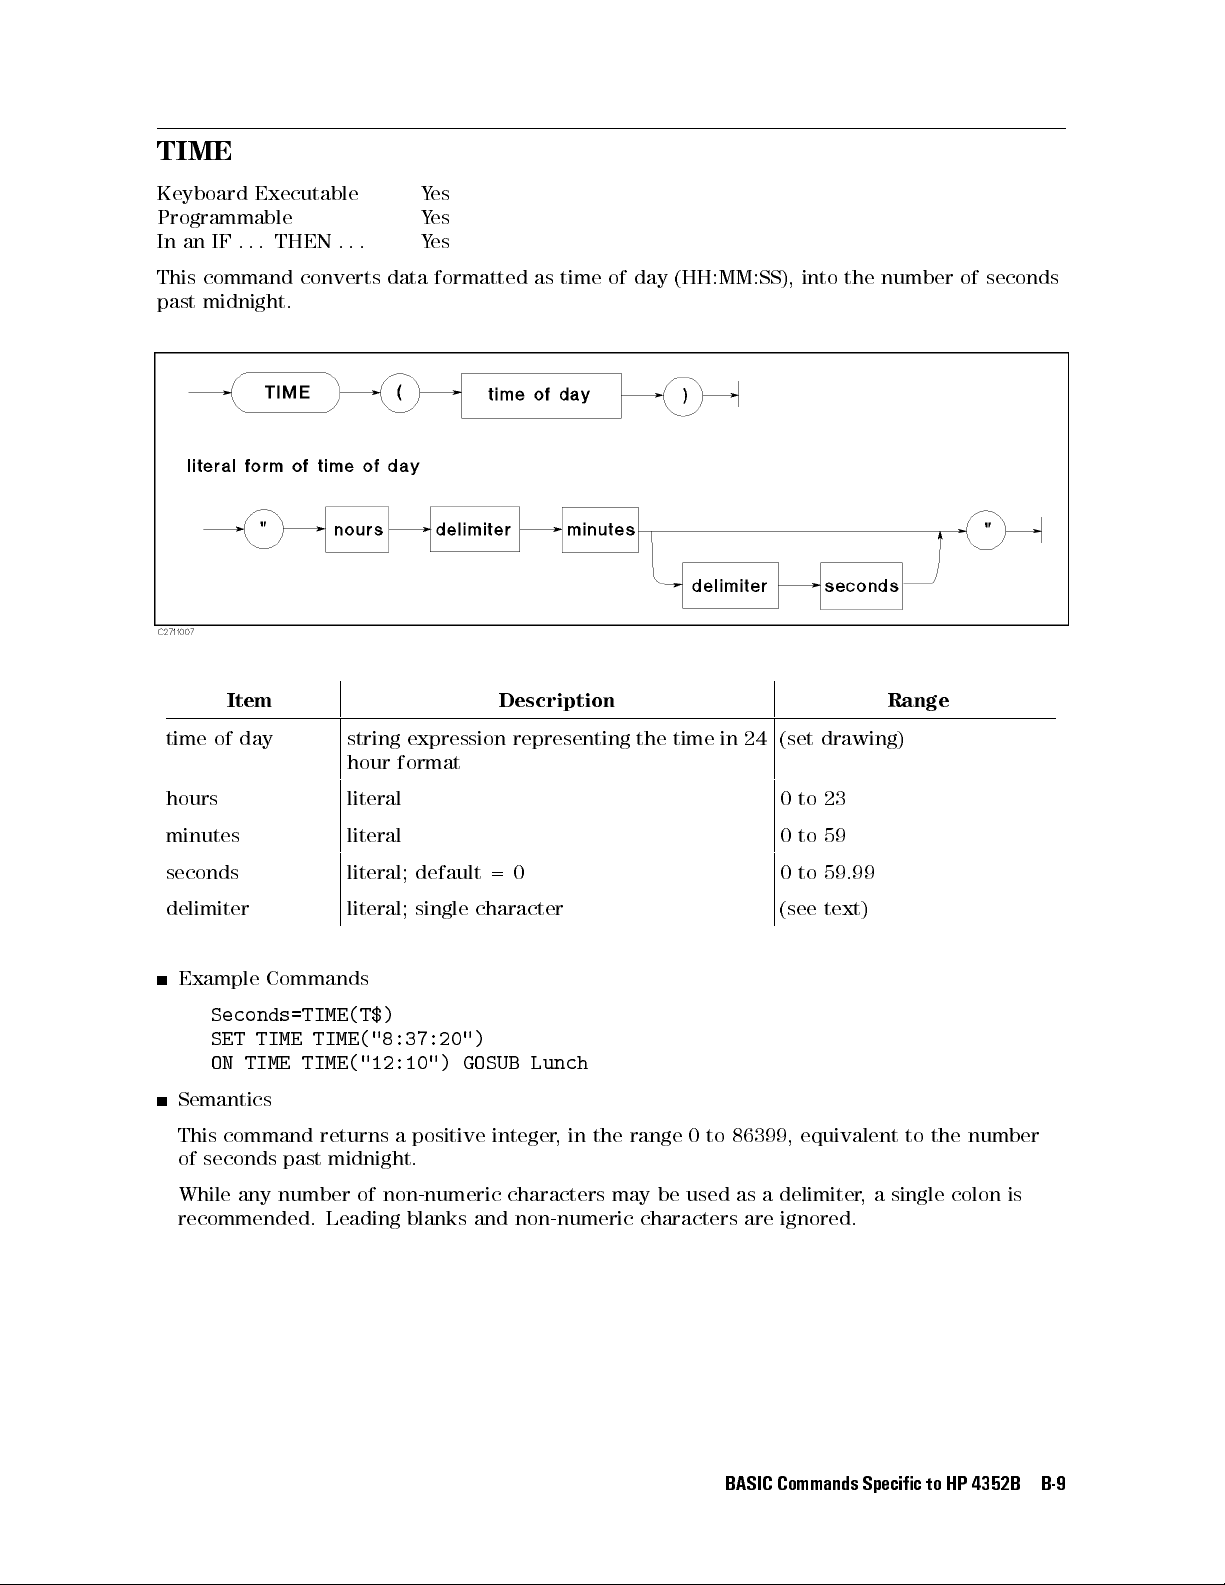
This command converts data formatted as time of day (HH:MM:SS), into the number of seconds
past midnight.
Item Description Range
time of day string expression representing the time in 24
hour format
hours literal 0to23
minutes literal 0to59
seconds literal; default = 0 0 to 59.99
delimiter literal; single character (see text)
Example Commands
Seconds=TIME(T$)
SET TIME TIME("8:37:20")
ON TIME TIME("12:10") GOSUB Lunch
Semantics
This command returns a positive integer, in the range 0 to 86399, equivalent to the number
of seconds past midnight.
While any number of non-numeric characters may be used as a delimiter, a single colon is
recommended. Leading blanks and non-numeric characters are ignored.
(set drawing)
BASIC Commands Specic to HP 4352B B-9
Page 52

TIME$
Keyboard Executable Yes
Programmable Yes
In an IF . . . THEN . . . Yes
This command converts the number of seconds past midnight into a string representing the
time of day (HH:MM:SS).
Item Description Range
seconds numeric expression, truncated to the
nearest second; seconds past midnight
Example Commands
DISP "The time is: ";TIME$(TIMEDATE)
PRINT TIME$(45296)
Semantics
TIME$ takes the time in seconds and returns the time of day in the form HH:MM:SS, where
HH represents hours, MM represents minutes, and SS represents seconds. A module 86400 is
performed on the parameter before it is formatted as a time of day
0 to 86399
.
B-10 BASIC Commands Specic to HP 4352B
Page 53

WRITEIO
Keyboard Executable Yes
Programmable Yes
In an IF . . . THEN . . . Yes
This statement writes register data in decimal notation to a specied EXECUTE command
parameter register or to a specied I/O port.
Item Description Range
select code numeric expression 8: EXECUTE register
15: 12 bit I/O port
16: 24 bit I/O port
register number numeric expression 0 to 800 (Select code 8)
0: 12 bit I/O port
0 to 7 : 24 bit I/O port
register data numeric expression
0
2147483648 to +2147483647: 24
bit I/O port
0 to 255: 12 bit I/O port
Semantics
How to write data to the I/O port:
When writing data to an I/O port, use15or16as the select code and the register
number that corresponds with the register.
How to write HP-IB command parameters when the
The
EXECUTE
To store this parameter, the
command. The
command uses the data stored in a register (select code 8) as a parameter
WRITEIO
WRITEIO
command stores one parameter in one register like the
command must be executed before the
EXECUTE
command is used:
command. For an HP-IB command that requires multiple parameters, use as many
WRITEIO
commands as the number of parameters.For more information on the
command, see the \EXECUTE" command.
.
EXECUTE
READIO
EXECUTE
BASIC Commands Specic to HP 4352B B-11
Page 54

Page 55

The Keyboard
Mini-DIN keyboard is following key layout.
C
Figure C-1. mini-DIN Keyboard
The Keyboard C-1
Page 56

Character Entry Keys
The character entry keys are arranged in the familiar QWERTY typewriter layout, but with
additional features.
4
Caps
5
Sets the unshifted keyboard to either upper-case (which is the default
after power ON) or lower-case (normal typewriter operation).
4
Shift
5
You can enter standard upper-case and lower-case letters, using the
4
key to access the alternate case.
4
Enter
5
Has three functions:
When a running program prompts you for data, respond by typing in the
requested data and then press
4
5
. This signals the program that you
Enter
have provided the data and that it can resume execution.
Shift
5
When typing in program source code, the
line of program code.
After typing in a command, the
4
Enter
executed.
4
CTRL
5
In the EDIT mode,
4
CTRL
5
allows you to control the editor in the same
as using the cursor-control, display-control, and editing keys.For more
4
Backspace
detail, see \Using
5
Erases the character to the left of the cursor and moves the cursor to the
4
CTRL
5
Key in Edit Mode".
erased character's position on the line.
4
Tab
5
Performs no function.
Cursor-Control and Display-Control Keys
485495
Allow you to scroll lines up and down in the print display area. Shifted,
these keys cause the display to scroll toward the top or bottom of the
display.
475465
Allow you to move horizontally along a line. Shifted, these keys allow you
to \jump" to the left and right limits of the current line.
4
Page Up54Page Down
5
Cause the display to scroll up or down in one page increments.
4
5
key is used to store each
Enter
5
key causes the command to be
C-2 The Keyboard
Page 57

Numeric Keypad
The numerical keypad provides a convenient way to enter numbers and perform arithmetic
operations. Just type in the arithmetic expression you want to evaluate, then press
4
Enter
5
. The
result is displayed in the lower-left corner of the screen.
4
Enter
5
Performs the same function as the
4
5
key. The numerical keypad
Enter
serves the same function as the numerical keypad on the front panel of
the analyzer.
4
Num Lock
5
Performs no function. Pressing the
but the keys are performes as the numerical keypad only.
Editing Keys
4
Insert
5
Performs no function. The HP Instrument BASIC is always in the insert
mode. The characters you type are always inserted to the left of the
cursor.
4
Shift
4
Delete
4
Shift
4
End
4
Shift
4
Home
5-4
5
5-4
5
5-4
5
Insert
Delete
5
End
5
Inserts a new line above the cursor's current position (edit mode only).
Deletes the character at the cursor's position.
5
Deletes the line containing the cursor (edit mode only).
Delete the line containing the cursor except the line number
Clears from the current cursor position to the end of the line
Clears the entire alpha screen. In EDIT mode, this exits the EDIT mode.
Program Control Keys
4
Num Lock
5
key causes the LED ON/OFF,
.
.
The following keys allow you to control execution of the program stored in the analyzer's
memory.
4
5 4
Pause
5or4
Pause
Pressing
5-4F45
Alt
NNNNNNNNNNNNNNNNNNNNNNNNNN
Continue
pauses program execution after the current line.
in the System menu resumes program execution from
the point where it paused.
4
5-4
5-4
5
stops program execution after the current line.To restart
F4
NNNNNNNNNNN
Run
in the System menu.
4
5-4
5-4
5
Shift
5
resets program execution immediately without erasing the
Alt
BASIC RESET
exits the edit mode.
F4
).
4
Ctrl
5-4
5 4
Break
Shift
Alt
the program, press
When in the editor mode,
5-4
Ctrl
Break
program from memory (
Pauses program execution when the computer is performing or trying to
perform an I/O operation. Press
when the computer is hung up during an I/O operation, because
4
5-4
5
Alt
works only after the computer nishes the current program line
F4
4
Alt
5-4F55
instead of
4
Pause
5or4
5-4F45
Alt
4
Pause
The Keyboard C-3
5
or
.
Page 58
System Control Keys
4
Shift
5-4
Page Up
5 4
Shift
5-4
Page Up
5
recalls the last line the you entered, executed, or deleted.
Several previous lines can be recalled this way. Recall is particularly
handy to use when you mistype a line. Instead of retyping the entire line,
you can recall it, edit it using the editing keys, and enter or execute it
again.
4
4
Alt
4
Alt
5-4F35
5-4F25
5-4
Shift
Page Down
(Run) Starts a program running from the beginning.
Resumes program execution from the point where it paused.
5
moves forward through the recall stack.
(Continue)
4
5
(IBASIC) Allows you to type BASIC commands on Keyboard Input Line. If Display
F12
Allocation is ALL INSTRUMENT, pressing this key changes the Display
Allocation to BASIC STATUS.
4
5-4
5
Shift
changes Display Allocation to ALL INSTRUMENT.
F12
Softkeys and Softkey Control
There are eight softkeys (labeled
4
5
f1
through
4
5
). The softkey labels are indicated on the right
f8
of the analyzer's screen.
Softkey Control Keys
Pressing the following:
4F95
4
Shift
5-4
F9
5
Leads to the IBASIC menu, which controls programs and the editor.
leads to the BASIC menu from which to control a BASIC program. This
menu is the same menu displayed when pressing
4
SYSTEM
NNNNNNNNNNNNNNNNNNNN
5
IBASIC
from
the front panel.
In the edit mode, pressing
4
5
leads to the Edit System menu, which
F10
provides softkeys to conveniently enter BASIC commands.
4
5-4
5
Shift
(User) leads to the ON KEY LABEL menu, which are user
F10
dened softkeys in a BASIC program. (For information on getting to this
menu through the HP Instrument BASIC, see \On Key Label Function"in
Chapter 7.)
Softkeys
4F95
and
4
5
keys leads to the IBASIC menu. Pressing a softkey performs the command labeled
F10
or produces a sequence of characters on the keyboard input line (or on the \current line" in
the EDIT mode).
Pressing the softkeys on the front panel of the analyzer performs the same functions as
pressing the
4f15
through
4f85
function keys.
C-4 The Keyboard
Page 59

Softkeys Accessed from
IBASIC Menu
Pressing the following:
NNNNNNNNNNNNNN
Step
Produces the command \
program at every line.
NNNNNNNNNNNNNNNNNNNNNNNNN
N
Continue
Produces the command \
program execution from the point where it paused.
NNNNNNNNNNN
Run
Produces the command \
executes a program.
NNNNNNNNNNNNNNNN
N
Pause
Produces the command \
execution after the current program line is executed.
NNNNNNNNNNNNNN
Stop
Produces the command \
execution after the current line.To restart the program, press
NNNNNNNNNNNNNN
EDIT
Produces the command \
entered, pressing
NNNNNNNNNNNNNNNNNNNNNNNNNNNNNNNNNNNNNNNNN
ON KEY LABELS
Leads to a softkey menu dened during program execution, if the softkey
menu has been dened.
NNNNNNNNNNN
CAT
Produces the command \
directory.
NNNNNNNNNNNNNN
SAVE
Produces the command \
lines as strings into that le.
NNNNNNNNNNNNNNNNNNNNNNN
RE-SAVE
Produces the command \
does not exist; otherwise, it rewrites a specied ASCII le by copying program
lines as strings into that le.
NNNNNNNNNNN
GET
Produces the command \
to store the strings into memory as program lines
NNNNNNNNNNNNNNNN
N
PURGE
Produces the command \
directory of a mass storage media.
NNNNNNNNNNNNNNNNNNNNNNNNNNNNNNNN
INITIALIZE
Produces the command \
media for use by the computer. When
the media is lost.
NNNNNNNNNNNNNNNNNNN
N
MSI []
Produces the command \
the mass strage.
the RAM disk.
NNNNNNNNNNNNNNNNNNNNNNN
SCRATCH
Produces the command \
memory. After
NNNNNNNNNNNNNNNNNNNNNNNNN
N
RENumber
Produces the command \
currently in memory.
NNNNNNNNNNNNNN
LIST
NNNNNNNNNNNNNNNNNNNNNNNNNNNNNNNNNNNNNNNNN
COMMAND ENTRY
Produces the command \
Leads to the Command entry menu, which allows you to execute the HP
Instrument BASIC commands from the front panel keys.
NNNNNNNNNNNNNNNNNNNNNNNNNNNNN
CLEAR I/O
Produces the command \
the program, press
4
5-4F95
Shift
4
Enter
INTERNAL
SCRATCH
NNNNNNNNNNNNNNNNNNNNNNNNNN
Continue
Key
Step
" on the keyboard input line. Step executes a
Continue
Run
Pause
Stop
EDIT
5
enters the edit mode.
CAT".CAT
SAVE".SAVE
RE-SAVE".RE-SAVE
GET".GET
" on the keyboard input line. Resumes
" on the keyboard input line. Immediately
" on the keyboard input line.Pauses program
" on the keyboard input line. Stops program
" on the keyboard input line. After
lists the contents of a mass storage
creates an ASCII le and copies program
creates a specied ASCII le if it
reads the specied ASCII le and attempts
.
PURGE".PURGE
INITIALIZE".INITIALIZE
MSI []
" on the keyboard input line. MSI [] species
deletes a le or directory from the
prepares mass storage
INITIALIZE
is executed, any data on
species the internal exible disk,
SCRATCH
is entered, pressing
REN".REN
LIST
CLEAR I/O
". The
SCRATCH
4
Enter
erases the program in
5
executes the command.
renumbers all of the program lines
". Lists the program on the screen.
". Pauses I/O operation program. To restart
.
NNNNNNNNNNN
Run
.
EDIT
MEMORY
is
species
The Keyboard C-5
Page 60
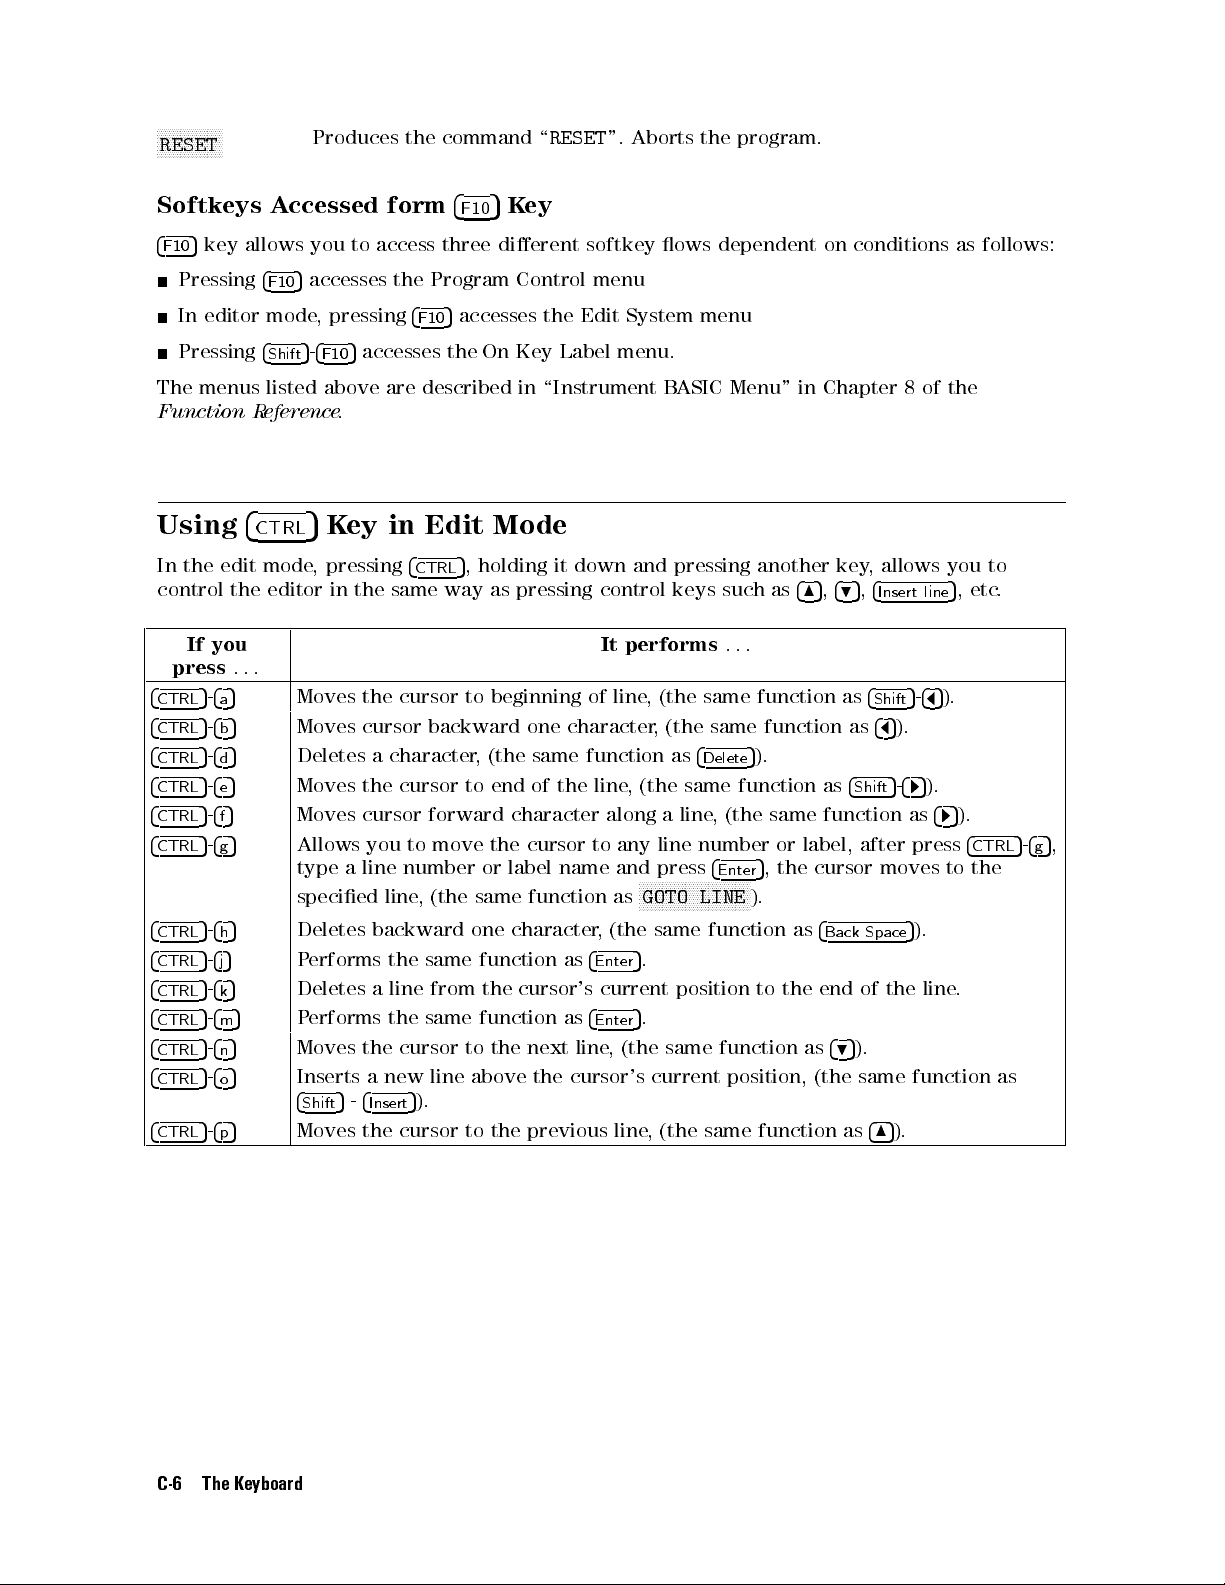
NNNNNNNNNNNNNNNNN
RESET
Produces the command \
RESET
". Aborts the program.
Softkeys Accessed form
4
5
key allows you to access three dierent softkey ows dependent on conditions as follows:
F10
Pressing
4
5
accesses the Program Control menu
F10
In editor mode, pressing
Pressing
4
Shift
5-4
5
accesses the On Key Label menu.
F10
4
5
Key
F10
4
5
accesses the Edit System menu
F10
The menus listed above are described in \Instrument BASIC Menu" in Chapter 8 of the
Function Reference.
Using
In the edit mode, pressing
control the editor in the same way as pressing control keys such as
press
4
CTRL
4
CTRL
4
CTRL
4
CTRL
4
CTRL
4
CTRL
4
CTRL
4
CTRL
4
CTRL
4
CTRL
4
CTRL
4
CTRL
4
CTRL
If you
5-4
5
a
5-4
5
b
5-4
5
d
5-4
5
e
5-4
5
f
5-4
5
g
5-4
5
h
5-4
5
j
5-4k5
5-4m5
5-4n5
5-4o5
5-4
5
p
...
4
5
CTRL
Key in Edit Mode
4
5
, holding it down and pressing another key, allows you to
CTRL
485,495,4
It performs
...
Moves the cursor to beginning of line, (the same function as
Moves cursor backward one character, (the same function as
Deletes a character, (the same function as
Moves the cursor to end of the line, (the same function as
4
Delete
5
).
4
Insert line
4
Shift
4
6
Shift
5
5-4
).
Moves cursor forward character along a line, (the same function as
Allows you to move the cursor to any line number or label, after press
type a line number or label name and press
specied line, (the same function as
NNNNNNNNNNNNNNNNNNNNNNNNNNNNN
GOTO LINE
Deletes backward one character, (the same function as
Performs the same function as
4
Enter
5
.
4
5
, the cursor moves to the
Enter
).
4
Back Space
Deletes a line from the cursor's current position to the end of the line.
Performs the same function as
Moves the cursor to the next line, (the same function as
4
Enter
5
.
495
).
Inserts a new line above the cursor's current position, (the same function as
4
5-4
Shift
Moves the cursor to the previous line, (the same function as
Insert
5
).
4
5
).
8
5-4
5
5
).
6
5
).
7
4
7
).
5
, etc.
5
).
4
CTRL
5-4
5
,
g
C-6 The Keyboard
Page 61

Softkeys Used for HP Instrument BASIC
Operation
The following softkeys are available with the HP Instrument BASIC:
4
System
5
NNNNNNNNNNNNNNNNNNNN
IBASIC
NNNNNNNNNNNNNNNNNNNNNNNNNNNNNNNNNNNNNNNNNNNNNNNNNN
MEMORY PARTITION
and the RAM disk.
controls HP Instrument BASIC.
changes size of memory areas for HP Instrument BASIC
D
Softkeys Used for HP Instrument BASIC Operation D-1
Page 62

4
System
WWWWWWWWWWWWWWWWWWWWWWWWWW
IBASIC
Displays the following softkeys to control HP Instrument BASIC (IBASIC):
5
Figure D-1. System menu
NNNNNNNNNNNNNN
Step
NNNNNNNNNNNNNNNNNNNNNNNNNN
Continue
D-2 Softkeys Used for HP Instrument BASIC Operation
Allows you to execute one program line at a time
useful for debugging.
Resumes program execution from the point where it paused.
. This is particularly
Page 63

NNNNNNNNNNN
Run
NNNNNNNNNNNNNNNNN
Pause
NNNNNNNNNNNNNN
Stop
NNNNNNNNNNNNNN
Edit
NNNNNNNNNNNNNNNNNNNNNNNNNNNNNNNNNNNNNNNNNNN
N
ASSIGN @Hp4352
NNNNNNNNNNNNNNNNNNNNNNNNNNNNNNNNNNNNNNNNNNNN
OUTPUT @Hp4352
NNNNNNNNNNNNNNNNNNNNNNNNNNNNNNNNNNNNNNNN
N
ENTER @Hp4352
NNNNNNNNNNN
END
NNNNNNNNNNNNNNNNNNNNNNNNNNNNN
GOTO LINE
NNNNNNNNNNNNNNNNNNNNNNNNNNNNNNNNNNN
RECALL LINE
NNNNNNNNNNNNNNNNNNNNNNNNNN
END EDIT
NNNNNNNNNNNNNNNNNNNNNNNNNNNNNNNNNNNNNNNNN
ON KEY LABELS
NNNNNNNNNNN
CAT
NNNNNNNNNNNNNN
SAVE
NNNNNNNNNNNNNNNNNNNNNNN
RE-SAVE
NNNNNNNNNNN
GET
NNNNNNNNNNNNNNNNN
PURGE
NNNNNNNNNNNNNNNNNNNNNNNNNNNNNNNN
INITIALIZE
NNNNNNNNNNNNNNNNNNNN
MSI []
NNNNNNNNNNNNNNNNNNNNNNN
SCRATCH
NNNNNNNNNNNNNNNNNNNNNNNNNN
RENumber
NNNNNNNNNNNNNN
LIST
NNNNNNNNNNNNNNNNNNNNNNNNNNNNNNNNNNNNNNNNN
COMMAND ENTRY
Starts a program from its beginning.
Pauses program execution after the current program line is executed.
Stops program execution after the current line.To restart the program,
NNNNNNNNNNN
press
Run
.
Enters into the EDIT mode.
Produces the command \
ASSIGN @Hp4352 TO 800
" at the cursor's current
position.
Produces the command \
OUTPUT @Hp4352;""
" at the cursor's current
position.
Produces the command \
Produces the command \
Allows you to move the cursor to any line number or to a label. After
pressing
NNNNNNNNNNNNNNNNNNNNNNNNNNNNN
GOTO LINE
ENTER @Hp4352;
END
".
" at the cursor's current position.
, type a line number or a label and then press
4
Return
The cursor moves to the specied line or label.
Recalls the last deleted line.
Exits the edit mode.
Leads to a softkey menu dened during program execution, if the softkey
menu has been dened.
Produces the command \
CAT".CAT
lists the contents of a mass storage
directory.
Produces the command \
SAVE".SAVE
creates an ASCII le and copies
program lines as strings into that le.
Produces the command \
RE-SAVE".RE-SAVE
creates a specied ASCII le
if it does not exist; otherwise, it rewrites a specied ASCII le by copying
program lines as strings into that le.
Produces the command \
GET".GET
reads the specied ASCII le and
attempts to store the strings into memory as program lines.
Produces the command \
PURGE".PURGE
deletes a le or directory from the
directory of a mass storage media.
Produces the command \
media for use by the computer. When
INITIALIZE".INITIALIZE
INITIALIZE
prepares mass storage
is executed, any data
on the media is lost.
Produces the command \
species the mass strage.
MEMORY
species the RAM disk.
Produces the command \
memory. After
SCRATCH
Produces the command \
MSI []
SCRATCH
" on the keyboard input line. MSI []
INTERNAL
species the internal exible disk,
". The
SCRATCH
is entered, pressing
REN".REN
renumbers all of the program lines
erases the program in
4
5
executes the command.
Enter
currently in memory.
Produces the command \
LIST
". Lists the program on the screen.
Leads to the Command entry menu, which allows you to execute the HP
Instrument BASIC commands from the front panel keys.
5
.
Softkeys Used for HP Instrument BASIC Operation D-3
Page 64

NNNNNNNNNNNNNNNNNNNNNNNNNNNNNNNNNNNNNNNNN
SELECT LETTER
NNNNNNNNNNNNNNNNN
SPACE
NNNNNNNNNNNNNNNNNNNNNNNNNNNNNNNN
BACK SPACE
NNNNNNNNNNNNNNNNNNNNNNNNNNNNNNNNNNN
ERASE TITLE
NNNNNNNNNNNNNN
DONE
NNNNNNNNNNNNNNNNNNNN
CANCEL
NNNNNNNNNNNNNNNNNNNNNNNNNNNN
N
CLEAR I/O
NNNNNNNNNNNNNNNNN
RESET
Selects the character pointed to by \"".
Inserts a space.
Deletes the last character entered.
Deletes all characters entered.
Terminates command entry, and executes the command you entered.
Cancels command entry and returns to the BASIC menu.
Produces the command \
restart the program, press
Produces the command \
CLEAR I/O
NNNNNNNNNNNNNNNNNNNNNNNNNN
Continue
RESET
". Pauses I/O operation program. To
.
". Aborts the program.
D-4 Softkeys Used for HP Instrument BASIC Operation
Page 65

W
WWWWWWWWWWWWWWWWWWWWWWWWWWWWWWWWWWWWWWWWWWWWWWWWWWWWWWWWWWWWWWWW
MEMORY PARTITION
Changes size of memory areas for HP Instrument BASIC and the RAM disk memory.
NNNNNNNNNNNNNNNNNNNNNNNNNNNNNNNNNNNNNNNNNNNNNNNNNNNNNNNNNNN
mm K RAM nn K BASIC
NNNNNNNNNNNNN
N
DONE
NNNNNNNNNNNNNNNNNNNNNNNNNNNNNNNN
CHANGE YES
NNNNNNN
N
NO
Selects memory partition so that
andnnKbyte is for HP Instrument BASIC.
Terminates selecting memory partition and displays the following
softkey labels.
Executes to change memory partition to one selected.
Cancels to change memory partition and return to the previous
softkey menu.
mm
Kbyte is for RAM disk memory
Caution
When the memory partition is recongured, the analyzer goes to the initial
settings. That is, the RAM disk memory is initialized and all the data saved in
the RAM disk memory is destroyed, and the program on the BASIC editor is
destroyed.
Softkeys Used for HP Instrument BASIC Operation D-5
Page 66

4
Display
Displays the following menu to allocate the BASIC screen area on the display.
5
Figure D-2. Display Menu
NNNNNNNNNNNNNNNNNNNNNNNNNNNNNNNNNNNNNNNNNNNNNNNNNNNNNNNNNNN
ALLCOCT'N ALL INSTR
NNNNNNNNNNNNNNNNNNNNNNNNNNNNNNNNNNNNNNNNNNNNNNNNNNNNNNNNNNNNNNNNN
HALF INSTR HALF BASIC
NNNNNNNNNNNNNNNNNNNNNNNNNNNNN
ALL BASIC
NNNNNNNNNNNNNNNNNNNNNNNNNNNNNNNNNNNNNN
BASIC STATUS
D-6 Softkeys Used for HP Instrument BASIC Operation
Selects a full screen single screen or two half-screen graticules.
Selects two half-screens, one graticule display above the HP
Instrument BASIC display.
Selects a full screen single HP Instrument BASIC display.
Selects a full screen graticule and three status lines for HP
Instrument BASIC under the graticule.
Page 67

Figure D-3. Display Allocation
The following table lists the number of lines and columns in the B
display allocation. It also shows the keyboard input line status for each allocation. When the
keyboard input line is available, you can execute BASIC commands from the keyboard.
Display Allocation BASIC Print Area Keyboard Input Line
Columns Lines
All Instrument 0 0 not available
Half Instrument Half BASIC 60 11 available
ALL BASIC 60 23 available
BASIC Status 0 0 available
Run Light Indications
t
(blank) Program stopped; can execute commands; CONTINUE not allowed.
Program paused; can execute commands; CONTINUE is allowed.
?
3
BASIC program waiting for input from keyboard; cannot execute commands.
This indication has two possible meanings:
Program running; CANNOT execute commands. CONTINUE not allowed.
System executing commanded entered from keyboard; CANNOT enter
commands.
ASIC print area for each
Softkeys Used for HP Instrument BASIC Operation D-7
Page 68

Page 69

Index
A
NNNNNNNNNNNNNNNNNNNNNNNNNNNNN
ALL BASIC
NNNNNNNNNNNNNNNNNNNNNNNNNNNNNNNNNNNNNNNNNNNNNNNNNNNNNNNNNNN
ALLOCAT'N ALL INSTR
, 2-3
, 2-3
arrow key
495
, C-2
465
, C-2
475
, C-2
485
, C-2
AUTOREC, 7-1
AUTOST, 7-1
auto start, 7-1
B
back space, 5-2
4
Backspace
NNNNNNNNNNNNNNNNNNNNNNNNNNNNNNNNNNNNNN
BASIC STATUS
5
, C-2
, 2-3
built-in exible disk drive, 8-2
C
4
5
, C-2
Caps
CAT, 4-2
character
deleting, 5-2
inserting, 5-2
character entry key, C-2
command
executing, 2-5
NNNNNNNNNNNNNNNNNNNNNNNNNNNNNNNNNNNNNNNNN
COMMAND ENTRY
, 2-6
CREATE, 6-3
CREATE DIR, 6-3
4
5
, C-2
CTRL
cursor
moving, 5-2
E
EDIT mode, 3-1, 5-1
4
5
, C-3
End
4
5
, C-2, C-3
Enter
"ERROR0257"
EXECUTE
, B-4
, 4-2
external RUN/CONT connector, 6-3
trigger signal, 6-3
F
le name
listing, 4-2
"File name error."
, 4-2
exible disk drive, 8-2
format option, 8-2
G
GET, 4-3
graphics, 6-1
H
NNNNNNNNNNNNNNNNNNNNNNNNNNNNNNNNNNNNNNNNNNNNNNNNNNNNNNNNNNNNNNNNN
HALF INSTR HALF BASIC
, 2-3
hard copy, 3-4
4
5
, C-3
Home
HP-IB address, 3-2
HP Instrument BASIC, 2-1
I
IBASIC, 2-1
INITIALIZE
4
5
, C-3
Insert
, 8-2
\INTERNAL,4", 6-3
I/O interfaces, 8-1
I/O port, 6-4
D
DATE
, B-2
DATE$
, B-3
4
5
, C-3
Delete
disk drive, 8-2
DOS le system, 6-3
K
keyboard, 2-4, C-1
connecting, 2-2
L
label function, 7-1
LIF le system, 6-3
line
clearing, 5-3
deleting, 5-3
inserting, 5-3
Index-1
Page 70

jumping, 5-3
recalling, 5-3
renumber, 5-3
scrolling, 5-2
list, 3-4
on the screen, 3-4
to printer, 3-4
M
manual changes, A-1
MASS STORAGE IS, 6-3
\MEMORY,0", 6-3
mini-DIN keyboard, C-1
MSI, 6-3
N
4
Num Lock
5
, C-3
O
OFF CYCLE
ON CYCLE
, B-1
, B-1
On Key Label function, 7-1
P
4
Page Down
4
Page Up
PEN
PRINTER IS
, B-1
5
, C-2
5
, C-2
, 3-4
program
executing, 3-4
getting, 4-3
listing, 3-4
running, 3-4
saving, 4-1
writing, 3-2
program speed
increasing, 7-2
R
RAM disk memory, 8-2
READIO
, 6-4, B-6
RUN/CONT connector, 6-3
trigger signal, 6-3
run light indication, D-7
S
screen area
allocating, 2-3
select code, 3-2, 8-1
serial number, A-2
SET TIME
SET TIMEDATE
4
Shift
4
Shift
4
Shift
4
Shift
5
, C-2
5-4
5-4
5-4
, B-7
Delete
End
Insert
5
5
, C-3
5
, C-3
, B-8
, C-3
storage unit, 8-1
T
4
5
, C-2
Tab
TIME
, B-9
TIME$
, B-10
title
entering, 2-5
W
WIDTH
, 4-2
WRITEIO
, 6-4, B-11
Index-2
 Loading...