

Page 1
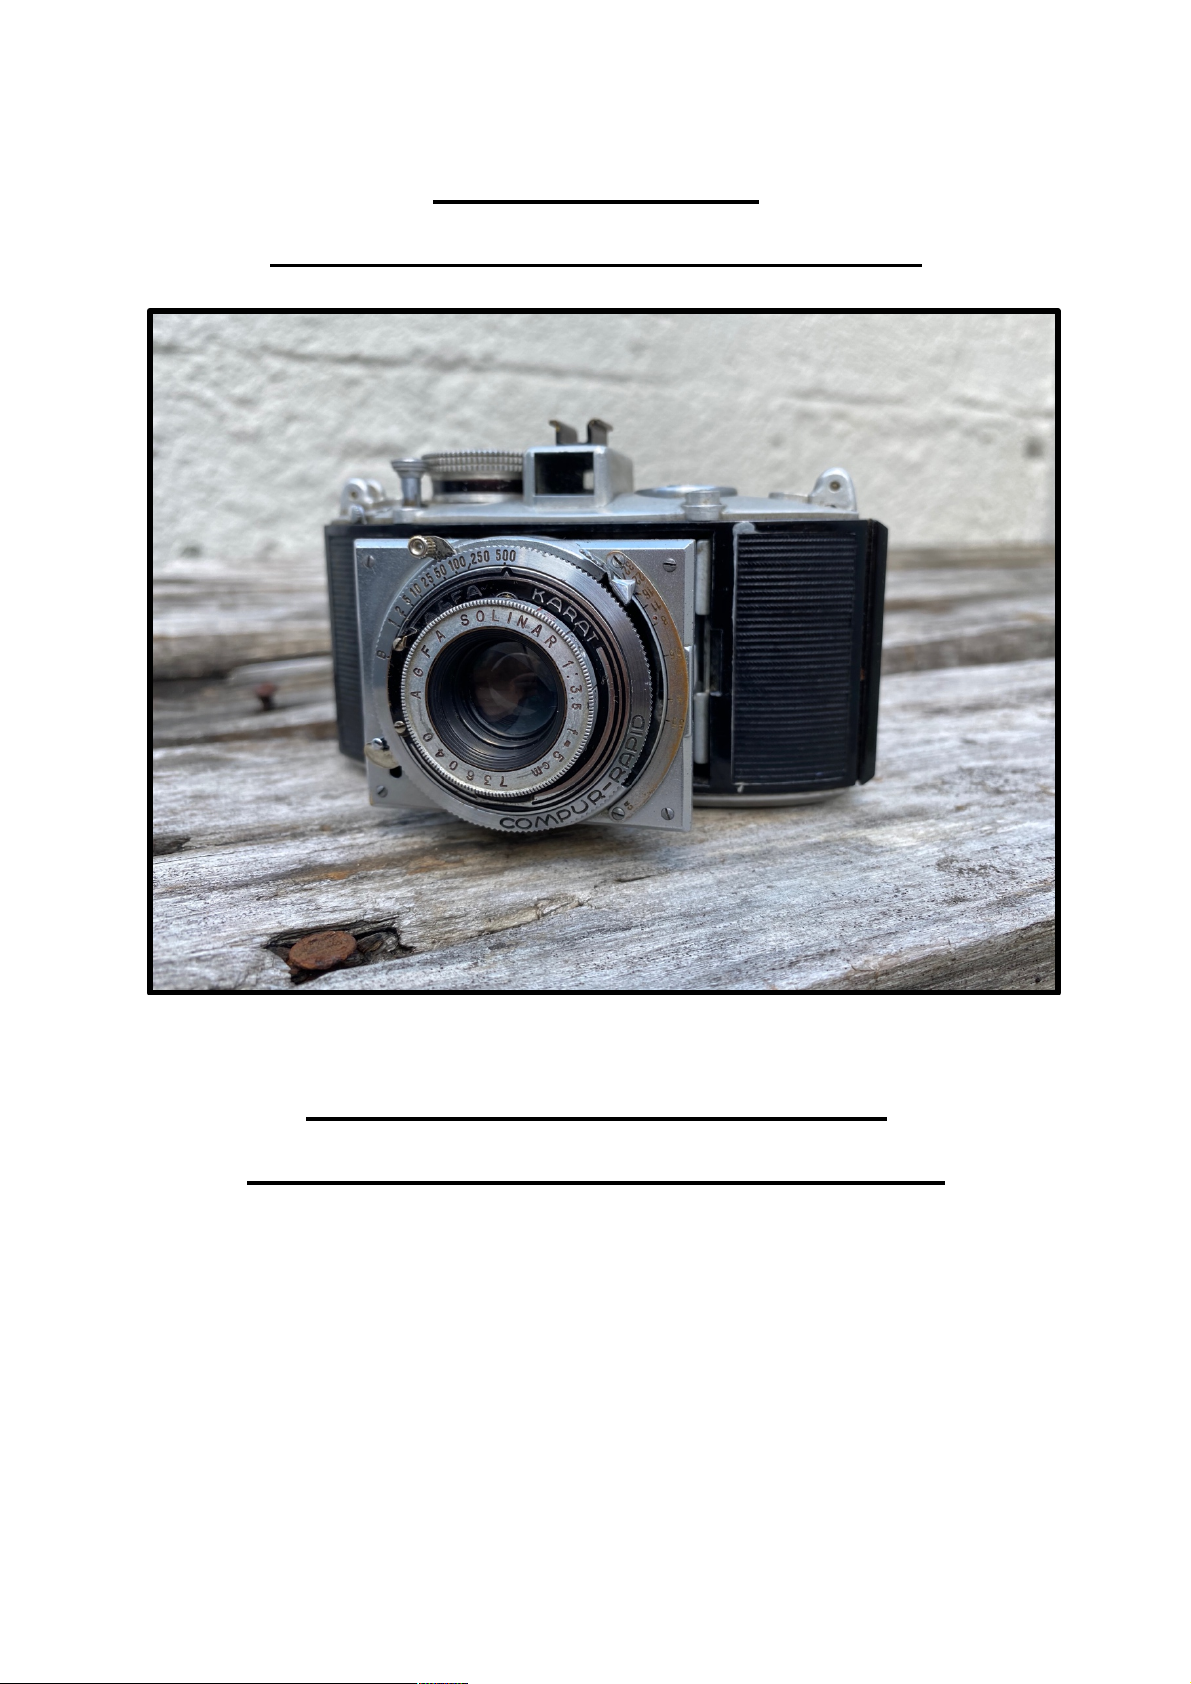
AGFA Karat 3.5
Compur-Rapid (Rim Set) 1936.
CLA of Camera and Shutter
Tim Langsford, September 2020.
Page 2
2
Preliminary Examination:
Camera fairly clean. Aperture smooth. Speed cam slightly loose. Speeds seem very slow,
probably due to visible oil on shutter blades, causing them to hang often.
A. Dismantling Camera to Free the Compur-Rapid Shutter Mechanism:
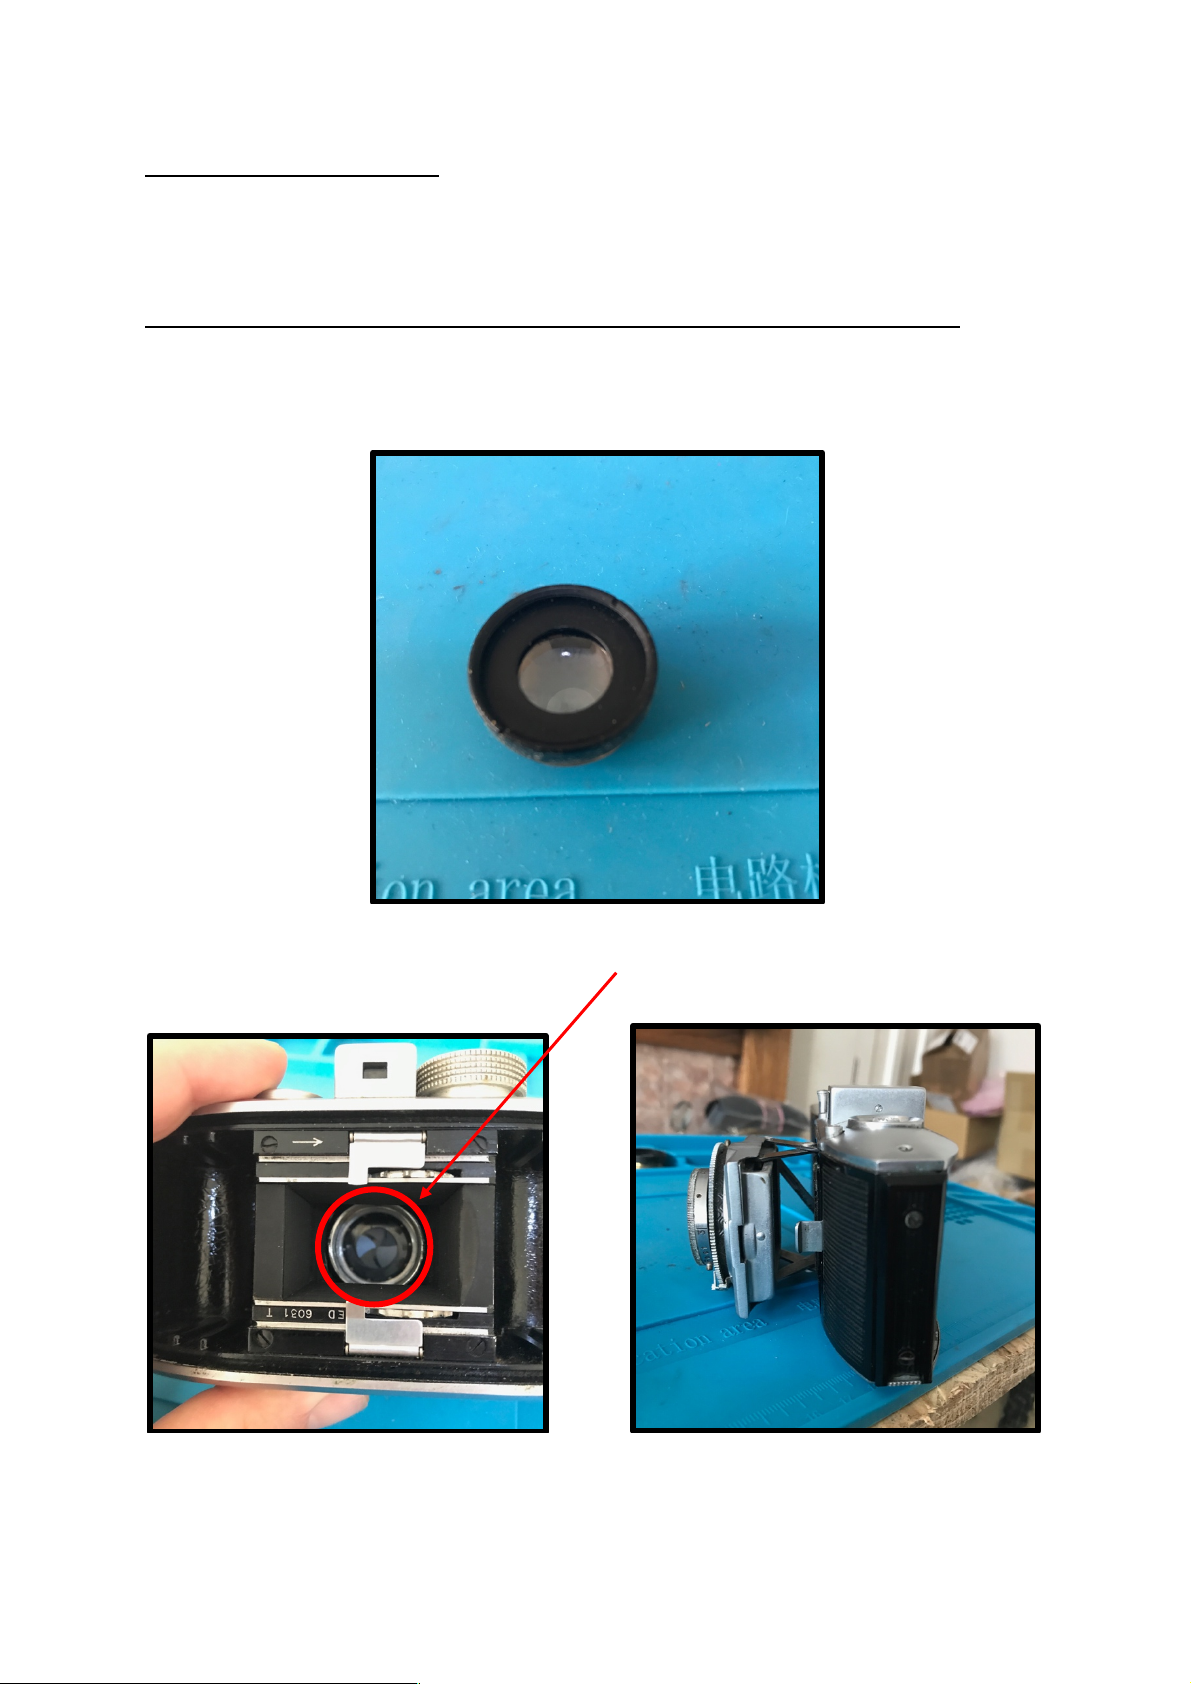
1. Remove rear lens element from focal-plane of camera. This can be quite tricky as
there is not enough room to manoeuvre a spanner wrench. I used a pair of
screwdrivers.
2. Detach bellows by unscrewing retaining ring which is exposed once rear lens
element is removed.
Page 3
3
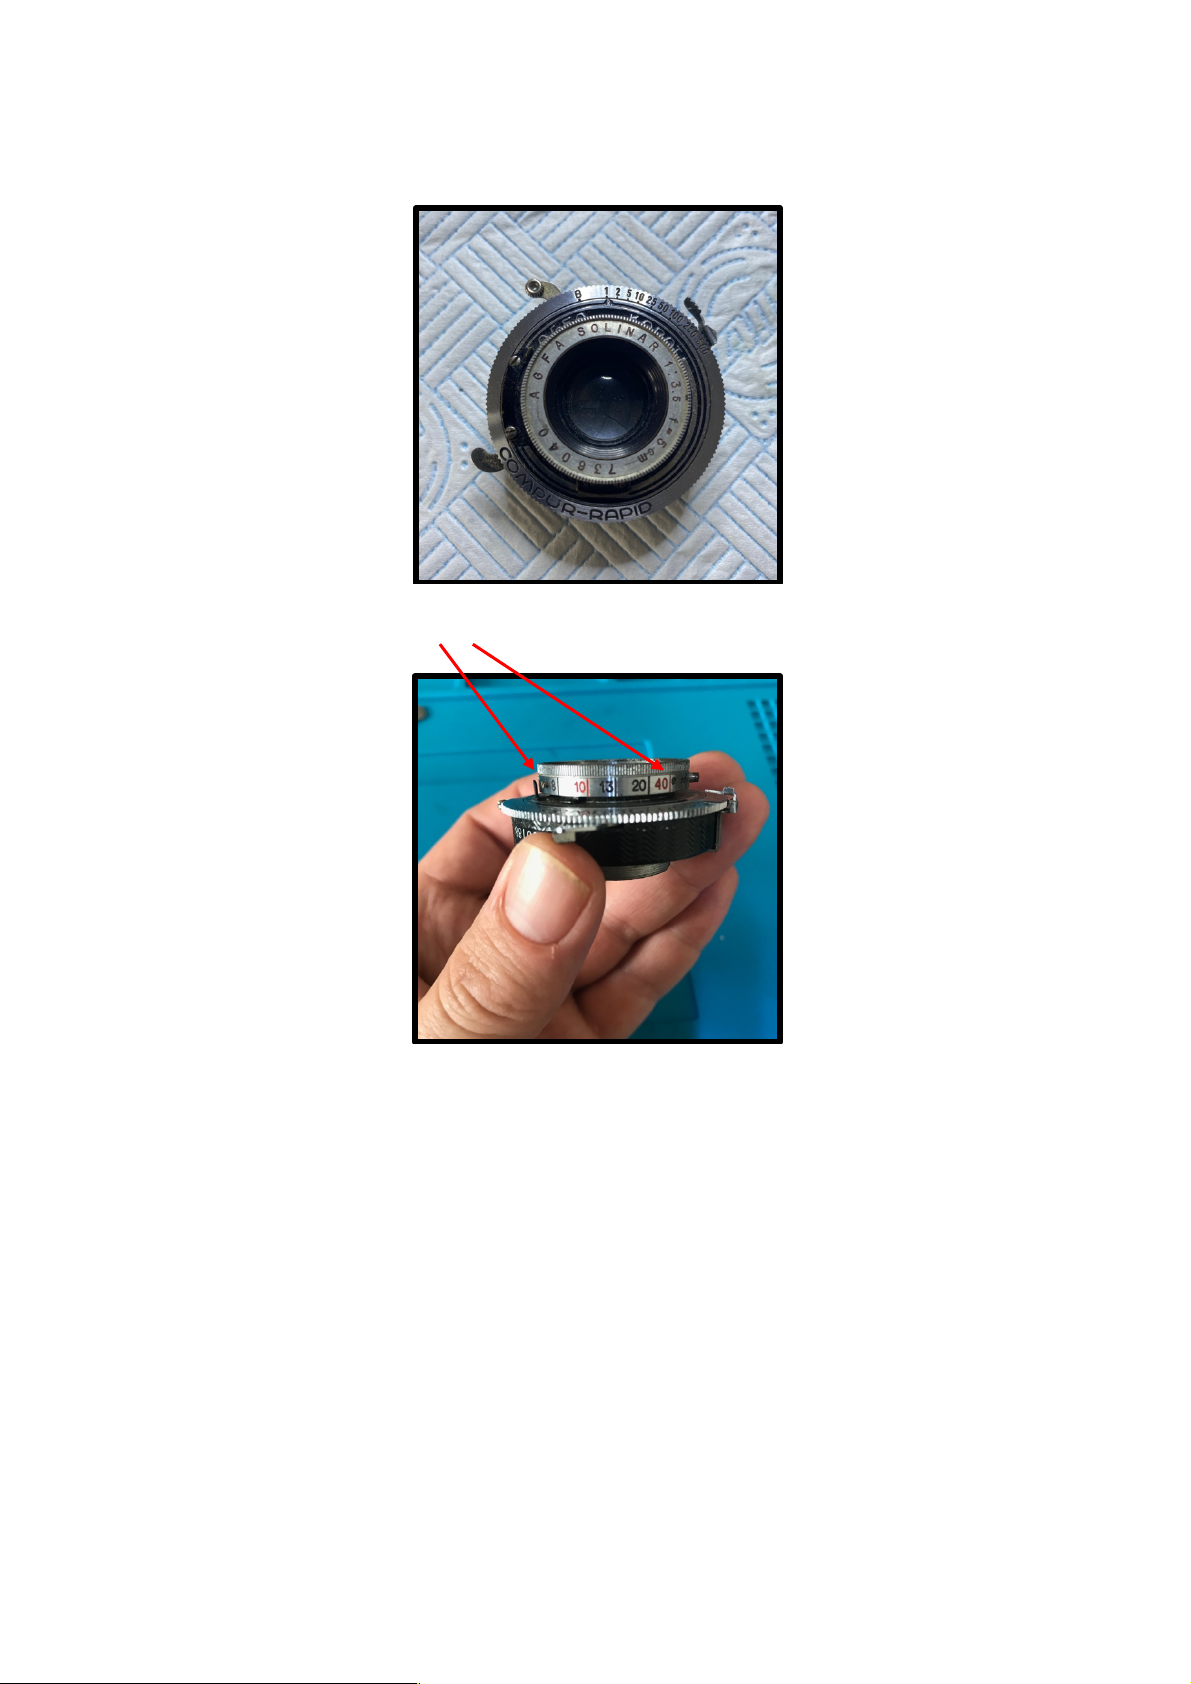
3. The shutter mechanism is now free and can be pulled from its housing.
4. Loosen the 3 grub screws to free front lens element.
Page 4
4
B. Compur-Rapid Shutter Mechanism Disassembly:
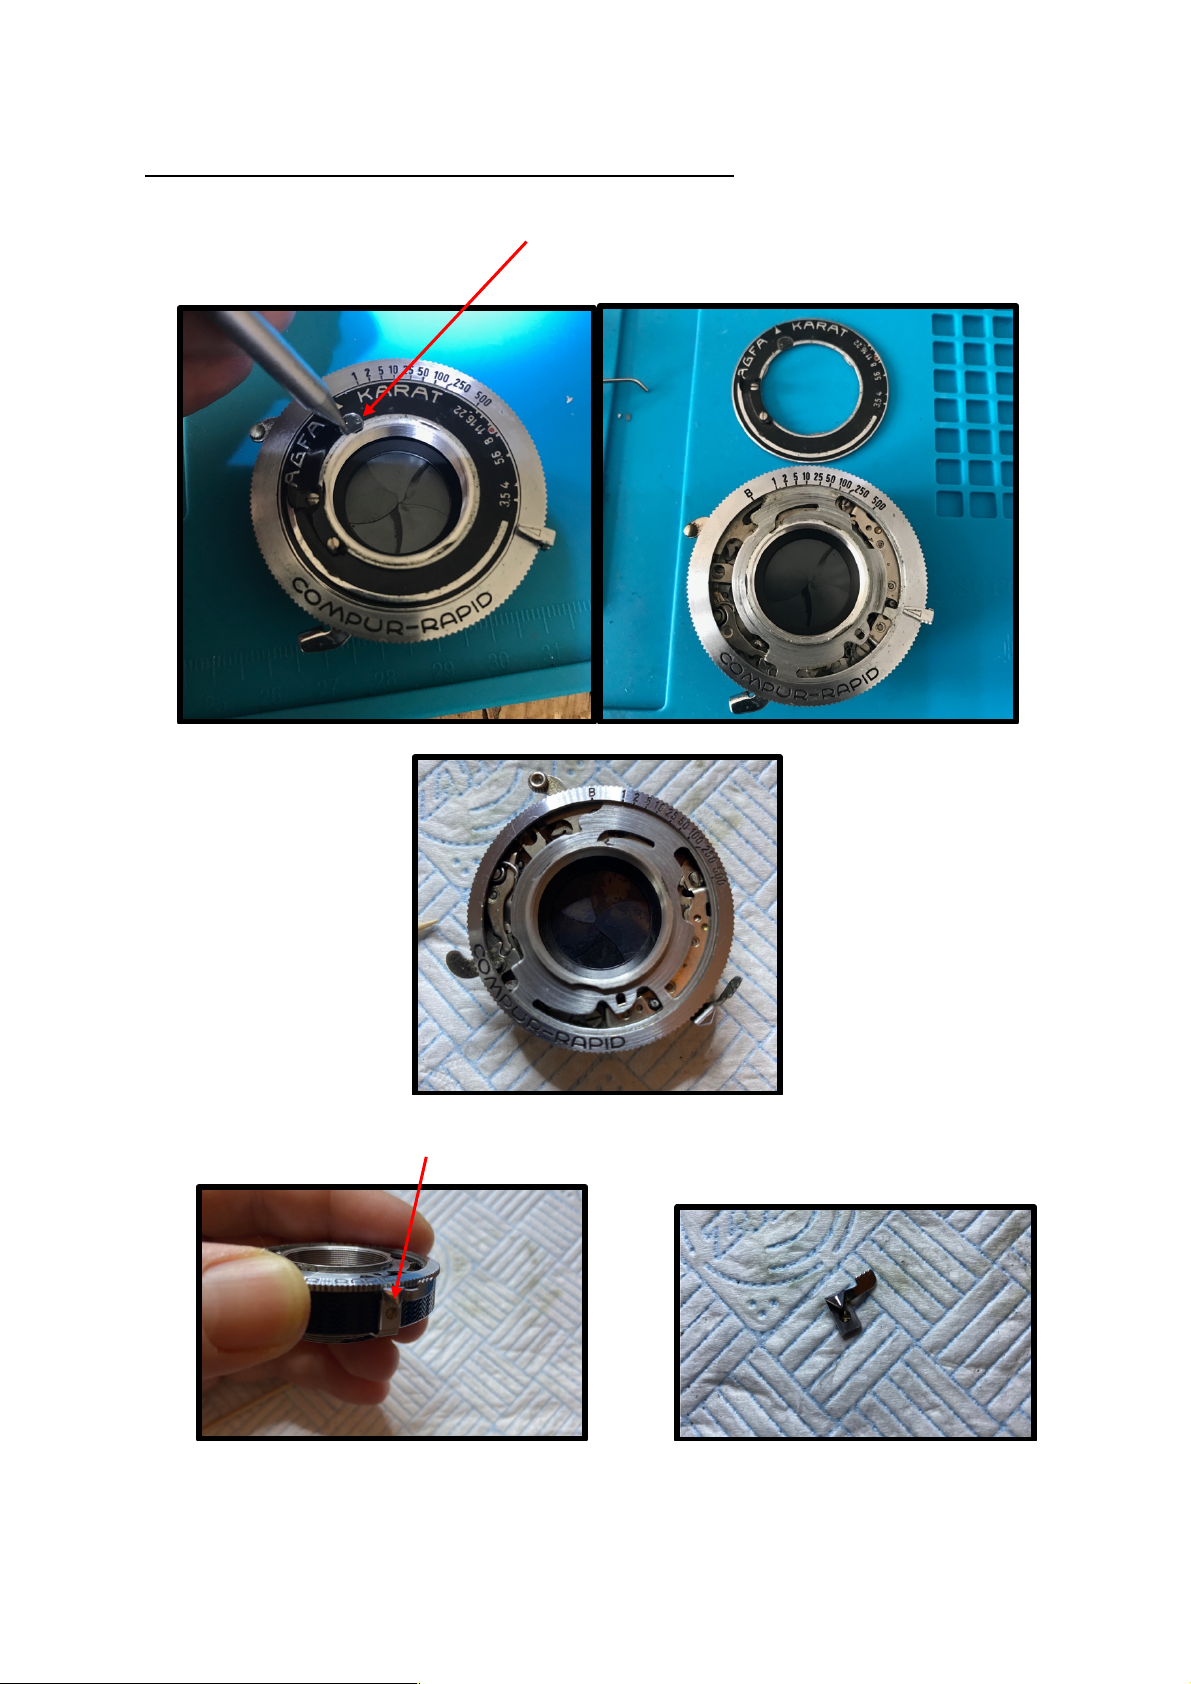
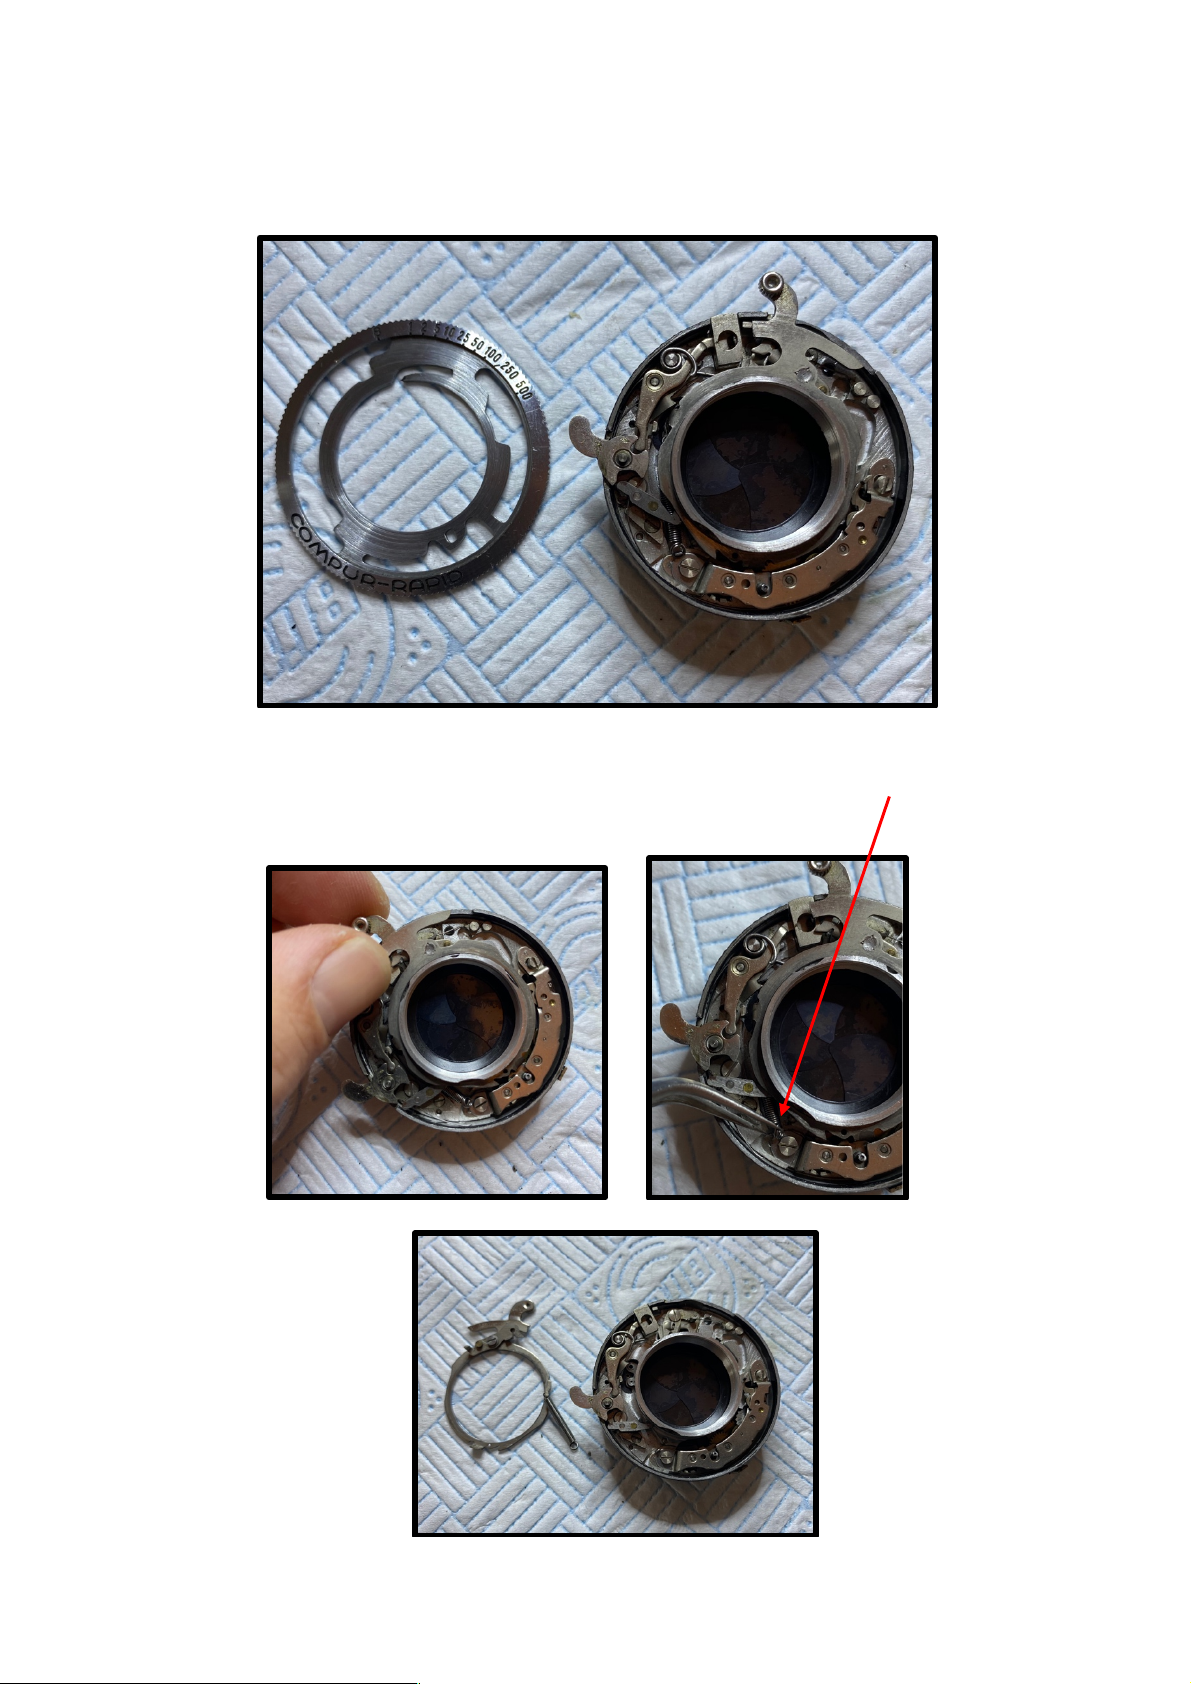
1. Rotate semi-circular locking cam 180˚. This will allow the nameplate to be rotated
anti-clockwise and lifted off.
2. Remove aperture pointer.
Page 5
5
3. Set speed cam to B and ensure shutter is released, gently rotate the speed cam
slightly in both directions so that it lifts off without disturbing the main lever.
4. Next the main lever is removed. First, lift the setting lever a little and allow the
spring tension to dissipate anti-clockwise. Then, disconnect the main spring from its
stud at the end of the retard escapement mechanism.
Page 6

6
5. Hold the outer release lever so that the screw holding the cable release socket is
accessible and remove this socket.
6. Prise the cable release lever from its post.
7. Disconnect the bulb lever spring from its position on the cable release leaver post so
that it rests on the shutter housing. Remove the bulb lever via its screw and the
outer release leaver by prising off its post.
Page 7

7
8. Remove inner release lever.
9. Remove high speed spring.
Page 8

8
10. Disconnect leaf lever spring from its post on the leaf lever. The spring will stay
attached to the mechanism plate. Remove leaf lever.
11. Hold down pallet lever and move the retard lever so it is locked towards the outer
edge of the shutter. This enables the retard assembly to be removed.
Page 9

9
12. Remove the retard assembly retaining screws and main spring bracket, then lift out
the retard assembly. Note the different lengths of screw.
13. Move the blade operating ring stud until the shutter blades are fully open.
Page 10

10
14. Turn the shutter over and remove the 3 screws holding the mechanism plate. Gently
lift the shutter housing from the mechanism plate to revel the shutter blades.
Remove the shutter blades.
15. Remove the 3 cover plate screws which hold the blade operating ring in place. Note
that one of the screws is longer.
Page 11

11
C. Cleaning, Lubrication and Reassembly of Compur-Rapid Shutter:
1. Clean shutter blades by immersing in Isopropyl and wiping with a clean cloth. Do the
same with the blade operating ring, cover plate and mechanism plate. Reassemble
these parts.
2. Install the shutter blades, starting with the first blade on the pins closest to the leaf
lever, then working in a clockwise direction.
Page 12

12
3. Reinstall the shutter housing with its 3 screws.
4. After cleaning, reinstall the leaf lever and reset the leaf lever spring.
5. Clean and reinstall the high-speed spring.
Page 13

13
6. Clean and reinstall the bulb lever and inner release lever. Reseat the bulb lever
spring on the cable release lever post.
7. Clean and reinstall the cable release lever. This step is a little tricky as this lever
needs to connect with the lug on the bulb lever, before being depressed onto its
post.
8. Clean and reinstall outer release lever and cable release socket.
Page 14

14
9. For the cleaning of the retard mechanism, I used an ultrasonic cleaner. The fluid was
water with a little washing up liquid. I set the cleaner for 4 minutes. After this, the
escapement was washed in clean water, before being submerged in Isopropyl and
blown dry.
10. Lubricate the pivot points on the retard mechanism using Nyoil or similar. Reinstall
the screws and main spring bracket but do not tighten.
Page 15

15
11. Next, seat the main lever and reattach the main spring to its bracket post (ensure
the coils of the spring face downward from the connecting loop). Then rotate the
main lever clockwise into its position against the main lever stop stud. It will be
necessary to ease the leaver down past the pallet lever and inner release lever.
12. Now the retard section must be correctly positioned before being tightened down.
Start with both ends towards the centre of the shutter, then back the retard lever
end off slightly and tighten the screws. Test the action at this point, holding down
the main lever to avoid it disengaging.
Page 16

16
13. Clean and lubricate the bearing edges of the speed control cam. Reinstall it and
check speeds seem good by ear (for example, check that 1/25 sounds faster the
1/10, the difference should be noticeable.)
14. Clean and reinstall the nameplate. Lock it in place with the semi-circular cam. Clean
and reinstall the aperture pointer.
Page 17

17
D. Testing
1. I reassembled the shutter mechanism with the main camera body following the
reverse of disassembly described, cleaning and lubricating moving parts and the
lenses. For the lenses I first cleaned with Isopropyl and then finished them with ROR
which left the glass looking really clean.
Page 18

18
2. I used a Phochron XA shutter speed tester to check all shutter speeds.
3. Finding the speeds to be generally agreeable, I loaded the camera with Kentmere
100. This step is slightly involved as the camera does not house standard 35mm
cassettes. Instead, I had to use a dark bag to manually feed about 12 shots worth
(about 55cm) of the Kentmere into one of the ‘Rapid’ film holders, before loading
this film to feed into another of these unique containers.
Page 19

19
4. I self-developed these test shots at home using a Paterson tank in ID-11 (ilford)
developer (1+1), at 20˚C for 11.5 minutes. Once dry, the negatives were scanned
using a Plustek 8100 to create large .dng files, and then had a quick pass through
Lightroom to invert and add a little contrast.
Page 20

20
 Loading...