


user manual
Built in double oven
EOD68043
2 electrolux
Electrolux. Thinking of you.
Share more of our thinking at www.electrolux.com
Contents
Safety information 2
First use 3
Product description 5
Operation 6
Use, tips and tables 13
Care and cleaning 21
Subject to change without notice
What to do if… 26
Installation 27
Disposal 30
GREAT BRITAIN & IRELAND - Guarantee/
Customer Service 30
www.electrolux.com 31
Safety information
These warnings are provided in the interests
of your safety. Ensure that you understand
them all before installing or using the appliance.
Your safety is of paramount importance. If
you are unsure about any of the meanings of
these warnings please contact customer
care.
Installation
• The appliance must be installed according
to the instructions supplied.
• The installation work must be undertaken
by a qualified electrician or competent person.
• The appliance should be serviced by an
authorised Service Engineer and only genuine approved spare parts should be used.
• The appliance must be installed in an adequately ventilated room.
• It is imperative that the appliance is left in
the base to protect both the appliance and
the floor.
• This appliance is heavy and care must be
taken when moving it. Always wear safety
gloves.
• Do not attempt to lift or move this appliance by the handles.
• All packaging, both inside and outside the
appliance must be removed before the appliance is used.
• It is dangerous to alter the specifications or
modify the appliance in any way.
Child safety
• Do not allow children to play with any part
of the packaging.
• Do not allow children to sit or climb on the
drop down doors.
• This appliance is not intended for use by
children and other persons whose physical, sensory or mental capabilities or lack
of experience and knowledge prevents
them from using the appliance safely without supervision or instruction by a responsible person to ensure that they can use
the appliance safely.
• Children should be supervised to ensure
that they do not play with the appliance.
Caution! Accessible parts may be hot.
Young children should be kept away.
During use
Warning! Never leave the appliance
unattended when the oven door is open.
• This appliance is not intended to be operated by means of an external timer or separate remote control system.
• This appliance has been designed for domestic use to cook edible foodstuffs only
and must not be used for any other purposes.
• Take great care when heating fats and oils
as they will ignite if they become too hot.
• Never place plastic or any other material
that may melt in or on the oven.
• Always support the grill pan when it is in
the withdrawn or partially withdrawn position.
• Always use oven gloves to remove and
place food in the oven.
electrolux 3
• During use the appliance becomes hot.
Care should be taken to avoid touching the
heating elements inside the oven.
• Ensure that all vents are not obstructed to
ensure ventilation of the oven cavity.
• Never line any part of the appliance with
foil.
• Always stand back from the appliance
when opening the oven door to allow any
build up of steam or heat to release.
• Stand clear when opening the drop down
doors. Support the doors using the handles until fully open.
• Do not place sealed cans or aerosols inside the oven. They may explode if they are
heated.
• Ensure that all control knobs are in the OFF
position when not in use.
• Do not stand on the appliance or on the
open oven doors.
• Do not hang towels, dishcloths or clothes
from the appliance or its handles.
First use
Setting the language
1. When the appliance has been connected
to the electrical supply, the following is
shown in the display: the company logo,
the version of the software and the period
of operation, the message "Set language".
2. Using + or - select the desired language.
3. Confirm selected language with OK key.
After setting language the first time you
can change your selection in the 'Basic
settings' menu
Setting contrast and brightness
After you have set the language, the messages "Set contrast" and "Set brightness"
are displayed. Contrast and brightness are
set the same way as the language - see "Setting the language" section.
Setting the clock
After you have set the contrast and the
brightness the message "Set time of day" is
displayed.
1. Set the hour using + or -
2. Confirm with OK
3. Set the minutes using + or -
The appliance is now ready for use
• Do not use this appliance if it is in contact
with water. Never operate it with wet
hands.
Cleaning and maintenance
Warning! For hygiene and safety
reasons this appliance should be kept
clean at all times. A build-up of fat or
other foodstuff could result in a fire
especially in the grill pan.
• Do not leave cookware containing foodstuffs, e.g. fat or oil in the appliance in case
it is inadvertently switched on.
• Always allow the appliance to cool before
switching off at the wall prior to carrying
out any cleaning/maintenance work.
• Only clean this appliance in accordance
with the instructions given in this book.
• Never use steam or high pressure steam
cleaners to clean the appliance.
The time has to be set only when the
appliance is disconnected from the
power supply for a long time.
Rating plate
This is situated on the front frame of the appliance and can be seen upon opening the
door. Alternatively the rating plate may also
be found on the back or top of some models
(where applicable).
The appliance must be protected by a suitably rated fuse or circuit breaker.
The rating of the appliance is given on the
rating plate.
Warning! Do not remove the rating plate
from the appliance as this may invalidate
the guarantee.
Preparing to use your appliance
Wipe over the base of the oven(s) with a soft
cloth using hot soapy water. Wash the furniture before use.
We suggest that you run the oven(s) and grill
for 10 – 15 minutes at maximum temperature, to burn off any residue from their surfaces. Accessible parts may become hotter
than in normal use. Children should be kept
away. During this period an odor may be

4 electrolux
emitted, it is therefore advisable to open a
window for ventilation.
Condensation and steam
When food is heated it produces steam similar to a boiling kettle. The vents allow some
of this steam to escape. However, always
stand back from the appliance when opening
the door(s) to allow any build up of steam or
heat to release.
If the steam comes into contact with a cool
surface on the outside of the appliance, e.g.
a trim, it will condense and produce water
droplets. This is quite normal and is not
caused by a fault on the appliance.
To prevent discoloration, regularly wipe away
condensation and foodstuff from surfaces.
For your safety wall coverings at the rear of
the appliance should be securely fixed to the
wall.
Cookware
Baking trays, dishes etc., should not be
placed directly against the grid covering the
fan at the back of the oven.
Do not use baking trays larger than 30cm x
35cm (12” x 14”) as they will restrict the circulation of heat and may affect performance.
Initial Cleaning
Before using the oven for the first time you
should clean it thoroughly.
Warning! Do not use any caustic,
abrasive cleaners! The surface could be
damaged.
To clean metal fronts use commercially
available cleaning agents.
1. Turn the oven function switch to oven
lighting .
2. Remove all accessories and the shelf
support rails and wash them with warm
water and washing up liquid.
3. Then wash out the oven with warm water
and washing-up liquid, and dry.
4. Wipe the front of the appliance with a
damp cloth.
Initial Cleaning
Before using the oven for the first time,
you must clean it.
Warning! Do not use sharp, abrasive
cleaning agents! These could damage
the surface.
For metal fronts, use normal commercially available cleaning agents.
1. Open door.
The oven light is activated.
2. Remove all accessories and the slide-in
grids and clean with warm water and
washing-up liquid.
3. Wipe the floor of the oven clean with
warm washing-up solution and dry.
4. Wipe the front of the appliance with a
damp cloth.
5. Insert the oven shelf runners supplied, as
described in the chapter ”Cleaning and
Care”.
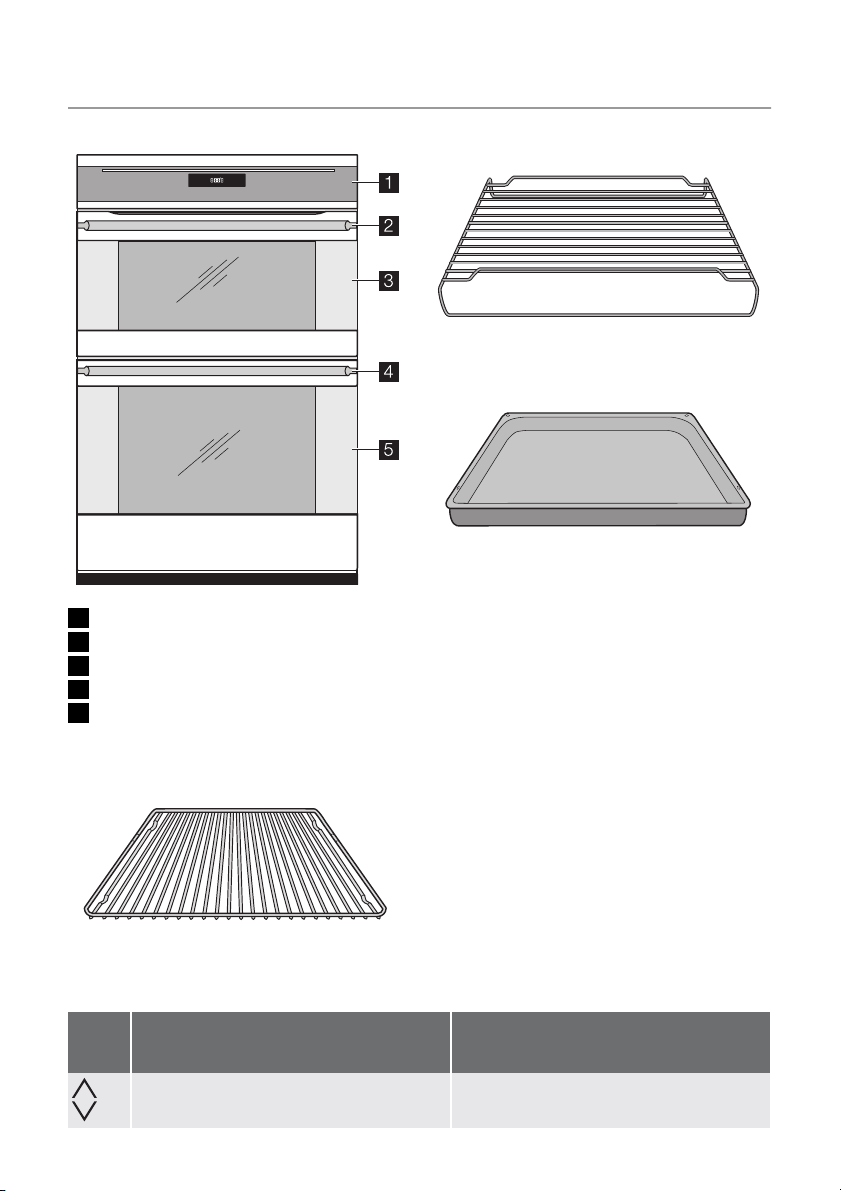
Product description
General overview
1 Control panel
2 Top oven handle
3 Top oven
4 Main oven handle
5 Main oven
Oven accessories
3 Anti-stick oven shelves
electrolux 5
Oven shelf
Anti Stick Meat/Drip pan
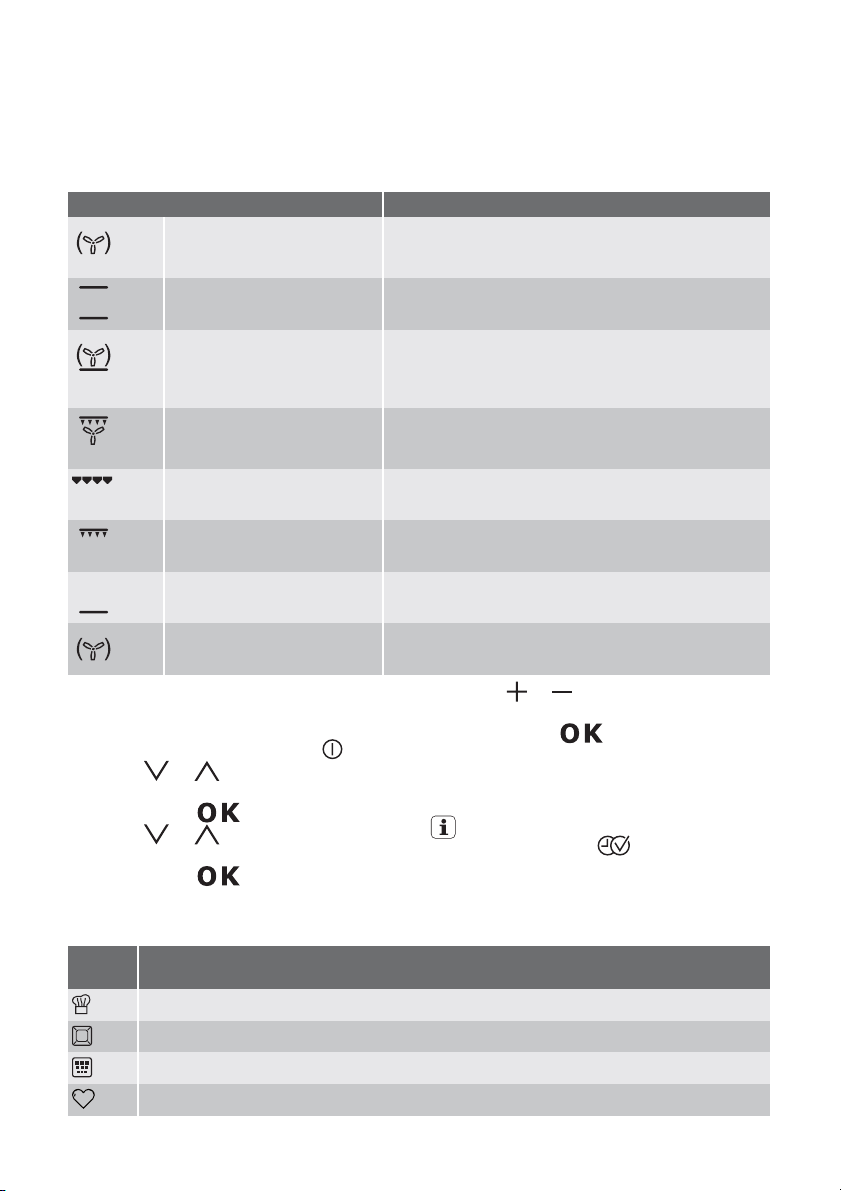
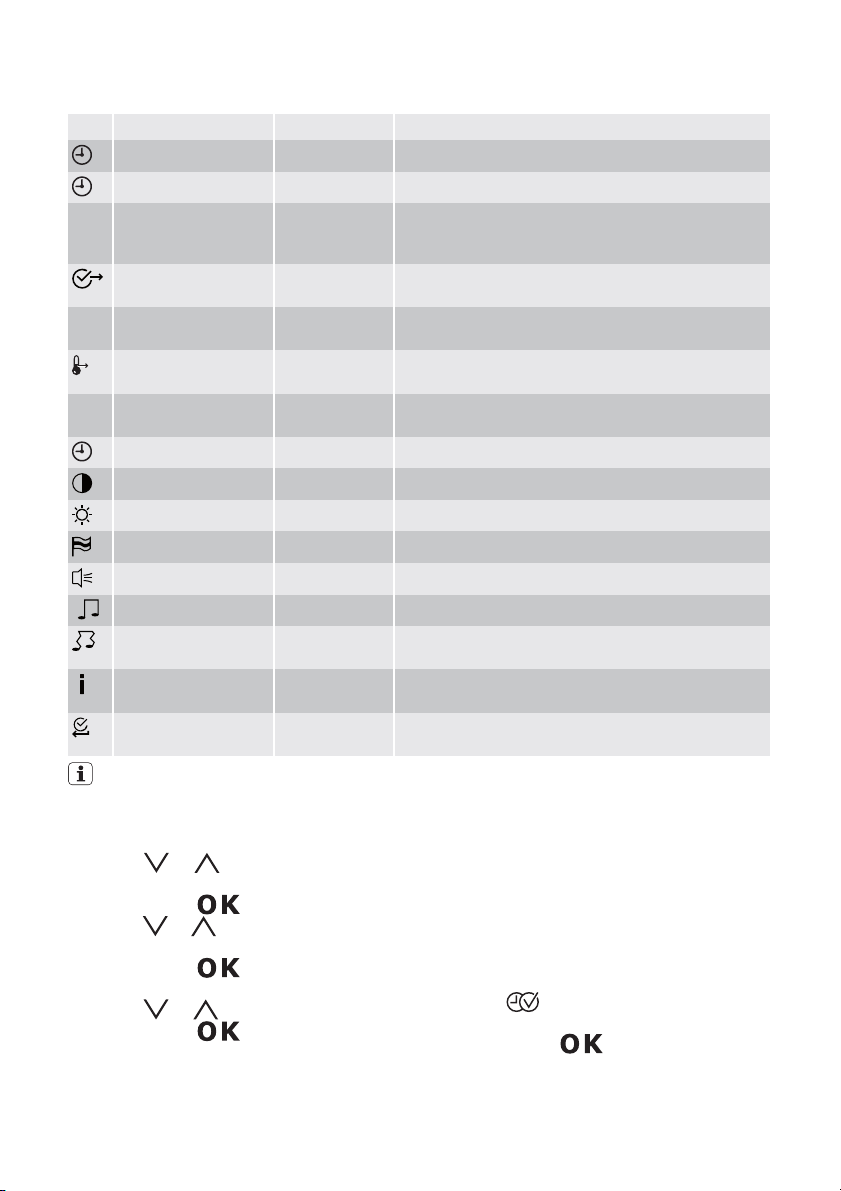
The electronic indicators
Touch control sensor fields
Sen-
sor
field
Used to navigate in the menu.
Function Comment
6 electrolux
Sen-
sor
field
To display main menu. Functions set are switched off (except for
Confirms selection.
Used to activate top oven
Used to activate bottom oven (main oven)
Switches appliance on or off.
Used to select time functions and additional
functions.
Sets values (e.g. temperature, time, weight) To activate value:
Function Comment
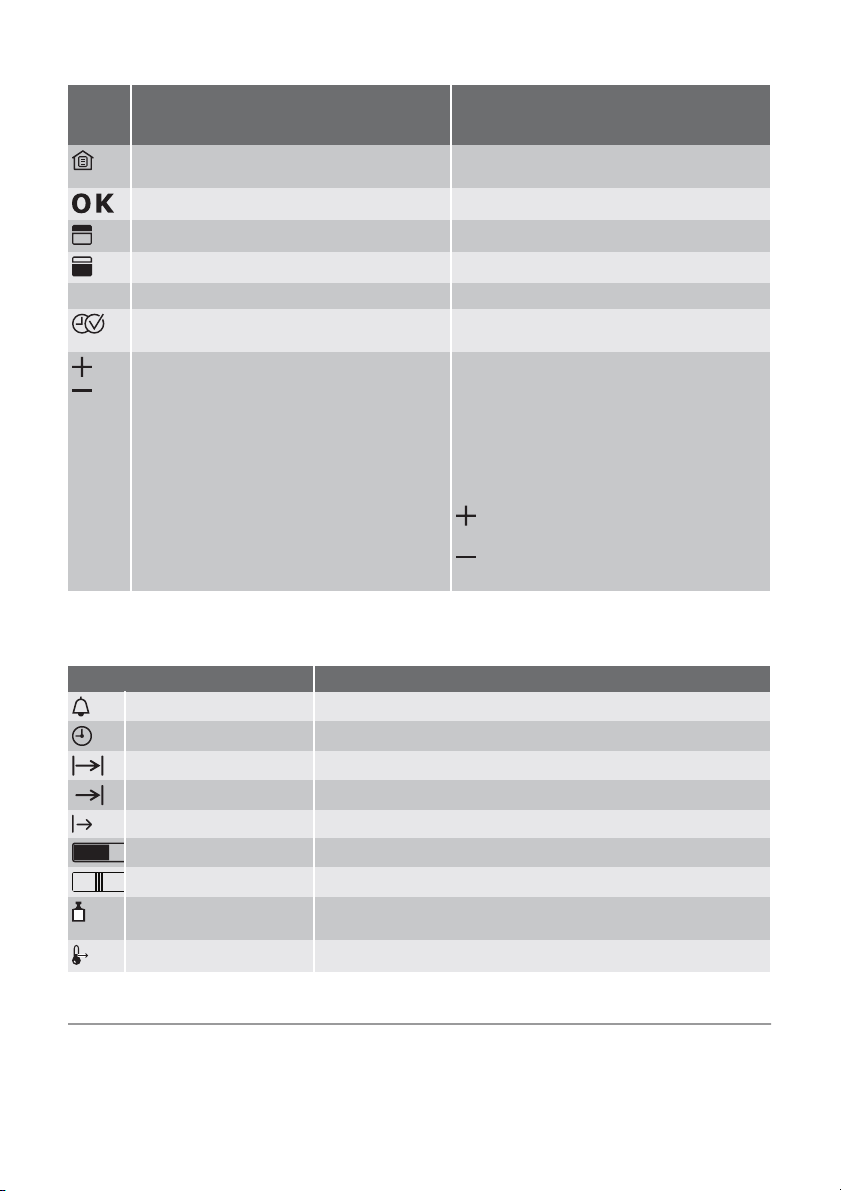
Symbols
Various symbols will be shown on the display
depending on the selected function
Symbol Function
Short timer The short timer is active.
Time Shows the set time.
Duration Shows the time required for the cooking cycle.
End Time Shows when the cooking cycle will finish.
Start Shows when the cooking cycle have started.
Temperature Shows the temperature the oven has reached.
Temperature Quick heat is active (reduced heating-up time)
Weight Possibilities: automatic weight system is active or weight can be
Heat + Hold Heat + Hold is activated.
changed
countdown timer).
• Press once: present symbol flashes
• Press twice: value can be set
To set values:
• Press once: to set value in single steps
• Hold down key: to set value in fast steps
When setting a cook time or time the display
can be set to zero if
and
are pressed at the same time.
Operation
Double oven operation
The appliance has two ovens. Press the relevant button on the control panel to switch
between top and bottom oven mode. Some
of the heating and electronic functions may
not be available in the top oven. For list of
heating functions see the relevant table in the
Operation chapter.
electrolux 7
The oven functions in overview
Using the oven functions you can set baking
and roasting sessions to suit your requirements.
Oven functions
Oven function Application
Fan Cooking For baking on up to three oven levels at the same time.
Set the oven temperatures 20-40 °C lower than when
using Conventional.
Conventional Cooking For baking and roasting on one oven level
Pizza Setting For baking on one oven level dishes that require more
intensive browning and a crispy base. Set the oven
temperatures 20-40 °C lower than when using conventional.
Turbo Grill For roasting larger joints of meat or poultry on one level.
The function is also suitable for gratinating and browning.
Economy Grill For grilling flat foodstufs placed in the middle of the grill
and for toasting.
Dual Grill For grilling flat foodstuffs in large quantities and for
toasting.
Bottom Heat For baking cakes with crispy or crusty bases.
Slow Cook For preparing especially tender, succulent roasts.
Important!
Always grill with the door closed.
Operating the oven functions
Example:
1.
Switch the appliance on with
2.
Using
or select the menu option
oven function.
3.
Confirm with
4.
Using
or select the desired oven
.
function.
5.
Confirm with
.
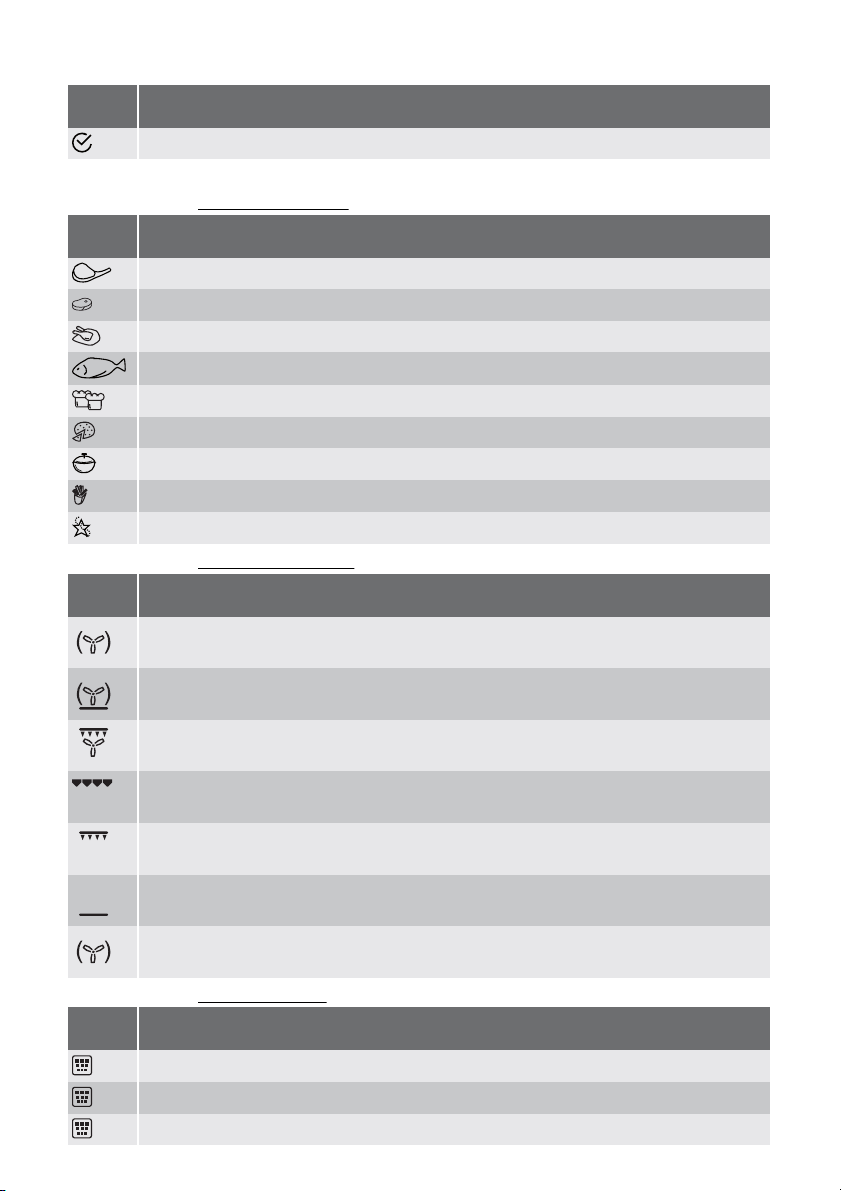
The menus in overview
Main menu
Sym-
bol
Assisted Cooking
Heating Functions
Cleaning Menu
My Programmes
6.
Using
or set the desired tempera-
ture.
7.
.
Confirm with
The oven starts to heat up.
or wait 5 seconds.
When the temperature set is reached, an
acoustic signal sounds.
Besides the temperature other functions
can be set using
Menu item
.
8 electrolux
Sym-
bol
Basic Settings
Submenus
Submenus for:
Sym-
bol
Assisted Cooking
Pork/Veal
Beef/Game/Lamb
Poultry
Fish
Cake
Pizza/Pie/Bread
Casseroles/Gratins
Convenience
Specials
Submenus for: Heating Functions
Sym-
bol
Fan Cooking
Menu item
Submenu
Submenu
Pizza Setting
Turbo Grill
Economy Grill
Dual Grill
Bottom Heat
Slow Cook
Submenus for: Cleaning Menu
Sym-
bol
Pyrolitic
Cleaning Assistant
Cleaning Reminder
Submenu
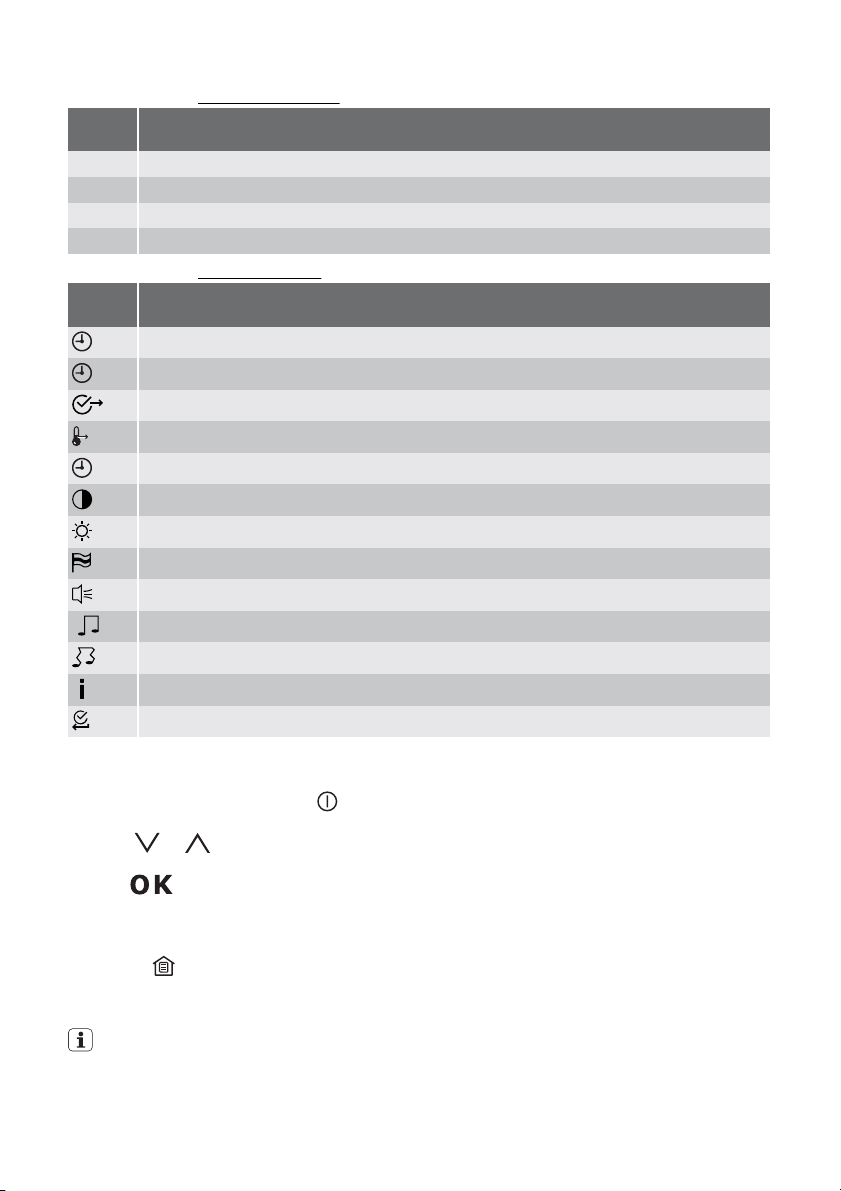
Submenus for: My Programmes
Sym-
bol
- 1 - My Program
- 2- My Program
- ...
- Edit Program Name
Submenus for: Basic Settings
Sym-
bol
Set Time of Day
Time Indication
Set + Go
Heat + Hold
Time Extension
Display Contrast
Display Brightness
Set Language
Buzzer Volume
Key Tones
Alarm/Error Tones
Service
Factory Settings
electrolux 9
Submenu
Submenu
Operation of the menus
Example
1.
Switch the appliance on with
. You will
find yourself in the main menu.
2.
With
or select the desired main
menu option.
3.
Use
to move to the appropriate
submenu.
4. Choose the desired function.
At every point you can get back to the main
menu with
. Moreover at the end of most
menus there is the option Back You can use
this to go back to the higher menu as well.
Cooling fan
The fan switches on automatically in order to keep the appliance`s surfaces
cool. When the oven is switched off, the
fan continues to run to cool the appli-
ance down, then switches itself off automatically.
Heating up indicator
When an oven function has been switched
on the bar that keeps getting longer indicates
how far the oven has heated up.
With some oven functions the heating up
time is shortened by automatic function Fast
heating. Until the set temperature is reached,
a stipe bar goes from left to right in the heat
indicator.
After switching off the oven, the residual heat
is displayed.
Displaying temperature to the degree:
The temperature is displayed to the degree
instead of the bar of the heating up indicator
for 5 seconds during the heating up time.
10 electrolux
When the temperature set is reached, an audible signal sounds.
Assisted Cooking with Weight
Automatic
The roasting time is automatically determined by inputting the weight.
1.
Using
or select the menu option
Assisted Cooking, the desired category
and the dish.
2.
Confirm each one with
3.
Using
or select Weight Automatic.
.
4. Confirm with OK.
5. Set the weight of the food using + or (change step is 0.2 kg)
The automatic programme is started. As
soon as the automatic programme has finished, an audible signal sounds. Press any
key to switch off the signal.
If the suggested weight is not changed
within 5 seconds the programme starts
automatically. The weight can be altered
at any time.
With poultry programmes turn the food
after 30 minutes. A reminder is displayed.
Assisted Cooking with Recipe
Automatic
All settings are fixed and cannot be
changed.
Example:
1.
Using
or select the menu option
Assisted Cooking, the desired category
and dish.
2.
Confirm with
3.
Using
4.
Confirm with
or select Recipe Automatic.
.
.
5. The automatic programme is started. As
soon as the automatic programme has
finished, an audible signal sounds.
6. Press any key to switch off the signal.
Manual: With Manual the optimum setting
(oven function and temperature) for the respective dish are taken, but you can change
them. You might use it if you don`t know the
weight of your food or have your own recipe.
Example:
1.
Using
or select the menu option
Assisted Cooking, the desired category
and the dish.
2.
Confirm each one with
3.
Using
4.
Confirm with
or select Manual.
.
.
5. You are now in the corresponding oven
function and can carry out the setting you
want (see section "Operating the oven
functions").
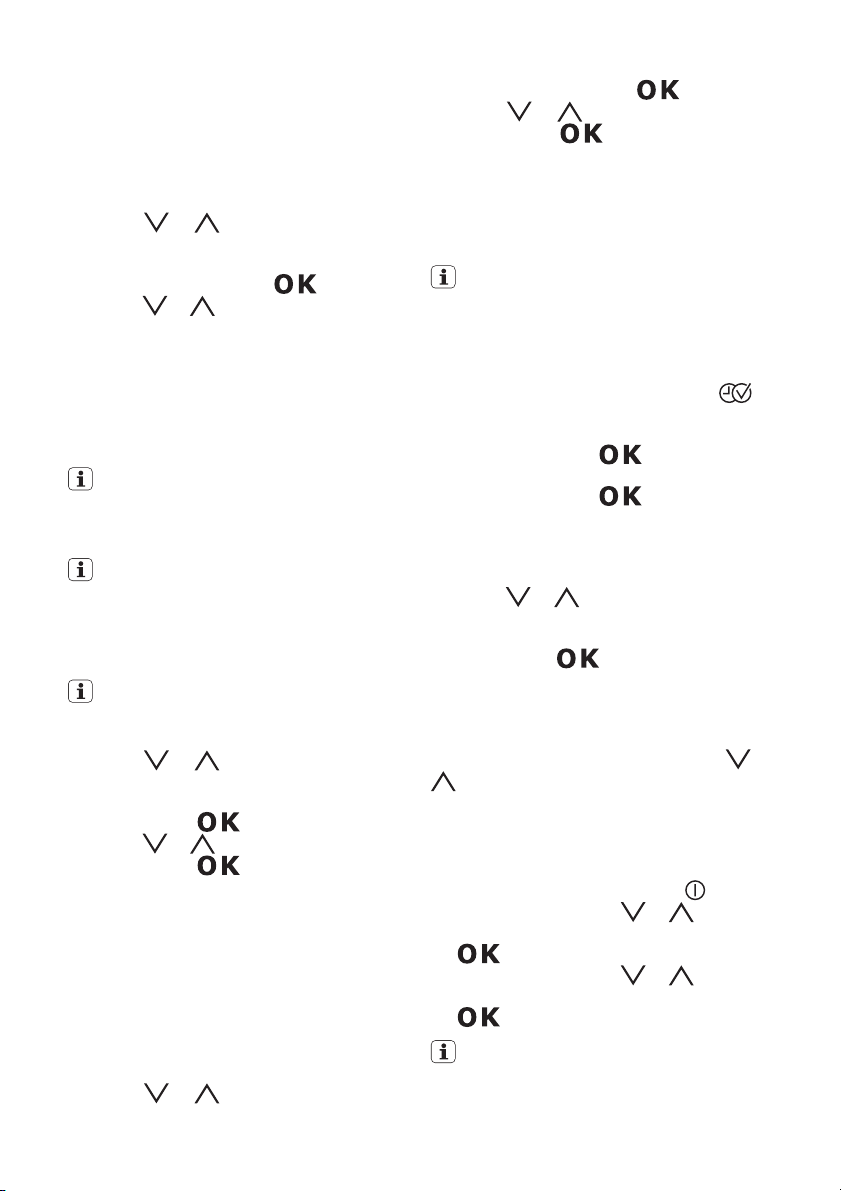
My Programmes menu overview
You can store 20 programmes.
Storing a programme
1. Select oven function or Assisted Cooking
with desired settings.
2. During or after the oven function or the
Assisted Cooking selection press
key repeatedly until "SAVE" window appears.
3.
Confirm using the
key. The next
free memory position is displayed.
4.
Confirm using the
key.
5. The first letter flashes. You can now write
the name of your programme.
6. Using + or - select the desired letter in
alphabetical order.
7.
Using
or move the writing mark to
the right or left. The next letter flashes and
can be changed, and so on.
8.
Confirm with
when you have written
your programme name.
9. Your programme is stored.
Memory positions that are already filled can
be overwritten at any time. Instead of the
suggested free memory position, with
or
select the programme that you would like
to overwrite. Programmes can be renamed
at any time in the menu "Edit Programme
Name".
Calling up a programme
1.
Switch the appliance on with
2.
Using the arrow keys
key
or select the
menu option My Programmes and press
.
3.
Using the arrow keys
or select the
stored programme and confirm with
key.
If no programmes have been stored, a
message appears to say how programmes are stored.
electrolux 11
The Basic Settings in overview
Settings Options Description
Set Time of Day 12:15 Set the current time on the clock.
Time Indication On Time is shown when appliance is switched off.
Off Time is not shown when appliance is switched off,
Set+Go On Set+Go function is shown in the Select Options win-
OFF Set+Go function is not shown in the Select Options
Heat+Hold On Heat+Hold function function is shown in the Select
Off Heat+Hold function is not shown in the Select Options
Time Extension On, Off Switch Time Extension function on/off.
Display Contrast 1...10 Adjust display contrast by degrees.
Display Brightness 1...10 Adjust display brightness by degrees.
Set language English, ... Select and set language for display.
Buzzer Volume 1...10 Adjust volume of touch-tones and signals by degrees.
Key Tones On, Off A tone is heard each time a key is pressed.
Alarm/Error Tones On, Off Alarm tone is heard if a step cannot be carried out.
Service ECAIA207
Factory Settings Reset all settings to factory settings (including My
V03IA003 24
When the appliance is switched off between 22:00 and 6:00 the display reduces its brightness to save energy.
Operation of the Basic Settings
1.
Using
or select the menu option
Basic Settings
2.
Confirm with
3.
Using
or go to the setting that you
want to adjust.
4.
Confirm with
. The value currently
set appears on the display.
5.
Using
6.
Confirm with
or select the desired value.
. The setting is
changed.
because display is switched off completely to save
energy.
dow and can be activated.
window.
Options window and can be activated.
window.
Switch alarm tones on/off.
Shows the software version and configuration.
Programmes).
Set+Go
The function Set+Go means you can set all
settings of an oven and then start it later. Example application: You prepare a dish in the
morning and enter all necessary settings in
the oven. Your child comes home at lunchtime, puts the dish in the oven, presses any
key and the oven starts with your settings.
To switch on Set+Go
1. Select oven function with desired set-
tings.
2.
Press
key repeatedly until the ”Set
+Go” window appears.
3.
Confirm with
. The function SET
+Go is now switched on.
 Loading...