

Page 1
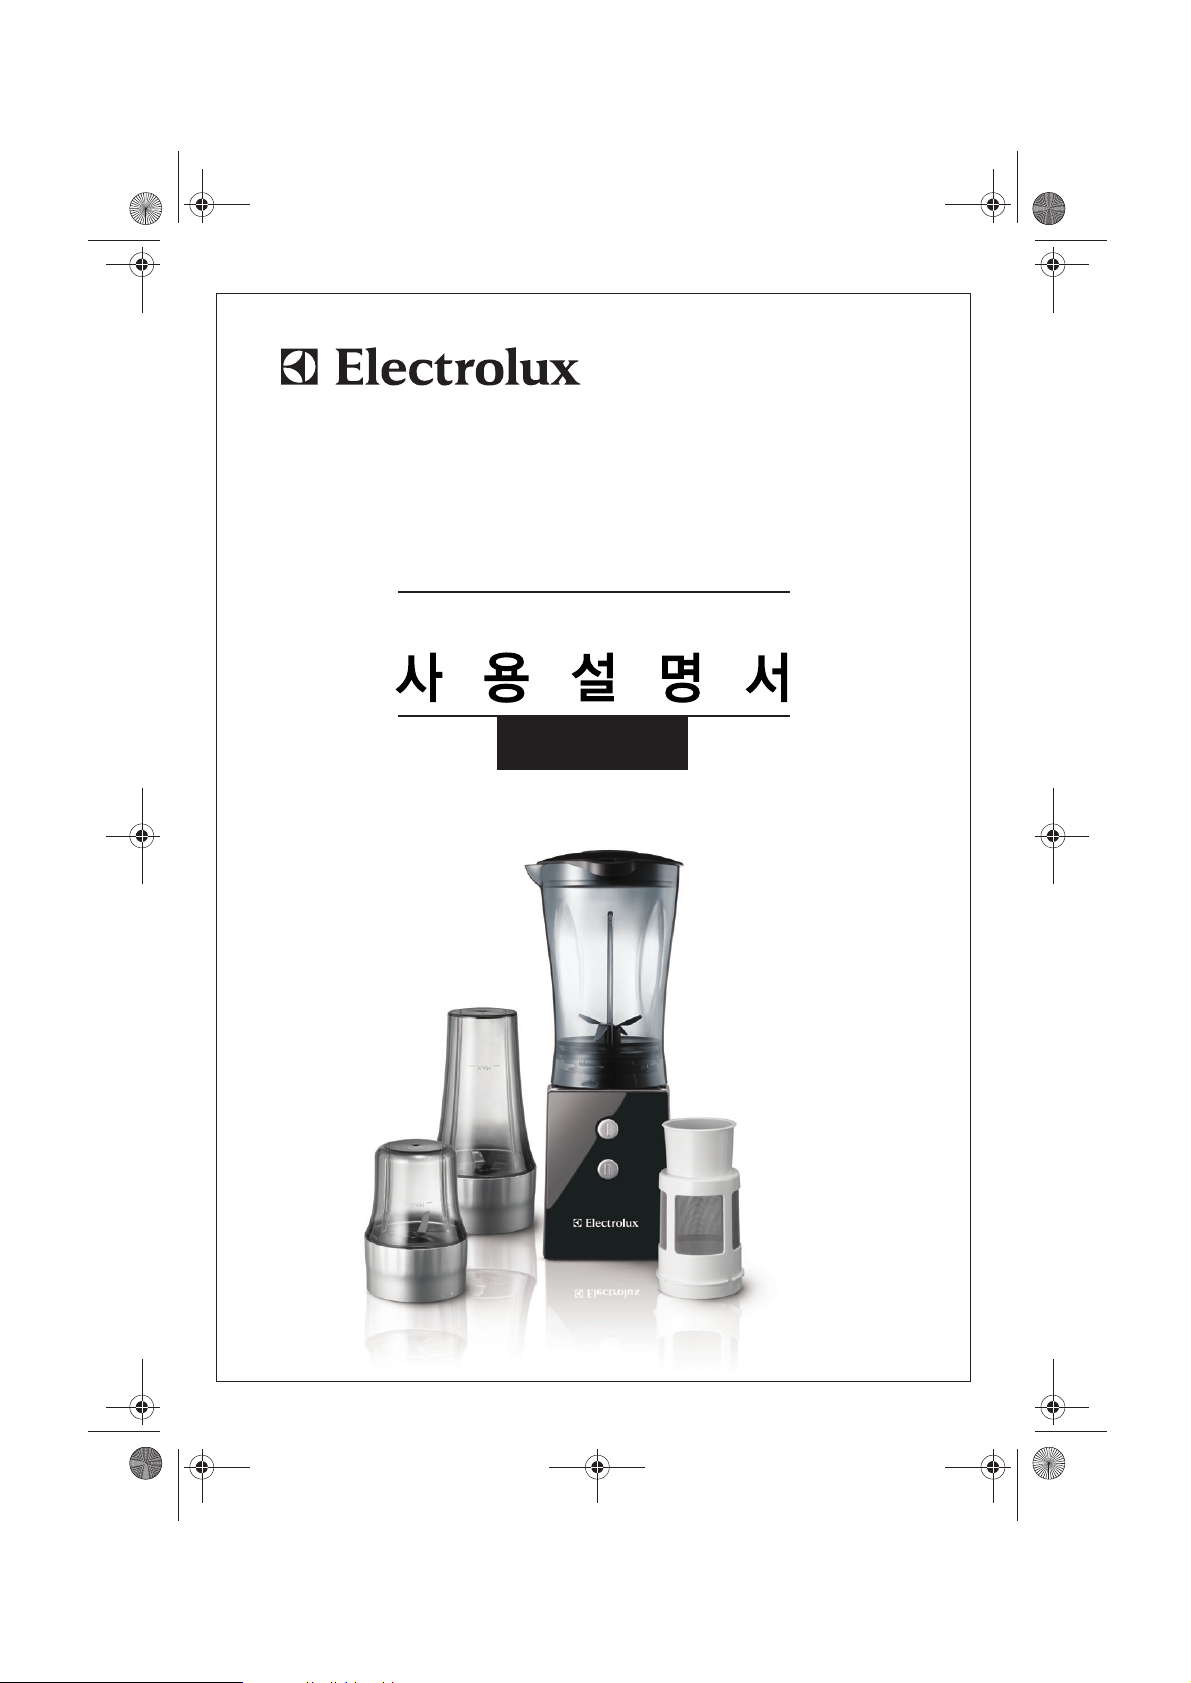
일렉트로룩스 미니 블렌더
EMB
4000
Page 2
2
1
F
G
H
A
B
C
D
E
I
J
K
L
M
N
O
P
R
Q
S
T
Q
Page 3
3
a
b
b
a
b
b
b
a
a
a
b
a
b
a
b
a
Page 4
4
한국어
고객님께
일렉트로룩스 제품을 구입해 주셔서 대단히 감
사합니다.
사용하시기 전에 먼저, 본 사용설명서를 주의
깊게 읽어 보십시오. 특히 첫 페이지에 있는 안
전에 대한 사항들을 자세히 읽어보십시오. 사용
중 언제라도 참고할 수 있도록 사용설명서를 잘 보
관하십시오. 본 제품을 타인에게 양도할 경우엔
사용설명서와 함께 넘겨 주시기 바랍니다.
본 기호가 있거나 다음과 같은 문구들(위험!
주의! 중요!)이 표시된 내용은 고객의 안전과
제품의 올바른 기능을 위해 중요하므로 반드시
숙지해 주시기 바랍니다.
☞
본 기호는 각 단계별 작동법을 설명합니다.
본 기호는 제품 사용에 대한 추가 정보나 실용적
인 도움말을 제공합니다
본 기호는 제품의 경제적/환경 친화적인 사용에
관한 정보입니다.
제품 명칭 (그림 1)
A
필터
B
본체
C
저속 버튼
D
고속 버튼
E
코드 보관
F
마개
G
믹서기 용기 뚜껑
H
뚜껑의 거름망
I
믹서기 용기
J
믹서기 용기 칼날 봉합 링
K
믹서기 용기 칼날
L
내장된 안전 잠금장치
M
코드
N
분쇄기 용기
O
분쇄기 칼날 봉합 링
P
분쇄기 칼날
Q
분쇄기/다지기 용기 뚜껑
R
다지기 용기
S
다지기 칼날 봉합 링
T
다지기 칼날
안전에 대한 사항
본 제품은 한국 가전제품 안전기준법에 의거한 기
술 기준을 충족합니다. 또한, 본 제품의 제조 및 판
매사로서 저희는 사용자에게 아래와 같이 추가적
인 안전 정보를 제공하고자 합니다
일반 안전사항
●
제품의 작동 전압과 가정에서 사용할 전압이 일치
해야 합니다. 제품에 부착된 제품정보 표시판을
참고 하십시오.
●
제품 코드를 잡아당겨 콘센트로부터 플러그를
제거하지 마십시오
●
전원 코드가 손상되었을 경우에는 반드시 일렉
트로룩스 고객 센터로 연락하시기 바랍니다.
●
제품이 높은 곳에서 떨어졌거나 눈에 띄게 손상
된 경우는 사용하지 마십시오.
●
본 제품의 수리는 반드시 공인된 기술자에 의해
서 이루어져야 합니다. 임의적인 수리는 위험할 수
있으니, 수리가 필요할 때에는 반드시 본사 고객
센터나 구입처로 문의해주십시오.
●
아래와 같은 경우에는 플러그를 제거해 주십시오.
- 청소나 보수 전
- 사용 후
- 사용 중 결함이 발생한 경우
●
어린이 등 취급이 익숙치 않은 자나 신체적, 정신적
문제가 있는 자, 혹은 경험이나 지식이 부족한 자
가 본 제품을 사용하지 않도록 주의 하십시오.
Page 5
어린이 안전사항
●
작동 중에는 항상 제품을 주시해 주십시오.
●
제품을 사용하는 동안에는 어린이를 주의
깊게 보호해 주십시오.
●
제품 포장재(예, 비닐봉지)는 어린이의 손
이닿지 않도록 해주십시오.
제품사용시 주의사항
제품을 사용하시기 전에 본 사용설명서를 주의 깊게
읽으 신 후, 다음을 참조할 수 있도록 잘 보관하십시오.
●
제품에 전원을 연결하기 전에, 제품에 명시된
전압이 사용 장소의 전원과 일치하는지 확인하
십시오.
●
전원 코드, 플러그 또는 기타 부품이 손상된 경우
에는 본 제품을 사용하지 마십시오.
●
전원 코드가 손상되었을 경우에는 위험을 방지하
기 위하여 반드시 일렉트로룩스 지정 서비스센
터에서 정품으로 교체하십시오.
●
부품을 분해, 조립 및 조정하기 전에 반드시 제품
의 전원 코드를 뽑으십시오.
●
절대로 본체를 물 또는 다른 액체에 넣거나 흐르
는 수돗물로 세척하지 마십시오. 본체를 세척할 경우
에는 젖은 수건을 사용하십시오.
●
사용 후 반드시 전원 코드를 뽑으십시오.
●
어린이들의 손에 닿지 않는 장소에 제품을 보관
하십시오.
●
사람이 없는 상태에서 믹서를 작동시켜 놓지 마
십시오.
●
표시된 최대량 및 작동 시간을 초과하지 마십
시오.
●
뜨거운 재료는 충분히 식힌 후 믹서기 용기에 넣거
나
다지십시오(최고 온도 80℃/175°F).
●
제품이 작동 중일 때는 절대로 용기 내부에 손
이나 다른 물건을 넣지 마십시오.
●
칼날에 음식물이 끼어 움직이지 않으면 먼저
전원 코드를 뽑고, 칼날의 움직임을 방해하는
음식물을 꺼내십시오.
●
칼날을 세척할 경우, 날카로운 부분을 만지지
않도록 주의하십시오. 매우 날카롭기 때문에 손
을 다칠 위험이 있습니다.
●
본체를 세척하기 전에는 반드시 제품의 전원 코
드를 뽑으십시오.
●
일렉트로룩스가 권장하지 않거나 다른 제조업
체의 제품 액세서리 또는 부품은 절대 사용하지
마십시오.
이러한 액세서리나 부품을 사용했을 경
우에는 보증을
받을 수 없습니다.
●
작동 중에 부품을 이용하여 제품을 켜거나 끄지 마십
시오.
●
벽면 콘센트에 전원 코드를 꽂기 전에 제품을 정
확히 조립하십시오.
●
위험한 상황이 발생하지 않도록 이 제품을 타
이머 스위치에 연결하지 마십시오.
●
본 제품은 가정용입니다.
안전기능
내장된 안전 잠금장치
이 기능은 본체에 각종 부품들이 올바르게 장착된
경우에만 제품의 작동을 가능하게 합니다. 부품들
이 올바르게 조립된 경우에만 내장된 안전 잠금 장
치가 해제됩니다.
열차단
과열되면 제품의 전원 공급을 자동으로 차단하는
열 차단 장치가 들어 있습니다.
제품의 작동이 갑자기 멈추는 경우
●
벽면 콘센트에서 전원 코드를 뽑으십시오.
●
30분간 제품을 그대로 두어 열을 식히십시오.
●
플러그를 벽면 콘센트에 꽂으십시오.
●
다시 제품의 전원 스위치를 켜십시오.
5
Page 6

열 차단 장치가 너무 자주 작동되면 일렉트로룩스 고
객 센터로 문의하십시오.
작동 방법
본 제품은 다음과 같은 용도로 사용하실 수
있습니다.
-
혼합 주스를 만들거나
-
액체를 섞거나
-
과일이나 채소를 작게 자르거나
-
유제품(마요네즈, 소스, 크림, 토핑, 각종 디저트)을
만들 때나
-
야채 스프나 이유식을 위한 퓌레를 만들거나
-
칵테일이나 쉐이크를 만들 때
사용전 준비 사항
분리 가능한 모든 부품을 세척하십시오(‘청소’란
참조).
날카로운 칼날을 만지지 마십시오. 칼날에 음식물
이 끼어 움직이지 않으면 먼저 전원 코드를 뽑고, 주
걱으로 칼날의 움직임을 방해하는 음식물을 꺼내십
시오.
믹서기 조립 및 사용법
1. 믹서기 용기에 믹서기 칼날을 부착하십시오(2a). 화살표 방향으로 돌려 고정시키십시오(2-b)
(그림 2).
●
믹서기 칼날에 고무 링이 제대로 끼워져 있는지
확인하십시오.
2. 용기에 재료를 넣으십시오(그림 3). 용기의 최대
량 표시인 MAX 눈금 이상으로 재료를 넣지 마십
시오. 권장량은 표를 참조하십시오.
용기에 온도가 80℃ 이상 되는 재료를 절대로 넣
지 마십시오.
믹믹서서기기 재재료료 용용량량
과일 200g
야채 200g
야채 주스 야채 200g + 물(적당량)
밀크쉐이크 과일 150g + 우유 250ml
아몬드 차
아몬드 75g + 물 200ml +
쌀 25g (1시간 동안 물에 불린 쌀)
3. 본체에 믹서기 용기를 올려놓으십시오(4-a). 용기
를 화살표 방향으로 돌려 고정시키십시오(4-b)
“○ ●”표시를 이용하여 정확하게 고정시키십시
오(‘딸각’소리가 남) (그림 4).
용기 위로 너무 강한 압력을 가하지 마십시오.
4. 용기에 뚜껑을 올려놓으십시오(5-a). 배출구 앞에
거름망이 놓여졌는지 확인하십시오(5-b) (그림 5).
5. 뚜껑의 구멍에 마개를 넣고(6-a) 단단히 고정될
때까지 돌리십시오(6-b) (그림 6).
작동하기 전에 반드시 뚜껑에 마개를 끼워서 내
용물이 흘러나오지 않도록 하십시오.
6. 벽면 콘센트에 전원 코드를 꽂고 저속 또는 고속
버튼을 눌러 제품의 스위치를 켜십시오.
7. 제
품이 작동하면 양손으로 본체를 잡고 계십시오.
한 번에 1분 이상 제품을 작동시키지 마십시오.
1분 후 블렌딩이 덜 되었으면 제품의 스위치를
끄고 1분간 기다렸다가 다시 사용하십시오.
제품이 뜨거워지면 식을 때까지 기다렸다가 다시 사
용하십시오. 믹서기 작동 중에는 손가락이나 다른
물체(예 : 주걱)를 절대로 비커 안에 넣지 마십시오.
도도움움말말
재료가 믹서기 용기의 벽면에 붙으면 제품의 스위치
를 끄고 주걱으로 벽면에 붙은 재료를 떼어 내십시오
(그림 7).
내용물이 흘러나오지 않도록 최대량 표시인 MAX 눈
금(0.6리터) 이상으로 재료를 넣지 마십시오.
믹서기 용기에 고체 재료를 넣을 경우 미리 작게 자
른 후(1-2cm) 넣으십시오. 동시에 너무 많은 고체
재료를 넣고 작동시키지 마십시오. 조금씩 블렌딩하
면서 고체 재료를 추가로 넣으십시오.
6
Page 7

액체 재료(예 : 기름)는 제품이 작동하는 동안
뚜껑의 구멍을 통해서 믹서기 용기에 부으면
됩니다. (그림 8).
분쇄기 조립 및 사용법
분쇄기는 건조한 재료를 갈 때 사용합니다 (그림 9).
- 분쇄기는 견과류처럼 매우 딱딱한 재료를 다지
는 데에는 적합하지 않습니다.
- 날카로운 칼날을 만지지 마십시오. 내용물이 칼날
이나 벽면에 붙으면 화살표 반대 방향으로 돌려 본
체에서 분쇄기 용기를 꺼내 내용물이 떨어질 때까
지 흔드십시오.
1. 분쇄기 용기에 건조한 재료를 넣으십시오 (그림
10). 분쇄기 용기의 최대량 표시인 MAX 눈금 이
상으로 재료를 넣지 마십시오.
권장량은 표를 참조하십시오.
분쇄기 재료 용량
견과류(껍질을 깐 상태) 20-35g
치즈 20-50g
커피 원두 20-50g
후추 열매 5-30g
검은 깨 20-50g
쌀, 밀 20-50g
각설탕 4-8개
빵가루 식빵 한쪽
대두(마른 것) 20-50g
딱딱한 향신료(예: 정향, 계피) 2g
마른 콩 20-50g
마른 고추 15g
2. 분쇄기에 분쇄기 칼날(날이 두 개)을 돌려서 끼
우십시오(11- a). 화살표 방향으로 돌려서 고
정시키십시오(11- b) (그림 11).
분쇄기 칼날에 고무 링이 제대로 끼워져 있는지
확인하십시오.
3. 조립한 분쇄기를 거꾸로 돌린 다음 본체에 올려
놓으십시오(12-a). 분쇄기를 화살표 방향으로
돌려 고정시키십시오(12-b)
“○ ●”표시를 이용하여 정확하게 고정시키십
시오 (‘딸각’소리가 남) (그림 12).
4. 벽면 콘센트에 전원 코드를 꽂고 저속 또는 고
속 버튼을 눌러 제품의 스위치를 켜십시오 (그
림 13). 제품이 작동하면 양손으로 본체를 잡고
계십시오.
연속해서 30초 이상 작동시키지 마십시오.
도도움움말말
정향, 스타 아니스 및 아니스는 항상 다른 재료
와 함께 블렌딩하십시오. 개별로 블렌딩할 경우
에는 이 재료들이 제품의 플라스틱 부품을 손상
시킬 수 있습니다.
계피와 같이 딱딱한 재료는 1×2cm보다 작은
조각으로 잘라주어야 합니다.
분쇄기 용기를 거꾸로 돌린 다음 칼날을 제거하
고, 그 위에 플라스틱 뚜껑을 씌워 보관 용기로
사용할 수 있습니다 (그림 14).
다지기 조립 및 사용법
●
다지기는 고기, 양파, 마늘 등과 같이 물기 있는
재료를 다질 때 사용합니다 (그림 15).
날카로운 칼날을 만지지 마십시오.
내용물이 칼날이나 벽면에 붙으면 화살표 반대
방향으로 돌려 본체에서 다지기 용기를 꺼내 내
용물이 떨어질 때까지 흔드십시오.
1. 재료를 작은 조각(약 1-2cm)으로 잘라 다지기 용
기에 넣으십시오 (그림 16).
다지기 용기의 최대량 표시인 MAX 눈금 이상으로
재료를 넣지 마십시오.
권장량은 표를 참조하십시오.
다지기 재료 용량
칠리소스(칠리, 샬롯, 마늘 등) 50g
마늘 25-100g
양파 25-100g
고기 80g
2. 다지기 용기에 다지기 칼날(날이 4개)을 돌려서
끼우십시오(17-a). 화살표 방향으로 돌려서 고
정시키십시오(17-b) (그림 17).
다지기 칼날에 고무 링이 제대로 끼워져 있는지
확인하십시오.
7
Page 8

3. 조립한 다지기를 거꾸로 돌린 다음 본체에 올려놓
으십시오(a). 다지기를 화살표 방향으로 돌려 고정
시키십시오(b)
“○ ●”표시를 이용하여 정확하게 고정시키십시오
(‘딸각’소리가 남) (그림 18).
4. 벽면 콘센트에 전원 코드를 꽂고 저속 또는 고속 버
튼을 눌러 제품의 스위치를 켜십시오 (그림 19).
제품이 작동하면 양손으로 본체를 잡고 계십시오.
연속해서 30초 이상 작동시키지 마십시오.
도도움움말말
음식물이 고루 분배되지 않아 제품이 흔들리면 제
품의 스위치를 끄고 칼날을 분리하십시오. 용기에
있는 내용물을 고루 섞은 다음 칼날을 다시 부착하
십시오. 그리고 제품의 스위치를 다시 켜십시오.
다지기 용기를 거꾸로 돌린 다음 칼날을 제거하
고, 그 위에 플라스틱 뚜껑을 씌워 보관 용기로 사
용할 수 있습니다 (그림 14).
필터 조립 및 사용법
이 필터를 사용하여 신선한 과일 주스, 칵테일 또
는 두유를 만들 수 있습니다(‘요리법’참조). 이
필터는 씨나 껍질 등이 음료 안으로 들어가는 것
을 방지합니다.
필터를 무리하게 사용하지 마십시오. 한 번에 125
그램 이상의 물에 불린 대두 또는 150그램 이상의
과일을 넣지 마십시오.
1. 믹서기 용기에 필터를 장착하십시오.
2. 필터 구멍을 통해 용기에 재료를 넣으십시오.
3.‘믹서기’란의 2단계부터 6단계까지 수행하십시오.
(6페이지)
4.
제품이 작동하면 양손으로 본체를 잡고 계십시오.
한 번에 30초 이상 제품을 작동시키지 마십시오.
30초 후 블렌딩이 덜 되었으면 제품의 스위치
를 끄고 30초간 기다렸다가 다시 사용하십시
오. 제품이 뜨거워지면 식을 때까지 기다렸다
가 다시 사용하십시오.
요리법
두유
이 요리법은 필터가 있어야 합니다. 연속으로 두
번 이상 사용하지 마십시오. 제품이 실내 온도와
비슷해질 때까지 기다렸다가 다시 사용하십시오.
재재료료
- 마른 대두 65g
- 물 400ml
가공하기 전에 대두를 4시간 동안 물에 불린 다
음 물기를 빼십시오.
불린 대두를 필터 안에 넣으십시오. 믹서기 용기
에 물 400ml를 붓고 30초 동안 갈아주십시오.
냄비에 두유를 부으십시오.
두유를 끓인 다음 설탕을 첨가하고 설탕이 녹을
때까지 약한 불에 끓이십시오.
뜨겁거나 차게 해서 드십시오.
문제 해결
8
문제점 원인 해결책
제품이 작동하지 않습니다. 제품에는 안전 잠금 장치가
부품을 제대로 조립했는지 확인하십시오
내장되어 있습니다. (‘제품 사용’참조).
본체에 부품을 제대로
조립하지 않으면 제품이
작동하지 않습니다.
제품에는 열 차단 장치가 벽면 콘센트에서 전원 코드를
장착되어 있습니다. 뽑고 30분간 제품의 열을 식히십시오.
제품이 과열되면 전원이 그런 다음 벽면 콘센트에 전원 코드를
자동으로 차단됩니다. 다시 꽂고 제품의 스위치를 켜십시오.
Page 9

9
칼날이 멈췄습니다. 제품에 음식을 너무 많이 제품의 전원을 끈 다음 적은 양을
넣었습니다. 덜어 가공하십시오.
칼날에 음식물이 걸렸습니다. 제품의 스위치를 끄고
주걱으로 칼날에 붙은
음식물을 떼어내십시오.
최초 몇 차례 사용하는 동안 이는 일반적인 현상입니다. 몇 차례 사용한 후에도 계속 이상한
본체에서 이상한 냄새가 냄새가 나면 사용하는 용량과 작동
납니다. 시간이 적당한지 확인하십시오.
제품의 소음이 심합니다. 믹서기 용기의 뚜껑 및 마개를 뚜껑과 마개를 제대로 놓고 믹서기
제대로 끼우지 않았습니다. 용기의 배출구 앞에 거름망이
놓여졌는지 확인하십시오.
제품에서 냄새가 나며, 제품에 음식물을 너무 많이 제품의 스위치를 끄고 내용물을
만지면 뜨겁고 연기도 납니다.
넣었거나 너무 오랫동안 덜어내거나 작동 시간을
작동시켰습니다. 줄이십시오.
믹서기/다지기/분쇄기 용기를 제대로 끼우지 용기를 제대로 끼웠는지
용기에서 물이 샙니다. 않았습니다. 확인하십시오.
제품에 음식물을 너무 많이 제품의 스위치를 끄고 음식물의 양을
넣었습니다. 줄이십시오.
분쇄기의 진동이 심하거나 용기의 음식물이 칼날에 걸린 음식물을 떼어내고 필요하면
소음이 많이 납니다. 또는 걸렸습니다. 양을 줄이십시오.
칼날이 튀어 나옵니다.
다지기에서 물이 샙니다. 고무 링이 칼날에 제대로 제품의 전원 코드를 뽑으십시오.
끼워져 있지 않습니다. 칼날을 분리하고 칼날에 고무 링이
제대로 끼워져 있는지 확인하십시오.
문제점 원인 해결책
청소와 관리
사용 후 바로 제품과 부품을 청소하는 것이 가장
편리합니다.
연마재, 솔, 알코올 등으로 제품을 청소하지 마십
시오.
본체를 물에 담그거나 식기세척기에 넣지 마십시오.
1. 제품의 전원 코드를 뽑고 분리형 부품을 모두
분리하십시오.
2. 부품을 소량의 세제와 미지근한 물 또는 식기 세
척기에서 세척하거나 흐르는 물에 헹구십시오.
3. 필요하면 칼날에 있는 고무 봉합 링을 분리해
물로 헹구십시오.
4. 본체는 젖은 천으로만 닦으십시오.
Page 10

10
색소가 많이 들어간 재료를 넣고 사용하면 제
품 일부의 색이 변할 수 있습니다. 이는 정상
적인 현상입니다.
5. 여분의 코드는 간편하게 제품 하단에 말아주
십시오 (그림 20).
생산일자 확인 방법
본 제품에 부착되어 있는 시리얼 번호 라벨을 통해 생
산일자를확인 확인하실 수 있습니다.
(예) Serial-N0 : 7 25 01234
제품기술정보
사용전압 : 220V / 60Hz
소비전력 : 250W
제조번호
생산주(25번째 주)
생산년의 마지막 년도
Page 11

11
Page 12

Dear customer
Please read these operating instructions
through carefully.
Above all please follow the safety
instructions on the first few pages of
these operating instructions! Please
keep the operating instructions for
future reference. If applicable pass these
instructions on to the next owner of the
appliance.
With the warning triangle and/or by
means of key words (Danger!, Caution!,
Attention!), information is
emphasized which is important for
your safety or the correct functioning
of the appliance. It is essential that this
information is observed.
☞
This symbol guides you step by step
through the operating procedure for
your appliance.
After this symbol you receive supplementary
information on the practical
application and use of the appliance.
Tips and information about the economical
and environmentally friendly
use of the appliance are marked with
the clover
Description of the
appliance (Figure 1)
A Filter
B Motor unit
C Low-speed button
D High-speed button
E Cord storage
F Stopper
G Blender beaker lid
H Sieve on lid
I Blender beaker
J Sealing ring of blender beaker blade unit
K Blender beaker blade unit
L Built-in safety lick
M Cord
N Mill Beaker
O Sealing ring of mill blade unit
P Mill blade unit
Q Mill/chopper beaker lid
R Chopper beaker
S Sealing ring of chopper blade unit
T Chopper blade unit
Safety instructions
This appliance corresponds to accepted
technological standards with regards
to safety and to the Appliance Safety
Law. Nevertheless as a manufacturer
we are committed to familiarise you
with the following safety instructions:
General safety
●
The appliance may only be connected
to a power supply whose voltage and
frequency comply with the specifications
on the rating plate!
●
Never pick up the appliance if
- the lead is damaged,
- the housing is damaged.
●
Never use the lead to pull the plug out
from the socket.
●
In order to avoid danger, if the connection
lead of this appliance is damaged,
it must be replaced by the manufacturer,
its customer service department
or a similarly qualified person.
●
Repairs to this appliance may only be
carried out by qualified service engineers.
Considerable danger may result
from improper repairs. If repairs
become necessary, please contact the
Customer Care Centre or your
authorised dealer.
12
Page 13

13
●
The manufacturer is not liable for any
damages which are caused by using the
appliance for any other purpose than
that intended or incorrect use.
●
This appliance is not intended for use
by people (including children) who, due
to lack of experience or knowledge, are
unable to operate it safely, or for use
by people (including children) whose
physical, sensory or mental capabilities
are reduced, unless a person responsible
for them has shown them how to
use it safely, and has supervised them
initially.
Safety of children
●
Only use the mini blender when supervised.
●
Supervise children particularly care-fully!
●
Packaging material, e.g. plastic bags,
should not be accessible to children.
When using your appliance
●
Check if the voltage indicated on the
appliance corresponds to the local mains
voltage before you connect the
appliance.
●
Do not use the appliance if the mains
cord, the plug or other parts are
damaged.
●
lf the mains cord is damaged, it must be
replaced by Electrolux service centre in
order to avoid a hazard.
●
Always unplug the appliance before
assembling, disassembling or making
adjustments to any of the parts.
●
Never immerse the motor unit in water
or any other liquid, nor rinse it under the
tap. Use only a moist cloth to clean the
motor unit.
●
Unplug the appliance immediately after use.
●
Keep the appliance out of the reach of
children.
●
Never let the appliance run unattended.
●
Do not exceed the maximum quantities
and processing times indicated in the
tables.
●
Let hot ingredients cool down before
chopping them or pouring then into the
blender beaker (max. temperature
80°C/175°C)
●
Never reach into the beaker with your
fingers or an object while the appliance is
running.
●
lf the blades get stuck, unplug the
appliance before removing the
ingredients that are blocking the blades
●
Avoid touching the cutting edges of the
blade units when cleaning them. they are
very sharp and you could easily cut your
fingers on them.
●
Always unplug the appliance before you
start cleaning the motor unit.
●
Never use any accessories or parts from
other manufacturers or that have mot
been specifically advised by Philips .Your
guarantee will become invalid if such
accessories or parts have been used.
●
Never use the parts to switch the
appliance on and off.
●
Assemble the appliance properly before
putting the plug in the wall socket.
●
ln order to avoid a hazardous situation,
this appliance must never be connected
to a timer switch.
●
This appliance is intended for household
only.
Built-in safety lock
This feature ensures that you can only
switch the appliance on when the parts
have been placed in the motor unit in the
correct position. When the parts have
been assembled correctly, the built-in
safety lock will be unlocked.
Page 14
14
Thermal cut-out
The appliance is equipped with a thermal
cut-out that automatically cuts off the
power supply to the appliance if it
overheats.
lf the appliance suddenly stops
running:
Pull the plug out of the wall socket.
Let the appliance cool down for 30
minutes.
Put the plug in the wall socket.
Switch the appliance on again.
Contact your Electrolux dealer or an
authorized Electrolux service centre if
the thermal cut-out, is activated too
often.
ln order to avoid a hazardous situation
due to inadvertent resetting of the
thermal cut-out, this appliance must
never be connected to a timer switch.,
the built-in safety lock will be unlocked.
Operation
You can use the blender e.g. for
- produce mixed drinks, mixing liquids,
- cutting up fruit and vegetables verysmall,
- producing emulsions (e.g. mayonnaise,
sauces, cremes, toppings, and deserts
based on dairy products),
- making pur`ee for vegetable soups or
boiled baby-food,
- preparing coctails and shakes.
Preparing for use
Before using for the first time, it is
advisable for reasons or hygiene to clean
the mixing attachment.
Dry the mixing attachment well before
using it.
Inserting/removing the mixing
attachment (Figure 3)
Before inserting or releasing the mixing
attachment, switch off the blender and
remove the plug from the mains socket!
Insert the mixing attachment to the
motor part and lock it by turning
clockwise.
Tor remove, unlock the mixing
attachment by turning it anticlockwise.
Working with the blender
I Wash all detachable parts (see chapter
‘Cleaning’).
Blender
The blender is intended for:
- Blending fluids, e.g. dairy products, sauces,
fruit juices, soups, mixed- drinks, shakes.
- Mixing soft ingredients, e.g. pancake
batter.
- Pureeing cooked ingredients, e.g cooked
beans, preparing baby food.
lAvoid touching the sharp blades. lf the
blades get stuck, unplug the appliance
and remove the ingredients that are
blocking the blades with a spatula.
1. Attach the blender blade unit to the
blender beaker (2-a).
Fix it by turning it in the direction of the
arrow (2-b) (fig.2).
Make sure the rubber ring has been
placed properly on the blender blade unit.
2. Put the ingredients in the beaker (fig.3).
Do not fill the beaker beyond the MAX
indication see the table for the
recommended quantities.
Never fill the beaker with ingredients
that are hotter than 80°C.
Page 15

3. Place the blender beaker on the motor
unit (4-a). Fix the beaker by turning it in
the direction of the arrow (4-b).
Use the
“○ ●”
mark to fix it correctly
(click) (fing.4).
Be careful not to exert too much
pressure on the beaker.
4. Put the lid on the beaker (5-a).Make sure
that the sieve is located in front of the
spout (5-b) (fig.5).
5. Place the stopper into the opening in
the lid (5-a) and turn it until It is firmly
fixed (5-b) (fig.5.).
To avoid spillage, always insert the
stopper into the lid before you start
processing.
6. Put the plug in the wall socket and
switch on the appliance by pressing the
low-speed or high-speed button.
7. Hold the motor unit firmly with both
hands when operating the appliance. Do
not operate the appliance longer than l
minute at a time. lf you have not
finished blending after l minute, switch
the appliance off and wait l minute
before you continue using it. lf the
appliance becomes hot, let it cool down
before you continue using it.
Never reach into the beaker with your
fingers or an object (e.g. a Spatula)
while the blender is running.
Tip
If the ingredients stick to the wall of the
blender beaker, switch the appliance off
and loosen the ingredients from the wall
with a spatula (fig.7).
To avoid spillage, never fill the beaker
above the MAX indication (0.6 liters).
Cut solid ingredients into smaller pieces (1-
2 cm) before putting them in the blender
beaker
Do not process a large quantity of Solid
ingredients at the same time. Process these
ingredients in a series of small batches
instead.
Liquid ingredients (e.g. oil) can be poured
into the blender beaker through the
opening in the opening in the lid while the
appliance is running (fig.8).
Mill
The mill is intended for grinding dry
ingredients(fig.9).
- The mill is intended for grinding dry
ingredients, such as nutmeg.
- Avoid touching the sharp blades. lf the
ingredients stick to the blade unit or
the wall, removes the mill beaker from
the motor unit by turning it in the
direction opposite to that indicated by
the arrow, and shake until the
ingredients get loose.
Ingredients blender Quantities
Fruit 200 g
Vegetables 200 g
Vegetable juice 200 g vegetables water (optimal)
Milkshake 150 g fruit +250 ml
Almond tea 75 g almonds +200 ml water + 25 g rice (soaked for l hour)
15
Page 16

1. Put the dry ingredients in the mill beaker
(fing.10).
Do not fill the mill beaker beyond the MAX
indication. See the table for the
recommended quantities.
2. Screw the mill blade unit (which has two
blades) onto the mill beaker (11-a).Fix it by
turning it in the direction of the arrow (11b) (fig.11).
●
Make sure the rubber ring has been placed
properly on the mill blade unit.
3. Turn the assembled mill upside down and
place it on the motor unit (12-a).Fix the
mill by turning it in the direction of the
arrow (12-b)
Use the
“○ ●”
mark to fix it correctly (click)
(fig.12).
4. Put the plug in the wall socket and switch
on the appliance by pressing the low-speed
or high-speed button (fig.13).
Hold the motor unit firmly with both
hands when operating the appliance.
Never use the mill for more than
30seconds without interruption.
Tip
Always process cloves, star anise and
aniseed together with other ingredients. lf
processed separately, then ingredients may
attack the plastic materials of the
appliance.
Hard spices such as cassia must be cut into
pieces smaller than 1x2 cm.
The mill beaker can be used as storage
container by turning it upside down and
putting the plastic lids on it (fig.14).
Chopper
The chopper is intended for chopping
moist ingredients such as meat, onion
,garlic etc (fig.15).
Avoid touching the sharp blades .lf the
ingredients stick to the blade unit or the
wall, remove the chopper beaker from
the motor unit by turning it in the
direction opposite to that indicated by
the arrow, and shake until the
ingredients get loose.
1. Cut the ingredients into smaller pieces
(approx.1-2cm) and put them in the
chopper beaker (fig.16). Do not fill the
chopper beaker beyond the MAX
indication.
See the table for the recommended
quantities
Ingredients mill Quantities
Chili paste
(chili, shallot, garlic, etc.)
50 g
Garlic 25-100 g
Onions 25-100 g
Meat 80 g
Ingredients mill Quantities
Nuts (shelled) 20-35 g
Cheese 20-50 g
Coffee beans 20-50 g
Pepperwoods 5-30 g
Black sesame seeds 20-50 g
Raw rice, wheat 20-50 g
Sugar cubes 4-8 cubes
Breadcrumbs one slice of bread
Soy beans (dried) 20-50 g
Hard spices, e.gg.
cloves and cassia 2 g
Dried beans 20-50 g
Dried chilies 15 g
16
Page 17

2. Screw the chopper blade unit (which has
four blades)onto the chopper beaker(17a). Fix it by turning it in the direction of
the arrow (17-b)(fig.17).
Make sure the rubber ring has been
placed properly on the chopper blade
unit.
3. Turn the assembled chopper upside
down and place it on the motor unit (18a).fix the chopper by turning it in the
direction of the arrow (18-b)
Use the
“○ ●”
mark to fix it correctly
(click) (fig.18).
4. Put the plug in the wall socket and
switch on the appliance by pressing the
low-speed or high-speed button (fig.19).
Hold the motor unit firmly with both
hands when operating the appliance.
Never use the chopper for more than 30
seconds without interruption.
Tip
If the appliance shakes because the food
is not evenly distributed, switch the
appliance off and remove the blade unit,
Distribute the ingredients evenly in the
beaker and reattach the blade unit. Then
switch the appliance on again.
The chopper beaker can be used as storage
container by turning It upside down and
putting the plastic lids on it (fig.14).
Filter
With this filter you can make delicious
fresh fruit juices, cocktails or soy milk (see
also Recipes). The filter prevents pips and
skins from ending up in your drink.
Never overload the filter. Do not put
more than 125g of presoaked soy beans
or 150g of fruit in the filer at same time.
1. Put the filter in the blender beaker.
2. Put the ingredients in the beaker
through the opening in the filter.
3. Follow steps 2 to 6 under the heading
‘Blender’)(p14~15)
4. Hold the motor unit firmly with both
hands when operating the appliance. Do
not operate the appliance linger than 30
seconds.
At a time lf you have not finished blending
after 30 seconds, switch the appliance off
and wait 30 seconds before you continue
using it. If the appliance becomes hot, let it
cool down before you continue using it.
Soy milk
This recipe can only prepared with the
filter. Do not process more than one batch
in a row. Let the appliance cool down to
room temperature before you continue
processing.
Ingredients:
- 65 g dried soy beans
- 400 ml water
●
Soak the soy beans for 4 hours before
processing them. Set aside to drain.
●
Put the soaked soy beans in the filter. Pour
400ml of water into the blender jar and
blend for 30 seconds.
●
Pour the soy milk into a pan.
●
Bring the soy milk to the boil, then add
sugar to taste and leave to simmer until all
the sugar has melted. Serve hot or cold.
17
Page 18

Problem cause solution
The appliance does not The appliance is Check weather the parts
work
equipped with a built-in have been assembled
safety lock, lf the parts properly (see chapter
have not been properly “Using the appliance”)
assembled onto the
motor unit, the appliance
does not work.
The appliance is Pull the plug out of the
equipped with a thermal wall socket and let the
cut-out, lf the appliance appliance cool down for
overheats, it 30 minutes. Then put the
automatically cuts off the plug back onto the wall
power supply socket and switch the
appliance on again.
The blade unit is There Is too much food Switch the appliance off
blocked. in the appliance. and process a smaller
quantity.
Food is sticking to the Switch the appliance off
Blades and dislodge the food
from the blades with a
spatula.
The motor unit gives off This is normal If the appliance continues
an unpleasant smell to give off this smell after
during the first few times you have used it a few times
check whether the quantity
you are processing and
the processing time are
correct.
The appliance makes The blender beaker lid Make sure the lid and
a lot of noise. and/or the stopper have the stopper are properly
not been properly placed and the sieve in
placed. the lid is in front of the
spout of the blender
beaker.
Guarantee & service
If you need information or if you have a problem, please contact the Electrolux Customer Care
Center in your country.
Troubleshooting
18
Page 19

The appliance smells, There Is too much food Switch the appliance
feels hot to the touch. in the appliance or the off and process a
emits smoke, etc. appliance has been smaller quantity or
operating too long reduce the operating
operating time.
The blender/chopper/ The beaker has mot been Make sure the breaker
mill beaker leaks. properly attached has been properly
attached.
There is too much food Switch the appliance off
In the appliance. and process a smaller
quantity.
The mill vibrates, The food in the beaker is Clear the blockage
strongly produces a lot blocking the blades. and process a smaller
of noise or the blade quantity.
unit is out of alignment.
The chopper leaks. The rubber ring has not Unplug the appliance.
been properly placed Remove the blade unit
onto the blade unit. and make sure the
rubber ring has been
properly placed onto the
blade unit.
19
Cleaning and care
Cleaning the appliance and its parts is
easiest immediately after use.
☞
Do not use abrasives, scourers, alcohol,
etc to clean the appliance.
☞
Never immerse the motor unit in water
or clean it in the dishwasher.
1. Unplug the appliance and remove the
detachable parts.
2. Clean the parts in lukewarm water with
sine washing-up liquid and rinse them
under the tap or clean them in the
dishwasher.
3. lf necessary, remove the rubber sealing
ring from the blade units and rinse it
with water.
4. Use only moist cloth to clean the motor
unit.
Parts of the appliance may become
discolored when it is used to process
ingredients that contain a lot of
pigment, this is normal.
5. Wind excess mains cord round the base
of the appliance for easy storage (fig.20).
Technical data
Mains voltage: 220 V / 60Hz
Power consumption: 250 W
Page 20

미니 블렌더
EMB4000
핸드블렌더
EMB4000
 Loading...