

Page 1

Electric cooker
INSTRUCTION BOOK
EKV 5605 X
Page 2

ELECTRIC COOKER
Instruction book
GB
ELEKTRICKÝ SPORÁK SE SKLOKERAMICKOU
VARNOU DESKOU
SKLOKERAMICKÝ SPORÁK
ÜVEGKERÁMIA FŐZŐFELÜLETŰ TŰZHELY
Návod k použití
Návod na používanie
Használati útmutató
CZ
SK
HU
Page 3

WARNINGS
It is most important that this instruction book should be retained with the appliance for future
reference. Should the appliance be sold or transferred, always ensure that the book is left with
the appliance in order that the new owner can get to know the functions of the appliance and
the relevant warnings.
These warnings are provided in the interest of safety. You MUST read them carefully before
installing or using the appliance.
Installation
• This cooker must be installed by qualified
personnel, according to the manufacturer's
instructions.
• Repairs to the appliance should only be
carried out by approved service engineers.
• This cooker is heavy. Take care when
moving it.
• Remove all packaging before using the cooker.
• Ensure that the electrical supply complies
with the type stated on the rating plate.
• Do not attempt to modify the cooker in any
way.
Child Safety
• This cooker is designed to be operated by
adults. Do not alow children to play near or
with the cooker.
• The cooker gets hot when it is in use and
retain their heat for a long period after use.
Children should be kept away until it is has
cooled.
• Children can also injure themselves by
pulling pans or pots off the cooker.
During use
• This cooker is intended for domestic cooking
only. It is not designed for commercial or
industrial purposes.
• Do not use this cooker if it is in contact with
water. Do not operate the cooker with wet
hands.
• The grill pan will become hot during use,
always use oven gloves when removing
or replacing a hot grill pan.
• During use the appliance becomes hot.
Care should be taken to avoid touching
heating elements inside the oven.
• Ensure the control knobs are in the ‘OFF’
position when not in use.
• When using other electrical appliances,
ensure the cable does not come into contact
with the hot surfaces of the cooker.
• Never leave the cooker unattended when
cooking with oil and fats.
• This cooker should be kept clean at all times.
A build-up of fats or foodstuffs could result in
a fire.
• Only clean this oven in accordance with the
instructions.
• The oven must be switched off before
removing the guard and after cleaning the
guard must be replaced in accordance
with the manufacturer's instructions.
• Do not use the hob as a work surface or for
storage.
• Do not use the cooking zones with empty
pans, or without pans.
• Ceramic glass is insensitive to temperature
shock and very robust, however it is not
unbreakable. Hard and sharp objects, in
particular, can damage the cooking surface
if they fall on it.
• Do not use cast iron pans or pans with
damaged bases that are rough or burred.
Scratching may occur when the pans are slid.
• Ensure that liquids containing acids, e.g.
vinegar, lemon or scale remover do not come
into contact with the hob frame, otherwise
matt spots will appear.
• If sugar or a dish containing sugar comes
into contact with a hot cooking zone and then
melts, remove the soiling immediately whilst
still hot using a scraper.
• Keep all items and materials that can melt
away from the ceramic glass surface, e.g.
plastics, aluminium foil, or oven foils. If
something of this nature should melt onto the
ceramic glass surface, it must also be
removed immediately using the scraper.
• Use only pans with flat bases without rough
edges to avoid remaining scratches.
• Never use plastic dishes in the oven. Never
line any part of the oven with aluminium foil.
• Always ensure that the oven vent which is
located at the centre back of the hob is left
unobstructed to ensure ventilation of the
oven cavity.
Service
• This cooker should only be repaired or
serviced by an authorised Service Engineer
and only genuine approved spare parts
should be used.
Environmental Information
• After installation, please dispose of the
packaging with due regard to safety and the
environment.
• When disposing of an old appliance, make it
unusable, by cutting off the cable.
3
Page 4

Instructions for the Installer
CONTENTS
Technical features
Installation
Location
Electrical connections
Instructions for the User
Use and care
Before the first use of the oven
Controls
- Oven function control knob
- Thermostat control knob
Using the fan oven
Using the conventional oven
Grilling
Electric timer
Cooking zones
Cooking equipment
Maintenance and cleaning
5
6
6
7
8
9
10
10
10
11
12
12
13
14
15
17
Oven bulb replacement
Something not working
Guarantee conditions
After sales service
18
19
20
20
How to read the instruction book
The symbols below will guide you when reading the
instruction book
Safety instructions
Step by Step Operation
Advice and recommendations
Environmental Information
4
Page 5
INSTRUCTIONS FOR THE INSTALLER
TECHNICAL FEATURES
Dimensions Height
Width
Depth
Oven Capacity
Hob Double ring cooking zone front left
Single ring cooking zone back left
Single ring cooking zone front right
Casserole cooking zone back right
Heater Element Voltage 230 V ~ 50 Hz
Total hob rating 6100 W
Oven Oven element
- Bottom heating element
- Top heating element
Grill element
Convection fan
Circular heating element
Light in the oven
Sound power level
Electric timer
Cleaning
Ø 120/180 mm
Ø 140 mm
Ø 140 mm
Ø 140/250 mm
858-868 mm
500 mm
600 mm
45 litres
700/1700 W
1200 W
1200 W
1100/2000 W
900 W
1000 W
1900 W
35 W
1900 W
Lamp 25W type E14
45,7 dB
1 W
manual
Total oven rating 1961 W
Supply Rated voltage
Rated frequency
Accessories Shelf
Roasting tray
Backing tray
Total cooker rating
This appliance complies with the following EEC
Directives :
73/23 - 90/683 ; (Low Voltage Directive) and
subsequent modifications,
89/336 (Electromagnetical Compatibility
Directive)
93/68 (General Directives) and subsequent
modifications.
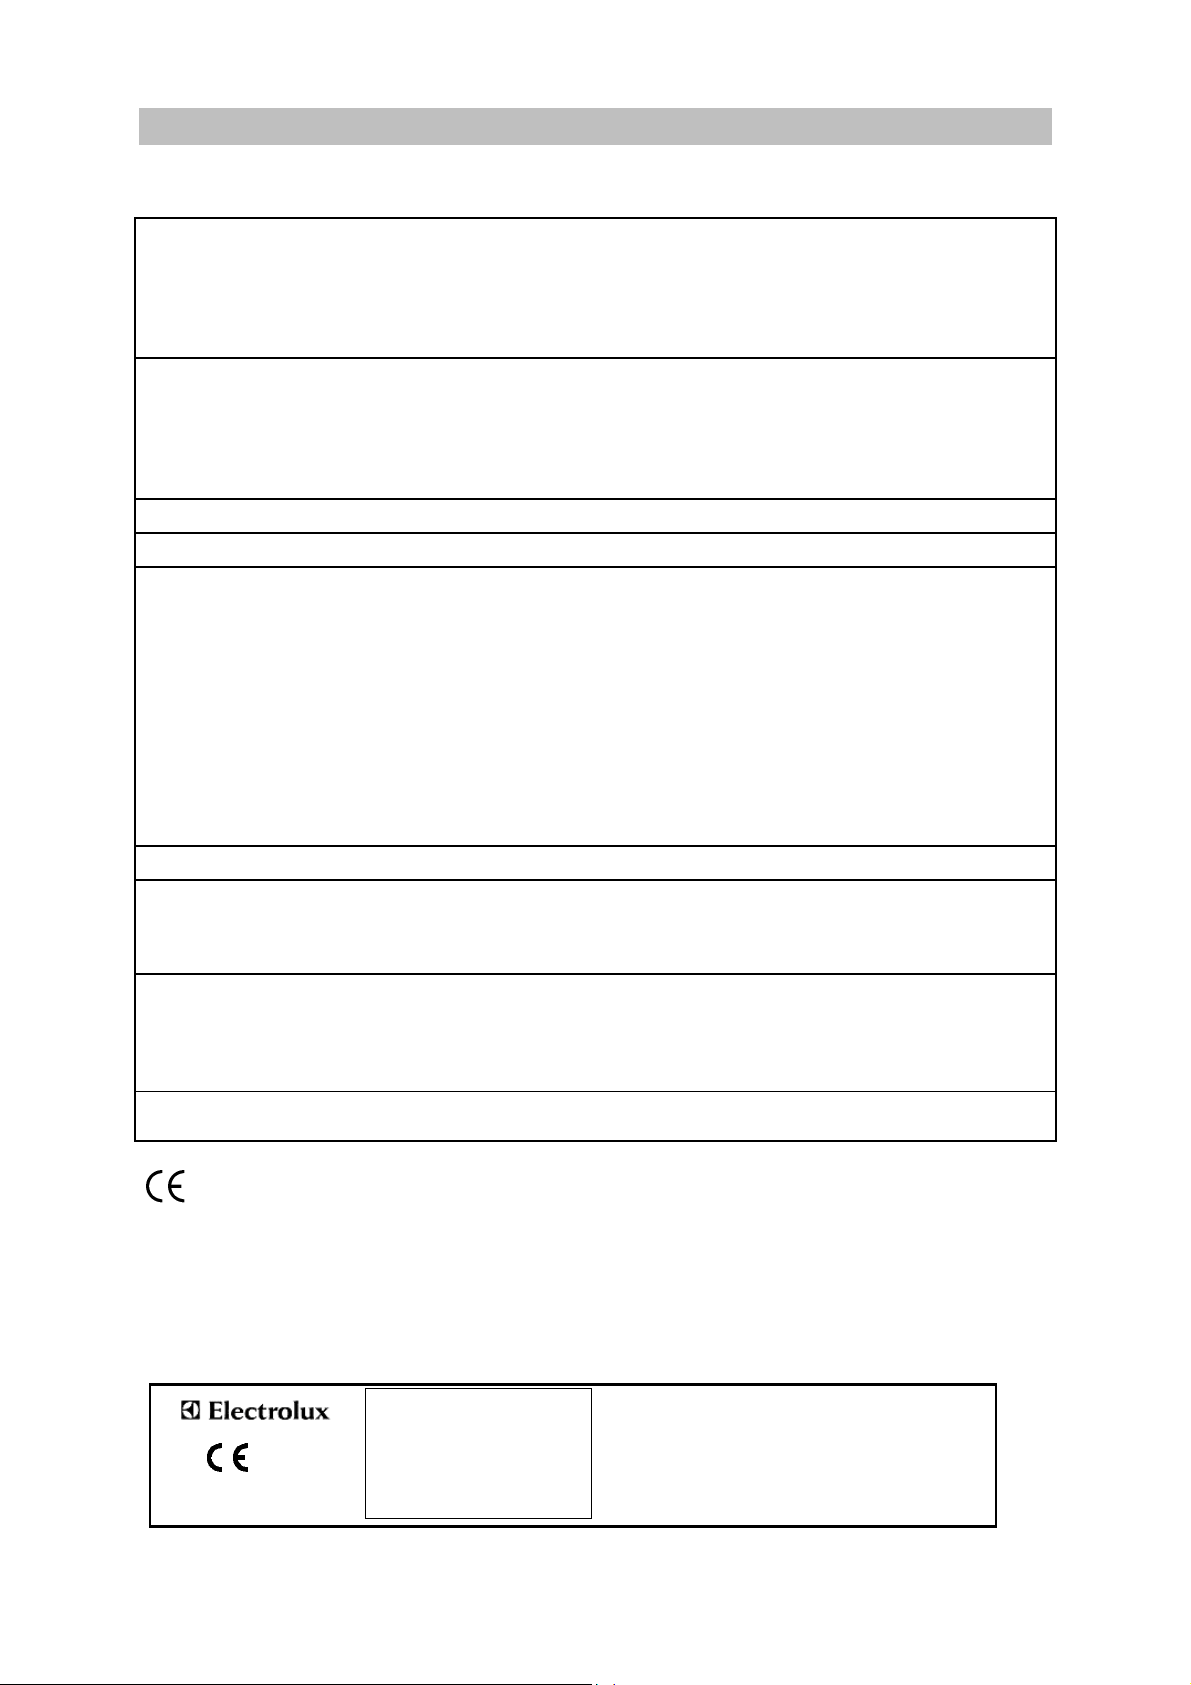
ELECTRIC COOKER
PNC: 943 265 138
230/400 V
50 Hz
Enamelled
Enamelled
8061 W
Model: EKV 5605X
Serial no. 34500001
230V 1N, 230/400V 3N, 230V 3~, 230/400V 2N 50Hz
Rated power: 8,061 kW
5
Page 6
INSTALLATION
It is mandatory that all operations required for the
installation be carried out by QUALIFIED
PERSONNEL in accordance with existing rules
and regulations.
The appliance must be installed in accordance
with " X " specification (EN60.335-2.6). The
cooker must not be installed higher than the
worktop.
Please ensure that when the appliance is
installed it is easily accessible for the
engineer in the event of a breakdown.
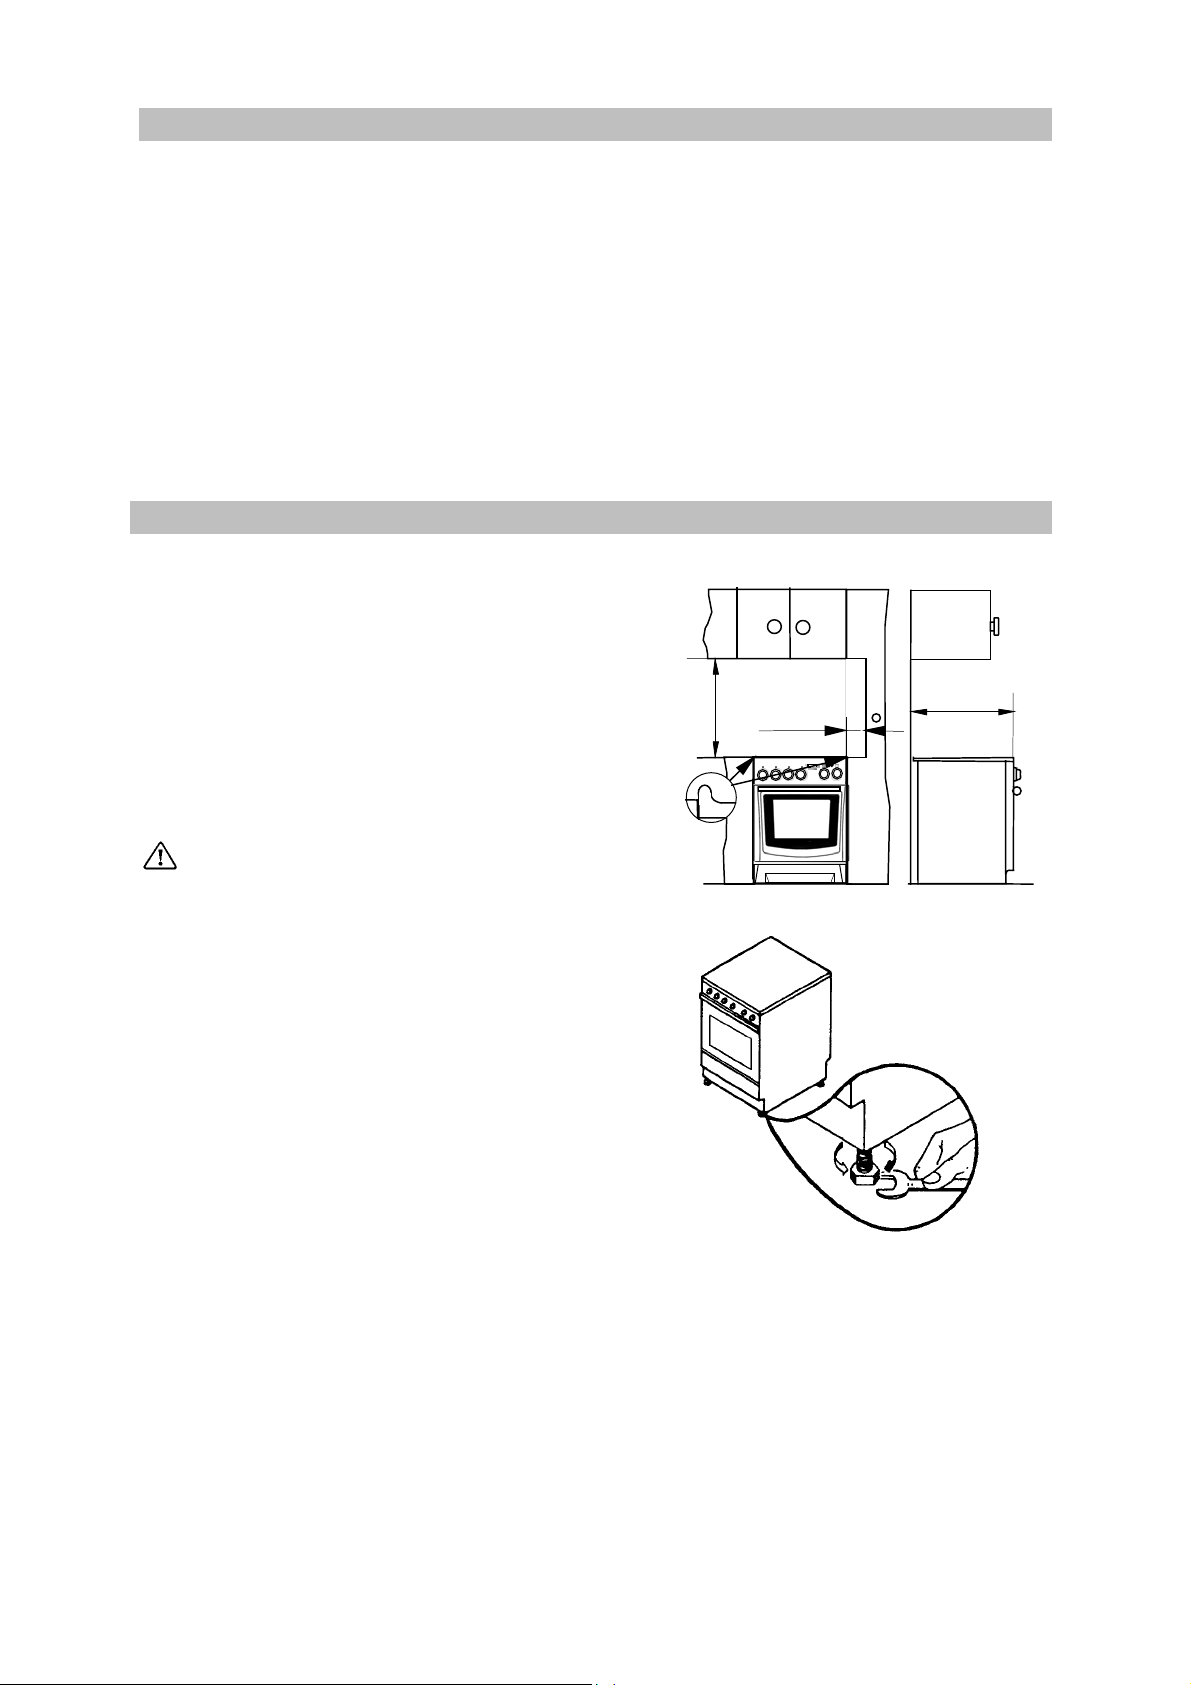
LOCATION
The cooker has been registered as a “Class
X”appliance according to Fire Risk Regulations.
Any adjacent cabinets or walls must not exceed
the cooker’s height.
The cooker may be located in a kitchen, a
kitchen/diner or bed sitting room, but not in a
bathroom or shower room.
Before your appliance is connected to the mains
electricity supply, check to ensure that the
voltage and the frequency shown on the rating
plate corresponds with your supply voltage.
This appliance must be earthed.
69cm
min 15 cm
60cm
The minimum distance combustible material can
be fitted above the cooker in line with the edges
of the cooker is 69 cm (see fig.)
The appliance must be set on a
heatproof floor. The adjustable feet must not
be removed.
Levelling
The appliance is provided with adjustable small
feet placed in the back and front corners of the
base.
By adjusting the small feet it is possible to
change the height of the appliance so as to
ensure a better levelling with other surfaces and
an even distribution of the liquids contained in
pots and pans.
6
Page 7

ELECTRICAL CONNECTIONS
Any electrical work required to install
this hob and the supply cable should be
carried out by a qualified electrician or
competent person, in accordance with the
current regulations.
THIS COOKER MUST BE EARTHED.
The manufacturer disclaims any
responsibility should these safety instructions
not be carried out.
This cooker is designed to be connected to a
230/400V, 50Hz electrical supply.
To connect to the electricity supply, use cable
type H05 RR-F.
Before switching on, make sure the electricity
supply voltage is the same as that indicated on
the rating plate.
The cooker is supplied without supply cable. A
flexible supply cable must be fitted, in
accordance with the specification gived in the
relevant table no. 1.
In case of a direct connection to the mains you
have to interpose an omnipolar switch a
minimum opening between contacts of 3 mm.
The switch should be sited within 2m of the hob
and be easily accessible upon completion of the
installation.
The yellow-green grounding cable has not to be
interrupted by the switch.
NOTE: The earth wire should be about 2 cm
longer than the live and neutral wires.
After installation and connecting, the
cable must be placed so that it cannot at any
point reach a temperature of more than 50°C
above the ambient temperature.
supply
cable
Before connecting check that:
• fuse and household electric installation can
bear the charge of the appliance (see rating
plate);
• The socket or the omnipolar switch used for
connection is easily reachable when the
appliance is installed.
How to proceed?
• Unscrew and remove the protective cover at
the back of the appliance;
• Connect the power cord to the terminal of the
cooker according to the table no.1;
• Fix by means of cable clamp;
• Make sure that the connection to the terminal
is matching the network power;
• Remount and screw the protective cover at the
back of the appliance.
If the supply cable is damaged, it must
be replaced by the manufacturer or its
service agent or a similarly qualified person
in order to avoid a hazard.
Table no. 1
Rated voltage 230V 1N, 230/400V 3N, 230V 3~, 230/400V 2N
Connection type Single phase
Cable connection to the
terminal plate
Network voltage
Voltage of heating
elements
Fusible capacity
Cable section
1 2 3
L1
1N/ 230 V 3N/400 V 3/230 V 2N/400 V
230 V 230 V 230 V 230 V
3 x 6 mm
4 5
N
35 A 3 x 16 A 3 x 20 A 2 x 25 A
2
Tri-phase Y 3 ph.
1 2
PE
+ neutral
4 5
3
N
L3L1
L2
5 x 2,5 mm
PE
2
Tri-phase
1 2
L1 L2
4 x 4 mm
3 4
L3
Tri-phase Y 2 ph. +
neutral
5
PE
2
2 3
1
L2L1
4 x 4 mm
4 5
N
PE
2
7
Page 8

USE AND CARE
A
A.
Glass ceramic hob
B. Control panel
C. Door handle
D. Oven door
E. Drawer
F. Adjustable feet
INSTRUCTIONS FOR THE USER
B
C
D
E
F
CONTROL PANEL
1 5
1. Back left heat zone control knob
2. Front left heat zone control knob
3. Front right heat zone control knob
4. Back right heat zone control knob
Oven
2
3
MULTIFUNCTION
4
6
7
8
9
5. Electric timer
6. Oven thermostat knob
7. Oven thermostat pilot light
8. Main pilot light
9. Oven function control knob
G
H
I
G.
Shelf supports
H.
Shelf
I.
Fan
8
Page 9

USE OF APPLIANCE
Before the First Use of the Oven
Remove all packaging, both inside and
outside the oven, before using the
oven.
Before first use, the oven should be heated
without food. During this time, an unpleasant
odour may be emitted. This is quite normal.
1. Remove the oven accessories.
2. Remove any adhesive labels or protective
films, if there are any.
3. Heat the oven the corresponding knob on
position “250” for about 45 min.
This procedure should be repeated with the grill
function for approximately 5-10 minutes.
Clean the ceramic hob carefully before its first use.
Afterwards clean it regularly when it is just warm
or cold. Avoid continued burning of food or dirt
until it is solified.
Ceramic hobs are treated and cleaned the same
way as glass. Never use aggressive detergents
or sponges with abrasive surface. When you
use the ceramic hob for the first time it can
temporarely emit an odeur caused by a
vaporation of water in the isolation.
Clean the accessories with a soft detergent.
Rinse and dry carefully.
Rating Plate
The model number of your cooker can be found
on the rating plate on the lower front frame of
the cooker upon opening the door.
The cooker must be protected by a suitably
rated fuse or circuit breaker. The rating of the
cooker is given on the rating plate.
About condensation and steam
When food is heated it produces steam in the
same way as a boiling kettle. The oven vents
allow some of this steam to escape. However,
always stand back from the oven when
opening the oven door to allow any build up of
steam or heat to release.
If the steam comes into contact with a cool
surface on the outside of the oven, e.g. a trim, it
will condense and produce water droplets. This
is quite normal and is not a fault with the oven.
To prevent discoloration, regularly wipe away
condensation and also soilage from surfaces.
Cookware
Use any ovenproof cookware, which will
withstand temperatures of 250
Oven dishes, etc. should not be placed
directly on the oven base.
0
C.
9
Page 10

CONTROLS
Oven Function Control Knob
Defrost – (NB: This is NOT a cooking
position). This position is intended to assist in
thawing of frozen foods.
Fan cooking – Thermaflow cooking; this
system will allow you to roast and bake at the
same time with very little flavour transference,
and on any shelf.
Grill - The grill cannot be used at the same
time as the oven. The oven door must be
closed when grilling.
Bottom oven element - enables you to
finish off dishes on the bottom only.
Top oven element - enables you to finish
off dishes on the top only.
Conventional cooking – used the top and
bottom element; this function will enable you to
use your favourite recipes without having to
adapt the temperatures. It is necessary to preheat the oven in this instance.
Caution
Do not place pans, dripping pans, biscuits pans
or aluminium foil directly on the base of the
oven. This could cause a heat build-up which
could affect the performance of the oven and
damage the oven enamel.
Thermostat Control Knob
By turning the oven control knob clockwise, you
select the cooking temperature.
Temperature selection starts at 50°C and will
reach approximately 250°C at the centre of the
oven.
The thermostat controlling the temperature is
totally variable so it is possible to select
temperatures between those marked.
The maxim setting is particularly suitable for
grilling.
Things to note
• Once the oven temperature has been
selected, the oven thermostat pilot light will
come on and remain on until the oven has
reached the correct setting; after that, it will
go on and off with the thermostat, showing
how the temperature is being maintained.
• The oven light will come on when the oven
function control knob is set.
10
Page 11

USING THE FAN OVEN
The Fan Oven
The air inside the oven is heated by the element
around the fan situated behind the back panel.
The fan circulates hot air to maintain an even
temperature inside the oven.
The advantages of cooking with this function
are:
Faster Preheating
Because the fan oven quickly reaches
temperature, it is not usually necessary to
preheat the oven although you may find that you
need to allow an extra 5-7 minutes on cooking
times. For recipes, which require higher
temperatures, best results are achieved if the
oven is preheated first, e.g. bread, pastries,
scones, souffles, etc.
Lower Temperatures
Fan oven cooking generally requires lower
temperatures than conventional cooking.
Remember to reduce temperatures by about
20- 25°C for your own recipes, which use
conventional cooking.
Even Heating for Baking
The fan oven has uniform heating on all runner
positions. This means that batches of the same
food can be cooked in the oven at the same
time. However, the top shelf may brown slightly
quicker that the lower one.
This is quite usual. There is no mixing of
flavours
between dishes .
The fan oven can be used to heat foods through
without thawing first, e.g. fruit tarts, mince pies,
sausage rolls, and other small pastry items. Use
a temperature of 190-200°C and allow 20-40
minutes (depending on the quantity of food in
the oven).
Only experience will enable you to determine
the proper settings for your personal cooking
needs. The temperatures are intended as a
guide only. It may be necessary to increase or
decrease the temperature to suit your individual
requirements.
The effects of dishes on cooking results
Dishes and tins vary in their thickness,
conductivity, colour, etc. which affects the way
they transmit heat to the food inside them:
A Aluminium, earthenware, oven glassware
and bright shiny utensils reduce cooking and
underneath browning.
B Enamelled cast iron, anodized aluminium,
aluminium with non-stick interior and coloured
exterior and dark, heavy utensils increase
cooking and underneath browning.
Defrosting
The defrosting function allows you to defrost
frozen foods. The oven fan operates without
heat and circulates the air, at room temperature,
inside the oven. This increases the rate at which
defrosting takes place.
This function is particularly suitable for delicate
food which could be damaged by heat, e.g.
cream filled gateaux, iced cakes, pastries,
bread and other yeast products.
How to Use the Fan Oven
1. Turn the oven function control knob to
2. Turn the thermostat control knob to the
required temperature.
HINTS AND TIPS
Runner positions are not critical, but make sure
the shelves are evenly spread.
When cooking more than one dish in the fan
oven, place dishes centrally on the shelves
rather than several dishes on one shelf.
When the oven is full, you may need to allow
slightly longer cooking time.
A shelf may be placed on the floor of the oven.
Place dishes on a shelf in this position rather
than on the oven base, to allow air circulation
around the food.
When the oven is full of the same food, e.g.
equal trays of small cakes or equal size victoria
sandwich cakes, then they will be cooked in the
same time and removed from the oven together.
When different sizes of trays or types of food,
e.g. biscuits and cakes are cooked, they will not
necessarily be ready together.
HINTS AND TIPS
• Cover food with a lid, aluminium foil or
plastic film to prevent drying out during
defrosting.
• Small or thin pieces of fish fillet or peeled
prawns, mince, liver and thin chops will
defrost in 1-2 hours. Ensure that they are
cooked or refrigerated immediately after
defrosting to maintain good foodhygiene.
• Place the food to be defrosted in a single
layer.
• And turn over half way through the defrosting
process, where possible.
• Place the frozen food a single layer where
possible, and turn it over half way through
the defrosting process.
• DO NOT leave food at room temperature
once it is defrosted. Cook raw food
immediately or store cooked food in the
fridge.
• Take care to follow the basic rules for
hygiene when handling fresh, frozen, raw
and cooked foods.
11
Page 12

USING THE CONVENTIONAL OVEN
When using this setting, heat comes from both
the top and bottom elements. This allows you to
cook on a single level and is particularly suitable
for dishes which require extra base browning
such as quiches and flans. Gratins, lasagnes
and hotpots which require extra top browning
also cook well in the conventional oven.
This form of cooking gives you the opportunity to
cook without the fan in operation.
How to use the conventional oven
• Turn the oven function control knob to the
required cooking function
• Turn the thermostat control knob to the
required temperature.
Top oven element only
This function is suitable for finishing cooked
dishes, e.g. lasagne, shepherds pie, cauliflower
cheese etc.
Bottom oven element only
This function is particularly useful when blindbaking pastry or cooking pizza. It may also be
used to finish off quiches or flans to ensure the
base pastry is cooked through.
During use the appliance becomes hot.
Care should be taken to avoid touching
heating elements inside the oven.
Main pilot light
This light will illuminate when the oven function
control knob is set or the heat zone knobs are
turned on and remains lit while these are in use.
DO NOT place dishes directly onto the oven
base as it becomes very hot and damage may
occur.
DO NOT use the grill pan or meat tin as a
baking tray as this will increase base browning
of the food.
For economy leave the door open for the
shortest possible time, particularly when placing
food into a preheated oven.
Grilling
When grilling, the accessible parts of
the appliance are hot and the appliance
should not be left unattended. Take care that
children do not play near it.
All grilling must be carried out with the
oven door closed .
To switch on the grill, turn the oven
function control knob to GRILL, then turn the
thermostat knob to the maximum temperature .
Most foods should be placed on the grid in the
grill pan to allow maximum circulation of air to lift
the food out of the fats and juices. Food such as
fish, liver and kidneys may be placed directly on
the grill pan, if preferred.
Adjust the grid and grill pan runner position to
allow for different thicknesses of food.
Food should be thoroughly dried before grilling
to minimise splashing. Brush lean meats and
fish lightly with a little oil or melted butter to keep
them moist during cooking.
Hints and Tips
There should always be at least 2.5cm between
the top of the food and the element. This gives
the best cooking results and allows room for rise
in yeast mixtures, Yorkshire puddings, etc.
When cooking cakes, pastry, scones, bread,
etc., place the tins or baking trays centrally
below element.
Ensure that food is placed centrally on the shelf
andthere is sufficient room around the baking
tray/dish to allow for maximum circulation.
Stand dishes on suitably sized baking trays to
prevent spillage onto the oven base and to help
reduce cleaning.
The material and finish of the baking tray and
dishes will affect the degree of base browning of
the food.
Enamelware, dark, or heavy utensils increase
base browning. Shiny aluminium or polished
steel trays reflect the heat away and give less
base browning.
12
Accompaniments such as tomatoes and
mushrooms may be placed underneath the grid
when grilling meats.
When toasting bread, we suggest that the top
runner position is used with the grid in its 'high'
position.
Preheat the grill on a full setting for a few
minutes before sealing steaks or toasting. Adjust
the heat setting and the shelf as necessary,
during cooking.
The food should be turned over during cooking,
as required.
NOTE: For safety in use, the grill element is
controlled by the thermostat. During
cooking, the grill cycles on and off to prevent
overheating.
Cooking time depends on the thickness of the
meat and not on its weight.
Page 13

LED timer with time control
The operation of this timer is done via 3 buttons.
The functions of the buttons are:
, Time setting knobs
Mode button
With this arrangement it is possible to select the
following four functions:
Operation period
Operation stop
Minute minder
Time-of-day
Time of day
When connected to mains supply the display
shows 12.00 o'clock and the LED
long as it is flashing, it is possible to adjust the
time via the plus
Once the time is adjusted it is stored approx. 5
seconds after the last operation, the LED
goes dark again.
It is possible to adjust the time-of-day any time it
is required. To do this, press the mode button
until
adjusted.
flashes, then the time-of-day can be
and minus button.
flashes. As
Minute minder (interval time)
In order to set the interval time, the “Mode”
button has to be pressed repeatedly until LED
is flashing. Then the interval time can be set
by using the plus and minus buttons. After
setting the interval time, it remains displayed
and the LED
now illuminated steadily. After the interval time
has run down, the alarm signal sounds (2
beeps) and the LED
Pressing any of the buttons stops the signal and
the flashing, the LED goes dark and the display
reverts to the time-of-day.
Operation period
In order to set an operation period, the mode
button has to be pressed repeatedly until the
LED
period (time frame between 0.01h and 10.00h)
can be set using the plus and minus buttons.
Once adjusted, it will be stored after approx. 5
seconds, and the LED
steadily. The display reverts to the time-of-day.
As soon as the operation period has run down,
the relay opens and the alarm signal sounds (4
beeps) and the LED
Pressing any of the buttons stops the signal and
the flashing, the LED goes dark and the relay
closes again.
is flashing. Then the desired operation
, which was flashing before, is
is flashing again.
remains illuminated
is flashing again.
13
Page 14

Operation stop
In order to set an operation stop, the mode
button has to be pressed repeatedly until the
LED
stop (time frame between time-of-day + 1 minute
and time-of-day minus 1 minute) can be set
using the plus and minus buttons. Once
adjusted it will be stored after approx. 5
seconds, and the LED remains illuminated
steadily. The display reverts to the time-of-day.
As soon as the operation stop has been
reached, the relay opens and the alarm signal
sounds (4 beeps) and the LED
Pressing any of the buttons stops the signal and
the flashing, the LED goes dark and the relay
closes again.
is flashing. Then the desired operation
is flashing.
COOKING ZONES
The zones are operated using the knobs on the
control panel .
The control knob is numbered from 1 to 12
0 - OFF
1 - Lowest heat
12 - Maximum heat
Switching on the single ring cooking zone
To switch on a cooking zone, turn the relevant
control knob to the required heat setting.
Switching on the double ring cooking
zone
Turn the relevant control knob to right to the
maximum position. The small ring cooking zone
switches on.
Turn the knob further till the position "Off" then
turn it back to the the maximum position (12).
The big ring cooking zone will switch on, too.
Switching on the casserole zone
Turn the relevant control knob to right to the
maximum position. The ring cooking zone
switches on.
Turn the knob further till the position "Off" then
turn it back to the the maximum position (12).
The oval area will switch on.
Residual Heat Indicator
This warning lamp lights up when the surface of
the cooking zone reaches a temperature which
could cause burning. This lamp also remains lit
after the heated-up area has been switched off
as long as the residual heat of the surface still
could cause burns. The lamp will only go out
when there is no more danger (temperature
below 50°C). The lamp with four lights indicates
the corresponding cooking zones. This way it is
possible to see at once which zone still hot.
14
Page 15

COOKING EQUIPMENT
Specially tested cooking and frying pans for
ceramic hobs exist.The following advice should
be considered to achieve an optimal energy
consumption as well as to avoid that overboiling
food can be burnt onto the cooking zones.
Cooking pans with aluminium or copper
bottoms are unsuitable for use. These
materials can cause stains which can not be
removed anymore.
Bottom of pans:
Cooking and frying pans should have a flat and
solid base. A base with rough edges can scratch
and leave abrasion marks on the ceramic
surface! Ask for electric saucepans.
Size of pans:
Pan or pot diameters should be a little bit larger
than the diameter of the cooking zone.
Lid of pans:
A lid prevents heat to escape.
Note:
• Always place the pan first before you switch
on the cooking zone, otherwise unnecessary
energy is consumed.
• Do not deposit items on the hob’s surface.
• The cooking zone and the bottoms of
saucepans should be dry and clean. Thus you
save unnecessary cleaning work.
• Sugar (solid or liquid) as well as plastic
material should never get onto the hot surface
of the hob. If it does happen do not turn off the
cooking zone!
• Sugar, plastic or kitchen foil remains should
immediately be scraped off the hot cooking
zone with a scraper. If the cooking zone cools
down without being cleaned it could lead to
fissures and cracks in the ceramic surface.
• The ceramic hob surface is resistant to
extreme temperatures. Neither cold nor heat
can harm it. Punctiform impacts, e.g. by the
fall of a salt shaker, can cause fissures and
cracks. The maintenance remains the same
for glass and ceramic hobs. Never use
aggressive detergents or scouring powder
and sponges with abrasive surfaces.
Caution: As soon as any crack in the heating
surface becomes visible, disconnect the appliance
immediately from the supply.
15
Page 16

Accessories delivered with the appliance
The following accessories are supplied with your
appliance :
•
Shelf for placing dishes on (roast, pastry
mounds). The dish should be put in the middle
of the shelf to balance the weight.
•
Backing tray
•
Roasting tray
It is used to collect juice when cooking in it,
place it on the shelf 2 from low.
If you do not use the roasting tray, remove it
from the oven.
In addition to the accessories supplied we
recommend you only use heatproof
dishes/pans (according to the manufacturer’s
instructions).
Removable drawer
The removable drawer is located underneath the
oven cavity.
During cooking the drawer may
become hot if the oven is in use for a long
period of time. Flammable materials such as
oven gloves, tea towels, plastic aprons etc.
should not be stored in the drawer.
Oven accessories such as baking sheets, will
also become hot, therefore care should be taken
when removing these items from the drawer
whilst the oven is in use or still hot.
To opening
•
Catch the drawer from bottom and pull it out.
•
To remove the drawer , pull it out till the stop,
than lift it slowly and pull it out completely.
Reassemble the drawer following the same
procedure in reverse.
Condense collector
The collector is used to collect condensation while
the oven is functioning. It should be place in the
drawer. After using, the collector should be emptied
and cleared.
16
Page 17

MAINTENANCE AND CLEANING
The oven should be kept clean at all
times. A build-up of fats or other
foodstuffs could result in a fire.
Before cleaning, ensure all control
knobs are in the OFF position, and
the appliance has cooled completely.
Before any maintenance or cleaning
can be carried out, you must
DISCONNECT the cooker from the
electricity supply.
Cleaning materials
Before using any cleaning materials on your
oven, check that they are suitable and that their
use is recommended by the manufacturer.
Cleaners that contain bleach should
NOT be used as they may dull the
surface finishes. A steam cleaner is not
to be used. Harsh abrasives should also
be avoided.
Ceramic glass
Important: Cleaners must not come into contact
with the ceramic glass when hot! All cleaners
must be removed with plenty of clean water after
cleaning as they may have a caustic effect when
the rings are next heated!
Do not use any aggressive cleaners, such as
e.g. grill or oven sprays, coarse scouring
cleaners or pan cleaners that cause scratches.
Clean the ceramic glass surface after each
use when it is hand warm or cold. By this means
you will avoid soiling becoming burnt on.
Remove scale and water marks, fat spots and
metallic shimmering discoloration with a
commercially available ceramic glass or
stainless steel cleaner, e.g. with "Stahl-Fix" or
"Vitroclen".
Light Soilage
1. Wipe the ceramic glass surface with a damp
cloth and a little washing up liquid.
2. Then rub dry with a clean cloth. No residues
of cleaner must be left on the surface.
3. Once a week, thoroughly clean the entire
ceramic glass surface with a commercially
available ceramic glass cleaner such as
«Vitroclen».
4. Then wipe the ceramic glass surface with
plenty of clean water and rub dry with a
clean fluff-free cloth.
You can obtain glass scrapers and ceramic
glass cleaners from your specialist retailers.
Burnt on Soilage
1. Remove burnt on sugar, melted plastic,
aluminium foil or other melted materials
immediately, while the hob is still hot, using
a glass scraper.
Important: When using the glass scraper on the
hot cooking zone, there is a risk of burns!
2. Clean the cooking surface as normal once it
is cold.
If the cooking zone has cooled down already
prior to the soilage being removed, warm it up
again for cleaning. Scratches or dark marks on
the ceramic glass surface, which have been
caused by a pan base with sharp edges, cannot
be removed. However, they do not impair the
function of the cooking surface.
As soon as any crack in the ceramic
glass surface becomes visible, disconnect
the appliance immediately from the supply to
avoid the possibility of electric shock.
The Hob Frame
Important! Do not put vinegar, lemons or scale
removers on the hob frame, otherwise mat spots
will appear.
1. Wipe the frame with a damp cloth and a little
washing up liquid.
2. Soften dried dirt with a wet cloth. Then wipe
off and rub dry.
External cleaning
We recommend for cleaning cleaners type
AXION or CIF that do not scratch the surface;
after that rinse and dry with a soft cloth. Avoid
use of metall objects, steel wool or nylon pads,
abrasive or caustic products, or diluents.
Oven Cavity
The enamelled oven cavity is best cleaned
whilst the oven is still warm.
Wipe the oven over with a soft cloth soaked in
warm soapy water after each use. From time to
time it will be necessary to do a more thorough
cleaning, using a proprietary oven cleaner.
Stubborn Soilage
1. To remove food that has boiled over or burnt
on spots, use a glass scraper.
2. Place the glass scraper at an angle to the
glass ceramic surface.
3. Remove soiling by sliding the scraper.
Oven Shelves and shelf support
To clean the oven shelves, and shelf support
soak in warm soapy water and remove stubborn
marks with a well wetted soap impregnated pad.
Rinse well and dry with a soft cloth.
Page 18

Cleaning the oven door
For a more complete cleaning of the oven door, it
is advisable to disassemble it in the following
way:
- Open the door completely.
- Turn the two locking parts on the hinge arms
to 170°;
- Partially close the door, to a 30
o
angle
- Lift the door and pull out
Refit the door by reversing the operation
described above.
locking parts
OVEN BULB REPLACEMENT
Ensure that the appliance is switched
off and disconnected from the electricity
supply before replacing the bulb to avoid
possibility of an electric shock.
If the oven bulb needs replacing, it must comply
with the following specifications:
Wattage: 25W
Voltage: 230/240V(50Hz)
Temperatures: 300ºC
Thread Type: E14
To replace the faulty bulb.
1. Turn the glass cover anticlockwise and
remove.
2. Remove the faulty bulb and replace with a
new one.
3. Refit the glass cover.
Reconnect the appliance to the electricity
supply.
18
Page 19

SOMETHING NOT WORKING
If the appliance is not working correctly, please carry out the following checks, before contacting your
local Electrolux Service Centre.
IMPORTANT: If you call out an engineer to a fault listed below, or to repair a fault caused by
incorrect use or installation, a charge will be made even if the appliance is under guarantee.
Symptoms Solutions
The cooking zones do not work? Check whether:
- the apliance is switched on,
- the control lamps are on in the operating field,
- the corresponding cooking zone is switched on,
- the switch is set to the correct heat setting,
- the fuses in the house instalation (fusebox) have
tripped. If the fuses repeatedly trip, call in an
approved electrician.
The oven does not come on Check:
- check if a cooking function/temperature has
been selected correctly
- the socket switch or the switch from the mains
supply to the cooker are ON.
It takes too long to finish the dishes, or they
are cooked too fast
Check:
- the temperature may need adjusting
If after these checks, the appliance still does not work, contact your local Service Force Centre. When
you contact the Service Centre, they will need the following information:
1. Your name, address and post code.
2. Your telephone number
3. Clear and concise details of the fault
4. The model and the serial number (see rating label)
5. Date of purchase
19
Page 20

GUARANTEE CONDITIONS
Guarantee stipulated in the contract
2 years starting from setting into function the
manufacturer will replace the damaged parts
except the cases mentioned in chapter
“Reserves”.
Conditions for applying
For applying this guarantee you have to direct to
the distributor who sold you the appliance and
submit to him your Guarantee Certificate. The
dealer will or will not overtake the expenses for
the labor and transport in accordance with their
sales conditions.
Reserves:
We draw your attention on the fact that the
guarantee will not be applied:
• if the damages are due to shock , abnominal
power variation, etc., or non-observing of the
installation and use conditions stipulated in
the Instruction book, wrong handling,
negligence or wrong, installation nonconforming to the rules imposed by the
power, gas distributor;
• if the user modified the material or took off
the marking or the serial numbers;
• if the person who made the repairing is not
certified by the manufacturer or the dealer;
• if the appliance was used for commercial or
industrial purpose or other household
purposes than what it was conceived for;
• if the appliance was bought or repaired
outside cantry territory
AFTER SALES SERVICE
Any repair work that needs to be carried out
should be done with the utmost care and
attention. For this reason we recommend that for
any problem you contact the dealer who sold it
to you.
In case of moving to another place, closing of
the shop, contact the nearest Consumers
Service (Authorized Service Center) who will
give you the address of an After Sales Service.
In case of intervention on your appliance ask
your after sales service only spare parts
certified by the Manufacturer.
20
Page 21

The symbol on the product or on its packaging indicates that
this product may not be treated as household waste. Instead it shall
be handed over to the applicable collection point for the recycling
of electrical and electronic equipment. By ensuring this product is
disposed of correctly, you will help prevent potential negative
consequences for the environment and human health, which could
otherwise be caused by inappropriate waste handling of this
product. For more detailed information about recycling of this
product, please contact your local city office, your household
waste disposal service or the shop where you purchased the
product.
Symbol na výrobku nebo jeho balení udává, že tento
výrobek nepatří do domácího odpadu. Je nutné odvézt ho do
sběrného místa pro recyklaci elektrického a elektronického
zařízení.
Zajištěním správné likvidace tohoto výrobku pomůžete zabránit
negativním důsledkům pro životní prostředí a lidské zdraví,
které by jinak byly způsobeny nevhodnou likvidací tohoto
výrobku.
Podrobnější informace o recyklaci tohoto výrobku zjistíte u
příslušného místního úřadu, služby pro likvidaci domovního
odpadu nebo v obchodě, kde jste výrobek zakoupili.
Page 22

Symbol na výrobku alebo na jeho obale znamená, že
s výrobkom sa nesmie zaobchádzať ako s domovým
odpadom. Namiesto toho ho treba odovzdať v zbernom
stredisku na recykláciu elektrických alebo elektronických
zariadení.
Zabezpečte, že tento výrobok bude zlikvidovaný správnym
postupom, aby ste predišli negatívnym vplyvom na životné
prostredie a ľudské zdravie, čo by bolo spôsobené
nesprávnym postupom pri jeho likvidácii.
Podrobnejšie informácie o recyklácii tohto výrobku získate,
ak zavoláte miestny úrad vo Vašom bydlisku, zberné
suroviny alebo obchod, v ktorom ste výrobok kúpili.
A terméken vagy a csomagoláson található szimbólum azt
jelzi, hogy a termék nem kezelhető háztartási hulladékként.
Ehelyett a terméket el kell szállítani az elektromos és
elektronikai készülékek újrahasznosítására szakosodott
megfelelő begyűjtő helyre.
Azzal, hogy gondoskodik ezen termék helyes hulladékba
helyezéséről, segít megelőzni azokat, a környezetre és az emberi
egészségre gyakorolt potenciális kedvezőtlen következményeket,
amelyeket ellenkező esetben a termék nem megfelelő
hulladékkezelése okozhatna.
Ha részletesebb tájékoztatásra van szüksége a termék
újrahasznosítására vonatkozóan, kérjük, lépjen kapcsolatba a
helyi önkormányzattal, a háztartási hulladékok kezelését végző
szolgálattal vagy azzal a bolttal, ahol a terméket vásárolta.
Page 23

From the Electrolux Group. The world’s No.1 choice
The Electrolux Group is the world’s largest producer of powered appliances for kitchen, cleaning and outdoor use. More than
55 million Electrolux Group products (such as refrigerators, washing machines, vacuum cleaners, chain saws and lawn
mowers) are sold each year to a value of approx. USD 14 billion in more than 150 countries around the world.
342 700 558 - B- 0020206-2
 Loading...