

Page 1
88101 K
Ceramic glass induction hob
Table de cuisson vetrocéramique à induction
Glaskeramische inductie-kookplaat
Installation and Operating Instructions
Instructions de montage et mode d’emploi
Montage- en gebruiksaanwijzing
Page 2

Dear Customer,
Please read these user instructions carefully and keep them to refer to
later.
Please pass the user instructions on to any future owner of the appliance.
The following symbols are used in the text:
1 Safety instructions
Warning! Information that affects your personal safety.
Important! Information that prevents damage to the appliance.
3 Useful tips and hints
2 Environmental information
2
Page 3

Contents
Operating Instructions. . . . . . . . . . . . . . . . . . . . . . . . . . . . . . . . . . . . . 4
Safety instructions. . . . . . . . . . . . . . . . . . . . . . . . . . . . . . . . . . . . . . . . . . . . . . 4
Description of the Appliance. . . . . . . . . . . . . . . . . . . . . . . . . . . . . . . . . . . . . 6
Cooking surface layout . . . . . . . . . . . . . . . . . . . . . . . . . . . . . . . . . . . . . . . . . . . 6
Control panel layout . . . . . . . . . . . . . . . . . . . . . . . . . . . . . . . . . . . . . . . . . . . . . 6
Touch Control sensor fields . . . . . . . . . . . . . . . . . . . . . . . . . . . . . . . . . . . . . 7
Displays . . . . . . . . . . . . . . . . . . . . . . . . . . . . . . . . . . . . . . . . . . . . . . . . . . . . . 8
Residual heat indicator . . . . . . . . . . . . . . . . . . . . . . . . . . . . . . . . . . . . . . . . 8
Operating the appliance. . . . . . . . . . . . . . . . . . . . . . . . . . . . . . . . . . . . . . . . . 9
Switching the appliance on and off . . . . . . . . . . . . . . . . . . . . . . . . . . . . . . . . 9
Setting the heat setting . . . . . . . . . . . . . . . . . . . . . . . . . . . . . . . . . . . . . . . . . . 9
Switching the STOP+GO function on and off. . . . . . . . . . . . . . . . . . . . . . . . . 10
Using the automatic warm-up function. . . . . . . . . . . . . . . . . . . . . . . . . . . . . 10
Locking/unlocking the control panel. . . . . . . . . . . . . . . . . . . . . . . . . . . . . . . . 11
Using the child safety device . . . . . . . . . . . . . . . . . . . . . . . . . . . . . . . . . . . . . . 12
Switching the power function on and off . . . . . . . . . . . . . . . . . . . . . . . . . . . 13
Using the timer . . . . . . . . . . . . . . . . . . . . . . . . . . . . . . . . . . . . . . . . . . . . . . . . . 14
Safety cut-out . . . . . . . . . . . . . . . . . . . . . . . . . . . . . . . . . . . . . . . . . . . . . . . . . . 17
Tips on Cooking and Frying . . . . . . . . . . . . . . . . . . . . . . . . . . . . . . . . . . . . . . 18
Cookware for induction cooking zones. . . . . . . . . . . . . . . . . . . . . . . . . . . . . . 18
Tips on energy saving . . . . . . . . . . . . . . . . . . . . . . . . . . . . . . . . . . . . . . . . . . . . 19
Examples of cooking applications . . . . . . . . . . . . . . . . . . . . . . . . . . . . . . . . . . 19
Cleaning and Care . . . . . . . . . . . . . . . . . . . . . . . . . . . . . . . . . . . . . . . . . . . . . . 21
What to do if … . . . . . . . . . . . . . . . . . . . . . . . . . . . . . . . . . . . . . . . . . . . . . . . . 22
Disposal . . . . . . . . . . . . . . . . . . . . . . . . . . . . . . . . . . . . . . . . . . . . . . . . . . . . . . . 24
Installation Instructions . . . . . . . . . . . . . . . . . . . . . . . . . . . . . . . . . . . 25
Guarantee Conditions. . . . . . . . . . . . . . . . . . . . . . . . . . . . . . . . . . . . . . 27
Customer Service Centres . . . . . . . . . . . . . . . . . . . . . . . . . . . . . . . . . 29
Service . . . . . . . . . . . . . . . . . . . . . . . . . . . . . . . . . . . . . . . . . . . . . . . . . . . . . . 31
3
Page 4

Operating Instructions
1 Safety instructions
Please comply with these instructions. If you do not, any damage re-
3
sulting is not covered by the warranty.
5 This appliance conforms with the following EU Directives:
– 73/23/EEC dated 19.02.1973 Low Voltage Directive
– 89/336/EEC dated 03.05.1989 EMC Directive inclusive of Amending
Directive 92/31/EEC
– 93/68/EEC dated 22.07.1993 CE Marking Directive
Correct use
• This appliance should be used only for normal domestic cooking and
frying of food.
• The appliance must not be used as a work surface or as a storage surface.
• Additions or modifications to the appliance are not permitted.
Children’s safety
• Small children must be kept away from the appliance.
• Only let bigger children work on the appliance under supervision.
General safety
• The appliance may only be installed and connected by trained, registered service engineers.
• Built-in appliances may only be used after they have built in to suitable built-in units and work surfaces that meet standards.
• In the event of faults with the appliance or damage to the glass ceramic (cracks, scratches or splits), the appliance must be switched off
and disconnected from the electrical supply, to prevent the possibility
of an electric shock.
• Repairs to the appliance must only be carried out by trained registered service engineers.
4
Page 5

Safety during use
• Remove stickers and film from the glass ceramic.
• There is the risk of burns from the appliance if used carelessly.
• Cables from electrical appliances must not touch the hot surface of
the appliance or hot cookware.
• Overheated fats and oils can ignite quickly. When cooking with fat or
oil (e.g. chips) do not leave the appliance unattended.
• Switch the cooking zones off after each use.
• Users with implanted pacemakers should keep their upper body at
least 30 cm from induction cooking zones that are switched on.
Safety when cleaning
• For cleaning, the appliance must be switched off and cooled down.
• For safety reasons, the cleaning of the appliance with steam jet or
high-pressure cleaning equipment is not permitted.
How to avoid damage to the appliance
• The glass ceramic can be damaged by objects falling onto it.
• The edge of the glass ceramic can be damaged by being knocked by
the cookware.
• Cookware made of cast iron, cast aluminium or with damaged bottoms can scratch the glass ceramic if pushed across the surface.
• Objects that melt and things that boil over can burn onto the glass
ceramic and should be removed straightaway.
• Do not use the cooking zones with empty cookware or without cookware.
• The ventilation gap of 5mm between the worktop and front of the
unit underneath it must not be covered.
5
Page 6
Description of the Appliance
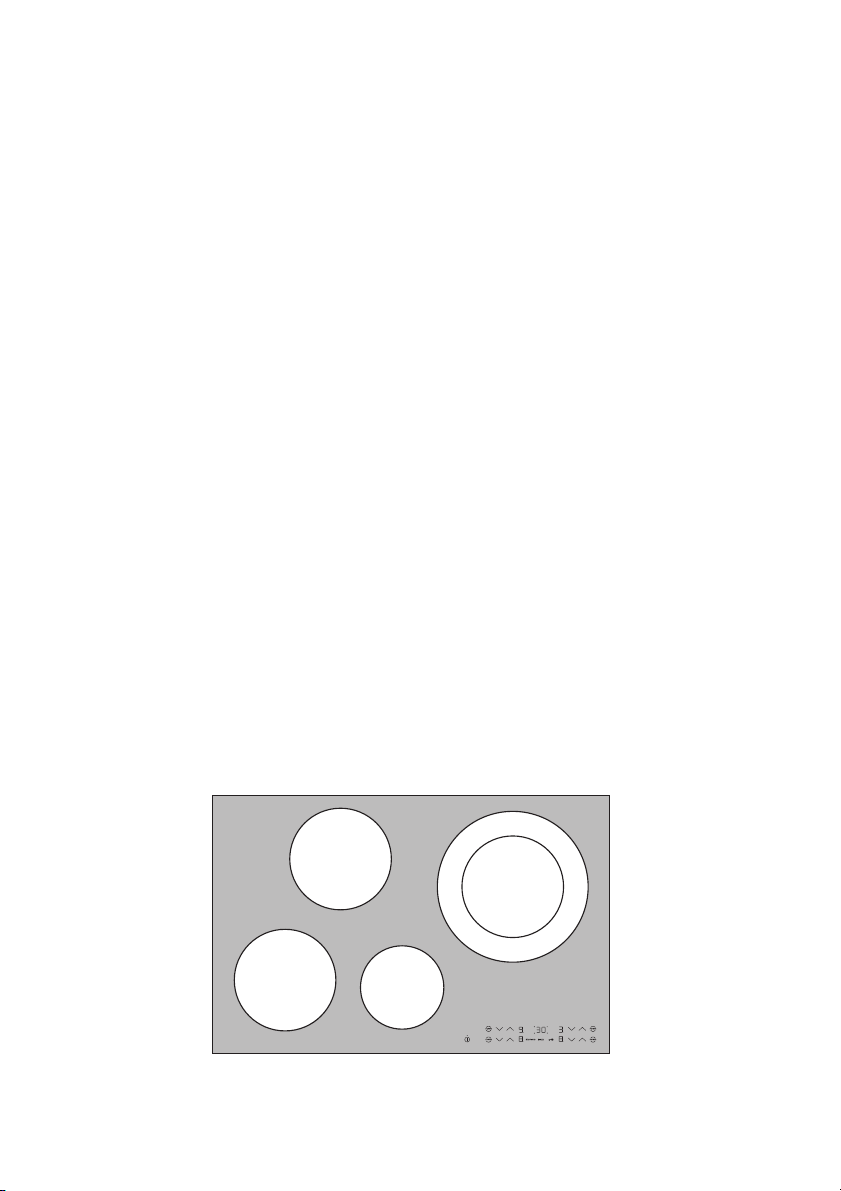
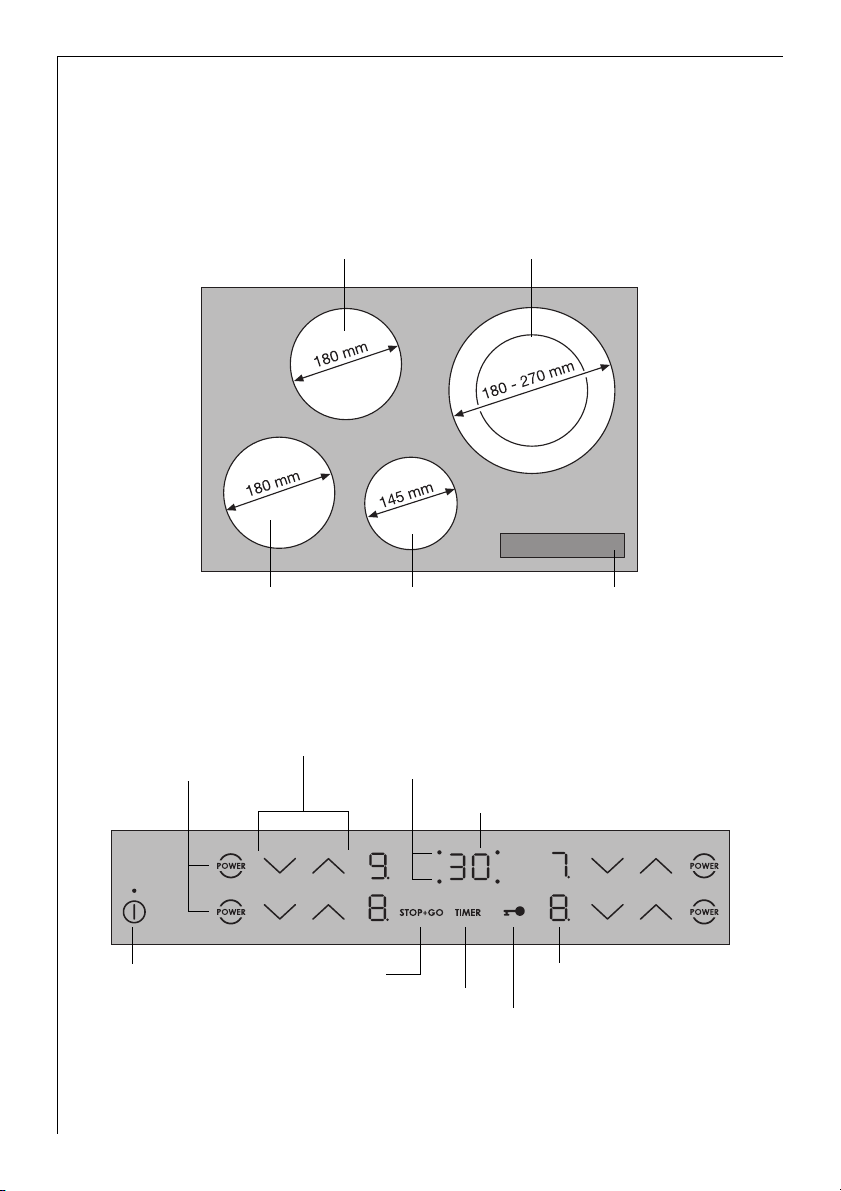
Cooking surface layout
Induction cooking zone 1800 W
with power function 2300 W
Induction cooking zone 2400W
with power function 3200W
Induction cooking zone 1800 W
with power function 2300 W
Control panel layout
Power function
On/Off
with power indicator
6
Heat setting selection
Induction cooking zone 1200W
with power function 1500 W
Cooking zone indicators
Timer function
Timer display
STOP+GO
Timer
Lock
Control panel
Display
Page 7
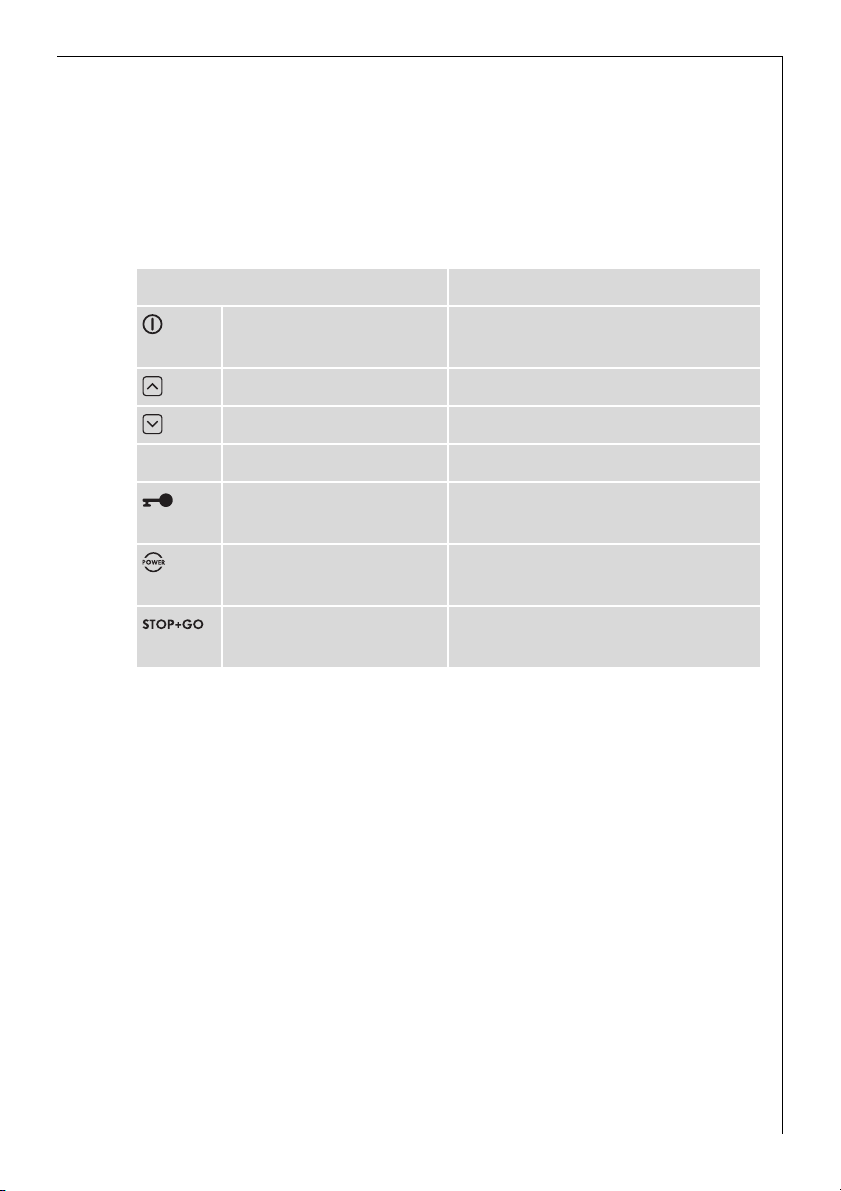
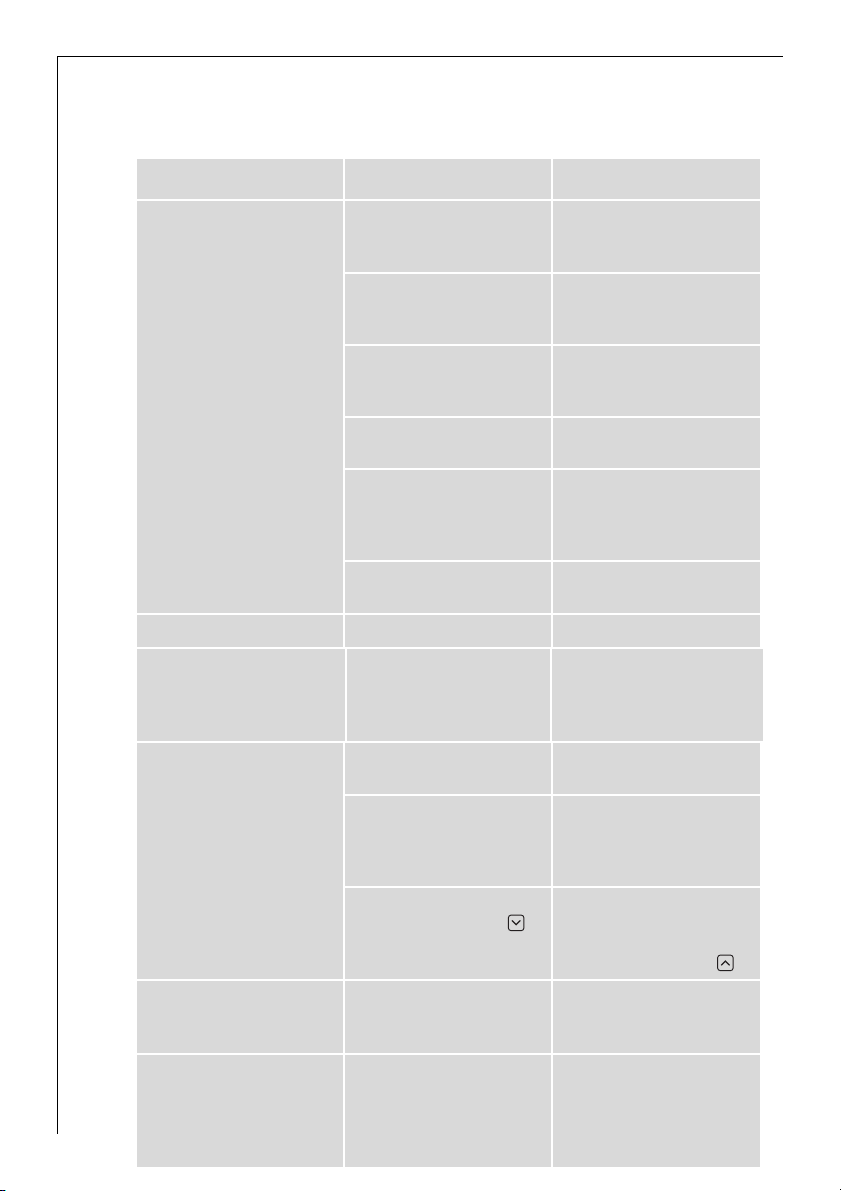
Touch Control sensor fields
The appliance is operated using Touch Control sensor fields. Functions
are controlled by touching sensor fields and confirmed by displays and
acoustic signals.
Touch the sensor fields from above, without covering other sensor
fields.
Sensor field Function
On / Off To switch the appliance on and
off
Increase settings Increasing heat setting/time
Decrease settings Decreasing heat setting/time
TIMER Timer Timer selection
Lock Locking/unlocking the control
panel
Power Switching the power function on
and off
Stop+Go To switch the Keep Warm setting
on/off
7
Page 8
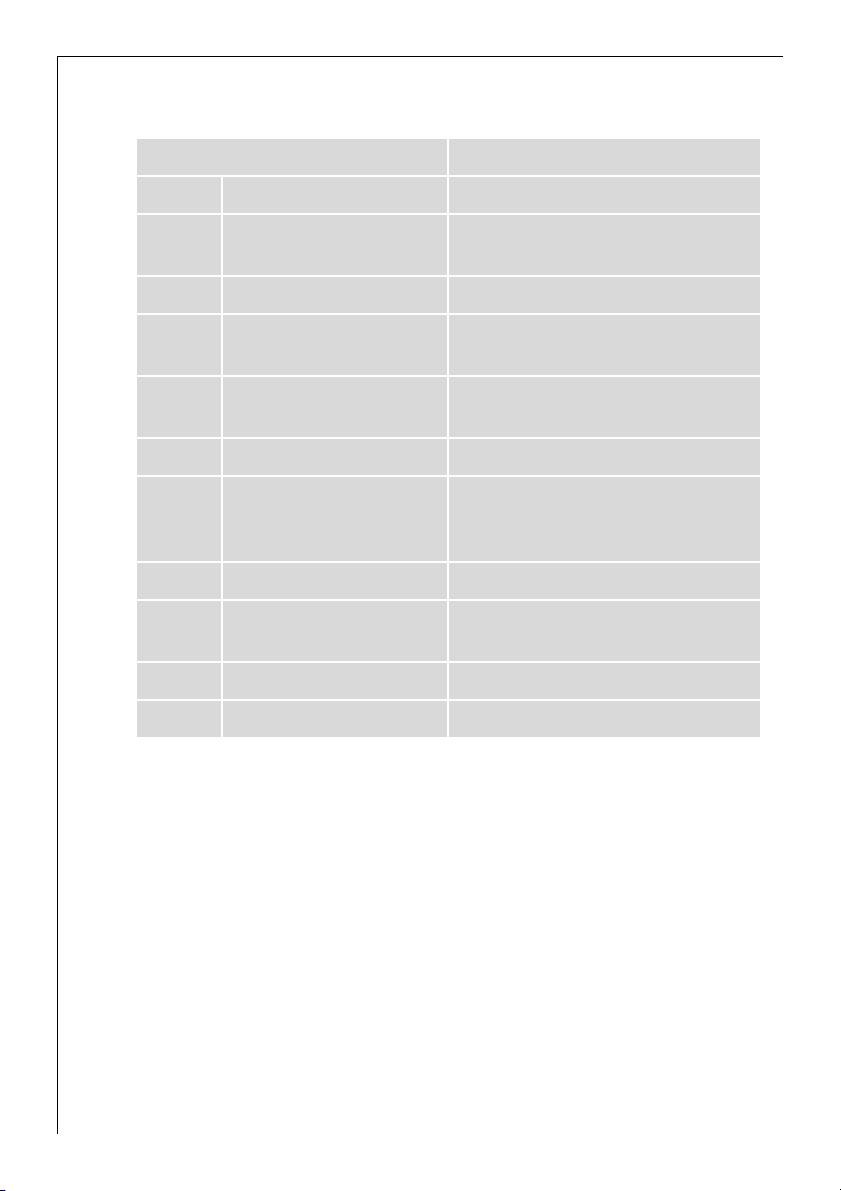
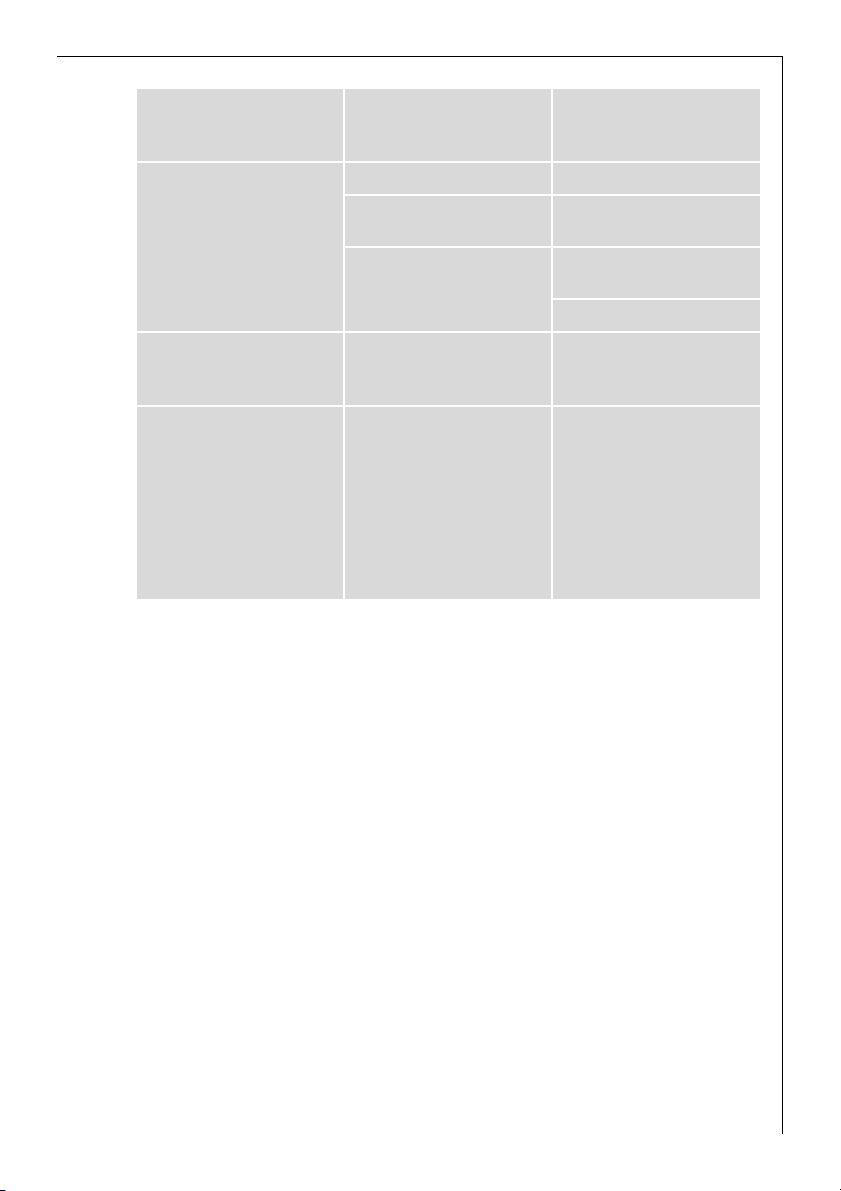
Displays
Display Description
¾ Cooking zone is switched off
u Keep warm setting Keep warm setting/STOP+GO
function is set
¿ - Ç Heat settings Heat setting is set
2 - 6 Heating setting plus
decimal point
a Automatic warm up
function
Intermediate heat setting is set
Automatic warm-up function is
activated
e Fault Malfunction has occurred
f Pan detection Cookware is unsuitable or too
small or no cookware has been
placed on the cooking zone
h Residual heat Cooking zone is still hot
l Child safety device Lock/child safety device is en-
gaged
p Power Power function is switched on
_ Safety cut-out Safety cut-out has been activated
Residual heat indicator
1 Warning! Risk of burns from residual heat. After being switched off,
the cooking zones need some time to cool down. Look at the residual
heat indicator
h .
3 Residual heat can be used for melting and keeping food warm.
The induction cooking zones create the heat required for cooking directly in the base of the cookware. The glass ceramic is merely heated
by the residual heat of the cookware.
The cooling fan switches itself on and off depending upon the temperature of the electronics.
8
Page 9
Operating the appliance
Use the induction cooking zones with suitable cookware.
3
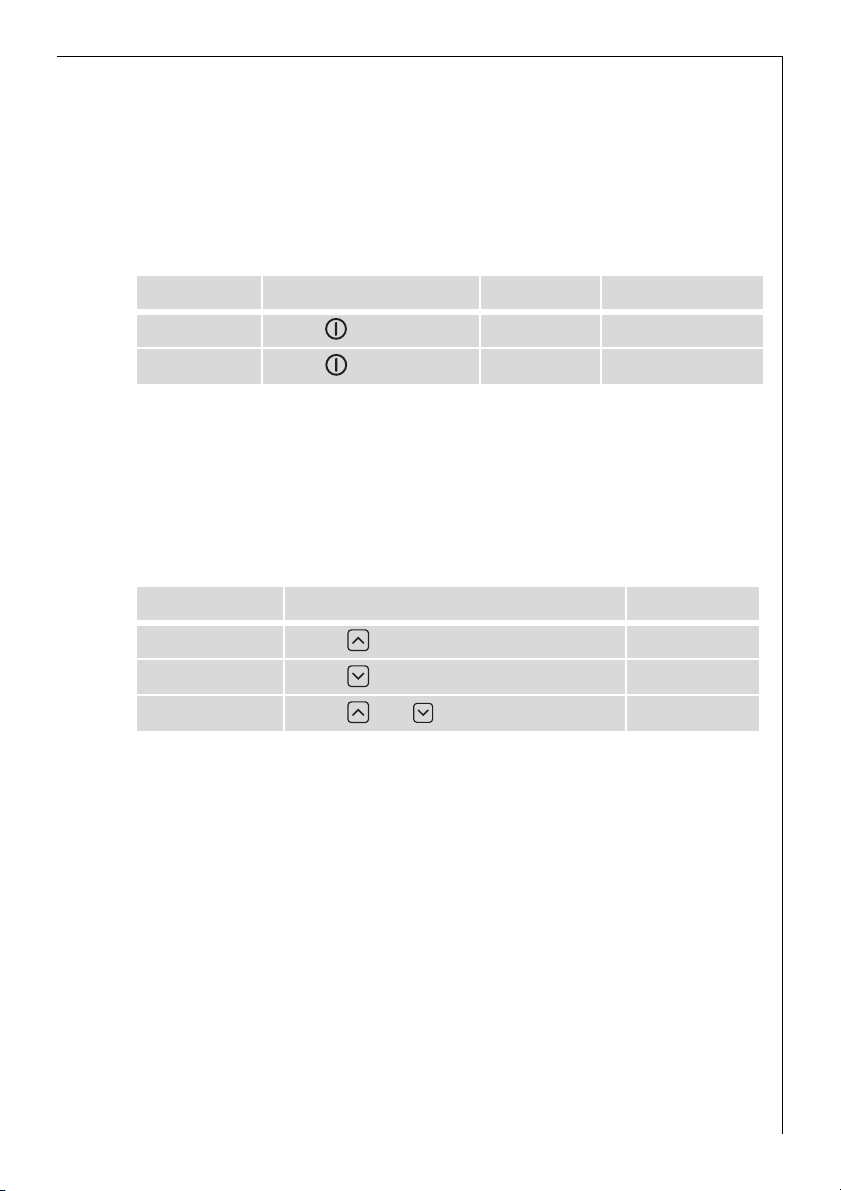
Switching the appliance on and off
Control panel Display Pilot light
Switch on Touch for 2 seconds ¾ lights up
Switch off Touch for 1 second h / none goes out
3 After switching on, within approx. 10 seconds a heat setting or a func-
tion must be set, otherwise the appliance automatically switches itself
off.
Setting the heat setting
Control panel Display
Increase Touch u to Ç / p
Decrease Touch Ç to ¾
Switch off Touch and at the same time ¾
9
Page 10
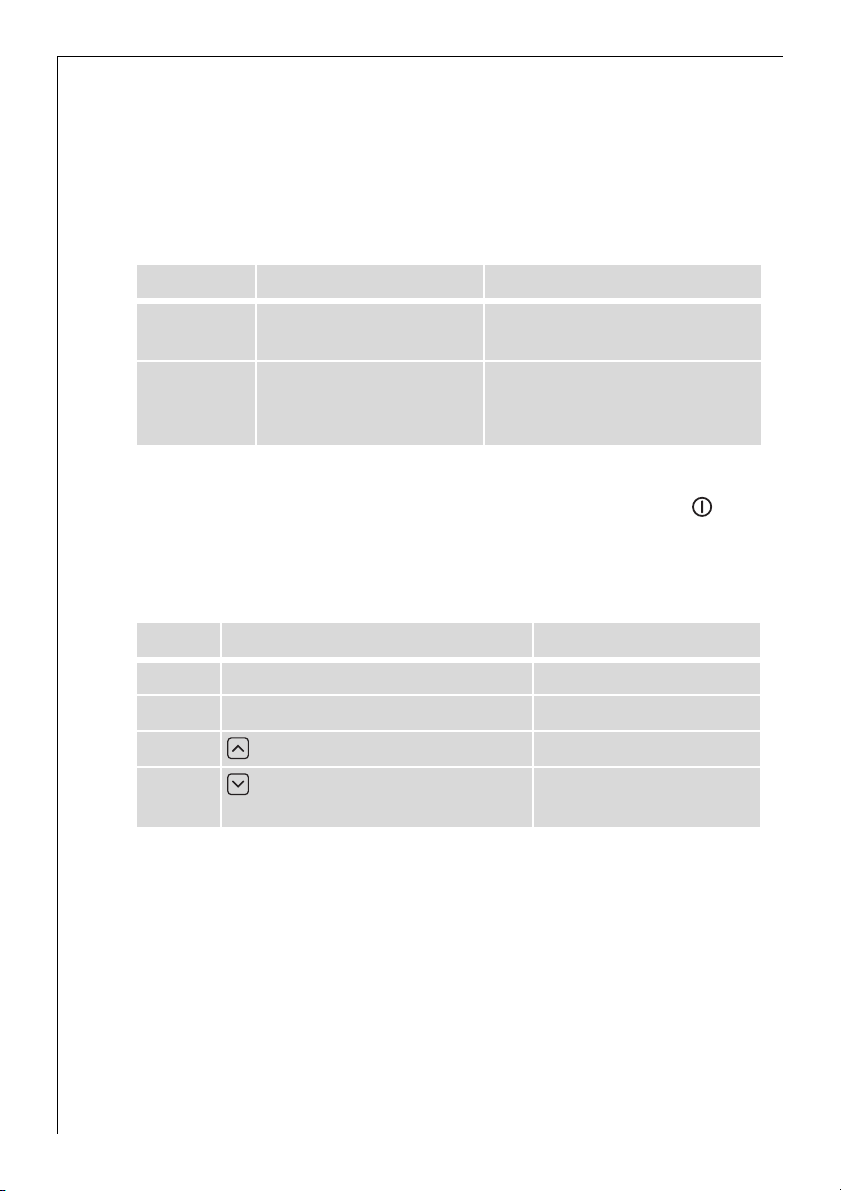
Switching the STOP+GO function on and off
The STOP+GO function simultaneously switches all cooking zones that
are switched on to the keep warm setting and then back to the heat
setting that was previously set. This function can be used to briefly interrupt and then continue the cooking process e.g. to take a telephone
call.
Control panel Display
To switch onTouch STOP+GO u
To switch
off
Touch STOP+GO heat setting that was previ-
ously set (not automatic
warm up function)
3 Timer functions are not stopped by STOP+GO.
3 STOP+GO locks the whole control panel except the sensor field .
Using the automatic warm-up function
Step Control panel Display
1. Setting the level Ç / p Ç / p
2. Place to one side for a moment Ç / p
3. touch a
4. touch in order to set the de-
sired cooking setting
All cooking zones are equipped with an automatic warm-up function.
The automatic warm-up function sets the cooking zone to the highest
setting for a certain period of time and then automatically switches
back to the cooking setting that was originally set.
Æ until ¿ / u
after 3 seconds
a
3 If during the automatic warm up a a higher heat setting is selected,
e.g. from
Á to Ã, the automatic warm up is adjusted.
3 If there is still residual heat on the cooking zone (display h), the auto-
matic warm up is not performed.
10
Page 11
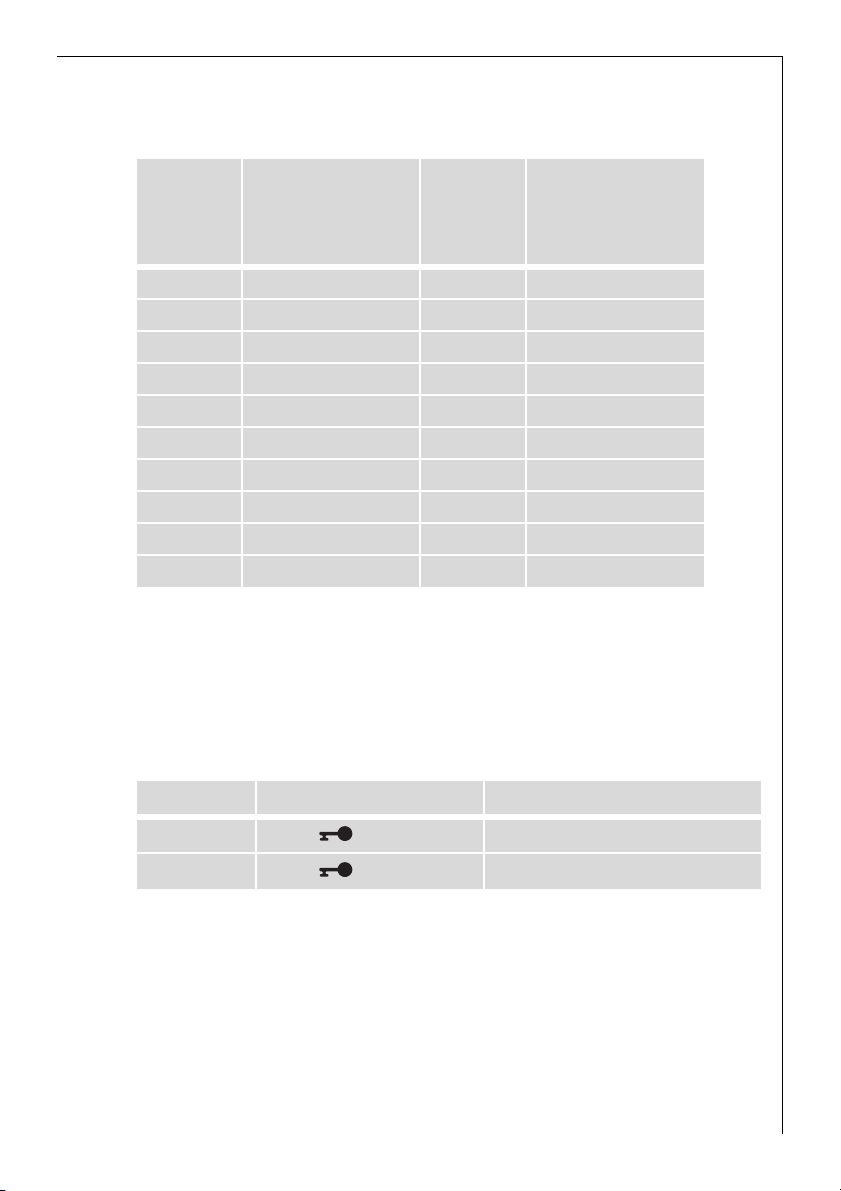
The length of time that the automatic warm up function operates depends on the heat setting selected.
Heat
setting
Length of the
automatic warm
up [min.]
Intermediate
heat set-
Length of the
automatic warm
up [min.]
ting
v 0
1 1
2 1.7 2. 3
3 4.8 3. 5.5
4 6.5 4. 8.2
5 10.2 5. 12.3
6 2 6. 2.5
7 3.5
8 4.5
9 ---
Locking/unlocking the control panel
The control panel, with the exception of the “On/Off” sensor field, can
be locked at any time in order to prevent the settings being changed
e.g. by wiping over the panel with a cloth.
Control panel Display
Switch on Touch l (for 5 seconds)
Switch off Touch previously set heat setting
3 When you switch the appliance off, the locking function is automati-
cally switched off.
11
Page 12
Using the child safety device
The child safety device prevents unintentional use of the appliance.
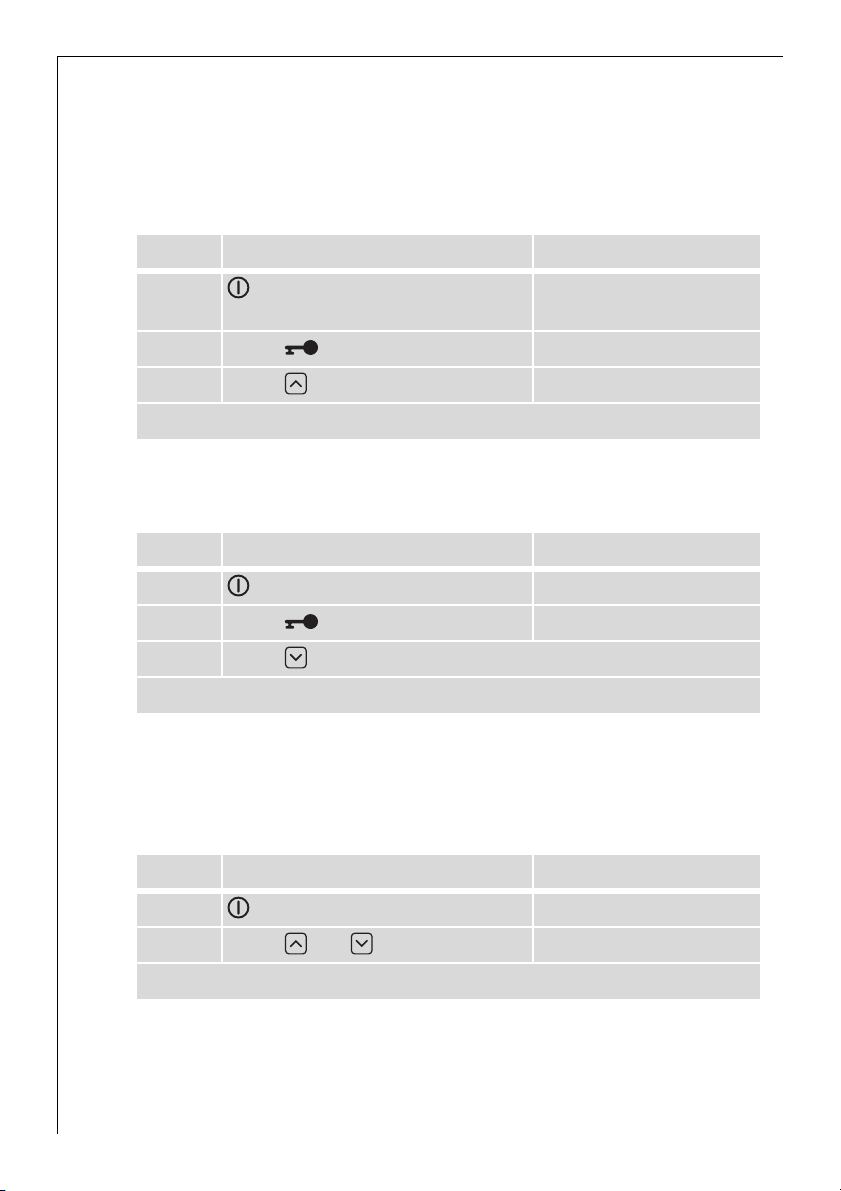
Setting the child safety device
Step Control panel Display/Signal
1. Switch on the appliance
¾
(Do not set a heat setting)
2. Touch until the signal sounds Acoustic signal
3. Touch l
Appliance switches off.
Releasing the child safety device
Step Control panel Display/Signal
1. Switch on the appliance l
2. Touch until the signal sounds Acoustic signal
3. Touch
Appliance switches off.
Overriding the child safety device
The child safety device can be released in this way for a single cooking
session; it remains activated afterwards.
12
Step Control panel Display/Signal
1. Switch on the appliance l
2. Touch and at the same time ¾ / acoustic signal
Until the appliance is next switched off, it can used as normal.
Page 13
Switching the power function on and off
The power function makes more power available to the cooking
zones, e.g. to bring a large quantity of water to the boil quickly.
The power function is activated for 10 minutes. After that the cooking
zone automatically switches back to heat setting 9.
Control panel Display
Switch on Touch p
Switch off Touch Ç
Touch Ç
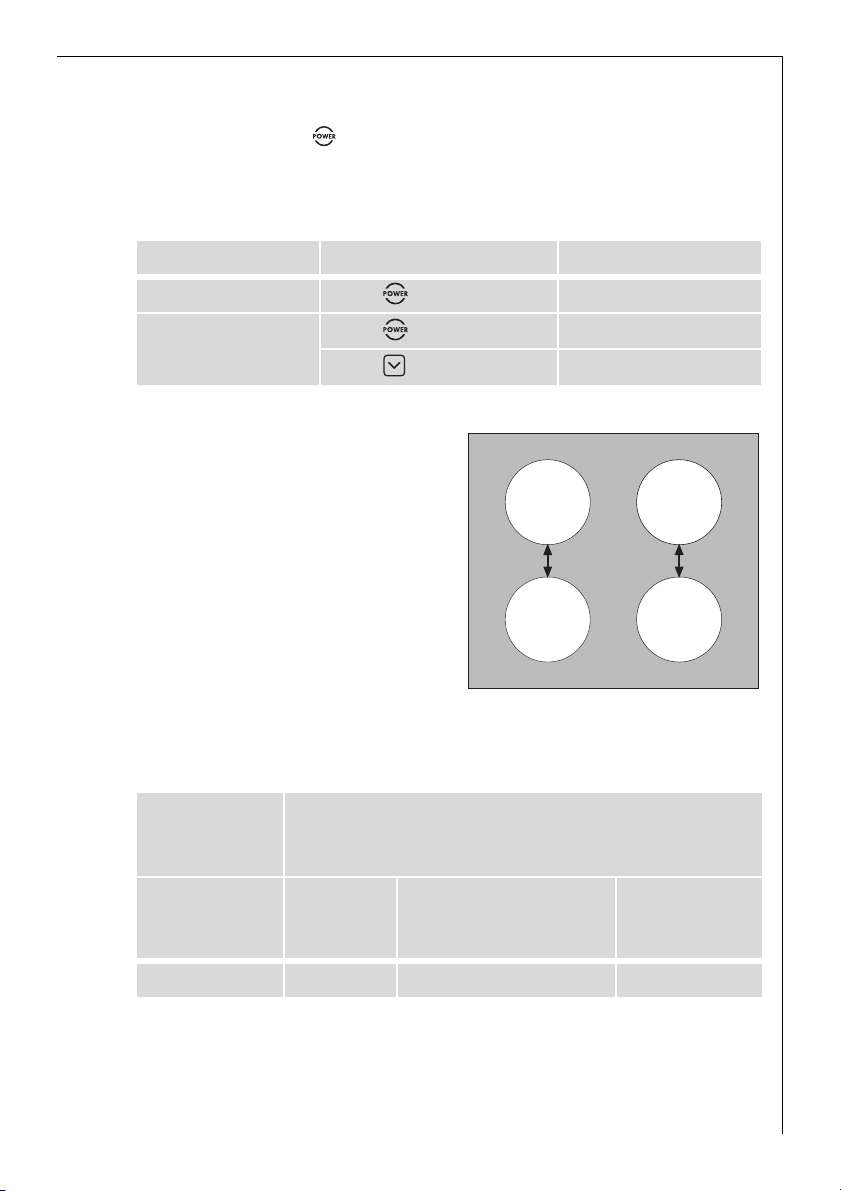
Power Management
The cooking zones have a maximum
power available to them.
If this power range is exceeded by
switching on the power function,
Power Management reduces the
heat setting of another cooking
zone.
The display for this cooking zone alternates for two minutes between
the set heat setting and the maximum possible heat setting. Thereafter the actual heat setting is
displayed.
Example:
Last
cooking zone
switched on
set
heat setting
Other cooking zone
set
heat setting
display actual
heat setting
p 9 6 alternating with 9 6
3 If the power function has ended, the cooking zones automatically
switch back to the heat setting set previously.
13
Page 14
Using the timer
All cooking zones can use each use one of the two timer functions at
the same time.
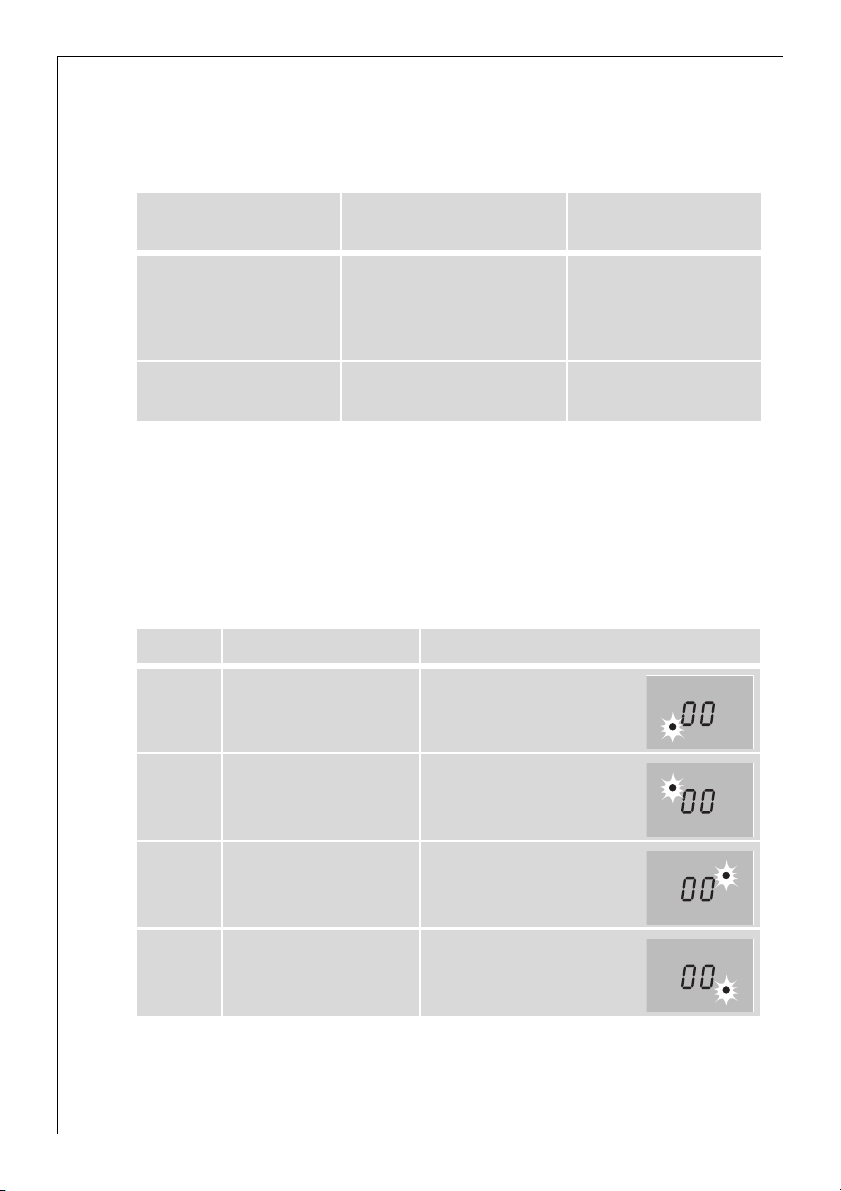
Function Condition Outcome after the
time has elapsed
Safety cut-out a heat setting is set acoustic signal
00 flashes
Cooking zone
switches off
Countdown timer cooking zones not in use acoustic signal
00 flashes
3 If a cooking zone is switched off, the timer function set is also switched
off.
3 If a heat setting is set on this cooking zone in addition to a countdown
timer, the cooking zone is switched off after the time set has elapsed.
Selecting a cooking zone
Step Control panel Display
1. Touch TIMER once Pilot light of the first
cooking zone flashes
2.º Touch TIMER once Pilot light of the second
cooking zone flashes
3. Touch TIMER once Pilot light of the third
cooking zone flashes
4. Touch TIMER once Pilot light of the fourth
cooking zone flashes
3 If the pilot light is flashing more slowly, the heat setting can be set or
modified.
14
Page 15
3 If other timer functions are set, after a few seconds the shortest re-
maining time of all the timer functions is displayed and the corresponding pilot light flashes.
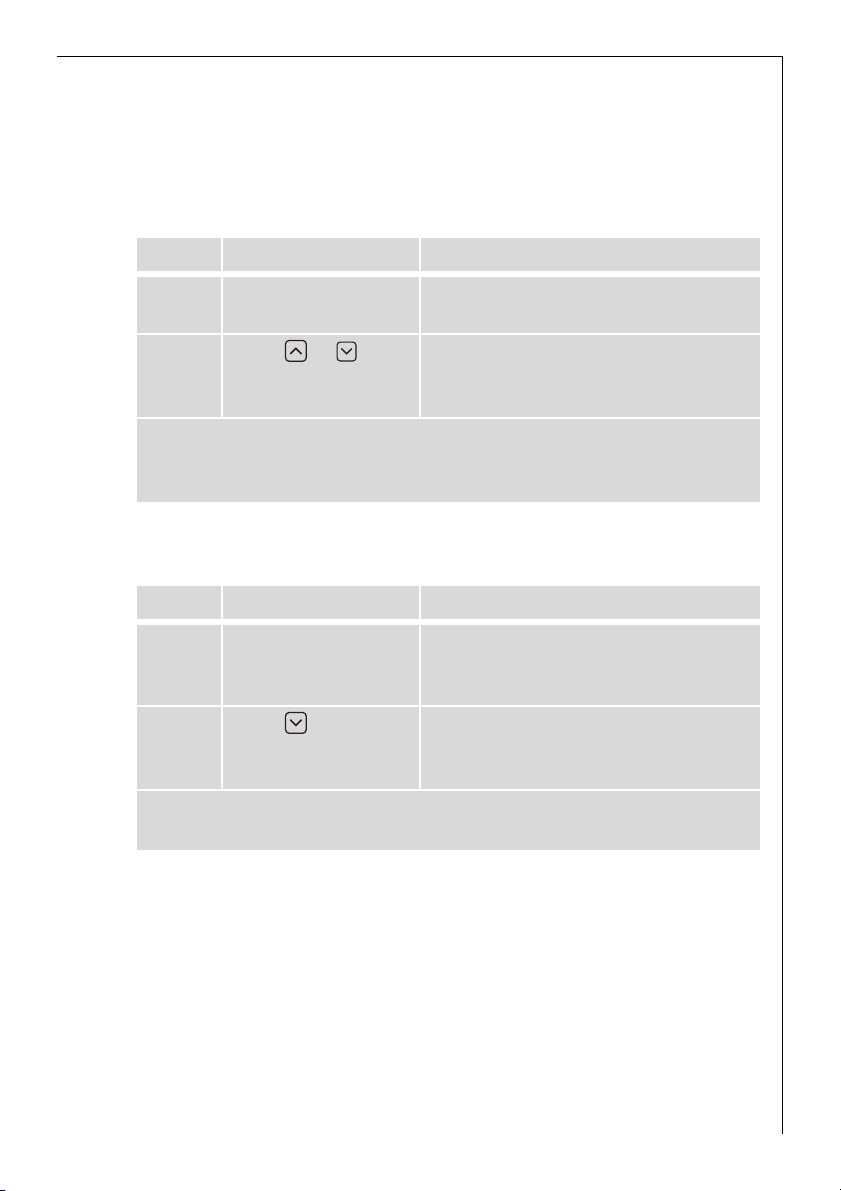
Setting the time
Step Control panel field Display
1. TIMER Select cook-
ing zone
2. Touch or for
the cooking zone selected
After a few seconds the pilot light flashes more slowly.
The time is set.
The time counts down.
Switching off the timer function
Step Control panel field Display
1. TIMER Select cook-
ing zone
2. Touch for the
cooking zone selected
The pilot light goes out.
The timer function for the selected cooking zone is switched off.
Pilot light of the cooking zone selected flashes
00 to 99 minutes
Pilot light of the cooking zone selected flashes faster
The time remaining is displayed
The time remaining counts down to
00.
15
Page 16
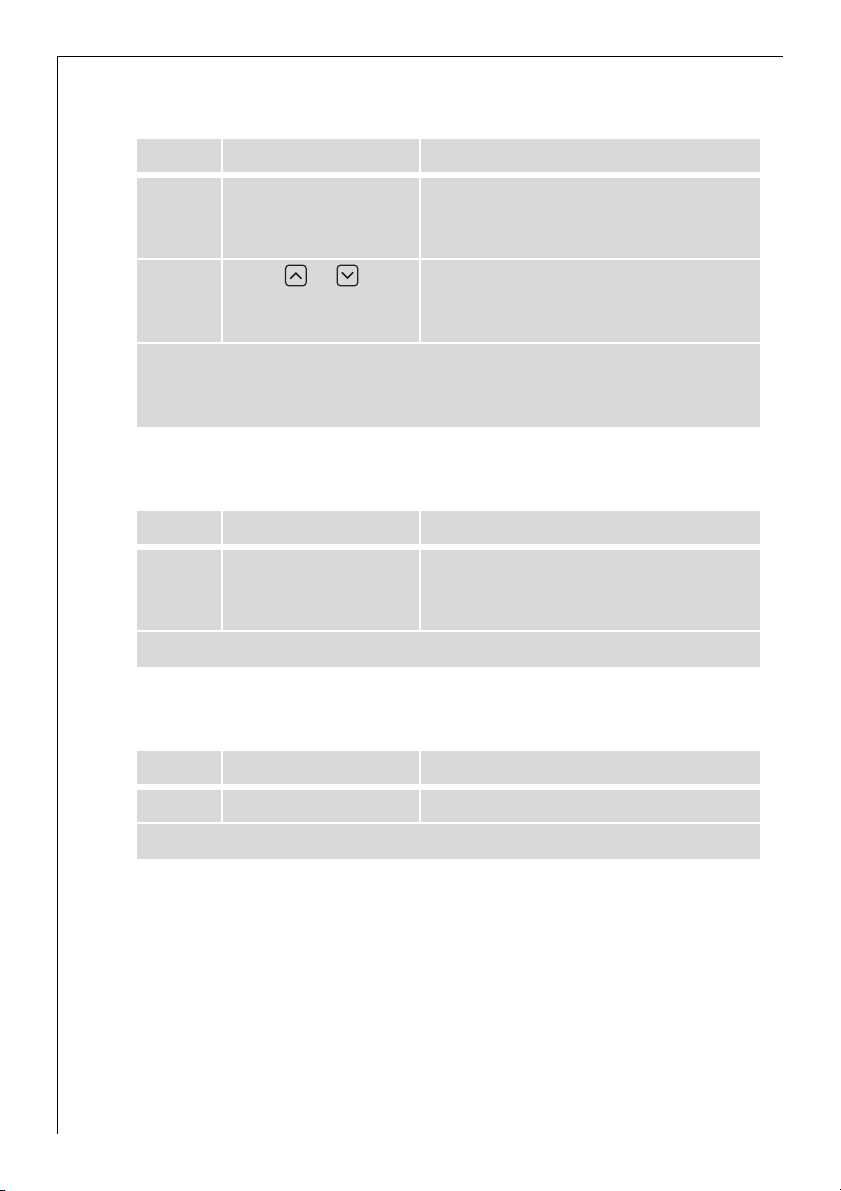
Changing the time
Step Control panel field Display
1. TIMER Select cook-
ing zone
Pilot light of the cooking zone selected flashes faster
The time remaining is displayed
2. Touch or for
01 to 99 minutes
the cooking zone selected
After a few seconds the pilot light flashes more slowly.
The time is set.
The time counts down.
Displaying the time remaining for a cooking zone
Step Control panel field Display
1. TIMER Select cooking
zone
Pilot light of the cooking zone select-
ed flashes faster
The time remaining is displayed
After a few seconds the pilot light flashes more slowly.
Switching off the acoustic signal
Step Control panel field Acoustic signal
16
1. Touch TIMER Acoustic signal to acknowledge.
Acoustic signal stops.
Page 17
Safety cut-out
Cooking surface
• If after switching on the cooking surface, a heat setting is not set for
a cooking zone within approx. 10 seconds, the cooking surface automatically switches itself off.
• If one or more sensor fields are covered for longer than approx. 10
seconds, e.g. by a pan placed upon it, a signal sounds and the cooking
surface switches off automatically.
• If all cooking zones are switched off, the cooking surface automatically switches itself off after approx. 10 seconds.
Control panel
3 Moisture (e.g. a wet cloth) or liquid boiling over onto the control panel
immediately switches all cooking zones off.
Cooking zones
• In the event of overheating (e.g. when a pan boils dry) the cooking
zone automatically switches itself off. _ is displayed. Before being
used again, the cooking zone must be set to 0 and allowed to cool
down.
• If cookware that is not suitable is used, f flashes in the display and
after 10 minutes the display for the cooking zone switches itself off.
• If one of the cooking zones is not switched off after a certain time, or
if the heat setting is not modified, the relevant cooking zone switches
off automatically.
Heat setting Switches off after
V, 1 - 2
3 - 4
5
6 - 9
6 hours
5 hours
4 hours
1.5 hours
17
Page 18
Tips on Cooking and Frying
Information on acrylamides
3
According to the latest scientific knowledge, intensive browning of
food, especially in products containing starch, can constitute a health
risk due to acrylamides. Therefore we recommend cooking at the lowest
possible temperatures and not browning foods too much.
Cookware for induction cooking zones
Cookware made of suitable
Steel, enamelled steel yes
Cast iron yes
Stainless steel if appropriately labelled by the manufacturer
Aluminium, copper, brass --Glass, ceramic, porcelain ---
3 Cookware for induction cooking zones is labelled as suitable by the
manufacturer.
Test of suitability
Cookware is suitable for induction, if …
• ... a little water is heated on an induction cooking zone set to heat
setting 9 within a few seconds.
• ... a magnet sticks to the bottom of the cookware.
3 Certain cookware can make noises when being used on induction cook-
ing zones. These noises are not a fault in the appliance and do not affect operation in any way.
Pan size
Induction cooking zones adapt automatically to the size of the cookware bottom up to a certain limit. However the magnetic part of the
cookware bottom must have a minimum diameter depending upon the
size of the cooking zone.
3 On the 270 mm cooking zone, the minimum pan base diameter of 180
mm is marked by the inner circle.
3 The cookware must be placed centrally on the cooking zone.
18
Page 19
Tips on energy saving
2 Place cookware on the cooking zone before it is switched on.
2 If possible, always place a lid on the cookware.
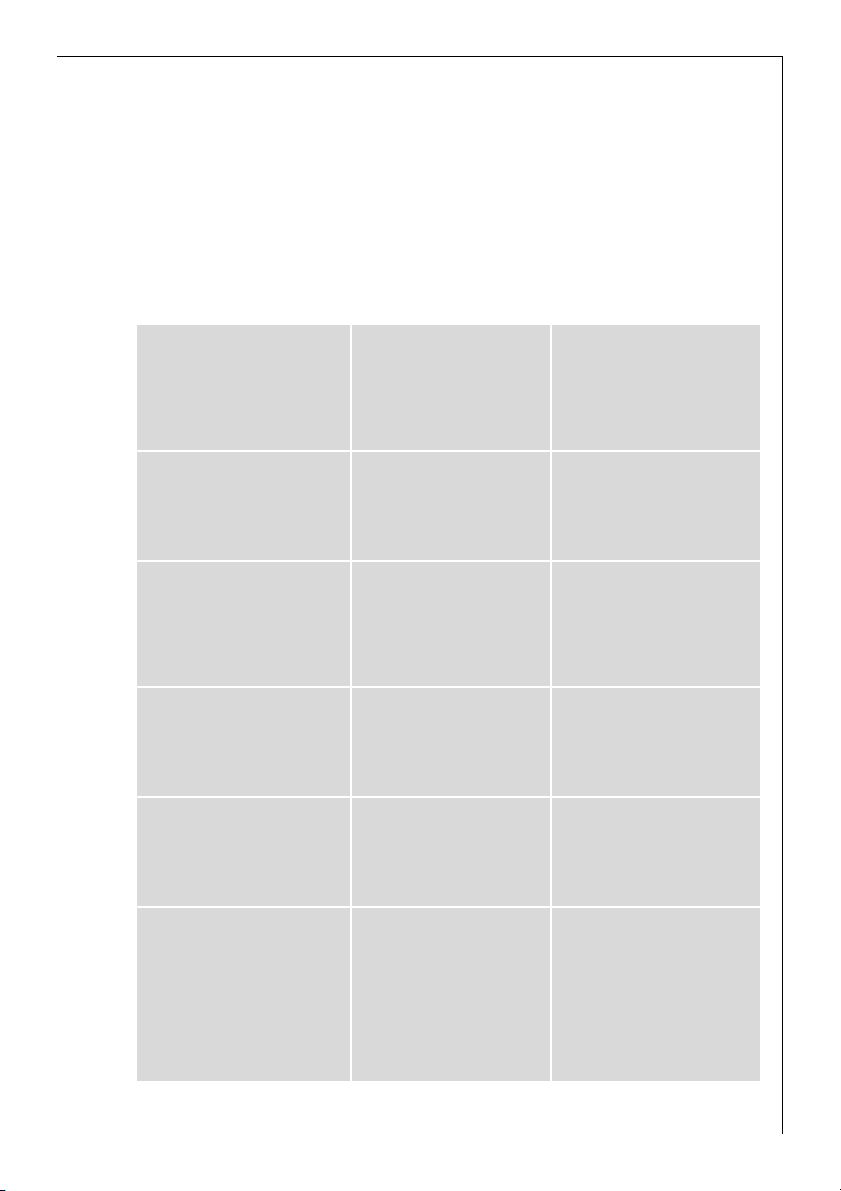
Examples of cooking applications
The information given in the following table is for guidance only.
Heat
Cooking-
setting
process
0 Off position
Keeping
u
1-2
2-3
3-4
4-5 Boiling
6-7
food
warm
Melting
Solidi-
fying
Simmer-
ing on
low heat
Steaming
Braising
Gentle
Frying
suitable for
Keeping cooked foods
warm
Hollandaise sauce,
melting butter, chocolate,
gelatine
Fluffy omelettes, baked
eggs
Simmering rice and milk-
based dishes
Heating up ready-cooked
meals
Steaming vegetables, fish
braising meat
Steaming potatoes 20-60 mins.
Cooking larger quantities
of food, stews and soups
Frying escalopes, veal
cordon bleu, cutlets, ris-
soles, sausages, liver, roux,
eggs, pancakes, dough-
nuts
Cooking
time
as required Cover
5-25 mins. Stir occasionally
10-40 mins. Cook with lid on
25-50 mins.
20-45 mins.
60-150
mins.
Steady
frying
Tips/Hints
Add at least twice as
much liquid as rice, stir
milk dishes part way
through cooking
With vegetables add
only a little liquid (a
few tablespoons)
Use only a little liquid,
e. g.: max.
for 750 g potatoes
Up to 3 l liquid plus in-
gredients
Turn halfway through
cooking
¼ l water
19
Page 20

Heat
setting
Cooking-
process
suitable for
Cooking
time
Tips/Hints
7-8
Heavy
Frying
Hash browns, loin steaks,
steaks, Flädle (pancakes
for garnishing soup)
5-15 mins.
per pan
Turn halfway through
Boiling
Searing
9
Deep
Boiling large quantities of water, cooking pasta, searing meat
(goulash, pot roast), deep frying chips
frying
The power function is suitable for heating large quantities of liquid.
cooking
20
Page 21
Cleaning and Care
Take care! Risk of burns from residual heat.
1
Let the appliance cool down.
1 Warning! Sharp objects and abrasive cleaning materials will damage
the appliance. Clean with water and washing up liquid.
1 Warning! Residues from cleaning agents will damage the appliance.
Remove residues with water and washing up liquid.
Cleaning the appliance after each use
1.Wipe the appliance with a damp cloth and a little washing up liquid.
2.Rub the appliance dry using a clean cloth.
Removing deposits
1.Place a scraper on the glass ceramic surface at an angle.
2.Remove residues by sliding the blade over the surface.
3.Wipe the appliance with a damp cloth and a little washing up liquid.
4.Rub the appliance dry using a clean cloth.
Remove
Type of dirt
sugar, food containing sugar yes --plastics, tin foil yes --limescale and water rings --- yes
fat splashes --- yes
shiny metallic discolorations --- yes
*Scrapers and cleaners for glass ceramic and stainless steel can be purchased in specialist shops
imme-
diately
when the appliance has
cooled down
using
a scraper*
cleaner for glass ce-
ramic or stainless
steel*
3 Remove stubborn residues with a cleaner for glass ceramic or stainless
steel.
3 Scratches or dark stains on the glass ceramic that cannot be removed
do not however affect the functioning of the appliance.
21
Page 22
What to do if …
Problem Possible cause Remedy
The cooking zones will not
switch on or are not functioning
The residual heat indicator
is not displaying anything
The automatic warm up
function is not switching
itself on
More than 10 seconds have
passed since the appliance
was switched on
The lock is switched on l Switch off the lock (See
The child safety device is
switched on
Several sensor fields were
touched at the same time
The sensor fields are partly
covered by a damp cloth or
with liquid
Safety cut-out has been
triggered
STOP+GO is activated Switching off STOP+GO
The cooking zone was only
on for a short time and is
therefore not hot
There is still residual heat
on the cooking zone h
The highest heat setting is
set Ç
The heat setting was set
using the sensor field
l
Switch the appliance on
again.
the section “Locking/unlocking the control panel”)
Deactivate the child safety
device (See the section
“Child safety device”)
Only touch one sensor field
Remove the cloth or the
liquid.
Switch the appliance on
again.
Switch the appliance on
again
If the cooking zone is supposed to be hot, call the
Customer Service Department.
Let the cooking zone cool
down
The highest heat setting
has the same power as the
automatic warm up function
1. Switching off the cook-
ing zone
2. Set the cooking zone us-
ing the sensor field
22
Repeated acoustic signal
(6x), appliance switches off
Acoustic signal sounds and
appliance switches itself on
and then off again; after 5
seconds another acoustic
signal sounds
One or more sensor fields
have been covered for
longer than 10 seconds
The On/Off sensor field has
been covered up, e.g. by a
cloth
Uncover sensor field
Do not place any objects
on the control panel
Page 23
Display is switching between two heat settings
Power management is reducing the power of this
cooking zone
See the section “Switching
the power function on and
off”
f flashes Unsuitable cookware Use suitable cookware
No cookware on the cooking zone
The diameter of the bottom of the cookware is too
small for the cooking zone
Place cookware on the
cooking zone
Move onto a smaller cooking zone
Use suitable cookware
_ is lit Overheating protection for
the cooking zone has been
triggered
e and number are dis-
played
Electronics fault Disconnect the appliance
Switch off the cooking
zone. Switch the cooking
zone on again
from the electrical supply
for a few minutes (Take the
fuse out of the house’s
wiring system)
If after switching on again,
e is displayed again, call
the customer service department
If you are unable to remedy the problem by following the above
suggestions, please contact your dealer or the Customer Care Department.
1 Warning! Repairs to the appliance are only to be carried out by quali-
fied service engineers. Considerable danger to the user may result from
improper repairs.
3 If the appliance has been wrongly operated, the visit from the customer
service technician or dealer may not take place free of charge, even
during the warranty period.
23
Page 24

Disposal
Packaging material
2
The packaging materials are environmentally friendly and can be recycled. The plastic components are identified by markings, e.g. >PE<,
>PS<, etc. Please dispose of the packaging materials in the appropriate
container at the community waste disposal facilities.
2 Old appliance
Please dispose of your old appliance in line with the guidelines for disposal in your community.
24
Page 25

Installation Instructions
Safety instructions
The laws, ordinances, directives and standards in force in the country of
use are to be followed (safety regulations, proper recycling in accordance with the regulations, etc.)
Installation may only be carried out by a qualified electrician.
The minimum distances to other appliances are to be observed.
Drawers may only be installed with a with protective floor directly
under the appliance.
The cut surfaces of the work top are to be protected against moisture
using a suitable sealant.
The sealant seals the appliance to the work top with no gap.
Do not use silicon sealant between the appliance and the work top.
When building in, protect the underside of the appliance from steam
and moisture, e.g. from a dishwasher or oven.
Avoid installing the appliance next to doors and under windows. Otherwise hot cookware may be knocked off the rings when doors and windows are opened.
1 WARNING!
Risk of injury from electrical current.
• The electrical mains terminal is live.
• Make electrical mains terminal free of voltage.
• Observe connection schematic.
• Observe electrical safety rules.
• Ensure anti-shock protection through correct installation by a quali-
fied electrician.
• The appliance must be connected to the electrical supply by a qualified electrician.
1 IMPORTANT!
Risk of injury from electrical current.
Loose and inappropriate plug and socket connections can make the terminal overheat.
• Have the clamping joints correctedly installed by a qualified electrician.
• Use strain relief clamp on cable.
25
Page 26

• In the event of single-phase or two-phase connection, the appropriate mains cable of type H05BB-F Tmax 90° (or higher) must be used.
• If this appliance’s mains cable is damaged, it must be replaced by a
special cable (type H05BB-F Tmax 90°; or higher). The latter is available from the Customer Care Department.
A device must be provided in the electrical installation which allows the
appliance to be disconnected from the mains at all poles with a contact
opening width of at least 3 mm.
Suitable isolation devices include line protecting cut-outs, fuses (screw
type fuses are to be removed from the holder), earth leakage trips and
contactors.
26
Page 27

Guarantee Conditions
Belgium
DECLARATION OF GUARANTEE TERMS.
Our appliances are produced with the greatest of care. However, a defect may still occur. Our consumer services department will repair this upon request, either during or after the guarantee period. The service life of the appliance will not, however, be reduced as a result.
This declaration of guarantee terms is based on European Union Directive 99/44/EC and the provisions of the Civil Code. The statutory rights that the consumer has under this legislation are not
affected by this declaration of guarantee terms.
This declaration does not affect the vendor's statutory warranty to the end user. The appliance is
guaranteed within the context of and in adherence with the following terms:
1. In accordance with provisions laid down in paragraphs 2 to 15, we will remedy free of charge any
defect that occurs within 24 months from the date the appliance is delivered to the first end user.
These guarantee terms do not apply in the event of use for professional or equivalent purposes.
2. Performing the guarantee means that the appliance is returned to the condition it was in before
the defect occurred. Defective parts are replaced or repaired. Parts replaced free of charge become
our property.
3. So as to avoid more severe damage, the defect must be brought to our attention immediately.
4. Applying the guarantee is subject to the consumer providing proof of purchase showing the pur-
chase and/or delivery date.
5. The guarantee will not apply if damage caused to delicate parts, such as glass (vitreous ceramic),
synthetic materials and rubber, is the result of inappropriate use.
6. The guarantee cannot be called on for minor faults that do not affect the value or the overall reli-
ability of the appliance.
7. The statutory warranty does not apply when defects are caused by:
• a chemical or electrochemical reaction caused by water,
• abnormal environmental conditions in general,
• unsuitable operating conditions,
• contact with harsh substances.
8. The guarantee does not apply to defects due to transport which have occurred outside of our re-
sponsibility. Nor will the guarantee cover those caused by inadequate installation or assembly, lack
of maintenance or failure to respect the assembly instructions or directions for use.
9. Defects that result from repairs or measures carried out by people who are not qualified or expert
or defects that result from the addition of non-original accessories or spare parts are not covered
by the guarantee.
10. Appliances that are easy to transport may be delivered or sent to the consumer services depart-
ment. Home repairs are only anticipated for bulky appliances or built-in appliances.
11 . If the appliances are built-in, built-under, fixed or suspended in such a way that removing and re-
placing them in the place where they are fitted takes more than half an hour, the costs that result
therefrom will be charged for. Connected damage caused by these removal and replacement operations will be the responsibility of the user.
12. If, during the guarantee period, repairing the same defect repeatedly is not conclusive, or if the re-
pair costs are considered disproportionate, in agreement with the consumer, the defective appliance may be replaced with another appliance of the same value.
In this event, we reserve the right to ask for a financial contribution calculated according to the
length of time it has been used.
13. A repair under guarantee does not mean that the normal guarantee period will be extended nor
that a new guarantee period begins.
14. We give a twelve month guarantee for repairs, limited to the same defect.
15. Except in the event where liability is legally imposed, this declaration of guarantee terms excludes
any compensation for damage outside the appliance for which the consumer wishes to assert his
rights. In the event of legally admitted liability, compensation will not exceed the purchase price
paid for the appliance.
These guarantee terms are only valid for appliances purchased and used in Belgium. For exported
appliances, the user must first make sure that they satisfy the technical conditions (e.g.: voltage,
frequency, installation instructions, type of gas, etc.) for the country concerned and that they can
27
Page 28

withstand the local climatic and environmental conditions. For appliances purchased abroad, the
user must first ensure that they meet the qualifications required in Belgium. Non-essential or requested adjustments are not covered by the guarantee and are not possible in all cases.
Our consumer services department is always at your disposal, even after the guarantee period has
expired.
Address for our consumer services department:
ELECTROLUX HOME PRODUCTS BELGIUM
Bergensesteenweg, 719 - 1502 LEMBEEK
Tel.: 02.363.04.44
Weitere Kundendienststellen im Ausland
In diesen Ländern gelten die Garantiebedingungen der örtlichen Partner. Diese können dort eingesehen werden.
Further after-sales service agencies overseas
In these countries our AEG agents’ own guarantee conditions are applicable. Please obtain further details direct.
Autres agences étrangères assurant le service après-vente
Dans ces pays, les conditions de garantie des concessionnaires de la région sont valables. Vous pouvez les consulter sur place.
Otros puntos de Postventa en el extranjero
En estos países rigen las condiciones de nuestros representantes locales.
las cuales pueden ser consultadas allí mismo.
Ulteriori uffici del servizio tecnico assistenza clienti all’estero
In questi paesi sono valide le condizioni di garanzia dei partner locali.
Queste condizioni possono essere esaminante sul luogo.
28
Serviços de assistência técnica no estrangeiro
Nestes países são válidas as condições de garantia dos concessionários
locais, podendo aí ser consultadas.
További vevöszolgálati irodák külföldön
Ezekben az országokban a mi AEG vevöszolgálatainknál saját
jótállási feltételek alkalmazhatók. A további adatokat kérjük közvetlenül szerezzék be.
Servisne službe
Na garancijskem listu boste našli seznam pooblašèenih servisnih
služb AEG.
Page 29
Customer Service Centres
Belgium
Electrolux Home Products Belgium
ELECTROLUX SERVICE
Bergensesteenweg 719
1502 Lembeek
E-mail:
consumer.services@electrolux.be
Consumer services 02/363.04.44 02/363.04.00
Tel.: Fax.:
02/363.04.60
U.A.E. Abu Dhabi
Universal Trading Company
P.O. Box 43 99
Tel.: 335331
Egypt
Middle East Commercial
Center
P.O. Box 19
Kairo-Heliopolis
Tel.: 29917/31634
Australia
ANDI-Co Pty. Ltd
9 Kingston Town Close
Oakleigh VIC 3166
Tel.: (03) 9569 1235
Fax: (03) 9569 1450
Bahrain/Arabian Gulf
A.A. Zayani & Sons
P.O. Box 9 32
Bahrain
Tel.: 261060
Bulgaria
Electrolux Bulgaria E.O.O.D.
91 Levski Blvd.
1000 Sofia
Tel.: 2 806676
Fax. 2 980 5276
Cyprus
Hadjikyrlakos & Sons Ltd.
Prodromou 121
P.O. Box 21587
Nicosia 1511
Service Telephones:
Nicosia 02 481226
Limassol 05 562182
Larnaca 04 633929
Paphos 06 932 699
Jordan
Jordan Household
Supply Co. Ltd.
P.O. Box 3/68
Amman/Tel.: 69 70 50
Canada
EURO-LINE Appliances
2150 Winston PARK Drive 20
Oakville, Ontario L6H 5V1
Tel.: 905 829 3980
Fax: 905 829 3985
Korea (South)
Core Incorp.
3/F Chewoo Bldg.
200 Nonhyun-Dong
Kangnam-Ku
Seoul
Telefon 82 2 549 89 61
Croatia
Electrolux D.O.O.
Suplova 7
10000 Zagreb
Tel.: 1 61 19512
Fax: 1 61 19513
Kuwait/Arabian Gulf
Ali Al-Ghanim Est.
P.O. Box 10 83
Tel.: 5322463
Fax: 5242114
Lebanon
Adib & Assaferi
P.O. Box 539
Tripoli
Malta
ITC
International Trading Company
White House Building
Mountbatte Street
Blata L-Bajda/Tel.: 220644
Mauritius
Happy World Centre Ltd.
P.O. 7 54
1 Chausee Street
Port Louis
Tel.: 25355
Namibia
AEG NAMIBIA (PTY)
LIMITED-Jeppe Street
Northern Industrial Area
Windhoek
Tel.: (061) 21-6082/4
Fax: (061) 217838
New Zealand
Euro-Life New Zealand Ltd.
Privat Bag
58 Symonds Street
Auckland
Tel.: (09) 525 2222
Nouvelle Caledonie
Socometra N.C.
B.P. 483
Nouman
Tel.: 275444
Oman
Moshin Haider Darwish
P.O. Box 1 35
Muscat
Tel.: 703743
29
Page 30

Estonia
Electrolux Estonia Ltd.
Mustamäe tee 24
EE0006 Tallinn
Tel.: (372) 6 650 090
Fax: (372) 6 650 092
Hongkong
Wo Kee Services Ltd.
585-609 Castle Peak Road
Kwai Chung N.T.
Hongkong
Tel.: 2494 4000
Israel
Electricity & Electronic
Services-Evis LTD.
19 Hataasia st.
Raanana,
Industrial area 43654
Tel: 972-9-7448118
Fax: 972-9-7603618
e-mail:evis@evis.co.il
Japan
Electrolux Japan Ltd.
Domestic Appliances
Department
Maruzen Showa Warehouse
Building
Tookai 4-5-12, Ota-ku
143-006 Tokyo
Tel.: 0120-13-7117
Fax: 03-3790-5257
Thailand
OLYMPIA Thai Ltd.
44 Ratchadapisek Road
10320 Bangkok
Tel.: 2 513 6111
Fax: 2 513 2574
Hungary
Electrolux Lehel KFT
Erzsébet Királyné útja 87.
1142 Budapest
Tel.: 00361/467-3200
Latavia
Electrolux Latavia Ltd.
Terlaton Street 42/44
1011 Riga
Tel.: 371 2 297821
Fax: 371 2 821286
Lthuania
Electrolux Lthuania
Verkui 29
2600 Vilnus
Tel.: 372 272 3326
Fax: 372 272 3366
Malaysia
Arzbergh Engineering
No. 49A/B, Jalan Petaling
Utama 7
4600 Petaling Jaya
Tel.: 3 795 1084
Fax: 3 795 1082
Singapore
Arzbergh Engineering
19 Tanglin Road 06-07
Singapore 247909
Tel.: 65 7356572
Fax: 7351124
Slovakia Rep.
Electrolux Slovakia S.R.O.
Seberiniho 1
821 03 Bratislava
Tel.: 02 4333 4322, 4355
Fax: 02 4333 6976
Syria
Masri & Shami
P.O. Box 24 96
Damascus
Tel.: 214080
Poland
Electrolux Poland Sp. zo.o.
ul. Domaniewska 41
02-034 Warszawa
tel.: 022 874 33 33
fax: 022 874 33 00
Russia
Electrolux Russia Ltd.
16 Olympiysky prospekt
129090 Moscow
Tel.: (095) 937 7837
Fax: (095) 926 5513
Saudi Arabia
Alia Trading Corporation
P.O. Box 4101
King Abdul Aziz Street
Riyadh
Tel.: 4645977
Al Nahas Est.
Musaidia Market I
P.O. Box 1 15 29
Jeddah
Tel.: 6606852
Slovenia
Electrolux Slovenia D.O.O.
Traska Ul. 132
1000 Ljubljana
Tel.: 61 1234 137
Fax: 61 1234 238
South Africa
AEG (Pty) Ltd.
55, 12th Road
P.O. Box 1 02 64
Kew/Johannesburg 2000
Tel.: 8069111
30
Page 31

Service
In the event of technical faults, please first check whether you can
remedy the problem yourself with the help of the operating instructions (section “What to do if…”).
If you were not able to remedy the problem yourself, please contact the
Customer Care Department or one of our service partners.
In order to be able to assist you
quickly, we require the following
information:
– Model description
– Product number (PNC)
– Serial number (S No.)
(for numbers see rating plate)
– Type of fault
– Any error messages displayed by
the appliance
– three digit letter-number combination for glass ceramic
So that you have the necessary reference numbers from your appliance
at hand, we recommend that you write them in here:
Model description: .....................................
PNC: .....................................
S No: .....................................
31
Page 32

Lors de sa fabrication, cet appareil a été construit selon des normes, directives et/ou décrets pour une utilisation sur le territoire français.
Pour la sécurité des biens et des personnes ainsi que pour le respect
de l'environnement, vous devez d'abord lire impérativement les
préconisations suivantes avant toute utilisation de votre appareil.
1 Pour éviter tout risque de détérioration de l'appareil, transportez-le
dans sa position d'utilisation muni de ses cales de transport (selon modèle).
Au déballage de celui-ci, et pour empêcher des risques d'asphyxie et
corporel, tenez les matériaux d'emballage hors de la portée des enfants.
1 Pour éviter tout risque (mobilier, immobilier, corporel,…), l'installation,
les raccordements (eau, gaz, électricité, évacuation selon modèle), la
mise en service et la maintenance de votre appareil doivent être effectués par un professionnel qualifié.
1 Votre appareil a été conçu pour être utilisé par des adultes. Il est desti-
né à un usage domestique normal. Ne l'utilisez pas à des fins commerciales ou industrielles ou pour d'autres buts que ceux pour lesquels il a
été conçu. Vous éviterez ainsi des risques matériel et corporel.
1 Débranchez votre appareil avant toute opération de nettoyage manuel.
N'utilisez que des produits du commerce non corrosifs ou non inflammables. Toute projection d'eau ou de vapeur est proscrite pour écarter
le risque d'électrocution.
1 Si votre appareil est équipé d'un éclairage, débranchez l'appareil avant
de procéder au changement de l'ampoule (ou du néon, etc.) pour éviter
de s'électrocuter.
1 Afin d'empêcher des risques d'explosion et d'incendie, ne placez pas de
produits inflammables ou d'éléments imbibés de produits inflammables
à l'intérieur, à proximité ou sur l'appareil.
1 Lors de la mise au rebut de votre appareil, et pour écarter tout risque
corporel, mettez hors d'usage ce qui pourrait présenter un danger :
coupez le câble d'alimentation au ras de l'appareil. Informez-vous
auprès des services de votre commune des endroits autorisés pour la
mise au rebut de l'appareil.
1 Pendant et après le fonctionnement, les récipients et leur contenu peu-
vent basculer et les composants de la table s'échauffent. Tenez les enfants éloignés pour éviter tout risque de brûlure.
Veuillez maintenant lire attentivement cette notice pour une utilisation optimale de votre appareil.
32
Page 33

Chère cliente, cher client,
Veuillez lire attentivement la notice d’utilisation dans son intéralité et
la conserver pour pouvoir le consulter ultérieurement.
Veuillez la transmettre à l’éventuel propriétaire ultérieur de l’appareil.
Les symboles suivants sont utilisés dans ce document :
1 Consignes de sécurité
Avertissement : conseils pour votre sécurité personnelle.
Avertissement ! Pour éviter d'endommager l'appareil
3 Conseils généraux et pratiques
2 Informations environnementales
33
Page 34

Sommaire
Sécurité . . . . . . . . . . . . . . . . . . . . . . . . . . . . . . . . . . . . . . . . . . . . . . . . . . . . . . . 35
Description de l'appareil. . . . . . . . . . . . . . . . . . . . . . . . . . . . . . . . . . . . . . . . . 37
Equipement du plan de cuisson . . . . . . . . . . . . . . . . . . . . . . . . . . . . . . . . . . . . 37
Bandeau de commande. . . . . . . . . . . . . . . . . . . . . . . . . . . . . . . . . . . . . . . . . . . 37
Touche sensitive “Touch Control” . . . . . . . . . . . . . . . . . . . . . . . . . . . . . . . . 38
Voyants . . . . . . . . . . . . . . . . . . . . . . . . . . . . . . . . . . . . . . . . . . . . . . . . . . . . . 39
Indicateur de chaleur résiduelle . . . . . . . . . . . . . . . . . . . . . . . . . . . . . . . . . 40
Utilisation de l’appareil. . . . . . . . . . . . . . . . . . . . . . . . . . . . . . . . . . . . . . . . . . 40
Mettre l’appareil sous/hors tension . . . . . . . . . . . . . . . . . . . . . . . . . . . . . . . . . 40
Sélectionner le niveau de cuisson . . . . . . . . . . . . . . . . . . . . . . . . . . . . . . . . . . 41
Activer et désactiver la fonction de maintien au chaud . . . . . . . . . . . . . . . . 41
Utilisation de la commande de démarrage automatique de la cuisson. . . . 42
Verrouiller/déverrouiller le bandeau de commande. . . . . . . . . . . . . . . . . . . . 43
Utilisation de la sécurité enfants . . . . . . . . . . . . . . . . . . . . . . . . . . . . . . . . . . . 44
Activer/désactiver la fonction Puissance. . . . . . . . . . . . . . . . . . . . . . . . . . . . . 45
Utilisation du minuteur. . . . . . . . . . . . . . . . . . . . . . . . . . . . . . . . . . . . . . . . . . . 46
Désactivation de sécurité . . . . . . . . . . . . . . . . . . . . . . . . . . . . . . . . . . . . . . . . . 49
Conseils de cuisson . . . . . . . . . . . . . . . . . . . . . . . . . . . . . . . . . . . . . . . . . . . . . 50
Plats pour cuisson sur zones de cuisson à induction . . . . . . . . . . . . . . . . . . . 50
Conseils d’économie d’energie . . . . . . . . . . . . . . . . . . . . . . . . . . . . . . . . . . . . . 51
Exemples d’utilisation pour la cuisson. . . . . . . . . . . . . . . . . . . . . . . . . . . . . . . 51
Nettoyage et entretien . . . . . . . . . . . . . . . . . . . . . . . . . . . . . . . . . . . . . . . . . . 52
Que faire si … . . . . . . . . . . . . . . . . . . . . . . . . . . . . . . . . . . . . . . . . . . . . . . . . . . 54
Protection de l’environnement . . . . . . . . . . . . . . . . . . . . . . . . . . . . . . . . . . . 56
Instructions d'installation . . . . . . . . . . . . . . . . . . . . . . . . . . . . . . . . . 57
Garantie. . . . . . . . . . . . . . . . . . . . . . . . . . . . . . . . . . . . . . . . . . . . . . . . . . . . . 59
Si vous devez nous contacter . . . . . . . . . . . . . . . . . . . . . . . . . . . . . 62
Service après-vente. . . . . . . . . . . . . . . . . . . . . . . . . . . . . . . . . . . . . . . . 63
34
Page 35

Notice d'utilisation
1 Sécurité
Pour ne pas perdre le bénéfice de la garantie en cas de panne, veuillez
3
observer ces recommandations.
5 Cet appareil est conforme aux directives CE suivantes :
– directive 73/23/CEE du 19.02.1973 basse tension
– directive 89/336/CEE du 03.05.1989 relative à la compatibilité élec-
tromagnétique (CEM) y compris la directive de révision 92/31/CEE
– directive 93/68/CEE du 22.07.1993 relative à la certification CE
Utilisation réglementaire
• Cet appareil est uniquement destiné à l’usage domestique habituel et
pour faire cuire et rôtir des aliments.
• L’appareil ne peut en aucun cas servir de plan de travail ou de support.
• Ne pas procéder à des transformations ou à modifications de l’appareil.
Sécurité enfants
• Eviter systématiquement que les enfants en bas âge s’approchent de
l’appareil.
• Les enfants plus âgés ne doivent être autorisés à utiliser l’appareil
qu’accompagnés et sous surveillance.
Consignes générales de sécurité
• Le montage et le branchement de l’appareil sont du ressort exclusif
de spécialistes agréés.
• Les appareils encastrables ne peuvent être mis en fonctionnement
qu’après avoir été montés dans des armoires et des plans de travail
homologués et adaptés.
• En cas de panne de l’appareil ou de dommages à la vitrocéramique
(cassures, fêlures ou déchirures), mettre l’appareil hors et débranchez-le pour éviter un éventuel choc électrique.
• Le montage et le branchement de l’appareil sont du ressort exclusif
de spécialistes agréés.
35
Page 36

Précautions d’utilisation.
• Retirer les étiquettes et les films protecteurs de la vitrocéramique.
• Attention aux risques de brûlures lors de l’utilisation de l’appareil.
• S’assurer que les câbles d’appareils électriques n’entrent pas en con-
tact avec les surfaces brûlantes de l’appareil ou les récipients brûlants.
• Les graisses et les huiles surchauffées peuvent rapidement s’enflammer. Surveiller constamment les mets cuits avec de la graisse ou de
l’huile (par ex. des frites).
• Mettre les foyers hors fonctionnement après chaque utilisation.
• Il est recommandé aux utilisateurs portant un pace-maker de ne pas
s’approcher des foyers à induction en fonctionnement à moins de
30 cm de distance.
Précautions de nettoyage
• Mettre l’appareil hors fonctionnement et le laisser refroidir avant de
le nettoyer.
• Pour des raisons de sécurité, il est interdit de nettoyer l’appareil avec
un jet à vapeur ou un appareil à haute pression.
Comment éviter d’endommager l’appareil
• Des objets peuvent endommager la vitrocéramque en tombant.
• Les plats de cuisson peuvent endommager la vitrocéramique en heur-
tant le bord.
• Les plats de cuisson en fonte ou pourvus d’un fonds abîmé peuvent
érafler la vitrocéramique lorsqu’on les déplace.
• Les objets susceptibles de fondre ou les produits ayant débordé peuvent se consumer sur la vitrocéramique et doivent par conséquent
être immédiatement enlevés.
• Ne pas placer de plats de cuisson vides sur les zones de cuisson et ne
pas mettre ces dernières en fonctionnement sans récipient.
• Ne recouvrez pas l’espace de 5cm permettant d’aérer l’espace entreestiné le plan de travail et la face avant du meuble.
36
Page 37

Description de l'appareil
Equipement du plan de cuisson
Zone de cuisson à induction 1800 W
avec fonction Puissance 2300 W
Zone de cuisson à induction 2400 W
avec fonction Puissance 3200 W
Zone de cuisson à
induction 1800 W
avec fonction Puissance 2300 W
Bandeau de commande
Sélection du niveau de cuisson
Fonction Puissance
Marche/Arrêt
avec voyant de contrôle
STOP+GO
Zone de cuisson à
induction 1200 W
avec fonction Puissance 1500 W
Indicateurs zones de cuisson
Fonction Minuteur
Affichage Minuteur
Voyant
Minuteur
Verrouillage
Bandeau de
commande
37
Page 38

Touche sensitive “Touch Control”
Les touches sensitives Touch Control permettent de commander l’appareil. Une pression sur les touches sensitives permet d’activer les fonctions et le fonctionnement de ces dernières est confirmé par des
voyants ou par des signaux sonores.
Appuyez sur les touches sensitives par un mouvement de haut en bas,
en évitant de recouvrir les autres touches.
Touche sensitive Fonction
Marche / Arrêt Mettre l’appareil sous/hors ten-
sion
Augmenter les réglages Augmenter la durée /le niveau de
cuisson
Réduire les réglages Réduire la durée /le niveau de
cuisson
TIMER Minuteur Sélection du Minuteur
Verrouillage Verrouillage/déverrouillage du
bandeau de commande
Puissance Activation/désactivation de la
fonction Puissance
38
Stop+Go Activer/désactiver la fonction de
maintien au chaud
Page 39

Voyants
Voyant Description
¾ La zone de cuisson est désactivée
u Position de maintien au
chaud
La fonction de maintien au
chaud/STOP+GO est activée
¿ - Ç Niveaux de cuisson Le niveau de cuisson est sélection-
né
2 - 6 Niveaux de cuisson avec
point décimal
a Commande de démarra-
ge automatique de la
cuisson
Le niveau intermédiaire est activé
La commande de démarrage automatique de la cuisson est activée
e Erreur Apparition d’une anomalie de
fonctionnement
f Détection des plats de
cuisson
Les plats de cuisson ne sont pas
adaptés ou trop petits ou bien il
n’y a pas de plat de cuisson sur la
zone de cuisson.
h Chaleur résiduelle La zone de cuisson est encore
chaude
l Sécurité enfants Verrouillage/la sécurité enfants
est activée
p Puissance La fonction Puissance est activée
_ Désactivation de sécuri-
té
La désactivation de sécurité est
active
39
Page 40

Indicateur de chaleur résiduelle
1 Avertissement ! Danger de brûlures dû à la chaleur résiduelle ! Les zo-
nes de cuisson mettent un peu de temps à se refroidir après avoir été
désactivées. Surveillez le voyant indiquant la chaleur résiduelle
h .
3 La chaleur résiduelle peut être utilisée pour faire fondre un ingrédient
et pour conserver les plats au chaud.
Les foyers à induction génèrent la chaleur nécessaire directement sur
le fond des plats de cuisson. La chaleur résiduelle des plats de cuisson
suffit pour chauffer la vitrocéramique.
Le ventilateur de refroidissement se met en fonctionnement et s’arrête automatiquement en fonction de la température du système électronique.
Utilisation de l’appareil
Utilisez des plats de cuisson adaptés aux zones de cuisson à induction.
3
Mettre l’appareil sous/hors tension
Bandeau de commande
Activer Appuyez sur pen-
dant 2 secondes
Désactiver Appuyez sur pen-
dant 1 seconde
Affichage Voyant de con-
trôle
¾ s’allume
h / aucun s’éteint
3 Après la mise sous tension, il est nécessaire d’activer un niveau de cuis-
son ou une fonction dans les 10 secondes environ qui suivent dans le
cas contraire l’appareil se déconnecte automatiquement.
40
Page 41

Sélectionner le niveau de cuisson
Bandeau de commande Affichage
Augmenter Appuyez sur . u jusqu’à Ç/ p
Réduire Appuyez sur . Ç jusqu’à ¾
Désactiver Appuyez simultanément sur et . ¾
Activer et désactiver la fonction de maintien au chaud
La fonction STOP+GO permet de mettre simultanément toutes les zones
de cuisson actives en position de maintien au chaud puis de réactiver le
niveau de cuisson sur lequel elles se trouvaient au préalable. Cette
fonction permet d’interrompre brièvement une cuisson, par ex. pour répondre à un appel téléphonique, puis de continuer ensuite la cuisson.
Bandeau de commande Activer
L’affichage Appuyez sur u
Désactiver Appuyez sur la touche préalablement sé-
lectionnée (pas sur le démarrage automatique de la
cuisson)
3 La fonction STOP+GO n’arrête pas les fonctions de la minuterie.
3 La fonction STOP+GO verrouille l’intégralité du bandeau de commande,
y compris la touche sensitive .
41
Page 42

Utilisation de la commande de démarrage automatique
de la cuisson
Etape Bandeau de commande Affichage
1. Réglage du Ç / p niveau Ç / p
2. Courte interruption Ç / p
3. Toucher a
4. toucher pour sélectionner le
niveau de cuisson souhaité
Æ jusqu’à ¿ / u
au bout de 3 secondes
a
Toutes les zones de cuisson sont dotées d’une position de maintien de
température. La position de maintien de température règle la zone de
cuisson à pleine puissance pendant une période de temps données puis
rétablit ensuite automatiquement le niveau de cuisson sélectionné.
3 Si, au cours du démarrage automatique de la cuisson à pleine puissan-
a un niveau de cuisson supérieur est sélectionné, par ex. lors du
ce,
passage de
s’adapte en conséquence.
Á à Ã, la durée de démarrage automatique de la cuisson
3 Si l’indicateur de chaleur résiduelle est visible (voyant h), le démarrage
automatique de la cuisson ne s’enclenche pas.
42
Page 43

La durée du démarrage automatique de la cuisson dépend du niveau
cuisson sélectionné.
Niveau de
cuisson
v 0
1 1
2 1,7 2. 3
3 4,8 3. 5,5
4 6,5 4. 8,2
5 10,2 5. 12,3
6 2 6. 2,5
7 3,5
8 4,5
9 ---
Durée du
démarrage de la
commande
automatique de
cuisson [min]
Niveau
intermédiaire
Durée du
démarrage de la
commande
automatique de
cuisson [min]
Verrouiller/déverrouiller le bandeau de commande
Il est possible à tout moment de verrouiller le bandeau de commande à
l’exception de la touche sensitive „Marche/Arrêt“, ce qui permet d’éviter
de modifier une sélection, par ex. en le nettoyant avec un chiffon.
Bandeau de commande Affichage
Activation Appuyez sur l (pendant 5 secondes)
Désactiva-
tion
Appuyez sur le niveau de cuisson précé-
dent
3 La désactivation de l’appareil déclenche automatiquement le verrouilla-
ge.
43
Page 44

Utilisation de la sécurité enfants
La sécurité enfants évite toute activation non souhaitée de l’appareil.
Activer la sécurité enfants
Etape Bandeau de commande Voyant/Signal
1. Mettre l’appareil sous tension
¾
(sans activer de niveau de cuisson)
2. Appuyez sur jusqu’à ce que le
Signal sonore
signal retentisse
3. Appuyez sur . l
L’appareil se déconnecte.
Désactiver la sécurité enfants
Etape Bandeau de commande Voyant/Signal
1. Mettre l’appareil sous tension l
2. Appuyez sur jusqu’à ce que le
Signal sonore
signal retentisse
3. Appuyez sur .
L’appareil se déconnecte.
Brider la sécurité enfants
Cette touche permet de désactiver la sécurité enfants le temps d’une
cuisson seulement, elle reste active ensuite.
44
Etape Bandeau de commande Voyant/Signal
1. Mettre l’appareil sous tension l
2. Appuyez simultanément sur et ¾ / signal sonore
Peut être utilisé normalement jusqu’à la prochaine mise hors tension
de l’appareil.
Page 45

Activer/désactiver la fonction Puissance
La fonction Puissance octroie des fonctionnalités supplémentaires
aux zones de cuisson, comme par exemple la possibilité de faire bouillir
une quantité importante d’eau.
La fonction Puissance est activée pendant 10 minutes. Puis la zone de
cuisson permute automatiquement de nouveau sur le niveau 9.
Bandeau de commande Affichage
Activer Appuyez sur p
Désactiver Appuyez sur Ç
Appuyez sur Ç
Gestion de la fonction Puissance
Les zones de cuisson sont dotées
d’une puissance maximale.
Lorsque la fonction Puissance excède cette puissance, la commande
Puissance réduit le niveau de cuisson d’une autre zone de cuisson.
Pendant deux minutes, le voyant de
cette zone de cuisson affiche alternativement le niveau de cuison sélectionné et le niveau de cuisson
maximum possible. Puis le niveau de
cuisson réel s’affiche.
Exemple :
Dernière zone
de cuisson sélectionnée
Zone de cuisson sélectionnée
Autre zone de cuisson
Zone de
cuisson
sélectionnée
Affichage niveau de cuis-
son réel
p 9 6 alternant avec 9 6
3 A la fin de la fonction Puissance, les zones de cuisson permutent de
nouveau sur le niveau de cuisson précédemment sélectionné.
45
Page 46

Utilisation du minuteur
L’une des deux fonctions Minuteur peut simultanément être attribuée à
l’ensemble des zones de cuisson.
Fonction Condition de mise en
oeuvre
Désactivation auto-
matique
Minuteur pour zones de cuisson
d’une zone de cuisson
sélectionnée
non utilisées
Résultat après
écoulement du dé-
lai
le signal sonore
00 clignote
La zone de cuisson
se désactive
le signal sonore
00 clignote
3 La désactivation d’une zone de cuisson entraîne la désactivation de la
fonction Minuteur.
3 Lorsqu’un niveau de cuisson est sélectionné en plus du minuteur pour
cette même zone de cuisson, cette dernière se désactive après écoulement de la durée programmée.
Sélection d’une zone de cuisson
Etape Bandeau de com-
mande
1. Appuyez sur
TIMER 1fois
Le voyant de contrôle de
la première zone de
cuisson clignote
Affichage
46
2. Appuyez sur
TIMER 1fois
3. Appuyez sur
TIMER 1fois
4. Appuyez sur
TIMER 1fois
Le voyant de contrôle de
la seconde zone de cuisson clignote
Le voyant de contrôle
de la troisième zone de
cuisson clignote
Le voyant de contrôle de
la quatrième zone de
cuisson clignote
Page 47

3 Lorsque le clignotement du voyant de contrôle ralentit, vous pouvez sé-
lectionner ou modifier un niveau de cuisson.
3 Lorsque la fonction Minuteur est sélectionnée sur plusieurs zones de
cuisson, le temps restant le plus court de l’ensemble de ces fonctions
s'affiche au de quelques secondes et le voyant de contrôle correspondant clignote.
Réglage de la durée
Etape Bandeau de com-
mande
1. TIMER sélection
d’une zone de cuisson
2. Appuyez sur ou
de la zone de cuisson
sélectionnée
Après quelques secondes, le clignotement du voyant de contrôle ralentit
La durée est sélectionnée.
Le décompte commence.
Désactiver la fonction Minuteur
Etape Bandeau de com-
mande
1. TIMER sélection
d’une zone de cuisson
Affichage
Le voyant de contrôle de la zone de
cuisson sélectionnée clignote
00 jusqu’à 99 minutes
Affichage
Le voyant de contrôle de la zone de
cuisson sélectionnée clignote plus rapidement
Le temps restant s’affiche
2. Appuyez sur de la
zone de cuisson sélectionnée
Le voyant de contrôle s’éteint.
La fonction Minuteur de la zone de cuisson sélectionnée s’éteint.
Décompte du temps restant
jusqu’à 00.
47
Page 48

Modification de la durée
Etape Bandeau de com-
Affichage
mande
1. TIMER sélection
d’une zone de cuisson
Le voyant de contrôle de la zone de
cuisson sélectionnée clignote plus rapidement
Le temps restant s’affiche
2. Appuyez sur ou
01 jusqu’à 99 minutes
de la zone de
cuisson sélectionnée
Après quelques secondes, le clignotement du voyant de contrôle ralentit
La durée est sélectionnée.
Le décompte commence.
Affichage du temps restant d’une zone de cuisson
Etape Bandeau de com-
mande
1. TIMER sélection
d’une zone de cuisson
Affichage
Le voyant de contrôle de la zone de
cuisson sélectionnée clignote plus rapidement
Le temps restant s’affiche
48
Après quelques secondes, le clignotement du voyant de contrôle ralentit
Désactivation du signal sonore
Etape Bandeau de com-
mande
1. Appuyez sur
TIMER
Neutralisation du signal sonore
Signal sonore
Confirmation signal sonore
Page 49

Désactivation de sécurité
Table de cuisson
• Si, après activation de la table de cuisson, une zone de cuisson ou un
niveau de cuisson n’est pas sélectionné dans les 10 secondes environ
qui suivent, la table de cuisson se désactive automatiquement.
• Si l’une ou plusieurs des touches sensitives est recouverte pendant
plus de 10 secondes environ, par ex. par une casserole, un signal sonore retentit et la table de cuisson se désactive automatiquement.
• Lorsque toutes les zones de cuisson sont désactivées, la table de cuisson se désactive automatiquement au bout de 10 secondes environ.
Bandeau de commande
3 L’humidité (par ex. un chiffon humide) ou le débordement d’un liquide
sur le bandeau de commande provoque l’arrêt immédiat des zones de
cuisson.
Zones de cuisson
• En cas de surchauffe (par ex. d’un plat vide), la zone de cuisson se désactive immédiatement. _ s’affiche. Avant de réutiliser la zone de
cuisson, il faut la remettre sur 0 et la laisser refroidir.
• En cas d’utilisation de plats de cuisson non adaptés, f clignote sur
l’affichage et le voyant correspondant à la zone de cuisson s’éteint au
bout de 10 minutes.
• Si, après quelques instants, l’une des zones de cuisson n’est pas désactivée ou si le niveau de cuisson n’est pas modifié, la zone de cuisson
en question se désactive automatiquement.
Niveau de cuisson Désactivation après
V, 1 - 2
3 - 4
5
6 - 9
6 heures
5 heures
4 heures
1 heure 30
49
Page 50

Conseils de cuisson
Conseils relatifs à l’acrylamide
3
Selon les connaissances scientifiques les plus récentes, faire brunir les
aliments de manière intensive, en particulier les produits contenant de
l’amidon, peut provoquer des problèmes de santé dus à l’acrylamide.
C’est pourquoi nous vous recommandons de faire cuire à basse température et de ne pas trop faire brunir les aliments.
Plats pour cuisson sur zones de cuisson à induction
Matériau des plats de cuisson adapté
acier, acier émaillé oui
fonte oui
acier inoxydable lorsque explicitement spécifié par le fabricant
aluminium, cuivre, laiton --verre, céramique, porcelaine ---
3 Les fabricants de plats de cuisson spécifient si leurs produits sont adap-
tés à la cuisson par induction.
Vérification de la compatibilité des plats de cuisson
Les plats de cuisson sont adaptés à la cuisson par induction lorsque …
• ... vous placez de l’eau sur une zone de cuisson à induction sur le niveau de cuisson 9 et qu’elle chauffe en quelques secondes.
• ... Un aimant se colle sur le fond d’un plat.
3 Certains plats de cuisson font du bruit lorsqu’ils sont placés sur une
zone de cuisson à induction. Ces bruits ne traduisent aucun défaut de
l’appareil et n’influent nullement sur son fonctionnement.
Dimension des casseroles
Les zones de cuisson à induction s’adaptent automatiquement à la dimension du fond des plats de cuisson jusqu’à une certaine limite. Le
fond magnétique des plats de cuisson doit néanmoins être d’un diamètre minimal en fonction de la dimension de la zone de cuisson correspondante.
3 Pour la zone de cuisson de 270 mm, le diamètre minimum de 180 mm
du fond de la casserole est inscrit sur le cercle interne.
3 Placez votre plat de cuisson bien au centre de la zone de cuisson.
50
Page 51

Conseils d’économie d’energie
2 Placez votre plat de cuisson sur la zone de cuisson avant d’activer cette
dernière.
2 Dans la mesure du possible, couvrez toujours votre plat de cuisson avec
un couvercle.
Exemples d’utilisation pour la cuisson
Les valeurs indiquées dans le tableau suivant sont indicatives.
Niveau
de
cuisson
1-2
2-3
3-4
4-5
Type de
cuisson
0 en position
Conser-
u
ver au
chaud :
Faire
fondre
Conserver
Faire
gonfler
Cuire à
l’étuvée
Cuire à la
vapeur
Cuire à
l’eau
adapté à Durée Remarques/conseils
Conserver des plats cuits
au chaud
de la sauce hollandaise,
faire fondre du beurre, du
chocolat, de la gélatine
une omelette norvégien-
ne, royale
Faire gonfler du riz ou des
plats à base de riz
Faire réchauffer des plats
cuisinés
Cuire des légumes ou du
poisson à la vapeur
Cuire de la viande à
l’étouffée
Faire cuire des pommes de
terre à l’étuvée
Faire cuire des quantités
assez importantes
d’aliments, ragoûts et
soupes
si néces-
saire
5-25 min
10-40 min
25-50 min
20-45 min
20-60 min
60-150
min
les recouvrir
Remuez de temps en
temps
Couvrez-la avec un
couvercle
Versez au moins le
double de quantité
d’eau que de riz, re-
muez le riz au lait de
temps en temps.
Pour les légumes, utili-
sez juste un peu d’eau
(quelques cuillères à
soupe)
Utilisez juste un peu
d’eau, par ex. max.
¼ l d’eau pour
750 g de pommes de
terre
Jusqu’à 3 l d’eau plus
les ingrédients
51
Page 52

Niveau
de
cuisson
6-7
7-8
La fonction Puissance peut également permettre de porter à ébullition
9
Type de
cuisson
Faire
cuire
à feu
doux
Faire
cuire
à tempé-
rature
élevée
Porter à
ébulli-
tion Faire
revenir
Faire frire
adapté à Durée Remarques/conseils
des escalopes, des cordons
bleus, des steaks de vian-
de hâchée, des saucisses,
du foie, des roux, des
œufs, des gâteaux aux
œufs, faire frire des bei-
gnets.
des beignets de pommes
de terre, des rognons, des
steaks, des galettes
Porter des quantités importantes d’eau à ébullition, faire reve-
nir de la viande (goulasch, bœuf brais), faire frire des pommes
cuisson
continue
5-15 min
poêle pro
frites
Retournez de temps en
Retournez de temps en
des quantités importantes de liquide.
Nettoyage et entretien
temps
temps
Attention ! Risque de brûlure dû à la chaleur résiduelle.
1
Laissez refroidir l’appareil.
1 Attention ! Les produits de nettoyage agressifs ou abrasifs endomma-
gent l’appareil. Nettoyez l’appareil avec de l’eau et de la lessive.
1 Attention ! Les restes de produits de nettoyage endommagent l’appa-
reil. Nettoyez les restes avec de l’eau et un produit de nettoyage.
52
Page 53

Nettoyez l’appareil après chaque utilisation
1.Nettoyez l’appareil à l’aide d’un chiffon humide et un peu de produit de
nettoyage.
2.Séchez l’appareil avec un chiffon propre.
Enlever les salissures
1.Placez le grattoir de nettoyage obliquement par rapport à la surface de
la vitrocéramique.
2.Enlevez les salissures en faisant glisser la lame.
3.Nettoyez l’appareil à l’aide d’un chiffon humide et un peu de produit de
nettoyage.
4.Séchez l’appareil avec un chiffon propre.
enlevez
immé-
Type de salissure
Sucre, mets contenant du sucre oui --Matériaux en plastique, feuilles
en aluminium
Bords calcaires et d’eau --- oui
Burette à graisse --- oui
Colorations métalliques luisantes --- oui
*grattoir de nettoyage, produit de nettoyage de vitrocéramique ou d’acier inoxydable sont
disponibles dans les magasins spécialisés.
diate-
ment
oui ---
lorsque l’appareil a
refroidi
avec
Grattoir de
nettoyage*
Produit de nettoyage
de vitrocéramique ou
d’acier inoxydable*
3 Nettoyez les salissures tenaces à l’aide d’un produit de nettoyage pour
vitrocéramique ou acier inoxydable.
3 Même s’il n’est plus possible de faire disparaître les égratignures ou les
taches sombres sur la vitrocéramique, cela n’a aucune influence sur le
fonctionnement de l’appareil.
53
Page 54

Que faire si …
Symptôme Cause possible Solution
Il est impossible d’activer
les zones de cuisson ou ces
dernières ne fonctionnent
pas
L’indicateur de chaleur résiduelle ne s'affiche pas
Plus de 10 minutes se sont
écoulées depuis que l’appareil est sous tension
Le verrouillage est enclen-
l
ché
La sécurité enfants est enclenchée
Plusieurs touches sensitives
ont été activées simultanément
Les touches sensitives sont
partiellement recouvertes
par un chiffon humide ou
par du liquide
Le système d’arrêt de sécurité s’est enclenché
STOP+GO est activée u Désactiver la fonction
La zone de cuisson fonctionne seulement depuis
peu et n’est par conséquent pas encore chaude
l
Remettez l’appareil sous
tension.
Déclenchez le verrouillage
(voir chapitre „Verrouiller/
déverrouiller le bandeau de
commande“)
Désactivez la sécurité enfants (voir chapitre „Sécurité enfants“)
Activez une seule touche
sensitive à la fois
Enlevez le liquide ou le
chiffon.
Remettez l’appareil sous
tension.
Remettez l’appareil sous
tension.
STOP+GO
Si la zone de cuisson est
chaude, contactez le service après-vente.
54
La commande de démarrage automatique de la cuisson ne s’enclenche pas
La zone de cuisson est encore chaude h
Le niveau de cuisson mamimum est activé Ç
Le niveau de cuisson a été
activé à l’aide de la touche
sensitive
Laissez refroidir la zone de
cuisson
Le niveau de cuisson maximum présente une puissance équivalente à celle
de la commande de démarrage automatique de la
cuisson.
1. Désactivez la zone de
cuisson
2. Activez la zone de cuis-
son à l’aide de la touche
sensitive
Page 55

Répétition du signal sonore
(6 fois), l’appareil se déconnecte
Un signal sonore retentit,
l’appareil se met sous tension puis de nouveau hors
tension au bout de 5 secondes ; au bout de 5
autres secondes, un nouveau signal sonore retentit
Une ou plusieurs touche(s)
sensititve(s) a/ont été recouverte(s) pendant plus
de 10 secondes
La touche sensitive Marche/Arrêt est recouverte,
par exemple par un chiffon
Libérez les touches sensitives
Ne déposez aucun objet sur
le bandeau de commande
L’affichage alterne entre
deux niveaux de cuisson
La commande de la fonction Puissance réduit la
puissance de cette zone de
cuisson
Voir chapitre „Activer/désactiver la fonction Puissance“
f clignote Plats de cuisson inadéquats Utilisez des plats de cuisson
adaptés
Il n’y a pas de plat sur la
zone de cuisson
Le diamètre du fond du
plat de cuisson est trop petit par rapport à la zone de
cuisson
_ s’allume La protection contre le ris-
que de surchauffe s’est enclenchée
Affichage de e et d’un
chiffre
Erreur du système électronique
Placez un plat sur la zone
de cuisson
Placez le plat sur une autre
zone de cuisson
Utilisez des plats de cuisson
adaptés
Désactivez la zone de cuisson Réactivez la zone de
cuisson
Débranchez l’appareil pendant quelques minutes (enlevez le fusible de
l’installation domestique).
e s’affiche de nouveau
Si
après avoir rebranché l’appareil, contactez le service
après-vente
Si les indications ci-dessus ne vous permettent pas de remédier au
problème, veuillez vous adresser au service après-vente de votre
magasin vendeur.
1 Avertissement ! Le montage et le branchement de l’appareil sont du
ressort exclusif de spécialistes agréés. Des réparations inadéquates peuvent s’avérer très dangereuses pour l’utilisateur.
3 En cas d’erreur de manipulation de la part de l’utilisateur, le déplace-
ment du technicien du service après-vente ou du vendeur peut être
facturé même en cours de garantie.
55
Page 56

Protection de l’environnement
Elimination du matériel d’emballage
2
Les matériaux d’emballage sont écologiques et recyclables. Les matières
plastiques portent un signe distinctif, par ex. >PE<, >PS<, etc. Eliminez
les matériaux d’emballage en fonction de leur signe distinctif dans les
containeurs prévus à cet effet sur le site de collecte de votre commune.
2 Appareils usagés
Eliminez votre appareil usagé conformément à la réglementation en vigueur dans votre lieu de résidence.
56
Page 57

Instructions d'installation
Sécurité
L’utilisateur est tenu de respecter la législation, la réglementation, les
lignes directrices et les normes en vigueur dans son pays de résidence
(dispositions relatives à la sécurité, recylage conforme et réglementaire,
etc.).
Le montage relève de la compétence exclusive de spécialistes.
Respectez l’espacement minimal requis par rapport aux autres appareils.
Seuls des tiroirs pourvus d’un fond de protection peuvent être installés directement sous l’appareil.
Protégez l’appareil de l’humidité en placant un joint d’étanchéité dans
les rainures du plan de travail.
Le joint comble les fentes entre le plan de travail et l’appareil.
N’utilisez pas de masse d’étanchéité en silicone entre le plan de travail
et l’appareil.
Montez sur la partie inférieure de l’appareil un élément de protection
contre la vapeur et l’humidité susceptibles d’être dégagées par ex. par
un lave-vaisselle ou un four.
Eviter de monter l’appareil à proximité d’une porte ou sous une fenêtre.
Autrement, l’ouverture d’une porte ou d’un battant de fenêtre peuvent
arracher le plat de cuisson posé sur la plaque de cuisson.
1 Avertissement!
Danger de blessure due au courant électrique.
• La borne de raccordement est sous tension.
• Isolez la borne de raccordement au secteur.
• Respectez le schéma de raccordement.
• Respectez les régles de sécurité électrotechniques.
• Assurez vous lors de l’installation qu’il n’y ait pas de possibilité de
contact.
• Le raccordement électrique relève de la compétence d’un électricien.
1 ATTENTION!
Le courant électrique peut provoquer des dommages.
Des raccordements mal ajustés ou incorrects peuvent provoquer une
surchauffe de la borne.
• Installez correctement les jonctions par serrage.
• Délestez le câble.
57
Page 58

• Pour les raccordements 1 ou 2 phases, utilisez respectivement un câble approprié de type H05BB-F T de max. 90° (ou de plus grande capacité).
• En cas d’endommagement du câble de raccordement de l’appareil,
remplacez impérativement ce dernier par un câble spécifique (de type
H05BB-F Tmax. 90° ou de plus grande capacité). Ce type de câble est
disponible auprès du service après-vente.
Au niveau de l'installation électrique, prévoir un dispositif qui permette
de couper cet appareil du secteur sur tous les pôles avec une ouverture
des contacts d'au moins 3 mm.
Des dispositifs de protection appropriés sont par exemple les disjoncteurs, les fusibles (les fusibles vissés doivent être retirés de leur socle),
les disjoncteurs différentiels et les contacteurs.
58
Page 59

Garantie
France
Conformément à la Législation en vigueur, votre Vendeur est tenu, lors de l'acte d'achat de votre
appareil, de vous communiquer par écrit les conditions de garantie et sa mise en œuvre appliquées
sur celui-ci.
Sous son entière initiative et responsabilité, votre Vendeur répondra à toutes vos questions concernant l'achat de votre appareil et les garanties qui y sont attachées.
N'hésitez pas à le contacter.
Electrolux Home Products France S.A.S.
Info Conso Electrolux
43 avenue Félix Louat – BP 50142
60307 Senlis Cedex
Tél. : 08 90 71 03 44 (0,15 G TTC/mn)
SAS au capital de 67 500 000 G
552 042 285 RCS SENLIS
59
Page 60

Belgique
DÉCLARATION DE CONDITIONS DE GARANTIE.
Nos appareils sont produits avec le plus grand soin. Malgré cela, un défaut peut toujours se présenter. Notre service clientèle se chargera de réparer ceci sur demande, pendant ou après la période de garantie. La durée de vie de l'appareil n'en sera pas pour autant amputée.
La présente déclaration de conditions de garantie est basée sur la Directive de l'Union Européenne
99/44/CE et les dispositions du Code Civil. Les droits légaux dont le consommateur dispose au titre
de cette législation ne peuvent être altérés par la présente déclaration de conditions de garantie.
Cette déclaration ne porte pas atteinte aux obligations de garantie du vendeur envers l'utilisateur
final. L'appareil est garanti dans le cadre et dans le respect des conditions suivantes :
1. Compte tenu des dispositions stipulées aux paragraphes 2 à 15, nous remédierons sans frais à tou-
te défectuosité qui se manifeste au cours de la période de 24 mois à compter de la date de livraison de l'appareil au premier consommateur final.
Ces conditions de garantie ne sont pas d'application en cas d'utilisation à des fins professionnelles
ou de façon équivalente.
2. La prestation sous garantie implique que l'appareil est remis dans l'état qu'il avait avant que la dé-
fectuosité ne survienne. Les composants défectueux sont remplacés ou réparés. Les composants
remplacés sans frais deviennent notre propriété.
3. Afin d'éviter des dommages plus sévères, la défectuosité doit immédiatement être portée à notre
connaissance.
4. L'application de la garantie est soumise à la production par le consommateur des preuves d'achat
avec la date d'achat et/ou la date de livraison.
5. La garantie n'interviendra pas si des dommages causés à des pièces délicates, telles que le verre (vi-
trocéramique), les matières synthétiques et le caoutchouc, résultent d'une mauvaise utilisation.
6. Il ne peut pas être fait appel à la garantie pour des anomalies bénignes qui n'affectent pas la va-
leur et la solidité générales de l'appareil.
7. L'obligation de garantie perd ses effets lorsque les défectuosités sont causées par :
• une réaction chimique ou électrochimique provoquée par l'eau,
• des conditions environnementales anormales en général,
• des conditions de fonctionnement inadaptées,
• un contact avec des produits agressifs.
8. La garantie ne s'applique pas pour les défectuosités, dues au transport, survenues en dehors de no-
tre responsabilité. Celles causées par une installation ou un montage inadéquat, par un manque
d'entretien, ou par le non-respect des indications de montage et d'utilisation, ne seront pas davantage couvertes par la garantie.
9. Ne sont pas couvertes par la garantie, les défectuosités qui proviennent de réparations ou d' inter-
ventions pratiquées par des personnes non qualifiées ou incompétentes, ou qui ont pour cause
l'adjonction d'accessoires ou de pièces de rechange non d'origine.
10. Les appareils aisément transportables doivent être délivrés ou envoyés au service clientèle. Les in-
terventions à domicile ne peuvent s'entrevoir que pour des appareils volumineux ou pour des appareils encastrables.
11 . Si des appareils sont encastrés, sous-encastrés, fixés ou suspendus de telle sorte que le retrait et la
remise en place de ceux-ci dans leur niche d'encastrement prennent plus d'une demi-heure, les
frais de prestation qui en découlent seront portés en compte. Les dommages connexes causés par
ces opérations de retrait et de remise en place sont à charge de l'utilisateur.
12. Si au cours de la période de garantie, la réparation répétée d'une même défectuosité n'est pas
concluante, ou si les frais de réparations sont jugés disproportionnés, le remplacement de l'appareil défectueux par un autre de même valeur peut être accompli en concertation avec le consommateur.
Dans ce cas nous nous réservons le droit de réclamer une participation financière calculée au prorata de la période d'utilisation écoulée.
13. La réparation sous garantie n'entraîne pas de prolongation de la période normale de garantie, ni le
départ d'un nouveau cycle de garantie.
14. Nous octroyons une garantie de douze mois sur les réparations, limitée à la même défectuosité.
15. Hormis les cas où une responsabilité est imposée légalement, cette déclaration de conditions de
garantie exclut toute indemnisation de dommages extérieurs à l'appareil dont le consommateur
voudrait faire prévaloir les droits. Dans le cas d'une responsabilité reconnue légalement, la compensation n'excèdera pas la valeur d'achat de l'appareil.
60
Page 61

Ces conditions de garantie sont valables uniquement pour des appareils achetés et utilisés en Belgique. Pour les appareils exportés, l'utilisateur doit d'abord s'assurer qu'ils satisfont aux conditions
techniques (p. ex. : la tension, la fréquence, les prescriptions d'installation, le type de gaz, etc.)
pour le pays concerné, et qu'ils supportent les conditions climatiques et environnementales locales. Pour les appareils achetés à l'étranger, l'utilisateur doit d'abord s'assurer qu 'ils répondent bien
aux qualifications requises en Belgique. Des adaptations indispensables ou souhaitées ne sont pas
couvertes par la garantie et ne sont pas possibles dans tous les cas.
Le service clientèle se tient à votre disposition, également après expiration de la période de garantie.
Adresse de notre service clientèle :
ELECTROLUX HOME PRODUCTS BELGIUM
Bergensesteenweg, 719 - 1502 LEMBEEK
Tél.: 02.363.04.44
61
Page 62

Si vous devez nous contacter
France
AEG
Pour tenir nos engagements, nous écoutons les Consommateurs
Info Conso Electrolux est le lien privilégié entre la marque et ses Consommateurs. Il assure en
permanence une double mission : satisfaire au mieux vos exigences et tirer parti de cette proximité pour améliorer sans cesse les produits que nous vous proposons.
AVANT L’ACHAT
Toute une équipe répond avec clarté et précision à vos sollicitations concernant l’éventail de nos
gammes de produits et vous apporte des infos pour vous aider dans votre choix en fonction de vos
propres besoins.
APRÈS L’ACHAT
Exprimez-vous sur la perception que vous avez de nos produits et votre satisfaction à l’usage. Mais
interrogez aussi nos spécialistes sur l’utilisation et l’entretien de vos appareils. C’est alors que notre
mission prend tout son sens. Ecouter, comprendre, agir : trois temps essentiels pour tenir l’engagement de la marque dans le plus grand respect du Consommateur.
Dans le souci d’une amélioration constante de nos produits, nous nous réservons le droit d’apporter à leurs caractéristiques toutes modifications liées à l’évolution technique (décret du 24.03.78).
BP 50142 – 60307 SENLIS CEDEX
Tél. : 08 90 71 03 44 (0,15 h TTC/mn)
Fax : 03 44 62 21 54
E-MAIL : info.conso@electrolux.fr
Permanence téléphonique du lundi au vendredi
A bientôt !
62
Belgique
Electrolux Home Products Belgium
ELECTROLUX SERVICE
Bergensesteenweg 719
1502 Lembeek
E-mail:
consumer.services@electrolux.be
Pour toute question technique :
Centre Contact Consommateurs
BP 20139 – 60307 SENLIS CEDEX
Tél. : 08 92 68 24 33 (0,34 h TTC/mn)
E-MAIL : ehp.consommateur@electrolux.fr
Permanence téléphonique du lundi au vendredi
Téléphone Téléfax
Consumer services 02/363.04.44 02/363.04.00
02/363.04.60
Page 63

Service après-vente
En cas d’anomalie de fonctionnemet vérifiez d’abord si vous ne pouvez
pas remédier vous-même au dysfonctionnement à l’aide de la notice
d’utilisation (chapitre “Que faire, si...“).
Si vous ne parvenez pas à remédier au dysfonctionnement, veuillez
contacter votre vendeur ou à défaut le Centre Contact Consommateurs
qui vous communiquera l’adresse service après-vente.
Pour un dépannage dans les plus
brefs délais, nous vous demandons
de nous fournir les informations suivantes :
– Désignation du modèle
– Numéro du produit (PNC)
– Numéro de série (S-No.)
(ces chiffres se trouvent sur la plaque signalétique)
– Type de dysfonctionnement
– Eventuellement le message d’erreur affiché par l’appareil
– Vitrocéramique avec une combinaison de lettres et de trois chiffres
Pour avoir les numéros d’identification de l’appareil sous la main, nous
vous recommandons de les inscrire ici.
Désignation du modèle .....................................
PNC: .....................................
S-No : .....................................
En cas d’intervention sur votre appareil, exigez
du service après-vente les pièces de rechange
certifiées Constructeur.
63
Page 64

Geachte klant,
Lees deze gebruiksaanwijzing zorgvuldig door en bewaar de gebruiksaanwijzing zodat deze later kan worden geraadpleegd.
Geef deze gebruiksaanwijzing door aan een eventuele volgende eigenaar van het apparaat.
De volgende symbolen worden in de tekst gebruikt:
1 Veiligheidsvoorschriften
Waarschuwing! Aanwijzingen ten behoeve van uw persoonlijke veiligheid.
Let op! Aanwijzingen om beschadiging van het apparaat te voorkomen.
3 Aanwijzingen en praktische tips
2 Milieu-informatie
64
Page 65

Inhoud
Gebruiksaanwijzing . . . . . . . . . . . . . . . . . . . . . . . . . . . . . . . . . . . . . . . . 66
Veiligheidsvoorschriften . . . . . . . . . . . . . . . . . . . . . . . . . . . . . . . . . . . . . . . . . 66
Beschrijving van het apparaat. . . . . . . . . . . . . . . . . . . . . . . . . . . . . . . . . . . . 68
Uitrusting kookplaat . . . . . . . . . . . . . . . . . . . . . . . . . . . . . . . . . . . . . . . . . . . . . 68
Uitrusting bedieningsveld. . . . . . . . . . . . . . . . . . . . . . . . . . . . . . . . . . . . . . . . . 68
Touch-control-sensorvelden . . . . . . . . . . . . . . . . . . . . . . . . . . . . . . . . . . . . 69
Indicaties. . . . . . . . . . . . . . . . . . . . . . . . . . . . . . . . . . . . . . . . . . . . . . . . . . . . 70
Restwarmte-indicatie. . . . . . . . . . . . . . . . . . . . . . . . . . . . . . . . . . . . . . . . . . 70
Bediening van het apparaat. . . . . . . . . . . . . . . . . . . . . . . . . . . . . . . . . . . . . . 71
Apparaat in- en uitschakelen . . . . . . . . . . . . . . . . . . . . . . . . . . . . . . . . . . . . . . 71
Kookstand instellen . . . . . . . . . . . . . . . . . . . . . . . . . . . . . . . . . . . . . . . . . . . . . . 71
STOP+GO-functie in- en uitschakelen. . . . . . . . . . . . . . . . . . . . . . . . . . . . . . . 72
Automatisch kooksysteem gebruiken . . . . . . . . . . . . . . . . . . . . . . . . . . . . . . . 72
Bedieningsveld vergrendelen / ontgrendelen . . . . . . . . . . . . . . . . . . . . . . . . . 73
Kinderbeveiliging gebruiken. . . . . . . . . . . . . . . . . . . . . . . . . . . . . . . . . . . . . . . 74
Powerfunctie in-en uitschakelen. . . . . . . . . . . . . . . . . . . . . . . . . . . . . . . . . . . 75
Timer gebruiken . . . . . . . . . . . . . . . . . . . . . . . . . . . . . . . . . . . . . . . . . . . . . . . . . 76
Veiligheidsuitschakeling . . . . . . . . . . . . . . . . . . . . . . . . . . . . . . . . . . . . . . . . . . 79
Tips voor koken en braden. . . . . . . . . . . . . . . . . . . . . . . . . . . . . . . . . . . . . . . 80
Kookgerei voor inductie-kookzones. . . . . . . . . . . . . . . . . . . . . . . . . . . . . . . . . 80
Tips voor energiebesparing. . . . . . . . . . . . . . . . . . . . . . . . . . . . . . . . . . . . . . . . 81
Toepassingsvoorbeelden voor het koken. . . . . . . . . . . . . . . . . . . . . . . . . . . . . 82
Reiniging en onderhoud . . . . . . . . . . . . . . . . . . . . . . . . . . . . . . . . . . . . . . . . . 83
Wat is er aan de hand als … . . . . . . . . . . . . . . . . . . . . . . . . . . . . . . . . . . . . . 84
Afvalverwerking . . . . . . . . . . . . . . . . . . . . . . . . . . . . . . . . . . . . . . . . . . . . . . . . 86
Montageaanwijzing . . . . . . . . . . . . . . . . . . . . . . . . . . . . . . . . . . . . . . . . 87
Garantievoorwaarden. . . . . . . . . . . . . . . . . . . . . . . . . . . . . . . . . . . . . . 89
Adres service-afdeling. . . . . . . . . . . . . . . . . . . . . . . . . . . . . . . . . . . . . 91
Garantievoorwaarden. . . . . . . . . . . . . . . . . . . . . . . . . . . . . . . . . . . . . . 92
Adres service-afdeling. . . . . . . . . . . . . . . . . . . . . . . . . . . . . . . . . . . . . 95
Service . . . . . . . . . . . . . . . . . . . . . . . . . . . . . . . . . . . . . . . . . . . . . . . . . . . . . . 96
65
Page 66

Gebruiksaanwijzing
1 Veiligheidsvoorschriften
Neem deze aanwijzingen in acht, omdat anders bij eventuele schade
3
het recht op garantie vervalt.
5 Dit apparaat is in overeenstemming met de volgende EG-richtlijnen:
– 73/23/EEG van 19.02.1973 Laagspanningsrichtlijn
– 89/336/EEG van 03.05.1989 EMC-richtlijn inclusief aangepaste richt-
lijn 92/31/EEG
– 93/68/EEG van 22.07.93 CE-markeringsrichtlijn
Gebruik volgens de voorschriften
• Dit apparaat mag alleen in het huishouden worden gebruikt voor het
koken, braden en bakken van levensmiddelen.
• Het apparaat mag niet worden gebruikt als werkblad of aanrecht.
• Het is niet toegestaan het appaat om te bouwen of te veranderen.
Veiligheid voor kinderen
• Houd kleine kinderen altijd uit de buurt van het apparaat.
• Grotere kinderen mogen alleen onder begeleiding en toezicht met het
apparaat werken.
66
Algemene veiligheid
• Het apparaat mag alleen worden gemonteerd en aangesloten door
een erkend elektro-installateur.
• Inbouwapparaten mogen alleen worden gebruikt nadat deze zijn ingebouwd in voorgeschreven, passende inbouwkasten en werkbladen.
• Bij storingen aan het apparaat of beschadiging van het glaskeramiek
(breuken, sprongen resp. scheuren) moet het apparaat worden uitgeschakeld en worden losgekoppeld van het elektriciteitsnet, om gevaar
op elektrische schokken te voorkomen.
• Reparaties aan het apparaat mogen alleen worden uitgevoerd door
vakmensen.
Page 67

Veiligheid tijdens het gebruik
• Verwijder stickers en folies van het glaskeramiek.
• Wanneer u onoplettend bent tijdens het werken met het apparaat,
bestaat er risico op verbranding.
• De snoeren van elektrische apparaten mogen niet tegen het hete apparaatoppervlak resp. hete pannen aankomen.
• Oververhit vet en olie is licht ontvlambaar. Laat het apparaat niet
zonder toezicht achter wanneer u kookt met vet of olie (bijv. patat
bakken).
• De kookzones moeten na ieder gebruik worden uitgeschakeld.
• Gebruikers met geïmplanteerde pacemakers dienen met het bovenli-
chaam een afstand van ten minste 30 cm van de ingeschakelde inductie-kookzones aan te houden.
Veiligheid bij het schoonmaken
• Voor het schoonmaken moet het apparaat zijn uitgeschakeld en afgekoeld.
• Uit veiligheidsoverwegingen is het niet toegestaan het apparaat met
een stoom- of een hogedrukreiniger schoon te maken.
Voorkoming van beschadiging van het apparaat
• Het glaskeramiek kan worden beschadigd door vallende voorwerpen.
• Door stoten met pannen kan de rand van het glaskeramiek bescha-
digd raken.
• Pannen van gietijzer of gietaluminium of pannen met een beschadigde bodem kunnen bij het verschuiven het glaskeramiek bekrassen.
• Voorwerpen die kunnen smelten en gerechten die kunnen overkoken,
kunnen inbranden op het glaskeramiek en moeten direct worden verwijderd.
• De kookzones mogen niet worden gebruikt als er geen pan of een
lege pan op staat.
• De luchtopening van 5 mm tussen de werkplaat en het daaronder liggende meubelfront mag niet niet worden afgedekt.
67
Page 68

Beschrijving van het apparaat
Uitrusting kookplaat
Inductie-kookzone 1800 W
met Powerfunctie 2300 W
Inductie-kookzone 2400 W
met Powerfunctie 3200 W
Inductie-kookzone 1800 W
met Powerfunctie 2300 W
Uitrusting bedieningsveld
Powerfunctie
Aan/uit
met controlelampje
68
Kookstandkeuze
STOP+GO
Inductie-kookzone 1200 W
met Powerfunctie 1500 W
Kookzone-indicaties
Timerfunctie
Timer-indicatie
Timer
Vergrendeling
Bedieningsveld
Indicatie
Page 69

Touch-control-sensorvelden
Het apparaat wordt bediend door middel van touch-control-sensorvelden. Functies worden door het aanraken van de sensorvelden gestuurd
en door indicaties en akoestische signalen bevestigd.
De sensorvelden moeten van bovenaf worden aangeraakt, zonder andere sensorvelden te bedekken.
Sensorveld Functie
Aan/uit Apparaat in- en uitschakelen
Instellingen verhogen Kookstand/Tijd verhogen
Instellingen verlagen Kookstand/Tijd verlagen
TIMER Timer Timerkeuze
Vergrendeling Bedieningsveld ver-/ ontgrendeld
Power Powerfunctie in-/uitschakelen
Stop+Go Warmhoudstand in-/uitschakelen
69
Page 70

Indicaties
Indicatie Beschrijving
¾ Kookzone is uitgeschakeld
u Warmhoudstand Warmhoudstand/STOP+GO-func-
tie is ingeschakeld
¿ - Ç Kookstanden Kookstand is ingesteld
2 - 6 Kookstanden met
decimale punt
a Automatisch kooksys-
teem
Tussenstand is ingeschakeld
Automatische kooksysteem is actief
e Fout Er is een storing opgetreden
f Panherkenning Kookgerei is ongeschikt of te klein
of er is geen kookgerei geplaatst
h Restwarmte Kookzone is nog warm
l Kinderbeveiliging Vergrendeling/kinderbeveiliging is
ingeschakeld
p Power Powerfunctie is ingeschakeld
_ Veiligheidsuitschakeling Veiligheidsuitschakeling is actief
Restwarmte-indicatie
1 Waarschuwing! Verbrandingsgevaar door restwarmte. Na het uitscha-
kelen duurt het nog enige tijd voordat de kookzones zijn afgekoeld. Let
h restwarmte-indicatie.
op de
3 Restwarmte kan worden gebruikt voor het smelten en warmhouden
van gerechten.
70
De inductie-kookzones geven de voor het koken benodigde warmte,
direct aan de onderkant van de pannen af. Het glaskeramiek wordt
slechts door de retourwarmte van het kookgerei verwarmd.
De koelventilator schakelt afhankelijk van de temperatuur van de elektronika automatisch in en uit.
Page 71

Bediening van het apparaat
Inductie-kookzone met daarvoor geschikte pannen gebruiken.
3
Apparaat in- en uitschakelen
Bedieningsveld Indicatie Controlelampje
Inschakelen 2 seconden
aanraken
Uitschakelen 1 seconde
aanraken
¾ brandt
h/ geen gaat uit
3 Na het inschakelen moet binnen ca. 10 seconden een kookstand of een
functie worden ingesteld, anders schakelt het apparaat automatisch uit.
Kookstand instellen
Bedieningsveld Indicatie
Verhogen aanraken u tot Ç / p
Verlagen aanraken Ç tot ¾
Uitschakelen en tegelijk aanraken ¾
71
Page 72

STOP+GO-functie in- en uitschakelen
De STOP+GO-functie schakelt alle ingeschakelde kookzones tegelijk in
de warmhoudstand in en weer in de eerder ingestelde kookstand. Deze
functie is geschikt voor een kortstondige onderbreking en voortgang
van het kookproces, bijv. om een telefoongesprek te voeren.
Bedieningsveld Indicatie
Inschakelen aanraken u
Uitschake-
len
aanraken eerder ingestelde kookstand
(niet automatisch kooksysteem)
3 Timerfuncties worden door STOP+GO niet aangehouden.
3 STOP+GO vergrendelt het gehele bedieningsveld tot het sensorveld .
Automatisch kooksysteem gebruiken
Stap Bedieningsveld Indicatie
1. Stap Ç / p instellen Ç / p
2. Kort uitschakelen Ç / p
3. aanraken a
4. aanraken om de gewenste
kookstand in te stellen
Alle kookzones zijn met een automatisch kooksysteem uitgevoerd. Het
automatische kooksysteem stelt de kookzone voor een bepaalde tijd op
vol vermogen en schakelt vervolgens automatisch op de ingestelde
kookstand terug.
Æ tot ¿ / u
na 3 seconden a
3 Wordt tijdens de kookactivering a een hogere kookstand gekozen, bijv.
van
Á naar Ã, wordt de kooktijd aangepast.
3 Heeft de kookzone nog restwarmte (indicatie h), wordt de kookactive-
ring niet uitgevoerd.
72
Page 73

De duur van de automatische kookactivering is afhankelijk van de ingestelde kookstand.
Kookstand Duur van de
kookactivering
[min]
v 0
1 1
2 1,7 2. 3
3 4,8 3. 5,5
4 6,5 4. 8,2
5 10,2 5. 12,3
6 2 6. 2,5
7 3,5
8 4,5
9 ---
Tussenstand
Duur van de
kookactivering
[min]
Bedieningsveld vergrendelen / ontgrendelen
Het bedieningsveld kan met uitzondering van het sensorveld ”Aan/Uit“
op ieder gewenst moment worden vergrendeld, bijv. om het wijzigen
van de instellingen als gevolg van het met een lap afnemen, te voorkomen.
Bedieningsveld Indicatie
Inschakelen aanraken l (na 5 seconden)
Uitschake-
aanraken eerder ingestelde kookstand
len
3 Als u het apparaat uitschakelt, wordt de vergrendeling automatisch uit-
geschakeld.
73
Page 74

Kinderbeveiliging gebruiken
De kinderbeveiliging voorkomt ongewenst gebruik van het apparaat.
Kinderbeveiliging inschakelen
Stap Bedieningsveld Indicatie/signaal
1. apparaat inschakelen
¾
(geen kookstand instellen)
2. aanraken tot het signaal
akoestisch signaal
klinkt
3. aanraken l
Apparaat wordt uitgeschakeld.
Kinderbeveiliging uitschakelen
Stap Bedieningsveld Indicatie/signaal
1. apparaat inschakelen l
2. aanraken tot het signaal
akoestisch signaal
klinkt
3. aanraken
Apparaat wordt uitgeschakeld.
Kinderbeveiliging tijdelijk uitschakelen
De kinderbeveiliging kan op deze manier eenmalig worden uitgeschakeld; bij het volgende gebruik is de kinderbeveiliging weer actief.
74
Stap Bedieningsveld Indicatie/signaal
1. apparaat inschakelen l
2. en tegelijk aanraken ¾ / akoestisch signaal
Tot de volgende keer dat het apparaat wordt uitgeschakeld, kan dit
normaal worden gebruikt.
Page 75

Powerfunctie in-en uitschakelen
De Powerfunctie geeft extra vermogen aan de kookzones, bijv. om
een extra grote hoeveelheid water snel aan het koken te brengen.
De Powerfunctie wordt voor een periode van 10 minuten geactiveerd.
Daarna schakelt de kookzone automatisch weer op kookstand 9 in.
Bedieningsveld Indicatie
Inschakelen aanraken p
Uitschakelen aanraken Ç
aanraken Ç
Power-Management
De kookzones beschikken over een
maximaal vermogen.
Als dit vermogen bij het inschakelen
van de Powerfunctie wordt overschreden, dan reduceert de functie
Power-Management de kookstand
van een andere kookzone.
De indicatie van deze kookzone wisselt gedurende twee minuten tussen
de ingestelde en de maximaal mogelijke kookstand. Daarna wordt de
daadwerkelijke kookstand aangegeven.
Voorbeeld:
Laatst
ingeschakelde kookzone
ingestelde
kookstand
Andere kookzone
ingestelde
kookstand
indicatie daadwerkelijke
kookstand
p 9 6 in wisseling met 9 6
3 Als de Powerfunctie wordt uitgeschakeld, wisselen de kookzones auto-
matisch naar de vooraf ingestelde kookstand terug.
75
Page 76

Timer gebruiken
Alle kookzones kunnen tegelijk een van de beide Timerfuncties gebruiken.
Functie Vereisten Resultaat na
verloop van de tijd
Automatische uit-
schakeling
Kookwekker bij niet gebruikte
bij een ingestelde
kookstand
kookzones
akoestisch signaal
00 knippert
kookzone wordt uit-
geschakeld
akoestisch signaal
00 knippert
3 Als een kookzone wordt uitgeschakeld, dan wordt tevens de ingestelde
Timerfunctie uitgeschakeld.
3 Als additioneel bij een ingestelde kookwekker bij deze kookzone een
kookstand wordt ingesteld, dan wordt de kookzone na afloop van de
ingestelde tijd uitgeschakeld.
Kookzone kiezen
Stap Bedieningsveld Indicatie
1. TIMER 1xaanraken Controlelampje van de
eerste kookzone knippert
2. TIMER 1xaanraken Controlelampje van de
tweede kookzone knippert
3. TIMER 1xaanraken Controlelampje van de
derde kookzone knippert
4. TIMER 1xaanraken Controlelampje van de
vierde kookzone knippert
3 Knippert het controlelampje langzamer dan kan de kookstand ingesteld
of gewijzigd worden.
76
Page 77

3 Als meerdere Timerfuncties zijn ingesteld, dan wordt na een aantal se-
conden de kortste resterende tijd van alle Timerfuncties aangegeven en
knippert het bijbehorende controlelampje.
Tijd instellen
Stap Bedieningsveld Indicatie
1. TIMER kookzone se-
lecteren
2. of van de
geselecteerde kook-
zone aanraken
Na een aantal seconden knippert het controlelampje langzamer.
De tijd is ingeschakeld.
De tijd geeft de resterende tijd aan (loopt terug).
Controlelampje van de geselecteerde
kookzone knippert
00 tot 99 minuten
Timerfunctie uitschakelen
Stap Bedieningsveld Indicatie
1. TIMER kookzone se-
lecteren
2. van de
geselecteerde kook-
zone aanraken
Het controlelampje gaat uit.
De Timerfunctie voor de geselecteerde kookzone is uitgeschakeld.
Controlelampje van de geselecteerde
kookzone knippert sneller
Resterende tijd wordt aangegeven
De resterende tijd telt terug tot 00.
77
Page 78

Tijd wijzigen
Stap Bedieningsveld Indicatie
1. TIMER kookzone se-
lecteren
2. of van de ge-
selecteerde kookzo-
ne aanraken
Na een aantal seconden knippert het controlelampje langzamer.
De tijd is ingeschakeld.
De tijd geeft de resterende tijd aan (loopt terug).
Controlelampje van de geselecteerde
kookzone knippert sneller
Resterende tijd wordt aangegeven
01 tot 99 minuten
Resterende tijd van een kookzone aangeven
Stap Bedieningsveld Indicatie
1. TIMER kookzone
selecteren
Na een aantal seconden knippert het controlelampje langzamer.
Controlelampje van de geselecteerde
kookzone knippert sneller
Resterende tijd wordt aangegeven
Akoestisch signaal uitschakelen
Stap Bedieningsveld Akoestisch signaal
78
1. TIMER aanraken Akoestische uitschakeling.
Akoestisch signaal gaat uit
Page 79

Veiligheidsuitschakeling
Kookplaat
• Als na het inschakelen van de kookplaat niet binnen ca. 10 seconden
bij een kookzone een kookstand wordt ingesteld, schakelt de kookplaat automatisch uit.
• Als een of meerdere sensorvelden langer dan ca. 10 seconden worden
afgedekt, bijv. door een daarop geplaatste pan, klinkt een signaal en
schakelt de kookplaat automatisch uit.
• Wanneer alle kookzones worden uitgeschakeld, schakelt de kookplaat
na ca. 10 seconden automatisch uit.
Bedieningsveld
3 Vochtigheid (bijv. een vochtige doek) of overgekookte vloeistoffen op
het bedieningsveld, schakelen alle kookzones direct uit.
Kookzones
• Bij oververhitting (bijv. als gevolg van een drooggekookte pan) schakelt de kookzone automatisch uit.
nieuw gebruiken moet de kookzone op
afgekoeld te zijn.
• Als hiervoor ongeschikte pannen worden gebruikt, knippert
indicatie en na 10 minuten schakelt de indicatie van de kookzone uit.
• Als een van de kookzones na een bepaalde tijd niet is uitgeschakeld
of als de kookstand niet wijzigt, schakelt de betreffende kookzone
automatisch uit.
_ wordt aangegeven. Voor het op-
0 gesteld worden en dient
f in de
Kookstand Uitschakeling na
V, 1 - 2
3 - 4
5
6 - 9
6 uur
5 uur
4 uur
1,5 uur
79
Page 80

Tips voor koken en braden
Aanwijzing met betrekking tot acrylamide
3
Volgens de laatste wetenschappelijke inzichten kan een intensieve bruining van levensmiddelen, met name bij zetmeelhoudende producten,
een gevaar voor de gezondheid door acrylamide veroorzaken. Om die
reden adviseren wij levensmiddelen zoveel mogelijk bij lage temperaturen te bereiden en de gerechten niet te veel te bruinen.
Kookgerei voor inductie-kookzones
Materiaal van de pannen / het
kookgerei
staal, staal-emaile ja
gietijzer ja
edelstaal indien door fabrikant als dusdanig aangegeven
aluminium, koper, messing --glas, keramiek, porcelein ---
geschikt
3 Kookgerei voor inductie-kookzones wordt door de fabrikant als dusda-
nig gekenmerkt.
Geschiktheidstest
Kookgerei is geschikt voor inductie als ...
• ... een klein beetje water op een inductie-kookzone met kookstand 9
binnen enkele seconden wordt verhit.
• ... en magneet aan de bodem van de pan “kleeft” en vast blijft zitten.
3 Een bepaald type kookgerei kan tijdens het verwarmen op de inductie-
kookzone een geluid geven. Deze geluiden duiden niet op een storing
of fout van de apparatuur en hebben op geen enkele wijze invloed op
de functie.
Formaat - pan
Inductie-kookzones passen zich, tot een bepaalde grens, automatisch
aan het formaat van de bodem van het kookgerei aan. Het magnetische
deel van de bodem van het kookgerei dient echter, afhankelijk van het
formaat van de kookzone, wel een bepaalde minimum diameter te hebben.
80
Page 81

3 Bij de kookzone met een diameter van 270 mm is de minimale diameter
van de panbodem van 180 mm aangegeven door de binnenste kring.
3 Het kookgerei moet op het midden van de kookzones staan.
Tips voor energiebesparing
2 Kookgerei vóór het inschakelen van de kookzone plaatsen.
2 Kookgerei, indien mogelijk, altijd met een deksel afsluiten.
81
Page 82

Toepassingsvoorbeelden voor het koken
De gegevens in de volgende tabel dienen slechts als richtlijn.
82
Kook-
stand
1-2
2-3 Wellen
3-4
4-5 Koken
6-7
7-8
De Powerfunctie is geschikt voor het koken van grote vloeistofhoeveel-
Kook-
proces
0 uit-stand
Warm
u
houden
Smelten
Stollen
Stomen
Stoven
Zacht
braden
Sterk
braden
Aan de
kook
brengen
9
Aanbra
den
Frituren
Geschikt voor Duur Aanwijzingen/tips
Warm houden van gare
gerechten
Hollandaisesaus,
smelten van boter,
chocolade, gelatine
Schuimomelet, bouillon
met ei
Wellen van rijst en melk-
gerechten
Verhitten van kant-en-
klaargerechten
Stoven van groente, vis
Vlees sudderen
Koken van aardappels 20-60 min.
Koken van grotere hoe-
veelheden, eenpansge-
rechten en soep
Schnitzel, cordon bleu,
karbonade, gehaktballen,
braadworst, lever, roux,
eieren, omelets, oliebollen
Aardappel koekjes, lende-
stukken, steaks, pannen-
koeken
Aan de kook brengen van grotere hoeveelheden water, pasta koken, aanbraden van vlees (goulash, stoofvlees), frituren van pata-
Naar be-
hoefte
5-25 min. Tussendoor omroeren
10-40 min. Met deksel bereiden
Minimaal dubbele
hoeveelheid vloeistof
25-50 min.
20-45 min.
60-150
min.
Voortdu-
rend bakken
5-15 min.
per pan
tes frites
aan de rijst toevoegen,
melkgerechten tussen-
door roeren
Bij groente weinig
vocht toevoegen (een
paar eetlepels)
Weinig vloeistof
gebruiken, bijvoor-
beeld: max.
per 750 g aardappels
Tot 3 l vloeistof plus
ingrediënten
Tussendoor keren
Tussendoor keren
heden.
Afdekken
¼ l water
Page 83

Reiniging en onderhoud
Voorzichtig! Verbrandingsgevaar door restwarmte.
1
Laat het apparaat afkoelen.
1 Let op! Bijtende en schurende schoonmaakmiddelen beschadigen het
apparaat. Schoonmaken met water en handafwasmiddel.
1 Let op! Resten van schoonmaakmiddelen beschadigen het apparaat.
Verwijder resten met water en handafwasmiddel.
Reinig het apparaat na ieder gebruik
1.Maak het apparaat schoon met een vochtige doek en een klein beetje
handafwasmiddel.
2.Wrijf het apparaat droog met een schone doek.
Verwijder verontreinigingen
1.Plaats een glasschraper schuin op het glaskeramische vlak.
2.Verwijder verontreinigingen door de schraper over het oppervlak te la-
ten glijden.
3.Maak het apparaat schoon met een vochtige doek en een klein beetje
handafwasmiddel.
4.Wrijf het apparaat droog met een schone doek.
verwijderen
Soort vervuiling direct bij afgekoeld apparaat met
Suiker, suikerhoudende gerechten
Kunststoffen, aluminiumfolies ja --Kalk- en watersporen --- ja
Vetspatten --- ja
metaalachtig glanzende
verkleuringen
*Glasschrapers en speciale schoonmaakmiddelen voor glaskeramiek of roestvrij staal zijn ver-
krijgbaar in de vakhandel.
ja ---
--- ja
Glasschraper*
Speciaal schoonmaakmiddel voor
glaskeramiek of
roestvrij staal*
3 Hardnekkige verontreinigingen verwijderen met een speciaal schoon-
maakmiddel voor glaskeramiek of roestvrij staal.
83
Page 84

3 Krassen of donkere vlekken in het glaskeramiek kunnen niet meer wor-
den verwijderd, zij hebben echter geen invloed op het functioneren van
het apparaat.
Wat is er aan de hand als …
Storing Mogelijke oorzaak Oplossing
De kookzones kunnen niet
ingeschakeld worden of
functioneren niet
De restwarmte-indicatie
geeft niets aan
De automatische kookactivering schakelt niet in
Na het inschakelen van het
apparaat zijn meer dan 10
seconden verstreken
De vergrendeling is ingeschakeld
De kinderbeveiliging is ingeschakeld
Er zijn meerdere sensorvelden tegelijk aangeraakt
De sensorvelden zijn gedeeltelijk bedekt door een
vochtige doek of door
vloeistof
De beveiligingsuitschakeling is geactiveerd.
STOP+GO is actief u STOP+GO uitschakelen
De kookzone is slechts kort
gebruikt en is daarom nog
niet heet
De kookzone heeft nog een
restwarmte
De hoogste kookstand is
ingesteld
De kookstand wordt met
het sensorveld ingesteld
l
l
h
Ç
Apparaat nogmaals inschakelen
De vergrendeling uitschakelen (zie hoofdstuk ”Bedieningsveld vergrendelen/
ontgrendelen“)
Kinderbeveiliging deactiveren (zie het hoofdstuk
”Kinderbeveiliging“)
Raak slechts één sensorveld
tegelijk aan
De doek of vloeistof verwijderen.
Apparaat nogmaals inschakelen.
Apparaat nogmaals inschakelen.
Neem contact op met de
klantenservice wanneer de
kookzone toch heet is.
De kookzone laten afkoelen
De hoogste kookstand
heeft hetzelfde vermogen
als het automatische kooksysteem
1. Kookzone uitschakelen
2. De kookzone via het sen-
sorveld instellen
84
Page 85

Herhaalde signaaltoon (6x),
het apparaat schakelt uit
Een of meerdere sensorvelden zijn langer dan
10 seconden bedekt
Sensorvelden vrij maken
Een zoemer is hoorbaar en
het apparaat wordt automatisch ingeschakeld en na
5 sec. weer uitgeschakeld,
na 5 sec. klinkt nogmaals
een zoemer.
De indicatie wisselt tussen
twee kookstanden
Het sensorveld Aan/Uit
wordt geblokkeerd, bijv.
door een doek
Power-Management reduceert het vermogen van
deze kookzone
Geen voorwerpen op het
bedieningsveld leggen
Zie hoofdstuk ”Powerfunctie in-/uitschakelen”
f knippert Ongeschikt kookgerei Geschikt kookgerei gebrui-
ken
Geen kookgerei op de
kookzone
De diameter van de bodem
van het kookgerei is te
klein voor de kookzone
_ brandt Oververhittingbeveiliging
van de kookzone is geactiveerd
e en nummer wordt aan-
gegeven
Fout in de elektronica Apparaat een aantal minu-
Kookgerei plaatsen
Op een kleinere kookzone
plaatsen
Geschikt kookgerei gebruiken
Kookzone uitschakelen
Kookzone nogmaals inschakelen
ten van de voeding scheiden (zekering uit de
huisinstallatie nemen)
Als na het inschakelen de
e nogmaals wordt
fout
aangegeven, contact opnemen met de servicedienst
Wanneer u de storing niet kunt verhelpen met de hierboven gegeven aanwijzingen, neem dan contact op met uw vakhandel of met
onze service-afdeling.
1 Waarschuwing! Reparaties aan het apparaat mogen alleen door vak-
mensen worden uitgevoerd. Onvakkundige reparaties kunnen tot aanzienlijke risico's voor de gebruiker leiden.
3 Bij een onjuiste bediening wordt het bezoek van de servicetechnicus
ook tijdens de garantieperiode in rekening gebracht.
85
Page 86

Afvalverwerking
Verpakkingsmateriaal
2
De verpakkingsmaterialen zijn niet schadelijk voor het milieu en herbruikbaar. De kunststoffen hebben de volgende aanduidingen, bijv.
>PE<, >PS<, enz. Verwijder de verpakkingsmaterialen in overeenstemming met de aanduiding bij de gemeentelijke inzamelplaatsen in de
daarvoor bestemde containers.
2 Oud apparaat verwijderen
Verwijder afgedankte apparatuur conform de in uw woonplaats geldende richtlijnen.
86
Page 87

Montageaanwijzing
Veiligheidsvoorschriften
De in het land van gebruik geldende wetten, verordeningen, richtlijnen
en normen moeten in acht worden genomen (veiligheidsvoorschriften,
vakkundige recycling volgens de voorschriften, enzovoort).
De montage mag alleen worden uitgevoerd door een vakman.
De minimale afstanden tot andere apparaten moeten worden aangehouden.
Laden mogen alleen met een beschermende bodem direct onder
het apparaat worden gemonteerd.
De snijvlakken van het werkblad moeten met een geschikt dichtingsmateriaal worden beschermd tegen vocht.
De dichting zorgt voor een naadloze aansluiting tussen apparaat en
werkblad.
Tussen het apparaat en het werkblad mag geen siliconendichtmiddel
worden aangebracht.
De onderkant van het apparaat aan de binnenzijde tegen damp en
vochtigheid beschermen, bijv. tegen een afwasautomaat of een oven.
Voorkom het plaatsen van het apparaat direct naast deuren of onder
ramen. Openklappende deuren en openspringende ramen kunnen anders het kookgerei van de kookplaat stoten.
1 WAARSCHUWING!
Risico op verwonding door elektrische stroom.
• Op de netaansluitklem staat spanning.
• Netaansluitklem spanningvrij maken.
• Houd u aan het aansluitschema.
• Houd u aan de veiligheidsvoorschriften met betrekking tot elektro-
techniek.
• Garandeer de contactbescherming door vakkundige inbouw.
• Laat de elektrische aansluiting uitvoeren door een erkend installateur.
1 LET OP!
Beschadigingen door elektrische stroom.
Loszittende en onvakkundig aangebrachte stekkerverbindingen kunnen
oververhitting van de aansluiting veroorzaken.
• Klemaansluitingen vakkundig uitvoeren.
• Zorg ervoor dat het snoer niet wordt belast door trekken.
• Bij een aansluiting met 1- of met 2-fasen dient steeds de juiste en
passende netaansluitng van het type H05BB-F Tmax 90° (of hoger) te
worden ingezet.
87
Page 88

• Als de aansluitkabel van dit apparaat beschadigd is, moet deze door
een speciale aansluitkabel (type H05BB-F Tmax 90°; of hoger) worden
vervangen. Deze is verkrijgbaar bij de service-dienst.
In de elektrische installatie moet een inrichting worden aangebracht,
die het mogelijk maakt het apparaat met een contactopeningswijdte
van min. 3 mm met alle polen van het net te scheiden.
Geschikte scheidingsinrichtingen zijn bijv. automatische zekeringen
(schroefzekeringen moeten uit de fitting geschroefd worden), aardlekschakelaar en veiligheidsschakelaars.
88
Page 89

Garantievoorwaarden
Nederland
Onze producten worden met de grootst mogelijke zorgvuldigheid geproduceerd. Desondanks kan
het voorkomen dat er een defect optreedt. Onze servicedienst zal dit op verzoek herstellen, zowel
binnen als buiten de garantietermijn. De levensduur van het product wordt daardoor niet negatief
beïnvloed.
Onderstaande garantievoorwaarden zijn gestoeld op de EU Richtlijn 99/44/EG en het Burgerlijk
Wetboek. De daaruit voortvloeiende rechten blijven onverlet.
Ook de garantieverplichtingen van de verkoper naar de eindgebruiker blijven onaangetast.
Voor dit product verlenen wij garantie volgens onderstaande voorwaarden:
1. Wij verhelpen kosteloos met inachtneming van de voorwaarden 2 tot en met 15 gebreken aan het
product die zich openbaren binnen 24 maanden vanaf de datum van levering aan de eindgebruiker. In geval van professioneel of daarmee gelijk te stellen gebruik is de garantie beperkt tot 12
maanden. Voor tweedehands producten geldt eveneens een termijn van 12 maanden.
2. De garantieprestatie houdt in dat het product kosteloos wordt teruggebracht in de toestand die
het had voor het defect optrad. Gebrekkige onderdelen worden hersteld of vervangen. Kosteloos
vervangen onderdelen worden ons eigendom.
3. Het gebrek moet terstond gemeld worden om mogelijke verdere schade te voorkomen. De garan-
tieaanspraak vervalt indien het gebrek niet binnen twee maanden na vaststelling is gemeld.
4. Voor een beroep op garantie dient het aankoopbewijs met aankoop- en/of leveringsdatum te wor-
den overlegd. Bij ontbreken daarvan dient ander overtuigend bewijs te worden overlegd.
5. De garantie heeft geen betrekking op schade aan kwetsbare onderdelen, zoals (vitrokeramisch)
glas, kunststof, rubber, die ontstaan is door onzorgvuldig gebruik.
6. De garantie heeft geen betrekking op kleine afwijkingen van de gestelde kwaliteit die voor de
waarde en deugdelijkheid van het product onbeduidend zijn.
7. De garantie geldt evenmin voor schade veroorzaakt door:
a. chemische en elektrochemische inwerking van water,
b. abnormale milieuomstandigheden in het algemeen,
c. voor het product oneigenlijke bedrijfsomstandigheden,
d. contact met agressieve stoffen.
8. De garantie heeft geen betrekking op gebreken door transportschade die buiten onze verantwoor-
delijkheid is ontstaan, niet-vakkundige installatie of montage, verkeerd gebruik, gebrekkig onderhoud, of het niet in acht nemen van de gebruiks- of montageaanwijzingen.
9. Het recht op garantie vervalt wanneer het defect werd veroorzaakt door herstelling of ingrepen
door derden die niet bevoegd of niet deskundig zijn, of wanneer het product voorzien werd van
toebehoren of onderdelen die niet origineel zijn en daardoor een defect veroorzaken.
10. Producten die gemakkelijk kunnen worden vervoerd dienen te worden overhandigd aan of gezon-
den naar onze servicedienst. Herstelling ter plaatse kan slechts worden gevraagd voor grote of ingebouwde producten.
11 . Indien het product zodanig is ingebouwd, ondergebouwd, opgehangen of geplaatst dat de beno-
digde tijd voor het in- en uitbouwen samen meer dan 30 minuten bedraagt, worden de hierdoor
ontstane extra kosten aan de gebruiker in rekening gebracht. Schade die ontstaat door abnormale
in- of uitbouw komt ten laste van de gebruiker.
12. Indien binnen de garantieperiode de herstelling van hetzelfde defect herhaaldelijk mislukt of de
herstellingkosten disproportioneel zijn wordt in overleg met de gebruiker een gelijkwaardige vervanging geleverd. In geval van vervanging behouden we ons het recht voor om een vergoeding te
rekenen naar rato van de verstreken gebruiksperiode.
13. Herstelling onder garantie heeft geen verlenging van de garantietermijn noch aanvang van een
nieuwe garantietermijn tot gevolg.
14. Op herstellingen geven wij een garantie van 12 maanden, uitsluitend op hetzelfde gebrek.
15. Verdere of andere aanspraken, in het bijzonder vergoeding van schade ontstaan buiten het pro-
duct, zijn uitgesloten voor zover een aansprakelijkheid niet wettelijk is vastgelegd.
16. In geval van aansprakelijkheid zal een vergoeding de aankoopwaarde van het product niet over-
treffen, tenzij wettelijk anders is bepaald.
Deze garantievoorwaarden gelden voor in Nederland gekochte en/of in gebruik zijnde producten.
Indien een product naar het buitenland wordt gebracht dient de gebruiker na te gaan of het product voldoet aan de technische voorwaarden ( o.a. spanning, frequentie, installatievoorschriften,
gassoort, klimaatomstandigheden) in het betreffende land. Voor in het buitenland aangeschafte
89
Page 90

producten dient de gebruiker zich te vergewissen van de bepalingen in Nederland. Noodzakelijke
of gewenste aanpassingen vallen niet onder de garantie, en kunnen niet altijd worden aangebracht.
Ook na afloop van de garantietermijn staat onze servicedienst u ter beschikking.
Adres Servicedienst:
Electrolux Service
Vennootsweg 1
2404 CG ALPHEN AAN DEN RIJN
Reparatievoorwaarden
Onze reparatievoorwaarden zijn conform de afspraak tussen de Consumentenbond en Vlehan*.
Art. 1 Aan de consument zal na een melding van een storing zo mogelijk direct, doch uiterlijk bin-
nen één werkdag worden medegedeeld op welke dag het bezoek van de technicus zal plaatsvinden. De reparatie zal als regel binnen zeven werkdagen na de melding zijn uitgevoerd.
Art. 2
a) Alvorens de reparatie wordt verricht zal de technicus een onderzoek uitvoeren naar de vermoedelijke oorzaak van de gemelde storing. Aan de hand hiervan zal hij een zo nauwkeurig mogelijke,
gespecificeerde begroting maken van de totale reparatiekosten inclusief voorrijkosten en diagnose-kosten. Desgevraagd zal deze begroting door de technicus schriftelijk worden vastgelegd.
b) Indien de consument met het begrote bedrag niet akkoord gaat, zal op verzoek het te repareren
toestel worden teruggebracht in de staat waarin het aan de technicus werd aangeboden. Nadat dit
is geschied, zullen alleen de kosten van voorrijden en arbeidsloon in rekening worden gebracht op
basis van de werkelijke bestede tijd, danwel van een vooraf vastgesteld tarief.
Art. 3 Indien tijdens het uitvoeren van de reparatie duidelijk wordt dat:
a) de oorspronkelijke reparatie door redelijkerwijs niet te voorziene omstandigheden niet tegen
het begrote bedrag kan worden uitgevoerd, of
b) ook andere dan in de begroting voorziene reparaties noodzakelijk zijn, zal overleg met de consument plaatsvinden en een herziene kostenbegroting worden gemaakt.
In geval de consument daarmee alsnog niet akkoord gaat, geldt eveneens het in artikel 2b bepaalde.
Art. 4 De reparatie zal zoveel mogelijk tijdens het eerste bezoek worden uitgevoerd. Indien om het
toestel in werkende staat te brengen een tweede bezoek noodzakelijk is, zal:
a) direct, doch uiterlijk binnen één werkdag door de betreffende service-organisatie of door de
technicus met de consument de datum voor een tweede bezoek worden afgesproken.
b) een herhalingsbezoek zal als regel binnen tien werkdagen na de melding plaatsvinden.
c) voor een tweede of daaropvolgend bezoek zal geen voorrijtarief in rekening worden gebracht,
tenzij de noodzaak voor een herhalingsbezoek aan de consument is toe te schrijven.
Art. 5 De consument ontvangt een gespecificeerde rekening met vermelding van type en serienummer van het apparaat, omschrijving van de diagnose, toegepaste tarieven, gebruikte onderdelen en materialen en een korte omschrijving van de verrichte werkzaamheden. De betaling van de
rekening dient tegen afgifte van een reparatienota direct contant of door middel van een gegarandeerd betaalmiddel plaats te vinden.
Art. 6 Op elke uitgevoerde en betaalde reparatie zal bij normaal huishoudelijk gebruik een volledige garantie van minimaal 3 maanden worden gegeven. Deze garantie omvat het kosteloos uitvoeren van een hernieuwde reparatie. Op de uitgewisselde en betaalde onderdelen geldt een
garantietermijn van 12 maanden. Bij een beroep op garantie op de reparatie dient de consument
op verzoek de gespecificeerde rekening van de voorgaande reparatie aan de technicus te overleggen.
Art. 7 Indien na driemaal uitvoeren van eenzelfde reparatie hetzelfde defect bij normaal huishoudelijk gebruik opnieuw optreedt binnen de onder art. 6 bedoelde garantietermijn en redelijkerwijs
een afdoend resultaat bij het opnieuw uitvoeren van de reparatie niet verwacht kan worden, zal
aan de consument een nieuw exemplaar of soortgelijk toestel van hetzelfde merk worden aangeboden tegen bijbetaling op basis van een per product te bepalen jaarlijks afschrijvingspercentage.
Art. 8 Vervangen onderdelen stelt de technicus weer ter beschikking van de consument, met uitzondering van de onder garantie of tegen een gereduceerde prijs vervangen onderdelen.
Art. 9 Een reparatie dient op zodanige wijze te worden uitgevoerd, dat een toestel daarna weer
volledig voldoet aan de veiligheidsvoorschriften, die op grond van een van fabriekswege aangebracht veiligheidskeurmerk gelden, danwel bij het ontbreken daarvan, aan de wettelijke vereisten
terzake. Dit houdt ondermeer in, dat reparaties moeten worden uitgevoerd met originele en door
de fabrikant ook terzake van veiligheidskeurmerken en -voorschriften gegarandeerde onderdelen.
*) Vereniging Leveranciers van Huishoudelijke Apparaten in Nederland
90
Page 91

Adres service-afdeling
Nederland
AEG fabrieksservice
Postbus 120
2400 AC Alphen aan den Rijn
Service-informatielijn
(voor bezoek servicetechnicus en onderdelen)
Consumentenbelangen
(voor algemene, product- of
gebruiksinformatie)
tel. 0172-468 300
tel. 0172-468 172
www.aeg.nl
91
Page 92

Garantievoorwaarden
Nederland
Onze producten worden met de grootst mogelijke zorgvuldigheid geproduceerd. Desondanks kan
het voorkomen dat er een defect optreedt. Onze servicedienst zal dit op verzoek herstellen, zowel
binnen als buiten de garantietermijn. De levensduur van het product wordt daardoor niet negatief
beïnvloed.
Onderstaande garantievoorwaarden zijn gestoeld op de EU Richtlijn 99/44/EG en het Burgerlijk
Wetboek. De daaruit voortvloeiende rechten blijven onverlet.
Ook de garantieverplichtingen van de verkoper naar de eindgebruiker blijven onaangetast.
Voor dit product verlenen wij garantie volgens onderstaande voorwaarden:
1. Wij verhelpen kosteloos met inachtneming van de voorwaarden 2 tot en met 15 gebreken aan het
product die zich openbaren binnen 24 maanden vanaf de datum van levering aan de eindgebruiker. In geval van professioneel of daarmee gelijk te stellen gebruik is de garantie beperkt tot 12
maanden. Voor tweedehands producten geldt eveneens een termijn van 12 maanden.
2. De garantieprestatie houdt in dat het product kosteloos wordt teruggebracht in de toestand die
het had voor het defect optrad. Gebrekkige onderdelen worden hersteld of vervangen. Kosteloos
vervangen onderdelen worden ons eigendom.
3. Het gebrek moet terstond gemeld worden om mogelijke verdere schade te voorkomen. De garan-
tieaanspraak vervalt indien het gebrek niet binnen twee maanden na vaststelling is gemeld.
4. Voor een beroep op garantie dient het aankoopbewijs met aankoop- en/of leveringsdatum te wor-
den overlegd. Bij ontbreken daarvan dient ander overtuigend bewijs te worden overlegd.
5. De garantie heeft geen betrekking op schade aan kwetsbare onderdelen, zoals (vitrokeramisch)
glas, kunststof, rubber, die ontstaan is door onzorgvuldig gebruik.
6. De garantie heeft geen betrekking op kleine afwijkingen van de gestelde kwaliteit die voor de
waarde en deugdelijkheid van het product onbeduidend zijn.
7. De garantie geldt evenmin voor schade veroorzaakt door:
a. chemische en elektrochemische inwerking van water,
b. abnormale milieuomstandigheden in het algemeen,
c. voor het product oneigenlijke bedrijfsomstandigheden,
d. contact met agressieve stoffen.
8. De garantie heeft geen betrekking op gebreken door transportschade die buiten onze verantwoor-
delijkheid is ontstaan, niet-vakkundige installatie of montage, verkeerd gebruik, gebrekkig onderhoud, of het niet in acht nemen van de gebruiks- of montageaanwijzingen.
9. Het recht op garantie vervalt wanneer het defect werd veroorzaakt door herstelling of ingrepen
door derden die niet bevoegd of niet deskundig zijn, of wanneer het product voorzien werd van
toebehoren of onderdelen die niet origineel zijn en daardoor een defect veroorzaken.
10. Producten die gemakkelijk kunnen worden vervoerd dienen te worden overhandigd aan of gezon-
den naar onze servicedienst. Herstelling ter plaatse kan slechts worden gevraagd voor grote of ingebouwde producten.
11 . Indien het product zodanig is ingebouwd, ondergebouwd, opgehangen of geplaatst dat de beno-
digde tijd voor het in- en uitbouwen samen meer dan 30 minuten bedraagt, worden de hierdoor
ontstane extra kosten aan de gebruiker in rekening gebracht. Schade die ontstaat door abnormale
in- of uitbouw komt ten laste van de gebruiker.
12. Indien binnen de garantieperiode de herstelling van hetzelfde defect herhaaldelijk mislukt of de
herstellingkosten disproportioneel zijn wordt in overleg met de gebruiker een gelijkwaardige vervanging geleverd. In geval van vervanging behouden we ons het recht voor om een vergoeding te
rekenen naar rato van de verstreken gebruiksperiode.
13. Herstelling onder garantie heeft geen verlenging van de garantietermijn noch aanvang van een
nieuwe garantietermijn tot gevolg.
14. Op herstellingen geven wij een garantie van 12 maanden, uitsluitend op hetzelfde gebrek.
15. Verdere of andere aanspraken, in het bijzonder vergoeding van schade ontstaan buiten het pro-
duct, zijn uitgesloten voor zover een aansprakelijkheid niet wettelijk is vastgelegd.
16. In geval van aansprakelijkheid zal een vergoeding de aankoopwaarde van het product niet over-
treffen, tenzij wettelijk anders is bepaald.
Deze garantievoorwaarden gelden voor in Nederland gekochte en/of in gebruik zijnde producten.
Indien een product naar het buitenland wordt gebracht dient de gebruiker na te gaan of het product voldoet aan de technische voorwaarden ( o.a. spanning, frequentie, installatievoorschriften,
gassoort, klimaatomstandigheden) in het betreffende land. Voor in het buitenland aangeschafte
92
Page 93

producten dient de gebruiker zich te vergewissen van de bepalingen in Nederland. Noodzakelijke
of gewenste aanpassingen vallen niet onder de garantie, en kunnen niet altijd worden aangebracht.
Ook na afloop van de garantietermijn staat onze servicedienst u ter beschikking.
Adres Servicedienst:
Electrolux Service
Vennootsweg 1
2404 CG ALPHEN AAN DEN RIJN
Reparatievoorwaarden
Onze reparatievoorwaarden zijn conform de afspraak tussen de Consumentenbond en Vlehan*.
Art. 1 Aan de consument zal na een melding van een storing zo mogelijk direct, doch uiterlijk bin-
nen één werkdag worden medegedeeld op welke dag het bezoek van de technicus zal plaatsvinden. De reparatie zal als regel binnen zeven werkdagen na de melding zijn uitgevoerd.
Art. 2
a) Alvorens de reparatie wordt verricht zal de technicus een onderzoek uitvoeren naar de vermoedelijke oorzaak van de gemelde storing. Aan de hand hiervan zal hij een zo nauwkeurig mogelijke,
gespecificeerde begroting maken van de totale reparatiekosten inclusief voorrijkosten en diagnose-kosten. Desgevraagd zal deze begroting door de technicus schriftelijk worden vastgelegd.
b) Indien de consument met het begrote bedrag niet akkoord gaat, zal op verzoek het te repareren
toestel worden teruggebracht in de staat waarin het aan de technicus werd aangeboden. Nadat dit
is geschied, zullen alleen de kosten van voorrijden en arbeidsloon in rekening worden gebracht op
basis van de werkelijke bestede tijd, danwel van een vooraf vastgesteld tarief.
Art. 3 Indien tijdens het uitvoeren van de reparatie duidelijk wordt dat:
a) de oorspronkelijke reparatie door redelijkerwijs niet te voorziene omstandigheden niet tegen
het begrote bedrag kan worden uitgevoerd, of
b) ook andere dan in de begroting voorziene reparaties noodzakelijk zijn, zal overleg met de consument plaatsvinden en een herziene kostenbegroting worden gemaakt.
In geval de consument daarmee alsnog niet akkoord gaat, geldt eveneens het in artikel 2b bepaalde.
Art. 4 De reparatie zal zoveel mogelijk tijdens het eerste bezoek worden uitgevoerd. Indien om het
toestel in werkende staat te brengen een tweede bezoek noodzakelijk is, zal:
a) direct, doch uiterlijk binnen één werkdag door de betreffende service-organisatie of door de
technicus met de consument de datum voor een tweede bezoek worden afgesproken.
b) een herhalingsbezoek zal als regel binnen tien werkdagen na de melding plaatsvinden.
c) voor een tweede of daaropvolgend bezoek zal geen voorrijtarief in rekening worden gebracht,
tenzij de noodzaak voor een herhalingsbezoek aan de consument is toe te schrijven.
Art. 5 De consument ontvangt een gespecificeerde rekening met vermelding van type en serienummer van het apparaat, omschrijving van de diagnose, toegepaste tarieven, gebruikte onderdelen en materialen en een korte omschrijving van de verrichte werkzaamheden. De betaling van de
rekening dient tegen afgifte van een reparatienota direct contant of door middel van een gegarandeerd betaalmiddel plaats te vinden.
Art. 6 Op elke uitgevoerde en betaalde reparatie zal bij normaal huishoudelijk gebruik een volledige garantie van minimaal 3 maanden worden gegeven. Deze garantie omvat het kosteloos uitvoeren van een hernieuwde reparatie. Op de uitgewisselde en betaalde onderdelen geldt een
garantietermijn van 12 maanden. Bij een beroep op garantie op de reparatie dient de consument
op verzoek de gespecificeerde rekening van de voorgaande reparatie aan de technicus te overleggen.
Art. 7 Indien na driemaal uitvoeren van eenzelfde reparatie hetzelfde defect bij normaal huishoudelijk gebruik opnieuw optreedt binnen de onder art. 6 bedoelde garantietermijn en redelijkerwijs
een afdoend resultaat bij het opnieuw uitvoeren van de reparatie niet verwacht kan worden, zal
aan de consument een nieuw exemplaar of soortgelijk toestel van hetzelfde merk worden aangeboden tegen bijbetaling op basis van een per product te bepalen jaarlijks afschrijvingspercentage.
Art. 8 Vervangen onderdelen stelt de technicus weer ter beschikking van de consument, met uitzondering van de onder garantie of tegen een gereduceerde prijs vervangen onderdelen.
Art. 9 Een reparatie dient op zodanige wijze te worden uitgevoerd, dat een toestel daarna weer
volledig voldoet aan de veiligheidsvoorschriften, die op grond van een van fabriekswege aangebracht veiligheidskeurmerk gelden, danwel bij het ontbreken daarvan, aan de wettelijke vereisten
terzake. Dit houdt ondermeer in, dat reparaties moeten worden uitgevoerd met originele en door
de fabrikant ook terzake van veiligheidskeurmerken en -voorschriften gegarandeerde onderdelen.
*) Vereniging Leveranciers van Huishoudelijke Apparaten in Nederland
93
Page 94

België
WAARBORGVOORWAARDEN
Onze toestellen worden met de grootst mogelijke zorgvuldigheid geproduceerd. Desondanks kan
het voorkomen dat er een defect optreedt. Onze klantendienst zal dit op verzoek herstellen, zowel
binnen als buiten de waarborgtermijn. De levensduur van het toestel wordt daardoor niet negatief
beïnvloed.
Onderstaande waarborgvoorwaarden zijn gestoeld op de EU Richtlijn 99/44/EG en het Burgerlijk
Wetboek. De daaruit voortvloeiende rechten blijven onverlet.
Ook de waarborgverplichtingen van de verkoper naar de eindgebruiker blijven onaangetast.
Voor dit toestel verlenen wij waarborg volgens onderstaande voorwaarden:
1. Wij verhelpen kosteloos met inachtneming van de voorwaarden 2 tot en met 15 gebreken aan het
toestel die zich openbaren binnen 24 maanden vanaf de datum van levering aan de eindgebruiker.
Deze waarborgvoorwaarden zijn niet van toepassing in geval van professioneel of daarmee gelijk
te stellen gebruik.
2. De waarborgprestatie houdt in dat het toestel kosteloos wordt teruggebracht in de toestand die
het had voor het defect optrad. Gebrekkige onderdelen worden hersteld of vervangen. Kosteloos
vervangen onderdelen worden ons eigendom.
3. Het gebrek moet terstond gemeld worden, om mogelijke verdere schade te voorkomen.
4. Voor een beroep op waarborg dient het aankoopbewijs met aankoop- en/of leveringsdatum te
worden overlegd.
5. De waarborg heeft geen betrekking op schade aan kwetsbare onderdelen, zoals (vitrokeramisch)
glas, kunststof, rubber, die ontstaan is door onzorgvuldig gebruik
6. De waarborg heeft geen betrekking op kleine afwijkingen van de gestelde kwaliteit die voor de
waarde en deugdelijkheid van het toestel onbeduidend zijn.
7. De waarborg geldt evenmin voor schade veroorzaakt door:
• chemische en elektrochemische inwerking van water,
• abnormale milieuomstandigheden in het algemeen
• voor het toestel oneigenlijke bedrijfsomstandigheden
• contact met agressieve stoffen.
8. De waarborg heeft geen betrekking op gebreken door transportschade die buiten onze verant-
woordelijkheid is ontstaan, niet vakkundige installatie of montage, verkeerd gebruik, gebrekkig
onderhoud, of het niet in acht nemen van de gebruiks- of montageaanwijzingen.
9. Het recht op waarborg vervalt wanneer het defect werd veroorzaakt door herstelling of ingrepen
door derden die niet bevoegd of niet deskundig zijn, of wanneer het toestel voorzien werd van
toebehoren of onderdelen die niet origineel zijn en daardoor een defect veroorzaken.
10. Toestellen die gemakkelijk kunnen worden vervoerd dienen te worden overhandigd of gezonden
naar onze klantendienst. Herstelling ter plaatse kan slechts worden gevraagd voor grote of ingebouwde toestellen.
11 . Indien het toestel zodanig is ingebouwd, ondergebouwd, opgehangen of geplaatst dat de beno-
digde tijd voor het in- en uitbouwen samen meer dan 30 minuten bedraagt, dan worden de hierdoor ontstane extra kosten aan de gebruiker in rekening gebracht. Schade die ontstaat door
abnormale in- of uitbouw komt ten laste van de gebruiker.
12. Indien binnen de waarborgperiode de herstelling van hetzelfde gebrek meermaals mislukt of de
herstellingkosten disproportioneel zijn wordt in overleg met de gebruiker een gelijkwaardige vervanging geleverd. In geval van vervanging behouden we ons het recht voor om een vergoeding te
rekenen naar rato van de verstreken gebruiksperiode.
13. Herstelling onder waarborg heeft geen verlenging van de waarborgtermijn noch aanvang van een
nieuwe waarborgtermijn tot gevolg.
14. Op herstellingen geven wij een waarborg van 12 maanden, uitsluitend op hetzelfde gebrek.
15. Verdere of andere rechten, in het bijzonder vergoeding van schade ontstaan buiten het toestel,
zijn uitgesloten voor zover een aansprakelijkheid niet wettelijk is vastgelegd.
In geval van aansprakelijkheid zal een vergoeding de aankoopwaarde van het toestel niet overtreffen.
94
Deze waarborgvoorwaarden gelden voor in België gekochte en/of in gebruik zijnde toestellen. Indien een toestel naar het buitenland wordt gebracht dient de gebruiker na te gaan of het toestel
voldoet aan de technische voorwaarden ( o.a. spanning, frequentie, installatievoorschriften, gassoort, klimaatomstandigheden) in het betreffende land. Voor in het buitenland aangeschafte toestellen dient de gebruiker zich zelf te vergewissen van de bepalingen in België. Noodzakelijke of
gewenste aanpassingen vallen niet onder de waarborg, en kunnen niet altijd worden aangebracht.
Ook na afloop van de waarborgtermijn staat onze klantendienst u ter beschikking.
Page 95

Adres Klantendienst:
ELECTROLUX HOME PRODUCTS BELGIUM
Bergensesteenweg, 719
1502 LEMBEEK
Tel.: 02.363.04.44
Adres service-afdeling
Nederland
AEG fabrieksservice
Postbus 120
2400 AC Alphen aan den Rijn
Service-informatielijn
(voor bezoek servicetechnicus en onderdelen)
Consumentenbelangen
(voor algemene, product- of
gebruiksinformatie)
België
Electrolux Home Products Belgium
ELECTROLUX SERVICE
Bergensesteenweg 719
1502 Lembeek
E-mail:
consumer.services@electrolux.be
tel. 0172-468 300
tel. 0172-468 172
www.aeg.nl
Consumer services 02/363.04.44 02/363.04.00
Telefon Telefax
02/363.04.60
95
Page 96

Service
Controleer bij technische storingen eerst of u met behulp van de gebruiksaanwijzing (hoofdstuk „Wat te moet doen als…“) het probleem
zelf kunt oplossen.
Wanneer u het probleem niet kunt oplossen, neemt u contact op met
onze service-afdeling.
Om u snel te kunnen helpen, hebben
wij de volgende gegevens nodig:
– Modelaanduiding
– Productnummer (PNC)
– Serienummer (S-No.)
(u vindt deze nummers op het
typeplaatje)
– Soort storing
– Eventuele foutmelding die het ap-
paraat aangeeft
– cijfer- of lettercombinatie bestaande uit drie posities, van de glas-
keramische industrie
Om ervoor te zorgen dat u de benodigde nummers van uw apparaat bij
de hand heeft, raden wij u aan deze hier te noteren:
96
Modelaanduiding: .....................................
PNC: .....................................
S-No: .....................................
Page 97

Assembly / Montage
97
Page 98

98
Page 99

Rating Plate / Plaque signalétique / Typeplaatje
99
Page 100

From the Electrolux Group. The world´s No.1 choice.
The Electrolux Group is the world´s largest producer of powered appliances for kitchen, cleaning and outdoor
use. More than 55 million Electrolux Group products (such as refrigerators, cookers, washing machines,
vacuum cleaners, chain saws and lawn mowers) are sold each year to a value of approx. USD 14 billion in more
than 150 countries around the world.
AEG Hausgeräte GmbH
Postfach 1036
D-90327 Nürnberg
http://www.aeg.hausgeraete.de
© Copyright by AEG
822 924 800-A-100504-01
Subject to change without notice
Sous réserve de modifications
Wijzigingen voorbehouden
 Loading...