

Page 1
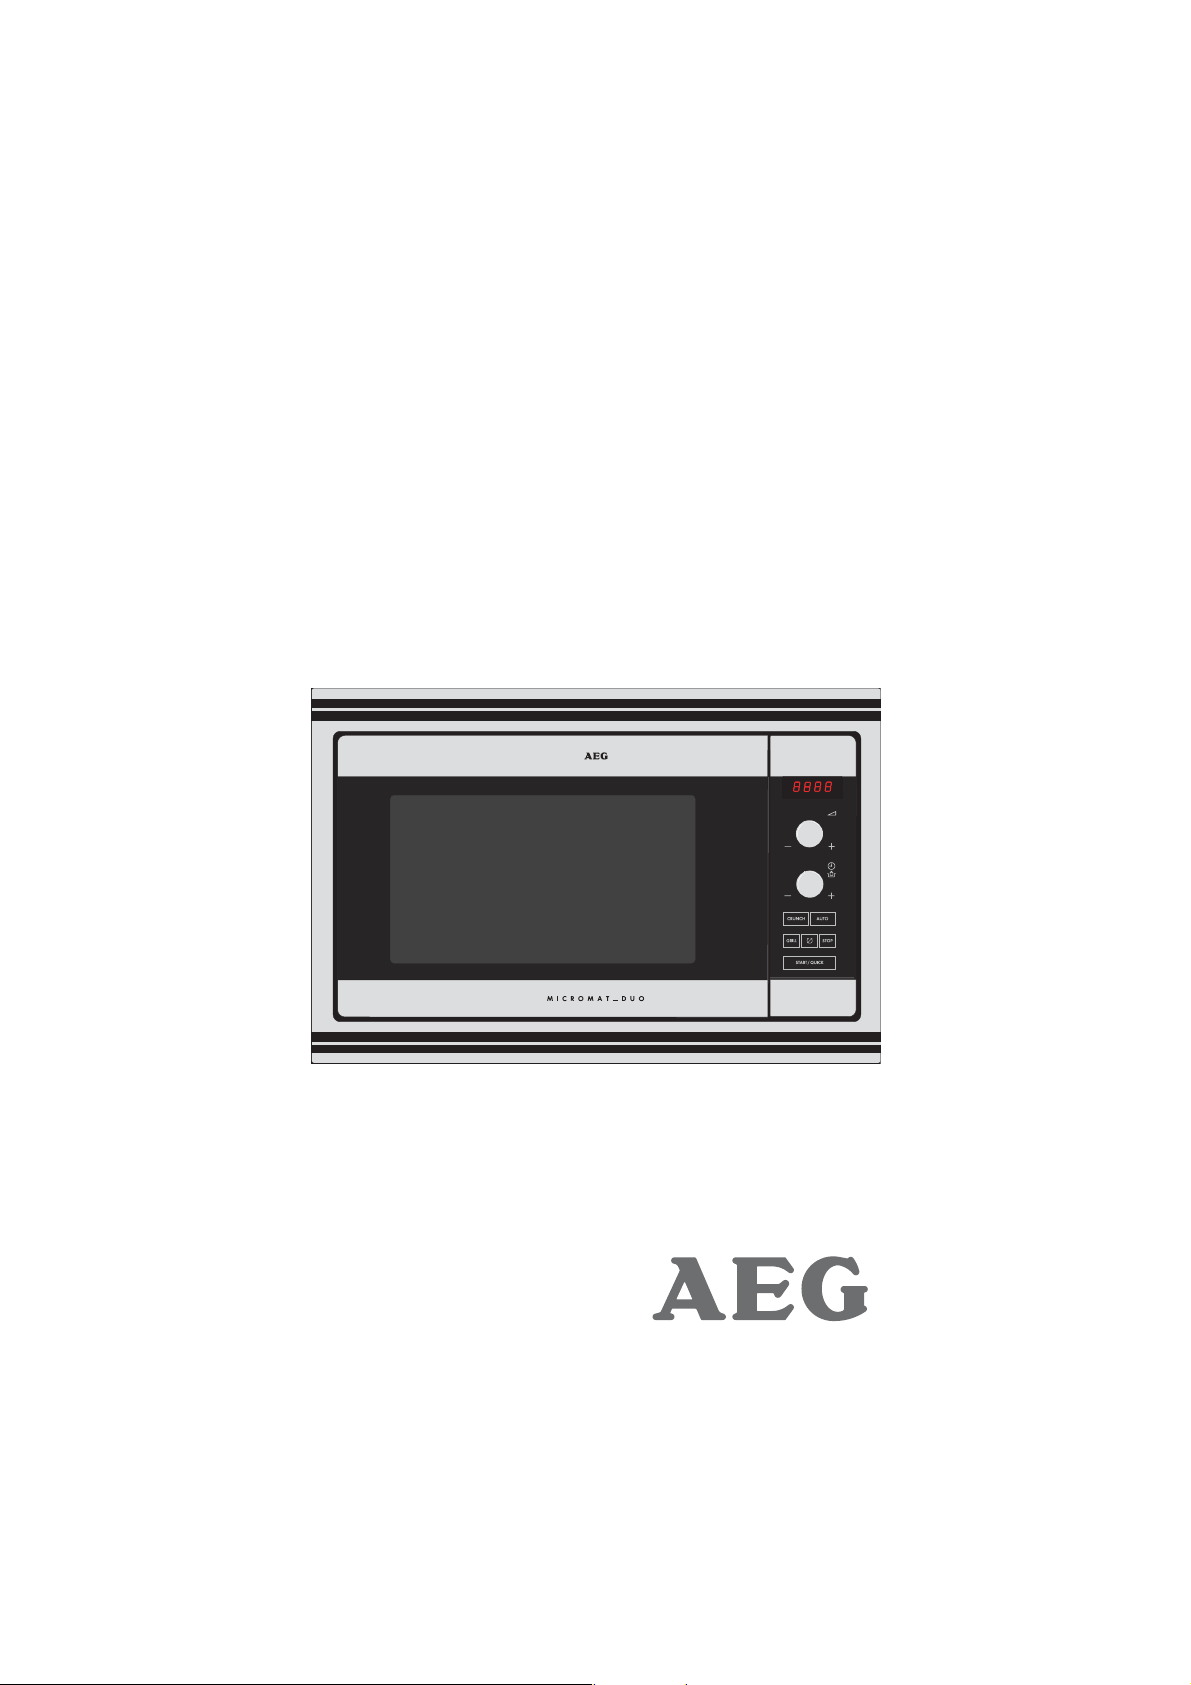
MCD 2460 E
Microwave oven
User manual
Page 2

2
Thank you for buying this microwave oven and for the confidence you have
placed in the AEG brand.
To benefit from the advantages of this appliance first read carefully this user
manual. Then keep it somewhere safe to consult if necessary.
Your new microwave will repay you with impeccable functioning. And you
will avoid the pointless expense of calling in the after sales service.
The warning triangle and/or the corresponding indications (Warning!
Prudence! Careful!) signal information that is important for your safety or
the correct functioning of your appliance. These instructions must be followed.
This symbol guides you through the user stages of the appliance.
This symbol precedes additional information on the practical use of the
appliance.
This user manual contains instructions that enable you to repair any defects
on your own. See chapter 'What to do if'.
Printed on paper that protects the environment. Don't just think
ecologically. Act ecologically.
Dear customer,
!
☞
i
s
s
s
)
Page 3

3
Important instructions
Recycling the packaging and old microwaves . . . . . . . . . . . . . . . . . . . . . 5
Assembly and connection . . . . . . . . . . . . . . . . . . . . . . . . . . . . . . . . . . . . . . . 5
Safety instructions
Generalities . . . . . . . . . . . . . . . . . . . . . . . . . . . . . . . . . . . . . . . . . . . . . . . . . . . 8
How to avoid damage to the microwave . . . . . . . . . . . . . . . . . . . . . . . . . . 8
Microwaves . . . . . . . . . . . . . . . . . . . . . . . . . . . . . . . . . . . . . . . . . . . . . . . . . . . 9
General instructions for functioning
The right dishes to use . . . . . . . . . . . . . . . . . . . . . . . . . . . . . . . . . . . . . . . . . 10
Some words of advice . . . . . . . . . . . . . . . . . . . . . . . . . . . . . . . . . . . . . . . . . . 10
Description
The appliance . . . . . . . . . . . . . . . . . . . . . . . . . . . . . . . . . . . . . . . . . . . . . . . . . 11
The control panel . . . . . . . . . . . . . . . . . . . . . . . . . . . . . . . . . . . . . . . . . . . . . . 12
The accessories . . . . . . . . . . . . . . . . . . . . . . . . . . . . . . . . . . . . . . . . . . . . . . . 13
Before using your microwave
Pre-cleaning . . . . . . . . . . . . . . . . . . . . . . . . . . . . . . . . . . . . . . . . . . . . . . . . . . 14
Setting the time . . . . . . . . . . . . . . . . . . . . . . . . . . . . . . . . . . . . . . . . . . . . . . . 14
Brief instructions . . . . . . . . . . . . . . . . . . . . . . . . . . . . . . . . . . . . . . . . . . . . . 15
Summary
Page 4

4
Types of functioning . . . . . . . . . . . . . . . . . . . . . . . . . . . . . . . . . . . . . . . . . 17
Microwaves alone . . . . . . . . . . . . . . . . . . . . . . . . . . . . . . . . . . . . . . . . . . . . . 18
Equivalence of microwave power . . . . . . . . . . . . . . . . . . . . . . . . . . . . . . . . 19
Start/Quick . . . . . . . . . . . . . . . . . . . . . . . . . . . . . . . . . . . . . . . . . . . . . . . . . . . 20
Automatic programmes . . . . . . . . . . . . . . . . . . . . . . . . . . . . . . . . . . . . . . . . . 21
Using automatic programmes . . . . . . . . . . . . . . . . . . . . . . . . . . . . . . . . . . . 22
Grill . . . . . . . . . . . . . . . . . . . . . . . . . . . . . . . . . . . . . . . . . . . . . . . . . . . . . . . . . 23
Combination microwave + grill cooking . . . . . . . . . . . . . . . . . . . . . . . . . . . 24
CRUNCH . . . . . . . . . . . . . . . . . . . . . . . . . . . . . . . . . . . . . . . . . . . . . . . . . . . . . 25
Child Lock . . . . . . . . . . . . . . . . . . . . . . . . . . . . . . . . . . . . . . . . . . . . . . . . . . . . 26
Timer . . . . . . . . . . . . . . . . . . . . . . . . . . . . . . . . . . . . . . . . . . . . . . . . . . . . . . . . 26
Tables/indicators
Defrosting . . . . . . . . . . . . . . . . . . . . . . . . . . . . . . . . . . . . . . . . . . . . . . . . . . . . 27
Reheating . . . . . . . . . . . . . . . . . . . . . . . . . . . . . . . . . . . . . . . . . . . . . . . . . . . . 28
Cooking . . . . . . . . . . . . . . . . . . . . . . . . . . . . . . . . . . . . . . . . . . . . . . . . . . . . . . 30
Practical instructions for use . . . . . . . . . . . . . . . . . . . . . . . . . . . . . . . . . . . . 31
Practical instructions for the microwave . . . . . . . . . . . . . . . . . . . . . . . . . . 32
Sample dishes . . . . . . . . . . . . . . . . . . . . . . . . . . . . . . . . . . . . . . . . . . . . . . . . . 33
Cooking table for grilling alone . . . . . . . . . . . . . . . . . . . . . . . . . . . . . . . . . . 34
Grill + microwave cooking table . . . . . . . . . . . . . . . . . . . . . . . . . . . . . . . . . 35
Practical instructions for use of the grill . . . . . . . . . . . . . . . . . . . . . . . . . . 35
Cleaning and maintenance . . . . . . . . . . . . . . . . . . . . . . . . . . . . . . . . . . . . 36
What to do if ... . . . . . . . . . . . . . . . . . . . . . . . . . . . . . . . . . . . . . . . . . . . . . . 37
After-sales service . . . . . . . . . . . . . . . . . . . . . . . . . . . . . . . . . . . . . . . . . . . . 38
Summary
Page 5

Recycling packaging and old microwaves
Packaging
Our microwaves are efficiently packaged to guard against transit risks. To respect the
environment packaging has been reduced to its strictest necessity. Packaging parts
(e.g. sheets, polystyrene) can be dangerous to children. There is a risk of suffocation!
Keep children away from these parts of the packaging.
All the packaging materials used respect the environment and can be recycled.
The cardboard parts are made from recycled paper. The synthetic parts are
characterised as follows:
>PE< for polyethylene e.g. packaging sheets
>PS< for polystyrene e.g. stuffing parts (with CFCs)
>PP< for polypropylene e.g. taping.
Recycling makes it possible to save raw materials and reduces the volume of waste
to dispose of.
Take the packaging of your microwave to a recycling centre whose address will be
given to you by your district or municipal authority.
Old microwaves
Before recycling your old microwave make it unusable. Remove the plug.
Then give it to your reseller when a new microwave is delivered or take it to a
recycling centre.
Important instructions
s
s
s
)
!
s
s
s
)
i
!
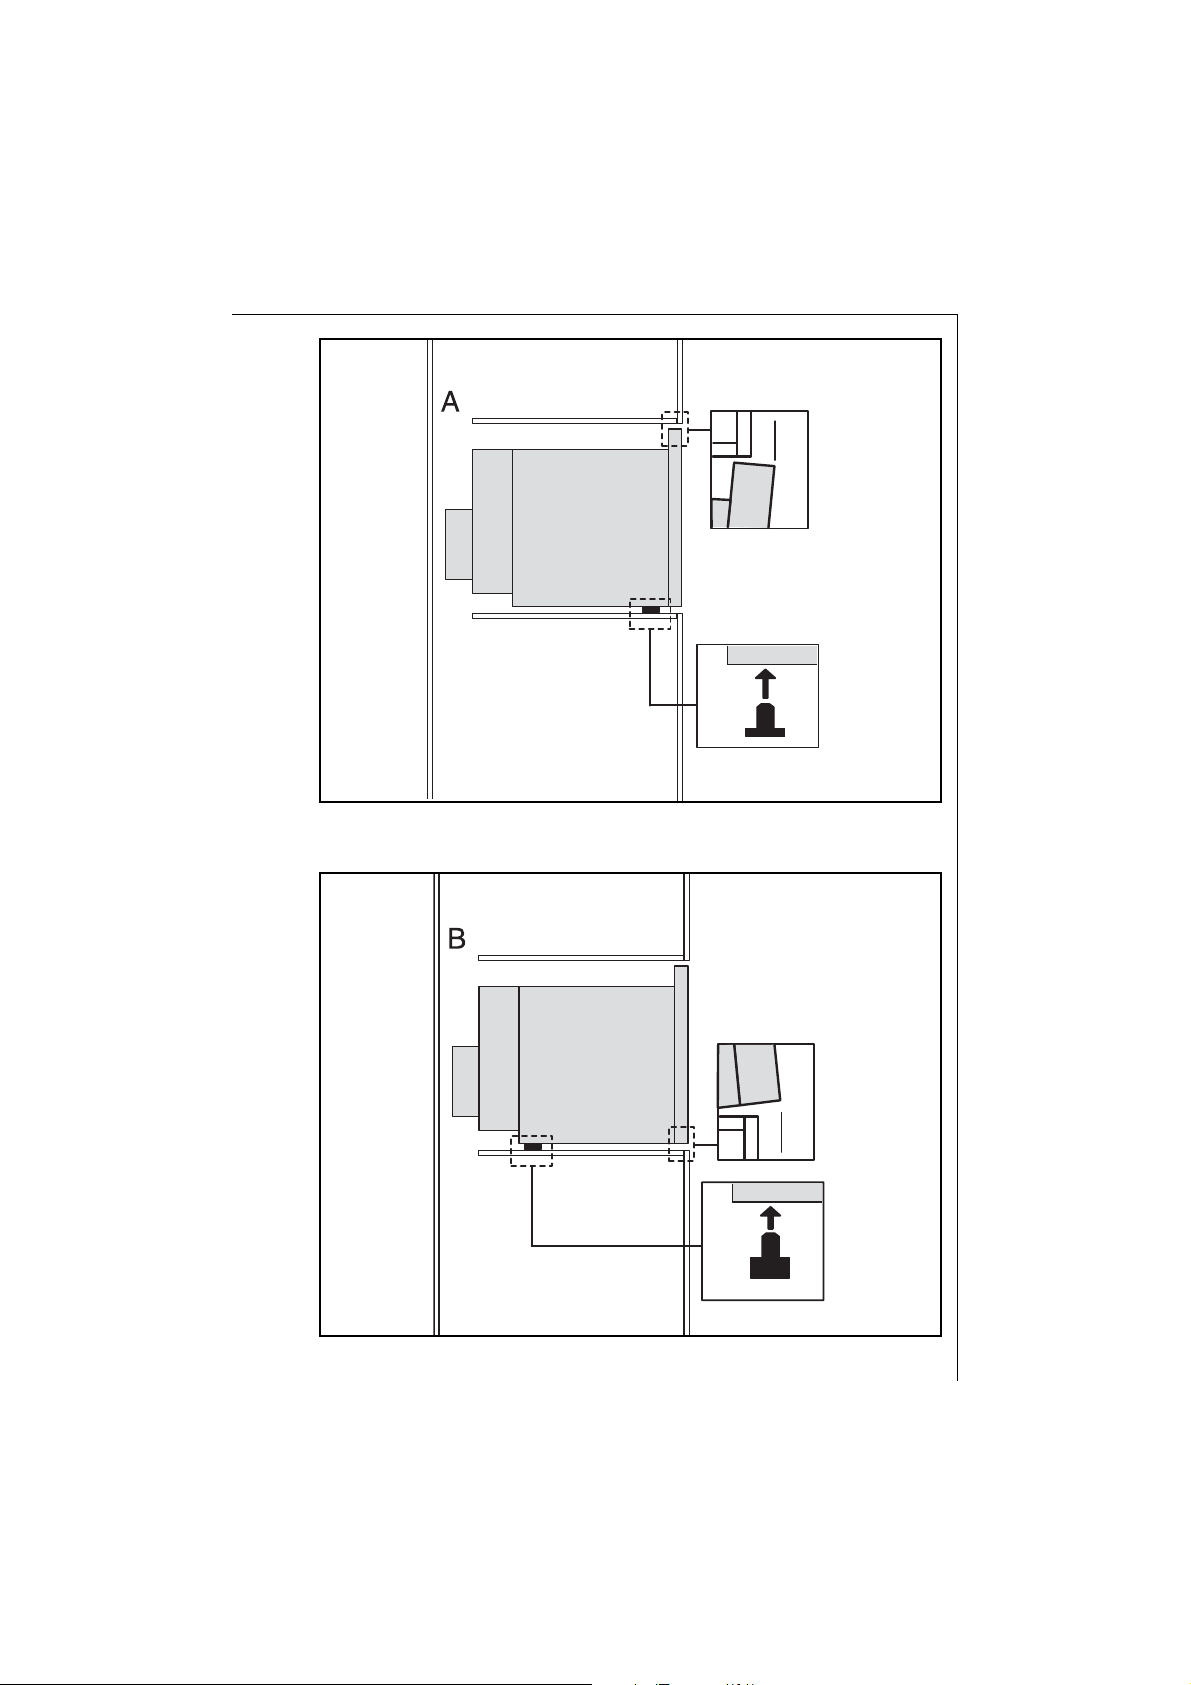
Assembly and connection
Do not use your microwave immediately (wait an hour or two) after transferring it
from a cold place to a hot place because condensation can cause it to malfunction.
This microwave is intended to be fitted at least 85 cm from the ground. Ensure there
is free circulation of air around the oven. Choose a location allowing a minimum free
space of 5 cm between the sides of the microwave and the walls, 14 cm above your
microwave and 10 cm for the rear wall. Make sure not to obstruct the air vents underneath and at the back of the microwave and make sure that the electrical plug is
accessible after installation.
• Caution: you must use an outlet with an earth terminal. The manufacturer is not
responsible for usage contrary to this advice.
This appliance conforms to the following European directives:
- Low tension directive: 73/23/EWG of 19.02.1973
- EMV directive: 89/336/EWG of 03.05.1989
(including the modification directive 92/31/EWG)
s
s
s
)
5
Page 6
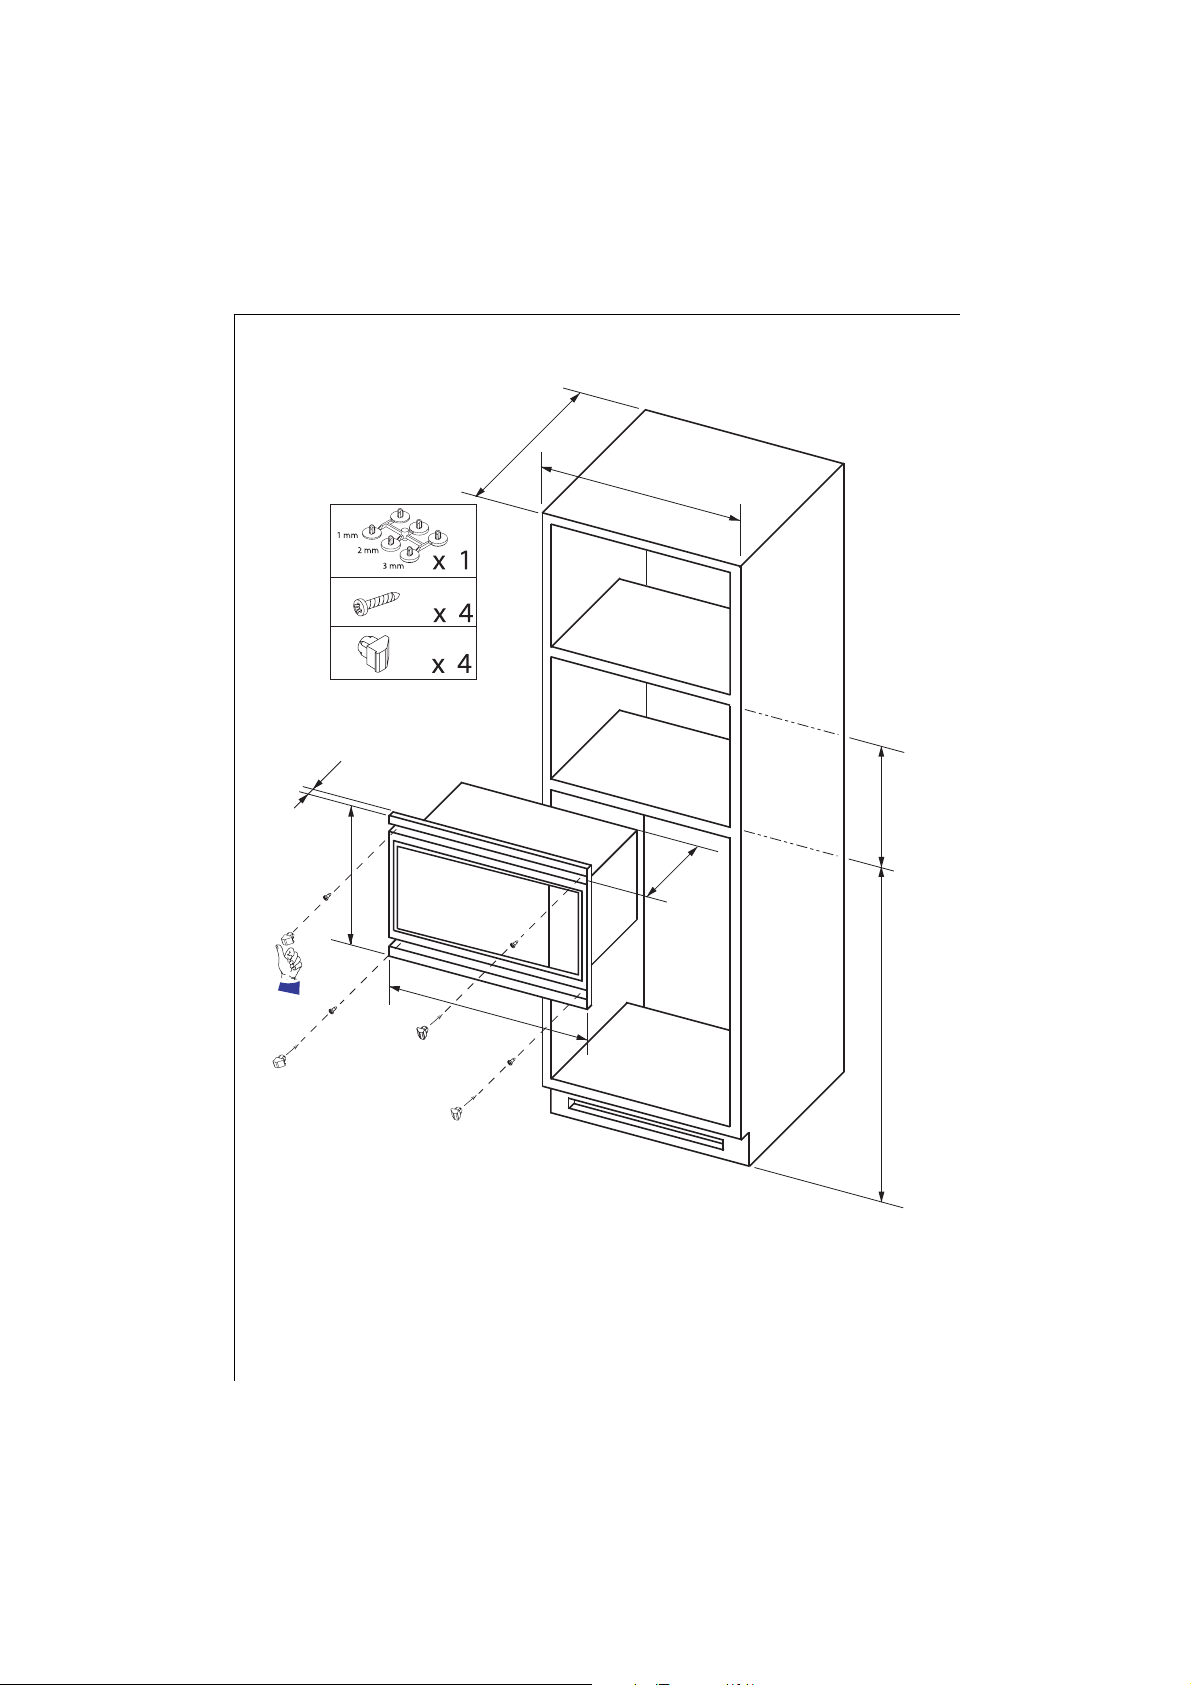
Assembly and connection
6
550
600 ext
23
450 int
460
507
592
850 mini
Page 7
7
Page 8

8
Generalities
• Only operate the microwave after having put the turntable and the drive shaft
in position.
• Only use dishes suited to microwaves.
• Regularly monitor the oven when food is heated or cooked in disposable containers
made of plastic, paper or other combustible material.
• If smoke is detected switch off or disconnect the oven and keep the door of the
microwave closed to smother any smoke. Contact your AEG after-sales service. Do
not use the microwave under any circumstances if it does not function correctly.
• If the microwave's feeder cable is damaged, change it for an identical cable.
• This appliance conforms to the safety standards in force. Repairs can only be
made by AEG after sales technicians. WARNING: it is dangerous for anyone other
than a trained technician to carry outmaintenance or repair operations which
require the removal of a cover protecting from exposure to microwave energy.
• In the event of malfunction: contact your stockist or your AEG after sales service.
If the area around the door and cavity or the flex or plug is damaged contact a
specialist technician before using your microwave.
• WARNING: Do not allow children to use the oven without supervision until
adequate instructions have been given so that the child is able to safely operate the microwave and understands the hazards of improper use.
• In order to evacuate the steam from waste water your microwave is provided
with a delayed ventilation function. Depending on the cooking mode selected
(solo / grill / combination), the fan may continue running after cooking has
finished.
How to avoid damage to the microwave
• Do not wedge anything between the door and the door frame.
• Always keep the seals of the door and their surfaces clean.
• Do not keep flammable objects in the oven area. They can ignite when the oven
is on.
• To avoid wearing down your microwave never operate it when it is empty or
without the turntable.
• Never preheat your oven using the microwave function.
Safety instructions
!
!
Page 9

9
Safety instructions
Microwaves
• Heating drinks by microwave can cause a sudden and delayed gushing of boiling
water. Also precautions should be taken when handling the container. You might
get burnt.
• Food with a 'skin' or a 'peel' like potatoes, tomatoes, sausages etc should be pier-
ced with a fork to allow the steam that forms to evaporate and to prevent the bursting of foodstuffs.
• Make sure that a minimum temperature of 70° C is reached for cooking/
reheating food. Just follow the data in the cooking tables (time/temperature).
Never use mercury or liquid thermometers to measure the temperature of food.
• Baby food in jars (glass) or bottles must always be reheated without a lid or top
and well stirred or shaken so that the heat is evenly distributed. Always check the
temperature before feeding your child so as to avoid scalding.
• Remember that hot food in a microwave oven will heat up the oven ware. Use
oven gloves or hotpads to handle hot dishes.
• Never cook your food for too long or at too high a power setting. Some parts of
the food can dry out or even ignite. To avoid this never use the same times
recommended for cooking in a conventional oven.
• WARNING: liquids or other foods should not be heated in hermetic containers
because they can explode.
Do not use microwaves for the following:
– Boiling eggs. They can burst open!
– Heating cooking oil (fondue or deep frying) and drinks containing a high level of
alcohol. There is a danger of spontaneous combustion!
– Drying animals, textiles or paper.
– Crockery (porcelain, ceramics, pottery etc) with hollows that can fill with water
and create steam pressure when the microwave is operating.
MICROWAVE OUTPUT POWER: 900 W
!
!
i
Page 10
10
X suitable - not suitable
1) Excluding silver, gold, platinum or metal decoration.
2) Excluding glaze containing metal.
3) Please note the maximum temperatures stated by the manufacturer.
4) Do not use the grill at the same time as a metallic container.
i
Tips
• Foods are of different shapes and types. They are prepared in different
quantities. This is why the cooking times and power needed for defrosting, reheating or cooking vary individually. Rule of thumb:
Double the amount = nearly double the time
• Follow the cooking tables. Always programme the shortest time first of all. Then if
necessary programme a longer time.
• When using microwaves heat forms in the food itself. As a result not all places can
be heated at the same time. For larger amounts especially, turn or mix the food
during the cooking cycle.
• In the cooking tables a "standing time" is indicated. Let the food stand in the
appliance or outside it so that the heat can be distributed more uniformly in the
food.
i
General operational instructions
The right crockery
Ovenware material Functions
Micro- wave Grill Combination
Ovenproof glass and ceramic dishes (without any
metal parts), dripping pan X X X
Non-ovenproof glass and Porcelain
1)
X- -
Glass ceramic and vitroceramic made fire X X X
frostproof material (e.g. Arcoflam)
Ceramics 2), earthenware
2)
X- X
Plastic, heat-resistant to X
-
X
3)
200 °C
3)
Cardboard, paper X - -
Plastic wrap X - -
Microwaveable roasting bags X
3)
-X
3)
Metal roasting pans e.g. enamel - X cast-iron dishes
Black lacquered or silicone coated baking tins - - -
Grill shelf
4)
- XX
Glass dripping-pan X X X
CRUNCH dish X X X
Page 11
11
F
Description
Appliance
A Control panel
B Door seal
C Door catch and safety system
D Viewing window
E Grill
F Turntable
G Turntable support
H Drive shaft
C
B
C
H GF
D
A
E
Page 12
12
Control panel
A Display window:
To indicate the time of day, the
cooking time, the function, the power
etc...
B Power knob:
The microwave power.
C The timer knob:
To regulate the time, cooking time or
to enter the weight when an
automatic programme is used.
D CRUNCH knob:
Allows you to use the CRUNCH dish.
E AUTO knob:
For automatic defrosting and
cooking programmes.
F GRILL knob:
To use the grill functions.
G TURNTABLE OFF knob:
To switch off the turntable.
H STOP knob:
To interrupt or cancel a programme in
operation (press once to pause, twice
to cancel).
I START/QUICK knob:
To start the oven.
A
B
G
I
F
C
H
E
D
Page 13

13
F
Product description
Accessories
Place the turntable and drive shaft like this. Make sure the
drive engages properly. The turntable can work in both
directions - clockwise or counter clockwise.
Do not rotate the drive shaft manually as you could
damage the drive system. If the rotation does not work make
sure there are no foreign bodies under the turntable.
The CRUNCH dish
3 For use with the CRUNCH function.
High position
➡
➡
Low position
➨
➥
➥
Dual position grill shelf:
1 With the grill or grill + microwave functions, you should use the grill shelf at the height best
suited to the dish to be grilled.
- Select the high position for browning thin foodstuffs.
- Select the low position for other dishes or place them directly on the turntable.
To fold the grill shelf down into the low position:
Push the hooks inwards and fold in the legs.
When using the grill shelf, take care to ensure that it is always well centred on the turntable.
The grill shelf should only be used with metal recipients on the grill function alone. However,
you can heat up foods in aluminium trays by putting a plate between the tray and the grill
shelf to avoid them coming into contact.
2 You may fold away the legs on your grill shelf to make it easier to store in the cupboard.
Page 14

14
Before using your microwave
Before using your microwave
Pre-cleaning
Only clean the outside surface of the appliance with a damp cloth. Do not use
abrasive cleaning agents (risk of damaging the surface).
For stainless steel surfaces only use cleaning agents specially designed for cleaning
stainless steel and which at the same time form a protective film against
fingerprints.
Before using the microwave for the first time remove all the accessories (including
the turntable and the turntable support) from the cooking compartment.
Clean the accessories with warm water and washing up liquid. Clean the cooking
compartment with a soft damp cloth.
Setting the time
Setting Example: 12 h 15
1. When you plug the appliance into the mains, ‘
11 22 :: 00 00
’
flashes on the display.
2. Set the clock, e.g. 12:15 by turning the timer1).
Press START/QUICK, the appliance is ready to function.
1)
Turn the timer to the left (to reduce) or to the right
(to increase).
The time of day can be corrected at any time:
Open the door, press START/QUICK for 5 seconds, turn the
timer to the desired time and confirm by pressing
START/QUICK or STOP.
☞
12:00
12:15
Page 15

15
F
Brief instructions
Process: Cooking food
1. Place the food in the appliance.
2. Close the door
3. Carry out the settings according
to the descriptions in the following
pages.
4 If necessary switch off the turntable by
pressing the
2
button.
5. Press on the START button.
6 End of programme.
Results/Remarks
The door catch engages with an audible
click. If the door is not properly closed
the microwave will not work.
Set the time by turning the knob to the
right (for a longer cooking cycle) and to
the left (for a shorter cooking cycle)
with the timer knob
1)
When the turntable is switched off the
button lights up. The turntable should
only be switched off when you use
plates that are bigger than the turntable.
This causes a blockage.
The appliance starts up. The function
appears in the display as well as the
programmed time and the countdown
starts.
The end of the process is indicated by a
triple beep. The microwave and the
interior lighting switch off. The display
shows 00:00 Then 3 beeps are repeated
every minute for 10 minutes or until the
door is opened. Then the time of day is
displayed again.
1)
If the programming is not finished at the end of 4 minutes, all the data entered is
automatically cancelled. The time of day is displayed again.
2)
The turntable continues to rotate during operation of the oven unless it is switched off before or during the programme cycle with the Stop Turntable button
(the button lights up).
☞
i
Page 16

16
1)
If on modifying the cooking time 00:00 appears on the display the end of the
cooking cycle is indicated by a triple beep. The microwave and the lighting
switch off.
During the cooking cycle, the cooking time can be increased up to a maximum of
60 minutes for all the programmes apart from the convection oven which can be
programmed up to 90 minutes.
The automatic programming times cannot be changed.
16
Brief instructions
During the cooking process
• Open the door e.g. to stir
• Close the door and press the START/
QUICK button.
• Press once on the STOP button
• Press twice on the STOP button.
• Change the cooking time:
turn the time to the left or
to the right.
• Change the microwave power:
turn the microwave power knob to
the left or to the right.
• Turn on the grill by pressing.
The GRILL button.
Results/Remarks
The appliance stops and the light
switches on. The STOP button lights up.
To continue the programme underway
press the START/QUICK button. To cancel
press STOP.
The programme continues.
The remaining time continues
automatically.
The programme underway is interrupted.
The STOP button lights up. To restart the
programme underway press
START/QUICK. To cancel press STOP.
The programme underway is cancelled.
The appliance and the interior lighting are
switched off. The display indicates the
time of day.
The duration indicated on the display is
modified according to the direction of
the rotation.
1)
The display indicates the power selected.
The remaining programme time operates
with the new power.
The display indicates the symbol and
grill level selected. The button lights up.
(See also "combination microwave and
grill" chapter).
i
i
Page 17

17
F
Microwave alone
In next to no time the microwave produces heat inside food for cooking,
heating defrosting.
Grill
The heat comes from the grill element. This function is particularly suited
to grilling meat steaks, sausages) or toast.
Combined function
The microwave function can be combined with the grill function as well
as the convection oven function. Combined cooking allows rapid and
regular cooking while browning the food.
Types of functioning
This appliance provides you with different types of
functioning.
Page 18

18
Microwave alone
Settings
Example: 1 minute 15 seconds at 700W
☞
1. Choose a power setting with the help of the power
knob. The time of the day disappears and the
programmed power is indicated on the display.
Turn to the left = weaker power.
Turn to the right = stronger power.
2. Set the cooking time with the help pf the timer.
The time is displayed.
3. Press the START/QUICK. The programmed duration is
calculated.
During the programme you can modify the microwave
power and/or the programming time.
i
Cooking time can be set as follows:
From 0 to 2 min in 5 second steps
From 2 to 5 min in 10 second steps
From 5 to 10 min in 20 second steps
From 10 to 20 min in 30 second steps
From 20 minutes in 1 minute steps
The maximum programme length is 60 minutes
Metallic objects should be kept at least 2 cm from the oven sides and
door in the microwave function.
!
i
You can add grill during the operation. See below the microwave + grill
function.
700
01:15
01:14
Page 19

19
Equivalences of microwave powers
This table indicates the power to use for different types of food.
900 Watts - Heating liquids
700 Watts - To start cooking or roasting
- Cooking vegetables
- Defrosting and reheating frozen dishes
- Reheating convenience foods
600 Watts - Finish cooking casseroles
500 Watts (e.g. pot-au-feu)
- Cooking egg-based dishes
450 Watts - Continue cooking a dish
350 Watts - Cooking delicate dishes
250 Watts - Heating baby food in a glass jar
- Cooking rice
- Reheating delicate dishes
- Melting gelatine
150 Watts - Defrosting meat, fish, bread
80 Watts - Defrosting cheese, cream and butter
- Defrosting cakes with cream icing
- Letting dough rise
- Softening butter
0 Watt - Timer
i
Page 20

Types of functioning
20
Setting
The START/QUICK allows rapid programming at full power for 30 seconds.
Each press on the START/QUICK button adds 30 seconds to the programming
time.
Example: heat 2 cups of water (2 min)
1. Press four times on the START/QUICK button. The
programming time is displayed. The oven starts
During the programme cycle each press on the
START/QUICK increases the time by 30 seconds. You
can also change the programming time using the
timer.
START/QUICK
i
☞
02:00
Page 21

21
Place the unwrapped frozen food on a small turned plate with a container underneath
to catch the defrosting liquid.
Midway through defrosting you will hear three beeps. Turn the food and, if possible,
separate the defrosted parts. Unstick the frozen parts.
After a grill function of more than 3 minutes the defrosting function will be
blocked for 20 minutes.
1)
Cover the ends of the thigh with aluminium foil before defrosting
2)
Cover the tail as well as the fins before defrosting.
Programme Food
Poultry
1)
Fish
2)
Meat
Pastry
Examples
Chicken
Whole fish, fillet
Roast pork, goulash
Cream pie
Weight from - to
100 - 2000 g
100 - 2000 g
100 - 2000 g
100 - 1000 g
Automatic programmes
Programme Food
Fresh vegetables I
Fresh vegetables II
Frozen vegetables
Examples
Brussels sprouts,
white cabbage,
carrots, celeriac
Courgettes, leeks
potatoes, spinach
fennel, cauliflower
broccoli
Carrots, cauliflower,
Brussels sprouts,
leeks, courgettes,
spinach, broccoli
Weight from - to
100 - 1000 g
100 - 1000 g
100 - 1000 g
If possible cook covered using a heat-resistant dish.
Midway through the cooking cycle you will hear three beeps. When the weight
of the vegetable is higher than 500 g it is recommended that you stir once or
twice. It is indispensable to add a small amount of water:
Fresh vegetables (I + II) : 100 - 500 g : 3 - 6 table spoons.
500 - 1000 g : 6 - 9 table spoons.
Frozen vegetables: 100 - 500 g : 3 - 9 table spoons.
500 - 1000 g : 9 -15 table spoons.
CC 11
CC 22
CC 33
i
i
j
11
22
33
Defrosting
!
Cook
The appliance has automatic programme enabling defrosting, cooking and
combination cooking. After selecting the programme suited to the type of food you
just enter its weight in grams. The microwave calculates the time required. The
following indicators will guide you in choosing the necessary programme.
-
j
-
j
-
Page 22

Types of functioning
22
Remarks
Place the chicken pieces
(legs) on the grill shelf (in the
high position). A whole
chicken should be placed
directly on the turntable.
Joints for roasting should be
placed on the turntable.
From 100 to 600g set the grill
at level 3. With foods above
625g place the grill at level 1
Combination cooking (cook and grill)
Programme
Food
Chicken
1)
(fresh)
Roast pork
2)
(fresh)
Gratin (alreadycooked
ingredients)
Weight from - to
100 - 2000 g
500 - 1500 g
100 - 2000 g
1)
The microwave beeps three times midway through the cooking cycle
indicating that the food should be turned.
These indications apply to refrigerated foods (+ 5° C).
The weight is set at 100 to 1000 g in 25g steps, from 1000 to 2000g in 50g steps.
Foods that are not covered by an automatic programme should be prepared
according to the indications on the cooking tables. Enter the microwave power
and the cooking duration manually.
CC GG 11
CC GG 22
CC GG 33
i
Using automatic programmes
Example: Defrost a chicken 1 kg
1. Press the AUTO button until the desired programme
appears on the display. The button lights up.
2. Enter the weight using the time/weight knob.
1
1000
3. Press the START/QUICK. The necessary duration is
indicated on the display.
24:00
4. If you wish to change the data, press twice on the
STOP button and restart the operation
☞
Midway through the defrosting cycle, the microwave will beep three times
indicating that the food should be turned or stirred. The appliance will not switch off.
i
j
-
Page 23

23
23
Grill
Setting
Example: 20 minutes GP2 power grill
☞
1. Turn the power knob to the left until “O” appears
on the display. The time of day disappears from the
display.
2. Press the GRILL button. The preset grill power, GP3,
is displayed. The GRILL button lights up. Select the
desired grill level, e.g. GP2, by pressing a second
time on the GRILL button.
3. Set the desired time using the timer. e.g. 20
minutes.
4. Press the START/QUICK button. The set time starts
to count down.
“O W” is displayed for 2 seconds before GP2
appears.
The GRILL button remains lighted during the
programme.
You can change the programming time and/or the
grill level during the cycle.
The grill levels are obtained by repeatedly pressing
on the grill button. Press the grill button once again
GP1 is displayed again GP3.
i
0
GP2
20:00
19:19
Page 24

Types of functioning
24
Combination microwave + grill cooking
Setting
Example: 20 minutes 700 W + GP2 grill microwave power
1. Press the GRILL button. The preset grill power level,
GGPP 33
, is displayed. The GRILL button lights up.
2. Select the desired gill level, e.g.
GGPP 22
, , by pressing
twice the GRILL button
GGPP 22
is displayed.
3. Select the microwave power using the power knob.
The microwave power is displayed.
4. Set the desired time with the timer e.g.
20 minutes.
5. Press the START/QUICK button. The set time starts to
count down.
You can change the microwave power, the grill level
and/or the programming time during the programming
cycle.
Higher or lower grill levels are obtained by repeatedly
pressing on the GRILL button.
During the cooking cycle the GRILL button remains lit.
It is possible to delete the microwave (set at 0 by the
power knob) or grill (press on the GRILL button until
the logo on the display is deleted) functions in the
course of the programme.
☞
i
GP3
GP2
700
20:00
19:59
Page 25

25
CRUNCH
Adjustment
Example: 12 minutes
1. Place the CRUNCH dish on the turntable, either
empty (for preheating) or filled with the foods to be
cooked
1)
2. Enter the time required using the Time selector. The
current clock time disappears and the
programming time appears.
4. Press the START button. The programmed time begins
to count down. The grill light goes out.
12:00
1)
Always place the CRUNCH tray directly onto the turntable and never onto
the grill shelf, as otherwise this can cause irreparable damage to your
appliance.
With the CRUNCH function, the microwave power setting is obligatorily
set at 900W.
You should only use the CRUNCH tray with the CRUNCH function.
The CRUNCH tray may be preheated when empty using the CRUNCH
function for a maximum of two minutes.
i
☞
Page 26

Types of functioning
26
Child lock
You can programme a "child lock" to prevent unauthorized use of your
microwave oven.
Setting
Press the STOP button for 5 seconds with the door open.
“
LL OO CC
” is displayed.
To cancel
Do the same: press on the STOP button for 5 seconds with the door
open. The time of day is displayed.
☞
LOC
You can use the timer function for a cooking cycle outside your microwave
oven. Example: cooking an egg on your conventional hotpot. The time is
counted down without the microwave starting.
Setting
1.Select the microwave power «0» by turning the power knob until
“0 W” is displayed.
2.Set the desired time using the timer.
3.Press the START/QUICK button. The time counts down. 3 beeps sound when
the time elapses.
Timer
☞
Page 27

27
Food Amount Power Duration Standing Hints
(g) (Watt) time (min)
(min)
Meat
Whole 500 150 10-15 15-20 Turn midway through
defrosting. Cover the
Fatty parts with aluminiumfoil.
Steak 200 150 4-6 5-10 Turn midway through
defrosting.
Minced meat 500 150 9-14 15-20 Remove the defrosted meat
midway through defrosting.
Goulash 500 150 10-12 15-20 Remove the defrosted meat
midway through defrosting.
Poultry
Chicken 1000 150 20-30 20-30 Midway through defrosting
turn and cover the wings and
thighs with aluminium foil.
Duck 1500- 150 35-45 40-45 “ “
2000 150 50-60 50-60
Fish
Whole fish 500 150 10-15 10-15 Turn midway through
defrosting. Cover the fins and
tail with aluminium foil.
Shrimp 250 150 6-8 5-10 Stir midway through defrosting
Dairy products
Fromage frais 500 150 15-20 15-20 Remove the aluminium foil.
Midway through defrosting
separate and stir.
Butter 250 150 2-3 15-20 Remove the aluminium foil.
Cheese 250 150 2-4 20-30 Turn midway through defrosting.
Fresh cream 200 ml 150 6-8 15-20 Remove the aluminium foil
cover. Separate and stir
midway through defrosting.
Fruit
Strawberries 500 150 7-9 5-10 Cover and separate while
defrosting.
Cherries 250 150 5-7 5-10 “ “
Blackcurrants 250 150 5-7 5-10 “ “
Redcurrants 250 150 4-6 5-10 “ “
Tables/hints
Microwave tables
Defrosting
Page 28

Tables/hints
28
Melting food
Reheating refrigerated food and drinks
Food Amount Power Duration Standing Hints
(g) (watt) (min) time (min)
Bread
Bread rolls 4 slices 150 1-3 3-5 Place on paper towel. Turn,
halfway through defrosting.
Wholemeal bread 1 slice 150 15”-30” 2-3 Defrost in a covered container.
farmhouse bread (60-80g)
Loaf 500 150 6-8 15-20 Place on paper towe. Turn
halfway through defrosting.
Cakes and pastry
Biscuit 300 80 2-3 5-10 Place on paper towel.
Do not cover.
Fruit flan 400-450 80 4-8 10-20 “ “
1 slice of cheese cake 400 80 4-8 10-20 “ “
1 slice of apple pie 400 80 3-5 10-20 “ “
Cream cake 300-400 80 2-4 10-20 Begin by defrosting ,
and then take it out.
Food Amount Power Duration Standing Hints
(g) (watt) (min) time (min)
Chocolate/topping 100 700 2-3 - Break into pieces and
Stir.
Butter 50 900 15”-45” -
Food Amount Power Duration Standing Hints
(g) (watt) (min) time (min)
1 baby jar 125-250 400 30”-50” 2-3 Reheat uncovered ,
stir and check the
temperature!
1 ready made dish 350-400 900 2-3 2-3 Reheat covered, heat
gravy separately
1 portion of meat approx. 900 45”-1’ 2-3 Cook breaded meat uncovered.
150 Cook all other types of meat
covered .
Page 29

29
Reheating refrigerated food and drink
Defrosting and heating of frozen convenience foods
Food Amount Power Duration Standing Hints
(g) (watt) (min) time (min)
1 portion vegetables, c. 200 900 1-1½ 2-3 Reheat covered.
Potatoes, rice or pates
1 cup of soup c. 200 900 1-2 2-3 Reheat clear soup.
Uncovered. Cover
thick soup. Stir.
Drinks
Milk or baby food 200 ml 900 35”-45” 2-3 Remove the cover.
Stir after reheating
Check the temperature.
Boil 1 cup water 180 ml 900 1-2 2-3 Check the Temperature. Stir
instant coffee or tea when
the water has stopped boiling.
1 cup milk 200 ml 900 1-2 2-3 Heat milk until it is just hot
enough to drink. Stir.
1 cup coffee 200 ml 900 45”-55” 2-3 Stir. Check temperature!
(reheat)
Food Amount Power Duration Standing Tips
(g) (watt) (min) time (min)
1 portion meat with 150 700 2-4 2-3 Heat in a covered
gravy container. Stir now and again.
I serving of convenience 350-450 700 7-14 2-3 “ “
food (meat and vegetables)
Page 30

30
Food Amount Liquid Power Duration Standing Hints
(g) added (Watt) (min) time
(min)
Cauliflower 500 1/8 l 900 8-10 2 Dot with butter.
Frozen broccoli 300 1/8 l 900 7-9 2 Stalks facing outward.
Mushrooms 250 No 900 4-6 2 Cut into slices.
Frozen peas and 300
1
/2 cup 900 7-9 2
Carrots
Carrots 250 2-3 tsp 900 6-8 2 Cut into cubes or
Slices.
Potatoes 250 2-3 tsp 900 4-6 2 Peel and quarter
Celeriac 250
1
/2 cup 900 6-8 2 Cut into juliennes
or slices.
Sweet peppers 250 No 900 4-6 2 Cut into slivers or
pieces.
Leeks 250
1
/2 cup 900 4-6 2 Cut into slices or
pieces.
Frozen Brussels 300
1
/2 cup 900 7-9 2
sprouts
Sauerkraut 250
1
/2 cup 900 6-8 2
Cooking vegetables
1)
1)
Cook all the vegetables in a covered container
Cooking fish
Food Amount Power Duration Standing Hints
(g) (Watt) (min) time
(min)
Fish fillets 500 500 6-8 2 Cover. Turn halfway
through cooking time.
Whole fish 800 1. 900 3-5 Cover. Turn halfway
2. 450 9-11 3 Through cooking time.
The times stated here are for guidance only.
Page 31

31
Tables/hints
i
Practical instructions for use
Generalities
•At the end of the cooking cycle leave the food to stand for a few minutes
(standing time) so as to homogenise the temperature.
• Remove the aluminium foil packaging and the metal containers before preparing the food.
• Metal object should be placed at least 2 cm from the walls and door of the
appliance to prevent sparking which could damage your microwave.
• Regularly check the food when using the grill.
Cooking
• Cover all the food and cook in microwavable dishes. Do not cover only if a
crust is to be obtained or maintained.
• Refrigerated or frozen foods require a longer cooking time.
• Gravy dishes should be stirred from time to time.
• Add a little water to vegetables like cauliflowers, carrots and peas.
• Vegetables like mushrooms, sweet peppers or tomatoes should be cooked
without adding water.
• Turn large pieces halfway through the cooking time.
• If possible cut the vegetables into regularly sized pieces.
Defrosting meat, poultry and fish
• Place frozen and unwrapped food on a turned plate in a container to catch
the defrosting liquid.
• Turn food halfway through defrosting. If possible separate the pieces and
remove the remaining ice.
Defrosting butter, pieces of pie and fromage frais
• Do not leave to defrost completely in the appliance. Finish the defrosting
at room temperature. The result will be more uniform. Remove all metal or
aluminium package pieces from the food.
Defrosting fruits and vegetables
• Do not leave to defrost completely in the appliance. Finish defrosting
vegetables which are to be used raw at room temperature.
• To save time cook frozen fruits and vegetables directly at a higher
microwave power instead of defrosting and cooking in 2 stages.
Convenience foods
• Convenience foods in metallic wrapping or with metal covers can only be
defrosted or heated in a microwave if this is specified on the packaging.
Follow the instructions on the wrapping (e.g. remove the metal cover or
pierce the plastic packaging).
Page 32

32
You do not find any indications for the
amount of food you wish to cook.
The food has become too dry.
After the programme has ended the food is
still not defrosted, heated or cooked.
After the cooking programme has ended,
the food is overcooked at the edges and
not enough in the middle.
Do as you would with a similar food. Extend
or reduce the cooking time according to
the following rule of thumb: double the
amount = nearly double the time/half the
amount = half the time.
Set a shorter cooking time or select a
lower microwave power.
Set a longer cooking time or select a
higher microwave level. Large amounts
of food need longer times.
Select a lower power and a longer time.
Stir the liquids (e.g. soup) from time to
time.
Practical indications for microwaves
i
Page 33

33
IEC 60 705 Power Time Standing Hints
1)
(min) time
(min)
Egg custard 400 W 24-26 120
(test A) 1000g 16-18 120
Sponge cake 900 W 5-6 5
(test B)
Meatloaf 900 W 11-12 5 Cover.
(test C)
Defrost minced 150 W 12 5 Place on an overturned saucer. Turn
meat halfway through the cooking cycle.
Defrost 150 W 6-8 3 Cover.
raspberries
Sample dishes
(900W microwave output power)
The quality and functioning of a microwave oven are tested by consumer institutes
with specific foods.
DIN Power Time Standing Hints
1)
Nr. 44 566 (min) time
Part 2 (min)
Defrost and cook 900 W 4 3 Cover. Turn halfway through cooking
A fish fillet cycle by placing the inside edges outwards
Grill bread
2)
Grill 3 2-4 - Preheat the oven for 2.5 min
Grill 2 steaks
2)
Grill 3 22-27 - Turn midway through the cooking time.
Grill chicken
3)
450 W 33-35 Turn halfway through.
1200g + Grill 3
1)
The turntable should always be in rotation.
2)
Place on the grill shelf in the high position.
3)
Place on the turntable.
Page 34

34
Cooking table for grilling alone
Food Amount Grill Time Remarks
(g) (min)
Fish
1)
Mackerel 800-1000 GP3 20-25
Oil. Turn halfway through
Sardines 6 pieces GP3 20-25 cooking cycle and season.
Meat
1)
Sausages 6-8 pieces GP3 20-26
Turn halfway through
Frozen minced 4 pieces GP3 23-27
Oil
and season.
meat
Steak 400 g GP3 25-30 “ “
(Approx 2-3 cm )
Other
Toast
2)
4 slices GP3 2-4 Turn midway through the
cooking cycle to ensure it is
toasted.
Toast au gratin 2 slices GP3 5-10 Turn halfway through the
cycle, except pizza.
Place all the food on the rack at level 3.
1)
Place on the grill shelf in the high position.
2)
Preheat the grill for 2 minutes.
i
The grill times are for guidance only and depend on the type and quality of meat.
Grilling is particularly suitable for flat pieces of meat and fish.
Preheating is not necessary.
Flat foods only need to be turned once, thicker pieces several times.
It is preferable to allow the fish to cook head to tail on the rack.
Page 35

35
The grill times are stated as guidance only and depend on the type and quality of
the food.
1)
Place the food on the turntable.
Practical instructions for the use of the grill
Combination grill and microwave cooking table
1)
The gratin is too brown.
You do not find any indication of the weight
of the food to be grilled in the tables.
Select a lower grill power.
select the indication that comes closest to
the weight and extend or reduce the time.
Food Amount Dish Microwave Grill Time
(g) power level (min)
(Watt)
Pastry au gratin Approx. casserole dish 250 3 12-17
500 g pastry
Potatoes Approx. 800 g casserole dish 900 1 20-22
au gratin of potatoes
Lasagne Approx. casserole dish 900 1 15-20
800 g
Meatloaf Approx. Hollow dish 600 3 14-16
500 g
Onion soup 2 bowls soup bowls 450 3 4-6
au gratin (200 g)
i
Page 36

36
Cleaning and maintenance
i
To prevent untimely activation of functions when cleaning the appliance it
is advisable to put it on "child lock".
The outside of the appliance
Clean the surface of the microwave with a soft cloth and a little washing up
liquid diluted in warm water.
Do not use abrasive powders or sharp objects because they might scratch the
surface.
Never clean the appliance with a spray cleaner
The cooking compartment
If the microwave is not kept in a good state of cleanliness its surface could
deteriorate. This could affect the microwave's lifespan and lead to a dangerous situation. In order to avoid damage, clean your microwave regularly and
remove any food deposits. The inside of the appliance will remain in good
condition as long as you do not use abrasive products. Use washing up liquid
diluted in warm water to clean the inside, Pay particular attention to the
cleanliness of the door and the area surrounding the door.
The grill is integrated into the appliance and cannot be removed. If it is soiled by grease or oil during the cooking process wait until the microwave has
cooled down. Clean the grill well before using the appliance again to avoid
unpleasant odours or smoke arising from it.
If there is an odour or the oven is dirty boil some water and lemon juice or
vinegar in a cup for 2 min and clean the walls with a little washing up liquid.
During operation condensation can occur. This is perfectly normal and is particularly affected by a low ambient temperature and high atmospheric humidity. Wipe the drops of water with a soft cloth after using the appliance.
Turntable and turntable support
Maintenance of the accessories
Soak the rack, the tray and/or the dripping pan in soapy water immediately
after use so as to facilitate cleaning.
To withdraw the turntable so as to
make it easier to clean pick it up by the
access zones provided for this.
Clean the turntable with washing up liquid or put it in the dishwasher. Clean
the turntable support with some washing up liquid.
Page 37

37
What to do if …
☞
☞
☞
☞
… the microwave does not work?
Check to see if
- It is plugged in
- The installation fuses are in good working order
- There is a power outage
- The child lock has not been set
… the microwave function does not work?
Check to see if
- The door is closed properly
- The door seals and surfaces of the seals are clean
- The START/QUICK button has been pressed
- The power knob is not set on ‘00’
… the turntable does not turn?
Check to see if
- The drive shaft is positioned properly
- The dish used is not too big, or does not exceed the turntable and does
not touch the inside wall of the microwave
- There is anything under the turntable
- The block turntable button has been pressed
...
““--dd 11 --”” ((““--dd 22 --””,, ““--dd 33 --””))
appears in the display window ?
- The microwave remains too hot from previous grilling. Let it coo down 15
minutes before reprogramming.
… the microwave does not stop?
- Unplug your appliance or cut off the electricity (fuse)
- Call the AEG after-sales department or an authorised AEG representative.
… If the interior light does not work?
– Contact the AEG after-sales service or an authorised AEG professional.
Only they are qualified to change the inside lighting.
… if the food cooks less quickly than before?
- Select a longer cooking time (double amount = nearly double the time) or
- If the food is always cold turn it or
- Select a higher power setting
☞
☞
☞
Page 38

38
i
After sales service
Certain problems you can solve yourself by referring to the preceding What if …
chapter. First analyse the problem, then consult the chapter. If you don't find the
solution there contact the after-sales service. Prepare yourself properly. It will be
easier for the after-sales technician to diagnose the problem and judge if he should
come and look at the problem.
State the E no. and the S no. indicated on the
nameplate or - if it exists - the PNC (arrow) of the
after-sales service.
These figures will enable the after-sales service to
prepare a substitute, thus avoiding costs that would
arise from a pointless visit.
To have these numbers to hand we recommend that you note them
below:
E no./
PNC .....................................................................................................................
S no. ...................................................................................................................
If in spite of the instructions provided in the chapter What if … or as a result of usage
that does not conform with the functioning conditions set out in the user instructions
you call in the after sales service the labour and travel costs will not be covered by the
guarantee. So please strictly follow the instructions provided in the user instructions
Page 39

Page 40

AEG Hausgeräte GmbH
Postfach 1036
D-90327 Nürnberg
http: // www.aeg.hausgeraete.de
©Copyright by AEG
03/04 - 99632551
 Loading...