

AEG FSK52617Z User Manual
FSK52617Z
USER
MANUAL
EN User Manual
Dishwasher

www.aeg.com2
CONTENTS
1. SAFETY INFORMATION............................................................................................. 2
2. SAFETY INSTRUCTIONS.............................................................................................4
3. PRODUCT DESCRIPTION...........................................................................................6
4. CONTROL PANEL....................................................................................................... 7
5. PROGRAMME SELECTION........................................................................................ 8
6. BASIC SETTINGS ......................................................................................................10
7. BEFORE FIRST USE................................................................................................... 14
8. DAILY USE.................................................................................................................. 15
9. HINTS AND TIPS........................................................................................................17
10. CARE AND CLEANING.......................................................................................... 19
11. TROUBLESHOOTING.............................................................................................21
12. TECHNICAL INFORMATION................................................................................. 25
FOR PERFECT RESULTS
Thank you for choosing this AEG product. We have created it to give you
impeccable performance for many years, with innovative technologies that help
make life simpler – features you might not find on ordinary appliances. Please
spend a few minutes reading to get the very best from it.
Visit our website to:
Get usage advice, brochures, trouble shooter, service and repair information:
www.aeg.com/support
Register your product for better service:
www.registeraeg.com
Buy Accessories, Consumables and Original spare parts for your appliance:
www.aeg.com/shop
CUSTOMER CARE AND SERVICE
Always use original spare parts.
When contacting our Authorised Service Centre, ensure that you have the
following data available: Model, PNC, Serial Number.
The information can be found on the rating plate.
Warning / Caution-Safety information
General information and tips
Environmental information
Subject to change without notice.
1.
SAFETY INFORMATION
Before the installation and use of the appliance,
carefully read the supplied instructions. The
manufacturer is not responsible for any injuries or

ENGLISH 3
damage that are the result of incorrect installation or
usage. Always keep the instructions in a safe and
accessible location for future reference.
1.1 Children and vulnerable people safety
• This appliance can be used by children aged from 8
years and above and persons with reduced physical,
sensory or mental capabilities or lack of experience
and knowledge if they have been given supervision or
instruction concerning the use of the appliance in a
safe way and understand the hazards involved.
• Children between 3 and 8 years of age and persons
with very extensive and complex disabilities shall be
kept away from the appliance unless continuously
supervised.
• Children of less than 3 years of age should be kept
away from the appliance unless continuously
supervised.
• Do not let children play with the appliance.
• Keep detergents away from children.
• Keep children and pets away from the appliance when
the door is open.
• Children shall not carry out cleaning and user
maintenance of the appliance without supervision.
1.2 General Safety
• This appliance is intended to be used in household
and similar applications such as:
– farm houses; staff kitchen areas in shops, offices
and other working environments;
– by clients in hotels, motels, bed & breakfast and
other residential type environments.
• Do not change the specification of this appliance.
• The operating water pressure (minimum and
maximum) must be between 0.5 (0.05) / 8 (0.8) bar
(MPa)
• Follow the maximum number of 13 place settings.
www.youtube.com/electrolux
www.youtube.com/aeg
How to install your 60 cm
Dishwasher Sliding Hinge
www.aeg.com4
• If the supply cord is damaged, it must be replaced by
the manufacturer, its Authorised Service Centre or
similarly qualified persons in order to avoid a hazard.
• Put the cutlery in the cutlery basket with the sharp
ends pointing down or put them in the cutlery drawer
in a horizontal position with the sharp edges down.
• Do not leave the appliance with the open door
unattended to avoid stepping accidentally onto it.
• Before any maintenance operation, deactivate the
appliance and disconnect the mains plug from the
socket.
• Do not use high pressure water sprays and/or steam
to clean the appliance.
• If the appliance has ventilation openings in the base,
they must not be covered e.g. by a carpet.
• The appliance is to be connected to the water mains
using the new supplied hose-sets. Old hose sets must
not be reused.
2. SAFETY INSTRUCTIONS
2.1 Installation
• Remove all the packaging.
• Do not install or use a damaged
appliance.
• Do not use the appliance before
installing it in the built-in structure
due to safety manner.
• Follow the installation instructions
supplied with the appliance.
• Always take care when moving the
appliance as it is heavy. Always use
safety gloves and enclosed footwear.
• Do not install or use the appliance
where the temperature is less than
0 °C.
• Install the appliance in a safe and
suitable place that meets installation
requirements.
WARNING!
Only a qualified person must
install this appliance.
2.2 Electrical connection
WARNING!
Risk of fire and electric
shock.
• The appliance must be earthed.
• Make sure that the parameters on the
rating plate are compatible with the
electrical ratings of the mains power
supply.
• Always use a correctly installed
shockproof socket.
• Do not use multi-plug adapters and
extension cables.
• Make sure not to cause damage to
the mains plug and to the mains
cable. Should the mains cable need
ENGLISH 5
to be replaced, this must be carried
out by our Authorised Service Centre.
• Connect the mains plug to the mains
socket only at the end of the
installation. Make sure that there is
access to the mains plug after the
installation.
• Do not pull the mains cable to
disconnect the appliance. Always pull
the mains plug.
• This appliance is fitted with a 13 A
mains plug. If it is necessary to
change the mains plug fuse, use only
a 13 A ASTA (BS 1362) fuse (UK and
Ireland only).
2.3 Water connection
• Do not cause damage to the water
hoses.
• Before connection to new pipes,
pipes not used for a long time, where
repair work has been carried out or
new devices fitted (water meters, etc.),
let the water flow until it is clean and
clear.
• Ensure that there are no visible water
leaks during and after the first use of
the appliance.
• The water inlet hose has a safety valve
and a sheath with an inner mains
cable.
2.4 Use
• Do not put flammable products or
items that are wet with flammable
products in, near or on the appliance.
• Dishwasher detergents are
dangerous. Follow the safety
instructions on the detergent
packaging.
• Do not drink and play with the water
in the appliance.
• Do not remove the dishes from the
appliance until the programme is
complete. Some detergent may
remain on the dishes.
• Do not store items or apply pressure
on the open door of the appliance.
• The appliance can release hot steam
if you open the door while a
programme operates.
2.5 Internal lighting
WARNING!
Risk of injury.
• Concerning the lamp(s) inside this
product and spare part lamps sold
separately: These lamps are intended
to withstand extreme physical
conditions in household appliances,
such as temperature, vibration,
humidity, or are intended to signal
information about the operational
status of the appliance. They are not
intended to be used in other
applications and are not suitable for
household room illumination.
• To replace the internal lighting,
contact the Authorised Service
Centre.
WARNING!
Dangerous voltage.
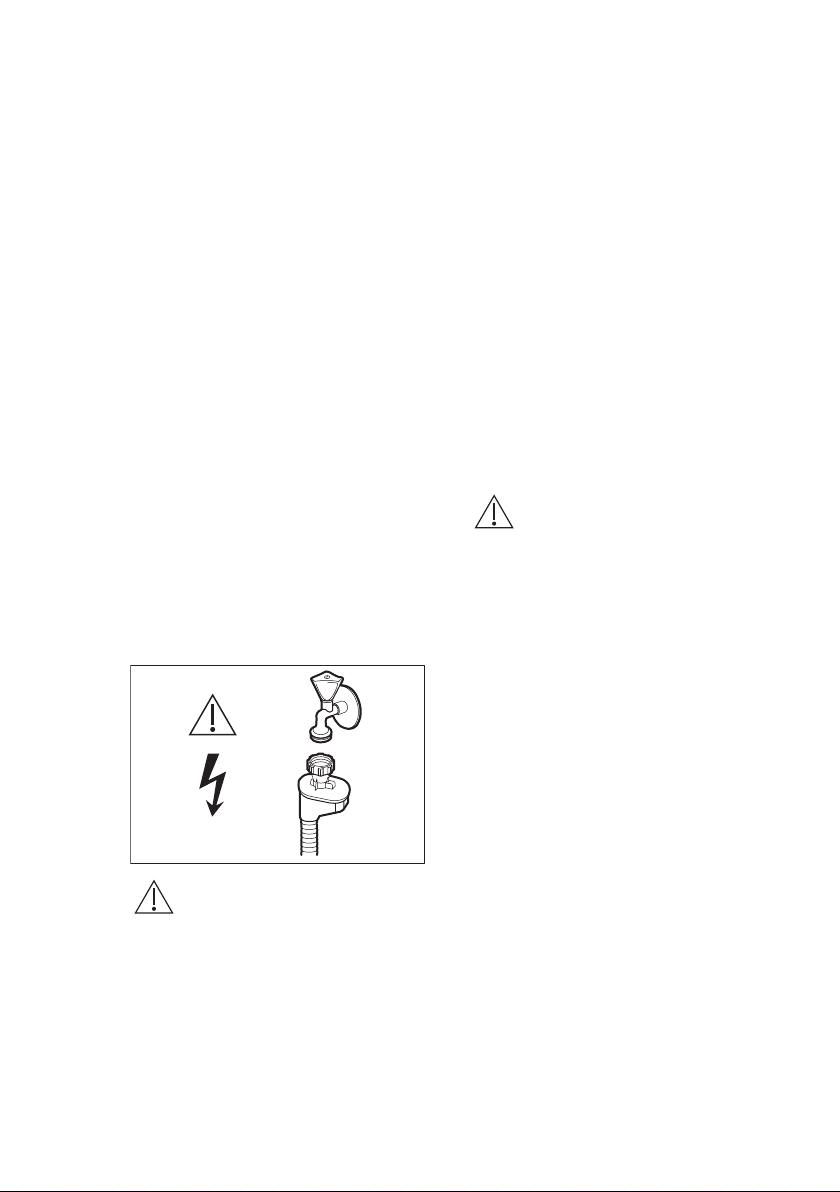
• If the water inlet hose is damaged,
immediately close the water tap and
disconnect the mains plug from the
mains socket. Contact the Authorised
Service Centre to replace the water
inlet hose.
2.6 Service
• To repair the appliance contact the
Authorised Service Centre. Use
original spare parts only.
• Please note that self-repair or nonprofessional repair can have safety
consequences and might void the
guarantee.
• The following spare parts will be
available for 7 years after the model
has been discontinued: motor,
circulation and drain pump, heaters
and heating elements, including heat
pumps, piping and related equipment
4
3
7
9
8
10
56
11
1
2
www.aeg.com6
including hoses, valves, filters and
aquastops, structural and interior
parts related to door assemblies,
printed circuit boards, electronic
displays, pressure switches,
thermostats and sensors, software
and firmware including reset software.
Please note that some of these spare
parts are only available to professional
repairers, and that not all spare parts
are relevant for all models.
• The following spare parts will be
available for 10 years after the model
has been discontinued: door hinge
and seals, other seals, spray arms,
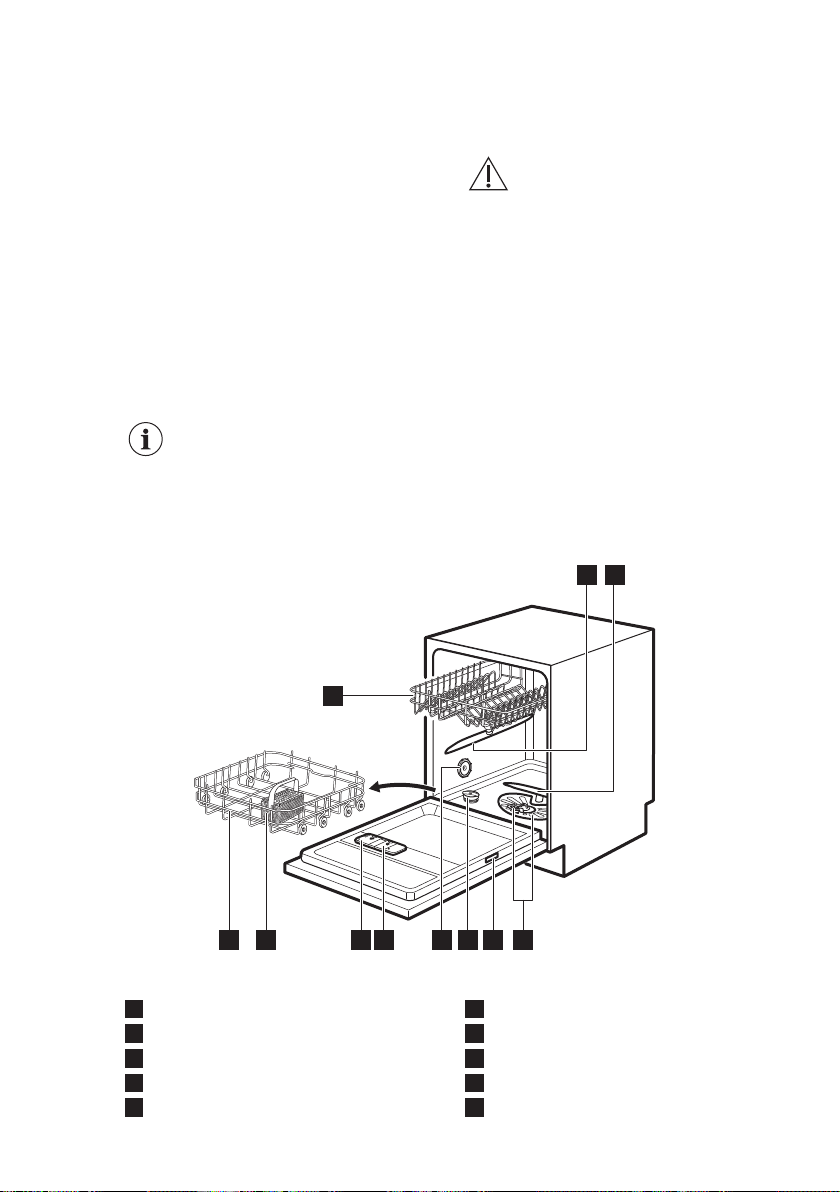
3. PRODUCT DESCRIPTION
The graphics below is just a
general product overview.
For more detailed
information, refer to other
chapters and/or documents
provided with the appliance.
drain filters, interior racks and plastic
peripherals such as baskets and lids.
2.7 Disposal
WARNING!
Risk of injury or suffocation.
• Disconnect the appliance from the
mains supply.
• Cut off the mains cable and discard it.
• Remove the door catch to prevent
children and pets to get closed in the
appliance.
1
2
3
4
5
Upper spray arm
Lower spray arm
Filters
Rating plate
Salt container
Air vent
6
Rinse aid dispenser
7
Detergent dispenser
8
Cutlery basket
9
Lower basket
10
Upper basket
1 2 3 4 5 6
A
CB B
11
ENGLISH 7
3.1 Beam-on-Floor
The Beam-on-Floor is a light that is
displayed on the floor below the
appliance door.
• When the programme starts, a red
light comes on and stays on for the
duration of the programme.
• When the programme is completed, a
green light comes on.
• When the appliance has a
malfunction, the red light flashes.
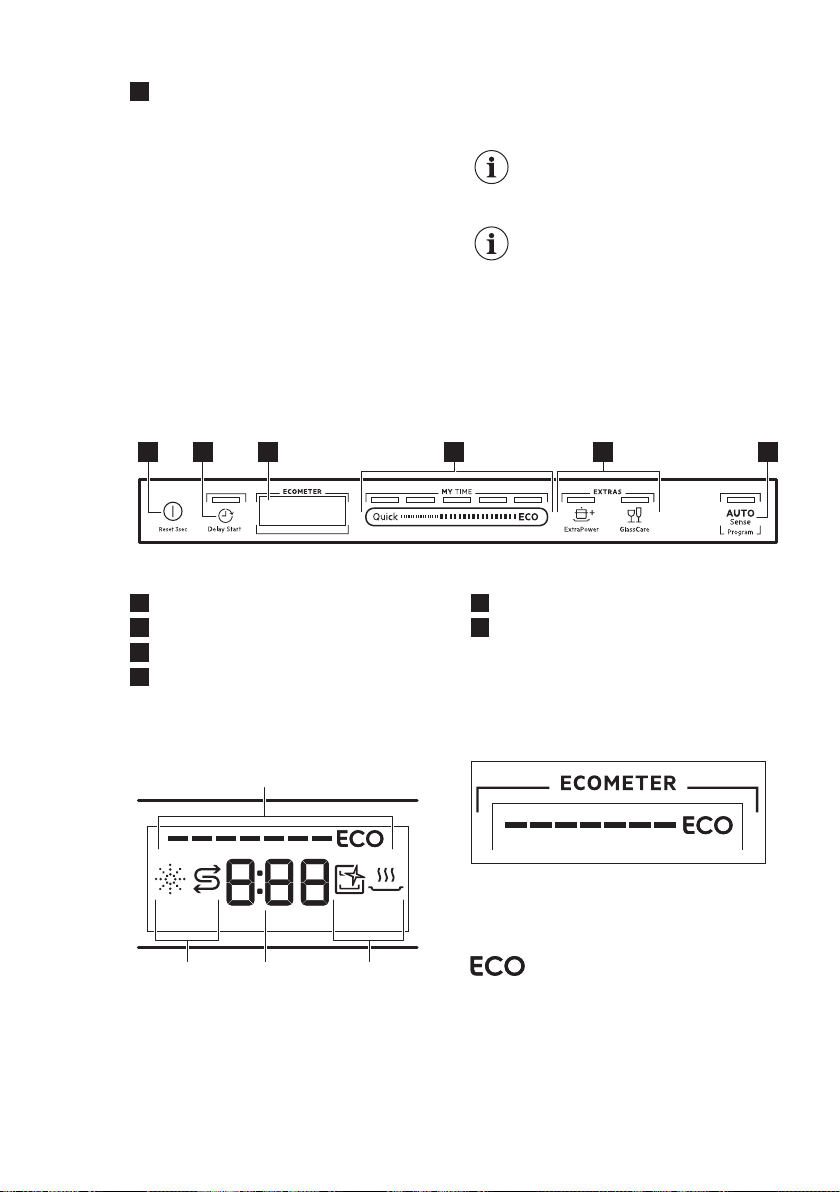
4. CONTROL PANEL
On/Off button
1
Delay Start button
2
Display
3
MY TIME selection bar
4
The Beam-on-Floor is off
when the appliance is
deactivated.
When AirDry is activated
during the drying phase, the
projection on the floor may
not be completely visible. To
see if the cycle has ended,
check the control panel.
EXTRAS buttons
5
AUTO Sense button
6
4.1 Display
A. ECOMETER
B. Indicators
C. Time indicator
4.2 ECOMETER
The ECOMETER indicates how the
programme selection impacts energy
and water consumption. The more bars
are on, the lower the consumption is.
indicates the most
environmentally friendly programme
selection for a normally soiled load.
CA B D E
www.aeg.com8
4.3 Indicators
Indicator Description
Rinse aid indicator. It is on when the rinse aid dispenser needs refilling. Refer to "Before first use".
Salt indicator. It is on when the salt container needs refilling. Refer to "Be-
fore first use".
Machine Care indicator. It is on when the appliance needs internal cleaning with the Machine Care programme. Refer to "Care and cleaning".
Drying phase indicator. It is on when a programme with the drying phase
is selected. It flashes when the drying phase operates. Refer to "Pro-
gramme selection".
5. PROGRAMME SELECTION
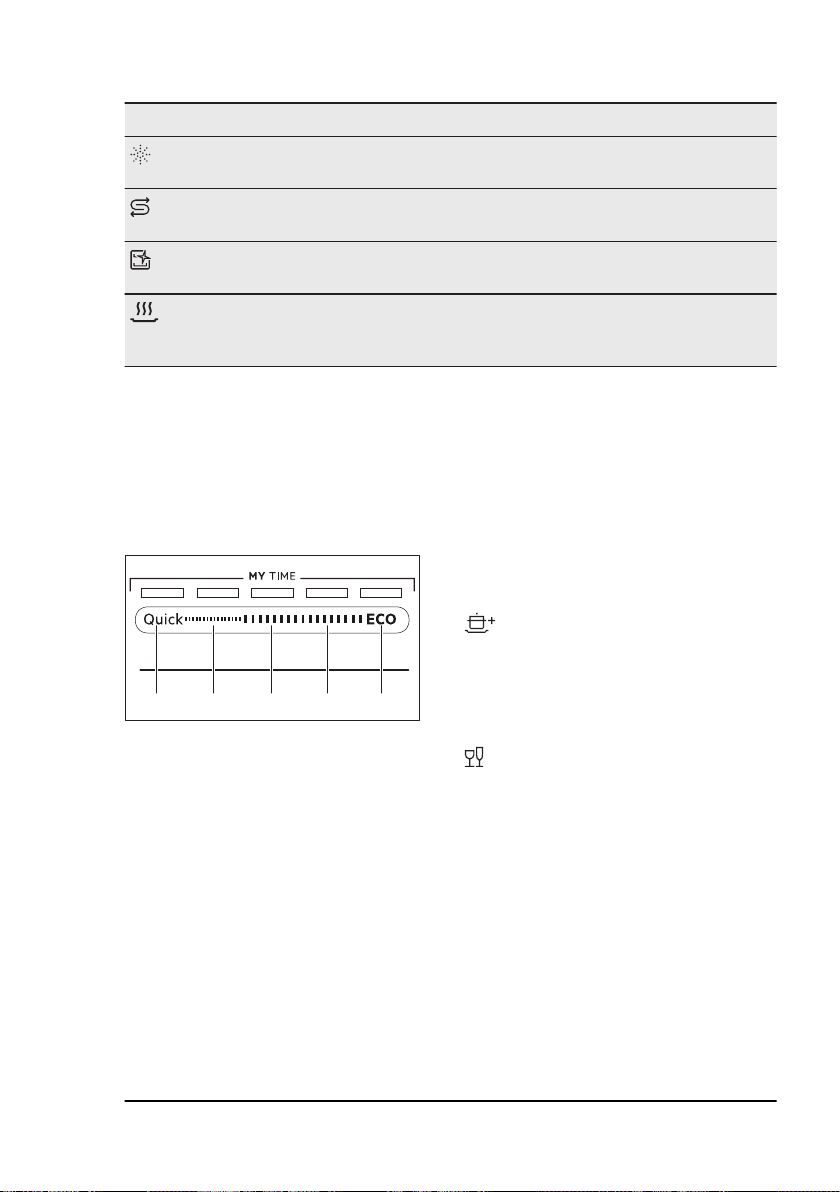
5.1 MY TIME
Using MY TIME selection bar, you can
select a suitable wash cycle based on
programme duration, ranging from 30
minutes to four hours.
A. Quick is the shortest programme
(30min) suitable for washing a load
with fresh and light soil.
B. 1h is a programme suitable for
washing a load with fresh and lightly
dried-on soil.
C. 1h 30min is a programme suitable
for washing and drying normally
soiled items.
D. 2h 40min is a programme suitable
for washing and drying heavily soiled
items.
E. ECO is the longest programme (4h)
offering the most efficient use of
energy and water consumption for
crockery and cutlery with normal soil.
This is the standard programme for
test institutes.
1)
5.2 EXTRAS
You can adjust the programme selection
to your needs by activating EXTRAS.
ExtraPower
ExtraPower improves the washing
results of the selected programme. The
option increases the wash temperature
and duration.
GlassCare
GlassCare provides special care for a
delicate load. The option prevents rapid
changes in the wash temperature of the
selected programme and reduces it to
45 °C. This protects glassware in
particular from damaging.
5.3 AUTO Sense
The AUTO Sense program automatically
adjusts the wash cycle to the type of
load.
The appliance senses the degree of soil
and the amount of dishes in the baskets.
It adjusts the temperature and quantity
of water as well as the wash duration.
1)
This programme is used to assess compliance with the Ecodesign Comission Regulation (EU)
2019/2022.
5.4 Programmes overview
ENGLISH 9
Programme
Quick • Crockery
1h • Crockery
1h 30min • Crockery
2h 40min • Crockery
ECO • Crockery
AUTO
Sense
Machine
Care
Type of load Degree of
• Cutlery
• Cutlery
• Cutlery
• Pots
• Pans
• Cutlery
• Pots
• Pans
• Cutlery
• Pots
• Pans
• Crockery
• Cutlery
• Pots
• Pans
• No load The pro-
Programme phases EXTRAS
soil
• Fresh • Wash 50 °C
• Intermediate rinse
• Final rinse 45 °C
• AirDry
• Fresh
• Lightly
dried-on
• Normal
• Lightly
dried-on
• Normal to
heavy
• Dried-on
• Normal
• Lightly
dried-on
The programme adjusts to all degrees of soil.
gramme
cleans the appliance interior.
• Wash 60 °C
• Intermediate rinse
• Final rinse 50 °C
• AirDry
• Wash 60 °C
• Intermediate rinse
• Final rinse 55 °C
• Drying
• AirDry
• Prewash
• Wash 60 °C
• Intermediate rinse
• Final rinse 60 °C
• Drying
• AirDry
• Prewash
• Wash 50 °C
• Intermediate rinse
• Final rinse 55 °C
• Drying
• AirDry
• Prewash
• Wash 50 - 60 °C
• Intermediate rinse
• Final rinse 60 °C
• Drying
• AirDry
• Wash 70 °C
• Intermediate rinse
• Final rinse
• AirDry
• ExtraPower
• GlassCare
• ExtraPower
• GlassCare
• ExtraPower
• GlassCare
• ExtraPower
• GlassCare
• ExtraPower
• GlassCare
EXTRAS are not applicable to this programme.
EXTRAS are not applicable to this programme.
Consumption values
Programme
Quick 9.4 -11.4 0.57 - 0.69 30
1)
Water (l) Energy (kWh) Duration (min)
 Loading...