

AEG FM 7531K-an INSTRUCTION BOOK
FM 7531K-an
949 601 403325 88-8450 rev. 3-343GB
INSTRUCTION BOOK

2
Your New Appliance
Thank you for purchasing an AEG appliance.
To enable you to use your new appliance efficiently and safely, please read this
instruction book carefully before installing or using the appliance, and retain for
future reference. Should the appliance be transferred to a new owner please
ensure this instruction book is left with the appliance in order that the new owner
can get to know the functions of the appliance and the relevant warnings.
If you require further assistance or advice, please contact our Customer Care
Department either by letter or telephone:
Customer Care Department
AEG Domestic Appliances
55-77 High Street
Slough
SL1 1DZ
Tel: 08705 350350*
* calls to this number may be recorded for training purposes
39

3
Contents Page no.
For the User
Your New Appliance ........................................................................................ 2
Safety Information .......................................................................................... 5
Product Description ........................................................................................ 6
Ceramic Hob .......................................................................................... 7
Cooking Zones ........................................................................................ 7
Electronic Control .................................................................................. 7
Before use ........................................................................................................ 8
Protect the Ceramic Hob ........................................................................ 8
How to Use the Hob ........................................................................................ 9
Ceramic Hob .......................................................................................... 9
Finger Touch .......................................................................................... 10
Automatic pan registration...................................................................... 10
Automatic zone registration .................................................................... 10
Cooking Zones ........................................................................................ 11
Residual Heat Indicator .......................................................................... 12
AUTOMAX ............................................................................................ 12
Safety Turn-off........................................................................................ 14
Autostop .................................................................................................. 14
Activating the Child Safety Device ........................................................ 15
Minute Minder ........................................................................................ 17
Timer ...................................................................................................... 18
Choice of Pans ........................................................................................ 20
Advise and Tips for Using the Cooking Zones ...................................... 21
Cleaning and Maintenance of ........................................................................ 22
Aluminium .............................................................................................. 22
Ceramic Hob .......................................................................................... 22
What to do if .................................................................................................... 31
Service and Spare Parts .......................................................................... 33
4
Contents Page no.
For the Installer
Unpacking ........................................................................................................ 23
Technical Data.................................................................................................. 24
Installation........................................................................................................ 25
Mounting .......................................................................................................... 26
1... 2...
Step by step
Safety information
Hints and tips
Environmental information
How to read the operating instructions
The products are continuously being developed and it may occur that some product specifications
are changed after this instruction book was printed. We therefore have to make reservation for any
changes or printing errors.
37

5
Safety Information
Keep an eye on children when the
hob is in use. Pans get very hot
when used and remain warm for
some time after the hob has been
turned off. Never let children touch
or play with the controls.
Never leave the hob unattended
when deep fat frying, or heating fats
and oils. In the event of fire turn off
all controls and if you have a cooker
hood this must be turned off as well.
Never leave paper, dish cloths, aluminium foil or any other easily ignited materials close to the
hob. A hot hob can cause foil, plastic
or paper to melt or burn.
Put out flames with a lid, and
never use water.
Check that the hob is turned off
when not in use.
The hob is intended for domestic use
only. If it is used in any other way
there is a risk of accidents.
Children
Use
For reasons of hygiene and safety
the cooking zones must be kept
clean. Grease and spilt food liberate
smoke when heated and may at
worst cause fire.
Service and repair must be performed by our service organisation
or an organisation approved by us.
Only spare parts supplied by our
service organisation may be used.
Make sure the packaging is disposed
of in such a manner that children
cannot access the used packaging.
The product may only be installed
by an authorised electrician or a person authorised by the manufacturer.
Work performed by an unauthorised
person may lead to injuries or building damages and deteriorate the
functionality of the product. When
installing make sure the cord does
not get jammed.
Cleaning and Maintenance
Service
Unpacking
Installation
Help prevent accidents when disposing of the product. Remove the cable
from the wall plug and cut off the
cable close to the product.
Disposal
6
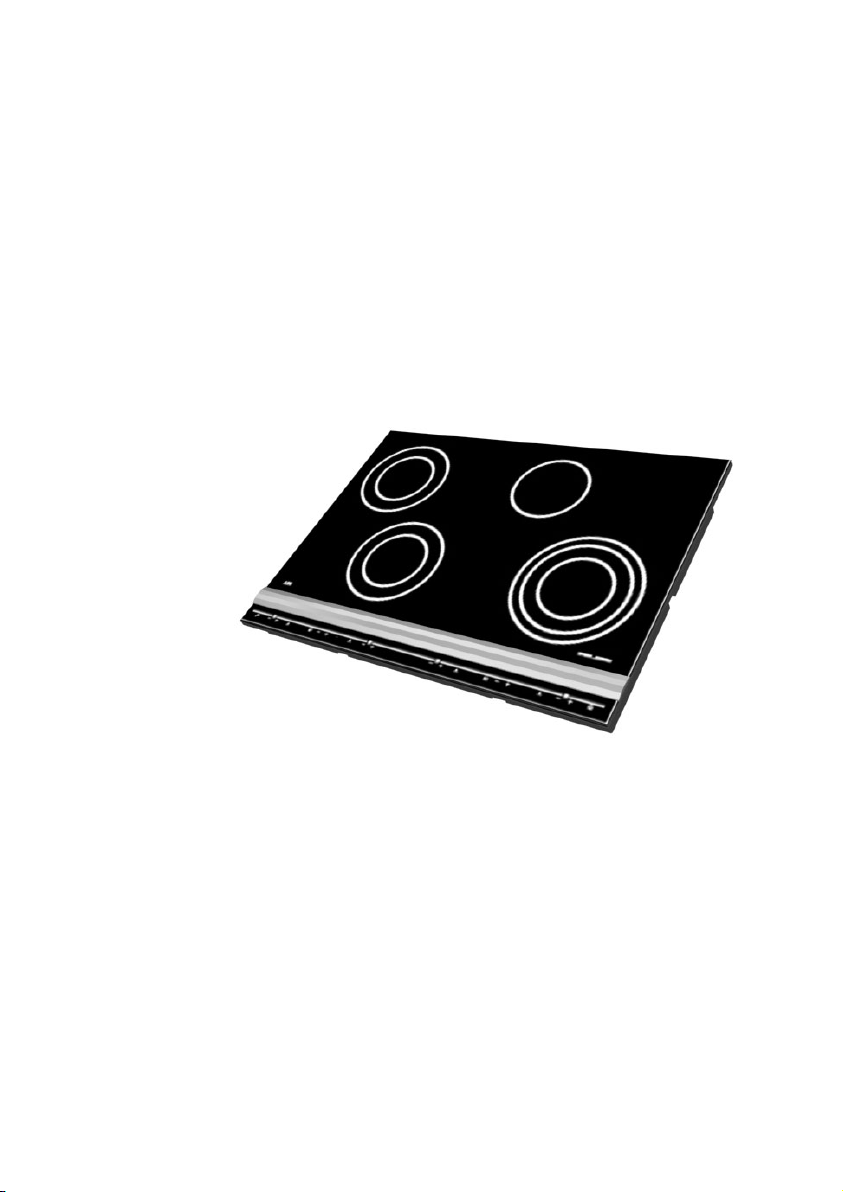
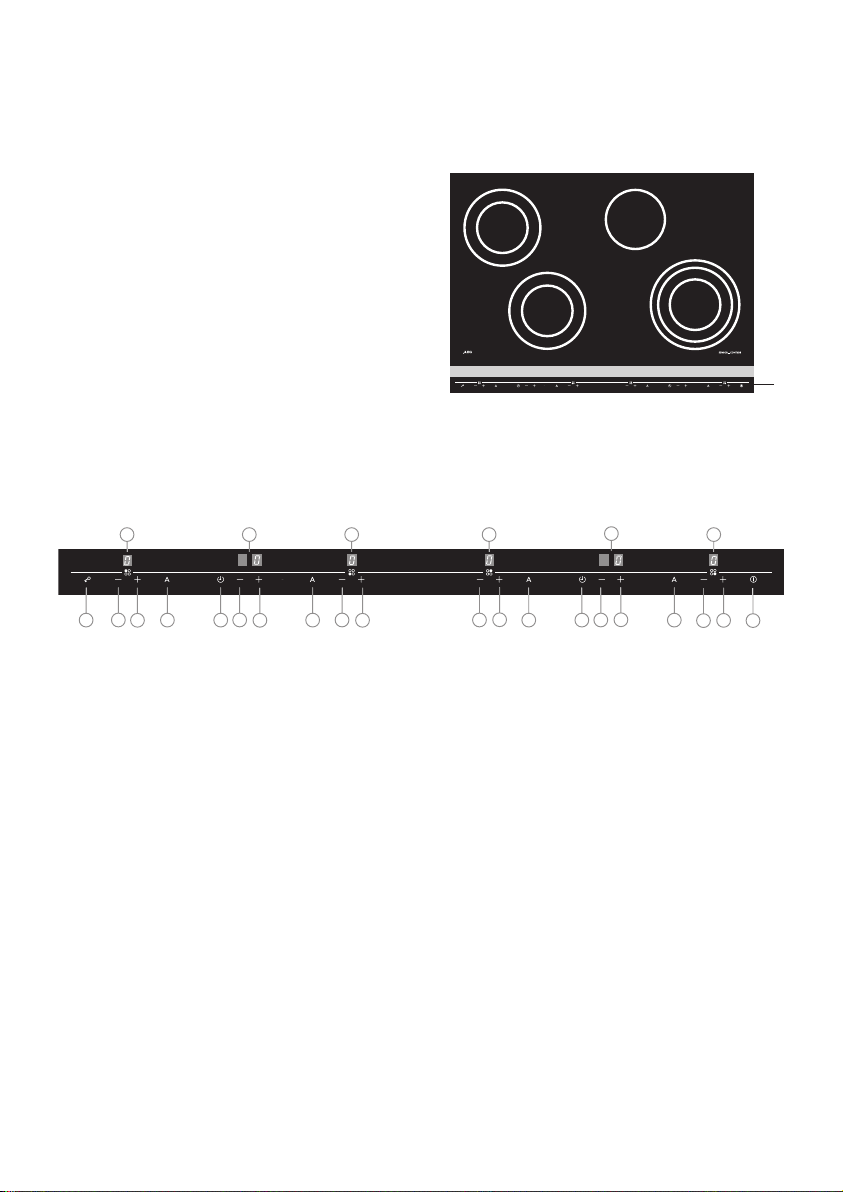
Product Description
1. Double cooking zone Ø 120 / 180
mm, 700 / 1700 W.
2. Double cooking zone Ø 120 / 180
mm, 700 / 1700 W.
3. Single cooking zone Ø 140 mm,
1200 W.
4. Triple cooking zone Ø 120 / 175 /
210 mm, 800 / 1600 / 2300 W.
5. Control panel.
1
3
24
5
2
2
1
4
4
2
2
2
2
4
4
2
2
3 3 3 3556
7
8
7787
Control Panel
1. On/off.
2. Heat settings.
3. AUTOMAX.
4. Timer setting.
5. Minute timer.
6. Child safety.
7. Display for cooker zone settings.
8. Minute display.
35
Exclusions
This guarantee does not cover:
· Damage or calls resulting from transportation, improper use or neglect, the
replacement of any light bulbs or removable parts of glass or plastic.
· Costs incurred for calls to put right an appliance which is improperly
installed or calls to appliances outside the United Kingdom.
· Appliances found to be in use within a commercial environment, plus those
which are subject to rental agreements.
· Products of AEG manufacture which are not marketed by AEG.
European Guarantee
If you should move to another country within Europe then your guarantee moves
with you to your new home subject to the following qualifications:
· The guarantee starts from the date you first purchased your product.
· The guarantee is for the same period and to the same extent for labour and
parts as exists in the new country of use for this brand or range of products.
· This guarantee relates to you and cannot be transferred to another user.
· Your new home is within the European Community (EC) or European Free
Trade Area.
· The product is installed and used in accordance with our instructions and is
only used domestically, i.e. a normal household.
· The product is installed taking into account regulations in your new country.
Before you move please contact your nearest Customer Care centre, listed below,
to give them details of your new home. They will then ensure that the local
Service Organisation is aware of your move and able to look after you and your
appliances.
France Senlis +33 (0)3 44 62 29 29
Germany Nürnberg +49 (0)800 234 7378
Italy Pordenone +39 (0)800 117511
Sweden Stockholm +46 (0)8 672 53 60
UK Slough +44 (0)1753 219899

7
Ceramic glass is insensitive to temperature shock and very robust:
however it is not unbreakable.
Especially sharp and hard
objects that fall on the cooking surface can damage it.
Ceramic hob
The ceramic surface has one single
cooking zone, two double cooking
zones and one triple cooking zone.
When a cooking zone is turned out it
will light up for different intervals
depending on the heat setting chosen. Even at the highest setting, the
cooking zone will turn off now and
again, to avoid overheating.
The hob has an electronic control
system to ensure precise heat control
of the cooking zones.
The electronics have the following
functions:
- Setting of the double zones
- AUTOMAX, automatic parboiling
- Safety turn-off
- Autostop. Automatic turn-off of
the cooking zones
- Child safety.
- Minute minder and timer.
Cooking Zones
Electronic Control
8
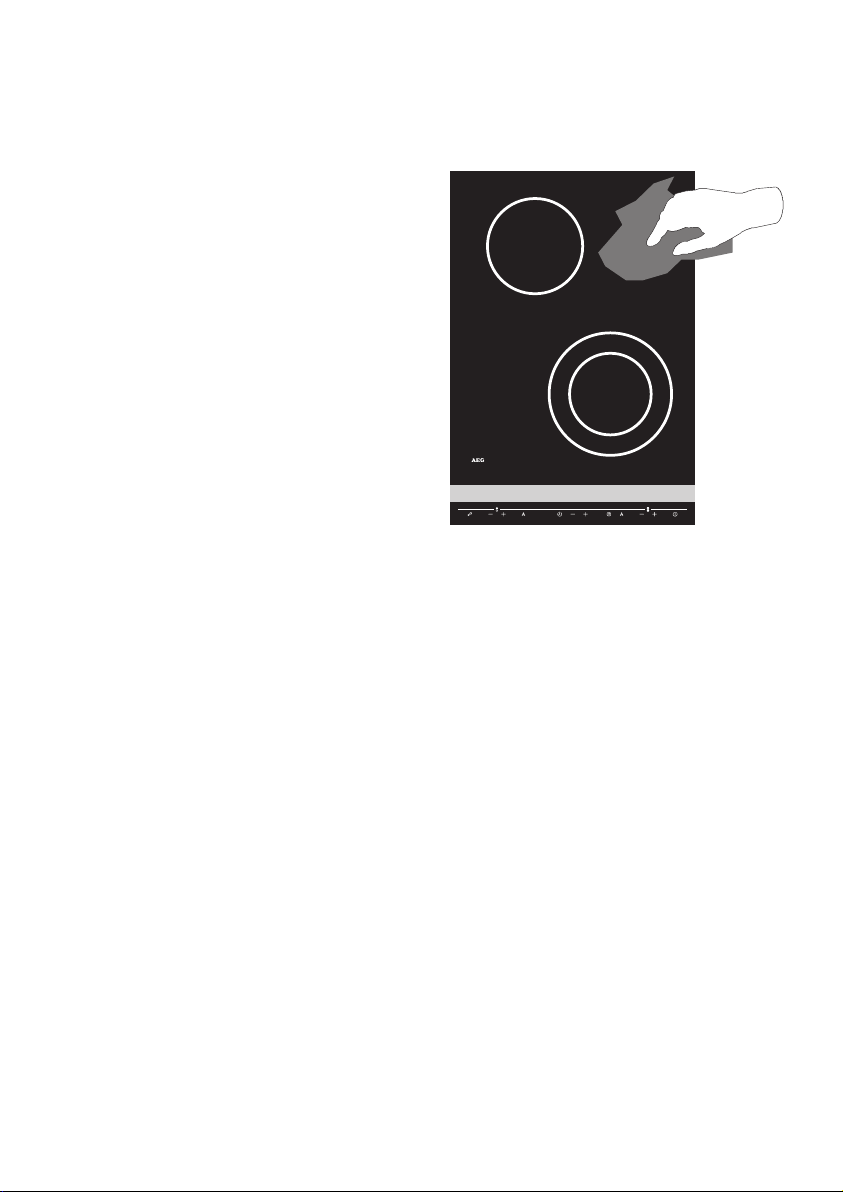
Before Use
Protect the ceramic hob
Before using the hob for the first
time it must be cleaned for manufacturing residues such as dust, dirt etc.
Apply a protective coating on the
ceramic hob before you use it. This
way it becomes easier to clean the
glass and you prevent any spillage
from burning.
This is what you do:
1. Pour a few drops of the cleaning
agent supplied with the hob on
paper towel and rub it on to the
entire surface.
2. Polish the surface with a clean
cloth until it is dry.
33
In the event of your appliance requiring service, or if you wish to purchase spare
parts, contact your local AEG Service Force Centre by telephoning:
08705 929 929
Your call will automatically be routed to the Service Centre covering your post
code area.
For the address of your local Service Force Centre and further information about
Service Force, please visit the website at www.serviceforce.co.uk
In-guarantee customers should ensure that the recommended checks under the
heading “What to do if..” have been made as the engineer will make a charge if
the fault is not a mechanical or electrical breakdown.
Please note that proof of purchase is required for in-guarantee service calls.
Help us to help you
Please determine your type of enquiry before writing or telephoning. When you
contact us we need to know:
1. Your name, address, post code and telephone number
2. Clear and concise details of the fault.
3. Date of purchase
4. The model and serial number
This information can be found on the rating plate.
Service and Spare Parts
9
How to use
Ceramic hob
Never use a cracked ceramic
hob. On spillage liquid may
penetrate into live parts. Cut
the power to the devise and
contact our Service Centre
(see section “Service and
Spare Parts” for contact
phone number)
Never leave aluminium foil,
paper, plastic or the like on
the ceramic hob. A cooking
zone may cause the
foil/paper/plastic to
burn/melt.
Never leave frying, melting
of fat, paraffin or other
inflammables unattended. In
the event of fire all knobs
are to be set at 0 and if you
have a cooker hood this
must be turned off.
Smother the fire with a lid,
never use water.
Immediately scrape off
spillages using a glass
ceramics scraper. Spillage of
sugar or any foodstuff containing sugar (jam, juice
etc.), melted plastics and
aluminium foil can damage
the ceramic hob.
Never place wet cooking utensils on
the ceramic hob. Make sure there is
no sand, sugar or salt on the utensil.
Sand may cause scratches, sugar and
salt may damage the ceramic hob.
Always dry off pans before placing
them on the ceramic hob.
The colour decoration on the ceramic hob may wear off or be scratched
depending on the use.
Do not use the ceramic hob without
the aluminium strip in place.
Do not use the ceramic hob as a wok
surface as this could damage the
hob.

10
The keys are to be touched for minimum 1 sec. before activation.
Under the ceramic hob all cooking
zones have a sensor which registers
the material and size of the pan. The
cooking zone you intend to use must
be switched on before placing the
pot on the zone. If the pan is placed
on the cooking zone before switching on, the pan will not be registered. The display will show “F”.
When a pan is placed on a cooking
zone, its material will be registered.
The cooking zone will only heat up
if the pan is made of metal.
If the pan or whatever placed on the
zone is not made of metal, the cooking zone will not heat up. The display will show “F”.
For double and triple zones, the circuits matching the pots being used
will automatically be switched on.
Registration depends on the material
and size of the pot.
Finger Touch
Automatic pan registration
Automatic zone registration
31
If the appliance is not working correctly, please carry out the following checks
before contacting your local AEG Service Force Centre.
IMPORTANT: If you call out an engineer to a fault caused by incorrect use or
installation, a charge will be made even if the aookuabce is under guarantee.
Problem
The hob doesn’t work.............
The hob surface gets
hot.................
The fuses are constantly blow-
ing.....
The cooking zones don’t get hot
enough
Remedy
Check that the hob is switched on.
Check the HPFI/HFI relay in the
main fuse box. Check the fuses
for the hob.
The surface will heat up to 80°C.
However, it may get hotter if you
use pots without a flat bottom or
which do not match the size of the
cooking zone.
Possibly you have too many elec-
trical appliance connected simul-
taneously. If your hob is connect-
ed to a 10 Amp fuse group, there
is a high risk of overload.
The pots must match the cooking
zone size. Check that the pots has
a flat bottom, e.g. by holding it
against the edge of a worktop.
Bring a litre of water to the boil in
a covered pot The cooking zone
must at the highest setting.
Boiling time on the 12 cm cook-
ing zone is approx. 25 min.
Boiling time on the 14 cm cook-
ing zone is approx. 13 min.
Boiling time on the 18 cm cook-
ing zone is approx. 10 min.
What to do if...
11
Cooking Zones
The cooking zones can be adjusted
from 0-9, where 9 is the highest setting.
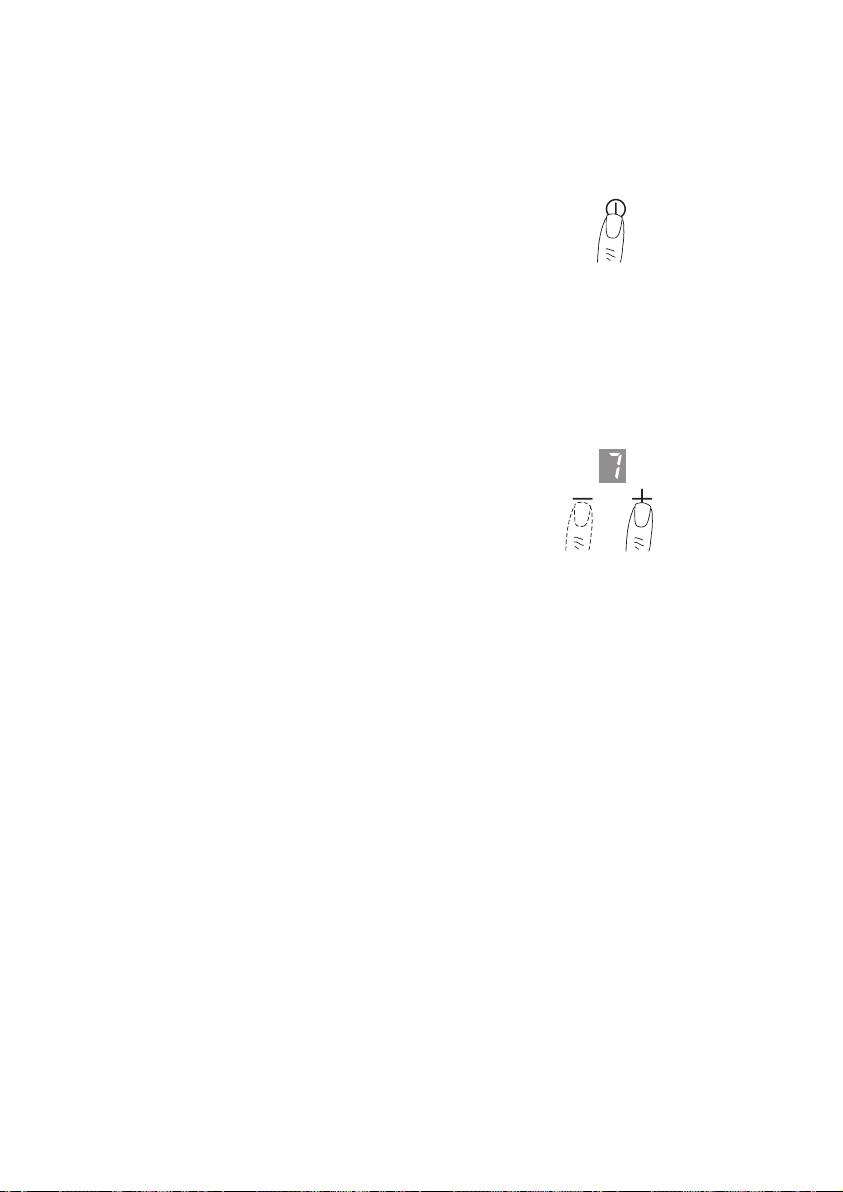
1. Push the
k
key.
2. Push
l
or mkey to adjust the
zone you wish to use.
The zones must be adjusted within
10 seconds or the hob turns off
again.
By pushing the
m
key the cooking
zone is adjusted in steps from 0-9.
By pushing the
l
key the cooking
zone is adjusted in steps from 9-0.
By continuously pushing the
l
or
m
key the adjustment goes faster -
the steps from 1-9 are run through.
Turn off a single zone by pushing
the
l m
keys simultaneously
until the display shows “0”.
Turn off all zones by pushing the
k
key.
12
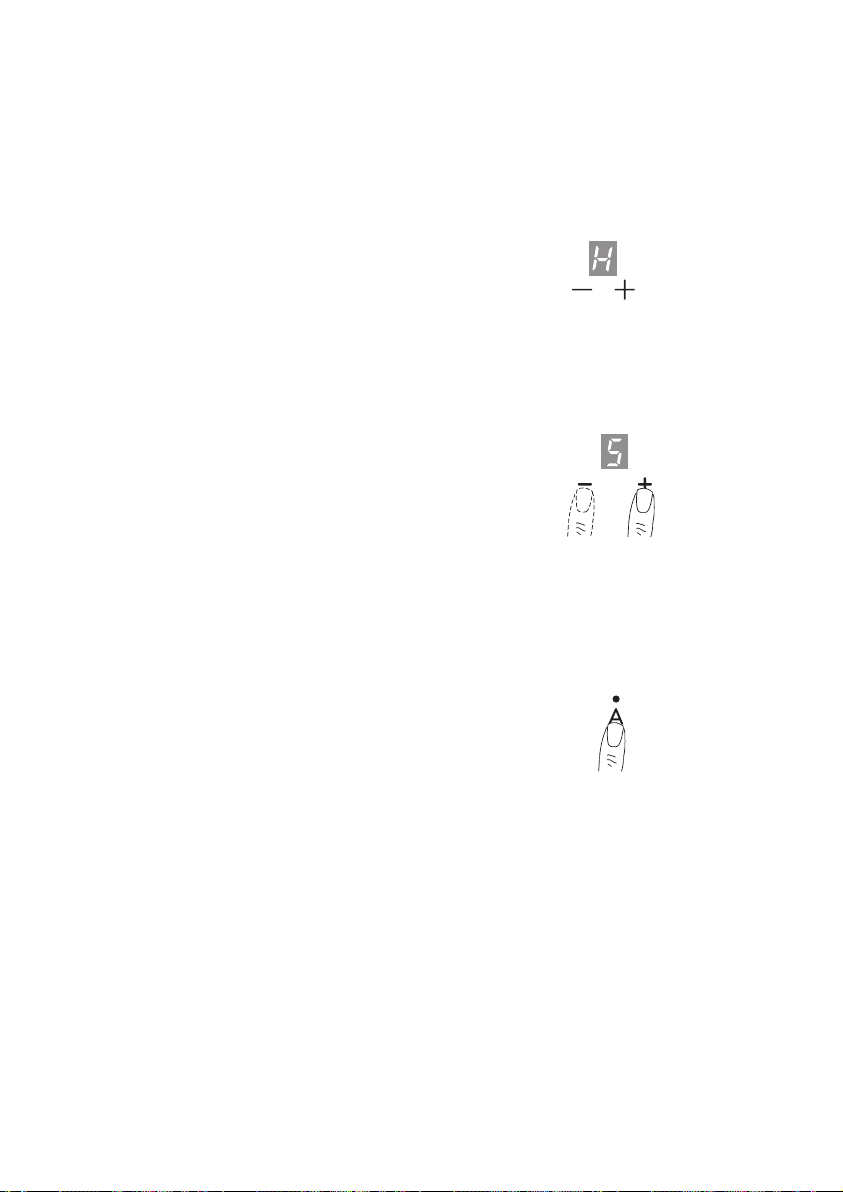
Residual Heat Indicator
Each cooking zone has a residual
heat indicator. When the cooking
zone is turned off the “H” is lit up in
the display until the cooking zone
has cooled. “H” is a warning that the
cooking zone is still hot.
Automax
With AUTOMAX you do not need
to turn down the temperature. When
using AUTOMAX the zone gets full
heat for a certain amount of time
where after the cooking zone automatically adjusts to the setting you
have chosen.
To adjust AUTOMAX you have to
do the following:
1. Turn on the hob, push
k
.
2. Adjust the desired cooking zone
at the setting you wish to use.
3. Push
N
.
When AUTOMAX is coded the control lamp for “A” will light up.
To turn off AUTOMAX, you have to
push
N
.
The “AUTOMAX” chart on the following page gives guidelines for
suitable heat settings for different
types of cooking.
29
To optimise joints between the installed hobs, the gap between the ceramic hob
may be grouted with silicone:
1. Remove the aluminium panels from the hobs.
2. Apply a stripe of silicone to the gap between the two ceramic hob. Use only
the silicone supplied, as it is designed to tolerate the appliance’s high temper-
ature. (Fig. 1)
3. Splash a little soapy water (washing-up liquid) on the silicone stripe
4. Press the rubber block hard against the ceramic hob and pull it slowly from
back to front (Fig. 2)
5. Leave the silicone to harden until the next day.
6. Remove surplus silicone coating from the ceramic hob with the razorblade
supplied. Be careful not to damage the silicone in the gap. Run tools only
along the joint, never across it.
7. Polish the ceramic hob with the supplied cleaning product for ceramic hobs.
1
2
 Loading...