

Page 1

Using
ADOBE® PREMIERE® PRO CS4
Copyright
Page 2

© 2009 Adobe Systems Incorporated and its licensors. All rights reserved.
Using Adobe® Premiere® Pro CS4 for Windows® and Mac OS
This user guide is protected under copyright law, furnished for informational use only, is subject to change without notice, and should not be construed as a
commitment by Adobe Systems Incorporated. Adobe Systems Incorporated assumes no responsibility or liability for any errors or inaccuracies that may appear
in the informational content contained in this guide.
This user guide is licensed for use under the terms of the Creative Commons Attribution Non-Commercial 3.0 License. This License allows users to copy,
distribute, and transmit the user guide for noncommercial purposes only so long as (1) proper attribution to Adobe is given as the owner of the user guide; and
(2) any reuse or distribution of the user guide contains a notice that use of the user guide is governed by these terms. The best way to provide notice is to include
the following link. To view a copy of this license, visit
Adobe, the Adobe logo, Adobe Audition, Adobe OnLocation, Adobe Premiere, Acrobat, After Effects, Creative Suite, Encore, Flash, Illustrator, Lightroom,
Photoshop, PostScript, Reader, Soundbooth, and Version Cue are either registered trademarks or trademarks of Adobe Systems Incorporated in the United
States and/or other countries.
OpenType, Microsoft, and Windows are either registered trademarks or trademarks of Microsoft Corporation in the United States and/or other countries.
Macintosh and Mac OS are trademarks of Apple Inc., registered in the United States and other countries. All other trademarks are the property of their respective
owners.
Updated Information/Additional Third Party Code Information available at http://www.adobe.com/go/thirdparty.
MPEG Layer-3 audio compression technology licensed by Fraunhofer IIS and Thomson Multimedia (http://www.mp3licensing.com).
This product includes software developed by the Apache Software Foundation (http://www.apache.org/).
This Program was written with MacApp®: ©1985-1988 Apple Inc. APPLE INC. MAKES NO WARRANTIES WHATSOEVER, EITHER EXPRESS OR IMPLIED,
REGARDING THIS PRODUCT, INCLUDING WARRANTIES WITH RESPECT TO ITS MERCHANTABILITY OR ITS FITNESS FOR ANY PARTICULAR
PURPOSE. The MacApp software is proprietary to Apple Inc. and is licensed to Adobe for distribution only for use in combination with Adobe Premiere.
Speech compression and decompression technology licensed from Nellymoser, Inc. (www.nellymoser.com)
Video in Flash Player is powered by On2 TrueMotion video technology. © 1992-2005 On2 Technologies, Inc. All Rights Reserved. http://www.on2.com
This product includes software developed by the OpenSymphony Group (http://www.opensymphony.com/).
Sorenson Spark™ video compression and decompression technology licensed from Sorenson Media, Inc.
Notice to U.S. Government end users: The Software and Documentation are “Commercial Items,” as that term is defined at 48 C.F.R. §2.101, consisting of
“Commercial Computer Software” and “Commercial Computer Software Documentation,” as such terms are used in 48 C.F.R. §12.212 or 48 C.F.R. §227.7202,
as applicable. Consistent with 48 C.F.R. §12.212 or 48 C.F.R. §§227.7202-1 through 227.7202-4, as applicable, the Commercial Computer Software and
Commercial Computer Software Documentation are being licensed to U.S. Government end users (a) only as Commercial Items and (b) with only those rights
as are granted to all other end users pursuant to the terms and conditions herein. Unpublished-rights reserved under the copyright laws of the United States.
Adobe agrees to comply with all applicable equal opportunity laws including, if appropriate, the provisions of Executive Order 11246, as amended, Section 402
of the Vietnam Era Veterans Readjustment Assistance Act of 1974 (38 USC 4212), and Section 503 of the Rehabilitation Act of 1973, as amended, and the
regulations at 41 CFR Parts 60-1 through 60-60, 60-250, and 60-741. The affirmative action clause and regulations contained in the preceding sentence shall be
incorporated by reference.
Adobe Systems Incorporated, 345 Park Avenue, San Jose, California 95110, USA.
http://creativecommons.org/licenses/by-nc-sa/3.0/
Last updated 11/6/2011
Page 3

Contents
Chapter 1: Resources
Installation, activation, and registration . . . . . . . . . . . . . . . . . . . . . . . . . . . . . . . . . . . . . . . . . . . . . . . . . . . . . . . . . . . . . . . . . . . . . . . . . . . . . . . . 1
Help and support . . . . . . . . . . . . . . . . . . . . . . . . . . . . . . . . . . . . . . . . . . . . . . . . . . . . . . . . . . . . . . . . . . . . . . . . . . . . . . . . . . . . . . . . . . . . . . . . . . . . . . 2
New features . . . . . . . . . . . . . . . . . . . . . . . . . . . . . . . . . . . . . . . . . . . . . . . . . . . . . . . . . . . . . . . . . . . . . . . . . . . . . . . . . . . . . . . . . . . . . . . . . . . . . . . . . . 4
Chapter 2: User interface
Changing workspaces . . . . . . . . . . . . . . . . . . . . . . . . . . . . . . . . . . . . . . . . . . . . . . . . . . . . . . . . . . . . . . . . . . . . . . . . . . . . . . . . . . . . . . . . . . . . . . . . . 6
Tools, clip details, and menus . . . . . . . . . . . . . . . . . . . . . . . . . . . . . . . . . . . . . . . . . . . . . . . . . . . . . . . . . . . . . . . . . . . . . . . . . . . . . . . . . . . . . . . . . 11
Preferences . . . . . . . . . . . . . . . . . . . . . . . . . . . . . . . . . . . . . . . . . . . . . . . . . . . . . . . . . . . . . . . . . . . . . . . . . . . . . . . . . . . . . . . . . . . . . . . . . . . . . . . . . . 14
Chapter 3: Workflows and system setup
Basic workflow . . . . . . . . . . . . . . . . . . . . . . . . . . . . . . . . . . . . . . . . . . . . . . . . . . . . . . . . . . . . . . . . . . . . . . . . . . . . . . . . . . . . . . . . . . . . . . . . . . . . . . . 19
File-based workflows . . . . . . . . . . . . . . . . . . . . . . . . . . . . . . . . . . . . . . . . . . . . . . . . . . . . . . . . . . . . . . . . . . . . . . . . . . . . . . . . . . . . . . . . . . . . . . . . . 25
DVD or Blu-ray Disc workflow . . . . . . . . . . . . . . . . . . . . . . . . . . . . . . . . . . . . . . . . . . . . . . . . . . . . . . . . . . . . . . . . . . . . . . . . . . . . . . . . . . . . . . . . . 25
SWF workflow . . . . . . . . . . . . . . . . . . . . . . . . . . . . . . . . . . . . . . . . . . . . . . . . . . . . . . . . . . . . . . . . . . . . . . . . . . . . . . . . . . . . . . . . . . . . . . . . . . . . . . . . 26
Cross-platform workflow . . . . . . . . . . . . . . . . . . . . . . . . . . . . . . . . . . . . . . . . . . . . . . . . . . . . . . . . . . . . . . . . . . . . . . . . . . . . . . . . . . . . . . . . . . . . . 27
Cross-application workflows . . . . . . . . . . . . . . . . . . . . . . . . . . . . . . . . . . . . . . . . . . . . . . . . . . . . . . . . . . . . . . . . . . . . . . . . . . . . . . . . . . . . . . . . . . 27
Adobe Dynamic Link . . . . . . . . . . . . . . . . . . . . . . . . . . . . . . . . . . . . . . . . . . . . . . . . . . . . . . . . . . . . . . . . . . . . . . . . . . . . . . . . . . . . . . . . . . . . . . . . . 34
Metadata workflow . . . . . . . . . . . . . . . . . . . . . . . . . . . . . . . . . . . . . . . . . . . . . . . . . . . . . . . . . . . . . . . . . . . . . . . . . . . . . . . . . . . . . . . . . . . . . . . . . . . 39
Setting up your system . . . . . . . . . . . . . . . . . . . . . . . . . . . . . . . . . . . . . . . . . . . . . . . . . . . . . . . . . . . . . . . . . . . . . . . . . . . . . . . . . . . . . . . . . . . . . . . 40
iii
Chapter 4: Project setup
Creating and changing projects . . . . . . . . . . . . . . . . . . . . . . . . . . . . . . . . . . . . . . . . . . . . . . . . . . . . . . . . . . . . . . . . . . . . . . . . . . . . . . . . . . . . . . . 48
Aspect ratios . . . . . . . . . . . . . . . . . . . . . . . . . . . . . . . . . . . . . . . . . . . . . . . . . . . . . . . . . . . . . . . . . . . . . . . . . . . . . . . . . . . . . . . . . . . . . . . . . . . . . . . . . 51
Chapter 5: Capturing, digitizing, transferring, and importing
Capturing and digitizing . . . . . . . . . . . . . . . . . . . . . . . . . . . . . . . . . . . . . . . . . . . . . . . . . . . . . . . . . . . . . . . . . . . . . . . . . . . . . . . . . . . . . . . . . . . . . . 56
Capturing DV or HDV video . . . . . . . . . . . . . . . . . . . . . . . . . . . . . . . . . . . . . . . . . . . . . . . . . . . . . . . . . . . . . . . . . . . . . . . . . . . . . . . . . . . . . . . . . . . 65
Capturing HD video . . . . . . . . . . . . . . . . . . . . . . . . . . . . . . . . . . . . . . . . . . . . . . . . . . . . . . . . . . . . . . . . . . . . . . . . . . . . . . . . . . . . . . . . . . . . . . . . . . 66
Digitizing analog video . . . . . . . . . . . . . . . . . . . . . . . . . . . . . . . . . . . . . . . . . . . . . . . . . . . . . . . . . . . . . . . . . . . . . . . . . . . . . . . . . . . . . . . . . . . . . . . 67
Capturing content for DVD . . . . . . . . . . . . . . . . . . . . . . . . . . . . . . . . . . . . . . . . . . . . . . . . . . . . . . . . . . . . . . . . . . . . . . . . . . . . . . . . . . . . . . . . . . . 68
Batch capturing and recapturing . . . . . . . . . . . . . . . . . . . . . . . . . . . . . . . . . . . . . . . . . . . . . . . . . . . . . . . . . . . . . . . . . . . . . . . . . . . . . . . . . . . . . . 69
Timecode . . . . . . . . . . . . . . . . . . . . . . . . . . . . . . . . . . . . . . . . . . . . . . . . . . . . . . . . . . . . . . . . . . . . . . . . . . . . . . . . . . . . . . . . . . . . . . . . . . . . . . . . . . . . 76
Transferring and Importing files . . . . . . . . . . . . . . . . . . . . . . . . . . . . . . . . . . . . . . . . . . . . . . . . . . . . . . . . . . . . . . . . . . . . . . . . . . . . . . . . . . . . . . . 80
Importing assets from tapeless formats . . . . . . . . . . . . . . . . . . . . . . . . . . . . . . . . . . . . . . . . . . . . . . . . . . . . . . . . . . . . . . . . . . . . . . . . . . . . . . . 88
Importing still images . . . . . . . . . . . . . . . . . . . . . . . . . . . . . . . . . . . . . . . . . . . . . . . . . . . . . . . . . . . . . . . . . . . . . . . . . . . . . . . . . . . . . . . . . . . . . . . . 90
Importing digital audio . . . . . . . . . . . . . . . . . . . . . . . . . . . . . . . . . . . . . . . . . . . . . . . . . . . . . . . . . . . . . . . . . . . . . . . . . . . . . . . . . . . . . . . . . . . . . . . 93
Importing sequences, clip lists, libraries, and compositions . . . . . . . . . . . . . . . . . . . . . . . . . . . . . . . . . . . . . . . . . . . . . . . . . . . . . . . . . . . . 95
Importing XML project files from Final Cut Pro . . . . . . . . . . . . . . . . . . . . . . . . . . . . . . . . . . . . . . . . . . . . . . . . . . . . . . . . . . . . . . . . . . . . . . . . . 97
Chapter 6: Managing assets
Customizing the Project panel . . . . . . . . . . . . . . . . . . . . . . . . . . . . . . . . . . . . . . . . . . . . . . . . . . . . . . . . . . . . . . . . . . . . . . . . . . . . . . . . . . . . . . . 101
Organizing assets in the Project panel . . . . . . . . . . . . . . . . . . . . . . . . . . . . . . . . . . . . . . . . . . . . . . . . . . . . . . . . . . . . . . . . . . . . . . . . . . . . . . . . 104
Managing metadata . . . . . . . . . . . . . . . . . . . . . . . . . . . . . . . . . . . . . . . . . . . . . . . . . . . . . . . . . . . . . . . . . . . . . . . . . . . . . . . . . . . . . . . . . . . . . . . . . 110
Last updated 11/6/2011
Page 4

USING ADOBE PREMIERE PRO CS4
Contents
Chapter 7: Monitoring assets
Source Monitor and Program Monitor . . . . . . . . . . . . . . . . . . . . . . . . . . . . . . . . . . . . . . . . . . . . . . . . . . . . . . . . . . . . . . . . . . . . . . . . . . . . . . . . 115
Playing assets . . . . . . . . . . . . . . . . . . . . . . . . . . . . . . . . . . . . . . . . . . . . . . . . . . . . . . . . . . . . . . . . . . . . . . . . . . . . . . . . . . . . . . . . . . . . . . . . . . . . . . . 119
Waveform monitors and vectorscope . . . . . . . . . . . . . . . . . . . . . . . . . . . . . . . . . . . . . . . . . . . . . . . . . . . . . . . . . . . . . . . . . . . . . . . . . . . . . . . . 122
Reference Monitor . . . . . . . . . . . . . . . . . . . . . . . . . . . . . . . . . . . . . . . . . . . . . . . . . . . . . . . . . . . . . . . . . . . . . . . . . . . . . . . . . . . . . . . . . . . . . . . . . . . 125
Chapter 8: Editing sequences and clips
Creating and changing sequences . . . . . . . . . . . . . . . . . . . . . . . . . . . . . . . . . . . . . . . . . . . . . . . . . . . . . . . . . . . . . . . . . . . . . . . . . . . . . . . . . . . 127
Multi-camera sequences . . . . . . . . . . . . . . . . . . . . . . . . . . . . . . . . . . . . . . . . . . . . . . . . . . . . . . . . . . . . . . . . . . . . . . . . . . . . . . . . . . . . . . . . . . . . . 144
Using multiple sequences . . . . . . . . . . . . . . . . . . . . . . . . . . . . . . . . . . . . . . . . . . . . . . . . . . . . . . . . . . . . . . . . . . . . . . . . . . . . . . . . . . . . . . . . . . . 149
Creating clips . . . . . . . . . . . . . . . . . . . . . . . . . . . . . . . . . . . . . . . . . . . . . . . . . . . . . . . . . . . . . . . . . . . . . . . . . . . . . . . . . . . . . . . . . . . . . . . . . . . . . . . 151
Modifying clip properties with Interpret Footage . . . . . . . . . . . . . . . . . . . . . . . . . . . . . . . . . . . . . . . . . . . . . . . . . . . . . . . . . . . . . . . . . . . . . 153
Creating special clips (synthetics) . . . . . . . . . . . . . . . . . . . . . . . . . . . . . . . . . . . . . . . . . . . . . . . . . . . . . . . . . . . . . . . . . . . . . . . . . . . . . . . . . . . . 154
Adding clips to sequences . . . . . . . . . . . . . . . . . . . . . . . . . . . . . . . . . . . . . . . . . . . . . . . . . . . . . . . . . . . . . . . . . . . . . . . . . . . . . . . . . . . . . . . . . . . 156
Trimming clips . . . . . . . . . . . . . . . . . . . . . . . . . . . . . . . . . . . . . . . . . . . . . . . . . . . . . . . . . . . . . . . . . . . . . . . . . . . . . . . . . . . . . . . . . . . . . . . . . . . . . . 165
Working with clips in a sequence . . . . . . . . . . . . . . . . . . . . . . . . . . . . . . . . . . . . . . . . . . . . . . . . . . . . . . . . . . . . . . . . . . . . . . . . . . . . . . . . . . . . 174
Rearranging clips in a sequence . . . . . . . . . . . . . . . . . . . . . . . . . . . . . . . . . . . . . . . . . . . . . . . . . . . . . . . . . . . . . . . . . . . . . . . . . . . . . . . . . . . . . . 179
Rendering and previewing sequences . . . . . . . . . . . . . . . . . . . . . . . . . . . . . . . . . . . . . . . . . . . . . . . . . . . . . . . . . . . . . . . . . . . . . . . . . . . . . . . . 183
Correcting mistakes . . . . . . . . . . . . . . . . . . . . . . . . . . . . . . . . . . . . . . . . . . . . . . . . . . . . . . . . . . . . . . . . . . . . . . . . . . . . . . . . . . . . . . . . . . . . . . . . . 188
Markers . . . . . . . . . . . . . . . . . . . . . . . . . . . . . . . . . . . . . . . . . . . . . . . . . . . . . . . . . . . . . . . . . . . . . . . . . . . . . . . . . . . . . . . . . . . . . . . . . . . . . . . . . . . . . 189
iv
Chapter 9: Editing Audio
Working with audio . . . . . . . . . . . . . . . . . . . . . . . . . . . . . . . . . . . . . . . . . . . . . . . . . . . . . . . . . . . . . . . . . . . . . . . . . . . . . . . . . . . . . . . . . . . . . . . . . 195
Working with clips, channels, and tracks . . . . . . . . . . . . . . . . . . . . . . . . . . . . . . . . . . . . . . . . . . . . . . . . . . . . . . . . . . . . . . . . . . . . . . . . . . . . . 201
Editing audio in a Timeline panel . . . . . . . . . . . . . . . . . . . . . . . . . . . . . . . . . . . . . . . . . . . . . . . . . . . . . . . . . . . . . . . . . . . . . . . . . . . . . . . . . . . . 208
Recording audio . . . . . . . . . . . . . . . . . . . . . . . . . . . . . . . . . . . . . . . . . . . . . . . . . . . . . . . . . . . . . . . . . . . . . . . . . . . . . . . . . . . . . . . . . . . . . . . . . . . . . 211
Adjusting volume levels . . . . . . . . . . . . . . . . . . . . . . . . . . . . . . . . . . . . . . . . . . . . . . . . . . . . . . . . . . . . . . . . . . . . . . . . . . . . . . . . . . . . . . . . . . . . . 215
Audio transitions . . . . . . . . . . . . . . . . . . . . . . . . . . . . . . . . . . . . . . . . . . . . . . . . . . . . . . . . . . . . . . . . . . . . . . . . . . . . . . . . . . . . . . . . . . . . . . . . . . . . 220
Applying effects to audio . . . . . . . . . . . . . . . . . . . . . . . . . . . . . . . . . . . . . . . . . . . . . . . . . . . . . . . . . . . . . . . . . . . . . . . . . . . . . . . . . . . . . . . . . . . . 222
Recording audio mixes . . . . . . . . . . . . . . . . . . . . . . . . . . . . . . . . . . . . . . . . . . . . . . . . . . . . . . . . . . . . . . . . . . . . . . . . . . . . . . . . . . . . . . . . . . . . . . 225
Panning and balancing . . . . . . . . . . . . . . . . . . . . . . . . . . . . . . . . . . . . . . . . . . . . . . . . . . . . . . . . . . . . . . . . . . . . . . . . . . . . . . . . . . . . . . . . . . . . . . 227
Advanced mixing . . . . . . . . . . . . . . . . . . . . . . . . . . . . . . . . . . . . . . . . . . . . . . . . . . . . . . . . . . . . . . . . . . . . . . . . . . . . . . . . . . . . . . . . . . . . . . . . . . . . 231
Editing audio in Adobe Soundbooth . . . . . . . . . . . . . . . . . . . . . . . . . . . . . . . . . . . . . . . . . . . . . . . . . . . . . . . . . . . . . . . . . . . . . . . . . . . . . . . . . 234
Editing audio in Adobe Audition . . . . . . . . . . . . . . . . . . . . . . . . . . . . . . . . . . . . . . . . . . . . . . . . . . . . . . . . . . . . . . . . . . . . . . . . . . . . . . . . . . . . . 235
Correcting common audio problems . . . . . . . . . . . . . . . . . . . . . . . . . . . . . . . . . . . . . . . . . . . . . . . . . . . . . . . . . . . . . . . . . . . . . . . . . . . . . . . . . 236
Chapter 10: Titling
Creating titles . . . . . . . . . . . . . . . . . . . . . . . . . . . . . . . . . . . . . . . . . . . . . . . . . . . . . . . . . . . . . . . . . . . . . . . . . . . . . . . . . . . . . . . . . . . . . . . . . . . . . . . 237
Creating popular types of titles . . . . . . . . . . . . . . . . . . . . . . . . . . . . . . . . . . . . . . . . . . . . . . . . . . . . . . . . . . . . . . . . . . . . . . . . . . . . . . . . . . . . . . 242
Adding text to titles . . . . . . . . . . . . . . . . . . . . . . . . . . . . . . . . . . . . . . . . . . . . . . . . . . . . . . . . . . . . . . . . . . . . . . . . . . . . . . . . . . . . . . . . . . . . . . . . . 242
Adding shapes and images . . . . . . . . . . . . . . . . . . . . . . . . . . . . . . . . . . . . . . . . . . . . . . . . . . . . . . . . . . . . . . . . . . . . . . . . . . . . . . . . . . . . . . . . . . 247
Working with text and objects in titles . . . . . . . . . . . . . . . . . . . . . . . . . . . . . . . . . . . . . . . . . . . . . . . . . . . . . . . . . . . . . . . . . . . . . . . . . . . . . . . 252
Adding fills, strokes, and shadows in titles . . . . . . . . . . . . . . . . . . . . . . . . . . . . . . . . . . . . . . . . . . . . . . . . . . . . . . . . . . . . . . . . . . . . . . . . . . . . 254
Working with styles . . . . . . . . . . . . . . . . . . . . . . . . . . . . . . . . . . . . . . . . . . . . . . . . . . . . . . . . . . . . . . . . . . . . . . . . . . . . . . . . . . . . . . . . . . . . . . . . . 259
Creating rolling and crawling titles . . . . . . . . . . . . . . . . . . . . . . . . . . . . . . . . . . . . . . . . . . . . . . . . . . . . . . . . . . . . . . . . . . . . . . . . . . . . . . . . . . . 261
Last updated 11/6/2011
Page 5

USING ADOBE PREMIERE PRO CS4
Contents
Chapter 11: Effects and transitions
Working with effects . . . . . . . . . . . . . . . . . . . . . . . . . . . . . . . . . . . . . . . . . . . . . . . . . . . . . . . . . . . . . . . . . . . . . . . . . . . . . . . . . . . . . . . . . . . . . . . . 262
Applying, removing, and organizing effects . . . . . . . . . . . . . . . . . . . . . . . . . . . . . . . . . . . . . . . . . . . . . . . . . . . . . . . . . . . . . . . . . . . . . . . . . . 265
Adjusting effects . . . . . . . . . . . . . . . . . . . . . . . . . . . . . . . . . . . . . . . . . . . . . . . . . . . . . . . . . . . . . . . . . . . . . . . . . . . . . . . . . . . . . . . . . . . . . . . . . . . . 269
Customizing effect presets . . . . . . . . . . . . . . . . . . . . . . . . . . . . . . . . . . . . . . . . . . . . . . . . . . . . . . . . . . . . . . . . . . . . . . . . . . . . . . . . . . . . . . . . . . . 276
Creating common effects . . . . . . . . . . . . . . . . . . . . . . . . . . . . . . . . . . . . . . . . . . . . . . . . . . . . . . . . . . . . . . . . . . . . . . . . . . . . . . . . . . . . . . . . . . . . 278
Motion . . . . . . . . . . . . . . . . . . . . . . . . . . . . . . . . . . . . . . . . . . . . . . . . . . . . . . . . . . . . . . . . . . . . . . . . . . . . . . . . . . . . . . . . . . . . . . . . . . . . . . . . . . . . . . 280
Changing clip duration, speed, or interlacing . . . . . . . . . . . . . . . . . . . . . . . . . . . . . . . . . . . . . . . . . . . . . . . . . . . . . . . . . . . . . . . . . . . . . . . . . 287
Color correction . . . . . . . . . . . . . . . . . . . . . . . . . . . . . . . . . . . . . . . . . . . . . . . . . . . . . . . . . . . . . . . . . . . . . . . . . . . . . . . . . . . . . . . . . . . . . . . . . . . . . 298
Special color and luminance adjustments . . . . . . . . . . . . . . . . . . . . . . . . . . . . . . . . . . . . . . . . . . . . . . . . . . . . . . . . . . . . . . . . . . . . . . . . . . . . 313
Transition overview . . . . . . . . . . . . . . . . . . . . . . . . . . . . . . . . . . . . . . . . . . . . . . . . . . . . . . . . . . . . . . . . . . . . . . . . . . . . . . . . . . . . . . . . . . . . . . . . . 319
Applying transitions . . . . . . . . . . . . . . . . . . . . . . . . . . . . . . . . . . . . . . . . . . . . . . . . . . . . . . . . . . . . . . . . . . . . . . . . . . . . . . . . . . . . . . . . . . . . . . . . . 322
Fine-tuning transitions . . . . . . . . . . . . . . . . . . . . . . . . . . . . . . . . . . . . . . . . . . . . . . . . . . . . . . . . . . . . . . . . . . . . . . . . . . . . . . . . . . . . . . . . . . . . . . 324
Customizing transitions . . . . . . . . . . . . . . . . . . . . . . . . . . . . . . . . . . . . . . . . . . . . . . . . . . . . . . . . . . . . . . . . . . . . . . . . . . . . . . . . . . . . . . . . . . . . . 328
About the effect reference . . . . . . . . . . . . . . . . . . . . . . . . . . . . . . . . . . . . . . . . . . . . . . . . . . . . . . . . . . . . . . . . . . . . . . . . . . . . . . . . . . . . . . . . . . . 329
Audio effects . . . . . . . . . . . . . . . . . . . . . . . . . . . . . . . . . . . . . . . . . . . . . . . . . . . . . . . . . . . . . . . . . . . . . . . . . . . . . . . . . . . . . . . . . . . . . . . . . . . . . . . . 331
Audio crossfade transitions . . . . . . . . . . . . . . . . . . . . . . . . . . . . . . . . . . . . . . . . . . . . . . . . . . . . . . . . . . . . . . . . . . . . . . . . . . . . . . . . . . . . . . . . . . 339
Adjust effects . . . . . . . . . . . . . . . . . . . . . . . . . . . . . . . . . . . . . . . . . . . . . . . . . . . . . . . . . . . . . . . . . . . . . . . . . . . . . . . . . . . . . . . . . . . . . . . . . . . . . . . 340
Blur and Sharpen effects . . . . . . . . . . . . . . . . . . . . . . . . . . . . . . . . . . . . . . . . . . . . . . . . . . . . . . . . . . . . . . . . . . . . . . . . . . . . . . . . . . . . . . . . . . . . . 343
Channel effects . . . . . . . . . . . . . . . . . . . . . . . . . . . . . . . . . . . . . . . . . . . . . . . . . . . . . . . . . . . . . . . . . . . . . . . . . . . . . . . . . . . . . . . . . . . . . . . . . . . . . . 346
Color Correction effects . . . . . . . . . . . . . . . . . . . . . . . . . . . . . . . . . . . . . . . . . . . . . . . . . . . . . . . . . . . . . . . . . . . . . . . . . . . . . . . . . . . . . . . . . . . . . 349
Distort effects . . . . . . . . . . . . . . . . . . . . . . . . . . . . . . . . . . . . . . . . . . . . . . . . . . . . . . . . . . . . . . . . . . . . . . . . . . . . . . . . . . . . . . . . . . . . . . . . . . . . . . . 362
GPU effects (Windows only) . . . . . . . . . . . . . . . . . . . . . . . . . . . . . . . . . . . . . . . . . . . . . . . . . . . . . . . . . . . . . . . . . . . . . . . . . . . . . . . . . . . . . . . . . . 366
Generate effects . . . . . . . . . . . . . . . . . . . . . . . . . . . . . . . . . . . . . . . . . . . . . . . . . . . . . . . . . . . . . . . . . . . . . . . . . . . . . . . . . . . . . . . . . . . . . . . . . . . . . 367
Image Control effects . . . . . . . . . . . . . . . . . . . . . . . . . . . . . . . . . . . . . . . . . . . . . . . . . . . . . . . . . . . . . . . . . . . . . . . . . . . . . . . . . . . . . . . . . . . . . . . . 374
Keying effects . . . . . . . . . . . . . . . . . . . . . . . . . . . . . . . . . . . . . . . . . . . . . . . . . . . . . . . . . . . . . . . . . . . . . . . . . . . . . . . . . . . . . . . . . . . . . . . . . . . . . . . 375
Noise & Grain effects . . . . . . . . . . . . . . . . . . . . . . . . . . . . . . . . . . . . . . . . . . . . . . . . . . . . . . . . . . . . . . . . . . . . . . . . . . . . . . . . . . . . . . . . . . . . . . . . 380
Perspective effects . . . . . . . . . . . . . . . . . . . . . . . . . . . . . . . . . . . . . . . . . . . . . . . . . . . . . . . . . . . . . . . . . . . . . . . . . . . . . . . . . . . . . . . . . . . . . . . . . . 383
Render effects . . . . . . . . . . . . . . . . . . . . . . . . . . . . . . . . . . . . . . . . . . . . . . . . . . . . . . . . . . . . . . . . . . . . . . . . . . . . . . . . . . . . . . . . . . . . . . . . . . . . . . . 385
Stylize effects . . . . . . . . . . . . . . . . . . . . . . . . . . . . . . . . . . . . . . . . . . . . . . . . . . . . . . . . . . . . . . . . . . . . . . . . . . . . . . . . . . . . . . . . . . . . . . . . . . . . . . . 385
Time effects . . . . . . . . . . . . . . . . . . . . . . . . . . . . . . . . . . . . . . . . . . . . . . . . . . . . . . . . . . . . . . . . . . . . . . . . . . . . . . . . . . . . . . . . . . . . . . . . . . . . . . . . . 390
Transform effects . . . . . . . . . . . . . . . . . . . . . . . . . . . . . . . . . . . . . . . . . . . . . . . . . . . . . . . . . . . . . . . . . . . . . . . . . . . . . . . . . . . . . . . . . . . . . . . . . . . . 393
Transition effects . . . . . . . . . . . . . . . . . . . . . . . . . . . . . . . . . . . . . . . . . . . . . . . . . . . . . . . . . . . . . . . . . . . . . . . . . . . . . . . . . . . . . . . . . . . . . . . . . . . . 394
Utility effects . . . . . . . . . . . . . . . . . . . . . . . . . . . . . . . . . . . . . . . . . . . . . . . . . . . . . . . . . . . . . . . . . . . . . . . . . . . . . . . . . . . . . . . . . . . . . . . . . . . . . . . . 396
Video effects . . . . . . . . . . . . . . . . . . . . . . . . . . . . . . . . . . . . . . . . . . . . . . . . . . . . . . . . . . . . . . . . . . . . . . . . . . . . . . . . . . . . . . . . . . . . . . . . . . . . . . . . 397
Video dissolve transitions . . . . . . . . . . . . . . . . . . . . . . . . . . . . . . . . . . . . . . . . . . . . . . . . . . . . . . . . . . . . . . . . . . . . . . . . . . . . . . . . . . . . . . . . . . . . 397
v
Chapter 12: Animation
Animating effects . . . . . . . . . . . . . . . . . . . . . . . . . . . . . . . . . . . . . . . . . . . . . . . . . . . . . . . . . . . . . . . . . . . . . . . . . . . . . . . . . . . . . . . . . . . . . . . . . . . 399
Adding, navigating, and setting keyframes . . . . . . . . . . . . . . . . . . . . . . . . . . . . . . . . . . . . . . . . . . . . . . . . . . . . . . . . . . . . . . . . . . . . . . . . . . . 403
Moving and copying keyframes . . . . . . . . . . . . . . . . . . . . . . . . . . . . . . . . . . . . . . . . . . . . . . . . . . . . . . . . . . . . . . . . . . . . . . . . . . . . . . . . . . . . . . 408
Controlling effect changes using keyframe interpolation . . . . . . . . . . . . . . . . . . . . . . . . . . . . . . . . . . . . . . . . . . . . . . . . . . . . . . . . . . . . . 410
Creating common animations . . . . . . . . . . . . . . . . . . . . . . . . . . . . . . . . . . . . . . . . . . . . . . . . . . . . . . . . . . . . . . . . . . . . . . . . . . . . . . . . . . . . . . . 413
Last updated 11/6/2011
Page 6

USING ADOBE PREMIERE PRO CS4
Contents
Chapter 13: Compositing
Compositing video . . . . . . . . . . . . . . . . . . . . . . . . . . . . . . . . . . . . . . . . . . . . . . . . . . . . . . . . . . . . . . . . . . . . . . . . . . . . . . . . . . . . . . . . . . . . . . . . . . 415
Transparency (masks, alpha channels) . . . . . . . . . . . . . . . . . . . . . . . . . . . . . . . . . . . . . . . . . . . . . . . . . . . . . . . . . . . . . . . . . . . . . . . . . . . . . . . . 418
Creating transparency and solid colors with keys and mattes . . . . . . . . . . . . . . . . . . . . . . . . . . . . . . . . . . . . . . . . . . . . . . . . . . . . . . . . . 419
Chapter 14: Exporting
Basics of exporting . . . . . . . . . . . . . . . . . . . . . . . . . . . . . . . . . . . . . . . . . . . . . . . . . . . . . . . . . . . . . . . . . . . . . . . . . . . . . . . . . . . . . . . . . . . . . . . . . . 427
Adobe Media Encoder . . . . . . . . . . . . . . . . . . . . . . . . . . . . . . . . . . . . . . . . . . . . . . . . . . . . . . . . . . . . . . . . . . . . . . . . . . . . . . . . . . . . . . . . . . . . . . . 434
Formats exported directly from Premiere Pro . . . . . . . . . . . . . . . . . . . . . . . . . . . . . . . . . . . . . . . . . . . . . . . . . . . . . . . . . . . . . . . . . . . . . . . . . 446
Exporting editable movie or audio files . . . . . . . . . . . . . . . . . . . . . . . . . . . . . . . . . . . . . . . . . . . . . . . . . . . . . . . . . . . . . . . . . . . . . . . . . . . . . . . 447
Exporting OMF files for Pro Tools . . . . . . . . . . . . . . . . . . . . . . . . . . . . . . . . . . . . . . . . . . . . . . . . . . . . . . . . . . . . . . . . . . . . . . . . . . . . . . . . . . . . . 449
Exporting HD and HDV sequences . . . . . . . . . . . . . . . . . . . . . . . . . . . . . . . . . . . . . . . . . . . . . . . . . . . . . . . . . . . . . . . . . . . . . . . . . . . . . . . . . . . 452
Exporting still images and still-image sequences . . . . . . . . . . . . . . . . . . . . . . . . . . . . . . . . . . . . . . . . . . . . . . . . . . . . . . . . . . . . . . . . . . . . . 452
Exporting PDF documents for comments . . . . . . . . . . . . . . . . . . . . . . . . . . . . . . . . . . . . . . . . . . . . . . . . . . . . . . . . . . . . . . . . . . . . . . . . . . . . 453
Exporting to DVD, Blu-ray Disc, or CD . . . . . . . . . . . . . . . . . . . . . . . . . . . . . . . . . . . . . . . . . . . . . . . . . . . . . . . . . . . . . . . . . . . . . . . . . . . . . . . . 455
Exporting projects for other applications or archiving . . . . . . . . . . . . . . . . . . . . . . . . . . . . . . . . . . . . . . . . . . . . . . . . . . . . . . . . . . . . . . . . 458
Exporting to videotape or film . . . . . . . . . . . . . . . . . . . . . . . . . . . . . . . . . . . . . . . . . . . . . . . . . . . . . . . . . . . . . . . . . . . . . . . . . . . . . . . . . . . . . . . 462
Exporting for the web . . . . . . . . . . . . . . . . . . . . . . . . . . . . . . . . . . . . . . . . . . . . . . . . . . . . . . . . . . . . . . . . . . . . . . . . . . . . . . . . . . . . . . . . . . . . . . . 465
Exporting to iPods, cell phones, PSPs and other mobile devices . . . . . . . . . . . . . . . . . . . . . . . . . . . . . . . . . . . . . . . . . . . . . . . . . . . . . . . 470
Exporting XMP metadata . . . . . . . . . . . . . . . . . . . . . . . . . . . . . . . . . . . . . . . . . . . . . . . . . . . . . . . . . . . . . . . . . . . . . . . . . . . . . . . . . . . . . . . . . . . . 472
vi
Chapter 15: Keyboard shortcuts
Finding and customizing keyboard shortcuts . . . . . . . . . . . . . . . . . . . . . . . . . . . . . . . . . . . . . . . . . . . . . . . . . . . . . . . . . . . . . . . . . . . . . . . . . 474
Default keyboard shortcuts . . . . . . . . . . . . . . . . . . . . . . . . . . . . . . . . . . . . . . . . . . . . . . . . . . . . . . . . . . . . . . . . . . . . . . . . . . . . . . . . . . . . . . . . . . 476
Index ...............................................................................................................483
Last updated 11/6/2011
Page 7

Chapter 1: Resources
Installation, activation, and registration
Before installing Adobe Premiere Pro software, review complete system requirements and recommendations in the
Read Me file. The Read Me file is on the installation disc, as well as on the
website.
For Premiere Pro system requirements, see the Adobe website.
For lists of various categories of hardware compatible with Adobe Premiere Pro, see the Adobe website.
Install the software
1 Quit all applications running on your computer.
2 Insert the installation disc into your DVD drive, and follow the on-screen instructions.
Note: The free trial version of Adobe Premiere Pro software does not include some features that depend upon software
licensed from parties other than Adobe. For example, some codecs for encoding MPEG formats are available only with
the full version of Adobe Premiere Pro software.
Premiere Pro support section of the Adobe
1
For a detailed list of limitations of the trial version of Premiere Pro software, see the Adobe website.
For frequently asked questions about trial versions, see the Adobe website.
Help with installation
For help with installation issues, see the Installation Support Center at www.adobe.com/go/cs4install.
License activation
During the installation process, your Adobe software contacts Adobe to complete the license activation process. No
personal data is transmitted. For more information on product activation, visit the Adobe website at
www.adobe.com/go/activation.
A single-user retail license activation supports two computers. For example, you can install the product on a desktop
computer at work and on a laptop computer at home. If you want to install the software on a third computer, first
deactivate it on one of the other two computers. Choose Help
> Deactivate.
Register
Register your product to receive complimentary installation support, notifications of updates, and other services.
❖ To register, follow the on-screen instructions in the Registration dialog box, which appears after you install the
software.
If you postpone registration, you can register at any time by choosing Help > Registration.
Last updated 11/6/2011
Page 8

USING ADOBE PREMIERE PRO CS4
Resources
Adobe Product Improvement Program
After you have used your Adobe software a certain number of times, a dialog box appears, asking whether you want
to participate in the Adobe Product Improvement Program.
If you choose to participate, data about your use of Adobe software is sent to Adobe. No personal information is
recorded or sent. The Adobe Product Improvement Program only collects information about the features and tools
that you use in the software and how often you use them.
You can opt in to or opt out of the program at any time:
• To participate, choose Help > Adobe Product Improvement Program and click Yes, Participate.
• To stop participating, choose Help > Adobe Product Improvement Program and click No, Thank You.
ReadMe
A ReadMe file for your software is available on-line and on the installation disc. Open the file to read important
information about topics such as the following:
• System requirements
• Installation (including uninstalling the software)
• Activation and registration
• Font installation
• Troubleshooting
• Customer support
• Legal notices
2
Help and support
Community Help
Community Help is an integrated environment on Adobe.com that gives you access to community-generated content
moderated by Adobe and industry experts. Comments from users help guide you to an answer.
Community Help draws on a number of resources, including:
• Videos, tutorials, tips and techniques, blogs, articles, and examples for designers and developers.
• Complete on-line product Help, which is updated regularly by the Adobe documentation team.
• All other content on Adobe.com, including knowledgebase articles, downloads and updates, Developer
Connection, and more.
Choose Help > product name Help in the application to access the Help and Support page, the portal to all of the
Community Help content for your product. You can also use the Help search field in some Creative Suite 4
applications, or press F1 (Windows), to access Community Help for your product.
The sites searched by the default Community Help search engine are hand-selected and reviewed for quality by Adobe
and Adobe Community Experts. Adobe experts also work to ensure that the top search results include a mixture of
different kinds of content, including results from on-line product Help.
For more information on using Community Help, see http://help.adobe.com/en_US/CommunityHelp/.
Last updated 11/6/2011
Page 9

USING ADOBE PREMIERE PRO CS4
Resources
For a video overview of Community Help, see www.adobe.com/go/lrvid4117_xp.
For frequently asked questions about Community Help, see http://community.adobe.com/help/profile/faq.html
Product Help
Adobe provides a comprehensive user guide for each product in several formats, including on-line product Help, PDF,
and printed book. Results from on-line product Help are included in your results whenever you search Community Help.
If you’re connected to the Internet, the Help menu within the product opens the product Help and Support page by
default. This page is a portal to all of the Community Help content for the product. If you want to consult or search
on-line product Help only, you can access it by clicking the product Help link in the upper-right corner of the Help
and Support page. Be sure to select the This Help System Only option before you do your search.
If you’re not connected to the Internet, the Help menu within the product opens local Help, a subset of the content
available in on-line product Help. Because local Help is not as complete or up-to-date as on-line product Help, Adobe
recommends that you use the PDF version of product Help if you want to stay offline. A downloadable PDF of
complete product Help is available from two places:
• The product’s Help and Support page (upper-right corner of the page)
• Local and web Help (top of the Help interface)
For more information on accessing product help, see http://help.adobe.com/en_US/CommunityHelp/.
3
If you are working in Adobe InDesign, Photoshop, Illustrator, Flash, Fireworks, or Dreamweaver, and you want to turn
off Community Help so that local Help opens by default, do the following:
1 Open the Connections panel (Window > Extensions > Connections).
2 From the Connections panel menu , select Offline Options.
3 Select Keep Me Offline and click OK.
Note: When you disable web services from the Connections panel, all other web services (such as Adobe Kuler and Adobe
ConnectNow) are also disabled.
Printed resources
Printed versions of the complete on-line product Help are available for the cost of shipping and handling at
www.adobe.com/go/store.
Support resources
Visit the Adobe Support website at www.adobe.com/support to learn about free and paid technical support options.
Last updated 11/6/2011
Page 10

USING ADOBE PREMIERE PRO CS4
Resources
New features
Premiere Pro CS4, in combination with AdobeOnLocation CS4, and Adobe Encore CS4, makes every step of video
production more efficient. They provide tools for every step, from on-location capture, through post-production, to
final delivery. These products run either on Windows or Mac OS. Here's a quick look at some of the new features.
New tapeless camera support Take advantage of the efficiency of tapeless cameras. Edit files from the latest tapeless
formats natively, including AVCHD, P2 (including the AVC-I codec), and XDCAM EX, without transcoding or
rewrapping. With the integrated Media Browser, you can browse your hard disks from inside Premiere Pro. You can
find footage, and then import the content directly into your Premiere Pro project.
Batch encoding Save time by automating the process of creating multiple encoded versions of your content using the
new batch encoder. Use any combination of sequences and clips as sources. Encode to a wide variety of video formats,
including FLV and F4V, Windows Media, MPEG-2, H.264, QuickTime, and more. Maximize your productivity by
continuing to work while files encode in the background.
Improved integration Tighter-than-ever integration among Premiere Pro, Adobe OnLocation, Encore, and
Soundbooth™ ensure end-to-end workflows that are smooth and efficient. Adobe Dynamic Link allows you to move
seamlessly among Premiere Pro, Soundbooth, After Effects, and Encore without rendering. You can work quickly and
stay focused. Save rendering time by natively importing Photoshop® PSD files with video and blending modes, sharing
more effects with After Effects®, and importing video sequences in Encore without having to encode them. You can
send entire shot lists directly to Premiere Pro from Adobe OnLocation, complete with all the metadata that was logged
during the shoot. Export interactive DVD elements created with Encore as SWF files for online viewing.
4
Improved editing efficiency
Work faster with powerful and flexible editing enhancements. Premiere Pro includes over
50 of the most requested enhancements that make the editing workflow more efficient. Apply effects to multiple
selections, get timecode information faster, speed up work in the timeline with new keyboard shortcuts, and much more.
Speech Search Quickly find the specific area of a shot by searching for keywords within the content. Premiere Pro
speech recognition technology converts your audio to a transcript and synchronizes it to the video. You can go directly
to the place of interest, and even cut video based on the script.
New and improved Adobe OnLocation CS4 Adobe OnLocation™ CS4, now cross-platform, is powerful direct-to-disk
recording and monitoring software to help you produce superior-quality results from your video camera. Featuring a
redesigned interface, Adobe OnLocation CS4 gives you an impressive array of production tools to help you shoot
better and faster while saving you time and money. Easily manage shots and takes with the new shot list. Adobe
OnLocation automatically creates metadata that speeds your workflow at every step of production.
End-to-end metadata workflow Easily track video metadata throughout your workflow. Import metadata into Adobe
OnLocation while you’re shooting. Log clip information directly in the project panel using a unique spreadsheet-style
interface that speeds up the process, and eliminates re-entering the same information for each clip in Premiere Pro.
Then, pass metadata through, on export, for publishing to the web, or for use in other Adobe applications.
Faster, customizable SWF file output With one click, easily create SWF versions of your DVD and Blu-ray Disc
projects for the web, without opening another application. Now with added flexibility, you can create content
compatible with Adobe Flash® Player, complete with DVD interactivity, menus, URL links, and HTML templates.
Export different video sizes for FLV file streaming or progressive download, customize SWF file player skins and
reduce FLV file encoding time by using optimized encode settings in Adobe Media Encoder. Build new revenue
sources based on secure streaming or protected download delivery models.
Industry-leading Blu-ray Disc output Create high-definition Blu-ray discs with advanced menus and subtitles with
Adobe Encore CS4 software, included with Adobe Premiere® Pro CS4.
Last updated 11/6/2011
Page 11

USING ADOBE PREMIERE PRO CS4
Resources
Thousands of visual and audio effects via Adobe Resource Central Create or customize existing video and audio using
numerous effects available via Adobe Resource Central. Get live access to fresh, new content and news. Get helpful
tutorials and training materials without leaving your workflow. (Internet connection required.)
Maximum Render Quality option You can improve rendering of motion, improve deinterlacing, and improve scaling
of video. Select Maximum Render Quality in your sequence settings or Use Maximum Render Quality in your export
settings.
Export To OMF for Pro Tools Export audio from any sequence to an OMF file for sweetening in DigiDesign Pro Tools.
Edit In Adobe Audition You can export the audio tracks from a sequence directly from Premiere Pro into Adobe
Audition, for full-featured sound editing and sweetening.
More Help topics
www.adobe.com/go/lrvid4068_pr
5
Last updated 11/6/2011
Page 12

Chapter 2: User interface
The similarity in the user interface design among all Adobe video and audio products allows users to move projects
through the applications best suited for each task in the workflow.
Changing workspaces
About workspaces
Adobe video and audio applications provide a consistent, customizable workspace. Although each application has its
own set of panels (such as Project, Metadata, and Timeline), you move and group panels in the same way across
products.
The main window of a program is the application window. Panels are organized in this window in an arrangement
called a workspace. The default workspace contains groups of panels as well as panels that stand alone.
You customize a workspace by arranging panels in the layout that best suits your working style. As you rearrange
panels, the other panels resize automatically to fit the window. You can create and save several custom workspaces for
different tasks—for example, one for editing and one for previewing.
6
You can use floating windows to create a workspace more like those in previous versions of Adobe applications, or to
place panels on multiple monitors.
BC
A
Example workspace
A. Application window B. Grouped panels C. Individual panel
Choose a workspace
Each Adobe video and audio application includes several predefined workspaces that optimize the layout of panels for
specific tasks. When you choose one of these workspaces, or any custom workspaces you’ve saved, the current
workspace is redrawn accordingly.
❖ Open the project you want to work on, choose Window > Workspace, and select the desired workspace.
Last updated 11/6/2011
Page 13
USING ADOBE PREMIERE PRO CS4
User interface
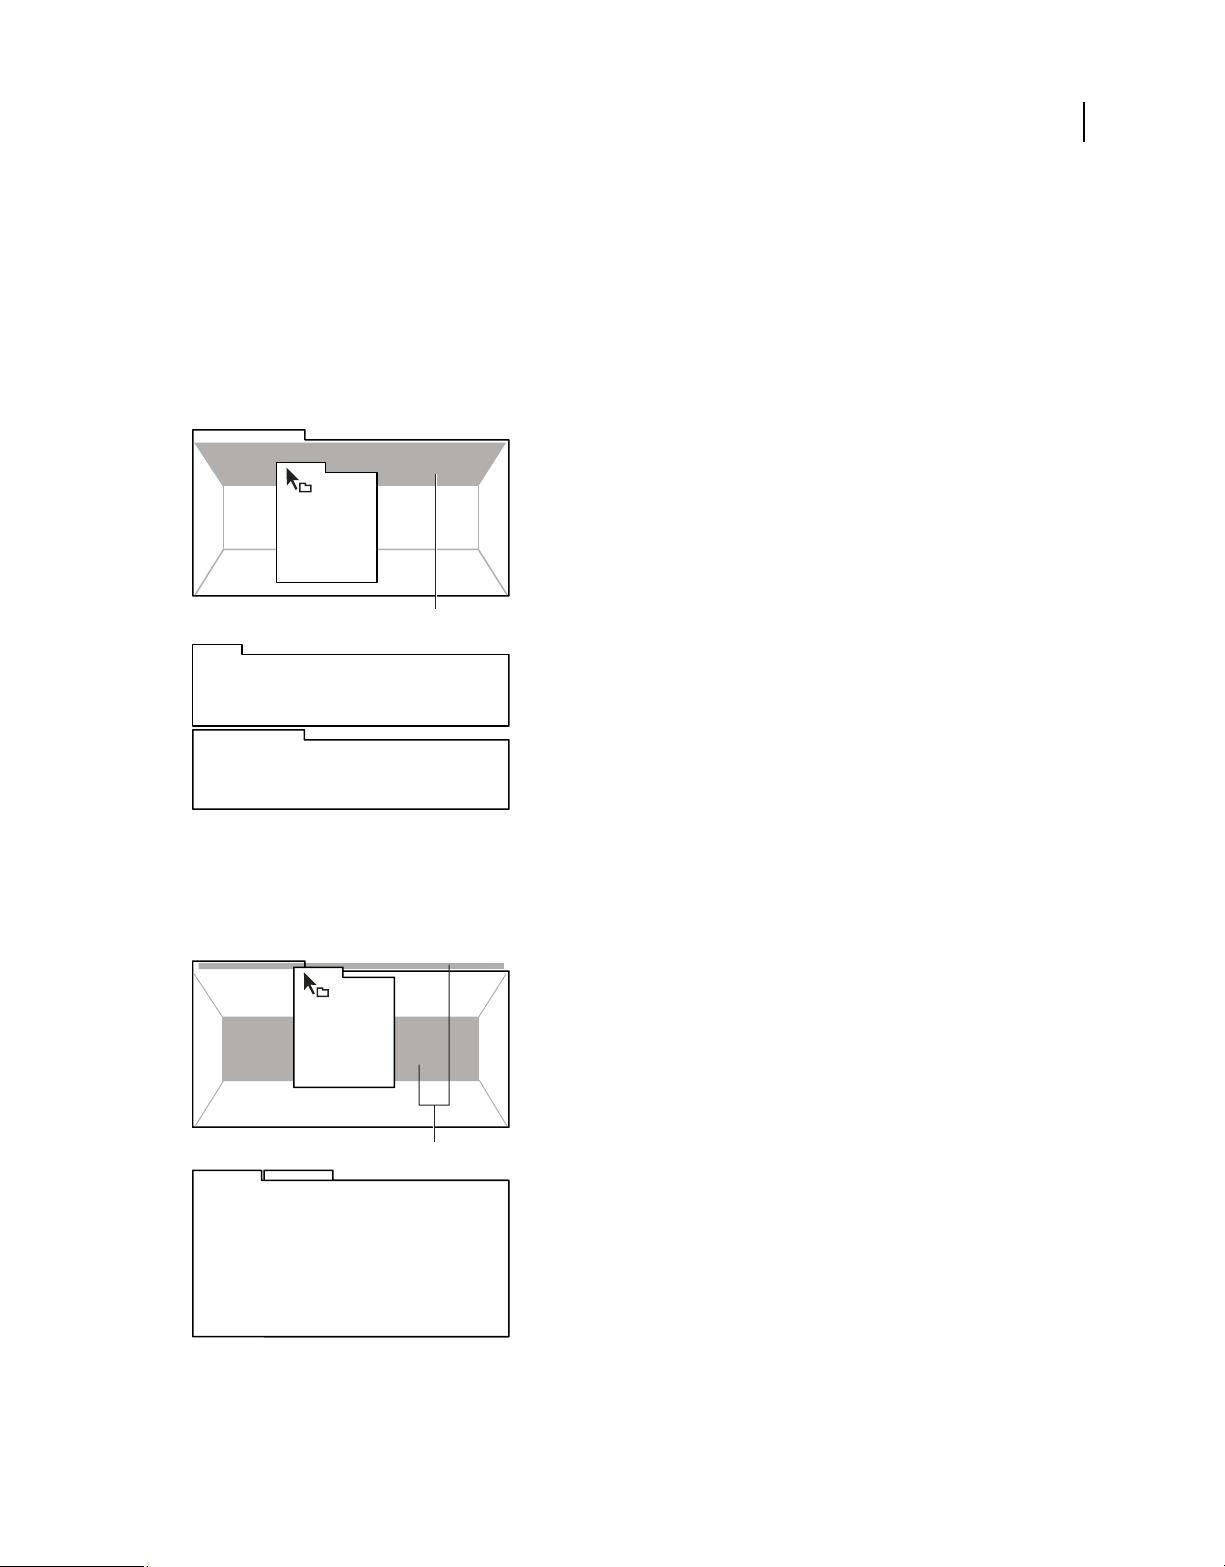
Dock, group, or float panels
You can dock panels together, move them into or out of groups, and undock them so they float above the application
window. As you drag a panel, drop zones—areas onto which you can move the panel—become highlighted. The drop
zone you choose determines where the panel is inserted, and whether it docks or groups with other panels.
Docking zones
Docking zones exist along the edges of a panel, group, or window. Docking a panel places it adjacent to the existing
group, resizing all groups to accommodate the new panel.
A
B
C
7
Dragging panel (A) onto docking zone (B) to dock it (C)
Grouping zones
Grouping zones exist in the middle of a panel or group, and along the tab area of panels. Grouping a panel stacks it
with other panels.
A
B
C
Dragging panel (A) onto grouping zone (B) to group it with existing panels (C)
Dock or group panels
1 If the panel you want to dock or group is not visible, choose it from the Window menu.
Last updated 11/6/2011
Page 14
USING ADOBE PREMIERE PRO CS4
User interface
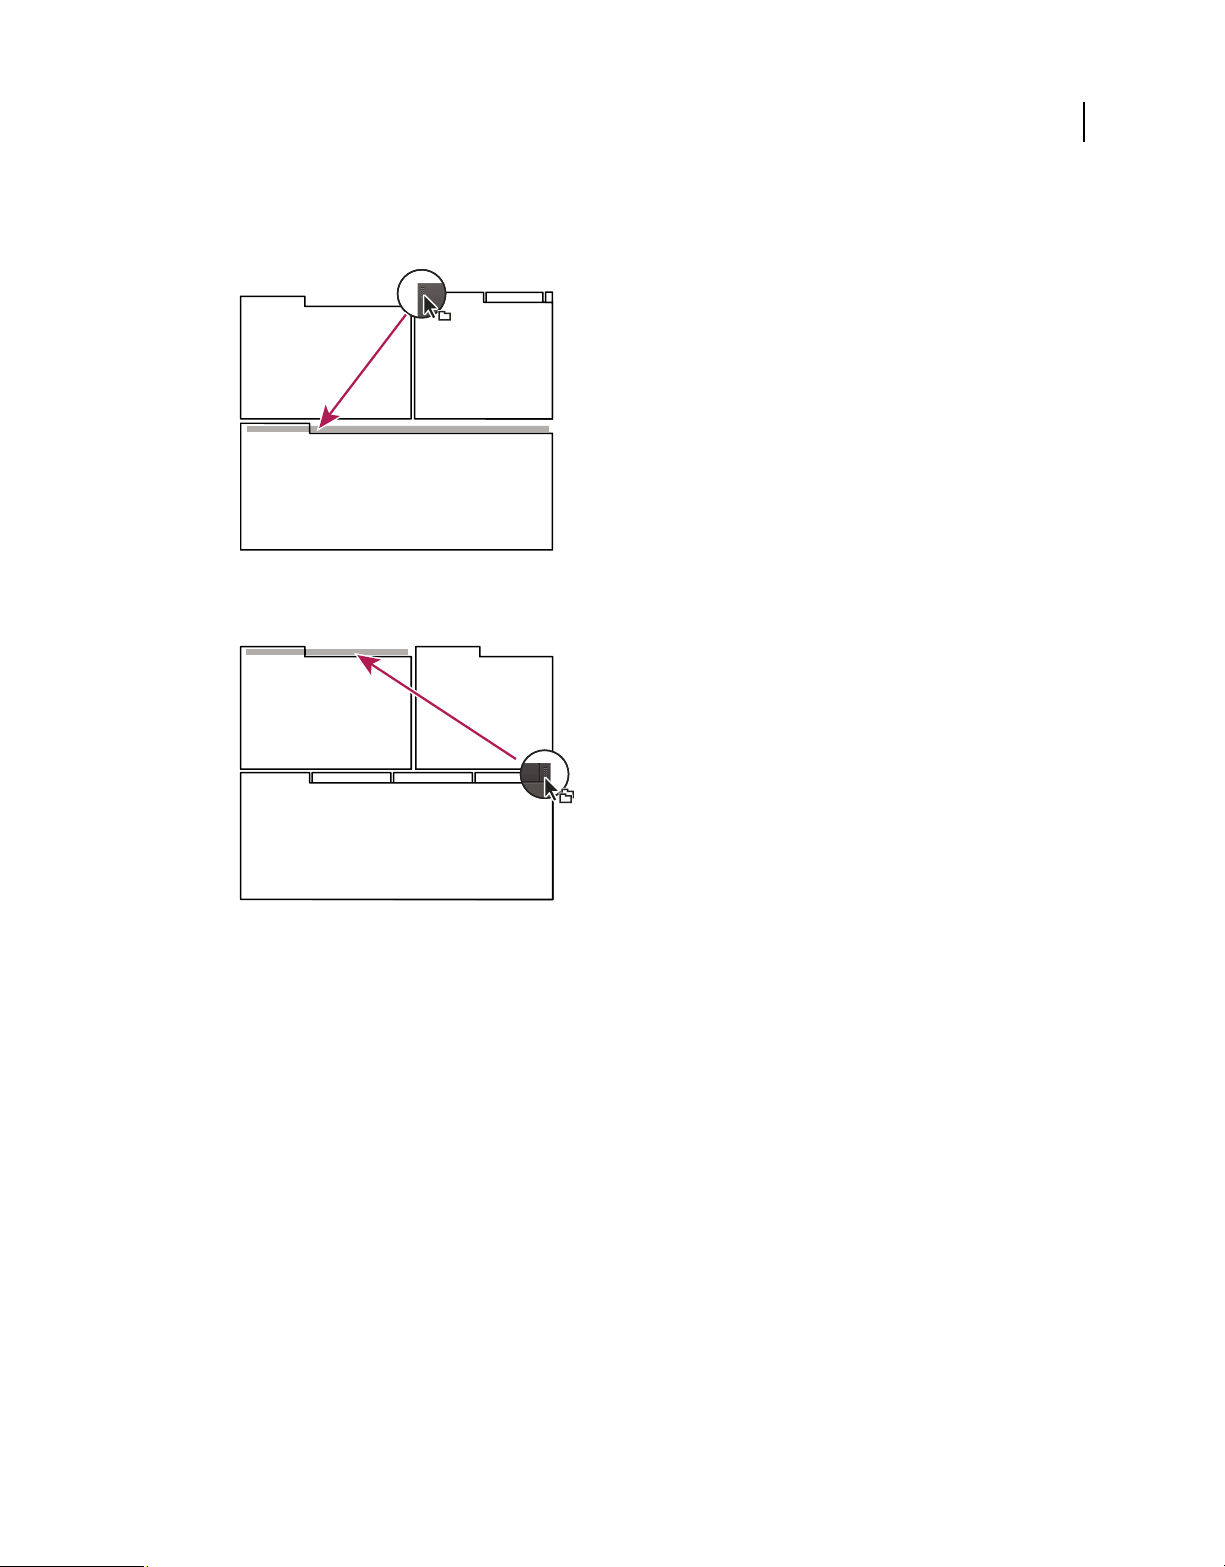
2 Do one of the following:
•
To move an individual panel, drag the gripper area in the upper-left corner of a panel’s tab onto the desired drop zone.
Drag panel gripper to move one panel
• To move an entire group, drag the group gripper in the upper-right corner onto the desired drop zone.
8
Drag group gripper to move entire group
The application docks or groups the panel, according to the type of drop zone.
Undock a panel in a floating window
When you undock a panel in a floating window, you can add panels to the window and modify it similarly to the
application window. You can use floating windows to make use of a secondary monitor, or to create workspaces like
those in earlier versions of Adobe applications.
❖ Select the panel you want to undock (if it’s not visible, choose it from the Window menu), and then do one of the
following:
• Choose Undock Panel or Undock Frame from the panel menu. Undock Frame undocks the panel group.
• Hold down Ctrl (Windows®) or Command (Mac OS®), and drag the panel or group from its current location.
When you release the mouse button, the panel or group appears in a new floating window.
• Drag the panel or group outside the application window. (If the application window is maximized, drag the
panel to the Windows taskbar.)
Last updated 11/6/2011
Page 15
USING ADOBE PREMIERE PRO CS4
User interface
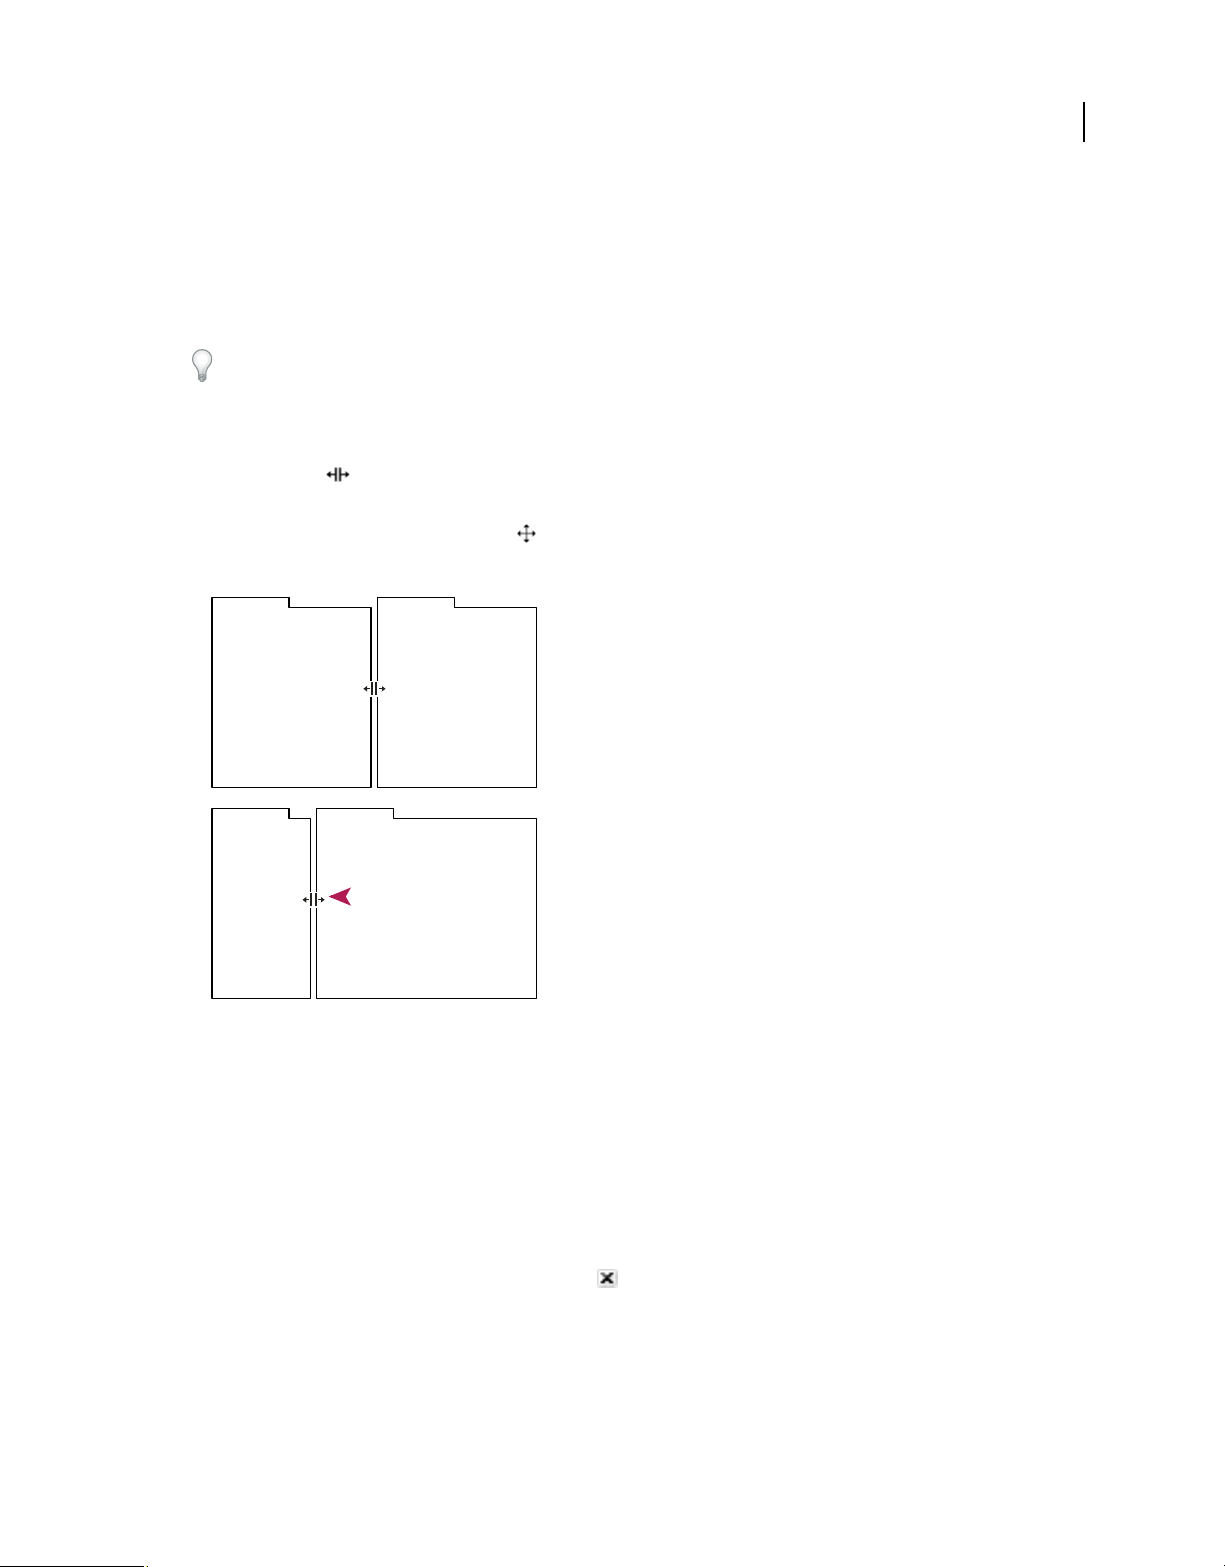
Resize panel groups
When you position the pointer over dividers between panel groups, resize icons appear. When you drag these icons,
all groups that share the divider are resized. For example, suppose your workspace contains three panel groups stacked
vertically. If you drag the divider between the bottom two groups, they are resized, but the topmost group doesn’t
change.
To quickly maximize a panel beneath the pointer, press the tilde (~) key. (Do not press Shift.) Press the tilde key again
to return the panel to its original size.
1 Do either of the following:
• To resize either horizontally or vertically, position the pointer between two panel groups. The pointer becomes a
double-arrow
• To resize in both directions at once, position the pointer at the intersection between three or more panel groups.
The pointer becomes a four-way arrow
2 Hold down the mouse button, and drag to resize the panel groups.
.
.
9
A
B
Dragging divider between panel groups to resize them horizontally
A. Original group with resize icon B. Resized groups
Open, close, and scroll to panels
Even if a panel is open, it may be out of sight, beneath other panels. Choosing a panel from the Window menu brings
it to the front. Likewise, if a panel group is very narrow, a scroll bar above the group reveals all the panel tabs.
When you close a panel group in the application window, the other groups resize to make use of the newly available
space. When you close a floating window, the panels within it close, too.
• To open or close a panel, choose it from the Window menu.
• To close a panel or window, click its Close button .
• To see all the panel tabs in a narrow panel group, drag the horizontal scroll bar.
Last updated 11/6/2011
Page 16

USING ADOBE PREMIERE PRO CS4
User interface
Drag horizontal scroll bar to see all panels in narrow group
Navigate the panels
You can use keyboard shortcuts to activate panels in rotation.
❖ Do one of the following:
• To activate panels in rotation to the right, press Ctrl+Shift+> (Windows), or Control+Shift+> (Mac OS).
• To activate panels in rotation to the left, press Ctrl+Shift+< (Windows), or Control+Shift+< (Mac OS).
Display any panel full-screen
You can expand any panel to display it in full-screen mode, and toggle back to normal view.
10
1 Select the panel you want to view full-screen.
2 Press the grave accent key (`), or the key that takes its place on your keyboard. Typically, this key lies just to the left
of the numeral one (1) key. Some refer to this key as the back quote key, or the tilde (~) key.
Press the back quote key again to toggle back to normal view.
Note: When Adobe Premiere Pro is installed on a computer with a non-U.S. keyboard, the Maximize Or Restore Frame
command is mapped to a key other than the back quote key. The key for Maximize Or Restore Frame is listed in the
Keyboard Customization dialog box. To find it, select the Adobe
the menu. Scroll down past the Help heading to Maximize Or Restore Frame.
Premiere Pro Defaults set. Then, select Application from
More Help topics
“Find keyboard shortcuts” on page 474
Save, reset, or delete workspaces
Save a custom workspace
As you customize a workspace, the application tracks your changes, storing the most recent layout. To store a specific
layout more permanently, save a custom workspace. Saved custom workspaces appear in the Workspace menu, where
you can return to and reset them.
❖ Arrange the frames and panels as desired, and then choose Window > Workspace > New Workspace. Type a name
for the workspace, and click
Note: If a project saved with a custom workspace is opened on another system, the application looks for a workspace with
a matching name. If it can’t find a match (or the monitor configuration doesn’t match), it uses the current local
workspace.
OK.
Last updated 11/6/2011
Page 17

USING ADOBE PREMIERE PRO CS4
User interface
Reset a workspace
Reset the current workspace to return to its original, saved layout of panels.
❖ Choose Window > Workspace > Reset workspace name.
Delete a workspace
1 Choose Window > Workspace > Delete Workspace.
2 Choose the workspace you want to delete, and then click OK.
Note: You cannot delete the currently active workspace.
Working with multiple monitors
To increase the available screen space, use multiple monitors. When you work with multiple monitors, the application
window appears on one monitor, and you place floating windows on the second monitor. Monitor configurations are
stored in the workspace.
More Help topics
“Dock, group, or float panels” on page 7
11
Import a workspace with a project
Workspace selections and customizations made in a project are saved in the project file. By default, Premiere Pro opens
projects in the current workspace. However, you can instead open a project in the workspace last used with it. This
option is particularly helpful if you often rearrange the workspace for each project.
❖ Before opening a project, select Window > Workspace > Import Workspace From Projects.
Brighten or darken the interface
You may prefer to lower the brightness when working in a darkened editing suite or when making color corrections.
Changing the brightness affects panels, windows, and dialog boxes but doesn’t affect scroll bars, title bars, and menus
that aren’t inside panels. In addition, the change doesn’t affect the application background in Windows.
1 Choose Edit > Preferences > Appearance (Windows) or Premiere Pro > Preferences > Appearance (Mac OS).
2 Drag the User Interface Brightness slider to the left or right. Click Default to restore the default brightness level.
Tools, clip details, and menus
Tools
The Tools panel contains a number of tools for editing sequences in a Timeline panel. When you select a tool, the
pointer changes shape according to the selection. For example, when you select the Razor tool and position the pointer
over a clip in a Timeline panel, the icon changes to a razor
reflect the task currently being performed. In some cases, pressing a modifier key (such as Shift) as you use a tool
changes its function, and its icon changes accordingly. Select tools from the Tools panel, or use a keyboard shortcut.
You can resize the Tools panel and orient it vertically or horizontally.
. However, the Selection tool icon may change to
Note: The Selection tool is the default tool. It’s used for everything other than specialized functions. If the program isn’t
responding as you expect, make sure that the Selection tool is selected.
Last updated 11/6/2011
Page 18

USING ADOBE PREMIERE PRO CS4
User interface
12
A
B
C
D
E
F
Toolbox
A. Selection tool B. Ripple Edit tool C. Rate Stretch tool D. Slip tool E. Pen tool F. Hand tool G. Track Select tool H. Rolling Edit tool I. Razor
tool J. Slide tool K. Zoom tool
G
H
I
J
K
Select any tool to activate it for use in a Timeline panel by clicking it or pressing its keyboard shortcut. Let the cursor
hover over a tool to see its name and keyboard shortcut.
Selection Tool The standard tool for selecting clips, menu items, and other objects in the user interface. It’s generally
a good practice to select the Selection Tool as soon as you are done using any of the other, more specialized, tools. For
more information about using the Selection Tool, see
Track Selection Tool Select this tool to select all the clips to the right of the cursor in a sequence. To select a clip and
“Select one or more clips” on page 177.
all clips to the right in its own track, click the clip. To select a clip and all clips to its right in all tracks, Shift-click the
clip. Pressing Shift changes the Track Selection Tool into the Multi-track Selection Tool. For more information about
using the Track Selection Tool, see
“Select one or more clips” on page 177 and “Delete all clips on one track” on
page 183.
Ripple Edit Tool Select this tool to trim the In or Out point of a clip in a Timeline. The Ripple Edit Tool closes gaps
caused by the edit and cascades clips to the right or left in the Timeline in order to preserve all edits to the left or right
of the trimmed clip. For more information about using the Ripple Edit tool, see
“Perform rolling and ripple edits” on
page 170.
Rolling Edit Tool Select this tool to roll the edit point between two clips in a Timeline, simultaneously trimming the In
point of one and the Out point of the other, while leaving the combined duration of the two unchanged. For more
information about using the Rolling Edit tool, see
Rate Stretch Tool Select this tool to shorten a clip in a Timeline by speeding up its playback, or to lengthen it by
“Perform rolling and ripple edits” on page 170.
slowing it down. The Rate Stretch Tool changes speed and duration, but leaves the In and Out points of the clip
unchanged. For more information about using the Rate Stretch Tool, see
“Change clip speed and duration with the
Rate Stretch tool” on page 290.
Razor Tool Select this tool to make one or more incisions in clips in a Timeline. Click a point in a clip to split it at that
precise location. To split clips in all tracks at that location, Shift-click the spot in any of the clips. For more information
about using the Razor Tool, see
Slip Tool Select this tool to simultaneously change the In and Out points of a clip in a Timeline, while keeping the time
“Split or cut one or more clips with the Razor tool” on page 181.
span between them constant. For example, if a 10-second clip has been trimmed to five seconds in a sequence, you can
use the Slip Tool to show an earlier part of the clip, while retaining its five-second duration and its location in the
Timeline. For more information about using the Slip Tool, see
Slide Tool Select this tool to move a clip to the left or right in a Timeline while simultaneously trimming the two clips
“Perform slip and slide edits” on page 172.
that surround it. The combined duration of the three clips, and the location of the group in the Timeline, remain
unchanged. For more information about using the Slide Tool, see
Pen Tool Select this tool to set or select keyframes, or to adjust connector lines in a Timeline. Click and drag a
“Perform slip and slide edits” on page 172.
connector line vertically to adjust it. Ctrl-click (Windows) or Command-click (Mac OS) on a connector line to set a
keyframe. Shift-click noncontiguous keyframes to select them. Drag a marquee over contiguous keyframes to select
them. For more information about using the Pen Tool, see
“Select keyframes” on page 405.
Last updated 11/6/2011
Page 19

USING ADOBE PREMIERE PRO CS4
User interface
Hand Tool Select this tool to move the viewing area of a Timeline to the right or left. Click and drag left or right
anywhere in the viewing area.
Zoom Tool Select this tool to zoom in or out in a Timeline viewing area. Click in the viewing area to zoom in by one
increment. Alt-click (Windows) or Option-click (Mac OS) to zoom out by one increment. For more information about
using the Zoom Tool, see
“Navigate in a sequence” on page 128.
Clip details in the Info panel
The Info panel displays several data about a selected item, and timecode information for clips under the current-time
indicator in the Timeline.
At the top of the panel, information is displayed for the current selection. This may vary depending on its media type,
the active panel, and so on. For example, the Info panel displays information unique to an empty space in a Timeline
panel, or a clip in the Project panel.
Video Indicates frame rate, frame size, and pixel aspect ratio, in that order.
Audio Indicates sample rate, bit depth, and channels, in that order.
Tape Indicates the name of the tape.
In Indicates the In point timecode of the selected clip.
13
Out Indicates the Out point timecode of the selected clip.
Duration Indicates the duration of the selected clip.
The section below the current selection data contains the timecode values for the active sequence and for clips in each
of its video and audio tracks. These are displayed in a stacking order that matches the Timeline for easy visual
correlation. Video track timecodes are displayed with the highest track number on top, and audio tracks are displayed
with the highest track number on the bottom. The only time this section is blank is when all sequences are closed.
When a track is added to or deleted from the current sequence, the Info panel updates to accurately display the number
of tracks in the sequence. There is no limit on the number of tracks displayed. Similarly, when the user switches to a
different sequence, the Info panel updates to display the correct number of tracks in that sequence.
The Info panel displays timecode for the current selection and for all track items under the current-time indicator.
When the playhead crosses a blank area in the timeline, no timecode value is displayed for that track, but the track label
remains visible and undimmed. This ensures that the vertical stack layout of the timecodes is easily correlated with the
physical layout of the tracks in the sequence.
Last updated 11/6/2011
Page 20

USING ADOBE PREMIERE PRO CS4
User interface
A
B
C
D
E
F
G
H
The Info panel
A. Name of selected clip B. Data for selected clip C. Tape name D. Sequence timecode locations of clip Start and End points E. Name of active
sequence F. Source timecode location in selected clip of current-time indicator G. Source timecode location in clips on video tracks of currenttime indicator H. Source timecode location in clips on audio tracks of current-time indicator
Display context and panel menus
In addition to choosing from the menus at the top of your screen, you can choose from context menus, which display
commands relative to the active tool or selected item. Panel menus display commands relative to the active panel.
14
• To display panel menus, click the button in the upper-right corner of the panel.
• To display context menus, right-click a panel.
Preferences
Change your preferences
You can customize the look and behavior of Premiere Pro in many ways, from determining the default length of
transitions to setting the brightness of the user interface. Most of these preferences will remain in effect until you
change them. The preferences you set for scratch disks, however, are saved with your projects, so that whenever you
open an project, it automatically defaults to the scratch disks you selected for it when you set up that project.
❖ Choose Edit > Preferences (Windows) or Premiere Pro > Preferences (Mac OS), and select the category of
preferences you wish to change.
General preferences
In the General pane of the Preferences dialog box, you can customize settings for everything from playback preroll
duration to bin behaviors.
More Help topics
“Play a sequence or clip with preroll and postroll pauses” on page 120
“Specify and apply default transitions” on page 323
“Change the default duration for still images” on page 296
Last updated 11/6/2011
Page 21

USING ADOBE PREMIERE PRO CS4
User interface
“Scroll a sequence during preview” on page 186
“Set the default keyframe display of video tracks” on page 132
“Set the default keyframe display of audio tracks” on page 132
“Render audio when rendering video” on page 185
“Scale assets” on page 281
“Change bin behaviors” on page 105
“Optimize rendering for available memory” on page 47
“Specify whether to render audio when rendering video” on page 45
Appearance preferences
In the Appearance pane of the Preferences dialog box, you can set the overall brightness of the user interface.
More Help topics
“Brighten or darken the interface” on page 11
15
Audio preferences
In the Audio pane of the Preferences dialog box, you can customize settings for audio mix, channel mapping, and more.
More Help topics
“Set Automatch Time for Touch mode” on page 227
“Downmixing to fewer channels” on page 233
“Specify whether to play audio while scrubbing” on page 216
“Mute input during recording” on page 215
“Map audio channels” on page 201
“Specify the automated keyframe creation” on page 227
Audio Hardware preferences
In the Audio Hardware pane of the Preferences dialog box, you specify the computer audio device and settings,
including ASIO settings, Premiere Pro uses for recording audio.
More Help topics
“Preparing the audio input channel for recording” on page 214
“Specify the default audio device” on page 44
“Specify ASIO device settings (Windows only)” on page 44
Audio Output Mapping preferences
In the Audio Output Mapping pane of the Preferences dialog box, you specify the target speaker in your computer
sound system for each audio channel supported by your computer for previews.
Last updated 11/6/2011
Page 22

USING ADOBE PREMIERE PRO CS4
User interface
More Help topics
“Map sequence audio channels to audio device hardware channels” on page 204
Change the Auto Save settings
By default, Premiere Pro automatically saves your project every 20 minutes and retains the last five versions of the
project file on the hard disk. You can revert to a previously saved version at any time. Archiving many iterations of a
project consumes relatively little disk space because project files are much smaller than source video files. It’s usually
best to save project files to the same drive as your application. Archived files are saved in the Premiere Pro Auto-Save
folder.
1 Choose Edit > Preferences > Auto Save (Windows) or Premiere Pro > Preferences > Auto Save (Mac OS).
2 Do any of the following, and then click OK:
• Select Automatically Save Projects, and type the number of minutes you would like between saves.
• For Maximum Project Versions, enter the number of versions of a project file you want to save. For example, if you
type 10, Premiere Pro saves the ten most recent versions.
3 Click OK.
16
Capture preferences
Controls how Premiere Pro transfers video and audio directly from a deck or camera. (None of the other project
settings options affect capturing.) The contents of this panel depend on the editing mode. If you’re capturing DV
footage, you don’t need to change capture settings. When DV/IEEE 1394 Capture is the selected capture format, no
options are available because the options are automatically set to the IEEE 1394 standard. Additional capture formats
and options may appear if you install other software, such as software included with a capture card certified to be
compatible with Premiere Pro.
Note: For P2 DVCPRO 50 and P2 DVCPRO HD projects, the Capture Format setting is not relevant, because the assets
are captured and recorded directly to the P2 card as digital files by the camera.
More Help topics
“Set up a project for device control” on page 59
Device Control preferences
In the Device Control pane of the Preferences dialog box, you specify the settings Premiere Pro uses when controlling
a computer-connected playback/recording device, such as a VTR or camcorder.
More Help topics
“Set up a device for device control” on page 60
Label Colors preferences
In the Label Colors pane of the Preferences dialog box, you can change the default colors and color names with which
you label assets in the Project panels.
More Help topics
“Label assets” on page 106
Last updated 11/6/2011
Page 23

USING ADOBE PREMIERE PRO CS4
User interface
Label Defaults preferences
In the Label Defaults pane of the Preferences dialog box, you can change the default colors assigned to bins, sequences,
and different types of media.
More Help topics
“Label assets” on page 106
Media preferences
In the Media pane of the Preferences dialog box, you can specify the location of the media cache files. These are files
created by the Media Cache feature, including conformed audio files, PEK audio files, and video index files (for
MPEG).
Also, you can change the location of the Media Cache Database, and you can clean it of unused data.
You can specify whether Premiere Pro shows the source or the sequence timecode for clips, and whether it shows the
timecode offset for the In and Out points of clips.
More Help topics
“Move or clean the Media Cache Database” on page 87
17
“Choose timecode display format” on page 77
“Ensure that Adobe video applications use the same cached files” on page 186
“About the Metadata panel in Premiere Pro” on page 110
Player Settings preferences
In the Player Settings pane of the Preferences dialog box, you can select the default player. Premiere Pro uses the player
to play media from clips and sequences for the following:
• Source Monitor
• Program Monitor
• the preview area at the top of the Project panel
• Trim Monitor
• Multi-Camera Monitor
• the video transition preview in the Effect Controls panel.
You can choose the default player for your computer, or a third-party plug-in player for Premiere Pro. Third-party
players are installed with some capture cards.
Titler preferences
In the Titler pane of the Preferences dialog box, you can change the letters Premiere Pro shows in the Titler Style
Swatches panel and in the font browser.
More Help topics
“Specify the characters in the Title Styles panel” on page 260
“Change the letters that appear in the Font Browser” on page 244
Last updated 11/6/2011
Page 24

USING ADOBE PREMIERE PRO CS4
User interface
Trim preferences
In the Trim pane of the Preferences dialog box you can specify the number of frames the trim point moves when you
click the negative or positive Large Trim Offset buttons in the Trim Monitor.
More Help topics
“Perform a rolling edit using the Trim Monitor” on page 171
18
Last updated 11/6/2011
Page 25
Chapter 3: Workflows and system setup
The steps you take in editing video, from import or capture through final output, make up your workflow. The basic
workflow describes the most general steps you would take with most projects. Specific types of workflows, such as the
P2 workflow or the cross-platform workflow, explain the noteworthy settings, variations, or issues specific to each type.
Reviewing the entire workflow for a production before creating a new project and first sequence can help you optimize
Premiere Pro for the needs of that production. It can also help you plan for the special needs your program may have
at any particular step. For example, if you consider, before you begin, what type of footage you will need to capture at
the third step of a workflow, or whether you will need to export video for playback on phones at the last step, you will
be able to select the best sequence presets for your production at the start.
Basic workflow
Whether you use Premiere Pro to edit video for broadcast, DVD, or the web, you’re likely to follow a similar workflow.
For a video overview of the basic workflow, see the Adobe website.
19
For a more detailed video about the basic workflow, see the Adobe website. This video was created for Premiere Pro
CS3, but the basic workflow is the same for the current version.
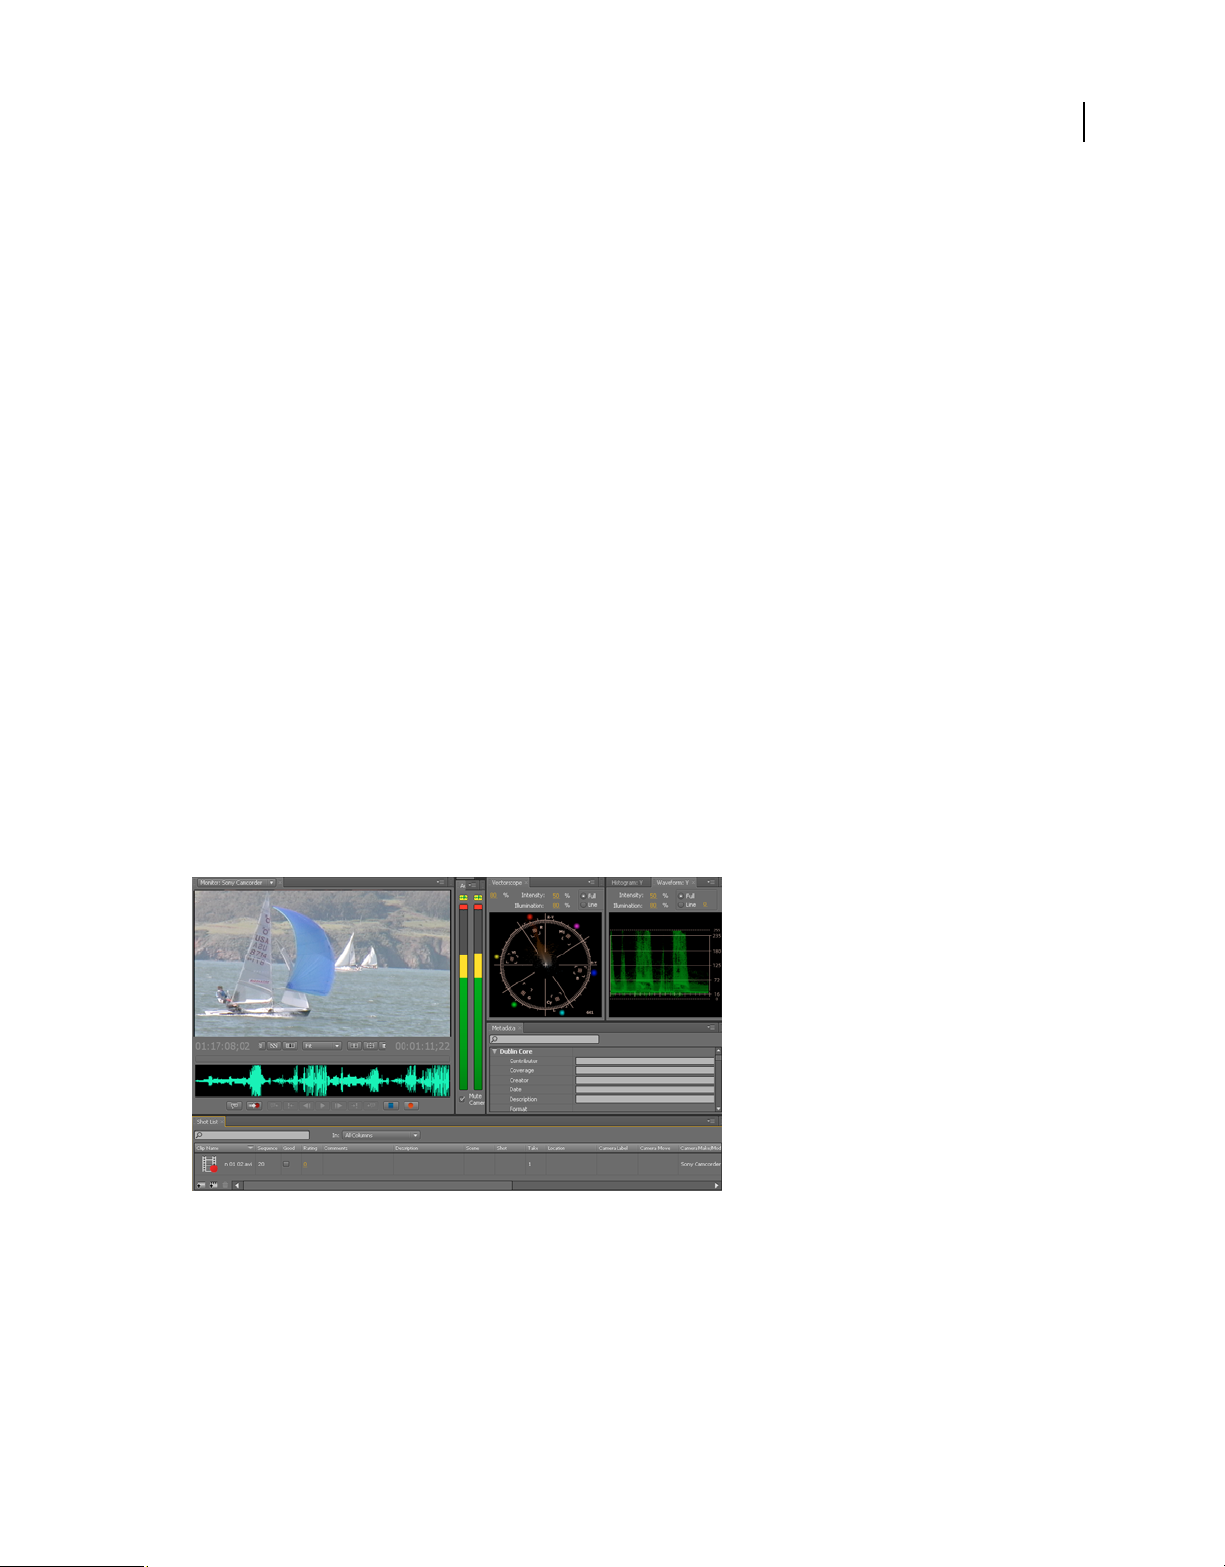
1. Shoot video with Adobe OnLocation
Adjust the video signal coming from your camcorder before you shoot, and then shoot directly to your hard drive with
Adobe® OnLocation™, the signal monitoring application bundled with Premiere Pro.
Adobe OnLocation
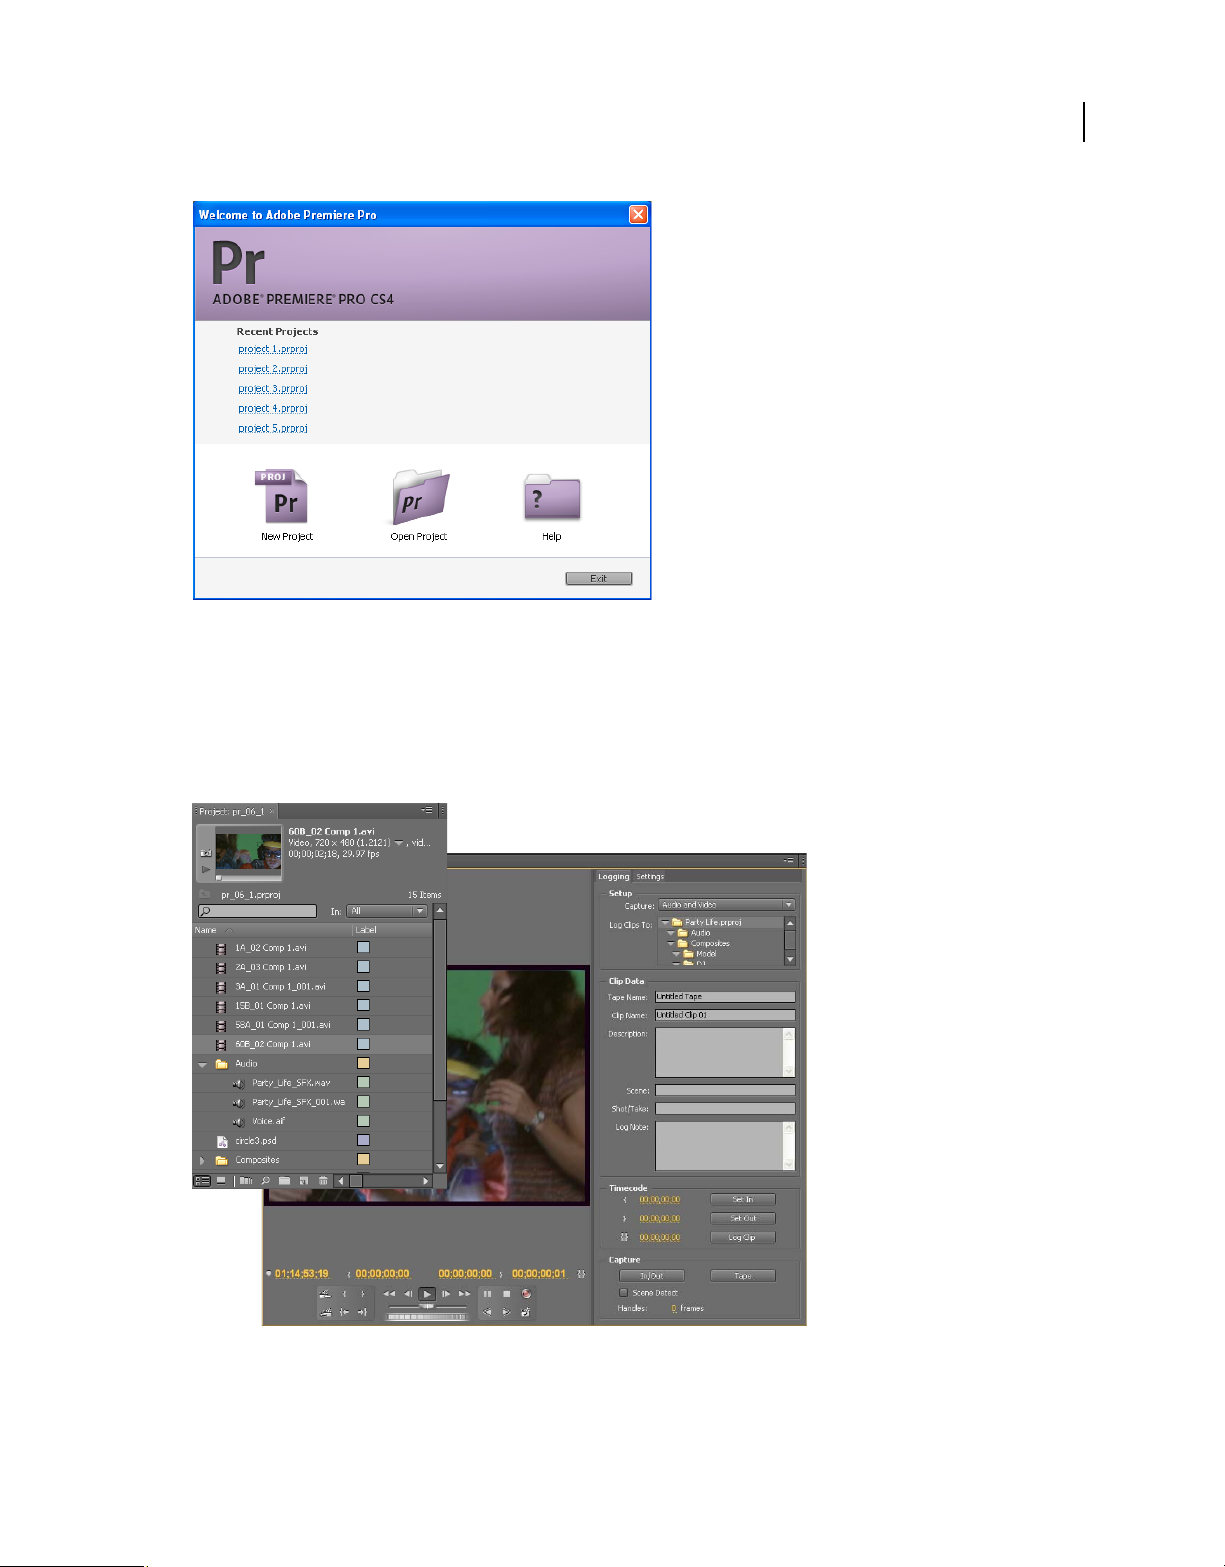
2. Start or open a project
Open an existing project, or start a new one from the Premiere Pro Quick--start screen. When starting a new project,
you can specify the television standard, video format, and other settings for your project. (See
projects” on page 48.)
“Creating and changing
Last updated 11/6/2011
Page 26
USING ADOBE PREMIERE PRO CS4
Workflows and system setup
Quickstart screen
3. Capture and import video and audio
Using the Capture panel, capture footage directly from a camcorder or VTR. With the proper hardware, you can
digitize and capture other formats, from VHS to HD. Using the Media Browser you can import files from computer
sources in any of the leading media formats. Each file you capture or import automatically becomes a clip in the Project
panel.
20
Project panel and Capture panel
Last updated 11/6/2011
Page 27
USING ADOBE PREMIERE PRO CS4
Workflows and system setup
You can also import a variety of digital media, including video, audio, and still images. Premiere Pro also imports
Adobe® Illustrator® artwork or Photoshop® layered files, and it translates After Effects® projects for a seamless,
integrated workflow. You can create synthetic media, such as standard color bars, color backgrounds, and a
countdown. (See
“About capturing and digitizing” on page 56.)
You can also use Adobe® Bridge to organize and find your media files, and then use the Place command in Adobe
Bridge to place the files directly into Premiere Pro.
In the Project panel, you can label, categorize, and group footage into bins to keep a complex project organized. You
can open multiple bins simultaneously, each in its own panel, or you can nest bins, one inside another. Using the
Project panel Icon view, you can arrange clips in storyboard fashion to visualize or quickly assemble a sequence.
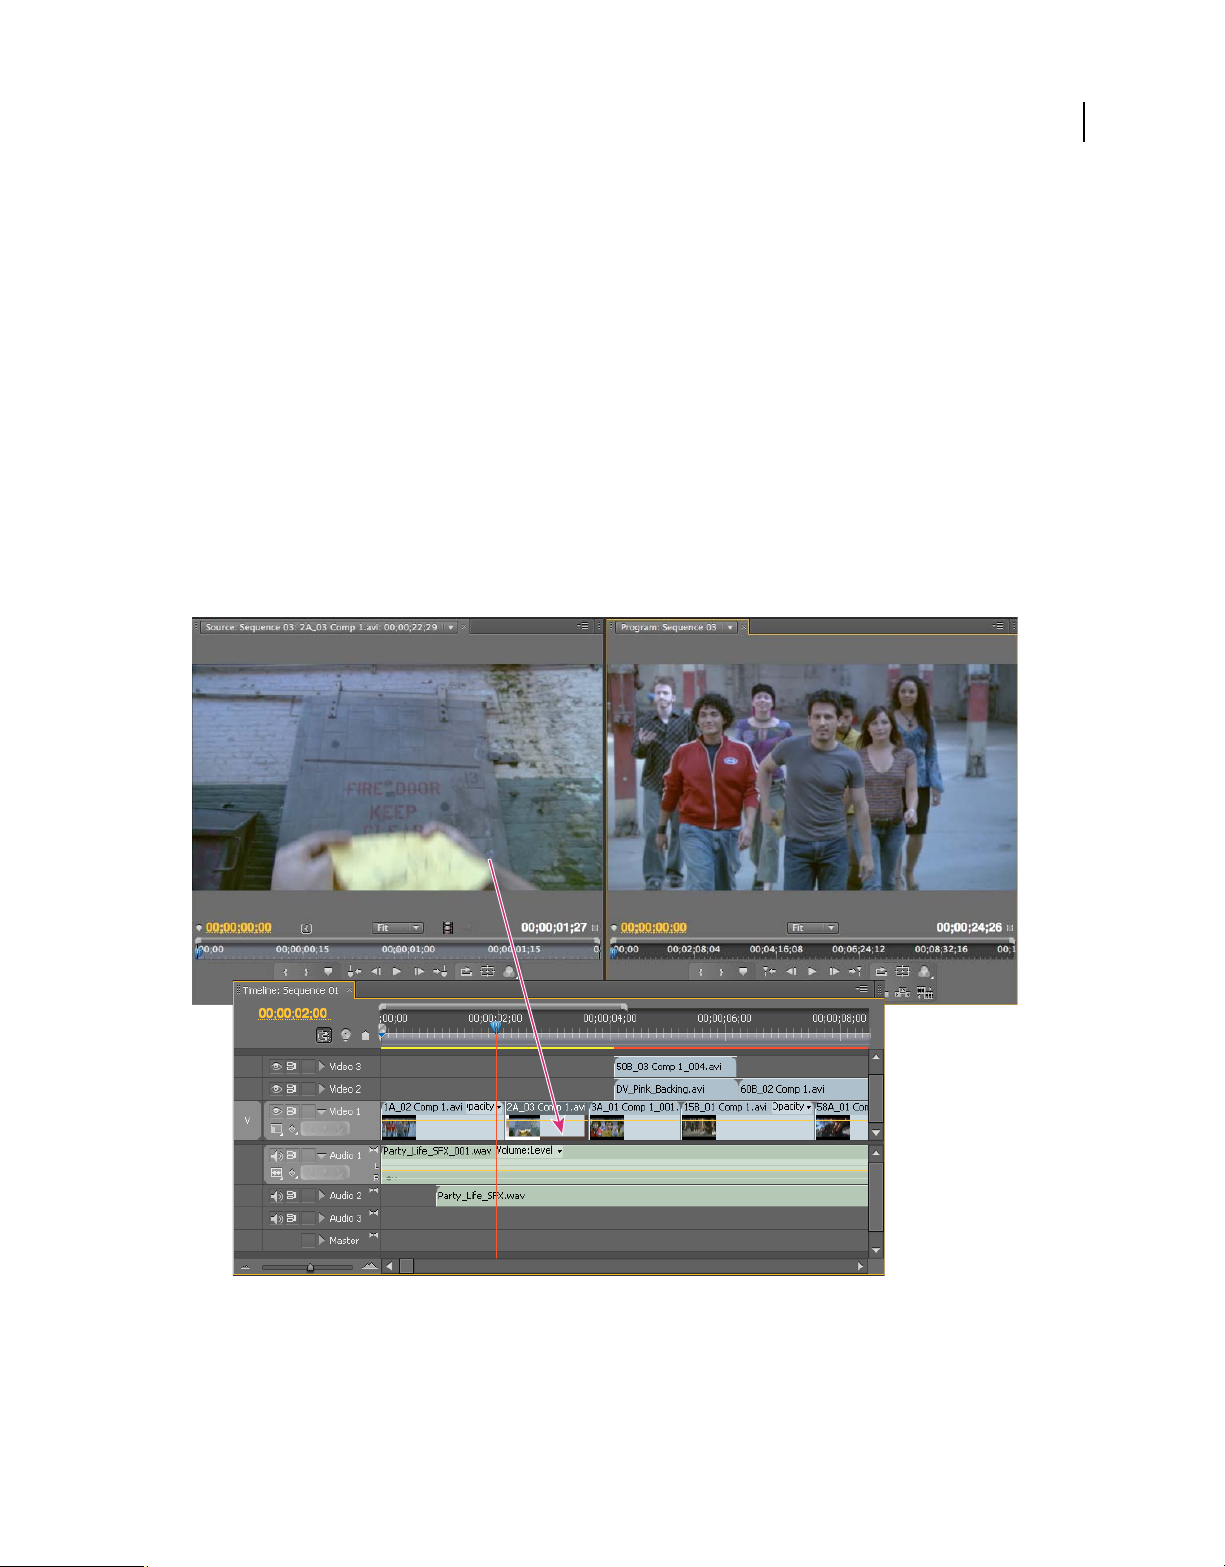
4. Assemble and refine a sequence
Using the Source Monitor, you can view clips, set edit points, and mark other important frames before adding clips to
a sequence. For convenience, you can break a master clip into any number of subclips, each with its own In and Out
points. You can view audio as a detailed waveform and edit it with sample-based precision. (See
“Source Monitor and
Program Monitor overview” on page 115.)
21
Source Monitor, Program Monitor, and Timeline panel
You add clips to a sequence in a Timeline panel by dragging or by using controls in the Source Monitor. You can
automatically assemble clips into a sequence that reflects their order in the Project panel. You can view the edited
sequence in the Program Monitor or watch the full-screen, full-quality video on an attached television monitor. (See
“About Timeline panels” on page 127 and “Adding clips to a sequence” on page 156.)
Last updated 11/6/2011
Page 28
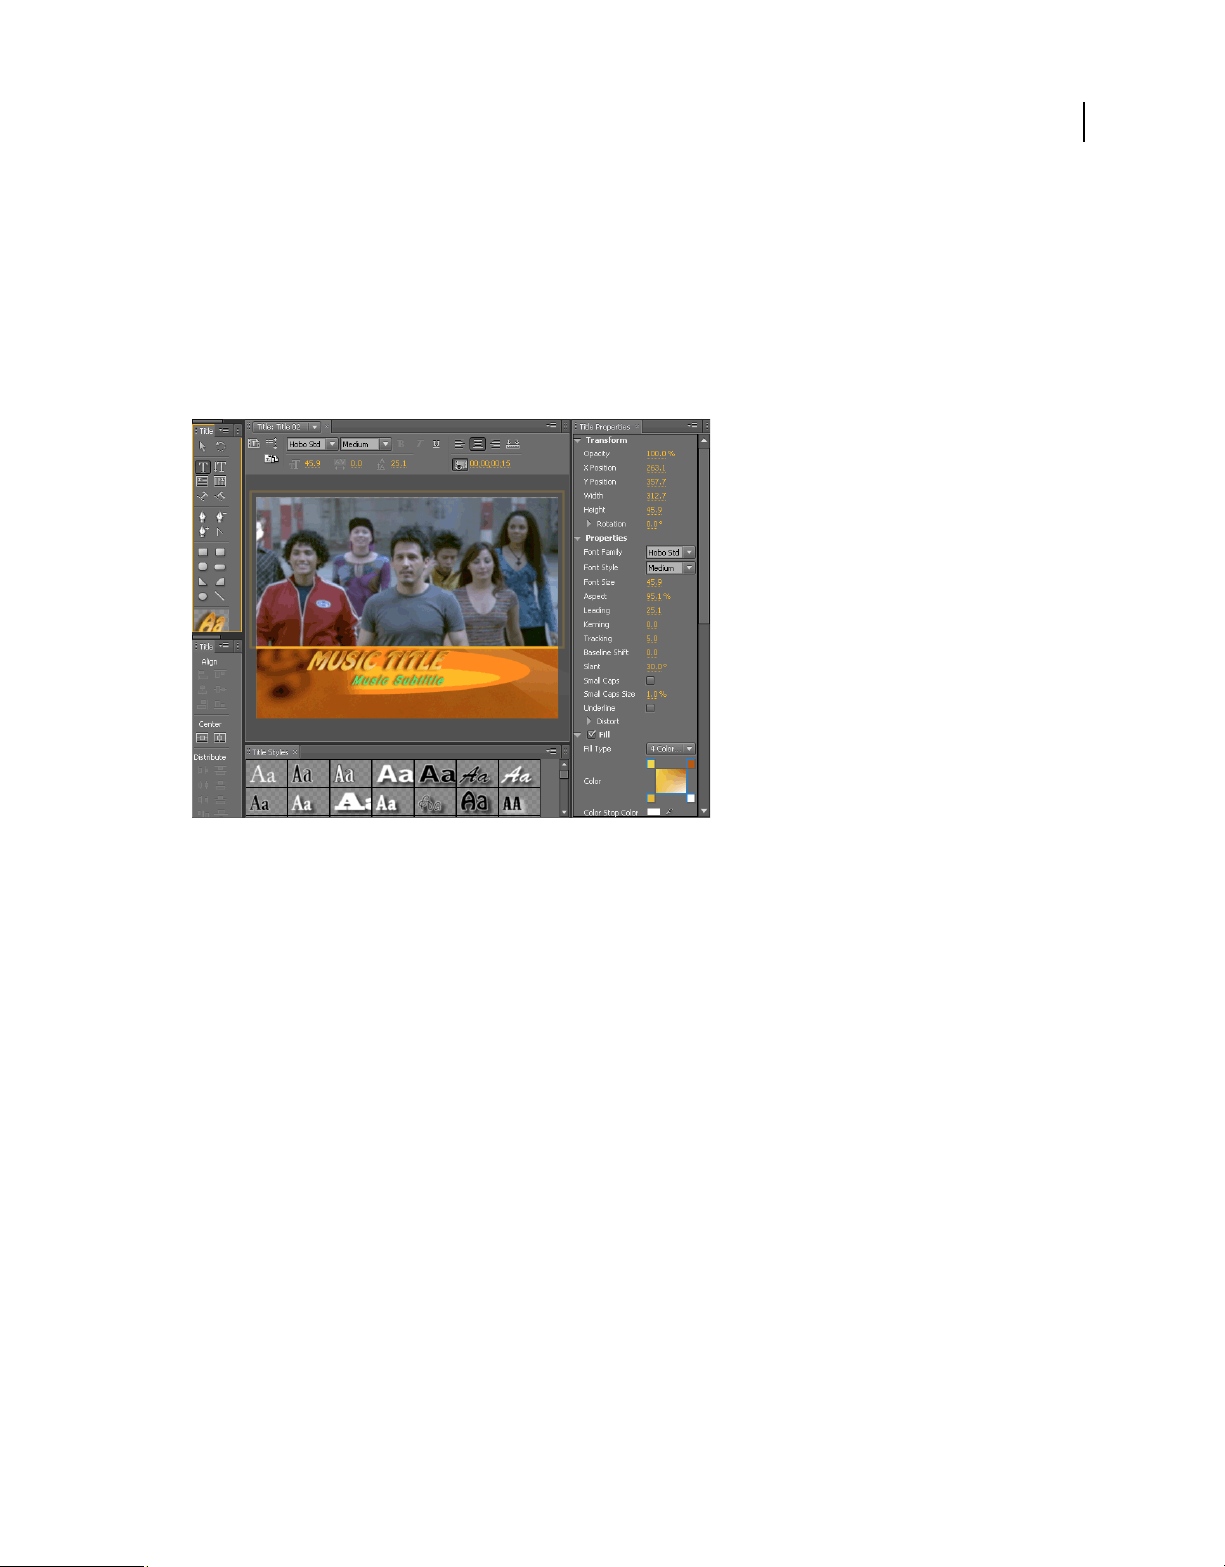
USING ADOBE PREMIERE PRO CS4
Workflows and system setup
Refine the sequence by manipulating clips in a Timeline panel, with either context-sensitive tools or tools in the Tools
panel. Use the specialized Trim Monitor to fine-tune the cut point between clips. By nesting sequences—using a
sequence as a clip within another sequence—you can create effects you couldn’t achieve otherwise.
5. Add titles
Using the Premiere Pro full-featured Titler, create stylish still titles, title rolls, or title crawls that you can easily
superimpose over video. If you prefer, you can modify any of a wide range of provided title templates. As with any clip,
you can edit, fade, animate, or add effects to the titles in a sequence. (See
“About the Titler” on page 237.)
22
Titler
6. Add transitions and effects
The Effects panel includes an extensive list of transitions and effects you can apply to clips in a sequence. You can
adjust these effects, as well as a clip’s motion, opacity, and Variable Rate Stretch using the Effect Controls panel. The
Effect Controls panel also lets you animate a clip’s properties using traditional keyframing techniques. As you adjust
transitions, the Effect Controls panel displays controls designed especially for that task. Alternatively, you can view and
adjust transitions and a clip’s effect keyframes in a Timeline panel. (See
“About transitions” on page 319 and “Apply
effects to clips” on page 267.)
Last updated 11/6/2011
Page 29
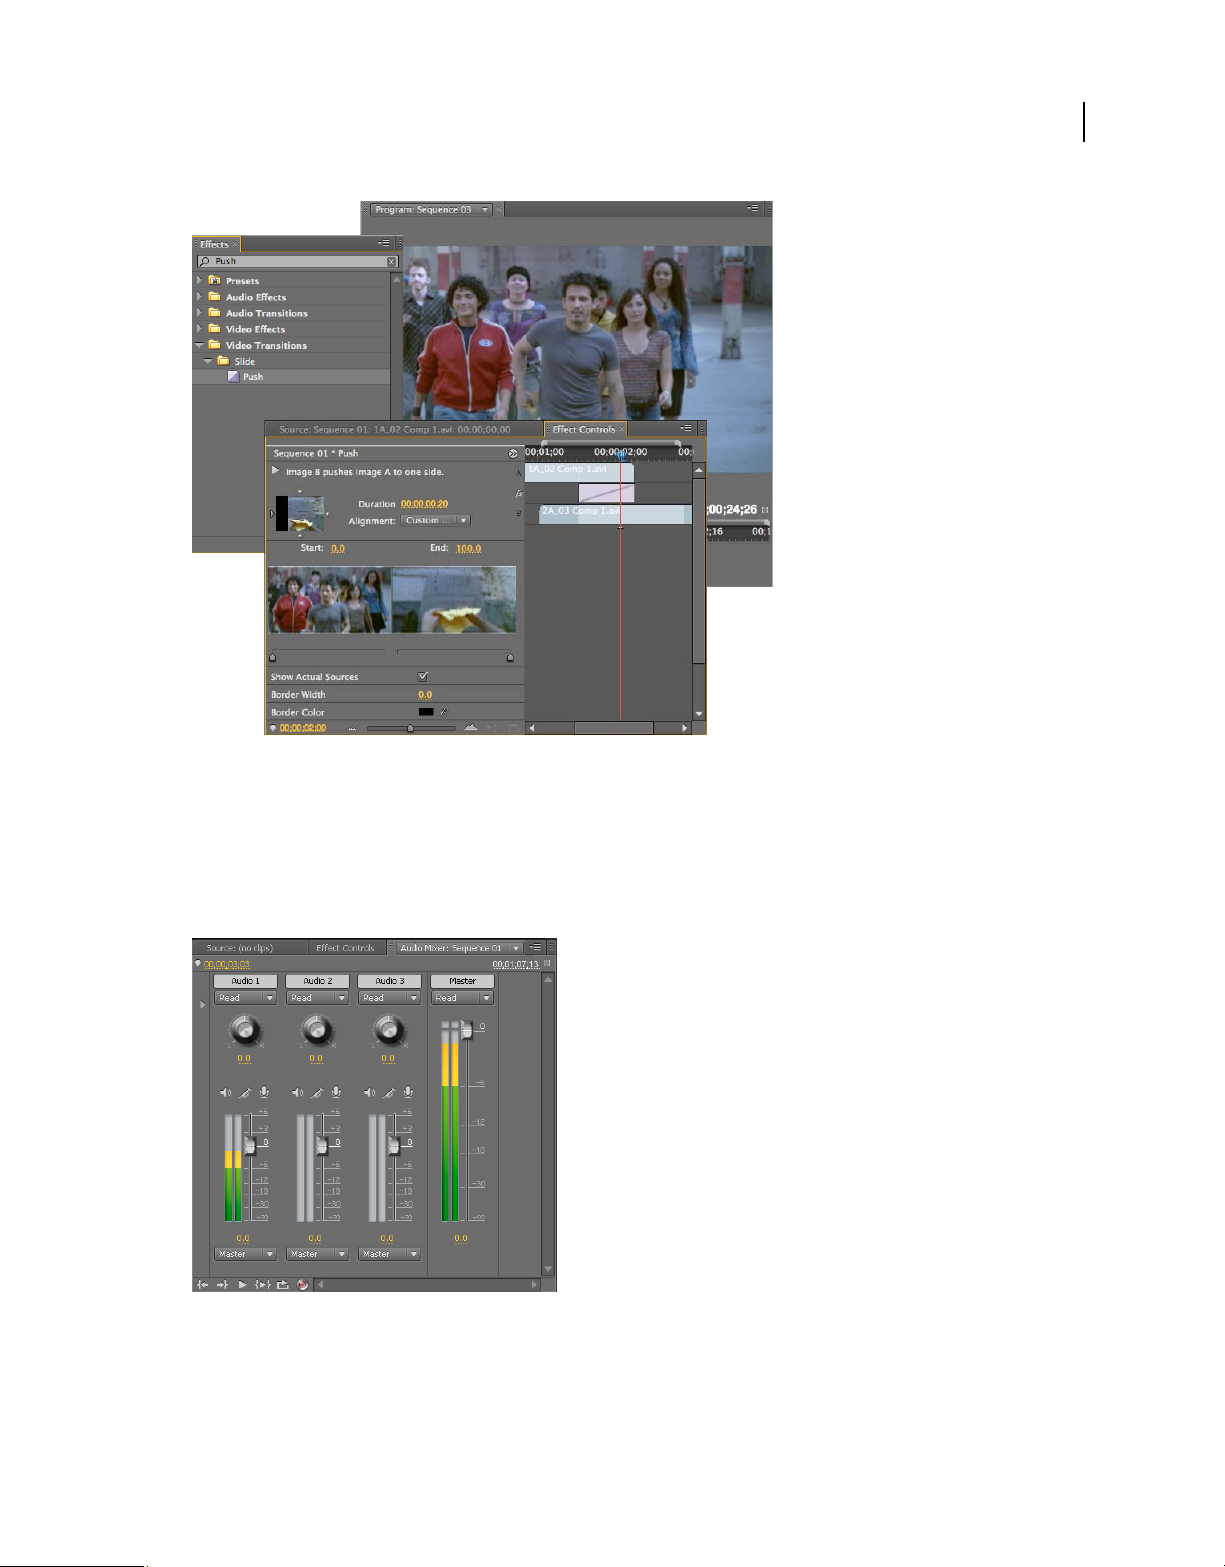
USING ADOBE PREMIERE PRO CS4
Workflows and system setup
23
Effects panel in filtered view, Effect Controls panel, and Program Monitor
7. Mix audio
For track-based audio adjustments, the Audio Mixer faithfully emulates a full-featured audio mixing board, complete
with fade and pan sliders, sends, and effects. Premiere Pro saves your adjustments in real time, on the fly. With a
supported sound card, you can record audio through the sound mixer, or mix audio for 5.1 surround sound. (See
“Mixing audio tracks and clips” on page 197.)
Audio Mixer
8. Collaborate
Using the Clip Notes feature, you can easily send out draft edits for review, and import reviewers’ comments back into
the timeline. The comments show up in sequence markers situated at the precise frames where comments were placed.
Last updated 11/6/2011
Page 30
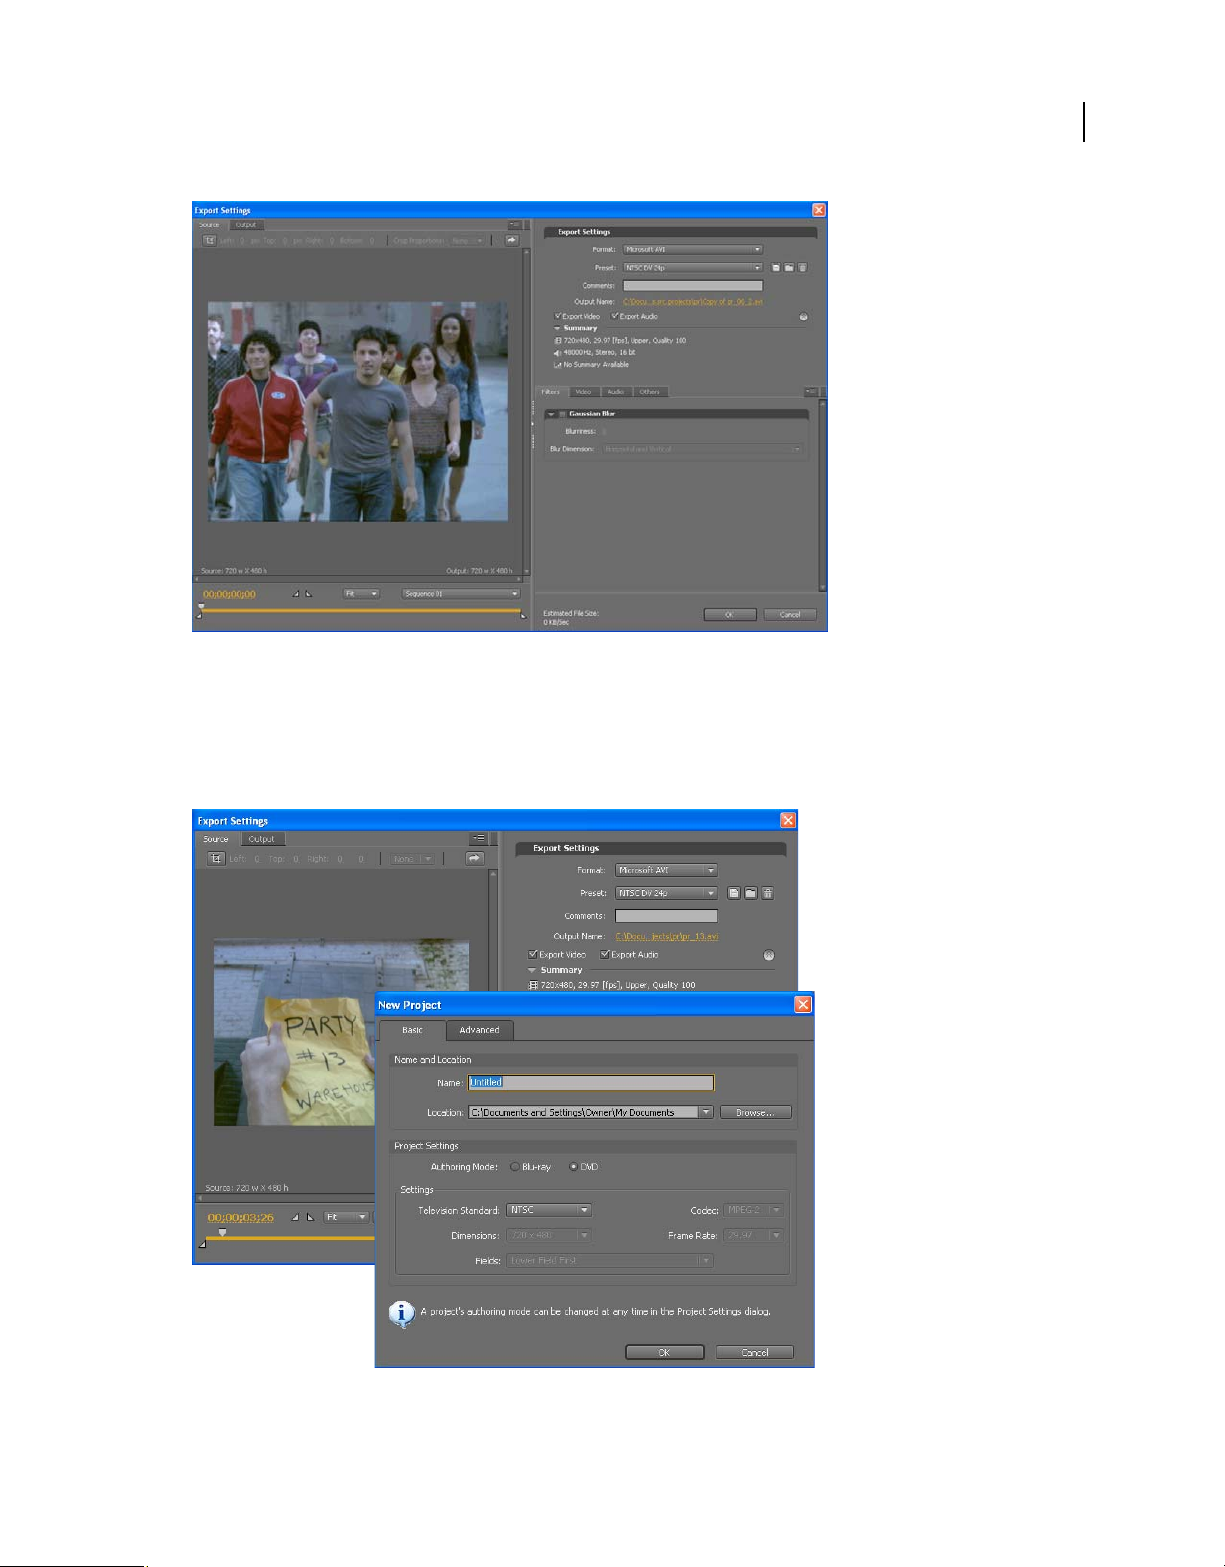
USING ADOBE PREMIERE PRO CS4
Workflows and system setup
Export Settings set for Clip Notes export
24
9. Export
Deliver your edited sequence in the medium of your choice: tape, DVD, Blu-ray Disc, or movie file. Using the Adobe
Media Encoder, you can customize the settings for MPEG2, MPEG-4, FLV, and other formats and codecs, to the needs
of your viewing audience. (See
“Types of exporting” on page 427.)
Export Settings dialog box and Encore New Project dialog box
Last updated 11/6/2011
Page 31

USING ADOBE PREMIERE PRO CS4
Workflows and system setup
More Help topics
www.adobe.com/go/vid0230
“Importing clips from OnLocation” on page 95
File-based workflows
You can take advantage of the efficiency of tapeless cameras and shooting with OnLocation. Edit files from the latest
tapeless formats natively, including AVCHD, P2, and XDCAM EX, without transcoding or rewrapping. With the
integrated Media Browser, you can browse your hard disks from inside Premiere Pro, find footage, and then import
the content directly into your Premiere Pro project.
More Help topics
About transferring files
About importing files
“Importing clips from OnLocation” on page 95
Importing assets from tapeless formats
25
Using Premiere Pro with Panasonic P2 content
Map P2 clip audio for export to P2
Premiere Pro and After Effects workflow using the RED plugin
Editing Native Red Camera Files & CS4
Importing tapeless assets in the Media Browser panel
Using Premiere Pro with Sony XDCAM content
DVD or Blu-ray Disc workflow
Using Adobe Encore and Premiere Pro, you can burn a single sequence to DVD or Blu-ray Disc, and each sequence in
your project can be burned to a separate DVD or Blu-ray Disc. First, you add all the content you want to include on a
disc into a sequence. After you prepare the sequence, perform the following basic tasks:
Add Encore chapter markers.
You can add Encore chapter markers in Premiere Pro that will be sent to Encore. Encore chapter markers are different
from sequence markers (which will not appear in Encore). However, you create Encore chapter markers in a Timeline
panel like sequence markers.
If you create an auto-play DVD, the Encore chapter markers become chapter points that allow the viewer to use a DVD
player remote control to move from scene to scene. If you create a DVD or Blu-ray Disc with menus, you can link scene
buttons on the menus to the Encore chapter markers in the Encore timeline.
Last updated 11/6/2011
Page 32

USING ADOBE PREMIERE PRO CS4
Workflows and system setup
Send to Encore or to an MPEG-2 file.
The File > Adobe Dynamic Link> Send To Encore command brings your sequence, or any portion of it you designate
with the work area bar, into Encore. From Encore, you can burn it directly to a DVD without menus, or add menus
and buttons before burning. You can burn the project to disc, or you can save it to a DVD image file, a set of DVD
folders, or DVD master files on DLT tape.
Alternatively, using the MPEG2-DVD format, you can export a DVD-compliant MPEG-2 file from Premiere Pro. You
can use the MPEG-2 file in most DVD-authoring applications.
Choose a menu template.
Encore templates are predesigned menus that come in several styles. Buttons on the templates automatically link to
chapter markers placed in the sequence. Encore creates additional submenus as necessary to accommodate all the
chapter markers in a sequence.
Note: Auto-play DVDs don’t have menus, so you don’t need to choose a template for them.
Customize the menu template.
Edit titles, change graphics, or add video for backgrounds in Encore. You can also use video in button thumbnails by
specifying a section of a clip to play in the button.
26
Preview the disc.
Check the functionality and the look of your DVD or Blu-ray Disc menus in the Preview DVD window.
Burn the disc.
With a DVD or Blu-ray Disc burner installed or connected, you can burn your content to disc. You can save the
compressed files to a folder for playback from a computer hard drive. You can also save an ISO image to distribute or
burn to a DVD.
Note: Encore creates DVDs that conform to DVD-video format. It does not create data or audio DVDs.
More Help topics
“About transferring files” on page 80
“Capturing content for DVD” on page 68
“Importing assets from tapeless formats” on page 88
Exporting to DVD, Blu-ray Disc, or CD
SWF workflow
With one click, easily create SWF versions of your DVD and Blu-ray Disc projects for the web, without opening
another application. Now with added flexibility, you can create content compatible with Adobe Flash Player, complete
with DVD interactivity, menus, URL links, and HTML templates. Export different video sizes for FLV streaming or
progressive download, customize SWF player skins and reduce FLV encoding time by using optimized encode settings
in Adobe Media Encoder. Build new revenue sources based on secure streaming or protected download delivery
models.
Last updated 11/6/2011
Page 33

USING ADOBE PREMIERE PRO CS4
Workflows and system setup
More Help topics
“Create a DVD, Blu-ray disc, or SWF file in Encore” on page 456
“
Sharing markers with After Effects, Encore, and Flash
Flash
“Moving content between Adobe Premiere Pro and Adobe Flash” on page 466
“Tips for creating FLV files” on page 466
“Exporting for Adobe Media Player” on page 468
” on page 193Sharing markers with After Effects, Encore, and
Cross-platform workflow
You can work on a project across computer platforms, for example, by starting on Windows and continuing on Mac
OS, or the other way around. A few functions will change, however, as the project moves from one platform to the
other. For a video on editing in a multi-platform environment, see
Sequence settings If a project is created on one platform and then moved to another, the equivalent sequence settings
will be set automatically for the second platform if an equivalent is found. For example, if a DV project containing DV
capture and device control settings is created on Windows, when the project is opened on Mac OS the appropriate Mac
DV capture and device control settings will be applied. Saving the project will record these Mac OS settings and a
translation to Windows settings will occur if the project is later opened on Windows.
www.adobe.com/go/vid0236.
27
Effects All video effects available on the Mac are available on Windows. Windows effects not available on the Mac will
appear as offline effects if the project is opened on the Mac. These effects are designated “Windows only” in Premiere
Pro Help. All audio effects are available on both platforms. Effect presets will work on both platforms (unless the preset
applies to an effect not available on a given platform).
Adobe Media Encoder presets Presets created on one platform are not available on the other.
Preview files Preview files made on one platform are not available on the other. When a project is opened on a
different platform, Premiere Pro re-renders the preview files. When that project is then opened on its original
platform, Premiere Pro must render the preview files yet again.
High bit-depth files Windows AVI files containing either 10-bit 4:2:2 uncompressed video (v210), or 8bit 4:2:2
uncompressed video (UYVU) are not supported on the Mac.
Preview rendering Playback quality of unrendered non-native files (for example, AVI on Mac OS and MOV on
Windows) will not be as high as playback quality of these files on their native platforms. Preview files must be rendered
for them on the current platform. Preview files always are rendered in a native format. A red bar in the timeline
indicates which sections contain files needing rendering.
More Help topics
Editing in a multi-platform environment
Cross-application workflows
You can make use of various other Adobe applications to enhance or modify the assets used in a Premiere Pro project.
• Import files shot with OnLocation, along with their metadata, into Premiere Pro projects. (See “Importing clips
from OnLocation” on page 95.)
Last updated 11/6/2011
Page 34

USING ADOBE PREMIERE PRO CS4
Workflows and system setup
• Launch Adobe Bridge from within Premiere Pro, use Adobe Bridge to organize, tag and find assets, and then use it
to place them in various applications, including Premiere Pro, for modification. (See Adobe Bridge Help.)
• Import layered Photoshop files, Illustrator files, After Effects projects, files made with the previous version of the
Titler, and various files made with Adobe Premiere 6.0, all into Premiere Pro. (See
commands” on page 86.)
“Import files with the Import
• Use the Edit Original command in Premiere Pro to edit an asset in the application in which it was generated. (See
“Edit a clip in its original application” on page 28.)
• Use the Edit In Adobe Soundbooth command in Premiere Pro to edit an audio file or soundtrack in Soundbooth.
“About editing audio in Adobe Soundbooth” on page 234.) Alternately, if you have Adobe Audition installed,
(See
you can use the Edit In Adobe Audition command to edit an audio file or soundtrack. (See “Editing audio in Adobe
Audition” on page 235.)
• Use Adobe Dynamic Link to create a new After Effects composition from within a Premiere Pro project. Any
changes made to that composition in After Effects will immediately appear in Premiere Pro without a need for
rendering. (See
“About Dynamic Link (Production Premium or Master Collection only)” on page 34)
• Export any sequence from Premiere Pro into Adobe Encore for authoring, mastering, and burning to DVDs or Blu-
ray Discs. (See
“About exporting to DVD, Blu-ray Disc, or CD” on page 455.)
• Export any sequence to FLV for web delivery, or further authoring in Adobe Flash Professional or Adobe
Dreamweaver. (See
“About exporting for the web” on page 465.)
28
About Adobe Bridge
Adobe Bridge helps you locate, organize, and browse assets that you need to create print, web, video, and audio
content.
From Adobe Bridge, you can do the following:
• Manage image, footage, and audio files: you can view, search, sort, and process files. You can also edit metadata for
files in Adobe Bridge, and place files into documents, projects, or compositions.
• Work with Version Cue®-managed assets.
• Perform automated tasks, such as batch commands.
• Manage photos: Generate a web gallery from a group of images, import and edit photos from a digital camera card,
group related photos in stacks, and open or import camera raw files and edit their settings without starting
Photoshop. You can also search leading stock libraries and download royalty-free images by way of Adobe Stock
Photos in Adobe Bridge.
• Start a real-time web conference to share your desktop and review documents.
• Synchronize color settings across color-managed Adobe Creative Suite components.
For more information about using Adobe Bridge, see Adobe Bridge Help.
Edit a clip in its original application
The Edit Original command opens clips in the applications associated with their file types. You can edit them in the
associated applications and automatically incorporate those changes into the current project without quitting
Premiere Pro or replacing files. Exported Premiere Pro movies can also be embedded with information that allows
them to be opened using the Edit Original command that is in other applications, such as Adobe After Effects.
1 Select a clip in either the Project panel or Timeline panel.
2 Choose Edit > Edit Original.
Last updated 11/6/2011
Page 35

USING ADOBE PREMIERE PRO CS4
Workflows and system setup
To export a movie with the information to use the Edit Original command, in the Export Movie Settings dialog box,
choose Project from the Embedding Options menu. (See “Export a movie file for further editing” on page 447.)
Working with Photoshop and Premiere Pro
If you use Photoshop to create still images, you can use Premiere Pro to make them move and change. You can animate
an entire image or any of its layers.
You can edit individual frames of video and image sequence files in Photoshop. In addition to using any Photoshop
tool to edit and paint on video, you can also apply filters, masks, transformations, layers styles, and blending modes.
You can paint using the Clone Stamp, Pattern Stamp, Healing Brush, or Spot Healing Brush. You can also edit video
frames using the Patch tool.
In Photoshop, with the Clone Stamp, you can sample a frame from a video layer and paint with the sampled source
onto another video frame. As you move to different target frames, the source frame changes relative to the frame from
which you initially sampled.
After making edits, you can save the video as a PSD file, or you can render it as a QuickTime movie or image sequence.
You can import any of these back into Premiere Pro for further editing.
If you use Premiere Pro to create movies, you can use Photoshop to refine the individual frames of those movies. You
can remove unwanted visual elements, draw on individual frames, or use the superior selection and masking tools in
Photoshop to divide a frame into elements for animation or compositing.
29
Comparative advantages for specific tasks
The strengths of Premiere Pro lie in its numerous video editing features. You can use it to combine Photoshop files
with video clips, audio clips and other assets, using the Photoshop files, for example, as titles, graphics, and masks.
In contrast, Photoshop has excellent tools for painting, drawing, and selecting portions of an image. Tracing a complex
shape to create a mask is much easier with the Photoshop Quick Selection tool or Magnetic Lasso tool than with the
masking tools in Premiere Pro. Rather than hand-drawing a mask on each frame in Premiere Pro, consider doing this
work in Photoshop. Similarly, if you are applying several paint strokes by hand to get rid of dust, consider using the
Photoshop paint tools.
The animation and video features in Photoshop Extended include simple keyframe-based animation. Premiere Pro,
however, provides quite a bit more keyframe control over various properties.
Exchanging still images
Premiere Pro can import and export still images in many formats, but you will usually want to use the native
Photoshop PSD format when transferring individual frames or still image sequences from Photoshop to Premiere Pro.
When importing a PSD file, Premiere Pro can preserve individual layers and masks. When you import a PSD file into
Premiere Pro, you can choose whether to import it as a flattened image, or with its layers separate and intact.
It is often a good idea to prepare a still image in Photoshop before importing it into Premiere Pro. Examples of such
preparation include correcting color, scaling, and cropping. It is often better to make a change to a source image in
Photoshop than to have Premiere Pro perform the same operation many times per second as it renders each frame for
previews or final output.
By creating your new PSD document from the Photoshop New File dialog box with a Film & Video preset, you can
start with a document that is set up correctly for a specific video output type. If you are already working in Premiere
Pro, you can create a new PSD document that matches your composition and sequence settings by choosing File > New
> Photoshop File.
Last updated 11/6/2011
Page 36

USING ADOBE PREMIERE PRO CS4
Workflows and system setup
Exchanging movies
You can also exchange video files, such as QuickTime movies, between Photoshop and Premiere Pro. When you open
a movie in Photoshop, a video layer is created that refers to the source footage file. Video layers allow you to paint
nondestructively on the movie’s frames. When you save a PSD file with a video layer, you are saving the edits that you
made to the video layer, not edits to the source footage itself.
You can also render a movie directly from Photoshop. For example, you can create a QuickTime movie from
Photoshop that can then be imported into Premiere Pro.
Color
Premiere Pro works internally with colors in an RGB (red, green, blue) color space. If you want to edit video clips you
create in Photoshop in Premiere Pro, you should create them in RGB.
If relevant for your final output, it is better to ensure that the colors in your image are broadcast-safe in Photoshop
before you import the image into Premiere Pro. A good way to do this is to assign the appropriate destination color
space—for example, SDTV (Rec. 601)—to the document in Photoshop.
More Help topics
Using Photoshop with Premiere Pro
Import 3D layers from Photoshop
30
Create and edit Photoshop files
You can create a Photoshop file that will automatically inherit the pixel and frame aspect ratio settings of your
Premiere Pro project. You can also edit any image file in a Premiere Pro project in Photoshop.
Create a new Photoshop file in a project
❖ Choose File > New > Photoshop File.
Photoshop opens with a new blank image. The pixel dimensions match the project’s video frame size, and image guides
show the title-safe and action-safe areas for the project.
Edit an image file in Photoshop
From within a project, you can open an image file in most formats that Adobe Photoshop supports. Premiere Pro does
not import files in CMYK or LAB color formats.
1 Select a clip in either the Project panel or Timeline panel.
2 Choose Edit > Edit In Adobe Photoshop.
The file opens in Photoshop. When you save the file, changes are available in the project.
Copying and pasting between After Effects and Adobe Premiere Pro
Copy between After Effects and Adobe Premiere Pro
• From the After Effects Timeline panel, you can copy layers based on audio or video footage items (including solids)
and paste them into the Adobe Premiere Pro Timeline panel.
• From the Adobe Premiere Pro Timeline panel, you can copy assets (any items in a track) and paste them into the
After Effects Timeline panel.
• From either After Effects or Adobe Premiere Pro, you can copy and paste footage items to the other’s Project panel.
Last updated 11/6/2011
Page 37

USING ADOBE PREMIERE PRO CS4
Workflows and system setup
Note: You can’t, however, paste footage items from the After Effects Project panel into the Adobe Premiere Pro
Timeline panel.
If you want to work with all clips or a single sequence from an Adobe Premiere Pro project, use the Import command
instead to import the project into After Effects.
Use Adobe Dynamic Link to create dynamic links, without rendering, between new or existing compositions in After
Effects and Adobe Premiere Pro.
For a video demonstrating some ways to exchange items between After Effects and Adobe Premiere Pro, see
www.adobe.com/go/vid0256.
Copy from After Effects to Adobe Premiere Pro
You can copy a layer based on a footage item from an After Effects composition and paste it into an Adobe Premiere
Pro sequence. Adobe Premiere Pro converts these layers to clips in the sequence and copies the source footage item to
its Project panel. If the layer contains an effect that is also used by Adobe Premiere Pro, Adobe Premiere Pro converts
the effect and all of its settings and keyframes.
You can also copy nested compositions, Photoshop layers, solid-color layers, and audio layers. Adobe Premiere Pro
converts nested compositions to nested sequences, and solid-color layers to color mattes. You cannot copy shape, text,
camera, light, or adjustment layers to Adobe Premiere Pro.
31
1 Start Adobe Premiere Pro (you must start Adobe Premiere Pro before you copy the layer in After Effects).
2 Select a layer (or layers) from the After Effects Timeline panel.
Note: If you select multiple layers and the layers don’t overlap in After Effects, they’re placed on the same track in Adobe
Premiere Pro. On the other hand, if the layers overlap in After Effects, the order in which you select them determines the
order of their track placement in Adobe Premiere Pro. Each layer is placed on a separate track, and the last selected layer
appears on Track 1. For example, if you select layers from top to bottom, the layers appear in the reverse order in Adobe
Premiere Pro, with the bottom-most layer on Track 1.
3 Choose Edit > Copy.
4 In Adobe Premiere Pro, open a sequence in the Timeline panel.
5 Move the current-time indicator to the desired location, and choose either Edit > Paste or Edit > Paste Insert.
Results of pasting into Adobe Premiere Pro
When you paste a layer into an Adobe Premiere Pro sequence, keyframes, effects, and other properties in the copied
layer are converted as follows:
After Effects item Converted to in Adobe Premiere Pro Notes
Audio volume property Channel Volume filter
Blending modes Blending modes supported by
Effect properties and
keyframes
Premiere Pro are converted
Adobe
Effect properties and keyframes, if the
effect also exists in Adobe Premiere Pro
Adobe Premiere Pro lists unsupported
effects as offline in the Effect Controls panel.
Some After Effects effects have the same
names as those in Adobe Premiere Pro, but
since they’re actually different effects, they
aren’t converted.
Expressions Not converted
Layer markers Clip markers
Last updated 11/6/2011
Page 38

USING ADOBE PREMIERE PRO CS4
Workflows and system setup
After Effects item Converted to in Adobe Premiere Pro Notes
Masks and mattes Not converted
Stereo Mixer effect Channel Volume filter
Time Remap property Time Remapping effect
32
Time Stretch property Speed property Speed and time stretch have an inverse
Transform property values
and keyframes
Motion or Opacity values and
keyframes
relationship. For example, 200% stretch in
After Effects converts to 50% speed in
Adobe Premiere Pro.
The keyframe type—Bezier, Auto Bezier,
Continuous Bezier, or Hold—is retained.
Copy from Adobe Premiere Pro to After Effects
You can copy a video or audio asset from an Adobe Premiere Pro sequence and paste it into an After Effects
composition. After Effects converts assets to layers and copies the source footage items into its Project panel. If the
asset contains an effect that is also used by After Effects, After Effects converts the effect and all of its settings and
keyframes.
You can copy color mattes, stills, nested sequences, and offline files, too. After Effects converts color mattes into solidcolor layers and converts nested sequences into nested compositions. When you copy a Photoshop still image into
After Effects, After Effects retains the Photoshop layer information. You cannot paste Adobe Premiere Pro titles into
After Effects, but you can paste text with attributes from the Adobe Premiere Titler into After Effects.
1 Select an asset from the Adobe Premiere Pro Timeline panel.
2 Choose Edit > Copy.
3 In After Effects, open a composition in the Timeline panel.
4 With the Timeline panel active, choose Edit > Paste. The asset appears as the topmost layer in the Timeline panel.
Note: To paste the asset at the current-time indicator, place the current-time indicator and press Ctrl+Alt+V (Windows)
or Command+Option+V (Mac
OS).
Results of pasting into After Effects
When you paste an asset into an After Effects composition, keyframes, effects, and other properties in a copied asset
are converted as follows:
Adobe Premiere Pro asset Converted to in After Effects Notes
Audio track Audio layers Audio tracks that are either 5.1 surround
Bars and tone Not converted
Blending modes Converted
Clip marker Layer marker
Color mattes Solid-color layers
Crop filter Mask layer
Frame Hold Time Remap property
or greater than 16-bit aren’t supported.
Mono and stereo audio tracks are
imported as one or two layers.
Last updated 11/6/2011
Page 39

USING ADOBE PREMIERE PRO CS4
Workflows and system setup
Adobe Premiere Pro asset Converted to in After Effects Notes
33
Motion or Opacity values and
keyframes
Sequence marker Markers on a new solid-color layer To copy sequence markers, you must
Speed property Time Stretch property Speed and time stretch have an inverse
Time Remapping effect Time Remap property
Titles Not converted
Universal counting leaders Not converted
Video and audio transitions Opacity keyframes (Cross dissolve
Video effect properties and
keyframes
Volume and Channel Volume
audio filters
Transform property values and
keyframes
only) or solid-color layers
Effect properties and keyframes, if
the effect also exists in After Effects
Stereo mixer effect Other audio filters are not converted.
Keyframe type—Bezier, Auto Bezier,
Continuous Bezier, or Hold—is retained.
either copy the sequence itself or import
the entire Adobe Premiere Pro project as a
composition.
relationship. For example, 50% speed in
Adobe Premiere Pro is converted to 200%
stretch in After Effects.
After Effects doesn’t display unsupported
effects in the Effect Controls panel.
Working with Adobe Premiere Pro and Adobe Flash
Adobe Premiere Pro is a professional tool for editing video. If you use Adobe Flash Professional to design interactive
content for websites or mobile devices, you can use Adobe
Premiere Pro gives you professional tools for frame-accurate video editing, including tools for optimizing
Adobe
video files for playback on computer screens and mobile devices.
Premiere Pro to edit the movies for those projects.
Adobe Flash Professional is a tool for incorporating video footage into presentations for the web and mobile devices.
Adobe Flash offers technological and creative benefits that let you fuse video with data, graphics, sound, and
interactive control. The FLV format lets you put video on a web page in a format that almost anyone can view.
If you use Adobe Premiere Pro to export FLV files, you can use Adobe Flash to embed those files into interactive
websites or applications for mobile devices. Adobe Flash can import sequence markers you add in an
Premiere Pro sequence as cue points. You can use these cue points to trigger events in SWF files on playback.
Adobe
If you export video files in other standard formats, Adobe Flash can encode your videos within rich media applications,
using the latest compression technologies to deliver the greatest quality possible at small file sizes.
Trace video with Adobe Bridge and Illustrator Live Trace
You can quickly trace a subject in a video and fill its outlines with color by using the Live Trace command in Adobe
Illustrator and the batch processing function in Adobe Bridge.
1 Export the sequence from Premiere Pro as a series of still images.
2 Select a preset in Illustrator.
3 Select the series in Adobe Bridge, and select Tools > Illustrator > Live Trace.
Last updated 11/6/2011
Page 40

USING ADOBE PREMIERE PRO CS4
Workflows and system setup
More Help topics
“Export still-image sequences” on page 453
Trace video with Adobe Bridge and Illustrator Live Trace
Working with Final Cut Pro and Premiere Pro
You can import XML project files from Final Cut Pro into Premiere Pro.
For more information about the workflows possible between Premiere Pro and Final Cut Pro, see Life without walls:
Open workflows with Avid and Apple.
More Help topics
Life without walls: Open workflows with Avid and Apple
Working with Avid Media Composer and Premiere Pro
For more information about the workflows possible between Premiere Pro and Avid Media Composer, see Life
without walls: Open workflows with Avid and Apple.
34
More Help topics
Life without walls: Open workflows with Avid and Apple
Pro Tools workflow
You can export all the audio tracks from an entire sequence in Premiere Pro to an OMF file for editing in DigiDesign
Pro Tools.
More Help topics
“Exporting OMF files for Pro Tools” on page 449
Adobe Dynamic Link
About Dynamic Link (Production Premium or Master Collection only)
In the past, sharing media assets among post-production applications has required you to render your work in one
application before importing it into another—an inefficient and time-consuming workflow. If you wanted to make
changes in the original application, you had to re render the asset. Multiple rendered versions of an asset consume disk
space and can lead to file-management challenges.
Dynamic Link, a feature of Adobe Creative Suite® Production Premium and Master Collection, offers an alternative to
this workflow: the ability to create dynamic links between After Effects, Adobe Premiere Pro, Encore, and Soundbooth.
Creating a dynamic link is as simple as importing any other type of asset, and dynamically linked assets appear with
unique icons and label colors to help you identify them. Dynamic links are saved in project, composition, and
document files generated by these applications.
Changes you make in After Effects to a dynamically linked composition appear immediately in the linked clips in
Adobe Premiere Pro, Encore, or Soundbooth. Changes you make to dynamically linked sequences in Adobe Premiere
Pro appear immediately in After Effects, Encore, and Soundbooth. You don’t have to render or save changes first.
Last updated 11/6/2011
Page 41

USING ADOBE PREMIERE PRO CS4
Workflows and system setup
Note: Dynamic Link is a one-way delivery mechanism from one application to another. You can't pass information back
and forth between two applications at the same time.
For a video tutorial on Dynamic Link, see www.adobe.com/go/lrvid4108_xp.
Tim Kolb provides a video tutorial on the Adobe website that shows the use of Dynamic Link with Premiere Pro,
Encore, and After Effects to creative an interactive DVD menu.
Linking to and from Adobe Premiere Pro
You can send selected clips from Adobe Premiere Pro into After Effects as a composition or nested composition,
replacing the clips in Adobe Premiere Pro with a dynamically linked composition.
With Dynamic Link, you can also send sequences from Adobe Premiere Pro into Encore for authoring to DVD, Bluray Disc, or SWF files.
Other ways to share content among Production Premium applications include copying and pasting between After
Effects and Adobe Premiere Pro, exporting After Effects projects to Adobe Premiere Pro, using the Capture In Adobe
Premiere Pro command in After Effects, and importing Adobe Premiere Pro projects into After Effects. You cannot,
however, import an Adobe Premiere Pro project into After Effects if the project contains a dynamic link to an After Effects
composition. For more information, see the relevant sections of each application’s Help documents.
Linking to and from After Effects
When you dynamically link to an After Effects composition from Adobe Premiere Pro, Encore, or Soundbooth, it
appears in the host application’s Project panel. You can use the dynamically linked composition as you would any
other asset. When you insert a linked composition into the host application timeline, a linked clip—which is simply a
reference to the linked composition in the Project panel—appears in the Timeline panel. After Effects renders the
linked composition on a frame-by-frame basis during playback in the host application.
35
In Adobe Premiere Pro, you can preview a dynamically linked After Effects composition in the Source Monitor, set In
and Out points, add it to a sequence, and use Adobe Premiere Pro tools to edit it. When you add a linked composition
that contains both video and audio to a sequence, Adobe Premiere Pro inserts linked video and audio clips in the
timeline. You can unlink the video from the audio to edit the clips separately.
In Encore, you can use a dynamically linked After Effects composition to create a motion menu, or you can insert it
into a timeline and use Adobe Encore tools to edit it. When you add a linked After Effects composition that contains
both video and audio to an Encore timeline, Encore inserts separate video and audio clips in the timeline.
Outside of Dynamic Link, you can create After Effects compositions from Encore menus.
Linking to Soundbooth
In Soundbooth, you can dynamically link to After Effects compositions and Adobe Premiere Pro sequences. The
resulting video previews provide helpful visual references for audio edits.
More Help topics
“Copying and pasting between After Effects and Adobe Premiere Pro” on page 30
www.adobe.com/go/lrvid4108_xp
www.adobe.com/go/learn_dv_tutorial_dynlink_en
Last updated 11/6/2011
Page 42

USING ADOBE PREMIERE PRO CS4
Workflows and system setup
Saving and Dynamic Link (Production Premium or Master Collection only)
You must save your After Effects project at least once before you can create a dynamic link from Adobe Premiere Pro
or Encore to a composition within it. However, you don’t have to subsequently save changes to an After
to see changes to a linked composition in Adobe Premiere Pro or Encore.
If you use the Save As command to copy an After Effects project that contains compositions referenced by Dynamic
Link, then Adobe Premiere Pro or Encore uses the original composition—not the new copy—as its source for the
linked composition. You can relink a composition to the new copy at any time.
Effects project
Performance and Dynamic Link (Production Premium or Master Collection only)
Because a linked composition may reference a complex source composition, actions you perform on a linked
composition may require additional processing time as After Effects applies the actions and makes the final data
available to Adobe Premiere Pro or Encore. In some cases, the additional processing time may delay preview or
playback.
If you’re working with complex source compositions and experiencing playback delays, you can take the composition
offline or disable a linked clip to temporarily stop referencing a dynamically linked composition, or render the
composition and replace the dynamically linked composition with the rendered file. If you commonly work with
complex source compositions, try adding RAM or using a faster processor.
36
Color and Dynamic Link (Production Premium or Master Collection only)
After Effects works with the RGB (red, green, blue) color model. Adobe Premiere Pro, however, works with the YUV
color model. When you work with a dynamically linked composition, Adobe Premiere Pro either converts it to YUV
or retains the RGB colors, depending on the output format.
Dynamically linked compositions are rendered in the color depth of the After Effects project (8, 16, or 32 bpc,
depending on project settings). Set the After Effects project color depth to 32 bpc if you’re working with HDR (high
dynamic range) assets.
In Adobe Premiere Pro, choose Project > Project Settings > Video Rendering, and select Maximum Bit Depth to have
Adobe Premiere Pro process at the highest possible quality. However, this option may slow processing.
Create and link to After Effects compositions with Dynamic Link (Production Premium or Master Collection only)
Create a composition from clips in Adobe Premiere Pro
You can replace selected clips in Adobe Premiere Pro with a dynamically linked After Effects composition based on
those clips. The new composition inherits the sequence settings from Adobe Premiere Pro.
1 In a sequence, select the clips you want in the composition.
2 Right-click any of the selected clips.
3 Select Replace With After Effects Composition.
Last updated 11/6/2011
Page 43

USING ADOBE PREMIERE PRO CS4
Workflows and system setup
Link to a new composition
When you link to a new composition from Adobe Premiere Pro or Encore, After Effects starts and creates a new project
and composition with the dimensions, pixel aspect ratio, frame rate, and audio sample rate of your Adobe Premiere
Pro or Encore project. (If After Effects is already running, it creates a new composition in the current project.) The
new composition name is based on the Adobe Premiere Pro or Encore project name, followed by Linked Comp [x].
Note: After Effects will not create a new composition by Dynamic Link if a composition is already open. Before creating
a Dynamic Link to a new composition from Adobe Premiere Pro, close all After Effects compositions. You can leave After
Effects itself open, however.
1 In Adobe Premiere Pro or Adobe Encore, choose File > Adobe Dynamic Link > New After Effects Composition.
2
If the After Effects Save As dialog box appears, enter a name and location for the After Effects project, and click Save.
When you link to a new After Effects composition, the composition duration is set to 30 seconds. To change the
duration, select the composition in After Effects, choose Composition > Composition Settings. Click the Basic tab, and
specify a new value for Duration.
Link to an existing composition
For best results, composition settings (such as dimensions, pixel aspect ratio, and frame rate) should match those used
in the Adobe Premiere Pro or Adobe Encore project.
37
❖ Do one of the following:
• In Adobe Premiere Pro or Encore, choose File > Adobe Dynamic Link > Import After Effects Composition. Choose
an After Effects project file (.aep), and then choose one or more compositions.
• In Adobe Premiere Pro, choose File > Import. Choose an After Effects project file and click Open, and then choose
a composition in the Import Composition dialog box and click OK.
• Drag one or more compositions from the After Effects Project panel to the Adobe Premiere Pro Project panel or
the Encore Project panel.
• Drag an After Effects project file into the Adobe Premiere Pro Project panel. If the After Effects project file contains
multiple compositions, the Import Composition dialog box opens.
Note: You can link to a single After Effects composition multiple times in a single Adobe Premiere Pro project. In an
Adobe Encore project, however, you can link to an After Effects composition only once.
Encore and After Effects: If you are linking to Adobe Dynamic Link compositions that were created using Create After
Effects Composition from Encore, turn off subpicture highlight layers in After Effects so that you can control their
display in Encore.
Dynamically linked After Effects compositions
Delete a dynamically linked composition or clip (Production Premium or Master Collection only)
You can delete a linked composition from an Encore project if the composition isn’t used in the project. You can delete
a linked composition from an Adobe Premiere Pro project at any time, even if the composition is used in a project.
Last updated 11/6/2011
Page 44

USING ADOBE PREMIERE PRO CS4
Workflows and system setup
You can delete linked clips, which are simply references to the linked composition in the Project panel, from the
timeline of an Adobe Premiere Pro sequence or from an Encore menu or timeline at any time.
❖ In Adobe Premiere Pro or Encore, select the linked composition or clip and press the Delete key.
Modify a dynamically linked composition in After Effects (Production Premium or Master Collection only)
Use the Edit Original command in Adobe Premiere Pro or Encore to modify a linked After Effects composition. Once
After Effects is open, you can make changes without having to use the Edit Original command again.
1 Select the After Effects composition in the Adobe Premiere Pro or Encore Project panel, or choose a linked clip in
the Timeline, and choose Edit
2 Make changes in After Effects, and then switch back to Adobe Premiere Pro or Encore to view your changes.
The changes made in After Effects will appear in Adobe Premiere Pro, but any preview files Adobe Premiere Pro may
have rendered for the clip prior to the changes will be invalidated.
Note: If you change the name of the composition in After Effects after you’ve created a dynamic link to it from Adobe
Premiere Pro, Adobe Premiere Pro doesn’t update the linked composition name in the Project panel, but retains the
dynamic link.
> Edit Original.
38
Create an After Effects composition from clips in Premiere Pro (Production Premium or Master Collection only)
You can replace a selection of clips in a sequence in Premiere Pro with an After Effects composition based on those
clips. The composition inherits the sequence settings from Premiere Pro and maintains a dynamic link to After Effects.
You can edit the composition in Premiere Pro or in After Effects.
1 In a sequence, select the clips you want in the composition.
2 Right-click any of the selected clips.
3 Select Replace With After Effects Composition.
More Help topics
Dynamic Link from Premiere Pro to After Effects
Offline compositions and Dynamic Link (Production Premium or Master Collection only)
Adobe Premiere Pro and Encore display dynamically linked compositions as offline in any of the following
circumstances:
• You’ve renamed, moved, or deleted the After Effects project that contains the composition.
• You’ve purposely taken the composition offline.
• You’ve opened the project that contains the composition on a system on which Production Premium or Master
Collection isn’t installed.
• You’re working with a project trimmed by the Adobe Premiere Pro Project Manager. Project Manager does not
move the After Effects source compositions to the trimmed project folder. You must do this manually.
Last updated 11/6/2011
Page 45

USING ADOBE PREMIERE PRO CS4
Workflows and system setup
Offline compositions appear with an Offline icon in the Adobe Premiere Pro Project panel. In Encore, the
thumbnail preview displays the Offline icon when an offline asset is selected in the Project panel. If you’re working
with an offline composition, you can relink it to the original After Effects composition. You can also choose to relink
a linked composition to a different source composition.
Take a dynamically linked composition offline
You can take a dynamically linked composition offline if low system resources are preventing you from smoothly
playing back or previewing, or if you want to share your project without having to open it on a system with Production
Premium or Master Collection installed. When you take a composition offline, you sever the dynamic link with After
Effects, and the linked composition is replaced in the Project panel with an offline composition.
You can temporarily suppress a linked clip in Adobe Premiere Pro by selecting the clip and choosing Clip > Enable.
To relink the clip, choose Clip > Enable again (a check mark next to the command indicates that the clip is enabled).
For more information about disabling clips, see Adobe Premiere Pro Help.
1 In Adobe Premiere Pro, select the composition in the Project panel.
2 Choose Project > Make Offline.
Relink a dynamically linked composition
❖ Do one of the following:
• In Adobe Premiere Pro, select the composition and choose Project > Link Media. In the Import Composition dialog
box, choose an After Effects project, and then choose a composition.
• In Encore, right-click the composition and choose Locate Asset. In the Locate Asset dialog box, locate the
composition you want to link to, and then click Select (Windows) or Open (Mac OS).
39
Metadata workflow
You can use metadata to speed your work, and deliver greater functionality to your audience. Metadata management
has been integrated, not only into Premiere Pro, but into all the products in Adobe Creative Suite Production
Premium.
More Help topics
XMP metadata in Creative Suite 4 Production Premium
“Managing metadata” on page 110
“Convert speech to text metadata” on page 175
“Find a word in any clip” on page 176
“Edit a text transcript” on page 177
“Search metadata” on page 112
“Exporting XMP metadata” on page 472
Last updated 11/6/2011
Page 46

USING ADOBE PREMIERE PRO CS4
Workflows and system setup
Setting up your system
For Premiere Pro system requirements, see the Adobe website.
For lists of various categories of hardware compatible with Adobe Premiere Pro, see the Adobe website.
About setting up your system
To use the full range of features in Premiere Pro, you’ll probably need to connect additional equipment to your
computer. Most editing workflows, for example, require connections with a camcorder or VTR, a television monitor,
and sometimes a device controller.
Supported hardware
To find out whether Premiere Pro supports a certain camcorder, VTR, or other hardware device, see Third-Party
Hardware Compatibility.
More Help topics
Third-Party Hardware Compatibility
40
Set up a DV or HDV system
C
A
B
DV/HDV setup
A. Computer and computer monitor B. 6-pin FireWire port and connector C. 4-pin FireWire port and connector D. DV/HDV camcorder
E. RCA jacks and plugs for L (white) audio, R (red) audio, composite video (yellow); jack and plug for S-Video (y/c) F. HDMI port and
connector G. Television monitor
D
E
With this setup you can capture audio and video from a DV or HDV source, monitor the signal on a TV monitor while
editing, and export any sequence back to videotape.
1 Connect the DV or HDV camcorder or VTR to the computer using a FireWire cable.
2 Connect the camcorder or VTR to the television monitor with an S-Video or RCA video cable and RCA audio
cables, or an HDMI cable.
3 Set the camcorder or VTR to VTR or Play mode.
4 (For HDV camcorders or VTRs only) Make sure the device is in DV playback mode for DV projects, or HDV
playback mode for HDV projects. See the user manual for your device for details.
5 In Premiere Pro, select File >New > Sequence.
G
F
Last updated 11/6/2011
Page 47

USING ADOBE PREMIERE PRO CS4
Workflows and system setup
6 Do one of the following:
• (For DV camcorders or VTRs only) In the Available Presets area of the New Sequence dialog box, select the DV
preset that matches the format of your source footage.
• (For HDV camcorders or VTRs only) Create and save a custom HDV sequence preset with settings that match the
parameters of your footage. Select the custom HDV sequence preset.
Note: For the standard HDV settings, see the table of specifications on the Wikipedia website.
7 Type a name in the Sequence Name box. Then click OK.
More Help topics
“Creating and changing projects” on page 48
Set up an SD-SDI, HD-SDI, or component system
I
H
41
D
A
SDI/component setup with breakout box
A. Computer and computer monitor B. (Optional) A/V breakout box C. XLR jacks and plugs for L & R audio D. RS232/422 port and
connector E. BNC jacks and plugs for Y/Pb/Pr component video, BNC jack and plug for SDI video F. HD/SD VTR G. BNC jacks and plugs for
Y/Pb/Pr component video, BNC jack and plug for SDI video H. RCA jacks and plugs for L (white) & R (red) audio I. Speakers J. Television
monitor
B
CE
F
G
J
With this setup you can capture audio and video from an SD-SDI, HD-SDI, or component video device (camcorder
or VTR), monitor the signal on a TV monitor while editing, and export any sequence back to the camcorder or VTR.
This setup requires either an SDI or component PCI card installed in the computer, or an external SDI or component
device connected to the computer via FireWire. Either of these would provide ports, usually with BNC connectors,
capable of receiving SDI or component video signals.
Some SDI and component PCI cards come with breakout boxes which provide ports for the SDI or component signals,
and sometimes also ports for genlock, in an easy-to-access array. Others provide the necessary outputs directly on the card.
1 Connect the SD-SDI, HD-SDI, or component device to the computer or breakout box using SDI or component
video cables. A single cable with BNC connectors carries SDI video, but three separate cables with BNC connectors
carry component video signals. Run video cables from the video outputs of the computer or breakout box to the
video inputs of the device. Also run video cables from the video outputs of the device to the video inputs of the
computer or breakout box.
Last updated 11/6/2011
Page 48

USING ADOBE PREMIERE PRO CS4
Workflows and system setup
2 Connect the SD-SDI, HD-SDI, or component device to the computer or breakout box using XLR audio cables. Run
audio cables from the audio outputs of the computer or breakout box to the audio inputs of the device. Also run
audio cables from the audio outputs of the device to the audio inputs of the computer or breakout box.
3 Do one of the following:
• Connect the serial device control port (RS-422 or RS-232) on the camcorder or VTR with the serial port (Windows)
or USB port (Mac OS) on the computer. Use the Pipeline Digital ProVTR cable for RS-232/422-controlled devices.
• If your system has a breakout box with a serial device control port (RS-422 or RS-232), connect the serial device
control port on the camcorder or VTR with this, rather than with the serial or USB port on the computer. You may
need to use a standard serial 9-pin D-Sub cable instead of the Pipeline Digital ProVTR cable. Consult the
documentation from the manufacturer of the breakout box.
Note: Native serial device control is available on Windows only.
4 Connect the deck or camcorder to the television monitor with component video cables and to amplified speakers
with RCA audio cables.
5 Put the camcorder or deck into VTR or Play mode.
6 In Premiere Pro, select File >New > Sequence.
7 In the Available Presets area of the New Sequence dialog box, select the SDI or component preset that matches the
format of your source footage. Premiere Pro does not provide these presets. They are provided by the
manufacturers of SDI and component capture cards and devices, and must be installed with those cards and
devices.
8 Type a name in the Sequence Name box. Then click OK.
42
More Help topics
“Create a project” on page 48
Set up a file-based system
A
C
B
File-based system
A. Card reader, drive, or camcorder for P2, XDCAM HD, XDCAM EX, or AVCHD media B. Computer and computer monitor C. Audio cables
running to speakers or amplifier D. Speakers E. TV monitor F. BNC connectors for component or SDI video cables to TV monitor (alternative
to “G”) G. HDMI connector for audio-video cable to TV monitor (alternative to “F”)
D
E
F
G
Last updated 11/6/2011
Page 49

USING ADOBE PREMIERE PRO CS4
Workflows and system setup
With this setup, you can import or transfer audio and video files from card readers, drives, or tapeless camcorders
recorded in digital video file formats, such as Panasonic P2, XDCAM HD, XDCAM EX, or AVCHD. You can also
preview video on a high-definition TV monitor, provided your computer has a high-definition capture card or display
card with component, SDI or HDMI outputs.
1 Connect the card reader, disk drive, or camcorder to the computer, typically with a USB 2.0 cable. Check the
manual for your device for details.
2 Connect the output of the computer sound card to computer speakers or audio amplifier.
3 Connect the video outputs from the capture card, breakout box, or display card to the TV monitor using
component, SDI, or HDMI cables.
Set up an S-Video or composite system
43
B
C
A
S-Video/composite setup
A. Computer and computer monitor B. Ports and connectors for FireWire, USB 2.0 C. A/D converter D. Jacks and plugs for RCA composite
video, S-Video (y/c) E. RS 232/422 port and connector F. RCA jacks and plugs for L (white) and R (red) audio G. Analog camcorder, analog
VTR H. RCA jacks and plugs for L (white) audio, R (red) audio, and composite video (yellow); jack and plug for S-Video (y/c) I. Television
monitor
D
F
G
E
H
I
With this setup, you can capture audio and video from an analog camcorder or VTR, monitor the video signal on a
TV monitor while editing, and export any sequence back to the camcorder or VTR.
To convert the analog source signal to a digital one the computer can use, this setup requires an analog/digital (A/D)
converter, or digitizer, either installed in the computer or attached to it, or a digital camcorder or VTR capable of
digitizing an incoming analog signal.
1 Connect the analog camcorder or VTR to the computer or its interface, such as a breakout box, A/D converter,
digital camcorder or VTR, using S-Video or RCA video cables. Run video cables from the video outputs of the
computer or its interface to the video inputs of the device. Also run video cables from the video outputs of the device
to the video inputs of the computer or its interface.
2 Connect the analog camcorder or VTR to the computer or its interface, such as a breakout box, A/D converter,
digital camcorder or VTR, using XLR or RCA audio cables. Run audio cables from the audio outputs of the
computer or its interface to the audio inputs of the device. Also run audio cables from the audio outputs of the
device to the audio inputs of the computer or its interface.
3 (Optional) On Windows, if the analog camcorder or VTR has an RS-422 or RS-232 port, connect the serial device
control port on the camcorder or VTR with the serial port (Windows) on the computer using the Pipeline Digital
ProVTR cable.
Note: Native serial device control is available on Windows only.
Last updated 11/6/2011
Page 50

USING ADOBE PREMIERE PRO CS4
Workflows and system setup
4 Connect the analog camcorder or VTR, or the breakout box, A/D converter, digital camcorder or VTR, to the
television monitor with an S-Video or RCA video cable, and RCA audio cables.
5 Put the analog camcorder or deck into VTR or Play mode.
6 In Premiere Pro, select File >New > Sequence.
7 In the Available Presets area of the New Sequence dialog box, select the preset that matches the format of your A/D
converter, not that of the source footage. For example, if you use a DV camcorder or A/DV converter to convert
the analog signal, choose a DV preset.
8 Type a name in the Sequence Name box. Then click OK.
Specify the default audio device
1 Choose Edit > Preferences > Audio Hardware (Windows) or Premiere Pro > Preferences > Audio Hardware (Mac
OS), and set the following options:
• select an output device from the Default Device menu.
• select a buffer size from the Buffersize menu.
2 Click OK.
44
Audio Hardware panel options
Enable Devices Determines which connected audio device is routed into and out of Premiere Pro. If the device is an
ASIO device, select the ASIO drivers for the device. If the sound card does not have manufacturer-supplied ASIO
drivers, choose Premiere Pro WDM Sound for this setting. For a device to be available, an up-to-date driver must be
properly installed on Windows. In addition, if you want to input more than two stereo channels or monitor 5.1
surround audio, the device driver must comply with the ASIO (Audio Stream Input Output) specification. If it does
not, only stereo inputs and outputs will be available, regardless of the number of hardware inputs and outputs that are
connected.
Buffersize Specifies the size of the buffer, in kilobytes, that Premiere Pro uses for recording audio.
Set up a USB microphone (Mac OS)
1 In the Audio Midi Setup application in Utilities, go to Audio > Open Aggregate Device Editor.
2 Check each of the following:
• Your USB microphone.
• An additional input device, for example, Line In.
• An output device
3 Select this new aggregate device within Premiere Pro's Audio Hardware Preference panel.
Specify ASIO device settings (Windows only)
1 Choose Edit >Preferences > Audio Hardware.
2 Click ASIO settings. Specify the ASIO settings for the selected device.
Note: The settings in this dialog box are set by the device and driver you use, not by Adobe Premiere Pro. See the
documentation for the ASIO device and driver you use.
3 In the Audio Hardware Settings dialog box, select the Input tab.
4 Check the boxes next to the names of any devices you want to enable.
Last updated 11/6/2011
Page 51

USING ADOBE PREMIERE PRO CS4
Workflows and system setup
5 Check Device 32-bit Recording if you want to record 32-bit audio.
6 Drag the Samples slider to set the size of the buffer.
7 Click OK.
Specify whether to render audio when rendering video
You can specify whether Premiere Pro renders audio previews by default when you select Sequence > Render Effects
In Work Area, or Sequence > Render Entire Work Area. Rendering audio previews could improve playback
performance, but could take additional time when you select either of these commands.
1 Select Edit > Preferences > General (Windows), or Premiere Pro > Preferences > General (Mac OS).
2 Select or deselect Render Audio When Rendering Video.
3 Click OK.
Specify the duration for preroll and postroll pauses
You can set the length of preroll and postroll for clip and sequence previews in the General pane of the Preferences
dialog box.
Note: The Preroll and Postroll fields are different from the Preroll setting in the Device Control pane of the Preferences
dialog box. The Preroll setting in the Device Control pane affects the control of external devices such as VTRs and
camcorders.
45
1 Select Edit > Preferences > General (Windows) or Premiere Pro > Preferences > General (Mac OS).
2 In the Preroll and Postroll fields, type in the number of seconds for each.
3 Click OK.
More Help topics
“Play a sequence or clip with preroll and postroll pauses” on page 120
Specify scratch disks to improve system performance
When you edit a project, Premiere Pro uses disk space to store files required by your project, such as captured video
and audio, conformed audio, and preview files that you create manually or that are created automatically when
exporting to certain formats. Premiere Pro uses conformed audio files and preview files to optimize performance,
allowing real-time editing, 32-bit floating-point quality, and efficient output.
All scratch disk preferences are saved with each project. You may select different scratch disk locations for different
projects. If you reopen an earlier project after editing another project with different scratch disk locations, Premiere
Pro will seek out the files belonging to the earlier project at the scratch disk locations you chose for that project.
If you delete preview files or conformed audio files for a project, Premiere Pro automatically recreates them when you
reopen the project.
By default, scratch disk files are stored where you save the project. The scratch disk space required increases as
sequences become longer or more complex. For best performance, it is recommended that you dedicate a hard disk or
disks, (other than the disk where you keep your project file, your operating system files, or your files for applications)
strictly to your media assets. That way your media disks can access and play media files as fast as possible, without
having to access other files. If your system has multiple disks, you can use the Project > Project Settings > Scratch Disks
command to specify which disks Premiere Pro uses for media files. This is best done when you set up a new project.
Last updated 11/6/2011
Page 52

USING ADOBE PREMIERE PRO CS4
Workflows and system setup
In terms of performance, it’s usually best to dedicate a different disk to each asset type, but you can also specify folders
on the same disk. You can specify unique scratch disk locations for each of the following types of files:
Captured Video Video files that you create using File > Capture.
If you transfer video files to a scratch disk folder before creating the project for them, specify the folder containing the
video files for Captured Video.
Captured Audio Audio files that you create using File > Capture, or by recording through the Audio Mixer as when
recording a voiceover.
Video Previews Files created when you use the Sequence > Render Entire Work Area command, export to a movie file,
or export to a device. If the previewed area includes effects, the effects are rendered at full quality in the preview file.
Audio Previews Files created when you use the Sequence > Render Entire Work Area command, use the Clip > Audio
Options > Render And Replace command, export to a movie file, or export to a DV device. If the previewed area
includes effects, they are rendered at full quality in the preview file.
Specify scratch disks
You set up scratch disks in the Scratch Disk pane of the Preferences dialog box. Before changing scratch disk settings,
you can verify the amount of free disk space on the selected volume by looking in the box to the right of the path. If
the path is too long to read, position the pointer over the path name, and the full path appears in a tool tip.
46
1 Choose Project > Project Settings > Scratch Disks.
2 Identify a location for each type of file named in the dialog box. Premiere Pro creates a subfolder named for each
file type (for instance, Captured Video) and stores the folder’s associated files in it. The menu lists three default
locations:
My Documents (Windows) or Documents (Mac OS) Stores scratch files in the My Documents folder (Windows) or
Documents folder (Mac OS).
Same As Project Stores scratch files in the same folder where the project file is stored.
Custom Allows you to specify a location of your choosing. Choose Custom, then click Browse and browse to any
available folder.
Optimizing scratch disk performance
For optimum performance, follow these guidelines:
• If your computer has only one hard disk, consider leaving all scratch disk options at their default settings.
• Set up scratch disks on one or more separate hard disks. In Premiere Pro, it’s possible to set up each type of scratch
disk to its own disk (for example, one disk for captured video and another for captured audio).
• On Windows, specify only partitions formatted for the NTFS file format as scratch disks. On Mac OS, use partitions
formatted for Mac OS Extended. FAT32 partitions are not recommended for video. They do not support large file
sizes.
• On Mac OS, disable journaling for best performance.
• Specify your fastest hard disks for capturing footage and storing scratch files. You can use a slower disk for audio
preview files and the project file.
• Specify only disks attached to your computer. A hard disk located on a network is usually too slow. Avoid using
removable media because Premiere Pro always requires access to scratch disk files. Scratch disk files are preserved
for each project, even when you close the project. They are reused when you reopen the project associated with
them. If scratch disk files are stored on removable media and the media are removed from the drive, the scratch
disk won’t be available to Premiere Pro.
Last updated 11/6/2011
Page 53

USING ADOBE PREMIERE PRO CS4
Workflows and system setup
• Although you can divide a single disk into partitions and set up partitions as scratch disks, this doesn’t improve
performance because the single drive mechanism becomes a bottleneck. For best results, set up scratch disk
volumes that are physically separate drives.
• You can capture audio and video to separate drives, if this is supported by the format codec. (This is not supported
by the native DV and HDV capture in Premiere Pro.) Set the locations for new files by choosing Edit > Preferences
> Scratch Disks (Windows) or Premiere Pro > Preferences > Scratch Disks (Mac OS). If you don’t change the
defaults, all files captured or created by Premiere Pro are stored in the same folder in which it stores the project files.
Optimize rendering for available memory
By default, Premiere Pro renders video using the maximum number of available processors, up to 16. However, some
sequences, such as those containing high-resolution source video or still images, require large amounts of memory for
the simultaneous rendering of multiple frames. These can force Premiere Pro to abort rendering and to give a Low
Memory Warning alert. In these cases, you can maximize the available memory by changing the rendering
optimization preference from Performance to Memory. Change this preference back to Performance when rendering
no longer requires memory optimization.
1 Select Edit > Preferences, and select General in the Preferences dialog box.
2 In the drop-down menu next to Optimize Rendering For, select Memory.
3 Click OK, close Premiere Pro, and reopen the project for the new preference to take effect.
47
Optimizing your operating system
You can optimize your operating system to get the best performance for Premiere Pro.
More Help topics
Optimize Windows XP for Premiere Pro CS4
Optimize Windows Vista for Premiere Pro CS4
Optimize Mac OS X for Premiere Pro CS4
Last updated 11/6/2011
Page 54

Chapter 4: Project setup
A project file stores information about sequences and assets, such as settings for capture, transitions, and audio mixing.
Also, the project file contains the data from all of your editing decisions, such as the In and Out points for trimmed
clips and the parameters for each effect. Premiere Pro creates a folder on your hard disk at the start of each new project.
By default, this is where it stores the files it captures, the preview and conformed audio files it creates, and the project
file itself.
Creating and changing projects
For every project you create, Premiere Pro creates a project file. This file contains the settings you select for each
sequence in the project, as well as crucial data about the assets, edit decisions, and effects used in the project.
Premiere Pro doesn’t store video, audio, or still image files in the project file—it stores only a reference to each of these
files, a clip, which is based on the filename and location of the file at the time you imported it. If you later move, rename,
or delete a source file, Premiere Pro can’t find it automatically the next time you open the project. In this case, Premiere
Pro displays the Where Is The File dialog box.
48
By default, every project includes a single Project panel. This acts as a storage area for all clips used in the project. You
can organize a project’s media and sequences using bins in the Project panel.
A project may contain multiple sequences, and the sequences within a project may differ from one another in their
settings. Within a single project, you can edit individual segments as separate sequences, and then combine the
segments into a finished program by nesting them into a longer sequence. Similarly, you can store multiple variations
of a sequence, as separate sequences, in the same project.
Note: There’s no need to save copies of a project when creating different segments or versions of the same video program.
Simply create new or duplicate sequences within a single project file.
More Help topics
“Sequence presets and settings” on page 134
www.adobe.com/go/learn_dv_primer_dvbasics_en
Create a project
Projects may contain more than one sequence, and the settings for one sequence may differ from that of another.
Premiere Pro will prompt you for settings for the first sequence every time you create a new project. However, you can
cancel this step to create a project containing no sequences.
1 (Optional) If you plan to capture video from a device, connect the device to your computer using an IEEE 1394 or
SDI connection. Then turn the device on, and do one of the following:
• If the device is a camera, set it to the playback mode, which may be labeled VTR or VCR.
• If the device is a deck, make sure that its output is set properly.
Note: Don’t set a camera to any of the recording modes, which may be labeled Camera or Movie.
2 Either choose New Project on the Welcome screen that appears when Premiere Pro starts up or, after the
application is open, choose File > New > Project.
Last updated 11/6/2011
Page 55

USING ADOBE PREMIERE PRO CS4
Project setup
3 Browse to a location where you want to save the project file, name the project, and click OK.
Note: Whenever possible, specify a location and name that you won’t have to change later. By default, Premiere Pro stores
rendered previews, conformed audio files, and captured audio and video in the folder where you store the project. Moving
a project file later may require moving its associated files as well.
4 Do one of the following:
• Select a preset, or customize settings, for the first sequence of the project. For more information, see “Create a
sequence” on page 134. Then, click OK.
• To create a project without a sequence, click Cancel.
5 (Optional) If you want to change where Premiere Pro stores various types of files, specify the scratch disk locations.
“Specify scratch disks to improve system performance” on page 45.
See
Note: Premiere Pro supports high bit-depth (greater than 8 bits per channel) video necessary for editing standard and
high definition footage.
More Help topics
“Create a sequence” on page 134
Review project settings
All project settings apply to the whole project, and most can’t be changed after a project is created.
49
After you begin working in a project, you can review project settings, but you can change only a few of them. You can
access these settings through the Project Settings dialog box.
1 Choose Project > Project Settings > General, or Project > Project Settings > Scratch Disks.
2 View or change settings as needed.
3 Click OK.
Project Settings dialog box
General
Title Safe Area Specifies how much of the frame edge to mark as a safe zone for titles, so that titles aren’t cut off by
television set overscan. A rectangle with cross hairs marks the title-safe zone when you click the Safe Margins button
in the Source Monitor or Program Monitor. Titles are usually assumed to require a wider safe zone than action.
Action Safe Area Specifies how much of the frame edge to mark as a safe zone for action so that action isn’t cut off by
television set overscan. A rectangle marks the action-safe zone when you click the Safe Margins button in the Source
Monitor or Program Monitor.
Display Format (Video and Audio) For information about video and audio display formats, see their entries under
General Settings in
Capture Format For information about setting the capture format, see “Set capture format, preferences, and tracks”
on page 57.
“Sequence presets and settings” on page 134.
Scratch Disks
For information about designating scratch disks, see “Specify scratch disks to improve system performance” on
page 45.
Last updated 11/6/2011
Page 56

USING ADOBE PREMIERE PRO CS4
Project setup
Open a project
Premiere Pro for Windows can open project files created with earlier versions of Premiere Pro or Adobe Premiere 6.x.
You can open only one project at a time. To transfer the contents of one project into another, use the Import
command.
Use the Auto Save command to automatically save copies of your projects in the Premiere Pro Auto-Save folder.
You may encounter missing files as you work on a project. You can continue working by substituting offline files as
placeholders for the missing files. You can edit using offline files, but you must bring the originals back online before
rendering your movie.
To bring a file back online after the project is open, use the Link Media command. You can continue working without
having to close and reopen the project.
1 Choose File > Open Project.
2 Browse to the project file and select it.
3 Select Open.
4 If the Where Is The File dialog box opens, locate the file using the Look In field, or choose one of the following in
the Where Is The File dialog box:
Find Launches the Windows Explorer (Windows) or Finder (Mac OS) search feature.
50
When moving a project and assets to a different machine, you can edit the file path in the project file so that Premiere
Pro finds the files associated with the project automatically. Open the PRPROJ file in a text editor, or in an XML editor
like Dreamweaver. Search for the file path that was used when the project was on the previous machine. Replace it with
the file path on the new machine.
Skip Replaces a missing file with a temporary offline clip for the duration of a session. When you close your project
and then reopen it, you see a dialog box that asks you to locate the file or allows you to skip it again.
Skip All Like Skip, Skip All replaces all missing files with temporary offline files.
Important: Select Skip or Skip All only when you are certain that you want to rework all the instances where the file is
used in the project. If you want to keep the file in the project but can’t locate it at the moment, use Offline instead.
Skip Previews Stops Premiere Pro from searching for any preview files already rendered for the project. This allows
the project to load faster, but you may need to render parts of its sequences for best playback performance.
Offline Replaces a missing file with an offline clip, a placeholder that preserves all references to the missing file
everywhere in the project. Unlike the temporary offline clip created by Skip, the one generated by Offline persists
between sessions, so you won’t have to locate missing files every time the project is opened.
Offline All Like Offline, Offline All replaces all missing files with persistent offline files.
Note: Do not delete source files while you are using them as clips in a Premiere Pro project unless they were captured using
device control, and you plan to recapture them. After you deliver the final movie, you can delete source files.
Delete a project file
1 In Windows Explorer (Windows) or Finder (Mac OS), browse to the Premiere Pro project file, and select it. Project
files have a .prproj filename extension.
2 Press Delete.
Last updated 11/6/2011
Page 57

USING ADOBE PREMIERE PRO CS4
Project setup
Moving a project to another computer
To move a project to another computer where you want to continue editing, you must move copies of all the assets for
the project to the second computer, as well as the project file. The assets should retain their file names and folder
locations so that Premiere Pro can find them and relink them to their clips in the project automatically.
Make certain, also that the same codecs you used for the project on the first computer are also installed on the second
computer. For more information about moving a project and its assets to another computer, see
Trim or copy your
project.
More Help topics
“Cross-platform workflow” on page 27
Trim or copy your project
Aspect ratios
About aspect ratios
An aspect ratio specifies the ratio of width to height. Video and still picture frames have a frame aspect ratio, and the
pixels that make up the frame have a pixel aspect ratio. You record video for television in either a 4:3 or 16:9 frame
aspect ratio. Additionally, different video recording standards use different pixel aspect ratios.
51
You set the frame and pixel aspect ratios for a Premiere Pro project when you create it. Once these ratios are set, you
cannot change them for that project. You can, however, use assets created with different aspect ratios in that project.
Premiere Pro automatically tries to compensate for the pixel aspect ratio of source files. If an asset still appears
distorted, you can manually specify its pixel aspect ratio. Reconcile pixel aspect ratios before reconciling frame aspect
ratios, because an incorrect frame aspect ratios can result from a misinterpreted pixel aspect ratio.
Frame aspect ratio
Frame aspect ratio describes the ratio of width to height in the dimensions of an image. For example, DV NTSC has a
frame aspect ratio of 4:3 (or 4.0 width by 3.0 height). A typical widescreen frame has a frame aspect ratio of 16:9. Many
cameras that have a widescreen mode can record using the 16:9 aspect ratio. Many films have been shot using even
wider aspect ratios.
4 16
3
A 4:3 frame aspect ratio (left), and wider 16:9 frame aspect ratio (right)
9
Last updated 11/6/2011
Page 58

USING ADOBE PREMIERE PRO CS4
Project setup
When you import clips shot in one frame aspect ratio into a project that uses another frame aspect ratio, you decide
how to reconcile the different values. For example, two common techniques are used for showing a 16:9 movie on a
4:3 standard television. You can fit the entire width of the 16:9 movie frame within the 4:3 television frame. This
placement leaves black bands above and below the movie frame, called letterboxing. Alternatively, you can fill the 4:3
frame vertically with the entire height of the 16:9 frame. Then, you pan the horizontal position of the 16:9 frame within
the narrower 4:3 frame so that important action always remains inside the 4:3 frame. This techniques is called pan &
scan. In Premiere Pro, you can implement either technique by using Motion effect properties such as Position and
Scale.
A B
52
CD
NTSC displays
A. 16:9 NTSC footage B. DVD player display using original widescreen format on widescreen TV screen C. 16:9 image on a 4:3 TV screen
cropped using automatic pan and scan D. 16:9 image on a 4:3 TV screen using automatic letterboxing to reduce overall frame size and display
entire image
Pixel aspect ratio
For a video that explains the basics of pixel aspect ratios, see the Adobe website.
Pixel aspect ratio describes the ratio of width to height of a single pixel in a frame. Pixel aspect ratios vary because
different video systems make various assumptions about the number of pixels required to fill a frame. For example,
many computer video standards define a 4:3 aspect ratio frame as 640 pixels wide by 480 pixels high, which results in
square pixels. Video standards such as DV NTSC define a 4:3 aspect ratio frame as 720x480 pixels, which results in
narrower, rectangular pixels because where more pixels lie within the same frame width. The computer video pixels in
this example have a pixel aspect ratio of 1:1 (square). The DV NTSC pixels have a pixel aspect ratio of 0.91 (nonsquare).
DV pixels, which are always rectangular, are vertically oriented in systems producing NTSC video and horizontally
oriented in systems producing PAL video. Premiere Pro displays clip pixel aspect ratio next to the clip image
thumbnail in the Project panel.
If you display rectangular pixels on a square-pixel monitor without alteration, images appear distorted; for example,
circles distort into ovals. However, when displayed on a broadcast monitor, the images appear correctly proportioned
because broadcast monitors use rectangular pixels. Premiere Pro can display and output clips of various pixel aspect
ratios without distortion. Premiere Pro attempts to automatically reconcile them with the pixel aspect ratio of your
project.
Last updated 11/6/2011
Page 59

USING ADOBE PREMIERE PRO CS4
Project setup
You could occasionally encounter a distorted clip if Premiere Pro interprets pixel aspect ratio incorrectly. You can
correct the distortion of an individual clip by manually specifying the source clip pixel aspect ratio in the Interpret
Footage dialog box. You can correct similar misinterpretations of groups of same-size files by editing the file
Interpretation Rules.txt.
AB C
Pixel and frame aspect ratios
A. 4:3 square-pixel image displayed on 4:3 square-pixel (computer) monitor B. 4:3 square-pixel image interpreted correctly for display on 4:3
non-square pixel (TV) monitor C. 4:3 square-pixel image interpreted incorrectly for display on 4:3 non-square pixel (TV) monitor
More Help topics
AE CS4: New pixel aspect ratios
Common pixel aspect ratios
53
Pixel aspect ratio When to use
Square pixels 1.0 Footage has a 640x480 or 648x486 frame size, is 1920x1080 HD (not
D1/DV NTSC 0.91 Footage has a 720x486 or 720x480 frame size, and the desired result is
D1/DV NTSC
Widescreen
D1/DV PAL 1.09 Footage has a 720x576 frame size, and the desired result is a 4:3 frame
D1/DV PAL
Widescreen
Anamorphic 2:1 2.0 Footage was shot using an anamorphic film lens, or it was
HDV 1080/DVCPRO
HD 720, HD
Anamorphic 1080
DVCPRO HD 1080 1.5 Footage has a 1280x1080 frame size, and the desired result is a 16:9
1.21 Footage has a 720x486 or 720x480 frame size, and the desired result is
1.46 Footage has a 720x576 frame size, and the desired result is a 16:9 frame
1.33 Footage has a 1440x1080 or 960x720 frame size, and the desired result
HDV or DVCPRO HD), is 1280x720 HD or HDV, or was exported from an
application that doesn’t support nonsquare pixels. This setting can also
be appropriate for footage that was transferred from film or for
customized projects.
a 4:3 frame aspect ratio. This setting can also be appropriate for
footage that was exported from an application that works with
nonsquare pixels, such as a 3D animation application.
a 16:9 frame aspect ratio.
aspect ratio.
aspect ratio.
anamorphically transferred from a film frame with a 2:1 aspect ratio.
is a 16:9 frame aspect ratio.
frame aspect ratio.
Last updated 11/6/2011
Page 60

USING ADOBE PREMIERE PRO CS4
Project setup
About square-pixel footage
Many graphics and animation programs generate square-pixel assets meant for display on square-pixel computer
monitors. Premiere Pro, however, typically generates files with non-square pixels for display on television sets.
Premiere Pro automatically conforms square-pixel assets to the project pixel aspect ratio. After the asset is conformed,
however, it no longer has its original frame aspect ratio. Also, its frame aspect ratio is not likely to match that of the
project, even if it did before it was conformed.
For example, suppose you generate a square-pixel asset at 720x540 and import it into a Premiere Pro DV project with
an aspect ratio of 720x540. In this case, the asset is wider than the screen when it is conformed. You can use the Scale
control to set the size of the asset frame within the project frame. However, to preserve the asset frame aspect ratio,
Premiere Pro often either crops the asset or frames it within black bars.
You can prevent this cropping and framing by carefully generating assets from your square-pixel graphics or
animation programs. Choose a frame aspect ratio that, when conformed, matches the project frame size exactly. For
best results, use programs such as Adobe Photoshop® and Adobe After Effects® that include pixel aspect ratio settings.
Set the frame dimensions and pixel aspect ratio to match the dimensions of your project. If the pixel aspect ratio setting
is unavailable in your program, do not try to match the frame dimensions (for example, 720x540). Instead, ensure that
the overall frame aspect ratio matches that of your project (for example, 4:3 or 16:9). Premiere Pro automatically
adjusts the video so that it is not distorted.
If your square-pixel program requires frame dimensions, use the option that matches your project output:
54
• 4:3 DV (NTSC) or ATSC SD—create and save the square-pixel file at 720x534.
• 4:3 D1 (NTSC)—create and save the square-pixel file at 720x534.
• 4:3 DV or D1 (PAL)—create and save the file at 788x576.
• 16:9 DV (NTSC)—create and save the file at 864x480.
• 16:9 D1 (NTSC)—create and save the file at 872x486.
• 16:9 DV or D1 (PAL)—create and save the file at 1050x576.
• 16:9 1080i HD—create and save the file at 1920x1080.
• 16:9 720p HD—create and save the file at 1280x720.
Using assets with various aspect ratios
Premiere Pro automatically attempts to preserve the frame aspect ratio of imported assets, sometimes changing the
pixel aspect ratio, the frame dimensions, or both so that the asset does not appear cropped or distorted when used in
a sequence. Assets created in an Adobe Creative Suite application contain metadata that allows Premiere Pro to make
the calculations automatically and precisely. For assets lacking this metadata, Premiere Pro applies a set of rules to
interpret pixel aspect ratio.
When you capture or import NTSC footage with the ATSC frame size of 704x480, the D1 frame size of 720x486, or the
DV frame size of 720x480, Premiere Pro automatically sets the pixel aspect ratio for that asset to D1/DV NTSC (0.91).
When you capture or import footage with the HD frame size of 1440x1080, Premiere Pro automatically sets the pixel
aspect ratio for that file to HD 1080 Anamorphic (1.33). When you capture or import PAL footage with the D1 or DV
resolution of 720x576, Premiere Pro automatically sets the pixel aspect ratio for that file to D1/DV PAL (1.094).
For other frame sizes, Premiere Pro assumes that the asset was designed with square pixels and changes the pixel aspect
ratio and frame dimensions in a way that preserves the asset image aspect ratio. If the imported asset is distorted, you
can change the pixel aspect ratio manually.
Last updated 11/6/2011
Page 61

USING ADOBE PREMIERE PRO CS4
Project setup
When you drag an asset into a sequence, Premiere Pro centers the asset in the program frame by default. Depending
on its frame size, the resulting image could be too small or overcropped for the needs of the project. If so, you can
change its scale. You can do this manually or have Premiere Pro do it automatically whenever you drag an asset into a
sequence.
It is always a good idea to make sure that files are interpreted correctly. You can read asset frame dimensions and pixel
aspect ratio near the preview thumbnail and in the Video Info column of the Project panel. You can also find this data
in the asset Properties dialog box, the Interpret Footage dialog box, and the Info panel.
More Help topics
“Add images to titles” on page 251
“Clip details in the Info panel” on page 13
Fix aspect ratio distortion
The sequence settings preset you choose when you create a sequence sets the frame and pixel aspect ratios for the
sequence. You can’t change aspect ratios after you create the sequence, but you can change the pixel aspect ratio that
Premiere Pro assumes for individual assets. For example, if a square-pixel asset generated by a graphics or animation
program looks distorted in Premiere Pro, you can correct its pixel aspect ratio to make it look right. By ensuring that
all files are interpreted correctly, you can combine footage with different ratios in the same project. Then you can
generate output that doesn’t distort the resulting images.
55
More Help topics
“Importing still images” on page 90
Correct individual aspect ratio misinterpretations
1 Select the still image in the Project panel.
2 Choose File > Interpret Footage.
3 Select an option in the Pixel Aspect Ratio section, and click OK.
4 Select one of the following:
Use Pixel Aspect Ratio From File Uses the original aspect ratio saved with the still image.
Conform To Lets you choose from a list of standard aspect ratios.
Note: When using Photoshop to generate images for use in video projects, it’s best to use the Photoshop preset named for
the video format you’ll use. Using the preset ensures that your images are generated with the correct aspect ratio.
Correct recurring aspect ratio misinterpretations
Premiere Pro automatically assigns pixel aspect ratios to files according to a file of rules. If a specific type of image is
consistently misinterpreted (distorted) when you import it, you can change the relevant rule.
1 Open a text editor.
2 From within the text editor, go to the Premiere Pro Plug-ins folder.
3 Open the file named Interpretation Rules.txt.
4 Edit the rule that you want to modify, and choose Save.
Last updated 11/6/2011
Page 62

Chapter 5: Capturing, digitizing, transferring, and importing
With your hardware hooked up, you can bring assets into a project by capturing them from digital sources, digitizing
them from analog sources, or importing them from locations on your hard disk.
Capturing and digitizing
About capturing and digitizing
To bring footage into a Premiere Pro project, you can capture it, or digitize it, depending on the type of source material:
Capture You capture digital video from a live camera or from tape: you record it from the source to the hard disk.
Many digital camcorders and decks record video to tape. You capture the video from tape to the hard disk before using
it in a project. Premiere Pro captures video through a digital port, such as a FireWire or SDI port installed on the
computer. Premiere Pro saves captured footage to disk as files, and imports the files into projects as clips. You can use
Adobe After Effects to start Premiere Pro and start the capture process. Alternatively, you can use Adobe OnLocation
to capture video.
56
Digitize You digitize analog video from a live analog camera source or from an analog tape device. You digitize the
analog video, convert it to digital form, so your computer can store and process it. The capture command digitizes
video when a digitizing card or device is installed in the computer. Premiere Pro saves digitized footage to disk as files,
and imports the files into projects as clips.
For a video tutorial on capturing and importing assets, see www.adobe.com/go/vid0231.
Note: While capturing footage, you can monitor audio levels in the Audio Masters Meter panel.
More Help topics
“About recording audio” on page 211
Importing footage into Premiere Pro
“Importing assets from tapeless formats” on page 88
System requirements for capturing
To capture digital video footage, your editing system needs the following components:
• For DV or HDV footage, one of the following:
• an OHCI-compliant IEEE 1394 (FireWire, i.Link) port or capture card
• a non-OHCI-compliant IEEE 1394 capture card with presets, drivers, and plug-ins written specifically for
Premiere Pro.
• For HD or SD footage playable on a device with SDI or component outputs, a supported HD or SD capture card
with SDI or component inputs.
• For HD or SD footage stored on media from file-based camcorders, a device connected to your computer capable
of reading the respective media.
Last updated 11/6/2011
Page 63

USING ADOBE PREMIERE PRO CS4
Capturing, digitizing, transferring, and importing
• For recording audio from analog sources, a supported audio card with an analog audio input.
• A codec for the type of footage you want to capture. Premiere Pro has its own codecs for importing DV and HDV
footage. Plug-in software codecs are available for other types. Hardware codecs are built in to some capture cards.
• A hard disk capable of sustaining the data rate for the type of footage you want to capture.
• Sufficient disk space for the captured footage.
Note: Your operating system or hard disk format could limit the length of a captured clip.
• A project that was created using a preset in the New Project dialog box in which all settings match the footage you
plan to capture.
Note: Some DV and HDV camcorders require a connection to their power adapters to activate their IEEE 1394 ports.
Other camcorders go into sleep mode or demo mode if left in the camera mode without tape activity for a period. To avoid
these problems, connect your camcorder to its power adapter when setting it up for capturing or dubbing video. If the
camcorder goes into demo mode with the power adapter connected, disable this feature using the camcorder menu system.
Set capture format, preferences, and tracks
Use the Capture panel (choose File > Capture) to capture digital or analog video and audio. This panel includes a
preview, which displays video being captured, and controls for recording with or without device control. The Capture
panel also contains a Settings pane for editing your capture settings, and a Logging pane for logging clips for batch
capturing. For convenience, some options available in the Capture panel are also available in the Capture panel menu.
57
You can control certain source devices, such as camcorders and decks, directly from the Capture panel. Your computer
must have an IEEE-1394, RS-232, or RS-422 controller compatible with Premiere Pro. If your source device lacks any
of these interfaces, you still use the Capture panel. You must cue, start, and stop your source device using its controls.
Note: When not capturing in Premiere Pro, close the Capture panel. The Capture panel assumes primary focus, so leaving
it open while editing or previewing video disables output to the source device. This may decrease performance.
A CB D
E
Capture panel
A. Status area B. Preview C. Tabs D. Panel menu E. Transport controls
Last updated 11/6/2011
Page 64

USING ADOBE PREMIERE PRO CS4
Capturing, digitizing, transferring, and importing
More Help topics
“Optimizing scratch disk performance” on page 46
Specify capture settings (Windows)
1 With a project open, choose File > Capture, and select the Settings tab.
2 In the Capture Settings pane, click Edit.
3 In the Capture Settings dialog box, select an option from the Capture Format menu.
4 Click OK.
Specify capture settings (Mac OS)
These steps store the QuickTime capture settings in the Premiere Pro project settings and in Preferences. Follow these
steps the first time you use a device in a project, whenever you change devices in the project, or whenever you want to
change the capture settings for the project.
1 With a project open, choose File > Capture.
2 In the Capture window, select the Settings tab.
3 In the Capture Settings pane, click Edit.
4 In the Capture Settings dialog box, select an option from the Capture Format menu.
5 Click Video.
6 Make any settings changes as desired and click OK. If no settings changes are required, simply click OK.
7 Select Audio from the Capture Settings Window.
8 If hearing audio during capture is desired, select On in the Speaker settings box in the Sound Window.
If you access the Sound options window again after closing the Sound window dialog, the Speaker option will revert
to Off. Select On each time this dialog is accessed to enable audio to be heard during capture.
58
9 Select the Sample tab and choose the Rate that matches the audio from your source.
10 Select the Source tab in the Sound Window.
11 Select DV Audio and next choose the desired source for the audio from your DV device. (By default, the Source is
set to Built-in Line Input > Line In.) Choose First 2 Channels.
12 (Optional) You can capture additional or alternate channels of audio. If your source material has additional
channels of audio, select one of the other two options.
13 Make any other changes to the audio settings as desired and click OK.
14 Click OK to close the Capture Settings Window.
15 If Record is still dimmed, select the Settings tab in the Capture Window. Then select Edit.
16 Click Video and then click OK.
17 Press Play.
The Record button becomes available.
Set capture preferences
1 Choose Edit > Preferences > Capture (Windows) or Premiere Pro > Preferences > Capture (Mac OS).
2 Specify whether you want to cancel capture on dropped frames, report dropped frames, or generate a batch log file.
Last updated 11/6/2011
Page 65

USING ADOBE PREMIERE PRO CS4
Capturing, digitizing, transferring, and importing
3 Select whether to use device control timecode. If a device controller is in use, the last selection enables Premiere Pro
to record the timecode supplied by the controller instead of attempting to record any timecode that is written to
the source tape.
Select tracks for capture
1 To open the Capture panel, select File > Capture.
2 In the Capture panel, click the panel menu.
3 Select Record Video, Record Audio, or Record Audio And Video, depending on the option desired.
Capture from stereo sources to mono tracks
You can capture from sources containing stereo or 5.1 audio channels so that each audio channel maps to its own
mono audio track automatically. The Mono Default Track Format preference enables this behavior for footage
captured from multi-channel sources, and for imported multi-channel files. For more information about audio
channel mapping, see
1 Select Edit > Preferences > Audio (Windows), or Premiere Pro > Preferences > Audio (Mac OS).
2
In the Source Channel Mapping pane of the Preferences dialog box, select Mono from the Default Track Format menu.
3 Click OK.
“Map audio channels” on page 201.
59
File size limits
Premiere Pro does not limit the size of files. However, your capture card, operating system, or hard disk may set such
a limit. Check your capture card and hard disk documentation for information on support of large files.
The format of your hard disk greatly affects its ability to handle large files. FAT32 formatting limits each file to 4 GB,
or about 18 minutes of DV footage. NTFS formatting doesn’t limit file size, although files are still subject to limitations
that may be imposed by other components of your video editing system. This is why it is best to use NTFS-formatted
disks as the scratch disks where you capture video and for the target hard drives where you export video files.
Set up device control
You can use device control to manage and automate video capture and to export sequences to tape. Device control lets
you precisely control devices, such as decks and camcorders, with capture and batch capture controls. With device
control, you can use the Capture panel to log each clip and then use the Batch Capture command to record logged clips
automatically.
Premiere Pro controls devices through its built-in support of IEEE 1394 (FireWire, i.Link) and its support, in Windows
only, of compatible RS-232 and RS-422 controllers. Regardless of type, if your device isn’t automatically recognized,
you need to set it up. Before setting up device control, make sure that you have a tape deck or camcorder that supports
external device control and a cable that connects the device to your controller, computer, or both.
Set up a project for device control
Some device control settings are available when you choose Edit > Preferences > Device Control (Windows) or
Premiere Pro > Preferences > Device Control (Mac OS), and others are in the Device Control section at the bottom of
the Settings pane of the Capture panel. Device control settings apply to the entire project.
1 Choose Edit > Preferences > Capture (Windows) or Premiere Pro > Preferences > Capture (Mac OS).
Last updated 11/6/2011
Page 66

USING ADOBE PREMIERE PRO CS4
Capturing, digitizing, transferring, and importing
2 Select one or more of the Capture options. If you are using a device controller that generates its own timecode, select
Use Device Control Timecode. Use Device Control Timecode replaces the unreadable timecode recorded on the
tape with the controller’s timecode. Click OK.
3 If you want to save captured clips to a specific bin in a project, make sure that the project is open and that the bin
exists in the Project panel.
4 Choose File > Capture.
5 In the Settings panel, click Edit to verify that the capture format specified in the Capture Settings dialog box is
appropriate for your device. Click OK.
Note: Not all formats have options for capture settings. For example, the HDV format has no options.
6 In the Capture Locations section of the Settings panel, make sure that the disk drives you designate for captured
video and audio have sufficient free space. If you want to change the locations, click the corresponding Browse
button, set the location, and click OK.
7 In the Device Control section, if device control has not been set up, choose a device from the Device menu. Click
Options to set it up. Options vary depending on the device; see the documentation for your device driver.
8 Test the device control buttons in the Capture panel to verify that they work. If video preview is supported for the
format, make sure you see video in the preview.
9 Click Logging. In the Setup area, choose Audio, Video, or Audio And Video from the Capture menu depending on
what you want to capture. Select a bin from the Log Clips To list if needed. By default, the Project panel is selected
in the Log Clips To field.
10 Enter information into the Clip Data area as needed. This information is saved in the metadata of the clip.
Note: To avoid confusion, make sure that the tape name is unique. Some types of device control software ask you to specify
the Tape Name setting each time you insert a new tape. The other Logging Data options aren’t required.
60
Set up a device for device control
Premiere Pro supports the control of devices such as camcorders and VTRs. It controls DV and HDV devices by way
of IEEE 1394 (FireWire, i.Link) connections. In Windows only, Premiere Pro controls serially-controlled devices by
way of RS-232 or RS-422 controllers if they are installed on the computer.
1 Open the Device Control Preferences dialog box by doing one of the following:
• Choose Edit > Preferences > Device Control (Windows) or Premiere Pro > Preferences > Device Control (Mac OS).
• In the Capture panel, click Settings.
2 Select the type of device you want to control from the Device menu.
3 Click Options, and do one of the following:
• If you are connecting a DV or HDV device, make your selections from the Video Standard, Device Brand, Device
Type, and Timecode Format menus. In the Device Type menu, if your particular model is not listed, select a model
from the same family (if known), leave at Standard, or click Go Online For Device Info.
• If you are connecting a serial device, make your selections from the Protocol, Port, Time Source, and Time Base
menus. Check either or both checkbox selections available for the Protocol you choose.
4 (DV/HDV Device Control only) Click Check Status. Premiere Pro displays one of the following statuses:
Offline Premiere Pro does not see your device. Check all your connections and settings.
Detected Premiere Pro sees your device but cannot control the tape (possibly because there is no tape inserted).
Online Premiere Pro sees your device and can control the tape.
Last updated 11/6/2011
Page 67

USING ADOBE PREMIERE PRO CS4
Capturing, digitizing, transferring, and importing
5 Click OK.
6 In the Device Control section of the Settings pane, specify the following options as needed:
Preroll Time Indicates how much before the In point Premiere Pro starts playing the tape before capture. The
appropriate value varies depending on the device you are using.
Timecode Offset Indicates the number of frames to adjust the timecode embedded in the captured video so that it
corresponds with the timecode number of the same frame on the source tape.
Calibrate an RS-422 or RS-232 device (Windows only)
1 Select File > Export > Export To Tape.
2 Click Options.
3 Enter the number of offset frames, as appropriate for your device, to the Delay Movie Start, Manual Edit Timing,
and Preroll boxes.
Control an RS-422 or RS-232 device (Windows only)
1 Select Edit > Preferences > Device Control (Windows).
2 From the Devices menu, select Serial Device Control.
3 Click Options.
4 In the VTR And Port Control section, select a protocol and port for your device.
5 In the Time Control section, select a time source and timebase for your device.
61
Device controls in the Capture panel
You can use the controls in the Capture panel to operate the device as you log clips. The jog control lets
you navigate quickly to nearby frames, and the shuttle control lets you change the speed of the tape as you play
it forward or backward. The Record button lets you begin a manual capture.
If you press the Rewind button when the tape is stopped, the device rewinds the tape at full speed. If you rewind
when the tape is playing or paused, the device rewinds while displaying video in the preview.
If you press the Fast Forward button when the tape is stopped, the device moves the tape forward at full speed.
If you fast forward when the tape is playing or paused, the device moves the tape forward while displaying video in the
preview.
If you press the Previous Scene button, the tape shuttles to the previous start point and pauses. If you press the
Next Scene button, the tape shuttles to the start point of the next scene and pauses.
Note: Previous Scene and Next Scene are supported for DV in Windows only, and not supported for HDV for either
Windows or Mac OS.
You can also press the J, K, and L keys to control your device. J rewinds the tape; L fast forwards it, and K pauses it.
The speed of forward or reverse increases each time you press J or L. To rewind or forward one frame at a time, hold
down K and press J or L once. To slowly rewind or forward, hold down K+J or K+L.
To operate Capture panel controls using the keyboard, see the tool tips in the Capture panel. You can change the
shortcuts by choosing Edit > Keyboard Customization. You can also shuttle to a tape location by typing its timecode
into the Capture Panel’s current timecode field, to the lower left of the monitor, and pressing Enter/Return.
Last updated 11/6/2011
Page 68

USING ADOBE PREMIERE PRO CS4
Capturing, digitizing, transferring, and importing
Capture without device control
If you do not have a device that can be controlled by Premiere Pro, you can capture video manually. You have to
operate both the playback device controls and the Capture panel controls in Premiere Pro.
Note: You must preview HDV footage on an external TV monitor, or, if the source is a camcorder, on the camcorder
viewfinder while shuttling, logging, and capturing on Mac OS. The preview pane in the Capture panel will show the words
Previewing On Camera.
1 Make sure that the deck or camcorder is properly connected to your computer.
2 Choose File > Capture.
3 (Mac OS) If a QuickTime Capture Settings dialog box opens, choose video and audio settings appropriate to your
project.
These settings will be preserved for the project, but you may need to set them again for each new project.
4 In the Setup area of the Logging pane, choose your media type from the Capture menu.
5 Use the controls on the deck or camcorder to move the videotape to a point several seconds before the frame where
you want to begin capturing.
6 Press the Play button on the deck or camcorder, and then click the red Record button in the Capture panel.
7 Record a few seconds beyond the end of the footage you need, to provide room for editing. Press the Esc key to stop
recording.
When the Save Captured File dialog box appears, enter logging data and click OK. The new file is listed in the Project
panel and is saved to the disk location specified in the Settings pane of the Capture panel.
62
Capture with device control
After a device and the project are set up properly, you can begin capturing clips using device control. You can capture
an entire tape or you can mark In and Out points for each clip, and then capture the clip. You can log In and Out points
for any number of clips and have Premiere Pro capture as many as you like in a batch. Premiere Pro supports FireWire
device control on both platforms, but supports serial device control in Windows only.
Note: On Mac OS, you must preview HDV footage on an external TV monitor, or, if the source is a camcorder, on the
camcorder viewfinder while shuttling, logging, and capturing. The preview pane in the Capture panel will show the words
Previewing On Camera.
More Help topics
“Set up device control” on page 59
Capture an entire tape or portion of a tape
1 Choose File > Capture.
2 (Mac OS) If a QuickTime Capture Settings dialog box opens, choose video and audio settings appropriate to your
project.
These settings are preserved for the project, but you set them again for each new project.
3 In the Capture panel, make sure that the device is online, as indicated above the preview.
4 Insert a tape into the device. Premiere Pro prompts you to name the tape. Be sure not to give any two tapes the same
name.
Last updated 11/6/2011
Page 69

USING ADOBE PREMIERE PRO CS4
Capturing, digitizing, transferring, and importing
Including a unique number in the name can help you avoid using the same name twice.
5 In the Setup area of the Logging pane, choose the media type from the Capture menu.
6 Rewind the tape to its beginning, or to the beginning of the portion you want to capture.
7 To create a separate file (Windows) or a subclip (Mac OS) for each new scene on the tape, select Scene Detect in the
Capture area. Scene Detect is not available for HD or HDV footage.
8 You can capture frames that extend beyond the In and Out points of each clip. Enter the number of frames in the
Handles box in the Capture area.
9 Click Tape.
10 To stop capturing at the end of a portion, click the Stop button. Otherwise capturing stops when the tape comes to
its end.
Select and capture a clip
1 Choose File > Capture.
2 (Mac OS) If a QuickTime Capture Settings dialog box opens, choose video and audio settings appropriate to your
project.
These settings will be preserved for the project, but you may need to set them again for each new project.
63
3 In the Capture panel, make sure that the device is online, as indicated above the preview.
4
Insert a tape into the device. Premiere Pro prompts you to name the tape. Be sure not to give any two tapes the same name.
5 In the Setup area of the Logging pane, choose the media type from the Capture menu.
6 Use the controls in the Capture panel to move to the first frame you want to capture, and click Set In. Then move
to the last frame you want to capture, and click Set Out.
Note: If capturing HDV footage on Mac OS, you must preview on an external TV monitor or camcorder viewfinder while
logging. The preview pane in the Capture panel will show the words Previewing On Camera.
7 If you want to capture frames that extend beyond the In and Out points of each clip, enter the number of frames in
the Handles setting of the Capture section.
8 Click the In/Out button in the Capture area of the Logging pane to capture the clip.
Determine whether your device is online
1 Select File > Capture.
2 (Mac OS) If a QuickTime Capture Settings dialog box opens, choose video and audio settings appropriate to your
project.
These settings will be preserved for the project, but you may need to set them again for each new project.
3 Select the Settings tab in the Capture panel.
4 In the Device Control area of the Settings tab, click Options.
5 In the DV/HDV Device Control Settings dialog box, click Check Status.
Last updated 11/6/2011
Page 70

USING ADOBE PREMIERE PRO CS4
Capturing, digitizing, transferring, and importing
Use automatic scene detection
Instead of manually logging In and Out points, you can use the Scene Detect feature. Scene Detect analyzes the video
for scene breaks as indicated by the tape's Time/Date stamp, such as those caused when you press the camera’s pause
button while recording. When Scene Detect is on and you perform a capture, Premiere Pro automatically captures a
separate file (Windows) or creates a master clip with a subclip (Mac OS) at each scene break it detects. On Mac OS, it
places the subclips in a new bin. Scene Detect works whether you capture an entire tape or just a section between
specific In and Out points. If you turn on Scene Detect and capture using In and Out points, Scene Detect may break
up clips between the defined In and Out points if a scene break is detected.
Scene Detect logs scenes for batch capturing without altering the tape’s progress. It also logs scenes that occur across
timecode breaks.
❖ In the Capture panel, do either of the following:
• Click the Scene Detect button below the image.
• Select Scene Detect in the Capture area of the Logging pane.
64
Scene Detect starts a separate file (Windows) or subclip (Mac OS) at the first frame of each scene
Note: Automatic scene detection isn’t available for HDV or HD assets.
Premiere Pro will capture a separate file for each scene it detects (Windows), or it will capture a master clip for the
duration of the capture, with a subclip for each scene, placing all subclips into a new bin (Mac OS).
Last updated 11/6/2011
Page 71

USING ADOBE PREMIERE PRO CS4
Capturing, digitizing, transferring, and importing
Common capture issues
If you run into problems while capturing digital footage, refer to Premiere Pro Help or the documentation for your
camera, deck, or capture card. For more information, check
issues that may arise when you capture digital video:
• If your device (camera or deck) goes into sleep mode, close and then reopen the Capture panel; or close the Capture
panel, turn the device off and back on, and then reopen the Capture panel. You can disable sleep mode on many
cameras by connecting them to AC power and ejecting the tape.
• If video looks grainy in the Capture panel or Monitor panel, Premiere Pro may have decreased display quality to
preserve capture quality. Video is captured and stored at the quality you determine and always plays at that quality
on an NTSC or PAL monitor. On slower systems, Premiere Pro may lower the quality of the capture preview in
order to ensure that sufficient CPU resources are available for full-quality capture.
• If the video image does not appear in the Capture panel, verify your device control and capture settings. Then,
leaving the device on, restart Premiere Pro.
• If captured audio and video are not in sync, make sure that sections of tape weren’t skipped (left unrecorded)
between shots. Blank tape areas lack timecode, which may cause interruptions in the camera time mode. When you
capture the blank area, the camera doesn’t transmit valid frames, but time continues to be marked.
• If no audio is recording, try playing a source through the computer’s sound input and speaker system without
recording. If you can’t hear it, the audio source may not be connected properly or audio parameters may not be set
properly. Check hardware connections, Sounds And Audio Devices in the Windows Control Panel, and mixer
settings, and refer to the documentation for your sound card. In Premiere Pro, select Edit > Preferences (Windows)
or Premiere Pro > Preferences (Mac OS), and check the settings for Audio, Audio Hardware, and Audio Output
Mapping.
• When shuttling, logging, and capturing HDV footage on Mac OS, the preview pane in the Capture panel will
remain blank. You must preview this footage on an external TV monitor or, when the source device is a camcorder,
on its viewfinder.
Adobe Technical Support. The following are common
65
More Help topics
Troubleshoot digital video capture and playback
Capturing DV or HDV video
You can capture audio and video from a DV or HDV device by connecting the device to your computer with a
FireWire cable. Premiere Pro records the audio and video signal to the hard disk and controls the device through the
FireWire port.
You can capture DV or HDV footage from XDCAM or P2 devices via SDI ports, provided your computer has a
supported third-party capture card or device installed. Also, it will need the respective drivers.
When you start a new project using one of the DV or HDV sequence presets, the capture settings are set for DV
Capture or HDV Capture, respectively. You can, however, change the capture settings to either DV or HDV from
within the Capture panel in an established project.
You can choose whether to preview DV video in the Capture window during preview and capture. You can also
preview HDV footage in the Capture window, in Windows only. However, you cannot preview HDV footage in the
Capture window during capture. Instead, the word Capturing appears in this window during HDV capture.
Last updated 11/6/2011
Page 72

USING ADOBE PREMIERE PRO CS4
Capturing, digitizing, transferring, and importing
Important: You can import DVCPRO HD assets, XDCAM HD, and XDCAM EX assets, and AVCHD assets from their
media without capturing. Capturing takes longer than transferring, and does not preserve all metadata. For more
information, see
“Importing assets from tapeless formats” on page 88.
More Help topics
“Set up a DV or HDV system” on page 40
“Capture with device control” on page 62
“Export a movie file for further editing” on page 447
“Export a sequence to tape with device control” on page 463
Capturing HD video
You can capture audio and video from an HD device with an SDI port. Your computer must have a supported SDI
capture card, and its drivers and software installed. Similarly, you can capture HD footage from XDCAM SDI sources
provided a supported XDCAM capture card is installed, along with its respective driver. Correct installation adds HD
presets to the Available Presets pane of the New Sequence dialog box. It also adds HD formats to the Capture Format
menu on the General tab of the Project Settings dialog box.
66
You typically connect the HD device to your computer by connecting its SDI ports by coaxial cable with BNC
connectors. To provide device control (Windows only), you also connect the serial port on the device with an RS422
or RS-232 port on the computer. See the setup instructions provided by the capture card manufacturer.
Important: You can transfer and import DVCPRO HD assets, XDCAM HD and XDCAM EX assets, and AVCHD assets
from their media without capturing. Capturing takes longer than transferring, and does not preserve all metadata. For
more information, see
“Importing assets from tapeless formats” on page 88.
More Help topics
“Set up an SD-SDI, HD-SDI, or component system” on page 41
“Set up device control” on page 59
“Capture without device control” on page 62
“Export a movie file for further editing” on page 447
“About exporting to videotape” on page 462
Last updated 11/6/2011
Page 73

USING ADOBE PREMIERE PRO CS4
Capturing, digitizing, transferring, and importing
Digitizing analog video
In order to edit video shot in an analog format, you must first digitize it. You can digitize it by routing the video signal
through either a digital camcorder that can digitize on the fly or a digitizing device installed in your computer.
Alternatively, you can dub the analog footage to a digital format, and then capture the video from a digital device
through a capture card as any other digital source. Depending on your equipment, you may be able to digitize analog
video from any of several signal types, including component video, composite video, and S-Video. Some digitizers
provide device control. They connect to your source device through RS-232 or RS-422 ports, enabling you to control
the device through Premiere Pro’s Capture panel and to perform batch capturing. Refer to the instructions included
with your camcorder and digitizer/capture card. For information on troubleshooting analog video capture, go to
Adobe Technical Support.
More Help topics
“Set up an S-Video or composite system” on page 43
“Capturing analog audio” on page 211
Troubleshoot analog capture problems in Premiere Pro
67
About capture card settings
Some of the capture settings you see in Premiere Pro may be from the plug-in software that came with your
digitizer/capture card. Because of the differences among brands of cards, specific options and supported formats can
vary. This complex relationship between video capture cards and Premiere Pro can make it difficult to identify which
part of the system is responsible for a particular option or problem. Adobe, as well as most capture card manufacturers,
provides troubleshooting documents online that can help you determine whether an option or problem is related to
the video capture card and its software or to Premiere Pro. Check the Premiere Pro website and the capture card
manufacturer’s website for troubleshooting resources.
Most of the supported capture cards install a settings file (preset) that you can select in the Premiere Pro New Project
dialog box, in the Load Preset pane. This preset automatically sets all capture settings for optimal support of your
capture card. For best results, use your capture card’s preset, if provided, and don’t change the capture settings in the
Custom Settings pane.
Digitize analog video
1 Exit from Premiere Pro.
2 Connect the analog device’s video and audio outputs to the digital device’s (digitizer, digital camcorder or digital
deck) analog inputs.
3 If the digital device is an external digitizer, deck, or camcorder, connect its FireWire or SDI port to the computer’s.
4 (Windows only) If the digital device is a digitizer with device controls, connect its device control port (RS-232 or
RS-422) with the same type port on the analog device.
5 Turn on the analog source and the digitizing device.
6 If the digitizing device is a camcorder, put it into VTR, VCR, or Play (not Camera) mode.
7 Set the input selection control on the digitizing device to the correct analog input.
8 Start Premiere Pro.
Last updated 11/6/2011
Page 74

USING ADOBE PREMIERE PRO CS4
Capturing, digitizing, transferring, and importing
9 When the Welcome screen appears, do one of the following:
• To start a new project using a capture card, click New Project, select the capture card’s preset (if available) from the
Load Preset pane, and click OK.
• To open an existing project using a capture card, select an existing project that was set up with the capture card’s
preset.
• To start a new project using an external device, such as a camcorder or deck, to digitize, click New Project, select a
DV or HDV preset that matches your target television standard and format, and click OK.
• To open an existing project using an external device, such as a camcorder or deck, to digitize, select an existing
project that was set up with the correct DV or HDV preset.
10 Choose File > Capture.
11 In the Capture panel, carefully check the settings on the Settings pane. If you need to change them, click Edit. (If
you’re using a capture card, the settings are provided by the card manufacturer’s plug-in software, not by Premiere
Pro, and vary according to the capture card’s brand and model. See the documentation for the software driver
provided by the capture card manufacturer.)
12 Do one of the following:
• If the digital device offers no device control, cue up your source using the analog device’s own controls. Press Play
on the analog device and click the Record button
in the Capture panel.
• If the digital device offers device control, capture or log footage using the Capture panel’s controls, as you would
with a digital source.
To help determine the effects of your compression settings on the data rate of the captured video, use the Premiere Pro
Data Rate graph. (For more information, see “Understanding video compression, file size, and data rate” on
page 429.)
68
Capturing content for DVD
DVD content is compressed according to DVD specifications so that it plays reliably on a wide range of players. When
preparing content for a DVD project, pay attention to frame size and frame rate, so that content retains its quality in
the transition to DVD.
For best results, make sure that you capture or record according to these specifications:
Frame size NTSC standard 720x480 or PAL standard 720x576. If your project uses a different frame size, Premiere Pro
scales it automatically.
Frame rate 29.97 fps (NTSC) or 25 fps (PAL); alternatively, 23.976 (NTSC) for 24p. All footage in a single project must
be of the same frame rate.
Aspect ratio 4:3 or 16:9 (widescreen).
Audio bit depth 16 bits.
Audio sample rate 48 kHz.
Last updated 11/6/2011
Page 75

USING ADOBE PREMIERE PRO CS4
Capturing, digitizing, transferring, and importing
Batch capturing and recapturing
About batch capturing
Premiere Pro supports batch capturing—automatic, unattended capture of multiple clips from a controllable device.
You can define a batch by selecting a group of clips you have logged. These appear as offline (placeholder) clips in the
Project panel or in a bin. You can capture any number of logged offline clips by selecting them and choosing File >
Batch Capture. When you begin capture, Premiere Pro automatically re-sorts entries by tape name and timecode In
points so that they’re captured as efficiently as possible.
To save time by reducing the number of clips you log manually, consider using Scene Detect. See “Use automatic scene
detection” on page 64.
When you want to batch capture a set of logged offline clips, select them in the Project panel and choose File > Batch
Capture. If you organized offline clips into bins, you can batch capture an entire bin by selecting the bin.
Premiere Pro can capture video in the background so that you can perform other tasks during capture. When you start
either a manual capture or batch capturing in Premiere Pro, you can minimize the Premiere Pro application or switch
to another application without stopping capture. After you restore the Premiere Pro window, you can click anywhere
inside it to halt capture. However, be aware that frames may drop out if you perform a system-intensive task while
capturing. The chance of dropping frames is lower on a high-performance system, such as one with dual processors.
69
Note: Batch capturing is not recommended for the first and last 30 seconds of your tape because of possible timecode and
seeking issues. Capture these sections manually.
A
B
Preparing for batch capturing
A. Clips selected for capture B. Capture Settings option
More Help topics
“Set up device control” on page 59
Log clips for batch capturing
You can specify which shots you want to use from source tapes by logging them as a set of offline clips for later capture.
If you set device-control options in the Preferences dialog box to remotely control your camera or deck, you can create
offline clips by using the clip-logging controls in the Capture panel, and then use the Batch Capture command to
capture the logged clips automatically.
Last updated 11/6/2011
Page 76

USING ADOBE PREMIERE PRO CS4
Capturing, digitizing, transferring, and importing
If you have a list of In and Out points, you can log them manually without a device online; simply enter each shot’s In
and Out points and click the Log Clip button. You can also log frame numbers using a separate logging or spreadsheet
program and then import the spreadsheet into Premiere Pro as a list of offline clips.
You can also log clips interactively: you can set In points and Out points while the source tape is playing.
1 In the Capture panel, make sure that your device is online, as indicated above the preview.
2 Insert a tape into your device. Premiere Pro prompts you to name the tape. Be sure not to give any two tapes you
log the same name.
3 Use the controls in the Capture panel to move to the first frame in your first shot, and click the Set In button. Then
move to the last frame in the shot and click the Set Out button.
4 In the Setup area of the Logging pane, choose your media type from the Capture menu.
5 If you want to capture some frames extending beyond the In and Out points of each clip, enter the number of frames
for these handles in the Handles setting of the Capture section.
6 Click the Log Clip button in the Timecode area of the Logging pane to log the clip you identified. Name the clip
when prompted. Premiere Pro logs the clip by placing an offline clip for it in the Project panel.
7 Repeat steps 2 through 6 to log each shot you want to batch capture.
70
Capture panel with Logging active
Log clips interactively
1 Make sure that your device is connected and in VTR or VCR (not Camera) mode, and then choose File > Capture.
2 In the Logging pane, enter the settings you want to use as the defaults for Setup and Clip Data.
Last updated 11/6/2011
Page 77

USING ADOBE PREMIERE PRO CS4
Capturing, digitizing, transferring, and importing
3 Play the tape. Click Set In or Set Out at any time, even as the tape plays. Repeat as necessary.
4 When you are satisfied with the In and Out points, click Log Clip, verify the clip data, and click OK.
You can make slight timecode adjustments by using the plus sign (+) or minus sign (–). For example, to add five frames
to the end of the Out point, select the entire Out point timecode, type +5, and press Enter/Return.
Tips for logging clips interactively
• Set options on the Logging pane of the Capture panel. Premiere Pro uses the current data in the Setup and Clip Data
sections as defaults for subsequent logged clips. If you want to log a series of clips into the same bin with similar
logging data, save work by specifying clip data before you start logging the series. When you click the Log Clip
button, a dialog box appears so that you can accept or change the clip data.
• In the Clip Data section, specify a tape name. Premiere Pro asks for this name every time you begin batch capturing.
• The Clip Name in the Clip Data section progresses in numerical increments automatically. For example, if you want
to number a series of clips with clip names starting with Car Chase, enter “Car Chase 01,” making sure that the clip
name ends with the number. Subsequent logged clips default to the next number, such as “Car Chase 02.”
• You can change Capture panel settings at any time. For example, if you see the action changing as the tape plays
back, you can get ready to capture the new upcoming action by selecting a different bin to log subsequent clips into
or by typing a different name for Description or Scene. You don’t have to stop the tape as you change settings.
• You can operate the device and log clips using the keyboard. See the tool tips for Capture panel controls, or choose
Edit > Keyboard Customization to view or change the shortcuts.
• You must click Log Clip to create a new offline clip. This pauses the tape as you confirm the clip data for the new
offline clip.
71
Choosing batch-capture settings
A batch list of logged clips appears as a list of offline clips in the Project panel. If you plan to capture many clips, you
may want to create bins in the Project panel in advance so that you can log each set of offline clips directly into its own
bin. When you batch capture, the offline clips are replaced by captured clips, maintaining the bin organization you set
up in advance.
By default, the settings that Premiere Pro uses to batch capture offline clips are the capture settings of the project. If an
offline clip has its own capture settings, Premiere Pro uses the clip settings when capturing it; the resulting clip
maintains its capture settings so that it can easily be recaptured using the same settings. For example, if an offline clip
has HDV as its format and the format specified in the project capture settings is DV, Premiere Pro captures the clip in
HDV unless you change the clip capture settings. You can override clip capture settings by choosing the Override
Capture Settings option in the Batch Capture dialog box.
More Help topics
“Specify capture settings (Windows)” on page 58
Determine whether an offline clip has capture settings
You can determine whether an offline clip already has its own capture settings.
❖ In the Project panel, scroll right to the Capture Settings column. If the column is hidden, choose Metadata Display
from the Project panel menu. Then click the triangle next to Premiere Project Metadata to expose column names.
Select Capture Settings. Click
If an offline clip has its own capture settings, its box in this column has a check mark.
OK.
Last updated 11/6/2011
Page 78

USING ADOBE PREMIERE PRO CS4
Capturing, digitizing, transferring, and importing
Change capture settings for an offline clip
You can change capture settings for an offline clip. For example, you can capture the clip at a resolution higher than it
had when it first was captured or logged.
1 Select the clip in the Project panel,
2 Choose Clip > Capture Settings > Set Capture Settings.
The Capture Settings dialog box opens.
3 See “Specify capture settings (Windows)” on page 58.
More Help topics
“Set up device control” on page 59
Remove capture settings from an offline clip
1 In the Project panel, select the clip.
2 Choose Clip > Capture Settings > Clear Capture Settings.
By default, Premiere Pro captures this clip with the project capture settings.
72
Batch capture clips
1 Select the offline clips that you want to capture, and then choose File > Batch Capture.
2 In the Batch Capture dialog box, do any of the following:
• Choose Capture With Handles and enter the number of frames for the handles if you want to capture frames
beyond the In and Out points identified for each clip in the batch.
Note: The number of frames you enter here will be added to the number you set for handles in the Capture panel.
• Choose Override Capture Settings if you want to replace the capture settings of individual clips in the batch with
the project’s default settings.
3 Verify that the deck and source videotape are set up properly for capture, and then click OK.
4 In the Insert Tape dialog box, insert the requested tape and click OK. If you are capturing from multiple tapes, be
ready to insert them when prompted.
5 If you want to stop batch capturing, click the Stop button in the Capture panel, or press the Esc key.
Troubleshooting batch capturing
You can perform trouble-free batch capturing if device control and the project’s capture settings are set up properly
and if the offline clips you logged are consistent and free of conflicting data. If you encounter problems with batch
capturing, make sure that all clips you want to batch capture are set up with the proper settings:
• The Status of each clip must be Offline. Verify the status in the Project panel List view. If a clip is not offline, select
it in the Project panel and choose Project > Unlink Media. If you select multiple clips and some are online, Premiere
Pro captures the offline clips only.
• Tape Name, Media Start, and Media End must be specified in the Edit Offline File dialog box for each offline clip.
As long as one selected offline clip contains these settings, the Batch Capture command is available, but only clips
with all three settings are captured. If necessary, verify this in the Project panel List view or double-click each offline
clip to edit settings.
Last updated 11/6/2011
Page 79

USING ADOBE PREMIERE PRO CS4
Capturing, digitizing, transferring, and importing
• Recording video, audio, or both must be supported by the selected capture device. For example, audio isn’t captured
if the capture device doesn’t capture audio. If settings exist that can’t be captured, batch capturing stops and the
Capture Settings Error dialog box appears.
• The filename of each clip (as specified in the Capture Settings dialog box) must not duplicate the filename of an
existing clip. If necessary, double-click each offline clip to verify that its name is unique. If you select an offline clip
with a duplicate name for batch capturing, Premiere Pro slightly alters the name of that clip when it captures it. In
this way, it avoids overwriting the other file with the same name.
To manage capture errors when the Capture Settings Error dialog box appears, do one of the following:
• To fix the capture settings for any clips in the list, select one or more files in the list and click Edit Settings.
• To omit the clips with invalid capture settings and proceed with the rest of the batch capture, click Skip. Clips you
skip are removed from the list and are not captured.
• To stop batch capturing, click Cancel. No clips are captured.
Import and export batch lists
You can import batch lists in a variety of file formats: tab-delimited text (TXT), comma-separated value (CSV), TAB,
and PBL. When imported, each entry in the text batch list appears as an offline clip in the Project panel. You can also
export offline clips as a CSV batch list so that you can transfer a logged clip list between projects and workstations. To
see the format of a batch list, export it and open the file in a text editor or in a spreadsheet. A batch list text file may
come from sources such as Adobe Premiere 6.5, logging utilities such as Pipeline Autolog, or custom video-production
software that uses a database or spreadsheet program to generate a batch list.
73
When you import a batch list, the order of fields in the list must be as follows: tape name, In point, Out point, clip
name, and comment. When you export offline clips as a batch list, Premiere Pro orders the fields as follows: tape name,
In point, Out point, clip name, log note, description, scene, and shot/take. Exported field data is exported from the
corresponding columns in the List view of the Project panel.
• To import a batch-list timecode log, open a project and choose Project > Import Batch List. Locate and select the
file, and click Open.
• To export a batch-list timecode log, select the files that you want to log. Then choose Project > Export Batch List.
Specify a filename and location, and click Save.
Work with offline clips
An offline clip is either a clip that has been unlinked from its source file, or a logged clip that you still have to capture.
Offline clips contain information about the source files they represent, and they give you flexibility when actual files
are not available. If an offline clip appears in a Timeline panel, “Media Offline” appears in the Program Monitor and
in the track.
When you log clips from a tape, Premiere Pro automatically creates offline clips containing the exact information
required to capture the clips later. You can also create offline clips manually. Use offline clips in situations such as the
following:
• Clips are logged but not yet captured. Because offline clips behave like captured clips, you can organize the logged
offline clips in the Project panel. You can even lay out sequences with them in a Timeline panel before the offline
clips are captured. When the offline clips are captured (or located, if they are already captured but missing), they
replace the corresponding offline clips.
• You want to capture logged clips using device control or batch capturing. In Premiere Pro, a batch-capture list is a
set of offline clips; selecting specific offline clips sets them up for batch capturing.
Last updated 11/6/2011
Page 80

USING ADOBE PREMIERE PRO CS4
Capturing, digitizing, transferring, and importing
• You want to recapture clips used in the project. Recapturing clips requires making the online clips offline by using
the Unlink Media command.
• A source file is unavailable when you open a project, so that Premiere Pro can’t locate it automatically and you can’t
locate it manually. Premiere Pro provides Offline and Offline All buttons in this case.
Note: Online and offline clips in Premiere Pro are not related to the concepts of online and offline editing.
Create an offline clip
You can create an offline clip, that is, a placeholder clip for footage you capture later.
1
In the Project panel, click the New Item button at the bottom of the panel and choose Offline File from the menu.
The Offline File dialog box opens.
2 For Contains, select whether you want to capture Video, Audio, or Audio And Video from the source footage.
3 For Audio Format, select the format that matches the audio format of your source footage: Mono, Stereo, or 5.1.
4 For Tape Name, type the name of the tape containing the source video for the offline clip.
5 For File Name, type the name of the file as you want it to appear on disk when you capture it using Premiere Pro.
If you’re creating an offline clip for a source file that is captured but isn’t on your computer yet, type the name of
that file.
6 Fill in Description, Scene, Shot/Take, and Log Note as needed.
7 Enter the timecode for the Media Start and Media End points. Set these points for the entire untrimmed clip,
including any extra handle frames you’ll need for editing and transitions.
Note: To be eligible for capture, an offline clip must contain at least a tape name, filename, and Media Start and Media
End settings.
74
Edit an offline clip
You can edit an offline clip. You can give it new start and end points, tape name and filename, and a new audio format.
You can specify whether it contains audio only, video only, or audio and video. When an edited offline clip is placed
in sequences, it retains the updated settings. These updated settings also are used for subsequent batch capture.
1 Do one of the following in a Project panel:
• Double-click the offline clip,
• Select the offline clip. Then choose Clip > Edit Offline.
You can assign a keyboard shortcut to the Clip > Edit Offline command.
The Edit Offline File dialog box opens.
2 Edit settings as needed, and then click OK.
Replace an offline clip with a captured source file
You can link an offline clip to a source file, even to a source file different from the one from which the offline clip was
made. The linked source file appears anywhere the offline clip is used in a project. It is possible, for example, to edit an
online clip into a sequence, make its source offline, and link the offline clip to another source file. The new source
appears in the sequence wherever the original one did.
You can link an offline clip containing audio to a source file containing no audio. However, Premiere Pro deletes the
audio track in all instances of the offline file from the project.
Last updated 11/6/2011
Page 81

USING ADOBE PREMIERE PRO CS4
Capturing, digitizing, transferring, and importing
Note: To link the audio of a new source file, the source file must have the same type of audio track as the offline clip. For
example, if the offline clip has a stereo audio track, you cannot link it to a source file with a monaural audio track.
1 In the Project panel, select one or more offline clips.
2 Choose Project > Link Media.
3 Select the source file, and click Select.
Note: If you selected more than one offline clip, the Link Media To dialog box appears in turn for each file you selected.
The title bar of the dialog box gives the filename for each offline clip. Relink the correct source file to each offline clip.
4 (Optional) If you selected a source file containing no audio to link to an offline clip containing audio, the Media
Mismatch dialog box appears. Do one of the following:
• To delete the audio track from all instances of the offline clip from the project click OK.
• To cancel linking to the source file, and retain the audio track in all instances of the offline clip, click Cancel.
Convert an online clip to an offline clip
1 In the Project panel, select one or more online files.
2 Choose Project > Make Offline.
3 Select one of the following options:
Media Files Remain On Disk
Makes the selected files offline in the project but doesn’t erase the source files from the disk.
75
Media Files Are Deleted Makes the selected files offline in the project and erases the source files from the disk.
Note: If you recapture a clip using the same filename as a file remaining on disk, the original file is replaced. To preserve
original clips without changing their names, move them to another folder or disk, or specify different filenames for the
clips you recapture.
About online and offline editing
For online editing, you edit clips at the level of quality required for the final version of the video program. This is the
default method of working in Premiere Pro. Online editing works well when the speed and storage capacity of the host
computer are adequate to the demands of the video formats used. For example, most modern computers can handle
the data rate of DV in full resolution. They may be challenged, however, by the greater demands of, for example, HDV
or HD footage. For many videographers, that’s where offline editing comes in.
In offline editing, after capturing high-quality clips, you make low-quality copies of them for editing purposes. After
editing, you can unlink the clips in Premiere Pro from the low-quality media, and relink them to the high-quality
originals. You can finish, render, and export your final product in high-quality. Editing the low-resolution clips allows
standard computers to edit excessively large assets, such as HDV or HD footage, without losing performance speed. It
also lets editors use laptop computers to edit—for example, while on location.
You may edit a project entirely online. On the other hand, you may edit in a two-phase workflow: making your initial
creative decisions offline, then switching to online for finishing tasks like fine-tuning, grading, and color correction.
You can complete an offline edit of, for example, an HD project with Premiere Pro and then export your project to
EDL for transfer to an editing system with more powerful hardware. You can then perform the final online edit and
rendering, at full HD resolution, on that system.
Last updated 11/6/2011
Page 82

USING ADOBE PREMIERE PRO CS4
Capturing, digitizing, transferring, and importing
Recapture clips
You can recapture clips in an existing project using batch capturing. Clips can be recaptured only if they have been
unlinked from their source files, becoming offline clips; if they have names in their Tape Name fields; and if their
source medium contains timecode.
1 If you want to override the capture settings for any clip that you intend to recapture, set the clip’s Capture settings.
2 In the Project panel, select all the clips you want to recapture. If you want to select clips in different bins, use List
view, which lets you view multiple bins.
3 Choose Project > Make Offline. The selected clips are dissociated from their current source files.
4 In the Make Offline dialog box, specify whether the source media files are to remain on disk or be deleted.
5 With the offline clips still selected, choose File > Batch Capture. Adjust the settings as necessary.
6 Verify that the deck and source videotape are set up properly for capture, and then click OK.
7 After recapturing is complete, save the project.
Timecode
76
About timecode
Many camcorders and high-end video decks record timecode, which marks specific frames with unique addresses.
Timecode is important whenever you want to capture exactly the same frames that were identified or captured
previously, as in the following tasks:
• You want to log clips before you capture them.
• You plan to capture clips using batch (automated) capture.
• You want to recapture clips because the original files became corrupted or were deleted.
• You plan to export sequences to another system by using EDL.
• You’re using a system in which you edit quickly with low-resolution captures, and later recapture the clips at full
resolution and quality for the final version.
• You plan to synchronize captured video with audio recorded separately.
Unlike the numbers on time counters found in home VCRs, timecode is recorded onto videotape as part of the video
signal. If footage lacks timecode, you can add it by copying it with a camera or deck that writes timecode. You can then
log or capture the video from that device.
For best results, timecode should run continuously from the beginning to the end of the tape; it shouldn’t restart from
zero anywhere in the middle. In editing, if you log a capture In point such as 00:00:01:09 but that number occurs on
the tape two or three times because of timecode restarts, Premiere Pro can’t be certain which 00:00:01:09 is the place
to start its capture. It can easily capture the wrong clips from tapes with discontinuous timecode.
To ensure unbroken timecode, you need to either shoot it continuously or stripe your tape with it before shooting.
To ensure that you always shoot continuous timecode, record at least 5 seconds of extra video past the end of the action
in any shot. If you review a clip in the camera, be sure to rewind the tape back into that 5-second margin before
recording again. Your camcorder reads the timecode from the frame on which you stop and begins recording timecode
with the very next frame number when you start your next shot. Be careful; if you leave a gap between the last frame of
the previous shot and the first frame of the next, the camcorder begins writing timecode at 00:00:00:00 again.
Last updated 11/6/2011
Page 83

USING ADOBE PREMIERE PRO CS4
Capturing, digitizing, transferring, and importing
For more information about timecode, see the video tutorial, lynda.com Digital Video Principles - Timecode.
More Help topics
lynda.com Digital Video Principles - Timecode
Choose timecode display format
By default, Premiere Pro displays the timecode for any clip that was originally written to the source medium. If a frame
has timecode 00:00:10:00 on tape, the timecode displayed for it after it has been captured is 00:00:10:00. Source
timecode often makes logging clips easy. Source timecode is shown for a clip regardless of the timebase of the
sequences in which it is used. When the timebase of the clip differs from the timebase of the sequence, source timecode
can make logging footage easier. For example, a clip shot in 24p has a timebase of 30 fps and 30 fps timecode. Premiere
Pro shows the original 30 fps timecode for that clip, even though it is used in a sequence with a timebase of 23.976.
However, you can change this default to instead show the timecode for every clip starting at 00:00:00:00.
Also, you can determine how Premiere Pro displays the frame count when a Frames or Feet And Frames display is
chosen for a panel. You can make the frame count for every clip start at 0 or at 1, or you can have it converted from
the source timecode. If a frame in a 30 fps clip has a source timecode of 00:00:10:00 the Timecode Conversion option
gives this frame number 300. Premiere Pro converts 10 seconds at the 30 fps frame rate to 300 frames.
1 Select Edit > Preferences > Media (Windows) or Premiere Pro > Preferences > Media (Mac OS).
2 In the Timecode menu, choose one of the following:
Use Media Source Shows the timecode recorded to the source.
77
Start At 00:00:00:00 Starts timecode shown for every clip at 00:00:00:00.
3 In the Frame Count menu, choose one of the following:
Start At 0 Numbers every frame sequentially, with the first frame numbered 0.
Start At 1 Numbers every frame sequentially, with the first frame numbered 1.
Timecode Conversion Generates frame number equivalents of the source timecode numbers.
4 Click OK.
More Help topics
“Display 24p source timecode” on page 143
Change how timecode is displayed
You can change the timecode display format in any panel where timecode is shown in hot text.
1 (Optional) To display timecode in audio units (Audio Samples or Milliseconds), click the panel menu button
in the panel desired, and select Show Audio Time Units.
2
Ctrl-click (Windows) or Command-click (Mac OS) a hot text timecode display to toggle through any of these timecode
formats that are available. The last two are available only if you select Show Audio Time Units in the panel menu.
• Drop-frame timecode
• Non-drop-frame timecode
• Frames
• Feet+Frames 16 mm
Last updated 11/6/2011
Page 84

USING ADOBE PREMIERE PRO CS4
Capturing, digitizing, transferring, and importing
• Feet+Frames 35 mm
• Audio Samples
• Milliseconds
The timecode display format for the Program Monitor (including the instance in the Trim Monitor) and Timeline
panels always match one another. Changing the display format in one of these panels changes it in the other.
Stripe tape or replace timecode
You can ensure continuous timecode by recording timecode onto the tape before you use it. This process is called
striping the tape. Striping is not necessary if you follow recommended shooting practices, but it can protect you from
accidentally breaking timecode by miscuing a tape in your camera.
Stripe a tape with timecode
1 Place an unused tape in the camera. It should have no timecode.
2 If you’re using a camera for striping, attach the lens cap and disable audio recording.
3 Ensure that all camera settings (particularly the audio sample rate) are exactly the same as the settings you will use
when you shoot. Use all these same settings whenever shooting on that tape.
4 Begin recording. Let the camera or deck run until the entire tape has been recorded.
5 Before you record video on a striped tape, play about 30 seconds of it from the beginning. Verify that the camcorder
is reading the timecode you striped before you start shooting. The 30-second empty lead on the tape also helps in
batch capturing.
Check your camera’s settings whenever changing tapes, especially when reinserting a tape you had begun shooting
previously. Though you may want to use different settings for different tapes, it’s best to use the same settings from
beginning to end of each tape. These should match the settings used when first striping that tape.
78
Replace DV timecode
If your source footage is in DV format and its timecode isn’t continuous, you can replace its timecode by making a DV
copy, or dub, of the tape. The DV device making the copy records new timecode that is continuous, so you can then
log and capture video, with the new timecode, from the copy.
Note: This technique does not work when dubbing to the DVCAM format or using a Panasonic AG-DV2500 as the record deck.
1 Load the tape you shot into a camcorder or deck, and fully rewind it.
2 Load a new tape into a second camcorder or deck, which you will use to record the copy.
3 If the recording device includes an option to record video with the timecode from your original tape, be sure that
this option is disabled. See the operating instructions for the device for information on this option.
4 If the recording device is digital, connect it to the DV source device using a digital cable, such as IEEE 1394 or SDI.
This will make a full-quality copy.
5 Connect the recording device to a television monitor.
6 Set both devices to VTR mode.
7 Make sure that the recording device is set to record from the digital port.
8 Begin recording the new tape and then start your original tape playing. Let the camcorders or decks run until the
entire original tape has been copied.
Last updated 11/6/2011
Page 85

USING ADOBE PREMIERE PRO CS4
Capturing, digitizing, transferring, and importing
Note: Scene Detect recognizes the starting and stopping points for each shot by looking for jumps in the timestamps.
Because copying a tape this way creates a single clip with a continuous timestamp, you can’t use Scene Detect when you
capture the copy in Premiere Pro.
Capturing timecode
The timecode of source video is captured when you use device control. Timecode capture with controllable analog
devices depends on the precision of your tape deck. If your tape deck cannot read the timecode accurately, you may
have to calibrate your system or manually assign the timecode to your movie by matching frames.
Note: Timecode is visible in the tape counter only on equipment that can recognize timecode, unless the timecode has been
burned in or recorded over the picture in a copy of the tape. Most analog home VCRs cannot read or write timecode.
Set timecode manually for a clip
You can change the timecode from that recorded by Premiere Pro. For example, you captured footage from a DV copy
of a Hi8 tape originally recorded with RCTC (Rewritable Consumer Time Code). The DV copy, and the video files on
your computer copied from it, carry the DV timecode, not the original RCTC. For convenience in referencing shot
logs made for the original Hi8 tape, you want to reset the timecode to the original RCTC numbers.
1 Select the clip in the Project panel.
2 Choose File > Timecode, specify options as needed, and click OK.
79
Enter timecode
As you capture and edit video, you enter timecode values many times. For example, you enter timecode values to set
In and Out points for clips and to navigate a Timeline panel. Premiere Pro provides many ways to enter timecode.
In Premiere Pro, the duration between the In and Out points includes the frames indicated by the timecode. For
example, if you enter the same timecode for the In and Out points of a clip, the duration of the clip is one frame. When
entering timecode, you can substitute periods for colons or type numbers without punctuation. Premiere Pro
interprets the numbers you type as hours, minutes, seconds, and frames.
• To set a specific timecode, select the timecode, type a new timecode, and then press Enter/Return.
• To adjust the current timecode by dragging, drag the timecode horizontally. For example, to set an earlier timecode,
drag to the left.
• To adjust the current timecode by using a relative value, type the plus sign (+) or minus sign (–) and the number
of frames to add or subtract. For example, to subtract five frames from the current timecode, select the entire
timecode, type –5, and then press Enter/Return.
View timecode as a burn-in
You can display clip timecode within the video preview of the clip by applying the Timecode effect to that clip. You
can display timecode within the video preview of any part of a sequence by applying the Timecode effect to a
transparent video clip. then trim the transparent video clip for the period when you want the timecode visible.
Onscreen timecode is commonly referred to as burn-in timecode. It is used in rough edits and proofs to give frameaccurate reference points to editors and their collaborators.
More Help topics
“Timecode effect” on page 397
Last updated 11/6/2011
Page 86

USING ADOBE PREMIERE PRO CS4
Capturing, digitizing, transferring, and importing
View clip timecode as a burn-in
1 In the Effects panel, click the triangle next to the Video Effects bin to open it. Then, click the triangle next to the
Video bin to open it.
2 Drag the Timecode effect and drop it onto a clip in a sequence.
3 Click the Effect Controls panel to make the panel active.
4 Click the triangle next to Timecode to expose the options for this effect.
5 Adjust the options as needed.
View sequence timecode as a burn-in
1 At the bottom of the Project panel, click the New Item icon . Select Transparent Video.
2 Drag the transparent video clip to an empty track in the sequence higher than all other video tracks.
3 In the Effects panel, click the triangle next to the Video Effects bin to open it. Then, click the triangle next to the
Video bin to open it.
4 Drag the Timecode effect and drop it onto the transparent video clip.
5 Click the Effect Controls panel to make the panel active.
6 Click the triangle next to Timecode to expose the options for this effect.
7 Adjust the options as needed.
80
Transferring and Importing files
About transferring files
Transferring projects from other computers
When transferring project files, such as After Effects project files, Premiere Pro project files, or Final Cut Pro project
files from another computer to the computer on which you will import those project files into Premiere Pro, make sure
you transfer all the assets associated with the project files. Keep the project files, and their associated assets, on the
destination computer in folders that have names and folder structures identical with those on the computer of their
origin.
Transferring assets from file-based media
It is possible to edit assets residing on file-based media, such as P2 cards, XDCAM cartridges, SxS cards, or DVDs.
However, Premiere Pro performs faster if you first transfer the assets to a local hard disk. Using Windows File Explorer
(Windows) or Finder (Mac OS), transfer files from file-based acquisition media. Then, import the files on the hard
disk into Premiere Pro projects.
When transferring files to hard disk from file-based media, transfer the folder containing all related files and all of its
subfolders. Keep the folder structure intact. For example, when transferring files from AVCHD file-based media,
transfer the BDMV folder and all its contents. When transferring files from DVCPRO HD media, transfer the
CONTENTS folder and all its contents. When transferring files from XDCAM EX media, transfer the BPAV folder
and all its contents. When transferring files from DVD, transfer all the contents of the VIDEO_TS folder, and if it
exists, all the contents of the AUDIO_TS folder.
Transfer video files from file-based media into the same folder you specify for captured video with the project scratch
disk settings.
Last updated 11/6/2011
Page 87

USING ADOBE PREMIERE PRO CS4
Capturing, digitizing, transferring, and importing
The folder structure for AVCHD assets
The folder structure for DVCPRO HD assets
81
The folder structure for XDCAM EX assets
The folder structure for DVD-video assets
More Help topics
“Specify scratch disks to improve system performance” on page 45
“Import files with the Media Browser” on page 85
About importing files
For a video overview of the ways to import assets into Premiere Pro, see the Adobe website.
Last updated 11/6/2011
Page 88

USING ADOBE PREMIERE PRO CS4
Capturing, digitizing, transferring, and importing
Importing is different from capturing. The Import command brings files that are already on your hard disk or other
connected storage device into your project. Importing files makes them available to a Premiere Pro project. Premiere
Pro lets you import numerous types of video, still images, and audio. Finally, you can export a Premiere Pro project
from After Effects, and import it into Premiere Pro.
You can import video, audio, and still files in various file formats into a Premiere Pro project. You can import a single
file, multiple files, or an entire folder. Frame sizes cannot exceed 16 megapixels.
If the software you use to create art doesn’t let you specify pixels as a unit of measure, try specifying points.
In Premiere Pro, you can import files by using the Media Browser or the Import command. You can also place files
into Premiere Pro from Adobe Bridge.
Premiere Pro indexes certain types of files and transcodes others after importing them. You cannot edit these types
fully until these processes are completed. The filename of a clip appears in the Project panel in italics until it has been
fully indexed or transcoded.
To import files that Premiere Pro doesn’t support natively, install the appropriate capture card or third-party plug-in
software. For more information, check the manual that came with the installed card or plug-in.
You can also import files and folders by dragging them from Windows Explorer (Windows) or Finder (Mac OS) into
the Project panel.
82
More Help topics
“Import files with the Media Browser” on page 85
“Import files with the Import commands” on page 86
“Import files using Adobe Bridge” on page 86
“Capturing and digitizing” on page 56
Channel support
Premiere Pro supports four-channel assets. Every processed pixel in the render pipeline uses four channels. When
Premiere Pro processes a three-channel asset, such as DV, HDV, or MPEG footage, Premiere Pro automatically
converts it to a four-channel asset. Premiere Pro converts a three-channel asset when you add an effect or transition
to the asset.
Premiere Pro supports 10-bit color depth, sometimes useful for editing standard and high-definition footage.
File formats supported for import
Premiere Pro can import many video and audio formats. Plug-in software modules provide file format support. Most
of these software modules are installed automatically with Premiere Pro.
Some filename extensions—such as MOV, AVI, MXF, FLV, and F4V—denote container file formats rather than
denoting a specific audio, video, or image data format. Container files can contain data encoded using various
compression and encoding schemes. Premiere Pro can import these container files, but the ability to import the data
that they contain is dependent on the codecs (specifically, decoders) installed.
By installing additional codecs, you can extend the ability of Premiere Pro to import additional file types. Many codecs
must be installed into the operating system (Windows or Mac OS) and work as a component inside the QuickTime or
Video for Windows formats. Contact the manufacturer of your hardware or software for more information about
codecs that work with the files that your specific devices or applications create.
Last updated 11/6/2011
Page 89

USING ADOBE PREMIERE PRO CS4
Capturing, digitizing, transferring, and importing
Premiere Pro can import files in the formats listed, provided the codec used to generate a specific file is installed locally.
For example, to play and edit an AVI file encoded with the DivX encoder, the DivX codec must be installed.
Note: The free trial version of Premiere Pro does not include some features that depend upon software licensed from
parties other than Adobe. For example, some codecs for encoding MPEG formats are available only with the full version
of Premiere Pro software.
Supported video and animation file formats
• 3GP, 3G2 (QuickTime movie)
• AVC-I, AVC-Intra,H.264 Intra (Advanced Video Coding Intra)
• ASF (Netshow, Windows only)
• AVI (DV-AVI, Microsoft AVI Type 1 and Type 2)
• DLX (Sony VDU File Format Importer, Windows only)
• DV (DV Stream, a QuickTime format)
• FLV/F4V
• GIF (Animated GIF)
• M1V (MPEG-1 Video File)
• M2T (Sony HDV)
• M2TS (Blu-ray BDAV MPEG-2 Transport Stream, AVCHD)
• M4V (MPEG-4 Video File)
• MOV (QuickTime Movie; in Windows, requires QuickTime player)
• MP4 (QuickTime Movie, XDCAM EX)
• MPEG, MPE, MPG (MPEG-1, MPEG-2), M2V (DVD-compliant MPEG-2)
• MTS (AVCHD)
• MXF (Media eXchange Format; P2 Movie: Panasonic Op-Atom variant of MXF, with video in DV, DVCPRO,
DVCPRO 50, DVCPRO HD, or AVC-I formats; XDCAM HD Movie, Avid MXF Movie)
• SWF (Shockwave Flash object)
• VOB (Video Object, MPEG Movie)
• WMV (Windows Media Video, Windows only)
Note: Type 1 AVI clips must be rendered before they can be previewed from a DV device. To render a Type 1 AVI clip,
add it to a sequence in a DV project, and preview it.
83
Supported audio file formats
• AAC (MPEG-2 Advanced Audio Coding File)
• AC3 (including 5.1 surround)
• AIFF, AIF (Audio Interchange File Format)
• ASND (Adobe Sound Document)
• AVI (Audio Video Interleaved)
• M4A
• MP3 (MP3 Audio)
Last updated 11/6/2011
Page 90

USING ADOBE PREMIERE PRO CS4
Capturing, digitizing, transferring, and importing
• MPEG, MPG (MPEG Movie)
• MOV (QuickTime; in Windows, requires QuickTime player)
• MXF (Media eXchange Format; P2 Movie: Panasonic Op-Atom variant of MXF, with video in DV, DVCPRO,
DVCPRO 50, DVCPRO HD, or AVC-I formats; XDCAM HD Movie, Avid MXF Movie)
• WMA (Windows Media Audio, Windows only)
• WAV (Windows WAVeform)
Supported still-image and sequence file formats
Premiere Pro supports 8-bit per-channel (4 bytes per pixel) and 16-bit per-channel (8 bytes per pixel) still-image files.
It converts images with lower bit-depths to 8-bits per channel and images with higher bit-depths to 16-bits per channel
on import. High bit-depth files are supported at one single-precision float per channel (16-bytes per pixel).
• AI, EPS (Adobe Illustrator and Illustrator sequence)
• BMP, DIB, RLE (Bitmap and Bitmap sequence)
• EPS
• GIF
• ICO (Icon File) (Windows only)
• JPEG and JPEG sequence (JPE, JPG, JFIF)
• PICT and PICT sequence (PIC, PCT)
• PNG (Portable Network Graphics)
• PSD (Adobe Photoshop and Photoshop sequence)
• PSQ (Adobe Premiere 6 Storyboard)
• PTL, PRTL (Adobe Premiere title)
• TGA, ICB, VDA, VST (Targa and Targa sequence)
• TIF (TIFF and TIFF sequence)
Note: You can import layered Illustrator and Photoshop files as sequences.
84
Supported video project file formats
• AAF (Advanced Authoring Format)
• AEP, AEPX (After Effects Project)
• CSV, PBL, TXT, TAB (Batch lists)
• EDL (CMX3600 EDLs)
• PLB (Adobe Premiere 6.x Bin) (Windows only)
• PPJ (Adobe Premiere 6.x Project) (Windows only)
• PREL (Adobe Premiere Elements)
• PRPROJ (Premiere Pro)
• PSQ (Adobe Premiere 6.x Storyboard) (Windows only)
• XML (Final Cut Pro XML)
Last updated 11/6/2011
Page 91

USING ADOBE PREMIERE PRO CS4
Capturing, digitizing, transferring, and importing
More Help topics
“Import files with the Media Browser” on page 85
“Import files with the Import commands” on page 86
“Import files using Adobe Bridge” on page 86
“Capturing and digitizing” on page 56
“Selecting a sequence preset” on page 133
“Export Settings Format options” on page 437
Third-party hardware support
Scale clip to sequence frame size
Premiere Pro can automatically scale clips you add to a sequence to the frame size set for that sequence.
1 Choose Edit >Preferences > General (Windows), or Premiere Pro > Preferences > General (Mac OS)
2 Check Default Scale To Frame Size.
3 Click OK.
85
Import files with the Media Browser
The Media Browser makes it easy to browse to files, and to find them by their type. Unlike the Import dialog box, the
Media Browser can be left open, and docked, like any other panel. The Media Browser gives you quick access to all
your assets while you edit. Also, you can use the Media Browser to import clips copied from video storage media such
as P2 cards, SxS cards, XDCAM disks, and DVDs. When you import an asset Premiere Pro leaves it in its current
location, and creates a clip in the Project panel that points to it. By default, Premiere Pro writes XMP files to the
directory where the media files are located, but you can turn off this behavior in Preferences. For best performance,
first transfer files from their file-based media to a local hard disk. Then, import them into Premiere Pro projects from
the hard disk.
B CA
The Media Browser panel
A Recent Directories menu B Files Of Type menu C. View As menu
1 Select Window > Media Browser.
2 To browse to the desired files, do one of the following:
• To open a folder recently opened, click the triangle in the Recent Directories menu, and select the folder.
Last updated 11/6/2011
Page 92

USING ADOBE PREMIERE PRO CS4
Capturing, digitizing, transferring, and importing
• In the list of hard drives and folders in the Media Browser, click the triangles next to folder names to open them.
3 To view only files of certain types, click the triangle in the Files Of Type menu, and select a file type. To select an
additional type, open the menu again and make another selection. Repeat until all desired types have been selected.
4 Select one or more files from the list of files. To select more than one non-contiguous file, Ctrl-click (Windows) or
Command-click (Mac OS) the filenames. To select more than one contiguous file, Shift-click the filenames.
5 Do one of the following:
• Select File > Import From Browser, or right-click the file in the Media Browser and select Import. Alternatively, you
can drag the file from the Media Browser into the Project panel, or drag the file from the Media Browser into a
Timeline.
The Media Browser imports the file into the Project panel.
• Right-click the file in the Media Browser and select Open In Source Monitor. Alternatively, double-click the file in
the Media Browser to open it in the Source Monitor.
The Media Browser opens the file in the Source Monitor.
Import files with the Import commands
Note: While you can import clips directly from file-based media connected to your computer, it is best to first transfer
clips from these media to a hard disk. Then, import them from the hard disk. For more information about transferring
files, see
“About transferring files” on page 80
86
• Choose File > Import. You can select multiple files.
• To import a recently imported file, choose File > Import Recent File > [file name]. (The file name doesn’t appear if
Premiere Pro preferences have been reset.)
• To import a folder of files, choose File > Import. Locate and select the folder, and then click Import Folder. The
folder, with its contents, is added as a new bin in the Project panel.
• To import a numbered still-image sequence as a clip, choose File > Import. Select the first file in the series. Check
Numbered Stills in the Import dialog box, and click Import.
More Help topics
“Import files using Adobe Bridge” on page 86
Import files using Adobe Bridge
You can import files into Premiere Pro from Adobe Bridge.
Start Adobe Bridge from Adobe Premiere Pro
For a video on using Adobe Bridge, see www.adobe.com/go/vid0090.
❖ Do one of the following:
• Choose File > Browse In Bridge.
• Select a file in the Project panel, then choose File > Reveal in Bridge.
Import files from Adobe Bridge
1 Start Adobe Bridge from Premiere Pro.
2 In Adobe Bridge, double-click the clip.
Last updated 11/6/2011
Page 93

USING ADOBE PREMIERE PRO CS4
Capturing, digitizing, transferring, and importing
Premiere Pro imports the clip into the Project panel.
You can also drag clips from the Adobe Bridge Content panel directly into the Premiere Pro Project panel.
Move or clean the Media Cache Database
When Premiere Pro imports video and audio in some formats, it processes and caches versions of these items that it
can readily access when generating previews. The media cache greatly improves performance for previews, because the
video and audio items do not need to be reprocessed for each preview.
Note: When you first import a file, you may experience a slight delay while the media are being processed and cached.
A media cache database retains links to each of the conformed audio files, PEK files, and index files used in Premiere
Pro projects. By default, Premiere Pro installs the media cache database in the folder where the application itself is
installed. However, you can move the media cache database to any location of your choosing. Also, you can clean the
database of all of the support files that are not in use.
Premiere Pro shares the media cache database with After Effects, Adobe Encore, and Adobe Soundbooth, so each of
these applications can each read from and write to the same set of cached media files. If you change the location of the
database from within any of these applications, the location is updated for the other applications, too. Each application
can use its own cache folder, but the same database keeps track of them all.
87
Move the Media Cache Database
1 Select Edit >Preferences > Media (Windows), or Premiere Pro > Preferences > Media (Mac OS).
2 Click Browse, browse to a new destination folder, and click OK.
3 To close the Preferences dialog box, click OK again.
Clean the Media Cache Database
Cleaning the media cache database removes only files associated with footage items for which the source file is no
longer available.
Important: Before cleaning the media cache database, make sure that any storage devices containing your active source
media are connected to your computer. If footage is determined to be missing because the storage device on which it is
located is not connected, the associated files in the media cache will be removed. This removal results in the need to
reconform or re-index the footage when you attempt to use the footage later.
1 Select Edit >Preferences > Media (Windows), or Premiere Pro > Preferences > Media (Mac OS).
2 Click Clean.
3 Click OK.
4 To close the Preferences dialog box, click OK again.
Note: Cleaning the Media Cache Database with the Clean button does not remove files that are associated with clips. To
manually remove conformed files and index files, navigate to the media cache folder and delete the files. The location of
the media cache folder is shown in the Media view of the Preferences dialog box. If the path is truncated, let your cursor
hover over the path to show the full path.
Scale clip to sequence frame size
Premiere Pro can automatically scale clips you add to a sequence to the frame size set for that sequence.
1 Choose Edit >Preferences > General (Windows), or Premiere Pro > Preferences > General (Mac OS)
Last updated 11/6/2011
Page 94

USING ADOBE PREMIERE PRO CS4
Capturing, digitizing, transferring, and importing
2 Check Default Scale To Frame Size.
3 Click OK.
Importing assets from tapeless formats
File-based camcorders from various manufacturers record video and audio into files of specific formats organized
within specific directory structures. These formats include Panasonic P2 camcorders, Sony XDCAM HD and XDCAM
EX camcorders, Sony CF-based HDV camcorders, and AVCHD camcorders.
Camcorders recording in any of these formats typically record to hard disks, optical media, or flash memory media,
not to videotape. These camcorders and formats are therefore called file-based, or tapeless, rather than tape-based.
The video and audio from a file-based camcorder are already contained in digital files. No capture or digitizing step is
necessary to bring them into Premiere Pro. Reading the data from the recording media and converting it to a format
that can be used in a project is instead called ingest. Premiere Pro ingests files in any of these file-based formats from
any of their media.
XDCAM and AVCHD formats
You can find the video files from XDCAM HD camcorders in the CLIP folder, written in the MXF format. XDCAM
EX camcorders write MP4 files into a folder named BPAV. For more information on the XDCAM format, see
“XDCAM: Codec technology for XDCAM tapeless products and systems, by Hugo Gaggioni,” at
pro.sony.com/bbsccms/assets/files/micro/xdcam/solutions/XDCAM_WhitePaper_F.pdf
88
AVCHD video files can be found in the STREAM folder. For more information about the AVCHD format, see
“AVCHD format specification overview,” at
The Panasonic P2 format
A P2 card is a solid-state memory device that plugs into the PCMCIA slot of a Panasonic P2 video camera, such as the
AG-HVX200. The digital video and audio data from the video camera is recorded onto the card in a structured, codecindependent format known as MXF (Media eXchange Format). Specifically, Premiere Pro supports the Panasonic OpAtom variant of MXF, with video in DV, DVCPRO, DVCPRO 50, DVCPRO HD, or AVC-I formats. A clip is in the
P2 format if its audio and video are contained in Panasonic Op-Atom MXF files. These files are located in a specific
file structure.
The root of the P2 file structure is a CONTENTS folder. Each essence item (an item of video or audio) is contained in
a separate MXF wrapper file. The video MXF files are in the VIDEO subfolder, and the audio MXF files are in the
AUDIO subfolder. XML files in the CLIP subfolder contain the associations between essence files and the metadata
associated with them.
Note: Premiere Pro does not support proxies recorded by some Panasonic P2 camcorders in P2 card PROXY folders.
For your computer to read P2 cards, it needs the appropriate driver, which you can download from the Panasonic website.
Panasonic also provides the P2 Viewer application, with which you can browse and play media stored on a P2 card.
Note: To use certain features with P2 files, you first change the file properties from read only to read and write. For
example, to change the timecode metadata of a clip using the Timecode dialog box, you first set the file properties to read
and write. Use the operating system file explorer to change file properties.
www.avchd-info.org/format/index.html
Last updated 11/6/2011
Page 95

USING ADOBE PREMIERE PRO CS4
Capturing, digitizing, transferring, and importing
Avid capture format
Avid editing systems capture footage to MXF files, generally into a folder called Avid Media files, with audio captured
into discreet files separate from the video files. When you import Avid video files, Premiere Pro automatically imports
their associated audio files. However, it is simpler to import Avid project files, in AAF format, than to identify and
import individual Avid MXF video files.
DVD format
DVD camcorders and DVD recorders capture video and audio into MPEG-encoded VOB files. VOB files are written
into a VIDEO_TS folder. Optionally, ancillary audio files may be written into an AUDIO_TS folder.
Note: Premiere Pro, and Premiere Elements, do not import or decrypt encrypted DVD files.
More Help topics
Importing tapeless assets in Media Browser
pro.sony.com/bbsccms/assets/files/micro/xdcam/solutions/XDCAM_WhitePaper_F.pdf
www.avchd-info.org/format/index.html
www.mog-solutions.com/img_upload/PDF/MOG_SOLUTIONS_operational_patterns_NAB2007.pdf
89
Import assets from file-based sources with Media Browser
You can import assets into Premiere Pro directly from tapeless media. However, it is more efficient to transfer tapeless
media contents to a hard disk before importing. Also, playback performance is much better from a dedicated internal
hard drive or RAID than from a camera or memory card reader.
Use the Media Browser, instead of File > Import, to import files from tapeless sources. The Media Browser assembles
the relevant files into coherent clips, and does not import irrelevant non-media files sometimes found in the folders of
tapeless media.
1 (Optional) Transfer the entire contents of one or more P2 cards, Sony Compact Flash cards, XDCAM media,
XDCAM EX SxS cards, hard disk camcorders, DVDs, or AVCHD media to a hard disk. For information about
transferring these media, see
Note: For XDCAM EX, copy the entire BPAV folder and its contents, not just one MP4 file at a time.
2 If the Media Browser is not already open, select Window > Media Browser.
Note: You can dock or group the Media Browser like any other panel in Premiere Pro.
3 Browse to the folder containing the media files.
The Media Browser shows a thumbnail or icon (depending on the format) and shot name for each shot in the folder.
The Media Browser automatically aggregates spanned clips and shot metadata from the subfolders into single clips for
any of these formats. The Media Browser shows different sets of metadata for different formats.
4 (Optional) To preview a shot before importing it, double-click the shot in the Media Browser.
Premiere Pro plays the clip in the Source Monitor without importing it into the Project panel.
“About transferring files” on page 80.
5 Either select File > Import From Browser, drag clips from the Media Browser into the Project panel, or drag clips
from the Media Browser into a timeline.
The asset or assets are imported into the Project panel as whole clips.
Last updated 11/6/2011
Page 96

USING ADOBE PREMIERE PRO CS4
Capturing, digitizing, transferring, and importing
More Help topics
“Start an HDV or HD sequence” on page 139
“Map audio channels” on page 201
“Export to Panasonic P2 format” on page 448
About spanned clips
When a shot or take is recorded requiring more than the file size limit of a medium, a file-based camcorder starts
another file, and continues recording the shot to that file without interruption. This is referred to as clip spanning
because the shot spans more than one file or clip. Similarly, a file-based camcorder sometimes spans a shot across clips
on different cards or disks, if the camcorder has more than one card or disk loaded. It records the shot until it runs out
of room on the first medium, then starts a new file on the next medium with available space, and continues recording
the shot to it. Although a single shot or take can be recorded to a group of multiple spanned clips, it is designed to be
treated as a single clip.
For P2 and XDCAM EX, Premiere Pro imports all of the spanned clips within a single shot or take as a single clip. It
will import all the clips within a shot on a card when you select any one of them, provided none of the spanned clips
is missing and the relevant XML is present. When one or more spanned clips are missing from a shot, Premiere Pro
will import one or more of them depending on where the missing clips fall within the shot.
90
To import a group of spanned clips, select one of them to import all of them. If you select more than one spanned clip,
you will import duplicates of the whole group of spanned clips as duplicate clips in the Project panel.
If the group of spanned clips itself spans two P2 or XDCAM EX cards, copy the full directory trees from them both to
same-level folders on the hard disk before importing. For P2 media only, you can alternatively import clips spanning
two P2 cards if both cards are simultaneously mounted to your computer.
Importing still images
You can import still images with frame sizes up to 4096 x 4096 pixels, individually or in groups. The size and aspect
ratio of imported still images are affected by the same factors that affect other imported assets, for example, whether
they use square pixels. Premiere Pro supports 4-channel assets at 16-bits per channel as well as 8-bits per channel files.
You can import individual still images into Premiere Pro or import a numbered sequence of still images as a sequence.
You can import still images from Adobe applications such as Photoshop and Illustrator. For information about the
still-image formats that Premiere Pro imports, see
An imported still image uses the duration specified in the Still Image preferences. You can change the duration of a
still image in a sequence.
More Help topics
“Change speed and duration for one or more clips” on page 289
“About aspect ratios” on page 51
“File formats supported for import” on page 82.
Last updated 11/6/2011
Page 97

USING ADOBE PREMIERE PRO CS4
Capturing, digitizing, transferring, and importing
Preparing still images before importing
Before you import a still image into Premiere Pro, prepare it as completely as possible to reduce rendering time. It’s
usually easier and faster to prepare a file in its original application. Consider doing the following:
• Make sure that the file format is supported by the operating system you plan to use.
• Set the pixel dimensions to the resolution you will use in Premiere Pro. If you plan to scale the image over time, set
image dimensions that provide enough detail at the largest size the image has in the project.
• For best results, create files with a frame size at least as large as the frame size of the project so that you don’t have
to scale up the image in Premiere Pro. Scaling an image larger than its original size can cause loss of sharpness. If
you plan to scale up an image, prepare it at a larger frame size than the project’s. For example, if you plan to scale
up an image 200%, prepare the image at double the project frame size before you import it.
• Crop the parts of the image that you don’t want to be visible in Premiere Pro.
• If you want to designate areas as transparent, create an alpha channel or use the transparency tools in applications
such as Photoshop or Illustrator.
• If final output will be shown on standard television screens, avoid using thin horizontal lines (such as 1-pixel lines)
for images or text. These may flicker as a result of interlacing. If you must use thin lines, add a slight blur so that
the lines appear in both video fields. See
page 287.
• Save the file using the correct naming convention. For example, if you plan to import the file into Premiere Pro in
Windows, use a three-character filename extension.
• When you prepare still images in applications that support color management, such as Photoshop, colors may
appear more consistent between the application and Premiere Pro if you prepare images in a video-friendly color
space, such as sRGB or NTSC RGB.
“Interlaced video, noninterlaced video, and progressive scanning” on
91
Preparing 3D images or animations for import
When creating 3D images or animations for use in Premiere Pro, follow these guidelines whenever possible:
• Use broadcast-safe color filtering.
• Use the pixel aspect ratio and frame size specified in the sequence settings in Premiere Pro.
• Use the appropriate field settings to match your project.
• If you’re generating the sequence in After Effects, select Include, and choose either Project Link, or Project Link &
Source XMP Metadata, so that you can open the sequence in After Effects after importing it into Premiere Pro.
Importing Photoshop and Illustrator files
You can import files from Adobe Photoshop 3.0 or later, or from Adobe Illustrator. You can control how layered files
are imported. Empty (transparent) areas of nonflattened files are transparent when imported into Premiere Pro,
because the transparency is stored as an alpha channel. This lets you import graphics and superimpose them over clips
in other tracks with no extra effort.
You can import layered Photoshop files either with selected layers imported as individual clips into a bin, with selected
layers imported as individual clips into a bin and sequence, or with selected layers merged into a single video clip.
Also, you can import Photoshop files that contain video or animations if they are saved from Photoshop in timeline
animation mode.
Note: Individual layers moved from a Photoshop composition into a Premiere Pro project may not behave as expected.
Last updated 11/6/2011
Page 98

USING ADOBE PREMIERE PRO CS4
Capturing, digitizing, transferring, and importing
More Help topics
“Working with Photoshop and Premiere Pro” on page 29
“Create and edit Photoshop files” on page 30
Import a layered Photoshop file
When you import a layered file saved in Photoshop file formats, you can choose how to import the layers in the Import
Layered File dialog box.
Note: Some Photoshop layer attributes aren’t supported, such as special blending modes and the Knockout option. For
best results, use basic transparency and opacity in Photoshop. Premiere Pro does support most Photoshop blending modes.
Premiere Pro imports attributes that were applied in the original file, including position, opacity, visibility,
transparency (alpha channel), layer masks, adjustment layers, common layer effects, layer clipping paths, vector
masks, and clipping groups. Photoshop exports a white background as opaque white, whereas it exports a
checkerboard background as a transparent alpha channel when exporting to a format that supports alpha channels.
Importing layered Photoshop files makes it easy to use graphics created in Photoshop. When Premiere Pro imports
Photoshop files as unmerged layers, each layer in the file becomes an individual clip in a bin. Each clip’s name consists
of the layer name followed by the name of the file that contained it. Each layer is imported with the default duration
you select for still images in Preferences.
92
You can import Photoshop files containing video or animations like any other Photoshop file. Since each layer is
imported at the default still-image duration, the imported video or animation may play back at a speed different from
that of its source in the Photoshop file. To make the speed match, change the still image default duration before
importing the Photoshop file. For example, if the Photoshop animation was created at 30 fps and the Premiere Pro
sequence frame rate is 30 fps, set the still image default duration in Premiere Pro to 30 frames in Preferences.
The options you select in the Import Layered File dialog box determine how the layers in the video or animation are
interpreted on import into Premiere Pro.
From the Import dialog box, when you select a Photoshop file containing layers for import, the Import Photoshop
Document dialog box opens. The Import As menu gives you these options for ways to import the file:
Merge All Layers Merges all layers, importing the file into Premiere Pro as a single flattened PSD clip.
Merged Layers Merges only the layers you select into Premiere Pro as a single, flattened, PSD clip.
Individual Layers Imports only the layers you select from the list into a bin containing one clip for each source layer.
Sequence Imports only the layers you select, each as a single clip. Premiere Pro also creates a sequence containing each
clip on a separate track, and deposits all these into their own bin in the Project panel. Choosing Sequence allows you
to select one of the following options from the Footage Dimensions menu:
• Document Size
Changes the frame size of the clips to match the frame size specified in the Sequence Settings dialog box.
• Layer Size Matches the frame size of the clips to the frame size of their source layers in the Photoshop file.
Note: When you import one layer as a single clip, its name in the Project panel consists of the layer name followed by the
original filename.
More Help topics
“Moving and scaling Photoshop layers separately” on page 414
Last updated 11/6/2011
Page 99

USING ADOBE PREMIERE PRO CS4
Capturing, digitizing, transferring, and importing
Importing Illustrator images
You can import an Adobe Illustrator still-image file directly into a Premiere Pro project. Premiere Pro converts pathbased Illustrator art into the pixel-based image format used by Premiere Pro, a process known as rasterization.
Premiere Pro automatically anti-aliases, or smooths, edges of the Illustrator art. Premiere Pro also converts all empty
areas into an alpha channel, so that empty areas become transparent.
If you want to define the dimensions of the Illustrator art when it is rasterized, use Illustrator to set crop marks in the
Illustrator file. For information about setting crop marks, see Illustrator Help.
For more information about importing Illustrator files, see the video tutorial, Premiere Pro CS3 Essential Training:
Importing Illustrator Files, on the
lynda.com Premiere Pro CS3 Essential Training - Importing Illustrator files.
More Help topics
lynda.com Premiere Pro CS3 Essential Training - Importing Illustrator Files
Importing numbered still-image sequences as one clip
You can import an animation contained in a single file, such as an animated GIF. You can also import a sequence of
numbered still-image files, such as a TIFF sequence, and automatically combine them into a single video clip; each
numbered file becomes one frame of video. Importing a sequence is useful for animations exported as a series of
numbered still images by applications like After Effects. The images in the series cannot include layers. For
information on layers and flattening, see the application’s documentation.
93
1 Make sure that each still-image filename contains an equal number of digits at the end and has the correct file
extension—for example, file000.bmp, file001.bmp, and so forth.
2 Choose File > Import.
3 Locate and select the first numbered file in the sequence, select Numbered Stills, and click Open. When Numbered
Stills is selected, Premiere Pro interprets each of the numbered files as a single frame in a video clip.
Note: Changing the default duration of still images in the Preferences dialog box does not affect the duration of numbered
stills imported into a video clip. Each still becomes one frame when imported in this way.
Importing digital audio
You can import digital audio clips stored as audio files or tracks in video files. Digital audio is stored on computer hard
disks, audio CDs, or digital audio tape (DAT) as binary data readable by computers. To keep quality as high as possible,
transfer digital audio files to your computer via digital connections. Avoid digitizing the analog outputs from your
audio sources through your sound card.
Note: To capture an audio-only file from a digital video source, choose Audio from the Capture menu in the Logging pane
of the Capture panel. Premiere Pro does not support audio-only capture for some formats, such as HDV.
Using audio from audio CDs
You can use CD audio (CDA) files in a project, but before you can import them into Premiere Pro, you need to convert
them to a supported file format, such as WAV or AIFF. You can convert CDA files using an audio application such as
Adobe® Audition®.
Note: Make sure that you own the copyrights or have licensed the copyrights to any audio tracks you use.
Last updated 11/6/2011
Page 100

USING ADOBE PREMIERE PRO CS4
Capturing, digitizing, transferring, and importing
Using compressed audio formats
Music stored in formats such as MP3 and WMA are compressed using a method that removes some of the original
audio quality. To play back compressed audio, Premiere Pro must decompress the file and may need to resample it to
match your output settings. Although Premiere Pro uses a high-quality resampler for this purpose, the best results
come from using an uncompressed or CD audio version of the audio clip whenever possible.
Using audio from Adobe Soundbooth
You can use Adobe® Soundbooth™ CS4 to perform advanced audio editing. If you export the audio from Adobe
Soundbooth to an audio file format compatible with Premiere Pro, you can import the audio into Premiere Pro
projects.
Audio sample rates supported
Premiere Pro natively supports these audio sample rates:
• 8000 Hz
• 11025 Hz
• 22050 Hz
• 32000 Hz
• 44100 Hz
• 48000 Hz
• 96000 Hz
94
Conforming audio
Premiere Pro processes each audio channel, including audio channels in video clips, as 32-bit floating-point data at the
sequence sample rate. This processing assures maximum editing performance and audio quality. Premiere Pro
conforms certain types of audio to match the 32-bit format and the sequence sample rate. If conforming is required, it
is done when a file is imported into a project for the first time. Conforming takes some time and disk space. A progress
bar appears at the lower right of the Premiere Pro window when conforming begins. Premiere Pro saves conformed
audio in CFA audio preview files. You can determine where to save these audio preview files by specifying a Scratch
Disk location for Audio Previews in the Project Settings dialog box.
You can work with audio files, even applying effects to them, before they are fully conformed. However, you can
preview only the parts of the files that have been conformed. You cannot hear unconformed sections on playback.
These rules determine which types of audio get conformed:
Uncompressed audio
• Premiere Pro does not conform audio in uncompressed clips that were recorded in one of the natively supported
sample rates, when you use these clips in sequences with matching sample rates.
• Premiere Pro does conform audio in uncompressed clips when you use them in sequences with non-matching
sample rates. However no conforming is done until you export the sequences or create audio preview files.
Last updated 11/6/2011
 Loading...