

Adam Equipment CBK 48, CBK 8a, CBK 16aH, CBK 8, CBK 35a User Manual
...
© Adam Equipment Company 2017
Adam Equipment
CBK & CBK-M SERIES
Adam Equipment strives to be more environmentally focused and uses recycled materials and
environmentally friendly packaging where possible. As part of this initiative we have developed a short form
manual that uses less paper and ink to describe the main functions of your new Adam scale. A complete
version is available at www.adamequipment.com. Thank you for your support of Adam Equipment and we
hope that you enjoy your new scale.

© Adam Equipment Company 2017

EN
© Adam Equipment Company 2017 1
1.0 CONTENTS
P.N. 3026610536, Revision A4, March 2017
2.0 OPERATION................................................................................................................ 2
2.1 SETTING UP AND TURN ON THE SCALE ........................................................ 2
2.2 ZEROING THE DISPLAY ...................................................................................... 2
2.3 TARING ................................................................................................................ 2
2.4 WEIGHING ............................................................................................................ 3
2.5 PARTS COUNTING .............................................................................................. 3
2.6 CHECK COUNTING .............................................................................................. 4
2.7 PERCENT WEIGHING .......................................................................................... 5
2.8 ACCUMULATED TOTALS .................................................................................... 6
3.0 RS-232 INTERFACE ................................................................................................ 7
4.0 PARAMETERS ......................................................................................................... 8
4.1 CHECK WEIGHING PARAMETERS..................................................................... 8
4.2 SCALE PARAMETERS ......................................................................................... 9
5.0 CALIBRATION ........................................................................................................ 10
5.1 CBK CALIBRATION ............................................................................................ 10
6.0 BATTERY ............................................................................................................... 10
7.0 SPECIFICATIONS .................................................................................................. 11
8.0 ERROR CODES ..................................................................................................... 14
9.0 SERVICE INFORMATION ...................................................................................... 15

EN
© Adam Equipment Company 2017 2
2.0 OPERATION
2.1 SETTING UP AND TURN ON THE SCALE
The CBK, CBK-M series of scales provides a range of accurate, fast and versatile weighing scales with
counting, percent weighing and check-weighing functions. For the first time, you should set up your scale as
follows:
Gently Place the platform in the locating holes on the top cover. Level the scale by adjusting the four feet.
The scale should be adjusted such that the bubble in the spirit level is in the centre of the level and the scale
is supported by all four feet.
Attach the power cable to the connector on the base on the left of the scale
Plug in the power cable to the mains. Switch on the power switch located on
the base on the right side of the scale.
The scale will first display the software revision then run a selftest. At the end of the self-test it will display zero weight when a
stable condition has been achieved. A stable symbol and zero
symbol indicators are also displayed.
2.2 ZEROING THE DISPLAY
You can press the [Zero] key at any time to set the zero point. When the zero point is obtained the display
will show the indicator for zero.
The scale has an automatic re-zeroing function to account for minor drifting or accumulation of material on
the platform. However you may need to press [Zero] to re-zero the scale if small amounts of weight are still
shown when the platform is empty.
2.3 TARING
Manual tare
Steps:
Zero the scale by pressing the [Zero] key if necessary. Place a container on the platform, a value for its
weight will be displayed.
Press the [Tare] key when reading is stable. The weight that was displayed is
stored as the tare value. The stable and “NET” indicator will be on. As a product
is added only the weight of the product will be shown. The scale could be tared
a second time.
When the container is removed a negative value will be shown. The zero indicator will also be on
because the platform is back to the same condition as it was when the [Zero] key was pressed last.
Press [Tare] or [Zero] to remove the tare value and display zero. The Net indicator will disappear.

EN
© Adam Equipment Company 2017 3
Preset tare
This method allows you to enter a value for the tare weight from the keypad. This is useful if all containers are
the same or if the container is already full but the net weight is required and the weight of the container is
known.
Steps:
1) Zero the scale by pressing [Zero]. The zero indicator will be on.
2) Enter a tare value using the numeric keys.
3) Press [Tare] to tare the scale. The value that was entered is stored as the tare value and it is
subtracted from the display, leaving a negative number on the display.
2.4 WEIGHING
To determine the weight of a sample, first tare an empty container if used, then place the sample in the
container. The display will show the weight and the unit of weight currently in use. To change the weighing
unit press the [Unit] key. Weighing units displayed are the ones that are enabled by the user in the
parameters section.
2.5 PARTS COUNTING
The scale can be used to count parts based on the average weight of a sample weighed. If a container is to
be used, place this container on the platform before entering parts counting and press [Tare]. Press [Count]
to enter the Parts Counting mode.
The display will show the last sample size used. For example,
“10 Pcs”
.
Either place 10 parts on the platform for determining the average piece
weight or use a different number of parts. To change the sample size, press
[CE] to clear the last values and then enter the value 20 using the numeric
keypad.
Place the right number of parts on the platform. Press [Count] to weigh the samples and determine an
average piece weight.
After the sample has been weighed the scale will count any other parts added
by applying the average piece weight to the weight of the parts to be counted.
During parts counting the display can be changed to show the net weight, unit weight and number of parts by
each time pressing the [Func] key.
To count a different sample quantity, press the [Count] key. To return to weighing, press [Unit] when
“0
pcs”
is displayed.
NOTE:
If the parts are too light to measure accurately, the count may become faulty. It is suggested that the
samples to be weighed should each weigh more than the resolution of the scale.
EN
© Adam Equipment Company 2017 4
2.6 CHECK COUNTING
Check-weighing is a procedure to display an indicator or sound an alarm when the weight on the platform
meets or exceeds the values stored in the memory. The memory holds values for a high limit and a low limit.
Either or both the limits can be set by the user.
The alarm and the LED bar graph can each be set to OFF. The LCD display will indicate whenever the
weight is within or exceeds the limits by showing
“OK”
(mass is between the limits),
“HI”
(mass is above the
high limit) or
“LO”
( mass is below the low limit).
The limits can be locked by the manager (see the menu structure section) .A Limit Password must be used
to change the limits or operation of the beeper or bar graph.
Steps:
1) In normal weighing, Press the [Low Limit] key. It will show the current low limit. The
“LO”
symbol will
appear on the display.
2) Press the [CE] key to clear the old value and then enter the new low limit using the numeric keys.
Then press [Tare] to accept the value. If you want to reset the value to zero, press [CE] to clear the
value. The limits are displayed in the weighing unit in use. If the weighing unit is pounds:ounces, the
limits are entered in pounds and decimal parts of pounds. i.e. 6,0125 lb.
3) To set the high limit press [High Limit], the
“HI”
symbol will be on. Set the high limit in the same way
the low limit was set. Pressing the [Tare] key to enter the value will return the scale to weighing, with
the Check-weighing function enabled.
4) During parts counting and percent weighing, the limits are set in the same way as above. The limits
are displayed in pcs or %.
5) To disable the check weighing function, enter zero into both the limits as described above. When the
current limits are shown, press [CE] to clear the settings, then press [Tare] to store the zero values.
NOTE:
The weight must be greater than 20 scale divisions for the check-weighing to operate.
Limits storing and recalling
The indicator can store up to 10 sets of high and low limits in memory along with the weighing units in use
(including pcs and %) as well as settings for the beeper and bar graph. During Check weighing the current
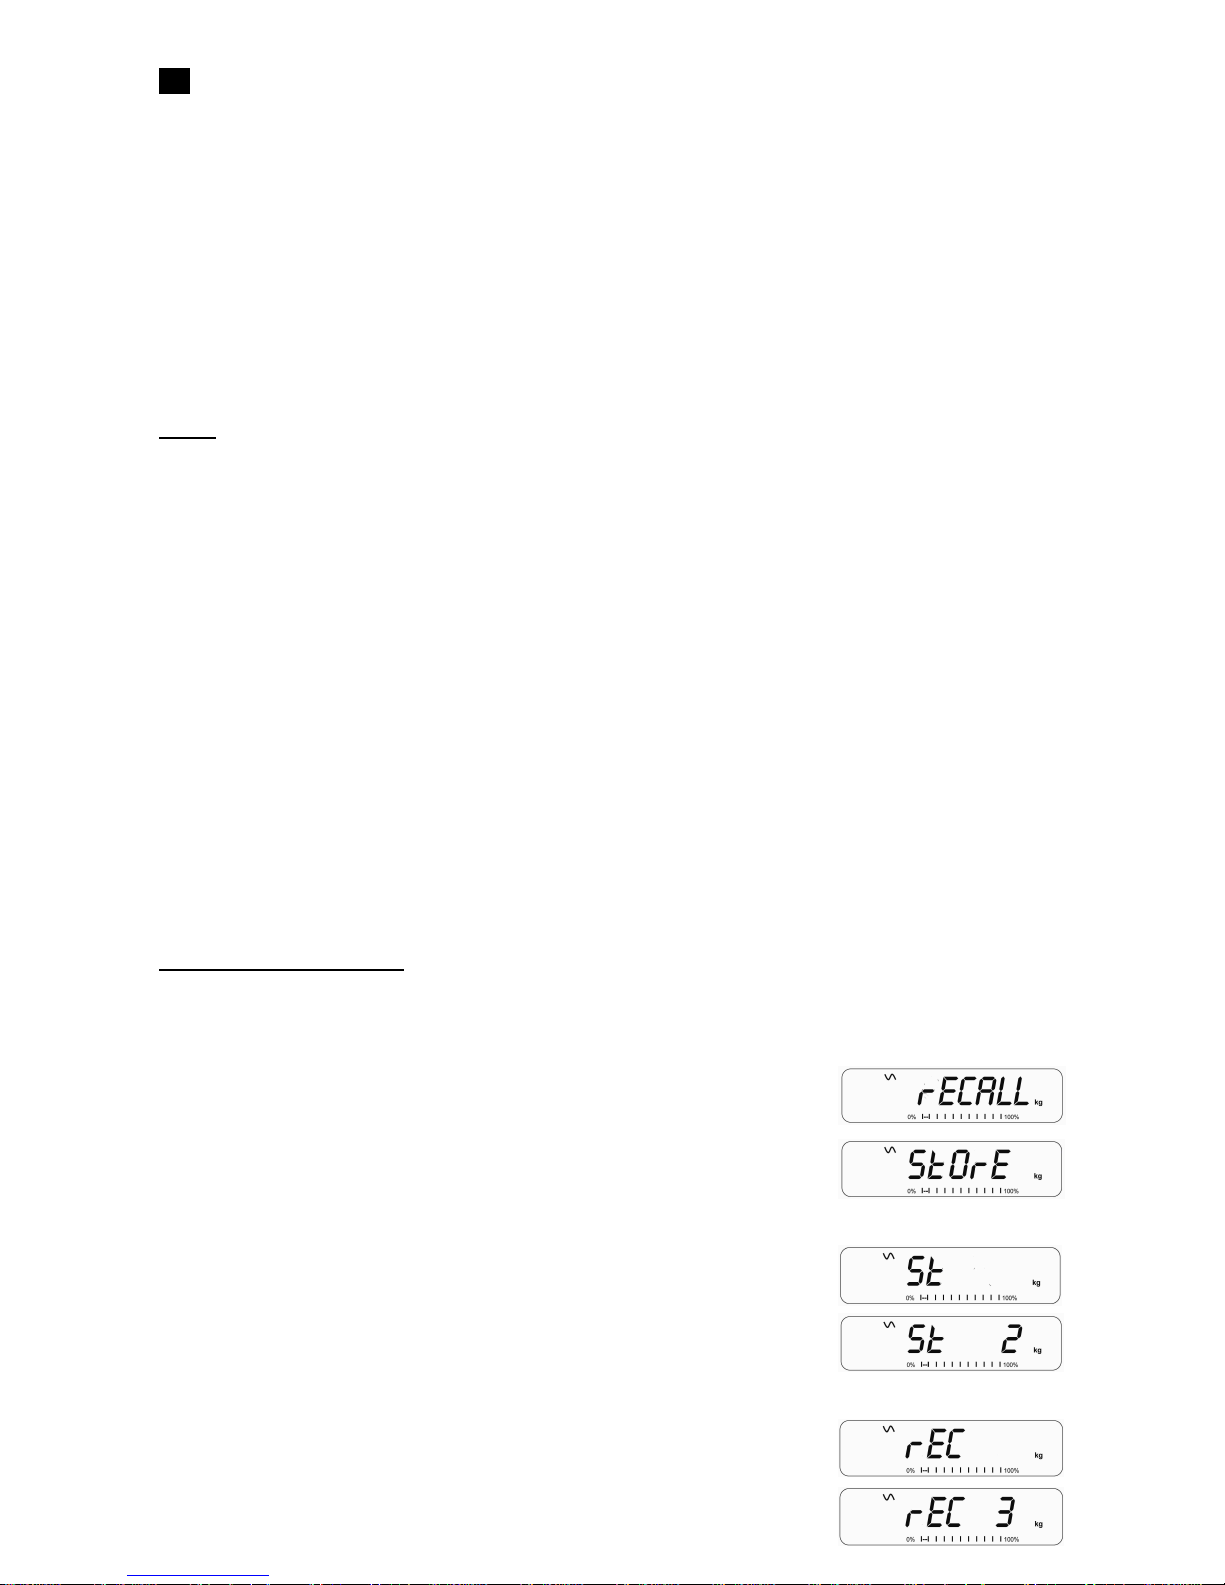
limits can be stored or previously stored units can be recalled.
If you are already in the check weighing mode the display will ask if you wish to
store the current limits by showing
“StOrE”
or recall another set of limits by
showing
“rECALL”
. The [Lim] key can be used to toggle between
“StOrE”
and
“rECALL”
.
If you want to store the limits, when
“StOrE”
is displayed press the [Tare] key.
The display shows
“St ”.
Enter a number corresponding to the desired memory
location (0 to 9).
“St X”
will be displayed for 2 seconds indicating the location X
where the current limits, weighing units and settings for the beeper and bar
graph are stored. The indicator will continue to work with the current settings as
active.
If you wish to recall any of the pre-stored limits, press [Tare] when
“rECALL”
is
 Loading...