


INSTRUMENTS
Operating manual
Wire, metal and wood detector
Model: Wall Scanner 120 Prof
Manufacturer: ADAINSTRUMENTS |
Address: WWW.ADAINSTRUMENTS.COM |

WallScanner120 Prof
INSTRUMENTS
|
|
|
Table of contents |
|
1. Intended Use . . . . . |
. . |
. . . . . . . . . . . . . . . . . . . . . . . . . . . . . . . . . . . . . . . . . . |
3 |
|
2. |
Product Features . . . . |
. . . |
. . . . . . . . . . . . . . . . . . . . . . . . . . . . . . . . . . . . . . . . . . . . . . |
3 |
3. |
Technical data . . . . . |
. . . |
. . . . . . . . . . . . . . . . . . . . . . . . . . . . . . . . . . . . . . . . . . . . . . |
. 5 |
4. |
Operation . . . . . . . . |
. . . |
. . . . . . . . . . . . . . . . . . . . . . . . . . . . . . . . . . . . . . . . . . . . . |
. 6 |
5. |
Detection of objects . . |
. . . |
. . . . . . . . . . . . . . . . . . . . . . . . . . . . . . . . . . . . . . . |
8 |
6. |
Operating Instructions . . |
. . |
. . . . . . . . . . . . . . . . . . . . . . . . . . . . . . . . . . . . . . . . . |
9 |
7. Maintenance and service . |
. . . |
. . . . . . . . . . . . . . . . . . . . . . . . . . . . . . . . . . . . . . . . . . . . . |
10 |
|
8. |
Warranty. . . . . . . . . |
. . . . . . . . . . . . . . . . . . . . . . . . . . . . . . . . . . . . . |
11 |
|
9. Exceptions from responsibility . |
. . . . . . . . . . . . . . . . . . . . . . . . . . . . . . . . . . . . . . . . . . . . . . . . . . . . . . |
11 |
||
Appendix 1. Warranty card
2 |
MEASUREMENT FOUNDATION |

WallScanner120 Prof
INSTRUMENTS
Intended Use
The measuring tool is intended for the detection of metals (ferrous and non-ferrous metals, e.g., rebar), joists and ‘live’ wires/conductors in walls, ceilings and floors.
Product Features
1. Illuminated ring
2. Marking line
3. Display
4. Operating - mode indication
5. ON/OFF button
6. Illumination button
7.Sound On/Off button
8.Charged wire mode
9.Metal mode
10.Multi-functional wall detector
mode
3 |
MEASUREMENT FOUNDATION |

WallScanner120 Prof
INSTRUMENTS
11.Contact pads
12.Sensor area
13.Type plate
14.Battery compartment lid
15.Hole for hand strip
DISPLAY ELEMENTS |
|
a) Switch Off audio signal |
|
b) Warning function |
|
c) Non-metal object |
|
d) Non-magnetic metal |
|
e) Magnetic metal |
|
f) Charged wire |
|
g) Temperature control |
|
h) Battery indication |
|
i) Measuring indicator |
|
j) Fine scale |
|
k) Indication “CENTER” |
|
4 |
MEASUREMENT FOUNDATION |

INSTRUMENTS |
WallScanner120 Prof |
|
|
Technical data |
|
Maximum scanning depth*: |
|
Ferrous metals |
120 mm |
Non-ferrous metals (Copper) |
80 mm |
Copper conductors (live)** |
50 mm |
Wood |
38 mm |
Automatic switch off after approx. |
5 min |
Operating temperature |
-10 °C…+50°C |
Storage temperature |
-20°C…+70°C |
Battery |
1x9 V |
Operating lifetime approx. |
5 h |
Weight |
270 g |
*Depends on material and size of objects as material and condition of structure. **Scanning depth will be smaller if wires/conductors are not “live”.
5 |
MEASUREMENT FOUNDATION |
WallScanner120 Prof
INSTRUMENTS
Operation
INSERTING/REPLACING THE BATTERY
Use only 9Vbattery. Insert the battery into the battery compartment (13) in accordance with the symbols in the battery compartment. Remove the batteries if the unit will not be used for a long period. The battery can be corroded or discharged over long periods.
SWITCHING ON AND OFF
Protect the measuring tool against moisture and direct sun irradiation. Before switching the measuring tool on, make sure that the sensor area 12 is dry. If required, wipe the measuring tool dry using a cloth.
If the measuring tool was subject to an extreme temperature change, allow it to the adjust to the ambient temperature before switching on. Press ON/OFF button to switch on the instrument. After a short test the detector is ready for operation. The measuring tool automatically enter the function mode of metal detection.
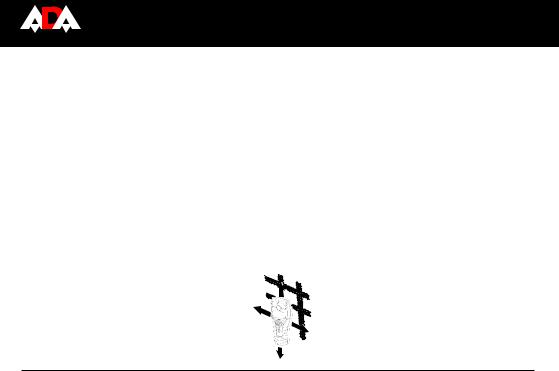
SCANNING
Put the tool on the surface of the object. Choose the correct operating mode and always move the tool in a straight line (as shown on the picture).
6 |
MEASUREMENT FOUNDATION |

WallScanner120 Prof
INSTRUMENTS
When the tool is on the surface of the object, the illuminated ring lights up green.
Measuring indicator i indicates maximum amplitude above the center of the object. Illuminated ring (1) lights up red and audio signal sounds. For small and deeply embeded objects ring (1) can continue to light up yellow while there is no audio signal. To localize the object more precise, move the measuring toolo repeatedly (3x) back and forth.
7 |
MEASUREMENT FOUNDATION |
WallScanner120 Prof
INSTRUMENTS
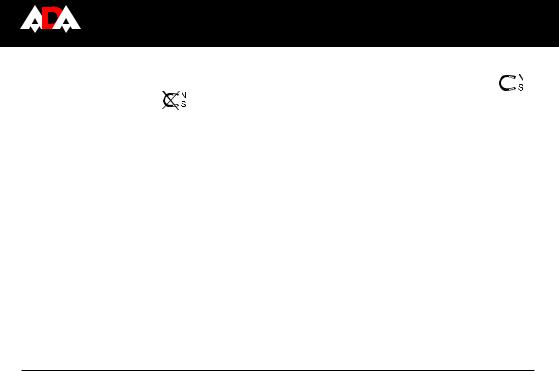
DETECTION OF OBJECTS
The detection of metal objects
Press button 9 to detect metal objects. Illuminated ring (1) and indication above the button (4) light up green. Symbol
(the metal detection indicator) or |
is indicated on the display. |
Note: Scale “i” will show all scale |
reinforcement steel mesh and steel in the examined base material. Illuminated ring lights |
up green.
Place the measuring tool onto the surface to be scanned and move it sidewards, when the measuring tool comes close to a metal object, the amplitude of the measuring indicator “j” increases. When it moves away from the object, the amplitude decreases, at the position of maximum amplitude, the metal object is located below the center of the sensor. Indicator k is displayed on the display.
Indicator “i” (detection depth value) is displayed on the display when scanning metal objects. The accuracy of depth value is a relation of shape and position of scanning metal objects. Symbol e/d shows whether metal is magnetic or not. Illuminated ring lights up yellow.
Note: If examined objects are small and deeply embedded, move the detector in horizontal and vertical direction. Pay attention to the indication “i” and “j” for accurate detection.
Multi-functional wall detector mode
Choose this mode for operation. The detector can indicate following items in the wall (except wooden beam):
-magnetic metal
-non-metal, e.g. beam, plastic pipes that are full of water.
-charged object, e.g. electric wire.
Press button 10. Illuminated ring and indicator above the button light up green. The detector can detect wooden beam as metallic object when scanning the metallic objects, nails, screws. In that case place the instrument on another place of the examined object and restart the measuring procedure.
8 |
MEASUREMENT FOUNDATION |
WallScanner120 Prof
INSTRUMENTS
In rear cases the detector can’t detect examined object, because the sensor area and type plate are solid and dirty. Just clean the measuring tool with dry and soft cloth and restart the measuring procedure.
Scanning for “live” wires
This mode is suitable for detecting “live” conductors (110-230V). Press button 8 to activate Charged wire mode. Illuminated ring and indicator above button 8 light up green. When a live conductor is detected, indication f appears on the display. Move the detector above the measuring area several times to detect live wires. When the measuring tool is very close to the conductor, the illuminated ring flashes red and audio signal beeps swiftly.
Under certain condition (such as below metal surfaces or behind suefaces with high water content) “live” conductors cannot be securely detected.
Static electricity can lead to inaccurate indication of electric lines, e.g. over a large range. In that case place your free hand flat on the wall next to the measuring tool, in order to remove the static electricity.
Temperature control
The detector is equipped with a temperature control indicator . When the temperature control inducator lights up, the measuring tool is out of the operating temperature range or there are significant variations oin temperature. Switch the tool off and allow it to adjust to the ambient temperature before switching it on again.
Operating Instructions
In accordance with the principles of tool operation, the measuring values can be impaired through certain ambient conditions.These include, e.g. the proximity of other equipment that produce strong magnetic or electromagnetic fields,
9 |
MEASUREMENT FOUNDATION |
 Loading...