

Page 1

Quick Installation Guide
PCS-100
1-Bay Mini Server with Intel Core i5-6500TE Processor
PCS-110
1-Bay Mini Server with Intel Core i5-6500TE Processor,
NVIDIA GeForce Graphics Card
PCS-200
1-Bay Mini Server with Intel Core i7-6700TE Processor
V.180904
Page 2
BEFORE YOU START
Thank you for purchasing ACTi PCS. This guide contains all the information you
need to quickly set up the system via local display interface.
For detailed instructions on installation and operation, please search for the
product manuals on http://www.acti.com/downloadcenter.
The items below are required for installation:
• Monitor (with HDMI or DVI input and the cable)
• USB mouse
• USB keyboard
• Network cables
• Network switch
1
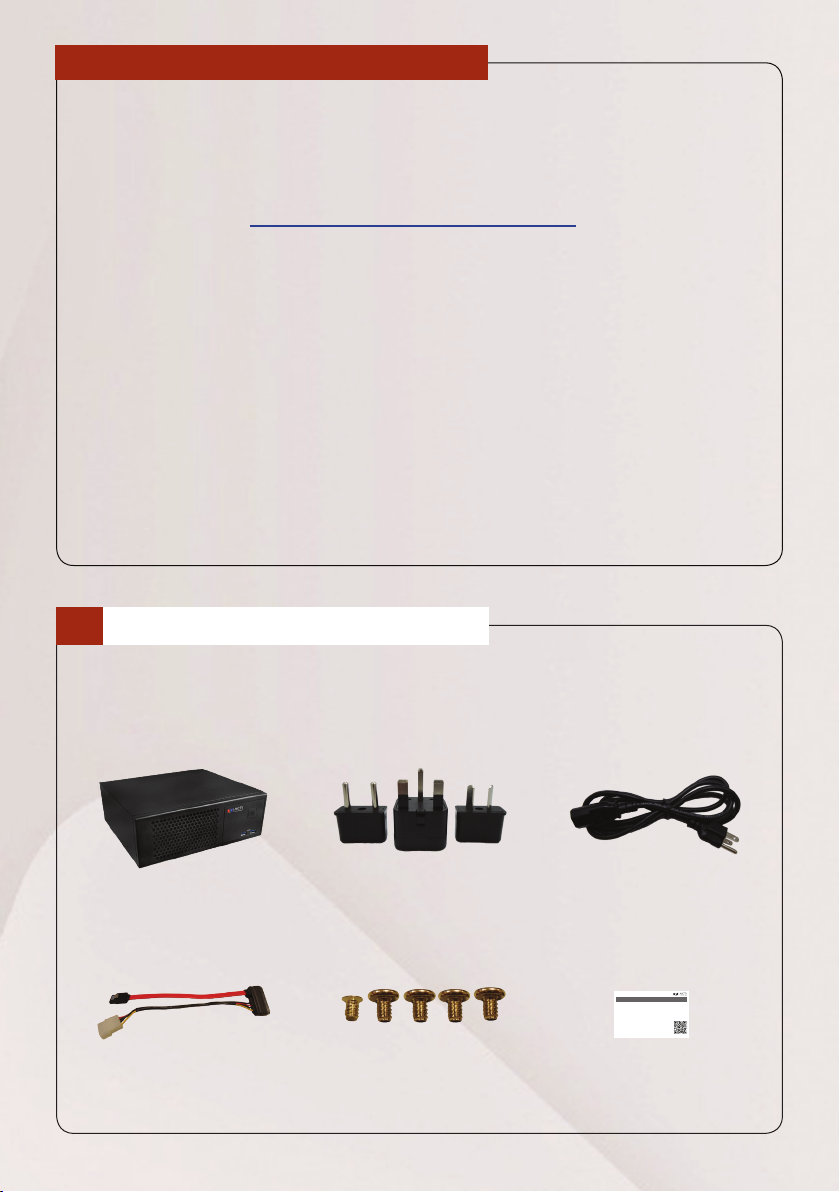
UNPACK
This package includes the following items:
Unit Power AdapterSocket Converters
SATA Cable HDD Screws
2 Quick Installation Guide
Warranty Card
WARRANTY CARD
This product is under warranty
from the date of the original purchase
(“Warranty Period”).
For more information,
please visit our website
http://www.acti.com/warranty
Page 3

2
AT A GLANCE
FRONT PANEL
1
1
Power Button
2
USB 3.0 Ports x 2
REAR PANEL
1 2 3 4 5
1
Power Connector
2
Display Port
3
LAN Ports x 2
4
COM Port x 2
(for RS-232)
6 7
2
8
5
Audio Output
6
HDMI Port
7
USB 3.0 Ports x 4
9
DVI Connector
10
Audio Input
10
Quick Installation Guide 3
Page 4

3
CONNECT THE DEVICES
The example below displays a local network consisting of the basic required
peripherals to start using the device.
Power Source
PCS
USB Devices
HDMI Monitor
4
START UP
1. On the front panel, press the POWER BUTTON
to turn on the device.
Network
2. On the Windows log on screen, type “123456”
to enter the Windows system.
Due to continuous product improvements, some contents may have changed from the time this
documentation was printed.
You can download the latest user documentation, which shall prevail over the printed version
provided in the package, from
4 Quick Installation Guide
http://www.acti.com/downloadcenter
.
 Loading...