

Page 1

TQ600BC & TQ600M External Bell Connection
Please consult your local electrician for installation.
All wiring must comply with all local and national electrical codes,
ordinances, and regulations. Failure to comply could cause serious
electrical shock and damage to equipment that will void the warranty.
It is necessary to install a relay in order to control an External Signal Device such as a
bell, horn, buzzer or strobe. When a signal is activated the internal contacts close
completing the circuit. These internal contacts are dry and supply no voltage. Voltage
applied to these contacts must not exceed 30 volts. The relay activates the external
signal device.
A 24 Volt Switching Relay made by Honeywell (Acroprint p/n 01-0230-000) is available
from Acroprint (see below):
Tech Specs
Type
Full Load Amps @120V
Full Load Amps @240vAC
Resistive Amps @ 120V
Resistive Amps @ 240V
Locked Rotor Amps @ 120V
Locked Rotor Amps @ 240V
Coil Volts
Switch Action
Depth (in)
Height (in)
Width (in)
Application
Hydronic
10.2
5.1
10
6
61.2
30.6
24 Volt Switching Relay
24 vAC
Manufacturer: Honeywell
SPST
Mfg. P/N: RA89A1074
2-3/8
5-1/4
4-1/4
Hydronic Heating
Page 1 of 5
Page 2
1) Mount the Relay vertically on a solid wall or partition as near as possible to the
TQ600BC (Barcode) or TQ600M (Mag Stripe). Select a location that is easily
accessible for installation and service.
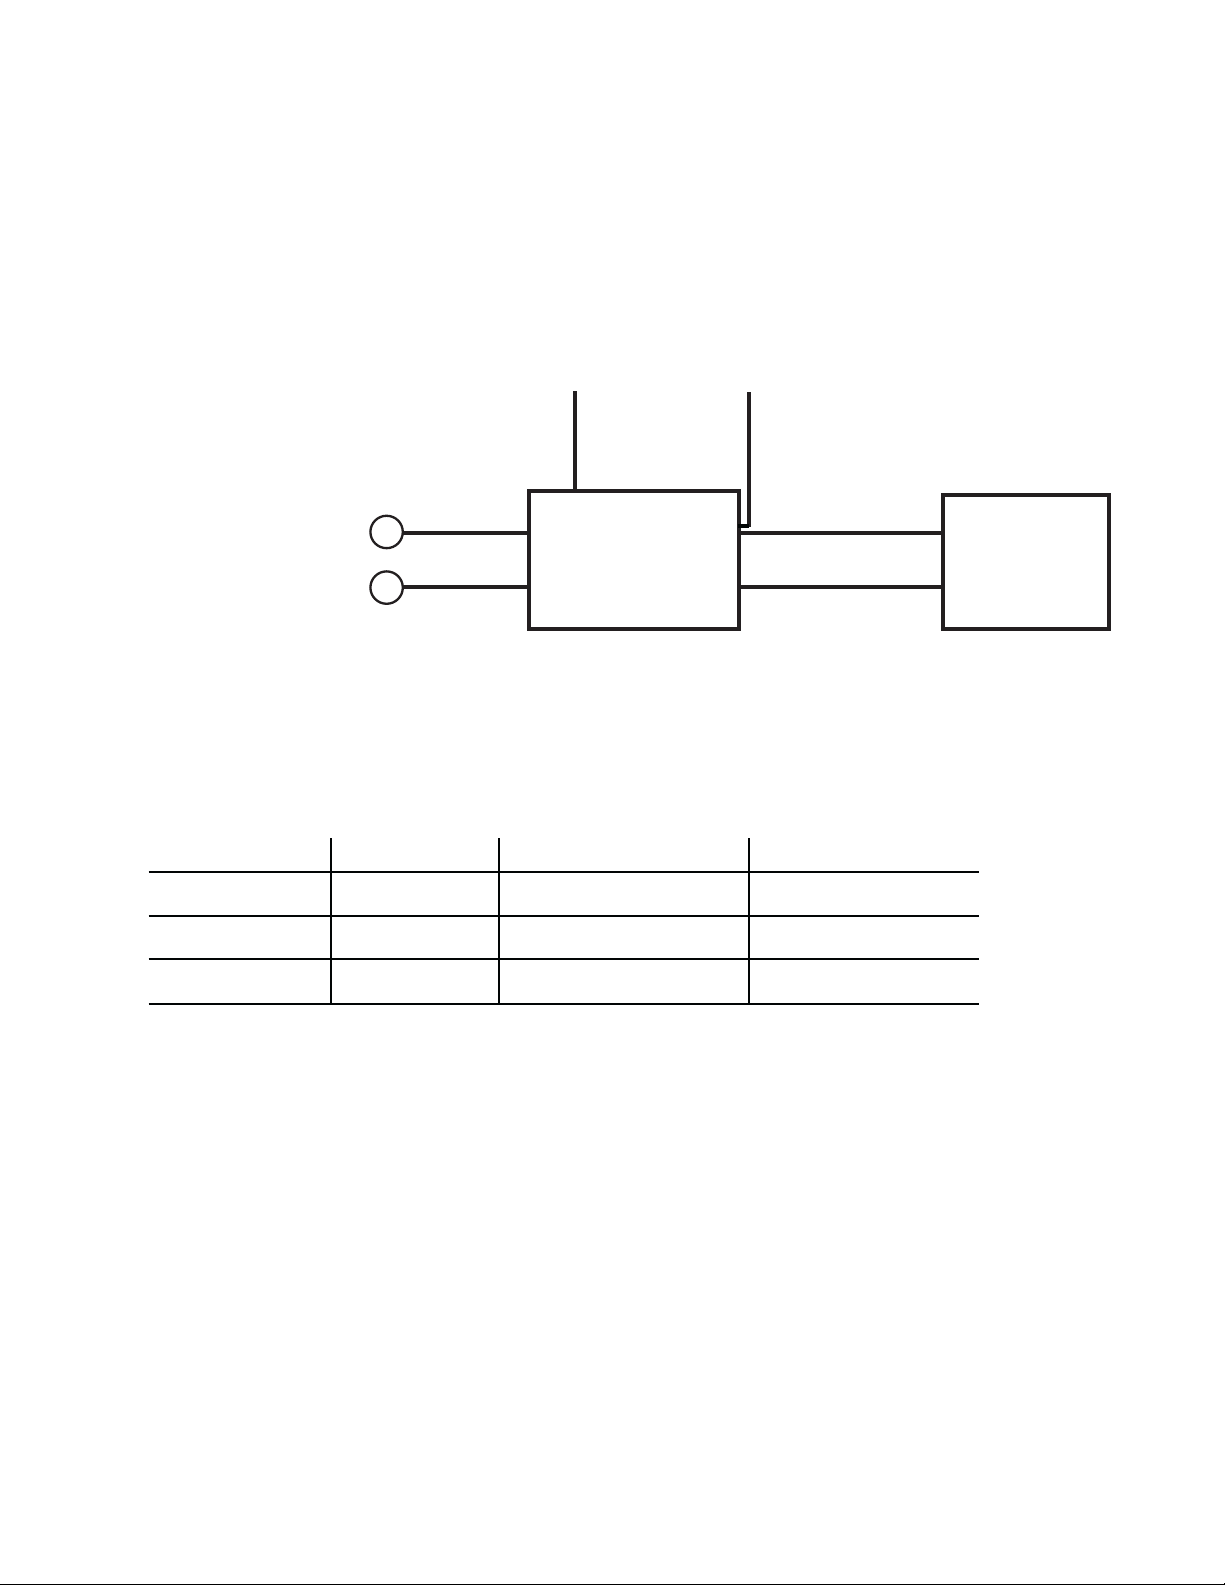
2) Disconnect the TQ600BC/M from the power then connect it to the Relay
(Acroprint p/n 01-0230-000) per the diagram below.
120VAC Neutral
1
TQ600BC/M
T
Internal
Relay
Note: see pp. 3 & 4 for
terminal connection
3) Connect the Relay to the External Signal Device.
External Signal Devices Available from Acroprint:
Acroprint P/N Description Manufacturer
64-0103-000 Grille Horn Edwards Signaling 874-N5
64-0105-000 8 Bell W.L. Jenkins Co. 3005
4) Connect the Relay to a 120VAC power source.
T
4-1/4 Bell W.L. Jenkins Co. 100564-0104-000
External
Relay
01-0230-000
2
4
Neutral
Hot
Manufacturers
Part Number
120VAC
External
Signal
Device
Page 2 of 5
Page 3

Internal Schematic and Hookup for 01-0230-000 Relay
NO
TQ600BC/M
(see pg. 4 for more detail)
COM
Power Supply: Provide Overload
1
Protection and Disconnect Means
as Required.
T T
RA89A (SPST)
2 1 3 4
Wht Blk
1
120vAC
Signal Device120vAC
5) Connect the TQ600BC/M to the power supply then plug the power supply
into a power outlet.
Program bell schedules (see pg. 5).
6) Verify that the External Signal Device is working properly. If it doesnt
activate check to see if the TQ600BC/M is set to the correct time. If the
time is correct check to see that the bell schedule is correct and verify
the schedule for AM or PM settings. If the external device still does not
activate check all connections and verify that the power outlet is working.
Page 3 of 5
Page 4

01-0230-000 Relay Connection to TQ600BC/M
A 3-Position Connector is provided with the TQ600BC/M terminals. The following
diagram shows the External Bell connection on the back of the terminal:
Back of TQ600BC/M Terminal
Device Interface:
NC COM NO TCP/IP DC12v
3-Position
External Bell
Connector
3-Position External Bell Plug:
4-Positon
Connector
(Not Used)
NO
Power
Ethernet
External Bell
Ethernet
Connector
Power
Connector
To TQ600BC/M
Page 4 of 5
COM
To Relay
Page 5

How to Set a Bell Schedule on the TQ600BC/M
Note:
The Internal Bell of the TQ600BC/M is disabled when the External Bell is Activated.
1) Activate the External Bell option on the TQ600BC/M:
Menu> Options> Power Mng> Ext.Bell: Set to Y
2) Set the Bell Delay (the duration of the External Bell):
Menu> Options> Power Mng> Bell Delay (0 - 999 sec)
3) Set the Bell Schedule:
Menu> Options> Power Mng> Scheduled Bell
Note: it make take up to 7 seconds for the Bell Schedule to be displayed.
The following screen will be displayed:
You can set up to 50 bell events.
It is recommended that you write down your complete bell schedule
before setting the schedule on the terminal.
a) Select the Bell# you wish to set and press Ok.
The following screen is displayed:
b) Press OK. The following screen is displayed:
Scheduled Bell
No. 1 N
No. 1 N
No. 1 N
Scheduled Bell
Set Sch. Fun?
ESC
Scheduled Bell
No. 1 23:59
No. 1 N
No. 1 N
OK
c) Enter the hour of the first bell (in military time).
Press either arrow key to set the min of the first bell:
Press OK to set the first bell.
d) Select the next bell# and enter the schedule. Repeat until all bells schedules
have been entered.
e) Press ESC then press OK to save all bell schedules.
Press ESC until the terminal menu is exited.
Page 5 of 5
TQ600BC-M Ext. Bell_031412
 Loading...