

Page 1
RTM
User's Guide
Page 2

Table of contents
1 Getting started ......................................................................................................................4
1.1 What is True Image™ Lite 2013 by Acronis®? ............................................................................ 4
1.2 True Image Lite 2013 basic concepts ......................................................................................... 4
1.3 System requirements and supported media ............................................................................. 5
1.4 Technical Support ...................................................................................................................... 6
1.5 True Image Lite 2013 installation .............................................................................................. 6
1.5.1 True Image Lite 2013 activation ..................................................................................................................... 8
1.6 How to get started ..................................................................................................................... 9
1.7 Trial version information .........................................................................................................10
1.8 How to get a full version ..........................................................................................................10
1.9 What to do if you bought a box version ..................................................................................11
2 Program workspace ............................................................................................................. 12
2.1 Main window ...........................................................................................................................12
2.2 Notification area icons .............................................................................................................14
2.3 Settings menu ..........................................................................................................................14
2.3.1 Integration settings ....................................................................................................................................... 14
2.4 Help menu ...............................................................................................................................15
3 Acronis Nonstop Backup ...................................................................................................... 16
3.1 What is Acronis Nonstop Backup? ...........................................................................................16
3.2 How to create nonstop backup ...............................................................................................17
3.2.1 Acronis Nonstop Backup data storage ........................................................................................................ 18
3.3 Recovering data .......................................................................................................................20
3.3.1 Acronis Backup Explorer ............................................................................................................................... 21
3.3.2 Recovering files and folders ......................................................................................................................... 26
3.3.3 Recovering file versions ................................................................................................................................ 27
3.4 Deleting backups and backup versions ....................................................................................27
3.5 Nonstop Backup - Frequently asked questions .......................................................................28
4 Acronis Online Backup ......................................................................................................... 30
4.1 What is Acronis Cloud? ............................................................................................................30
4.2 What is True Image for mobile devices? .................................................................................30
4.3 How to get a subscription ........................................................................................................31
4.4 Sign-in menu ............................................................................................................................31
4.5 Backing up to Acronis Cloud ....................................................................................................32
4.5.1 Online backup options .................................................................................................................................. 33
4.6 Recovery from Acronis Cloud ..................................................................................................39
4.6.1 Recovering data from online backups ......................................................................................................... 39
4.6.2 Selecting a version to recover ...................................................................................................................... 40
4.7 Managing online backups ........................................................................................................40
4.8 Removing data from Acronis Cloud .........................................................................................41
2 Copyright © Acronis International GmbH, 2002-2013
Page 3

5 Troubleshooting .................................................................................................................. 42
5.1 Acronis System Report .............................................................................................................42
5.2 Acronis Smart Error Reporting .................................................................................................42
5.3 How to collect crash dumps ....................................................................................................44
5.4 General recommendations ......................................................................................................44
5.5 Viewing log...............................................................................................................................45
5.6 Acronis Customer Experience Program ...................................................................................47
6 Glossary of Terms ................................................................................................................ 49
3 Copyright © Acronis International GmbH, 2002-2013
Page 4

1 Getting started
1.1 What is True Image™ Lite 2013 by Acronis
True Image Lite 2013 by Acronis is a software product that ensures the security of data on your PC.
With this software, you can continuously back up selected files and folders by using two main
utilities:
®
?
Acronis Nonstop Backup
This utility continuously saves changes in your files, as often as every five minutes. If needed, you
can rollback easily to any point in time.
Acronis Online Backup
This utility allows you to store your most important files on Acronis Cloud, a special secure
remote storage. Your data will be protected even if your computer is lost, stolen or destroyed.
True Image Lite 2013 allows you to recover your photos, videos, documents and other personal data
should a disaster occur, such as losing data, accidentally deleting critical files or folders, or suffering a
complete hard disk crash.
You can store backups on almost any PC storage device.
Windows-style interface and wizards will make your work easier. Just perform a few simple steps and
let True Image Lite 2013 take care of everything else! When a system problem occurs, the software
will get you up and running in no time.
1.2 True Image Lite 2013 basic concepts
This section provides general information about basic concepts which could be useful for
understanding how the program works.
Backup and recovery
Backup refers to making copies of data so that these additional copies can be used to recover the
original after a data loss event.
Backups are useful primarily for two purposes. The first is to restore a state following a disaster
(called disaster recovery). The second is to recover small numbers of files after they have been
accidentally deleted or corrupted.
Since True Image Lite 2013 protects only your files and folders, and not your disks and partitions, it
serves only the second purpose. The full version of True Image 2013 does both by creating disk (or
partition) images and file-level backups respectively.
Backup versions
Backup versions are the file or files created during each backup operation. If you do not use
consolidation feature, the number of versions created is always equal to the number of times the
backup is executed or to the amount of stored points in time. So, a version represents a point in time
to which the data can be restored.
4 Copyright © Acronis International GmbH, 2002-2013
Page 5

The backup versions are similar to file versions. The file versions concept is familiar to those who use
a Windows Vista and Windows 7 feature called "Previous versions of files". This feature allows you to
restore a file as it existed on a particular date and time. A backup version allows you to recover your
data in a similar way.
This could be useful when trying to find damaged or deleted files. Simply browse through the backup
versions in the Acronis Backup Explorer until you find the backup version containing the required
files. Additionally, you can recover different saved versions of found files.
Backup boxes
All your backups are represented as rectangles on the main window. These rectangles are called
backup boxes. A backup box contains all the main information about the corresponding backup and
provides you full control over this backup. Every time you want to create a new backup version,
recover your data or change backup settings, just find the required backup box and click the
appropriate button or link.
Nonstop backup file format
Acronis Nonstop Backup uses a special storage for data and metadata. This storage is a hidden folder
named Time Explorer Storage. This folder contains auxiliary files (for example, config.xml,
cdp.metadata) and your backed up data. The data is compressed and split into files of about 1 GB (for
example, cdp.data, cdp2.data, cdp3.data, and so on). These files also have a proprietary format and
the data they contain can be recovered only with the help of True Image Lite 2013.
Nonstop backup consolidation
Consolidation allows you to delete unneeded backup versions, without risking backup chain
corruption.
Acronis Nonstop Backup performs consolidation automatically. The program consolidates the
metadata it uses for managing the backed up data. Because the metadata information volume is
significantly less than the backed up data volume, consolidation requires much less time and system
resources.
Online backup schedule
For your backups to be really helpful, they must be as "up-to-date" as possible. True Image Lite 2013
automatically creates backup versions every hour. If you want to back up your data more often, you
can always run the backup manually. Your data will be backed up as long as there is sufficient storage
space.
Understanding these terms and concepts will be helpful when using the program's features.
1.3 System requirements and supported media
True Image Lite 2013 has minimum hardware requirements corresponding to that of the operating
system installed on the computer to be used for running True Image Lite 2013. In addition, True
Image Lite 2013 requires the following hardware:
Mouse or other pointing device.
Using Acronis Nonstop Backup requires at least 1 GB RAM.
The minimum screen resolution is 1024 x 768.
5 Copyright © Acronis International GmbH, 2002-2013
Page 6

Operating system
True Image Lite 2013 has been tested on the following operating systems:
Windows XP SP3
Windows XP Professional x64 Edition SP2
Windows 7 SP1 (all editions)
Windows 8 (all editions)
Correct work on other Windows operating systems is possible, but not guaranteed.
File system
Supported file systems:
FAT16/32
NTFS
Storage media
Supported storage media:
Internal hard disk drives*
External hard disk drives with any of the following interfaces: USB (including USB 3.0), eSATA,
FireWire (IEEE-1394), and SCSI
Solid State Drives (SSD)
Networked storage devices
* True Image Lite 2013 does not support the following dynamic volume types: Mirrored and RAID-5.
1.4 Technical Support
Maintenance and Support Program
If you need assistance with your Acronis product, please go to http://www.acronis.com/support/
Product Updates
You can download the latest updates for all your registered Acronis software products from our
website at any time after logging into your Account (https://www.acronis.com/my) and registering
the product. See Registering Acronis Products at the Website (http://kb.acronis.com/content/4834)
and Acronis Website User Guide (http://kb.acronis.com/content/8128).
1.5 True Image Lite 2013 installation
Installing True Image Lite 2013
To install True Image Lite 2013:
1. Run the setup file. Before starting the setup process, True Image Lite 2013 will check for a newer
build on the Web site. If there is one, the newer version will be offered for installation.
6 Copyright © Acronis International GmbH, 2002-2013
Page 7
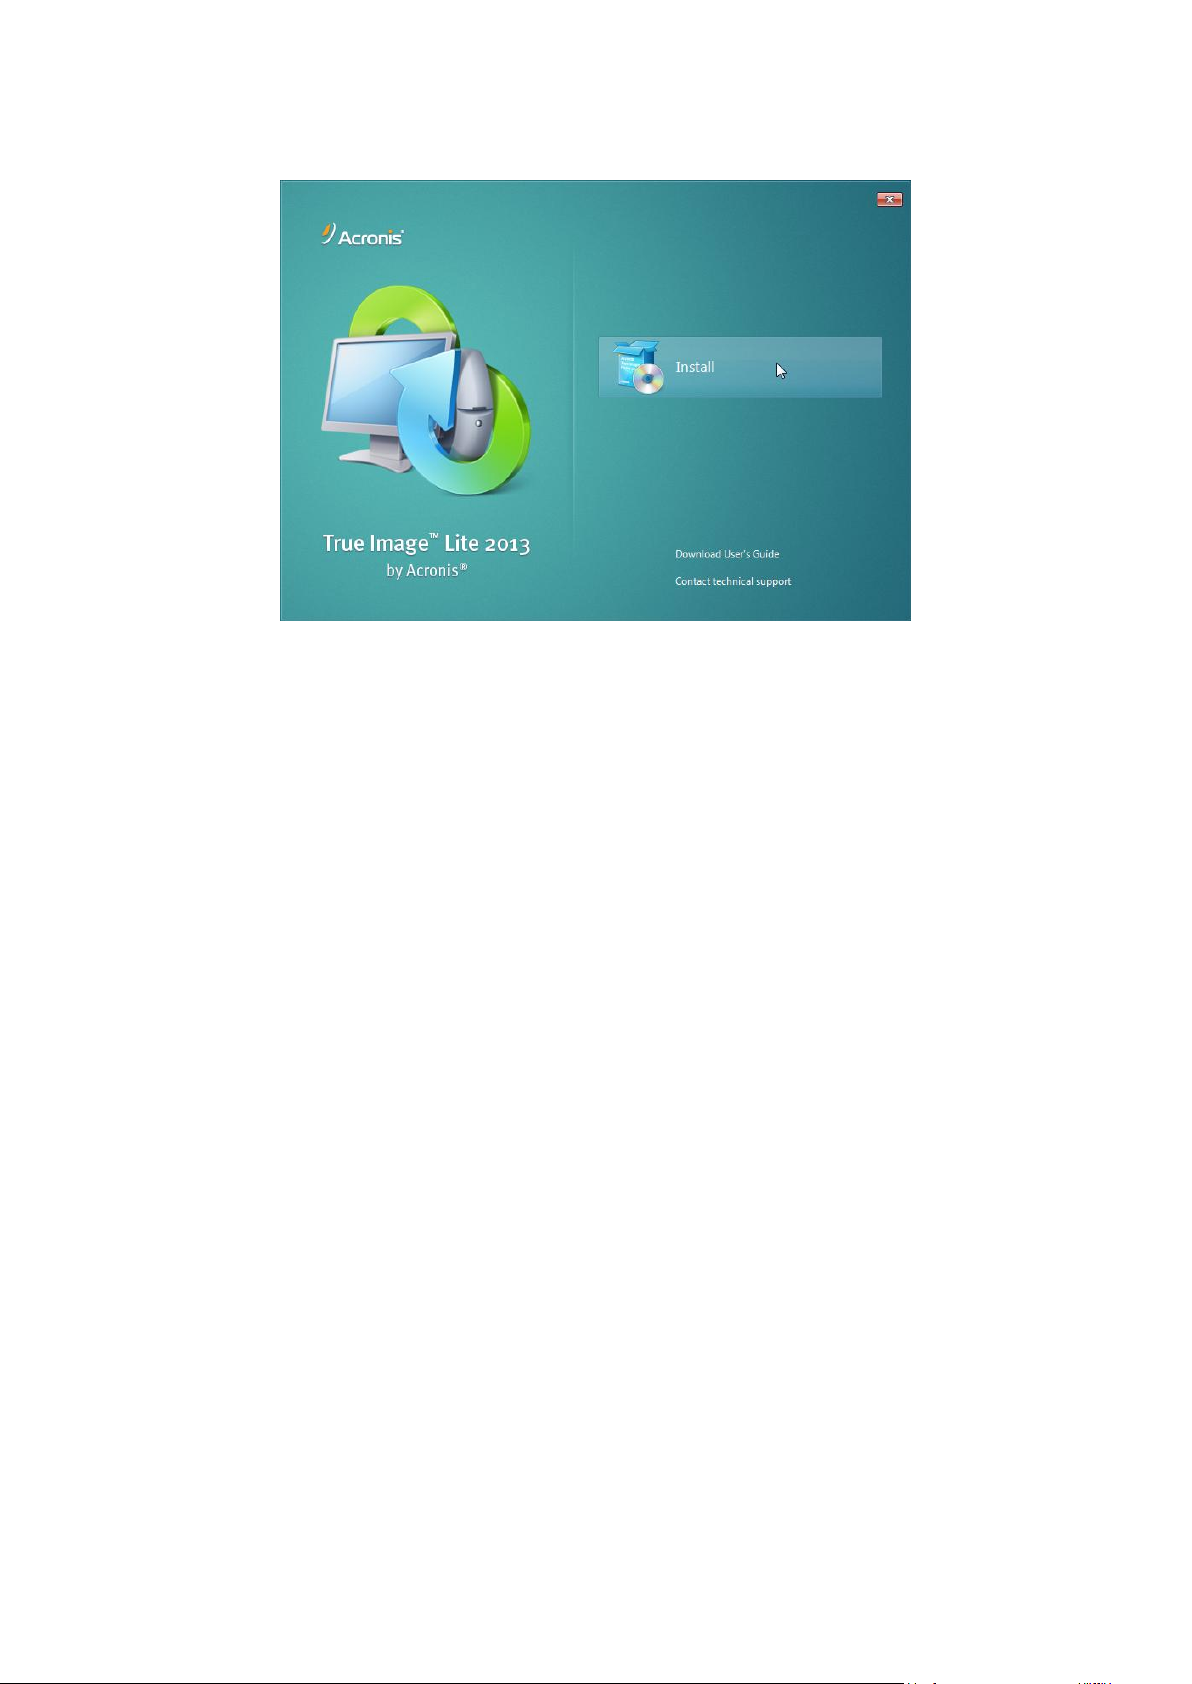
2. In the install menu, click Install to start the installation procedure.
3. Read and accept the terms of the license agreement in the License Agreement window.
4. Read the participation terms and decide whether you want to participate in the Acronis
Customer Experience Program.
5. In the Setup options window, change the installation folder, if necessary.
6. Click Proceed to begin installation.
Updating True Image Lite 2013
You can update your current version of the product in the following ways:
Updating before the installation start.
True Image Lite 2013 checks for a new version automatically in the installation window. If a new
version is available at the Acronis website, True Image Lite 2013 will suggest you to download
and install the new version.
Updating the installed program in the Acronis Update window.
If the Automatically check for updates at startup check box is selected, this window will notify
you about a new version of the product. To check for updates manually, click the Help menu and
then click Check for updates.
Purchasing a serial number directly from the program interface.
If your use a trial version of the product and you want to update it to the full version, you can
purchase a serial number directly from the program interface, without the need to go to the
Acronis website. To do this, on the toolbar, click Acronis Store, and follow the on-screen
instructions.
Recovering from an True Image Lite 2013 error
If True Image Lite 2013 ceased running or produced errors, its files might be corrupted. To repair this
problem, you first have to recover the program. To do this, run True Image Lite 2013 installer again.
It will detect True Image Lite 2013 on your computer and will ask you if you want to repair or remove
it.
7 Copyright © Acronis International GmbH, 2002-2013
Page 8

Removing True Image Lite 2013
Select Start -> Settings -> Control panel -> Add or remove programs -> True Image Lite 2013 ->
Remove. Then follow the instructions on the screen.
If you use Windows Vista, select Start -> Control panel -> Programs and Features -> True Image Lite
2013 -> Remove. Then, follow the instructions on the screen. You may have to reboot your computer
afterwards to complete the task.
If you use Windows 7, select Start -> Control Panel -> Uninstall a program -> True Image Lite 2013 ->
Uninstall. Then follow the instructions on the screen. You may have to reboot your computer
afterwards to complete the task.
If you use Windows 8, click the Settings icon, then select Control Panel -> Uninstall a program ->
True Image Lite 2013 -> Uninstall.
If you used Acronis Nonstop Backup, select in the window that appears what to do with the Nonstop Backup
storages. Then, click Next to proceed with the uninstallation procedure.
1.5.1 True Image Lite 2013 activation
True Image Lite 2013 activation is a fully automatic process. You do not need to activate the product manually.
The product requires activation via the Internet. Without activation, the fully functional product
works for 30 days. After that, all the program functions become unavailable except recovery.
Note that only True Image Lite 2013 with a full subscription must be activated. The product with a
trial subscription does not require activation.
Activation will be performed automatically if the following conditions are met:
Your computer has an Internet connection.
You have an Acronis account.
You purchased a full product license or entered a serial number.
You installed the product only on 1 computer.
True Image Lite 2013 is activated when you sign in for the first time after purchasing the full
subscription.
Moving license between computers
If you have one Acronis account, you can activate True Image Lite 2013 on 1 computer only. If you
install the product on a second computer, you will see a corresponding error message at the bottom
of the console window. In such an event, you can move the license to your new computer from the
one where the product is already activated. If you want to move the license, perform the following
steps.
To move the license from a computer that has an installed activated product:
1. Install True Image Lite 2013 on another computer.
2. Sign in using the same Acronis account.
8 Copyright © Acronis International GmbH, 2002-2013
Page 9
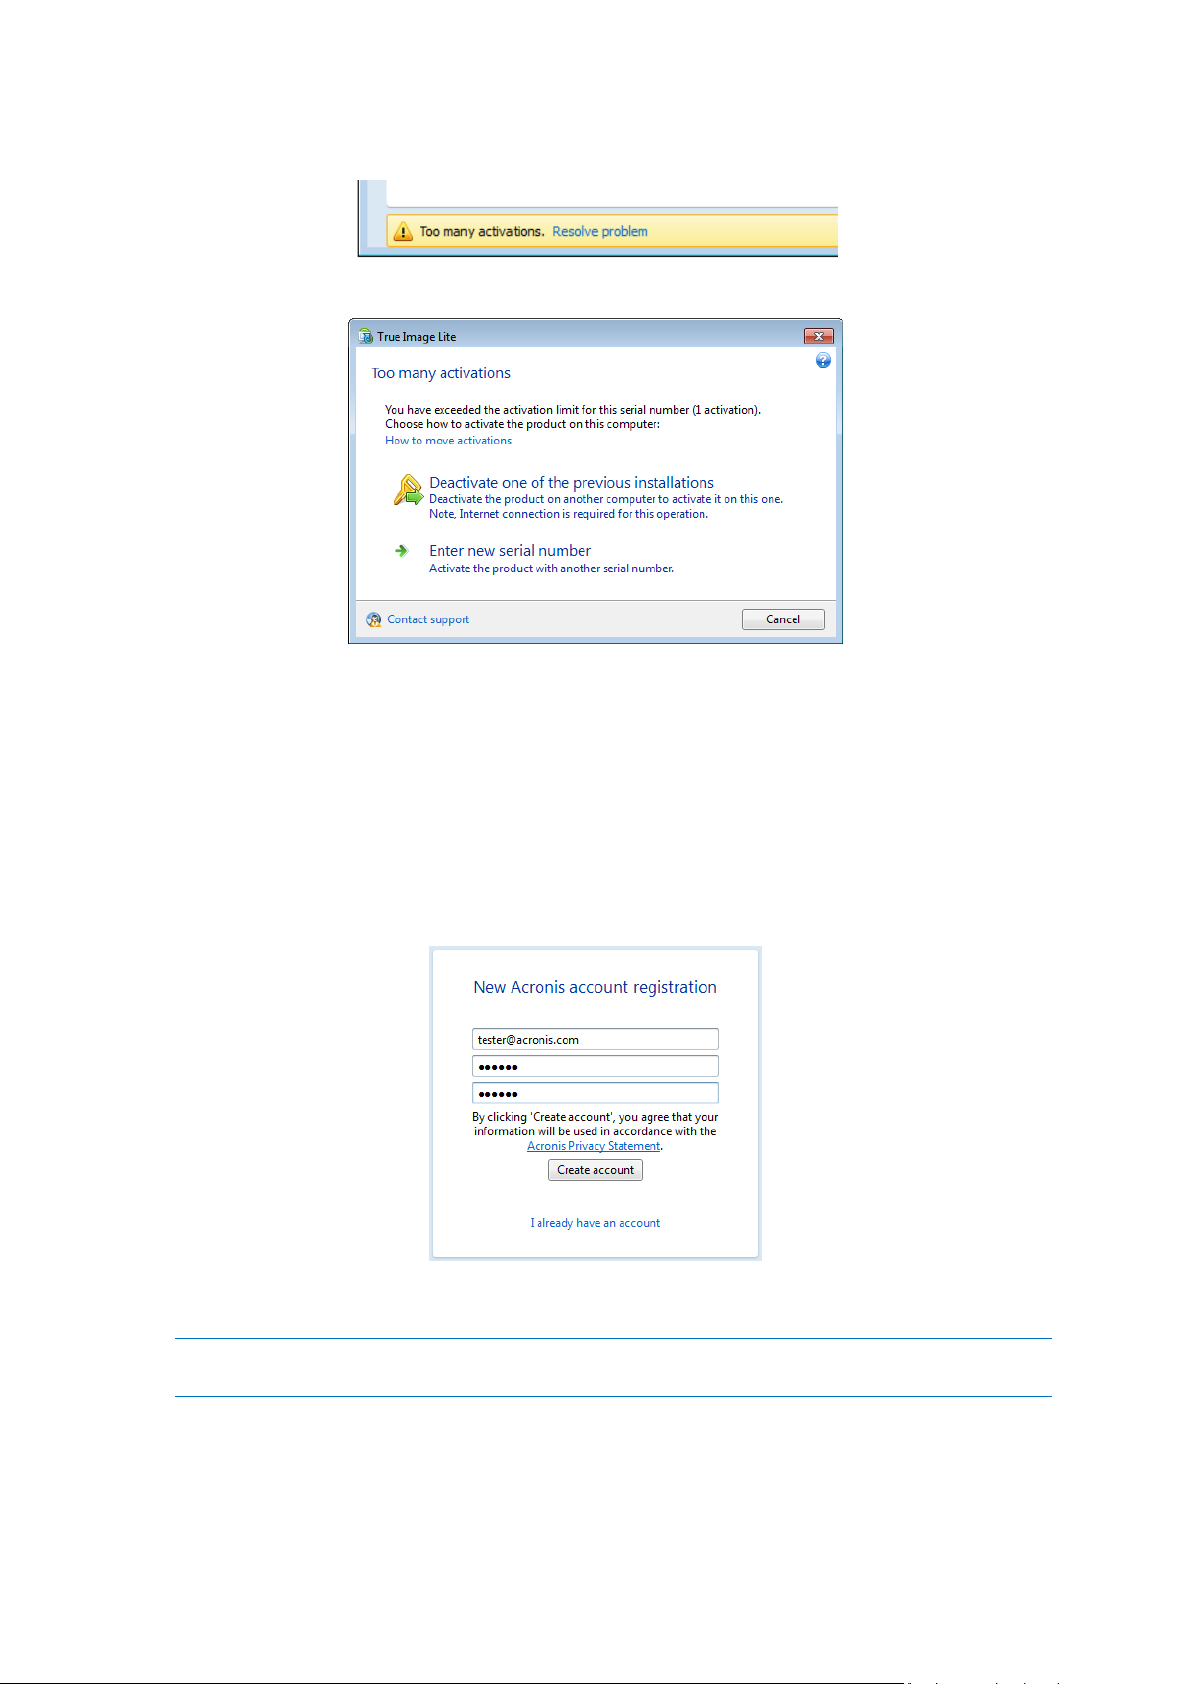
3. Find the error message at the bottom of the window and click Resolve problem.
4. In the opened window, click Deactivate one of the previous installations.
5. On the opened webpage, follow the on-screen instructions. From the list, choose a computer you
want to move the license from. Note that the product will be deactivated on the chosen
computer.
1.6 How to get started
After the product installation, you need to sign in using your Acronis account.
If you do not have an Acronis account yet, then perform the following steps:
1. In the registration form, provide your email address.
2. Provide a password for your new account and confirm the password by retyping it once more in
the appropriate field.
To keep your personal data secure, choose a strong password for your Acronis account, guard it from
getting into the wrong hands, and change it from time to time.
3. Click Create account.
9 Copyright © Acronis International GmbH, 2002-2013
Page 10
4. True Image Lite 2013 will send a message to the email address you specified. Open the message
and confirm that you want to create an Acronis account. To do this, click the corresponding link
in the message.
Attention! If you do not confirm your account within 5 days, the account will be deleted.
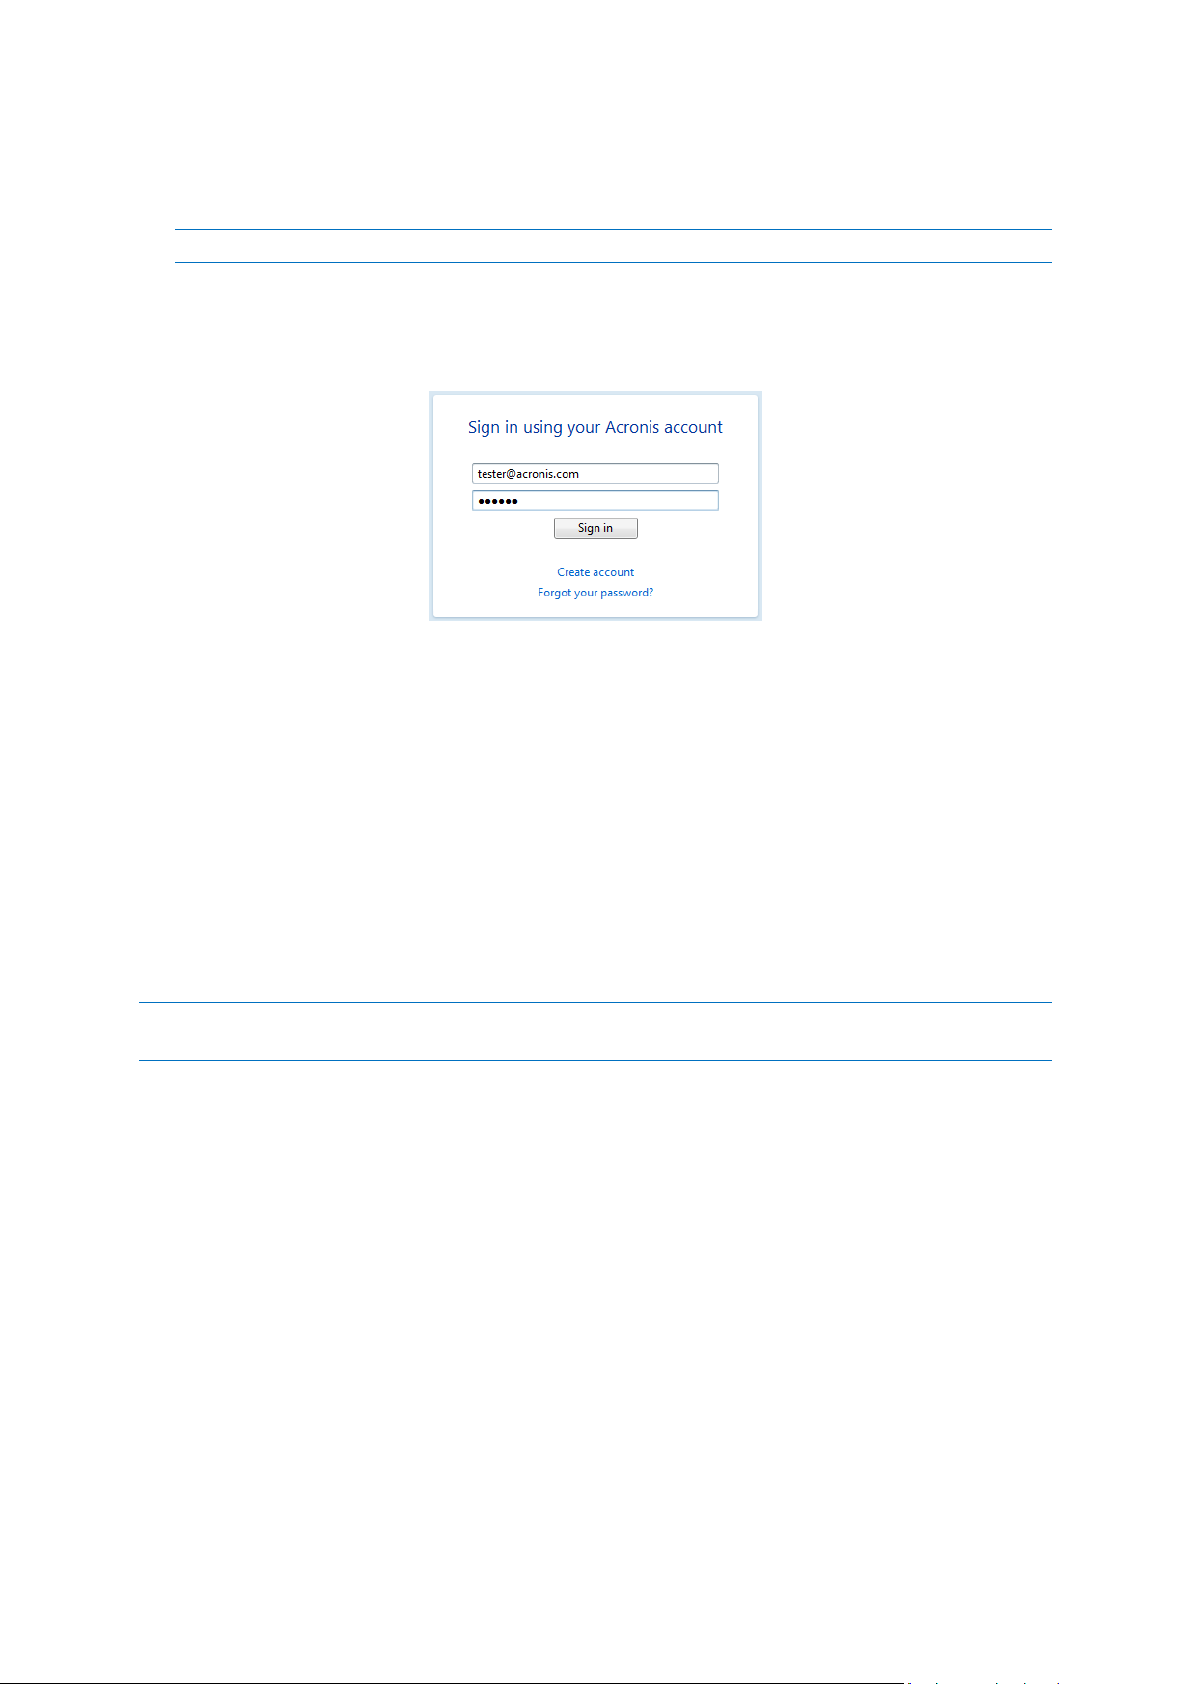
If you already have an Acronis account, then perform the following steps:
1. In the registration form, click I already have an account.
2. Enter the email address and password of your Acronis account, and then click Sign in.
When you sign in, True Image Lite 2013 automatically provides you access to the trial version of the
product. See details in Trial version information (p. 10).
1.7 Trial version information
After you install True Image Lite 2013 and sign in to your Acronis account, you can start using a trial
version of the product. It is fully functional, but works only during the 30-day trial period. After the
trial period expires you will only be able to recover data from Acronis Cloud.
Note that after the trial period you will not be able to back up your data to Acronis Cloud, even if you have a full
subscription to the Acronis Cloud service.
For details about purchasing a full version, see How to get a full version (p. 10).
Acronis Cloud trial subscription
When you activate your trial subscription, you get fully functional Online Backup and 250 GB of
storage space on Acronis Cloud for 30 days. After that, Online Backup will work for 30 days in
recovery-only mode.
After the period of 60 days, all the versions of backed up files will be permanently deleted from
Acronis Cloud.
1.8 How to get a full version
When you install True Image Lite 2013 and sign in to your Acronis account, you automatically get
access to a 30-day free trial version of the product (see details in Trial version information (p. 10)).
After that, you will be able to buy a full version.
10 Copyright © Acronis International GmbH, 2002-2013
Page 11
To get a full version:
1. Start True Image Lite 2013.
2. On the toolbar, click Acronis Store.
3. In the opened window, choose a license you want to buy, click Proceed and provide your
payment information.
If you have a serial number, choose the corresponding option, click Proceed, enter the serial
number in the box and click Submit.
1.9 What to do if you bought a box version
If you bought a box version of True Image Lite 2013, you will find a serial number inside the box.
Serial number is a unique code that you need to activate your version of the product. Therefore,
please keep it in a safe place.
To get a full version of True Image Lite 2013 using a serial number:
1. Install True Image Lite 2013 on your computer. See details in True Image Lite 2013 installation (p.
6).
2. When the installation completes, start True Image Lite 2013 and sign in to your Acronis account.
See details in How to get started (p. 9). After that, you automatically get access to a 30-day free
trial version of the product (see details in Trial version information (p. 10)).
3. On the toolbar, click Acronis Store.
4. In the opened window, choose I already have my serial number and click Proceed.
5. In the opened window, enter your serial number in the box and click Submit.
11 Copyright © Acronis International GmbH, 2002-2013
Page 12

2 Program workspace
In this section
Main window ........................................................................................... 12
Notification area icons ............................................................................. 14
Settings menu .......................................................................................... 14
Help menu ................................................................................................ 15
2.1 Main window
The main window provides quick access to all of the program functionality.
If you have not created any backups yet, the program will offer to create a new backup or add an
existing backup. If you have at least one backup, the screen will display the list of your backups.
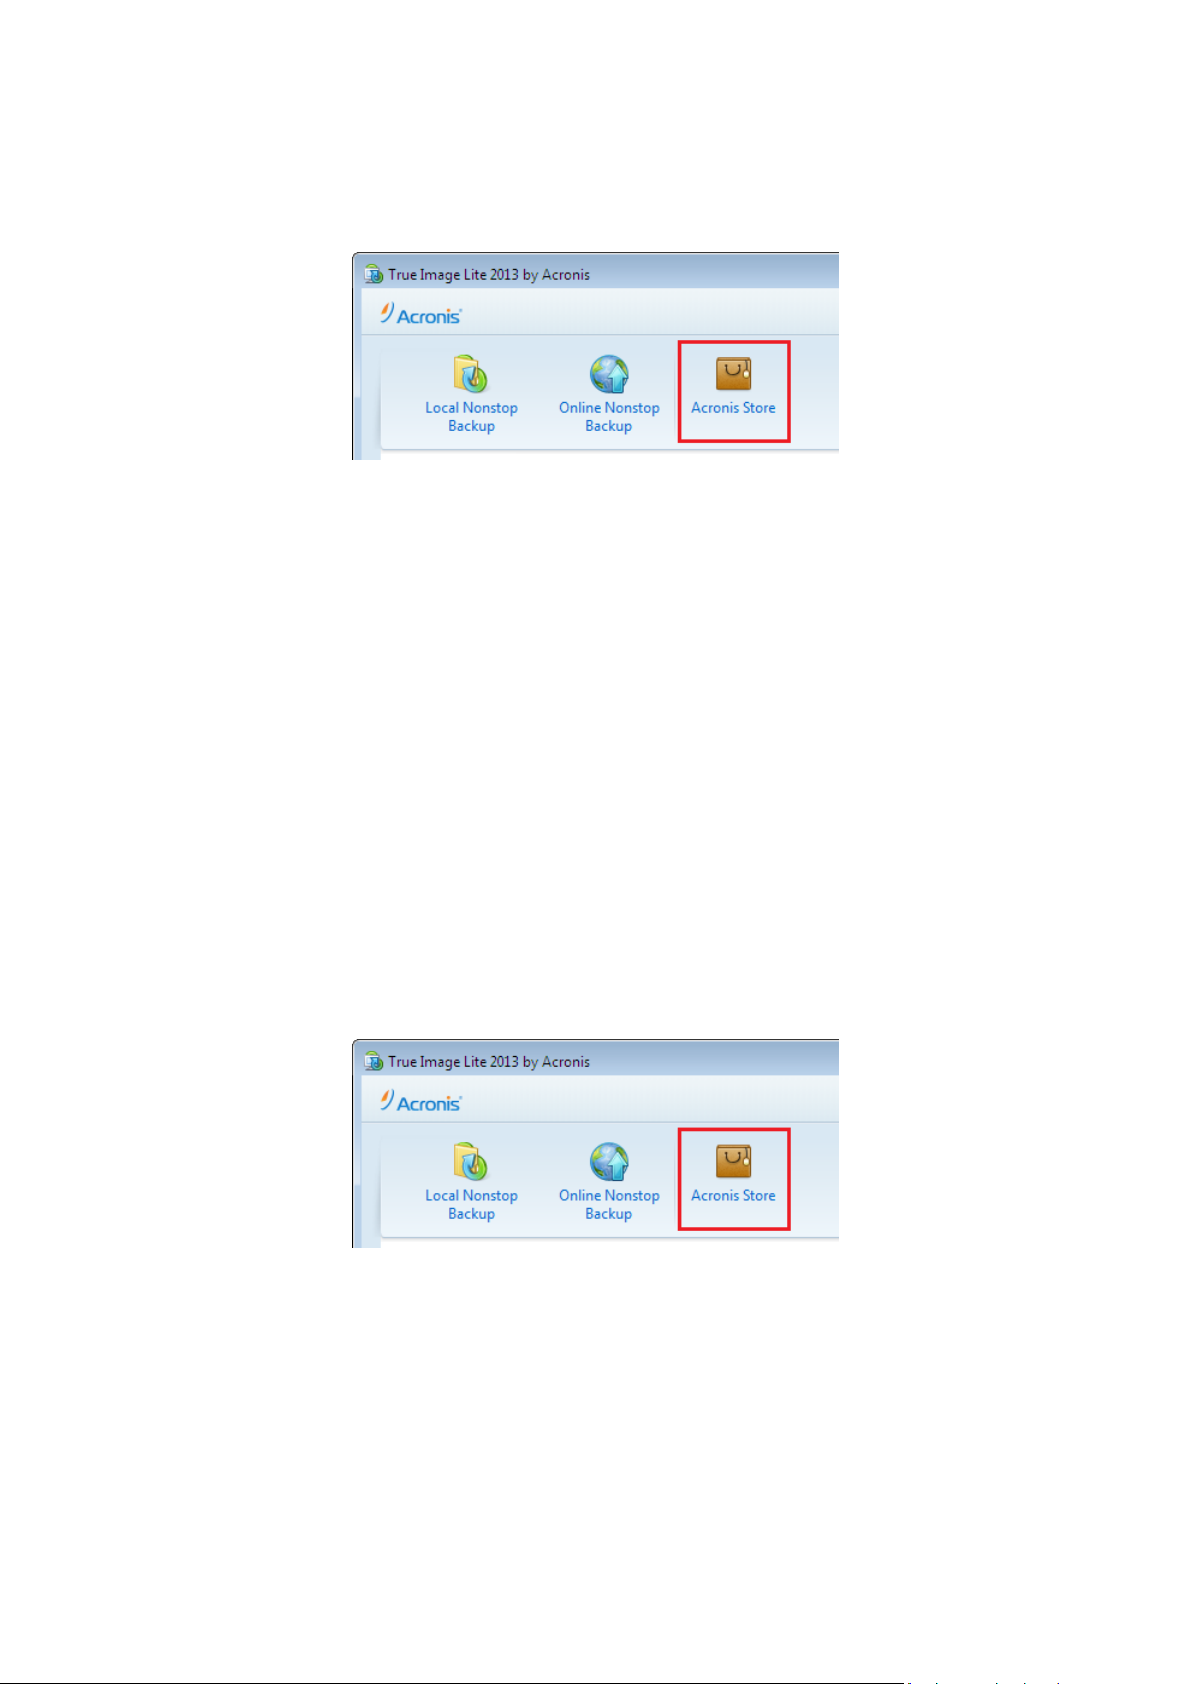
The toolbar
The toolbar contains the following commands:
Local Nonstop Backup
This feature allows nonstop backup of your files and folders to a local disk. In most cases, True
Image Lite 2013 automatically updates your nonstop backup every 5 minutes.
Note that you can run only one nonstop backup.
Online Nonstop Backup
12 Copyright © Acronis International GmbH, 2002-2013
Page 13
This feature allows you to store your data in the secure Acronis Cloud which is accessible via the
Internet. In most cases True Image Lite 2013 automatically updates your online backup every
hour.
Note that you can run only one online backup at a time.
Acronis Store
When you click this button, True Image Lite 2013 opens a window where you can upgrade a trial
version to a full one, purchase an Acronis Cloud subscription, renew this subscription, etc.
The backups area
This area shows the backups you already have. It provides access to all operations with the existing
backups and allows you to start recovery of your data.
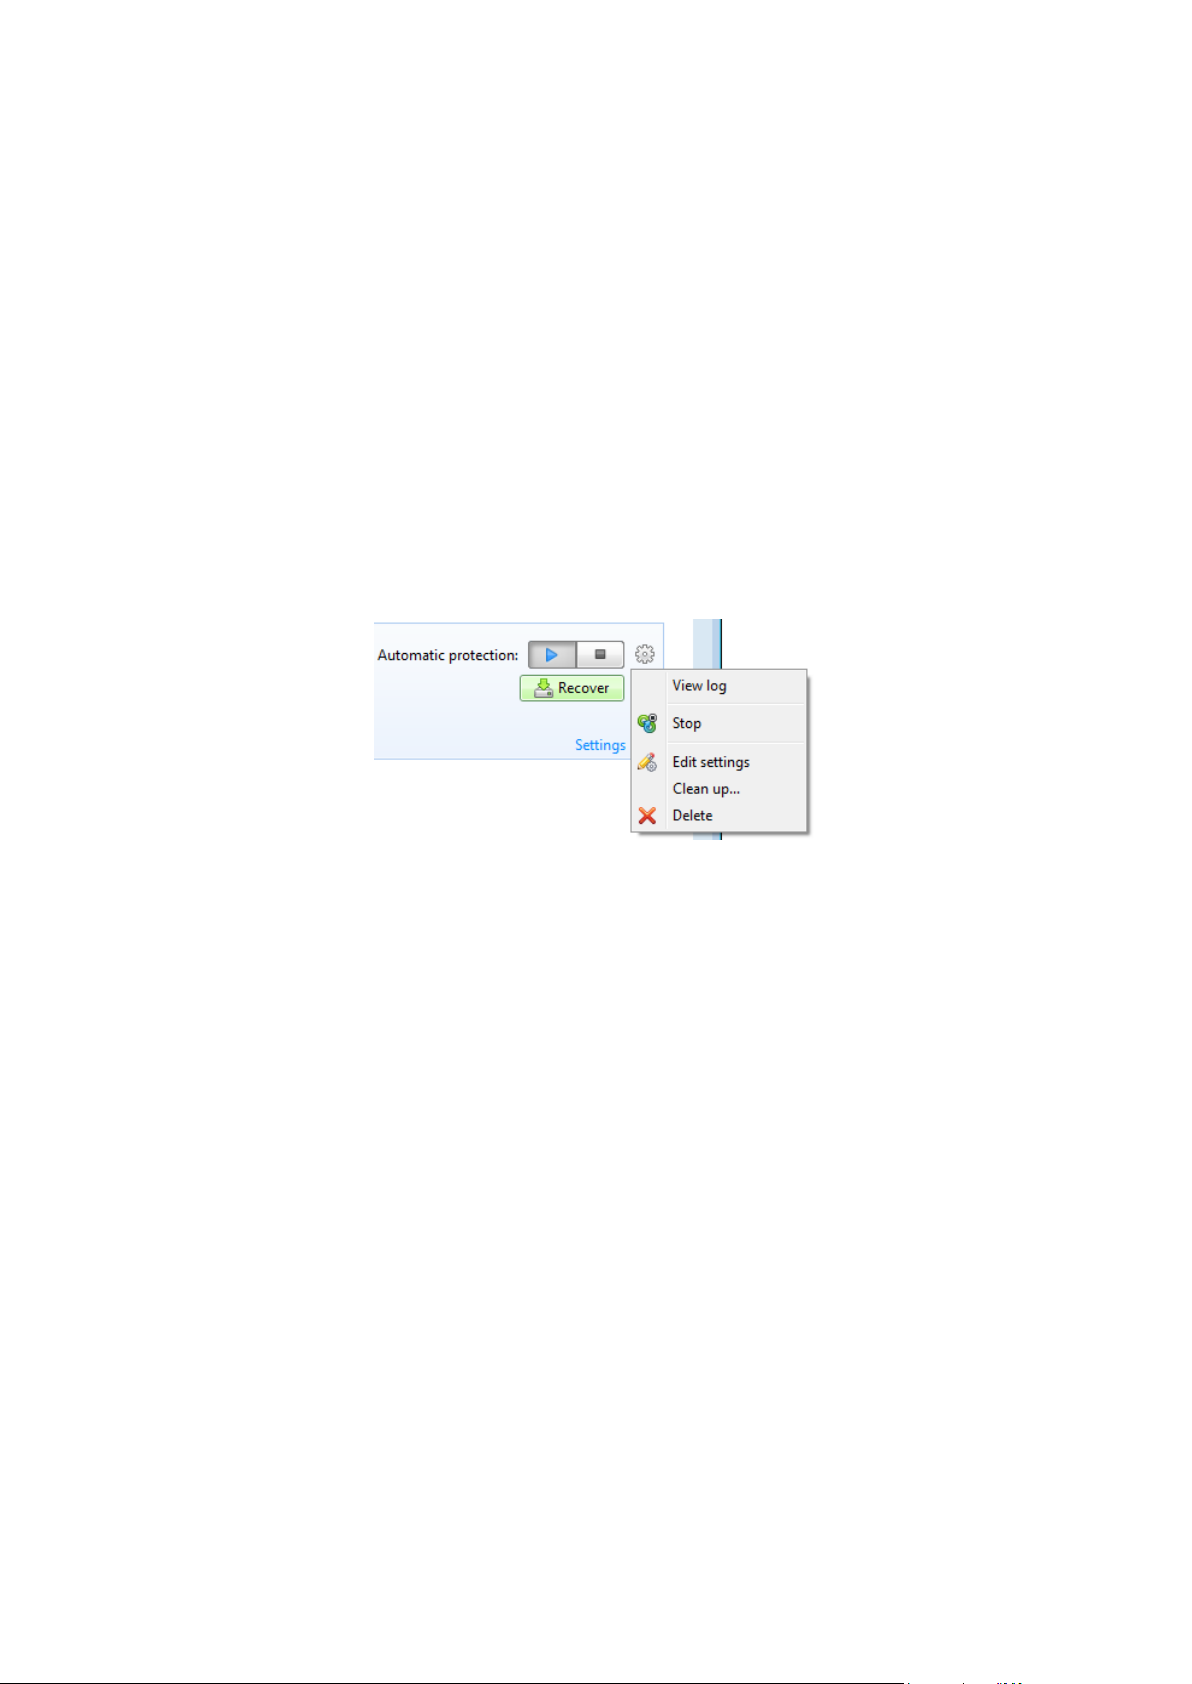
Start - starts automatic creation of backup versions.
Stop - suspends automatic creation of backup versions.
Recover - click to recover data.
Operations menu
Clicking the gear icon in the box of a selected backup or right-clicking in the free area of the box
opens an Operations menu containing the following items:
View log - click to open the log for the current backup.
Edit settings - allows editing of the current backup settings.
Recover (available for Online Backup only) - opens the Acronis Cloud application.
Clean up (available for Nonstop Backup only) - opens the Cleanup dialog box where you can
delete the backup versions you no longer need. The backup chain will not be corrupted.
Delete - deletes all backup versions of the current backup at their location. Be careful, deletion
cannot be undone.
13 Copyright © Acronis International GmbH, 2002-2013
Page 14
2.2 Notification area icons
During most of the operations, special indicator icons appear in the Windows taskbar notification
area (the right portion of the status bar with the clock). If you mouse over the icon, you will see a
tool tip indicating the operation's progress or state. Right-clicking on the icon opens a shortcut menu
where you can change the operation's status or cancel the operation if necessary. This icon doesn't
depend on the main program window being open. It is present for background execution of
scheduled backups as well.
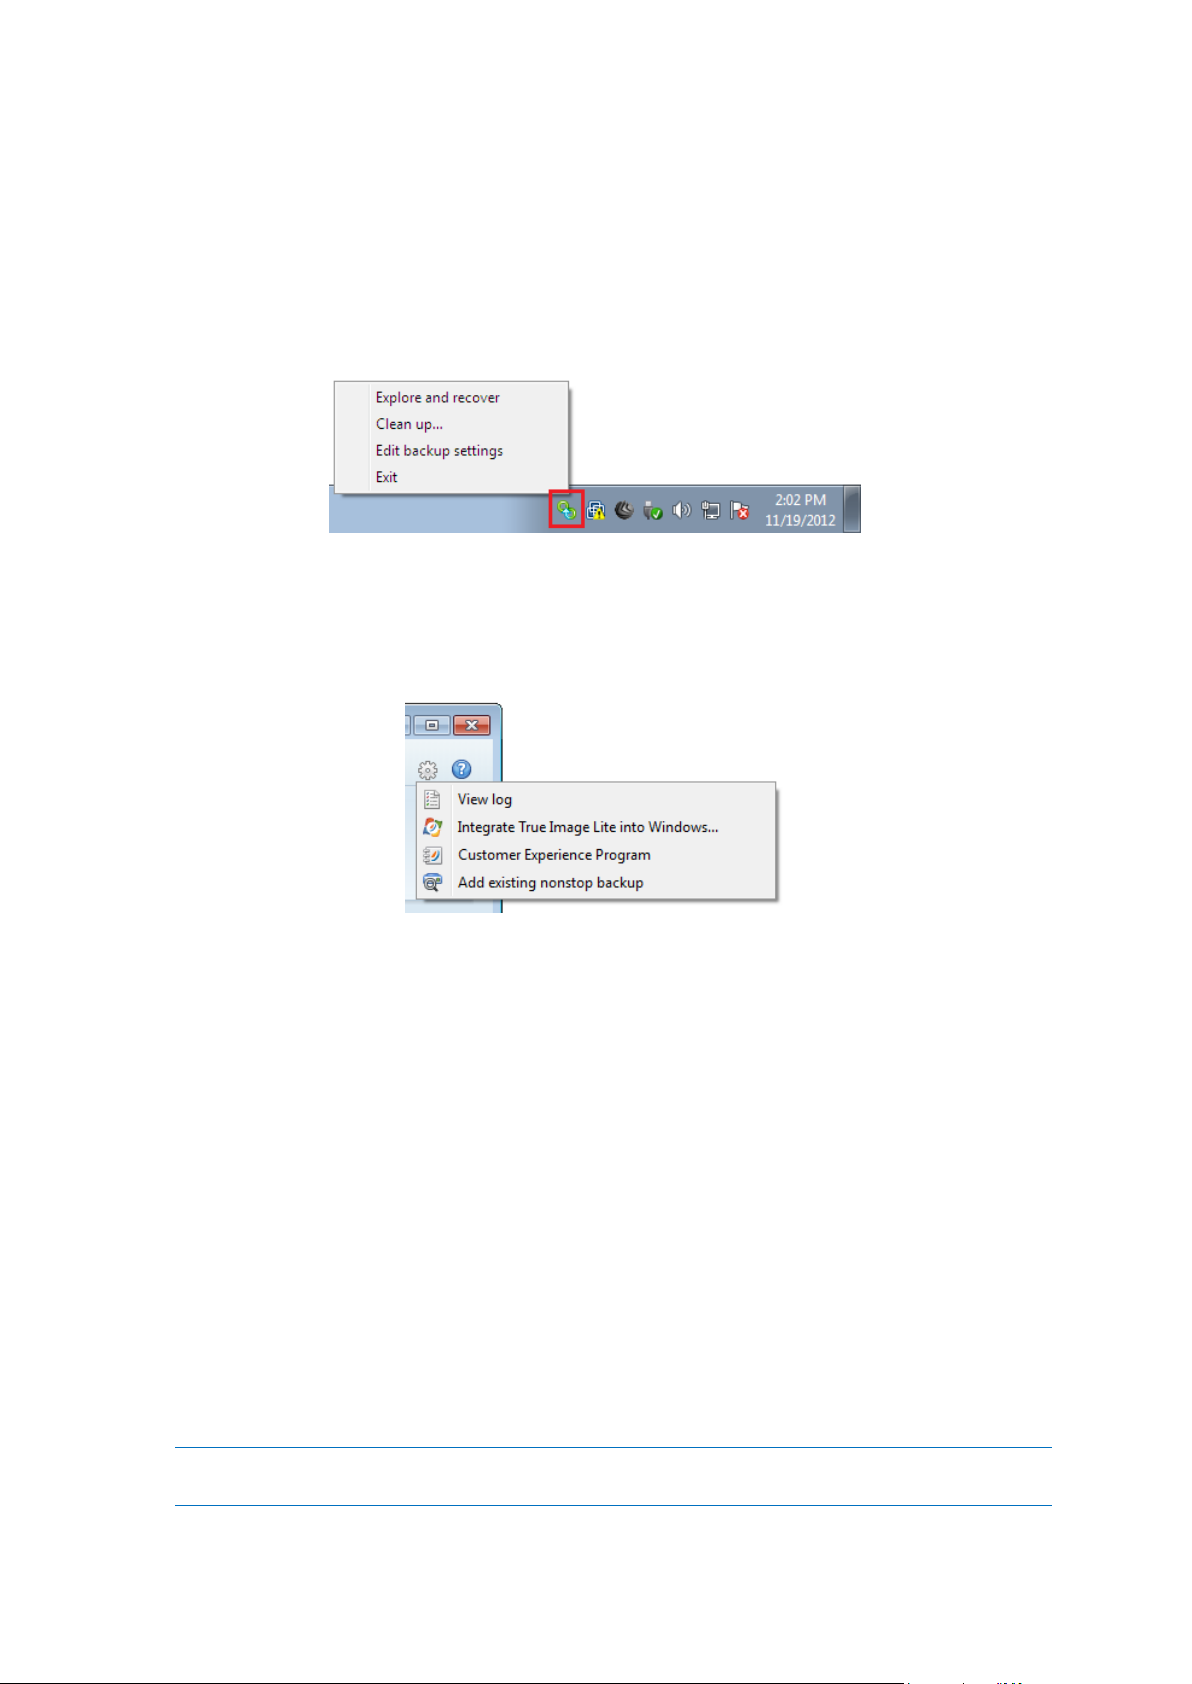
2.3 Settings menu
With the Settings menu you can make or change some settings of True Image Lite 2013. To open the
menu, click the gear icon at the upper-right corner of the program screen.
The Settings menu contains the following items:
View log - opens the log of True Image Lite 2013 operations.
Integrate True Image Lite into Windows - allows selecting the Acronis components to be
integrated into Windows.
Customer Experience Program - allows joining or leaving Acronis Customer Experience Program.
For more information on the program click the Learn more link in the opened window.
Add existing nonstop backup - allows you to browse for nonstop backups on your computer and
add them to the backup list. This may be useful when you have backups created by Acronis True
Image Home which are not shown in the backup list.
2.3.1 Integration settings
You can select the Acronis components that should be integrated into Windows.
The Acronis Recovery tab in the Properties window
Select this item to add the Acronis Recovery tab to the Properties window. To open the window,
in Windows Explorer, right-click the required file or folder, and then click Properties. The Acronis
Recovery tab allows you to view and recover versions of the selected file or folder.
If you rename a file or folder protected by Acronis Nonstop Backup, the versions of the renamed item on the
Acronis Recovery tab will disappear. They may reappear after certain time.
14 Copyright © Acronis International GmbH, 2002-2013
Page 15
Shortcut menu commands
In Windows Explorer, right-clicking on a file, folder, partition or disk opens the shortcut menu.
Along with Windows commands, this menu may contain Acronis commands, such as Back Up,
Acronis Recovery, etc.
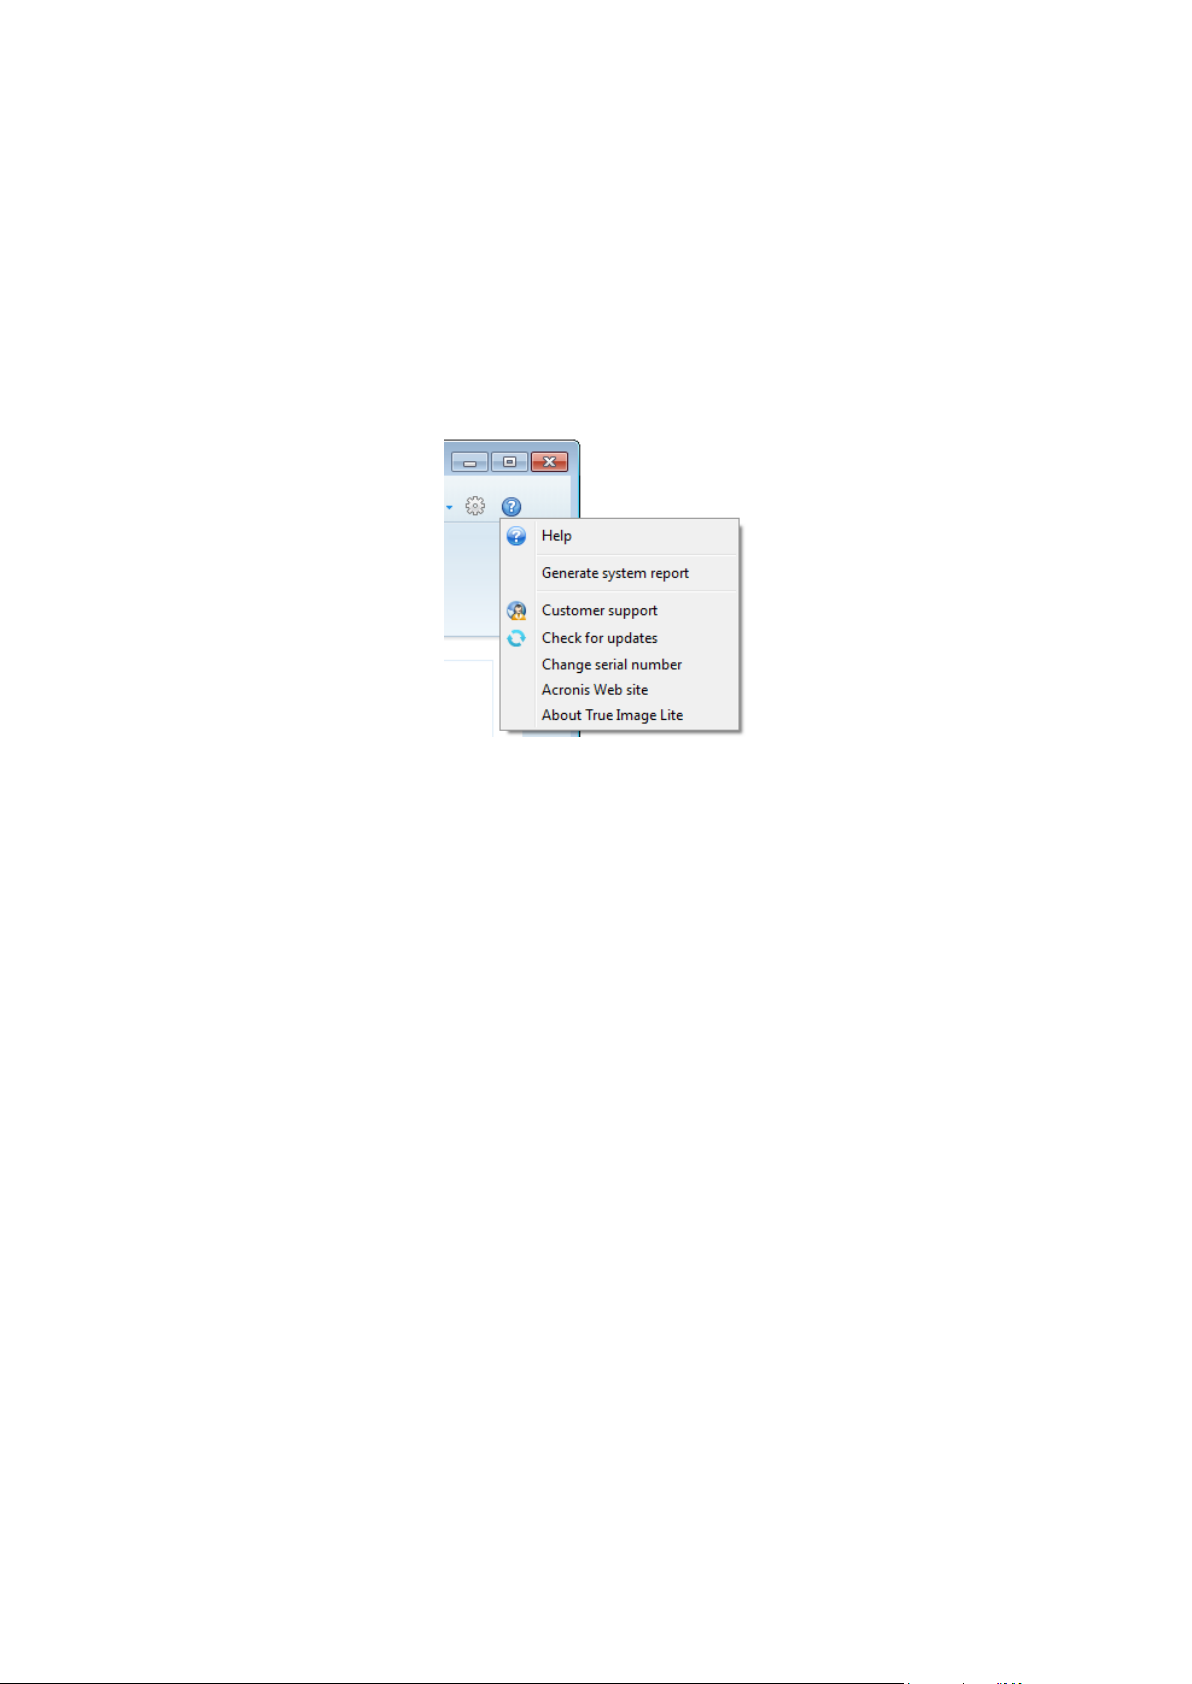
2.4 Help menu
The Help menu allows you to open the program's Help, perform certain operations, view the
product's build number, etc. To open the menu, click the question mark icon at the upper-right
corner of the program screen.
The Help menu contains the following items:
Help - opens the program's Help.
Generate system report - click to generate an Acronis system report for sending to Acronis
Customer support.
Customer support - takes you to Acronis Customer support Web page.
Check for updates - click to check for True Image Lite 2013 updates (you can also disable or
enable automatic checking for updates by selecting or clearing the Automatically check for
updates at startup check box).
Change serial number - click to change the serial number of the product.
Upgrade to full version - click to buy the full version of the product if you are using the trial
version.
Acronis Web site - takes you to the Acronis Web site.
About True Image Lite - shows information about True Image Lite 2013 including the product's
serial number and build number.
15 Copyright © Acronis International GmbH, 2002-2013
Page 16

3 Acronis Nonstop Backup
In this section
What is Acronis Nonstop Backup? ........................................................... 16
How to create nonstop backup ................................................................ 17
Recovering data ....................................................................................... 20
Deleting backups and backup versions .................................................... 27
Nonstop Backup - Frequently asked questions ........................................ 28
3.1 What is Acronis Nonstop Backup?
Acronis Nonstop Backup provides easy protection of your files and folders. It allows you to recover
individual files and their different versions.
You cannot use Acronis Nonstop Backup for protecting data stored on external hard drives.
How it works
Once you start Acronis Nonstop Backup, the program will perform an initial full backup of the data
selected for protection. Acronis Nonstop Backup will then save changes in the protected files
(including open ones) every five minutes, so that you will be able to recover your data to an exact
point in time.
Usually the different states of the protected data will be backed up at 5-minute intervals for 24
hours.
The older backups will be consolidated in such a way that True Image Lite 2013 will keep daily
backups for the last 30 days and weekly backups until all Nonstop Backup data destination space is
used.
Note, that if no changes have occurred for 5 minutes since the last backup, the next scheduled
backup will be skipped. Acronis Nonstop Backup will wait for a significant data change and will create
a new backup version only when such change has been detected. In those cases, the actual time
interval will exceed 5 minutes. In addition, if for instance, you are working in Word and do not use
the "Save" operation for an hour, changes in the Word document will not be backed up every five
minutes. This is because True Image Lite 2013 checks file changes on the disk and not in the memory.
The consolidation will be performed every day between midnight and 01:00 AM. The first
consolidation will take place after the Nonstop Backup has been working for at least 24 hours. For
example, you have turned on the Nonstop Backup at 10:00 AM on July 12. In this case, the first
consolidation will be performed between 00:00 and 01:00 AM on July 14. Then the program will
consolidate the data every day at the same time. If your computer is turned off between 00:00 and
01:00 AM, the consolidation will start when you turn the computer on. If you turn off Nonstop
Backup for some time, the consolidation will start after you turn it on again.
You may think that at these backup rates the storage will fill in no time. Do not worry as True Image
Lite 2013 will back up only the so called "deltas". This means that only differences between old and
new versions will be backed up and not whole changed files. For example, if you use Microsoft
Outlook or Windows Mail, your pst file may be very large. Furthermore, it changes with each
received or sent E-mail message. Backing up the entire pst file after each change would be an
16 Copyright © Acronis International GmbH, 2002-2013
Page 17

unacceptable waste of your storage space, so True Image Lite 2013 backs up only its changed parts in
addition to the initially backed up file.
3.2 How to create nonstop backup
Let's consider how you can use Nonstop Backup for protecting your data.
To protect your data continuously:
1. Start True Image Lite 2013 and click Local Nonstop Backup. This opens the Nonstop Backup
window.
2. Select on the directory tree an item to be protected by Nonstop Backup. The right side shows the
item contents with all the files and subfolders selected. There, you can unselect the files you do
not need to protect. If you need to protect more items, just continue selecting items on the
directory tree in the same way.
3. Select a destination for nonstop backup (you can leave the default destination or browse for a
destination after clicking on the current destination. Select a suitable destination from the
dropdown list). For more information on selecting and managing Nonstop Backup storage see
Acronis Nonstop Backup data storage.
4. The Nonstop Backup will get a default name. However, if you would like to assign another name,
type the name in the Backup name field.
5. Click the Start now button to start protecting the selected data immediately.
You can change the Nonstop Backup settings any time. To do so, click the gear icon in the Nonstop
Backup box and then select Edit settings in the Operations menu. Save the edited Nonstop Backup
settings by clicking the Save button. The Nonstop Backup will immediately start working with the
new settings. If you have changed the Nonstop Backup destination, the program will create a new full
backup of the data to be protected on the new Nonstop Backup storage.
17 Copyright © Acronis International GmbH, 2002-2013
Page 18

3.2.1 Acronis Nonstop Backup data storage
Acronis Nonstop Backup data storage can be created on local hard disk drives (both internal and
external).
In many cases an external hard disk will be the best choice for Nonstop Backup data storage. You can
use an external disk with any of the following interfaces: USB (including USB 3.0), eSATA, FireWire,
and SCSI.
You can also use an NAS as the storage, but with one limitation - it must be accessible with the SMB
protocol. It does not matter whether an NAS share you want to use for the storage is mapped as a
local disk or not. If the share requires login, you will need to provide the correct user name and
password. For more information see Authentication settings (p. 19). True Image Lite 2013
remembers the credentials and the subsequent connections to the share do not require login.
When an external hard disk or NAS is unavailable, the Nonstop Backup destination can be an internal
disk, including a dynamic one. Please note that you cannot use a partition to be protected as a
Nonstop Backup storage.
Before creating Acronis Nonstop Backup data storage, True Image Lite 2013 checks whether the
selected destination has enough free space. It multiplies the volume of data to be protected by 1.2
and compares the calculated value with the available space. If the free space on the destination
satisfies this minimum storage size criterion, the destination can be used for storing Nonstop Backup
data.
When the Acronis Nonstop Backup data storage becomes full, you can clean up your current storage
or set another one. See details in What to do when Nonstop Backup storage is full (p. 19).
3.2.1.1 Deciding where to store your backups
True Image Lite 2013 supports quite a few of storage devices. For more information see Supported
storage media. Some of the supported storage locations are discussed below.
Hard disk drives
Since hard disk drives are now quite inexpensive, in most cases purchasing an external hard drive for
storing your backups will be an optimal solution. An external drive enhances the security of your data
because you can keep it off-site (for example, at home if you back up your office computer and vice
versa). You can choose various interfaces – USB, FireWire, eSATA depending on the configuration of
your computer ports and the required data transfer rate. In many cases the best choice will be an
external USB hard drive, especially if your computer supports USB 3.0.
If you plan to use an external USB hard drive with your desktop PC, connecting the drive to a rear
connector using a short cable will usually provide the most reliable operation. This reduces the
chance of data transfer errors during backup/recovery.
Home file server, NAS or NDAS
If you have a Gigabit Ethernet home network and a dedicated file server or NAS, you can store
backups on the file server or NAS practically like on an internal drive.
If you decide to use an external hard drive, NAS, NDAS, etc., you will need to check whether True
Image Lite 2013 detects the selected backup storage.
18 Copyright © Acronis International GmbH, 2002-2013
Page 19

To gain access to an NDAS enabled storage device, in many cases you will need to specify the NDAS
device ID (20 characters) and the write key (5 characters). The write key allows you to use an NDAS
enabled device in write mode (for example, for saving your backups). Usually the device ID and write
key are printed on a sticker attached to the bottom of the NDAS device or on the inside of its
enclosure. If there is no sticker, you need to contact your NDAS device vendor to obtain that
information.
Authentication settings
If you are connecting to a networked computer, in most cases you will need to provide the necessary
credentials for accessing the network share. For example, this is possible when you select a backup
storage in the Browse for destination window. The Authentication Settings window appears
automatically when you click a networked computer name. To open it manually, click Specify
credentials for this locations on the toolbar.
If you need to specify the user name and password:
User name - enter a user name
Password - enter the user's password
When you click the Test connection button, the computer will try to connect to the selected network
share. If you receive an error message, check if the credentials are correct and provide the correct
user name and password for the selected network share. To repeat the connection attempt, click the
Test again button.
Having provided the required information, click Connect.
3.2.1.2 What to do when Nonstop Backup storage is full?
Inevitably, the Acronis Nonstop Backup data storage becomes full after a period of time which
depends on the selected Nonstop Backup destination and the volume and composition of the data
protected by Acronis Nonstop Backup.
Setting another storage
When the free space on the storage becomes less than 200 MB, the program will alert you. You can
choose another destination without losing the previously backed up data. You will be able to recover
the data backed up on the old storage. Note that after selecting a new destination, True Image Lite
2013 creates a new full backup of the data selected for protection by Nonstop Backup.
Cleaning up the existing storage
One more way of managing the Acronis Nonstop Backup storage is by deleting the backup versions
you no longer need.
To clean up the storage:
1. On the nonstop backup box, click the gear icon and select Clean up.
19 Copyright © Acronis International GmbH, 2002-2013
Page 20

2. In the opened window, select a period of time for deleting the backup versions created during
that period, and then click OK.
You can clean up only the active Acronis Nonstop Backup storage.
You can also completely clean up the Acronis Nonstop Backup storage by selecting Delete in the
Operations menu of a nonstop backup box. If you select the active nonstop backup box, the deletion
stops operation of Acronis Nonstop Backup.
3.3 Recovering data
The purpose of data backup is to recover backed up data when the original is lost due to hardware
failure, fire, theft or accidental deletion of files.
We hope that you backed up your data using the backup features provided by True Image Lite 2013.
If so, nothing will have been lost.
The following sections describe how to recover files and folders from a nonstop backup. To do this,
you will use Acronis Backup Explorer.
20 Copyright © Acronis International GmbH, 2002-2013
Page 21

3.3.1 Acronis Backup Explorer
The Acronis Backup Explorer provides you with a wealth of information on your nonstop backup:
backup versions number, dates, contents, backup results, etc. In addition, the Backup Explorer allows
you to explore and recover backed up data.
The window shows the files and folders states of when the current backup version was created. You
can switch between the backup versions by using the time line at the bottom of the screen. For more
information on using the time line see Time line (p. 22).
While switching between versions you see the backed up files and folders contained in the selected
backup version. The left-hand area of the tab shows a directory tree and the right-hand area shows
the contents of a selected directory tree item.
Data recovery
To recover files and/or folders:
1. On the time line, select the backup version, from which you want to recover your files/folders.
The version's exact date and time will be displayed near the backup name. Your data will be
recovered to the state it was at this point in time.
2. Select the corresponding check boxes of the files and folders you want to recover (see selection
rules below). Short information about the selected items (their number and total size) will be
displayed near the Recover button.
3. Click the Recover button.
You can also recover files and folders by dragging them to your Desktop or into a selected folder in
Windows Explorer.
21 Copyright © Acronis International GmbH, 2002-2013
Page 22

You cannot recover files by dragging them to an FTP, recordable CD/DVD or other optical media, as well as
mounted ISO files.
File version recovery
When you click an item, short information on this item is displayed under the browser area. The set
of displayed parameters depends on the item's type. Clicking the View versions link opens the View
Versions window containing a list of all versions of the file in the backup. You can recover a desired
version by its backup time.
By double-clicking on a file in the right-hand area, you will recover the file to a temporary folder.
Then, True Image Lite 2013 will open the file using the associated application.
Selection rules
Check boxes that correspond to the items may be in the following states:
Selected (check mark in square) - this state indicates that the item is selected for recovery. A
selected folder means that all items in the folder are selected.
Cleared (clear square) - this state indicates that the item is not selected.
Mixed (filled square) - this state is available for folders only and indicates that some items in the
folder are selected and the others are not. Note that you cannot set the state by clicking the
check box, but you can change it to a cleared or selected state.
Selecting a file or folder to make it the current item in a list does not mean selecting it for recovery!
Search
To find a file or folder you need to recover, type the file or folder name in the search field. See details
in Searching inside nonstop backup (p. 25).
3.3.1.1 Time line
Usually the time line at the bottom of the Acronis Backup Explorer screen shows information on the
backup versions stored in the selected backup. The time line provides easy navigation through
backup versions and allows you to recover your data to the state it was in at a certain date and time.
22 Copyright © Acronis International GmbH, 2002-2013
Page 23

The picture below shows various states of a time line. The states vary depending on the number of
backups and the time interval through which you are navigating.
The "Now" interval shows backup versions created during the last hour.
The "Today" interval shows backup versions created from the beginning of the current day to the last
hour.
The "week" interval can be named either "Week ago" or "This week".
When today is Monday, Tuesday or Wednesday, the "week" interval is named "Week ago". In such
cases, the time line shows backup versions created during the previous week and from the beginning
of the current week to the beginning of today.
When today is Thursday, Friday, Saturday or Sunday, the "week" interval is named "This week". In
such cases the time line shows backup versions created from the beginning of the current week to
the beginning of today.
The "month" interval can be named either "Month ago" or "This month".
When today is any date from the 1st to 15th day of the month, the "month" interval is named
"Month ago". In that case, the time line shows backup versions created during the previous month
and from the beginning of the current month to the "week" interval.
When today is any date from the 16th to 31st day of the month, the "month" interval is named "This
month". In that case, the time line shows backup versions created from the beginning of the current
month to the "week" interval.
The "This year" interval shows backup versions created from the beginning of the current year to the
“month” interval.
23 Copyright © Acronis International GmbH, 2002-2013
Page 24

The "Older" interval shows backup versions created from earlier than the beginning of the current
year.
Working with time intervals and backup versions
Time intervals may be expanded (when the number of backup versions fits onto the time line) or
folded into a square "block". When a time interval is expanded, the squares representing backup
versions may contain a "warning" or "error" icon. Such an icon indicates that warning(s) or error(s)
have been written into the Log during version creation.
If more than one backup version has been created during a day within "week", "month", "year", or
"older" time interval, such a date is shown on the time line using a special "version pack" icon.
If you hover over a folded block for more than half a second, a balloon will show the information
about the time interval start, its end, and the number of backup versions it contains.
If you hover over a backup version within an expanded time interval, a balloon will show more
detailed information about the backup version.
Clicking on a folded block or its name above or below the time line expands the corresponding time
interval. If the number of backup versions within the time interval is too big to fit onto the time line,
the horizontal scroll line allows you to navigate through the backup versions within the time interval.
If you select another folded block and there is no room for displaying all backup versions of the newly
expanded block, then the current expanded block will collapse.
By clicking on a backup version, you select it in the Backup Explorer.
Shortcut menus
Right-clicking on the time line opens the shortcut menu.
The menu contents will change depending on the selected item:
Explore and recover (available for backup versions).
Expand (available for folded version packs and time blocks).
Viewing additional information on the time line
You can also set up the time line to show additional information. The appropriate commands are
available in the View submenu. The View submenu is opened by right-clicking on a backup version or
by right-clicking on time line's free space.
24 Copyright © Acronis International GmbH, 2002-2013
Page 25

Show software installations - if this item is selected, the time line shows icons that indicate
moments when new programs have been installed on your computer.
Show software updates - if this item is selected, the time line shows icons that indicate updates
of Windows and programs installed on your computer.
Show warnings - if this item is selected, the time line shows all the backup versions that have
been suspended or completed with warning messages (selected by default).
Show errors - if this item is selected, the time line shows failed backup versions and backup
versions that have completed with errors.
3.3.1.2 Searching inside nonstop backup
In addition to the ability to explore your nonstop backup, True Image Lite 2013 allows you to search
for files inside all versions of the backup.
True Image Lite 2013 cannot perform search on network shares, Acronis Cloud, and devices that are recognized
by Windows as Devices with removable storage.
Enter a search string into the Search field at the top right of the Backup Explorer window. The
program shows search results.
Double-clicking on a filename opens the file. You can recover the file by right-clicking on its filename
and choosing Recover in a shortcut menu. This shortcut menu also enables you to open the file or
view its versions.
When searching files in backups, you can type all or part of the filename and use the common
Windows wildcard characters. For example, to find all batch files in the backups, type "*.bat". Typing
my???.exe will allow you to find all .exe files with names consisting of five symbols and starting with
25 Copyright © Acronis International GmbH, 2002-2013
Page 26

"my". It should be noted that search is not case-insensitive, i.e. "Backup" and "backup" are the same
search string.
3.3.2 Recovering files and folders
You will usually start recovering files and folders from Acronis Backup Explorer. When recovering a
specific file version, you will start recovery from the View Versions window. In either case, starting
recovery opens the File Recovery window.
Let's consider recovery of files and folders from the Backup Explorer.
1. Start True Image Lite 2013.
2. Find the nonstop backup which contains the files and folders you want to recover. On the
corresponding box click Recover.
3. In the Backup Explorer, select the files and folders you want to recover. For more information on
selection rules see Acronis Backup Explorer (p. 21). Click Recover to start recovery. This will open
the File Recovery window.
4. Select a destination on your computer where you want to recover selected files/folders. You can
recover data to its original location or choose a new one, if necessary. To choose a new location,
click the Browse... button.
5. When you choose a new location, the selected items will be recovered by default without
recovering the original, absolute path. You may also wish to recover the items with their entire
folder hierarchy. In this case select the Recover absolute path check box.
6. To start the recovery process, click the Recover now button.
7. The recovery progress will be shown in a special window. You can stop the recovery by clicking
Cancel. Please keep in mind that the aborted recovery may still cause changes in the destination
folder.
26 Copyright © Acronis International GmbH, 2002-2013
Page 27

3.3.3 Recovering file versions
If you need to recover a specific version of a file, select the file in the Backup Explorer. When you
select the file, the View versions link appears below the file size information. Clicking the link opens
the View Versions window with a list of all versions of the file in the backup.
Until you select a file version, the Open and Recover... buttons remain disabled. Selecting a file
version enables the buttons:
Select the required version by its backup time and click the Recover... button. This will open the File
Recovery window. Select the destination and recover the file version to the folder of your choice. For
more information, see Recovering data from file-level backups.
You can also recover the version by dragging it into a selected folder in Windows Explorer.
To choose the correct version, you can open the version in the associated application and view the
file contents. Choose the version by its backup time, and then click the Open button. True Image Lite
2013 will recover the file version to a temporary folder. Then, it will open the file using the
associated application.
3.4 Deleting backups and backup versions
You may want to delete backups and backup versions you no longer need. True Image Lite 2013
stores information on the backups in a metadata information database.
Therefore, deleting unneeded backup files in Windows Explorer will not delete information about
these backups from the database, and True Image Lite 2013 will consider that they still exist.
This will result in errors when the program tries to perform operations on the backups that no longer
exist. So you must only remove obsolete backups and backup versions by using the tools provided by
True Image Lite 2013.
To delete an entire backup:
27 Copyright © Acronis International GmbH, 2002-2013
Page 28

On the corresponding backup box, click the gear icon to open the Operations menu and then click
Delete.
When you delete an entire backup, all its versions will be deleted as well.
To delete backup versions:
1. On the nonstop backup box, click the gear icon and select Clean up.
2. In the opened window, select a period of time for deleting the backup versions created during
that period, and then click OK.
See details in What to do when Nonstop Backup storage is full (p. 19).
3.5 Nonstop Backup - Frequently asked questions
Why does Acronis Nonstop Backup pause on its own? - This is the designed behavior of Acronis
Nonstop Backup. When the system load rises to a critical level, Acronis Nonstop Backup receives the
overload alarm from Windows and pauses itself. This is done to aid Windows relieve the load caused
by other applications. The overload can be caused by running resource-intensive applications (for
example, performing a deep system scan with your antivirus software).
In such a case Nonstop Backup automatically pauses and you cannot restart it. After pausing, Acronis
Nonstop Backup gives the system one hour to relieve the load and then attempts to restart.
The automatic restart count for Acronis Nonstop Backup is 6. This means that after the first
automatic restart Acronis Nonstop Backup will attempt to restart five more times with intervals of
exactly one hour between attempts.
After the sixth unsuccessful attempt, Acronis Nonstop Backup will wait for the next calendar day. On
the next day the automatic restart count will automatically reset. When not interfered with, Acronis
Nonstop Backup performs six restart attempts per day.
The restart attempt count can be reset by doing any of the following:
Restarting Acronis Nonstop Backup service;
Rebooting the computer.
Restarting Acronis Nonstop Backup service will only reset the restart count to 0. If the system is still
overloaded, Acronis Nonstop Backup will pause again. An Acronis Support Knowledge Base article at
http://forum.acronis.com/forum/14958 describes the procedure for restarting the Acronis Nonstop
Backup service.
Rebooting the computer will reset the load and the restart count. If the system overloads again,
Acronis Nonstop Backup will pause.
Why does Acronis Nonstop Backup sometimes cause a high CPU load? - This is the expected
behavior of Acronis Nonstop Backup. This may happen on restart of a paused Acronis Nonstop
Backup if a considerable amount of protected data has been modified during the pause.
For example, if you manually pause the Acronis Nonstop Backup that you use for protecting your
system partition and then install a new application. When you restart Acronis Nonstop Backup, it
loads the CPU for some time. However, the process (afcdpsrv.exe) then goes back to normal.
This happens because Acronis Nonstop Backup needs to check the backed up data against the data
that have been modified during the pause to ensure protection continuity. If there was a
28 Copyright © Acronis International GmbH, 2002-2013
Page 29

considerable amount of data modified, the process may load CPU for some time. After the check is
done and all the modified data is backed up, Acronis Nonstop Backup goes back to normal.
Can I have Acronis Nonstop Backup storage on an FAT32 partition of a local hard disk? - Yes, you
can. A FAT32 partition can be used as the storage.
Can I set up Acronis Nonstop Backup storage on a network share or NAS? - Yes, Acronis Nonstop
Backup supports network shares, mapped drives, NAS and other network attached devices with one
limitation - they must use the SMB protocol.
How does manual clean up of Acronis Nonstop Backup storage work? - You can clean up Acronis
Nonstop Backup storage by deleting the backed up data for a certain period of time. For example,
you started Acronis Nonstop Backup of your system partition on August 15, 2011. It has been
protecting your partition since that day. Let's suppose that today is December 15, 2011 and your
Acronis Nonstop Backup storage is almost full. You decide to clean up unnecessary data to free up
some storage space. To clean up the storage, click the gear icon in the Nonstop Backup box to open
the Operations menu and then select Clean up.... True Image Lite 2013 displays a window allowing
you to select a period of time for deleting the backup versions created during that period. Let's
suppose that you did not make important changes to the system during a period from September 1
to December 1. Select the period and click OK. The program will delete all backup versions created
during the selected period and consolidate the remaining backup versions to keep their consistency.
Let's consider some cases to explain which data is deleted and which data is kept. First let's consider
a system file, for example, notepad.exe. It was backed up during the initial full backup on August 15
and naturally did not change since then. In this case the file will remain in Nonstop Backup after
clean up. And now suppose you installed a game on September 15, played for some time, and then
uninstalled the game on October 5. In this case all files related to the game will be deleted from
Nonstop Backup. One more example: you started to write your master's thesis using Microsoft Word
on November 16. In this case, all thesis file versions backed up from November 16 to December 1 will
be deleted and only the versions from December 2 to today will remain. To sum up the above, all
data modifications made during the selected period will be lost. All files that did not change since the
initial full backup made on August 15 and all data modifications made before September 1 and after
December 1 will be kept.
How to pause Acronis Nonstop Backup? - You can pause Nonstop Backup by clicking the gear icon
on the Nonstop Backup box and selecting Stop in the menu. To resume Nonstop Backup, click the
gear icon again and select Start in the menu. You can also pause and resume Nonstop Backup by
clicking the corresponding buttons in the Nonstop Backup box.
How can I turn off and delete Acronis Nonstop Backup? - To turn off and delete Acronis Nonstop
Backup, click the gear icon on the Nonstop Backup box and select Delete in the menu. This deletes all
the Nonstop Backup data.
29 Copyright © Acronis International GmbH, 2002-2013
Page 30

4 Acronis Online Backup
In this section
What is Acronis Cloud? ............................................................................ 30
What is True Image for mobile devices? .................................................. 30
How to get a subscription ........................................................................ 31
Sign-in menu ............................................................................................ 31
Backing up to Acronis Cloud .................................................................... 32
Recovery from Acronis Cloud ................................................................... 39
Managing online backups ........................................................................ 40
Removing data from Acronis Cloud ......................................................... 41
4.1 What is Acronis Cloud?
Acronis Cloud might be unavailable in your region. For more information, click here:
http://kb.acronis.com/content/4541
On the one hand, Acronis Cloud is a remote storage which you may use for storing your data. All you
need for using this storage is an Acronis account.
You can save important files to a secure remote location and recover them when the need arises.
Because files are stored on a remote storage, they are protected even if your computer gets stolen or
your house burns down. So the risk of data loss as a result of fire, theft, or other natural disasters is
practically eliminated. If something happens to your backup image, PC, or external storage device,
you can get your most important files back. If your computer crashes, you can recover your files back
to your PC or another system that has True Image Lite 2013 installed on it.
On the other hand, Acronis Cloud is a Web application that allows you to recover and manage the
data you store on Acronis Cloud. You can use any computer with a Web browser without the
necessity of installing True Image Lite 2013 or other Acronis application that operates with Acronis
Cloud.
Simply go to the Acronis Web site using this link https://www.acronis.com/my/online-backup/ and
log in to your account. When your subscription information page opens, click Recover my data now.
After the Acronis Cloud page opens, select the backup or sync that contains the files you need to
recover and then download the files to your current computer.
You can save documents, photos, music, and more from up to five PCs on one account. If a computer
crashes, no problem... Just log in from another computer and retrieve your files.
4.2 What is True Image for mobile devices?
Acronis Cloud might be unavailable in your region. For more information, click here:
http://kb.acronis.com/content/4541
True Image for mobile devices allows you to access data you stored on Acronis Cloud, and sync this
data with your other mobile devices and computers. Note that True Image for mobile devices is
useless without Acronis Cloud, so you need to subscribe to the service first.
True Image for mobile devices allows you to:
30 Copyright © Acronis International GmbH, 2002-2013
Page 31

Get access to your Acronis Cloud
Sync Gallery (in Android) and Camera Roll (in iOS) across devices
Add files to Favorites (in Android) or Pinned (in iOS) to keep them up-to-date and get offline
access
Share files with your friends by using public links
Upload both newly created photos, videos, etc. and existing files from your SD card to Acronis
Cloud
Which devices does the mobile app support?
You can install True Image on any mobile devices that have iOS (iPhone, iPad, iPod) and Android
(mobile phones and tablets) operating systems.
Where can I get these apps?
You can view additional information and download True Image for mobile devices from App Store or
Google Play:
True Image for iOS devices: https://itunes.apple.com/us/app/true-image/id486764267?mt=8
True Image for Android devices:
https://play.google.com/store/apps/details?id=com.acronis.acronis&feature=search_result#?t=
W251bGwsMSwyLDEsImNvbS5hY3JvbmlzLmFjcm9uaXMiXQ..
How much does the mobile app cost?
True Image for mobile devices is available for free.
4.3 How to get a subscription
Performing backups to Acronis Cloud requires subscription to the Acronis Cloud service.
First of all, to get started you need an Acronis account. When you run True Image Lite 2013 for the
first time, it provides you a registration form. If you do not have an Acronis account yet, please fill
out the form and click Create account. See details in How to get started (p. 9).
After you install True Image Lite 2013 and sign in to your Acronis account, you will automatically get
a trial subscription to Acronis Cloud. See details in Trial version information (p. 10).
To get a full subscription, click Acronis Store, choose a subscription and provide your payment
information. See details in How to get a full version (p. 10).
4.4 Sign-in menu
Clicking Sign in opens a window for signing in to your Acronis account. After you sign in, the Sign in
item is replaced by the e-mail address of your account.
31 Copyright © Acronis International GmbH, 2002-2013
Page 32

Clicking the e-mail address of your account opens a menu with the following items:
My account – click to go to the screen where you can view and change your account information.
Acronis Cloud – click to go to your account page on the Acronis website.
The line below shows the percentage of your used space on Acronis Cloud.
Buy subscription – click to start the procedure of purchasing a subscription.
Sign out – click to sign out from the current account. This may be useful if you have more than
one account.
4.5 Backing up to Acronis Cloud
True Image Lite 2013 allows you to have only one active online backup on the current computer.
New versions of the backup will be created every hour even after you sign out of Acronis Cloud. If
you need to create a new version manually, just rerun the automatic protection. To do this, on the
online backup box, click Stop and then click Start.
Let's consider how to configure an online backup if you have not used Acronis Cloud yet.
To create an online backup:
1. Enter the email address and password of your Acronis account, and then click Sign in. If you have
already signed in to your account, this window will be skipped. See details about the registration
process in How to get started (p. 9).
2. Start True Image Lite 2013 and click Online Nonstop Backup.
32 Copyright © Acronis International GmbH, 2002-2013
Page 33

3. In the opened window, specify items to include in the backup by selecting the corresponding
check boxes.
4. [optional step] You can exclude from online backups hidden files, system files, folders and files
that mach the criteria you specify. For more information, see Exclusions (p. 37).
5. [optional step] The destination for the backup will be Acronis Cloud. The destination field shows
your quota of the storage space on Acronis Cloud and the approximate amount of data to be
backed up.
6. Click the Back up now button.
The first online backup may take a considerable amount of time to complete. Further backup processes will
likely be much faster, because only changes to files will be transferred over the Internet.
4.5.1 Online backup options
If you want to reset all the modified options to their initial values that were set after the product
installation, click the Reset to initial settings button.
4.5.1.1 Acronis Cloud cleanup
You can configure the cleanup settings for Acronis Cloud to optimize usage of its space.
To set the limits for the amount of versions on Acronis Cloud:
Select the Delete versions older than check box and enter a value that limits the maximum age
of the older versions. All other versions will be automatically deleted except the most recent
versions.
33 Copyright © Acronis International GmbH, 2002-2013
Page 34

Select the Delete all versions except … recent ones check box and enter a value that limits the
maximum number of all versions in the storage.
These settings are permanent. Therefore, file versions will be deleted as soon as any of the specified
cleanup conditions are met. If you want to perform one-time cleanup of your Acronis Cloud or if you
want to delete specific files and folders, please use the Acronis Cloud web application. See details in
Removing data from Acronis Cloud (p. 41).
4.5.1.2 Encryption key
To protect your data on Acronis Cloud from unauthorized access, you can use encryption. In this case
your data will be stored on Acronis Cloud in encrypted form. To encrypt and decrypt your data, the
program needs the encryption key, that you should specify when you register your computer. An
encryption key is a unique alphanumeric code, like a password. You can specify any set of characters
you like. Note that the key is case-sensitive.
An encryption key cannot be retrieved. Please memorize the key that you specify during your computer
registration.
While attempting to access the encrypted data, the program asks you to enter the encryption key.
Note that you cannot set or change the encryption key for an already existing online backup.
4.5.1.3 Windows account for Online backup
When you create a backup, you can specify a Windows account under which this backup should be
performed. This may be useful if your computer is used not only by you, but also by your relatives. In
such a case each user often has personal documents, e-mail accounts, settings, and other personal
data. By default True Image Lite 2013 backs up data of the current user. We recommend that you
change this setting if the Windows account under which you are currently working is not yours. The
program will back up only the data related to the specified account. Data of all other accounts will
not be backed up.
34 Copyright © Acronis International GmbH, 2002-2013
Page 35

To change the current Windows account:
1. Select the Run backup as different Windows user check box.
2. Type the account name and password in the appropriate fields.
4.5.1.4 Operation priority
Changing the priority of an operation process can make it run faster or slower (depending on
whether you raise or lower the priority), but it can also adversely affect the performance of other
running programs. The priority of any process running in a system determines the amount of CPU
usage and system resources allocated to that process. Decreasing the operation priority will free up
more resources for other CPU tasks. Increasing operation priority may speed up the backup process
by taking resources from the other currently running processes. The effect will depend on total CPU
usage and other factors.
You can set up the backup process priority:
Low (enabled by default) - the backup process will run slower, but the performance of other
programs will be increased
Normal - the backup process will have equal priority with other processes
High - the backup process will run faster, but the performance of other programs will be
reduced. Be aware that selecting this option may result in 100% CPU usage by True Image Lite
2013
4.5.1.5 Network connection speed limit
You can reduce the influence of Acronis Cloud connection on other network connections of your
computer. Set the connection speed that will allow you to send e-mail or surf the Web without
annoying slowdowns while online backup is running. To do so:
35 Copyright © Acronis International GmbH, 2002-2013
Page 36

Select the Limit transfer rate to check box and specify an optimal value and an appropriate
measurement unit (kilobits or megabits per second)
4.5.1.6 Notifications
You can specify an e-mail account that will be used for notification of the backup process.
To specify the e-mail settings:
Enter the e-mail address in the E-mail address field. You can enter several e-mail addresses in a
semicolon-delimited format.
Enter the outgoing mail server (SMTP) in the Outgoing mail server (SMTP) field.
Set the port of the outgoing mail server. By default the port is set to 25.
Enter the user name in the User name field.
36 Copyright © Acronis International GmbH, 2002-2013
Page 37

Enter the password in the Password field.
To specify additional notification settings, click the Additional notification settings link.
To send notification concerning process completion, select the Send notification upon
operation's successful completion check box.
To send notification concerning process failure, select the Send notification upon operation
failure check box.
To send notification with operation messages, select the Send notification when user interaction
is required check box.
To send notification with full log of operations, select the Add full log to the notification check
box.
After making the additional settings, click OK to return to the previous window.
If you would like to use encryption, select the required encryption protocol from the dropdown
list in the Encryption field.
To check whether your settings are correct, click the Send test message button.
4.5.1.7 Exclusions
If you want to exclude unnecessary files from an online backup, specify the appropriate file types on
the Exclusions tab of the backup options.
37 Copyright © Acronis International GmbH, 2002-2013
Page 38

How to use the default exclusion settings
After you have installed the application, all the exclusion settings are set to the initial values. You can
change them for your current backup operation only or for all backups that will be created in future.
Select the Save the settings as default check box to apply the modified settings to all further backup
operations by default. If you want to reset all the modified settings to the values that they were
originally set to when the product was installed, click the Reset to initial settings button.
What you can exclude and how
1. You can exclude hidden and system files from a backup by selecting the corresponding check
boxes.
2. You can exclude files meeting the criteria you specify. To do this, select the Files matching the
following criteria check box, enter the exclusion criterion, and then click Add.
By default, the program excludes from backups files with the following extensions: .~, .tmp, and .tib.
How to add an exclusion criterion:
You can enter explicit file names for exclusion from the backup:
file.ext - all such files will be excluded from the backup.
C:\file.ext - the file.ext file on the C: disk will be excluded.
You can use wildcard characters (* and ?):
*.ext - all files with a .ext extension will be excluded.
??name.ext - all files with a .ext extension, having six letters in their names (starting with any
two symbols (??) and ending with name), will be excluded.
To exclude a folder, click Browse, select the folder you want to exclude on the directory tree,
click OK, and then click Add.
To delete a criterion, for example, added by mistake, click the Delete icon to the right of the
criterion.
38 Copyright © Acronis International GmbH, 2002-2013
Page 39

4.6 Recovery from Acronis Cloud
4.6.1 Recovering data from online backups
With True Image Lite 2013 you can browse and recover data that was backed up on Acronis Cloud.
1. Start True Image Lite 2013 and click the Recover button on the box of the online backup from
which you want to recover data. You will be taken to Acronis Cloud web application.
If the data from the selected computer is stored on the Cloud in encrypted form, you will be asked to enter
the encryption key which has been used for encryption. You will not be able to access the data until you
enter the correct encryption key.
2. On the Files tab, select the files and folders you want to recover. Click the Download button to
start recovery.
If you selected several files and folders, they will be placed into a zip archive.
3. After the File Download window opens, click Save to start download.
39 Copyright © Acronis International GmbH, 2002-2013
Page 40

4. By default the data will be downloaded to the Downloads folder. You may change the download
path.
5. After the download finishes, you may click Open folder to open the Downloads folder.
4.6.2 Selecting a version to recover
By default True Image Lite 2013 selects the latest versions with respect to the date you specified.
However, for any file you can select a specific version of the file to recover.
To recover a specific file version:
1. In the backup contents, select the file which version you want to recover, then click the gear icon
at the right-hand side. Select View versions in the opened menu.
2. Select the version to which you want to rollback. The version's exact date and time will be
displayed. Your current version will be reverted to the state it was at that point in time.
3. Click Recover to proceed. The selected version will become the latest version on Acronis Cloud.
4. After the process finishes, refresh the Files page in your Web browser.
5. Select the file once more and then click Download to download the selected version to your
Downloads folder.
4.7 Managing online backups
You can have up to five online backups from up to five different computers, but only one online
backup can be active at the same time.
When you log in to your Acronis account, True Image Lite 2013 tries to find out whether you already
have online backups.
If you already have online backups created under your account, for example, performed on another
computer, the program operates as follows. It adds the existing online backups to the console and
displays at the bottom of the screen a notification about the online backups it has found.
You can select any one of the existing online backups and then make it active by clicking the
Continue backup here button. It does not matter from which computer you backed up data using
this backup earlier. The backed up data remains available for recovery and you can back up more
data from the current computer.
If you want to create a new online backup, click Online Nonstop Backup.
Note that you can have only one active online backup at a time. Online backups from other
computers will only provide recovery of the backed up data. Such online backups may also be
deleted.
40 Copyright © Acronis International GmbH, 2002-2013
Page 41

If you have five online backups, True Image Lite 2013 will display a dialog stating that you already
have the maximum allowable number of online backups. You can either activate one of them and
edit its settings for your new computer or delete an existing online backup and create a new one.
4.8 Removing data from Acronis Cloud
Because the available space on Acronis Cloud is limited, you need to manage your Cloud space by
cleaning up the obsolete data or the data you do not need anymore. Cleanup can be done in a variety
of ways.
Deleting entire backup
The most "drastic" one is deleting the entire backup from a computer on Acronis Cloud. To remove
the backup, click the gear icon in the box of the online backup to open the Operations menu and
select Delete; then, click Yes in the confirmation window.
Cleanup settings
The Online backup options provide for automatic cleanup of Acronis Cloud. You can specify deletion
of files that have been kept longer than the specified number of months or days. In addition, you can
set the maximum number of file versions to be kept on Acronis Cloud. You can accept the default
settings for those options or set the values you need. For more information see Acronis Cloud
cleanup (p. 33).
One-time cleanup
When your Acronis Cloud is full or is running out of space, we recommend that you use the cleanup
tool in Acronis Cloud web application. This tool allows you to free up considerable amount of space
on the cloud fast and easy.
To clean up Acronis Cloud:
1. Start True Image Lite 2013 and click Recover on an online backup box. You will be taken to the
Acronis Cloud web application.
2. On the Storage status tab, click the Clean up space link in the center of the screen.
3. In the opened window, configure the cleanup settings and click Clean up now.
Deleting specific files and folders
You can also manage Acronis Cloud by deleting individual files and folders.
1. Start True Image Lite 2013 and click Recover on an online backup box. You will be taken to the
Acronis Cloud web application.
2. Select files and folders you want to delete by selecting their check boxes. Having finished
selection, click the Delete button.
41 Copyright © Acronis International GmbH, 2002-2013
Page 42

5 Troubleshooting
In this section
Acronis System Report ............................................................................. 42
Acronis Smart Error Reporting ................................................................. 42
How to collect crash dumps ..................................................................... 44
General recommendations ...................................................................... 44
Viewing log ............................................................................................... 45
Acronis Customer Experience Program ................................................... 47
5.1 Acronis System Report
When you contact the Acronis support team, they will usually need information about your system in
order to resolve your problem. Sometimes getting the information is an inconvenient process and
may take a long time. The Generate system report tool simplifies the procedure. It generates a
system report containing all the necessary technical information and allows you to save the
information to file. When it’s necessary, you can attach the created file to your problem description
and send it to Acronis support team. This will simplify and speed up the search for a solution.
To generate a system report:
On the main program window click the question mark symbol, and select Generate system
report, or
Press CTRL+F7. Note that you can use the key combination even when True Image Lite 2013 is
performing another operation.
After the report is generated:
To save the generated system report to file, click Save and in the opened window specify a
location for the created file.
To save the report to file and send it to Acronis support team by e-mail, click Save and send.
To exit to the main program window without saving the report, click Cancel.
5.2 Acronis Smart Error Reporting
To help users with troubleshooting, the new releases of Acronis products employ the so called
Acronis Smart Error Reporting. When an issue is caused by an error in the program's operation, True
Image Lite 2013 displays an appropriate error message.
An ordinary error
The error message contains an event code and a short description of the error (sometimes with a
possible solution), for instance:
"Check the disk and file system for errors and try to repeat the operation. Event Code: 0x000101F6"
The error message may also include the program module where the error has occurred and the error
message from the module.
42 Copyright © Acronis International GmbH, 2002-2013
Page 43

You can view more detailed information about the error by clicking the More details link in the
message box. The detailed information may look like as is shown on the following screen shot:
To view the Acronis Knowledge Base article suggesting a solution(s) for correcting the error, click the
Knowledge Base button.
This will open a confirmation window that lists the information to be sent via Internet to the Acronis
Knowledge Base. Click OK to permit sending the information.
If in future you would like to send such information without confirmation, select the Always send
without confirmation check box.
An error in a low-level module
Sometimes, an error may occur in a low-level program module and then propagate to higher-level
modules resulting in errors in those modules as well. This is a so called composite error, where every
higher level module generates its own error (event) code. The following event code is an example:
0x00970007+0x00970016+0x00970002
The event codes from different modules are combined with "+" symbols. When manually entering
such event codes into the appropriate field to search in the Knowledge Base, enter the event code
components without spaces around the "+" symbols.
If you do not have Internet
If you do not have Internet access when such an error message is shown (this may happen, for
example, when booted from the rescue media), please write down the event code. When you
establish Internet connection or if you can use another computer where Internet connection is
available, use the following URL to go to the Acronis Web site error reporting form:
http://kb.acronis.com/errorcode/.
43 Copyright © Acronis International GmbH, 2002-2013
Page 44

Select the Acronis product version you use and manually enter the event code into the appropriate
field. Then, click the Search button to search for an article that may contain the solution to your
issue.
If the event code(s) is not recognized in the Knowledge Base, the base does not yet contain an article
to resolve the issue. In such cases, please open a trouble ticket with Acronis Customer Central.
5.3 How to collect crash dumps
Because a crash of True Image Lite 2013 or Windows can be caused by different reasons, each crash
case must be investigated separately. Acronis Customer Central would appreciate if you could
provide the following information:
If True Image Lite 2013 crashes, please provide the following information:
1. A description of the exact sequence of steps performed before you encountered the issue.
2. Dr. Watson crash dump. For information on how to collect such a dump, see the Acronis Support
Knowledge Base (KB) article at http://kb.acronis.com/content/2192
If True Image Lite 2013 causes a Windows crash:
1. A description of the exact sequence of steps performed before you encountered the issue.
2. A Windows dump file. For information on how to collect such a dump see the Acronis Support KB
article at http://kb.acronis.com/content/17639
If True Image Lite 2013 hangs:
1. A description of the exact sequence of steps performed before you encountered the issue.
2. A userdump of the process. See the Acronis Support KB article at
http://kb.acronis.com/content/6265
3. The Procmon log. See the Acronis Support KB article at http://kb.acronis.com/content/2295
If you cannot access the information, contact Acronis Customer Central for an FTP link for
uploading files.
This information will speed up the process of finding a solution.
5.4 General recommendations
The below information may help you in troubleshooting issues encountered during installation and
use of True Image Lite 2013.
Quite often the cause of an issue may be trivial; for example, a loose connection of an external hard
drive. Before trying other solutions described in this chapter, it is advisable to check if the issue is
caused by one of the following:
loose connections to the external drive;
poor quality connecting cable;
When using an external USB hard drive, try the following additional suggestions:
if the drive is connected through a hub, connect it directly to a rear connector of your PC;
44 Copyright © Acronis International GmbH, 2002-2013
Page 45

to prevent conflict with other USB devices attached to your PC, try disconnecting all the USB
devices (except the mouse and keyboard).
You can try to find the solution to your problem in the Acronis Support Knowledge Base (KB). To
access the Support KB, click on the following link: http://kb.acronis.com/. Then use the Search
function. Enter the key words related to your problem into the appropriate field and click Search. The
KB may have recommendations on solving your specific problem. Acronis Support team continuously
adds new articles to the KB. If you are not able to find the solution to your problem in the KB or the
suggested solution(s) does not help, feel free to contact Acronis Customer Central at
http://www.acronis.com/support/.
When you encounter an error during True Image Lite 2013 operation, the error message box will
contain the Knowledge Base button. Clicking the button will take you to a Support KB article offering
solution(s) for the issue that caused the error. The error message box will also have a link to the
Acronis Support KB. This link may be useful when the KB does not have the appropriate article yet.
Clicking the link will take you to a Web form. There, you can enter the event code displayed in the
error box to search for a solution in the entire KB. For more information, see Acronis Smart Error
Reporting (p. 42).
System report
Acronis Support personnel may request you to provide the system report. To create the report,
select Generate system report in the Help menu, then save the report and send it to Acronis
Customer Central. For more information see Acronis System Report (p. 42).
5.5 Viewing log
Most True Image Lite 2013 operations write their own entries in the logs. When issues with the
operations occur, the log entries may provide information on their causes.
The log can provide information, for example, about scheduled backup results, including causes for
any failures.
If you want to view the log of True Image Lite 2013 operations, click the gear wheel icon on the
toolbar to open the Settings menu and then select View log.
45 Copyright © Acronis International GmbH, 2002-2013
Page 46

You can also open the log for viewing by selecting View log in the Operations menu of a backup box. In this case
you will see only the log items for the last run of the selected backup.
Viewing log entries
By default all logs are selected for viewing. The right pane shows all major log entries in the collapsed
state. To expand a log entry for viewing individual log items, double-click it. To collapse the expanded
log entry, double-click it again. You can scroll the log entries using the scroll bar on the right side of
the window.
For some error events the log may have the How to solve the problem link. Clicking the link takes
you to an article of the Acronis Knowledge Base, which may help you to solve the problem.
To delete a log entry, select it, right-click and select Delete in the shortcut menu. To delete all log
entries, select Delete all. You can also save a log entry to file by selecting Save. To save all logs to file,
select Save all.
The toolbar
To view the logs for a desired period, select the period from the drop-down list. You can select
Today, Last week, Last month, and Custom. To view all logs, select All.
To view the logs for a specific time interval, select Custom and specify the desired interval. You can
enter the desired period start and end dates directly into the fields. You can also select a time
interval on the calendar. To select, click the start date and then the end date while keeping the Shift
key pressed.
To view the logs for a specific event source, select the desired event source in the dropdown list
below Event source:. You can select the following event sources:
All - shows all logged events.
All backups - shows logs for all your backups.
46 Copyright © Acronis International GmbH, 2002-2013
Page 47

<Backup name> - shows logs for a specific backup you select by its name.
Etc.
The three buttons to the left filter the following events: successful completion states, warning
messages and error messages.
To reset all the filters to their default values, click Reset all filters.
The Save all to file and Delete all buttons are in the upper right hand corner. They do the same
operations as the corresponding shortcut menu items.
The calendar section
The buttons with up and down arrows at the top and bottom of the calendar allow you to browse the
months being shown in the calendar.
The color marks in the calendar provide information about the days when operations completed with
errors (red marks), warnings (yellow marks), and success (green marks). The current day is
highlighted. Clicking a marked day shows the logs for that date.
5.6 Acronis Customer Experience Program
Acronis Customer Experience Program (CEP) is a new way to allow Acronis customers to contribute
to the features, design and development of Acronis products. This program enables our customers to
provide us with various information, including information about the hardware configuration of your
host computer and/or virtual machines, the features you use most (and least), and the nature of the
problems you face. Based on this information, we will be able to improve the Acronis products and
the features you use most often.
If you choose to participate, the technical information will be automatically collected every 90 days.
We will not collect any personal data, like your name, address, phone number, or keyboard input.
Participation in the CEP is voluntary, however, but the end results intended to provide software
improvements and enhanced functionality to better meet the needs of our customers.
Note that you will be able to leave the program any time.
Click the Learn more link to read the participation terms.
To make a decision:
Choose Yes, I want to participate in the program if you want to join the program
Choose No, I do not accept if you do not want to join the program
47 Copyright © Acronis International GmbH, 2002-2013
Page 48

Copyright Statement
Copyright © Acronis International GmbH, 2002-2013. All rights reserved.
"Acronis", "Acronis Compute with Confidence", "Acronis Recovery Manager", "Acronis Secure Zone",
Acronis True Image, Acronis Try&Decide, and the Acronis logo are trademarks of Acronis
International GmbH.
Linux is a registered trademark of Linus Torvalds.
VMware and VMware Ready are trademarks and/or registered trademarks of VMware, Inc. in the
United States and/or other jurisdictions.
Windows and MS-DOS are registered trademarks of Microsoft Corporation.
All other trademarks and copyrights referred to are the property of their respective owners.
Distribution of substantively modified versions of this document is prohibited without the explicit
permission of the copyright holder.
Distribution of this work or derivative work in any standard (paper) book form for commercial
purposes is prohibited unless prior permission is obtained from the copyright holder.
DOCUMENTATION IS PROVIDED "AS IS" AND ALL EXPRESS OR IMPLIED CONDITIONS,
REPRESENTATIONS AND WARRANTIES, INCLUDING ANY IMPLIED WARRANTY OF MERCHANTABILITY,
FITNESS FOR A PARTICULAR PURPOSE OR NON-INFRINGEMENT, ARE DISCLAIMED, EXCEPT TO THE
EXTENT THAT SUCH DISCLAIMERS ARE HELD TO BE LEGALLY INVALID.
Third party code may be provided with the Software and/or Service. The license terms for such
third-parties are detailed in the license.txt file located in the root installation directory. You can
always find the latest up-to-date list of the third party code and the associated license terms used
with the Software and/or Service at http://kb.acronis.com/content/7696
Acronis patented technologies
Technologies, used in this product, are covered by the following U.S. Patents: U.S. U.S. Patent
#7,047,380, U.S. U.S. Patent #7,275,139, U.S. Patent #7318135, U.S. Patent #7,366,859, U.S. Patent
#7,462,11, U.S. Patent #7,603,533, U.S. Patent #7,650,473, U.S. Patent #7,831,789, U.S. Patent
#7,895,403, U.S. Patent #7,934,064, U.S. Patent #7,953,948, U.S. Patent #8,005,797, U.S. Patent
#8,069,320, U.S. Patent #8,074,035.
48 Copyright © Acronis International GmbH, 2002-2013
Page 49

6 Glossary of Terms
B
Backup
1. The same as Backup operation (p. 49).
2. A set of backup versions created and
managed by using backup settings. A
backup can contain multiple backup
versions created using full and
incremental backup methods. Backup
versions belonging to the same backup
are usually stored in the same location.
Backup operation
An operation that creates a copy of the data
that exists on a machine's hard disk for the
purpose of recovering or reverting the data to
a specified date and time.
Backup settings
A set of rules configured by a user when
creating a new backup. The rules control the
backup process. Later you can edit the backup
settings to change or optimize the backup
process.
C
Consolidation
Combining two or more subsequent backup
versions (p. 49) belonging to the same backup
(p. 49) into a single backup version.
The consolidation procedure allows you to
delete the backup versions you no longer
need from any backup chain while maintaining
the consistency of chain's backups. A chain to
be consolidated consists of a full backup and
one or more incremental backups.
Consolidation keeps whichever backups you
choose and deletes any backups that are not
selected. Note that consolidation may take a
lot of time and system resources (including
disk space).
Acronis Nonstop Backup uses a different
consolidation mechanism. In such cases, the
program consolidates the metadata
information it uses for managing the backed
up data. This is because the metadata
information volume is much less than the
backed up data volume. Accordingly,
consolidation requires much less time and
system resources.
N
Backup version
The result of a single backup operation (p. 49).
Physically, it is a file or a set of files that
contains a copy of the backed up data as of a
specific date and time. Backup version files
created by Acronis True Image Lite 2013 have
a TIB extension. The TIB files resulting from
consolidation (p. 49) of backup versions are
also called backup versions.
Backup version chain
Sequence of minimum 2 backup versions (p.
49) that consist of the first full backup version
and the subsequent one or more incremental
or differential backup versions. Backup
version chain continues till the next full
backup version (if any).
Nonstop backup
Nonstop backup actually is a disk/partition or
file backup that is created using the Acronis
Nonstop Backup feature. This is a set of one
full backup version and a sequence of
incremental backup versions that are created
at short intervals. It gives almost continuous
protection of data, that is, it allows recovery
of previous data state at any recovery point
you need.
Nonstop protection
Nonstop protection - the process that the
Nonstop Backup feature performs when it is
turned on.
Page 50

O
Online backup
Online backup - a backup that is created using
Acronis Online Backup. Online backups are
stored in a special storage named Acronis
Cloud, accessible over the Internet. The main
advantage of an online backup is that all
backups are stored on the remote location. It
gives a guarantee that all backed up data will
be safe independently of a user local storages.
To begin to use Acronis Cloud a user should
subscribe to the service.
R
Recovery
Recovery is a process of returning of a
corrupted data to a previous normal state
from a backup (p. 49).
50 Copyright © Acronis International GmbH, 2002-2013
 Loading...