

Page 1

User's Guide
Acronis
Privacy Expert Suite 9.0
Compute with confidence
www.acronis.com
Page 2

Copyright © Acronis, Inc., 2000-2005. All rights reserved.
Linux is a registered trademark of Linus Torvalds.
OS/2 is a registered trademark of IBM Corporation.
UNIX is a registered trademark of The Open Group. Windows and MS-DOS are
registered trademarks of Microsoft Corporation.
All other trademarks and copyrights referred to are the property of their
respective owners.
Distribution of substantively modified versions of this document is prohibited
without the explicit permission of the copyright holder.
Distribution of this work or derivative work in any standard (paper) book form
for commercial purposes is prohibited unless prior permission is obtained from
the copyright holder.
DOCUMENTATION IS PROVIDED «AS IS» AND ALL EXPRESS OR IMPLIED
CONDITIONS, REPRESENTATIONS AND WARRANTIES, INCLUDING ANY
IMPLIED WARRANTY OF MERCHANTABILITY, FITNESS FOR A PARTICULAR
PURPOSE OR NON-INFRINGEMENT, ARE DISCLAIMED, EXCEPT TO THE EXTENT
THAT SUCH DISCLAIMERS ARE HELD TO BE LEGALLY INVALID.
2
Page 3

END-USER LICENSE AGREEMENT
BY ACCEPTING, YOU (ORIGINAL PURCHASER) INDICATE YOUR ACCEPTANCE OF THESE
TERMS. IF YOU DO NOT WISH TO ACCEPT THE PRODUCT UNDER THESE TERMS, YOU
MAY CHOOSE NOT TO ACCEPT BY SELECTING "I decline..." AND NOT INSTALLING THE
SOFTWARE.
The Acronis Privacy Expert Suite (the software) is Copyright © Acronis, Inc., 2000-2005.
All rights are reserved. The ORIGINAL PURCHASER is granted a LICENSE to use the
software only, subject to the following restrictions and limitations.
1. The license is to the original purchaser only, and is not transferable without prior
written permission from Acronis.
2. The original purchaser may use the software on a single computer owned or leased
by the original purchaser. You may not use the software on more than one machine
even if you own or lease all of them, without the written consent of Acronis.
3. The original purchaser may not engage in, nor permit third parties to engage in, any
of the following:
A. Providing or permitting use of or disclosing the software to third parties.
B. Providing use of the software in a computer service business, network, timesharing or
multiple user arrangement to users who are not individually licensed by Acronis.
C. Making alterations or copies of any kind in the software (except as specifically
permitted above).
D. Attempting to un-assemble, de-compile or reverse engineer the software in any way.
E. Granting sublicenses, leases or other rights in the software to others.
F. Making copies or verbal or media translations of the users guide.
G. Making telecommunication data transmission of the software.
Acronis has the right to terminate this license if there is a violation of its terms or default
by the original purchaser. Upon termination for any reason, all copies of the software
must be immediately returned to Acronis, and the original purchaser shall be liable to
Acronis for any and all damages suffered as a result of the violation or default.
ENTIRE RISK
THE ENTIRE RISK AS TO THE QUALITY AND PERFORMANCE OF THE SOFTWARE IS
WITH YOU THE PURCHASER. ACRONIS DOES NOT WARRANT THAT THE SOFTWARE OR
ITS FUNCTIONS WILL MEET YOUR REQUIREMENTS OR THAT THE OPERATION OF THE
SOFTWARE WILL BE UNINTERRUPTED OR ERROR FREE OR THAT ANY DEFECTS WILL
BE CORRECTED. NO LIABILITY FOR CONSEQUENTIAL DAMAGES — IN NO EVENT SHALL
ACRONIS OR ITS VENDORS BE LIABLE FOR ANY DAMAGES WHATSOEVER (INCLUDING,
WITHOUT LIMITATION, DAMAGES FOR THE LOSS OF BUSINESS PROFITS, BUSINESS
INTERRUPTION, LOSS OF BUSINESS INFORMATION, OR ANY OTHER PECUNIARY LOSS)
ARISING OUT OF THE USE OR INABILITY TO USE THE SOFTWARE, EVEN IF ACRONIS
HAS BEEN ADVISED OF THE POSSIBILITY OF SUCH DAMAGES.
3
Page 4

Table of Contents
END-USER LICENSE AGREEMENT.................................................................................................. 3
INTRODUCTION............................................................................................................................... 7
What is Acronis Privacy Expert Suite?................................................................................................ 7
Why is it necessary to keep PC work confidential?............................................................................. 7
Standards of guaranteed destruction of confidential information......................................................... 8
What's new in Acronis Privacy Expert Suite 9.0?................................................................................8
What Acronis Privacy Expert Suite enables you to clean up............................................................... 9
How to find information you need in this guide:................................................................................... 9
System requirements ........................................................................................................................ 10
Software use conditions .................................................................................................................... 10
Technical support.............................................................................................................................. 11
CHAPTER 1. INSTALLING ACRONIS PRIVACY EXPERT SUITE........................................... 12
1.1 Installing the program............................................................................................... 12
1.2 Recovering Acronis Privacy Expert Suite................................................................. 13
1.3 Acronis Privacy Expert Suite extracting ...................................................................13
1.4 Removing the software............................................................................................. 14
CHAPTER 2. WORKING WITH ACRONIS PRIVACY EXPERT SUITE .................................... 15
2.1 Getting started..........................................................................................................15
2.2 Working in the main program window......................................................................15
2.3 Basic operation principles ........................................................................................16
2.4 Acronis Privacy Expert Suite options .......................................................................17
2.4.1 General options.................................................................................................................. 17
2.4.2 Clean-up Options ............................................................................................................... 17
2.4.3 Scheduled tasks.................................................................................................................18
2.4.4 Explorer enhancements ..................................................................................................... 18
2.4.5 Invoking the scheduler ....................................................................................................... 18
2.4.6 Scheduled tasks preferences............................................................................................. 19
2.5 Using the Log ...........................................................................................................20
CHAPTER 3. MALICIOUS SOFTWARE REMOVAL AND MALWARE SHIELD...................... 22
How malware gets on your PC.......................................................................................................... 22
How to recognize malware?.............................................................................................................. 22
If you need to:.................................................................................................................................... 23
3.1 Malicious software removal......................................................................................23
3.1.1 Removing malware with the Malicious Software Wizard.....................................................23
3.1.2 Setting up the Malicious Software Wizard.......................................................................... 25
Selecting scanning mode .................................................................................................................. 25
Setting up Deep scanning mode ....................................................................................................... 26
Saving settings.................................................................................................................................. 26
3.2 Malicious software protection...................................................................................26
3.2.1 Enabling Malware shield..................................................................................................... 27
3.2.2 Setting up Malware shield .................................................................................................. 27
Setting up the system protection level............................................................................................... 27
General settings................................................................................................................................ 28
Process analyzing............................................................................................................................. 29
Registry protection ............................................................................................................................ 29
Memory protection............................................................................................................................. 30
File protection.................................................................................................................................... 31
Specified rules................................................................................................................................... 31
History............................................................................................................................................... 32
4 Copyright © Acronis, Inc., 2000-2005
Page 5

Show alerts........................................................................................................................................ 32
3.3 Quarantine................................................................................................................ 33
3.4 Malware definitions updates..................................................................................... 34
3.4.1 Product registration............................................................................................................34
3.4.2 Running Malicious Software Definitions Updates Wizard................................................... 35
3.4.3 Selecting update mode....................................................................................................... 35
3.4.4 Setting the schedule........................................................................................................... 36
CHAPTER 4. INTERNET CLEAN-UP......................................................................................... 37
4.1 General information.................................................................................................. 37
4.2 Using the Internet Clean-up Wizard.........................................................................37
4.3 Internet Clean-up Wizard Settings ........................................................................... 39
4.3.1 «Data Destruction Method» settings .................................................................................. 39
4.3.2 «Internet Browsers» setting................................................................................................ 39
4.3.3 «Address» setting...............................................................................................................40
4.3.4 «File» settings....................................................................................................................42
4.3.5 «Data filter» settings........................................................................................................... 43
4.3.6 «E-mail clients» settings..................................................................................................... 43
4.4 Cleaning up separate Internet components............................................................. 44
CHAPTER 5. SYSTEM CLEAN-UP............................................................................................ 45
5.1 General information.................................................................................................. 45
5.2 Using the System Clean-up Wizard ......................................................................... 45
5.3 System Clean-up Wizard settings............................................................................46
5.3.1 «Data Destruction Method» settings .................................................................................. 47
5.3.2 «Files» settings .................................................................................................................. 47
5.3.3 «Computers» setting.......................................................................................................... 48
5.3.4 «Drive Free Space» setting................................................................................................ 49
5.3.5 «Commands» setting ......................................................................................................... 50
5.3.6 «System Password Filter» setting...................................................................................... 50
5.4 Cleaning up separate system components.............................................................. 51
CHAPTER 6. APPLICATION TRACES CLEAN-UP .................................................................. 52
6.1 General information.................................................................................................. 52
6.2 Using the Application Traces Clean-up Wizard........................................................ 52
6.3 Application Traces Clean-up Wizard settings .......................................................... 53
6.3.1 «Data Destruction Method» settings .................................................................................. 53
6.3.2 Select Applications.............................................................................................................54
6.3.3 «Files» settings .................................................................................................................. 55
CHAPTER 7. MY PRIVACY TOOLS........................................................................................... 57
7.1 General information.................................................................................................. 57
7.2 Using File Shredder.................................................................................................. 58
7.3 Paging file cleaner.................................................................................................... 58
CHAPTER 8. ACRONIS POP-UP BLOCKER............................................................................ 60
8.1 What are pop-ups?................................................................................................... 60
8.2 Acronis Pop-up Blocker............................................................................................ 60
8.3 Acronis Pop-up Blocker settings .............................................................................. 60
8.3.1 Acronis Pop-up Blocker General Settings.......................................................................... 61
8.3.2 User List............................................................................................................................. 61
8.3.3 Black List............................................................................................................................ 61
8.3.4 History................................................................................................................................ 62
8.3.5 Acronis Pop-up Blocker options ......................................................................................... 63
CHAPTER 9. ACRONIS DRIVE CLEANSER............................................................................. 65
9.1 Acronis Drive Cleanser capabilities.......................................................................... 65
9.2 Working with Acronis Drive Cleanser....................................................................... 65
Copyright © Acronis, Inc., 2000-2005 5
Page 6

9.3 Using preset data destruction methods.................................................................... 66
9.4 Creating custom methods of data destruction.......................................................... 68
9.4.1 Creating custom methods .................................................................................................. 68
9.4.2 Method definition: template ................................................................................................ 69
9.4.3 Saving a custom method to file.......................................................................................... 73
9.4.4 Loading a method from a file.............................................................................................. 75
9.5 Creating a bootable diskette or CD with Acronis Drive Cleanser ............................ 75
APPENDIX A. HARD DISK WIPING METHODS........................................................................76
A.1 Information wiping methods’ functioning principles.................................................. 76
A.2 Information wiping methods used by Acronis........................................................... 77
APPENDIX B. MALWARE THREATS GLOSSARY...................................................................78
Adware.............................................................................................................................................. 78
Browser Helper Objects..................................................................................................................... 78
Browser hijackers.............................................................................................................................. 78
Commercial keylogger....................................................................................................................... 78
Dialers............................................................................................................................................... 78
Exploit/Security holes........................................................................................................................79
Backdoor...........................................................................................................................................79
Sniffers.............................................................................................................................................. 79
Spyware............................................................................................................................................ 79
Toolbars ............................................................................................................................................ 79
Trojan Horses (Trojans) .................................................................................................................... 79
6 Copyright © Acronis, Inc., 2000-2005
Page 7

Introduction
What is Acronis Privacy Expert Suite?
Acronis Privacy Expert Suite is an integrated software suite that provides
confidentiality and protects standalone PCs or machines connected to the
Internet.
The following capabilities of Acronis Privacy Expert Suite ensure PC
confidentiality:
Clean-up of malicious software that secretly operates on a user’s PC
Proactive protection from malicious software threats
PC hard disk and Windows partition clean-up of any traces of user actions
Unwanted pop-up ad blocking for convenient Web browsing
Guaranteed confidential data destruction on selected hard disks or disk
partitions
Unlike other software, Acronis Privacy Expert Suite fully removes evidence of PC
usage through the use of guaranteed data destruction methods.
Introduction
It also increases PC performance by cleaning out temporary files.
Why is it necessary to keep PC work confidential?
Working with a PC creates a number of serious security problems for users:
While installing software on your PC, you might unknowingly install malware
— malicious programs that secretly change system settings, collect and
transfer personal information to external addresses, and perform other
unwanted and uncontrollable actions.
You have created and deleted many files on your computer. You do not want
anyone to view them. But is a deleted file really gone? No! The problem is
that deleted files can be easily recovered under the Windows operating
system to gain access to information a user would like to conceal.
Windows and the most widely used browsers, Internet Explorer and Netscape
Navigator, provide very weak protection on keeping trace Internet data
private.
While working with a PC, you leave thousands of bytes of evidence showing
your actions (records in various system files) that you don’t even know
about. This could include user names and passwords.
When replacing your old hard drive with a new, higher-capacity one, you
potentially could leave lots of important and confidential information on the
old drive that can be recovered, even if you reformat the drive.
Acronis Privacy Expert Suite provides a solution to all of these problems. It
assures complete confidentiality of your PC and Internet actions and prevents
situations that threaten your computer and general security.
Copyright © Acronis, Inc., 2000-2005 7
Page 8

Introduction
Standards of guaranteed destruction of confidential information
The software offers the guaranteed destruction of confidential information on
hard disk drives with the help of special tools.
Acronis methods comply with most national standards:
American: U.S. Standard, DoD 5220.22-M
American: NAVSO P-5239-26 (RLL)
American: NAVSO P-5239-26 (MFM)
German: VSITR
Russian: GOST P50739-95
Besides methods corresponding to national standards, Acronis supports
predefined methods proposed by widely known and authoritative specialists in
the field of information security:
Peter Gutmann’s method – data on a hard disk is destroyed with 35 passes
Bruce Schneier’s method – data is destroyed with seven passes
The suite also supports simple but fast methods of information destruction that
zero all sectors on a single hard disk pass.
Another major feature of this version is the opportunity for you to create your
own methods for data destruction.
The most popular at the moment is the U.S. Standard, Department of
Defense 5220.22-M method. Therefore, Acronis Privacy Expert Suite utilizes it
by default for all user trace removal operations.
Detailed information on data destruction standards is given in Appendix A «Hard
Disk Wiping methods» of this guide.
What's new in Acronis Privacy Expert Suite 9.0?
Acronis Privacy Expert Suite has many new features that make it a fully
integrated software suite. They include:
User-friendly and simple wizards that quickly remove all traces of user
actions from PCs quickly, efficiently and effectively
Improved Malicious Software Wizard that scans your computer for
malicious software and moves it in the Quarantine folder
Fully new Malware shield – continuous malicious software protection that
now offers multiple levels of security
Daily updated malware definitions base
Quarantine feature enables the user restore and remove malicious objects
(files, registry keys etc.), deleted by malicious software removal operations
Updated Acronis Pop-up Blocker - convenient and powerful tool protecting
you from importunate pop-up advertising
Additionally, improvements have been made to provide even more convenience.
8 Copyright © Acronis, Inc., 2000-2005
Page 9

What Acronis Privacy Expert Suite enables you to clean up
The suite enables you to remove the evidence of your work in any Windows
section. It allows you:
to remove secretly operating malicious software threats using the Malicious
Software Wizard
to protect your PC from malware threats using Malware shield
to clean the Internet cache
to delete cookies
to delete downloaded components
to clean up the last visited pages and typed URLs lists
to delete forms autocomplete and password lists for Web sites that require
authorization
to delete e-mail messages in Microsoft Outlook and Microsoft Outlook Express
and clean up the contacts and address book lists
to remov e Windows registry backups that retain evidence of a user’s work
with PCs and the Internet
to delete temporary files from standard Windows folders
Introduction
to delete custom folders/files from any disks connected to a PC
to clean the Windows Recycle Bin
to clean hard disk free space
to clean the Windows prefetch directory
to clean system passwords
to clean the opened/saved files history
to remove evidence from the find files list and find computers list
to block unwanted pop-up ads using Acronis Pop-up Blocker
to destroy securely all data on hard disks or partitions using Acronis Drive
Cleanser, if needed
to clean up the Windows paging/swap file using Paging File Cleaner
Acronis Privacy Expert Suite permanently removes evidence of user PC activity.
To clean up a PC, it uses strict methods for guaranteed confidential data
destruction that meet or exceed most national/state standards (see Appendix A
«Hard Disk Wiping methods» for details).
How to find information you need in this guide:
This guide contains the following chapters:
Chapter 1«Installing Acronis Privacy Expert Suite» — contains detailed
information about the installation of this software.
Chapter 2 «Working with Acronis Privacy Expert Suite» — describes common
principles and settings.
Chapter 3 «Malicious software removal and Malware shield» — describes
malicious software removal and Malware shield settings.
Copyright © Acronis, Inc., 2000-2005 9
Page 10

Introduction
Chapter 4«Internet Clean-up» — describes Web and
Chapter 5« System Clean-up» — offers detailed information on how to clean
Chapter 6«Application Traces Clean-up» — describes how to remove
Chapter 7«My privacy tools» — provides general information on additional
Chapter 8«Acronis Pop-up Blocker» — describes how to use the Acronis Pop-
0«Options
Acronis Drive Cleanser» — provides tools for guaranteed data destruction on
Appendix A«Hard Disk Wiping methods» — contains more detailed
e-mail traces removal.
up your Windows system of all user traces
application usage traces from Windows using the Application Traces
Clean-up Wizard.
tools and wizards that provide the means to completely delete data from
your PC, either with the suite installed, or just from a bootable diskette.
up Blocker.
selected drives or partitions.
information about methods of guaranteed confidential data destruction on a
PC hard disk.
Appendix B «Malware threats glossary» — contains supplemental information
on the most popular spyware and spyware parasites that Acronis Privacy
Expert Suite protects you from.
System requirements
To take full advantage of Acronis Privacy Expert Suite, you should have:
a PC-compatible computer with a Pentium CPU or equivalent
32 MB RAM
a floppy or a CD-RW drive
a mouse (recommended)
Microsoft Windows 98/Me/NT/2000/XP/ or
Microsoft Windows NT Server/2000 Server/2000 Advanced Server/Windows
2003 Server
Microsoft Internet Explorer 4.0 or higher for correct Pop-up Blocker
operation.
Software use conditions
The conditions for use of Acronis Privacy Expert Suite are listed in the supplied
«License Agreement». The registration card that came with the software is your
proof that you legally purchased the suite. Each registration card has a unique
number.
Based on current legislation, the «License Agreement» is considered as a
contract between the user and software vendor. Violation of the contract may
lead to prosecution.
10 Copyright © Acronis, Inc., 2000-2005
Page 11

Introduction
Illegal use or distribution of software is a violation of the law and will be
prosecuted.
Technical support
Users who have legally purchased and registered their copy of Acro ni s P ri va cy E xpe rt Su it e
will receive free technical support from Acronis. If you have installation or working
problems that you can’t solve by yourself using this manual and the readme.txt file, email the tec hnical s u pport team. You will need to provide the serial number of your A c roni s
Privacy Expert Suite copy bundled with the program.
Before you do this, you will have to register your copy at
http://www.acronis.com/homecomputing/my/products/registration/
Support URL:
http://www.acronis.com/homecomputing/my/support/
Copyright © Acronis, Inc., 2000-2005 11
Page 12

Installing Acronis Privacy Expert Suite
Chapter 1. Installing Acronis Privacy
Expert Suite
1.1 Installing the program
To install Acronis Privacy Expert Suite:
1. Run the setup file.
2. In the Install Menu, click on the Install Acronis Privacy Expert
Suite.
3. Read and accept the terms of the license agreement, then click Next.
4. Enter the serial number provided with product.
5. In the Choose setup type window, choose setup type:
Typical - installs most common program features (recommended
for most users).
Custom - allows users to choose program features to install and
select a location for setup (recommended for advanced users). If
you pick Custom, you can select components to install. You can
even install only one program component and it will work as a
standalone program (for example, you can install only the Acronis
Pop-up Blocker to block the annoying pop-ups).
Complete - all program features will be installed (requires the
most disk space).
6. In the Select Administrators Options window, choose Install for all
users or Install for the currently logged-in user, then click Next.
7. Click Proceed to begin installation. To make changes in the setup,
use Back and Next buttons.
8. After installation, reboot your PC. If you installed program from the
installation CD, please, do not forget to remove this CD from the drive
before you restart your PC to avoid booting from this CD.
12 Copyright © Acronis, Inc., 2000-2005
Page 13

Acronis Privacy Expert Suite install menu
If you run the Acronis Privacy Expert Suite under Windows 98 or Windows NT 4.0, then
make sure that Microsoft Data Access Components (MDAC) version 2.5 is installed on
your computer. To install MDAC on your computer, run the "mdac.exe" file that could be
found on your PC in the Acronis Privacy Expert Suite installation folder. For example,
"C:\Program Files\Acronis\PrivacyExpert\mdac.exe
Acronis Privacy Expert Suite also supports the Microsoft Installer utility
(msiexec.exe) with all its commands.
1.2 Recovering Acronis Privacy Expert Suite
If the Acronis Privacy Expert Suite ceased running or produces errors, its files
might be corrupted. To repair this problem, you first have to recover the program.
To do this run the Acronis Privacy Expert Suite installer again. It will detect
Acronis Privacy Expert Suite on your computer and will ask you if you want to
repair or remove it.
1.3 Acronis Privacy Expert Suite extracting
Advanced users may save the .msi (Microsoft Installer) file needed for the
installation of Acronis Privacy Expert Suite on a local or network drive for the
further manual installation of the program.
To do this:
1. In the install menu, right click on the Install Acronis Privacy Expert
Suite and select Extract
2. Select the location where you want to save the setup file and press the
Save button
3. The following .msi file will be extracted: AcronisPrivacyExpert.msi
Copyright © Acronis, Inc., 2000-2005 13
Page 14

Installing Acronis Privacy Expert Suite
1.4 Removing the software
To remove Acronis Privacy Expert Suite from your PC, select Start → Settings
→ Control Panel → Add or Remove Programs → Acronis Privacy Expert
Suite → Remove. You will see a dialog to confirm the program removal. Click
Yes to confirm and Acronis Privacy Expert Suite will be completely removed. You
may have to reboot your computer afterwards to complete the task.
14 Copyright © Acronis, Inc., 2000-2005
Page 15
Working with Acronis Privacy Expert Suite
Chapter 2. Working with Acronis Privacy
Expert Suite
2.1 Getting started
The Acronis Privacy Expert Suite user interface features standard Windows XP
icon graphical user interface (GUI) elements.
2.2 Working in the main program window
Work takes place in the main program window that is invoked after the suite is
launched by selecting Start
Acronis Privacy Expert Suite or double-clicking the respective desktop
shortcut.
Æ All programs Æ Acronis Æ PrivacyExpert Æ
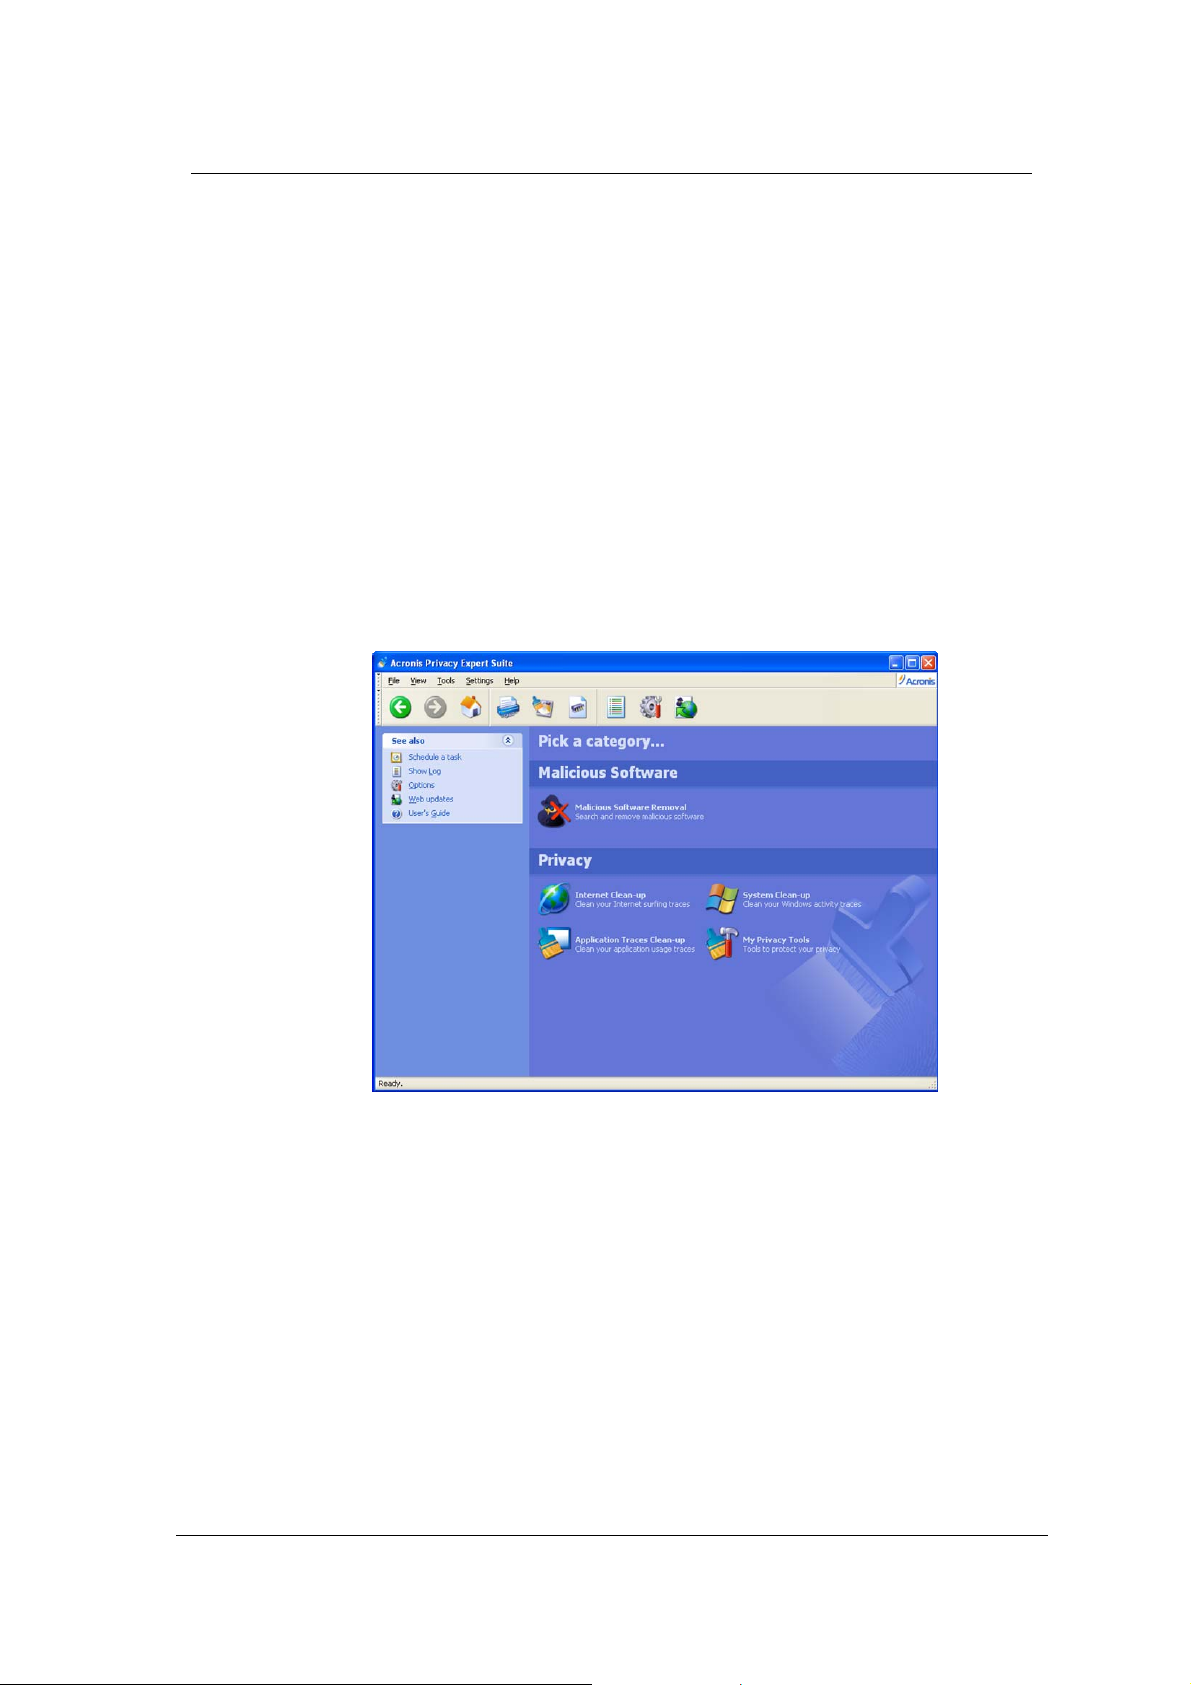
Acronis Privacy Expert Suite main window
Users can choose between two window layouts. By default, the program offers
the standard Category View traditional for Windows XP, in which all functional
elements are grouped by their category. If needed, a user can switch to the
Classic View that is more familiar to users of previous versions of Acronis Privacy
Expert Suite. To do this, select View settings
In the main program window, you will see two major groups of PC cleaning tools.
The Malicious software group includes:
Malicious Software Removal – removes malware, including applications
and spyware that threaten information confidentiality by operating without
the user’s knowledge.
The Privacy group includes:
Internet Clean-up – completely removes traces of Internet and e-mail
usage.
Copyright © Acronis, Inc., 2000-2005 15
Æ Switch to classic view.
Page 16

Working with Acronis Privacy Expert Suite
System Clean-up – guaranteed to clean Windows components of any
traces of user work.
Application Traces Clean-up – removes traces of application usage.
My Privacy Tools – provides additional means of enforcing user data
confidentiality, Acronis Drive Cleanser that completely clean up user hard disk
without the possibility of recovering information (see 0«Options
Acronis Drive Cleanser»).
Use Go back, Go forward and Home Toolbar buttons to switch between
categories and to return to the main program window. You can also return
to the main program window using Other categories Sidebar button.
2.3 Basic operation principles
In Acronis Privacy Expert Suite, the primary operations are performed using
user-friendly wizards:
Malicious Software Wizard – removes unwanted malware and spyware
System Clean-up Wizard – completely cleans Windows components of
traces of user work, including temporary files, recently used files list, file
search string, Windows Recycle Bin, etc
Internet Clean-up Wizard – quickly removes traces of Internet and e-mail
usage
Application Traces Clean-up Wizard – removes traces of application
usage.
All wizards are under user control. Using wizards, you can clean either the entire
category or any of its components.
If you need to:
Check your PC for malicious software and remove it if found, select
Malicious Software Removal in the Malicious software group in the
main program window
Remove all traces of your work on the Internet and e-mail, select
Internet Clean-up in the Privacy group in the main program window
Clean Windows components of any traces of user work, select System
Clean-up in the Privacy group in the main program window
Remove application usage traces from your PC, select Application Traces
Clean-up in the Privacy group in the main program window
Additionally, the My Privacy Tools category offers you a number of extra PC
clean-up and protection tools
Block unwanted pop-ups that appear when you load certain Web sites, use
Acronis Pop-up Blocker (from your Internet Explorer session).
Clean up the swap file, run Paging File Cleaner
16 Copyright © Acronis, Inc., 2000-2005
Page 17

Working with Acronis Privacy Expert Suite
Securely remove data in the selected partition and/or disk, run Acronis
Drive Cleanser
Remove selected files or folders, so they can't be recovered, run File
Shredder
For more information on wizard usage and settings, see the respective chapters
of this guide.
2.4 Acronis Privacy Expert Suite options
If you regularly use Acronis Privacy Expert Suite, you can provide custom
preferences for typical situations.
The Options window can be invoked in different ways:
From the sidebar of the Acronis Privacy Expert Suite main window
From Settings of the main menu
By clicking the Options icon on the Toolbar
2.4.1 General options
The General section contains the following items:
Start Clean-up/Removal Wizard – if you flag this item, Acronis Privacy Expert
Suite will ask each time before it runs the clean-up wizard for the given
component or the entire category. Otherwise, the clean-up will be performed
automatically without user confirmation.
Show Summary – if you flag this item, the program will show you the
clean-up summary after each session.
Treat shortcuts as separate files – if you flag this item, the shortcut target will
be left untouched. Otherwise, target files will be deleted along with the
shortcuts.
2.4.2 Clean-up Options
In the Clean-up Options group, you can set the common data destruction
method that will be used by default for any PC clean-up operation,
independently of category.
In this section, you will see all data destruction methods available in Acronis
Privacy Expert Suite by clicking your mouse on the drop-down list in the
righthand part of the editor.
If you need to ensure:
maximum security while destroying files, select Peter Gutmann’s method (35
data destruction cycles), but please keep in mind that this method requires
the greatest amount of time to complete the task
mid-level security at an average speed of clean-up, select VSITR or Bruce
Schneier’s method (seven data destruction cycles)
Copyright © Acronis, Inc., 2000-2005 17
Page 18

Working with Acronis Privacy Expert Suite
fast PC clean-up with limited security in mind, select any methods that
overwrite in a single pass, two passes or three passes
If you haven't set the common data destruction method yourself, Acronis
Privacy Expert Suite will default to the most popular and generally accepted one:
U.S. Standard, DoD 5220.22-M algorithm (See detailed information in
Appendix A«Hard Disk Wiping methods»).
2.4.3 Scheduled tasks
The scheduled clean-up (see section 0 «Scheduling tasks») might lead to errors
if data to be deleted is used by other programs.
You can set up Acronis Privacy Expert Suite for such situations by selecting from
the following variants:
Ignore
Retry
Cancel
Ask user
2.4.4 Explorer enhancements
Acronis Privacy Expert Suite provides an easy way to delete files quickly and
clean up folders through the Windows Explorer context menu.
To enable these options and to add the context menu commands, mark the
Enable Explorer Enhancements check-box.
The context menu also allows you to clean up the Windows Recycle Bin securely.
For that matter, clean-up preferences can not only include the data destruction
method, but also the destruction method wildcard. Scheduling tasks
Each PC clean-up variant of Acronis Privacy Expert Suite can be executed either
manually o r automatically as scheduled.
Having set PC clean-up as a daily procedure to be performed, for example, at
the end of a workday before powering off the PC, you can be sure that all
evidence of your PC and Internet activity will be removed each day.
Acronis Privacy Expert Suite features a built-in scheduler.
2.4.5 Invoking the scheduler
To set up the clean-up schedule, click the Schedule task sidebar button in the
Acronis Privacy Expert Suite main window.
Having invoked the Scheduler, you will need to select a clean-up variant to
perform at the selected time.
18 Copyright © Acronis, Inc., 2000-2005
Page 19

Working with Acronis Privacy Expert Suite
You can:
Schedule any Quick Task to perform complete or particular clean-up,
including Entire PC Clean-up, Malicious software Removal, Internet
Clean-up, System Clean-up and Application Traces Clean-up
Schedule automatic clean-up of any PC components
Scheduler
2.4.6 Scheduled tasks preferences
Having selected the clean-up variant, you will need to set its schedule:
You can select the following variants of automatic clean-up launch:
Do not start automatically
Daily, according to the schedule with the ability to select only workdays or
once every few days
Weekly, according to the schedule with the ability to select particular days,
such as Tuesday and Friday, or once every two or three weeks, etc
Monthly, according to the schedule on the time and day set; The suite
supports clean-up on the <first, second, third, fourth, last> <day of the week>
(Monday, Tuesday, Wednesday, Thursday, Friday, Saturday, Sunday), for
example
One time only, at a specific time (hours:minutes) on a particular day
(month/day/year)
Copyright © Acronis, Inc., 2000-2005 19
Page 20

Working with Acronis Privacy Expert Suite
When my computer starts
When I log on
When my computer shuts down
When I log off
Having selected any variant, click Next to set additional parameters on the
second wizard page.
The scheduled clean-up might lead to errors if data to be deleted is used by other
programs.
You can set up Acronis Privacy Expert Suite for such situations. See section Global
settings Æ Scheduled tasks.
2.5 Using the Log
The Log keeps track of all actions performed by Acronis Privacy Expert Suite. It
can provide you with a complete history and reasons for any problems that have
occurred.
Log view window
Log settings enables you to keep track with different degrees of detail. You can
select one of the following variants:
Everything
Important information – error and malware messages
20 Copyright © Acronis, Inc., 2000-2005
Page 21

Nothing
Working with Acronis Privacy Expert Suite
Log settings
Copyright © Acronis, Inc., 2000-2005 21
Page 22

Malicious software removal and Malware shield
Chapter 3. Malicious software removal and
Malware shield
There are many programs that, once on your PC, start working without your
knowledge. Such software can do such things as collect information or change
user settings for the Internet or your system. These programs are called
malicious software or malware. For more information on the main malware
types, see Appendix B of this guide.
Acronis Privacy Expert Suite enables you to completely clean your PC of
malicious software and protect it from future intrusions.
How malware gets on your PC
One of the most common ways that malicious software gets on your PC is from
new software installations, in particular freeware and shareware. When you
install such applications, they can implement software modules that collect
information on Web sites you visit, your PC configuration, etc.
Also malicious software can penetrate your computer via e-mail, for example,
when you open e-mail attachments. In this way, malware is similar to a virus,
but your antivirus software might not find it.
Another common source of malicious software is peer-to-peer networks, gaming
portals and other Web services.
Sometimes malicious software is installed by commercial applications whose
makers want to collect additional information about users, their habits and
preferences.
Poorly secured networks, network shares and software vulnerability are the
elements, making easier for malicious software to get on a computer and spread
over the network.
How to recognize malware?
Though in many cases malicious software works without users’ knowledge, there
are signs that you should watch for:
Hard drive LED is blinking even when no programs are run or documents
open
Your PC receives and sends unknown information via the Internet though you
aren’t using a Web browser or e-mail client
The home page setting of your browser has changed without your consent
When you work with certain programs or visit certain Web sites, you see ads
or pop-ups
If you notice some of these activities, you need to run Acronis Privacy Expert
Suite to find and eliminate malicious software performing unauthorized
operations on your PC.
22 Copyright © Acronis, Inc., 2000-2005
Page 23

Malicious software removal and Malware shield
If you need to:
Find and remove any type of malicious software from your PC, run
Malicious Software Removal (see section 3.1.1 «Removing malware with
the Malicious Software Wizard»)
Prevent malware from getting on your PC, enable and set up Malware
shield (see section 3.2 «Malicious software protection»)
3.1 Malicious software removal
Using Acronis Privacy Expert Suite, you can find and remove malicious software
from your PC. To do this, select and click Malicious software removal in the
main program window.
After that, you can either initiate malicious software removal with the Malicious
Software Wizard at once, or configure this wizard.
With the Configurate M al ic io us S of tw ar e Re mo va l Options, you can select
the malicious software type to clean up. By default, it is set to remove any type
of malicious software.
Also you can Update spyware definitions and remove/recover malicious
objects stored in Quarantine.
3.1.1 Removing malware with the Malicious Software Wizard
To run the Malicious Software Wizard, select Remove Malicious
Software Now in the Malicious software Removal window.
Copyright © Acronis, Inc., 2000-2005 23
Page 24

Malicious software removal and Malware shield
Malicious Software Wizard
After the wizard is run, your PC will be checked for malicious software. The
results will be shown in the righthand part of the wizard window. You will see
what malicious software applications are found and which files and registry keys
are related to them:
Malicious software scanning results
Information about particular malicious software applications will be available in
the lefthand part of the wizard window after you select malicious software from
the list with a mouse.
All malicious software found will be automatically checked for removal. If you,
want to leave some malicious applications or their components, uncheck them in
the resulting list. (Some common applications are sometimes identified as
malware. This option gives you the ability to keep those programs and/or
settings.)
24 Copyright © Acronis, Inc., 2000-2005
Page 25

Malicious software removal and Malware shield
g
After you finish forming the list of malicious software to be removed, click Next.
In the next window, you will see the final script of malicious software removal
operations.
Malicious software removal operations final script
To execute the script, click Proceed.
After malicious software clean-up is finished, you will see a summary that will
state the amount of malicious software applications removed.
In Windows normal mode some malicious applications are usually stay hidden so you
can not see them and track their work. Therefore, we recommend you to launch the
Malicious Software Wizard in Windows safe mode periodically in addition to scannin
malware in normal mode. To run Windows in safe mode press <F8> key after your
computer starts (restarts) but before Windows launches.
3.1.2 Setting up the Malicious Software Wizard
To set up the Malicious Software Wizard, select Configure Malware
Removal Options in the Malware Removal window.
Selecting scanning mode
There are two modes of searching for malware:
Smart scanning mode – used by default. In this case, the suite searches
for malware only in the most likely locations, including system, user profile
and temporary files folders, as well as in the system registry. Select this
mode for a quick PC check.
Deep scanning mode – an extended algorithm for malware scanning. In
this case, all folders on all PC hard drives are searched. This variant could
take much more time depending on the capacity of your hard disks.
Copyright © Acronis, Inc., 2000-2005 25
Page 26

Malicious software removal and Malware shield
Malicious software scanning modes
Setting up Deep scanning mode
If you selected Deep scanning mode, you can manually select disks and
folders in which to search for malware:
Saving settings
Disk and folders selection
All Malicious Software Wizard settings will be active until you change them.
3.2 Malicious software protection
Acronis Privacy Expert Suite not only allows you to remove malicious software,
but also prevent it from getting on your PC in the first place. This is provided by
26 Copyright © Acronis, Inc., 2000-2005
Page 27

Acronis Malware shield — a special tool that monitors your system for suspicious
applications and components.
3.2.1 Enabling Malware shield
To enable Malware shield, select Start → Programs → Acronis → Malware
shield → Acronis Malware shield.
After Malware shield is enabled, you will see its icon in the system tray.
To disable Malware shield right click the Acronis Malware shield icon in the
system tray and select Disable Acronis Malware shield.
3.2.2 Setting up Malware shield
You can configure the Malware shield settings. To do so, right click on the
Acronis Malware shield icon in the system tray and select Acronis Malware
Shield Options.
Setting up the system protection level
Malicious software removal and Malware shield
You can set up the Protection Level monitoring your system for malicious
software and applications:
Low protection level monitors only all running processes and notifies you if a
process is described in malicious software database.
Medium protection level monitors all running processes and notifies you if a
process is described in malicious software database. It also prevents
suspicious processes from launching at Windows startup, prevents Web
browser settings from hijacking and protects ActiveX components settings.
High protection level is most secure. It includes all Medium level protections
and also protects all processes and Windows system files. This is the
recommended setting for experienced users.
Copyright © Acronis, Inc., 2000-2005 27
Page 28

Malicious software removal and Malware shield
System protection level
To view and/or customize options of the selected protection level click Options.
General settings
In the General settings window, you can enable Acronis Malware Shield
protecting your system and running at system startup.
General settings window
Having set up all settings, you can apply changes by clicking Apply button.
Use Cancel button to if you do not want changes to be applied.
28 Copyright © Acronis, Inc., 2000-2005
Page 29

Process analyzing
You can enable/disable analyzing of the running processes by checking the
corresponding parameter.
Malicious software removal and Malware shield
Registry protection
In the Registry protection section, you can enable/disable:
Browser settings protection from hijacking by suspicious applications
Preventing suspicious software and processes from launching at system
startup
Protection of the ActiveX components settings
Preventing application from sharing resources or changing settings of shared
resources
Process analyzing
Copyright © Acronis, Inc., 2000-2005 29
Page 30

Malicious software removal and Malware shield
Registry protection
Memory protection
In the Memory protection section, you can enable/disable:
Process’ thread access protection from other processes
Process’ virtual memory protection from trying to get access to any other
process memory
Process terminating protection
30 Copyright © Acronis, Inc., 2000-2005
Page 31

File protection
Malicious software removal and Malware shield
Process protection
In the File protection section, you can enable/disable protection your system
files, critical to Windows work.
Specified rules
The Specified rules section contains a list of protection rules that you specified.
You can remove selected rule by clicking Remove or use Clear all to remove all
entries.
Copyright © Acronis, Inc., 2000-2005 31
Page 32

Malicious software removal and Malware shield
History
Specified rules
The History section contents a list of all events occurred, so you can view and
analyze it. Use Clear all button to remove all list entries.
History window
Show alerts
You can select an unresolved alert (or group of alerts), view its description and
choose an action to be taken with it.
32 Copyright © Acronis, Inc., 2000-2005
Page 33

Malicious software removal and Malware shield
To extend the chosen action to all other alerts of the same activity type check
the Propagate this action to all alerts of the same activity type
parameter.
You can also choose how to apply specified action (Once, This time and
specify the permanent rule or This time and always until the process is
restarted).
You can close Alert window, outing off rule creation. As a result the Malware
Shield’s pictogram in the system tray will start to blink, notifying that you have
unresolved alerts. To open Malware Shield Alert window double click on the
Malware Shield’s pictogram in the system tray.
3.3 Quarantine
The Malicious Software Wizard removes all the malicious programs from the
system and stores them in the special protected directory called Quarantine.
You can either permanently delete the removed objects (files, registry keys etc.)
from Quarantine or restore them if needed (fore example, if your system works
unstable as a result of malware removal). Besides, it may be useful to look
through the list of deleted objects and obtain the detailed information about
Acronis Privacy Expert operation on your PC.
Select the Quarantine item in the Malicious Software Removal category to launch Quarantine wizard.
On the Choose an operation window you need to choose an action (Restore
or Clear) to be taken on the Quarantine folder’s elements.
Alert window
Copyright © Acronis, Inc., 2000-2005 33
Page 34

Malicious software removal and Malware shield
j
g
The next window contains a list of elements moved to the quarantine folder and
sorted by date. Check the necessary elements and click Next to proceed with
their recovery/removal.
Restoring items from the Quarantine
If the system configuration has been changed since the restored objects were placed
to the Quarantine, these ob
uration. Therefore, it is recommended that you think twice and use restoration
confi
feature in a short time after malicious software removal.
ects may be inconsistent with the new system
3.4 Malware definitions updates
Offering you timely and reliable protection from new malware released as often
as every day, Acronis Privacy Expert launches the special Malware Web
Updates service.
It enables users to obtain the most up-to-date information and malware
protection from Acronis website.
When you purchase Acronis Privacy Expert Suite, you also subscribe to malware
definitions updates. When the subscription period is over, you can renew your
right to use Malware Web Updates service at Acronis website.
3.4.1 Product registration
Remember that malware definitions updates service is available for registered
users of Acronis Privacy Expert Suite only!
You can register you copy of the program at Acronis website following this link:
http://www.acronis.com/homecomputing/my/products/registration/
34 Copyright © Acronis, Inc., 2000-2005
Page 35

Malicious software removal and Malware shield
Your login is your valid email address.
Once you register your copy of the Acronis Privacy Expert Suite on the Acronis
website, you will not have to enter any additional user information to receive
Malware Definitions Updates.
3.4.2 Running Malicious Software Definitions Updates Wizard
You can run Malware Definitions Updates Wizard the following ways:
By clicking Web updates on sidebar of Acronis Privacy Expert Suite main
window
By selecting Settings → Web updates in the menu
By clicking Web updates on the toolbar.
Malware definitions update wizard
3.4.3 Selecting update mode
Having run Malicious Definitions Updates Wizard, you can select the update
mode: either manual, or scheduled automatic:
To update malware definitions right now, select Update malware
definitions now
To automatically update malware definitions on a suitable schedule, select
Update automatically.
Copyright © Acronis, Inc., 2000-2005 35
Page 36

Malicious software removal and Malware shield
Selecting update mode window
3.4.4 Setting the schedule
If you selected automatic updates, you will be asked to set the suitable schedule.
The following variants are available:
Do not start automatically
Daily, according to the schedule with the ability to select only workdays or
once every few days
Weekly, according to the schedule with the ability to select particular days,
such as Tuesday and Friday, or once every two or three weeks, etc
Monthly, according to the schedule on the time and day set; The suite
supports clean-up on the <first, second, third, fourth, last> <day of the week>
(Monday, Tuesday, Wednesday, Thursday, Friday, Saturday, Sunday), for
example
One time only, at a specific time (hours:minutes) on a particular day
(month/day/year)
When my computer starts
When I log on
When my computer shuts down
When I log off
Having selected any variant, click Next to set additional parameters on the
second wizard page.
36 Copyright © Acronis, Inc., 2000-2005
Page 37

Chapter 4. Internet Clean-up
4.1 General information
The greatest threat to the privacy of your work has the Web as its source. You
have read about it in the Introduction, which also describes system sections
where traces of user actions are stored. The cache, cookies, visited pages and
history form autocomplete lists and passwords are stored in different places on
your system, depending on your browser. You can clean up all of them with
Acronis Privacy Expert Suite. Internet clean-up works with Microsoft Internet
Explorer and Mozilla Firefox browsers.
Internet Clean-up.
The Internet Clean-up category enables you to:
Completely remove all traces of your Web and e-mail actions using the
Internet Clean-up Wizard
Clean up separate system components related to Web actions, i.e. clean
up visited pages list, empty cache, etc
Internet Clean-up
Fine-tune the Internet Clean-up Wizard to suit your needs
4.2 Using the Internet Clean-up Wizard
The Internet Clean-up Wizard enables you to completely remove all traces of
your Web and e-mail actions.
It enables you to:
Clean up Temporary Internet files that are stored on your PC hard disk
while you browse the Web to speed up loading next time you visit the same
page
Remove cookies, small text files created on your PC when you visit a Web
site. Such cookies might contain user name and other information entered
during, say, registration at the Web site
Remove downloaded files (ActiveX elements) that can be installed secretly
while you browse Web sites. ActiveX elements enable Web pages to act like
applications and dynamically change content. At the same time, ActiveX
elements might be used maliciously to gain access to your PC
Clean up visited Web sites history
Clean up Web site addresses typed in the address field
Remove form autocomplete lists stored by the browser to speed up filling
various forms
Remove passwords stored by a browser to speed up authorization on Web
sites
Copyright © Acronis, Inc., 2000-2005 37
Page 38

Internet Clean-up
Securely remove e-mail messages (from Microsoft Outlook and Outlook
Express)
Clean up the contacts and address book of your e-mail client
Internet clean-up wizard
After you run the wizard, it will search your PC for traces of any Web actions.
The search results will be shown in the righthand part of the wizard window.
After the search is finished, you will be able to manually select elements to
remove:
38 Copyright © Acronis, Inc., 2000-2005
Page 39

Preview Internet data to clean
Internet Clean-up
After you select the elements to remove, you can run the clean-up.
4.3 Internet Clean-up Wizard Settings
To set up the Internet Clean-up Wizard, select Configure Clean-up
Options in the Internet Clean-up window.
To enable or disable any Internet Clean-up component, set or remove its
Enable this component flag.
In the Internet Clean-up Wizard settings window, you can also set clean-up
parameters for each system component. Some of these parameters are related
to all components.
4.3.1 «Data Destruction Method» settings
This setting defines the method of guaranteed data destruction to use to clean
up a given component.
By default, all components that have such a setting have it set to Use common
method (See section 2.4.2 «Clean-up Options» of this guide»).
If you need to set a custom method of data destruction for a component, choose
Use custom method for this component and then select your preference.
4.3.2 «Internet Browsers» setting
Acronis Privacy Expert Suite automatically locates all installed and supported
browsers and removes any of their Web activity traces by default.
Copyright © Acronis, Inc., 2000-2005 39
Page 40

Internet Clean-up
If you have Internet Explorer installed, the structures to clean belong only to the
currently logged-on user.
Netscape Navigator and Mozilla support personal profiles. Without additional
settings, Acronis Privacy Expert Suite cleans either the «default profile» (if it is
the only one), or the profile of the currently logged-on user.
If you need to clean up only one browser:
1. Set the checkbox near its name only (for example, Internet Explorer),
unchecking all other boxes.
2. If you use a version of Netscape Navigator (or Mozilla), you should also
select a personal profile (by clicking Profiles… link).
4.3.3 «Address» setting
The «Address» setting is meant for cleaning up the Internet cache, cookies, last
visited pages, typed URLs, and passwords).
40 Copyright © Acronis, Inc., 2000-2005
Page 41

Address settings
Internet Clean-up
You can also enter any full or partial Internet addresses separated by a
semicolon as a value of the «Address» setting; for example:
*worldsoccer.com; *formula1.com;
All files downloaded from sites fully or partially corresponding to at least one of
the addresses entered will be removed.
Attention! The length of a search string with full or partial Internet addresses is almost
infinite! You can enter any number of addresses like
*formula1.com separated by a semicolon.
*worldsoccer.com or
If you need to:
1. clean up the Internet cache (last visited pages list) of all files (lists,
elements) downloaded from a specific Internet address (site), enter
addresses or their parts separated by a semicolon; for example, like:
*CompanyA*;*XYZ123*
As a result, all files downloaded from www.Company.com
, www.xyz123.com will
be deleted.
2. clean up the Internet cache of only specific file types downloaded from a
specific Internet address (site), enter addresses separated by a semicolon;
for example, like:
*companya*.jpg;*companya*.gif;*xyz123*.jpg;*xyz123*.gif
As a result, only *.jpg, *.gif files will be deleted, while *.html files, for example,
remain in the cache.
Copyright © Acronis, Inc., 2000-2005 41
Page 42

Internet Clean-up
Entering the Internet addresses list, you can browse files (visited pages)
selected according to the list. To do this, click Show URLs. You will see the
window with selected addresses. They will be deleted during the selected
component clean-up.
If you want to cancel the deletion of any address in this list, uncheck the
corresponding box.
4.3.4 «File» settings
The «Files» setting provides temporary filenames to clean with Acronis Privacy
Expert Suite and can be used with a search string.
Files settings
Under the Windows operating system, a search string can represent a full or partial
filename. A search string can contain any alphanumeric symbols, including comma, *
and ? symbols, and can have values similar to the following:
*.* – to delete all files from the Recycle Bin – with any file names and
extensions
*.doc – to delete files with specific extension – a Microsoft document file in
this case
read*.* – to delete all files with any extensions, and names beginning with
«read»
read?.* – to delete all files having five-letter names and any extensions,
names beginning with «read»; the fifth letter is random
The last search string, for example, will result in removal of read1.txt,
ready.doc files, but readyness.txt will remain with its longer name (excluding
the extension)
forums, etc.
42 Copyright © Acronis, Inc., 2000-2005
Page 43

Internet Clean-up
You can enter several different search strings separated by a semicolon; for
example:
*.bak; *.tmp; *.~~~;
All files with names corresponding to at least one of the search strings will be
deleted.
Attention! The length of a search string with full or partial filenames is almost infinite!
You can enter any number of filenames or their parts like
a semicolon.
*.tmp, read?.* separated by
4.3.5 «Data filter» settings
This setting will enable you to set clean-up parameters for certain autocompleted
form fields. For example, you can set it so each time the Internet Clean-up
Wizard is run, fields with your personal information (name, surname, e-mail
address, etc.) will be cleaned up.
You can use * and ? wildcards to set this parameter:
john@* - clean up all e-mail addresses that contain ‘john’ before the @ sign.
4.3.6 «E-mail clients» settings
Here you can specify e-mail clients to clean up using settings above.
E-mail client settings
Acronis Privacy Expert Suite currently supports MS Outlook and Outlook Express
e-mail clients.
Copyright © Acronis, Inc., 2000-2005 43
Page 44

Internet Clean-up
4.4 Cleaning up separate Internet components
If you don't want to remove traces of all components listed in the Internet
Clean-up (e.g. to save time), you can separately clean any component in this
category.
In that case, all global settings of the Internet Clean-up Wizard will be valid
for separate components as well.
To clean up separate components, select them by clicking Clean-up
component in the Internet Clean-Up category and run the Internet Cleanup Wizard.
44 Copyright © Acronis, Inc., 2000-2005
Page 45

Chapter 5. System Clean-up
5.1 General information
In the System clean-up section, you can clean up components (folders, files,
registry sections, etc.), related to general system tasks. These Windows
components retain evidence of user PC activity, so they too should be thoroughly
wiped to maintain confidentiality.
5.2 Using the System Clean-up Wizard
The System Clean-up Wizard enables you to securely remove all traces of
your PC actions stored by Windows.
It performs the following:
Removes temporary files from respective Windows folders
System Clean-up
Removes custom folders/files from any media connected to a PC
Securely destroys data in the Windows Recycle Bin
Cleans up free space of any traces of information previously stored on it
Cleans up opened/saved files history
Cleans the list of user system passwords
Cleans the Windows prefetch directory, where Windows keeps the
information about programs you have executed and run recently
Removes traces of file searches on connected disks and computers in the
local area network
Destroys registry backups (Windows 98/Me only)
After you run the wizard, it will search for any traces of user actions stored by
Windows. The search results will be available in the righthand part of the
wizard window.
Copyright © Acronis, Inc., 2000-2005 45
Page 46

System Clean-up
System clean-up wizard
After the search is finished, you will be able to manually select elements to
remove.
Preview system data to clean
After you select the elements to remove, you can run the clean-up.
5.3 System Clean-up Wizard settings
To set up the System Clean-up Wizard, select Configure Clean-up Options
in the Internet Clean-up category.
46 Copyright © Acronis, Inc., 2000-2005
Page 47

System Clean-up
To enable or disable any System Clean-up component, set or remove its
Enable this component flag.
In the System Clean-up Wizard settings window, you can also set clean-up
parameters for each system component. Some of these parameters are related
to all components.
5.3.1 «Data Destruction Method» settings
This setting defines the method of guaranteed data destruction to use to clean
up a given component.
By default, all components that have such a setting have it set to Use common
method (see Appendix A «Hard Disk Wiping methods»).
If you need to set a custom method of data destruction for a component, choose
Use custom method for this component and then select your preference
(see Appendix A «Hard Disk Wiping methods»).
5.3.2 «Files» settings
The «Files» setting provides temporary filenames to clean with Acronis Privacy
Expert Suite and can be used with a search string.
Files settings
Under the Windows operating system, a search string can represent a full or partial
filename. A search string can contain any alphanumeric symbols, including comma, *
and ? symbols, and can have values similar to the following:
*.* – to delete all files from the Recycle Bin – with any file names and
extensions
Copyright © Acronis, Inc., 2000-2005 47
Page 48

System Clean-up
*.doc – to delete files with specific extension – a Microsoft document file in
this case
read*.* – to delete all files with any extensions, and names beginning with
«read»
read?.* – to delete all files having five-letter names and any extensions,
names beginning with «read»; the fifth letter is random
The last search string, for example, will result in removal of read1.txt,
ready.doc files, but readyness.txt will remain with its longer name (excluding
the extension)
You can enter several different search strings separated by a semicolon; for
example:
*.bak; *.tmp; *.~~~;
All files with names corresponding to at least one of the search strings will be
deleted.
Upon entering the «Files» setting value, you can browse the search strings in the
registry selected by Acronis Privacy Expert Suite. To do this, click Show Files.
You will see the window with file names searched for. These items will be
deleted.
Attention! The length of a search string with full or partial filenames is almost infinite!
You can enter any number of filenames or their parts like
a semicolon.
*.tmp, read?.* separated by
5.3.3 «Computers» setting
The «Computers» setting cleans up the registry search strings for finding
computers in the local network. These strings keep information on what
interested you in the network. These elements should also be deleted to
maintain confidentiality.
The «Computers» setting is the same as «Files». The «Computers» setting is a string
that can contain any number of full or partial computer names separated by a
semicolon. The deletion of computer search strings is based on a comparison with the
«Computers» setting according to Windows rules.
If you s i m p l y need to delete all local network computer search strings (suitable in
most cases):
1. Select Find Computer List.
2. Check the Enable the Find Computer List cleaning box.
3. Select the «Computers» setting; leave its default value unchanged – *.
As a result, all computer search strings will be deleted from the registry.
Upon entering the «Computers» setting value, you can browse the search strings
in the registry selected by Acronis Privacy Expert Suite. To do this, click Show
Computers. You will see the window with full and partial computer names
searched for in the network. These items will be deleted.
48 Copyright © Acronis, Inc., 2000-2005
Page 49

Computers settings
System Clean-up
5.3.4 «Drive Free Space» setting
Here you can manually specify physical and/or logical drives to clean up free
space on.
By default, Acronis Privacy Expert Suite cleans up free space on all available
drives.
If you want to change settings of this parameter, you can use the Remove
button to delete drives you don't need to clean free space on from the list.
If you need to add these drives to the list again, use the Add button.
Drive Free Space settings
Copyright © Acronis, Inc., 2000-2005 49
Page 50

System Clean-up
5.3.5 «Commands» setting
Here you can select the commands to remove during Windows Run List cleanup.
This template can contain any comma-separated command names or their parts,
e.g.:
*help; cmd; reg*
This will result in removing commands with names corresponding to or
containing any of the names or parts of names you entered.
Commands settings
5.3.6 «System Password Filter» setting
Here you can enter any full or partial passwords values separated by a
semicolon. You can also use * and ? wildcards to set this parameter.
To see passwords to be cleaned according to your filter, press Show
passwords button.
50 Copyright © Acronis, Inc., 2000-2005
Page 51

System password filter settings
System Clean-up
5.4 Cleaning up separate system components
If you don't want to clean up all system components, you can clean individual
component separately.
In this case, all global settings of the System Clean-up Wizard will be valid for
separate components as well
To clean up separate components, select them in the Clean-up component
section in the System Clean-Up window and run the System Clean-up
Wizard.
Copyright © Acronis, Inc., 2000-2005 51
Page 52

Application Traces Clean-up
Chapter 6. Application Traces Clean-up
6.1 General information
Most Windows applications can store lists of recently opened files, as a
convenience to users.
However, in some cases you might want to remove any trace that you used a
particular program.
In this situation, the Application Traces Clean-up Wizard will preserve your
privacy. This wizard cleans up the recently used files list of most popular
Windows applications, including office, multimedia, graphics applications and
system tools.
Application Traces Clean-up category enables you to:
Completely remove all traces of your work with various Windows applications
using the Application Traces Clean-up Wizard
Fine-tune the Application Traces Clean-up Wizard to fully meet your
needs.
Application traces clean-up wizard
6.2 Using the Application Traces Clean-up Wizard
After you run the wizard, it will search for any traces of user actions stored by
Windows. The search results will be available in the righthand part of the
wizard window.
After the search is finished, you will be able to manually select elements to
remove:
52 Copyright © Acronis, Inc., 2000-2005
Page 53

Application Traces Clean-up
Preview application traces to clean
After you select the elements to remove, you can run the clean-up.
6.3 Application Traces Clean-up Wizard settings
To set up the Application Traces Clean-up Wizard, select Configure
Clean-up Options in the Application Traces Clean-up category.
To enable or disable any Application Traces Clean-up component, set or
remove its Enable this component flag.
You can set the following parameters in the Application Traces Clean-up
Wizard settings window:
6.3.1 «Data Destruction Method» settings
This setting defines the method of guaranteed data destruction to use to clean
up a given component.
By default, all components that have such a setting have it set to Use common
method (see Appendix A «Hard Disk Wiping methods»).
If you need to set a custom method of data destruction for a component, choose
Use custom method for this component and then select your preference
(see Appendix A «Hard Disk Wiping methods»).
Copyright © Acronis, Inc., 2000-2005 53
Page 54

Application Traces Clean-up
Data destruction method settings
6.3.2 Select Applications
In these settings, you can see a list of Windows applications, traces of that the
Application Traces Clean-up Wizard can destroy. If an application is flagged,
all traces of its usage will be deleted. Unflag an application if you want to keep
its recently opened files list.
Applications selection
54 Copyright © Acronis, Inc., 2000-2005
Page 55

Application Traces Clean-up
6.3.3 «Files» settings
The «Files» setting provides temporary filenames to clean with Acronis Privacy
Expert Suite and can be used with a search string.
Files settings
Under the Windows operating system, a search string can represent a full or partial
filename. It can contain any alphanumeric symbols, including comma, * and ?
symbols, and can have values similar to the following:
*.* – to delete all files from the Recycle Bin – with any file names and
extensions
*.doc – to delete files with specific extension – a Microsoft document file in
this case
read*.* – to delete all files with any extensions, and names beginning with
«read»
read?.* – to delete all files having five-letter names and any extensions,
names beginning with «read»; the fifth letter is random
The last search string, for example, will result in removal of read1.txt,
ready.doc files, but readyness.txt will remain with its longer name (excluding
the extension)
You can enter several different search strings separated by a semicolon; for
example:
*.bak; *.tmp; *.~~~;
Copyright © Acronis, Inc., 2000-2005 55
Page 56

Application Traces Clean-up
All files with names corresponding to at least one of the search strings will be
deleted.
Attention! The length of a search string with full or partial filenames is almost infinite!
You can enter any number of filenames or their parts like
a semicolon.
*.tmp, read?.* separated by
56 Copyright © Acronis, Inc., 2000-2005
Page 57

Chapter 7. My privacy tools
7.1 General information
My privacy tools offers additional means of providing user data privacy and
work security:
File shredder – securely destroys any files or folders you select so they
can't be recovered.
Acronis Drive Cleanser – securely destroys data on a selected partition
and/or disk so it can't be recovered.
Bootable Media Builder – creates bootable diskettes or CDs to securely
destroy data on PC hard disks even without having Acronis Privacy Expert
Suite installed.
Paging file cleaner – cleans up the Windows swap file.
My privacy tools
My privacy tools window
This chapter describes the File Shredder and Paging File Cleaner tools. The
usage and setup of Acronis Drive Cleanser is described in it respective
chapter.
If you need to:
Securely destroy files or folders you select, run File Shredder. See section
7.2 of this guide, «Using File Shredder», for instructions on how to use it.
Clean up the Windows swap file – run Paging File Cleaner. See section
7.3 of this guide, «Paging file cleaner», for instructions on how to use it.
Copyright © Acronis, Inc., 2000-2005 57
Page 58

My privacy tools
Securely destroy data on selected partitions and/or disks so it can't be
recovered, run Acronis Drive Cleanser. For more information on how to
use it, see 0 of this guide, «Options
Acronis Drive Cleanser».
7.2 Using File Shredder
The File Shredder enables users to select files and folders quickly in order to
destroy them permanently.
This wizard features the familiar Windows Explorer interface.
To run the folders/files cleaner, do one of the following:
Select File Shredder in the My privacy tools category
Select Tools Æ File Shredder in the main menu
Select File Shredder button in the main menu
Using File Shredder
7.3 Paging file cleaner
The Paging file cleaner allows you to remove any traces of PC or Internet activity
permanently.
A paging file is a file on a hard disk (e.g. C:\win386.swp in Windows 98/Me or
C:\pagefile.sys in Windows NT/2000/XP/2003 Server) used by Windows as
additional memory when that is required in order to run applications.
This file might contain personal information that a user is unaware is there. For
example, if a user opened too many Internet Explorer windows and entered
personal information in one of them, then tried to switch to another Internet
58 Copyright © Acronis, Inc., 2000-2005
Page 59

My privacy tools
Explorer window, the operating system might lack enough physical memory for
all the windows and store the contents of the previous one in its paging file. If a
user closes browser windows after this, there is a strong possibility that
confidential information will have been left in the paging file.
To run the Paging file cleaner, do one of the following:
Click the Paging file cleaner icon in the My privacy tools category of the
Acronis Privacy Expert Suite main window
Select Tools Æ Paging file cleaner in the main menu
Click Paging file cleaner on the toolbar
After you run Paging file cleaner, you can set it to clean up the swap file at
each reboot by clicking Enable.
If you want to disable paging file clean-up, select Disable.
Paging file cleaner activation
Copyright © Acronis, Inc., 2000-2005 59
Page 60

Acronis Drive Cleanser
Chapter 8. Acronis Pop-up Blocker
8.1 What are pop-ups?
While browsing some Web sites, you might have unwanted pop-up windows
open along with the window you want. Generally, pop-ups contain bothersome
advertising. They slow down your Internet connection speed and increase the
traffic you pay for. On some Web sites, pop-ups are used to provide extra
information or as locations where the user needs to input information.
8.2 Acronis Pop-up Blocker
Acronis Pop-up Blocker is activated automatically after installation and prevents
new windows from opening while browsing a website with the Microsoft Internet
Explorer. With Acronis Pop-up Blocker, you can filter a selected web site contents
(GIF files and flash animation, ActiveX objects, pop-ups in layers, etc.).
8.3 Acronis Pop-up Blocker settings
You can invoke the Acronis Pop-up Blocker options window in the following
ways:
By selecting Acronis Pop-up Blocker in the Tools menu of the Internet
Explorer
By clicking Acronis Pop-up Blocker icon on the toolbar of the Internet
Explorer
By right-clicking on a web page and selecting Acronis Pop-up Blocker –
Options on the context menu
Pop-up Blocker settings
60 Copyright © Acronis, Inc., 2000-2005
Page 61

Acronis Drive Cleanse
r
8.3.1 Acronis Pop-up Blocker General Settings
In the general settings section, you can enable or disable Pop-up Blocker by
selecting/deselecting Enable Acronis Pop-up Blocker parameter.
Choose the appropriate filter level (webpage content blocking) by dragging the
slider. To customize the current filter’s settings click Change settings and
select a contents to be blocked.
8.3.2 User List
In this section, you can make up your own User List – list of sites with
customized filter settings. The User List is sometimes known generically as a
White List. Here you can pre-approve certain pop-ups, such as a log-in pop-up
from your bank.
To add a new site, click the Add button. On the appearing window enter its URL
and adjust filter settings.
To edit the existing site and its filter settings click the Edit button and on the
appearing window make the necessary changes.
Also you can move the existing site to the Black List section by clicking Move to
Black List. Remove button rejects the selected site from the list. Use Clear
button to remove all entries from the User List.
User list
8.3.3 Black List
If necessary, you can use Acronis Pop-up Blocker to block a Web site by adding its URL to the Black List. In this case, you will see "Acronis Privacy Expert Pop-
Copyright © Acronis, Inc., 2000-2005 61
Page 62

Acronis Drive Cleanser
up Blocker: Black URL link – navigation stopped" message in the browser when
trying to access this Web site.
To add a new site, click the Add button. On the appearing window enter its URL.
Also you can move the existing site to the User list by clicking Move to User
List.
To remove the existing site from the list click Remove. Use Clear button to
remove all entries from the Black List.
Black list
8.3.4 History
The History section contents a list of visited websites with detailed information on the blocked content.
In this list, you can select websites to move to either the User or Black list.
Moving a website to the User list means that you allow this site to be browsed.
Moving a site to the Black list means that you always want to block this site.
Use Clear button to remove all entries from the list.
62 Copyright © Acronis, Inc., 2000-2005
Page 63

Acronis Drive Cleanse
r
History
8.3.5 Acronis Pop-up Blocker options
In this section you can set up the following Acronis Pop-up Blocker options:
Secure sites blocking (via https protocol). Enable https blocking only if it is
really necessary!
Blocking the Internet Explorer spawned configuration windows, dialogs and
panels
Hotkeys for temporary disabling Acronis Pop-up Blocker
Enable/disable sound notifications (sound beep, play sound, select sound for
notifications) and displaying massages in the Internet Explorer status bar
Copyright © Acronis, Inc., 2000-2005 63
Page 64

Acronis Drive Cleanser
Options
64 Copyright © Acronis, Inc., 2000-2005
Page 65

Acronis Drive Cleanse
r
Chapter 9. Acronis Drive Cleanser
9.1 Acronis Drive Cleanser capabilities
Many operating systems do not provide users with sufficient data destruction
tools, so deleted files can be restored easily by simple applications. Even a
complete disk reformat can’t guarantee permanent confidential data destruction.
Acronis Drive Cleanser solves this problem with guaranteed and permanent data
destruction on selected hard disks and/or partitions. It allows you to select from
a number of data destruction methods depending on the importance of your
confidential information.
9.2 Working with Acronis Drive Cleanser
Acronis Drive Cleanser allows you to perform the following:
clean up selected hard disks or partitions using preset methods
create and execute custom user methods of hard disk clean-up.
Acronis Drive Cleanser is based on a wizard that scripts all hard disk operations,
so no data destruction is performed until you execute the complete script. At any
stage, you can return to the previous stages to select other disks or partitions or
data destruction methods.
First, you must select the hard disk partitions where you want to destroy data.
The list of PC hard disks with partitions
To select a partition, click the corresponding rectangle. You will see a red mark
in the upper right corner indicating the partition is selected.
Copyright © Acronis, Inc., 2000-2005 65
Page 66

Acronis Drive Cleanser
You can select an entire hard disk or several disks for data destruction. To do
this, click the rectangle corresponding to the hard disk (with a device icon, disk
number and capacity.)
You can select several partitions simultaneously located on different hard disks
or on several disks.
Click Next to continue.
In the Final actions window, you can select actions to be performed on the
partitions selected for data destruction. Acronis Drive Cleanser offers you three
variants:
Leave partition as is — just destroy data using the method selected below
Delete partition — destroy data and delete partition
Format partition — destroy data and format partition (default)
Final actions window
In this example, the switch is set to Format. This will allow you to see the results
of partition and data destruction, along with the reformatting of the partition.
9.3 Using preset data destruction methods
Acronis Drive Cleanser utilizes a number of the most popular data destruction
methods that are described in detail in Appendix A «Information wiping methods
used by » of this manual.
66 Copyright © Acronis, Inc., 2000-2005
Page 67

Acronis Drive Cleanse
r
The list of preset methods
After you select a method, Acronis Drive Cleanser will perform all actions
necessary to destroy contents of the selected partition or disk. After this is done,
you will see a message indicating the successful data destruction.
Acronis Drive Cleanser offers you another useful capability — to estimate the
results of executing a data destruction method on a hard disk or partition. It
features an integrated DiskViewer hard disk browsing tool.
The aforementioned methods offer various levels of confidential data
destruction. Thus the picture you might see on disk or partition depends on the
data destruction method. But what you actually see are disk sectors filled with
either zeros or random symbols.
DiskViewer window
Copyright © Acronis, Inc., 2000-2005 67
Page 68

Acronis Drive Cleanser
9.4 Creating custom methods of data destruction
Acronis Drive Cleanser gives you an opportunity to create your own methods for
wiping hard disks. Although the software includes several levels of data
destruction, you can choose to create your own.
9.4.1 Creating custom methods
To create a custom method of hard disk wiping, select and mouse-click the
«Custom…» line from the drop-down list in the Method selection window. Please
pay close attention to the load method option in the same drop-down list.
The selection of custom method creation
Click the Next button to continue.
The window with the script for wiping a hard disk partition (the partition and/or
hard disk was selected during a previous step) shows after the selection of one
of the predefined wiping methods. This time the Custom method wizard will be
started and you will see the Number of passes window.
As an example, let’s create a simple custom method similar to the U.S. Department
of Defense standard. This standard assumes three passes for a hard disk during
which different symbols are written to it, plus one more pass for verification — i.e.
four passes total.
68 Copyright © Acronis, Inc., 2000-2005
Page 69

Acronis Drive Cleanse
r
The window with number of passes of the custom method
Remember, the predefined wiping methods perform from one (fast method, the
Russian standard) to up to 35 passes (Peter Gutmann’s method).
You may enter any value into the spinner field of the wizard window with the
keyboard or mouse. For our example, enter 4 into this field.
Click the Next button to continue.
9.4.2 Method definition: template
The Method definition window shows you a template of the future method; the
list contains many elements, including the defined method at the previous stage.
The method definition window
The window has the following legend: The first column of the list contains the
number of passes for a disk; the second contains the type of operation on a disk
(there are just two: to write a symbol to disk, «writing», and to verify written,
Copyright © Acronis, Inc., 2000-2005 69
Page 70

Acronis Drive Cleanser
«verification»); the third column contains the pattern of data to be written to
disk.
The pattern to be written is always a hexadecimal value, for example, a value of
this kind: 0x00, 0xAA, or 0xCD, etc. These values are 1 byte long, but they may
be up to 512 bytes long. Except for such values, you may enter a random
hexadecimal value of any length (up to 512 bytes). Your method may also
include one more value for writing that is designated as the «complementary
value» – the value that is complementary to the one written to disk during the
previous pass.
If the binary value is represented by 10001010 (0x8A) sequence, then the
complementary binary value will be represented by 01110101 (0x75) sequence.
Thus you may include the following values in a method:
Any hexadecimal value 1-512 bytes long
Random hexadecimal values 1-512 bytes long
Hexadecimal values, complementary to those written to hard disk during the
previous pass
The Method definition window offers you the template for the method only. You
should define exactly what the software should write to disk to destroy the
confidential data according to your method.
To do this, click your mouse on the line representing pass #1.
The selection of the first pass for pattern definition
Click the Next button to continue.
You will see the window that allows you to define the pattern to be written to
disk (hexadecimal value).
70 Copyright © Acronis, Inc., 2000-2005
Page 71

Acronis Drive Cleanse
r
The wiping pass adjustment window for definition of patterns to be written
In this figure, the switch is set to the Write a value position by default, and the
hexadecimal value 0x00 is entered into the field.
This is what the window control elements mean: You may enter any hexadecimal
value into the field under the Write a value switch to write it to a hard disk
during any pass (during the first pass in this case).
By setting the switch to Write a random value position, you first will select write
a random value to disk, and specify the length of random value in bytes in the
spinner field below.
The U.S. standard provides the writing of random values to each byte of each
disk sector during the first pass, so set the switch to Write a random value
position and enter 1 into field.
The input of a random 1-byte value as the pattern for writing
Click the Next button to continue.
Copyright © Acronis, Inc., 2000-2005 71
Page 72

Acronis Drive Cleanser
You will be taken to the method definition window again and will see that the
former record (1 – write – 00) was replaced by 1 – write – random value, 1 byte.
The first pass of the custom method is defined
To define the next pass, select the second line of the list and click the Next
button.
You will see the already-familiar window, but this time there will be more switch
positions available: two additional positions will be available for selection:
Write complementary to previous pass pattern
Verify.
The input of value complementary to the one written during the previous pass
As during the second pass of the U.S. standard, each disk sector is filled with
hexadecimal values that are complementary to those written during the previous
72 Copyright © Acronis, Inc., 2000-2005
Page 73

Acronis Drive Cleanse
r
pass. Therefore you should set the switch to the Write complementary to
previous pass pattern position and click the Next button.
You will be taken to the method definition window again. In this window, the
second record looked like this before: 2 – write – 00, and it was replaced by: 2 –
write – previous step complementary value.
The second pass of the custom method is defined
Following the U.S. data destruction standard specification, define third and
fourth data overwriting passes.
In the same way, you can create any data destruction method to match your
security requirements.
9.4.3 Saving a custom method to file
In the next Saving custom method window, you will be able to save the method
you have created. This will be useful if you are going to use it again.
The saving custom method window
Copyright © Acronis, Inc., 2000-2005 73
Page 74

Acronis Drive Cleanser
In order to save your method, you need to give it a filename and define the path
in the Select file field or click the Browse button to locate an existing file on the
disk. You should also enter a brief description of your method.
The method filename and description window
Each custom method is stored in a separate file with its own name. If you try to write a
new method to an already existing file, the existing file’s contents will be erased.
As all passes of your method are defined and the method is saved to file, clicking
the Next button will let you see the window with the generated wiping script
based on your custom method.
The script of data destruction, based on the custom method
By clicking the Proceed button, you will execute the generated script.
74 Copyright © Acronis, Inc., 2000-2005
Page 75

Acronis Drive Cleanse
r
9.4.4 Loading a method from a file
If you created and saved your method for data destruction while working with
Acronis Privacy Expert Suite software, you can use it in the following way:
In the Select Method window, choose Load from file… from the drop-down list
and select the file with custom data destruction method parameters. By default,
such files have *.alg extension.
Method selection: loading from file
9.5 Creating a bootable diskette or CD with Acronis Drive
Cleanser
If you didn’t create a bootable diskette or CD with Acronis Drive Cleanser during
installation of Acronis Privacy Expert Suite, you can do it later using the Bootable
Media Builder.
This diskette or CD will allow you to easily and permanently destroy data on your
PC even if it doesn’t have Acronis Privacy Expert Suite installed.
To create a bootable diskette, select Bootable Media Builder in the My
privacy tools group of the main program window and follow the wizard
instructions.
Copyright © Acronis, Inc., 2000-2005 75
Page 76

Hard Disk Wiping methods
Appendix A. Hard Disk Wiping methods
Information removed from a hard disk drive by non-secure means (for example,
by simple Windows delete) can easily be recovered. Utilizing specialized
equipment, it is possible to recover even repeatedly overwritten information.
Therefore, guaranteed data wiping is more important now than ever before.
The guaranteed wiping of information from magnetic media (e.g. a hard disk
drive) means it is impossible to recover data by even a qualified specialist with
the help of all known tools and recovery methods.
This problem can be explained in the following way: Data is stored on a hard
disk as a binary sequence of 1 and 0 (ones and zeros), represented by
differently magnetized parts of a disk.
Generally speaking, a 1 written to a hard disk is read as 1 by its controller, and 0
is read as 0. However, if you write 1 over 0, the result is conditionally 0.95 and
vice versa – if 1 is written over 1 the result is 1.05. These differences are
irrelevant for the controller. However, using special equipment, one can easily
read the «underlying» sequence of 1 and 0.
It only requires specialized software and inexpensive hardware to read data
«deleted» this way by analyzing magnetization of hard disk sectors, residual
magnetization of track sides and/or by using current magnetic microscopes.
Writing to magnetic media leads to subtle effects summarized as follows: every
track of a disk stores an image of every record ever written to it, but the effect of
such records (magnetic layer) becomes more subtle as time passes.
A.1 Information wiping methods’ functioning principles
Physically, the complete wiping of information from a hard disk involves the
switching of every elementary magnetic area of the recording material as many
times as possible by writing specially selected sequences of logical 1 and 0 (also
known as samples).
Using logical data encoding methods in current hard disks, you can select
samples of symbol (or elementary data bit) sequences to be written to sectors in
order to repeatedly and effectively wipe confidential information.
Methods offered by national standards provide (single or triple) recording of
random symbols to disk sectors that are straightforward and arbitrary decisions,
in general, but still acceptable in simple situations. The most effective
information-wiping method is based on deep analysis of subtle features of
recording data to all types of hard disks. This knowledge speaks to the necessity
of complex multipass methods to guarantee information wiping.
The detailed theory of guaranteed information wiping is described in an article
by Peter Gutmann. Please see:
http://www.cs.auckland.ac.nz/~pgut001/pubs/secure_del.html
76 Copyright © Acronis, Inc., 2000-2005
.
Page 77

Hard Disk Wiping methods
/
A.2 Information wiping methods used by Acronis
The table below briefly describes information wiping methods used by Acronis.
Each description features the number of hard disk sector passes along with the
number(s) written to each sector byte.
The description of built-in information wiping methods
NN Algorithm (writing
Passes Record
method)
1. United States
Department of
Defense 5220.22M
4 1
st
pass – randomly selected symbols to
each byte of each sector, 2 –
complementary to written during the 1
pass; 3 – random symbols again; 4 –
writing verification.
2. United States:
NAVSO P-5239-26
(RLL)
3. United States:
NAVSO P-5239-26
(MFM)
4 1
4 1
st
pass – 0x01 to all sectors, 2 –
0x27FFFFFF, 3 – random symbol
sequences, 4 – verification.
st
pass – 0x01 to all sectors, 2 –
0x7FFFFFFF, 3 – random symbol
sequences, 4 – verification.
4. German: VSITR 7 1st – 6th – alternate sequences of: 0x00
th
and 0xFF; 7
– 0xAA; i.e. 0x00, 0xFF,
0x00, 0xFF, 0x00, 0xFF, 0xAA.
5. Russian: GOST
P50739-95
1 Logical zeros (0x00 numbers) to each
th
byte of each sector for 6
to 4th security
level systems.
Randomly selected symbols (numbers)
to each byte of each sector for 3
rd
to 1st
security level systems.
6. Peter Gutmann’s
method
35 Peter Gutmann’s method is very
sophisticated. It’s based on his theory of
hard disk information wiping (see
http://www.cs.auckland.ac.nz/~pgut001
pubs/secure_del.html).
7. Bruce Schneier’s
method
7 Bruce Schneier offers a seven-pass
overwriting method in his Applied
st
Cryptography book. 1
pass – 0xFF, 2nd
pass – 0x00, and then five times with a
cryptographically secure pseudo-random
sequence.
8. Fast 1 Logical zeros (0x00 numbers) to all
sectors to wipe.
st
Copyright © Acronis, Inc., 2000-2005 77
Page 78

Malware threats glossary
Appendix B. Malware threats glossary
This glossary contains supplemental information on the most popular malware from
which Acronis Privacy Expert Suite protects you.
Adware
This is a kind of Web marketing where banners are integrated into freeware and
shareware programs. To be able to use a program, a user has to watch ads
downloaded from the Web. This increases traffic volume and slows down your
Internet connection.
Browser Helper Objects
Some Browser Helper Objects are useful at expanding your browser’s
capabilities, but there are others that might not need your permission to install
on your computer and that can be used for malicious purposes like gathering
information on your surfing habits. This can cause problems ranging from
incompatibility issues to corrupting important system functions, making them not
only a threat to your security, but also to your system’s stability.
Browser hijackers
Browser hijackers have the ability to change your Internet browser settings,
redirect your Web searches through their own search engines, redirect mistyped
or incomplete URLs, and change your default home page. They may redirect
your searches to "pay-per-search" Web sites which are very often pornographic
Web sites.
Commercial keylogger
Keyloggers register which keys are pressed on user PC and transmit this
information via e-mail. Such applications can also store the time of running or
quitting any applications. They might operate without users’ knowledge.
Dialers
Dialers have the ability to disconnect your computer from your local Internet
provider and reconnect you to the Internet using an alternate connection, such
as an expensive pornographic, toll or international phone number. They do not
spy on you, but they may rack up significant long-distance phone charges. They
have the ability to run in the background, hiding their presence.
78 Copyright © Acronis, Inc., 2000-2005
Page 79

y
Exploit/Security holes
These are security bugs and vulnerabilities in applications primarily meant for
Web operations. Through such holes, intruders can corrupt a PC or gain remote
control over it.
Backdoor
A kind of software, including commercial, designed for remote PC control. In
some cases, users might not be aware of such applications running.
Sniffers
Programs that capture network traffic (sent and received data packets). Sniffers
could be a serious threat, able to capture and decrypt user names, passwords
and private information and prevent normal operation of computers and network
in general. As most protocols (FTP, POP, HTTP, telnet) have secret information
transmitted unencrypted, an intruder can easily gain access to a user’s
information by setting up sniffer filters and waiting for the victim to connect to a
server.
Malware threats glossar
Spyware
Programs that secretly gather and transmit personal user information. Spyware
can be a part of various applications, including commercial products.
Toolbars
Toolbars can be downloaded to your Web browser to make browsing easier.
Examples include the Google, Alexa and Yahoo toolbars. Even though these are
very handy to use, they have the ability to track everything you do on the
Internet and to pass that information back to the owners of the toolbars. Be sure
to read the terms and conditions page before you download any toolbar.
Trojan Horses (Trojans)
Trojans are specially created programs that are deployed to PCs imitating useful
applications and utilities. They can result in failures, lock-ups or even complete
data destruction. Trojans are spread via mailing lists, Web forums, etc.
Copyright © Acronis, Inc., 2000-2005 79
 Loading...