

Page 1

www.acova.com
Code : Z22170/07-04
Emplacement et raccordement du radiateur . . . . . . . . . . . . . . . . . . . . . . . . . . . . . P [ 2
Règles particulières d’installation concernant les salles d’eau . . . . . . . . . . . . . . . . . P [ 3
Fixation du thermostat mural “CADIR” et mise en service. . . . . . . . . . . . . . . . . . . . P [ 4
Fonctionnement de la régulation électronique . . . . . . . . . . . . . . . . . . . . . . . . . . . P [ 6
Caractéristiques. . . . . . . . . . . . . . . . . . . . . . . . . . . . . . . . . . . . . . . . . . . . . . . P [ 10
Pour connaitre et profiter au mieux de votre radiateur Acova . . . . . . . . . . . . . . . . P [ 11
Conseils d’entretien . . . . . . . . . . . . . . . . . . . . . . . . . . . . . . . . . . . . . . . . . . . . P [ 14
Vérifications en cas de non fonctionnement ou d’anomalies . . . . . . . . . . . . . . . . . P [ 14
SAV (service après vente) . . . . . . . . . . . . . . . . . . . . . . . . . . . . . . . . . . . . . . . . P [ 15
Garantie . . . . . . . . . . . . . . . . . . . . . . . . . . . . . . . . . . . . . . . . . . . . . . . . . . . . P [ 15
Aisn'Imprim 84254/04
NOTICE D’UTILISATION
INSTRUCTION FOR USE
BEDIENUNGSANLEITUNG
AVVERTENZE D’USO
GEBRUIKSAANWIJZING
INSTRUCCIONES DE USO
Z22170
F
GB
D
I
NL
SP
Positioning and connecting of the radiator . . . . . . . . . . . . . . . . . . . . . . . . . . . .P [ 18
Special regulations for installation in bathrooms . . . . . . . . . . . . . . . . . . . . . . . .P [ 19
Securing of the “CADIR” wall regulator and commissioning . . . . . . . . . . . . . . . . . .P [ 20
Operating the programmable infrared electronic regulation system . . . . . . . . . . . .P [ 22
Characteristics . . . . . . . . . . . . . . . . . . . . . . . . . . . . . . . . . . . . . . . . . . . . . . . .P [ 26
Learn more about and make the most of your Acova radiator . . . . . . . . . . . . . . . .P [ 27
Maintenance instructions . . . . . . . . . . . . . . . . . . . . . . . . . . . . . . . . . . . . . . . .P [ 30
Checks in the event of operating failure or faults . . . . . . . . . . . . . . . . . . . . . . . .P [ 30
Customer service . . . . . . . . . . . . . . . . . . . . . . . . . . . . . . . . . . . . . . . . . . . . . .P [ 31
Warranty . . . . . . . . . . . . . . . . . . . . . . . . . . . . . . . . . . . . . . . . . . . . . . . . . . . .P [ 31
Einbauort und Anschluß des Heizkörpers . . . . . . . . . . . . . . . . . . . . . . . . . . . . .P
[ 34
Besondere Installationshinweise für Nasszellen . . . . . . . . . . . . . . . . . . . . . . . . . .P [ 35
Befestigung des Wandthermostats “CADIR” und Inbetriebnahme . . . . . . . . . . . . . .P [ 36
Funktionieren der programmierbaren elektronischen Infrarot-Regelung . . . . . . . . . .P [ 38
Merkmale . . . . . . . . . . . . . . . . . . . . . . . . . . . . . . . . . . . . . . . . . . . . . . . . . . .P [ 42
Zum richtigen Kennenlernen und Benutzen des Acova Heizkörpers . . . . . . . . . . . . .P [ 43
Pflegehinweise . . . . . . . . . . . . . . . . . . . . . . . . . . . . . . . . . . . . . . . . . . . . . . .P [ 46
Prüfungen bei Funktionsausfall oder Anomalien . . . . . . . . . . . . . . . . . . . . . . . . .P [ 46
Kundendienst . . . . . . . . . . . . . . . . . . . . . . . . . . . . . . . . . . . . . . . . . . . . . . . .P [ 47
Garantie . . . . . . . . . . . . . . . . . . . . . . . . . . . . . . . . . . . . . . . . . . . . . . . . . . . .P [ 47
Sistemazione e collegamento del radiatore . . . . . . . . . . . . . . . . . . . . . . . . . . . .P
[ 50
Regole particolari di installazione nelle stanze da bagno . . . . . . . . . . . . . . . . . . .P [ 51
Installazione del termostato murale “CADIR” e Utilizzazione . . . . . . . . . . . . . . . . .P [ 52
Funzionamento della regolazione elettronica a raggi infrarossi programmabile . . . . .P [ 54
Caratteristiche . . . . . . . . . . . . . . . . . . . . . . . . . . . . . . . . . . . . . . . . . . . . . . . .P [ 58
Per conoscere e utilizzare al meglio il radiatore Acova . . . . . . . . . . . . . . . . . . . . .P [ 59
Consigli di manutenzione . . . . . . . . . . . . . . . . . . . . . . . . . . . . . . . . . . . . . . . .P [ 62
Controlli da effettuare in caso di mancato funzionamento o di anomalie . . . . . . . . .P [ 62
Servizio Assistenza . . . . . . . . . . . . . . . . . . . . . . . . . . . . . . . . . . . . . . . . . . . . .P
[ 63
Garanzia . . . . . . . . . . . . . . . . . . . . . . . . . . . . . . . . . . . . . . . . . . . . . . . . . . . .P [ 63
Plaatsing en aansluiting van de radiator . . . . . . . . . . . . . . . . . . . . . . . . . . . . . .P
[ 66
Speciale voorschriften voor de installatie betreffende de wasruimten . . . . . . . . . . .P [ 67
Bevestiging van de “CADIR” muurthermostaat en in gebruik stelling . . . . . . . . . . .P [ 68
Werking van het elektronisch programmeebare infrarood regelsysteem . . . . . . . . . .P
[ 70
Technische gegevens . . . . . . . . . . . . . . . . . . . . . . . . . . . . . . . . . . . . . . . . . . .P [ 74
Om uw Acova radiator beter te kennen en gebruiken . . . . . . . . . . . . . . . . . . . . . .P [ 75
Onderhoudsadviezen . . . . . . . . . . . . . . . . . . . . . . . . . . . . . . . . . . . . . . . . . . . .P [ 78
Controles in geval van niet of gebrekkig functioneren . . . . . . . . . . . . . . . . . . . . .P [ 78
Service na verkoop . . . . . . . . . . . . . . . . . . . . . . . . . . . . . . . . . . . . . . . . . . . . .P [ 79
Garantie . . . . . . . . . . . . . . . . . . . . . . . . . . . . . . . . . . . . . . . . . . . . . . . . . . . .P [ 79
Ubicación y conexión del radiador . . . . . . . . . . . . . . . . . . . . . . . . . . . . . . . . . .P
[ 82
Normas particulares de instalación en cuartos de baños . . . . . . . . . . . . . . . . . . . .P [ 83
Fijación del termostato mural “CADIR” y puesta en servicio . . . . . . . . . . . . . . . . .P [ 84
Funcionamiento de la regulación electrónica a infrarrrojos programable . . . . . . . . .P [ 86
Características . . . . . . . . . . . . . . . . . . . . . . . . . . . . . . . . . . . . . . . . . . . . . . . .P [ 90
Para conocer mejor y sacar el máximo provecho de su radiador Acova . . . . . . . . . . .P [ 91
Consejos de mantenimiento . . . . . . . . . . . . . . . . . . . . . . . . . . . . . . . . . . . . . . .P [ 94
Comprobaciones en caso de mal funcionamiento o anomalías . . . . . . . . . . . . . . . .P [ 94
Servicio posventa . . . . . . . . . . . . . . . . . . . . . . . . . . . . . . . . . . . . . . . . . . . . . .P
[ 95
Garantía . . . . . . . . . . . . . . . . . . . . . . . . . . . . . . . . . . . . . . . . . . . . . . . . . . . .P [ 95
Page 2

1. ÉTIQUETTE SIGNALÉTIQUE
TECHNICAL LABEL - GERÄTESCHILD - ETICHETTA SEGNALETICA
KENPLAATJE
- ETIQUETA DESCRIPTIVA
2. THERMOSTAT MURAL PROGRAMMABLE à EMISSION INFRA-ROUGE (sans fil)
P
ROGRAMMABLE INFRA-ROUGE WALL CONTROL “CADIR” - PROGRAMMIERBARE INFRAROT - VANDSTEUERUNG “CADIR”
R
EGOLAZIONE MURALE PROGRAMMABILE A INFRAROSSI “CADIR”
P
ROGRAMMEERBARE INFRAROOD MUURREGELING “CADIR” - REGULACION MURAL PROGRAMMABLE INFRARROJO “CADIR
3. BOITIER RECEPTEUR INFRAROUGE
O
NTVANGER
INFRAROT
-EMPFANGSGERÄT
SCATOLA ELECTRONICA RICEVITRICE
ENTVANGSTBO X-CAJETIN RECEPTOR
4. POSITION CONSEILLÉE DU THERMOSTAT MURAL INFRAROUGE “CADIR”
RECOMMENDED POSITION FOR INFRA-RED PROGRAMMABLE WALL REGULAT OR “CADIR”
E
MPFOHLENE STELLUNG DER PROGRAMMIERBAREN INFRAROT W ANDSTEUERUNG “CADIR”
P
OSIZIONE CONSIGLIATA DELLA REGOLAZIONE MURALE PROGRAMMABILE A INFRAROSSI “CADIR”
A
ANBEVOLEN PLAATS VOOR DE PROGRAMMEERBARE INFRAROOD MUURREGELING “CADIR”
P
OSICION ACONSEJ ADA DE LA REGULACION MURAL PROGRAMABLE INFRARROJO “CADIR”
5. PRINCIPE DE RACCORDEMENT D’UN RADIATEUR
SECHE
-SERVIETTE MIXTE
C
ONNECTING PRINCIPALE FOR DUAL-ENERGY TOWEL-DRYING RADIATOR
ANSCHLUSSBILD EINES KOMBINIERTEN BADHEIZKÖRPERS
PRINCIPIO DI COLLEGAMENTO DI UN RADIA T ORE ASCIUGASALVIETTE MISTO
AANSLUITINGSPRINCIPE VAN EEN GEMENGDE RADIATOR-HANDDOEKENDROGER
PRINCIPIO DE CONNEXION DEE UN APARATO MIXTO
15
16
2
13
14
17
1
7
6
5
4
8
9
10
3
11
12
Type d’appareil - Model type
Gerätetyp - Tipo di apparechio
Type apparaat - Tipo de aparata
N° de série OF - Serial number
Serienummer - N° di fabbricazione OF
Serienummer - Número de fabricación
Page 3

1
Madame, Mons ieu r
Nous vous remercions d’avoir choisi ce radiateur Acova. Elaboré avec le plus grand
soin selon notre charte qualité, nous vous en souhaitons une entière satisfaction.
Pour profiter pleinement de toutes ses possibilités, nous vous invitons à lire
attentivement cette notice et à la conserver à proximité de votre appareil.
Pour des informations plus précises sur la régulation électronique,
reportez-vous directement aux pages 6 à 9.
Merci de votre confiance.
IMPORTANT : Cet appareil ne doit jamais être installé avec son boîtier récepteur
en position Haute. Le boîtier ne doit pas reposer sur le sol.
Prévoyez tout simplement des cales lors de l’installation.
ATTENTION : votre séche-serviettes est muni d'un récepteur électronique intégré, nous
dégageons toute responsabilité en cas d'utilisation avec des centrales de commande
par coupure de tension d'alimentation (consulter la notice de votre centrale)
Introduction Français
Page 4

2
Emplacement :
Pour profiter pleinement de votre appareil et pour votre plus grand confort,
nous vous recommandons :
• de réaliser l’installation si possible à proximité des emplacements à fortes
déperditions (fenêtres, portes…)
• de ne pas disposer tout objet (meubles, fauteuils,...) pouvant perturber
l’émission ou la réception INFRAROUGE.
• de positionner le bas du boitier au minimum à 15 cm du sol.
• l’appareil de chauffage ne doit pas être placé juste en dessous d’une prise de
courant.
Raccordement :
Les caractéristiques techniques de votre radiateur Acova sont indiquées sur son
étiquette signalétique située en bas de l’appareil, côté boîtier de commande
(voir couverture schéma n°1)
Merci d’en prendre note préalablement à toute demande d’intervention SAV.
Le raccordement au réseau électrique doit être effectué en respectant :
• la tension indiquée sur cette étiquette
• les couleurs conventionnelles
Marron : phase, Bleu ou Gris : neutre.
Si le câble d’alimentation est endommagé, il doit être remplacé par le fabricant,
son service aprés vente ou une personne de qualification similaire afin d’éviter
un dange r.
Le câble souple monté d’origine est destiné à être relié au réseau par
l’intermédiaire d’une boîte de connexion qui devra être placée derrière l‘appareil,
sans interposition d’une fiche prise de courant.
Dans une cuisine ou une salle de bains, la boîte de connexion sera placée au
moins à 25 cm du sol.
Emplacement et raccordement
du radiateur
[
Français
Page 5

3
Au delà des règles prescrites dans
cette notice, l’installation doit être
conforme à la norme NFC 15.100. et
aux règles de l’art.
Cet appareil est de classe II.
Il est protégé contre les projections
d’eau et peut être installé dans les
volumes 2 et 3, sous réserve que les
organes de régulation électrique
ne puissent être touchés
par une personne utilisant
la baignoire ou la douche.
Il ne doit pas être raccordé
à une borne de terre.
Il est rappelé qu’un dispositif de
coupure omnipolaire conformément à
la norme NFC 15.100 est obligatoire.
Dans une salle de bain ou de douche,
veillez à protéger la ligne
électrique par un dispositif
différentiel haute sensibilité 30 mA.
Instructions pour les autres pays
L’installation doit être conforme aux
normes en vigueur et aux règles de
l’art du pays dans lequel il est mis en
œuvre.
Règles particulières d’installation
concernant les salles d’eau
INSTRUCTIONS POUR LA FRANCE (EN APPLICATION DE LA NORME NFC 15.100)
[
Français
Page 6

4
Emplacement de l’émetteur:
Vous pouvez utilisez le thermostat mural CADIR posé sur son socle ou en fixation
murale. Nous vous conseillons de vérifier, avant la fixation définitive du
thermostat mural CADIR, que l'emplacement retenu, de préférence sur une
cloison interne, permet d'assurer une transmission correcte des rayons
infrarouges.
Pour définir la position de thermostat mural CADIR, vous devez vous inspirer du
schéma situé sur la page intérieure de la couverture.
Pour que la sonde du thermostat réagisse correctement, le thermostat mural
CADIR doit être placé sensiblement à 150 cm du sol, 10 cm d'un angle de murs,
150 cm minimum du radiateur et de tout élément produisant de la chaleur
(canalisation d'eau chaude, éclairage, etc. ).
Dans tous les cas de figure, veillez à vous assurer que le rayon infrarouge reliant
la cellule infrarouge émettrice à la cellule infrarouge réceptrice placée sur
le radiateur ne soit pas interrompu par un objet mobile (tabouret, drap de bain,
etc ).
Si votre séche-serviettes est privé des ordres du thermostat mural CADIR pour
une raison quelconque : piles usées, émetteur masqué, etc., il arrêtera de
chauffer 20 minutes après la dernière information , la led clignotera tant que
l'anomalie ne sera pas rectifiée.
La portée du rayon infrarouge est limitée à 8 mètres en visée directe.
Installation et remplacement des piles :
Pour la première mise en service, ouvrez le thermostat mural CADIR en appuyant
sur le clip et retirez la languette d’isolation des piles.
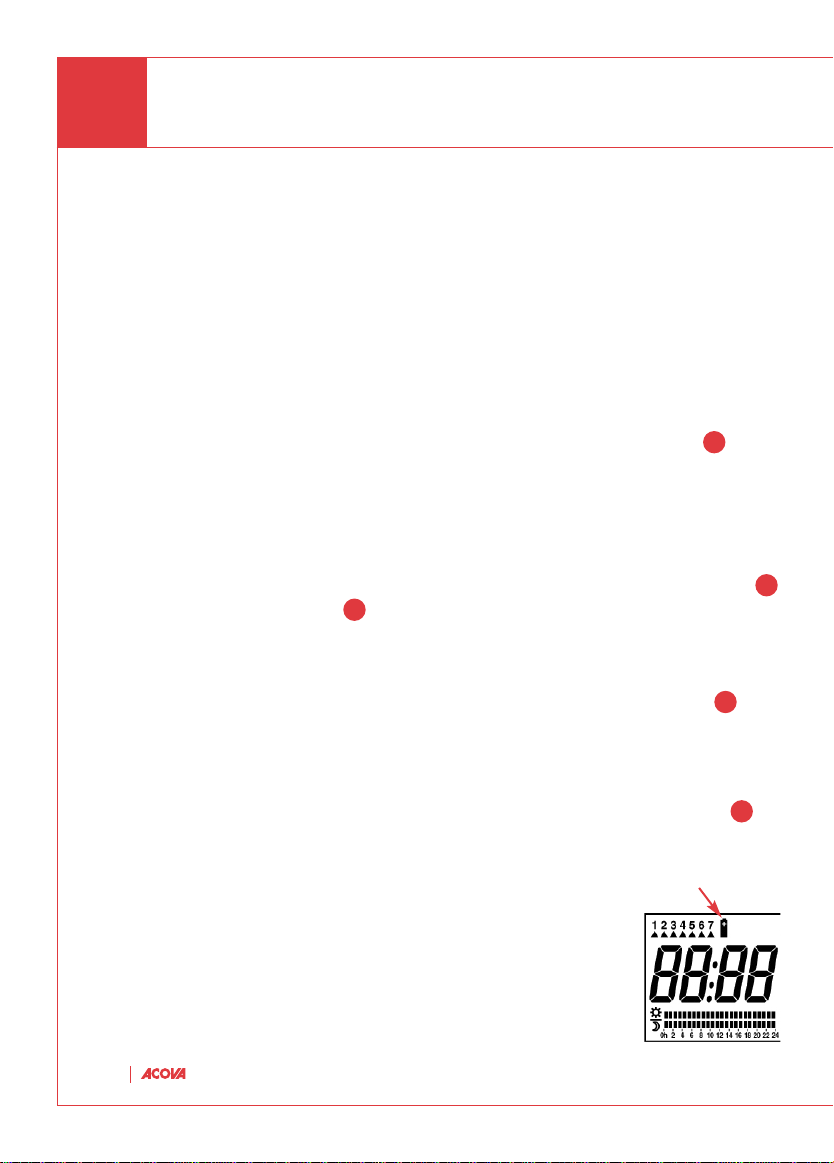
Dès que le témoin d'usure des piles s'allume, vous disposez
d'un mois environ pour changer les piles. Lors du changement
des piles, vous avez environ 2 minutes pour installer les
nouvelles piles, sans perdre le réglage de l'heure
(le reste des informations demeure inchangé quelle que soit la
durée).
Fixation du thermostat mural “CADIR”
et mise en service
[
4
3
1
5
1
6
1
7
Français
Page 7

5
Français
Ne laisser pas les piles usées séjourner dans l'appareil (la garantie ne couvre pas
les dégradations dues à des piles ayant coulées).
- Ouvrez le boîtier de l'émetteur en appuyant sur le clip
- Retirez les piles usagées
- Insérez 2 piles alcalines 1,5V de type LR06 en prenant soin de respecter
les polarités. (+ / -)
Ne jamais utiliser de piles rechargeables.
Utilisez impérativement des piles alcalines.
Et pour le respect de l'environnement, veillez à recycler les piles usagées dans un
container prévu à cet effet.
Fixation du thermostat mural CADIR :
Si vous avez décidé de fixer l'émetteur au mur :
Séparez la face arrière de l'émetteur en appuyant sur le clip .
Fixez la face arrière de l'émetteur à l'aide des vis et des chevilles fournies.
Problèmes Diagnostic / Solutions
Rien n'apparaît sur l'écran
Pas d'alimentation. Changez les piles ou vérifiez
leur polarité (Sens)
Le thermostat vient d'être mis sous tension.
Vérifiez et réglez si nécessaire l'horloge et les
températures, sinon appuyez sur une touche.
Le récepteur n'a pas reçu d'informations depuis
plus de vingt minutes. Vérifier l'état des piles et
faites un test de transmission
Tout l'affichage clignote
La Led rouge clignote
1
7
1
6
17
Page 8

6
Fonctionnement
de la régulation électronique
[
COMMANDES :
Français
Socle (Translucide)
Ecran LCD
Cellule Infrarouge
Sélecteur de modes
Bouton de Marche forcée ou de
Validation
Bouton de réglage Bouton de réglage +
Mode “Confort”
Mode “Auto”
Mode “Eco”
Mode “Hors Gel”
Mode “Arrêt”
Initialisation “Horloge”
Initialisation “Programmation”
1
8
9
10
11
12
13
14
11
12
2
13
14
1
7
6
5
4
8
9
10
3
2
3
4
5
6
7
Page 9

7
RÉGLAGES ET FONCTIONS DES DIFFÉRENTS “MODES”
: Confort permanent
Température souhaitée de la pièce (préréglée à 19°C).
Utilisation :
Positionnez le sélecteur sur
+ ou - pour modifier la température.
: Automatique
Le progamme hebdomadaire choisit heure par heure la
bonne température: Confort ou Eco
Positionnez le sélecteur sur
La configuration du programme du jour s’affiche
et la tranche horaire courante clignote.
Pour régler les températures
Confort et Eco ,
positionnez le sélecteur sur ou et
réglez la température à l’aide de + ou -
: Economie permanent
Température souhaitée lors de votre absence ou
pendant la nuit (pré-réglée à 16°C).
Une température réduite est maintenue permettant des
économies d'énergie
Utilisation :
Positionnez le sélecteur sur
+ ou - pour modifier la température.
Nota : pour les 3 modes précédents,
Présence de la flamme: le radiateur chauffe.
Absence de la flamme: la piéce est à la température
souhaitée.
Français
8
9
10
Page 10

8
: Hors Gel permanent
Température minimum pour éviter les risques dus au
gel (pré-réglée à 7°C). A utiliser lors d'absences
prolongées
Utilisation :
Positionnez le sélecteur sur
+ ou - pour modifier la température.
: Arrêt
Mise en arrêt pour stopper le chauffage
durant l'été.
Positionnez le sélecteur sur
Le chauffage ne se déclenchera plus, quelle que soit la
température
: Mise à l’heure
Positionnez le sélecteur sur
Appuyer sur + ou - pour régler le jour et l'heure.
Chaque passage à 24h00 vous permet de changer de
jour, les jours de la semaine sont matérialisés par les
repères de 1 à 7 en haut à gauche de l'écran LCD.
(1=lundi ; 2=mardi..)
Appui bref : avance au pas de 1 minute
Appui maintenu : avance rapide
Attention :
En Initialisation , le chauffage est à l'arrêt.
Le changement d'heure été/hiver , n'est pas automatique.
11
12
13
Français
Page 11

9
: Programmation
Les programmes hebdomadaire et week-end sont
préenregistrés et peuvent être personnalisé à tout
moment :
Positionnez le sélecteur sur
Le programme du lundi s'affiche et le 1
er
créneau
horaire clignote.
Appuyez sur + pour sélectionner 1 heure de
Confort ou - pour sélectionner 1 heure
d'économie.
Vous passez au créneau horaire suivant. Répétez
l'opération pour régler la journée entière.
Appuyez sur OK pour valider et passer au jour
suivant.
Pour revenir en mode automatique, positionnez
le sélecteur sur
Fonction “Marche forcée”
La fonction Marche forcée , est disponible en mode
Confort, Auto, Eco, Hors gel à tout moment.
Pour l'activer, presser sur le bouton 3h pendant
environ 10 secondes (Appui long).
La Marche forcée est activée, et compte à rebours de
3 heures jusque 0 minute. (Cependant, vous pouvez
modifier la durée du programme par pas de 15 minutes
à l'aide des boutons + ou -
Une fois, le décompte écoulé, l'émetteur reprend son
état initial.
Pour désactiver à tout moment cette fonction, presser
de nouveau sur le bouton 3h (Appui bref).
14
5
7
6
5
AUTO
PROG
Français
Page 12

10
Français
Choix parmi 3 températures permanentes (Hors gel , Economie, Confort) et un
programme personnalisable.
Programmation par pas de 1 heure.
Programmation par défaut :
Mode arrêt.
Les 3 températures de consigne sont réglables :
de 5° à 30°C pour Economie et Confort.
de 5° à 15°C pour Hors gel.
Réglage par pas de 0.5°C
Affichage de la température par pas de 0,1°C
Régulation Haute précision : régulation proportionnelle intégrale dérivée.
Base de temps :15mn.
Indice de protection : IP30
Alimentation par 2 piles alcalines 1,5V de type LR06
(autonomie supérieure à 1 an)
Isolement classe II (récepteur) et classe III (émetteur).
Caractéristiques
[
Page 13

11
Français
1 - RADIATEURS SECHE-SERVIETTES ELECTRIQUES
Cet appareil électrique à fluide hydractif est livré prêt à l’emploi.
Il est bouchonné et rempli en usine d’une huile minérale thermique haute
performance. Ce fluide, spécialement élaboré pour cet usage, est
inaltérable et ne nécessite aucun entretien particulier.
Cet appareil de chauffage est rempli d'une quantité précise d'huile.
Les réparations nécessitant l'ouverture du réservoir d'huile ne doivent être
effectuées que par le fabricant ou son service après vente qui doit être contacté
en cas de fuite d'huile.
Dès la mise en chauffe de l’appareil, vous constaterez des phénomènes
différents de ceux générés par un chauffage électrique conventionnel :
• La résistance électrique réchauffe le fluide qui se met progressivement
et de façon naturelle en circulation à l’intérieur du radiateur.
• Les propriétés d’inertie du fluide font que la température de surface
du radiateur n’atteint un niveau optimal qu’au bout de 10mn au minimum,
ceci suivant les modèles et la température d’ambiance de la pièce lors de la
mise en chauffe de l’appareil.
• C’est cette inertie qui à l’inverse garantit la constance et la durée de la
chaleur émise, même lorsque la résistance n’est plus alimentée.
• Votre radiateur est constitué d’une large surface de chauffe, ce qui permet
de façon auto-régulée l’adaptation de la quantité de chaleur émise aux besoins.
Il est donc normal qu’en intersaison, lors d’un fonctionnement modéré
de l’appareil, les écarts de température de surface du radiateur soient plus
perceptibles.
Pour garantir un fonctionnement efficace de votre appareil, il est toutefois
recommandé de ne pas le couvrir entiérement.
Pour connaitre et profiter au
mieux de votre radiateur Acova
[
Page 14

12
2. Radiateurs sèche serviettes mixtes
Cet appareil, destiné à être raccordé au circuit chauffage central, est livré non
bouchonné et vide.
• Utilisation en chauffage central :
Le boîtier de commande doit être hors tension,
Le robinet d’alimentation doit être ouvert pour laisser passer l’eau
du chauffage central.
IMPORTANT : Cet appareil a été conçu pour être utilisé distinctement en mode chauffage
central ou en mode électrique. Chaque utilisation requiert des dispositions particulières,
spécifiques et précises. Une exploitation anormale peut entraîner la détérioration de la
cartouche chauffante suite à des températures de fluide excessives, en particulier dans le
cas d’une utilisation simultanée en mode électrique et chauffage central.
Tout usage inapproprié entraînera l’annulation de la garantie contractuelle.
• Utilisation en chauffage électrique :
A. Fermez uniquement le robinet d’alimentation, ne jamais fermer le retour
du corps de chauffe : cet orifice est nécessaire pour permettre l’expansion
du fluide vers l’installation.
la fermeture du retour peut entrainer la destruction du corps de chauffe suite
à une pression excessive supérieure à la pression d’utilisation.
B. S’assurez que l’appareil est correctement rempli d’eau en ouvrant le purgeur
situé en partie haute. Le refermer si l’eau sort régulièrement, prévoir pour cette
opération une éponge et un petit récipient.
Si la pression n’est pas suffisante pour permettre la purge du corps de chauffe :
• remplir le chauffage central d’eau jusqu‘ à la pression indiquée sur
votre manomètre,
• demandez conseil à votre installateur chauffagiste,
• prévenir la société d’exploitation (en chauffage collectif).
Français
Page 15
13
Français
C. Pour la mise en marche, procéder comme pour un appareil sèche serviettes
électrique.
Pendant l’utilisation du radiateur sèche-serviettes mixte en « fonction électrique »,
si l’installation du chauffage central est pourvue d’une pompe de circulation
indépendante de la chaudière :
il est impératif de l’arrêter ( risque de siphonner le corps de chauffe dans
le cas d’une étanchéité imparfaite des raccords).
IMPORTANT : La mise sous tension de l’appareil doit s’effectuer uniquement si celui ci est
correctement rempli d’eau (sous risque d’annulation de la garantie).
Ce radiateur est équipé d’une cartouche chauffante possédant un coupe
circuit intégré et un fusible. Son utilisation sans eau entraînera
la détérioration définitive du fusible et par conséquent celle de la
cartouche chauffante : cet incident, « non couvert par la garantie
constructeur », nécessitera impérativement son échange. L’utilisation du
radiateur partiellement rempli d’eau entraînera la coupure du coupe circuit
thermique. Ce dernier maintiendra un fonctionnement alterné tant que le
corps de chauffe n’est pas correctement rempli.
Si vous constatez que la partie électrique de votre séche-serviette est activée
et que celui-ci ne chauffe plus malgré une demande du thermostat ou en
marche forcée:
Procédez aux manoeuvres suivantes:
1) Assurez vous que votre radiateur est correctement rempli d’eau (voir page 12
“Utilisation en chauffage électrique, paragraphe B”
2) Positionnez l’émetteur sur “ARRET” pour couper le courant, et arrêtez la
fonction électrique pendant 30 à 60 minutes. Cette opération est nécessaire pour
désamorcer la sécurité thermique.
3) Repositionnez l’émetteur sur la fonction “MODE” désirée..
Page 16

14
Français
Conseils d’entretien
[
Avant toute opération d’entretien, prenez soin d’arrêter l’appareil.
Le choix des meilleurs matériaux et la qualité du double traitement de surface
protègent votre radiateur Acova de la corrosion et des chocs.
Pour garantir par un entretien simple la longévité de votre appareil, nous vous
recommandons de suivre les conseils suivants :
• Pour l’entretien des parois extérieures du radiateur, ne pas utiliser de produit
abrasif ou corrosif, utilisez de préférence un chiffon imbibé d’alcool.
• Pour le corps du boîtier de régulation, utilisez un chiffon sec (sans solvant).
En cas de vidange d’un modèle tout électrique, le fluide doit obligatoirement
être déposé chez un collecteur d’huile usagée.
En cas de non-fonctionnement de votre appareil, vous pouvez procéder
vous-même aux vérifications suivantes, en vous assurant que :
• Votre radiateur est convenablement connecté et alimenté (voir page 2 de la notice),
• La position du thermostat commande bien la mise en chauffe du radiateur
(voir page 7 de la notice),
• Votre radiateur sèche serviettes mixte est correctement rempli d’eau
(voir page 12 et 13 de la notice),
Si votre radiateur est relié à un appareil « maître », une horloge ou une centrale
de programmation, veuillez vous reporter à la notice du constructeur.
Vérifications en cas de non
fonctionnement ou d’anomalies
[
Page 17

15
Français
En cas de non fonctionnement ou besoin de pièces détachées,
contactez votre installateur ou votre revendeur.
Au préalable, pour permettre la bonne compréhension et
un traitement rapide du problème, assurez vous d'avoir bien relevé :
• Les éléments figurant sur l’étiquette signalétique de l’appareil,
(voir rabat couverture, schéma 1),
• La référence commerciale Acova figurant sur votre facture d’achat datée.
Votre radiateur est conforme à la directive 89/336/CEE modifiée par la
92/31/CEE relative à la limitation des perturbations radioélectriques et aux
normes européennes
EN 60.335.1 / 60.335. 2.30 / 60.335.2.43
SAV (service après vente)
[
Garantie
(VOIR CONDITIONS GÉNÉRALES DE VENTE ACOVA DANS LE PAYS CONCERNÉ)
[
Page 18

Garantie spécifique aux radiateurs sèche serviettes mixtes :
La garantie Acova de votre sèche-serviettes mixte ne s’applique que sous les
réserves suivantes :
• l’eau utilisée pour l’alimentation du circuit de chauffage ne doit être ni
agressive ni corrosive.
• l’installation ne doit pas comporter de traces de gaz dissous ( 02-C02 ),
notamment en cas d’utilisation de matériaux perméables au gaz ( plancher
chauffant).
Pour cela, il est nécessaire d’assurer un dégazage efficace en amont du
circulateur et la purge des points hauts de l’installation.
Le radiateur ne doit pas être soumis à une humidité ambiante intensive ou
permanente (douche, piscine, etc).
Cas d’annulation de la garantie :
La garantie Acova ne s’applique pas notamment dans les conditions
d’installation ou d’utilisation suivantes :
• Mise en œuvre, installation ou entretien non conforme à la norme en vigueur
du pays, aux règles de l’art et à la notice d’utilisation du constructeur.
• Utilisation du radiateur sèche serviettes mixte non respectueuse des
recommandations de la notice constructeur : mise en service simultané du
mode chauffage central et électrique, absence ou insuffisance d’eau dans
le corps de chauffe…
Pour toute autre question concernant la garantie, contactez votre installateur ou
votre revendeur.
16
Français
Page 19

17
Dear Customer,
Thank you for choosing this Acova radiator, produced to the highest standards in
line with our quality charter. We hope that it will fully meet your requirements.
To take full advantage of all the possibilities it offers, we recommend that you
read these instructions carefully and keep them close to the radiator. For more
specific information about the electronic regulation system, refer directly to
pages 22 to 25.
Thank you for placing your trust in us.
IMPORTANT : the radiator should never be installed with its receiver unit uppermost.
This should not rest on the ground, but should be installed using spacers.
NOTE: your towel dryer is fitted with a built-in electronic receiver. We disclaim any
responsibility for use with supply voltage cut-off control units (refer to your control
unit manual).
Introduction English
Page 20

18
Positioning:
To get the most from your radiator and for maximum comfort, we recommend the
following:
• If possible, install the radiator close to large sources of heat loss
(windows, doors, etc).
• Clear away any objects (furniture units, armchairs, etc) that may obstruct the
transmitting or receiving of the INFRARED signal.
• Position the bottom of the unit at least 15cm from the ground.
• The heating unit should not be placed just beneath a power socket.
Connecting:
The technical characteristics of your Acova radiator are shown on the label at
the bottom of the radiator, on the control unit side
(see cover, diagram n°1)
Please have this information to hand should you need to contact the customer
service team.
The radiator must be connected to the mains power supply in compliance with
the following:
• The voltage shown on the label
• The standardised colours:
Brown : phase, Blue or Grey : neutral.
If the power cable is damaged, it must be replaced by the manufacturer, its after
customer service staff, or any similarly qualified person, to avoid any danger.
The flexible cable originally installed is designed to be connected to the mains
via a connection box that should be placed behind the radiator, with no plug
required in between.
In a kitchen or bathroom, the connection box should be placed at least 25cm
from the ground.
Positioning and connecting
of the radiator
[
English
Page 21

19
This is a class-II appliance. It is protected against water spray and can be
installed in bathrooms on condition that the installation complies with the
standards in force and industry practice in the country concerned.
Special regulations for installation
in bathrooms
[
English
Page 22
20
Positioning of the transmitter :
You can use the CADIR wall regulator on its base or secured to the wall. Before
permanently securing the CADIR wall regulator, we advise you to check that the
position chosen, preferably on an inside wall, allows adequate transmitting of
the infrared rays.
To decide on the position of the CADIR wall regulator, refer to diagram on
the inside cover page.
For the regulator probe to respond correctly, the CADIR wall regulator must be
placed at least 150 cm from the ground, 10 cm from a wall corner and 150 cm
minimum from the radiator and from any heat-producing element (hot water
pipe, lighting, etc).
In any case, make sure that the infrared ray linking transmitting infrared cell
with receiving infrared cell placed on the radiator is not broken by a
movable object (stool, bath towel, etc).
If your towel dryer is deprived of commands from the CADIR wall regulator for
whatever reason: empty batteries, transmitter covered up, etc, it will stop being
heated 20 minutes after the last information has been received and LED will
flash until the fault is corrected.
The infrared ray's range is limited to a line-of-sight distance of 8 metres.
Installing and replacing of batteries:
On first commissioning, open up the CADIR wall regulator by pressing clip
and remove the battery insulating tab.
When the battery empty indicator light comes on, you have around
one month in which to change the batteries. During
the battery changing process, you have around 2 minutes in
which to install the new batteries before the time setting is
lost (the rest of the information remains unchanged, however
long it takes to install the batteries).
Securing of the “Cadir” wall regulator
and Commissioning
[
4
3
1
5
1
6
1
7
English
Page 23

21
English
Do not leave empty batteries inside the unit (the warranty does not cover
damage owing to batteries leaking).
- Open up the transmitter unit by pressing clip
- Remove the empty batteries
- Insert 2 1.5V LR06 alkaline batteries, making sure that they are inserted
the right way round (+/- terminals)
Never use rechargeable batteries.
Always use alkaline batteries.
To protect the environment, recycle used batteries in a container designed for this
purpose.
Securing of the CADIR wall regulator:
If you have decided to fix the transmitter to the wall:
Separate the transmitter’s rear panel by pressing clip .
Secure the transmitter’s rear panel using the screws and bolts provided.
Problems Cause / Solutions
Nothing appears on the
screen
No power is being supplied. Change the batteries
or check that they are positioned the right way
round.
The regulator has just been switched on. Check
and, if necessary, reset the clock and the
temperatures, otherwise press a key
The receiver has not received information for
more than twenty minutes. Check the condition
of the batteries and carry out a transmission test
The entire display is
flashing
The red LED is flashing
1
7
1
6
17
Page 24

22
Operating the programmable infrared
electronic regulation system
[
COMMANDS :
English
Base (transparent)
LCD screen
Infrared cell
Mode selector switch
Forced Operation
or Confirm button
- adjusting button
+ adjusting button
"Comfort" mode
"Auto" mode
"Eco" mode
"Frost Free" mode
"Stop" mode
"Clock" setup
"Programme" setup
1
8
9
10
11
12
13
14
11
12
2
13
14
1
7
6
5
4
8
9
10
3
2
3
4
5
6
7
Page 25

23
SETTINGS AND FUNCTIONS OF THE DIFFERENT “MODES”
: Constant comfort
Desired temperature of the room (preset at 19ºC)
Use :
Turn the selector switch to
Use + or – to change the temperature.
: Automatic
The weekly Auto programme sets the temperature hour
by hour : Comfort or Eco
Use :
Turn the selector to
The settings for the day’s programme will be
displayed, with the current time period flashing.
To adjust the Comfort or Eco
temperatures,
turn the selector switch to or and
set the temperature using the + or – buttons
: Constant economy
The temperature required when you are out or during
the night (preset at 16ºC).
A lower temperature is maintained to save energy
Use :
Turn the selector switch to
Use + or – to change the temperature.
Note : for the 3 previous modes,
Presence of flame: radiator heats up.
Absence of flame: the room is at the desired temperature.
English
8
9
10
Page 26

24
: Constant Frost Free
Minimum temperature to prevent possible damage
from frost (preset at 7ºC). To be used during
prolonged absences.
Use :
Turn the selector switch to
Use + or – to change the temperature.
: Stop
Used to shut down the heating system during the
summer.
Use :
Turn the selector switch to
The heating system will no longer start up,
whatever the temperature
: Clock setup
Turn the selector switch to
Press + or – to set the date and time.
Each time you reach 24.00 hours you are moved on to
the next day. The days of the week are shown by the
numbers from 1 to 7 at the top left of the LCD screen
(1 = Monday, 2 = Tuesday, etc)
Short press: moves forward by 1 minute
Long press: moves forward quickly
Note :
In setup mode, the heating system is switched off.
The change from summer/winter time is not automatic.
11
12
13
English
Page 27

25
: Programme setup
The weekly and weekend programmes are pre-recorded
and may be altered to meet your requirements at any
time:
Turn the selector switch to
The programme for Monday will be displayed and
the 1st time period will be flashing.
Press + to select 1 hour of Comfort or – to select
1 hour of Economy.
You will be moved on to the next time period.
Repeat the process to determine the settings for
the entire day. Press OK to confirm and move on
to the next day.
To return to automatic mode, turn the selector
switch to
“Forced operation” function
The Forced operation function is available in Comfort,
Auto, Eco and Frost Free mode at any time.
To activate this function, press 3h button for
around 10 seconds (Long press).
Forced operation will be activated, counting back
from 3 hours to 0 minute. However, you can change
the length of the programme by 15 minutes
increments using + and – buttons and .
Once the countdown has ended, the transmitter will
resume its initial state.
To disable this function at any time,
press 3h button once a gain (Short press).
14
5
7
6
5
AUTO
PROG
English
Page 28

26
English
Choice of 3 constant temperatures (Frost Free, Economy and Comfort) and a
personalisable programme.
Programming through 1 hour increments.
Default programming:
Shut down mode.
The 3 reference temperatures are adjustable:
From 5º to 30ºC for Economy and Comfort.
From 5º to 15ºC for Frost Free.
Adjusting through 0.5º increments
Displaying of the temperature through 0.1ºC increments
High precision regulation: three-term regulation system.
Time base: 15 min.
Protection class: IP30
Powered by 2 1.5V LR06 alkaline batteries
(more than 1 year's capacity)
Class II (receiver) and class III (transmitter) insulation.
Characteristics
[
Page 29
27
English
1 – ELECTRIC TOWEL-DRYING RADIATORS
This hydractive fluid-based electric radiator comes ready to use.
It is capped and filled in the factory with high performance thermal mineral oil.
This fluid has been specially designed for this purpose. It is stable and does
not require any special maintenance.
The heating unit is filled with a precise quantity of oil. Repairs requiring the
opening of the oil tank should only be carried out by the manufacturer or its
customer service staff, who should be contacted in the event of an oil leak.
When the heating process is started, you will notice certain phenomena that are
different from those caused by a conventional electric heating system :
• The electrical resistance has a heating effect on the fluid, which gradually and
naturally begins to circulate inside the radiator.
• The fluid’s inertia properties mean that the radiator’s surface temperature only
reaches an optimum level after at least 10 min, in line with the models and
the room’s ambient temperature when the heating process is begun.
• It is this inertia that, conversely, guarantees the consistency and duration of
the heat emitted, even when power is no longer being supplied to create the
electrical resistance.
• Your radiator consists of a large heating surface which means that the quantity
of heat emitted can be adapted to requirements in a self-regulated way. It is
therefore normal, between seasons, when the radiator is operating at a
moderate level, for differences in the radiator's surface temperature to become
more noticeable.
For your radiator to operate efficiently, you are recommended, however, not to
cover it completely.
Learn more about and make the
most of your Acova radiator
[
Page 30
28
2. Dual-energy towel-drying radiators
This radiator, which is designed to be connected to the central heating system,
comes capped and empty.
• Use in central heating mode :
The control unit must be switched off,
The feed cock must be open to allow the passage of water from the central
heating system.
Important: This radiator has been desi gn ed for use in separ ate cen tral h eatin g or electric
mode. Each mode requires special, specific and precise provisions. Abnormal use may
cause damage to the cartridge heater owing to excessive fluid temperatures, particularly
in the case of simultaneous use in electric and central heating mode.
Any misuse will invalidate the contractual warranty.
• Use in electric heating mode:
A. Only close the feed cock. Never close the heater body return valve: this
opening is necessary to allow the expanding of the fluid towards the system.
Closing the return valve may cause the destroying of the heater body owing to
excessive pressure higher than the operating pressure.
B. Check that the radiator is adequately filled with water by opening the bleed
valve at the top. Close it again if the water is released in a steady flow. Have a
sponge and a small container to hand for this operation.
If the pressure is not sufficient for the bleeding of the heater body :
• Fill the central heating system with water up to the pressure indicated on your
pressure meter,
• Consult your heating engineer,
• Inform the operating company (for collective heating systems).
English
Page 31

29
English
C. For start-up, follow the same steps as for an electric towel-drying radiator.
During use of the dual-energy towel-drying radiator in “electric mode”, if the
central heating system has a circulation pump that is independent of the boiler :
It is vital to switch it off (risk of siphoning off the heater body if the unions
are not completely watertight).
Important : The radiator should only be switched on if it is adequately filled with
water (under risk of invalidating the warranty).
This radiator is fitted with a cartridge heater with a built-in circuit breaker
and a fuse. Using it without water would cause permanent damage to the
fuse and therefore to the cartridge heater: such as incident, “not covered
by the manufacturer’s warranty”, would require its inevitable replacing.
Using the radiator when partially filled with water will cause the tripping
of the thermal circuit breaker. This will maintain alternating operation for
as long as the heater body is not adequately filled.
If you notice that the electrical part of your towel dryer is switched on but it
is no longer heating up, despite a command from the regulator or in forced
operation mode :
Perform the following steps
1) Check that your radiator is adequately filled with water (see page 28, “Use in
electric heating mode, paragraph B”
2) Set the transmitter to "STOP" to switch off the current and stop operation in
electric mode for 30 to 60 minutes. This step is necessary to disable the thermal
safety system.
3) Reset the transmitter to the “MODE” function required.
Page 32

30
English
Maintenance instructions
[
Before any maintenance operations, remember to switch off the radiator.
The materials used and the high standard of the double surface treatment will
protect your Acova radiator from corrosion and shocks.
To guarantee the long lifetime of your radiator through simple maintenance, we
recommend that you follow the instructions below:
• When cleaning the radiator’s outside walls, do not use abrasive or corrosive
products; preferably use a rag soaked in alcohol.
• For the body of the regulation unit, use a dry rag (without a solvent).
When draining a fully electric model, the fluid must be deposited with a waste
oil collector.
If your radiator malfunctions, you can perform the following checks yourself,
looking to see whether:
• Your radiator is appropriately connected and powered
(see page 18 of the instruction manual),
• The regulator's position is indeed controlling the heating up of the radiator
(see page 23 of the instruction manual)
• Your dual-energy towel-drying radiator is adequately filled with water (see
page 28 and 29 of the instruction manual).
If your radiator is connected to a “master” unit, a clock or a programming unit,
refer to the manufacturer’s manual.
Checks in the event of operating
failure or faults
[
Page 33

31
English
If your radiator malfunctions or you need spare parts,
contact your fitter or dealer.
Before ringing, to make the problem easier to understand and resolve, make sure
that you have to hand:
• The information appearing on the radiator’s technical label
(see cover flap, diagram 1),
• The Acova sales reference appearing on your dated purchase invoice.
Your radiator complies with directive 89/336/CEE amended by 92/31/CEE
relating to the limiting of radioelectric disturbances and with the European
norms EN 60.335.1/60.335.2.30/60.335.2.43.
Customer service
[
Warranty
(SEE ACOVA GENERAL SALES TERMS AND CONDITIONS FOR THE COUNTRY CONCERNED)
[
Page 34

Warranty specific to dual-energy towel-drying radiators :
The dual-energy towel-drying radiator Acova warranty only applies under the
following conditions:
• The water used to supply the heating system must be neither aggressive nor
corrosive.
• The system must not show traces of dissolved gases (02-C02), in particular
where materials are used that are gas permeable (hot floor).
To ensure their absence, you must thoroughly degas the system upstream of the
circulator and its topmost points must be bled.
The radiator must not be exposed to intensive or constant atmospheric
humidity (shower, swimming pool, etc).
Invalidation of the warranty :
The Acova warranty does not apply in the following conditions of installation or
use in particular:
• Implementation, installation or maintenance that does not comply with the
current norm within the country, best practice or the manufacturer’s operating
instructions.
• Use of the dual-energy towel-drying radiator that does not comply with the
recommendations in the manufacturer's manual: simultaneous use of the
central heating and electric modes, absence of, or insufficient water in the
heater body, etc.
For any other questions relating to the warranty, contact your fitter or dealer.
32
English
Page 35

33
Sehr geehrte Damen und Herren,
Wir danken Ihnen für Ihre Wahl dieses Acova Heizkörpers. Er wurde mit größter
Sorgfalt nach unserer Qualitätscharta entwickelt und wir wünschen Ihnen, daß er
Sie voll zufriedenstellt.
Wir empfehlen Ihnen, diese Anleitung aufmerksam zu lesen und sie in der Nähe
des Geräts aufzubewahren, damit Sie alle seine Möglichkeiten voll nutzen
können. Genauere Informationen zur elektronischen Regelung finden Sie auf den
Seiten 38 bis 41.
Wir danken Ihnen für Ihr Vertrauen.
WICHTIG: Dieses Gerät darf niemals mit seinem IR-Empfangsgerät in OBERER Position
eingebaut werden. Das Empfangsgerät darf nicht auf dem Boden ruhen. Beim Einbau
nur einfach Keile vorsehen.
ACHTUNG: Der Handtuchtrockner ist mit einem integrierten elektronischen
Empfangsgerät ausgerüstet. Bei Benutzung mit Steuerzentralen mit Unterbrechung der
Versorgungsspannung lehnen wir jegliche Haftung ab (in der Anleitung Ihrer Zentrale
nachlesen).
Einleitung Deutsch
Page 36

34
Einbauort :
Wir empfehlen Ihnen folgendes für die bestmögliche Nutzung des Geräts und
Ihren größten Komfort :
• Wenn möglich, das Gerät in der Nähe von Orten mit starken Wärmeverlusten
(Fenster, Türen, ...) einzubauen;
• Kein Objekt (Möbel, Sessel, ...) so anordnen, das es die Emission oder den
Empfang des INFRAROT-Signals stören kann;
• Den unteren Teil des Empfängers in mindestens 15 cm über dem Fußboden
anordnen;
• Das Heizgerät darf nicht direkt unter einer Steckdose angeordnet werden.
Anschluß :
Die technischen Merkmale des Acova Heizkörpers sind auf dem Geräteschild am
unteren Geräteteil bei dem Steuergerät angegeben
(siehe Schema 1 auf dem Deckblatt).
Bitte die Angaben zur Kenntnis nehmen, bevor Sie den Kundendienst rufen.
Der Anschluß an das Stromnetz muß unter Einhaltung folgender Angaben
vorgenommen werden :
• Der auf dem Etikett angegebene Spannungswert
• Die üblichen Farben :
Braun : Phase, Blau oder Grau : Nulleiter.
Wenn das Versorgungskabel beschädigt ist, muß es vom Hersteller, seinem
Kundendienst oder einer gleich qualifizierten Person ersetzt werden, um jegliche
Gefahr auszuschließen.
Das ursprünglich montierte weiche Kabel soll über einen Anschlußkasten und
ohne Umweg über eine Steckdose an das Netz angeschlossen werden, der hinter
dem Gerät angeordnet wird.
Bei Einbau in einer Küche oder einem Badezimmer wird der Anschlußkasten
mindestens 25 cm über dem Fußboden angebracht.
Einbauort und Anschluß des
Heizkörpers
[
Deutsch
Page 37

35
Das Gerät gehört zur Schutzklasse II. Es ist gegen Spritzwasser geschützt und
kann unter der Voraussetzung, dass die Installation den gültigen Vorschriften
und bewährten Praktiken des jeweiligen Landes entspricht, in Badezimmern
installiert werden.
Besondere Installationshinweise für
Nasszellen
[
Deutsch
Page 38

36
Einbauort des Emitters :
Sie können das CADIR Wandthermostat entweder auf seinem Sockel oder mit
Wandbefestigung benutzen. Wir empfehlen Ihnen, vor der endgültigen
Befestigung des CADIR Wandthermostats zu prüfen, daß der am besten an einer
inneren Trennwand gewählte Einbauort die richtige Übertragung der
Infrarotstrahlen gewährleistet.
Für die Festlegung der Position des CADIR Wandthermostats müssen Sie im
Schema auf der Umschlaginnenseite nachsehen.
Das CADIR Wandthermostat muß in 150 cm Höhe über dem Fußboden, 10 cm von
einer Wandecke, mindestens 150 cm vom Heizkörper und von jeglichem
wärmeerzeugenden Element entfernt angebracht werden (Heißwasserleitung,
Beleuchtung, usw.), damit die Sonde des Thermostats richtig reagiert.
Auf jeden Fall darauf achten, daß der Infrarotstrahl, der den
Sender mit dem Empfänger auf dem Heizkörper verbindet, nicht von
einem mobilen Objekt unterbrochen wird
(Hocker, Badetuch, usw.).
Wenn der Handtuchtrockner aus irgendeinem Grunde keine Befehle des CADIR
Wandthermostats empfängt: verbrauchte Batterien, verdeckter Sender, usw., stellt
er 20 Minuten nach der letzten Information die Heizung ein, die LED blinkt,
solange die Anomalie nicht behoben ist.
Die Tragweite des Infrarotstrahls ist bei direktem Anzielen auf 8 Meter begrenzt.
Einbau und Ersatz der Batterien :
Vor der ersten Inbetriebnahme durch Drücken des Clip das CADIR
Wandthermostat öffnen und die Isolierlasche
der Batterien herausziehen.
Ab dem Moment, in dem die Anzeigelampe für
Batterieverbrauch aufleuchtet, haben Sie noch ca. einen Monat
Zeit für den Batterieaustausch. Beim Batterieaustausch haben
Sie ca. 2 Minuten Zeit für das Einsetzen der neuen Batterien
ohne Verlust der Uhreinstellung (die übrigen Informationen
bleiben bei jeder Dauer unverändert).
Befestigung des Wandthermostats
"CADIR" und Inbetriebnahme
[
4
3
1
5
1
6
1
7
Deutsch
Page 39

37
Deutsch
Keine verbrauchten Batterien im Gerät lassen (die Garantie deckt keine
Beschädigungen durch ausgelaufene Batterien).
- Mit Drücken des Clip das Gehäuse des Senders öffnen.
- Die verbrauchten Batterien herausnehmen.
- 2 Alkalibatterien mit 1,5 V vom Typ LR06 einsetzen und die Polungen
beachten. (+ / -).
Niemals aufladbare Akkus verwenden.
Unbedingt Alkalibatterien benutzen.
Und für die Umweltpflege darauf achten, daß die Batterien in einen hierfür
vorgesehenen Container entsorgt werden.
Befestigung des CADIR Wandthermostats :
Wenn Sie eine Wandbefestigung des Senders beschlossen haben:
Den Clip drücken und die Rückseite des Senders abnehmen.
Die Rückseite des Senders mit den mitgelieferten Schrauben und Dübeln
befestigen.
Probleme Diagnose / Lösungen
Am Bildschirm erscheint
nichts
Keine Stromversorgung. Die Batterien
austauschen oder ihre Polung
(Richtung) prüfen
Das Thermostat ist gerade eingeschaltet worden.
Die Uhr und die Temperaturen prüfen und bei
Bedarf einstellen, ansonsten einen Knopf
drücken.
Der Empfänger hat seit über zwanzig Minuten
keine Informationen erhalten. Den Zustand der
Batterien prüfen und einen Übertragungstest
durchführen.
Jede Anzeige blinkt
Die rote LED blinkt
1
7
1
6
17
Page 40

38
Funktionieren der programmierbaren
elektronischen Infrarot-Regelung
[
STEUERUNGEN :
Deutsch
Sockel (durchscheinend)
LCD Bildschirm
Infrarot-Zelle
Betriebsartenwähler
Knopf für gezwungenen Betrieb
oder für die Bestätigung
Regelknopf –
Regelknopf +
Modus "Komfort"
Modus "Auto"
Modus "Spar"
Modus "Frostschutz"
Modus "Aus"
Initialisierung "Uhr"
Initialisierung "Programmierung"
1
8
9
10
11
12
13
14
11
12
2
13
14
1
7
6
5
4
8
9
10
3
2
3
4
5
6
7
Page 41

39
REGELUNGEN UND FUNKTION DER EINZELNEN "MODI"
: Ständiger Komfort
Gewünschte Raumtemperatur (auf 19°C voreingestellt).
Benutzung :
Für die
Temperaturänderung
den Wahlschalter auf + oder – stellen.
: Automatik
Das Wochenprogramm Auto Stunde für Stunde die
richtige Temperatur : Komfort oder Spar.
Benutzung :
Den Wahlschalter auf stellen.
Die Konfiguration des Tagesprogramms wird
angezeigt, und aktuelle Zeitabschnitt blinkt.
Für die Einstellung der
Temperaturen Komfort
und Spar den Wahlschalter auf oder
stellen und die Temperatur mit + oder –
einstellen.
: Ständiges Sparprogramm
Die bei Ihrer Abwesenheit oder in der Nacht
gewünschte Temperatur (auf 16°C voreingestellt).
Es wird eine verringerte Temperatur aufrecht erhalten,
die Energieeinsparungen ermöglicht.
Benutzung :
Für die
Temperaturänderung
den Wahlschalter auf + oder – stellen.
Hinweis : In den drei vorstehenden Modi:
Flamme vorhanden : der Heizkörper heizt.
Keine Flamme: Der Raum ist auf der gewünschten
Temperatur.
Deutsch
8
9
10
Page 42

40
: Ständiger Frostschutz
Mindesttemperatur zur Vermeidung der frostbedingten
Gefahren (auf 7°C voreingestellt). Wird bei längerer
Abwesenheit eingestellt.
Benutzung :
Für die
Temperaturänderung
den Wahlschalter auf + oder – stellen.
: Abschaltung
Abschaltung für die Ausschaltung der Heizung im
Sommer.
Benutzung :
Den Wahlschalter auf stellen.
Die Heizung schaltet bei keiner Temperatur ein.
: Uhreinstellung
Den Wahlschalter auf stellen.
Mit Drücken auf + oder – den Tag und die Uhrzeit
einstellen.
Jeder Durchgang bei 24.00 Uhr ermöglicht, den Tag zu
ändern. Die Wochentage werden mit Merkzeichen von
1 bis 7 oben links im LCD Bildschirm angezeigt.
(1 = Montag; 2 = Dienstag ...).
Kurzes Drücken : Weiter im 1 Minutenschritt
Drücken und Halten : Schnelldurchlauf.
Achtung:
Bei der Initialisierung ist die Heizung abgeschaltet.
Der Wechsel von Sommer-/Winterzeit ist nicht automatisch.
11
12
13
Deutsch
Page 43

41
: Programmierung
Die Programme für die Wochentage und Wochenenden
sind voreingestellt und können jederzeit individuell
verändert werden :
Den Wahlschalter auf stellen.
Das Programm für den Montag wird angezeigt,
und die erste Zeitperiode blinkt.
Auf + für die Wahl einer Stunde Komfort oder –
für eine Stunde Sparprogramm drücken.
Dann zur nächsten Zeitperiode übergehen. Den
Vorgang wiederholen und den ganzen Tag
einstellen. Zur Bestätigung OK drücken und zum
nächsten Tag übergehen.
Für die Rückkehr zum Automatikmodus den
Wahlschalter auf stellen.
Funktion "Gezwungener Betrieb"
In den Modi Komfort, Auto, Spar und Frostschutz ist
die Funktion Gezwungener Betrieb jederzeit verfügbar.
Zur Aktivierung den Knopf 3 h ca. 10 Sekunden
lang drücken (langer Druck).
Der Gezwungene Betrieb ist aktiviert, und die
Rückwärtszählung geht von 3 h bis 0 Minute. (Sie
können jedoch die Programmdauer mit den Knöpfen
+ oder – mit 15 Minuten Schritten ändern. Nach
Ablauf der Rückwärtszählung kehrt der Sender wieder
in seinen Ausgangszustand zurück. Zur jederzeitigen
Entaktivierung dieser Funktion erneut den Knopf
3 h drücken (kurzer Druck).
14
5
7
6
5
AUTO
PROG
Deutsch
Page 44

42
Deutsch
Auswahl unter 3 ständigen Temperaturen (Frostschutz, Sparprogramm, Komfort)
und einem individuell einstellbaren Programm.
Programmierung in 1 h Schritten
Normale Programmierung:
Modus Abschaltung
Die 3 empfohlenen Temperaturen sind einstellbar:
Von 5° bis 30°C für Sparprogramm und Komfort
Von 5° bis 15°C für Frostschutz
Temperaturanzeige in 0,1°C Schritten
Hochpräzisionseinstellung: Vollständige abgeleitete Proportionalregelung
Zeitbasis : 15 Min.
Schutzklasse : IP 30
Versorgung mit 2 Alkalibatterien 1,5 V vom Typ LR06
(Autonomie über 1 Jahr)
Isolierung Klasse II (Empfänger) und Klase III (Sender).
Merkmale
[
Page 45

43
Deutsch
1 – ELEKTRISCHE HEIZKÖRPER MIT HANDTUCHTROCKNER
Dieses Elektrogerät mit hydroaktivem Medium wird gebrauchsfertig geliefert.
Es wird im Werk mit einem hochleistungsfähigen Wärmeträger-Mineralöl gefüllt
und verschlossen. Das speziell für diesen Einsatz entwickelte Medium ist
unveränderbar und erfordert keinerlei besondere Pflege.
Das Heizgerät ist mit einer präzisen Ölmenge gefüllt.
Reparaturen, bei denen das Öffnen des Öltanks erforderlich ist, dürfen nur vom
Hersteller oder seinem Kundendienst durchgeführt werden, der bei einem Ölleck
angesprochen werden muß.
Sie werden sofort bei der Aufheizung des Geräts Erscheinungsbilder feststellen,
die sich von den bei herkömmlicher elektrischer Heizung beobachteten
unterscheiden:
• Der elektrische Heizwiderstand erhitzt das Medium, das nach und nach im
Heizkörper in Umlauf gerät.
• Die Trägheitseigenschaften des Mediums sorgen dafür, daß die Temperatur an
der Oberfläche des Heizkörpers erst nach mindestens 10 Min. ein optimales
Niveau erreicht, und dies je nach den Gerätemodellen und der Raumtemperatur
beim Aufheizen des Geräts.
• Diese Trägheit garantiert umgekehrt die Beständigkeit und Dauer der
abgegebenen Wärme, auch wenn der Heizwiderstand nicht mehr versorgt wird.
• Das Heizgerät hat eine große Heizfläche, was die Anpassung der abgegebenen
Wärmemenge mit Selbstregelung an den Bedarf ermöglicht. Es ist also normal,
daß bei gemäßigtem Betrieb des Geräts in den Übergangsjahreszeiten die
Temperaturunterschiede an der Oberfläche des Heizkörpers leichter
wahrnehmbar sind.
Zur Garantie des effizienten Betriebs des Geräts wird jedoch empfohlen, es nicht
vollständig abzudecken.
Zum richtigen Kennenlernen und
Benutzen des Acova Heizkörpers
[
Page 46

44
2 - Kombinierte Badheizkörper
Dieses Gerät ist für den Anschluß an die Zentralheizung bestimmt und wird leer
und unverschlossen geliefert.
• Benutzung mit Zentralheizung
Das Steuergerät muß abgeschaltet sein.
Der Vorlauf muß offen sein, damit das Wasser der Zentralheizung durchlaufen
kann.
WICHTIG: Dieses Gerät ist so ausgelegt worden, daß es getrennt mit der Zentralheizung
oder im elektrischen Modus benutzt werden kann. Jeder Einsatz erfordert besondere,
spezifische und präzise Vorgehensweisen. Der anormale Betrieb kann nach übermäßigen
Temperaturen des Mediums zur Beschädigung der Heizpatrone führen, was insbesondere
bei gleichzeitiger Benutzun g im elektrisch en Mod us un d mit d er Zen tr alheizun g ein tr eten
kann.
Jeder ungeeignete Einsatz führt zum Erlöschen der vertraglichen Garantie.
• Benutzung mit elektrischer Heizung:
A. Nur den Vorlauf schließen, niemals den Rücklauf des Heizkörpers schließen:
Diese Öffnung ist für die Ausdehnung des Mediums in die Anlage erforderlich.
Das Verschließen des Rücklaufs kann zur Zerstörung des Heizkörpers durch
übermäßigen Druck über dem Betriebsdruck führen.
B. Sich durch Öffnen der Entlüftung am oberen Teil vergewissern, daß das Gerät
ordnungsgemäß mit Wasser gefüllt ist. Ihn wieder schließen, wenn das Wasser
regelmäßig austritt, und hierfür einen Schwamm oder einen kleinen Behälter
vorsehen.
Wenn der Druck nicht für das Entlüften des Heizkörpers ausreicht :
• Die Zentralheizung bis zum am Druckmesser angezeigten Druckmesser mit
Wasser füllen;
• Den Heizungsinstallateur um Rat bitten;
• Die Betriebsgesellschaft (der Zentralheizung) befragen.
Deutsch
Page 47

45
Deutsch
C. Bei rein elektrischem Betrieb des kombinierten Heizkörpers, wenn die zentrale
Heizanlage mit einer von dem Heizkessel unabhängigen Umwälzpumpe
ausgestattet ist, muß die Pumpe unbedingt abgeschaltet werden (Gefahr des
Absaugens des Heizkörpers, falls die Anschlüsse nicht völlig dicht sind).
WICHTIG: Bei Einschalten des Geräts ohne ausreichende Wasserfüllung erlischt die
Garantie.
Dieser Heizkörper ist mit einer Heizpatrone versehen, die einen
Überhitzungsschutz und eine Sicherung besitzt. Seine Benutzung ohne
Wasser beschädigt die Sicherung dauerhaft und damit auch die
Heizpatrone : In diesem Falle muß sie undedingt ausgewechselt werden.
Dieser Störfall unterliegt nicht der Garantie des Herstellers. Bei
Benutzung einer nur teilweise mit Wasser gefüllten Heizkörpers schaltet
der Überhitzungsschutz selbsttätig ab. Solange das Heizelement nicht mit
Wasser aufgefüllt ist, funktioniert das Gerät nur im Wechselbetrieb.
Wenn Sie feststellen, daß der elektrische Teil des Handtuchtrockners
aktiviert ist und trotz einer Anforderung des Thermostats oder bei
gezwungenem Betrieb nicht heizt :
Wie folgt vorgehen :
1) Sich vergewissern, daß der Heizkörper richtig mit Wasser gefüllt ist (siehe
Seite 44 "Benutzung mit elektrischer Heizung, Paragraph B".
2) Den Sender auf "AUS" stellen, um den Strom abzuschalten, und den
elektrischen Betrieb 30 bis 60 Minuten ausschalten. Dieser Vorgang ist
notwendig, um den elektrischen Schutz abzuschalten.
3) Den Sender wieder auf die gewünschte Funktion "Modus" stellen.
Page 48

46
Deutsch
Pflegehinweise
[
Das Gerät vor jeglicher Pflege ausschalten.
Durch die Wahl der besten Werkstoffe und die Qualität der doppelten
Oberflächenbehandlung ist der Acova Heizkörper korrosions- und stoßfest.
Wie empfehlen, die folgenden Ratschläge zu befolgen, um mit einfacher Pflege
die lange Lebensdauer des Geräts zu gewährleisten:
• Für die Pflege der Außenwände des Heizkörpers kein Scheuer- oder korrosives
Produkt verwenden, sondern bevorzugt einen mit Alkohol getränkten Lappen.
• Für den Körper des Regelgehäuses einen trockenen Lappen (ohne
Lösungsmittel) benutzen.
Bei Entleerung eines reinen Elektrogeräts muß das Medium unbedingt zu einer
Sammelstelle für verbrauchtes Öl gebracht werden.
Bei Funktionsausfall des Geräts können Sie selbst folgende Prüfungen vornehmen
und sich vergewissern, daß:
• Das Heizgerät ordnungsgemäß angeschlossen und versorgt ist (siehe Seite 34
der Anleitung);
• Die Thermostatstellung richtig die Beheizung des Heizkörpers steuert (siehe
Seite 39 der Anleitung);
• Das Heizgerät mit Handtuchtrockner mit gemischtem Betrieb richtig mit Wasser
gefüllt ist (siehe Seiten 44 und 45 der Anleitung).
Wenn Ihr Heizgerät an ein "Master" Gerät, an eine Uhr oder eine
Programmierungszentrale angeschlossen ist, in der Herstellerbeschreibung
nachlesen.
Prüfungen bei Funktionsausfall
oder Anomalien
[
Page 49

47
Deutsch
Wenden Sie sich bei Betriebsausfall oder Bedarf an Einzelteilen an den
Installateur oder Händler.
Zur Sicherstellung des richtigen Verstehens und der raschen Bearbeitung des
Problems überprüfen, daß Sie folgende Angaben bereit haben:
• Die Angaben auf dem Geräteschild (siehe Umschlagklappe, Schema 1);
• Die Acova Artikelnummer, die auf Ihrer datierten Kaufrechnung steht.
Das Heizgerät entspricht der Richtlinie 89/336/EWG mit Änderung durch
92/31/EWG bezüglich der Begrenzung der funkelektrischen Störungen sowie den
europäischen Normen EN 60.335.1 / 60.335.2.30 / 60.335.2.43.
Kundendienst
[
Garantie
(SIEHE ALLGEMEINE GESCHÄFTSBEDINGUNGEN VON ACOV A IM BETROFFENEN LAND)
[
Page 50

Spezifische Garantie für Kombinierte Badheizkörper :
Die Acova Garantie für Ihren Handtuchtrockner mit gemischtem Betrieb gilt nur
unter folgenden Vorbehalten:
• Das für den Heizkreis verwendete Wasser darf weder aggressiv noch korrosiv
sein.
• Die Anlage darf keine Spuren von gelösten Gasen (02 – CO2) enthalten, und
dies insbesondere bei Verwendung von gasdurchlässigen Werkstoffen
(Fußbodenheizung).
Hierzu ist die Gewährleistung einer effizienten Gasentfernung oberhalb der
Umlaufpumpe und das Zapfen oder oberen Zapfstellen der Anlage erforderlich.
Der Heizkörper darf keiner intensiven oder permanenten Luftfeuchte
ausgesetzt sein (Dusche, Schwimmbad, usw.).
Fall für die Stornierung der Garantie :
Die Acova Garantie gilt insbesondere nicht bei folgenden Einbau- oder
Benutzungsbedingungen:
• Einsatz, Einbau oder Pflege, die nicht mit der im Land gültigen Norm, den
technischen Regeln und der Herstellerbeschreibung entsprechen.
• Benutzung des Heizkörpers mit Handtuchtrockner mit gemischtem Betrieb ohne
Einhaltung der Empfehlungen in der Herstellerbeschreibung: gleichzeitige
Einschaltung des Heizungsmodus Zentralheizung und elektrische Heizung, kein
oder ungenügendes Wasser im Heizkörper ...
Für weitere Fragen zur Garantie wenden Sie sich bitte an den Installateur oder
Händler.
48
Deutsch
Page 51

49
Caro Cliente,
La ringraziamo per avere scelto il radiatore Acova, elaborato conformemente alla
nostra carta di qualità e che ci auguriamo possa soddisfarLa pienamente.
Per usufruire al massimo delle sue possibilità, La invitiamo a leggere
attentamente queste avvertenze d'uso e a tenerle vicino all'apparecchio. Per
ulteriori informazioni sulla regolazione elettronica del radiatore, riportarsi
direttamente alle pagine da 54 a 57.
La ringraziamo per la Sua fiducia.
IMPORTANTE : Questo apparecchio non deve mai essere installato con la scatola
elettronica ricevitrice posizionata in Alto. La scatola ricevitrice non deve poggiare sul
pavimento. Per l'installazione, prevedere degli spessori.
ATTENZIONE : Il radiatore asciuga-salviette ha una scatola elettronica ricevitrice
incorporata. Decliniamo ogni responsabilità in caso di utilizzo con centraline di
comando mediante interruzione dell'alimentazione (vedi le avvertenze d'uso della
centralina).
Introduzione Italiano
Page 52

50
Sistemazione :
Per usufruire al massimo dell'apparecchio e per un comfort ottimale, si
raccomanda:
• di effettuare l'installazione più vicino possibile alle zone di entrata dell'aria
(finestre, porte, ecc.)
• di non mettere davanti al radiatore oggetti (mobili, sedie, ecc.) che
potrebbero perturbare l'emissione o il ricevimento del segnale a INFRAROSSI
• di posizionare la parte inferiore della scatola elettronica ad almeno 15 cm dal
pavimento
• di non installare il radiatore sotto una presa di corrente.
Collegamento :
Le caratteristiche tecniche del radiatore Acova sono indicate sull'etichetta
segnaletica posta nella parte inferiore dell'apparecchio, sul lato della scatola di
comando (vedi copertina schema n° 1).
Prendere nota di tali caratteristiche prima di chiedere l'intervento del Servizio
Assistenza.
Il collegamento alla rete elettrica deve essere effettuato rispettando :
• la tensione indicata su questa etichetta
• i colori convenzionali:
Marrone : fase, Blu o Grigio : neutro.
Se il cavo di alimentazione è danneggiato, deve essere sostituito dal fabbricante,
dal suo servizio assistenza o da personale qualificato, per evitare qualsiasi
pericolo.
Il cavo flessibile montato in fabbrica deve essere collegato alla rete tramite una
scatola elettronica di collegamento che dovrà essere posta dietro l'apparecchio,
senza interporre una presa di corrente.
In una cucina o in un bagno, la scatola elettronica di collegamento deve essere
posizionata ad almeno 25 cm dal pavimento.
Sistemazione e collegamento del
radiatore
[
Italiano
Page 53

51
L’apparecchio è di classe II, è protetto contro le proiezioni d’acqua e può essera
installato nelle stanze da bagno, a condizione che l’installazione sia conforme
alle norme in vigore e alle regole dell’arte del paese nel quale viene effettuata.
Regole particolari di installazione
nelle stanze da bagno
[
Italiano
Page 54

52
Sistemazione della scatola elettronica emettrice :
E' possibile utilizzare il termostato murale CADIR poggiato sulla relativa base o
fissato al muro. Prima dell'installazione definitiva del termostato murale CADIR,
si consiglia di verificare che l'ubicazione scelta, preferibilmente su una paratia
interna, consenta la corretta trasmissione dei raggi infrarossi. Per determinare la
posizione del termostato murale CADIR, riferirsi allo schema illustrato sulla
pagina interna della copertina.
Affinché la sonda del termostato possa reagire correttamente, il termostato
murale CADIR deve essere posto ad almeno 150 cm dal pavimento, a 10 cm da
un angolo delle pareti, a 150 cm minimo dal radiatore e da qualsiasi elemento
che produce calore (tubi d'acqua calda, lampade, ecc.).
In ogni caso, accertarsi che il raggio a infrarossi che collega la cellula a
infrarossi emettrice alla cellula a infrarossi ricevitrice posta sul radiatore,
non sia interrotto da un oggetto mobile (sgabello, telo bagno , ecc.).
Se l'asciuga-salviette non riceve più gli ordini del termostato murale CADIR per
qualsivoglia motivo (pile usate, scatola emettrice nascosta, ecc.), smetterà di
riscaldare 20 minuti dopo l'ultima informazione ricevuta e il Led lampeggerà
fino a quando l'anomalia non verrà corretta.
La portata del raggio a infrarossi è limitata a 8 metri in linea retta.
Installazione e sostituzione delle pile :
Per la prima utilizzazione, aprire il termostato murale CADIR premendo la clip
e togliere la linguetta d'isolamento delle pile.
Non appena la spia di usura delle pile si accende, avete un mese di tempo per
sostituire le pile. Per la sostituzione delle pile, avete 2 minuti
circa per installare le nuove pile senza perdere la regolazione
dell'ora (le altre informazioni non cambiano qualunque sia la
durata dell'intervento).
Installazione del termostato murale
"CADIR" e Utilizzazione
[
4
3
1
5
1
6
1
7
Italiano
Page 55

53
Italiano
Non lasciare le pile usate nell'apparecchio (la garanzia non copre il
deterioramento dovuto al liquido che fuoriesce dalle pile usate).
- Aprire la scatola elettronica emittente premendo la clip
- Togliere le pile usate
- Inserire 2 pile alcaline da 1,5 V di tipo LR06 rispettandone i poli (+ / -)
Non utilizzare mai le pile ricaricabili
Utilizzare imperativamente le pile alcaline.
Per rispettare l'ambiente, riciclare le pile usate mettendole nell'apposito contenitore.
Installazione del termostato murale CADIR :
Se avete deciso di installare la scatola elettronica emettrice sulla parete:
Separare la parte posteriore della scatola emettrice premendo la clip .
Fissare la parte posteriore della scatola emettrice con le viti e gli stop forniti.
Problemi Diagnosi / Soluzioni
Sullo schermo non appare
nulla
Non c'è corrente. Sostituire le pile o controllarne
i poli (orientamento)
Il termostato è stato appena acceso. Se
necessario, controllare e regolare l'orologio e la
temperatura, altrimenti premere un tasto
qualsiasi.
La scatola ricevitrice non ha ricevuto nessuna
informazione da oltre venti minuti. Controllare
le condizioni delle pile e fare un test di
trasmissione.
Il display lampeggia
Il Led rosso lampeggia
1
7
1
6
17
Page 56

54
Funzionamento della regolazione elettronica
a raggi infrarossi programmabile
[
COMMANDI :
Italiano
Base (Traslucida)
Schermo LCD
Cellula a infrarossi
Selettore delle modalità
Tasto di funzionamento forzato o
di Conferma
Tasto di regolazione Tasto di regolazione +
Modo "Comfort"
Modo "Automatico"
Modo "Economia"
Modo "Temperatura minima"
Modo "Arresto"
Inizializzazione "Orologio"
Inizializzazione "Programmazione"
1
8
9
10
11
12
13
14
11
12
2
13
14
1
7
6
5
4
8
9
10
3
2
3
4
5
6
7
Page 57

55
REGOLAZIONI E FUNZIONI DELLE DIVERSE "MODALITA' "
: Comfort permanente
Temperatura desiderata nel locale
(pre-regolata a 19°C).
Utilizzazione :
Posizionare la manopola su
Premere + o - per modificare la temperatura
: Automatico
Il programma settimanale Automatico regola per ogni
ora la temperatura giusta :
Comfort o Economia
Posizionare la manopola su
La configurazione del programma giornaliero
appare e la fascia oraria in corso lampeggia.
Per regolare le temperature
Comfort ed Economia,
posizionare la manopola su o
e regolare la temperatura con i tasti + o -
: Economia permanente
Temperatura desiderata quando l'abitazione è vuota o
durante la notte (pre-regolata a 16°C)
Viene mantenuta una temperatura ridotta che
consente di risparmiare energia
Utilizzazione :
Posizionare la manopola su
Premere + o - per modificare la temperatura
Nota : per le 3 modalità precedenti
Se c'è la fiammella : il radiatore sta riscaldando
Se non c'è la fiammella: nel locale c'è la temperatuta
desiderata.
Italiano
8
9
10
Page 58

56
: Temperatura minima permanente
Temperatura minima per evitare i rischi dovuti al
freddo intenso (pre-regolata a 7°C), da utilizzare nei
lunghi periodi di assenza.
Utilizzazione :
Posizionare la manopola su
Premere + o - per modificare la temperatura.
: Spegnimento
Spegnimento per chiudere il riscaldamento d'estate.
Utilizzazione :
Posizionare la manopola su
Il radiatore non riscalderà più, qualunque sia la
temperatura del locale.
: Ora
Posizionare la manopola su
Premere u + o - per regolare il giorno e l'ora.
Ogni passaggio di 24 ore permette di modificare il
giorno. I giorni della settimana sono indicati con i
valori di riferimento da 1 a 7, in alto a sinistra dello
schermo LCD (1 = lunedì, 2 = martedì, ecc.)
Premendo leggermente: l'ora avanza di 1 minuto
Premendo forte: l'ora avanza rapidamente
Attenzione :
Durante l'inizializzazione , il riscaldamento è spento.
Il passaggio dall'ora invernale all'ora legale non è
automatico.
11
12
13
Italiano
Page 59

57
: Programmazione
I programmi settimanale e week-end sono preregistrati e possono essere personalizzati in qualsiasi
momento:
Posizionare la manopola su
Il programma del lunedì appare e la prima fascia
oraria lampeggia.
Premere + per selezionare 1 ora di Comfort o -
per selezionare 1 ora di economia.
Passare alla fascia oraria successiva. Ripetere
l'operazione per regolare la giornata completa.
Premere OK per confermare e passare al giorno
successivo.
Per ritornare al modo automatico, posizionare la
manopola su
Funzione "Funzionamento forzato"
La funzione Funzionamento forzato è disponibile in
qualsiasi momento con il modo Comfort, Economia,
Temperatura minima.
Per attivarla, premere il tasto 3h per 10 secondi
circa (Premere a lungo).
Il Funzionamento forzato è attivato e conta a ritroso
di 3 ore fino a 0 minuti. (Ciononostante, è possibile
modificare la durata del programma con passi di 15
minuti utilizzando i tasti + o - . Quando il
conteggio è terminato, l'emettrice ritorna al suo stato
iniziale. Per disattivare in qualsiasi momento questa
funzione, premere di nuovo il tasto 3h (Premere
leggermente).
14
5
7
6
5
AUTO
PROG
Italiano
Page 60

58
Italiano
E' possibile scegliere tra 3 temperature permanenti (Temperatura minima,
Economia, Comfort) e un programma personalizzabile.
Programmazione con passo di 1 ora.
Programmazione predefinita:
Modo arresto.
Le 3 temperature di riferimento sono regolabili:
tra 5° e 30°C per Economia e Comfort
tra 5° e 15°C per Temperatura minima
Regolazione con passo di 0,1°C
Regolazione di elevata precisione: regolazione proporzionale completa derivata.
Tempo di base: 15 min
Indice di protezione: IP30
Alimentazione con 2 pile alcaline da 1,5 V di tipo LR06
(autonomia superiore a 1 anno)
Isolamento classe II (ricevitrice) e classe III (emettrice).
Caratteristiche
[
Page 61

59
Italiano
1 - RADIATORE ASCIUGA-SALVIETTE ELETTRICO
Questo apparecchio elettrico a fluido idrattivo è venduto pronto per l'uso.
E' chiuso e riempito in fabbrica con un olio minerale termico dalle elevate
prestazioni. Il fluido, appositamente elaborato per questo utilizzo, è
inalterabile e non richiede nessuna manutenzione particolare.
Questo apparecchio da riscaldamento è stato riempito con una quantità precisa
di olio. Le riparazioni per le quali bisogna aprire il serbatoio dell'olio devono
essere effettuate soltanto dal fabbricante o dal suo servizio assistenza, che deve
essere contattato in caso di perdita d'olio.
Quando si accende l'apparecchio per la prima volta, si noteranno fenomeni
diversi da quelli generati da un riscaldamento elettrico convenzionale:
• La resistenza elettrica riscalda il fluido che si mette progressivamente e
naturalmente in circolazione all'interno del radiatore.
• Le proprietà di inerzia del fluido consentono alla temperatura in superficie del
radiatore di raggiungere un livello ottimale soltanto dopo almeno 10 minuti, a
seconda dei modelli e della temperatura ambiente del locale, al momento
dell'accensione dell'apparecchio.
• Ed è proprio questa inerzia che garantisce un calore costante e duraturo,
anche quando la resistenza non è più alimentata.
• Il radiatore è costituito da un'ampia superficie di riscaldamento, il che
permette di adattare automaticamente la quantità di calore prodotta alle
esigenze dell'utente. E' quindi normale che durante la mezza stagione, quando
l'apparecchio funziona poco, le differenze di temperatura sulla superficie del
radiatore siano più percettibili.
Per garantire un funzionamento efficace dell'apparecchio, si raccomanda
tuttavia di non coprirlo completamente.
Per conoscere e utilizzare al
meglio il radiatore Acova
[
Page 62

60
2. Radiatore asciuga-salviette misto
Questo apparecchio, che deve essere collegato al circuito del riscaldamento
centrale, è venduto non chiuso e vuoto.
• Utilizzazione come riscaldamento centrale:
La scatola di comando deve essere spenta.
Il rubinetto di alimentazione deve essere aperto per far passare l'acqua del
riscaldamento centrale.
IMPORTANTE: Questo appar ecchio è stato ideato per essere usato sia come riscaldam ento
centrale che come riscald amento elettrico. Ogni utilizzo richiede disposizioni parti colari,
specifiche e precise. Un utilizzo anormale può danneggiare la cartuccia riscaldante a
causa delle temperature eccessive del flui do, sopr attutto se l'apparecchi o vien e utilizzato
contemporaneamente come riscaldamento elettrico e riscaldamento centrale. L'uso
inadeguato dell'apparecchio rende nulla la garanzia contrattuale.
• Utilizzazione come riscaldamento elettrico:
A. Chiudere soltanto il rubinetto di alimentazione, non chiudere mai il ritorno
della struttura di riscaldamento: questo orifizio è necessario per consentire
l'espansione del fluido verso l'impianto.
La chiusura del ritorno può provocare la distruzione della struttura di
riscaldamento dovuta ad una pressione eccessiva superiore alla pressione di
utilizzo.
B. Accertarsi che l'apparecchio sia correttamente riempito d'acqua aprendo lo
spurgatore posto nella parte superiore. Chiuderlo se l'acqua esce regolarmente e
prevedere per questa operazione una spugna e un piccolo recipiente.
Se la pressione non è sufficiente per consentire lo spurgo della struttura di
riscaldamento:
• riempire il riscaldamento centrale d'acqua fino alla pressione indicata sul
manometro
• chiedere consiglio alla persona che ha installato il riscaldamento
• avvisare la società che gestisce l'impianto di riscaldamento (per un impianto
collettivo).
Italiano
Page 63

61
Italiano
C. Per l'accensione, procedere come per un apparecchio elettrico asciuga-
salviette.
Durante l'uso del radiatore asciuga-salviette misto con la "funzione elettrica", se
l'impianto di riscaldamento centrale ha una pompa di circolazione indipendente
dalla caldaia:
è indispensabile chiudere quest'ultima (c'è il rischio di svuotare la struttura di
riscaldamento se la tenuta stagna dei raccordi non è perfetta).
IMPORTANTE: L'apparecchio deve essere acceso soltanto se è riempito d'acqua (rischio di
annullamento della garanzia).
Questo radiatore ha una cartuccia riscaldante con un interruttore integrato
e un fusibile. Se è utilizzato senza acqua, il fusibile viene danneggiato e,
di conseguenza, la cartuccia riscaldante: questa anomalia, "non coperta
dalla garanzia del fabbricante", richiede imperativamente la sostituzione
della cartuccia. L'uso d el radiatore parzialmente riempito d'acqua provoca il
disinnesto dell'interruttore termico, che avrà un funzionamento alternato
fino a quando la struttura del riscaldamento non sarà correttamente
riempita.
Se constatate che la parte elettrica dell'asciuga-salviette è attivata e non
riscalda più nonostante l'uso del termostato o un funzionamento forzato,
effettuare le seguenti manovre :
1) Accertarsi che il radiatore sia correttamente riempito d'acqua (vedi pagina 60
"Utilizzazione come riscaldamento elettrico, paragrafo B"
2) Posizionare l'emettrice su "ARRESTO" per togliere la corrente, e bloccare la
funzione elettrica tra 30 e 60 minuti. Questa operazione è necessaria per
disinnestare il dispositivo di sicurezza termico.
3) Riposizionare l'emettrice sulla funzione "MODALITA' " desiderata.
Page 64

62
Italiano
Consigli di manutenzione
[
Prima di effettuare qualsiasi operazione di manutenzione, spegnere l'apparecchio.
La scelta dei migliori materiali e la qualità del duplice trattamento della
superficie proteggono il radiatore Acova dalla corrosione e dagli urti.
Per garantire la durata dell'apparecchio con una manutenzione semplice, si
raccomanda di seguire questi consigli :
• Per la pulizia delle pareti esterne del radiatore, non usare prodotti abrasivi o
corrosivi, ma usare preferibilmente un panno imbevuto d'alcool.
• Per il corpo della scatola elettrica di regolazione, usare un panno asciutto
(senza solvente).
In caso di mancato funzionamento dell'apparecchio, potete effettuare da soli i
seguenti controlli, accertandovi che :
• Il radiatore sia correttamente collegato e alimentato (vedi pagina 50 delle
avvertenze)
• La posizione del termostato sia quella che serve a comandare il riscaldamento
del radiatore (vedi a pagina 55 delle avvertenze)
• Il radiatore asciuga-salviette misto sia correttamente riempito d'acqua (vedi a
pagina 60 e 61 delle avvertenze).
Se il radiatore è collegato ad un apparecchio "master", ad un orologio o ad una
centralina di programmazione, riportarsi alle avvertenze del fabbricante.
Controlli da effettuare in caso di
mancato funzionamento o di anomalie
[
Page 65

63
Italiano
In caso di mancato funzionamento o se avete bisogno di pezzi di ricambio,
contattare la persona che ha installato l'apparecchio o il rivenditore:
Prima di chiamare, per consentire una corretta comprensione e un trattamento
rapido del problema, prendere nota:
• Degli elementi indicati sull'etichetta segnaletica dell'apparecchio (vedi pattella
della copertina, schema 1)
• Della referenza commerciale Acova indicata sulla fattura d'acquisto con la data.
Il radiatore è conforme alla direttiva 89/336/CEE modificata dalla direttiva
92/31/CEE sulla limitazione dei disturbi radioelettrici e alle norme europee
EN 60.335.1 / 60.335.2.30 / 60.335.2.43.
Servizio assistenza
[
Garanzia
(VEDI CONDIZIONI GENERALI DI VENDITA ACOVA NEL PAESE INTERESSATO)
[
Page 66

Garanzia specifica riguardante i radiatori asciuga-salviette misti :
La garanzia Acova del radiatore asciuga-salviette misto è applicabile con le
seguenti riserve:
• che l'acqua usata per alimentare il circuito di riscaldamento non sia né
aggressiva né corrosiva
• che nell'impianto non ci siano tracce di gas sciolti (O2-CO2), soprattutto in
caso di utilizzo di materiali permeabili al gas (riscaldamento a pavimento).
Per effettuare ciò, bisogna garantire un degasaggio efficace a monte del
circolatore e lo spurgo delle parti superiori dell'impianto.
Il radiatore non deve essere sottoposto a un'umidità ambiente elevata o
permanente (doccia, piscina, ecc.).
Casi di annullamento della garanzia :
La garanzia Acova non è applicabile nelle seguenti condizioni di installazione o
di utilizzazione:
• Utilizzazione, installazione o manutenzione non conforme alla norma in vigore
nel paese interessato, alle regole dell'arte e alle avvertenze d'uso del
fabbricante.
• Utilizzazione del radiatore asciuga-salviette misto non conforme alle
raccomandazioni delle avvertenze del fabbricante: utilizzazione simultanea del
modo riscaldamento centrale ed elettrico, mancanza o insufficienza d'acqua
nella struttura di riscaldamento, ecc.
Per gli altri problemi riguardanti la garanzia, contattare la persona che ha
effettuato l'installazione o il rivenditore.
64
Italiano
Page 67

65
Geachte heer/mevrouw,
Wij danken u voor het kiezen van deze Acova radiator. Wij hopen dat deze
radiator, die wij met de grootste zorg in overeenstemming met ons
kwaliteitshandvest hebben ontwikkeld, naar uw tevredenheid zal zijn.
Om alle mogelijkheden ervan optimaal te benutten, adviseren wij u deze
gebruiksaanwijzing aandachtig door te lezen en te bewaren in de nabijheid van
uw apparaat. Voor nadere informatie over het elektronische regelsysteem
verwijzen wij u rechtstreeks naar de pagina’s 70 tot en met 73.
Wij danken u voor uw vertrouwen.
BELANGRIJK : Dit apparaat mag nooit geïnstalleerd worden met de ontvangstkast aan de
bovenkant. De ontvangstkast mag niet op de grond rusten. Zorg bij de installatie voor
steunblokken.
LET OP : Uw handdoekd r og er is voorzi en van een g eïn tegr eer d e elektr onisch e r eceptor. In
geval van gebruik met besturingscen tr ales met voedin gsspannin gson derbr ekin g wijzen wij
iedere verantwoordelijkheid af (raadpleeg de gebruiksaanwijzing van uw centrale)
Introductie Nederlands
Page 68

66
Plaatsing :
Om uw apparaat zo optimaal mogelijk te benutten en voor het beste comfort,
bevelen wij u aan :
• de plaatsing zo mogelijk te doen in de nabijheid van plekken met groot verlies
(ramen, deuren).
• geen voorwerpen (meubels, fauteuils, …) te plaatsen die de emissie of de
ontvangst van het INFRAROOD signaal kunnen verstoren.
• de onderkant van de kast minimaal 15 cm van de grond te plaatsen.
• het verwarmingsapparaat niet vlak onder een stopcontact te plaatsen.
Aansluiting :
De technische kenmerken van uw Acova radiator staan aangeduid op de
productidentificatielabel die is geplaatst aan de onderzijde van het apparaat,
aan de zijde van de bedieningsdoos (zie omslag schema n°1)
Wij verzoeken u deze in te zien voordat u de afdeling service na verkoop
inschakelt. De aansluiting op het elektriciteitsnet dient te gebeuren met
inachtneming van de volgende regels :
• de op dit plaatje aangegeven spanning
• de gebruikelijke kleuren :
Bruin : fase, Blauw of Grijs : neutraal
Om gevaar te vermijden moet de voedingskabel, indien deze is beschadigd,
vervangen worden door de fabrikant, de afdeling service na verkoop of een
persoon met vergelijkbare kwalificatie.
De oorspronkelijk gemonteerde soepele kabel is bestemd om op het net te
worden aangesloten via een aansluitdoos die achter het apparaat geplaatst dient
te worden zonder tussenschakeling van een stopcontact.
In een keuken of badkamer moet de aansluitdoos geplaatst worden op minstens
25 cm. van de vloer.
Plaatsing en aansluiting van
de radiator
[
Nederlands
Page 69

67
Afgezien van de voorschriften in deze
technische beschrijving, moet de
installatie conform de NF 15.100 en
de regels van de kunst zijn.
Dit apparaat valt onder klasse II.
Het is beschermd tegen spattend
water en mag in de ruimten 2 en 3
worden geïnstalleerd, onder
voorbehoud dat de organen voor de
elektrische regeling niet door iemand
kunnen worden aangeraakt die de
badkuip of de douche gebruikt.
Het apparaat mag niet op een
aardklem worden aangesloten.
Er wordt aan herinnerd dat een
veelpolige verbrekingsinrichting
conform de norm NFC 15.100,
verplicht is. De scheidingsafstand
tussen de contacten moet ten minste
3 mm bedragen.
In een badkamer of douchecel, moet
erop worden gelet de
elektriciteitsleiding door een
differentiële inrichting hoge
gevoeligheid 30 mA te beschermen.
Instructies voor de andere landen
De installatie moet conform de van
kracht zijnde normen en de regels van
de kunst van het land zijn waarin het
apparaat wordt gebruikt.
Speciale voorschriften voor de
installatie betreffende de wasruimten
INTRUCTIES VOOR FRANKRIJK(IN TOEPASSING VAN DE NORM NFC 15.100)
[
Nederlands
Page 70

68
Plaatsing van de zender :
U kunt de CADIR muurthermostaat gebruiken op een voetstuk of tegen de muur
bevestigd. Wij rade n u aan vóór definitieve bevestiging van de CADIR
muurthermostaat te controleren dat de plaats waar u van plan bent deze te
bevestigen, bij voorkeur een binnenmuur, een correcte overbrenging van
infrarood stralen kan verzekeren.
Om de plaats van de CADIR muurthermostaat te bepalen dient u het voorbeeld te
volgen van schema dat op de binnenzijde van de omslag staat.
Om de sonde van de thermostaat correct te laten reageren, moet de CADIR
muurthermostaat op 150 cm van de vloer worden geplaatst, op 10 cm van een
hoek van muren, op minimaal 150 cm van de radiator en ieder ander warmte
producerend element (warmwaterleiding, verlichting etc.).
In iedere denkbeeldige situatie dient u erop te letten dat de infrarood straal
waarmee de infrarood zendercel in verbinding staat met de infrarood
ontvangstcel op de radiator, niet onderbroken wordt door een los voorwerp
(krukje, badlaken etc.).
Indien uw handdoekdroger geen opdrachten kan ontvangen van de CADIR
muurthermostaat om welke reden dan ook : lege batterijen, bedekte zender, etc.,
zal hij 20 minuten na de laatste doorgegeven informatie stoppen met
verwarmen, de led zal knipperen zolang de verbinding niet wordt hersteld.
De dracht van de infrarood straal is beperkt tot 8 meter in rechte lijn.
Installatie en vervanging van batterijen :
Bij de eerste in gebruik neming de CADIR muurthermostaat openen door
op klem te drukken en het isolatielipje van de batterijen eruit trekken.
Als het batterijcontrolelampje gaat branden heeft u nog
ongeveer een maand om de batterijen te verwisselen. Bij
verwisseling van de batterijen heeft u ongeveer 2 minuten om
de nieuwe batterijen te installeren zonder dat de
tijdsinstellingen verloren gaan (de overige instellingen blijven
onveranderd ongeacht de duur).
Bevestiging van de “CADIR”
muurthermostaat en in gebruik stelling
[
4
3
1
5
1
6
1
7
Nederlands
Page 71

69
Nederlands
Laat geen lege batterijen achter in het apparaat (de garantie dekt geen
beschadiging als gevolg van lekkende batterijen).
- Open de zenderkast door te drukken op klem
- Haal de gebruikte batterijen eruit
- Plaats 2 alkaline batterijen van 1,5 V type RC06 en houdt daarbij
rekening met de polen (+ / -).
Nooit oplaadbare batterijen gebruiken.
Gebruik alleen alkaline batterijen.
Uit milieuoverwegingen dient u te zorgen voor hergebruik van de batterijen door ze in te
leveren bij een inzamelpunt.
Bevestiging van de CADIR muurthermostaat :
Als u heeft besloten de zender op de muur te bevestigen :
Scheid de achterzijde van de zender door te drukken op klem .
Bevestig de achterzijde van de zender met behulp van de meegeleverde
schroeven en pluggen.
Problemen Diagnose / Oplossingen
Er verschijnt niets op het
scherm
Geen voeding. Verwissel de batterijen of
controleer de polen (richting)
De thermostaat is zojuist onder spanning komen
staan. Controleer en stel zonodig de klok en de
temperaturen in of druk op een toets.
De ontvanger heeft geen informatie ontvangen
sinds meer dan 20 minuten. Controleer de
batterijen en doe een overdrachtstest.
Het hele venster knippert
De rode led knippert
1
7
1
6
17
Page 72

70
Werking van het elektronisch
programmeerbare infrarood regelsysteem
[
BEDIENINGSKNOPPEN :
Nederlands
Voetstuk (doorschijnend)
LCD scherm
Infrarood cel
Modusschakelaar
Gedwongen aan of
bevestigingsknop
Regelknop –
Regelknop +
Modus “Comfort”
Modus “Auto”
Modus “Zuinig”
Modus “Vorstvrij”
Modus “Stop”
Formatteren “Klok”
Formatteren “Programmering”
1
8
9
10
11
12
13
14
11
12
2
13
14
1
7
6
5
4
8
9
10
3
2
3
4
5
6
7
Page 73

71
AFSTELLINGEN EN FUNCTIES VAN DE VERSCHILLENDE “MODI”
: Permanent comfort
De gewenste kamertemperatuur (voorgeprogrammeerd
op 19° C ).
Gebruik :
Stel de schakelaar in op
+ of – om de temperatuur te wijzigen.
: Automatisch
Het weekprogramma Auto ieder uur de juiste
temperatuur :
Comfort of Zuinig
Stel de schakelaar in op
De configuratie van het dagprogramma licht op
en het lopende dagdeel knippert.
Om de temperaturen Comfort en Zuinig in te
stellen, dient u de
schakelaar in te stellen op of en de
temperatuur te regelen met behulp
van de + en de -
: Permanent economisch
De gewenste temperatuur tijdens uw afwezigheid of ‘s
nachts (voorgeprogrammeerd op 16 ° C ).
Er wordt een lagere temperatuur behouden waardoor
bezuinigd wordt op energie
Gebruik :
Stel de schakelaar in op
+ of – om de temperatuur te wijzigen.
Opmerking : voor de 3 vorige modi,
Aanwezigheid van de vlam : de radiator wordt warm.
Afwezigheid van de vlam : de ruimte is op de gewenste
temperatuur.
Nederlands
8
9
10
Page 74

72
: Permanent vorstvrij
Minimum temperatuur om risico’s als gevolg van vorst
te voorkomen (voorgeprogrammeerd op 7 °C ). Te
gebruiken bij langdurige afwezigheid.
Gebruik :
Stel de schakelaar in op
+ of – om de temperatuur te wijzigen.
: Stop
Om de verwarming in de zomer stop te zetten.
Gebruik :
Stel de schakelaar in op
De verwarming zal niet meer aanslaan, ongeacht
de temperatuur
: Tijdinstelling
Stel de schakelaar in op
Druk op + of – om de dag en de tijd in te stellen.
De dag kan ingesteld worden als u langs 24u00 komt,
de dagen van de week worden aangegeven door een
cijfer van 1 tot 7 links bovenaan in het LCD scherm.
(1=maandag; 2=dinsdag..)
Kort drukken : langzaam per minuut vooruit
Lang drukken : snel vooruit
Let op :
Bij formattering staat de verwarming uit.
De verandering van wintertijd en zomertijd is niet
automatisch.
11
12
13
Nederlands
Page 75

73
: Programmering
De week- en weekend programma’s zijn
voorgeprogrammeerd en kunnen op ieder moment
aangepast worden :
Stel de schakelaar in op
Het programma voor maandag licht op en het
eerste tijdvak knippert.
Klik op + om een uur comfort te selecteren of op
– om een uur zuinig te selecteren.
U gaat verder naar het volgende tijdvak. Herhaal
deze handeling om de hele dag in te stellen. Klik
op OK om te bevestigen en ga naar de volgende
dag.
Om terug te gaan naar de automatische modus,
stelt u de schakelaar in op
Functie “Gedwongen aan”
De functie Gedwongen aan is op ieder moment
beschikbaar in de modus Comfort, Auto, Zuinig,
Vorstvrij.
Om deze modus te activeren, moet u gedurende
ongeveer 10 seconde op de knop 3h drukken (lang
drukken).
Gedwongen aan is dan geactiveerd en telt af van 3
uur naar 0 minuten. (In de tussentijd kunt u de duur
van het programma wijzigen per 15 minuten, met
behulp van de + en – knoppen.
Als de aftelling is afgelopen zal de zender weer in
oorspronkelijke staat terugkeren. Om deze functie te
deactiveren, op eender welk moment, kunt u opnieuw
op de 3h knop drukken (Kort drukken).
14
5
7
6
5
AUTO
PROG
Nederlands
Page 76

74
Nederlands
Keuze tussen 3 permanente temperaturen (Vorstvrij, Zuinig, Comfort) en een zelf
instelbaar programma.
Programmering per stap van 1 uur.
Standaardprogrammering :
Stop modus.
De 3 ingestelde temperaturen kunnen versteld worden :
van 5 ° tot 30 °C voor Zuinig en Comfort.
van 5 ° tot 15 °C voor Vorstvrij.
Afstelling per stap van 0,5 °C
Weergave van de temperatuur per stap van 0,1 °C
Hoge Precisie regeling : PID regelaar
Tijdbasis : 15 min.
Beschermingsfactor : IP30
Voeding met 2 alkaline batterijen van 1,5 V type LR06
(levensduur meer dan 1 jaar)
Isolatie klasse II (ontvanger) en klasse III (zender).
Technische gegevens
[
Page 77

75
Nederlands
1 – ELECTRISCHE RADIATOR – HANDDOEKDROGER
Dit elektrische apparaat met hydroactieve vloeistof wordt klaar voor gebruik
geleverd.
Het is in de fabriek dicht gemaakt na gevuld te zijn met een hoogwaardig
thermische minerale olie. Deze vloeistof, die speciaal voor dit gebruik is
ontwikkeld, is onveranderlijk en vereist geen specifiek onderhoud.
Dit verwarmingsapparaat is gevuld met een precieze hoeveelheid olie. Reparaties
waarbij het oliereservoir geopend moet worden, mogen alleen door de fabrikant
gedaan worden of door de service na verkoop van de fabrikant. U dient contact
op te nemen in geval van olielekkage.
Zodra het apparaat gaat verwarmen zult u andere verschijnselen waarnemen dan
bij conventionele elektrische verwarmingsapparatuur :
• De elektrische weerstand verwarmt de vloeistof die geleidelijk aan en op
natuurlijke wijze gaan circuleren in de radiator.
• De traagheidseigenschappen van de vloeistof zorgen ervoor dat de temperatuur
van de oppervlakken van de radiator pas na minimaal 10 minuten het optimale
niveau bereikt, afhankelijk van het model en de omgevingstemperatuur van de
ruimte op het moment dat het apparaat in werking wordt gesteld.
• Door deze traagheid zorgt er ook voor dat de warmte langdurig vastgehouden
wordt, zelfs als de weerstand niet meer aan staat, blijft het apparaat warmte
afgeven.
• Uw radiator bestaat uit een groot verwarmingsoppervlak, waardoor het
mogelijk is op autoregulerende wijze de hoeveelheid uitgezonden warmte aan
te passen aan de behoefte. Het is dus normaal dat in de zomerperiode, als het
apparaat minder sterk verwarmt, de temperatuurverschillen van het oppervlak
van de radiator niet echt merkbaar zijn.
Om een efficiënte werking van uw apparaat te garanderen, wordt echter
aanbevolen het apparaat niet volledig te bedekken.
Om uw Acova radiator beter te
kennen en gebruiken
[
Page 78

76
2. Combinatie radiator - handdoekdrogers
Dit apparaat wordt leeg en niet dichtgemaakt geleverd, het is bestemd om te
worden aangesloten op het centrale verwarming circuit.
• Gebruik als centrale verwarming :
De bedieningsdoos moet spanningsvrij zijn,
De toevoerkraan moet open staan om het water van de centrale verwarming door
te laten.
BELANGRIJK : Dit apparaat is ontworpen om verschillend gebruikt te worden in de
centrale verwarmingsmodus of in elektrische modus. Ieder gebruik vereist speciale,
specifieke en precieze maatregelen. Een afwijkend gebruik kan beschadiging van de
verwarmingsstaaf tot gevolg hebben als gevolg van te h og e temper atuur van d e vloeisto f,
in het bijzonder in geval van gelijktijdig gebruik in elektrische modus en centrale
verwarmingsmodus.
Door verkeerd gebruik vervalt de contractuele garantie.
• Gebruik als elektrische verwarming :
A. Sluit alleen de toevoerkraan, sluit nooit de terugloop uit het
verwarmingslichaam : deze opening is nodig om het uitzetten van de vloeistof
naar de installatie mogelijk te maken.
Het sluiten van de terugloop kan vernieling van het verwarmingslichaam
veroorzaken, als gevolg van overmatige druk, hoger dan de werkdruk.
B. Zich ervan verzekeren dat het apparaat correct is gevuld met water, door het
aftapventiel dat zich aan de bovenzijde bevindt, te openen. Sluit het
aftapventiel als het water er op gelijkmatige wijze uit komt. Houd hierbij een
spons en een opvangbakje gereed.
Indien de druk niet voldoende is om het verwarmingslichaam te kunnen
ontluchten :
• Vul de centrale verwarming met water tot de druk die aangegeven staat op uw
manometer.
• Vraag advies aan uw verwarmingsinstallateur
• waarschuw de exploitatiemaatschappij (bij collectieve verwarming)
Nederlands
Page 79

77
Nederlands
C. Om het apparaat in werking te stellen, dient u te handelen zoals voor een
elektrische handdoekdroger.
Tijdens het gebruik van de combinatie radiator – handdoekdroger in de
“elektrische functie”, als de centrale verwarmingsinstallatie is uitgerust met een
circulatiepomp die onafhankelijk van de verwarmingsketel werkt :
is het absoluut noodzakelijk deze stop te zetten ( het verwarmingslichaam
kan anders leeggepompt worden in geval van een onvolmaakte waterdichtheid
van de verbindingsstukken).
BELANGRIJK : Het onder spanning zetten van het apparaat mag alleen gebeuren als dit
correct is gevuld met water (anders vervalt de garantie).
Deze radiator is uitgerust met een verwarmingsstaaf met een geïntegreer de
stroomveilighei d en een smeltzek ering. Gebruik zon der water zal d efiniti eve
schade aan de smeltzekering toebrengen en daardoor ook aan de
verwarmingsstaaf : dit defect “niet gedekt door fabrieksgarantie” maakt
vervanging absoluut noodzakelijk. Het gebruik van de radiator als deze
gedeeltelijk gevuld is met water veroorzaakt onderbreking van de
thermische beveiliging. Deze zal afwisselend blijven functioneren zolang
het verwarmingslichaam niet correct gevuld is.
Indien u constateert dat het elektrische gedeelte van uw handdoekdroger is
geactiveerd en dat deze niet warm wordt ondanks het verzoek van de
thermostaat of bij gedwongen aan :
Voer de volgende handelingen uit :
1) Verzeker u ervan dat uw radiator voldoende gevuld is met water (zie pagina
76 “Gebruik als elektrische verwarming, paragraaf B”)
2) Stel de zender in op “STOP” om de stroom uit te schakelen, en stop de
elektrische functie gedurende 30 tot 60 minuten. Deze handeling is noodzakelijk
om de thermische beveiliging te onderbreken.
3) Stel daarna de zender daarna weer in op de gewenste “MODUS”.
Page 80

78
Nederlands
Onderhoudsadviezen
[
Voor iedere handeling dient het apparaat uitgeschakeld te worden.
De keuze van de beste materialen en de kwaliteit van de dubbele
oppervlaktebehandeling beschermen uw Acova radiator tegen corrosie en tegen
stoten.
Om door een eenvoudig onderhoud de levensduur van uw apparaat te
garanderen, raden wij u aan de volgende adviezen op te volgen :
• Voor het onderhoud van de buitenwanden van de radiator geen schurende of
bijtende middelen gebruiken, gebruik bij voorkeur een in alcohol gedrenkte
doek.
• Voor de regelkast een droge doek gebruiken (zonder oplosmiddel).
In geval van ledigen van een geheel elektrisch model, bent u verplicht de
vloeistof naar een verzamelpunt voor gebruikte olie te brengen.
In geval van niet functioneren van uw apparaat, kunt u zelf de volgende punten
controleren. Ga na of :
• Uw radiator naar behoren is aangesloten en wordt gevoed (zie pagina 66 van
de gebruiksaanwijzing),
• De stand van de thermostaat wel het verwarmen van de radiator verzoekt (zie
pagina 71 van de gebruiksaanwijzing),
• Uw combinatie radiator handdoekdroger correct is gevuld met water (zie
pagina 76 en 77 van de gebruiksaanwijzing).
Indien uw radiator is aangesloten op een “hoofd”apparaat, een klok of een
programmeringcentrale, dient u de gebruiksaanwijzing van de constructeur te
raadplegen.
Controles in geval van niet of
gebrekkig functioneren
[
Page 81

79
Nederlands
In geval van niet functioneren of indien er onderdelen nodig zijn dient u contact
op te nemen met uw installateur of de detailhandelaar.
Voor een goed begrip en een snelle afhandeling van het probleem, verzoeken wij
u, voordat u belt, te noteren :
• De factoren die op de productidentificatielabel van het apparaat staan (zie
uitvouw omslag, schema 1),
• De Acova handelsreferentie die op uw gedagtekende aankoopbon staat .
Uw radiator voldoet aan de normen 89/336/CEE, gewijzigd door 92/31/CEE
betrekking hebbend op de beperking van radio-elektronische storingen en
Europese normen.
EN 60.335.1 / 60.335. 2.30 / 60.335.2.43.
Service na verkoop
[
Garantie
(ZIE ACOVA ALGEMENE VERKOOPVOORWAARDEN IN HET BETREFFENDE LAND)
[
Page 82

Specifieke garantie voor combinatie radiator handdoekdrogers :
De Alcova garantie van uw combinatie handdoekdroger is alleen onder de
volgende voorwaarden geldig :
• Het water dat gebruikt wordt voor het verwarmingcircuit mag niet agressief of
corrosief zijn.
• De installatie mag geen sporen van opgeloste gassen (O2-CO2) bevatten, met
name in geval van gebruik van materialen die gasdoorlaatbaar zijn (verwarmende
vloer).
Hiervoor is het noodzakelijk te zorgen voor een efficiënte ontgassing vóór de
circulatiepomp en voor ontluchting van de hoge punten van de installatie.
De radiator mag niet in een sterk of blijvend vochtige omgeving staan
(douche, zwembad, etc.)
Annulering van de garantie :
De Acova garantie vervalt in de volgende installatie- of
gebruiksomstandigheden :
• Gebruik, installatie of onderhoud dat niet voldoet aan de geldende normen van
het land, de algemene regels en de gebruiksaanwijzing van de fabrikant.
• Gebruik van de combinatie radiator handdoekdroger waarbij de aanbevelingen
in de gebruiksaanwijzingen niet zijn opgevolgd : gelijktijdig gebruik van de
centrale verwarmingmodus en de elektrische modus, afwezigheid of gebrek aan
water in het verwarmingslichaam…
Voor iedere andere vraag betreffende de garantie kunt u contact opnemen met
uw installateur of uw detailhandelaar.
80
Nederlands
Page 83

81
Estimado señor o señora:
Le damos las gracias por haber elegido este radiador Acova. Ha sido elaborado
con el mayor cuidado, siguiendo nuestro compromiso de calidad, y deseamos que
le dé total satisfacción.
Para poder sacar plenamente provecho todas sus posibilidades, le invitamos a
que lea atentamente este manual y lo conserve cerca del aparato.
Para otras informaciones más precisas sobre la regulación electrónica, consulte
las páginas 86 a 89.
Muchas gracias por su confianza.
IMPORTANTE: Este aparato no debe ser instalado con el cajetín receptor hacia arriba. El
cajetín receptor tampoco debe tocar el suelo.
Cuando lo vaya a instalar piense sencillamente en calzarlo.
ATENCIÓN: su radiador está provisto de un receptor electrónico integrado; no asumimos
ninguna responsabilidad si fuera utilizado con centrales de control por corte de tensión
de alimentación (consulte las instrucciones de su central)
Introducciòn Español
Page 84

82
Ubicación :
Para sacar el máximo provecho del radiador y para que usted logre mayor
confort, le recomendamos que :
• si es posible, efectúe la instalación cerca de los lugares con mayor pérdida de
calor (ventanas, puertas...),
• no coloque objetos (muebles, sillones...) que puedan perturbar la emisión o la
recepción de la señal de INFRARROJOS,
• coloque la parte inferior del cajetín al menos a 15 cm del suelo,
• el aparato de calefacción no se debe colocar justo debajo de un enchufe.
Conexión :
Las características técnicas de su radiador Acova están indicadas en su etiqueta
de características situada en la parte inferior del aparato, en el lado de la caja
de mandos (ver esquema 1).
Le rogamos que tome nota de los datos en ella indicados antes de llamar al
servicio posventa.
La conexión a la red eléctrica debe ser efectuada respetando :
• la tensión indicada en la etiqueta
• los colores convencionales
Marrón : fase; azul o gris : neutro.
Si el cable de alimentación estuviera dañado, deberá ser reemplazado por el
fabricante, su servicio posventa o una persona con cualificación similar con el
fin de evitar todo peligro.
El cable flexible montado de fábrica está destinado a ser conectado a la red por
medio de una caja de conexiones que deberá ir colocada detrás del aparato, sin
interposición de un enchufe.
En una cocina o un baño, la caja de conexión deberá ir colocada a 25 cm del
suelo como mínimo.
Ubicación y conexión del radiador
[
Español
Page 85

83
El aparato es de clase II, está protegido contra las proyecciones de agua y puede
ser instalado en los baños, siempre que la instalación sea conforme con las
normas vigentes y las reglas del arte del país en el que se realice.
Normas particulares de instalación en
cuartos de baño
[
Español
Page 86

84
Ubicación del emisor :
Puede utilizar el termostato mural CADIR colocándolo sobre una base o bien
fijándolo a la pared. Le aconsejamos que, antes de fijar definitivamente el
termostato mural CADIR, compruebe que el emplazamiento elegido,
preferentemente un tabique interno, permita garantizar una transmisión correcta
de los rayos infrarrojos.
Para definir la posición del termostato mural CADIR, deberá consultar el
esquema que se encuentra en la página interior de la portada.
Para que la sonda del termostato reaccione correctamente, el termostato mural
CADIR deberá estar colocado a 150 cm del suelo, a 10 cm de un ángulo de dos
paredes y a 150 cm como mínimo del radiador o cualquier otro aparato que
genere calor (canalización de agua caliente, iluminación, etc.).
En cualquier caso, asegúrese de que el rayo infrarrojo que enlaza la célula
infrarroja emisora a la célula infrarroja receptora situada en el radiador
no quede interrumpido por ningún objeto móvil (taburete, toalla, etc.).
Si su radiador no recibe las órdenes del termostato mural CADIR por la razón que
fuera, pilas gastadas, emisor oculto, etc., dejará de calentar 20 minutos después
de la última información y el led parpadeará mientras no se rectifique la
anomalía.
El alcance del rayo infrarrojo está limitado a 8 metros en línea recta.
Instalación y sustitución de las pilas:
La primera vez que lo utilice, abra el termostato mural CADIR pulsando el clip
y retire la lengüeta de aislamiento de las pilas.
Dispone de aproximadamente un mes para sustituir las pilas a
partir del momento en que se encienda el piloto indicando que
las pilas están gastadas. Al cambiar las pilas, dispone de unos
2 minutos para instalar las nuevas pilas para no perder la
regulación de la hora (el resto de las informaciones no
cambiará a pesar del tiempo que tarde).
Fijación del termostato mural “CADIR”
y puesta en servicio
[
4
3
1
5
1
6
1
7
Español
Page 87

85
Español
No deje las pilas gastadas dentro del aparato (la garantía no cubre las
degradaciones debidas a las pilas que hayan sufrido fugas).
- abra el cajetín del emisor pulsando el clip 17
- retire las pilas gastadas
- introduzca 2 pilas alcalinas de 1,5 V, tipo LR06, teniendo cuidado de
respetar las polaridades (+ / -).
No utilice nunca pilas recargables.
Utilice obligatoriamente pilas alcalinas.
Para conservar el medio ambiente, acuérdese de depositar las pilas gastadas en un
contenedor especial para ellas.
Fijación del termostato mural CADIR :
Si ha decidido fijar el emisor a la pared:
Separe la cara trasera del emisor pulsando el clip .
Fije la cara trasera del emisor con ayuda de los tornillos y clavijas que se
incluyen.
Problemas Diagnóstico / Soluciones
No se ve nada en la
pantalla
Sin alimentación. Cambie las pilas o compruebe
la polaridad (sentido)
El termostato se acaba de poner en tensión.
Compruebe y regule si fuera necesario el reloj y
las temperaturas, de lo contrario pulse una
tecla.
El recepto no ha recibido informaciones desde
hace más de veinte minutos. Compruebe el
estado de las pilas y haga un test de
transmisión.
La pantalla parpadea
El led rojo parpadea
1
7
1
6
17
Page 88

86
Funcionamiento de la regulación
electrónica a infrarrrojos programable
[
MANDOS :
Español
Base (traslúcida)
Pantalla LCD
Célula a infrarrojos
Selector de modos
Botón de marcha forzada o de
validación
Botón de regulación –
Botón de regulación +
Modo “Confort”
Modo “Auto”
Modo “Ahorro”
Modo “Sin hielo”
Modo “Para da”
Inicialización “Reloj”
Inicialización “Programación”
1
8
9
10
11
12
13
14
11
12
2
13
14
1
7
6
5
4
8
9
10
3
2
3
4
5
6
7
Page 89

87
EGULACIONES Y FUNCIONES DE LOS DISTINTOS “MODOS”
: Confort constante
Temperatura que desea en la habitación
(regulada de fábrica a 19º C).
Utilización:
Coloque el selector en
y pulse + ó – para modificar la temperatura.
: Automático
El programa semanal AUTO controla hora a hora la
temperatura correcta : Confort o Ahorro.
Coloque el selector en
Aparece en la pantalla la configuración del
programa del día y la franja horaria parpadea.
Para regular las temperaturas
Confort y Ahorro,
coloque el selector en y regule
la temperatura pulsando + ó -.
: Ahorro constante
Temperatura deseada cuando esté ausente o durante la
noche (regulada de fábrica a 16º C).
Se mantiene constante una temperatura que permite
ahorrar energía.
Utilización:
Coloque el selector en
y pulse + ó – para modificar la temperatura.
Nota : en los tres modos precedentes,
Presencia de llama : el radiador calienta
Ausencia de llama : la habitación está a la temperatura
deseada.
Español
8
9
10
Page 90

88
: Sin hielo constante
Temperatura mínima para evitar riesgos derivados del
hielo (regulada de fábrica a 7º C). Utilícese en
ausencias prolongadas.
Utilización :
Coloque el selector en
y pulse + ó – para modificar la temperatura.
: Parada
Parada para detener la calefacción durante el verano.
Utilización :
Coloque el selector en
La calefacción ya no se pondrá en marcha sea
cual sea la temperatura ambiente.
: Puesta en hora
Coloque el selector en
y pulse + ó – para regular el día y la hora.
Cada paso de 24 horas le permite cambiar el día del
mes; los días de la semana vienen indicados por los
números de 1 a 7 que aparecen en la parte superior
izquierda de la pantalla LCD (1 = lunes; 2 = martes...).
Pulsación breve : avance por pasos de 1 minuto.
Pulsación mantenida : avance rápido.
Atención :
en inicialización , la calefacción está parada.
El cambio de hora de invierno y verano, no es automático.
11
12
13
Español
Page 91

89
: Programación
Los programas semanales y de fin de semana están
grabados de fábrica, pero los puede personalizar en
todo momento. Para ello :
Coloque el selector en
Aparecerá en la pantalla el programa del lunes y
la 1ª franja horaria de confort
Pulse + ó – para seleccionar 1 hora de ahorro.
Entonces pasará a la siguiente franja horaria.
Repita la operación para regular todo el día.
Pulse en OK para validar y pase al día siguiente.
Para volver a modo automático, coloque el
selector en
Función “marcha forzada”
La función marcha forzada, está disponible en modo
Confort, Auto, Ahorro y Sin hielo en todo momento.
Para activarla, sólo tiene que pulsar el botón 3h
durante unos 10 segundos (pulsación larga).
La marcha forzada se activa y comienza la cuenta
atrás, de 3 horas a 0 minutos. (No obstante, puede
cambiar la duración del programa por pasos de 15
minutos con ayuda de los botones + ó – .
Una vez que haya finalizado la cuenta atrás, el emisor
vuelve a su estado inicial
Puede desactivar esta función en todo momento,
pulsando nuevamente el botón 3h . (Pulsación
breve).
14
5
7
6
5
AUTO
PROG
Español
Page 92

90
Español
Se puede elegir 3 temperaturas constantes (sin hielo, ahorro y confort), y se
puede personalizar la programación.
Programación por pasos de 1 hora.
Programación por defecto:
Modo parada
Las 3 temperaturas de oficio son regulables:
de 5º a 30º en ahorro y confort,
de 5º a 15º en sin hielo.
Regulación por pasos de 0,5º C
Regulación de alta precisión: regulación proporcional integral derivada.
Base de tiempo : 15 min.
Índice de protección : IP30
Alimentación con 2 pilas alcalinas de 1,5 V de tipo LR06
(autonomía superior a 1 año).
Aislamiento clase II (receptor) y clase III (emisor).
Características
[
Page 93

91
Español
1 – RADIADORES ELÉCTRICOS
Este aparato eléctrico de fluido hidractivo se entrega listo para usar.
Está taponado y llenado en fábrica con un aceite mineral térmico de alto
rendimiento. Este fluido, especialmente diseñado para este uso, es
inalterable y no necesita ningún cuidado particular.
El aparato de calefacción ha sido llenado con una cantidad precisa de aceite. Las
reparaciones que requieran que se abra el depósito de aceite sólo deben ser
efectuadas por el fabricante o su servicio posventa, al que se deberá llamar en
caso de fuga de aceite.
Al poner a calentar el aparato, constatará que su funcionamiento es diferente al
de una calefacción eléctrica convencional :
• la resistencia eléctrica calienta el fluido, el cual se pone progresivamente y de
forma natural en circulación en el interior del radiador.
• las propiedades de inercia del fluido hacen que la temperatura de superficie
del radiador sólo alcance el nivel óptimo al cabo de unos 10 minutos como
mínimo, según los modelos y la temperatura ambiente de la habitación en el
momento de poner en marcha el aparato.
• es esa inercia la que garantiza la constancia y la duración del calor emitido,
incluso cuando la resistencia ya no está alimentada.
• su radiador está formado por una larga superficie de calefacción, lo que
permite que la cantidad de calor emitida se autorregule según las necesidades.
En consecuencia, es normal que en las estaciones intermedias, cuando el
aparato funciona de forma moderada, las diferencias de la temperatura de
superficie del radiador sean más perceptibles.
Para garantizar un funcionamiento eficaz del aparato, se recomienda no
cubrirlo totalmente.
Para conocer mejor y sacar el máximo
provecho de su radiador Acova
[
Page 94

92
2. RADIADORES MIXTOS
Este aparato, destinado a ser conectado al circuito de calefacción central, se
entrega sin taponar y vacío.
• Utilización en calefacción central :
La caja de mandos debe estar sin tensión,
El grifo de alimentación debe estar abierto para que pueda pasar el agua de la
calefacción central.
IMPORTANTE: Este aparato ha sido diseñado para que funcione en modo de calefacción
central o en modo eléctrico. Cada utilización requiere disposiciones particulares,
específicas y precisas. Una utilización anormal podría ocasionar el deterioro del cartucho
calefactor debido a temperaturas de fluido excesivas, en particular si se utilizara
simultáneamente en modo eléctrico y calefacción central.
Todo uso indebido provocará la anulación de la garantía contractual.
• Utilización en calefacción eléctrica :
A. Cierre únicamente el grifo de alimentación. No cierre nunca el retorno del
cuerpo de calefacción, ya que este orificio es necesario para que se pueda
expandir el fluido hacia la instalación.
El cierre del retorno puede ocasionar la destrucción del cuerpo calefactor debido
a una presión excesiva, superior a la presión de utilización.
B. Asegúrese de que el aparato está correctamente lleno de agua, abriendo el
purgador que se encuentra en la parte superior. Ciérrelo si el agua fluye de
manera constante (al realizar esta operación, prevea tener a mano una esponja o
un pequeño recipiente).
Si la presión no fuera suficiente para poder purgar el cuerpo de calefacción
• rellene de agua la calefacción central hasta alcanzar la presión indicada en el
manómetro.
• pida consejo a su instalador de calefacciones.
• avise a la sociedad encargada de la explotación (en calefacción colectiva).
Español
Page 95

93
Español
C. Para ponerlo en marcha, proceda como en los radiadores eléctricos.
Cuando utilice el radiador mixto en “función eléctrica”, si la instalación de
calefacción central posee una bomba de circulación independiente a la de la
caldera :
Es necesario que la pare (riesgo de provocar un sifón en el cuerpo de
calefacción en el caso de una estanqueidad imperfecta de las uniones).
IMPORTANTE : El aparato sólo debe ser puesto en tensión si está correctamente lleno de
agua (de lo contrario, podría quedar anulada la garantía).
Este radiador está equipado con un cartucho calefactor que posee un
cortocircuito integrado y un fusible. La utilización sin agua provocaría un
deterioro definitivo del fusible y en consecuencia del cartucho calefactor;
este inciden te, no cubierto por la garantía del fabricante, haría necesaria
su sustitución. La utilización del radiador parcialmente lleno de agua,
provocaría el corte de alimentación por cortocircuito térmico. Ese último
mantendrá un funcionamiento alterno mientras el cuerpo de calefacción no
esté correctamente lleno.
Si constata que la parte eléctrica de su radiador está activada pero que éste
no calienta a pesar de la demanda del termostato o en marcha forzada:
efectúe las siguientes maniobras :
1- asegúrese de que el radiador está correctamente lleno de agua (ver página 92
“utilización en calefacción eléctrica, párrafo b”
2- coloque el emisor en “PARADA” para cortar la corriente, y detenga la función
eléctrica durante 30 ó 60 minutos. Esta operación es necesaria para desactivar la
seguridad térmica.
3- vuelva a colocar el emisor en la función “MODO” que desee.
Page 96

94
Español
Consejos de mantenimiento
[
Antes de realizar una operación de mantenimiento, acuérdese de apagar el
aparato.
La utilización de los mejores materiales y la calidad del doble tratamiento de
superficie protegen a los radiadores Acova de la corrosión y los golpes.
Para garantizar la duración de su aparato con un mantenimiento sencillo, le
recomendamos que siga los siguientes consejos:
• para el cuidado de las paredes exteriores del radiador, no utilice productos
abrasivos o corrosivos; utilice preferentemente un trapo empapado de alcohol.
• Para el cajetín de regulación, utilice un trapo seco (sin disolventes).
Si se vacía un modelo totalmente eléctrico, el fluido deberá ser depositado
obligatoriamente en un colector de aceite usado.
En caso de que su aparato no funcione, haga usted mismo las comprobaciones
siguientes, asegurándose de que:
• su radiador está correctamente conectado y alimentado (ver página 82 del
manual),
• la posición del termostato transmite correctamente la orden de calefacción al
radiador (ver página 87 del manual),
• el radiador mixto está correctamente lleno de agua (ver páginas 92 y 93 del
manual).
Si el radiador está conectado a un aparato “maestro”, un reloj o una central de
programación, vea el manual del fabricante.
Comprobaciones en caso de mal
funcionamiento o anomalías
[
Page 97

95
Español
En caso de que el aparato no funcione o si necesita piezas de recambio, póngase
en contacto con su instalador o su revendedor.
Previamente, para que se entienda bien el problema y se pueda solucionar
cuanto antes, acuérdese de anotar :
• los datos que figuran en la placa de características del aparato (ver solapa de
portada, esquema 1).
• La referencia comercial Acova que se encuentra en su factura de compra
fechada.
Su radiador es conforme con la directiva 89/336/CEE, modificada con la
92/31/CEE relativa a la limitación de las perturbaciones radioeléctricas, y con las
normas europeas.
EN 60.335.1 / 60.335.2.30 / 60.335.2.43.
Servicio posventa
[
GARANTÍA
(VER CONDICIONES GENERALES DE VENTA ACOVA EN EL PAÍS CORRESPONDIENTE)
[
Page 98

Garantía específica para los radiadores mixtos:
La garantía Acova de su radiador mixto es aplicable con las siguientes reservas :
• el agua utilizada para la alimentación del circuito de calefacción no deberá ser
agresiva ni corrosiva.
• la instalación no deberá tener rastro de gases disueltos (O2 - CO2), sobre todo
en caso de que se utilicen materiales permeables a los gases (suelo
calefactor).
Para ello, es necesario efectuar una desgasificación eficaz antes del circulador y
purgar los puntos altos de la instalación.
El radiador no deberá estar expuesto a una humedad ambiente intensa o
constante (ducha, piscina, etc.).
Caso de anulación de la garantía
La garantía Acova no se aplicará en los siguientes casos de instalación o
utilización principalmente :
• Puesta en marcha, instalación o mantenimiento no conforme con la normativa
vigente del país, las reglas del arte o el manual de uso del fabricante.
• Utilización del radiador sin respetar las recomendaciones del manual del
fabricante: puesta en marcha simultánea del modo de calefacción central y
eléctrica, falta o ausencia de agua en el cuerpo de calefacción...
Para toda pregunta relativa a la garantía, póngase en contacto con su vendedor.
96
Español
 Loading...