

Page 1

Page 1 of 39Spin It Again
Welcome to Spin It Again 2.0's help file. Spin It Again is the easiest way to convert your LPs &
tapes to CDs or audio files.
Getting Started / Overview
Purchase Spin It Again!
How To Use Spin It Again
Getting Started/Overview
Record An LP/Tape To CD
Record An LP/Tape To Audio Files
Type Or Look Up Album Information During Recording
Split An MP3 Into Multiple Tracks
Manually Creating Tracks
Reduce Clicks And Pops From A Record
Reduce Tape Noise Hiss or Hum
Tips
Hook Up Your Record Player or Cassette Player To Your Computer
Getting A Good Recording Level
Clean Your Records Before Recording Them
Recording 78s at 45 rpm
Online Animated Tutorials
Reference
Hardware Hookup Wizard Screen
Recording Level Wizard Screen
Choose Tape, LP or Existing File Screen
Recording Screen
Preview And Edit Screen
Tagging/Naming Your Recordings Screen
Burn A CD And Or Create Audio Files Screen
Audio File Settings Screen
CD Burning Settings Screen
Working/Processing Screen
The Voice Assistant
Settings
Troubleshooting
Getting Started / Overview
Normally, you'd have to use several programs to record, split the recording into multiple tracks,
remove noise and crackles, create audio files and/or burn a CD. In addition, you'd probably
end up using two or three times the hard drive space. Spin It Again streamlines this very
specific task of archiving your LPs and cassettes so that you do less work and can spend more
time enjoying your music.
7/10/2007file://C:\acoustica\vinylman\help\flat\spinitagain.htm
Page 2

A
Spin It Again helps you:
z Hookup your record player or cassette player to your computer
z Set the optimal recording level so you don't record too low or with distortion
z Make a recording
z Automatically split up the recording into multiple tracks
z Reduce tape noise or LP clicks and pops
z Tag or name each track, including artist and album information
z Create audio files for use on your computer or portable MP3 player
z Burn audio CDs
How To Record An LP or Tape To CD
Record An LP/Tape To Audio Files
Split An MP3 Into Tracks
Manually Creating Tracks
Reduce Clicks And Pops From A Record
Reduce Tape Noise Hiss or Hum
Page 2 of 39Spin It Again
Purchase Spin It Again!
Spin It Again comes with three free recordings, which means that you can process and
convert three recordings to CD and/or audio files.
If you are happy with the software and would like to continue using it with unlimited recordings,
visit our purchase page at:
http://www.acoustica.com/spinitagain/buy.asp
You can convert all your LPs and tapes to CD right now!
An unlock registration code can be emailed to you automatically, regardless of the time of day!
Click here to purchase NOW!
coustica accepts all major credit cards, Pay Pal or money orders.
7/10/2007file://C:\acoustica\vinylman\help\flat\spinitagain.htm
Page 3
Page 3 of 39Spin It Again
Thank you for your support!
-The Acoustica Team
Record An LP/Tape To CD
Step 1: Hookup Your Record Or Cassette Player Yo Your Computer
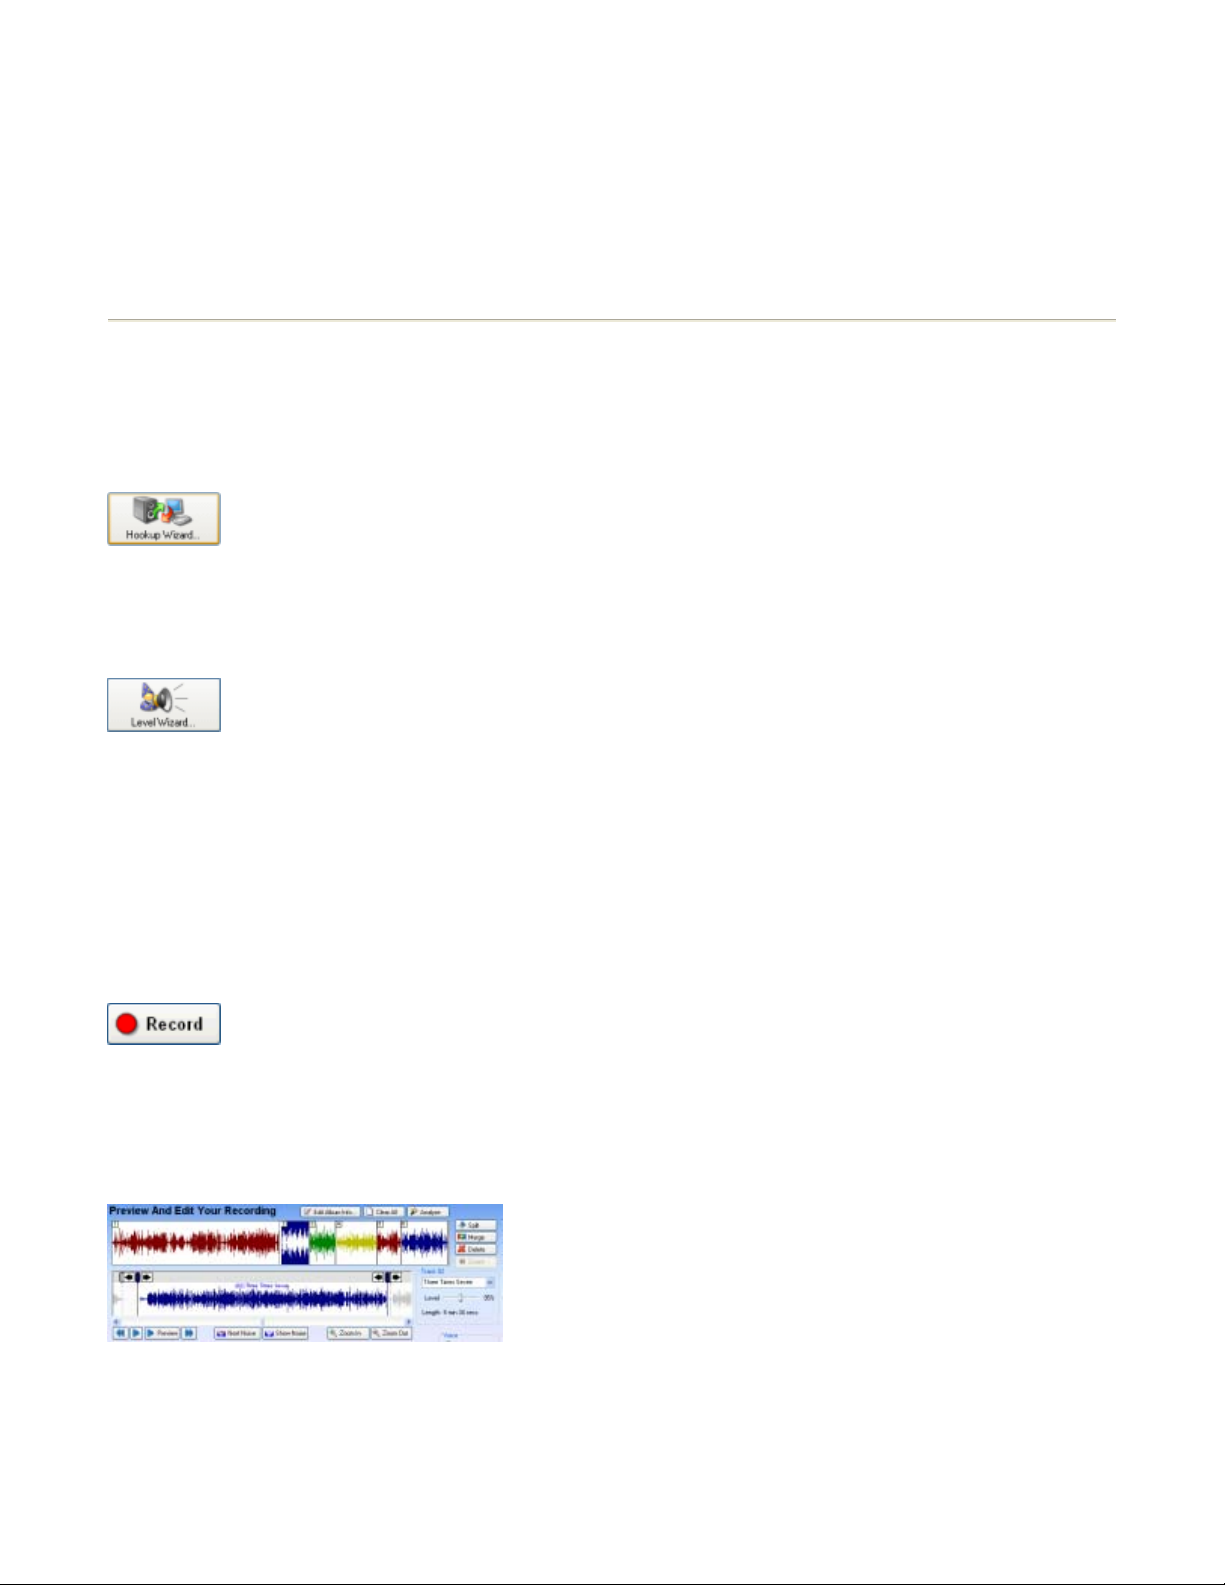
Run the software and click "Hookup Wizard". It will guide you through a series of questions
and show you photos and images to help you hook up your record or cassette player to your
computer.
Step 2: Get A Good Recording Level
The first time you run the software, it will ask you if you want to run the "Recording Level
Wizard". Click "Yes" or click "Level Wizard"
Once the wizard starts, click the "Start" button and follow the instructions. (It will have you play
the loudest part of the record or tape.) If you see a level, but don't hear anything and are
recording off of a USB device, click the "Monitor" checkbox.
Step 3: Click "Record"
If you are recording a tape, make sure to rewind it. Click "Record" and start playing your
record or tape. Once it is done, flip over the record or tape and play side two. When it's
finished, click "Next" or "Stop". (Type or Look Up Album Information During Recording)
Step 4: Preview And Edit Your Recording
The software automatically splits your recording up into tracks. If there were any erroneous
tracks created or if there was extra silence, you can edit it by clicking "Split" and/or by dragging
the track markers.
If the recording has lots of clicks and pops, select a built in cleaning preset. Once you are
satisfied, click "Next"
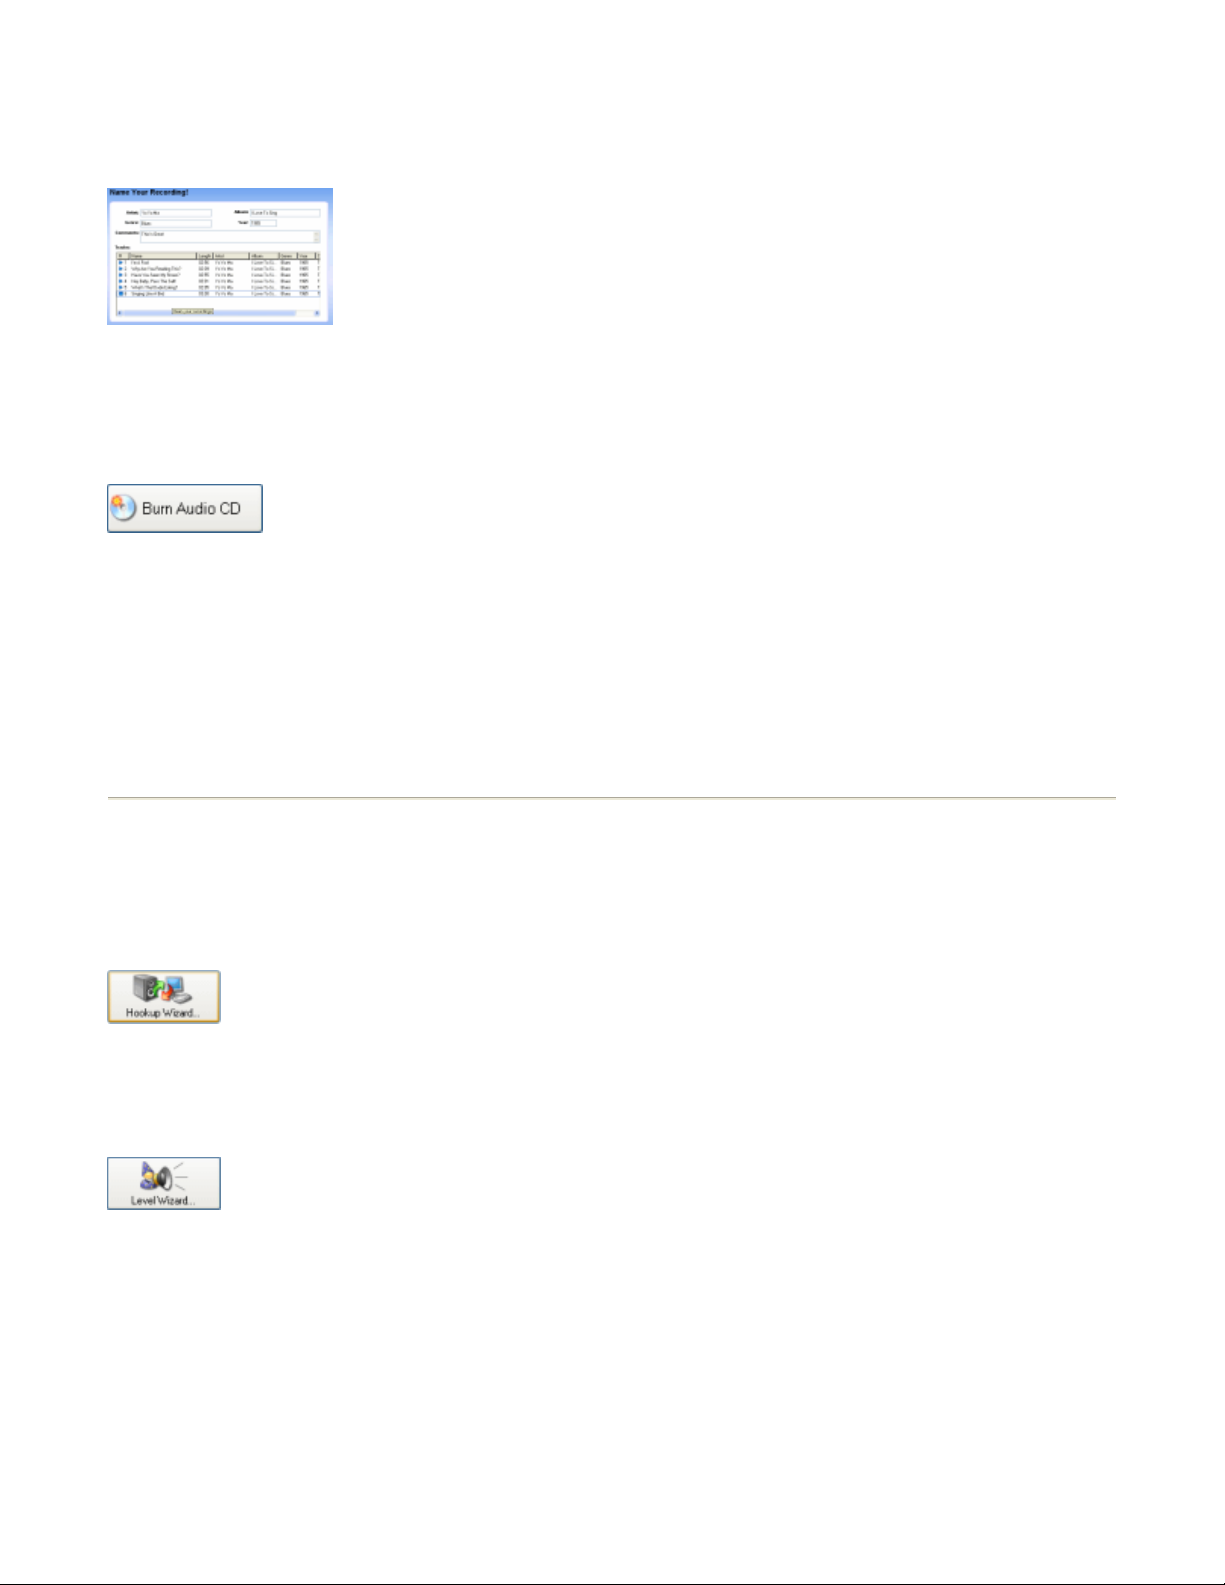
Step 5: Tag / Name Your Recording
7/10/2007file://C:\acoustica\vinylman\help\flat\spinitagain.htm
Page 4
Page 4 of 39Spin It Again
Enter in the artist, album, genre and track names if your CD burner supports burning CD-Text.
(This screen is more important when creating MP3s or other audio files.)
Click "Next" when you are done.
Step 6: Click "Burn CD"
Click the "Burn CD" button, click "Next" to accept the default settings and click "Next" again.
Insert a blank CD and wait for it to finish! Enjoy your new CD in your car or home stereo!
Don't forget to print a CD label with the optional Acoustica CD/DVD Label Maker. The track list
will be automatically imported from step 4!
Record An LP/Tape To Audio Files
Step 1: Hookup Your Record Or Cassette Player Yo Your Computer
Run the software and click "Hookup Wizard". It will guide you through a series of questions
and show you photos and images to help you hook up your record or cassette player to your
computer.
Step 2: Get A Good Recording Level
The first time you run the software, it will ask you if you want to run the "Recording Level
Wizard". Click "Yes" or click "Level Wizard"
Once the wizard starts, click the "Start" button and follow the instructions. (It will have you play
the loudest part of the record or tape.) If you see a level, but don't hear anything and are
recording off of a USB device, click the "Monitor" checkbox.
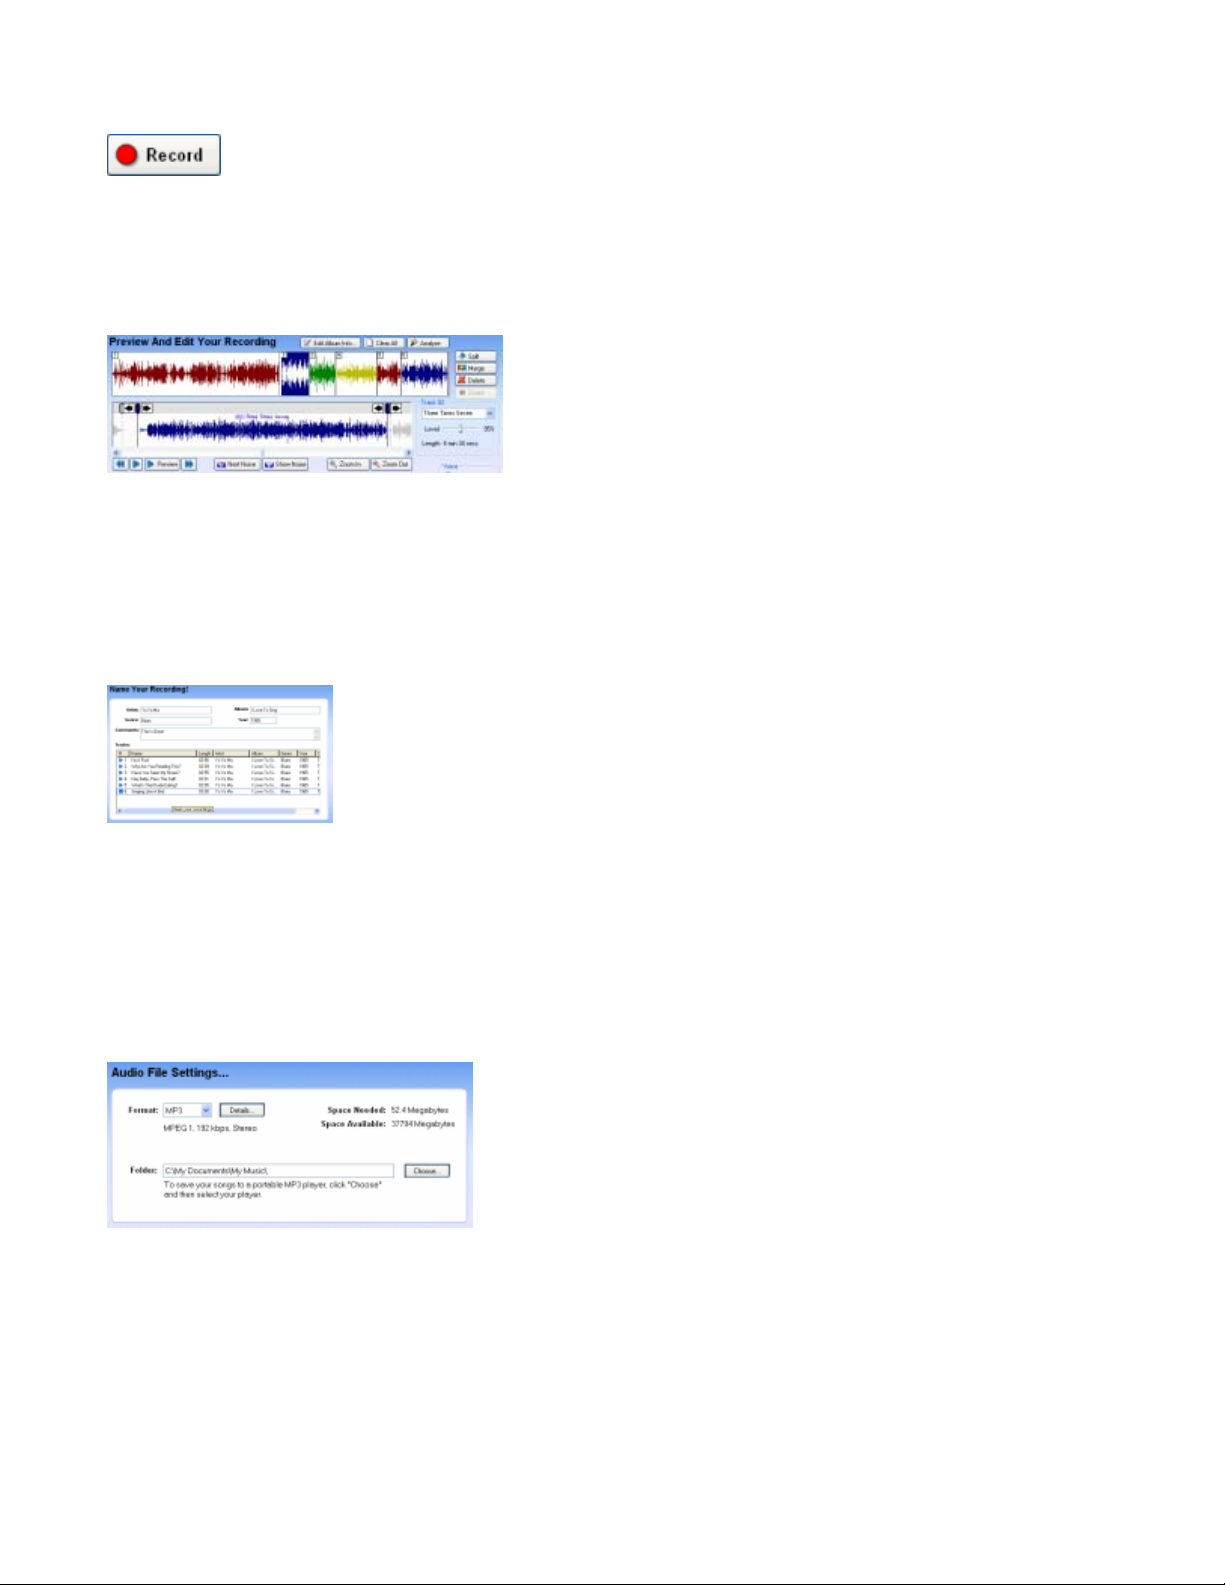
Step 3: Click "Record"
If you are recording a tape, make sure to rewind it. Click "Record" and start playing your
record or tape. Once it is done, flip over the record or tape and play side two. When it's
finished, click "Next" or "Stop". (Type or Look Up Album Information During Recording)
7/10/2007file://C:\acoustica\vinylman\help\flat\spinitagain.htm
Page 5
g
Page 5 of 39Spin It Again
Step 4: Preview And Edit Your Recording
The software automatically splits your recording up into tracks. If there were any erroneous
tracks created or if there was extra silence, you can edit it by clicking "Split" and/or by dragging
the track markers.
If the recording has lots of clicks and pops, select a built in cleaning preset. Once you are
satisfied, click "Next"
Step 5: Tag / Name Your Recording
Enter in the artist, album, genre and track names. This will affect how the individual MP3s are
named and tagged.
Click "Next" when you are done.
Step 6: Pick A Destination & Format.
If you want to put it on an MP3 player, make sure it's plugged in and then click "Choose" and
select it from the list. Otherwise, choose a folder on your computer. You can also choose a
format (MP3*, OGG, WAV or WMA) and click "Details" to change the bit rate and other
advanced settings.
Click "Next" and it will create your audio files!
* Creating MP3s is not available in some bundled versions of Spin It Again.
Type Or Look Up Album Information During Recordin
7/10/2007file://C:\acoustica\vinylman\help\flat\spinitagain.htm
Page 6
Page 6 of 39Spin It Again
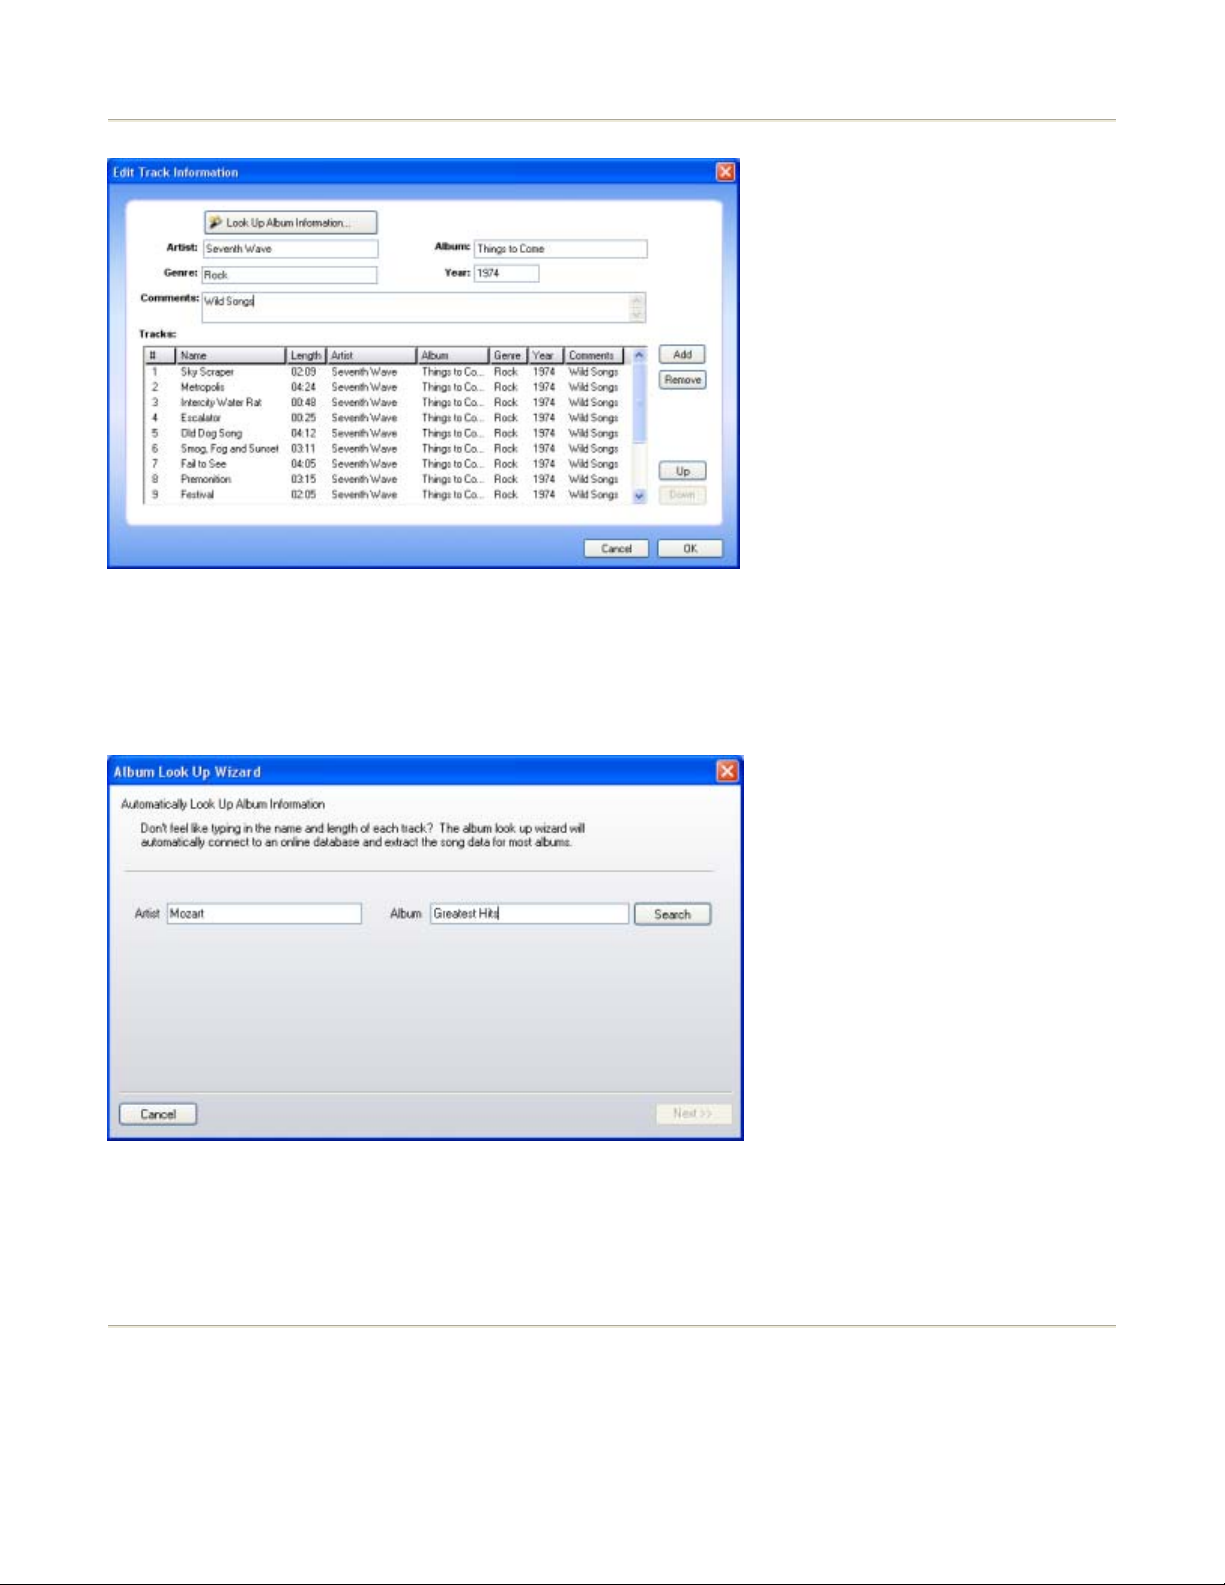
Type in the track names and track lengths that correspond to the recording. To add a new
track, click the "Add" button. Move tracks around by selecting them and clicking the "Up" or
"Down" buttons.
If you don't feel like typing, click the "Look Up Album Information" button. Type in an album
and/or artist and click "Search".
You may need to adjust your search query if you are not finding the results you would expect.
Also, make sure that you can connect to the Internet!
Split An MP3 File Into Multiple Tracks
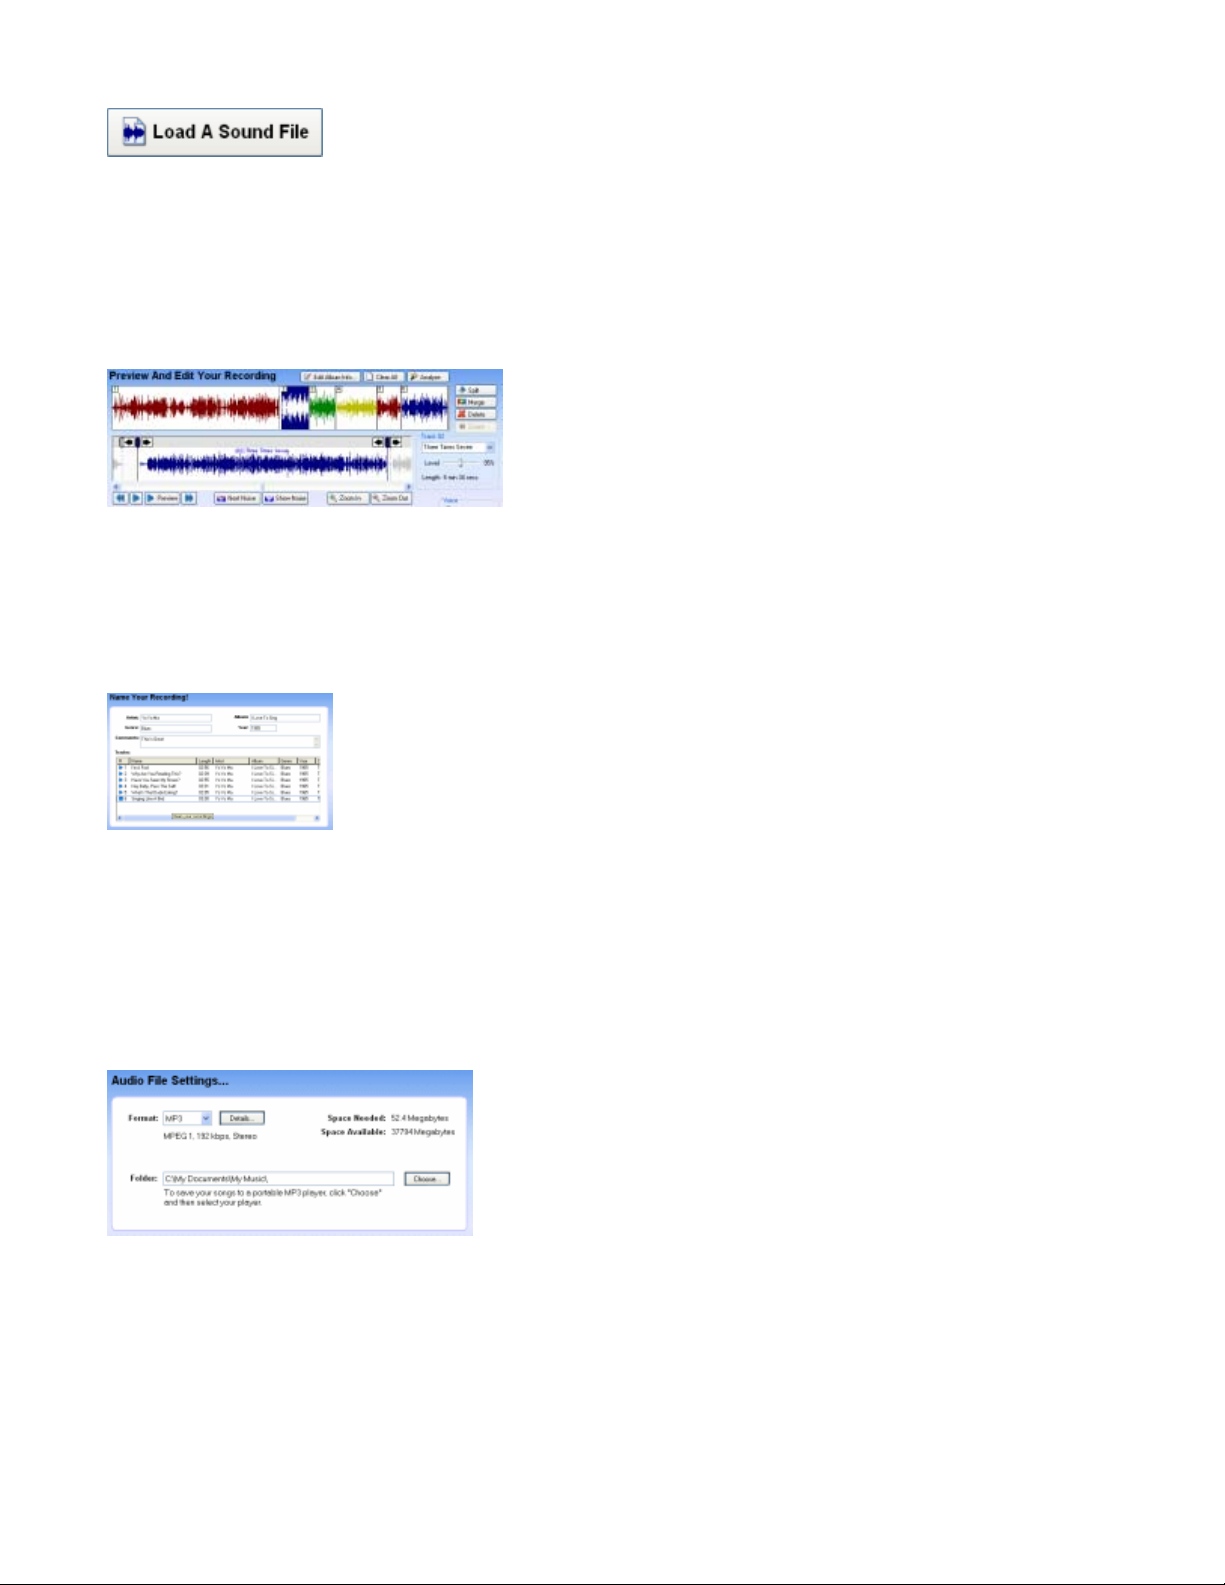
Step 1: Load An MP3
Run the software and click "Load A Sound File".
7/10/2007file://C:\acoustica\vinylman\help\flat\spinitagain.htm
Page 7
Page 7 of 39Spin It Again
Select your audio file and click "Open".
Step 2: Preview And Edit Your Multi-Track Audio File
The software automatically splits the audio file into multiple tracks. If there were any
erroneous tracks created or if there was extra silence, you can edit it by clicking "Split" and/or
by dragging the track markers. See more on manually creating tracks here.
Once you are satisfied, click "Next".
Step 3: Tag / Name Your Tracks
Enter in the artist, album, genre and track names. This will affect how the individual audio files
are named and tagged.
Click "Next" when you are done.
Step 4: Pick A Destination & Format.
If you want to put it on an audio player, make sure it's plugged in and then click "Choose" and
select it from the list. Otherwise, choose a folder on your computer. You can also choose a
format (MP3*, OGG, WAV or WMA) and click "Details" to change the bit rate and other
advanced settings.
Click "Next" and it will split your tracks!
* Creating MP3s is not available in some bundled versions of Spin It Again
Manually Creating Tracks
7/10/2007file://C:\acoustica\vinylman\help\flat\spinitagain.htm
Page 8
Page 8 of 39Spin It Again
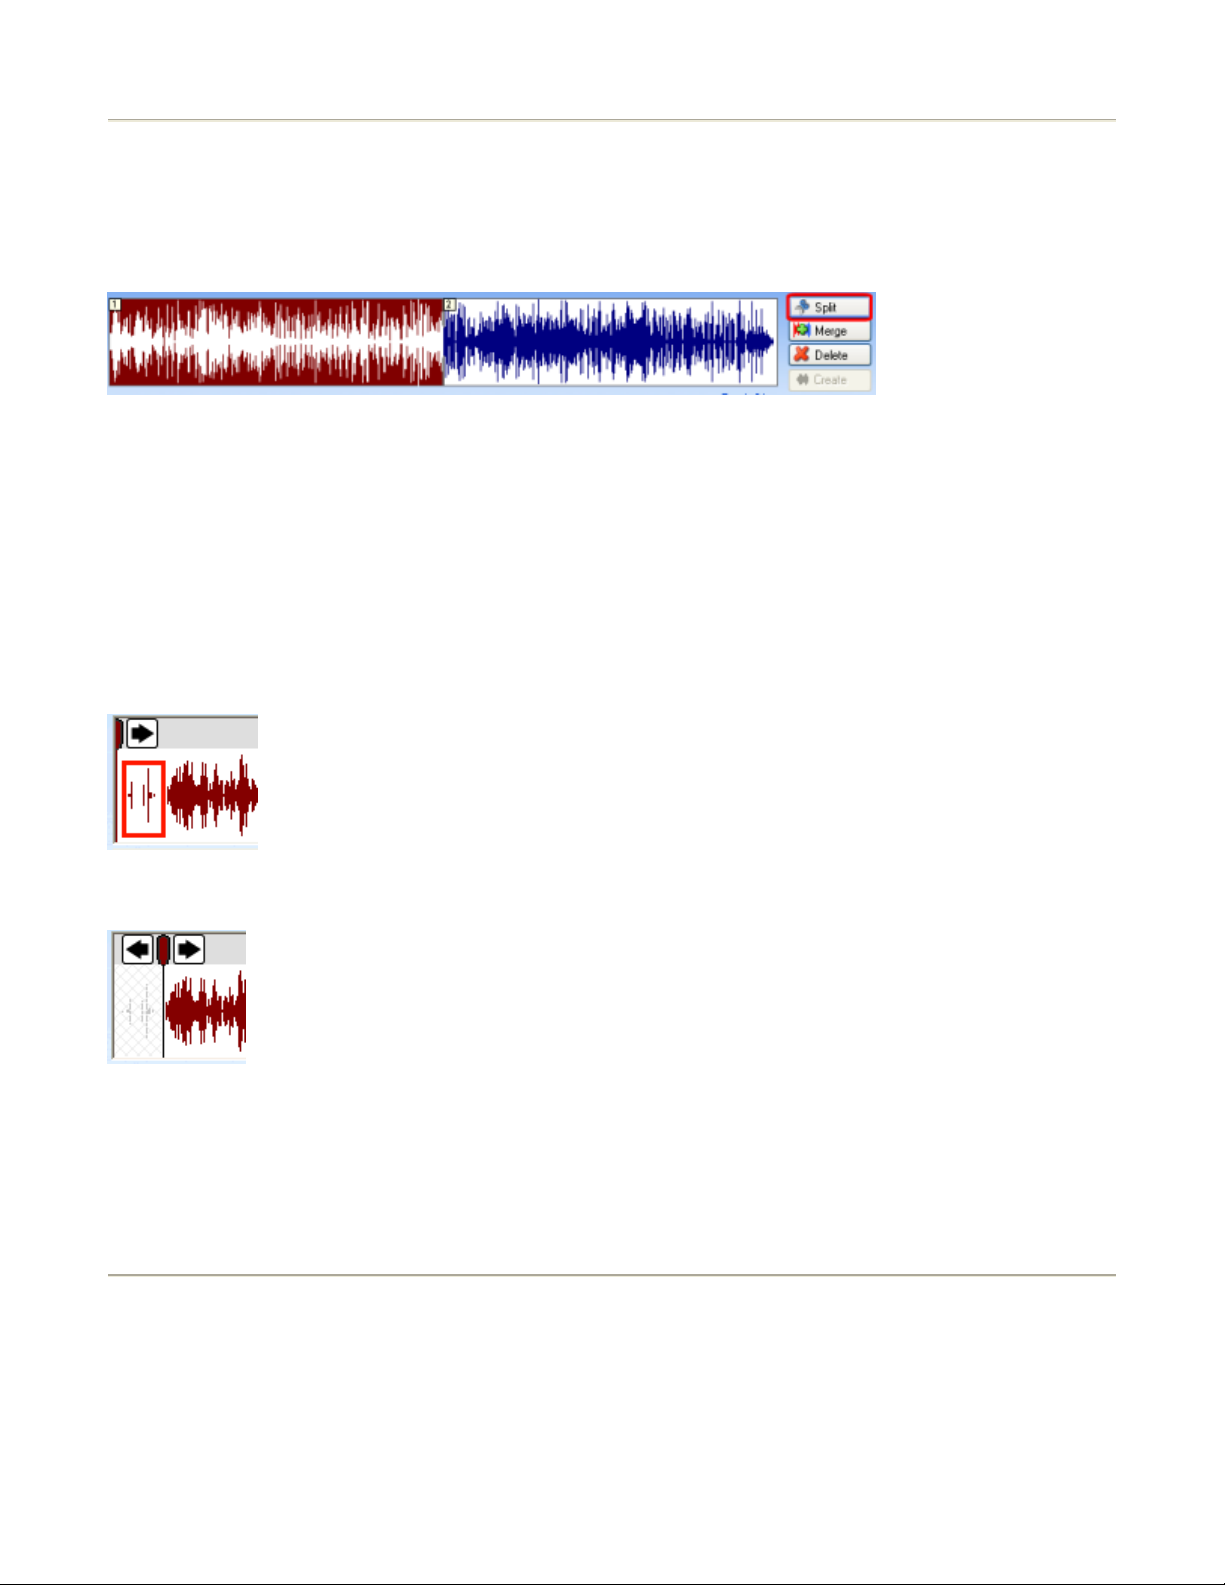
In some cases, the automatic track detection will not work as desired. Luckily, you can
manually create your own tracks with some built in tools.
Select a track on the top track view. Click the "Split" button to split it into two tracks.
Notice that it splits it exactly in half. Alternatively, you can right click at an exact position and
select "Split Track At Cursor" to create tracks.
In the bottom track view, use the zoom buttons, the scroll bar and the play back controls to find
actual spot where one track ends and the next one begins.
Drag and drop track markers by cllicking near the top of a start or end marker and dragging it
to a new position.
In this example, the red boxed area shows the noise area we want to get rid of.
Click an arrow or drag the head of the marker to the right to trim out the unwanted record
noise, etc.
Use the "Delete" button to remove false positive tracks, ie: record or tape noise or a bad track.
Use the "Create" button to restore a deleted area.
Reduce Clicks And Pops From A Record
Step 1: Load An Existing Recording or Record An LP
Run the software and click "Load A Sound File" or go through the steps to record an LP
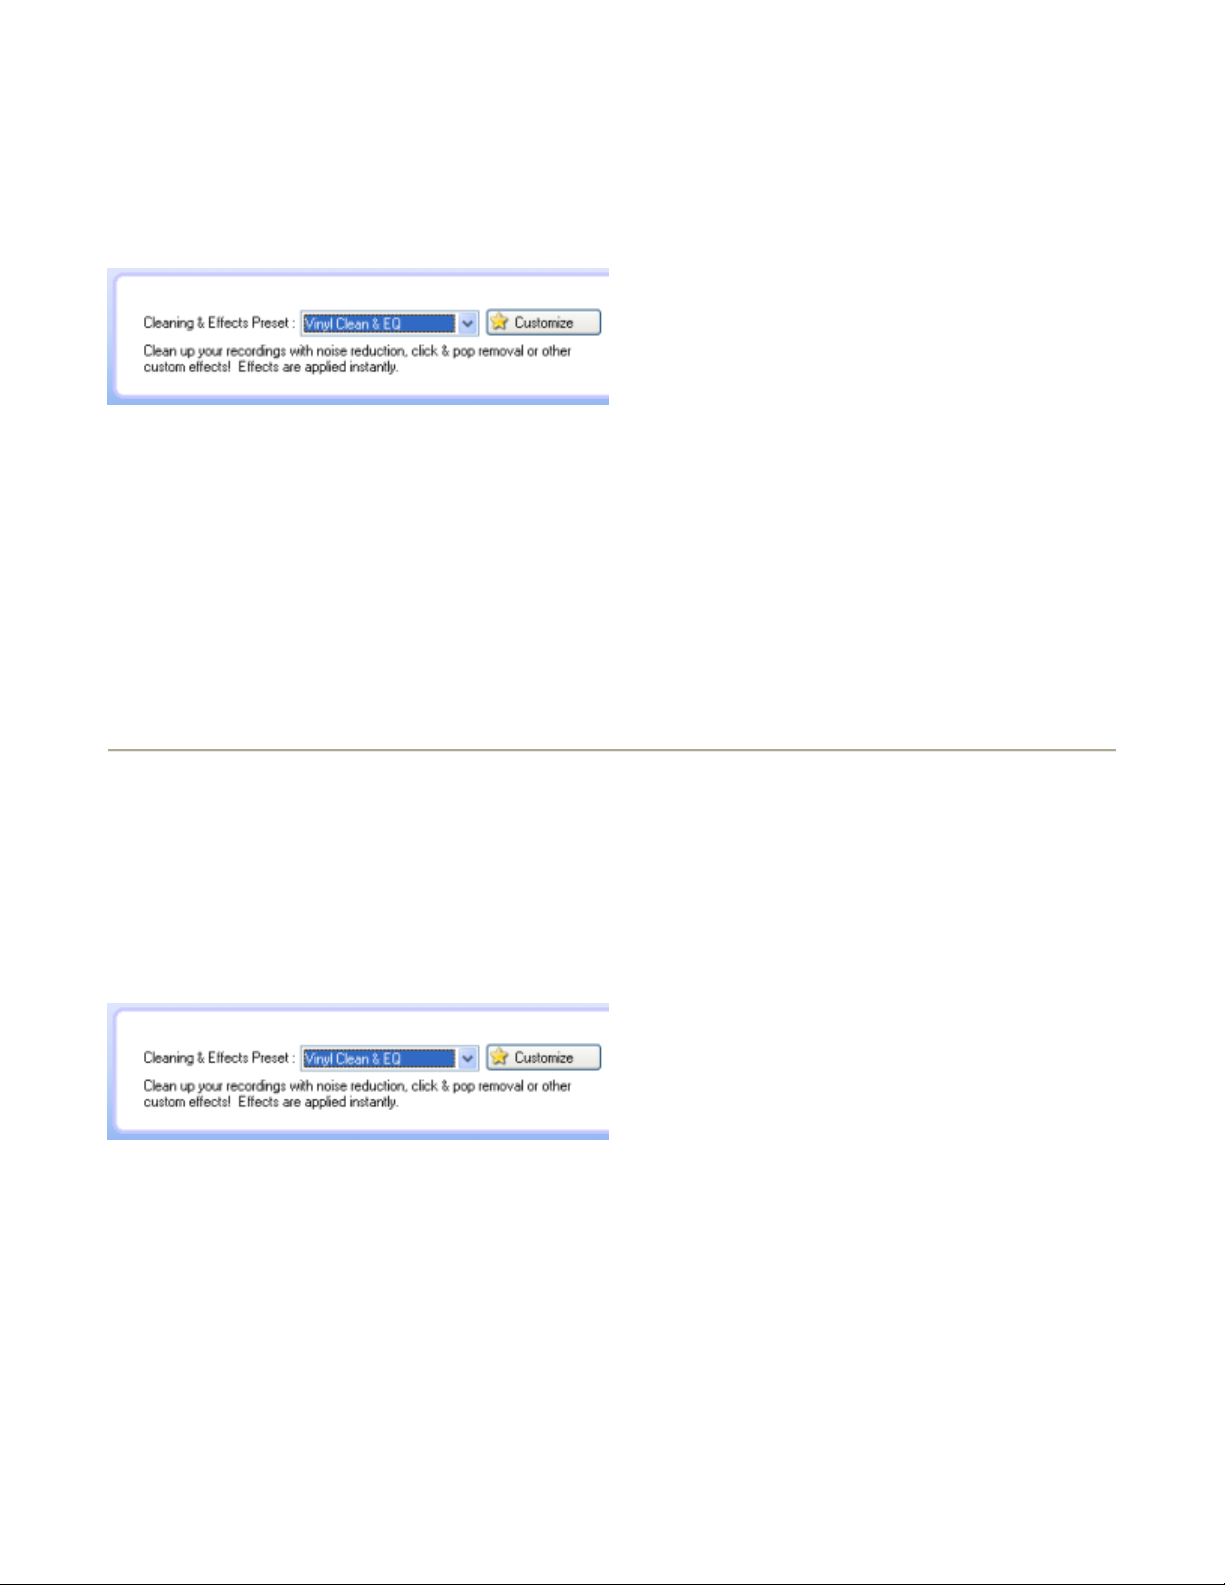
Step 2: Select A Click & Pop Reduction Effect
On the bottom of the "Preview And Edit Your Recording" screen, you will be able to choose a
Cleaning & Effect Preset. Choose "Vinyl Clean & EQ" from the drop down box. (Or choose
7/10/2007file://C:\acoustica\vinylman\help\flat\spinitagain.htm
Page 9
y
Page 9 of 39Spin It Again
anything with the word 'vinyl' in it.) Effect Presets Explained
** Please note: When you select an effect preset, it will be instantaneously applied! (You do
not need to play the entire recording, unless you want to double check the quality of the noise
removal effects.)
Click "Play" to listen to your recording without record noise. The cleaning algorithms are
applied in real time when you play the recording or burn a CD. (You do not need to listen to
the whole recording to clean it as some users have tried to do.)
[ Don't forget to clean your records before recording them! ]
Learn more about Cleaning And Audio Effects
Reduce Tape Noise Hiss or Hum
Step 1: Load An Existing Recording or Record A Tape
Run the software and click "Load A Sound File" or go through the steps to record a tape
Step 2: Select A Noise Reduction Effect
On the bottom of the "Preview And Edit Your Recording" screen, you will be able to choose
"Tape Noise BeGone" from the drop down box. ** Please note: When you select an effect
preset, it will be instantaneously applied. Effect Presets Explained
Click "Play" to listen to your recording without tape noise. The cleaning algorithms are applied
in real time when you play the recording or burn a CD. (You do not need to listen to the whole
recording to clean it as some users have tried to do.)
Step 3: Preview The Recording Without Noise
Click the "Play" button to listen to the recording without noise. If it sounds warbly or as if its
under water, it means that it needs a better "noise print". The noise print is a part of the
recording that is just noise and not music. The software subtracts the noise print out of the
music to create noise-free music.
To automaticall
choose another noise print, click "Next Noise".
7/10/2007file://C:\acoustica\vinylman\help\flat\spinitagain.htm
Page 10

Page 10 of 39Spin It Again
The noise print will look like this:
If it's still not sounding great, you can try right clicking on a noisy area and choose "Set As
Noise Print". (Make sure to not choose an area with music.) Right click on the noise print and
choose "Play Noise Print" to hear what it sounds like.
You can also drag and drop the noise print.
If it's sounding like it's under water or warbly, check out the noise reduction troubleshooting
area.
Learn more about Cleaning And Audio Effects
Built-in Effects Presets
Spin It Again comes with 14 built in presets to help clean, declick, decrackle and de-hum!
Here is a description of each preset. Of course, you can create your own presets, as well.
Clean Anything!
Use this if you are not sure how to clean the recording!
z Moderate noise reduction
z Aggressive vinyl declick & decrackle with hiss & hum reduction
z Basic middle EQ cut to help bring out the treble and bass frequencies
Damaged Record 1
Use this for moderately damaged records.
z Light noise reduction
z Aggressive vinyl declick & decrackle with hiss & hum reduction
z "Classic V" EQ to reduce mid frequencies and boost bass and treble.
Damaged Record 2
Use this for severely damaged records.
z Moderate noise reduction
z Aggressive vinyl declick & decrackle with hiss & hum reduction
z "Classic V" EQ to reduce mid frequencies and boost bass and treble.
Damaged Tape 1
7/10/2007file://C:\acoustica\vinylman\help\flat\spinitagain.htm
Page 11

Use this for moderately damaged tape recordings.
z Strong noise reduction
z Aggressive vinyl declick & decrackle with hiss & hum reduction
z "Classic V" EQ to reduce mid frequencies and boost bass and treble.
Damaged Tape 2
Use this for severely damaged tape recordings.
z Maximum noise reduction
z Aggressive vinyl declick & decrackle with hiss & hum reduction
z "Classic V" EQ to reduce mid frequencies and boost bass and treble.
No PreAmp Blues
Use this for recordings made without a preamp.
z Moderate noise reduction
z "Classic V" EQ to reduce mid frequencies and boost bass and treble.
Tape Clean & EQ
Use this older tape recordings.
z Moderate noise reduction
z Moderate hiss & hum reduction
z "Classic V" EQ to reduce mid frequencies and boost bass and treble.
Tape Light Cleaning
Use this to apply a very small amount of noise reduction to a recording
z Light noise reduction for removing constant noise, such as hiss or hum.
Tape Noise BeGone
Use this to apply a moderate amount of noise reduction to a recording
z Moderate noise reduction
z Extra hum & hiss reduction
Vinyl Clean & EQ
Use this for vinyl recordings with a touch of noise reduction and EQ.
z Light noise reduction
z Aggressive vinyl declick & decrackle with hiss & hum reduction
z "Classic V" EQ to reduce mid frequencies and boost bass and treble.
Vinyl Declick & Decrackle
Use this to just remove clicks, pops and crackle.
z Aggressive vinyl declick & decrackle with hiss & hum reduction
Vinyl Declick & Decrackle
Use this to just remove clicks, pops and crackle with a touch of EQ.
z Aggressive vinyl declick & decrackle with hiss & hum reduction
z "Classic V" EQ to reduce mid frequencies and boost bass and treble.
Vinyl Light Cleaning
Use this to lightly remove clicks, pops and crackle.
z Moderate vinyl declick & decrackle with hiss & hum reduction
Warped Mind
Page 11 of 39Spin It Again
7/10/2007file://C:\acoustica\vinylman\help\flat\spinitagain.htm
Page 12
Page 12 of 39Spin It Again
Use this to add a crazy echo effect in addition to noise reduction. Not that practical, but it
sounds cool!
z Light noise reduction
z Aggressive vinyl declick & decrackle with hiss & hum reduction
z Echos occur at 165 milliseconds after the original signal.
Hook Up Your Record Player or Cassette Player To Your
Computer
One of the biggest stumbling blocks to recording your LPs and cassettes to CD is how to hook
up your record player or cassette player to your computer's sound card. Luckily, our software
has a guide that helps you make the connection.
Simply click the "Hookup Wizard.." button and the software will ask you a series of questions to
guide you on the hookup.
If that doesn't help you make the hookup, here are some more tips:
z You will probably need to purchase the right kind of cable from an electronics or audio store
such as Radio Shack, Best Buy, The Good Guys, etc. Support your local "Mom & Pop" family
audio/electronics store, if possible! The cables usually cost less than $5.
z If you have a laptop that does not have a sound "line-in" port, you can use a USB audio
device.
z Your sound card will require an eighth inch stereo mini plug on one side.
z Use a flashlight to look at the line in port of your computer's sound card.
z The sound card's line-in looks like an arrow going into a speaker.
z If you are connecting your stereo amp to your computer, you will probably need an RCA to
an eighth inch stereo mini.
z You can usually hook up your tape/cassette player directly to your computer's sound card.
z Record players have an extra low level and usually need to go into the Phono In on a stereo
amp or through a preamp before going into the computer's sound card.
z If you don't have an RCA jack on the back of your device, you can still hook it up from the
headphone jack of your record player or tape player. You'll need a special cord that goes from
a quarter inch stereo jack to an eighth inch stereo mini.
z You may need to purchase a new record player or cassette deck.
7/10/2007file://C:\acoustica\vinylman\help\flat\spinitagain.htm
Page 13

Getting A Good Recording Level
Click the "Level Wizard..." button to launch the Level Wizard.
The Recording Level Wizard helps you get the best recordings.
Page 13 of 39Spin It Again
Step 1: Choose the right sound card and source
If you have more than one sound device, make sure to choose the one that your record player
or cassette player is plugged into. The software will automatically attempt to choose the "Line
In" or equivalent. However, all sound devices are different and you may need to manually
select the correct source. (If it's a USB device, make sure that it is connected.)
Step 3: Check "Monitor" if necessary
If you have a USB sound device and you'd like to be able to hear the recording through your
speakers, click the "Monitor" checkbox.
Step 3: Start the Wizard
Click "Start". Make sure to play back the loudest part of the loudest song. It will automatically
lower the recording level until it is optimal. In addition, it may have you turn down the input
level from the tape or record player.
(IMPORTANT: You may have to lower the volume on your stereo amp if the signal is coming
in too loud. Spin It Again will some times be able to detect distortion, but not always.)
Get A Strong Recording Level
Later on, after your recording is done, make sure you don't have a weak recording. If your
recording looks like a weak recording, you may still need to adjust a volume or input to get a
stronger recording level.
Example of a weak recording level:
7/10/2007file://C:\acoustica\vinylman\help\flat\spinitagain.htm
Page 14

A
Page 14 of 39Spin It Again
Example of a strong and desired recording level:
Clean Your Records Before Recording Them
Start with the cleanest records possible. If you can see dust on them, that will turn into clicks
and pops in the recording. That should be avoidable. You can use a soft lint-free cloth or
brush to clean them, or you can purchase a special spray.
Do not use TAP water to clean the records as this can cause corrosion. If you are going to use
water, purchase some distilled water.
Purchase a new needle if possible. If you've been using the same needle for 50 years, it might
be time to replace it.
If you record player is really warped, you may need to get a new one. After all, it's not the
record player we care about, it's the music!
Visit our accessories and equipment page for helpful links:
http://www.acoustica.com/spinitagain/buyequip.htm
Recording 78s at 45 rpm
Most record players play at 33 or 45 rpm. If you have some non standard records that play at 78 or 16.7 rpm, you
can still record them at the closest speed and then adjust the rate later.
1) Set your record to 45 rpm and place your 78 rpm record on the player.
2) Record both sides of the album.
3) On the "Preview And Edit Your Recording" page, go to the botton and look at the "Recording Speed
djustment" drop down control.
4) Choose "78 recorded at 45 rpm"
5) Note that the "Playback Rate" is now 173.9%
Of course, you can do the same with 16.7 speed records. And, if you have recorded some other non stardard
rate, you can calculate and manually set a new playback rate with the following equation:
Playback Rate = (Actual Speed of Audio / Recorded Speed Of Audio) * 100
7/10/2007file://C:\acoustica\vinylman\help\flat\spinitagain.htm
Page 15

Page 15 of 39Spin It Again
Hardware Hookup Wizard
The Hardware Hookup Wizard guides you through the sometimes complicated process of
hooking up your record or cassette player to your computer's sound card.
Click the "Hookup Wizard" button to start it. (You can find this button on the first screen or on
the recording screen.)
The wizard may recommend some additional equipment:
z A cable to connect the tape or record player to your computer's sound device.
z A preamplifier for LP recordings.
z A new record or tape player
More tips on hooking up your record player or cassette deck to your sound card.
You may need to purchase the right kind of cable from an electronics or audio store such as
Radio Shack, Best Buy, The Good Guys, etc. Support your local "Mom & Pop" family
audio/electronics store, if possible! The cables usually cost less than $5.
Visit our accessories and equipment page for helpful links:
http://www.acoustica.com/spinitagain/buyequip.htm
Recording Level Wizard
Click the "Level Wizard..." button to launch the Level Wizard.
The Recording Level Wizard helps you get the best recordings.
7/10/2007file://C:\acoustica\vinylman\help\flat\spinitagain.htm
Page 16

Page 16 of 39Spin It Again
Sound card or USB sound device
If you have more than one sound card or USB sound device, choose the sound card that you'd
like to record from. Make sure that your record or tape player is connected to the line in of the
selected sound card.
Source
Your sound card has multiple inputs, such as Microphone, Wave, Line In, CD, Auxiliary and
others. If you are recording from the Line-In, make sure to choose a source that has "Line-In"
in it's name. If you aren't sure, play back some music on your cassette or record player and
change the input until you see the levels in the Level control.
Level
This shows the signal from the left and right channel inputs based on the selected Source and
Sound card.
Volume
This is the recording level. It is automatically adjusted when you run the wizard. You can also
adjust it manually. This will control how strong the signal is recorded. If it is strong, you may
record distortion, depending on your setup.
Open Mixer...
This button launches the Window's sound mixer which will let you adjust the playback and
recording levels of all controls on your sound card. On some computers and sound cards, this
may not do anything.
Start
This button starts the Recording Level Adjustment Wizard and will help you set the optimal
recording level. (HIGHLY RECOMMENDED!)
Voice On/Off
This turns the voice assistant on or off.
Get A Strong Recording Level
Later on, after your recording is done, make sure you don't have a weak recording. If your
recording looks like a weak recording, you may still need to adjust a volume or input to get a
stronger recording level.
Example of a weak recording level:
7/10/2007file://C:\acoustica\vinylman\help\flat\spinitagain.htm
Page 17

Page 17 of 39Spin It Again
Example of a strong and desired recording level:
Choose Tape, LP or Existing File Screen
On the first screen of Spin It Again, you can choose to record an LP, tape or load an existing
audio file.
Record A Vinyl LP *
Choose this option to record a 16's, 33's, 45's or 78's.
Record A Cassette Tape *
Choose this option to record cassette tapes, reel to reel or 8-tracks.
Load A Sound File
Choose this option to load and edit an existing MP3, WAV, OGG or WMA file that is already on
your computer.
Hookup Wizard...
Click this for help on connecting your record or cassette player to your computer. More...
Voice On/Off
Turns the voice assistant on or off.
Settings
Brings up the settings and advanced preferences.
* Note
: You can use the software to record from Microphone, MIDI, Wave, Auxiliary or
7/10/2007file://C:\acoustica\vinylman\help\flat\spinitagain.htm
Page 18

Page 18 of 39Spin It Again
whatever you'd like. Just choose either one of the recording buttons to record from a source
other than LP or tape.
Recording Screen
Step 1: Make sure you are ready to record!
If you haven't hooked up your cassette or record player to your computer, run the "Hardware
Hookup Wizard"
If you haven't adjusted your recording level, run the "Level Wizard"
Step 2: Adjust "Auto Pause" if necessary.
The software will automatically pause recording after a certain amount of time. If you are
going to be gone for any amount of time, this allows you to set the maximum time it will
record. Otherwise, it would fill up your hard drive with hours of silence.
Choose an auto pause time which is a little longer than the music you are going to record. For
cassette tapes, make sure you rewind it first!
Step 3: Start recording
Click the "Record" button and then start playing the record or press play on the tape deck.
Step 4: Type or look up album information during recording
While the software is recording, click "Type or Look Up Album Info..." button and enter in the
album and track information. On this pop up window, you can also click a button that lets you
type in the album or artist name and automatically get the track and album information so you
don't have to type it! (The track times and number of tracks can help in track detection,
especially if the album has continuous audio such as a live or concert recording.)
Step 5: Record the other side of the tape or record
The software will automatically pause when it senses the end of the record. Flip the record or
tape over and play side two.
If the software auto-paused, click "Record" before playing side two.
7/10/2007file://C:\acoustica\vinylman\help\flat\spinitagain.htm
Page 19

A
Page 19 of 39Spin It Again
Step 6: Finished
Once the software senses the end of the side two or it auto-pauses, click "Next" to go to the
"Preview And Edit" window.
Tutorial : Record A LP/Tape To CD
BUTTON REFERENCE
Record / Pause button
Press the Record button to start recording. As soon as you press Record, it turns into a Pause
button. Clicking Pause will pause the recording so that you can take a break, flip over to
another side, etc.
Stop button
The Stop button ends a recording. Once a recording is ended, you aren't able to append any
more audio to it.
New button
This clears and deletes the current recording and lets you start over.
Monitor checkbox
If you have a USB sound device and you'd like to monitor or hear the recording in real time,
click "Monitor" to turn it on.
Auto Pause After controls
If you are going to be gone or not actively monitoring the recording and you'd like to make sure
that the software will not fill up your hard drive for hours and hours, make sure to check "Auto
Pause After" and then select the maximum number of minutes that it will record for. (Spin It
gain will stop recording if it thinks it has reached the end of an album, but if the record or tape
player is noisey, it may not automatically turn off, which is why we created this fail safe for
you.)
Voice On / Off
Turns the voice assistant on or off.
Level Wizard...
Runs the Recording Level Wizard
Hookup Wizard...
Runs the Hardware Hookup Wizard
Preview And Edit Screen
After you've finished recording, you have the chance of previewing and editing the recording
so that you can remove extra silence, clean up the clicks, pops and remove unwanted tape
7/10/2007file://C:\acoustica\vinylman\help\flat\spinitagain.htm
Page 20

Page 20 of 39Spin It Again
hum. By default, the software will automatically split up the recording into multiple tracks
based on a silence location algorithm and/or typed or looked up track times. (In some cases, it
doesn't accurately split up the tracks and you'll need to edit the tracks manually. See track
splitting troubleshooting.)
There are two views of the recording. The top view shows all the tracks, the track numbers
and is a quick way of getting around the entire recording. The bottom view allows you to zoom
in and out, and adjust the start and end of each track. (In the screen shot above, track three is
shown in green.)
You can adjust a track's start and end by dragging it or clicking the track adjustment buttons.
The figure below shows some unwanted record noise highlighted by a red square.
Adjust the start marker by dragging it to the right to get rid of the record noise.
Track one now starts at the beginning of the music.
You can also set the name and volume for each track as shown in the figure below.
7/10/2007file://C:\acoustica\vinylman\help\flat\spinitagain.htm
Page 21

Page 21 of 39Spin It Again
(If you have typed in or looked up album track names, they will appear in the drop down list.)
BUTTON REFERENCE
Edit Album Info... button
This pops up the Edit Track Information window that allows you to type in the track names,
track lengths, album, genre, artist and year. In addition, you can click a button to look up the
album information automatically online through the MusicBrainz.org lookup service!
Clear All button
Clears all track information and the recording becomes one large track.
Analyze button
Click this to reanalyze the recording for tracks. It will attempt to figure out where the tracks are
and where the unwanted audio is. It won't always find all tracks. You can adjust three
parameters: music threshold, minimum track length and minimum time between tracks. In
addition, it will use any typed or looked up album track times to try and determine where the
songs are. See track splitting troubleshooting for more help.)
Split button
This will split the currently selected track into two parts. This is useful if there are two tracks in
a spot that the software auto determined to be one track.
Merge button
This will merge the currently selected track with either the next non-track space or track, which
ever is first. This is useful if the software mistakenly made two tracks where there was really
only one track.
Delete button
This will change a track into a non-track and the audio will be ignored for the mix down and
burned CDs. If the software recorded a bunch of record needle noise at the end of the record
or if there was a track that skipped for ever, use this to remove it.
Create button
This will restore an unwanted non-track space to become a track. Just select an unwanted
non-track space and then click "Create" and it will turn into a track.
Rewind button
This selects the previous track. If it is currently playing, it plays the previous track.
Play / Stop button
This plays the recording. It will skip all non-track unwanted areas.
7/10/2007file://C:\acoustica\vinylman\help\flat\spinitagain.htm
Page 22

Page 22 of 39Spin It Again
Fast Forward button
This selects the next track. If it is currently playing, it plays the next track.
Preview Play button
This will play a few seconds of the start and end of each track. If the voice assistant is on, she
will say "Start Of Track " and "End Of Track" before each preview. (The default mode is to
auto preview play when you first go to this screen.)
Zoom In button
This will zoom in to the recording for a closer and more detailed view.
Zoom Out button
This will zoom out of the recording for a larger view.
Next Noise button
If a noise print is set and the Acoustica Noise Reduction effect is loaded, this button will auto
find the next best suited noise print. Troubleshooting noise reduction.
The noise print looks like this:
Show Noise button
If a noise print is set and the Acoustica Noise Reduction effect is loaded, this button will scroll
to the current noise print. Note that you should stop play back before clicking this so that it
doesn't auto scroll based on the current playback position. Troubleshooting noise reduction.
The noise print looks like this:
Cleaning & Effect Preset
This is a drop down control that lets you choose an effect preset, such as click and pop
reduction, noise removal or other custom settings. Choose "<No Effect>" to turn off any
processing. Choose "<Create New Effect>" to make your own meta preset.
More On Cleaning And Audio Effects
Built-in Effect Presets
Customize button
This lets you customize the currently loaded effect. Choose any effects in the list and adjust
their settings. The software will handle third party DirectX and VST effects if installed.
More On Cleaning And Audio Effects
Recording Speed Adjustment
If you recorded a 78 at 45 rpm or a 16.7 @ 33 rpm, click the drop down and select the
adjustment. This will set the appropriate playback rate to correct for the speed difference.
Playback Rate control
Adjust the play back rate to accommodate for record players that don't play back at the correct
speed.
Voice On / Off
This turns the voice assistant on or off.
Settings Button
7/10/2007file://C:\acoustica\vinylman\help\flat\spinitagain.htm
Page 23

Page 23 of 39Spin It Again
Launches the settings & preferences screen.
Tagging/Naming Your Recordings Screen
Enter in the artist, album, genre, year and comments for your recording. Click on each track to
type in a track name. If you want to double check a track, you can click it to play it back.
If you have already entered the track or album information on a previous screen, it will already
be entered. You can optionally click the "Look Up Album Information..." button to connect to
the MusicBrainz.org service and automatically look up the album information and track names!
TIP: If any track looks extra large, it may actually be two tracks. Click "<< Previous" and
double check it in the Preview & Edit screen
This track information will be used for:
z CD Text for burned CDs (If supported by your hardware)
z Tag and file naming. (If rendering to audio files)
z Sending track information to the CD/DVD Label Maker. (Optional add-on)
TIP: You can use the TAB key or the arrow keys to quickly navigate from track to track.
Click "Next >>" when you are done.
Burn A CD And Or Create Audio Files Screen
On this screen, you have the option of burning an audio CD and / or creating audio files.
Burn CD & Create Audio Files Button
Choose this if you want to burn a CD and create audio files.
Burn Audio CD
Choose this if you just want to burn an Audio CD.
Create Audio Files
Choose this if you just want to create audio files.
Make A New Recording
Choose this if you want to start over.
Save Recording...
Normally, all your recordings go into your recording folder. When you quit the software, it will
ask you if you want to delete it. If you don't delete it, you can load it again. The "Save
Recording" feature lets you save the raw, original recording to work on later. It will save
a .WAV file and a .SIA file. The .SIA file contains the track information, times and names.
The .WAV file will be the original recording without any effects or processing.
7/10/2007file://C:\acoustica\vinylman\help\flat\spinitagain.htm
Page 24

Page 24 of 39Spin It Again
Print A CD Label...
Choose this to print a CD label or jewel case cover for this CD. The track information will be
sent to the optional Acoustica CD/DVD Label Maker.
TIP: The "Next Operation" is shown below the buttons and if you always burn a CD, you can
simply click "Next >>"
Audio File Settings Screen
Choose your audio format, bit rate and other format settings. This screen shows how much
space is needed and how much space in MB is available. Set the folder that you wish to
create the audio files in.
Format
Select from MP3*, WAV, WMA and OGG.
Details...
Select the bit rate, type of encoding and other details based on the selected format.
Folder
Enter in the folder that you wish to create the audio files in. You may enter in a folder that
does not exist and Spin It Again will create it for you.
Choose...
This lets you choose a folder or portable MP3 device to create your audio files in.
Voice On / Off
This turns the voice assistant on or off.
Settings Button
Launches the settings and advanced preferences window.
* Creating MP3s is not available in some bundled versions of Spin It Again.
CD Burning Settings Screen
7/10/2007file://C:\acoustica\vinylman\help\flat\spinitagain.htm
Page 25

Page 25 of 39Spin It Again
Choose which CD recorder to use, the speed, number of copies, CD-Text options and testing
options. Please note that if your recording spans more than 80 minutes, it will require two or
more CDs. If you don't wish to burn two CDs, go back to the Preview And Edit Screen and
delete some tracks.
CD Burner
If you have more than one CD recorder or CD burner, select the one you want to burn with.
Speed
Choose the speed to burn a CD with. Slower burn speeds will take longer, but will be more
compatible with CD players. If you do not have buffer underrun protection or "Burn-Proof",
lowering the burn speed will help to ensure a successful burn.
CD-Text
CD-Text is an option that must be supported by your CD recorder and the burning engine. A
CD with CD-Text will show track and artist information when it is played on CD-Text enabled
CD player. (Look for a CD-Text logo on your CD player. Most Sony CD players have it.)
Test Mode
If this option is on, the software will not use waste a CD and will simulate the burning of a CD.
In this way, you can adjust the settings that work best for you before using any blank CDs.
(The two options to adjust would be "Convert To Wav Files First" and "Speed")
Convert To Wav Files First
This option will convert all tracks to temporary WAV files first. In some cases, if you are
having burn failures, you should choose this options, as it will require considerably less
computer power to burn the CD. However, it will use up to 700 MB of hard drive space.
Number Of Copies
Set the number of copies you wish to make. Note that if the recording spans more than one
CD, this will multiplies the total number of CDs needed by the number of copies, ie: If three
CDs are needed for the recording and you set the number of copies to four, it will need 12
blank CDs for the burn.
Working/Processing Screen
This screen shows the progress for the creation of audio files and/or the progress of burning
your audio CDs. After it's done, it will play a sound to notify you.
Abort Button
7/10/2007file://C:\acoustica\vinylman\help\flat\spinitagain.htm
Page 26

Page 26 of 39Spin It Again
Click this to cancel any operation currently under progress. If it is currently burning a CD and
you click Abort, the CD will become unusable.
The Voice Assistant
The Voice Assistant will add that extra help by speaking about current software actions and
events. It will guide you through the following things:
z Hooking up your record or tape player to your computer.
z Setting a strong recording level.
z Previewing Your Recording (Preview Mode)
z Audio instructions on each main page.
z Notification of a successful CD burn or audio file creation
If you do not wish to hear the Voice Assistant, click the "Off" radio button. If you want to turn
the Voice Assistant back on, click "On".
Settings
You can edit advanced preferences and options that are rarely changed in the settings.
There are five setting tabs:
z Audio
z Recording
z Miscellaneous
z Cleaning & Effects
z File Tagging
Click "OK" if you are happy with the changes you've made to the settings. If you wish to
cancel or back out of the changes, click "Cancel".
Audio Settings
Playback Device
If you have more than one sound device, choose the one you'd like to play from.
7/10/2007file://C:\acoustica\vinylman\help\flat\spinitagain.htm
Page 27

Page 27 of 39Spin It Again
Recording Device
If you have more than one sound device, choose the one you'd like to record from.
Monitor Recording Device through Playback Device
Some sound devices such as USB sound devices do not allow you to hear or monitor the
incoming audio. This option instructs the software to play the recording audio through the
playback device.
Sample rate:
Choose the sample rate to play audio at. The default is 44,100 (CD quality). Your recording
sample rate and play back sample rate should be the same, in most cases.
Bit depth:
Choose the bit depth to play audio at. The default is 16 bits (CD quality). Your recording bit
depth and play back bit depth should be the same, in most cases.
Automatically preview play after recording is done
When the recording is done, the software will automatically play X seconds of the start and end
of each auto recognized track. If the voice assistant is on, it will speak "start of track" and "end
of track" before each segment.
Preview Length
If the automatic preview play option is turned on, this determines how much audio to preview.
Voice
Turn the voice assistant on or off.
Recording Settings
Level Wizard...
This runs the Recording Level Wizard.
Recording Folder:
This is where your recordings will be stored. You can change the folder by clicking "Choose..."
or by typing in a new folder in the edit box.
Always Ask Before Automatically Detecting Tracks
If checked, the software will ask you if you want to automatically detect tracks based on the
settings below.
Use Album Information To Improve Track Detection
If checked, the software will use the album information typed in or looked up online to improve
recognition of tracks. For example, if you have a live or concert recording, it is sometimes
difficult to tell where one song ends and the next ends based on silence. This option assumes
that the times that you type in are correct.
Automatically Detect Tracks
7/10/2007file://C:\acoustica\vinylman\help\flat\spinitagain.htm
Page 28

Page 28 of 39Spin It Again
If checked, the software will automatically split up the recording into multiple tracks. It will use
the following parameters.
Consider It A Track When
The following parameters will help determine if audio is silence, garbage or a track.
The volume is greater than X % - (Music Threshold)
If the volume is greater than X %, we consider it signal/music and not record or tape noise.
Since recordings are not perfectly silent, this is a threshold that can be used to help separate
noise from music. (The default is 10%)
It is longer than X minute(s)
If the software detects music signal and not noise (see above) for X minutes, it will consider it a
track. This helps eliminate false tracks such as record scratches, tape clicks and so on. (The
default is 1/2 minute or 0.50 minutes.)
It is separated by at least X seconds of 'silence'
Music will sometimes have silence in it and if the software considered every silent area it found
a new track, it would end up with a lot of false positive tracks. Usually, tracks will be separated
with at least two seconds of silence. (The default is 1.75 seconds.) Note that this will
consider silence to be anything under the music threshold % above.
Miscellaneous Settings
Normalize Volume
Choose between the following options:
z Do not normalize
z Normalize based on entire recording
z Normalize each track individually
Normalization will be increase the audio level to the maximum possible volume without
distortion. If your recordings look more like a horizontal line, you should rerun the Recording
Level Adjustment Wizard. and re-record. Normalizing each track indivudally will analyze the
maximum signal for a specific track and adjust the volume. Normalizing based on the entire
recording will analyze the entire recording and then adjust each track by the same amount.
Normally, you should use "Normalize based on entire recording", but "Normalize each track
individually" may work well with mix tapes or compilations.
Fade Track Edges (to reduce clicks between tracks)
This option will fade the edges (start and end) of all tracks. Note that it will not fade tracks that
have no audio gap between them.
Pause Recording When Silence Is Detected
This is an optimization for recording to eliminated the recording of extended periods of silence.
If you are having trouble recording songs with really long fade ins, turn this option off.
Ask Before Deleting Recorded Files After Use
If checked, the software asks you if you want to delete the original temporary recording after
7/10/2007file://C:\acoustica\vinylman\help\flat\spinitagain.htm
Page 29

Page 29 of 39Spin It Again
use.
Delete Recorded Files After Use
To help cut down on used hard drive space, the software will automatically delete recorded
files when you quit the program or start another recording.
Show Folder After Rendering Files
The software will open the folder where the new audio files were created.
Ask Before Allowing Level Wizard To Select The Best Input
If checked, the software will ask to automatically change the recording input to "Line In" when
running the Level Wizard...
Allow Level Wizard To Select The Best Input
If checked, the software will automatically set the recording input to "Line In" when running the
Level Wizard...
Advanced CD Burner Options
----------------------------------------------
Use X Minute Blank CDs
Choose the length of audio CDs that you are going to burn. The most common length is 80
minutes. (The default is 79 minutes which helps to accommodate for a few burners which can
only burn 79 minutes and 29 seconds)
Use IMAPI For Burning (XP Only)
For Windows XP only! You can have Spin It Again use Windows XP's built in CD burning
system. It will take longer and require more disk space. It will also burn your CDs in Track At
Once (TAO) mode which may not be as compatible with all CD players. If you are having
problems burning, you might try this option. (Please note that you will need to restart the
software before this change will be activated.)
Use Acoustica ASPI Layer
The tells the software to use the Acoustica ASPI layer . If this is unchecked, Spin It Again will
attempt to use an Adaptec / Roxio ASPI layer. Try toggling this option, if you are having
problems burning CDs. (Please note that you will need to restart the software before this
change will be activated.)
Goldenhawk Drive Override
This button allows you to configure your CD burners that our software fails to recognize. You
can set up the software to use a 'generic' CD burning driver or choose from a list of similar CD
burners. This is not guaranteed to work, but is there as an option. If, after trying this option
that the software crashes when it gets to the CD burner page, you should delete a file called
"DEVICES.DEF" located in your Spin It Again folder. (Please note that you will need to restart
the software before this change will be activated.)
Cleaning & Effects Settings
7/10/2007file://C:\acoustica\vinylman\help\flat\spinitagain.htm
Page 30

Page 30 of 39Spin It Again
This settings page shows all effect presets which are actually combinations of effects and
cleaning filters. You can create new effects, edit them, delete them or rename them. Click on
an effect to edit, rename or delete it.
New
This creates a new effect.
Edit
This edits the currently selected effect.
Rename
This pops up a window which lets you rename the selected effect
Delete
This deletes the selected effect.
Load DirectX Effects
This will cause the software to load any optional 3rd party DirectX effects found on the
computer. These plug ins provide extra processing beyond the default Acoustica effects.
Load VST Effects
This will cause the software to load any optional 3rd party VST effects found on the computer.
These plug ins provide extra processing beyond the default Acoustica effects.
Edit VST Effect Folders...
VST Effects are not loaded automatically. VST plug ins or .DLL files are located in various
folders on your computer. If you have a VST plug in saved on your computer and Spin It Again
is not finding it, you'll need to add the folder that the plug in is located in. (VST plug ins end
with .DLL. Note that not all .DLL files are VST plug ins, though.) Click "Edit VST Effect
Folders" to change or edit the folders that Spin It Again should look for VST plug ins.
More On Cleaning And Audio Effects
Built-In Effect Presets Explained
File Tagging Settings
These settings are used when the software determines how to tag and name the audio files.
Tag Files
If set, the software creates textual tags inside the audio files for artist, album, genre, year and
track names.
Store recordings in folder with the artist's name.
The software will automatically create a sub folder based on the artist's name. For example, if
your output file folder was C:\My Documents\My Music\ and you had just recorded "George
7/10/2007file://C:\acoustica\vinylman\help\flat\spinitagain.htm
Page 31

Page 31 of 39Spin It Again
And The Dog Walkers" latest hit, it would store all audio files in C:\My Documents\My
Music\George And The Dog Walkers\
Use ARTIST in song's file name
This will put the artist in each audio file. IE: "George And The Dog Walkers - Track X.wma"
Use ALBUM in song's file name
This will put the album in each audio file. IE: "George And The Dog Walkers - Walkin Ze
Dawg Again - Track X.wma"
Use TRACK NUMBER in song's file name.
This will put the track number in each audio file. IE: "George And The Dog Walkers - Walkin
Ze Dawg Again - Track X - 01.wma"
Troubleshooting
Here are some common problems that may arise.
It's not recording anything.
It's not recognizing the tracks correctly.
The recording sounds like it's under water and warbly.
It doesn't recognize my CD recorder.
It is failing to burn audio CDs.
What is the maximum length Spin It Again can record?
Precisely Split Two Tracks Into One Track
How Do I Import Track information Into Acoustica CD/DVD Label Maker
If your problem still isn't answered, try our online F.A.Q.
It's not recording anything
1. Make sure that you've hooked up your record or cassette tape player properly. Run the
Hookup Wizard!
2. Make sure to set the correct recording source and adjust the level. Run the Recording Level
Wizard!
3. Make sure to click the "Record" button and then play back your record or tape.
4. If you are still having problems, try turning off "Pause Recording When Silence Is Detected"
in the Miscellaneous area of the settings.
5. If that didn't help, try recording from a different source. Can you record anything at all? See
the Recording Level Wizard.
7/10/2007file://C:\acoustica\vinylman\help\flat\spinitagain.htm
Page 32

Page 32 of 39Spin It Again
6. Make sure to click the "Open Mixer" button and double check that the correct source is not
muted. Double check the recording settings. Click "Properties" from the "Options" menu.
Select "Recording" and click "OK". Make sure that the correct source is selected. Normally,
the correct source would be "Line In" or "Analog Mix".
It's not recognizing the tracks correctly
After recording, the Preview & Edit Screen comes up and, by default, automatically chops the
recording up into multiple tracks, if possible.
If the tracks are not being recognized properly, it could be a variety of problems.
1) Make sure you are recording with a good level. Weak recordings look more like a horizontal
line.
Example of a weak recording level:
Example of a strong recording level:
If you have a recording that looks like the weak recording image, try running the Recording
Level Adjustment Wizard to get a better recording level.
2) Try adjusting the auto track analysis parameters.
Click "Analyze" and then change the following parameters to try and better recognize the
recording.
Consider It A Track When
The following parameters will help determine if audio is silence, garbage or a track.
The volume is greater than X % - (Music Threshold)
If the volume is greater than X %, we consider it signal/music and not record or tape noise.
Since recordings are not perfectly silent, this is a threshold that can be used to help separate
noise from music. (The default is 10%)
It is longer than X minute(s)
If the software detects music signal and not noise (see above) for X minutes, it will consider it a
track. This helps eliminate false tracks such as record scratches, tape clicks and so on. (The
default is 1/2 minute or 0.50 minutes.)
It is separated by at least X seconds of 'silence'
7/10/2007file://C:\acoustica\vinylman\help\flat\spinitagain.htm
Page 33

Page 33 of 39Spin It Again
Music will sometimes have silence in it and if the software considered every silent area it found
a new track, it would end up with a lot of false positive tracks. Usually, tracks will be separated
with at least two seconds of silence. (The default is 1.75 seconds.) Note that this will
consider silence to be anything under the music threshold % above.
3) Type in or look up track information and song lengths.
Some recordings won't have clear gaps between tracks. For example, some albums have
songs that fade into each other without a pause. For these recordings, you'll have to enter in
track information and times .These times will aid in track recognition.
To enter album and track information or look them up online, click the "Edit Album Info..."
button. After entering the information, click the "Analyze" button again followed by clicking
"OK".
4) If the tracks are still not being recognized, you'll have to split the tracks up manually.
Click "Clear" button to remove all tracks if the software was completely wrong. (It's easier this
way in a few cases.)
Click the "Split" button to split a track into two tracks.
In the bottom track view, use the zoom buttons, the scroll bar and the play back controls to find
the track transition. You can then right click and select "Split Track At Cursor" and 2 new
tracks will be created.
You can drag and drop track markers. Click near the top of a start or end marker and drag it to
a new position.
In this example, the red boxed area shows the noise area we want to get rid of.
Click an arrow or drag the head of the marker to the right to trim out the unwanted record
noise, etc.
Use the "Delete" button to remove false positive tracks, ie: record or tape noise or a bad track.
Use the "Create" button to restore a deleted area.
7/10/2007file://C:\acoustica\vinylman\help\flat\spinitagain.htm
Page 34

y
Page 34 of 39Spin It Again
The recording sounds like it's under water and warbly
The most likely culprit is that the Acoustica Noise Reduction is on and has a bad noise print.
The software uses a noise print to remove or subtract noise from the music. In order to work
properly, it needs a good noise print. If the noise print is music and not actual noise, it will
sound warbly.
1) Stop play back if it's currently playing.
2) Click the "Show Noise" button.
3) Right click on the noise print and select "Play Noise Print"
The noise print looks like this:
4) If you hear music in the noise print, try auto finding the next noise print by clicking the "Next
Noise" button
5) Now try playing the noise print again by right clicking on the noise print and selecting "Play
Noise Print"
6) If it is still sounds like it's under water, verify that it is the noise print, by changing the current
effect to "<No Effect>". Try playing back the recording and if the under water sound goes
away, it is definitely the noise print.
7) You can manually set the noise print by dragging it around. Just click on one of the blue
triangles and while holding down the mouse, move the mouse left or right. Alternatively, you
can right click and select "Set As Noise Print"
8) Keep playing with it until you find a noise print that is just noise and does not have music in
it.
9) If you really need to remove the noise, you may need to record the tape or LP again and,
this time, try to record some tape or record noise so that the noise reduction and noise print
will work properly!
It doesn't recognize my CD recorder
1. We update our supported CD and DVD recorders several times a year. Please check to
make sure that you have the latest version.
2. If
ou just installed the software and you have WinME, Win98, Win98SE or Win95, you'll
7/10/2007file://C:\acoustica\vinylman\help\flat\spinitagain.htm
Page 35

Page 35 of 39Spin It Again
need to restart your computer before some drivers are working properly. Make sure to restart,
in this case.
3. Try turning on IMAPI in the Miscellaneous section of the Settings. You will have to restart
the software. (This requires Windows XP)
4. Try using the Goldenhawk override which will cause Spin It Again to use a generic CD or
DVD burner driver template for your CD or DVD burner. To do this, click "Settings", followed
by clicking "Miscellaneous". Click "Goldenhawk Drive Override..." Select the CD or DVD drive
that you are interested in and then click the "Use A Generic CD Writer Driver" radio button.
Click "OK" and then quit and restart Spin It Again.
5. Alternatively, you can render out the tracks as audio files (MP3*, WAV, OGG or WMA) and
then load them into another burning program to burn as audio CDs. While this isn't the most
desirable way to do it, it is an option.
* Creating MP3s is not available in some bundled versions of Spin It Again
It is failing to burn audio CDs
There are many CD recorders, computer configurations, blank CD models, and reasons for
burn failures. Here are some things for you to try.
1. Do a test burn! Make sure to click "Test Mode" on the CD Burning Settings Screen
2. Shut down all other programs.
3. Reduce your burn speed.
4. Turn off CD-Text on the CD Burning Settings Screen
5. Select "Convert To Wav Files First" on the CD Burning Settings Screen
6. Try a different blank CDR. (Make sure its not damaged, scratched or already used!)
7. Try a different BRAND of blank CDR. (Some CD recorders work better with certain brands.
Consult your CD recorder manual.)
8. If you have Windows XP, try switching to IMAPI mode.
To do this, quit Spin It Again. Select "All Programs" from the Window's "Start" button, followed
by "Acoustica Spin It Again", followed by "Burning Engine", followed by "Use-IMAPI (XP Only)"
9. Try restarting your computer and trying again.
10. Try reducing the number of tracks, if you are exceeding the length of the CD's capacity.
7/10/2007file://C:\acoustica\vinylman\help\flat\spinitagain.htm
Page 36

Page 36 of 39Spin It Again
What is the maximum length Spin It Again can record?
Spin It Again is limited to recording 3.38 hours of audio at CD quality.
However, you can change the sample rate and other factors to get more recording time. (IE:
you are recording an 8 hour book on tape.)
Max Time Format
62 minutes 192,000 hz, 24 bit, stereo
124 minutes 96,000 hz, 24 bit, stereo
6.76 hours 44,100 hz, 16 bit, stereo
13.52 hours 22,050 hz, 16 bit, stereo
54.1 hours 11,025 hz, 8 bit, stereo
You can change the recording format in the settings, by clicking "Settings". Click on the
"Recording" page and change the settings to the appropriate values.
Precisely Split Two Tracks
You probably know that you can use the 'Split' button to split a track down the center into two
tracks. But did you know that you can precisely select the split point for the two tracks?
Here's how:
On either the top multi-track waveform display or the bottom single-track display, find the spot
where you would like to split the track into two tracks. Then, right click on that spot. A pop-up
menu will appear. Select 'Split Track at Cursor,' and the track will be split into two at the exact
spot where you clicked!
Note that the track is split at the mouse cursor, not the playback cursor.
If you are not pleased with the split point, simply press the 'Merge' button and the tracks will be
recombined.
Using this tool, it is possible to very accurately split up tracks. It is especially useful for live
music albums (or any album where one song fades directly into the next song) for which the
auto track detection fails.
For more help, see the Tutorial on Splitting.
Online Animated Tutorials
How Do I Import Track information Into Acoustica CD/DVD
Label Maker
You'll need to run the label maker from Spin It Again. There are a few ways to do it.
7/10/2007file://C:\acoustica\vinylman\help\flat\spinitagain.htm
Page 37

Page 37 of 39Spin It Again
1. If you your CD burner supports reading and writing of CD-Text, you can use the label maker
to read the CD directly.
2. If you are still running Spin It Again, make sure to enter in the correct track info on the title
"Name Your Recording!" and then click "Next". Click "Print a CD Label..." and it will launch the
Acoustica CD/DVD Label Maker with your track information.
3. If you have already made a recording and did not let the software delete the recording, you
have an option of reloading it.
A. Run Spin It Again
B. Click "Load A Sound File"
C. Find "My Documents"
D. You'll find "My Recordings" under "My Documents"
E. Locate the recording that you are interested in creating a label for.
F. On the "Preview & Edit" screen, click "Next"
G. On the "Name Your Recording!" screen, make sure that the track information is there,
otherwise, type it in. Click "Next"
H. Click "Print a CD Label..." and it will launch the Acoustica CD/DVD Label Maker with your
track information.
Cleaning And Audio Effects
Spin It Again comes with built in Acoustica effects and 14 presets to help clean and process
your recordings.
To create a new meta effect preset, click "<Create New Effect>" from the "Cleaning And Effect
Preset" drop down on the Preview And Edit Screen.
When you are starting off with a brand new effect, you will see a screen like this:
Select an effect from the drop down title "Select New Effect To Add"
In this case, we will select "Acoustica Advanced Vinyl Cleaner" and then "Acoustica Noise
Reduction"
7/10/2007file://C:\acoustica\vinylman\help\flat\spinitagain.htm
Page 38

A
Page 38 of 39Spin It Again
We now have two effects loaded. To adjust the parameters for either effect, click on the effect
title on the left hand side and then adjust the parameters to the right.
The list of effects that you choose is also called an "effect chain" because the audio will pass
through each effect starting at the top effect going to the bottom effect. In the above case, the
raw recording will first go through "Acoustica Advanced Vinyl Cleaner" and then "Acoustica
Noise Reduction".
When you are done, click the [x] on the top right hand side of the window. It will ask you if you
want to save it and give it a name. You can always edit it again later.
You can reorder the effects by drag and drop or by selecting it and then clicking "Up" or
"Down".
If you do not want an effect, select it and click "Delete"
Useful Acoustica Effects
z Click And Pop Reduction - Reduces and muffles clicks and pops.
z Noise Reduction - Cancels out noise such as tape hum and hiss. You'll need to have a
noise print set to hear this. For more help see Reduce Tape Noise Hiss or Hum
z EQ - A 10 band equalizer to adjust different frequency ranges.
z Compressor - Great for bringing a quiet recording up in volume. It can work wonders for
older recordings.
z Reverb - Simulate a great concert hall
DirectX Effects
If you have any third party DirectX effects installed, you will be able to load them as well.
(Please note that you must have "Load DirectX Effects" checked in the Miscellaneous
Settings)
VST Effects
If you have any third party VST effects installed, you will be able to load them as well. (Please
note that you must have "Load VST Effects" checked in the Miscellaneous Settings)
LP
n LP stands for 'long play' and is a term for a record that is played on a record player.
The standard speeds are 33 rpm, 45 rpm and 78 rpm.
7/10/2007file://C:\acoustica\vinylman\help\flat\spinitagain.htm
Page 39

Page 39 of 39Spin It Again
Audio Files
MP3, WMA, OGG or WAV files
Buffer Under-Run Protection
This is an option that most newer cd recorders have. If the CD recorder does not get data fast enough, it won't
fail and it will pause the burn until it gets more data.
Burn Proof
Burn Proof, Just-Link is another name for Buffer Under-run Protection.
Burning Engine
Spin It Again uses two burning engines. Goldenhawk is the default. If the software does not recognize your CD
recorder by default, it will try Windows XP IMAPI (XP Only)
MB
MB = Megabyte or roughly 1 million bytes. A typical hard drive has 4,000 MB when its completely empty. A
typical MP3 file is about 4 MB.
7/10/2007file://C:\acoustica\vinylman\help\flat\spinitagain.htm
 Loading...