

Page 1
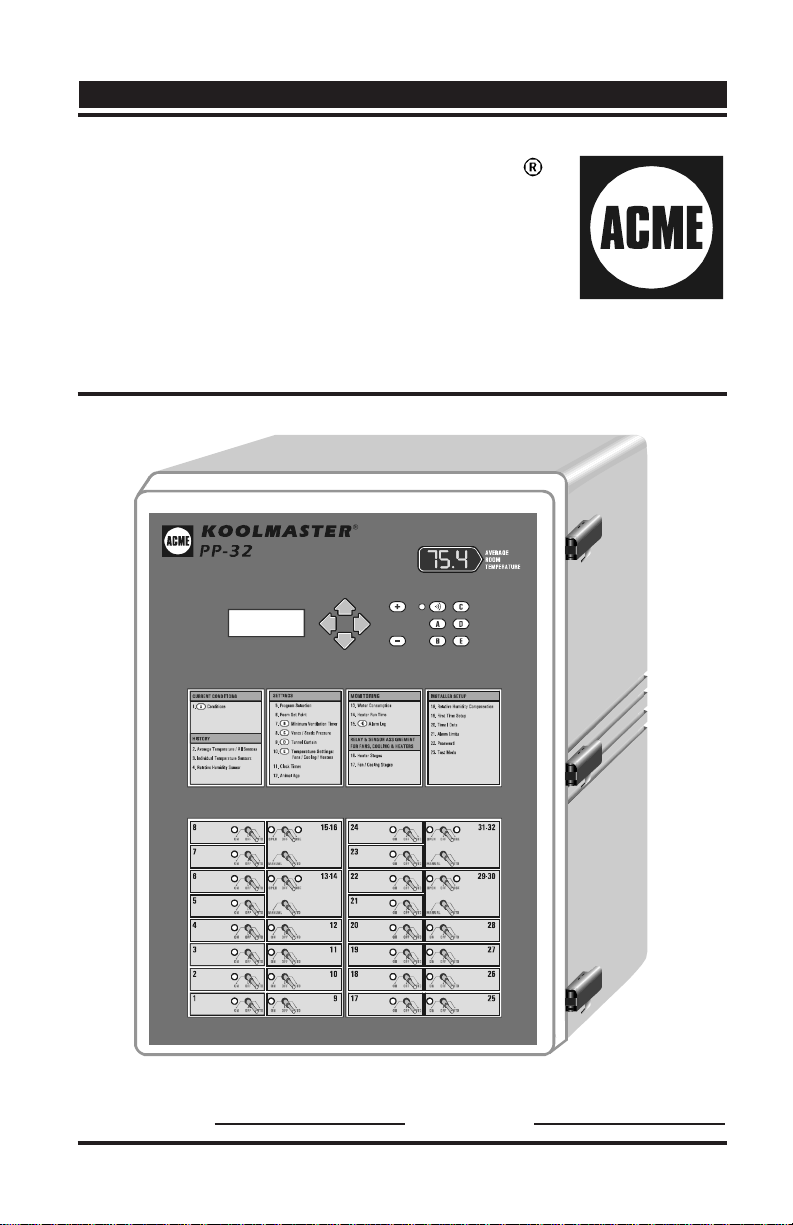
KOOLMASTER
PP-32
CONTROLLER
ENVIRONMENTAL
MANAGEMENT
SYSTEM
SERIAL NUMBER: DATE:
Read this guide carefully before using the controller.
R01
Page 2

NOTICE
Every effort has been made to ensure that this manual is complete, accurate and up-to-date. The
information contained in it is however subject to change without notice due to further developments.
Page 3

T ABLE OF CONTENTS
Page
1. PRECAUTIONS............................................................ 6
2. FEATURES ................................................................. 7
3. LOCATION OF THE CONTROLS .................................... 9
4. MOUNTING INSTRUCTIONS ....................................... 11
4.1 CONNECTION ..................................................................11
4.2 SETTING THE DIP SWITCHES ............................................. 14
5. CONTROLLER SETUP ................................................ 15
5.1 CURRENT CONDITIONS ..................................................... 15
5.2 CONTROLLER PROGRAMS ................................................16
5.2.1 Selecting a Program ........................................................ 16
5.2.2 Selecting a Season.......................................................... 16
5.3 ADJUSTING THE ROOM SET POINT ....................................18
5.4 MINIMUM VENTILATION................................................... 19
5.4.1 Adjusting Minimum Ventilation's On-Time.......................... 19
5.4.2 Adjusting Minimum Ventilation's Cycle Time ...................... 20
5.5 INLET / VENT DOOR SETTINGS...........................................21
5.5.1 Inlet Settings (Potentiometer Feedback from Inlets)............... 21
5.5.1.1 Setting DWR-F-1A's ID numbers ......................................... 21
5.5.1.2 Adjusting the Air Inlet Compensation .................................. 22
5.5.2 Vent Door Settings ......................................................... 23
5.5.2.1 Adjusting Static Pressure Set Points ................................... 2 6
5.5.2.2 Adjusting Vent Doors Open / Close / Off Times ................... 26
5.5.2.3 Adjusting Stage Level for the Closing of Vent Doors ............. 2 8
5.5.2.4 2nd Group of Pressure Set Points: at Stage X ...................... 2 8
5.5.2.5 2nd Group of Pressure Set Points: at Outside T° X ............... 29
5.6 TUNNEL CURTAIN ............................................................ 31
5.6.1 Adjusting Minimum Age for Tunnel Ventilation .................. 34
5.6.2 Selecting the First Tunnel Stage........................................ 34
5.6.3 Adjusting Curtain's Operating Times.................................. 35
5.6.4 Adjusting Static Pressure Hi and Lo Set Points .................... 36
5.6.5 Adjusting Curtain's Timer Cycle ....................................... 36
5.7 FAN STAGES SETTINGS.................................................... 38
5.7.1 Adjusting Fan Stages' Start/Stop Temperatures................... 39
5.7.2 Adjusting Fans Stages' Timer ........................................... 39
5.8 HEATER SETTINGS ........................................................... 41
KOOLMASTER PP-32 REV.01
3
Page 4

PP-32
5.9 AUXILIARY OUTPUTS....................................................... 42
5.10 ANIMAL AGE ................................................................ 44
5.11 CLOCK OUTPUTS........................................................... 45
5.11.1 Adjusting Clock Output Start and Stop Times ................... 46
5.11.2 Adjusting Starting Day of Clock Programs ........................ 47
5.12 HISTORY ......................................................................48
5.12.1 Resetting Histories........................................................ 48
5.12.2 Average Temperature History ......................................... 48
5.12.3 Individual Temperature Sensors History ........................... 49
5.12.4 Outside Temperature Sensor History................................ 49
5.12.5 Relative Humidity History .............................................. 49
5.12.6 Water Consumption History ........................................... 50
5.12.7 Heater Run Time History................................................ 50
5.13 ALARM SETTINGS..........................................................52
5.13.1 Alarm Log.................................................................... 52
5.13.2 Setting Alarm Limits...................................................... 53
5.13.2.1 Adjusting Hi/ Lo Temperature Alarms ................................. 54
5.13.2.2 Adjusting Critical Temperature ......................................... 55
5.13.2.3 Adjusting the Outside Temperature Influence ..................... 55
5.13.2.4 Adjusting Static Pressure Alarms ...................................... 5 6
5.13.3 Resetting the Alam Log.................................................. 58
5.14 INSTALLATION .............................................................. 59
5.14.1 Step-by-Step Installation Guide ...................................... 59
5.14.2 Password Settings ........................................................ 61
5.14.3 Installation Setup .......................................................... 63
5.14.4 Sensor Assignment ....................................................... 66
5.14.4.1 Assigning Sensors to the Room T° and Fan Stages.............. 66
5.14.4.2 Assigning Sensors to Heater Stages .................................. 6 7
5.14.4.3 Assigning Sensors to Air Inlets.......................................... 67
5.14.4.4 Assigning Sensors to Auxiliary Outputs ............................... 68
5.14.5 Setting Time and Date................................................... 70
5.14.6 Relay Assignment ......................................................... 70
5.14.6.1 Assigning Fan Stages' Relays ............................................. 72
5.14.6.2 Assigning Heater Stages' Relays ........................................ 73
5.14.6.3 Assigning Relays to Vent Doors ......................................... 7 3
5.14.6.4 Assigning Relays to the Tunnel Curtain ............................... 7 4
5.14.6.5 Assigning Relays to Clock Outputs ..................................... 7 5
5.14.6.6 Assigning Relays to Auxiliary Outputs ................................. 7 5
5.14.6.7 Assigning Relays for the Lo Static Pressure Alarm ............... 7 6
5.14.7 Calibrating the Water Counter ......................................... 77
4
KOOLMASTER PP-32 REV.01
Page 5

PP-32
5.15 ADVANCED SETTINGS .................................................... 78
5.15.1 Setting the Temperature Curve........................................ 78
5.15.2 Setting the Minimum Ventilation Curve ............................ 80
5.15.3 Humidity Control ......................................................... 82
5.15.3.1 Adjusting Relative Humidity Set Point ................................ 82
5.15.3.2 RH Compensation on Minimum Ventilation ......................... 83
5.15.3.3 Adjusting Mist or Kool-Cel Shutoff ..................................... 8 4
5.15.3.4 Adjusting Heater Timer Cycle ............................................ 84
5.15.4 Calibrating Sensors ....................................................... 86
5.15.4.1 Calibrating Room and Outside T° Sensors ......................... 86
5.15.4.2 Calibrating the Relative Humidity Sensor ........................... 86
5.15.4.3 Calibrating the Static Pressure Level ................................. 8 7
6. TECHNICAL SPECIFICATIONS .................................... 89
7. FACTORY SETTINGS ................................................. 90
8. USING THE CONFIGURATION MODULE ...................... 91
8.1 LOADING A CONFIGURATION ...........................................91
8.2 SAVING A CONFIGURATION ............................................. 92
9. INSTALLATION REPORT ............................................ 93
10. INDEX .................................................................... 98
KOOLMASTER PP-32 REV.01
5
Page 6

1. PRECAUTIONS
We strongly recommend installing supplementary natural ventilation as well as a backup thermostat on at least one cooling stage
(refer to the wiring diagram enclosed with this user's manual to
connect the thermostat).
Although fuses at the input and outputs of the controller protect
its circuits in case of an overload or overvoltage, we recommend
installing an additional protection device on the controller's
supply circuit.
The room temperature where the controller is located MUST
ALWAYS REMAIN BETWEEN 32°F AND 104°F (0°C TO 40°C).
To avoid exposing the controller to harmful gases or excessive
humidity, it is preferable to install it in a corridor.
DO NOT SPRAY WATER ON THE CONTROLLER
6
KOOLMASTER PP-32 REV.01
FOR CUSTOMER USE
Enter the serial number located on
the side of the controller below for
future reference.
Model number:
Serial number:
PP-32
Page 7

2. FEATURES
The PP-32 is an electronic device used for environmental control in livestock
buildings. It allows the user to maintain a specified target temperature by
controlling the operation of ventilation and heating equipment. Eight heater
stages, 16 fan stages, a tunnel curtain, 2 auxiliary outputs, vent doors and 4
clock outputs can be controlled. Fan stages can be configured to activate
cooling systems in timer mode. In all, the PP-32 provides up to 32 relay
outputs. In addition, up to 12 DWR-F-1A air inlet controllers can be connected to the PP-32.
The main features of the PP-32 are as follows:
LCD DISPLAY
An LCD display provides an efficient interface for displaying, monitoring and
adjusting parameter values.
MINIMUM VENTILATION CYCLE
When ventilation is not required for reducing room temperature, on-off fan
outputs can be operated either continuously or intermittently to reduce the
level of humidity and supply oxygen to the room.
TEMPERATURE AND MINIMUM VENTILATION CURVES
The controller can automatically change the temperature set point and the
minimum ventilation's On-Time over a given period of time in accordance
with the user's requirements.
AVERAGE TEMPERATURE READINGS RECORDED FOR THE PAST 60 DAYS
The average temperature readings are logged into the controller's history for
the past 60 days.
INDIVIDUAL SENSOR READINGS RECORDED FOR THE PAST 10 DAYS
The minimum and maximum readings of each sensor (temperature & humidity
sensors) are logged into the controller's history for the past 10 days.
WATER AND HEATER MONITORING
A pulse input is provided to monitor the water consumption. Heater run times
are also logged into an history. These values are recorded for the current day
and for the previous 60 days.
ALARM MANAGEMENT
Alarms are provided for high-low temperatures, defective sensors and other
system failures. The controller keeps in memory the 10 most recent alarms.
KOOLMASTER PP-32 REV.01
7
Page 8

PP-32
EIGHT INDEPENDENT TEMPERATURE SENSOR INPUTS
Up to eight temperature sensors can be connected to the controller in order to
obtain a more accurate reading of the average room temperature and a faster
reaction time. Sensors may be assigned to each heater output or to auxiliary
outputs. Auxiliary outputs can be used to operate various devices such as
heating units or stir fans for instance.
OUTSIDE TEMPERATURE SENSOR
HUMIDITY COMPENSATION
Three mechanisms can be used to compensate for a high humidity level:
1. Fans' On-Time, in minimum vent. cycles, can automatically be increased.
2. Kool-Cel or mist units can be shutoff.
3. Heaters can be activated in timer mode.
STATIC PRESSURE & VENT DOORS & TUNNEL CURTAIN CONTROL
A static pressure input is provided to control static pressure by opening and
closing the vent doors and/or tunnel curtain.
CONTROL OF AIR INLET MOVEMENT
If the PP-32 is used in combination with one or more DWR-F-1A controllers,
the movement of air inlets can be coordinated with the operation of the fans
using a potentiometer located on the panel drive. This allows the air inlets to
be adjusted correctly, without the influence of uncontrollable factors such as
wind or air from adjoining rooms.
PASSWORD PROTECTION
A password can be enabled to restrict access to the controller setup functions.
BACKUP BATTERY
A backup battery allows the unit to keep time in case of a power failure.
OVERLOAD AND OVERVOLTAGE PROTECTION
Resettable fuses are provided at low-voltage inputs and outputs of the controller
to protect its circuitry in the case of an overload or overvoltage.
COMPUTER CONTROL
The controller can be connected to a computer, thus making it possible to
centralize the management of information and diversify control strategies.
TEST MODE
A test mode allows you to simulate temperature changes and verify controller
performance, as well as manually activate each output sequentially.
8
KOOLMASTER PP-32 REV.01
Page 9
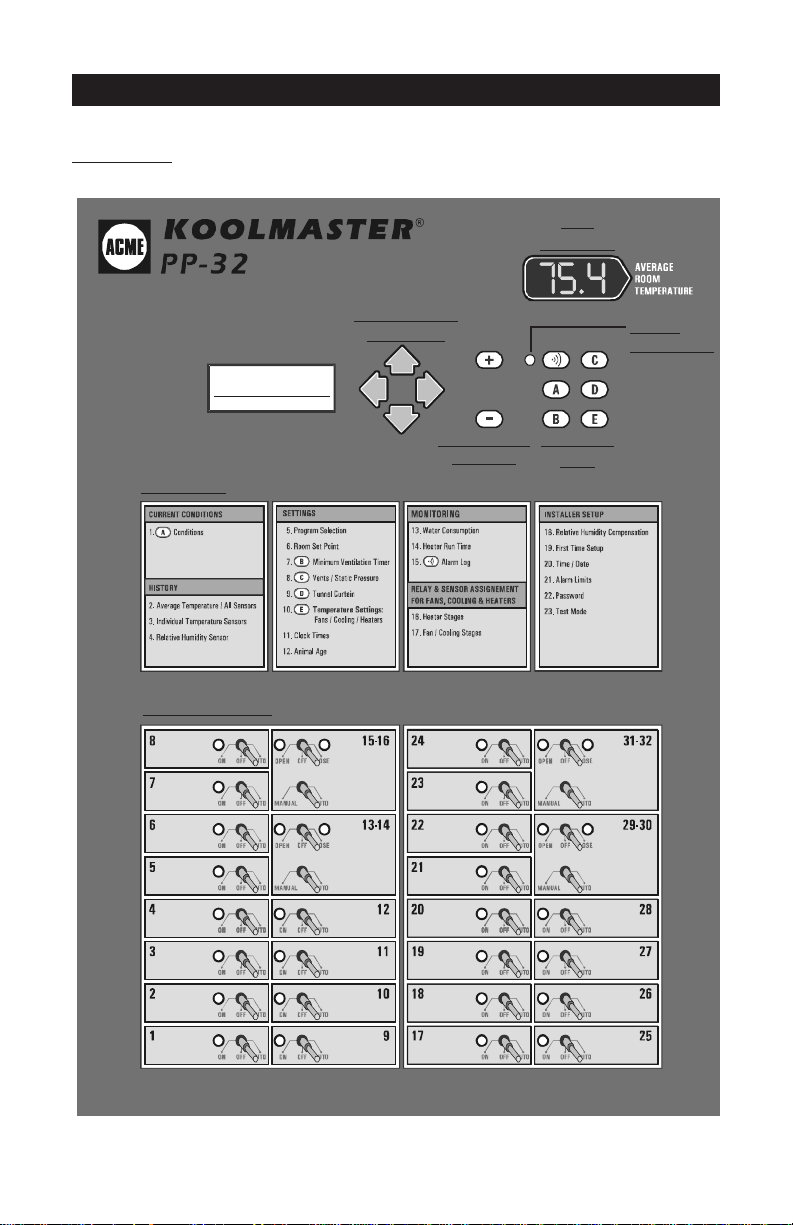
3. LOCATION OF THE CONTROLS
Front Panel
LED
DISPLAY
LCD DISPLAY
MAIN MENUS
32 ON/OFF RELAYS
NAVIGATION
BUTTONS
ADJUSTMENT
BUTTONS
ALARM
STATUS LED
SHORTCUT
KEYS
KOOLMASTER PP-32 REV.01
9
Page 10
PP-32
LCD Display: The LCD display gives the current readings and parameters to be adjusted when you select a function. When the parameters
for a given function cannot all be presented at once on the display,
arrows are displayed on the right handside to indicate that additional
parameters can be displayed using the arrow keys.
After 5 minutes of inactivity, the display returns to the CURRENT
CONDITIONS display.
Led Display: This display shows the current average room temperature.
Navigation buttons (Arrow Keys): The up and down-arrow keys are used
to scroll within a function menu. The right-arrow key is used to select a
menu option. The left arrow key is used to return to the previous menu
display.
Adjustment Buttons: These two push-buttons allow the user to adjust
the value of a parameter that is shown on the display.
Adjusting a Parameter: A parameter can be adjusted when it is flashing
on the LCD display. Use the adjustment buttons to change the value of a
parameter. Pressing increases the value, pressing decreases the
value.
Shortcut Keys: These 6 buttons allow the user to step quickly to the
special predefined functions on the display.
syeKtuctrohSnoitanitseD
goLmralA
snoitidnoCtnerruC
remiTnoitalitneVmuminiM
sgnitteSerusserPcitatS/srooDtneV
sgnitteSniatruClennuT
sgnitteSerutarepmeT
)segatSgnilooC/snaF(
10
KOOLMASTER PP-32 REV.01
Page 11
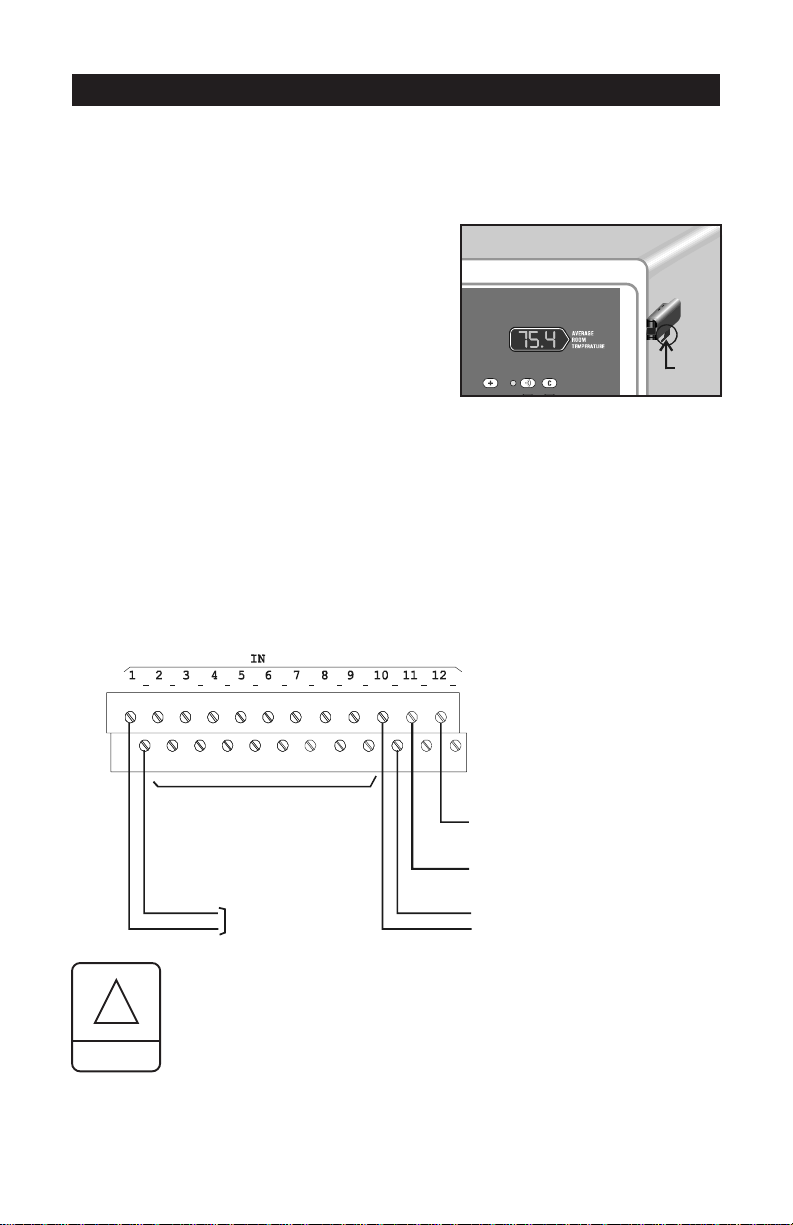
4. MOUNTING INSTRUCTIONS
Fasten the four metal brackets on the mounting holes located behind the
controller using the four screws included with the controller. Mount the
enclosure on the wall using four other
screws. Make sure the electrical knockouts
are at the bottom of the enclosure in order
to prevent water from entering the controller. The enclosure must be mounted in a
location that will allow the cover to be
completely opened right up against the
wall. Push on the locking devices to open
LOCKING
DEVICE
the enclosure as illustrated.
4.1 CONNECTION
To connect the controller, refer to the wiring diagram enclosed with this
user's manual. Use the electrical knockouts provided at the bottom of
the enclosure. Do not make additional holes in the enclosure, particularly
on the side of the enclosure when using a computer communications
module.
1. SENSOR INPUTS
!
WARNING
ROOM TEMPERATURE SENSORS
WATER METER
ALL WIRING MUST BE DONE BY AN AUTHORIZED ELECTRICIAN
AND MUST COMPLY WITH APPLICABLE CODES, LAWS AND
REGULATIONS. BE SURE POWER IS OFF BEFORE DOING ANY
WIRING TO AVOID ELECTRICAL SHOCKS AND EQUIPMENT DAMAGE.
HUMIDITY SENSOR
(Refer to the main wiring diagram)
STATIC PRESSUR E SENSOR
(Refer to the main wiring diagram)
OUTSIDE T° SENSOR
KOOLMASTER PP-32 REV.01
11
Page 12
PP-32
Sensors operate at low voltage and are isolated from the
supply. Be sure that sensor cables remain isolated from all high
voltage sources. In particular, do not route the sensor cables
through the same electrical knockout as other cables. Do not
connect the shield from the sensor cable to a terminal or a
ground.
Extending a sensor: Each sensor can be extended up to 500 feet (150
meters). To extend a sensor:
Use a shielded cable of outside diameter between 0.245 and
0.260 in (6.22 and 6.60 mm) (the cable dimensions should not
be under 18 AWG) to ensure the cable entry is liquid tight. Do
not ground the shielding.
It is preferable to solder the cable joint to ensure a proper
contact between the two cables.
CAUTION: Do not run sensor cables next to other power cables. When
crossing over other cables, cross at 90°.
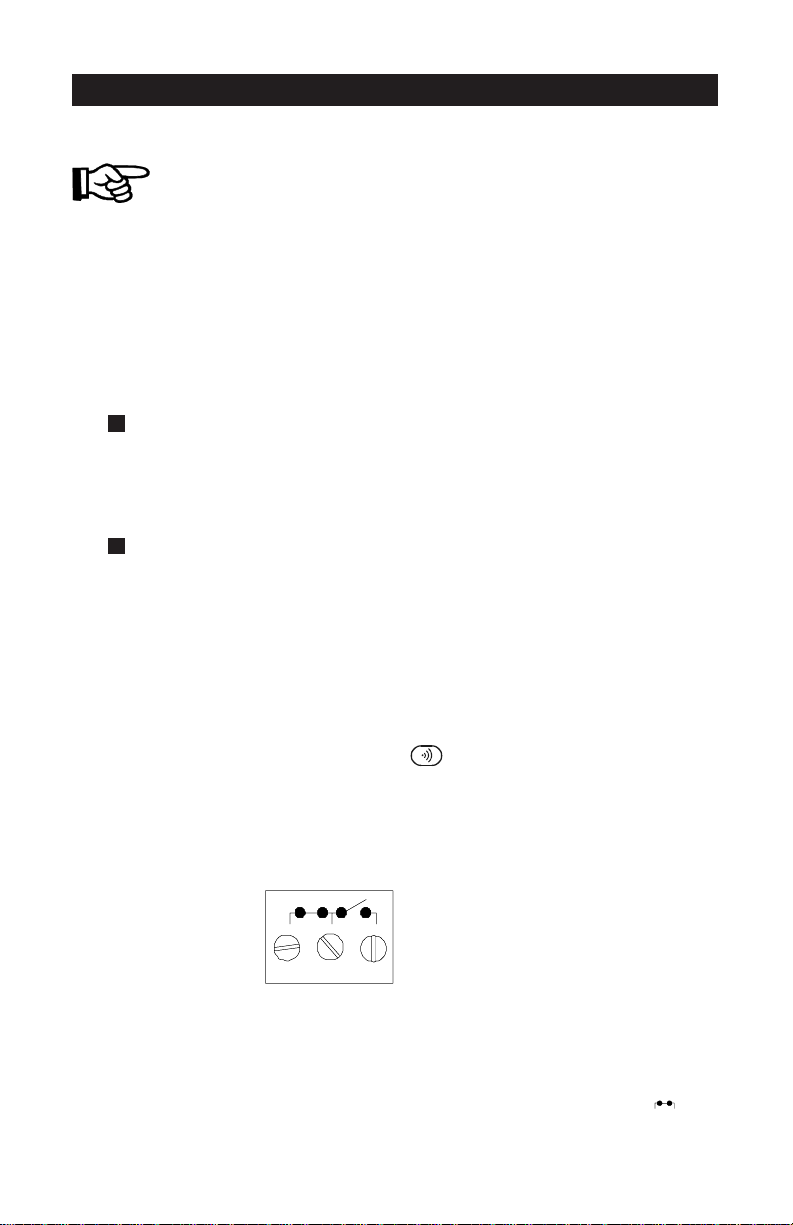
Defective temperature sensors: An alarm is generated when a defective
sensor is detected. The defective temperature sensors are identified in
the "15. Alarm Log" menu. Press the key to directly access this
menu.
2. ALARMS
ALARM
There are two types of alarms on the market. One type activates when
current is cut off at its input, whereas the other activates when current
is supplied at its input. For an alarm of the first type, use the NC
12
KOOLMASTER PP-32 REV.01
Page 13

PP-32
terminal as shown on the wiring diagram. For an alarm of the second
type, use the NO terminal.
3. DWR-F-1A COMMUNICATION HOOKUP
If DWR-F-1A air inlet controllers are connected to the PP-32, use id
numbers within the range 4-15. Id numbers 1,2 and 3 are reserved for
another purpose. Refer to section 5.5.1.1 to set the proper ID numbers.
KOOLMASTER PP-32 REV.01
13
Page 14
PP-32
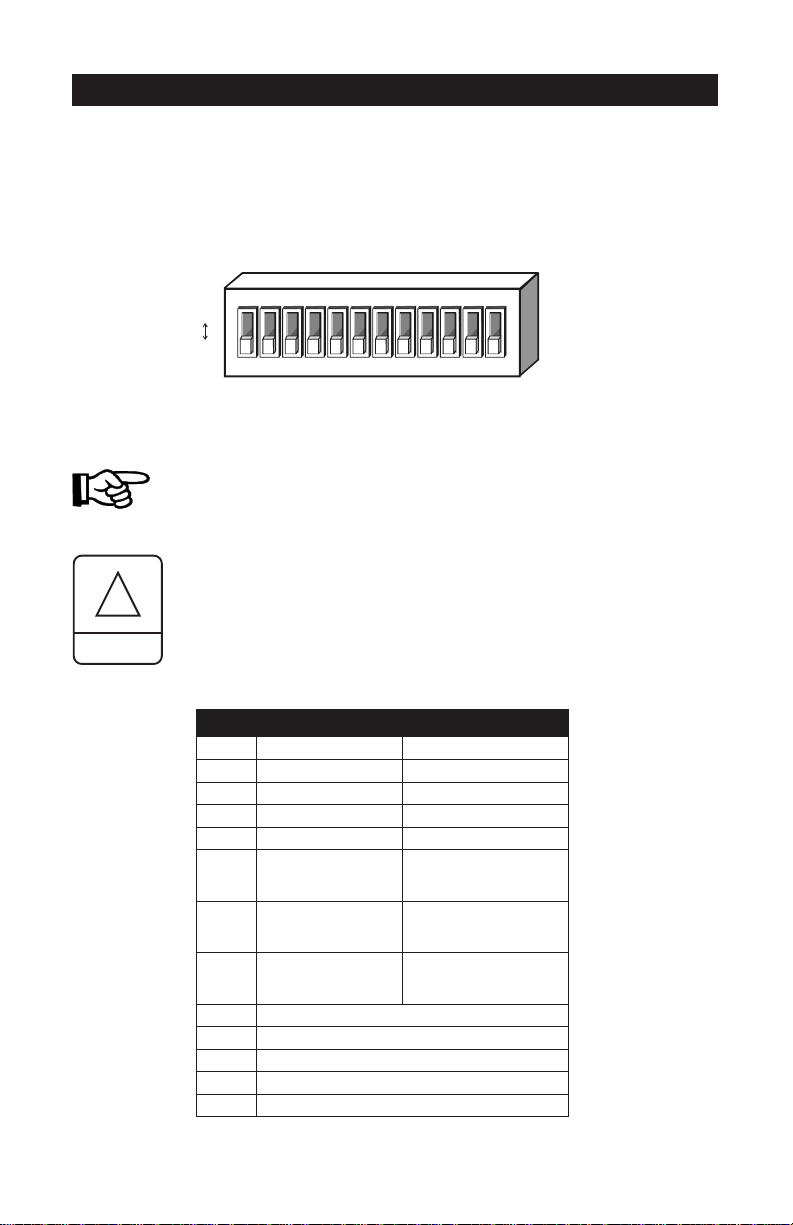
4.2 SETTING THE DIP SWITCHES
The PP-32 has 12 DIP switches (only the first 7 are used) which determine how the controller works. These switches are located on the
board inside the top cover.
ON
ON
OFF
123456789101112
To change the position of a DIP switch, use a small screwdriver or
similar object to move the switch to the desired position.
Pay attention when setting DIP switches. Since they are very
close to each other, it is easy to switch 2 switches at the same
time.
When the controller is shipped, all DIP switches are set
!
to the OFF position.
WARNING
14
KOOLMASTER PP-32 REV.01
ALWAYS close the controller before applying power to it.
1 SEERGEDTIEHNERHAF SEERGEDSUISLEC
2 EDOMMP/MA EDOMSRUOH42
3 SNOLLAG SRETIL
4 RETAWFOSEHCNI SLACSAP
5
6
7
8 DESUTON
9 DESUTON
#hctiwS FFO NO
TSIMROLLECLOOK
NOITASNEPMOCHR
ELBASID
HRRETAEH
NOITASNEPMOC
ELBASID
NOITALITNEVMUMINIM
NOITASNEPMOCHR
ELBASID
01 DESUTON
11 DESUTON
21 DESUTON
ELBATHCTIWSPID
TSIMROLLECLOOK
NOITASNEPMOCHR
ELBANE
HRRETAEH
ELBANENOITASNEPMOC
HRNOITALITNEVMUMINIM
ELBANENOITASNEPMOC
Page 15

5. CONTROLLER SETUP
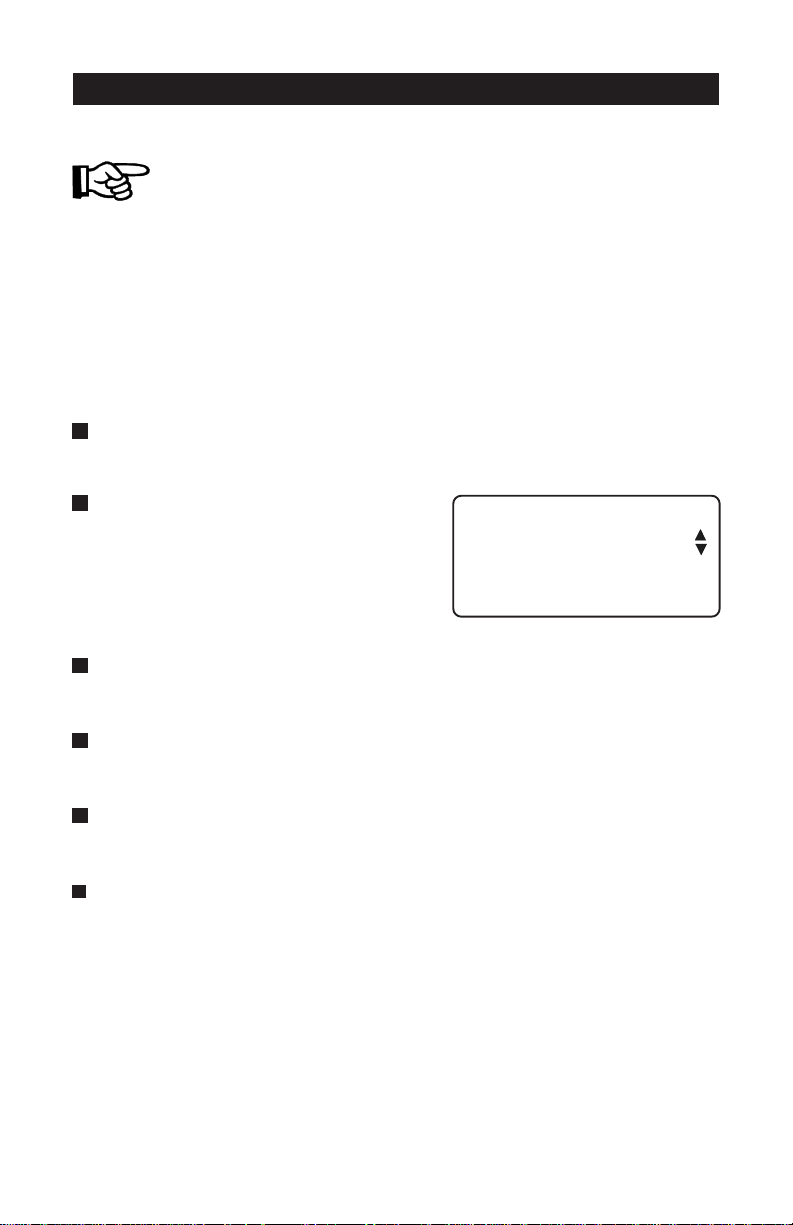
5.1 CURRENT CONDITIONS
The current conditions menu gives a quick view of the actual conditions
in the barn. Press to step directly to this menu.
Room Set Point: this is the target
temperature in the barn.
Average Temperature: shows the
average temperature in the barn.
Static Pressure: current static pressure
in the barn.
Fan Stage: shows which fan stage is
currently active.
Program: shows the selected program.
Fan On-Time sec: fans' on-time in minimum ventilation.
Sensor 1-8: actual reading of each temperature sensor.
Outside: actual outside temperature reading.
RH Sensor: current humidity level in the room.
Room Set Point 80.0
Average Temp 79.2
Static Pressure 0.01
Fan Stage: Min.V
Program: (a)
Fan On Time sec 30
Sensor 1: 79.3
Sensor 2: 79.1
Outside: 65.9
R. Humidity 74
KOOLMASTER PP-32 REV.01
15
Page 16
PP-32
5.2 CONTROLLER PROGRAMS
The controller allows to use up to 4 separate programs to control the
room temperature. It then becomes possible to activate a specific
program, that uses particular fan settings, in accordance with the animal
age for instance.
Relays that are activated on fan stages 1-4 vary depending on the chosen
program: the first 4 fan stages use separate relay assignment settings for
each program. This allows to activate a greater number of fans as the
occupied space in the barn increases. Fan stage's sensor assignment must
also be set separately for each program in use.
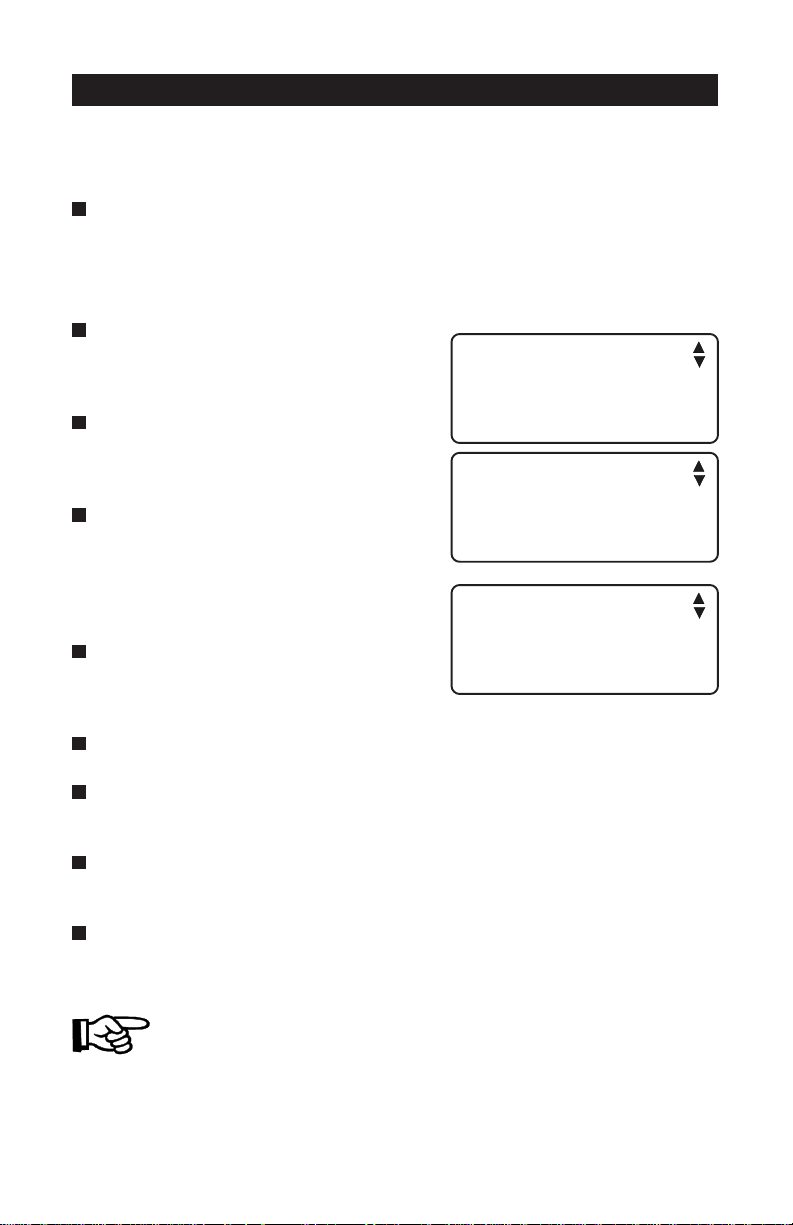
5.2.1 Selecting a Program
Use the navigation buttons to select
"5. Program Select" from the main
menu then press the right-arrow
key. The program that is currently
in use is flashes on the display.
Use the adjustment buttons to select
the proper program (a, b, c or d).
Only the programs that have been
enabled during the installation can be
selected (see sec. 5.14.3). Press the
left-arrow key to exit this menu.
5. Program Select.
Fan / Sensor Program
Selection: (a)
Temp Settings: Summr
Main Menu
5.2.2 Selecting a Season
The start and stop temperatures of heating and ventilation stages can be
set separately for summer and winter seasons. The season change is
signalled by the user as follows:
Use the navigation buttons to select "5. Program Select" from the
main menu then press the right-arrow key. The program that is
currently in use is flashes on the display.
Press the down-arrow key to select the " Temp Settings" display.
16
KOOLMASTER PP-32 REV.01
Page 17

PP-32
Use the adjustment buttons to
select the proper season (winter/
summer). The start and stop
temperatures of heating and
ventilation stages that are associated with this seasons will be used.
Press the left-arrow key to exit this menu.
Fan / Sensor Program
Selection: (a)
Temp Settings: Summr
KOOLMASTER PP-32 REV.01
17
Page 18
PP-32
5.3 ADJUSTING THE ROOM SET POINT
The room set point is the target room temperature. It can be adjusted
between 32°F and 120°F (0°C and 48.9°C). Note that the temperature
curve must be turned off to adjust this value.
The set point can quickly be accessed by pressing the shortcut key
(note that the set point will not be accessible this way if the temperature
curve is turned on, see below to deactivate the temperature curve).
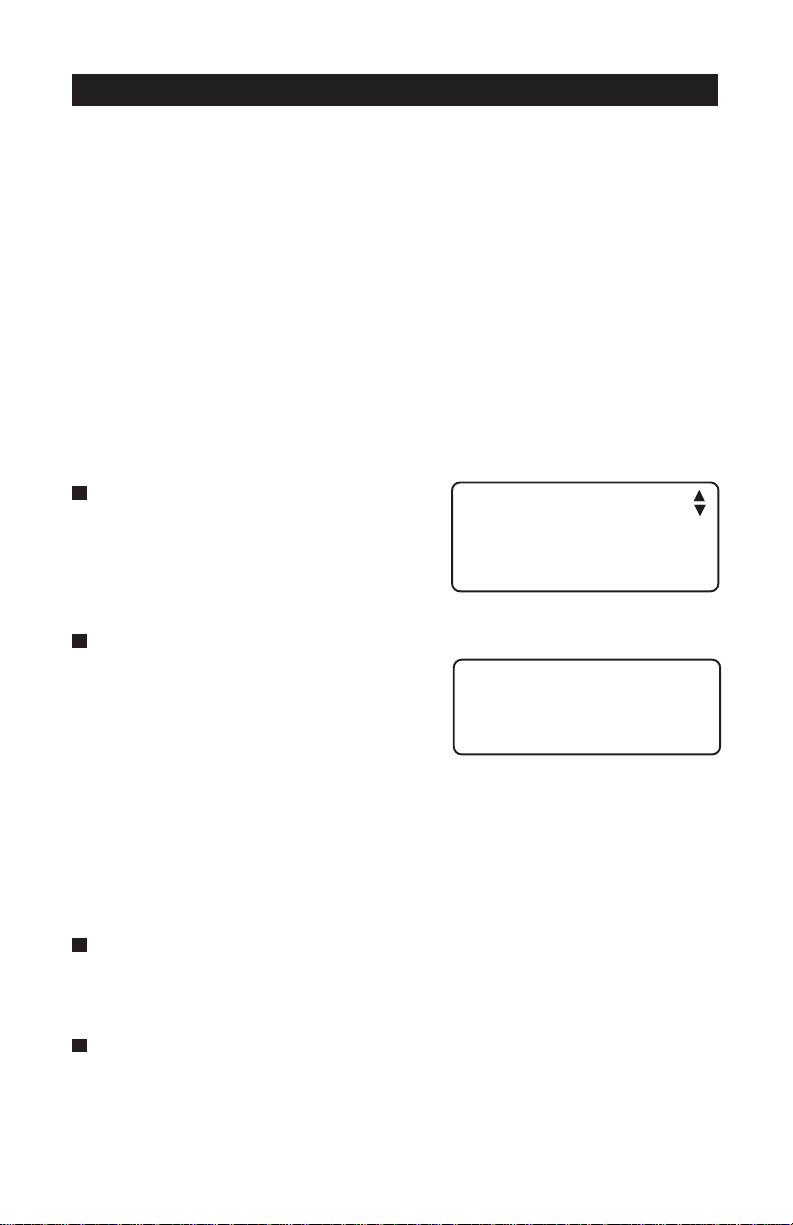
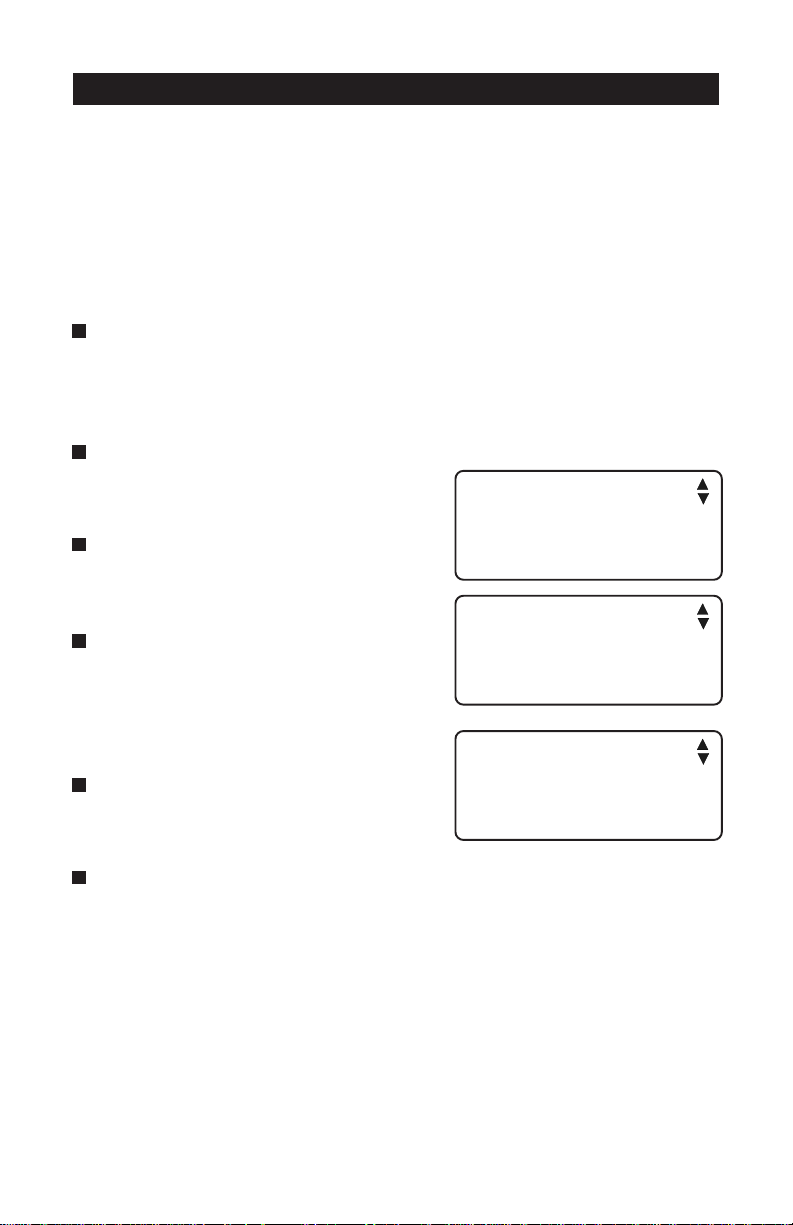
Select the "6.Room Set Point"
function from the main menu using
the navigation buttons then press
the right-arrow key. The current set
point is displayed, as well as the on/
off state of the temperature curve.
6. Room Set Point
Main Menu
If the temperature curve is OFF,
the set point flashes on the display.
Use the adjustment buttons to
adjust the room set point to the
desired value.
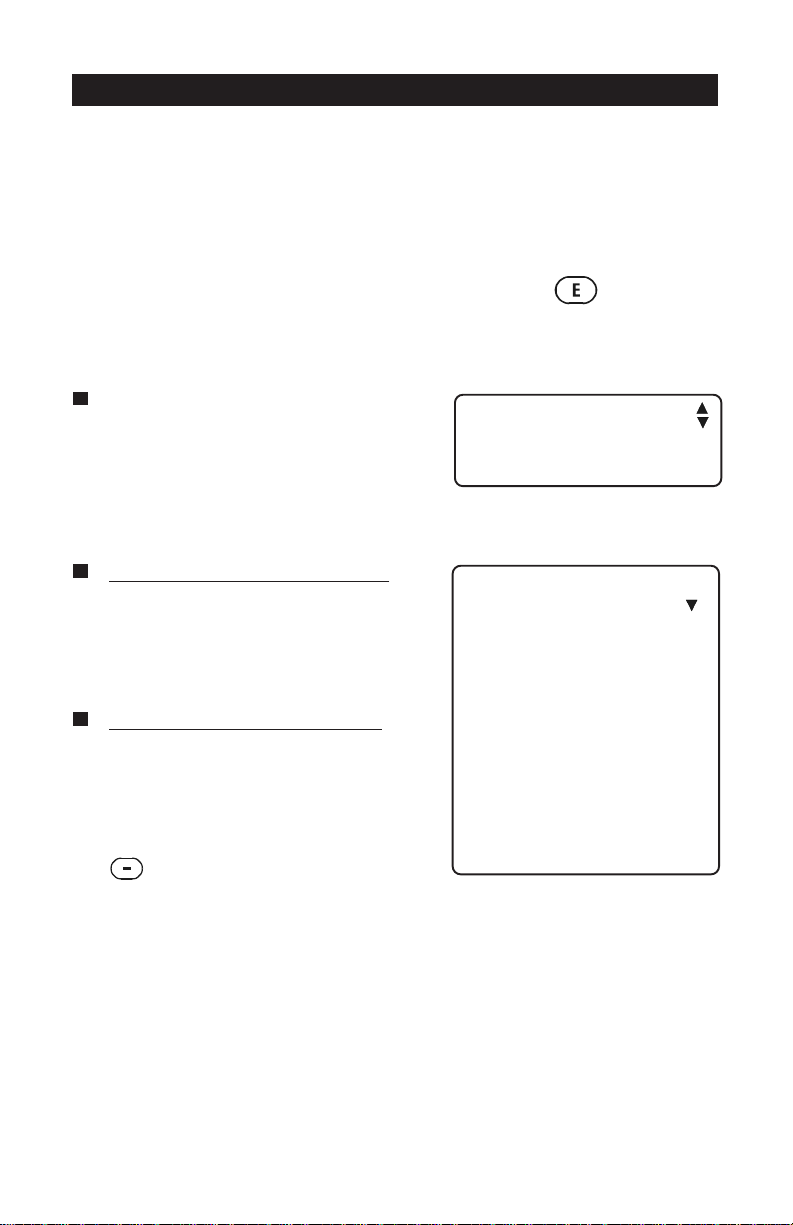
If the temperature curve is ON, the
set point, as determined by the
temperature curve, is displayed.
Press the down-arrow key and
scroll the menu until "Curve stat"
status flashes on the display. Press
to turn off the temperature
curve then follow the procedure
above to adjust the set point.
18
KOOLMASTER PP-32 REV.01
Room Temperature
Set Point: 80.0°F
Curve stat Off
Day: 1
Temp: 60.0°F
Day: 10
Temp: 75.0°F
(...)
Curve stat Off
Page 19
PP-32
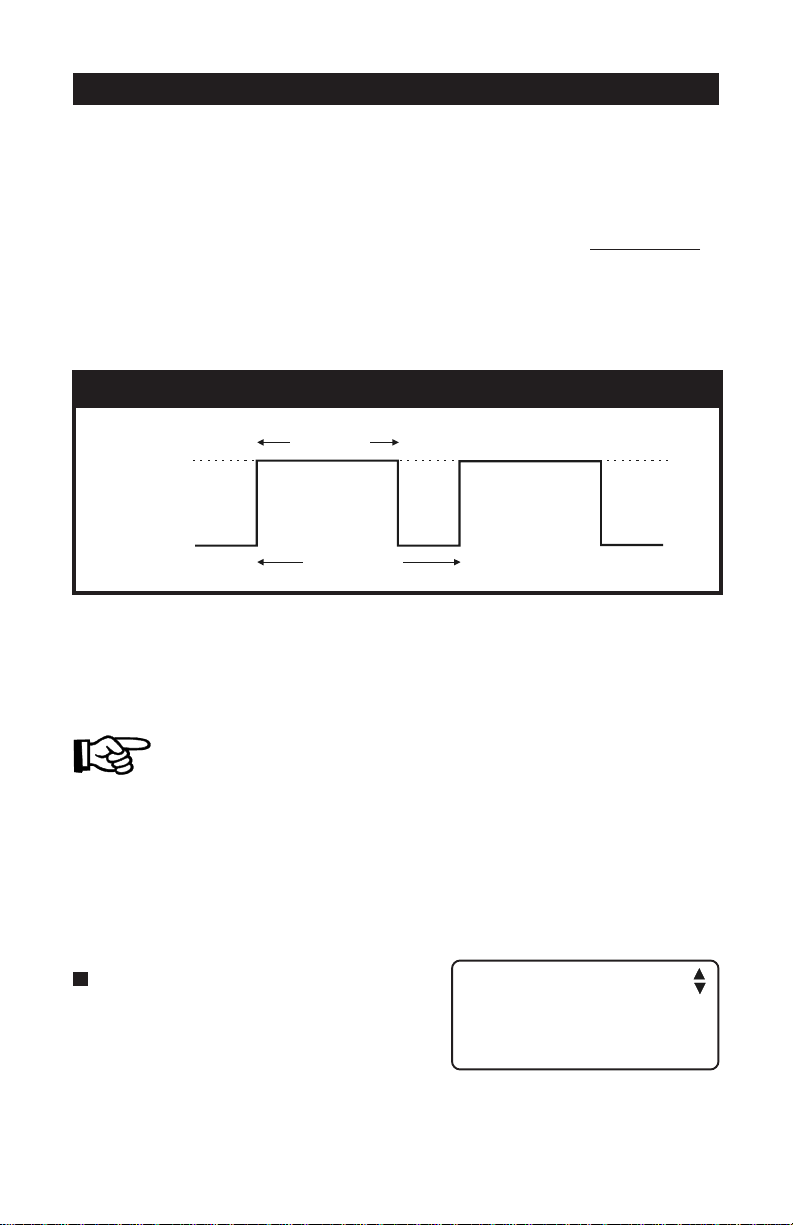
5.4 MINIMUM VENTILATION
PRINCIPLE OF OPERATION
When the room temperature is below the set point, fans can operate
according to a timer. The minimum ventilation cycles runs stage 1 fans
according to a timer as shown below. Running fans even though ventilation is not required for reducing the room temperature is useful to reduce
the humidity level and supply oxygen to the room. It also prevents the
fans from freezing in winter.
MINIMUM VENTILATION TIMER
ON
OFF
In addition, fans' On-Time, in minimum ventilation, can automatically be
adjusted over time by using a curve. Refer to section 5.15.2 for further
information on the minimum ventilation curve.
Note that the minimum ventilation curve must be TURNED OFF
in order to adjust minimum ventilation settings.
ON-TIME
CYCLE-TIME
5.4.1 Adjusting Minimum Ventilation's On-Time
Fans' On-Time, in the minimum ventilation cycle, can be adjusted from 0
to 900 seconds (15 minutes), in increments of 5 seconds. Note that the
On-Time cannot be greater than the cycle time. If vent doors are used, the
On-Time is limited by the vent doors' pre-opening delay (see sec. 5.14.3).
Select "7.Min. Ventilation" from
the main menu using the navigation buttons then press the rightarrow key.
Min ventilation
On Time: 30sec
Curve stat Off
KOOLMASTER PP-32 REV.01
19
Page 20
PP-32
Use the arrow keys to select the "1. On Time/Curve" function. Press
the right-arrow key. The fans' On- Time, in minimum ventilation, is
displayed, as well as the status of the minimum ventilation curve.
If the curve is OFF, the On-Time
value flashes on the display. Use the
adjustment buttons to adjust
minimum ventilation's On- Time to
the desired value then press the
left-arrow key to exit this menu.
If the curve is ON, press the down-arrow key to scroll all ten points
of the curve. The curve status flashes on the display. Press to
turn off the minimum ventilation curve then follow the procedure
above to adjust the set point.
5.4.2 Adjusting Minimum Ventilation's Cycle Time
Fans' Cycle-Time, in minimum ventilation, can be adjusted from 0 to 900
seconds (15 minutes), in increments of 5 seconds. If vent doors are used,
the Cycle-Time is limited by the vent doors' pre-opening delay : it must be
set at a greater value than twice the pre-opening delay (see sec. 5.14.3).
Min ventilation
Curve stat Off
Select "7.Min. Ventilation" from
the main menu using the navigation
buttons then press the right-arrow
key.
Use the arrow keys to select the "2. Cycle Time" function. Press the
right-arrow key. The current cycle time flashes on the display.
Use the adjustment buttons to adjust the Cycle-Time to the desired
value then press the left-arrow key to exit this menu.
20
KOOLMASTER PP-32 REV.01
Min Ventilation
Cycle Time 300sec
Page 21

PP-32
5.5 INLET / VENT DOOR SETTINGS
The PP-32 controller can operate the air inlets / vent doors in two
different ways:
1. Inlets' positions can be determined by using a potentiometer feedback
controller (DWR-F-1A). Refer to the installation setup section to
enable DWR-F-1A modules. Note that the static pressure sensor must
be deactivated in order to activate the air inlets (see sec. 5.15.3).
2. Inlets' positions can be determined by the static pressure level in the
barn. In this case, a static pressure sensor is required and must be
activated during the installation setup (see sec. 5.15.3). The term
"Vent Door" is used to refer to an air inlet that is controlled by the
static pressure.
5.5.1 Inlet Settings (Potentiometer Feedback from Inlets)
If air inlets operate according to potentiometer feedback modules (DWRF-1A), the PP-32 controller adjusts the air inlets opening according to
ventilation stages. As the temperature increases and new stages are
activated, the inlet is opened or closed accordingly. The air inlet position
is directly related to these ventilation stages. Refer to the DWR-F-1A
instruction manual to program inlet openings.
In addition, a compensation can be activated to ensure the uniformity in
room temperature: air inlet positions are automatically adjusted when the
reading of the sensors that are associated with the air inlet differs from
the average room temperature.
5.5.1.1 Setting DWR-F-1A's ID numbers
ID numbers must be assigned to each DWR-F-1A modules. This allows to
establish the communication with the PP-32 control and the external
modules. The following table gives the proper ID numbers for each
DWR-F-1A module.
KOOLMASTER PP-32 REV.01
21
Page 22

PP-32
Note that the reference numbers that
are used by the PP-32 DO NOT
correspond to the ID numbers that
used by the DWR-F-1A modules
because #1, 2 and 3 are reserved for
other purpose.
23-PP
#ecnerefeR
14
25
......
2151
#diA1-F-RWD
5.5.1.2 Adjusting the Air Inlet Compensation
The compensation is expressed as a percentage per degree difference
between the average controller's temperature and the average temperature of sensors that are assigned to the inlet. It determines by how much
the inlet must open or close to help reduce the temperature differences
in the building. For each degree above or below the average temperature, the inlet will open or close using the compensation value assigned
by the user. For example, if the compensation value is set to 5%/°F and
the inlet's sensors read 3°F above the average controller temperature,
the inlet will open of 15% to help decrease the temperature in that zone.
The compensation can be adjusted from 0 to 10% of inlets' opening or to
"Off" to deactivate this function.
Select "8.Inlet Settings" from the main menu using the navigation
buttons then press the right-arrow key. Note that this menu is only
available if the static pressure sensor is disabled and if inlets have
been activated (see sec. 5.15.3).
Press the right-arrow key once
again to select "1.Inlet Comp"
menu. The compensation value of
each air inlet is displayed.
Use the up or down-arrow key to
select the desired inlet.
Use the adjustment buttons to set
the compensation to the proper
value. Press the left-arrow key to
exit this menu.
22
KOOLMASTER PP-32 REV.01
Inlet Settings
1. Inlet Comp
Inlet Compensation
Inlet 1 5%/°F
Inlet 2 5%/°F
Inlet 3 5%/°F
Page 23
PP-32
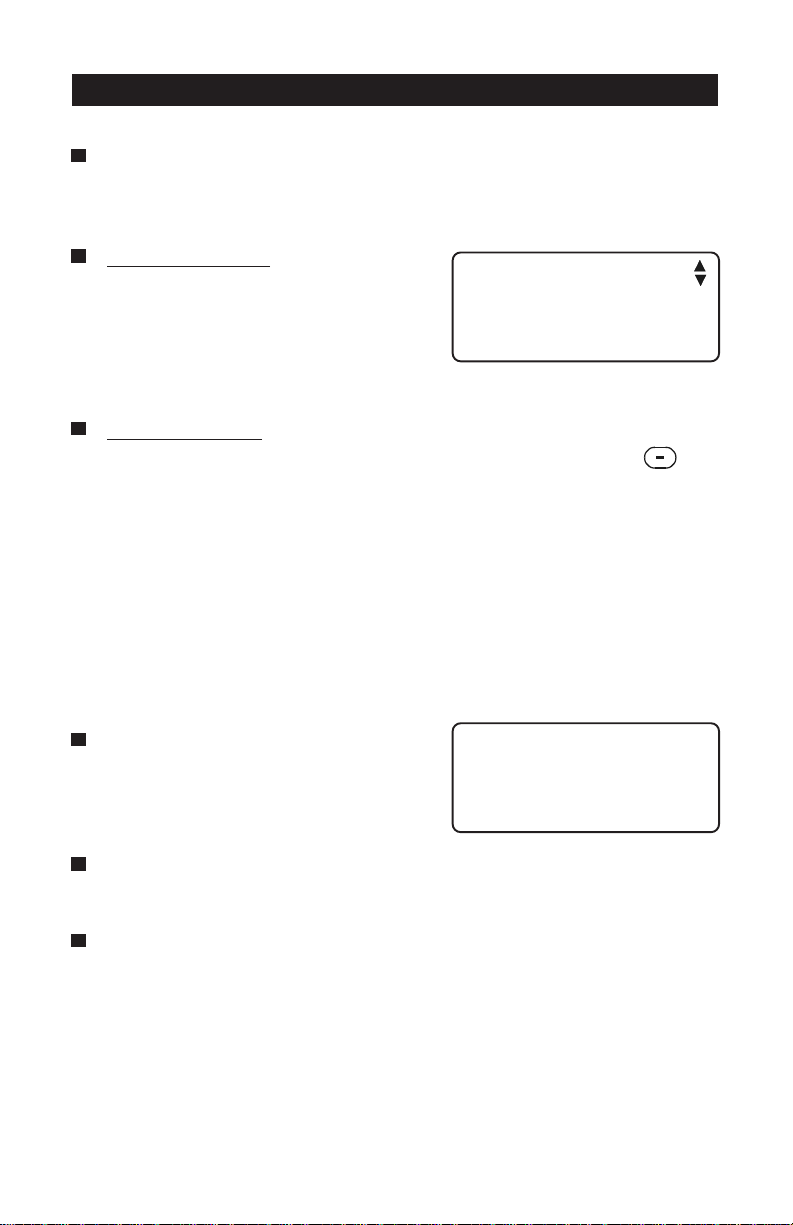
5.5.2 Vent Door Settings
If a static pressure sensor is used, the PP-32 can control the static
pressure in the room by opening and closing vent doors. When the
pressure drops below the low pressure set point, the vent doors close
according to a timer. Likewise, when the static pressure increases
above the high pressure set point, the vent doors open according to a
timer. It is also possible to define a stage level above which the vent
doors will always remain closed. Refer to sec. 5.15.3 to activate the
static pressure sensor.
VENT DOORS OPERATION
STATIC
PRESSURE
VENT DOORS STOP
OPENING
HIGH SET POINT
(OPEN AT)
LOW SET POINT
(CLOSE AT)
STATIC PRESSURE
EXCEEDS
CLOSING
HI SET POINT:
VENT DOORS OPEN IN
TIMER CYCLE
(OPEN TI ME/ OFF TIME)
OPEN
VENT DOORS
STAY STILL
VENT DOORS
CLOSE
VENT DOORS
STATIC PRESSURE
DROPS BELOW
LO SET POI N T:
VENT DOORS CL OSE IN
TIMER C YCLE
(CLOSE TIME/ OFF TI ME)
VENT DOORS STOP
TIME
In minimum ventilation, the vent doors open during the pre-opening delay
before fans start running. The same delay is used to close the vent doors
when the stage 1 fans return to a stop.
Static Pressure Alarm: alarms can be set off if the static pressure
remains below or exceeds a certain level for a too long period of time. In
this case, a delay is set in order to activate the alarm: the alarm condition
must maintained during this delay before the alarm is set off. Refer to
section 5.13.2 to set the static pressure alarm settings.
KOOLMASTER PP-32 REV.01
23
Page 24
PP-32
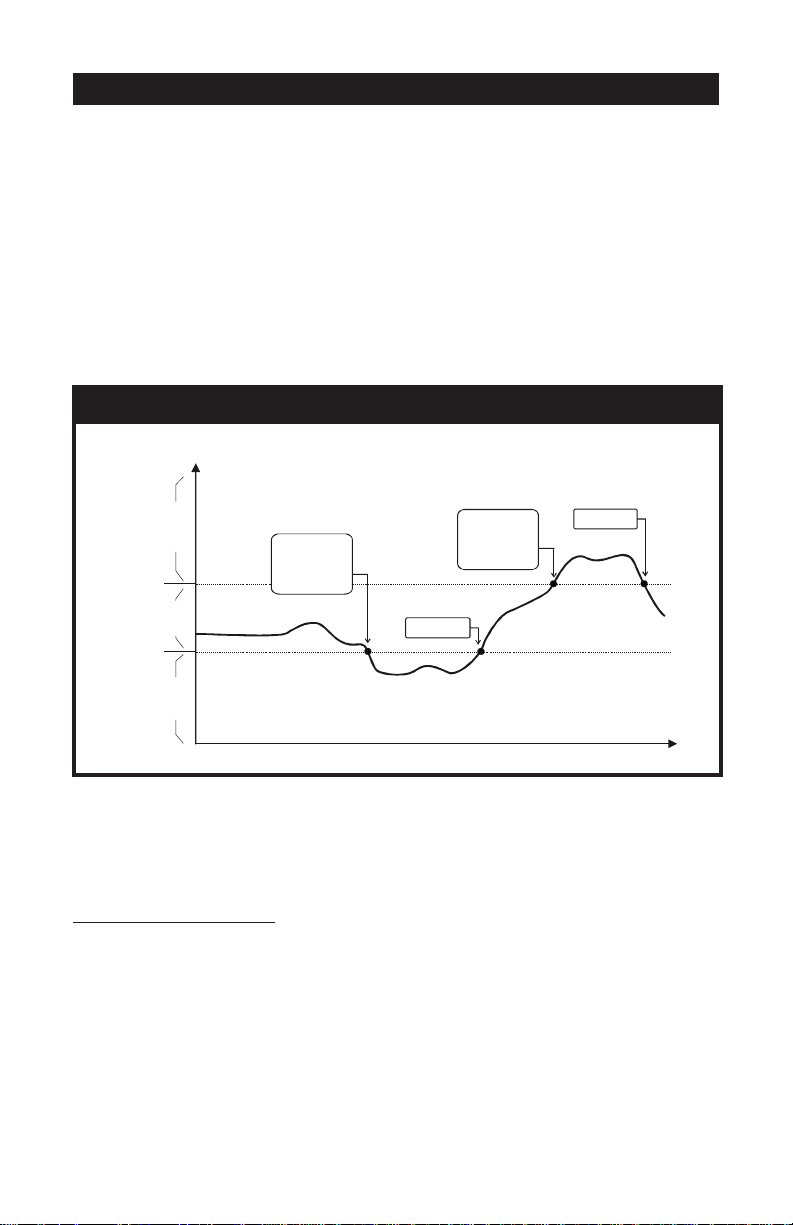
GROUPS OF STATIC PRESSURE SET POINTS :
Two groups of static pressure set points can be defined. HI and LO static
pressure set points #2 start being used either when a certain ventilation
stage is reached or when the outside temperature decreases below a
user-define value. The following graphs sum both cases:
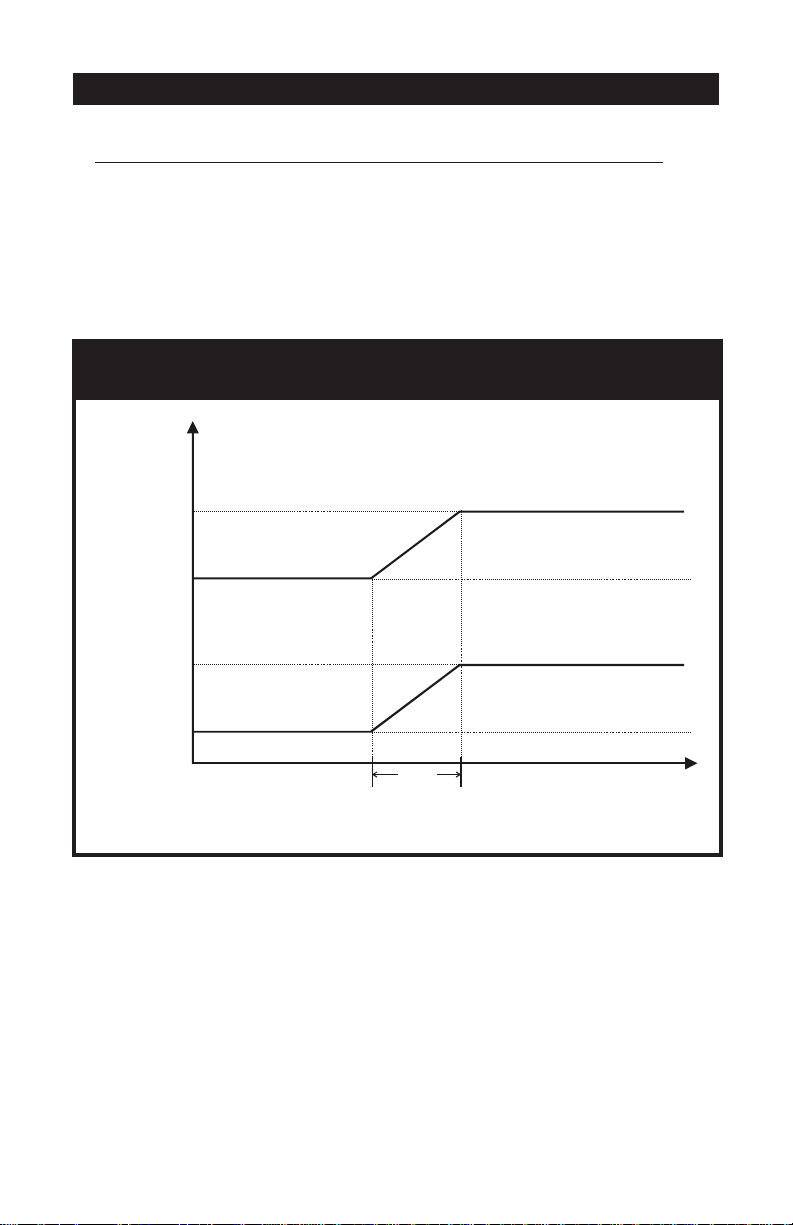
1. Static pressure set points' transition according to ventilation stages:
Example: when the start temperature of stage 5 is reached, the vent
doors start operating according to the second group of static
pressure set points. The first group of set points is being used
once again when the room temperature drops below the stage
5 stop temperature.
STATIC PRESSURE SET POINTS
INFLUENCED BY VENTILATION STAGES
STATIC
PRESSURE
SET POINTS
HI SET POINT 2
(OPEN AT)
HI SET POINT 1
(OPEN A T )
LO SET POINT 2
(CLOSE AT)
LO SET POINT 1
(CLOSE AT)
FAN STAGE 5
STOP T°
FAN STAGE 5
START T°
TEMPERATURE
ROOM
Refer to the installation setup section to activate the second group of
static pressure set points (see sec. 5.14.3).
24
KOOLMASTER PP-32 REV.01
Page 25
PP-32
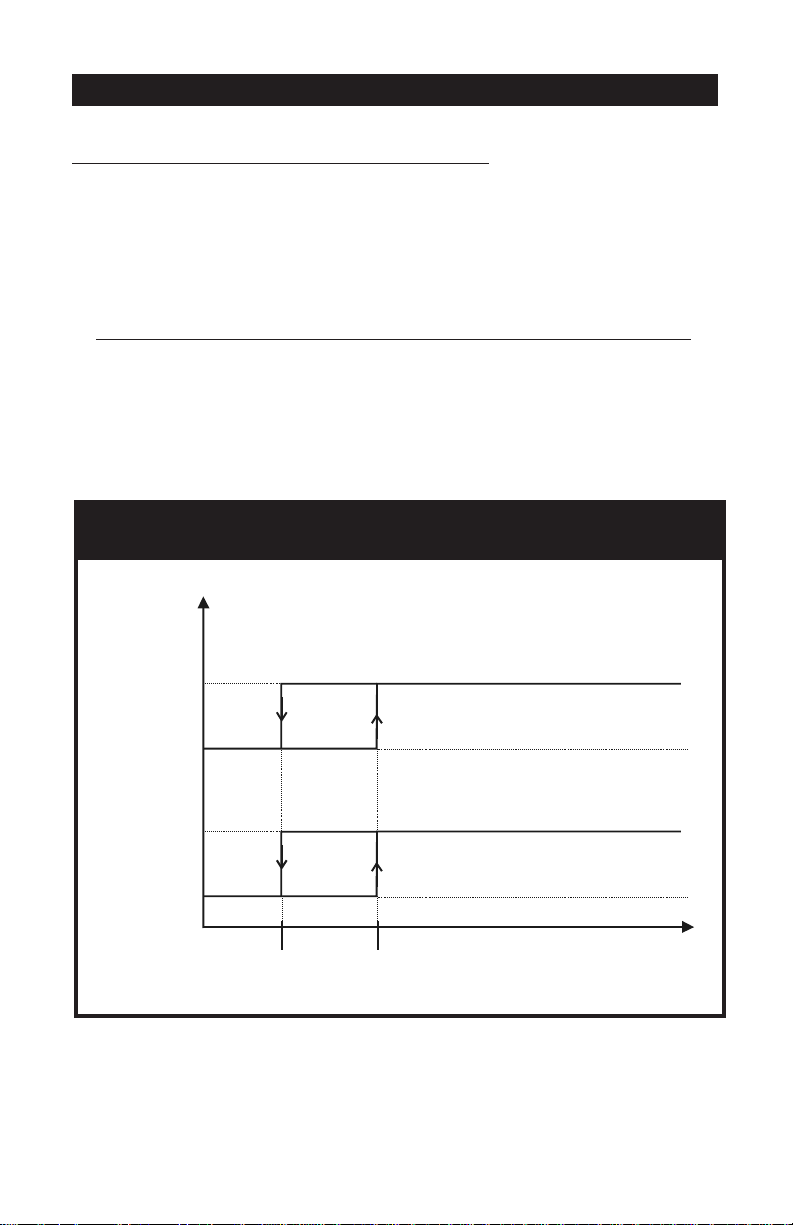
2. Static pressure set points' transition according to the outside T°:
Example: When the outside temperature drops below the "outside
temperature influence" value, a transition between the two set
point groups starts. When the outside temperature decreases
5°F further than the user-defined value, the second group of
set points is used.
STATIC PRESSURE SET POINTS
INFLUENCED BY THE OUTSIDE TEMPERATURE
STATIC
PRESSURE
SET POINTS
HI SET POINT 1
(OPEN AT)
HI SET POINT 2
(OPEN AT)
LO SET POINT 1
(CLOSE AT)
LO SET POINT 2
(CLOSE AT)
50°F
(27.8°C)
5°F
(2.8°C)
55°F
(30.6°C)
(outside t° influence)
OUTSIDE
TEMPERATURE
Refer to the installation setup section to activate the second group of
static pressure set points (see sec. 5.14.3).
KOOLMASTER PP-32 REV.01
25
Page 26

PP-32
5.5.2.1 Adjusting Static Pressure Set Points
When the high pressure set point is reached
opens the vent doors according to a timer cycle. When the low pressure
set point is reached
according to the another timer. The pressure set points can be adjusted
from 0 to 0.2 inches of water (0 to 50Pa).
Select "8.Vents/Static P" from the main menu using the navigation
buttons then press the right-arrow key. Note that this menu is only
available if the static pressure sensor has been enabled during the
installation setup (see sec 5.14.3).
Press the right-arrow key to select the "1.Set Points" menu.
Press the down-arrow key once, the
LO static pressure set point is
selected
Use the adjustment buttons to
adjust the low static pressure set point
value then press the down-arrow key. The hi static pressure set
point
Use the adjustment buttons to adjust the hi static pressure set point
(Close At)
(Open At)
(Open At)
(Close at)
is selected.
to the desired value.
, the controller closes the vent doors
.
(Open at)
Vents/Static Press
Cal. SP .000WC
Close At: .070WC
Open At: .090WC
(Close At)
, the controller
to the desired
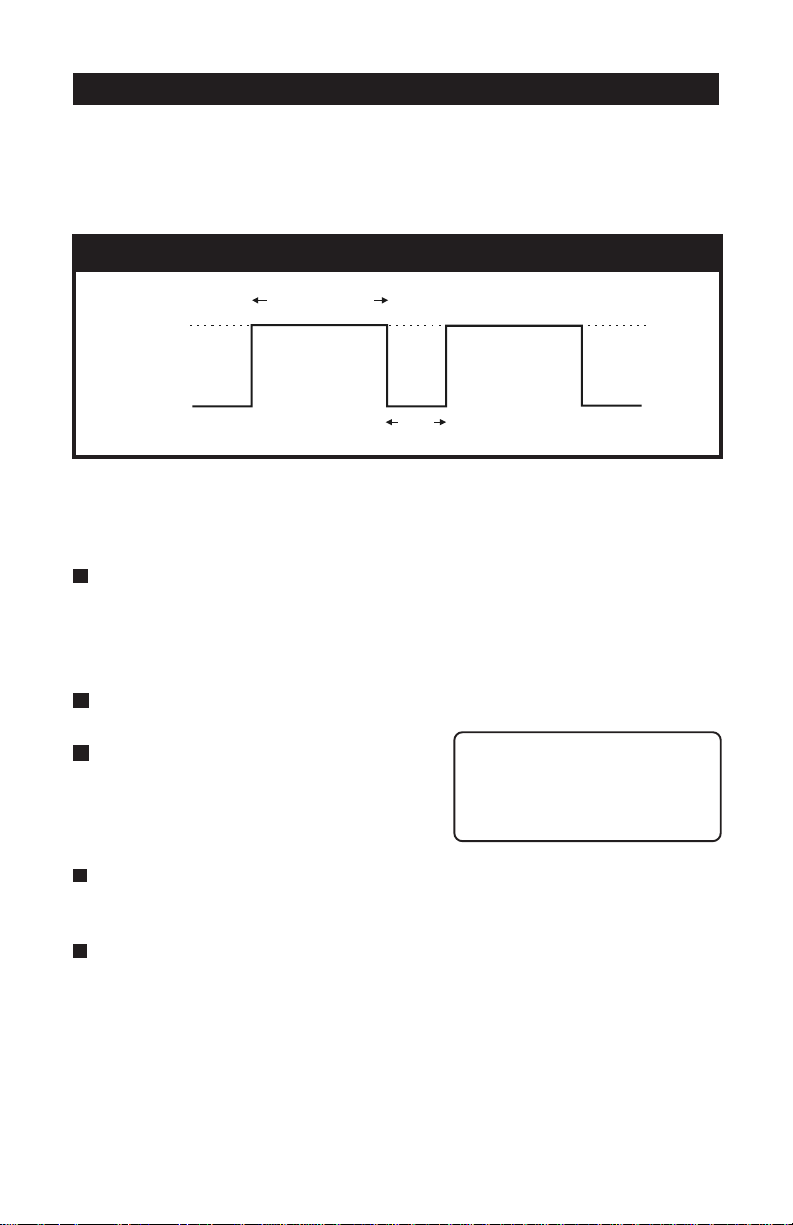
5.5.2.2 Adjusting Vent Doors Open / Close / Off Times
When the static pressure level in the room exceeds the hi or low set
points, the vent doors start opening or closing according to a cycle, as
explained below:
Open Time: when the static pressure exceeds the Hi pressure set point,
the vent doors open during this delay. The open time ranges from 0 to
900 seconds.
Close Time: when the static pressure drops below the Lo pressure set
point, the vent doors close during this delay. The close time ranges from
0 to 900 seconds.
26
KOOLMASTER PP-32 REV.01
Page 27
PP-32
Off Time: once the vent doors have opened or closed (depending on the
situation), they then stop operating during the Off time delay. The Off
Time delay ranges from 0 to 900 seconds.
VENT DOORS TIMER
OPEN / CLOSE
ON
TIMES
OFF
OFF
TIME
If the pressure has not reached the desired value after the Off Time, the
cycle starts again, up until the pressure goes back into the normal range.
Select "8.Vents/Static P" from the main menu using the navigation
buttons then press the right-arrow key. Note that this menu is only
available if the static pressure sensor has been enabled during the
installation setup (see sec 5.14.3).
Press the right-arrow key to select the "1.Set Points" menu.
Press the down-arrow key in order
to select the Open Time then use
the adjustment buttons to set the
Open Time 30sec
Close Time 30sec
Off Time 60sec
opening time to the desired value.
Press the down-arrow key. The Close Time flashes on the display.
Use the adjustment buttons to set the Close Time to the desired value.
Press the down-arrow key once again. The Off Time flashes on the
display. Use the adjustment buttons to set the Off Time to the
desired value.
KOOLMASTER PP-32 REV.01
27
Page 28

PP-32
5.5.2.3 Adjusting Stage Level for the Closing of Vent Doors
When the stage defined by this parameter is reached, the vent doors start
to close continuously until they are completely closed, no matter what the
static pressure is. This feature is usefull for closing vent doors when a
tunnel ventilation stage starts. Select "None" to deactivate this function.
Select "8.Vents/Static P" from the main menu using the navigation
buttons then press the right-arrow key. Note that this menu is only
available if the static pressure sensor has been enabled during the
installation setup (see sec 5.14.3).
Press the right-arrow key to select the "1.Set Points" menu.
Press the down-arrow key in order to
select "Close Vent Door At Stage"
menu on the display.
Use the adjustment buttons to select
the fan stage above which the vent
doors will be closed.
Close Time 30sec
Off Time 60sec
Close Vent Door
At Stage 5
5.5.2.4 2nd Group of Pressure Set Points: at Stage X
The following procedure shows how to select the fan stage above which
the second group of static pressure set points starts being used. It also
explains how to adjust Hi and Lo static pressure set points #2
and Close At)
Select the "8.Vents/Static P" from the main menu using the navigation buttons then press the right-arrow key. Note that this menu is
only available if the static pressure sensor has been enabled during
the installation setup (see sec 5.14.3).
Press the right-arrow key to select the "1.Set Points" menu.
Press the down-arrow key in order to
select "Static Settings 2 At Stage"
display. This menu is only displayed if
the 2nd group of static pressure set
points has been enabled during the
installation (see sec. 5.14.3).
. Refer to sec.5.14.3 to activate this function.
Static Settings 2
At Stage 10
Close At: .050WC
Open At: .080WC
(Open At
28
KOOLMASTER PP-32 REV.01
Page 29

PP-32
Use the adjustment buttons to select the fan stage above which the
second group of static pressure set points starts being used.
Press the down-arrow key once, the LO static pressure set point #2
is selected
Use the adjustment buttons to adjust the 2nd low static pressure set
point
The HI static pressure set point #2
Use the adjustment buttons to adjust the 2nd HI static pressure set
point
Press the left-arrow key to exit this menu.
5.5.2.5 2nd Group of Pressure Set Points: at Outside T° X
The following procedure shows how to select the outside temperature
below which the second group of static pressure set points starts being
used. It also explains how to adjust the second group of Hi and Lo static
pressure set points
activate this function.
(Close At)
(Close At)
(Open At)
.
to the desired value then press the down-arrow key.
(Open At)
to the desired value.
(Open At and Close At)
. Refer to sec.5.14.3 to
is selected.
Select "8.Vents/Static P" from the main menu using the navigation
buttons then press the right-arrow key. Note that this menu is only
available if the static pressure sensor has been enabled during the
installation setup (see sec 5.14.3).
Press the right-arrow key to select the "1.Set Points" menu.
Press the down-arrow key in order
to the select "Outside Temperature
Influence" display. Note that this
menu only appears if the outside
temperature has been enabled
during the installation setup and if
the 2nd Group of static pressure set
points has been enabled (see sec
5.14.3).
Static Settings 2
Outside Temperature
Influence: 50.0°F
Close At: .070WC
Open At: .090WC
KOOLMASTER PP-32 REV.01
29
Page 30

PP-32
Use the adjustment buttons to set the outside temperature below
which the second group of static pressure set points start to be
used.
Press the down-arrow key once, the LO static pressure set point #2
(Close At)
Use the adjustment buttons to adjust the 2nd low static pressure set
point
The HI static pressure set point #2
Use the adjustment buttons to adjust the 2nd HI static pressure set
point
Press the left-arrow key to exit this menu.
is selected .
(Close At)
(Open At)
to the desired value then press the down-arrow key.
(Open At)
to the desired value.
is selected.
30
KOOLMASTER PP-32 REV.01
Page 31
PP-32
5.6 TUNNEL CURTAIN
The PP-32 allows you to control an endwall curtain for tunnel ventilation.
The tunnel curtain is controlled either by the static pressure level in the
barn or in timer mode, according to the room temperature. Select the
proper mode (Timer or Static pressure) that is used to control the tunnel
curtain in the installation setup (see sec 5.14.3).
In both modes, a minimum animal age is defined to avoid starting the
tunnel ventilation mode when animals are too young.
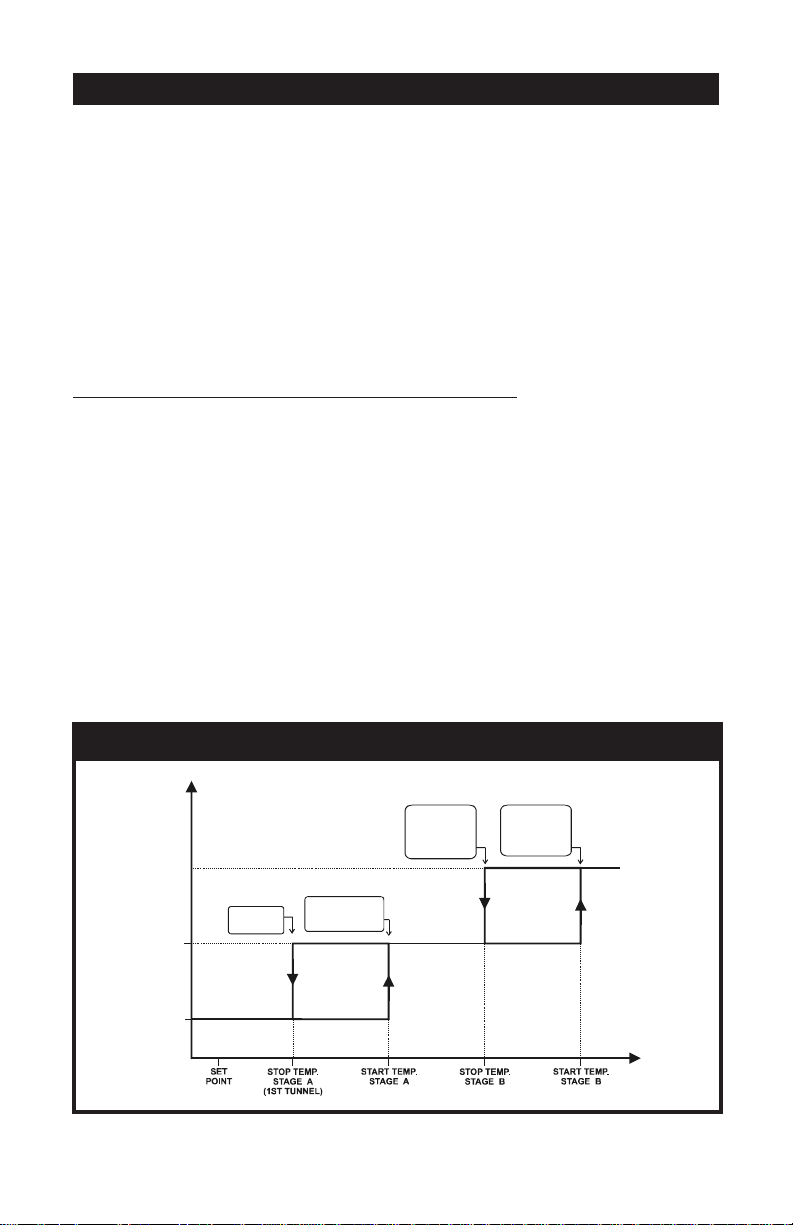
Tunnel Curtain Controlled in Time Mode:
Every time a tunnel fan stage starts, the curtain opens according to the
Open-Time related to this stage. A maximum running time is also set to
limit the curtain's opening.
When the start temperature of the first tunnel stage is reached, the
tunnel curtain opens during half of the opening time that is associated
with this stage. When half of the opening time has elapsed tunnel fans
are activated. When the next tunnel stage is reached, the tunnel curtain
continues to open according to the opening time defined for that stage,
etc. When the temperature decreases, the same sequence is executed in
reverse order. The following diagram sums up the operation of the first
two tunnel stages.
TUNNEL FAN
STAGES
STAGE B
TUNNEL FAN
STAGE A
TUNNEL FAN
OFF
TUNNEL CURTAIN - TIMER MODE
STAGE A
TUNNEL FANS
TURN OFF
CURTAIN STARTS
OPENING, THEN STAGE A
TUNNEL FANS
TURN ON
STAGE B
TUNNEL
TURN OFF
FANS
--------------------CURTAIN CLOSES
DURING STAGE B
OPEN TIME DELAY
STAGE B T UNNEL
FANS TURN ON
---------------------
CURTAIN OP ENS
DURING STAGE B
OPEN TIME DELAY
KOOLMASTER PP-32 REV.01
ROOM T°
31
Page 32

PP-32
Tunnel Curtain Controlled by the Static Pressure:
When the pressure drops below the low pressure set point, the tunnel
curtain closes according to a timer. Likewise, when the static pressure
increases above the high pressure set point, the curtain opens according
to another timer. The curtain only starts operating this way once the
start temperature of the first tunnel stage has been reached.
When the curtain starts opening, it first opens during the pre-opening
delay. Fans of the first tunnel stage are then activated.
The following diagram sums up the operation of the tunnel curtain
controlled by the static pressure.
TUNNEL CURTAIN - STATIC PRESSURE MODE
STATIC
PRESSURE
OPENS
CURTAIN
HIGH SET POINT
CURTAIN
LOW SET POINT
32
KOOLMASTER PP-32 REV.01
STAYS STI LL
CLOSES
CURTAIN
STATIC PRESSURE
DROPS BELOW
LO SET POINT:
CURTAIN CLOSES IN
TIMER CYCLE
(CLOSE TIME/ OFF T IME)
CURTAIN STOPS
CLOSING
STATIC PRESSURE
EXCEEDS
HI SET POIN T:
CURTAIN OPENS IN
TIMER CYCLE
(OPEN TIME/ OFF TIME)
CURTAIN STOPS
OPENING
TIME
Page 33

PP-32
TRANSITION BETWEEN SIDEWALL AND
TUNNEL VENTILATION MODES:
The following section describes the vent doors and curtain's behavior
when the transition between sidewall ventilation (vent doors) and tunnel
ventilation is being done. These steps are automatically performed by
the controller.
VENT DOORS TO TUNNEL :
1. Vent doors stop operating;
2. The tunnel curtain opens during the Pre-Opening time;
3. Fans of the first tunnel stage turn on;
4. The tunnel curtain automatically adjusts the static pressure level,
until it reaches
5. Vent doors close until the static pressure level reaches
Pressure Limit
6. Steps 4 and 5 are repeated until the vent doors run for over 30
seconds without reaching
The house is now in tunnel mode.
Lo Static Pressure Limit
- 0.01"WC;
Hi Static Pressure Limit
+ 0.01"WC;
Hi Static
- 0.01"WC;
TUNNEL TO VENT DOORS:
1. Tunnel fans are turned off when the temperature decreases and
reaches the first non-tunnel stage;
2. The tunnel curtain automatically adjusts the static pressure level,
until it reaches
3. Vent doors open until the static pressure level reaches
Pressure Limit
4. Steps 2 and 3 are repeated until the tunnel curtain runs for over 30
seconds without reaching a static pressure of
Limit
- 0.01"WC;
The house is now in sidewall ventilation mode (vent doors).
Hi Static Pressure Limit
+ 0.01"WC;
- 0.01"WC;
Lo Static
Hi Static Pressure
KOOLMASTER PP-32 REV.01
33
Page 34

PP-32
5.6.1 Adjusting Minimum Age for Tunnel Ventilation
The minimum age is used to prevent tunnel ventilation from being used
when the animals are too young. It ranges from 1 to 450 days. The
tunnel curtain will never open until the animal age reaches this value.
Select "9.Tunnel Curtain" from the main menu using the navigation
buttons then press the right-arrow key. Note that this menu is only
available if the tunnel curtain has been enabled during the installation
setup (see sec 5.14.3).
Press the right-arrow key once to select "1.Set Points" menu.
Press the down-arrow key once to
select "Min. Animal Age" then use
the adjustment buttons to set the
minimum animal age to the desired
value.
Press the left-arrow key to exit this menu.
Tunnel Curtain
Tunnel Stage # 5
Min. Animal age 1
5.6.2 Selecting the First Tunnel Stage
The stage at which the tunnel curtain starts opening is related to a
specific fan stage. All consecutive fan stages will then operate as tunnel
fan stages. When the start temperature of the first tunnel fan stage is
reached, the curtain starts to operate according to the static pressure or
according to a timer (depending on the chosen mode).
Select "9.Tunnel Curtain" from the main menu using the navigation
buttons then press the right-arrow key. Note that this menu is only
available if the tunnel curtain has been enabled during the installation
setup (see sec 5.14.3).
Press the right-arrow key once to select "1.Set Points" menu. The
first tunnel stage # is displayed.
Use the adjustment buttons to set
the first tunnel stage.
Tunnel Curtain
Tunnel Stage # 5
Min. Animal age 1
34
KOOLMASTER PP-32 REV.01
Page 35

PP-32
5.6.3 Adjusting Curtain's Operating Times
This function is only used if the curtain operates in timer mode.
The curtain's operating time is the time during which the curtain opens
when a new tunnel fan stage is activated or closes when a tunnel fan
stage is deactivated. This value needs to be adjusted for each tunnel fan
stage. In addition, the user must set the maximum curtain's running
time. The sum of all running times cannot exceed this value.
Operating times range from 0 seconds to 15 minutes, in increment of
5 seconds. Select "Off" if you do not want the curtain to open when the
start temperature of a certain stage is reached.
Select "9.Tunnel Curtain" from the main menu using the navigation
buttons then press the right-arrow key. Note that this menu is only
available if the tunnel curtain has been enabled during the installation
setup (see sec 5.14.3).
Press the right-arrow key once to select "1.Set Points" menu.
Press the down-arrow key in order
to select the "Total Run Time"
function then use the adjustment
buttons to set the curtain's maximum running time. This menu only
appears if the tunnel curtain operates in timer mode
Press the down-arrow key once. The
first tunnel fan stage is selected. Set
the curtain's opening time for that
stage. When the start temperature
of this stage is reached, the curtain
will open during this delay.
(see sec 5.14.3).
Tunnel Curtain
Tunnel Stage # 5
Min. Animal age 1
Open/Clo Time mm:ss
Total Run Time 2:00
Stage 5 0:30
Stage 6 0:30
Stage 7 0:30
Stage 8 0:30
Proceed in similar fashion to set all curtain running times for each
tunnel stage below. Remember that the sum of all running times
cannot exceed the "Total Run Time" value.
KOOLMASTER PP-32 REV.01
35
Page 36

PP-32
5.6.4 Adjusting Static Pressure Hi and Lo Set Points
This function is only used if the curtain operates in static pressure mode.
When controlled by the static pressure, the curtain opens or closes
according a timer cycle whenever the static pressure level exceeds the
Hi or Lo static pressure set points. The Lo
at)
set points can be adjusted from 0 to 0.2 inches of water (0 to 50Pa).
Select "9.Tunnel Curtain" from the main menu using the navigation
buttons then press the right-arrow key. Note that this menu is only
available if the tunnel curtain has been enabled during the installation
setup (see sec 5.14.3).
Press the right-arrow key once to select "1.Set Points" menu.
Press the down-arrow key in order to select the "Close At" value.
This is the Lo static pressure set point. Note that this menu only
appears if the tunnel curtain operates in static pressure mode
sec 5.14.3).
(Close At)
and the Hi
(Open
(see
Use the adjustment buttons to
adjust the Lo static pressure set
point to the desired value.
Press the down-arrow key in order
to select the "Open At" value. This
is the Hi static pressure set point.
Use the adjustment buttons to adjust the Hi static pressure set point
to the desired value. Press the left-arrow key to exit this menu.
Tunnel Curtain
Tunnel Stage # 5
Min. Animal age 1
Close At: .050WC
Open At: .080WC
5.6.5 Adjusting Curtain's Timer Cycle
This function is only used if the curtain operates in static pressure mode.
When controlled by the static pressure, the curtain uses a timer cycle to
close and to open. The tunnel curtain starts opening or closing according
to this timer whenever the static pressure level exceeds high or low set
points that have been defined above.
36
KOOLMASTER PP-32 REV.01
Page 37

PP-32
Open Time: when the static pressure exceeds the Hi pressure set point,
the curtain opens during this delay. It ranges from 0 to 900 seconds.
Close Time: when the static pressure drops below the Lo pressure set
point, the curtain closes during this delay. It ranges from 0 to 900 sec.
Off Time: once the curtain has opened or closed (depending on the
situation) it then stops operating during this delay. The Off Time delay
ranges from 0 to 900 seconds.
CURTAIN'S TIMER
OPEN / CLOSE
ON
TIMES
OFF
OFF
TIME
Select "9.Tunnel Curtain" from the main menu using the navigation
buttons then press the right-arrow key. Note that this menu is only
available if the tunnel curtain has been enabled during the installation
setup (see sec 5.14.3).
Press the right-arrow key once to select "1.Set Points" menu.
Press the down-arrow key in order
to select the "Open Time" display.
Use the adjustment buttons to
adjust the Open Time. Note that
this menu only appears if the
Open At: .080WC
Open Time 60sec
Close Time 60sec
Off Time 10sec
curtain operates in static pressure
mode (see sec 5.14.3).
Press the down-arrow key in once. The Close Time is selected. Use
the adjustment buttons to set the Close Time to the desired value.
Press the down-arrow key in once. The Off Time is selected. Use the
adjustment buttons to set the Off Time to the desired value.
KOOLMASTER PP-32 REV.01
37
Page 38

PP-32
5.7 FAN STAGES SETTINGS
The PP-32 controls up to 16 on-off fan stages. These stages operate in
a sequence to increase the level of ventilation as the room temperature
rises. Each stage can also activate relays in timer mode. The user
defines a start and stop temperature for each stage. When the room
reaches the start temperature, the stage is activated. When the room
reaches the stop temperature, the stage is deactivated. The following
diagram shows how fan stages operate.
OPERATION OF FAN STAGES
VENTILATION
LEVEL
STAGE S+1
STAGE S
STAGE S FANS
TURN OFF
STAGE S FANS
TURN ON
STAGE S+1
FANS TURN OFF
STAGE S+1
FANS TURN ON
ROOM T°
Start temperatures are defined with respect to the set point and with
respect to each other. This means that when one of these values is
adjusted, all the consecutive values are adjusted by the same amount.
For example, if the set point is increased by 1°F, the start temperatures
for all fan stages will be increased by the same amount. The minimum
temperature difference between two start temperatures is 0.5°F.
Start and stop temperatures of all fan stages are set separately for the
summer and winter seasons. Refer to sec. 5.2.2 to select the proper
season.
The relay assignement for fan stages 1 to 4 differs depending on the
selected program. Refer to section 5.2 for further information on the
controller's programs and to section 5.14.6 to assign fan stage relays.
38
KOOLMASTER PP-32 REV.01
Page 39

PP-32
5.7.1 Adjusting Fan Stages' Start/Stop Temperatures
The minimum temperature difference between two consecutive start
temperatures is 0.5°F (0.3°C). The stop temperature of a fan stage
must always be lower than its start temperature.
Make sure the right season is selected before making any
changes in start/stop temperatures of fan stages. The selected
season appears beside the start and stop temperatures: (S) for
summer or (W) for winter. Refer to sec. 5.2.2 to select the
proper season.
Select "10.Temp. Settings" from the main menu using the navigation
buttons then press the right-arrow key.
Use the down-arrow key to select
the on or off temperature of a fan
stage that needs to be adjusted.
Stg 1 On 80.5 (S)
Stg 1 Off 80.0 (S)
Stg 2 On 82.0 (S)
Stg 2 Off 80.0 (S)
Use the adjustment buttons to adjust
the start or stop temperature.
Proceed in similar fashion for both winter and summer seasons.
Refer to sec. 5.2.2 to select a season.
5.7.2 Adjusting Fans Stages' Timer
A fan stage can include certain relays configured to operate in timer mode.
This feature may be used to operate cooling devices such as Kool-Cel
Pumps. The ON and OFF times can be adjusted from 0 to 900 seconds, in
increment of 15 seconds. The timer uses operates according to an ON and
Off time as follows :
FAN STAGES TIMER
ON
OFF
ON-TIME
OFF
TIME
KOOLMASTER PP-32 REV.01
39
Page 40

PP-32
Set the function to "17. Fan Settings" from the main menu. Note
that this menu is available only in the installer mode (see sec.
5.14.2).
Press the right-arrow key once again to select the "1. Relays" menu.
Select the stage that needs to be
adjusted by using the navigation
buttons then press the right-arrow
key (the letter standing beside fan
stages 1-4 represents the selected
program, when applicable).
Press the down-arrow key and
scroll all relays until the On-Time
display is reached.
Use the adjustment buttons to adjust the On-Time to the desired
value.
Press the down-arrow key once again and use the adjustment
buttons to set the Off-Time to the desired value.
Press the left-arrow key to exit this menu.
Ventilation Stage
Relay Assignement
3. Stage 1a
4. Stage 2a
Relay 31 Off(1)
Relay 32 Off(1)
On Time 15 sec
Off Time 120 sec
40
KOOLMASTER PP-32 REV.01
Page 41

PP-32
5.8 HEATER SETTINGS
The PP-32 operates up to eight independent heater stages. A start and
stop temperature is defined for each heating stage. The stop temperature
must be at least 0.5°F (0.3°C) greater than the start temperature for a
given heater and the start temperature cannot be greater than the set
point. The number of heater stages needed and the sensor assignment for
each stage is determined during the installation (see sec. 5.14.3 and
5.14.4). The following diagram shows the operation of an heater stage.
OPERATION OF HEATER STAGES
HEATER
ON
OFF
HEATER
TURNS ON
HEATER
TURNS OFF
ROOM T°
Start and stop temperatures of all heater stages can be set separately
for summer and winter seasons. Refer to sec. 5.2.2 to select the proper
season.
Set the function to "10. Temp. Settings" from the main menu using
the navigation buttons. The current set point is displayed.
Press the down-arrow key to select
the start or stop temperature of the
desired heater stage.
Set Point: 70.°F
Start/Stop Temp
Heat 4 On 78.0(S)
Use the adjustment buttons to set
Heat 4 Off 79.0(S)
the Start or Stop temperature to the desired value.
Proceed in similar fashion for both winter and summer seasons.
Refer to sec. 5.2.2 to select the proper season.
KOOLMASTER PP-32 REV.01
41
Page 42
PP-32
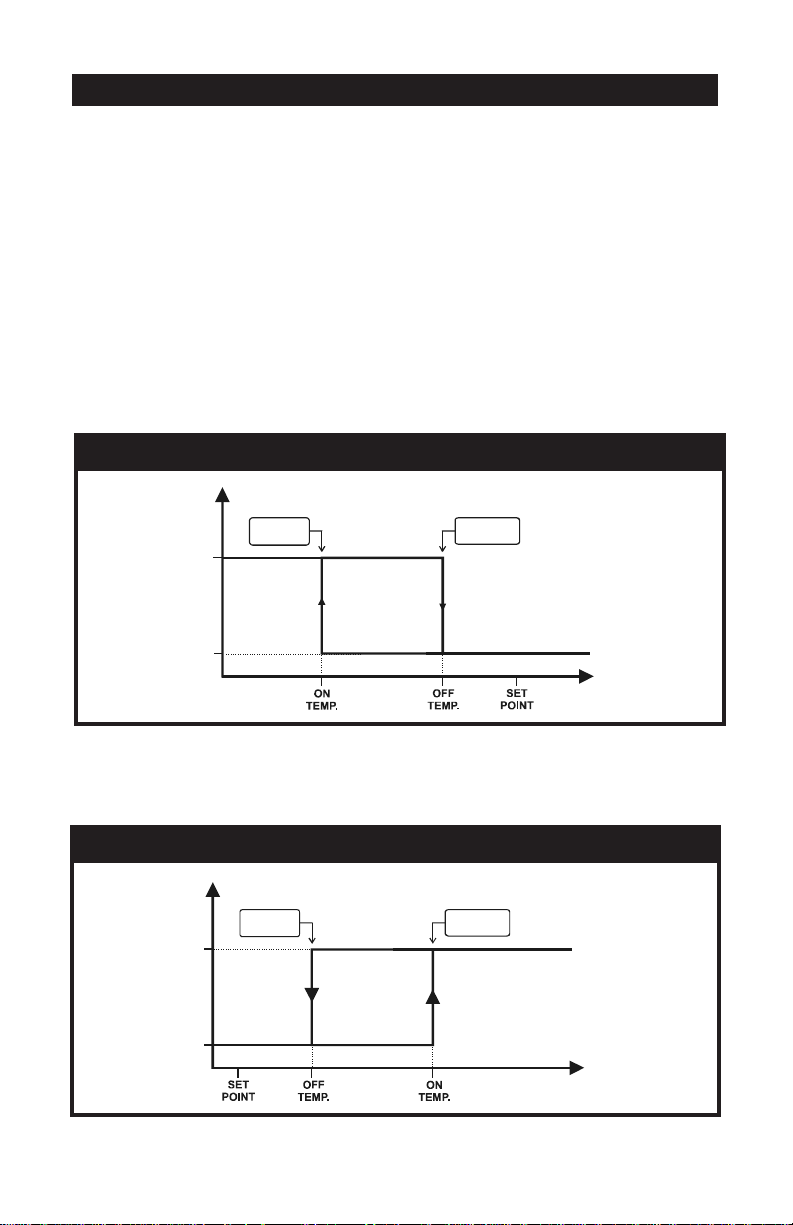
5.9 AUXILIARY OUTPUTS
The PP-32 can control up to two auxiliary outputs. They are used as
supplementary outputs for heating or cooling and may be used to control
several devices such as chimney dampers, stir fans, lamps, heat mats, etc.
The user must specify if the auxiliary output operates in heating or in cooling
mode. In heating mode, the output is activated whenever the temperature
decreases below its start temperature. In cooling mode, the output is activated
whenever the temperature increases above the start temperature.
1. In heating mode, the auxiliary output operates below its start temperature:
AUXILIARY OUTPUTS - IN HEATING MODE
AUXILIARY
OUTPUT
STA TUS
ON
OFF
AUX. OUTPUT
TURNS ON
AUX. OUTPUT
TURNS OF F
ROOM T°
2. In cooling mode, the auxiliary output operates above its start temperature:
AUXILIARY OUTPUTS - IN COOLING MODE
AUXILIARY
OUTPUT
STA TUS
ON
OFF
42
KOOLMASTER PP-32 REV.01
AUX. OUTPUT
TURNS OFF
AUX. OUTPUT
TURNS ON
ROOM T°
Page 43
PP-32
Refer to the installation setup to activate the auxiliary outputs
and to select either if they operate in heating or cooling mode
(sec. 5.14.3).
Adjusting Start/Stop Temperatures of Auxiliary Outputs
-In heating mode, the stop temperature
0.5°F (0.3°C) greater than the start temperature
-In cooling mode, the start temperature
0.5°F (0.3°C) greater than the stop temperature
Set the function to "10. Temp. Settings" from the main menu using
the navigation buttons the. The current set point is displayed.
(Off Temp)
(OnTemp)
must be at least
(On Temp)
must be at least
(OffTemp)
.
.
Press the down-arrow key to select
the start temperature of the first
auxiliary output
this menu only appears if auxiliary
outputs have been enabled during the
installation setup (see sec. 5.14.3).
Use the adjustment buttons to set start temperature to the desired
value.
Press the down-arrow key once. The stop temperature is selected
(Off Temp.)
Use the adjustment buttons to set stop temperature to the desired
value.
Proceed in similar fashion for the other auxiliary output (if applicable).
.
(On T°)
. Note that
Set Point: 80.0°F
Start / Stop Temp
Aux. 1 On 80.0°F
Aux. 1 Off 80.5°F
KOOLMASTER PP-32 REV.01
43
Page 44

PP-32
5.10 ANIMAL AGE
The animal age is used as the reference day to determine the position in
curves that are used by the controller (temperature curve, minimum
ventilation curve). The controller also refers to the animal age to activate
the proper clock output programs. The age can be adjusted from 0 to
450 days.
Note that all histories are cleared once the animal age goes
from "OFF" to "1 day", except for the Alarm Log history.
In addition it is now possible to clear all histories without changing the
animal age. Refer to section 5.12.1 for further information about the
"Clear All" function.
Setting the Animal Age
Set the function to "12. Animal
Age" from the main menu using the
navigation buttons. The current
animal age is displayed.
Use the adjustment buttons to set the age to the desired value.
44
KOOLMASTER PP-32 REV.01
Animal Age 15days
Clear All? No
Page 45

PP-32
5.11 CLOCK OUTPUTS
The PP-32 has 4 clock outputs to control various devices, using the realtime clock. Refer to the installation setup section to activate the clock
outputs (see sec. 5.14.3).
START TIME / STOP TIME DEFINITION
ON
OFF
START
TIME = 8:00
STOP
TIME = 9:30
OPERATION OF CLOCK OUTPUTS 1 AND 2 :
The first 2 clock outputs can use up to 8 programs and each program
has up to 10 start and stop times. The user determines at what day each
program starts being used (this day is directly related to the animal age).
When a new program starts, the previous program is deactivated. Refer
to section 5.13.3 to enable the proper number of clock programs for
clock outputs 1 and 2.
An alarm is set off when a clock program that has not
been properly set is activated (this applies to clock
programs 2-8). This means that an alarm occurs whenever a clock program that has all the same start and stop
times (other than 12:00AM) is activated. In this case,
CLOCK OUTPUTS 1-2
PROGRAM 1
ON / OFF 1
ON / OFF 2
ON / OFF 3
ON / OFF 4
ON / OFF 5
ON / OFF 6
ON / OFF 7
ON / OFF 8
ON / OFF 9
ON / OFF 10
PROGRAM 2
ON / OFF 1
ON / OFF 2
ON / OFF 3
ON / OFF 4
ON / OFF 5
ON / OFF 6
ON / OFF 7
ON / OFF 8
ON / OFF 9
ON / OFF 10
PROGRAM 3
ON / OFF 1
ON / OFF 2
ON / OFF 3
ON / OFF 4
ON / OFF 5
ON / OFF 6
ON / OFF 7
ON / OFF 8
ON / OFF 9
ON / OFF 10
PROGRAM 4
ON / OFF 1
ON / OFF 2
ON / OFF 3
ON / OFF 4
ON / OFF 5
ON / OFF 6
ON / OFF 7
ON / OFF 8
ON / OFF 9
ON / OFF 10
PROGRAM 5
ON / OFF 1
ON / OFF 2
ON / OFF 3
ON / OFF 4
ON / OFF 5
ON / OFF 6
ON / OFF 7
ON / OFF 8
ON / OFF 9
ON / OFF 10
PROGRAM 6
ON / OFF 1
ON / OFF 2
ON / OFF 3
ON / OFF 4
ON / OFF 5
ON / OFF 6
ON / OFF 7
ON / OFF 8
ON / OFF 9
ON / OFF 10
PROGRAM 7
ON / OFF 1
ON / OFF 2
ON / OFF 3
ON / OFF 4
ON / OFF 5
ON / OFF 6
ON / OFF 7
ON / OFF 8
ON / OFF 9
ON / OFF 10
PROGRAM 8
ON / OFF 1
ON / OFF 2
ON / OFF 3
ON / OFF 4
ON / OFF 5
ON / OFF 6
ON / OFF 7
ON / OFF 8
ON / OFF 9
ON / OFF 10
the previous clock program keeps on running
until the defective program is corrected.
OPERATION OF CLOCK OUTPUTS 3-4 :
Clock outputs 3-4 operate using 10 start and stop times.
KOOLMASTER PP-32 REV.01
CLOCK OUTPUTS 3-4
ON / OFF 1
ON / OFF 2
ON / OFF 3
ON / OFF 4
ON / OFF 5
ON / OFF 6
ON / OFF 7
ON / OFF 8
ON / OFF 9
ON / OFF 10
45
Page 46
PP-32
5.11.1 Adjusting Clock Output Start and Stop Times
Set the function to "11.Clock Times" from the main menu using the
navigation buttons then press the right-arrow key. This menu is only
available if clock outputs have been enabled in the installation setup
(see sec. 5.14.3).
Press the right-arrow key once
again to select the "1.Start/Stop"
menu.
Use the navigation buttons to select
the desired clock output. Press the
right-arrow key.
If you have chosen Clock 1 or Clock
2, select the desired program use
the arrow keys to select the proper
program then press the right-arrow
key.
Use the arrow keys to select the first
start time
lected clock output.
(On Time 1)
of the se-
Clock Time
Start / Stop
1. Clock 1
2. Clock 2
Clock Time
Start / Stop
1. Program 1
2. Program 2
Clock 1 Program 1
Animal Age: 1
On 1 8:00A (1)
Off 1 8:30A (1)
Use the adjustment buttons to adjust the first start time
Press the down-arrow key. The first off time of the selected clock
flashes on the display
Use the adjustment buttons to set the first off time to the desired
value.
Proceed in similar fashion to adjust all 10 start and stop times of all
clock outputs.
If all 10 start and stop times are not needed, set the start and
stop times of unused cycles to the same value (any value except
for 12:00AM). When all start and stop times are set to
12:00AM, the output runs continuously, 24h.
46
KOOLMASTER PP-32 REV.01
(Off Time 1)
.
(On Time 1)
.
Page 47
PP-32
5.11.2 Adjusting Starting Day of Clock Programs
Clock outputs 1 and 2 use up to 8 programs. The user must select the
day at which each program starts (this day number is directly related to
the animal age). When a new program starts, the previous program is
deactivated.
Set the function to "11.Clock Times" from the main menu using the
navigation buttons then press the right-arrow key. This menu is only
available if clock outputs have been enabled in the installation setup
(see sec. 5.14.3).
Press the right-arrow key once
again to select the "1.Start/Stop"
menu.
Use the navigation buttons to select
clock output 1 or 2 then press the
right-arrow key.
Use the navigation buttons to select
the desired program then press the
right-arrow key. The animal age at
which the selected program starts
flashes on the display.
Use the adjustment buttons to set
the age at which the selected
program will start.
Clock Time
Start / Stop
1. Clock 1
2. Clock 2
Clock Time
Start / Stop
1. Program 1
2. Program 2
Clock 1 Program 1
Animal Age: 1
On 1 8:00A (1)
Off 1 8:30A (1)
Proceed in similar fashion to adjust
the start age for each program of clock outputs 1 and 2 (if applicable).
KOOLMASTER PP-32 REV.01
47
Page 48

PP-32
5.12 HISTORY
5.12.1 Resetting Histories
The controller automatically resets all sensor histories when the animal
age goes from "
Alarm Log history.
The following procedure shows how to clear all histories without having
to change the animal age.
Set the function to "12.Animal Age" from the main menu using the
navigation buttons.
Press the down-arrow key once to select the "Clear All?" menu.
!
WARNING
Off
" to "
1day
". Note that this reset doen't clear the
If the following step is performed from the INSTALLER
mode, the Alarm Log will be lost. If it is performed from
the USER mode, the Alarm history will not be reset. Refer
to section 5.14.3 to select the proper mode.
Press to select
answer is validated after a 10
second delay. The display then
returns to
cleared.
"No"
Yes
. The
. Histories are now
Animal Age Off
Clear All? No
5.12.2 Average Temperature History
The controller has an history in which the minimum and maximum
average temperature readings for the past 60 days are logged in.
Set the function to "2. Average Temp." from the main menu using
the navigation buttons then press the right-arrow key. The current
average room temperature is displayed.
Press the down-arrow key to scroll
the menus. The minimum
maximum
the past 60 days are displayed.
48
KOOLMASTER PP-32 REV.01
(T°H)
temperatures for
(T°L)
and
5 days ago
T°L 72.3 T°H 74.0
6 days ago
T°L 72.0 T°H 74.3
Page 49

PP-32
5.12.3 Individual Temperature Sensors History
The controller has an history in which the minimum and maximum
temperature readings of each sensor, for the past 10 days, are logged in.
Set the function to "3.Temp.
Sensors" from the main menu using
the navigation buttons then press
the right-arrow key. Sensors'
temperature readings are displayed.
Press the down-arrow key to scroll the display. Sensors' Hi and Lo
temperature readings are displayed for the past 10 days.
2 days ago
T°1L 69.2 T°1H 75.4
T°2L 70.3 T°2H 74.0
T°3L 69.3 T°3H 74.2
5.12.4 Outside Temperature Sensor History
The controller has an history in which the minimum and maximum
temperature readings of the outside temperature sensor, for the past 10
days, are logged in.
Set the function to "3.Temp. Sensors" from the main menu using the
navigation buttons then press the right-arrow key. Sensors' temperature readings are displayed.
Press the down-arrow key to scroll
the display. The outside temperature
sensors' Hi and Lo temperature
readings
played for the past 10 days.
(OutL and OutH)
are dis-
2 days ago
T°1L 69.2 T°1H 75.4
T°2L 70.3 T°2H 74.0
OutL 79.3 OutH 84.7
5.12.5 Relative Humidity History
The controller has an history in which the minimum and maximum
humidity readings for the past 10 days are logged in.
Set the function to "4.R. Humidity"
from the main menu using the
navigation buttons then press the
right-arrow key. The current
humidity level is displayed. This
menu is only accessible if a humidity
sensor has been installed (see sec. 5.14.3).
Min/Max Recorded
RH L 81 RH H 84
Yesterday
RH L 79 RH H 90
KOOLMASTER PP-32 REV.01
49
Page 50

PP-32
Use the down-arrow key to scroll the display. Relative humidity's Hi
and Lo readings are displayed for the past 10 days.
5.12.6 Water Consumption History
The controller has an history in which the water consumption, for the
past 60 days, is logged in. The controller also displays the total water
consumption since the last reset.
Set the function to "13. Water Consumption" from the main menu
using the navigation buttons then press the right-arrow key. The
water consumption of the current day is displayed.
Press the down-arrow key once.
The total water consumption since
the last reset is displayed.
Press the down-arrow key once
again. The water consumption
history is displayed. Keep pressing
the down-arrow key to scroll the
display and look at all histories.
Water Consumption
Total Consumption
41.2Gal
Water Consumption
2002/10/01
2.8Gal
5.12.7 Heater Run Time History
The controller has an history in which the heater run times , for the past
60 days, are logged in. The controller also displays the total run time of
heaters since the last reset.
Set the function to "14. Heater Run Time" from the main menu
using the navigation buttons then press the right-arrow key.
Select the desired heater using the
navigation buttons then press the
right-arrow key. The heater run time
for the current day is displayed.
Heater 1 Run Time
2002/10/01
30min
50
KOOLMASTER PP-32 REV.01
Page 51

PP-32
Press the down-arrow key once.
The Use the down-arrow key to
scroll the display. The The total
heater run time, since the last
reset, is displayed.
Keep pressing the down-arrow key to scroll the display. The Heater
Run Time values recorded for the past 60 days are displayed. Keep
pressing the down-arrow key to scroll the display and look at all
histories.
Heater 1 Run Time
Total run time
120min
KOOLMASTER PP-32 REV.01
51
Page 52

PP-32
5.13 ALARM SETTINGS
5.13.1 Alarm Log
When an alarm occurs, the light next to the alarm button turns on
and the alarm is logged along with the time and date. To view alarms in
the alarm log, press the alarm button then use the up and downarrow keys to step through the recorded alarms. Refer to section 5.12.1
to clear the alarm log. A total of 10 alarms can be logged. The alarm
conditions are as follows:
yalpsiD gninaeM
mralApmeTwoLmralaerutarepmetwoL
mralApmeThgiHmralaerutarepmethgiH
mralAerusserPwoLmralAerusserPcitatSwoL
mralAerusserPhgiHmralAerusserPcitatShgiH
noitacinummoctelnI eludomA1-F-RWDehthtiwrorrenoitacinummoC
noitacinummocyaleRyalerahtiwrorrenoitacinummoC
"y"egats,tluaf"x"margorP ."x"margorpfo"y"egatsrofdengissasiyaleroN
"x"#margorP,tluaf2ro1kcolC .ylreporptestonsi2ro1tuptuokcolcfo"x"margorP
8-1tcefeDrosneSevitcefedsixrosneS
tuO°TtcefeDrosneSevitcefedsirosneserutarepmetedistuO
Another alarm situation occurs when power to the PP-32 fails. In this
case, the alarm relay is activated. When the alarm relay is activated,
the normally open contact ( ) closes.
52
KOOLMASTER PP-32 REV.01
Page 53

PP-32
5.13.2 Setting Alarm Limits
The following diagram explains how temperature alarms are detected:
REGULAR TEMPERATURE ALARM DETECTION
ROOM
TEMPERATURE
Set Point + HI Offset
Hi OffsetLo Offset
Set Point
Set Point - Lo Offset
NORMAL RANGE: NO TEMPERATURE ALARMS
OUTSIDE THE RANGE: THE TEMPERATURE ALARM IS SET OFF
When the average room temperature exceeds the high temperature
alarm setting (Set Point + Hi Offset), a high temperature alarm is
generated. When the average room temperature drops below the low
temperature alarm setting (Set Point - Lo Offset), a low temperature
alarm is generated.
An alarm
is set off
TIME
The critical temperature is the absolute maximum temperature allowed
in the room.
Oustide Temperature Influence on Alarms:
This feature avoids false alarms due to warm weather: the room temperature can exceed the Hi temperature limit in the case where the
outside temperature is warm enough. The room temperature must
remain equal or lower than: Outside T°+ Hi Offset+ Outside Influence.
The room temperature must always remain below the critical temperature, no matter what the outside temperature is. The following diagram
illustrates this situation:
KOOLMASTER PP-32 REV.01
53
Page 54

PP-32
ALARM DETECTION WITH OUTSIDE T° INFLUENCE
ROOM
TEMPERATURE
Critical Ala rm
Outside
SP + HI Offset
Set Point - Lo Offset
5.13.2.1 Adjusting Hi/ Lo Temperature Alarms
The low alarm temperature can be adjusted from 20°F to 0.5°F (11.1 to
0.3°C) below the set point
be adjusted from 0.5°F to 20°F (0.3 to 11.1°C) above the set point
Offset)
point at which an alarm is set off.
. The offset is the number of degrees above or below the set
Influence
NORMAL RANGE: NO TEMPERATURE ALARMS
OUTSIDE THE RANGE: THE TEMPERATURE ALARM IS SET OFF
(Lo Offset)
. The high alarm temperature can
ALARM LIMIT
OUTSIDE TEMP.
TIME
(Hi
Set the function to "21.Alarm Limits" from the main menu using the
navigation buttons then press the right-arrow key.
Press the right-arrow key once again, in to select the "1.Tempera-
ture" menu. Lo and Hi Offsets are displayed.
Use the adjustment buttons to set
the Lo and Hi offsets to the desired
values.
Temperature Alarm
Lo Offset T° 10.0
Hi Offset T° 15.0
Critical 95.0°F
54
KOOLMASTER PP-32 REV.01
Page 55

PP-32
5.13.2.2 Adjusting Critical Temperature
The critical temperature is the absolute maximum temperature allowed
in the room.
Set the function to "21.Alarm Limits" from the main menu using the
navigation buttons then press the right-arrow key.
Press the right-arrow key once again, in to select the "1.Tempera-
ture" menu.
Press the down-arrow key in order to
select the critical temperature menu.
Use the adjustment buttons to adjust
the critical temperature to the desired
value.
Temperature Alarm
Lo Offset T° 10.0
Hi Offset T° 15.0
Critical 95.0°F
5.13.2.3 Adjusting the Outside Temperature Influence
The outside temperature influence is the number of degrees that are
added to the outside temperature to avoid false alarms on warm days.
Refer to the previous diagram.
Set the function to "21.Alarm Limits" from the main menu using the
navigation buttons then press the right-arrow key.
Press the right-arrow key once again, in to select the "1.Tempera-
ture" menu.
Press the down-arrow key in order
to select the "Out. Influence"
display. Note that this menu only
appears if the outside temperature
sensor has been enabled during the
installation (see sec. 5.14.3).
Temperature Alarm
Lo Offset T° 10.0
Hi Offset T° 15.0
Out. Influence 5.0
Use the adjustment buttons to adjust the Outside Temperature
Influence to the desired value.
KOOLMASTER PP-32 REV.01
55
Page 56

PP-32
5.13.2.4 Adjusting Static Pressure Alarms
The controller can generate an alarm if the static pressure drops below
the low pressure limit or if it exceeds the high pressure limit. The controller uses a delay before activating the alarm. If the static pressure
exceeds the high or low limits for that delay, an alarm is generated.
LO STATIC PRESSURE ALARM:
The user can assign a relay that will be activated when a Low Static
Pressure Alarm occurs. This relay may activate a fan output for instance. When this type of alarm occurs, the relay turns on for a 15
minute delay. If the static pressure level is still below the Low Pressure
Limit after the delay has elapsed, the relay remains activated for another
15 minutes, up until the pressure level goes back into the normal range
once again.
Set the Lo Alarm Limit to Off to deactivate this feature.
HI STATIC PRESSURE ALARM:
When a high static pressure alarm occurs, the controller can open both
vent doors and the tunnel curtain. The curtain or vent doors open during a
user-defined delay
minutes (this time includes the Open-Time). If the pressure level still
exceeds the Hi Static Pressure Limit after this delay, the same cycle starts
over again, up until the pressure level goes back into the normal range.
(Open-Time)
and then stay still for a total time of 15
Adjusting Hi/Lo Static Pressure Alarm Limits
Set the function to "21.Alarm Limits" from the main menu using the
navigation buttons then press the right-arrow key.
Use the navigation buttons to select "2.Static Pressure" then press
the right-arrow key.
Press the right-arrow key once again in order to select the "1.Hi/Lo
limits" option. The Lo and Hi pressure limits are displayed.
Use the adjustment buttons to set
the Low alarm limit to the desired
value.
56
KOOLMASTER PP-32 REV.01
Static Press Alarm
Low Alarm .015WC
Hi Alarm .150WC
Page 57

PP-32
Press the down-arrow key to select the Hi alarm limit.
Use the adjustment buttons to set the Hi alarm limit to the desired
value.
Note : If you do not want a relay to be turned off in the case of a low
static pressure alarm, set the Low Alarm limit to "
pressing the down-arrow key.
Adjusting High/Low Delays
Set the function to "21.Alarm Limits" from the main menu using the
navigation buttons then press the right-arrow key.
Use the navigation buttons to select "2.Static Pressure" then press
the right-arrow key.
Press the right-arrow key once again in order to select the "1.Hi/Lo
limits" option. The Lo and Hi pressure limits are displayed.
Off
" by
Press the down-arrow key in order
to select the "Lo Delay" display.
Use the adjustment buttons to set
the Lo Pressure Alarm Delay to the
desired value.
Press the down-arrow key once again to select the "Hi Delay" display.
Use the adjustment buttons to set the Hi Pressure Alarm Delay to
the desired value.
Low Alarm .030WC
Hi Alarm .150WC
Lo Delay 60sec
Hi Delay 300sec
KOOLMASTER PP-32 REV.01
57
Page 58

PP-32
Adjusting the Open-Time for the Hi Static Pressure Alarm
The Open-Time of the tunnel curtain or vent doors, in case a Hi static
pressure alarm occurs, can be adjusted from 0 to 900 sec.
Set the function to "21.Alarm Limits" from the main menu using
the navigation buttons.
Use the navigation buttons to select "2.Static Pressure" then press
the right-arrow key.
Press the right-arrow key once
again in order to select the "3.Hi
Static Alarm" option. The opening
time of vent doors and of the tunnel
curtain are displayed.
Use the adjustment buttons to adjust vents doors' Open-Time.
Press the down-arrow key once to select curtain's Open-Time.
Use the adjustment buttons to adjust curtain's Open-Time.
Hi Static Alarm
Open Vents sec 30
Open Tunnel sec 30
5.13.3 Resetting the Alam Log
Resetting the alarm log can only be performed from the installer mode.
Set the function to "19.Installation" from the main menu using the
navigation buttons then press the right-arrow key. The "Clear
Alarms" menu is selected. Note that this menu is only accessible
from the installer mode (see sec. 5.14.2).
Use the adjustment buttons to select "Yes", in order to clear the
alarm log. The answer is validated after an 8 second delay or when
the user exits the menu.
58
KOOLMASTER PP-32 REV.01
Page 59

PP-32
5.14 INSTALLATION
5.14.1 Step-by-Step Installation Guide
These are the basic steps to start-up your PP-32 controller.
1. Connect the control according to the wiring diagram enclosed with
this manual.
2. Turn on the power.
3. Adjust the Date and Time (sec. 5.14.5).
4. Step through the "19. Installation" menu and answer all questions in
order to customize the controller for your particular application (see
sec. 5.14.3).
5. Adjust dip switches. Refer to the dip switch table in section 4.2.
6. Assign output relays. The relay assignment may only be performed
from the installer mode (see sec. 5.14.2). Refer to section 5.14.6 to
assign the following relays:
Assign relays for each heater stage.
Assign relays for each fan stage;
Assign relays for the vent doors, if applicable;
Assign relays for the tunnel curtain, if applicable.
Assign relays for each clock output, if applicable.
Assign relays for each auxiliary output, if applicable.
Assign relays for the Low Static Pressure Alarm, if applicable.
7. Sensor assignment (see sec. 5.14.4):
Sensors must be assigned for each heating stage. Heater stages
use the average temperature of their assigned sensors to
operate.
Sensors must be assigned to be part of the average room
temperature. Fan stages operate according to this average
temperature.
Sensors must be assigned to each air inlet, in the case where
DWR-F-1A modules are used. Inlets use the average temperature
of their assigned sensors to operate.
KOOLMASTER PP-32 REV.01
59
Page 60

PP-32
8. Adjust the temperature set point. This is the target temperature in
the room. Refer to section 5.3.
9. Adjust the start/stop temperature of fan stages (see sec. 5.7) and
heater stages (see sec. 5.8).
10. Adjust the minimum ventilation cycle settings (see sec. 1.1.1).
11. If inlets operate using DWR-F-1A modules, set the air inlet compensation. This feature helps to reduce temperature differences in the
building (see sec. 5.5.1).
12. Adjust all vent door parameters, if applicable (see sec 5.5.2).
13. Adjust all tunnel curtain settings, if applicable (see sec 5.6).
14. Calibrate the water counter, if applicable (see sec. 5.14.7).
15. Enable the desired options to control the humidity level in the barn
(see sec. 5.15.3).
16. Adjust and activate the temperature curve (optional). This feature
allows the temperature set point to be automatically adjusted over
time (see sec. 5.15.1).
17. Adjust and activate the minimum ventilation curve (optional). This
feature allows fans' On-Time, in minimum ventilation, to be automatically adjusted over time (see sec. 5.15.2).
18. Adjust start/stop times of each clock output. These outputs allow to
operate various devices according to timer cycles (see sec. 5.11).
19. Adjust start/stop temperatures of each auxiliary output. These
outputs allow to operate various devices according to the room
temperature (see sec. 5.9).
20. Adjust the animal age (see sec. 5.10). To clear previous histories,
the animal age must first be set to "Off" and then be changed for
"1 day".
60
KOOLMASTER PP-32 REV.01
Page 61
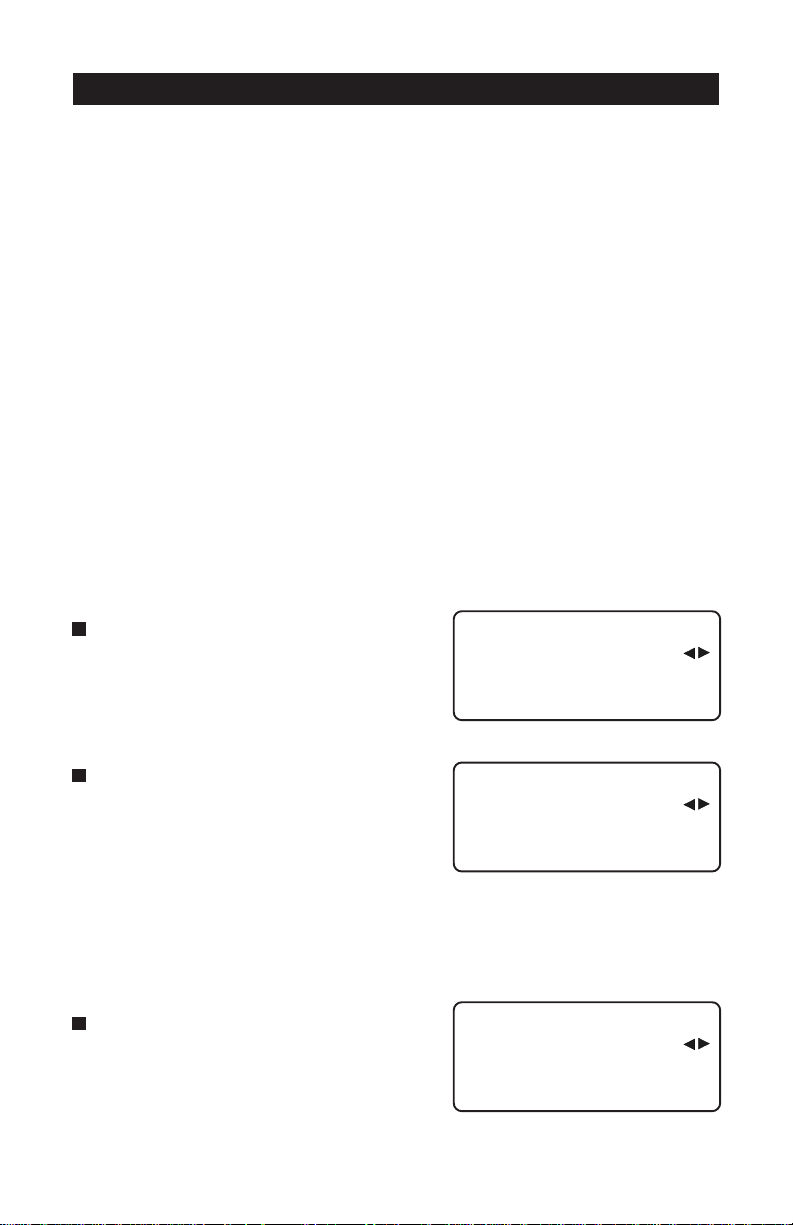
PP-32
5.14.2 Password Settings
This function allows to identify 2 different user types. It is used to
restrict the access to certain parameters. The password is made up of
three blocks of two digits, for example: 13 44 21. When a correct
password is entered, the current user is identified.
Installer Password: By default, the INSTALLER PASSWORD is set to
"01-01-01". The installer mode gives full access to all functions of the
PP-32. The controller automatically returns to the user mode after 15
minutes of inactivity. The installer may return to the user mode before
that delay by entering the user password. The installer's password can
be modified.
User Password: The user mode gives access to the basic functions of the
PP-32. By default this password is set to "01-02-03". Some menus will
not be accessible from this mode.This password cannot be modified. The
control automatically goes back to the user mode after 15 minutes of
inactivity.
Entering the Installer's Password:
Set the function to "22.Password"
from the main menu using the
navigation buttons then press the
right-arrow key. The current user
mode is displayed.
Password
Current mode:
User 1
Press the right-arrow key once
again to enter a password. The
first two-digit number are flashing.
Use the adjustment buttons to set
the first number. Press the rightarrow key once, the second twodigit number is selected. Use the adjustment buttons to set the
second number. Proceed in similar fashion to set the third two-digit
number. Press the right-arrow another time to validate the whole
password.
If the entered password is incorrect, the error message “Wrong
Password” is displayed.
Password
Enter password:
01 ** **
Password
Wrong password!
KOOLMASTER PP-32 REV.01
61
Page 62
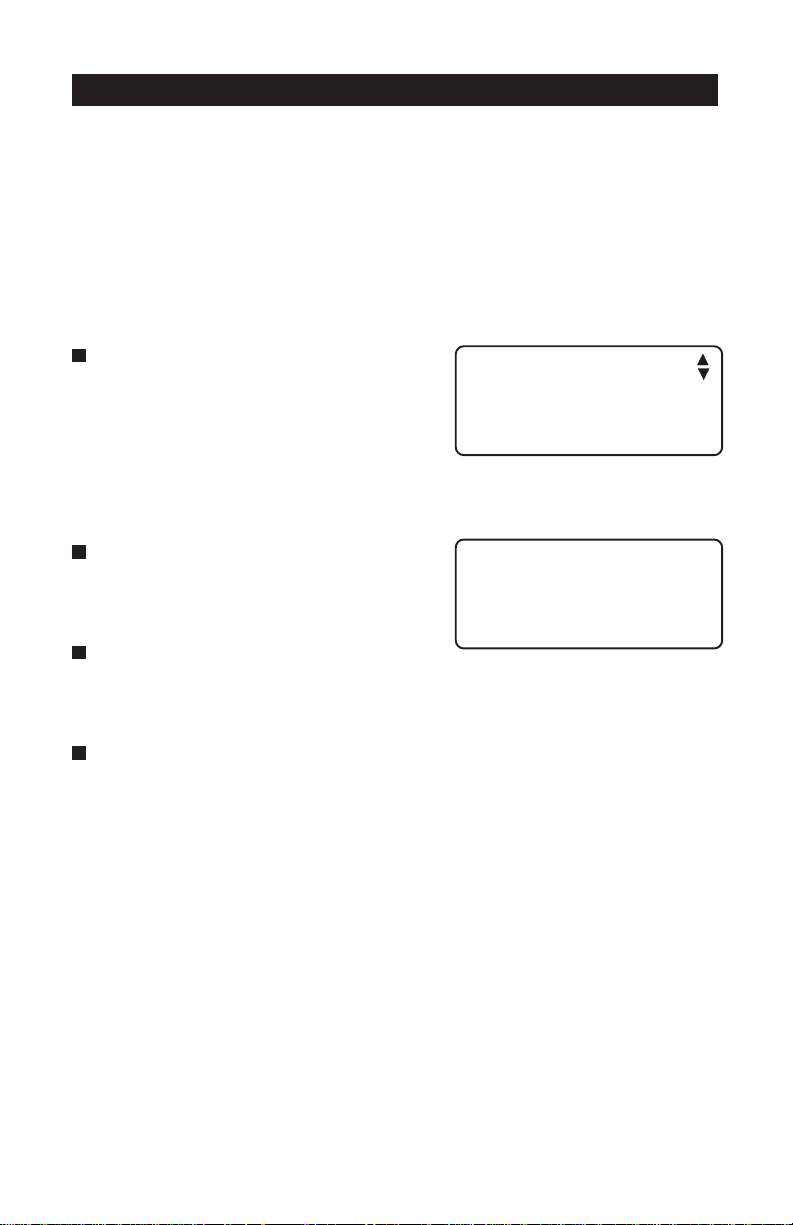
PP-32
Modifying the Installer's Password
The installer's password must first be entered before being allowed to
modify it. Proceed as explained above to enter the installer password
(1-1-1 by default).
Note : The password "1-2-3" is reserved for the user mode. Do not use
the same number sequence for the installer password.
Set the function to "19.Installa-
tion" from the main menu using the
navigation buttons. Press the rightarrow key. Note that this menu is
only accessible from the installer
mode (refer to the previous section
to enter the installer's password).
Press the down-arrow key and scroll
the display until you reach the
Installer's Password menu.
Use the adjustment buttons to
adjust all three numbers of the
installer's password.
Once the new Installer Password is correctly set, press the leftarrow key to exit this menu.
Installation
Clear Alarms? No
Reset Min/Max 11:00A
Use RH? Yes
Installer Password
code #1 1
code #2 1
code #3 1
62
KOOLMASTER PP-32 REV.01
Page 63

PP-32
5.14.3 Installation Setup
The following section describes how to customize the controller for your
particular application. Normally, this setup needs to be done only once.
Parameters are presented below in the order they appear on the display.
Use the adjustment buttons to adjust a parameter value. When you are
finished adjusting a parameter, press the down-arrow key to move to the
next parameter. The user should step through all the parameters at least
once. These parameters are located in the "19.Installation" main menu.
Note that this menu is only accessible on the installer mode (see sec.
5.14.2).
1. Clear Alarms:
Set to "Yes" to reset the alarm log.
2. Reset Time:
Set the time at which minimum and
maximum readings of all sensors are
logged into the history.
3. Use RH?:
Set to "Yes" if a humidity sensor is
connected to the controller.
Installation
Clear Alarms? No
Reset Min/Max 11:00A
Use RH? Yes
PreOpenVents sec 10
PreOpen Tun sec 30
Use Tunnel ? Yes
Tunnel Mode: SP
4. Pre-Open Vent Door Delay:
Set the pre-opening delay of vent doors to the desired value. This
delay can be adjusted from 0 to 60 seconds. Note that this menu only
appears if the static pressure sensor is enabled on #8 below
5. Pre-Open Tunnel Delay:
Set the pre-opening delay of the tunnel curtain to the desired value.
This delay can be adjusted from 0 to 30 seconds. Note that this menu
only appears if the tunnel is enabled on #6 below.
6. Use Tunnel ?:
Set to "Yes" to enable the tunnel ventilation mode.
7. Tunnel Mode:
Select either the tunnel curtain is controlled in timer mode
by the static pressure level
is enabled on #6 above.
(SP)
. This menu only appears if the tunnel
KOOLMASTER PP-32 REV.01
(Timer)
or
63
Page 64

PP-32
8. Use Static Pressure ?
Set to "Yes" to activate the static
pressure sensor.
9. Static Pressure Set 2.
Select whether the activation of the
second group of static pressure set
points is related to a specific stage
(Stage)
ture
for further information on this
feature.
10 .# of Inlets:
Select the proper number of air inlets. Each air inlet is related to a
DWR-F-1A module. Note that this menu only appears if the static
pressure sensor is deactivated on #8 above. Up to 12 air inlet can be
activated.
11.# of Auxiliary Outputs
Select the proper number of auxiliary outputs.
12.Auxiliary Output Mode
Select whether auxiliary outputs 1 and 2 operate in Heating or in
Cooling mode. Up to 2 auxiliary outputs can be activated.
or to the outside tempera-
(Out T°)
. Refer to section 5.5.2
Use Stat. pres? Yes
Static Set. 2 Stage
# Inlets 12
# Auxiliary Out. 2
Aux. 1 Mode: Heat
Aux. 2 Mode: Cool
# Fan Stages 16
# Stg Programs abc
# Heater Stages 8
13.# of Fan Stages
Set the number of fan stages to the desired value. Up to 16 fan
stages can be activated.
14 .# of Stage Programs
Select the number of stage programs that will be used by the controller. Up to 4 programs can be selected:
None =1 program only, ab =2 programs,
abc = 3 programs, abcd = 4 programs
15 .# of Heater Stages
Set the number of heater stages to the desired value. Up to 8 heater
stages can be activated.
64
KOOLMASTER PP-32 REV.01
Page 65

PP-32
16.# of Clock Outputs:
Set the number of clock outputs to
the desired value. Up to 8 clock
outputs can be activated.
17 .# of Clock Programs for Clock
Outputs 1 & 2 :
Set the number of programs for
clock outputs 1 & 2. Up to 8 programs can be activated for the first
2 clock outputs.
18.# of Sensors :
Select the number of temperature sensors in the room. Up to 8
sensors can be used.
19.Use Outside Temperature Sensor ?
Set to "Yes" if an outside temperature sensor is connected to the
controller.
20.Installer Password
Set the 3 two-digit numbers of the installer's password to the desired
value.
# Clocks 4
# Clock 1 Prog 8
# Clock 2 Prog 8
# Sensors 8
Use Out. Temp? Yes
Contrast 70%
Installer Password
code #1 1
code #2 1
code #3 1
KOOLMASTER PP-32 REV.01
65
Page 66

PP-32
5.14.4 Sensor Assignment
5.14.4.1 Assigning Sensors to the Room T° and Fan Stages
The controller uses the average reading of activated sensors to calculate
the room temperature. Fan stages use this temperature to operate.
The selection of sensors that are used to determine the average room
temperature differs depending on the selected program. Therefore, the
user must make a separate sensor assignment for each program in use.
Note also that sensor assignment can only be done from the installer
mode (see sec. 5.14.2).
Set the function to "17.Fan
Settings" from the main menu
using the navigation buttons. Note
that this menu is only available in
the installer mode (see sec. 5.14.2).
Press the down-arrow key once to
select "2.Sensors" menu then press
the right-arrow key.
Press the right-arrow key once to
select "1.Program (x)" or "1.Sensor
Selection" menu (depending if many
programs are activated). Sensors
that have been activated during the
installation are displayed (see sec. 5.14.3).
Use the right and left-arrow keys to select the desired sensor. When
the item is flashing, press to activate the sensor or to
deactivate it. The selected sensors are used to calculate the aver-
age room temperature into the selected program.
Proceed in similar fashion to activate the proper sensors for each
program. Refer to sec. 5.2 to select another program.
Ventilation Stage
Settings
2. Sensors
Sensor Settings
1. Program (a)
2. Auxiliary 1
Program (a) Sensors
12345678
√√√
66
KOOLMASTER PP-32 REV.01
Page 67

PP-32
5.14.4.2 Assigning Sensors to Heater Stages
Heater stages use the average temperature of their assigned sensors to
operate. The assignment of heater stages is common to all programs and
can only be set in the installer mode (see sec. 5.14.2). Select sensors
that are used for the operation of each heater stage as follows:
Set the function to "16.Heater Settings" from the main menu using
the navigation buttons. Note that this menu is only available in the
installer mode (see sec. 5.14.2).
Press the down-arrow key once to
select "2.Heater Sensors" menu
then press the right-arrow key.
Use the navigation buttons to select
the desired heater stage then press
the right-arrow key. Sensors that
have been activated during the
installation are displayed (see sec.
5.14.3).
Use the right and left-arrow keys to
select the desired sensor. When the
item is flashing, press to activate
the sensor or to deactivate it.
Heater Settings
2. Heater Sensors
Heater Sensor
1. Heater 1
2. Heater 2
Heater 1 Sensors
12345678
√
5.14.4.3 Assigning Sensors to Air Inlets
Air inlets use the average temperature of their assigned sensors to
operate. Select the proper sensors of each air inlet as follows:
Select "8.Inlet Settings" from the main menu using the navigation
buttons then press the right-arrow key. Note that this menu is only
available if the static pressure sensor is disabled and if inlets have
been activated during the installation setup (see sec. 5.14.3).
KOOLMASTER PP-32 REV.01
67
Page 68

PP-32
Select "2.Inlet Sensors" then press
the right-arrow key. This option is
only available in the installer mode
(see sec. 5.14.2).
Use the navigation buttons to select
the desired inlet then press the rightarrow key . Sensors that have been
activated during the installation are
displayed (see sec. 5.14.3).
Use the right and left-arrow keys to
select the desired sensor. When the
item is flashing, press to
activate the sensor or to
deactivate it.
Proceed in similar fashion to assign sensors to each air inlet in use.
Inlet Settings
1. Inlet Comp
2. Inlet Sensors
Inlet Sensors
1. Inlet 1
2. Inlet 2
Inlet 1 Sensors
1234567
√ √
5.14.4.4 Assigning Sensors to Auxiliary Outputs
Auxiliary outputs use the average temperature of their assigned sensors
to operate. This parameter is common to all programs and can only be
set in the installer mode (see sec. 5.14.2). Select sensors that are used
for the operation of each auxiliary output as follows:
Set the function to "17.Fan Settings" from the main menu using
the navigation buttons. Note that this menu is only available in the
installer mode (see sec. 5.14.2).
Press the down-arrow key once to
select "2.Sensors" menu then press
the right-arrow key.
Use the navigation buttons to select
"2.Auxiliary 1" or "3.Auxiliary 2"
menu. Sensors that have been
activated during the installation are
displayed (see sec. 5.14.3).
68
KOOLMASTER PP-32 REV.01
Ventilation Stage
Settings
2. Sensors
Sensor Settings
2. Auxiliary 1
3. Auxiliary 2
Page 69

PP-32
Use the right and left-arrow keys to
select the desired sensor. When the
item is flashing, press to
activate the sensor or to
deactivate it.
Proceed in similar fashion to assign sensors to the second auxiliary
output, if applicable.
Auxiliary 1 Sensors
12345678
√√√
KOOLMASTER PP-32 REV.01
69
Page 70

PP-32
5.14.5 Setting Time and Date
Set the function to "20.Time / Date" from the main menu using the
navigation buttons. Press the right-arrow key. The current time and
date are displayed.
Press the right-arrow key once. The
year is selected. Use the adjustment
buttons to set the year. Press the
right-arrow key once again, the
month is selected. Use the adjustment buttons to set the month.
Press the right-arrow key. The day is selected. Use the adjustment
buttons to set the day to the proper value.
Press the right-arrow key once again, hours are selected. Use the
adjustment buttons to set the hours. Press the right-arrow key.
Minutes are selected. Use the adjustment buttons to set the minutes.
Press the right-arrow key. Seconds are selected. Use the adjustment
buttons to adjust the seconds.
Press the left-arrow several times, in order to exit this menu.
Time / Date
(Y/M/D)
Date: 2002/10/01
Time: 13:21:01
5.14.6 Relay Assignment
The PP-32 controller has 32 integrated ON/OFF relays. The mapping
between the stages and relays is determined by the user. Fill out the
template at the end of this manual to map the relays before assigning
them from the front panel. Note that relay assignment can only be done
in the installer mode (see sec 5.14.2).
Relays with a mark underneath are
assigned to the selected output. Use the
right and left-arrow keys to scroll the
display and select the desired relay.
HINT: Pressing the UP or DOWN arrow keys acts as a page-up
& page-down function. This makes it easier to step through the
relays.
70
KOOLMASTER PP-32 REV.01
Heater 1 Relays
1 2 3 4 5 6 7 8 9 10
√
Page 71

RELAY ASSIGNMENT EXAMPLE
(an empty template is available at the end of this manual)
#YALER/TUPTUO
123456789 0111213141516171819102122232425262728292031323
8egatSretaeH
7egatSretaeH
6egatSretaeH
xxxx
5egatSretaeH
x x x x
4egatSretaeH
xxx
3egatSretaeH
x x
2egatSretaeH
x
1egatSretaeH
)a(1egatSgnilooC
)b(1egatSgnilooC
)c(1egatSgnilooC
)d(1egatSgnilooC
)a(2egatSgnilooC
)b(2egatSgnilooC
)c(2egatSgnilooC
)d(2egatSgnilooC
)a(3egatSgnilooC
)b(3egatSgnilooC
)c(3egatSgnilooC
)d(3egatSgnilooC
)a(4egatSgnilooC
)b(4egatSgnilooC
)c(4egatSgnilooC
)d(4egatSgnilooC
5egatSgnilooC
6egatSgnilooC
7egatSgnilooC
8egatSgnilooC
9egatSgnilooC
01egatSgnilooC
11egatSgnilooC
21egatSgnilooC
31egatSgnilooC
41egatSgnilooC
51egatSgnilooC
61egatSgnilooC
nepOsrooDtneV
esolCsrooDtneV
snepOniatruC
sesolCniatruC
1tuptuOkcolC
2tuptuOkcolC
3tuptuOkcolC
4tuptuOkcolC
1tuptuOyrailixuA
2tuptuOyrailixuA
mralA.PcitatSoL
snaF.PcitatSoL
x
x
x x x
x x
xx x x
x x x
xxx x x
x x x x
xxxx x x
x x x x x T x x
xxxxxx Txx
x x x x x x x T x x
x
x
x
x
x
x
xx x x
PP-32
x
x
x
x
x
KOOLMASTER PP-32 REV.01
71
Page 72

PP-32
5.14.6.1 Assigning Fan Stages' Relays
Ventilation stages 1 to 4 use a separate relay assignment for each
progam in use. Refer to sec. 5.2 to select the proper program.
MAKE SURE EVERY FAN STAGE HAS RELAYS ASSIGNED TO IT!
!
WARNING
Set the function to "17.Fan Settings" from the main menu using
the navigation buttons then press the right-arrow key. Note that this
menu is only available in the installer mode (see sec. 5.14.2).
Press the right-arrow key once again to select the "1.Relays" menu.
An alarm is set off whenever a fan stage, that doesn't activate
any relay, is activated. In this case, all relays of the previous fan
stage are copied into this stage.
Use the adjustment buttons to
select the proper fan stage then
press the right-arrow key. The
letter that stands beside stages 1-4
corresponds to the current program
in use (if applicable).
Use the up and down-arrow keys to
select the desired relay. When the
item is flashing, press to activate
the relay or to deactivate it.
Proceed in similar fashion to assign relays for each fan stage.
TIMER RELAYS ON FAN STAGES:
The user can configure certain relays to operate in timer mode for
cooling while other relays operate in ON/OFF mode. For example, a Kool-
Cel Pump can operate according a timer mode, using a fan stage output.
The Kool-Cel Pump will then operate while fan stages continue running at
the same time. Timer relays can only be set on fan stage outputs. Refer
to section 5.7.2 to set the timers' ON and OFF time settings.
Ventilation Stage
Relay Assignment
3. Stage 1a
4. Stage 2a
Stage 1a Relays:
Relay 1 On(1)
Relay 2 Off(1)
Relay 3 Off(1)
72
KOOLMASTER PP-32 REV.01
Page 73

PP-32
To assign relays on timer mode, proceed
as described above and use the adjustment buttons to select the "Timer"
option.
Stage 1a Relays:
Relay 1 On(1)
Relay 2 Timer(1)
Relay 3 Off(1)
5.14.6.2 Assigning Heater Stages' Relays
Set the function to "16.Heater Settings" from the main menu using
the navigation buttons then press the right-arrow key. Note that this
menu is only available in the installer mode (see sec. 5.14.2).
Press the right-arrow key once again to select the "1.Relays" menu.
Use the navigation buttons to select the desired heater stage then
press the right-arrow key.
Use the right and left-arrow keys to
select the desired relay. When the
item is flashing, press to activate
the relay or to deactivate it.
Proceed in similar fashion to assign relay(s) for each heater stage.
Heater 1 Relays
1 2 3 4 5 6 7 8 9 10
√
5.14.6.3 Assigning Relays to Vent Doors
Relays 13-14, 15-16, 29-30 and 31-32 have specially been designed for
vent doors, air inlets or tunnel curtain. It is strongly recommend to use
these relays to open/close these devices: this prevents activating the
OPEN and CLOSE relays, by inadvertence, at the same time.
ASSIGNING VENT DOORS OPEN / CLOSE RELAYS:
Set the function to "8.Vent Doors" from the main menu using the
navigation buttons then press the right-arrow key. Note that this menu
is only available in the installer mode (see sec. 5.14.2) and if vent
doors have been enabled during the installation setup (see sec 5.14.3).
KOOLMASTER PP-32 REV.01
73
Page 74
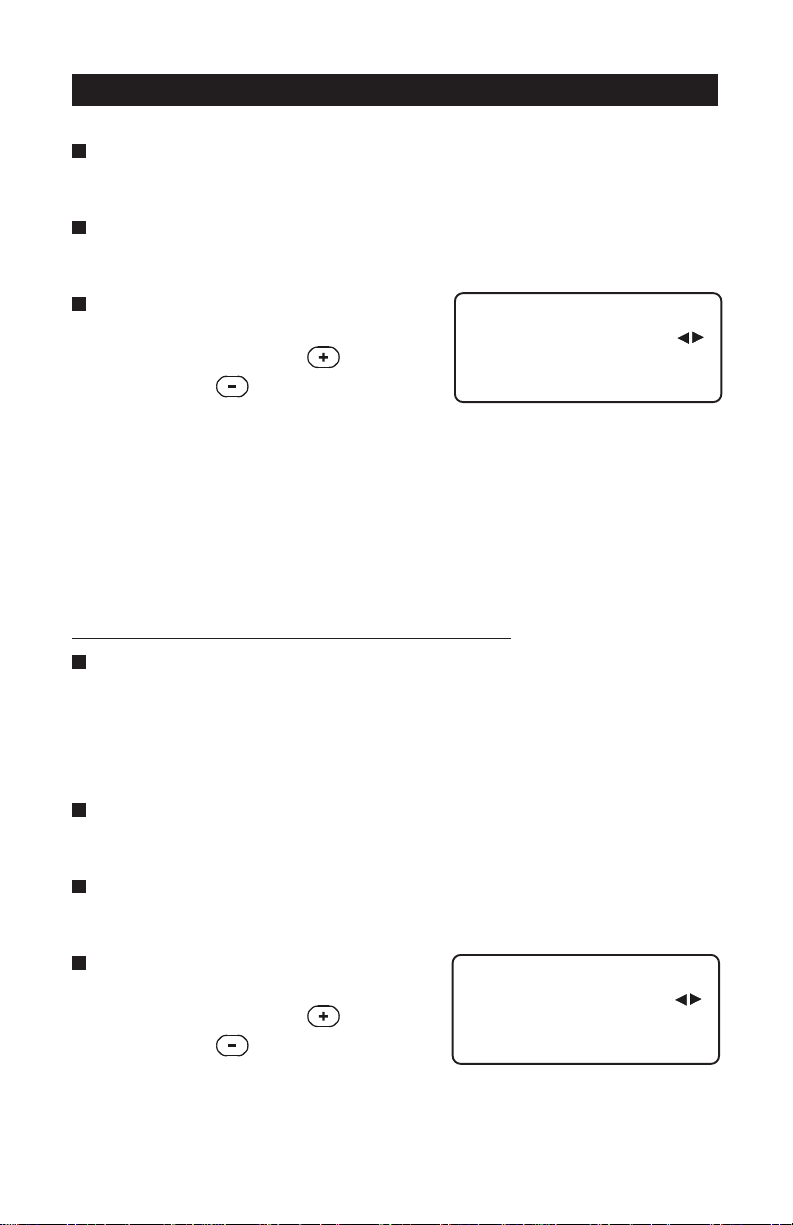
PP-32
Use the navigation buttons to select the "2. Relay Settings" menu
then press the right-arrow key.
Use the navigation buttons to select the "1.Open Relay" or "2. Close
Relay" menu then press the right-arrow key.
Use the right and left-arrow keys to
select the desired relay. When the
item is flashing, press to activate
the relay or to deactivate it.
Vent Door
Open Relay
13 14 15 16 17 18 19
√
5.14.6.4 Assigning Relays to the Tunnel Curtain
Relays 13-14, 15-16, 29-30 and 31-32 have specially been designed for
vent doors, air inlets or tunnel curtain. It is strongly recommend to use
these relays to open/close these devices: this prevents activating the
OPEN and CLOSE relays, by inadvertence, at the same time.
ASSIGNING CURTAIN'S OPEN / CLOSE RELAYS:
Set the function to "9.Tunnel Curtain" from the main menu using
the navigation buttons then press the right-arrow key. Note that this
menu is only available in the installer mode (see sec 5.14.2) and if
the tunnel curtain has been enabled during the installation setup (see
sec. 5.14.3).
Use the navigation buttons to select the "2. Relay Settings" menu
then press the right-arrow key.
Use the navigation buttons to select the "1.Open Relay" or "2. Close
Relay" menu then press the right-arrow key.
Use the right and left-arrow keys to
select the desired relay. When the
item is flashing, press to activate
the relay or to deactivate it.
74
KOOLMASTER PP-32 REV.01
Tunnel Curtain
Open Relay
13 14 15 16 17 18 19
√
Page 75
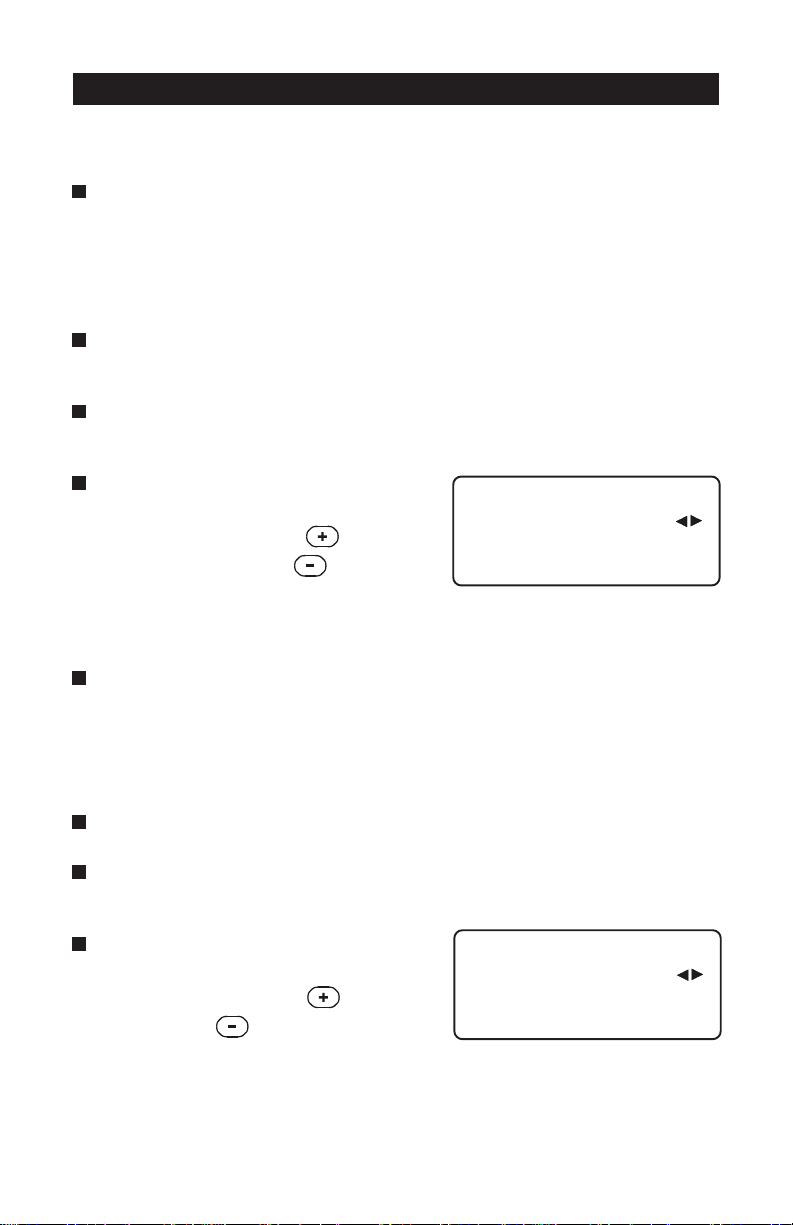
PP-32
5.14.6.5 Assigning Relays to Clock Outputs
Set the function to "11.Clock Times" from the main menu using
the navigation buttons then press the right-arrow key. Note that this
menu is only available in the installer mode (see sec. 5.14.2) and if
clock outputs have been enabled during the installation setup (see
sec. 5.14.3).
Use the navigation buttons to select the "2. Clock Relays" menu then
press the right-arrow key.
Use the navigation buttons to select the desired clock output then
press the right-arrow key.
Use the right and left-arrow keys to
select the desired relay. When the
item is flashing, press to
activate the relay or to deacti-
vate it.
Clock 1 Relays
13 14 15 16 17 18 19
√
5.14.6.6 Assigning Relays to Auxiliary Outputs
Set the function to "17.Fan Settings" from the main menu using
the navigation buttons then press the right-arrow key. Note that this
menu is only available in the installer mode (see sec. 5.14.2) and if
auxiliary outputs have been enabled during the installation setup (see
sec. 5.14.3).
Press the right-arrow key to select the "1.Relays" menu.
Use the navigation buttons to select the desired auxiliary output then
press the right-arrow key.
Use the right and left-arrow keys to
select the desired relay. When the
item is flashing, press to activate
the relay or to deactivate it.
Auxiliary 1 Relays
13 14 15 16 17 18 19
√
KOOLMASTER PP-32 REV.01
75
Page 76

PP-32
5.14.6.7 Assigning Relays for the Lo Static Pressure Alarm
This relay is activated if a low static pressure alarm occurs. Refer to sec.
5.13.2 to activate/deactivate the low static pressure alarm.
Set the function to "21.Alarm
Limits" from the main menu using
the navigation buttons then press
the right-arrow key.
Use the navigation buttons to select
"2.Static Pressure" then press the
right-arrow key. Note that this menu
is only accessible if the static pressure
sensor has been enabled in the installation setup (see sec. 5.14.3).
Use the navigation buttons to select the "2. Lo Static Alarm" menu
then press the right-arrow key.
Use the right and left-arrow keys to select the desired relay. When
the item is flashing, press to activate the relay or to
deactivate it.
Alarm Settings
1. Temperature
2. Lo Static Alarm
Lo Static Alarm
Relay Assignment
1 2 3 4 5 6 7
√
76
KOOLMASTER PP-32 REV.01
Page 77

PP-32
5.14.7 Calibrating the Water Counter
The PP-32 provides a pulse input to monitor the water consumption. The
user must enter the water flow per pulse, it can be adjusted from 1 to 100
gallons per pulse.
Set the function to "13. Water Consumption" from the main menu
then press the right-arrow key. The water consumption of the
current day is displayed.
Press the up-arrow key once. The water flow per pulse is displayed.
Use the adjustment buttons to set
the water flow per pulse to the
desired value.
Water Consumption
Calib: 1Gal/p
Min 1 Max 100
KOOLMASTER PP-32 REV.01
77
Page 78
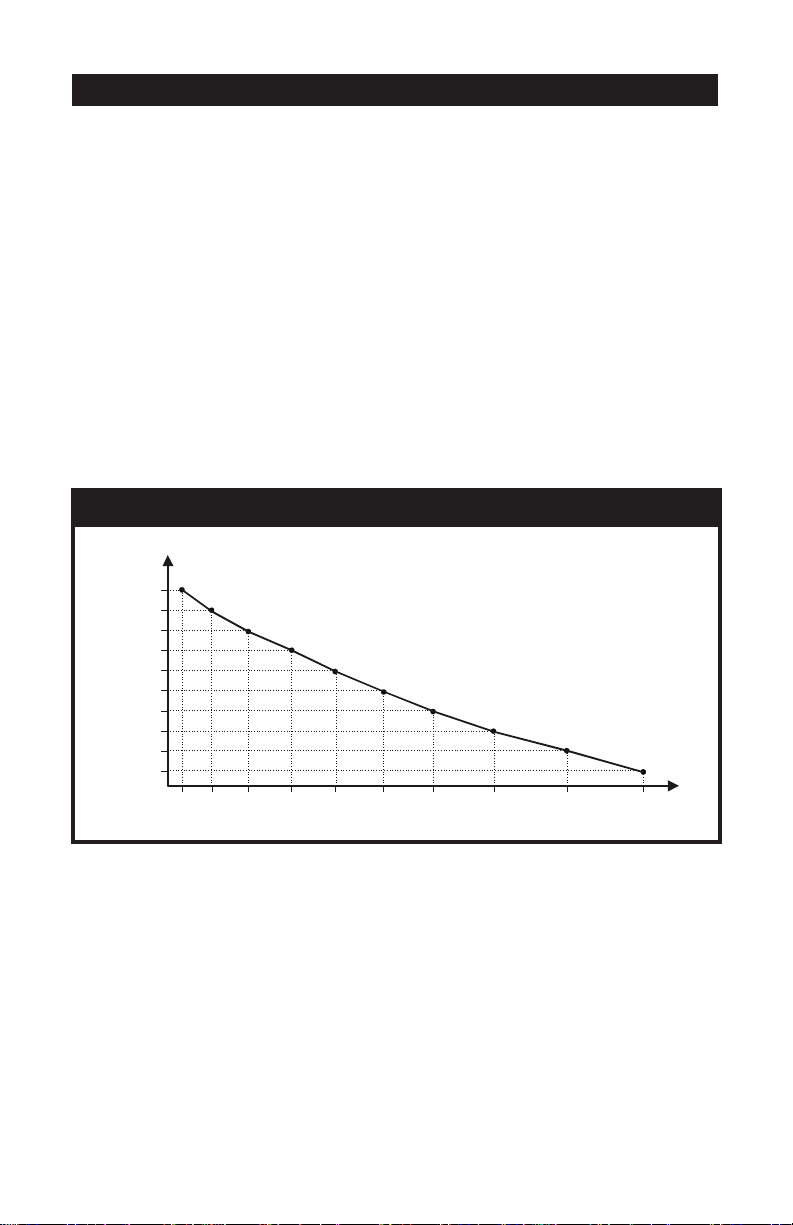
PP-32
S
5.15 ADVANCED SETTINGS
5.15.1 Setting the Temperature Curve
The user can define a temperature curve to adjust the set point automatically over a given time period.
A curve is defined using up to 10 points. Each point specifies a day
number and a set point for that day. The animal age defines the current
day number that is used by the curve. Once the points of the curve are
defined, the curve must be activated. The controller will change the
temperature set point every hour in a linear fashion between consecutive
points of the curve. When the last point of the curve is reached, the
temperature set point for that day is maintained until the animal is set
back to 0
TEMPERATURE
SET POINT
(Off)
.
TEMPERATURE CURVE
T° 1
T° 2
T° 3
T° 4
T° 5
T° 6
T°7
T°8
T° 9
T° 10
DAY 4 DAY 15 DAY 21 DAY 30 DAY 36 DAY 55DAY 45 DAY70 DAY 100DAY 80
DAY
NOTES:
i) All ten points of the curve must be specified. If ten points are not
needed, repeat the last temperature value for each unnecessary point.
ii) Certain restrictions apply to reduce the risk of errors:
- The highest possible day number is 450.
- Decreasing day numbers are not allowed.
- Increasing temperatures are not allowed.
78
KOOLMASTER PP-32 REV.01
Page 79
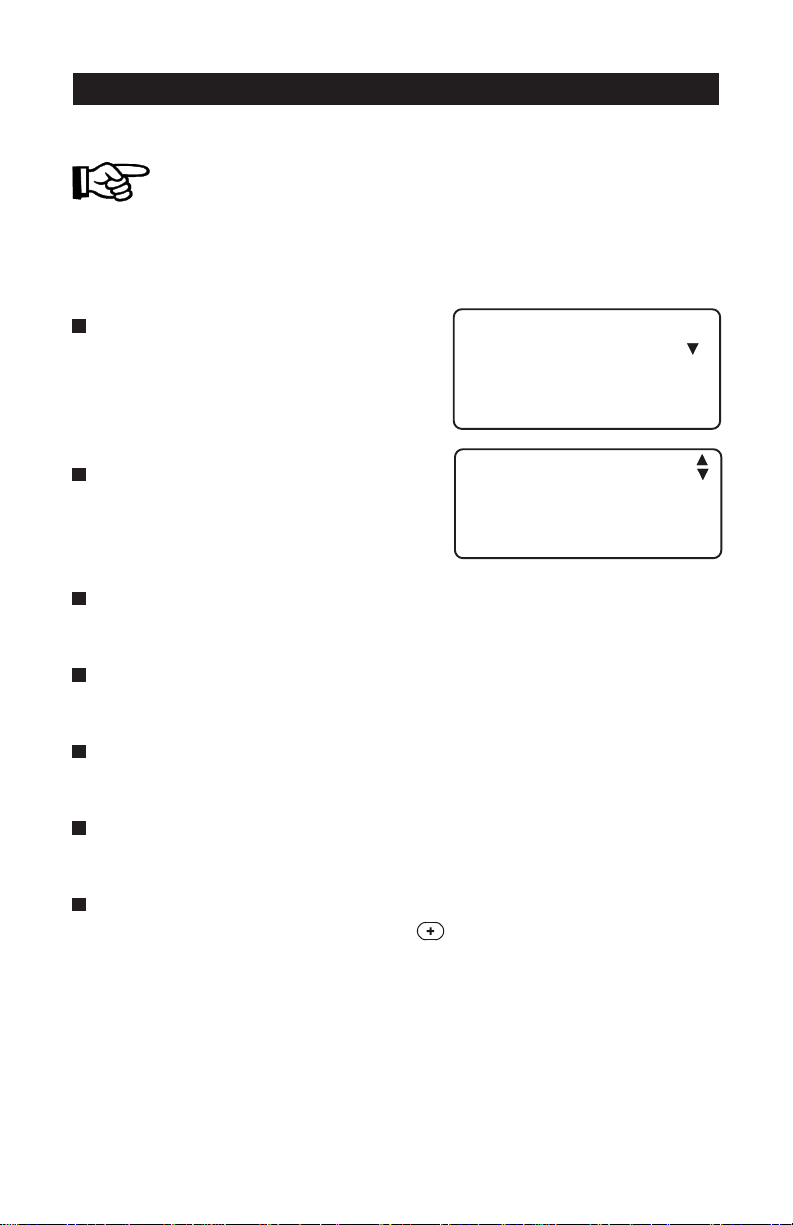
PP-32
Note that the temperature curve must be turned off to adjust
its points and days. Use the down-arrow key to scroll each point
of the curve. The curve status then flashes on the display. Use
the adjustment buttons to turn it Off.
Set the function to "6.Room Set
Point" from the main menu then press
the right-arrow key. The current set
point and the curve status are displayed.
Press the down-arrow key once. The
first day, corresponding to the first
point of the curve flashes on the display.
Use the adjustment buttons and set the first day of the curve to the
desired value.
Press the down-arrow key once again. The temperature for the first
point of the curve flashes on the display.
Use the adjustment buttons to adjust the temperature for the first
point of the curve to the desired value.
Press the down-arrow key to display and adjust all other points of
the curve.
Once they are all properly set, press the down-arrow key. The curve
state flashes on the display. Press to activate the curve.
Room Set Point
Temperature
Set Point: 70.0°F
Curve stat Off
Room Set Point
Temperature
Day: 1
Temp: 78.0°F
NOTE: All ten points of the curve must be specified. If ten points are not
needed, repeat the last temperature value for each unnecessary point.
KOOLMASTER PP-32 REV.01
79
Page 80

PP-32
5.15.2 Setting the Minimum Ventilation Curve
Fans' On-Time, in minimum ventilation, can automatically be adjusted
over a given period of time, by using the minimum ventilation curve.
The On-Time changes using 10 steps. Each step specifies a day number and
an On-Time value for that day. The animal age defines the current day
number used by the curve. Once the 10 steps are defined, the curve must
then be activated. The controller changes the On-Time, i n minimum
ventilation, every hour in a linear fashion between consecutive steps of the
ramping curve. When the last step is reached, the fans' On-Time for that
day is maintained until the animal age is set back to Off.
MINIMUM VENTILATION CURVE
ON TIME
(SECONDS)
STEP 10
STEP 9
STEP 8
STEP 7
STEP 6
STEP 5
STEP 4
STEP 3
STEP 2
STEP 1
NOTES:
i) All ten points of the curve must be specified. If ten points are not
needed, repeat the last On-Time value for each unnecessary point.
ii) Certain restrictions apply to reduce the risk of errors:
- The highest possible day number is 450.
- Decreasing day numbers are not allowed.
- Decreasing On-Times are not allowed.
80
KOOLMASTER PP-32 REV.01
Page 81

PP-32
Note that the minimum ventilation curve must be turned off to
adjust its points and days. Use the down-arrow key to scroll
each point of the curve. Then the curve status then flashes on
the display. Use the adjustment buttons to turn it Off.
Set the function to "7.Min Ventilation" from the main menu then press
the right-arrow key.
Use the adjustment buttons to select the "1.On Time/ Curve" menu.
The current On-Time and the curve status are displayed.
Press the down-arrow key once. The
first day that corresponds to the first
point of the curve, flashes on the display.
Use the adjustment buttons to set the first day to the desired value.
Press the down-arrow key once again. The On-Time for the first point
is displayed.
Use the adjustment buttons to adjust the On-Time to the desired value.
Press the down-arrow key to display and adjust all other points of
the curve.
Once they are all properly set,
press the down-arrow key. The
curve state flashes on the display.
Press to activate the curve.
NOTE: All ten points of the curve must be specified. If you don't need
ten different points, repeat the last On-Time for each unnecessary point
of the curve.
Min ventilation
Day: 1days
On Time: 15sec
Min ventilation
Curve stat On
KOOLMASTER PP-32 REV.01
81
Page 82

PP-32
5.15.3 Humidity Control
If a humidity sensor is being used, the PP-32 has three mechanisms to
compensate for a high humidity level :
1. The humidity level can be decreased by increasing the fans' on time
during minimum ventilation cycles. Set Dipswitch #7 to ON to
activate this function;
2. Kool-Cels are shut off whenever the relative humidity is too high (this
applies to fan stage outputs that are using a timer relay). Set
Dipswitch #5 to ON to activate this function ;
3. Heaters are activated in timer mode whenever the relative humidity
is too high. Set Dipswitch #6 to ON to activate this function;
5.15.3.1 Adjusting Relative Humidity Set Point
Set the function to "18.RH Compensation" from the main menu
using the navigation buttons then press the right-arrow key. Note
that this menu only appears if the relative humidity sensor has been
enabled during the installation setup (see sec. 5.14.3).
Use the navigation buttons to
select the relative humidity set
point
(RH Set Point)
Use the adjustment buttons to
adjust the relative humidity set
point to the desired value.
82
KOOLMASTER PP-32 REV.01
display.
RH Compensation
AddMinVent sec 60
RH set point % 65
Mist shutoff % Off
Page 83

PP-32
5.15.3.2 RH Compensation on Minimum Ventilation
When the humidity level reaches the RH set point + 10%, the On-Time
portion of the minimum ventilation cycle is increased by an amount
ranging from 0 to 900 seconds. Set the dipswitch #7 to ON to activate
this function.
HUMIDITY COMPENSATION ON MIN. VENTILATION
ON TIME
(IN MIN. VENT.)
MAX ON TIME
NORMAL ON TIME
WHEN THE HUMIDITY
EXCEEDS THE RH SET
ADDED TIME
POINT, THE ON TIME
STARTS INCREASING
RH SET POINT
ON TIME +
ADDED DELAY
RELATIVE
HUMIDITY (RH)
Set the function to "18.RH Compensation" from the main menu
using the navigation buttons then press the right-arrow key. Note
that this menu only appears if the relative humidity sensor has been
enabled during the installation setup (see sec. 5.14.3).
Use the adjustment buttons to set
the time that will be added to the
minimum ventilation's On-Time
when the humidity level reaches the
Humidity Set Point + 10%
Min Vent sec)
. Note that this menu
(Add
RH Compensation
Add Min Vent sec 30
RH set point % 65
Mist shutoff % Off
only appears if dipswitch #7 is
turned ON.
KOOLMASTER PP-32 REV.01
83
Page 84

PP-32
5.15.3.3 Adjusting Mist or Kool-Cel Shutoff
When the humidity level is too high, Kool-Cel or mist units are shut off to
avoid increasing the humidity level any further. This means that the fan
stage outputs that operates in timer mode stop operating whenever the
humidity level exceeds the mist shutoff limit. This limit ranges from 25%
to 100% (Off) of humidity. Set the dipswitch #5 to ON to activate this
function.
Set the function to "18.RH Compensation" from the main menu
using the navigation buttons then press the right-arrow key. Note
that this menu only appears if the relative humidity sensor has been
enabled during the installation setup (see sec. 5.14.3).
Use the navigation buttons in order
to select the "Mist Shutoff" display.
Note that this menu only appears if
dipswitch #5 is turned ON.
RH Compensation
Add Min Vent 30
RH set point % 65
Mist shutoff % 90
Use the adjustment buttons to set
the mist shutoff humidity level to the desired value.
5.15.3.4 Adjusting Heater Timer Cycle
Heaters can be activated in timer mode to compensate for a high level of
humidity. As the humidity level increases, the heaters' On-Time increases proportionally to compensate for the change. Heaters reach their
HUMIDITY COMPENSATION ON HEATERS
SECONDS
MAX ON TI ME
MIN ON TIME
0 SEC
HEATERS START
IN TIMER MODE
WITH MIN. ON TIME
HEATERS REACH
MAXIMUM ON TIME
84
KOOLMASTER PP-32 REV.01
RH SET POINT
RELATIVE
HUMIDITY (RH)
Page 85

PP-32
full On-Time when the humidity is at or above RH Set Point + 10% as
shown below. The cycle time can be adjusted from 0 to 900 seconds.
Set the dipswitch #6 to ON to use this function.
Set the function to "18.RH Compensation" from the main menu
using the navigation buttons then press the right-arrow key. Note
that this menu only appears if the relative humidity sensor has been
enabled during the installation setup (see sec. 5.14.3).
Use the navigation buttons in order to select the "Heater On time"
display. Note that this menu only appears if dipswitch #6 is turned
ON.
Use the adjustment buttons to set
the Heater's On-Time to the desired
value.
Press the down-arrow key once to
select the "Heater Off time" display.
Use the adjustment buttons to set the Heater's Off-Time to the
desired value.
RH set point % 65
Mist shutoff % Off
Heater On time Off
Heater Off time 0
KOOLMASTER PP-32 REV.01
85
Page 86

PP-32
5.15.4 Calibrating Sensors
The reading of each sensor can be slightly adjusted by the user in order
to obtain the most accurate and uniform readings of all sensors. The
calibration of sensors can only be preformed in the installer mode (see
sec. 5.14.2).
5.15.4.1 Calibrating Room and Outside T° Sensors
The reading of each temperature sensor can adjusted by an amount of
±3°F (±1.7°C).
Set the function to "3.Temp. Sensors" from the main menu using the
navigation buttons. Sensors' temperature readings are displayed.
Use the down-arrow key to select
the calibration menu of a room
temperature sensor or of the
outside temperature sensor
(Cal.Sens.x or Cal.Out)
these menus are only displayed in
the installer mode (see sec. 5.14.2).
Use the adjustment buttons to set the temperature that will be
added or removed from all readings of the selected sensor.
. Note that
Temperature Sensors
Sensor 1: 72.3°F
Cal.Sens.1 0.0°F
Sensor 2: 73.0°F
5.15.4.2 Calibrating the Relative Humidity Sensor
The reading of the humidity sensor can adjusted by an amount of ±3%.
Set the function to "4.R. Humidity" from the main menu using the
navigation buttons then press the right-arrow key. The current
relative humidity level is displayed. Note that this menu is only
accessible if a humidity sensor has been enabled (see sec. 5.14.3).
Press the down-arrow key once in
order to select the calibration menu
of the humidity sensor "Cal. RH".
Note that this menu is only displayed in the installer mode (see
sec. 5.14.2).
Relative Humidity
Current RH Low %
Cal. RH 0%
Min/Max Recorded
86
KOOLMASTER PP-32 REV.01
Page 87

PP-32
Use the adjustment buttons to set the humidity level that will be
added or removed from all readings of the humidity sensor.
5.15.4.3 Calibrating the Static Pressure Level
The reading of the static pressure level can adjusted by an amount of
±0.030"WC (±7Pa).
Select "8.Vents/Static P" from the
main menu using the navigation
buttons then press the right-arrow
key. The calibration menu flashes
on the display "Cal. SP". Note that
this menu is only available if the
static pressure sensor has been enabled during the installation setup
and in the installer mode (see sec. 5.14.2 and 5.14.3).
Use the adjustment buttons to set the humidity level that will be
added or removed from all readings of the humidity sensor.
Vents/Static Press
Cal. SP .000WC
Close At: .070WC
Open At: .090WC
KOOLMASTER PP-32 REV.01
87
Page 88
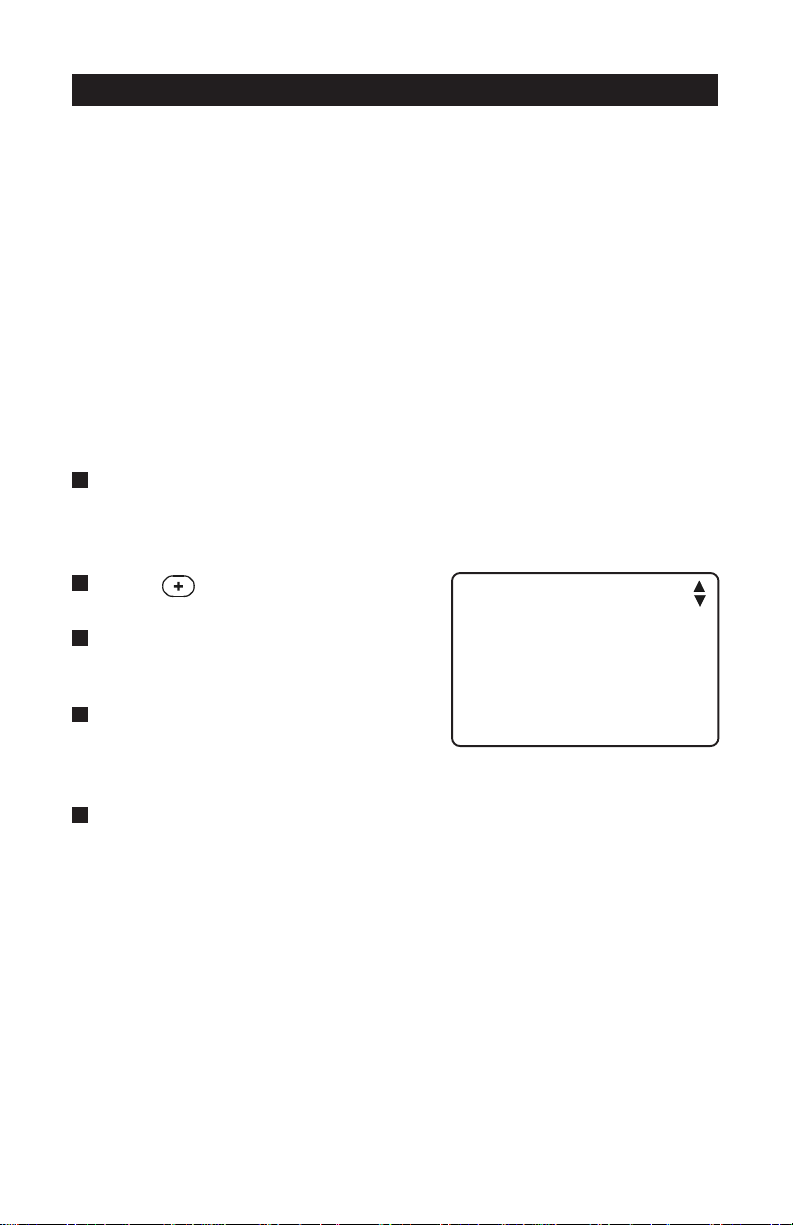
PP-32
5.15.5 Test Mode
A test mode allows you to simulate temperature changes and verify
the controller's performance. In test mode, the temperature sensor inputs
are turned off, allowing the user to change the temperature used by the
controller to operate the stages. The controller operates as before using
the new temperature settings.
Adjusting Room Temperature
When the room temperature is adjusted, the controller bypasses the temperature sensor inputs and uses the new value as a reference. The test
mode is deactivated after 15 minutes of inactivity.
Set the function to "23.Test Mode" from the main menu using the
navigation buttons then press the right-arrow key. The On/Off status
of the test mode displayed.
Press to activate the test mode.
Press the down-arrow key to select
the room temperature.
Use the adjustment buttons to set the
room temperature to the desired
value.
The controller then displays the fan stage that is activated, in accordance
with the selected temperature. It also displays the current program in use
and the static pressure readings (if a static pressure sensor is used). These
values are displayed as readings, they cannot be modified.
88
KOOLMASTER PP-32 REV.01
Test Mode
Mode On
Temp: 69.5 °F
Static Pressure .015
Fan Stage: Min.V
Program: (a)
Page 89

6. TECHNICAL SPECIFICATIONS
Type PP-32
Main supply fuse F1 3A, fast-blow
Mains supply/frequency 115/230 Vac , 50/60Hz
OUT1 to OUT4 0-10Vdc, 10mA max.
14Vdc output 14 Vdc ±10%, regulated, 1A max.
14Vdc output fuse F2 1A max, fast-blow
Alarm contact 10mA to 2A, 24 Vac or dc max.
Housing NEMA 4X, IP54, plastic casing, IEC
529, UL-508-4X
Operating temperature 32 to 140°F (0 to 40°C)
Storage temperature 5 to 104°F (-15 to 50°C)
Ambient relative humidity max. 95%
The room temperature where the controller is located MUST
ALWAYS REMAIN BETWEEN 32o AND 104oF (0o AND 40oC).
KOOLMASTER PP-32 REV.01
89
Page 90

7. FACTORY SETTINGS
RETEMARAP
tnioPteSerutarepmeT
egAlaminA FFOsyad054ot1
muminiM
noitalitneV
lennuT
noitalitneV
srooDtneV
smralA
margorP
noitceleS
emiTnOces03s009ot0
emiTelcyCces003s009ot0
lennuTtsriF
egatS
egAmuminiM0 syad054ot1
niatruC
esolC/nepO
semiT
emiTnuRlatoTnim2
nepOerP
yaleDlennuT
erusserPhgiH
tnioPteS
)tAnepO(
erusserPwoL
tnioPteS
)tAesolC(
emiTgninepOces06sdnoces009ot0
emiTgnisolCces06sdnoces009ot0
emiTffOces01sdnoces009ot0
yaleD
srooD
mralA
mralA
nosaeSremmuSretniWroremmuS
tneVnepOerP
rofleveLegatS
tneVgnisolC
erusserPcitatS
yaleDmralA
mralAhgiH
erutarepmeT
mralAwoL
erutarepmeT
lacitirC
erutarepmeT
erusserPhgiH
erusserPwoL
smargorpfo#1 4ot1
YROTCAF
GNITTES
F°0.08
)C°7.62(
561-3
ces03
ces03sdnoces03ot0
CW"080.0
)aP5.91(
CW"050.0
)aP5.21(
ces01sdnoces06ot0
enoN
ces006oL
ces003iH
F°0.51
)C°3.8(
F°0.01
)C°6.5(
F°59
)C°53(
CW"051.0
)aP4.73(
CW"510.0
)aP7.3(
SEULAVFOEGNAR
o
F
021ot23
o
9.84ot0(
)C
ni,setunim51ot0
sdnoces5fostnemercni
ni,setunim51ot0
sdnoces5fostnemercni
CW"002.0ot500.0
)aP8.94ot3.1(
CW"002.0ot0
)aP8.94ot0(
naFotegatSlennuTtsriF
rebmunegats
sdnoces009ot0
F°53ot5.0
tnioptes
F°02ot5.0
tnioptes
ehtevoba)C°4.91ot3.0(
ehtwoleb)C°1.11ot3.0(
tesehtevoba)C°3.0(F°5.0
)C°9.84(F°021ottniop
CW"004.0ot0
)aP001ot0(
CW"593.0ot0
)aP5.89ot0(
90
KOOLMASTER PP-32 REV.01
Page 91

8. USING THE CONFIGURATION MODULE
8.1 Loading a Configuration
Loading a Configuration from the Configuration
Module into the PP-32 Controller:
1- Position the configuration module on the J1
connector, at the top left corner of the
board, with the components facing DOWN.
2- Simultaneously press the up and
down-arrow keys
during a 5 second delay. The
following message is displayed : “
Load Configuration Press +/- to start”.
3- Simultaneously press the +and- push buttons . The
Load Configuration
Press +/- to start
configuration starts to load. Wait until it is completely loaded.
4- Once the configuration has reached 100%, press the up and down-
arrow keys once again simultaneously to exit this
menu.
5- The new configuration is now loaded. Remove the configuration
module from the connector.
KOOLMASTER PP-32 REV.01
91
Page 92
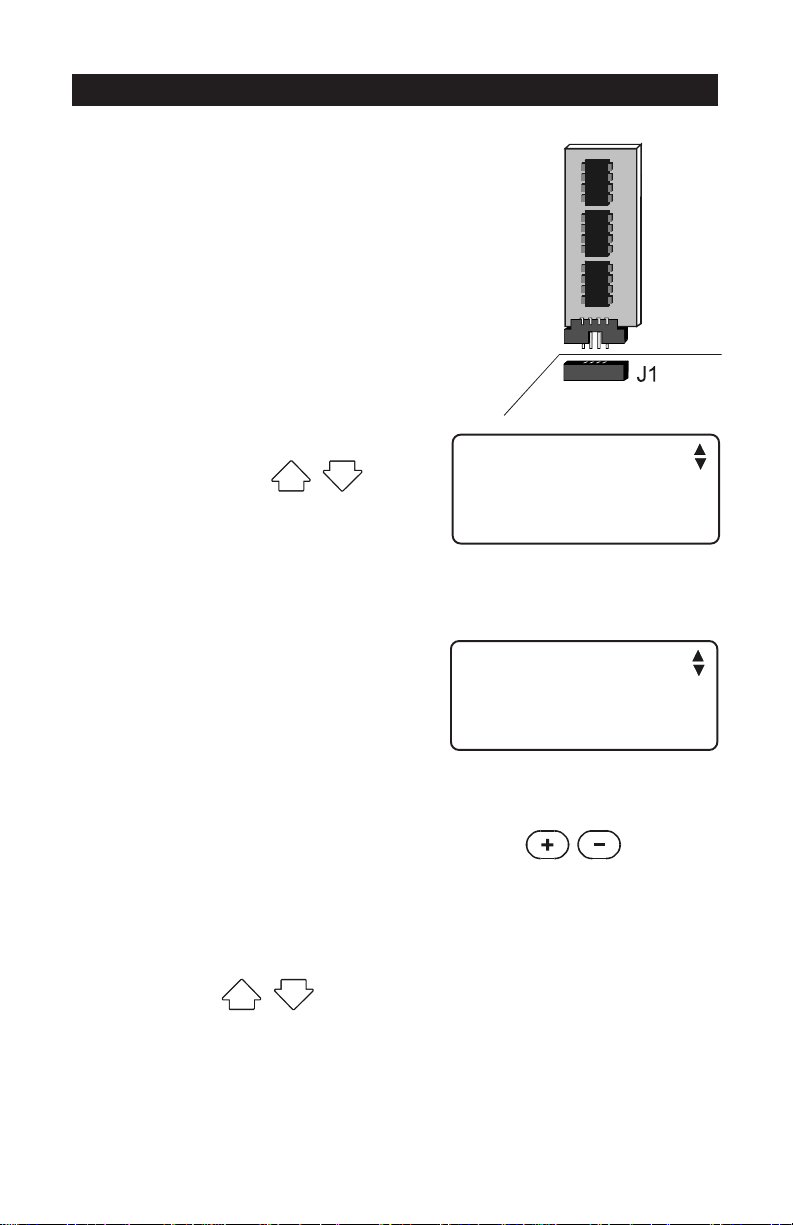
PP-32
8.2 Saving a Configuration
Saving a Configuration from the PP-32 Controller
into the Configuration Module:
1- Place the configuration module on the J1
connector, at the top left corner of the
board, with the components facing DOWN.
2- Simultaneously press the up and
down-arrow keys during
a 5 second delay. The following
message is displayed : “ Load
Configuration Press +/- to start”.
Load Configuration
Press +/- to start
3 - Press the up-arrow key once. The
following message is displayed:
“Save Configuration Press +/- to
start”.
4- Simultaneously press the +and - push buttons . The
configuration starts to save. Wait until it is completely saved.
5- Once the configuration has reached 100%, press the up and down-
arrow keys once again to exit this menu.
6- The new configuration is now saved on the configuration module.
Remove the configuration module from the connector.
92
KOOLMASTER PP-32 REV.01
Save Configuration
Press +/- to start
Page 93
9. INSTALLATION REPORT
CONTACT INFORMATION
CLIENT INFORMATION
INSTALLER INFORMATION
KOOLMASTER PP-32 REV.01
93
Page 94
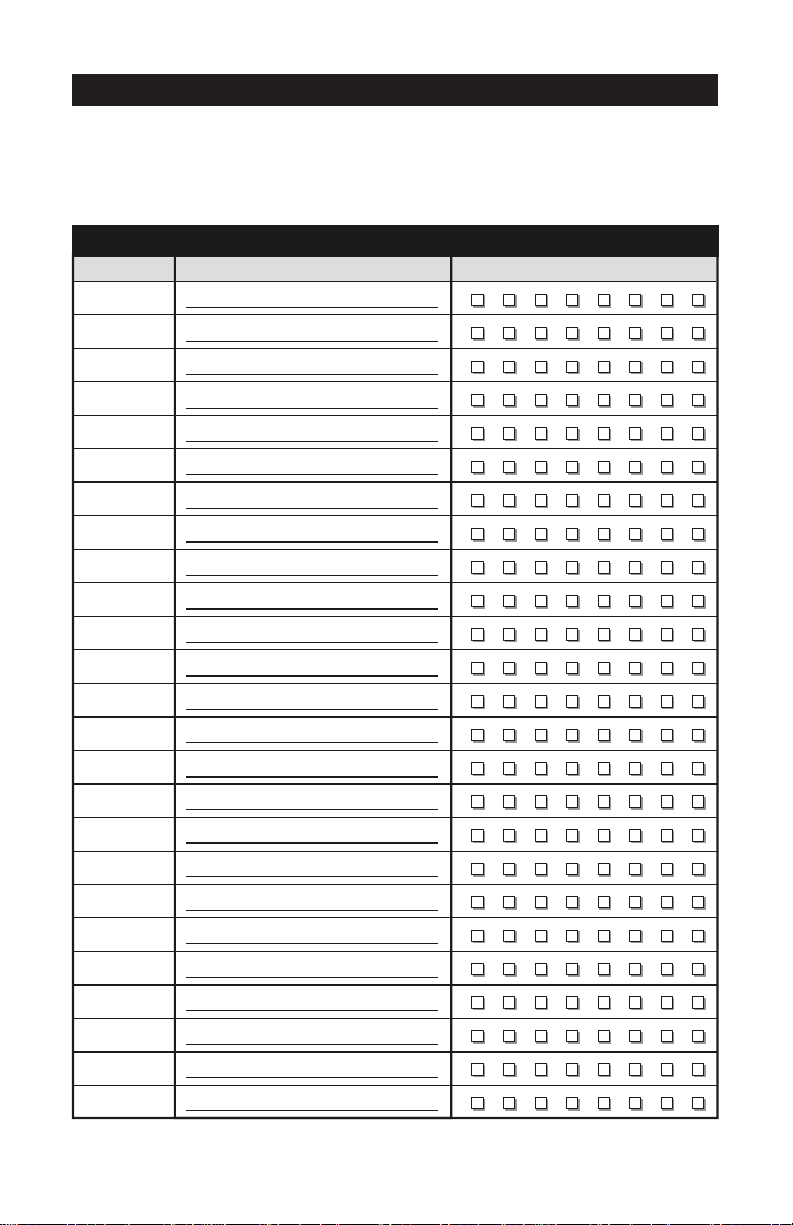
PP-32
SENSOR ASSIGNMENT TEMPLATE (see sec. 5.14.4)
Note : each program (a, b, c and d) has its own sensor assignement
SENSOR AS SI GN EM ENT
OUTPUTS SENSORS
Room T° (a)
Room T° (b)
Room T° (c)
Room T° (d)
Heater 1
Heater 2
Heater 3
Heater 4
Heater 5
Heater 6
Heater 7
Auxiliar y 1
Auxiliar y 2
Inlet 1
Inlet 2
Inlet 3
Inlet 4
Inlet 5
Inlet 6
Inlet 7
Inlet 8
Inlet 9
Inlet 10
Inlet 11
Inlet 12
DESCRIPTION
1 2 3 4 5 6 7 8
1 2 3 4 5 6 7 8
1 2 3 4 5 6 7 8
1 2 3 4 5 6 7 8
1 2 3 4 5 6 7 8
1 2 3 4 5 6 7 8
1 2 3 4 5 6 7 8
1 2 3 4 5 6 7 8
1 2 3 4 5 6 7 8
1 2 3 4 5 6 7 8
1 2 3 4 5 6 7 8
1 2 3 4 5 6 7 8
1 2 3 4 5 6 7 8
1 2 3 4 5 6 7 8
1 2 3 4 5 6 7 8
1 2 3 4 5 6 7 8
1 2 3 4 5 6 7 8
1 2 3 4 5 6 7 8
1 2 3 4 5 6 7 8
1 2 3 4 5 6 7 8
1 2 3 4 5 6 7 8
1 2 3 4 5 6 7 8
1 2 3 4 5 6 7 8
1 2 3 4 5 6 7 8
1 2 3 4 5 6 7 8
94
KOOLMASTER PP-32 REV.01
Page 95
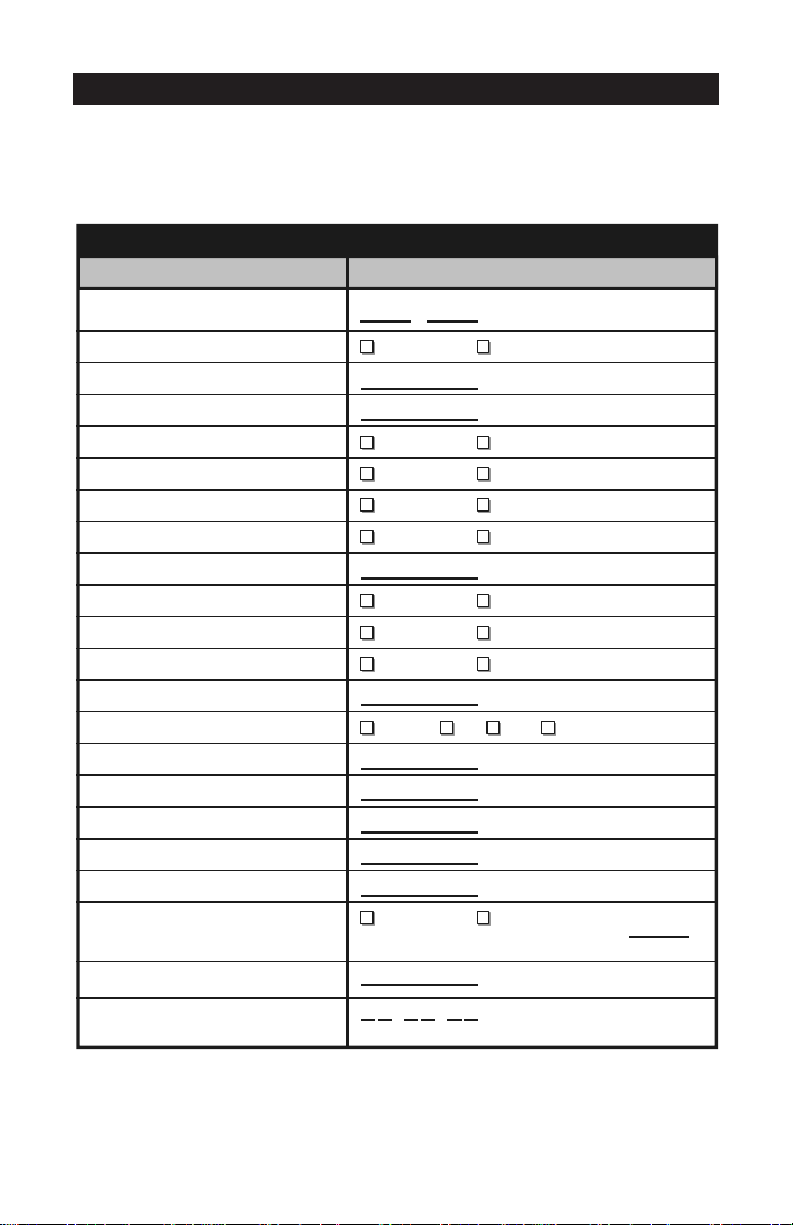
INSTALLATION SETUP TEMPLATE (see sec. 5.14.3)
INSTALLATION SETUP
Parameter Setting
PP-32
Reset Min/Max
Relative humidity sensor
Pre-Open vent s delay
Pre-Open tunnel delay
Use Tunnel ?
T unnel Mode
Use static pressure sensor?
Static Set. 2
Number of air inlets
Number of auxiliary outputs
Auxiliary output 1 Mode
Auxiliary output 2 Mode
Number of fan stages
Number of stage programs
Number of heater stages
Number of clocks
# of programs for clock 1
# of programs for c
lock 2
Number of sensors
Use outside temperature?
Contrast
Installer password code
:
YES NO
(0 to 60 sec.)
(0 to 30 sec.)
YES NO
TIMER STATIC P.
YES NO
STAGE OUTSIDE T°
(0 to 12)
1 2
HEATING COOLING
HEATING COOLING
(2 to 16)
NONE ab abc abcd
(0 to 8)
(0 to 4)
(1 to 8)
(1 to 8)
(1 to 8)
YES NO
OUTSIDE T°
INFLUENCE
ON ALARMS
(0 to 100%)
°F
KOOLMASTER PP-32 REV.01
95
Page 96

PP-32
RELAY ASSIGNMENT TEMPLATE (see sec. 5.14.6)
PROCEDURE
1- Write down the description of each relay.
2- Put an "X" to assign ON/OFF relays or a "T" for relays that operate in
timer mode.
RELAY ASSIGNEMENT EXAMPLE
#YALER/TUPTUO
5678
X X
1egatSgnilooC
XXX
2egatSgnilooC
T X X X
3egatSgnilooC
In minimum vent. : Exhaust Fans 1 and 2 operates according to the
minimum ventilation timer (minimum ventilation
cycles run stage 1 fans in timer mode).
At cooling stage 1 : Exhaust Fans 1 and 2 run continuously;
At cooling stage 2: Exhaust Fans 1, 2 and 3 run continuously.
At cooling stage 3: Exhaust Fans 1, 2 and 3 run continuously and
the Kool-Cel is activated in timer mode.
Each controller program uses a separate relay assignment for
cooling stages 1 to 4 (program a, b, c or d).
96
KOOLMASTER PP-32 REV.01
Page 97

#YALER/TUPTUO
123456789 0111213141516171819102122232425262728292031323
8egatSretaeH
7egatSretaeH
6egatSretaeH
5egatSretaeH
4egatSretaeH
3egatSretaeH
2egatSretaeH
1egatSretaeH
)a(1egatSgnilooC
)b(1egatSgnilooC
)c(1egatSgnilooC
)d(1egatSgnilooC
)a(2egatSgnilooC
)b(2egatSgnilooC
)c(2egatSgnilooC
)d(2egatSgnilooC
)a(3egatSgnilooC
)b(3egatSgnilooC
)c(3egatSgnilooC
)d(3egatSgnilooC
)a(4egatSgnilooC
)b(4egatSgnilooC
)c(4egatSgnilooC
)d(4egatSgnilooC
5egatSgnilooC
6egatSgnilooC
7egatSgnilooC
8egatSgnilooC
9egatSgnilooC
01egatSgnilooC
11egatSgnilooC
21egatSgnilooC
31egatSgnilooC
41egatSgnilooC
51egatSgnilooC
61egatSgnilooC
nepOsrooDtneV
esolCsrooDtneV
snepOniatruC
sesolCniatruC
1tuptuOkcolC
2tuptuOkcolC
3tuptuOkcolC
4tuptuOkcolC
1tuptuOyrailixuA
2tuptuOyrailixuA
mralA.PcitatSoL
snaF.PcitatSoL
Page 98

10. INDEX
A
Age see Animal age
Air inlets see inlets
Alarms
Alarm connection 12
Alarm limits 53–58
Alarm log 52
Resetting the alarm log 48, 58, 63
Clock program alarm 45
Critical temperature alarms 53
Static pressure alarms 56
Assigning relays for Lo SP alarm 76
Deactivating LO pressure alarm 56
Temperature alarms 54
Critical temperature alarm 55
Outside influence on T° alarms 55
Animal age
Minimum age before tunnel ventilation 34
Setting the animal age 44
Arrow keys 10
Assignment of relays see relays
Assignment of sensors see Sensors
Auxiliary outputs
Activating auxiliary outputs 64
Adjusting auxiliary output settings 42–43
Assigning relays to auxiliary outputs 75
Assigning sensors to auxiliary outputs 68–69
Average temperature see Temperature
B
Buttons 10
C
Calibration
Calibrating the water counter 77
Sensors' calibration 86–87
Celsius degrees 14
Clock
Selecting time units 14
Setting time and date 70
Clock outputs
Activating clock outputs 65
Activating clock programs 65
Adjusting clock output settings 45–47
Assigning relays to clock outputs 75
Compensation
Air inlet compensation 22
Humidity compensation 82–85
Configuration module 91–92
Connections 11
Alarm connection 12
Precautions 6
Technical specifications 89
Controller
Connections 11
Factory settings 90
Front panel 9
Installation setup 63
Location of the controls 9
Main features 7
Model number 6
Mounting instructions 11
Serial number 6
Step-by-step installation 59–60
Technical specifications 89
Critical temperature see Temperature
Curtains see Tunnel ventilation
Curves
Minimum ventilation curve
Adjusting the minimum ventilation curve 80
Deactivating the min. vent. curve 19
Temperature curve
Adjusting the temperature curve 78
Deactivating the temperature curve 18
D
Date
Setting time and date 70
Dip switches 14
Display
LCD display 10
LED display 10
DWR-F-1A see also Inlets
Activating air inlets 64
Setting DWR-F-1A's ID numbers 13, 21
E
Electrical specifications 89
Endwall ventilation see Tunnel ventilation
F
Factory settings 90
Fahrenheit degrees 14
Fans
Fan stages
Activating fan stages 64
Adjusting fan stages 38–40
Assigning relays to fan stages 72
Assigning sensors to fan stages 66
Timer relay on fan stages 39, 72
Fans' On-Time in minimum ventilation 15
G
Gallon units 14
H
Heaters
Activating heater stages 64
Assigning relays to heater stages 73
Assigning sensors to heater stages 67
Heater stages' settings 41
History of heater run times 50–51
R. humidity compensation using heaters 84
History 48–51
Clearing histories 44, 46, 48
Hot keys 10
Humidity see Relative humidity
I
Identification numbers 13, 21
Inches of water units 14
Inlets
Activating air inlets 64
Adjusting inlet settings 21–22
98
KOOLMASTER PP-32 REV.01
Page 99

PP-32
Assigning sensors to air inlets 67
Inlet compenation 22
Inlets' operation 21
Installation
Installation report templates 93–96
Installation setup 63–65
Installation setup template 95
Step by step installation 59–60
Installer password 61
K
Keys see also buttons
Shortcut keys 10
Kool-Cel pump
Adjusting Kool-Cel timer 39
Assigning Kool-Cel relays 72
Kool-Cel shutoff 84
L
LCD display 10
Led display 10
Limits
Alarm limits see also Alarms 53–58
Litre units 14
Loading a configuration 91
Logs see History
M
Memory stick see Configuration module
Minimum ventilation
Adjusting minimum ventilation's settings 19–20
Fans' On-Time in minimum ventilation 15
Minimum ventilation curve 80
Relative humidity compensation on min. vent 83
Mist
Adjusting mist timer 39
Assigning mist relays 72
Mist shutoff 84
Modules
Air inlet modules see also DWR-F-1A 13
Mounting instructions 11
N
Navigation buttons 10
O
Options
Installation options 63–65
Outside Temperature see Temperature
P
Parameters
Adjusting a parameter 10
Pascal units 14
Password
Changing the installer's password 62
Password settings 61–62
Potentiometer control see DWR-F-1A
Pre-opening the tunnel see Tunnel ventilation
Pre-opening vents see Vent doors
Pressure units 14
Probes see also Sensors
Programs
Activating programs 64
Clock programs 45, 65
Program selection 16
Season selection 16
Viewing the program currently in use 15
Pump see Kool-Cel pump
R
Ramping see Curves
Relative humidity
Activating the relative humidity sensor 63
Calibrating the relative humidity sensor 86
History of humidity readings 49
Humidity set point 82
Relative humidity compensation 82–85
Viewing the current humidity level 15
Relays
Relay assignment 70–76
Relay assignment template 96
Timer relays on fan stages 39, 72
Report 93–96
Reset
Reset time 63
Resetting histories 48
Resetting the alarm log 58
RH see Relative humidity
Room temperature see temperature 66
S
Saving a configuration 92
Seasons
Selecting a season 16
Sensors
Activating temperature sensors 65
Calibrating sensors 86–87
Connecting sensors 11
Current sensor readings 15
Extending a sensor 12
Identify a defective sensor 12
Outside T° sensor see Temperature
Relative humidity sensor see Relative humidity
Sensor assignment 66–69
Sensor assignment template 94
Sensor inputs 11
Static pressure sensor see Static pressure 15
Serial number 6
Set points
Relative humidity set point 82
Room set point
Adjusting the room set point 18
Viewing current room set point 15
Static pressure set points for tunnel curtains 36
Static pressure set points for vent doors 26
Groups of static pressure set
points 24, 25, 28–30, 64
Settings
Adjusting a parameter 10
Adjusting set points see Set points
Alarm limits 53–58
Animal age adjustment 44
KOOLMASTER PP-32 REV.01
99
Page 100

PP-32
Clock output settings 45–47
Factory settings 90
Fan stages settings 38
Heater settings 41
Humidity compensation 82–85
Inlet settings 21–22
Minimum ventilation settings 19–20
Password settings 61–62
Relay assignment 70–76
Sensor assignement settings 66–69
Time & date settings 70
Tunnel ventilation settings 31–37
Vent doors settings 23–30
Setup
Installation setup 63–65
Step by step installation 59–60
Sidewall ventilation see Vent doors or Inlets
Static pressure
Activating the static pressure sensor 64
Calibrating the static pressure sensor 87
Static pressure alarms 56–58
Assigning relays for lo SP alarm 76
Static pressure Hi and Lo alarm limits 33, 56
Static pressure for tunnel curtains
Activating tunnel curtains in SP mode 63
Static pressure set points 36
Static pressure for vent doors
Groups of static pressure set
points 24, 25, 28–30
Static pressure set points 26
Static pressure units 14
Viewing the current static pressure level 15
Summer see Seasons
T
Table of contents 3
Tables see Templates
Technical specifications 89
Temperature
Activating temperature sensors 65
Average room temperature 15
Adjusting the temperature in test mode 88
Assigning sensors to the Room T° 66
Critical temperature 53, 55
History
History of the average temperature 48
History of the outside temperature 49
Outside temperature
Activating outside temperature sensor 65
Calibrating the outside temperature sensor 86
Outside influence on temperature alarms 53
Pressure set points influenced by out. T° 25
Viewing current outside temperature 15
Temperature alarms see Alarms
Temperature curve 78
Temperature set point see Set points
Temperature units 14
Temperature units 14
Templates 93–96
Installation setup template 95
Relay assignment template 96
Sensor assignment template 94
Test mode 88
Time
Reset time 63
Setting time and date 70
Setting time units 14
Timer
Minimum ventilation timer 20
Timer relays on fan stages 39, 72
Tunnel curtain timer 36
Vent doors timer 26
Tunnel curtain see Tunnel ventilation
Tunnel ventilation 31–37
Activating the tunnel curtain 63
Assigning relays to the tunnel curtain 74
Curtain controlled by static pressure 31
Pre-opening delay 32, 63
Selecting tunnel mode : SP/Timer 63
Tunnel and sidewall transition 33
Tunnel curtain controlled by static pressure 32
Tunnel curtain in timer mode 31
U
Units
Unit selection 14
User password 61
User setup see Installation setup
V
Vent doors
Adjusting vent door settings 23–30
Assigning relays to vent doors 73
Pre-opening delay 19, 20, 63
Tunnel and sidewall transition 33
Vent doors' operation 21
Ventilation
Endwall ventilation see Tunnel ventilation
Sidewall ventilation see Inlets or Vent doors
W
Water
Calibrating the water counter 77
History of the water consumption 50
Water unit selection 14
Weather see Temperature
Winter see Seasons
Wiring 11
100
KOOLMASTER PP-32 REV.01
 Loading...