

Page 1

Quick Guide for
Acer n10 Handheld
Page 2

COPYRIGHT
Copyright © 2003 Acer Inc. or its subsidiaries
All Rights Reserved. Printed in Taiwan.
Acer n10 Quick Guide
Original issue: August 2003
Acer and the Acer logo are registered trademarks of Acer Inc.
Microsoft, ActiveSync, Outlook, Pocket Outlook, Windows, Windows NT, and the Windows logo are either
registered trademarks or trademarks of Microsoft Corporation in the United States and/or other countries.
Microsoft products are licensed to OEMs by Microsoft Licensing, Inc., a wholly owned subsidiary of Microsoft
Corporation.
Other company’s product names or trademarks are used herein for identification purpose only and belong to
their respective companies.
Changes may be made periodically to the information in this publication without obligation to notify any person
of such revision or changes. Such changes will be incorporated in new editions of this Quick Guide or
supplementary documents and publications.
No part of this publication may be reproduced, stored in a retrieval system, or transmitted, in any form or by any
means, electronic, mechanical, photocopy, recording, or otherwise, without the prior written permission of
Acer Inc.
DISCLAIMER AND LIMITATION OF LIABILITY
Acer and its subsidiaries makes no representations or warranties, either expressed or implied, with respect to the
contents hereof and specifically disclaims the implied warranties of merchantability or fitness for a particular
purpose. Acer and its subsidiaries assume no responsibility for any damage or loss resulting from the use of this
Acer n10 Quick Guide.
NOTES
Record the serial number, purchase date, and place of purchase information in the space provided below. The
serial number is recorded on the label affixed to your handheld. All correspondence concerning your unit should
include the serial number and purchase information.
Acer n10 Handheld
S/N: _______________________________________
Purchase Date: ____________________________
Place of Purchase: _________________________
Page 3

Contents
Just for starters v
Check the package contents . . . . . . . . . . . . . . v
Your guides . . . . . . . . . . . . . . . . . . . . . ix
Taking care of your Acer n10 . . . . . . . . . . . . . . ix
Proper care and usage of your Acer n10 . . . . . . . . ix
Resetting your Acer n10 . . . . . . . . . . . . . . . x
Getting started 1
System requirements . . . . . . . . . . . . . . . . . 1
Features summary. . . . . . . . . . . . . . . . . . . 1
Performance . . . . . . . . . . . . . . . . . . . . 1
Display . . . . . . . . . . . . . . . . . . . . . . 2
Audio. . . . . . . . . . . . . . . . . . . . . . . 2
Connectivity . . . . . . . . . . . . . . . . . . . . 2
Expansion . . . . . . . . . . . . . . . . . . . . . 2
Battery . . . . . . . . . . . . . . . . . . . . . . 2
Design and ergonomics . . . . . . . . . . . . . . . 3
System tour . . . . . . . . . . . . . . . . . . . . . 4
Front view . . . . . . . . . . . . . . . . . . . . . 4
Left view . . . . . . . . . . . . . . . . . . . . . 6
Right view . . . . . . . . . . . . . . . . . . . . 7
Top view . . . . . . . . . . . . . . . . . . . . . 8
Bottom view . . . . . . . . . . . . . . . . . . . 9
Customising your Acer n10 . . . . . . . . . . . . . . . 9
Adjusting handheld settings . . . . . . . . . . . . . 9
Adding and removing programs . . . . . . . . . . . . 11
iii
Page 4

iv
Page 5
Just for starters
Check the package contents
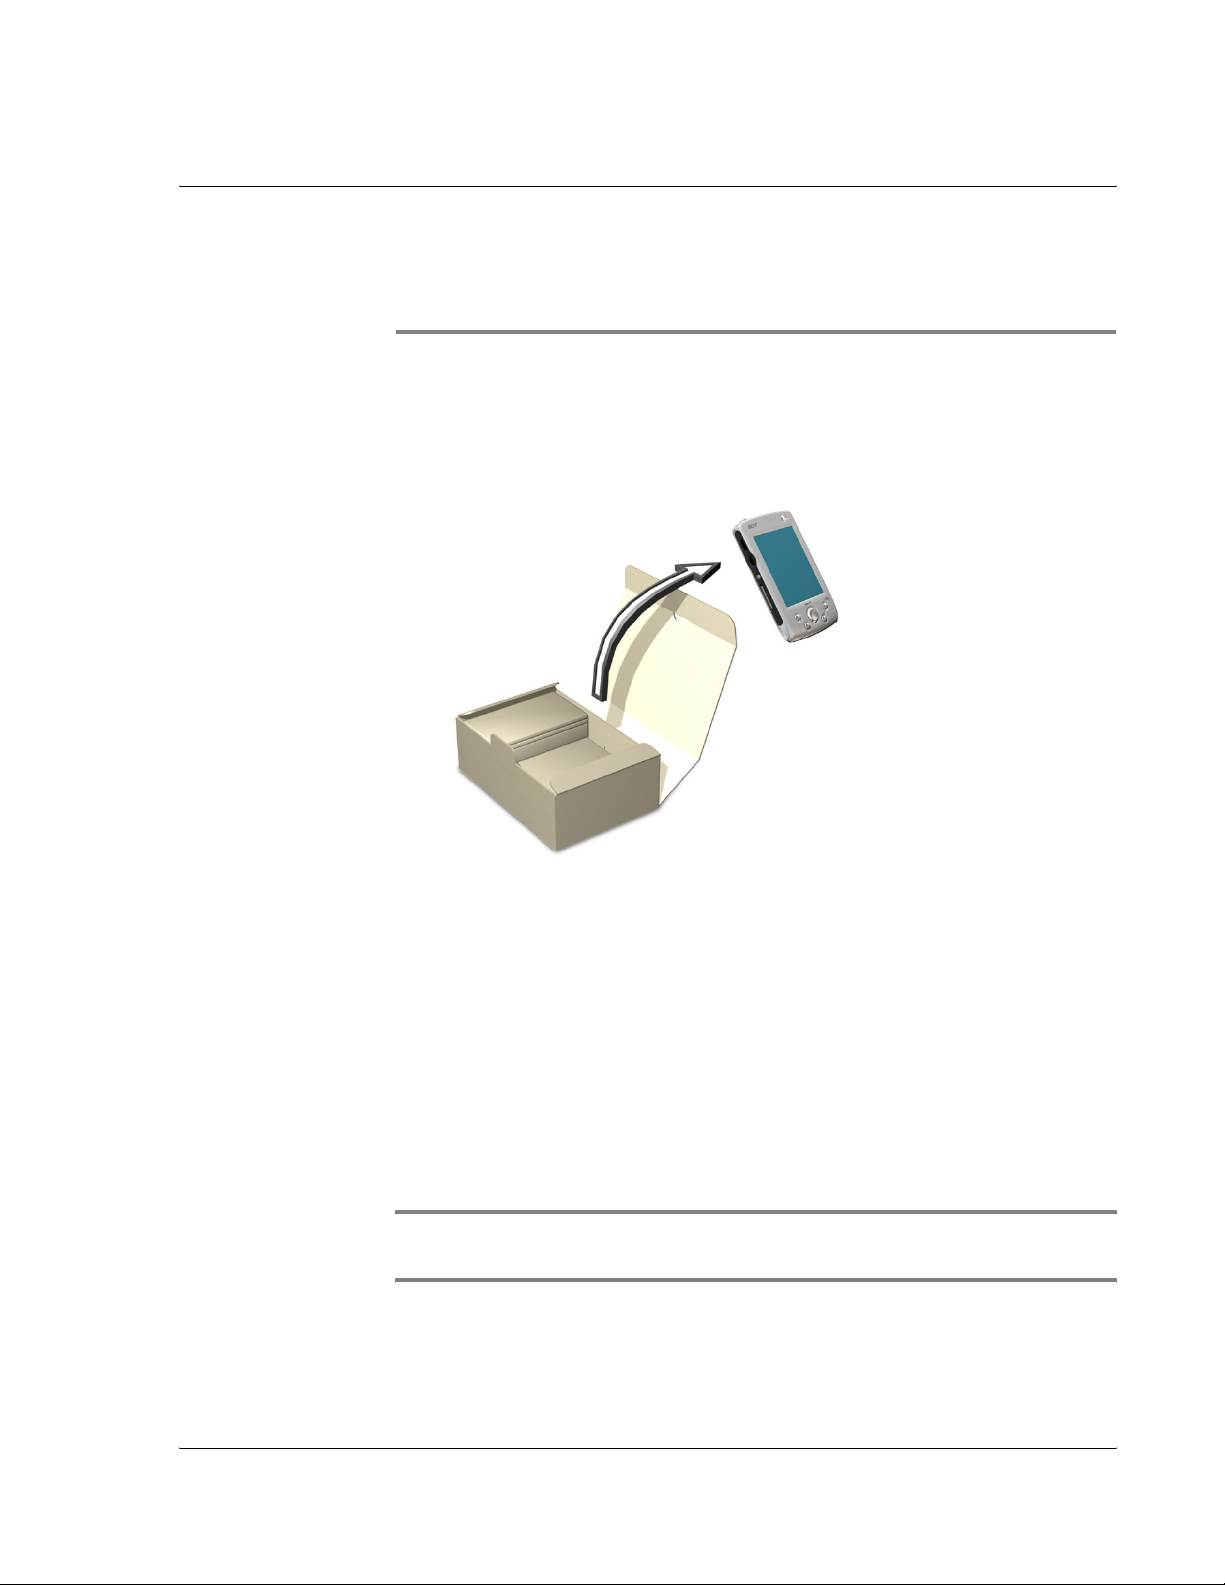
1 Begin by unpacking. Your Acer n10 box should contain:
Just for starters
Check the package contents
• Acer n10 handheld and a stylus
• Companion CD
• AC power adapter
• USB sync cable
• Quick Guide
• International Traveller’s Warranty
• Accessories Catalogue
• End User Lisence Agreement
NOTE: If any of the items listed above are damaged or are not
present, contact your authorised Acer reseller immediately.
v
Page 6
Just for starters
Check the package contents
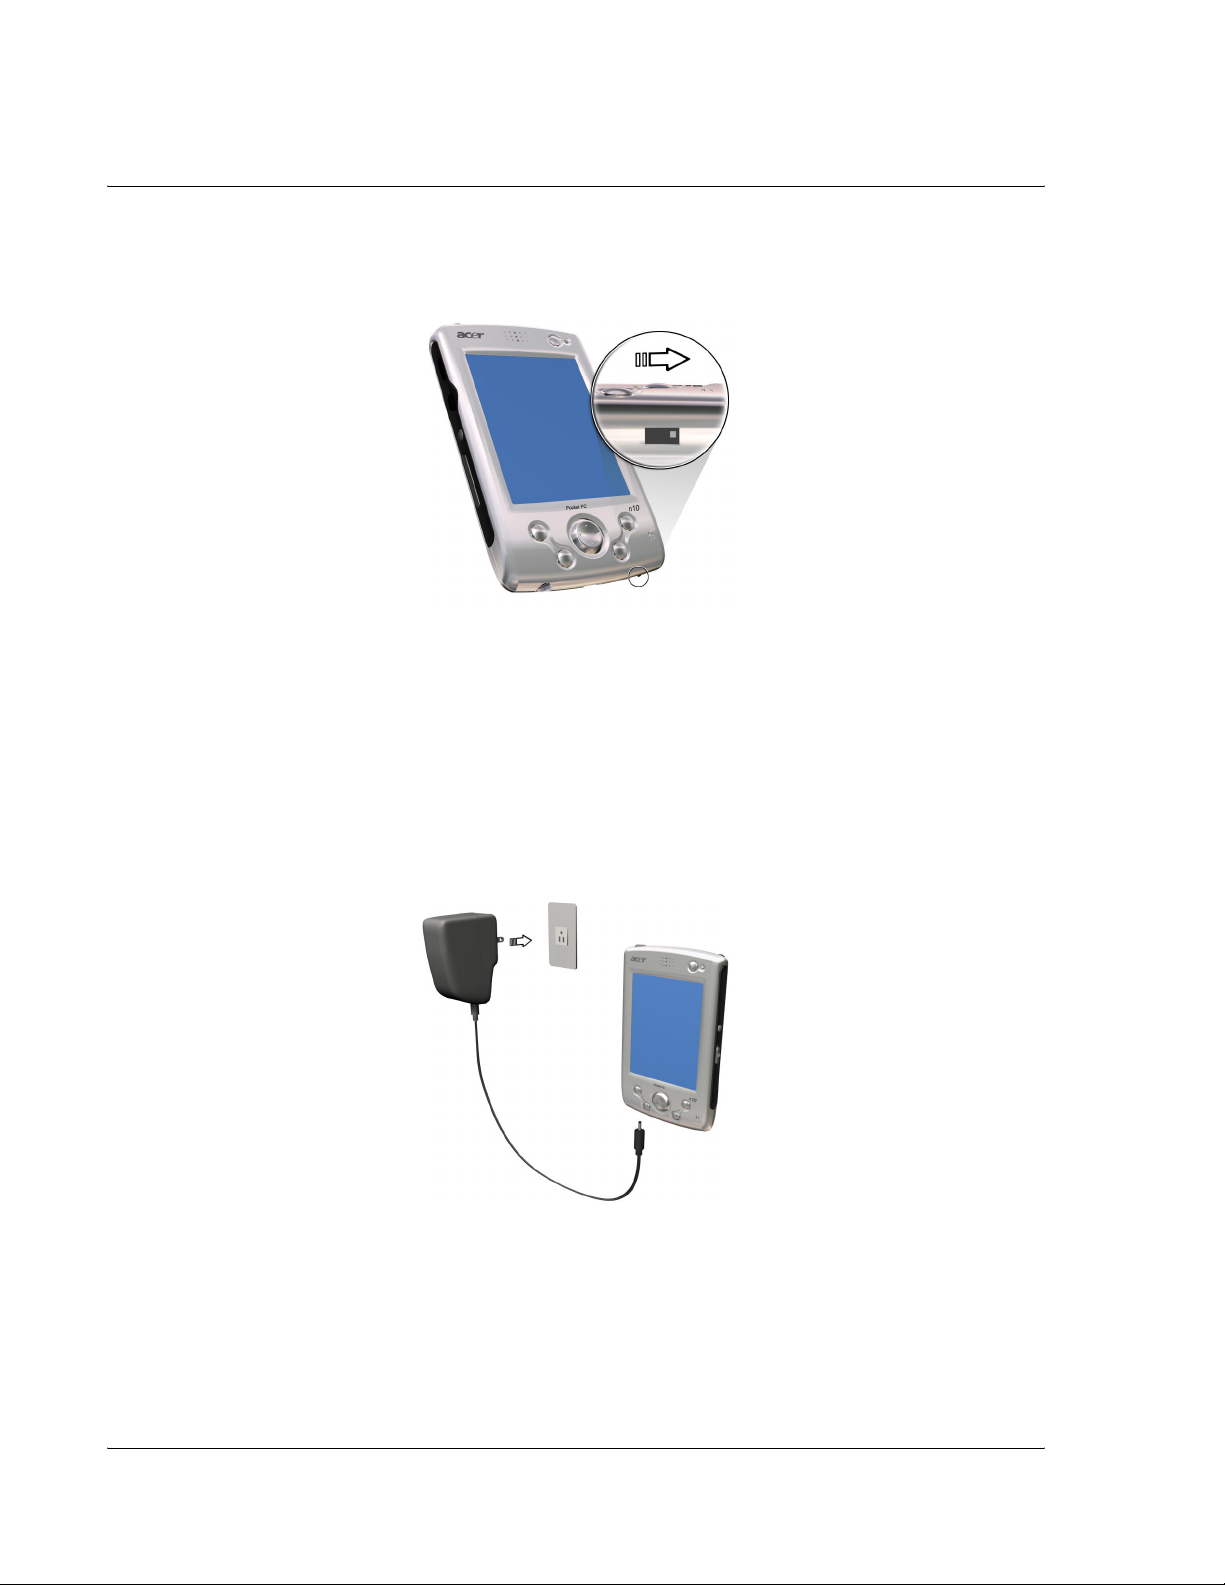
2 Move the “Hard Reset” switch to the “on” position.
3 Connect the power adapter and charge your handheld to full
power.
vi
Page 7
Just for starters
Check the package contents
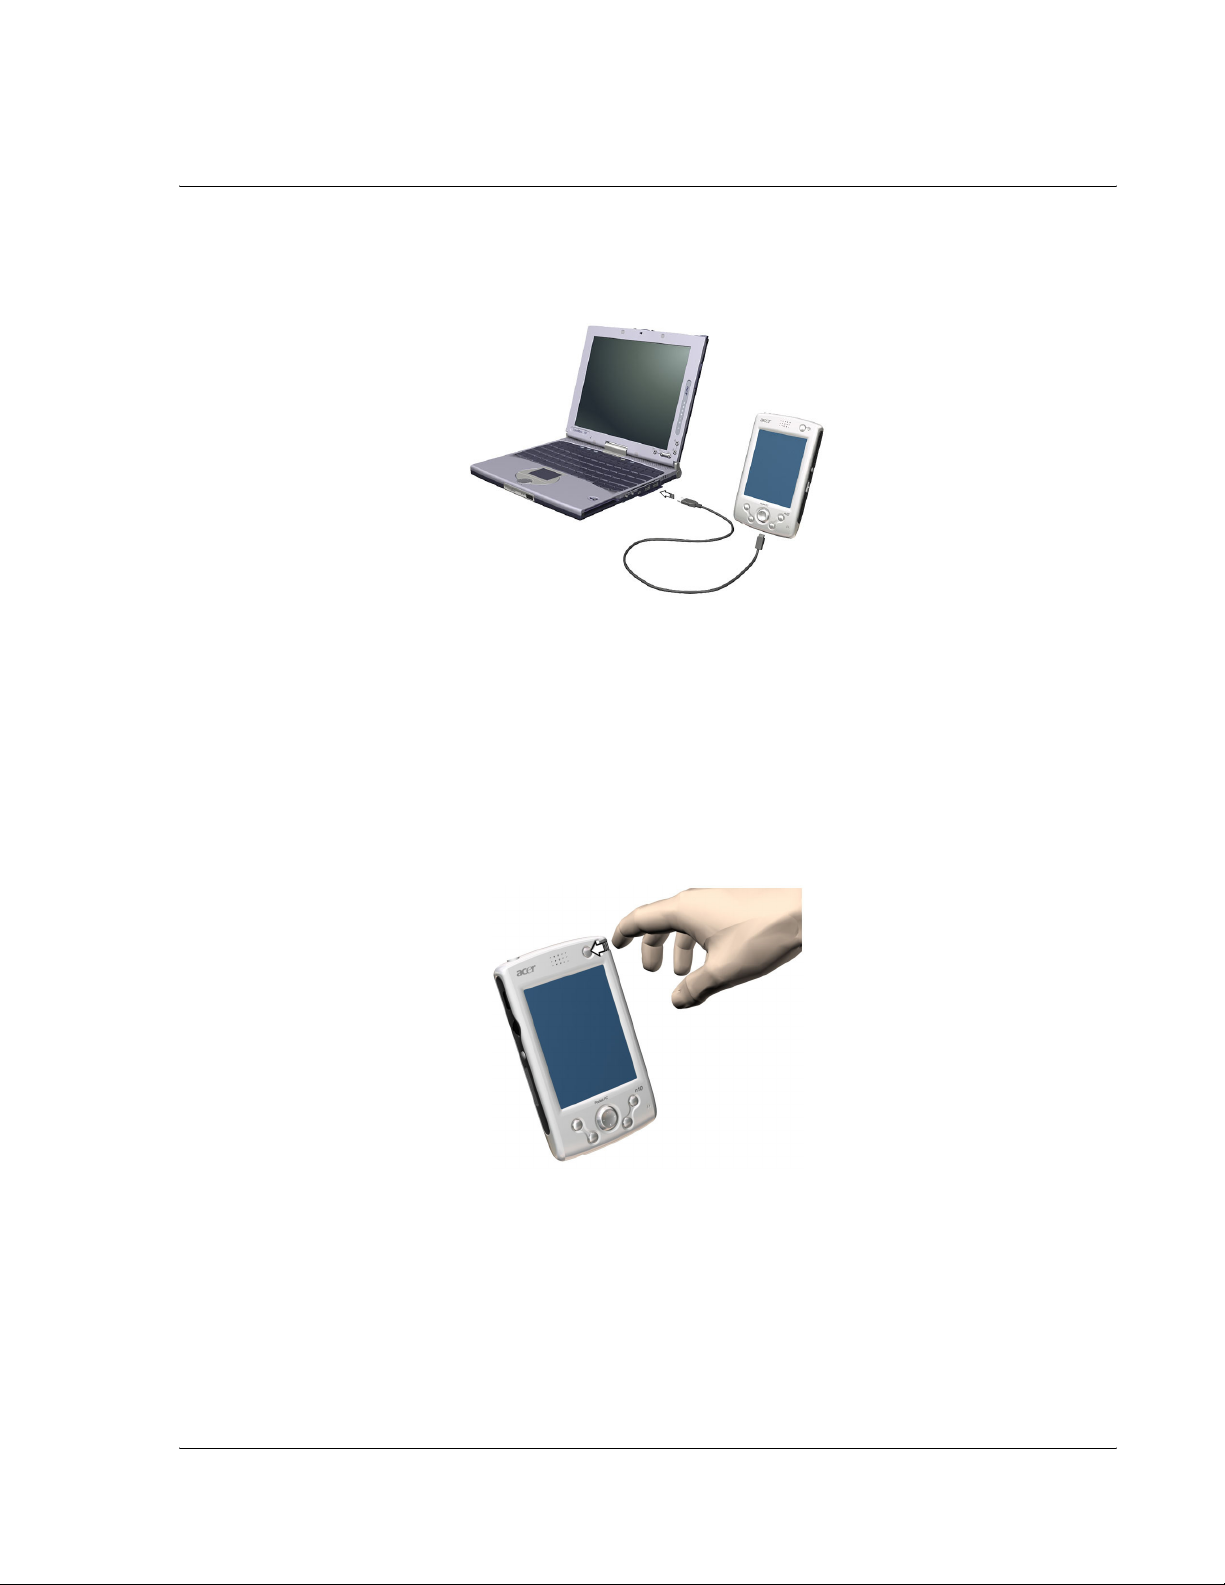
4 Synchronise your handheld with your computer.
5 Turn on and setup your handheld.
vii
Page 8
Just for starters
Check the package contents
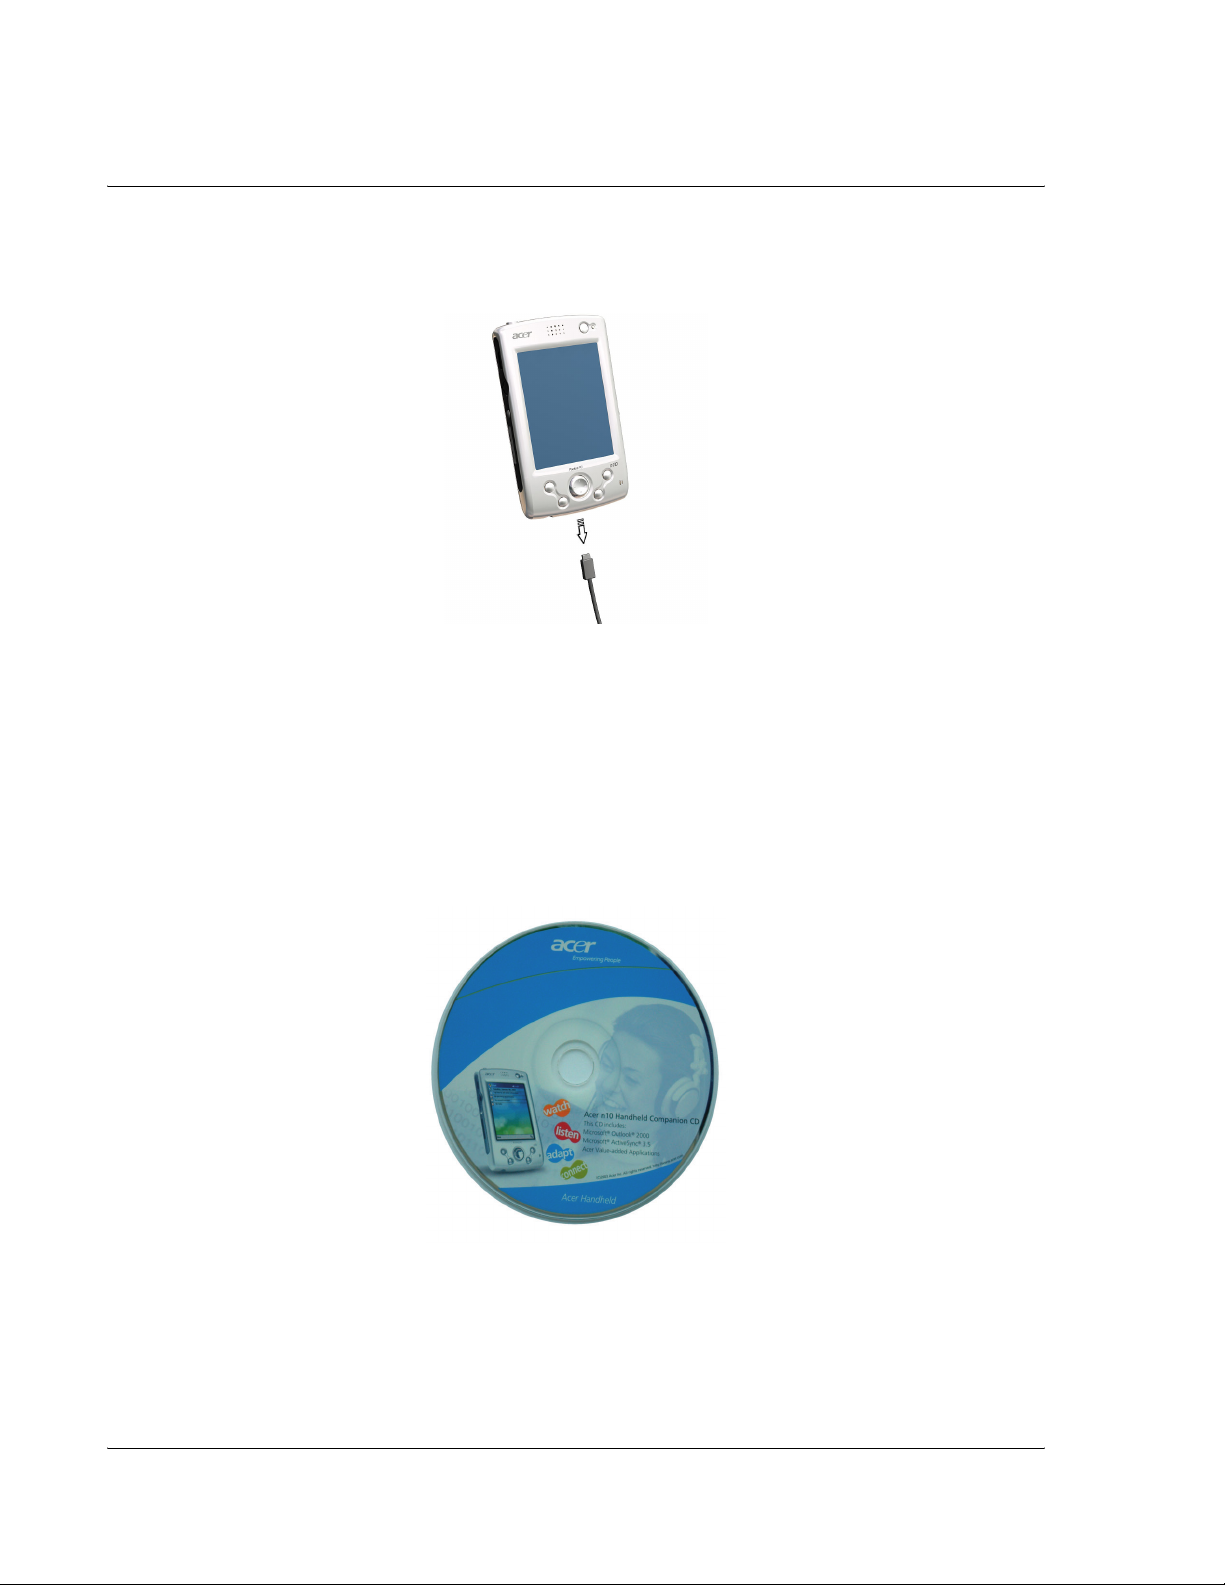
6 Remove the USB sync cable from your handheld.
7 For more information, refer to the Acer n10 User’s Manual (PDF
file) on the companion CD..
viii
Page 9

Your guides
Just for starters
Your guides
To help you use your Acer n10, we have designed a set of
guides:
For information on: Refer to:
Programs on your
handheld
Last-minute updates and
detailed technical
information
Up-to-date information
regarding your Acer n10
Taking care of your Acer n10
This section provides information on the following:
• Proper care and usage of your handheld
• Resetting your handheld
The Acer n10 Handheld Manual.
Bundled in the Acer n10 Handheld
Companion CD, it provides online
reference for using your handheld.
The Acer n10 Handheld Help.
To view Help, tap and then Help.
The Read Me files.
Located in the Microsoft ActiveSync
folder on your computer and on the
Acer n10 Handheld Companion CD.
http://www.acer.com/
Proper care and usage of your Acer n10
1 Take care not to scratch the screen of your handheld. Keep the
screen clean.
2 Your handheld is not waterproof and should not be exposed to
rain or moisture.
3 Take care not to drop your handheld or subject it to any strong
impact. Do not place your handheld in your back pocket.
4 Protect your handheld from temperature extremes.
5 Do not use or store your handheld in any location that is
extremely dusty, damp or wet.
6 Use a soft, damp cloth to clean your handheld.
ix
Page 10

Just for starters
Taking care of your Acer n10
Resetting your Acer n10
You may have to perform a reset if your handheld no longer
responds to the buttons on the screen.
Performing a soft reset
A soft reset allows your handheld to get a fresh start, similar to
rebooting a computer. All records and entries are retained after
a soft reset.
To perform a soft reset:
• Using the tip of your stylus, lightly press the reset button
inside the hole on the rear panel of your handheld.
x
Page 11

Just for starters
Taking care of your Acer n10
Performing a hard reset
A hard reset will erase all records and entries stored in your
handheld. Never perform a hard reset unless a soft reset does
not correct your problem. To perform a hard reset, do the
following:
• Use the tip of your stylus toggle the reset switch to the
left (a) and back to the right (b) on the bottom of your
handheld.
NOTE: When you perform a hard reset, formats, preferences, and
other settings including date and time are restored to their factory
default settings. All data, records, and entries will be erased.
xi
Page 12

Just for starters
Taking care of your Acer n10
xii
Page 13

Getting started
This chapter will discuss the following topics:
• System requirements
• Features Summary
• System tour
• Customising your Acer n10
• Adding and removing programs
System requirements
In order to install the Microsoft® ActiveSync® software and use
your new Acer n10 with a computer at work or at home, be sure
the system(s) meet the following minimum system and program
requirements.
•Intel
®
Getting started
System requirements
Pentium processor (minimum 233 MHz)
•64 MB RAM
• 120 MB disk space
• CD-ROM drive
• USB port or Infrared port
• SVGA (or compatible) graphics card supporting 256
colours
• Microsoft® Windows XP, 2000, ME or 98SE
• Microsoft® Internet Explorer 4.01
Features summary
Performance
•Intel® PXA255 Applications Processor with Intel® XScaleTM
Technology
• System memory:
– 64 MB SDRAM for application storage
– 32 MB Flash ROM for operating system
1
Page 14

Getting started
Features summary
• Microsoft
®
Pocket PC 2003 Premium with Microsoft
®
Outlook 2002
Display
• 3.5" Transfeflective TFT LCD
• 240 x 320 resolution
• 65536 colour support
• Microsoft
®
ClearType technology for clearer, crisper font
display
Audio
• Embedded AC '97 CODEC with CD-quality stereo output
• Built-in industry-standard 3.5-mm earphone jack
• Built-in microphone
Connectivity
• Mini USB Connector
• SIR (Serial Infrared) capability
Expansion
• Integrated Compact Flash slot (type I/type II)
• Integrated (dual-usage) Secure Digital/MultiMedia Card
(SD/MMC) slot
Battery
• Built-in Lithium polymer battery
– 1500 mAH capacity
• Operation time for normal usage
– 12 hours (when backligh is inactive)
NOTE: Length of battery operation will depend on power
consumption which is based in turn on system resource use. For
example, constantly using the backlight or using power-demanding
applications will shorten battery life between charges.
• Charging time from empty to full capacity
– 3 hours
2
Page 15

Design and ergonomics
• Stylish, light and thin design
Specifications Acer n10 measurement
Height 130 mm
Width 78 mm
Depth 16.9 mm
Weight 165 g (including stylus)
Getting started
Features summary
3
Page 16

Getting started
System tour
System tour
Front view
No. Component Description
1 Power button/
LED indicator
2 Internal
speaker
3LCD
touchscreen
4 Quick button
for Today
Press to turn on your handheld (LED lights
up green) if it is off and returns to the last
screen that was displayed ,and off if it is
on.
LED status description:
• Flashing green - Charging handheld
• Steady green - Charging is complete
• Flashing red - Alarm indicator
Outputs sounds from your handheld.
Displays the applications and data stored
in your handheld. It is touch-sensitive and
responds to the stylus or your finger.
Displays the Today screen.
4
Page 17

No. Component Description
Getting started
System tour
5 Quick button
for Calendar
6 Directional pad Enables 5 direction scrolling in various
7 Quick button
for Contacts
8 Quick button
for Inbox
9 Microphone Inputs audio into your handheld.
Activates the Calendar program.
menus and applications. Press the center
of the pad on to simulate the function of
the Enter key.
Activates the Contacts program.
Activates the Inbox program.
Using the backlight
If lighting conditions make it difficult for you to see the
information on your handheld, use the backlight to illuminate
your screen.
To activate the backlight:
• Press the power button and hold it down for about two
seconds. Release the button when the backlight turns on.
To turn off the backlight:
• Press the power button and hold it down for two seconds.
Release the button when the backlight turns off.
5
Page 18

Getting started
System tour
Left view
No. Component Description
1 Infrared (IR)
port
2 Scroll wheel Scroll up or down to display the text and
3 Start
hardware
button
4 SD/MMC slot Accepts a Secure Digital or MultiMedia
Uses infrared technology to transmit and
receive data from other IR-enabled devices.
other information.
Hardware button to display the Start
menu.
card.
6
Page 19

Getting started
System tour
Right view
No. Component Description
1 Hold switch Slide to lock all buttons and the touch
screen from being accidentally pressed. A
red dot is visible on the hold switch when
in hold state.
®
2Record
button
Activates the Microsoft
program.
Pocket PC’s Record
7
Page 20

Getting started
System tour
Top view
No. Component Description
1 Stylus holder Secures the stylus to your handheld.
2 CF slot Accepts a Compact Flash card to add
memory or I/O functionality.
3 Dummy CF
card
4 Earphone jack
Use this to protect the CF connector when
no card is installed.
Connects to audio line-out devices
(earphones/headphones).
8
Page 21

Bottom view
No. Component Description
Getting started
Customising your Acer n10
1 2.5 mm DC
power
connector
2Mini USB
connector
3 Hard reset
switch
Customising your Acer n10
• Adjust the handheld settings
• Add or remove programs
Adjusting handheld settings
You can adjust the settings of your handheld to suit the way you
work.
To access Settings
Connects your handheld’s DC power supply
to an AC wall outlet to charge the battery.
Connects your handheld to a portable or
desktop computer.
Press to return your handheld settings to
the factory defaults. See "Performing a
hard reset" on page xi.
• Tap , then Settings.
Tap an available Settings option to open the
corresponding adjustment page.
9
Page 22

Getting started
Customising your Acer n10
The Settings window has three tabs—Personal, System, and
Connections, each of which has its own set of options.
Setting Description
Personal
Buttons Assign your favorite programs to any of the Quick
buttons.
Input Select an input method, options for word
completion and other related settings.
Menus Customise what appears on the menu, and
enable a pop-up menu from the New button.
Owner
Information
Password Set a password to prevent unauthorized access to
Sounds &
Notification
Today Customise the look and the information that is
System
About Displays your handheld’s version and copyright
Backlight Define settings for backlight control.
Certificates Manage personal and root certificates.
Clock Change the time or set alarms.
Enter your personal information and customise text
display when handheld is turned on.
your handheld.
Select the types of action you want to hear sounds
for and define how you want to be notified about
different events.
displayed on the Today screen.
information; includes an option to define a
device ID.
Memory Adjust allocation of storage and main memory.
Power Define settings to minimise power consumption.
Regional
Settings
Set default number and time display formats and
other related options.
10
Page 23

Setting Description
Getting started
Customising your Acer n10
Remove
Programs
Screen Align screen and enable the ClearType feature.
System Info Provides system information about your handheld.
Connections
Beam Define settings for the beam function.
Connections Adjust settings for connecting to the Internet or to
Remove programs from storage memory.
a local network. Select your handheld’s network
adapter and set its properties.
For detailed instructions on setting preferences for your
handheld, access the Settings page by tapping then Help.
Adding and removing programs
Programs bundled with your handheld at the factory are stored
in ROM (read-only memory). You cannot remove these
programs. All other programs and data files installed to your
handheld after factory installation are stored in RAM (random
access memory).
You can install any program created for your handheld, as long
as the device has enough memory. The most popular place to
find software for your handheld is on the Pocket PC Web site
(http://www.microsoft.com/mobile/pocketpc/).
You could add programs to your handheld either by using
ActiveSync or by downloading the program from the Internet.
For detailed instructions on how to add or remove programs,
refer to the Acer n10 Handheld Manual.
11
Page 24

Getting started
Customising your Acer n10
12
 Loading...