

Page 1
Page 2

ALTOS EASYSTORE
User’s Manual
Version 1.2
Copyright © 2006-2007 Acer Incorporated all Rights Reserved. Changes may be made periodically to the
information in this publication without obligation to notify any person of such revision or changes. Such changes will
be incorporated in new editions of this manual or supplementary documents and publications. This company makes
no representations or warranties, either expressed or implied, with respect to the contents hereof and specifically
disclaims the implied warranties of merchantability or fitness for a particular purpose. No part of this publication
may be reproduced, stored in a retrieval system, or transmitted, in any form or by any means, electronic, mechanical,
photocopy, recording, or otherwise, without the prior written permission of Acer Incorporated.
Acer and the Acer logo are registered trademarks of Acer Inc. Other company’s product names or trademarks are
used herein for identification purposes only and belong to their respective companies.
Page 3

l
Chapter
Chapter 1 Introducing Your Storage System
Chapter
2 Getting Started
Initializing
Installing the Console
S
Initializing the disks
Configuring your storage system
Accessing the Manager
Accessing the Manager using the Console
your storage system
t
arting the Console
Accessing the Manager using a Web browser
Logging in to the Manager
Navigating the Manager
Viewing information about your storage system
Adding users
Creating shared folders
Managing shared folders
Deleting a shared folder
Assigning users to shared folders
Chapter 3
Managing Your Storage System
Managing users
Adding users
Modifying users
Removing users
Working with groups
Changing the authentication mode
Managing shared folders
Creating shared folders
Assigning users to shared folders
Deleting a shared folder
Managing backups
Changing the recovery password
Configuring remote boot
Deleting a backup
Deleting a client
Setting up e-mail alerts
Upgrading the firmware
Disconnecting USB devices
Changing the system settings
Changing the network settings
Reconfiguring your storage system disks
33
35
54
24
5
5
9
11
13
19
19
20
21
22
26
30
33
36
37
37
38
40
41
45
54
55
58
59
60
60
62
62
64
67
69
70
72
76
Altos easyStore Manua
1
Page 4

l
Chapter
Expanding the shared storage
Reconfiguring the disks
Viewing system status information
Logging out of the Manager
Shutting down the storage system
Chapter 4
Work
ing
with Shared Folders
Windows users
Linux users
Mac users
Accessing shared folders using FTP
Disconnecting from shared folders
Windows users
Linux users
Mac users
Chapter 5
Protecting Local Disks
Getting started
System requirements
Additional prerequisites
Installing the Microsoft iSCSI Initiator
Installing DiskSafe Express
S
t
arting DiskSafe Express
Activating your license
Protecting your disks
Manually backing up your disk
S
t
opping a backup or recovery in progress
Changing the backup schedule
Receiving event notifications
Changing the recovery password
Enabling or disabling remote boot
Enabling remote boo
Disabling remote boot
Recovering data
Recovering files or folders
Recovering a data disk
Recovering a system disk using the recovery CD
Recovering a system disk while booting remotely
Removing protection
Adding hard disks
to a linear or normal RAID configuration
to a degraded RAID configuration
Removing hard disks or responding to disk failure
Responding to RAID degradation
Responding to RAID failure
t
77
78
82
83
84
85
85
90
91
93
94
94
95
95
96
98
98
99
99
100
104
106
108
116
117
118
120
121
123
124
126
127
129
131
133
139
143
147
148
150
151
152
153
Altos easyStore Manua
2
Page 5

l
Chapter
Swapping hard disks
Transferring hard disks to a new storage system
Appendix A: Software Specifications
Appendix B: Configurations
Appendix C: Hardware Specifications
Technical Assistance
Glossary
155
156
Altos easyStore Manua
3
Page 6

l
Preface
Documentation conventions
Related documentation
This guide provides you with the following information:
l
An overview of the Altos easyStore and instructions for setting
provide shared storage space to users in your network
l
Information about advanced features for configuring your storage system
l
Instructions for installing and using DiskSafeTM Express to back up your
networked computer disks to the storage system and recover that data as
needed
l
Reference material about product specifications and troubleshooting
l
Bold is used to indicate menu items, buttons, labels, and file and folder names.
l
Instructions to click a series of menu items are indicated with an arrow (-->).
For example, the instructions to click the Start menu, click Programs, and then
click
Storage System Console are presented as Start --> Programs -->
System Console
l
When you see two keys joined by a plus sign (+), press and hold down the first
key
,
and then press the second key. For example, Alt+F2 indicates that you
should
l
Significant information or exceptions are indicated with the note icon shown at
the lef
l
The potential for data loss or corruption is indicated with the caution icon shown
at the le
l
The term Windows refers to any supported Microsof
system.
press and hold down the Alt key and then press F2
t.
ft.
In addition to this guide, you can find information about DiskSafe Express in the
online
help. To access the online help, click Help --> He
Express
application window
it up to
Storage
.
.
®
t
Windows
lp
Topics in the DiskSafe
®
operating
.
Altos easyStore Manua
4
Page 7

l
Preface
Altos easyStore Manua
5
Page 8

Introducing Your
Storage System
ALTOS EASYSTORE is an intelligent network storage solution for small and medium-
offices and home network environments
sized
space for both shared files and backups of your computer hard disks, offering an ideal
What your package includes
way to distribute and protect important data
To make
DiskSafe
rapid data recovery in the event of a system crash or disk failure.
With DiskSafe Express, you can recover your local disks or partitions without having
to reinstall or reconfigure the operating system or applications, dramatically
shortening
Before you begin using your storage system, please make sure that your package
includes
l
l
l
l
l
If
any of these items are missing, please contact the reseller or retailer from which
you
it
easy to back up your computer hard disks, this solution includes
Express, a software application that provides reliable data protection and
recovery time.
the following items:
The Altos easyStore un
One power cord
One RJ-45 Ethernet cable
Installation CD (for the Storage System Console and DiskSafe Express)
DiskSafe Express recovery CD
purchased this product.
1
. It
provides up to 2 TB of hard disk
.
it
1
Altos easyStore Manual 1
Page 9
Chapter 1
Additional accessories
The storage system supports up to two USB disks, which can be purchased
separately
Notes:
l
l
.
Only USB disks are supported. USB hubs and other USB devices are no
supported.
Any USB disk must be formatted before you can use
system,
and only the first partition of a FAT or FAT32 file system will be
recognized
l
Do not use a USB cable to attach the storage system directly to a USB port on
a computer
Key features and benefits
l
Flexible storage capacity
SATA-I hard disks, with a capacity of 250–500 GB each.
l
Built-in data protection
the
disks are treated as independent entities, the storage system supports
several
means
duplication
different types of RAIDs (redundant arrays of independent disks). This
that you can take advantage of the build-in data protection and data
offered by advanced RAID levels.
multiple hard disks and one fails, you won’t lose important data. For more
t
informa
l
Simple administration
ion, refer to Appendix B, "Disk Configurations
interface from any computer in your network, and
configuration
l
Status at a glance
quickly
connected.
l
Support for multiple platforms
Windows,
file
l
Security
system.
determine how much space is being used and who’s currently
Mac OS X or other Mac operating systems, or Linux, you can set up
sharing for each of them.
—Only authorized users can access the shared folders on your storage
You can also control whether the user can only view the information in
the shared folders or also add, modify, or delete files there.
l
Fast performance
provides
fast access to the data you need, when you need
Introducing Your Storage System
it
with the storage
.
.
—The storage system supports up to four 3.5"
—In addition to a linear disk configuration in which all
If
your storage system has
."
—You can run the browser-based managemen
its
informative wizards and
pages will help you accomplish your tasks quickly and easily
—The Home page of the management interface lets you
—Whether the computers in your network run
—With
its
gigabit
Et
hernet support, the storage system
it.
t
t
.
2
Altos easyStore Manual 2
Page 10

Chapter
2
Getting Started
Getting Started
Getting started with your storage system involves the following general steps:
2
1
.
Set up your storage system.
This involves attaching any optional USB devices, attaching the storage system to your
network, and powering up the system.
2
.
Install the Storage System Console on a computer in the same subnet as your
storage system and initialize the hard disks on your storage system.
Initializing the hard disks involves installing the operating system and other software from
a file on your installation CD to each of the hard disks in your storage system. (Altos
easyStore comes already configured)
For information about this step, refer to “Initializing your storage system.”
3
. A
ccess the Web-based management interface (the Manager) and log in.
For information about this step, refer to “Accessing the Manager”
Manager.”
and
“Logging in to the
4
.
Add users.
This is necessary only
access to the shared folders, or
or Macs other than those running OS
For information about this step, refer to “Adding users.”
5
.
Create shared folders.
By default, the storage system includes a shared folder named public
However, you might want to create other shared folders as well. For example, in an office
environmen
can view, and separate folders for confidential business documents that only selected
individuals can view or change. In a home environmen
folders for different types of
files, like photos, videos, or music.
For information about this step, refer to “Creating shared folders.”
3
if
you’re using local authentication mode and want to control
if
some users in your network use Linux
X.
t,
you might want to create a shared folder for company policies that everyone
t,
you might want to set up separate
Altos easyStore Manual 3
.
Page 11

Chapter
2
Getting Started
6
.
Access the shared folders.
For information about this step, refer to “Accessing shared folders.”
7
.
Protect your computer hard disks.
This involves installing DiskSafe Express on each computer that you want to protect and
specifying which hard disks or partitions to back up and how often backups should occur
For information about this step, refer to Chapter 5, "Protecting Local Disks."
.
4
Altos easyStore Manual 4
Page 12
Chapter
2
Initializing your storage system
Altos easyStore comes with four
must install the Storage System Console on a computer in the same subnet as your
Inst
alling
the Console
storage system and use that application to connect to the storage system.
You can install the Console on any computer that runs one of the following operating
systems
l
l
l
:
Microsoft Windows Server 2003
Microsoft Windows XP
Microsoft Windows 2000 Professional, Server, or Advanced Server with
Service Pack 2 or newer
Note: To access the storage system, the Console launches a Web browser, so
the computer where you install the Console must have Microsoft Internet Explorer
6.0 or Firefox 1.06 or newer installed as well. In addition, one of those browsers
be
must
your defau
lt
browser
browser, refer to the documentation for your browser
To install the Console:
1
. At a
computer in the same subnet as your storage system, insert the installation
CD into a CD-ROM drive.
2
. Start
the setup utility for the Console.
Getting Started
hard disks drive, they are already initialized. You
. If
you’re not sure how to configure the defau
lt
.
5
Altos easyStore Manual 5
Page 13
Chapter
2
3
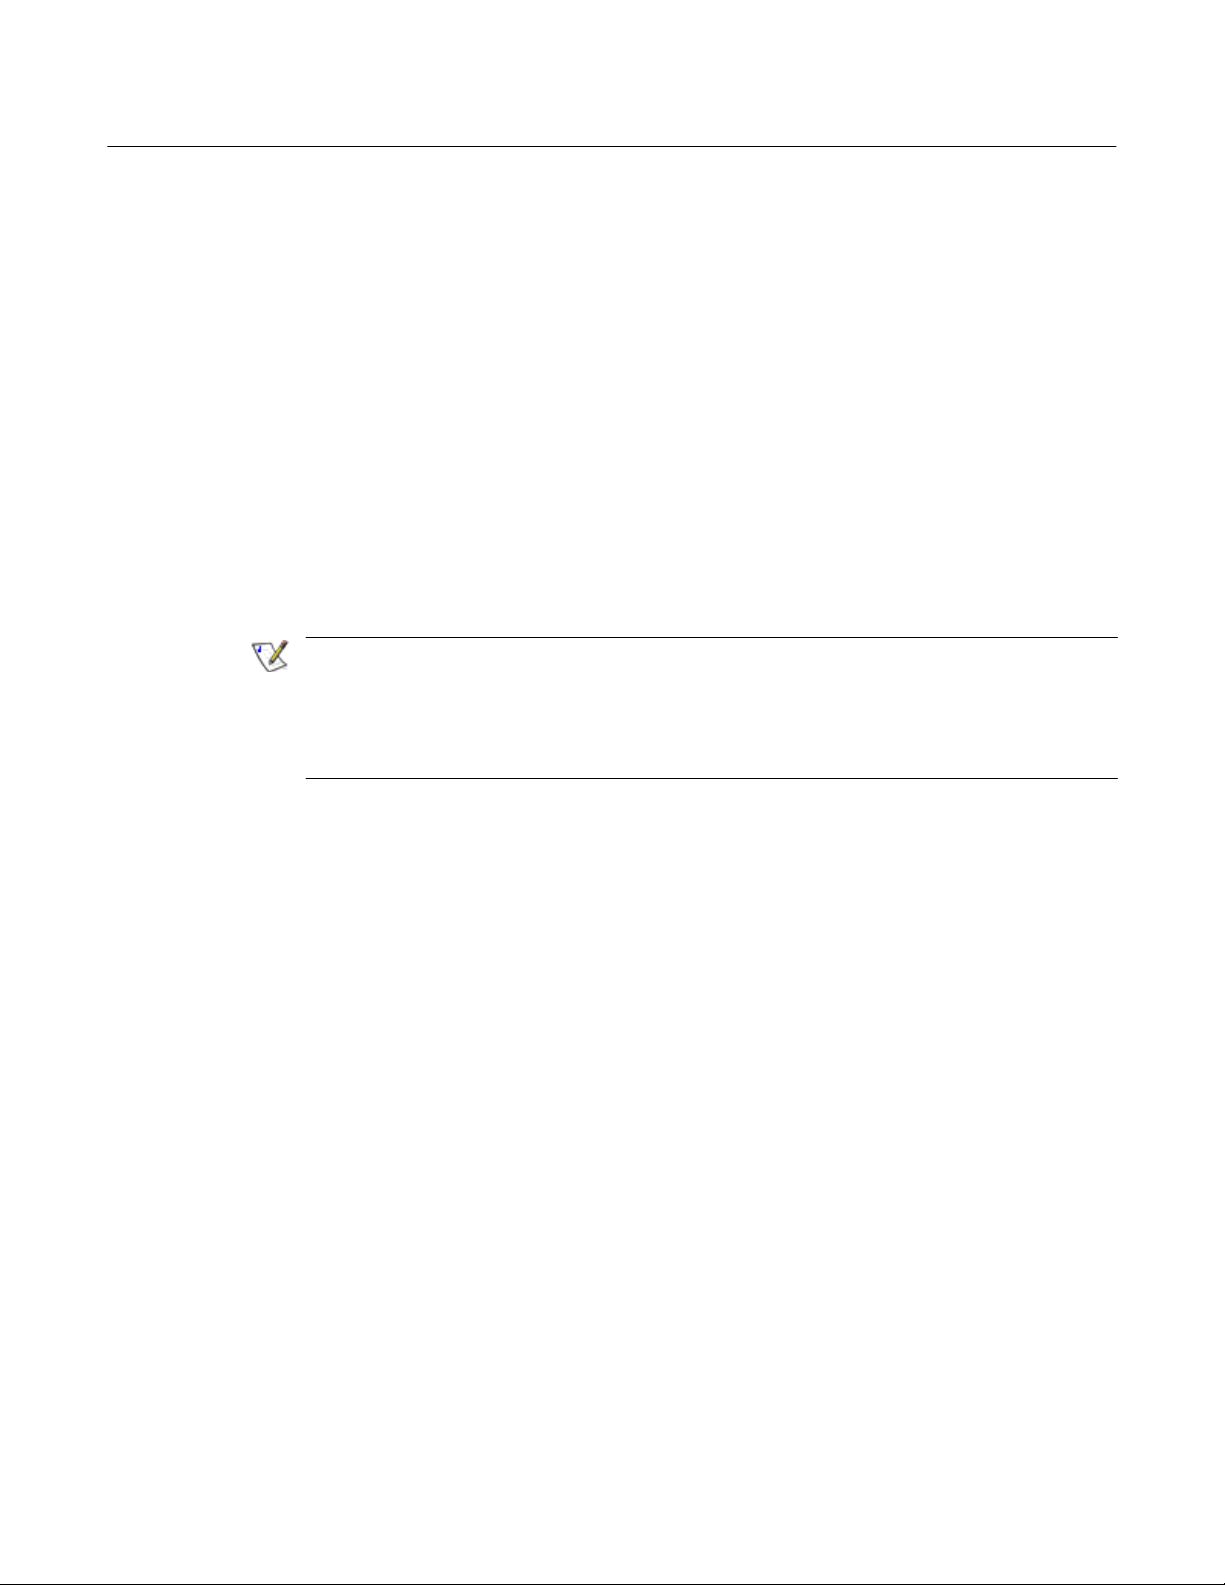
. On
the welcome page, click Next
Getting Started
.
4
. If
you agree to the terms of the license agreement, click Yes
.
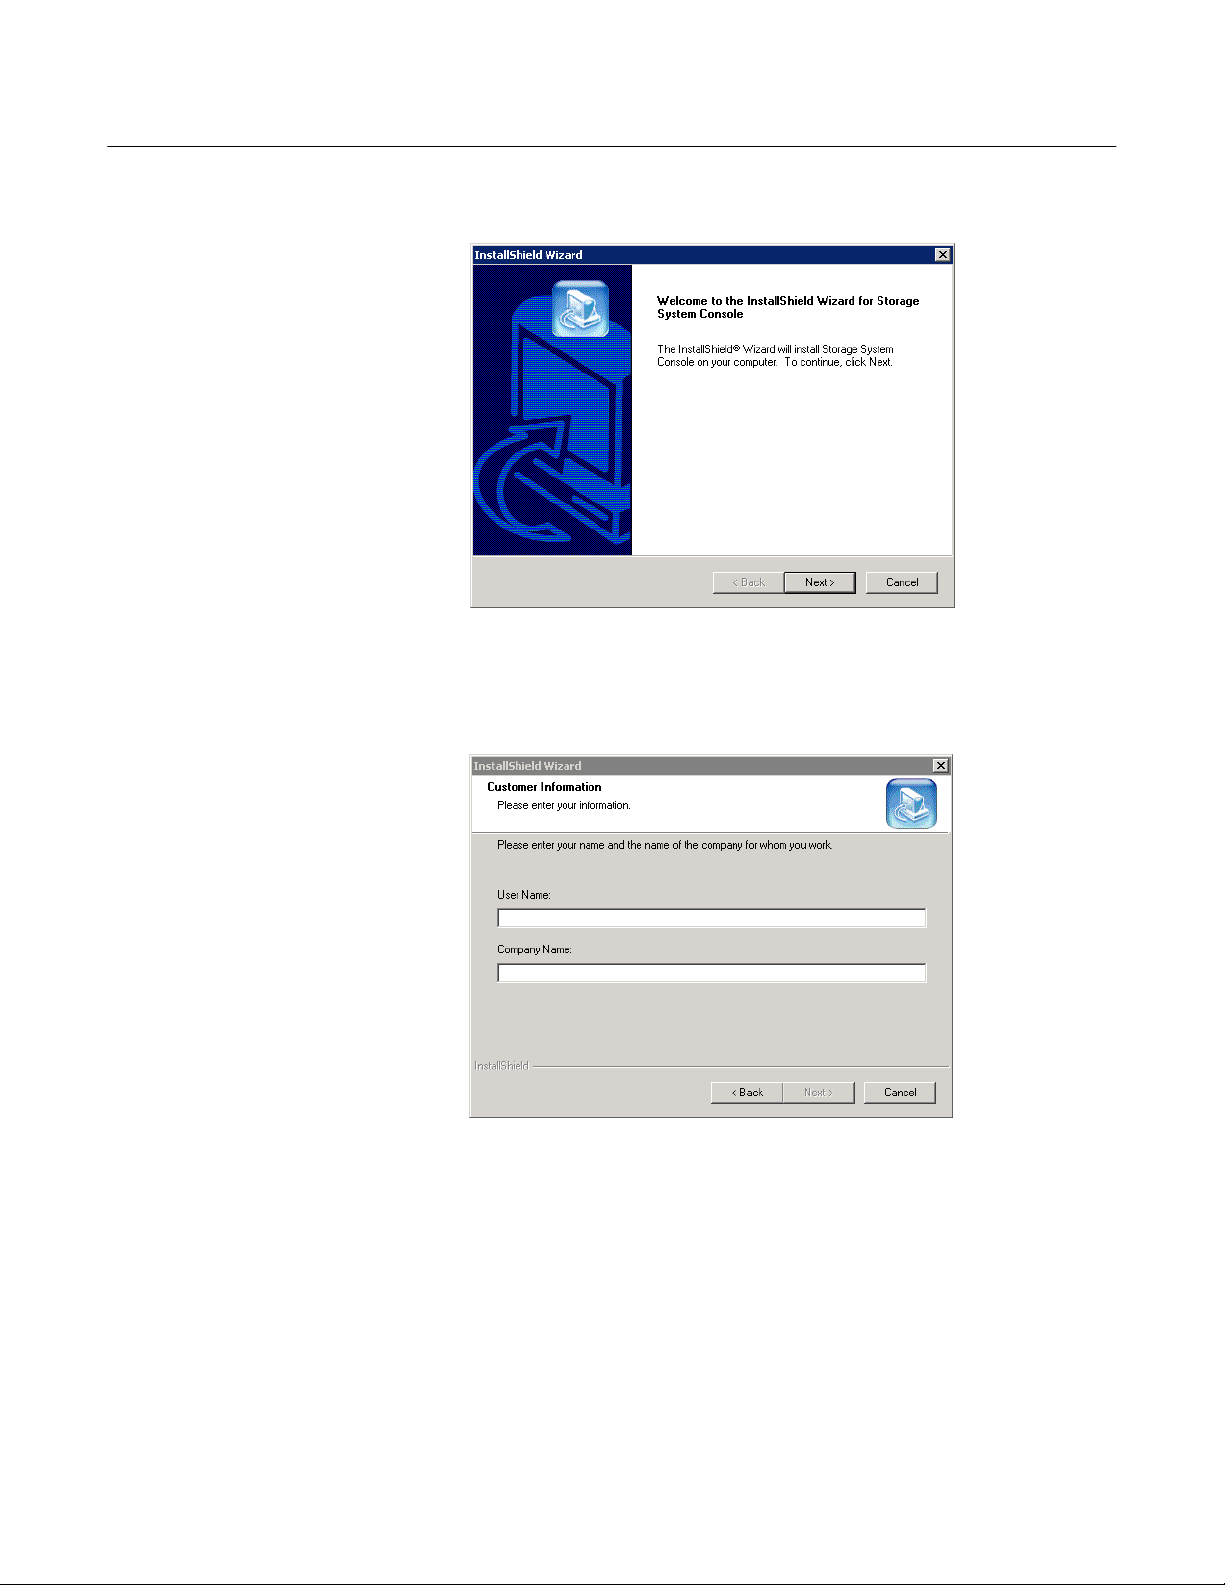
5
.
Enter your name and company name and then click Next
.
6
Altos easyStore Manual 6
Page 14
Chapter
2
Getting Started
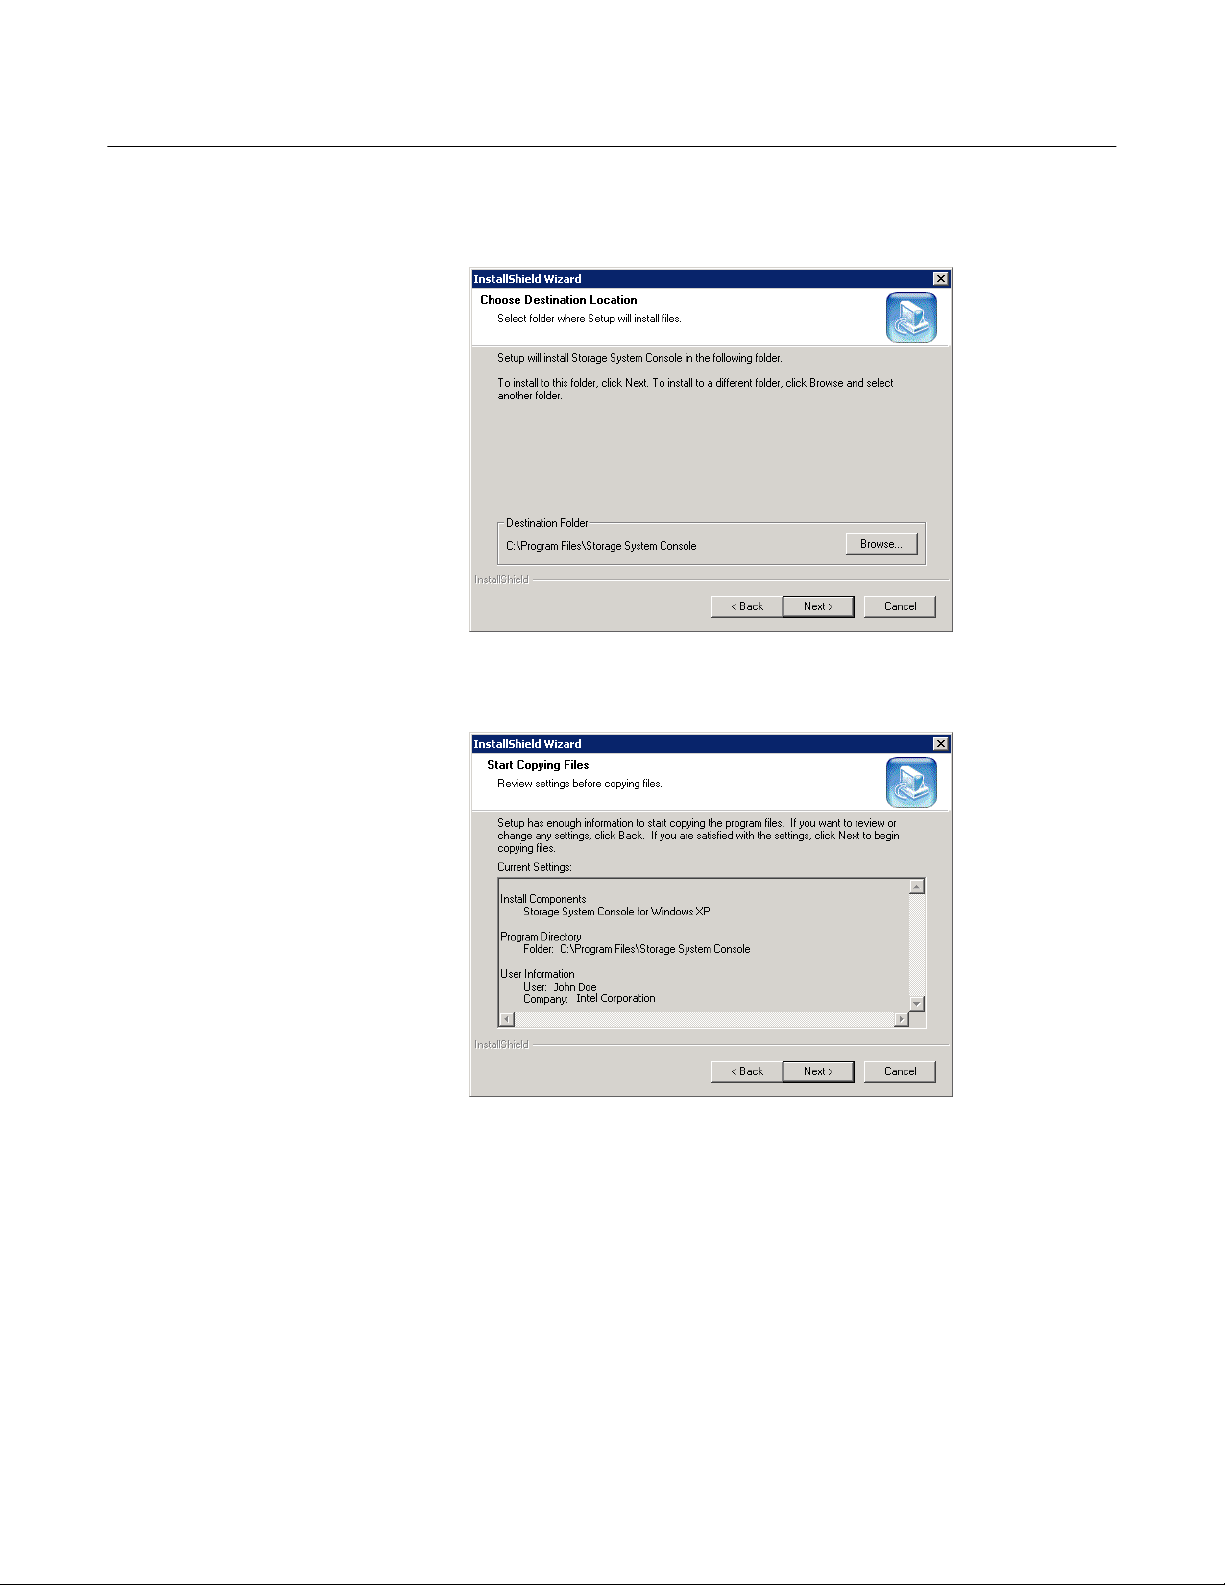
6. Click Next to install the Console in the displayed location, or click Browse to
select or specify a different location and then click Next
.
7
.
Review your selections and click Next
.
7
Altos easyStore Manual 7
Page 15
Chapter
2
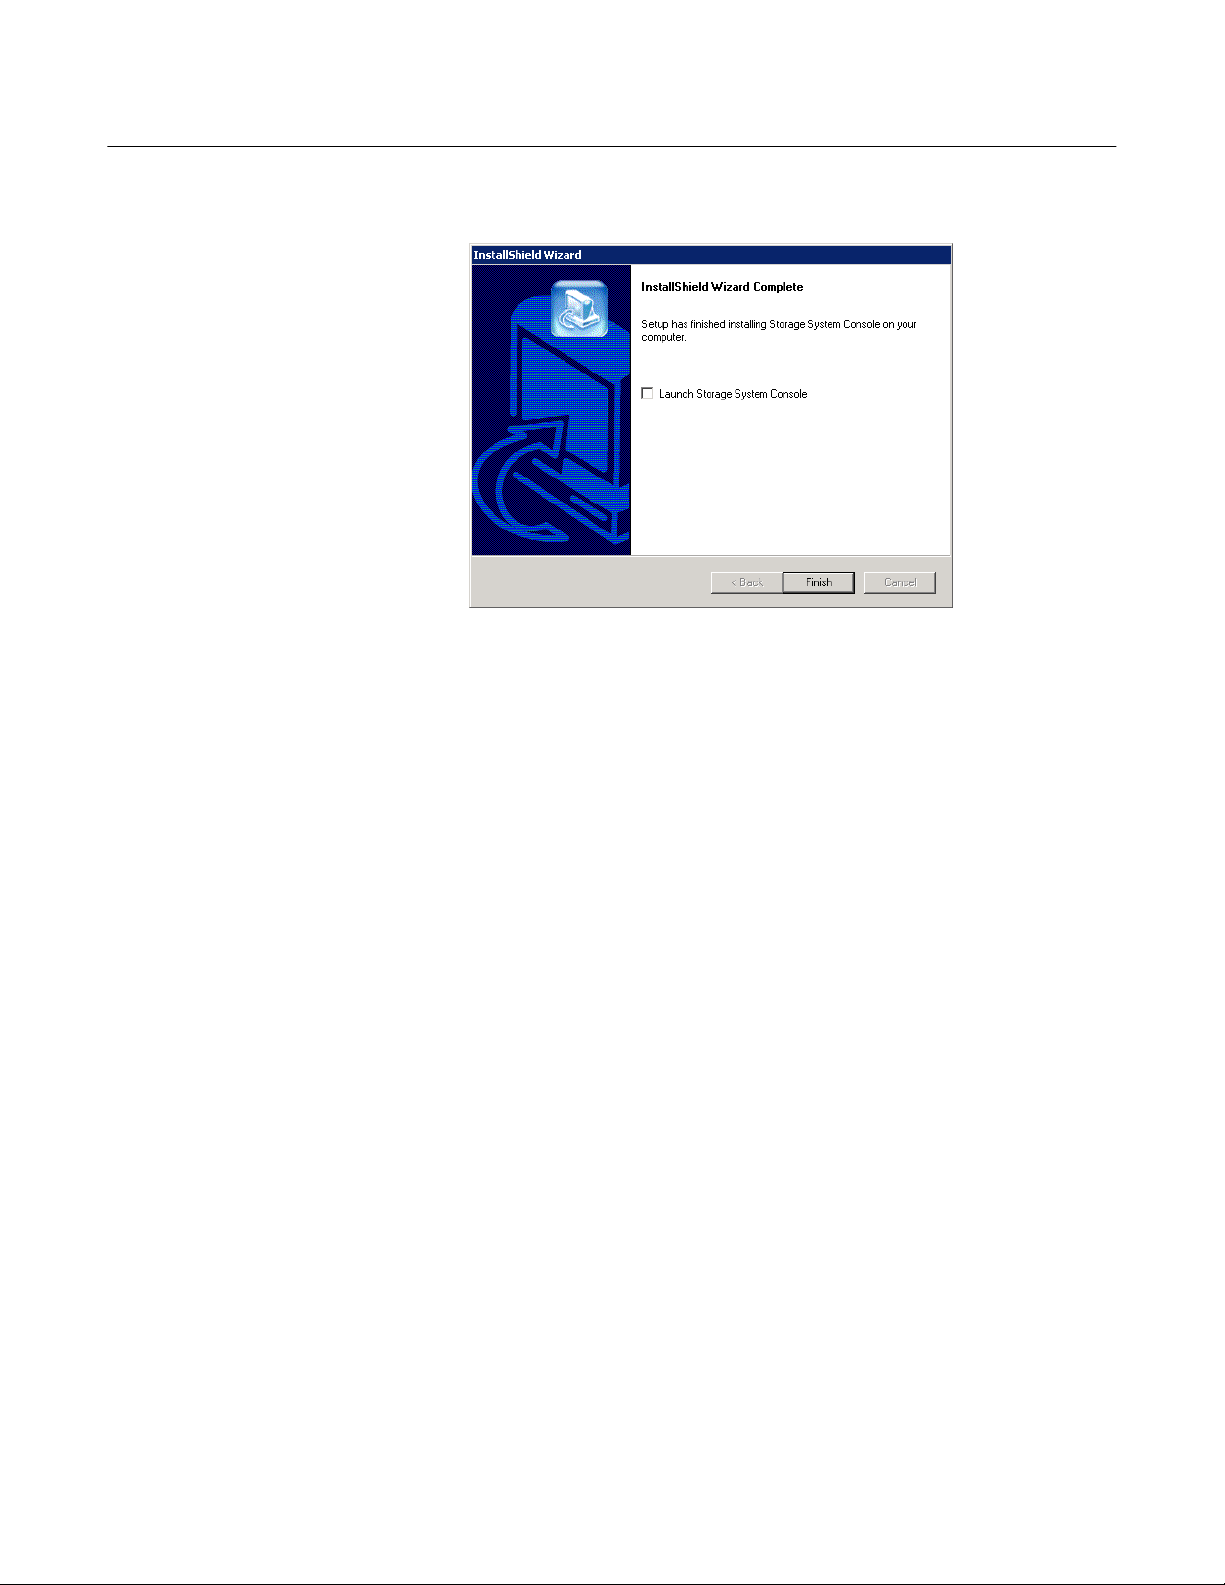
8
. To
install the Console, click Finish
Getting Started
.
If
you want to start the Console immediately after
it is
installed, select the
Launch Storage System Console check box before you click Finish
.
8
Altos easyStore Manual 8
Page 16

Chapter
2
Starting the Console
Getting Started
Once you have installed the Console (as described in “Installing the Console”), you
can use the following procedure to start
Note:
If
the storage system is not directly connected to your computer and your
network
does not have a DHCP server, you must change the
computer to use the same subnet as the storage system. (You can change
you have configured the storage system.)
after
it.
IP
address of your
it
back
To do this, access your local area network properties. (For example, you might
right-click
network
(TCP/IP)
with
storage
each open dialog box.
When you configure the storage system (as described in “Configuring your
storage system”), you can specify whatever
system to use
your computer, you must also specify the gateway to use (as
My
Network
connection and click Properties.) In the
and click Properties. The
192.168.0 except 192.168.0.101, since that’s the
system. The subnet mask must be 192.168.0.1. Then click OK to close
Pl
aces and click Properties, and then right-click your
list, select Internet Protocol
IP
address can be any address beginning
IP
address used by the
IP
address you would like the storage
. If
the
IP
address of the storage system is in a different subnet than
described in “Changing the network settings”). This ensures that you can manage
the storage system from any computer using a Web browser (as described in
“Accessing the Manager using a Web browser”). Then
you can change your computer’s
To start the Console:
IP
address back to
1. Click Start --> Programs --> Storage System Console
As soon as you start the Console,
systems.
le
ft
This might take a few minutes. As soon as the scan is complete, the
pane displays a tree view of all the storage systems
it
automatically scans the network for storage
its
original setting.
.
it
found.
9
Altos easyStore Manual 9
Page 17
Chapter
2
Getting Started
Note:
If
already scanned
storage
network
If no
the
same subnet as the storage system. Be sure to install the Console on a
compu
2
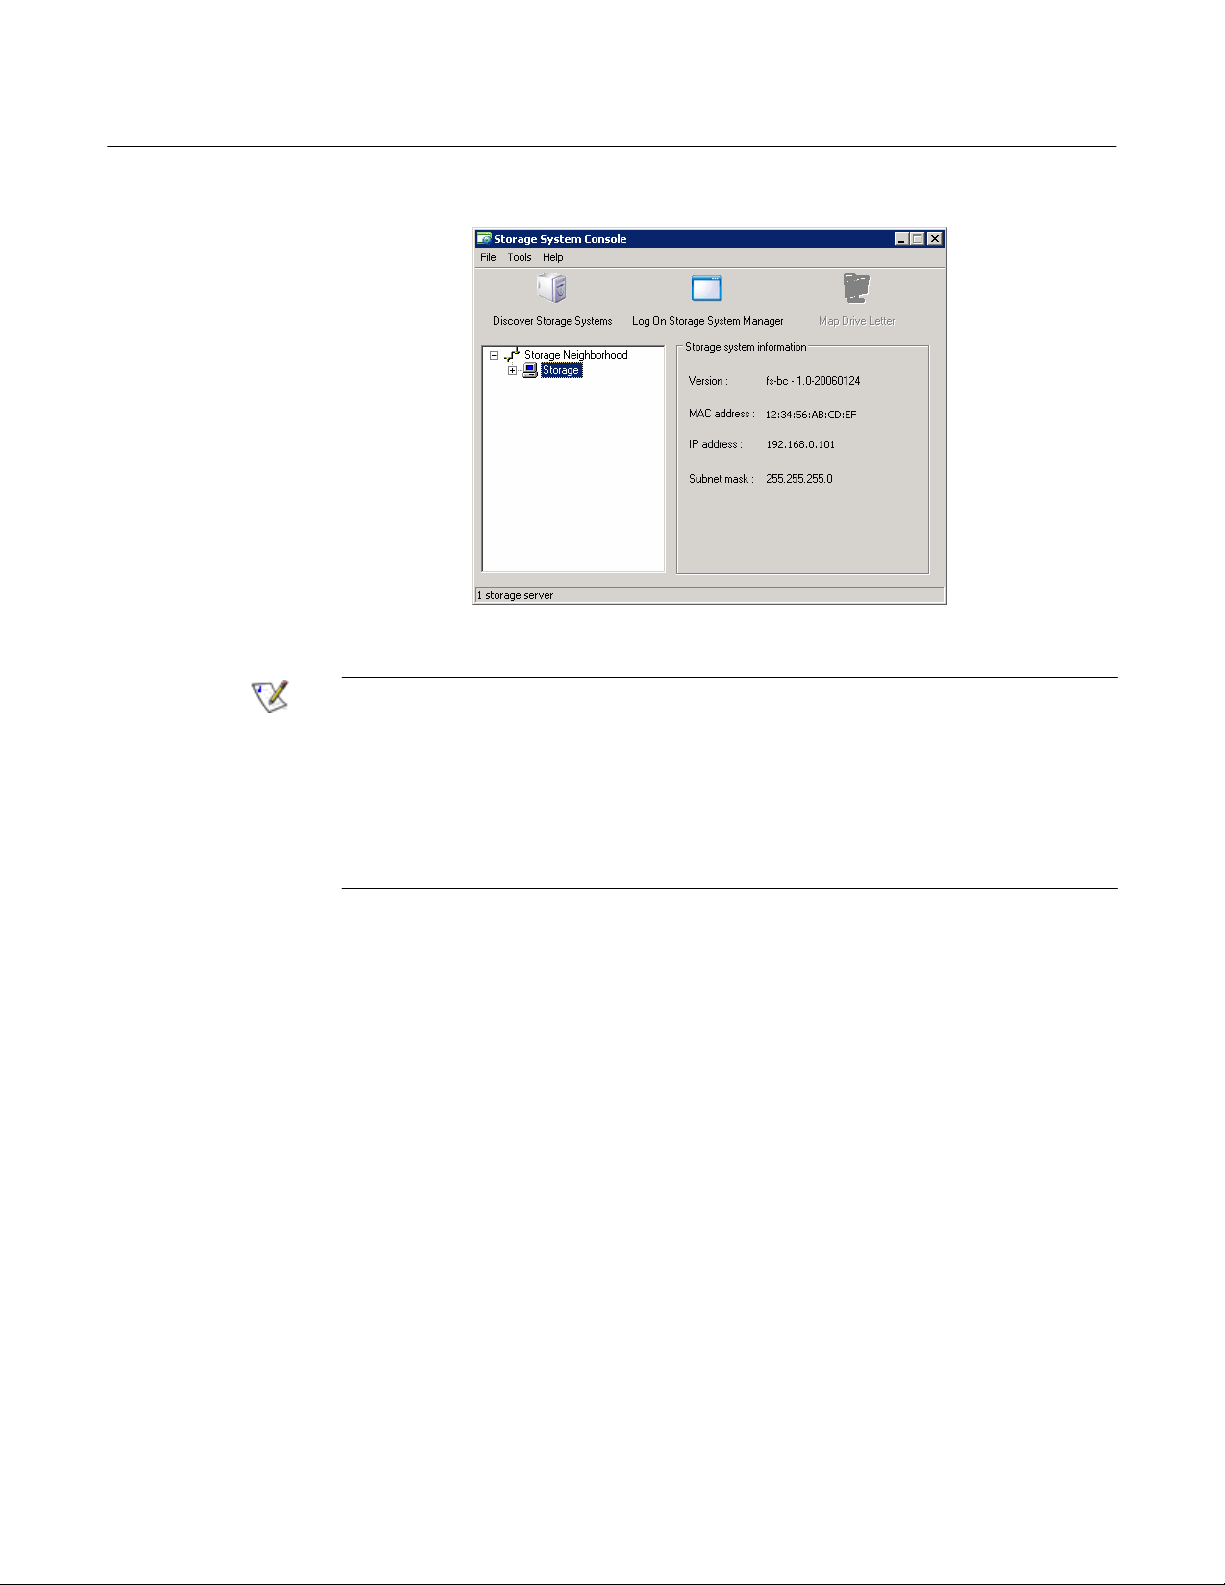
. In
the le
(for example, Storage),
If
your storage system uses both available ports to connect to the network, you
can
select either item
you connect a storage system to the network after the Console has
it, or if
system, you must click Discover Storage Systems to scan the
again and update the tree in the left pane.
you subsequently change the
IP
storage system displays in the left pane, your computer might not be in
ter in
the same subnet as the storage system and try again.
ft
pane, select the name of the storage system that you want to access
and then click Log On Storage System Manager
.
address of the
.
3
. If
your storage system has not yet been initialized, the System Initialization
page displays. For more information, refer to the next section, “Initializing the
disks.”
If
the System Setup Wizard displays. For more information, refer to
“Configuring your storage system”
If
Manager
your storage system been initialized but not yet configured, the welcome page for
.
your storage system has been initialized and configured, the login page for the
displays. For more information, refer to “Logging in to the Manager”.
10
Altos easyStore Manual 10
Page 18
Chapter
Initializing
2
the
Getting Started
di
sks
Once you have installed the Console (as described in “Installing the Console”),
started
Console”), the System
it,
and connected to the storage system (as described in “Starting the
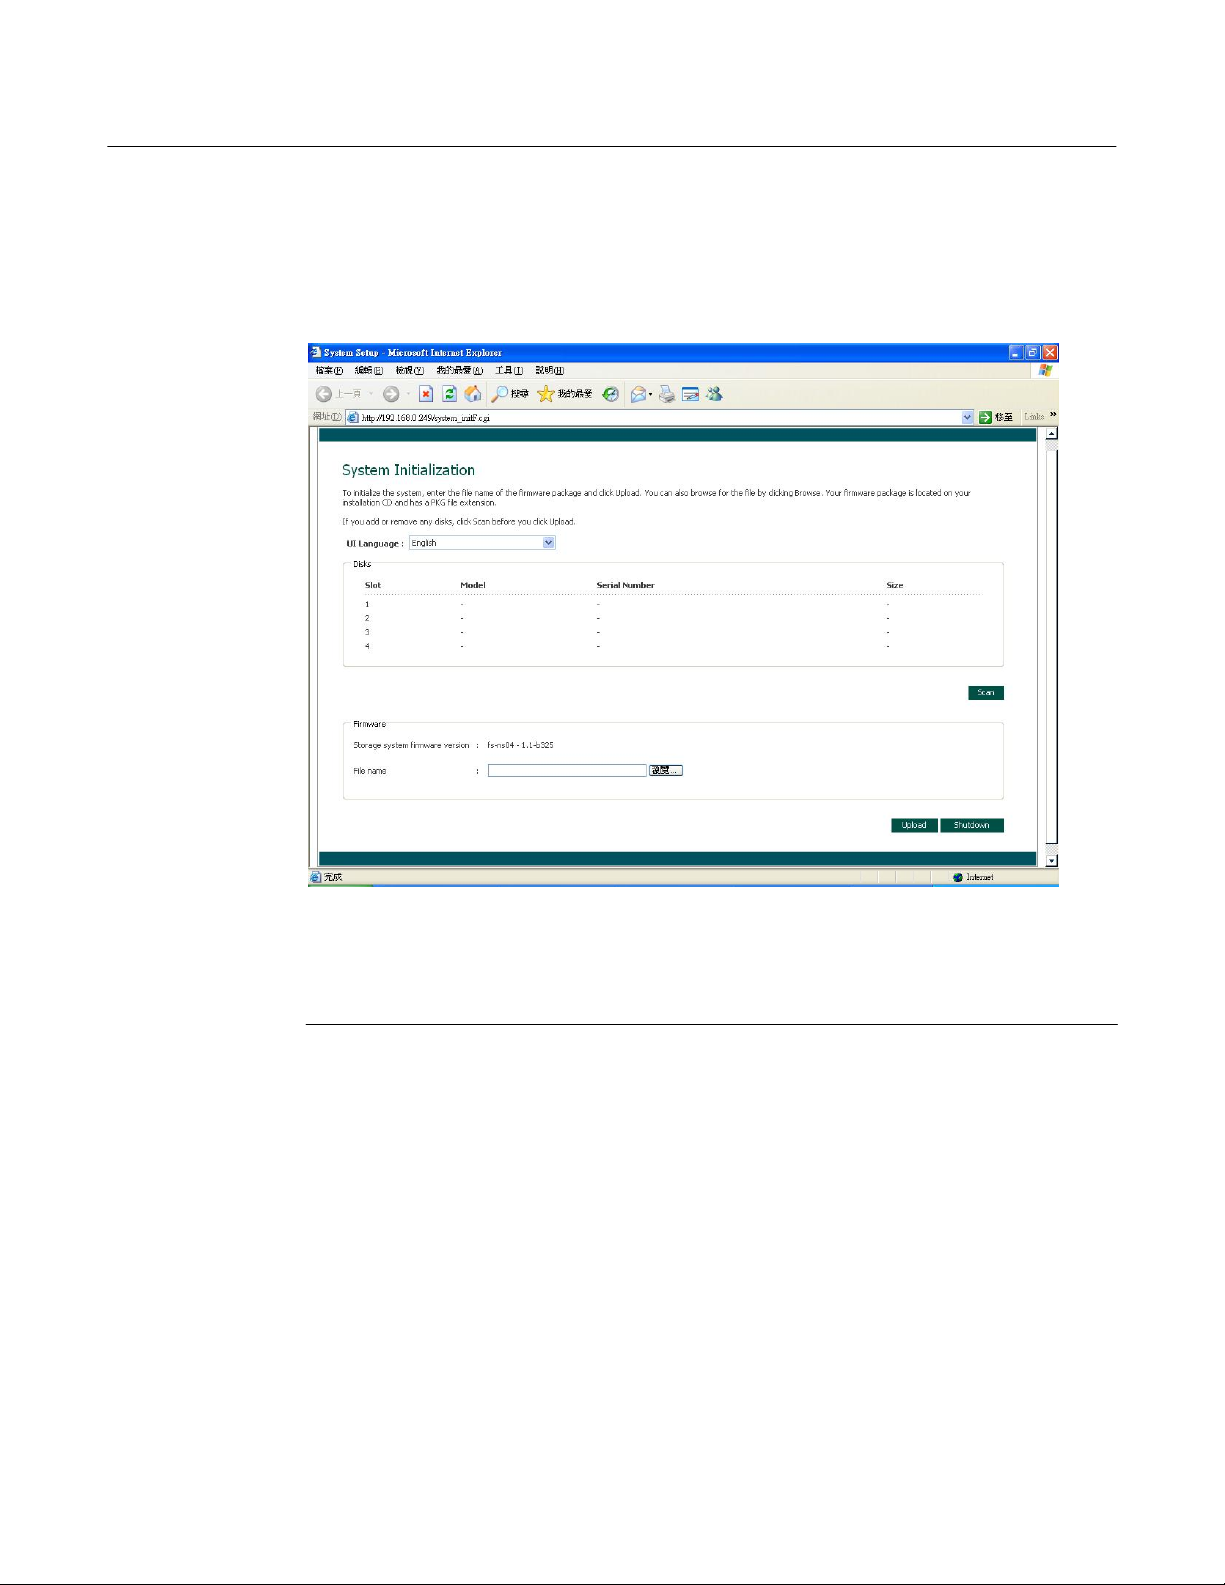
Initiali
zation page displays:
If
all the hard disks have not been detected, or
if
you want to add, remove, or
re-order the disks at this time, insert or remove the disks one at a time and click
Scan after each action.
1
.
Insert the installation CD into your computer’s CD-ROM drive, type the path to
the firmware package in the File name text box, and click Upload
.
Alternatively, you can click Browse and browse the CD for the firmware package
The firmware package is the file on the CD that ends in the PKG file extension.
.
11
Altos easyStore Manual 11
Page 19
Chapter
2
Getting Started
The firmware is uploaded to the hard disks. When this process is complete, the
storage system restarts
Note: The operating system and storage system software are installed on each
.
disk in your storage system to ensure that the failure or removal of any one disk
will not cause the entire storage system to fail.
2
. If the
welcome screen does not appear immediately after the storage system
restarts, close the browser window and log in again using the Console.
You can now perform initial configuration (as described in “Configuring your
storage
system”
)
12
Altos easyStore Manual 12
Page 20
Chapter
2
Configuring your storage system
Once your storage system has been initialized (as described in “Initializing your
storage
necessary initial configuration:
1
system”), follow these steps to run the System Setup wizard and perform the
. If
you have not already installed the Storage System Console, install
in
described
Console”)
In the le
“Installing the Console”) and start
.
ft
pane, click the name of the storage system. Then click Log On
Storage System Manager
Getting Started
it
(as
it
(as described in “Starting the
.
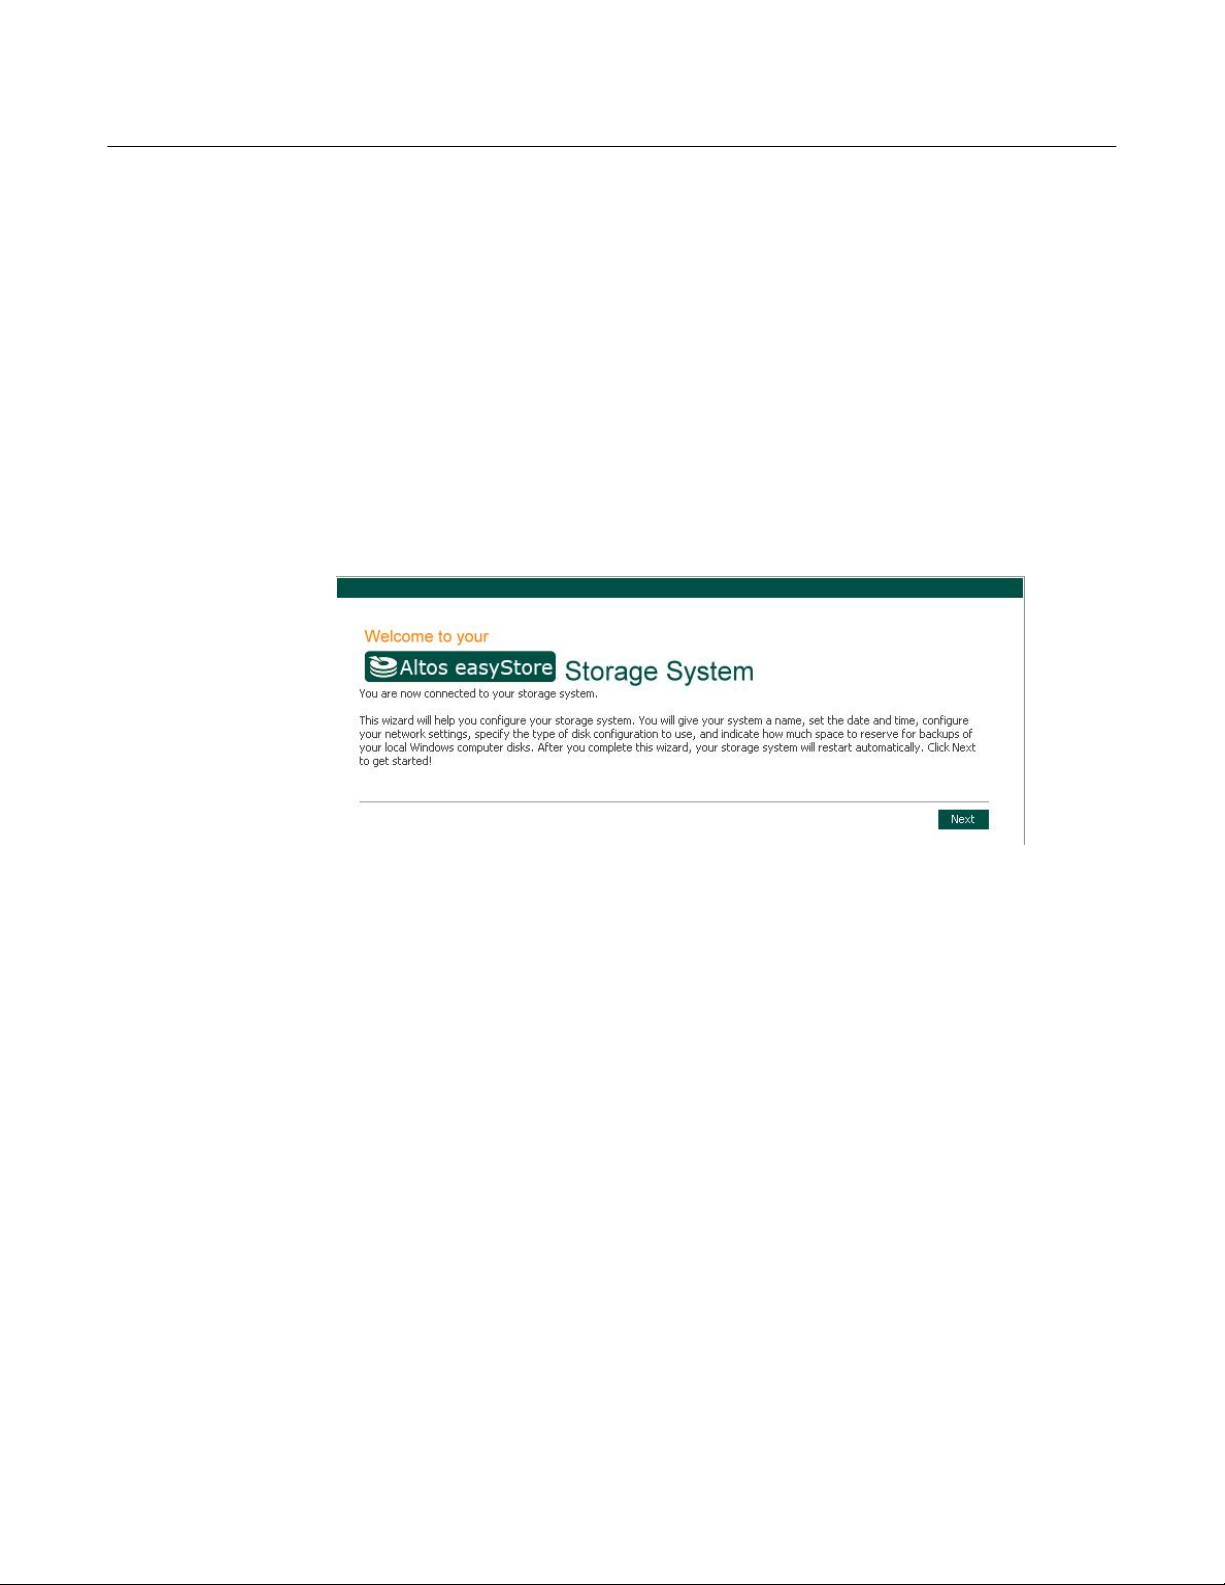
The welcome page displays:
2
. On
the welcome page, click Next
.
13
Altos easyStore Manual 13
Page 21
Chapter
2
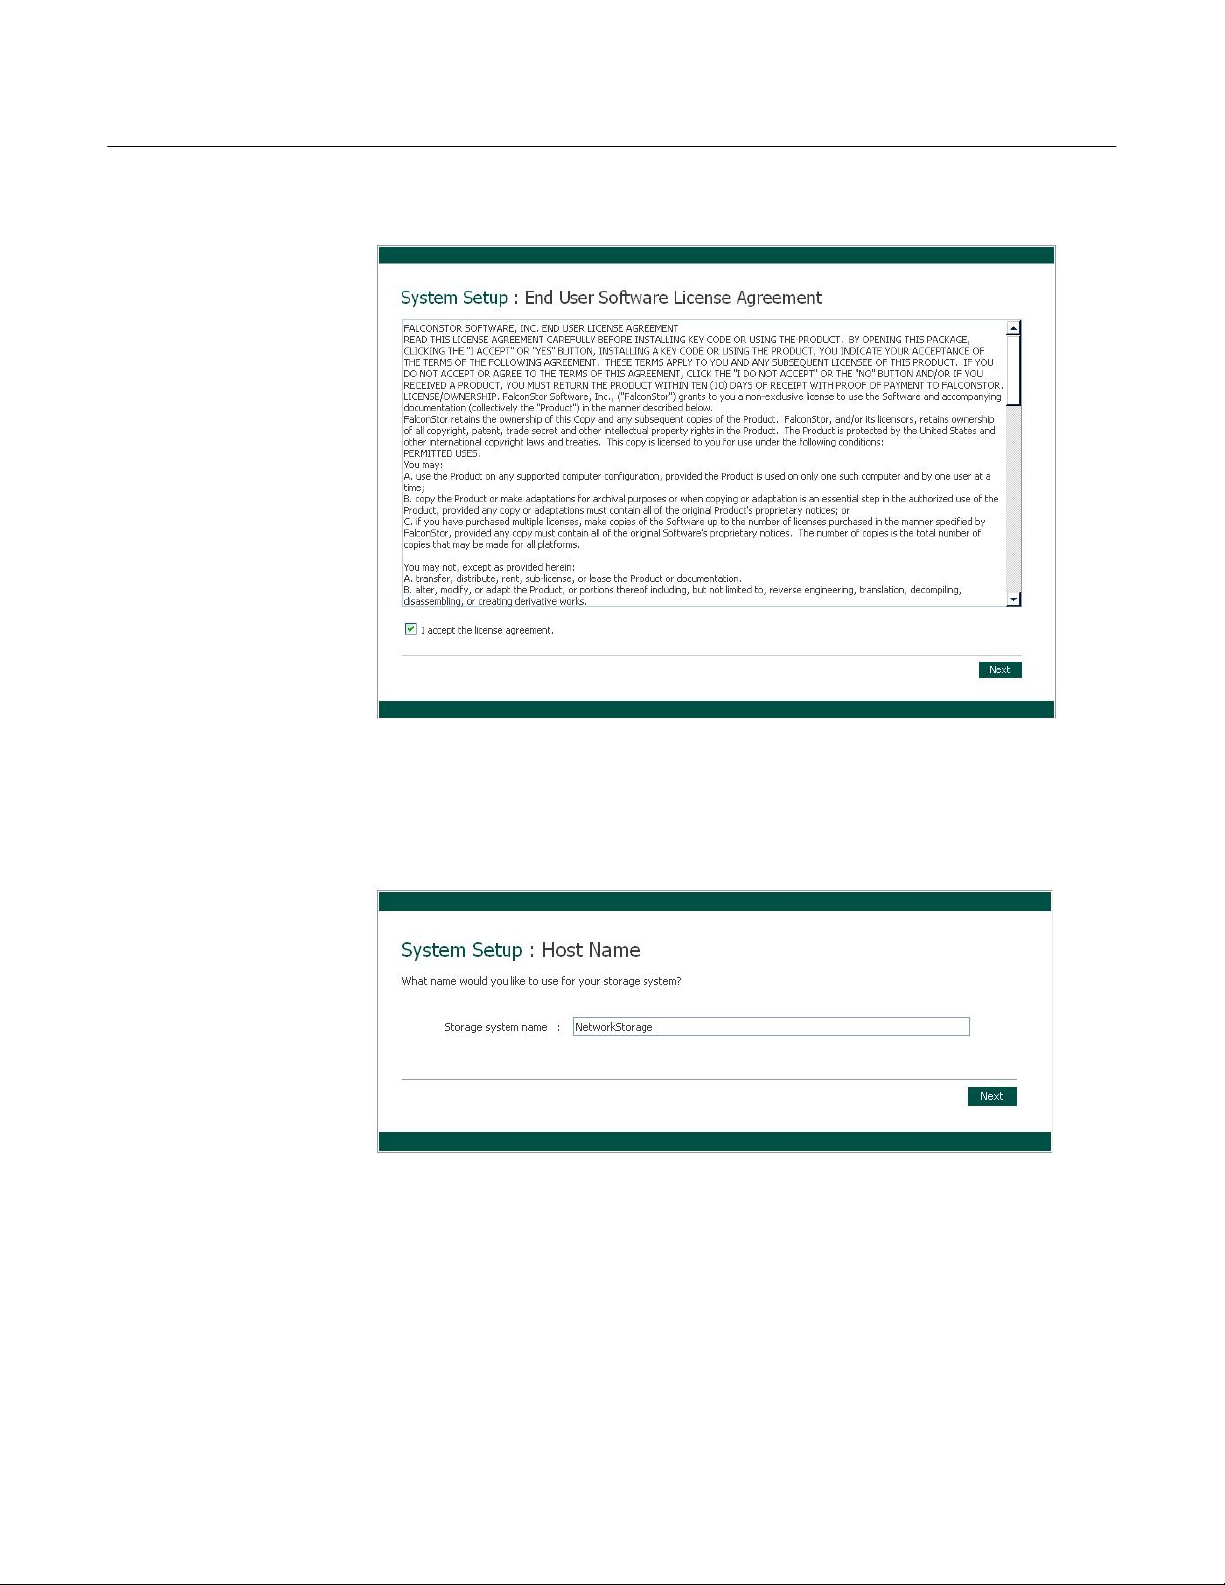
The End User Software License Agreement page displays:
Getting Started
3
. If
you agree to the terms, select the
then click Next
and
.
The Host Name page displays:
I
accept the license agreement check box
4. Click Next to accept the default storage system name (
whatever
name you prefer and then click Next
.
The storage system name can be up to 15 characters long and can include
letters,
numbers, and hyphens.
Storage), or
enter
14
Altos easyStore Manual 14
Page 22
Chapter
2
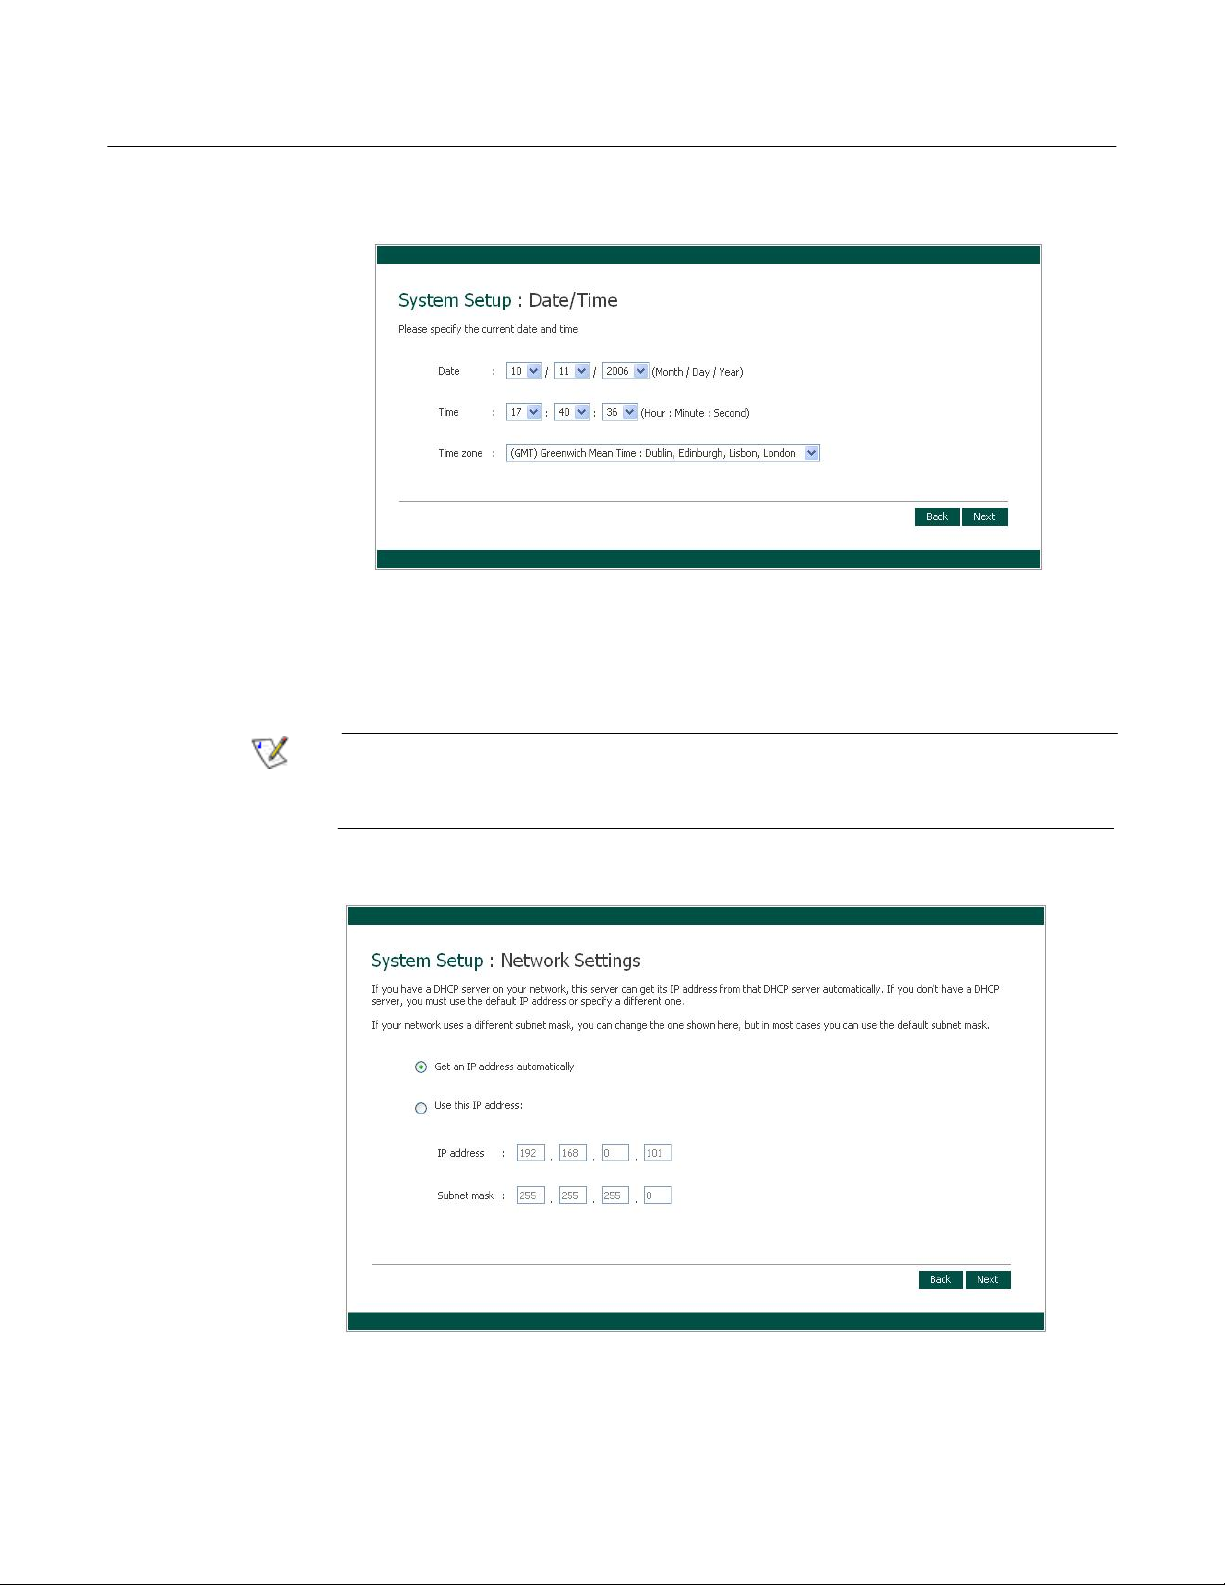
When you click Next, the Date/Time page displays:
Getting Started
5
.
Specify the current date,
ti
me, and time zone, and then click Next
.
The time should be expressed in 24-hour format. For example, 2:00 P.M. would be
entered as 14:00:00
Note: The storage system time does not automatically change to reflect
.
daylight savings time. To accommodate this, you can manually adjust the time
as needed. For more information, refer to “Changing the system settings.”
When you click Next, the Network Settings page displays:
15
Altos easyStore Manual 15
Page 23
Chapter
2
6
. By
default,
IP
address from that server
If
your network does not have a DHCP server, or
attached
defau
255.255.255.0).
if
your network has a DHCP server, the storage system obtains
.
if
the storage system is directly
to
your computer, the default
lt IP
address is 192.168.0.101, and the default subnet mask is
IP
address and subnet mask are used. (The
To accept the default settings, click Next. Otherwise, specify the desired
settings
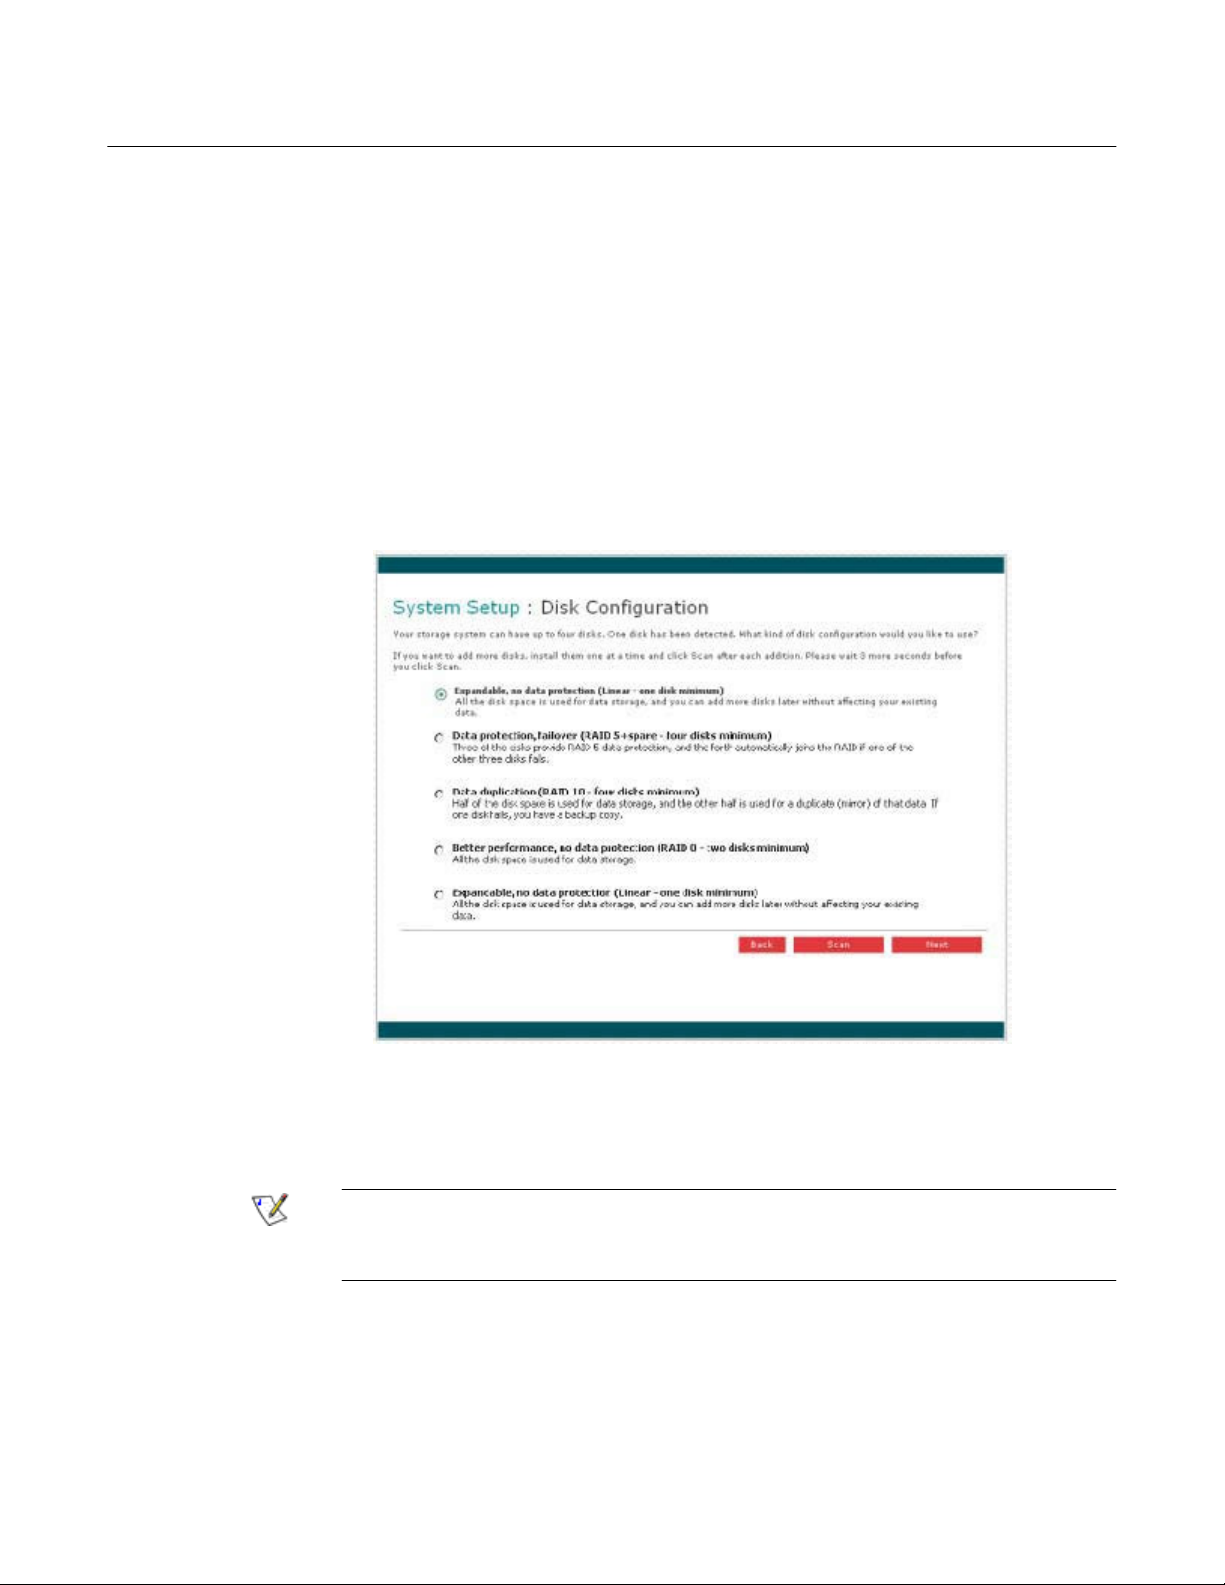
When you click Next, the Disk Configurat
appear
currently
and then click Next
on
this page vary, depending on the number of hard disks that are
installed in the system.)
.
ion
page displays. (The options that
Getting Started
its
16
7
. If
you want to add or remove hard disks, do so one at a time and click Scan after
each
action
.
you want to use in the storage system at this time, since changing the number of
hard disks later can require disk reconfiguration and possible data loss.
To accept the defau
protection available for the number of hard disks currently installed), click Next. By
default, a linear disk configuration is used for a single hard disk, RAID 1 is used for
two hard disks, and RAID 5 is used for three or four hard disks.
Note:
It is
strongly recommended that you install all the hard disks that
lt
disk configuration (which will provide the best level of data
Altos easyStore Manual 16
Page 24
Chapter
2
Getting Started
If
you want to change the disk configuration, select the desired RAID level and
then click Next. (For detailed information about the different RAID levels, refer to
Appendix B, "Disk Configurations.")
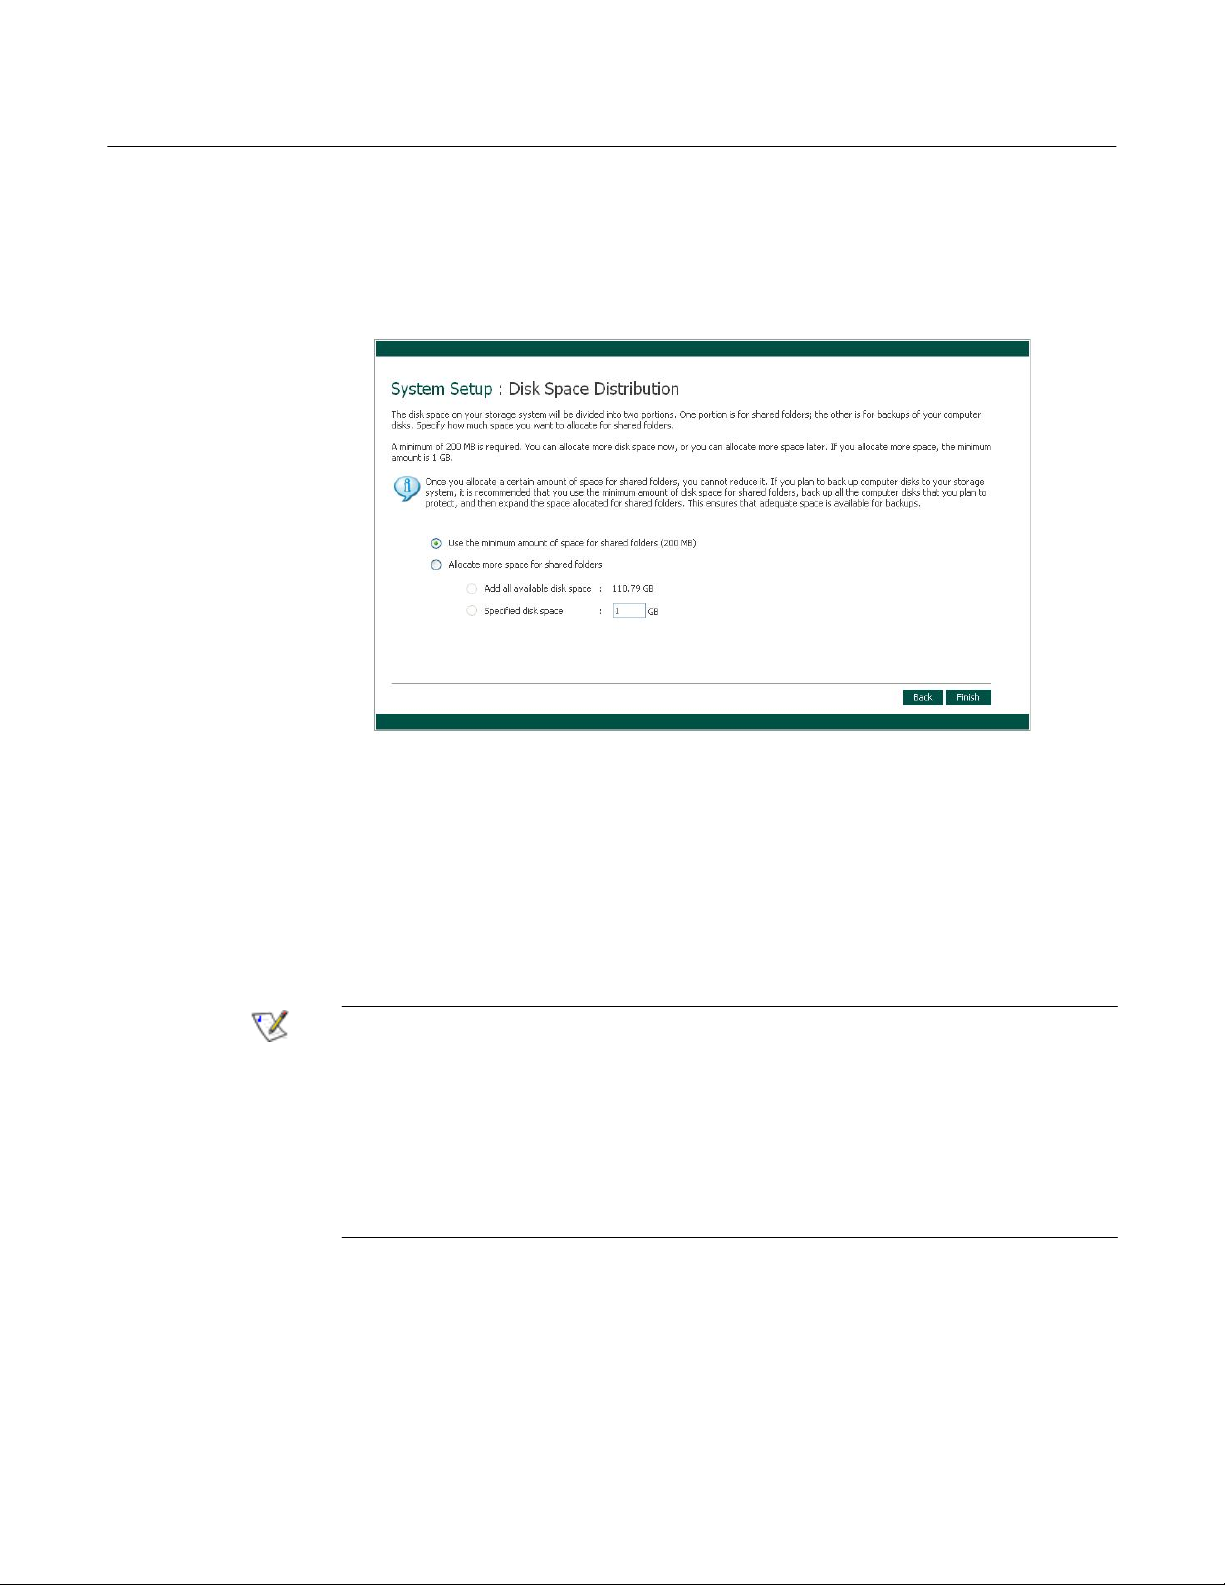
When you click Next, the Disk Space Distribution page displays:
8
. To
accept how the disk space will be proportioned for shared folders and
backups
If
you want to allocate more space for shared folders, select Allocate more space
(only 200 MB will be allocated for shared folders), click Finish
for shared folders and then specify how much space to allocate (either
available disk space or Specified disk space). If
you select Specified
.
All
disk space, enter the number of gigabytes to allocate for shared folders (the
minimum
GB). Then click Finish
.
is 1
f
olders later (as long as free disk space is available), but you cannot reduce
without reconfiguring your disks and losing all your data.
If
recommended
back
space
available
Note: You can expand the amount of disk space allocated for shared
you plan to back up computer disks to your storage system, it is
that you use the minimum amount of space for shared folders,
up
all the computer disks that you plan to protect, and then expand the
allocated for shared folders. This ensures that adequate space is
for backups
.
it
17
Altos easyStore Manual 17
Page 25
Chapter
2
Getting Started
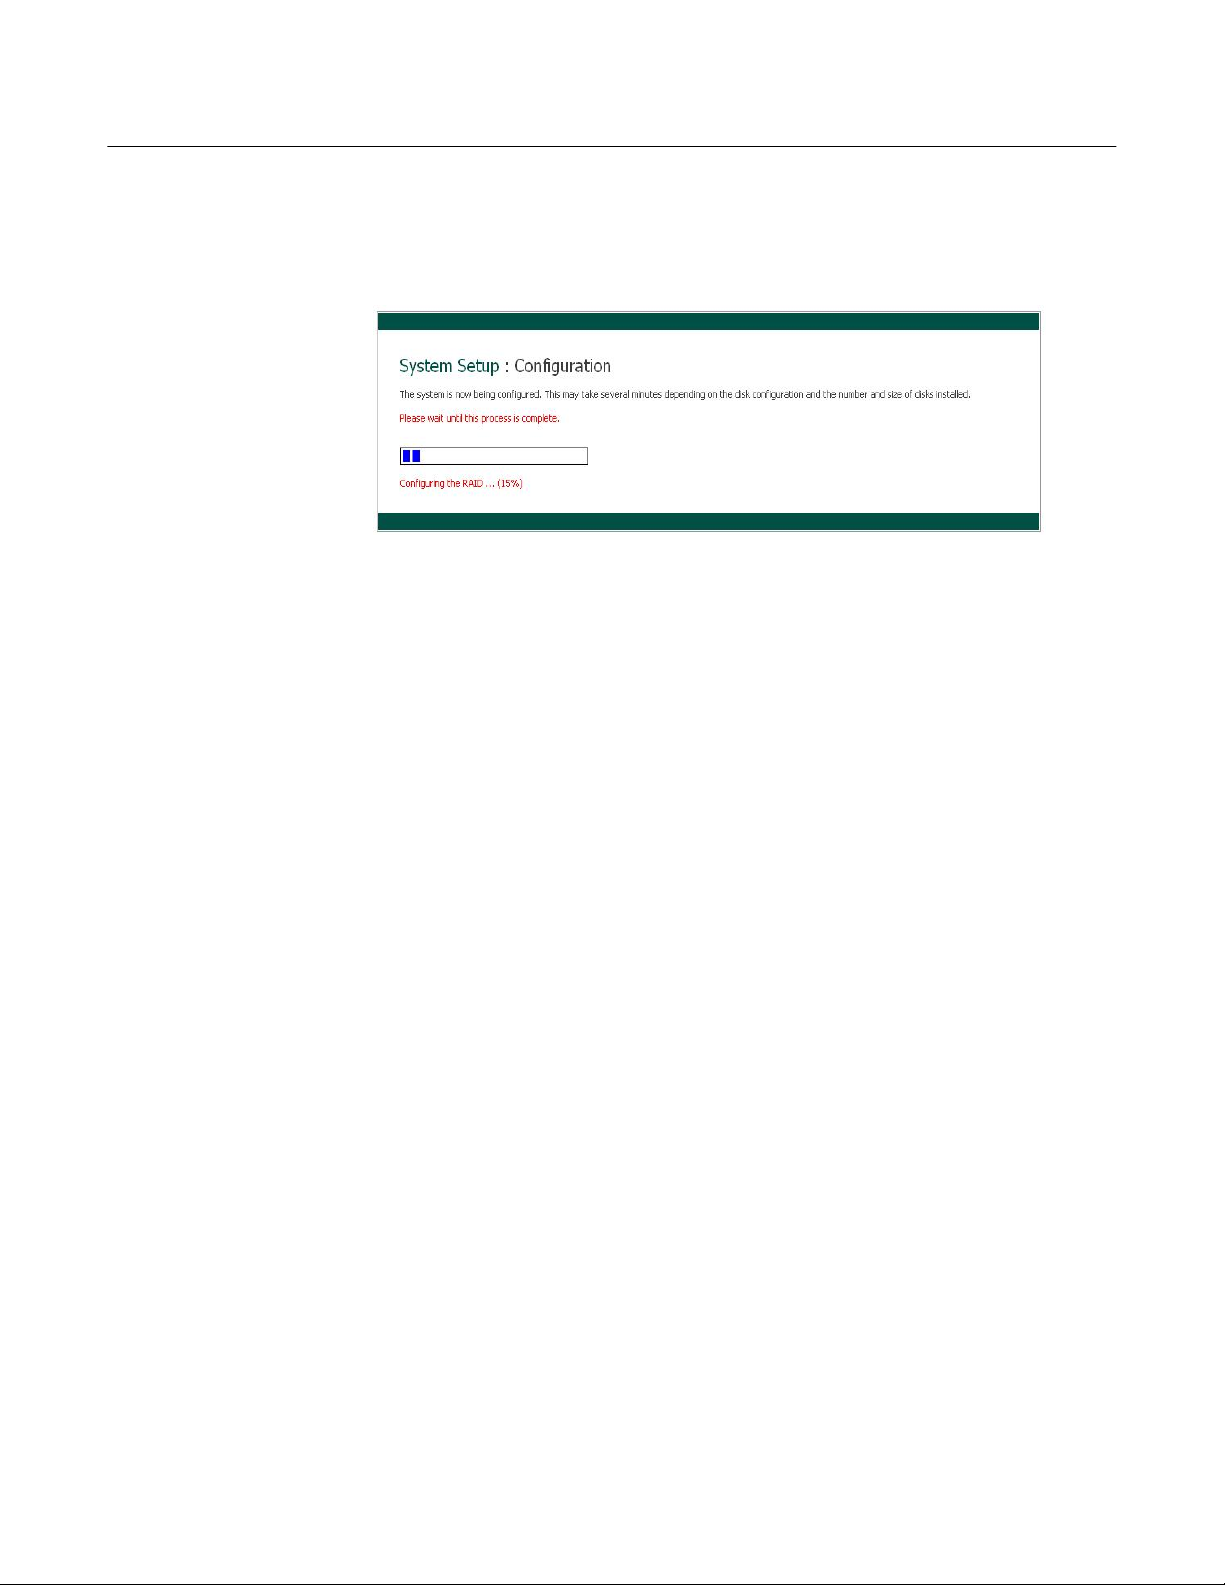
9
. On
the confirmation message, click OK
.
The Configuration page displays and the system is configured according to the
settings
you specified. Once the configuration is complete, the system restarts
.
10. After the storage system restarts, you can access the Manager, add users, and
create
For more information, refer to “Accessing the Manager”, “Logging in
to the Manager”, “Adding users”, and “Creating shared folders.”
shared folders.
18
Altos easyStore Manual 18
Page 26

Chapter
2
Accessing the Manager
Once you have initialized and configured your storage system (as described in
“Initializing your storage system” and “Configuring your storage system”
), you can access the Manager to add users, create shared folders, and perform other
asks related to managing your storage system.
t
There are two ways to access the Manager:
l
Using the Console
l
Using a Web browser (Microsoft Internet Explorer 6.0 or Firefox 1.06 or newer)
Using
the Console, you can access the Manager only from a computer in the same
subnet as the storage system, but you do not have to know the name or
of the storage system or otherwise modify the network settings.
Using a Web browser, you can access the Manager from any computer in your
network,
addition,
but
you must know the name or
if
you configured the storage system to use a specific
might need to specify the
successfully
using
the Console and then specify the gateway address (as described in
access the Manager using a Web browser. First access the Manager
“Changing the network settings”.) and try to access
Accessing the Manager using the Console
To access the Manager using the Console
1
. If
you have not already done so, install the Console on each computer from
which
you plan to manage the storage system (as described in “Installing the
Console”)
2
. Start
the
3
.
Log in to the Manager (as described in “Logging in to the Manager”).
the Console and connect to the storage system (as described in “Starting
Console”).
Getting Started
IP
address
IP
address of the storage system. In
IP
address, you
IP
address of the gateway in your network before you can
it
using a Web browser
.
:
19
Altos easyStore Manual 19
Page 27
Chapter
2
Accessing the Manager using a Web browser
To access the Manager using a Web browser:
1
.
From any computer in your network, run Microsoft Internet Explorer 6.0 or
Firefox
Enter:
https://storage_system
where storage_system is the name or
When the login page displays, you can bookmark
easily access
2
.
1.06 or newer, enter the following in the address bar, and then press
Note: You can use the storage system name only
the same subnet as the storage system,
IP
address and name to your local hosts file, or
name
with a DNS server in your network.
it
the next time
Log in to the Manager (as described in “Logging in to the Manager”).
Getting Started
IP
address of the storage system.
if
your computer is in
if
you added the storage system’s
if
you manually registered the
it so
that you can quickly and
.
20
Altos easyStore Manual 20
Page 28
Chapter
2
Logging in to the Manager
To ensure that your connection to the storage system is secure, the HTTPS protocol
is used, and only individuals who know the administrator user name and password
view or change any of the storage system settings.
can
To log in to the Manager:
1
.
When the security alert displays, click Yes
The login page displays.
Getting Started
.
2
.
Enter the administrator user name and password.
The defau
case-sensitive.) Once you have logged in, you can change both the
are
lt
user name is adm
in,
and the default password is storage. (These
administrator user name and password at any time. For more information, refer
to “Changing the system settings”.
3. Click Log
In.
21
Altos easyStore Manual 21
Page 29
Chapter
2
Navigating the Manager
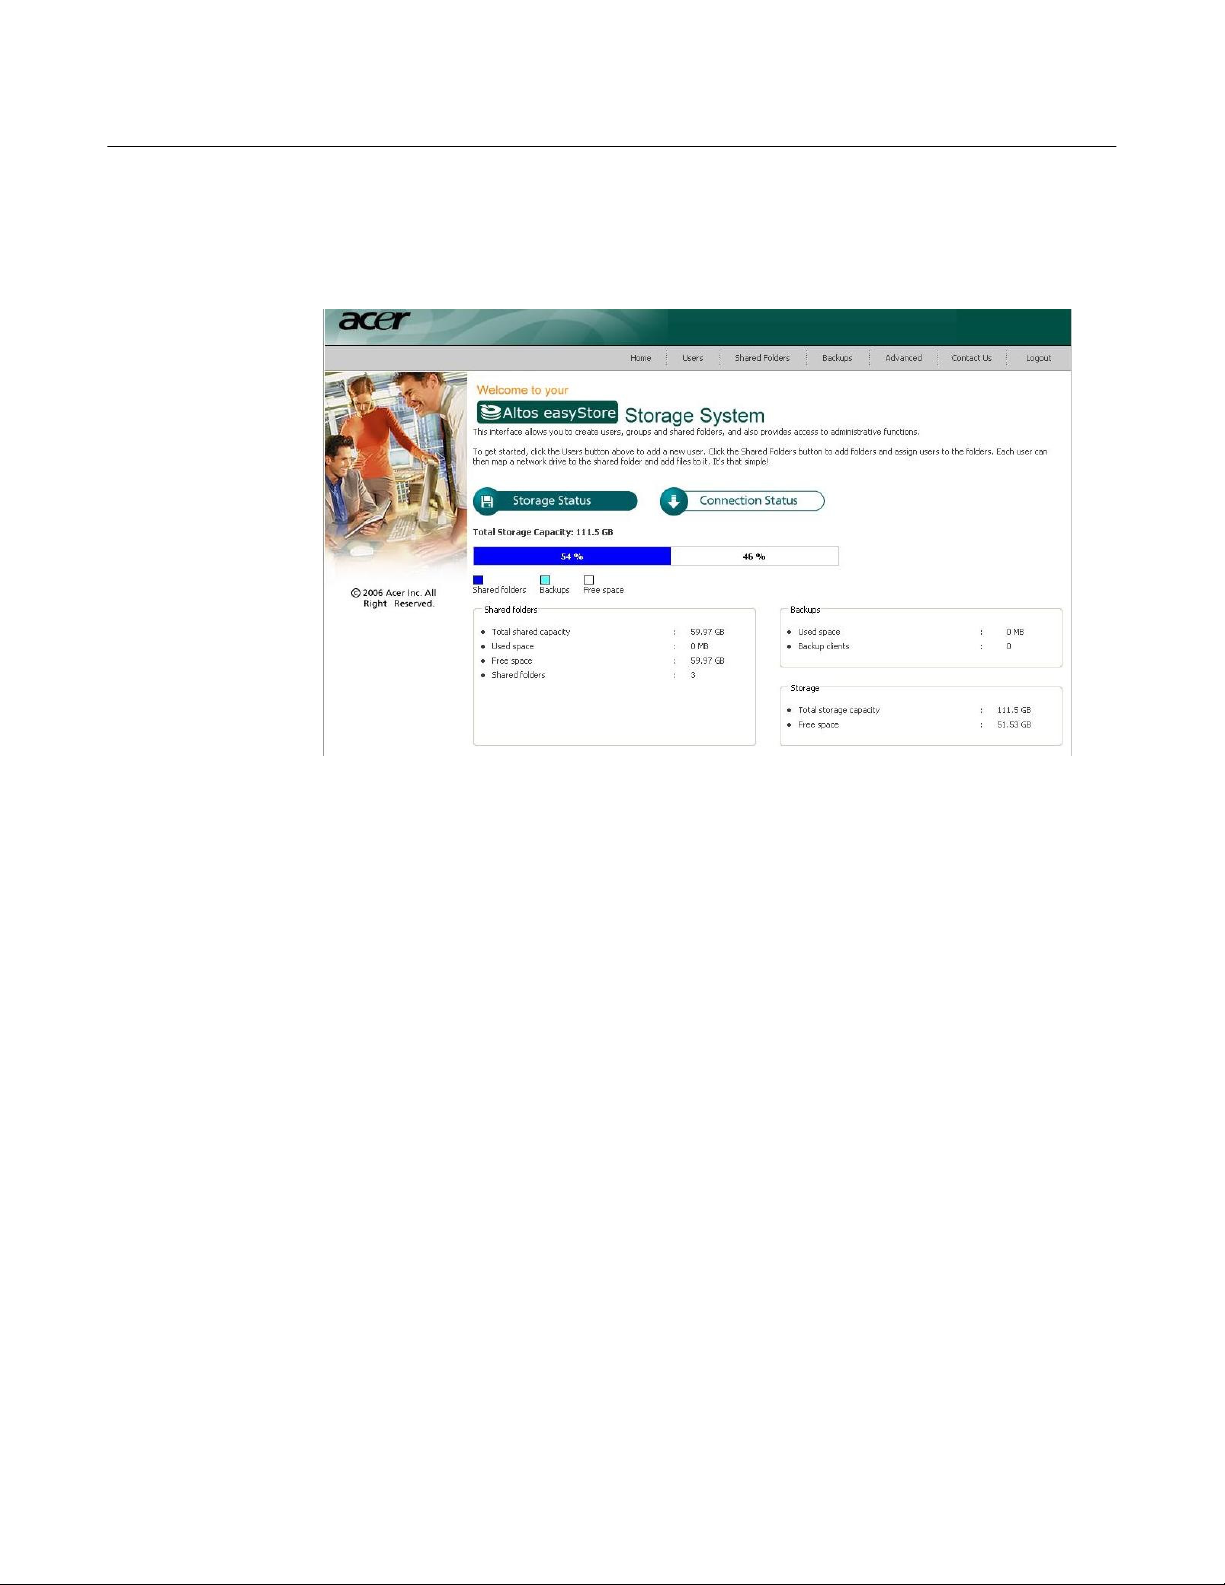
Once you log in to the Manager, the Home page displays:
Getting Started
22
Altos easyStore Manual 22
Page 30
Chapter
2
Getting Started
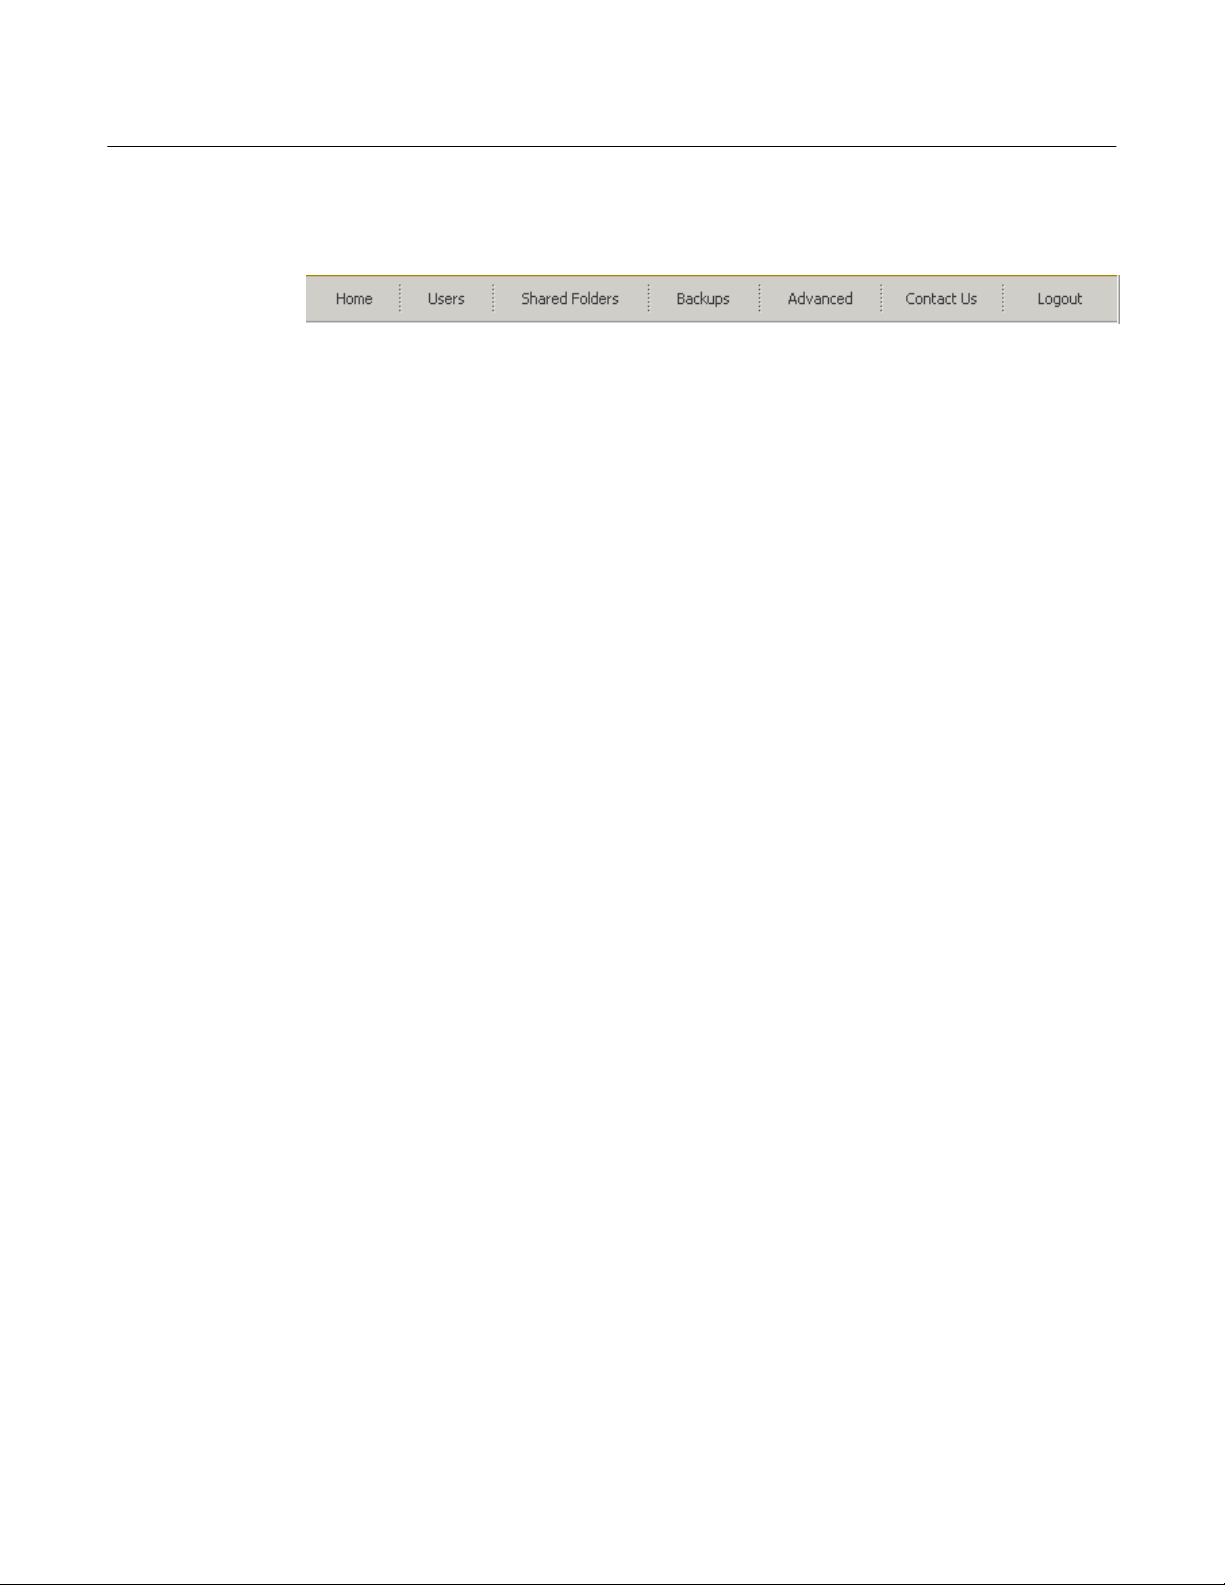
The top of the Home page (and every page in the Manager) displays a navigation
bar that lets you access all the features of the storage system:
l
Home
—Displays information about your storage system, including how the
storage
informa
l
Users
authentication
add,
using
Linux
authentication
space is being used and which users are connected. For more
t
ion, refer to “Viewing information about your storage system”
—Displays a list of all currently configured users.
mode, you can add, modify, and remove all types of users, and
modify, and remove groups of Windows and Mac OS X users.
Active Directory authentication mode, you can add, modify, and remove
users and other Mac users. You can also use this page to change the
mode.
If
you’re using local
If
you’re
For more information, refer to “Adding users”, “Managing users”, and “Changing
l
Shared Folders
ts
you add shared folders, change which users can access them, and remove
le
them
.
—Displays a list of all currently configured shared folders and
For more information, refer to “Creating shared folders” and
“Managing shared folders”.
l
the authentication mode”.
Backups
le
ts
you change the recovery password, delete backups or a backup client, and
change information related to booting remotely
—Displays a list of all computer disk backups that currently exist and
.
For more information, refer to “Managing backups” and Chapter 5, "Protecting
Local Disks.”
l
Advanced
—Provides access to advanced storage system configuration
options, such as setting up e-mail alerts; upgrading the firmware; removing USB
devices;
informa
system
For more information, refer to Chapter 3, "Managing Your Storage System,"
l
Contact Us
services
l
Log Out
changing the system, network, or disk configuration settings; viewing
t
ion about the system status or system events; and shutting down the
remotely
.
—Provides information about FalconStor and the other products and
it
offers.
—Logs you out of the Manager
.
23
Altos easyStore Manual 23
Page 31

Chapter
View
2
ing
information about your storage system
The Home page can display two different views: Storage Status and Connection
Status
the
l
.
You can switch from one view to the other by clicking the desired button on
Home page.
Storage Status
storage
—Displays information about the total storage capacity on the
system, how much disk space is allocated for shared folders, how much
is currently used by backups, and how much is available for either. (Initially
there is no used backup space. The information on this page changes as each
ter
compu
refresh
backs up
the browser window to reflect these changes.)
This page also indicates how much of the storage space allocated for shared
folders
networked
on
is
actually used, the total number of shared folders, and the number of
computers (backup clients) that have backed up one or more disks
the storage system.
Getting Started
its
hard disks to the storage system. You might have to
,
24
Note: The total storage capacity will be less than the total size of all your hard disks
because some of the disk space is needed for the operating system and
management
software.
In addition, the amount of used backup capacity will be greater than the total
size
of
all the disks listed on the Backups page because additional storage
space
is
needed for the data that has changed between backups
Altos easyStore Manual 24
.
Page 32

Chapter
2
Getting Started
l
Connection Status
—Displays a list of the Windows and Mac OS X users who
are currently connected to shared folders, including which shared folder they are
accessing
and when they logged on.
l
If
l
l
l
Notes:
anyone accessed a shared folder using the guest user name (which is
described
column, followed in parentheses by the computer name.
in
more detail in “Adding users”), guest displays in the Users
Due to the nature of the NFS protocol, Linux and other Mac users are not
listed
on
this page
Ongoing backup or recovery activities do not appear on this page.
.
This page indicates only that a connection with a shared folder has been
established;
files
there.
this does not necessarily mean that the user has opened any
25
Altos easyStore Manual 25
Page 33

Chapter
2
Adding users
Getting Started
Note: By defau
uses Active Directory, you might want to use Active Directory authentication
mode instead. Since all user data and all shared folder assignments are deleted
you switch from one mode to another
when
which
mode you want to use before proceeding. For more information, refer to
“Changing
In local authentication mode, by default the storage system includes a user named
guest that has a password of guest. Windows and Mac OS X users can access all
f
shared
other
olders that guest is authorized to access. However, you might want to add
users as well. For example,
that contains confidential information, you would add at least one user and
authorize that user to access that shared folder (and not authorize the guest user to
access
maximum
it). Adding a user for each individual or computer in your network provides
flexibility and security, enabling you to control exactly who can access
what information.
In addition, only Windows and Mac OS X users can use the guest user name.
there are Linux users or Mac users who aren’t using OS X in your network, you must
add users to allow those individuals to access any shared folders. (In Active
Directory authentication mode, you can add only Linux/other Mac users.)
You can add up to 128 Windows or Mac OS X users, and up to 128 Linux or other
Mac users (for a total of up to 256 users).
Note: Since each Linux/other Mac user can represent multiple users, the number
of actual users can be higher
To add a user
1
. In
the navigation bar, click Users
lt,
the storage system uses local authentication mode
the authentication mode”
if
.
:
. If
your site
, it is
recommended that you decide
you want to restrict access to a shared folder
.
If
26
Altos easyStore Manual 26
Page 34

Chapter
2
The Users & Computers page displays:
2. Click Add
3
.
Select the type of user that you want to add, and then click Next
.
The operating system used by the user determines which option you should
choose—
l
Windows/Mac OS X user (CIFS) or Linux/Other Mac user (NFS)
Notes:
Linux users and Mac users who are not using OS X access shared folders
using
the Network File System (NFS). In this environment, access to shared
f
olders is given to entire computers, not to individual users o
those computers. However, in Windows and Mac OS X environments,
each computer user can have individual access to a shared folder
l
If
your storage system uses Active Directory authentication mode, you
can
add only Linux/other Mac users.
Getting Started
.
.
f
.
27
Altos easyStore Manual 27
Page 35

Chapter
2
Getting Started
The page that displays next varies, depending on the user type you selected.
Windows/Mac OS X user (CIFS)
Linux/Other Mac user (NFS)
28
Altos easyStore Manual 28
Page 36

Chapter
2
Getting Started
4
.
Enter the requested user information and click Done
For this type of user Do this
Windows/Mac OS X
user (CIFS)
Enter the user name and password for accessing the shared
folders.
(You must enter the password a second time to confirm it.)
:
The user name can be up to 20 characters long and can include
letters
and numbers. It cannot begin with a period, contain
spaces
/ \ [ ] : ; | = , + * ? < > @ "
The password can be up to 24 characters long.
or a
double period, or contain the following characters:
' # ~ ` % $
Note: If the user name and password that you specify here are
the
same as the person’s Windows user name and password,
the
person will not be prompted to provide a user name and
password
when accessing the shared folder.
Enter a computer description and the IP address or computer
Linux/other Mac user
(NFS)
the person’s computer.
The Computer description can be the name of the person
who
typically uses the computer, or any other description that
you
want to provide to identify the computer in the Users list.
This
description can be up to 15 characters long. It cannot
contain
the following characters: / \ [ ] : ; | = , + * ? < > @ "
name
of
The IP address or computer name is the IP address or the
actual
computer name in the computer's system configuration.
The
computer name cannot contain spaces or the following
characters:
/\ [ ] : ; | = , + * ? < > @ "
Note: You can create a single user that actually represents
multiple
box,
range
include
client.
domain
used
computers. In the IP address or computer name text
you can use the wildcard characters * and ? to indicate a
of
names. For example, client* or client? would
all computers in the subnet whose name begins with
*.company.com would include all computers in the
company.com. However, these wildcards cannot be
with IP addresses.
The specified user name and type displays in the list on the Users &
Computers page.
5
.
Repeat steps 2 through 4 until you have added all the users that you want to
add
at
this time. (You can always add more users later.)
If
you’d like to put Windows/Mac OS X users into groups, refer to “Working with
groups.”
'
29
Altos easyStore Manual 29
Page 37

Chapter
2
Creating shared folders
By default, the storage system includes a shared folder named public. In local
authentication
create,
or their access rights as described in “Assigning users to shared folders” on
page 55). In Active Directory authentication mode, you must manually assign users
to this folder in order to provide them with access.
You can create other shared folders as well. For example, in an office environment,
you
only view, and separate shared folders for confidential business files that only
selected
you
videos,
You can create up to 128 shared folders. Users who can access and write to these
shared
there.
To create a shared folder:
1
modify, or delete files there (unless you change the list of authorized users
might want to create a shared folder for company policies that everyone can
individuals or departments can view or change. In a home environment,
might want to create separate folders for different types of files, like photos,
or
music.
f
olders can create additional sub-folders for organizing the files they store
. In
the navigation bar, click Shared Folders
The Shared
Note: The Shared folders list includes usbdisk1 and usbdisk2
whether or
Getting Started
mode, all users are automatically assigned to this folder and can
.
Fold
ers page displays:
not
any USB disks have been connected to the storage system.
,
30
Altos easyStore Manual 30
Page 38

Chapter
2
2. Click Add
Getting Started
.
3
. In
the Shared folder name text box, enter a unique name for the shared folder
and then click Next
.
,
This name can be up to 64 characters long and can contain letters, numbers,
hyphens,
double period or the following characters:
The page that displays next varies, depending on the user type you selected.
4
.
Select either the CIFS, NFS or GROUP tabs, check the Assign box for the user
and
For any shared folder or USB disk, you can specify which users can access
and what level of access they have.
underlines, and spaces.
It
cannot begin with a period or contain a
/ \ [ ] : ; | = , + * ? < > @ " ' # ~ ` % $.
select the radio button for either RO (read only) or RW (read/write) access.
it
.
To do this
Allow selected users to
access
folder
to
the shared
or
USB disk
Do this
Click the check box next to the user(s) name and change
Users with read-only access can only view the files in the
If you wish to cancel the selection, click the check box
their
access,
shared
add,
modify, and delete folders and files in the shared
resource.
again
to
resource; users with read/write access can view,
remove the check.
31
Altos easyStore Manual 31
Page 39

Chapter
2
Getting Started
For any shared folder or USB disk, you can specify which users can access
what level of access they have.
it
and
When you add a user to the list of authorized users for a shared folder or USB disk,
tha
t
change takes effect immediately. However
authorized
ake effect until that user disconnects from the shared folder or USB disk, or shuts
t
down
users, or
the computer
if
you change the user’s access rights, the change does no
.
, if
you remove a user from the list of
t
For example, the user Alice might have read/write access to the Budget shared
folder
. If
Alice is currently connected to that shared folder and you subsequently
remove her from the list of authorized users or change her access level to read-only
,
she will continue to have read/write access to that folder until she disconnects or shuts
down her computer. The next time she connects, she will either not have
access (if she was removed from the list of authorized users), or she will be able to
view the files there (if her access level was changed).
only
Note: Linux users and Mac users who are not using OS X access shared
folders using NFS. In this environment, access to shared folders is given to
entire
Windows
ual
Note:
perform this step with the Group Tab
This tab will display all groups. For example,
Group1,
will
Select Group1 and click RO (
access.
select
would
read/write
5
.
When finished, click Apply
Note: You can also click Cancel to negate the shared folder assignments or
Reset the current shared folder
computers, not to individual users of those computers. However, in
and Mac OS X environments, each computer user can have individ-
access to a shared folder
If
you created groups (as described in “Adding a group”), you can
.
.
if
you created a group named
and added User2 and User3 to that group, by default
be
assigned the access to the shared folder.
Read-Only).
This allows you to specify unique access rights for those users. You could
User3 and click RW (Read/Write).
have read-only access to the shared folder except User3, who would have
access to it.
User2 and User3 are not assigned the
This would mean that everyone in Group1
,
none of them
.
32
Altos easyStore Manual 32
Page 40

Chapter
2
Managing shared folders
When you click Shared Folders in the navigation bar, the page displays a list of
shared
an item in the Shared folders list, the users and groups that can access that item
display
an @ symbol.)
resources, including both shared folders and USB devices. When you select
in
the Users with access list. (For groups, the group name is preceded by
Getting Started
By default, the storage system includes a shared folder named public. In local
authentication
modify, or delete files there. (You change the list of authorized users or their access
rights). In Active Directory authentication mode, you must manually assign users to
this folder in order to provide them with access.
The Shared folders list also includes usbdisk1 and usbdisk2, whether or not any
USB disks have been connected to the storage system.
You can create additional shared folders and delete them at any time. For both
shared
what
Deleting a shared folder
Once you have created a shared folder, you can delete
delete
disconnected
mode, all users are automatically assigned to this folder and can create,
f
olders and USB disks, you can change which users can access them and
they can do with the subfolders and files there.
a
shared folder, any users who are currently accessing
from
it.
Caution: Deleting a shared folder deletes all the subfolders and files in that
shared folder
shared
items.
. If
you want to delete only selected subfolders or files, access the
folder (as described in “Accessing shared folders”) and delete the desired
it at
any time. When you
it
are immediately
33
Altos easyStore Manual 33
Page 41

Chapter
2
Getting Started
Notes:
l
l
You cannot delete the public folder
.
You cannot delete the contents of a USB disk using the Shared
page.
Fol
To remove the USB disk from the storage system, use the Manager to disconnect
it
.Then physically unplug the USB disk from the storage system.
Even after you physically unplug the USB disk,
ers
list. This ensures that you don
nec
t the
USB disk
To delete a shared folder:
1
. In
the navigation bar, click Shared Folders
2
. In
the Shared folders list, select the shared folder that you want to delete.
3. Click Delete
4
.
When prompted to confirm the deletion, click OK
.
.
’t
have to re-assign users
it
remains in the Shared fold-
if
you later recon-
.
.
The shared folder no longer displays in the Shared folders list, and all
associated
subfolders and files are deleted.
ders
34
Altos easyStore Manual 34
Page 42

Chapter
Assign
2
ing
users to shared folders
1
. In
2
. In
access
3.
Click Assign Access,
access
Getting Started
the navigation bar, click Shared Folders
.
the Shared folders list, select the shared folder or USB disk whose user
you want to change.
select the user that you want to assign and change the
leve
l.
Although you can choose only one user type at a time, you can assign both
types
of
users to the same shared folder
.:
4
.
When finished, click Apply then OK
.
5
. To
assign users of a different type, repeat this procedure, selecting the other
user
type in step 3.
35
Altos easyStore Manual 35
Page 43

3
Managing Your Storage
System
The Web-based storage system Manager enables you perform a number o
help you get the most from your storage system:
l
Managing users—Add, modify, or remove users; put users into groups; or
change
l
Managing shared folders—Create shared folders, rename existing shared
the authentication mode.
folders, change which users can access existing shared folders or their access
or
l
Managing backups—View which computer disks are backed up, change the
password
or delete a backup or backup client.
rights,
l
Setting up e-mail alerts—Specify whether or not e-mail notifications should be
sent
l
Upgrading the firmware—Upgrade your storage system firmware to the latest
version.
l
Disconnecting USB devices—If you’re using optional USB devices, you must
disconnect
l
Changing the system settings—Change the storage system name or time and
date
Manager
l
Changing the network settings—Change the workgroup name, the storage
system’s
allow
l
Reconfiguring your storage system disks—Change the proportions of your
storage
your
l
Viewing system status information—See details about CPU and memory usage,
how
l
Logging out of the Manager—Log out of the Manager so that no one else can
use
l
Shutting down the storage system—Shut down the storage system using the
delete shared folders that you no longer want to keep
for recovering a backup, specify which backup to remotely boot from,
when a problem occurs, and who should receive the notifications.
them using the Manager before you physically unplug them.
settings, as well as the user name or password for logging in to the
.
IP
address, the gateway or DNS server settings, or the settings that
the storage system to act as a DHCP server or FTP server
system that are allocated to shared folders and backups, or change
disk configuration.
long the storage system has been running, disk temperatures, etc.
your computer to make changes to the storage system
.
.
Manager rather than pushing the power button on the storage system manually
f t
asks to
.
.
36
Altos easyStore Manual 36
Page 44

Chapter
3
Managing users
When you click Users in the navigation bar, the Users & Computers page displays.
This
as well as all Linux and other Mac computers. (In this guide, the term user refers to
both
By default, the storage server uses local authentication mode, which means that
you can add, modify, or remove all types of users at any time.
Directory
users,
Active Directory server. (For more information about authentication modes, refer to
Adding users
“Changing the authentication mode.”)
If
users
shared
group
corporate
(such as Sales or HR) and give those groups read/write access to shared folders
with information specifically for those groups (such as expense reports or company
benefits).
Directory
groups
To add a user, refer to “Adding users”
Managing Your Storage System
page displays a list of all currently configured Windows and Mac OS X users,
individuals and computers.)
authentication mode, you can add, modify, or remove Linux or other Mac
but not Windows users. All Windows users are controlled entirely by the
If
you’re using Active
you’re using local authentication mode, you can also put Windows and Mac OS X
into groups. This makes it easier to give several users access to the same
f
older at once. For example, in an office environment, you might create one
for all users and give that group read-only access to a shared folder with
policies. You might then create separate groups for each departmen
Each user can be a member of multiple groups.
authentication mode, you cannot create groups using the Manager. All
are controlled entirely by the Active Directory server.)
.
(If
you’re using Active
t
37
Altos easyStore Manual 37
Page 45

Chapter
3
Modifying users
Managing Your Storage System
In local authentication mode, for Windows and Mac OS X users you can change the
password used to access the shared folders, but not the user name. This change
will not affect current connections, but will take effect the next time the person tries
to connect to a shared folder. (In Active Directory authentication mode, you canno
modify Windows/Mac OS X users, only Linux/other Mac users.)
For Linux and other Mac users, you can change the
bu
t
not the computer description. Changing this information immediately
disconnects that computer from the shared folders.
Note: To change the user name or computer description, you must remove the
existing
user as described in “Removing users”, and then add a new
IP
address or computer name,
user with the desired name or description as described in “Adding users”
To modify a user:
1
. In
the navigation bar, click Users
2
.
Select the radio button next to the user that you want to modify
3. Click Edit
.
Note:
.
If
the storage system uses Active Directory authentication mode
.
and you select a Windows/Mac OS X user, this button displays dimmed.
t
38
Altos easyStore Manual 38
Page 46

Chapter
3
Managing Your Storage System
The page that displays next varies, depending on the type of user you selected
Windows/Mac OS X user (CIFS)
Linux/Other Mac user (NFS)
.
39
Altos easyStore Manual 39
Page 47

Chapter
3
Removing users
Managing Your Storage System
4
.
Make the desired change and click OK
For this type of user Do this
Windows/Mac OS X
user (CIFS)
Linux/Other Mac
user
(NFS)
Enter the password for accessing the shared folders. (You must
Note: If the user name and password specified here are the
Enter the computer’s IP address or the actual computer name
A single user can actually represent multiple computers. In the
Note: If the user is currently connected to a shared folder,
enter
the password a second time to confirm it.)
same
as
the person’s Windows user name and password, the
person
password
in
IP address or computer name text box, you can use the
wildcard
example,
the subnet whose name begins with client.
would include all computers in the domain company.com.
However, these wildcards cannot be used with IP addresses.
changing
will not be prompted to provide a user name and
when accessing the shared folders.
the computer's system configuration.
characters * and ? to indicate a range of names. For
client* or client? would include all computers in
this information will disconnect the user.
:
*.company.com
In local authentication mode, you can remove any user except the guest user. In
Active Directory authentication mode, you an remove any Linux user or any Mac
user not running Mac OS
Those can be removed only on the Active Directory server
If
you remove a user who is currently connected to the storage system, that user
remains
computer
To remove a user:
1
2
connected until the user disconnects from the shared folder or shuts down the
.
. In
the navigation bar, click Users
.
Select the radio button next to the user that you want to remove.
3. Click Remove
Note:
If
X,
but you cannot remove any Windows/Mac OS X user
.
.
.
the storage system uses Active Directory authentication mode
and you select a Windows/Mac OS X user, this button displays dimmed.
4
.
When prompted to confirm the removal, click OK
The user no longer displays in the list on the Users page.
.
.
40
Altos easyStore Manual 40
Page 48

Chapter
3
Working with groups
Adding a group
Managing Your Storage System
Windows and Mac OS X users can be put into groups, which makes
several
users access to the same shared folder at once.
it
easier to give
When you click Users in the navigation bar and click Groups in the left pane, the
page
displays a list of all currently configured groups. When you select a group in
the
Groups list, the members of that group appear in the adjacent Members lis
If
you’re using local authentication mode, you can add a group, modify the group
membership,
authentication
remove
or
remove groups at any time.
mode, you can view the group membership but not add, modify, or
groups. Those actions can be done only on the Active Directory server
If
you’re using Active Directory
t.
.
In local authentication mode, when you create a group, you typically specify which
users
should be members of that group, although you can create an empty group and
add users later. (You must add users as described in “Adding
add those users to a group.)
users” before you can
Each user can be a member of multiple groups. For example, the user Alice might be
a member of both the Marketing and Executives groups.
You can create up to 128 groups
.
41
To add a group
1
. In
the navigation bar, click Users
2
. In
the le
:
ft
pane, click Groups
.
.
Altos easyStore Manual 41
Page 49

Chapter
3
Managing Your Storage System
3. Click Add
.
Note:
If
button displays dimmed
4
. In
the Group name text box, enter a unique name for the group.
the storage system uses Active Directory authentication mode, this
.
This name can be up to 15 characters long and can include letters, numbers,
hyphens,
double
/ \ [ ] : ; |
5
.
Specify which users should belong to this group, and then click OK
To do this
Add all users to the
group
Add selected users to
the
Remove all users from
the
Remove selected users
from
and underlines
period, or contain the following characters:
=
, + * ? < > @ " ' # ~ ` % $
. It
cannot begin with a period, contain spaces or a
Do this
Click Add All Users.
All users move from the Available users list to the Group
members
list.
In the Available users list, select the user(s) that you want
to
group
add and then click Add Selected User(s)
Click Remove All Users.
group
All users move from the Group members list to the
Available users list.
In the Group members list, select the user(s) that you want
to
the group
remove from the group and then click Remove Selected
User(s)
a
.
:
a
.
42
Altos easyStore Manual 42
Page 50

Chapter
3
Managing Your Storage System
a. To select multiple, contiguous users, hold down the Shift key and select the first user,
then select the last user. All users between the first and last selected
user are selected.
To select multiple, non-contiguous users, hold down the Ctrl key as you select each
user.
1
.
Changing the group membership
In local authentication mode, you can change which users are members of each
group
at
any time. When you add a user to a group, that user immediately has
access
you remove a user from a group, the change does no
disconnects
For example, the user Alice might be a member of both the Marketing and
Executives groups. The Marketing group might have read-only access to the
to
all the shared folders that the group is authorized to access. However
t t
ake effect until that user
from the shared folder or shuts down the computer
.
, if
Budget shared folder, while the Executives group might have read/write access. As
a member of the Executives group, Alice would have read/write access to that
f
older
. If
shared
subsequently
read/write
The next time she connects, she will continue to have access to the shared folder
Alice is currently connected to that shared folder and you
remove her from the Executives group, she will continue to have
access to that folder until she disconnects or shuts down her computer
.
(since she is still a member of the Marketing group), but she will be able to only view
files there; she will not be able to add, modify, or delete any files.
the
To change the group membership:
1
. In
the navigation bar, click Users
2
. In
the le
ft
pane, click Groups
3
. In
the Groups list, select the group whose membership you want to change
.
.
.
43
Altos easyStore Manual 43
Page 51

Chapter
3
Managing Your Storage System
4. Click Edit
Note:
button displays dimmed
5
.
Specify which users should belong to this group, and then click OK
To do this
Add all users to the
group
Add selected users to
the
group
Remove all users from
the
group
Remove selected users
from
.
If
the storage system uses Active Directory authentication mode, this
the group
.
Do this
Click Add All Users.
In the Available users list, select the user(s) that you want
to
add and then click Add Selected User(s)
.
Click Remove All Users.
In the Group members list, select the user(s) that you want
to
remove from the group and then click Remove Selected
User(s)
a
.
a. To select multiple, contiguous users, hold down the Shift key and select the first user,
then select the last user. All users between the first and last selected
user are selected.
To select multiple, non-contiguous users, hold down the Ctrl key as you select each
user.
The selected users move from one list to the other
.
On the Groups page, when you select this group in the Groups list, the
adjacent
Members list immediately reflects the changes you just made.
:
a
44
Altos easyStore Manual 44
Page 52

Chapter
3
Removing a group
Chang
ing
the authenticat
Managing Your Storage System
In local authentication mode, removing a group does not remove the users that are
members of that group;
it
simply means that the group will no longer appear in the
Groups list on the Groups page. The users remain listed on the Users &
Computers
page. (In Active Directory authentication mode, you cannot remove a
group on the storage system. That can be done only on the Active Directory server.)
However, removing a group can affect access to shared folders. When you remove
a group, the members of that group will no longer have access to any shared folders
t
the group was authorized to access unless they were granted individual access
tha
as well.
For example, the Executives group might include Alice, Bob, and Carlos, and that
group
might have read/write access to the Budget shared folder
Executives
any
access to that shared folder
On the other hand,
group, Alice, Bob, and Carlos remain users, but they will no longer have
if
the Executives group had read/write access to the Budget shared
.
. If
you remove the
folder, but Alice had read-only access, when you remove the group, Bob and Carlos will
no longer have access to the Budget shared folder (since their access rights were
determined by their group membership), but Alice will continue to have read-only
access, since that access right was granted to her on a user level.
To remove a group
1
. In
the navigation bar, click Users
2
. In
the le
3
. In
the Groups list, select the group that you want to remove
4. Click Remove
Note:
this button displays dimmed
5
.
When prompted to confirm the removal, click OK
The group no longer displays in the Groups lis
ion
mode
Your storage system can operate in one of two modes:
l
Local authentication mode
l
Active Directory authentication mode
:
ft
pane, click Groups
.
If
the storage system uses Active Directory authentication mode,
.
.
.
.
t.
.
45
Altos easyStore Manual 45
Page 53

Chapter
3
Managing Your Storage System
In local authentication mode, the storage system authenticates all users who try to
connect to shared folders, and you can add, modify, or remove all types of users
(bo
th
Windows/Mac OS X and Linux/other Mac users). By defau
system
uses local authentication mode.
lt, the
storage
In Active Directory authentication mode, the Active Directory server authenticates
all Windows users who try to connect to shared folders. You can add, modify, or
remove
create
Directory
l
l
If
Linux /other Mac users, but not Windows users. In addition, you cannot
groups. All Windows users and groups are controlled entirely by the Active
server
.
Notes:
The authentication mode has no effect on backups performed using DiskSafe
Express.
you use Active Directory authentication mode, the User must change
password
at
next
logon
check box must be cleared in the properties for
each user on the Active Directory server who will be accessing shared folders on
the storage system. In addition, each user’s password can be no longer
than 24 characters.
l
If
you use Active Directory authentication mode, you must add any Mac OS X
users
to
your Active Directory server in order to provide those users with access
to shared folders on the storage system.
l
Active Directory authentication mode does not automatically include a guest
l
If
accoun
Active
system
will
t.
However, the Active Directory administrator can create one on the
Directory server
you use Active Directory authentication mode, and the clocks of the storage
and the Active Directory server differ by more than five minutes, errors
occur whenever the storage system tries to connect to the Active
.
Directory server (that is, when you set the authentication mode, when
synchronization
shared
f
olders). You must adjust the storage system time, time zone, or both
between the two systems occurs, and when users access
to ensure that they match (as described in “Changing the system settings”).
Even
if the
zone
server
the
time zone and time on the storage system. For example,
storage system and Active Directory server are in the same time
and have the same time, errors might still occur
adjusts for daylight savings
ti
me. In this case, you must change both
if
the Active Directory
if
the Active
Directory server time is 2:00 P.M. in the Central Time zone (GMT-06:00), you
set
would
then set the time to match the Active Directory server (14:00).
the storage system time zone to Eastern Time (GMT-05:00) and
If
you do this,
do not synchronize the storage system with an NTP server, as the time will be
readjusted
based on the time zone
.
46
Altos easyStore Manual 46
Page 54

Chapter
3
Managing Your Storage System
You can change the authentication mode at any time, but you must provide the
administrator password to do so.
Caution: Changing the authentication mode deletes all your existing user data
and shared folder assignments. However
, if
any users are currently accessing
shared folders, they will remain connected until they disconnect from the shared
folders
To change the authentication mode:
1
2
3
4. Click Change Authentication Mode
or
shut down their computer
.
. In
the navigation bar, click Users
. In
the le
ft
pane, click Authentication Mode
The Authenticat
. In
the Administrator password text box, enter the password for accessing the
storage
system.
ion
Mode page displays the current authentication mode.
.
.
.
The Authenticat
ion
Mode page displays.
47
Altos easyStore Manual 47
Page 55

Chapter
3
Managing Your Storage System
5
. If
you’re currently using Active Directory authentication mode, Local
authentication mode is selected by automatically, and Active Directory
authentication
user assignments are deleted, and you can add new users (as described in
and
“Adding
users”) and assign them to shared folders (as described in “Assigning
users to shared folders”).
If
you’re currently using local authentication mode, Active Directory
authentication
mode displays dimmed. Click Finish. All your existing user data
mode is selected automatically, and Local authenticat
mode displays dimmed. Click Next. The Active Directory Server page
displays
6
. In
Active Directory server. (You cannot use the server’s name.)
7
. If
Secondary server
This
.
the Primary server
desired, enter the
IP
server will be used
IP
address text box, enter the
IP
address of your primary
IP
address of a secondary Active Directory server in the
address text box. (You cannot use the server’s name.)
if
the primary Active Directory server is not available
The secondary server must be in the same domain as the primary server
8. Click Next
The Active Directory User
.
Login
page displays.
ion
.
.
48
Altos easyStore Manual 48
Page 56

Chapter
3
Managing Your Storage System
9
. In
the User name text box, enter the name of a user who has privileges to
access the Active Directory tree
.
When accessing the Active Directory server, this name will be appended with
the
10
. In the
name.
11
. If
and
fully qualified domain name shown on this page.
Password text box, enter the password associated with the specified user
you want to specify the name of the organizational un
groups that will be able to access shared folders on the storage system,
it
that contains the users
enter the name in the Organizational unit name text box (up to 256
characters).
must
be
For example,
organizational un
organizational
If
you om
Directory tree on the next page. However
subunits, you must specify an organizational unit name.
When you click Next, the Active Directory Tree page displays.
This unit must not have more than 100 subunits, and the name
preceded by a forward slash (as in /Sales).
Note: The name of the organizational un
if
the name is Sales/Marketing, you must either specify a different
it
name, leave the name blank, or change the name of the
unit on
it an
organizational un
the Active Directory server
it
name here, you can browse the Active
, if
the tree has more than 100
it it
self cannot contain a slash.
.
49
Altos easyStore Manual 49
Page 57

Chapter
3
Managing Your Storage System
Note:
If
more than five minutes, an error message displays. You must adjust the
storage
described
Even
zone
server
the
time zone and time on the storage system. For example,
the storage system time and Active Directory server time differ by
system time, time zone, or both to ensure that they match (as
in
“Changing the system settings”).
if the
storage system and Active Directory server are in the same time
and have the same time, errors might still occur
adjusts for daylight savings
ti
me. In this case, you must change both
if
the Active Directory
if
the Active
Directory server time is 2:00 P.M. in the Central Time zone (GMT-06:00), you
set
would
then set the time to match the Active Directory server (14:00).
the storage system time zone to Eastern Time (GMT-05:00) and
If
you do this, do
not synchronize the storage system with an NTP server, as the time will be
readjusted based on the time zone
.
12. Select the organizational units that contain the users or groups that will be
allowed to access the shared folders on the storage system, and then click
Next
.
You must select at least one organizational unit. Selecting the forward slash
mark
(/) selects everyone in the tree.
Note: Your storage system supports only 128 users and 128 groups.
the selected organizational unit exceeds these maximums, the excess users or
groups will not be added to the storage system.
The Active Directory Administrator
13
. In
the User name text box, enter an administrator user name for accessing the
Active Directory server
.
Login
page displays.
This account will be used to automatically configure the Active Directory server
to allow the storage system to become a trusted member and communicate
directly
14
. In the
name,
with that server
Password text box, enter the password associated with the specified user
and then click Finish
. It is
used only when setting up this relationship.
.
If
50
Altos easyStore Manual 50
Page 58

Chapter
3
Managing Your Storage System
All the current users and groups associated with the selected organizational unit
are imported into the storage system and appear on the Users & Computers
and Groups pages.
At
this point, you can assign these users and groups to
shared folders (as described in “Assigning users to shared folders”).
Modifying
the Active Directory properties
If
your storage system is currently using Active Directory authentication mode, an
em called Active Directory Properties displays in the left pane when you click
it
Users in the navigation bar. When you click this item, you can change the
address of your primary or secondary Active Directory server, the user name or
password
system
for browsing the Active Directory tree, and how frequently the storage
should synchronize with the Active Directory server
To modify the Active Directory properties:
1
. In
the navigation bar, click Users
2
. In
the le
ft
pane, click Authentication Directory Properties
This item displays only
mode.
Mode
To
determine which mode you’re currently using, click Authentication
in
the left pane and observe the mode specified in the right pane.
When you click Authentication Directory Properties, the Update
Authentication Mode page displays.
IP
.
.
.
if
you are currently using Active Directory authentication
51
Altos easyStore Manual 51
Page 59

Chapter
3
3
.
Make the desired changes,
To change this
The IP address of the
primary
server
Active Directory
The IP address of the
secondary
server
Active Directory
The user name or password
for
browsing the Active
Directory
tree
The number of minutes
between
synchronizations
Synchronizing the storage system and Active Directory server
By defau
Active
described
If
you add a new user or group to the Active Directory server and don’t want to wait
until
you can synchronize the storage system and Active Directory server immediately
You should also do this
and
To synchronize the storage system and Active Directory server:
lt,
the storage system obtains information about users and groups from the
Directory server every 30 minutes, and you can change this value (as
in
“Modifying the Active Directory properties”).
the next synchronization before assigning that user or group to a shared folder
if a
the user can no longer access shared folders on the storage system.
if
any, and click Apply
Do this
In the Primary server IP address text box, enter the IP
address
cannot
Note: The new server must reside in the same domain
as
the original server. To change domains, you must
switch
switch to Active Directory authentication mode again (as
described
In the Secondary server IP address text box, enter the
IP
address of your secondary Active Directory server.
(You
Note: The secondary server must reside in the same
domain
In the User name text box, enter the name of a user who
has
privileges to access the Active Directory tree.
In the Password text box, enter the password
associated
This user name and password will be used to obtain new
user
server
In the Synchronization interval (minutes) text box,
enter
synchronizations.
If this interval is too short, network traffic might be
adversely
whose
problems
user’s password changed on the Active Directory server
Managing Your Storage System
:
of
your primary Active Directory server. (You
use the server’s name.)
back to local authentication mode and then
in
“Changing the authentication mode”).
cannot use the server’s name.)
as
the primary server.
with that user name.
and group information from the Active Directory
at
every synchronization.
the number of minutes that should elapse between
affected. If this interval is too long, users
passwords have changed might experience
accessing shared folders.
,
.
52
Altos easyStore Manual 52
Page 60

Chapter
3
1
. In
the navigation bar, click Users
2
. In
the le
ft
pane, click either Users & Computers or Groups
3. Click Synchronize
.
.
The page displays the progress of the synchronization.
l
l
If
Notes:
Your storage system supports only 128 users and 128 groups
selected
exceeds
to the storage system.
organizational unit on your Active Directory server currently
these maximums, the excess users or groups will not be added
the clocks of the storage system and the Active Directory server differ by
more
than five minutes, errors will occur when the two systems synchronize.
You must adjust the storage system time, time zone, or both
to ensure that they match (as described in “Changing the system settings”).
Even
if the
storage system and Active Directory server are in the same time
zone and have the same time, errors might still occur
server adjusts for daylight savings time. In this case, you must change both
the time zone and time on the storage system. For example
if
the Active Directory server time is 2:00 P.M. in the Central Time zone
(GMT-06:00),
Time
(GMT-05:00) and then set the time to match the Active Directory
server (14:00).
you would set the storage system time zone to Eastern
If
you do this, do not synchronize the storage system with an
NTP server, as the time will be readjusted based on the time zone
Managing Your Storage System
.
. If
the
if
the Active Directory
,
.
53
Altos easyStore Manual 53
Page 61

Chapter
3
Managing shared folders
When you click Shared Folders in the navigation bar, the page displays a list of
shared
an item in the Shared folders list, the users and groups that can access that item
appear
an @ symbol.)
By default, the storage system includes a shared folder named public. In local
authentication
modify, or delete files there. (You change the list of authorized users or their access
rights). In Active Directory authentication mode, you must manually assign users to
this folder in order to provide them with access.
The Shared folders list also includes usbdisk1 and usbdisk2, whether or not any
USB disks have been connected to the storage system.
You can create additional shared folders and delete them at any time. For both
shared
what
Creating shared folders
To create a shared folder, refer to “Creating shared folders”
resources, including both shared folders and USB devices. When you select
in
the Users with access list. (For groups, the group name is preceded by
f
olders and USB disks, you can change which users can access them and
they can do with the subfolders and files there.
Managing Your Storage System
mode, all users are automatically assigned to this folder and can create,
54
Altos easyStore Manual 54
Page 62

Chapter
Assign
3
ing
users to shared folders
For any shared folder or USB disk, you can specify which users can access
what
level of access they have.
When you add a user to the list of authorized users for a shared folder or USB disk,
tha
t
change takes effect immediately. However
authorized
t
ake effect until that user disconnects from the shared folder or USB disk, or shuts
the computer
down
For example, the user Alice might have read/write access to the Budget shared
. If
folder
remove her from the list of authorized users or change her access level to read-only
she will continue to have read/write access to that folder until she disconnects or shuts
down her computer. The next time she connects, she will either not have
access (if she was removed from the list of authorized users), or she will be able to
view the files there (if her access level was changed).
only
To change user access to shared folders and USB disks:
1
. In
2
. In
access
3. Click Assign Access
4
.
Select the type of user that you want to assign, change the access level for, or
remove
The operating system used by the user determines which option you should
choose—
shared folders using NFS. In this environment, access to shared folders is
given to
entire computers, not to individual users of those computers. However, in
Windows
individual
Although you can choose only user type at a time, you can assign both types of
users to the same shared folder
Managing Your Storage System
it
and
, if
you remove a user from the list of
users, or
if
you change the user’s access rights, the change does no
.
Alice is currently connected to that shared folder and you subsequently
the navigation bar, click Shared Folders
.
the Shared folders list, select the shared folder or USB disk whose user
you want to change.
.
,
and then click Next
.
Windows/Mac OS X user (CIFS) or Linux/Other Mac user (NFS)
Note: Linux users and Mac users who are not using OS X access
and Mac OS X environments, each computer user can have
access to a shared folder
.
.
t
,
.
55
Altos easyStore Manual 55
Page 63

Chapter
3
Managing Your Storage System
The page that displays next varies, depending on which type of user you
selected.
Windows/Mac OS X user (CIFS)
Lin
ux/Other Mac user (NFS)
56
Altos easyStore Manual 56
Page 64

Chapter
3
Managing Your Storage System
5
.
Specify which users should be able to access this shared folder or USB disk,
and then click OK
To do this
Allow selected users to
access
folder
Prevent selected users
from
shared
disk
a. To select multiple, contiguous users, hold down the Shift key and select the first user,
then select the last user. All users between the first and last selected
user are selected.
To select multiple, non-contiguous users, hold down the Ctrl key as you select each
user.
to
the shared
or
USB disk
accessing the
folder or USB
The selected users move from one list to the other
l
Notes:
To change the access level for a user, select the user in the Authorized
users
list and click Remove. Then select that user in the Unauthorized
users
list and click either Add (Read-Only) or Add (Read/Write)
:
Do this
In the Unauthorized users list, select the user(s) who
Users with read-only access can only view the files in the
In the Authorized users list, select the user(s) who should
should
be
able to access the shared resource and then
click
Add (Read-Only) or Add (Read/Write)
shared
resource; users with read/write access can view,
add,
modify, and delete folders and files in the shared
resource.
not
Remove
be
able to access the shared resource and then click
a
.
.
depending on the access level you now want the user to have.
l
If
you created groups (as described in “Adding a group”), you can perform
this step with groups as well.
This page shows all groups and all users. For example,
group
named Group1, and added User2 and User3 to that group, the
if
you created a
Unauthorized groups list includes Group1, and the Unauthorized users
list includes User2 and User3.
If
you select Group1 and click
Add (Read-Only), Group1 moves to the Authorized groups list, but
User2
and User3 do not move to the Authorized users list. This allows
you
to
specify unique access rights for those users. For example, you
could
select User3 and click Add (Read/Write). This would mean that
everyone
excep
6
. To
assign users of a different type, repeat this procedure, selecting the other
user type in step 4.
in
Group1 would have read-only access to the shared folder
t
User3, who would have read/write access to
it.
a
.
,
57
Altos easyStore Manual 57
Page 65

Chapter
3
Deleting a shared folder
Once you have created a shared folder, you can delete
delete
disconnected
To delete a shared folder:
1
2
3. Click Delete
4
Managing Your Storage System
it at
any time. When you
a
shared folder, any users who are currently accessing
from
it.
it
are immediately
Caution: Deleting a shared folder deletes all the subfolders and files in that
shared folder
. If
you want to delete only selected subfolders or files, access the
shared folder (as described in “Accessing shared folders”) and delete the desired
items.
Notes:
l
l
You cannot delete the public folder
.
You cannot delete the contents of a USB disk using the Shared
page. To delete
its
contents, you must give yourself read/write access to tha
Fol
ders
disk (as described in “Assigning users to shared folders”), access the disk (as
described in “Accessing shared folders”), and then delete the desired folders
and files.
To remove the USB disk from the storage system, use the Manager to
disconnect
physically unplug the USB disk from the storage system.
Even after you physically unplug the USB disk,
folders
reconnect
it
(as described in “Disconnecting USB devices”). Then
it
remains in the Shared
list. This ensures that you don’t have to re-assign users
the USB disk.
if
you later
. In
the navigation bar, click Shared Folders
. In
the Shared folders list, select the shared folder that you want to delete.
.
.
.
When prompted to confirm the deletion, click OK
.
The shared folder no longer displays in the Shared folders list, and all
associated
subfolders and files are deleted.
t
58
Altos easyStore Manual 58
Page 66

Chapter
3
Managing backups
Once the users have used DiskSafe Express to back up their computer hard disks
to the storage system (as described in Chapter 5, "Protecting Local Disks,"
), the Backups page displays a list of each computer that has done this, the size o
each protected disk, the date and time of all available
backups, and the backup disk ID (the number used to identify the backup on both
storage system and on the Status page in DiskSafe Express).
the
If a
user ever has to recover a disk using the recovery CD or remotely boot from a
backup
The
user had to provide this password when protecting the disk. However
user forgets
recovering a disk using the recovery CD, refer to “Recovering a system disk
using the recovery CD”. For information about booting remotely, refer
to “Recovering a system disk while booting remotely”.)
Managing Your Storage System
on
the storage system, the user will be prompted for a password to do so.
, if
it,
you can reset the password using the Manager. (For information about
f
the
59
Altos easyStore Manual 59
Page 67

Chapter
3
For booting remotely, you can also specify the MAC address to use (if you want to
remotely boot a computer using a different computer’s backup) and the backup to
Chang
ing
the recovery password
Configuring remote boot
boot
In addition, when a user removes protection for a disk, the existing backups are not
deleted
delete those backups manually using the Manager
To change the recovery password:
1
2.
3
4. Click Change Password
5
Normally, when you enable remote boot for a client computer (as described in
“Enabling
However
computer’s backup, you must change the MAC address. For example,
has been infected by a virus, and all of
to boot Computer1 from one of Computer2’s backups and recover that disk to
Computer1.
Computer2.
compu
operate properly
You can also specify which backup to remotely boot from. By default, you always
boot from the latest backup. (You can boot from an earlier backup, but no matter
which
Managing Your Storage System
from.
.
The user can re-use the allocated space for new backups, or you can
.
. In
the navigation bar, click Backups
In
Computer name list in the Recovery passwords group box, select the name
of the computer whose recovery password you want to change.
. In
the Recovery password text box, type the password to use.
This password must be 12–16 characters long.
.
It
cannot contain multi-byte
words. This means you can only enter ASCII character whose code value is less
than
128.
.
.
When the confirmation message displays, click OK
.
The user must provide this password when recovering a disk from this storage
system
storage
using the recovery CD or when remotely booting from a backup on the
system.
remote boot”), no additional action is necessary on the storage system.
, if
you want to remotely boot one computer from another
its
backups are also infected, you might want
To do
this, you must change the MAC address associated with
if
Computer1
Note:
If
you try to recover one computer from another computer’s backup, both
t
ers must have identical hardware. Otherwise, the recovered files will no
.
backup you boot from, you can recover only the latest backup.)
t
60
Altos easyStore Manual 60
Page 68

Chapter
3
Managing Your Storage System
To configure remote boo
1
. In
the navigation bar, click Backups
2
. In
the Computer name list in the Remote boot group box, select the name o
the computer whose backup you want to remotely boot from.
3
. If
you’re remotely booting the computer from
MAC address. However
t:
.
its
own backup, do not change the
, if
you’re booting a different computer from the
selected computer’s backup, enter the MAC address of the NIC of the computer
t
you want to remotely boot in the MAC address text box.
tha
Remote boot must have been previously enabled on that computer
4
.
From the Backup for booting remotely list, select the time and date of the
backup
that you want to remotely boot from.
To always boot from the most recent backup, select Latest backup
.
.
An asterisk (*) identifies the backup that will be used for booting remotely
l
l
If
5. Click Apply Boot Info
6
.
When the confirmation message displays, click OK
If
you changed the backup for booting remotely, an asterisk now displays next to
the
Notes:
You can remotely boot only from backups that were created after remote
boo
t
was enabled on the client computer
.
the selected backup is deleted to make room for newer backups, the
recent backup will be used for booting remotely
most
.
.
.
selected backup
.
f
.
61
Altos easyStore Manual 61
Page 69

Chapter
3
Deleting a backup
Deleting a client
Managing Your Storage System
You can delete all backups of a given disk, but you cannot delete just an individual
backup from a specific date and time.
Note:
If
you delete all backups of all disks for a particular computer
compu
name remains in the storage system and counts toward the total number of
compu
all backups of all disks and the computer name, refer to the next section,
“Deleting
To delete all backups of a disk:
1
2
3. Click Delete Backup
4
If
computer name, the original computer name remains on the storage system and
counts
storage
compu
To delete a client:
1
2
ter no
t
. In
the navigation bar, click Backups
.
Select the radio button adjacent to the disk whose backups you want to delete
(in the second Select column).
.
When prompted to confirm the deletion, click OK
The disk no longer displays on the Backups page, and all backup versions are
deleted
page
remove protection for that disk, when the user subsequently accesses
DiskSafe
Express, the Status page will indicate that the backup of the protected disk is
offline.
then
and “Protecting your disks”
you remove DiskSafe Express from a particular computer, or
toward the total number of computers that are allowed to back up to the
ter
. In
the navigation bar, click Backups
.
Select the radio button to the left of the computer whose backups and computer
name
longer displays on the Backups page. However, that computer
ers that are allowed to back up to the storage system.
a
client.”
. If
as
well.
Note:
To
protect the disk again. For more information, refer to “Removing protection”
system. To delete all backups of all disks for a particular computer and the
name, you must delete the client.
you want to delete from the storage system (in the first Select column).
.
only one disk was protected, the computer name disdisplays from the
If
you delete a backup and the user did not previously
back up the disk once again, the user must remove protection and
, t
If
you want to delete
.
.
.
if
you change the
.
hat
62
Altos easyStore Manual 62
Page 70

Chapter
3
3. Click Delete Client
4
.
When prompted to confirm the deletion, click OK
All backups of all disks associated with this computer are deleted, and the
compu
protection
ter
Note:
for that disk, when the user subsequently accesses DiskSafe Express, the
Status page will indicate that the backup of the protected disk is offline. To
up
back
pro
t
ect the disk again. For more information, refer to “Removing protection”
and “Protecting your disks”.
Managing Your Storage System
.
.
name is also deleted from the storage system.
If
you delete a client and the user did not previously remove
the disk once again, the user must remove protection and then
63
Altos easyStore Manual 63
Page 71

Chapter
3
Setting up e-mail alerts
The Alerts page allows you to set up the storage system to notify up to three people
via
e-mail
if a
is
space
To take advantage of this feature, you must have access to an SMTP e-mail server
either within your own network or through an Internet service provider
will be sent within five minutes of the even
within that time frame—for example,
will
To set up e-mail alerts
1
. In
available for creating new files or performing a backup:
Note: The e-mail might not be sent immediately when the problem occurs, bu
not be sent.
the navigation bar, click Advanced
problem occurs—for example,
if
you replace the disk that failed—the alert
:
.
Managing Your Storage System
if
one of the disks fails, or
t. In
addition,
if
the problem is fixed
if
insufficient
,
.
t
64
Altos easyStore Manual 64
Page 72

Chapter
3
Managing Your Storage System
2
.
Specify whether or not the storage system should send e-mail notifications when
a problem occurs by selecting or clearing the Send e-mail notifications check
box.
If
you select this option, you must provide the fully qualified domain name or
address of your e-mail server and at least one e-mail address.
If
you clear this option, e-mail notifications will not be sent, and all the related
fields
on
this page appear dimmed. However
informa
re-enable e-mail notifications later
complete
3
. In
domain
4
.
Specify whether or not your e-mail server requires authentication by selecting or
clearing
If
into
If
5
. If
(root@localhost), or
to be able to reply to the aler
return
t
ion on this page, that information is retained so that you can easily
. If
you clear this option, you do not have to
the rest of this procedure; simply click Apply
the SMTP server name or
name or
the SMTP server authentication check box.
IP
address of your e-mail server
IP
address text box, enter the fully qualified
you select this option, you must enter a user name and password for logging
that server in the User name and Password text boxes.
you clear this option, no authentication will be performed
your e-mail server cannot use the default sender e-mail address
if
you want the individuals who receive e-mail notifications
t,
enter the address that you want to appear as the
address in the Sender e-ma
il
address text box.
, if
you previously entered
.
.
For example, you could enter your own e-mail address (such as
MyName@MyCompany.com).
6
. In
the First e-mail address text box, enter the e-mail address of an individual
who
should receive e-mail notifications when a problem occurs.
.
The e-mail address can be up to 128 characters long and must include the @
symbol (for example, MyName@MyCompany.com).
7
. If
you want e-mail notifications to be sent to other individuals as well, enter the
appropriate
address
8. Click Apply
9
.
When the confirmation message displays, click OK
e-mail addresses in the Second e-ma
text boxes.
.
il
address and Third e-mail
.
IP
65
Altos easyStore Manual 65
Page 73

Chapter
3
Managing Your Storage System
10. To confirm that the configuration is correct, click Test E-ma
the confirmation message
This sends a test message to the specified recipients
test
message, make sure that all the entries on this page are correct. You might
have to modify the network settings (such as the gateway to use). For
also
informa
settings”
t
ion about changing the network settings, refer to “Changing the network
.
. If
they do not receive the
il,
and click OK on
66
Altos easyStore Manual 66
Page 74

Chapter
3
Upgrading the firmware
The Firmware page displays the current version of the firmware that is installed on
your
storage system.
available
For additional security, you must enter your administrator password in order to
upgrade
.
the firmware.
Caution:
Managing Your Storage System
It
also allows you to upgrade
it if
newer firmware becomes
l
When you upgrade the firmware, the storage system restarts. Access to the
Manager
shared
system,
close
l
Restarting the storage system when a backup is occurring will not have any
adverse
resumes
recovered can potentially corrupt the user’s operating system, and the user will
have to recover the system disk using the recovery CD (or
was not protected, re-install the operating system). Be sure to upgrade the
firmware only when recovery is not occurring.
l
If
you upgrade from version 1.0 or 1.1, the personal folders (that is, the home
is
temporarily interrupted, and users will not be able to access the
f
olders during this process.
data
might be lost. Be sure to have all users save their changes and
any open files before you upgrade the firmware.
effect; the backup will resume automatically when the storage server
operation. However, restarting the storage system when a disk is being
If
users have files open on the storage
, if
the system disk
folders) that were automatically created for each Windows or Mac OS X user
will
be
deleted
to another location before upgrading the firmware.
To upgrade the firmware:
. If
you want to retain the data in those folders, you must copy
it
1
. In
the navigation bar, click Advanced
.
2
. In
the le
ft
pane, click Firmware
.
3
. In
the Firmware file text box, enter the path and file name for the firmware
package
from
(such as D:\fs-bc - 1.2-b507.pkg), or
the displayed list.
click Browse and select the file
67
Altos easyStore Manual 67
Page 75

Chapter
3
Managing Your Storage System
4
. In
the Administrator password text box, enter the password that you use for
logging in to the Manager
5. Click Upgrade
6
. If
you are upgrading from version 1.0 or 1.1, click Continue to delete all home
.
folders and proceed with the upgrade.
7
.
When the confirmation message displays, click OK
.
.
68
Altos easyStore Manual 68
Page 76

Chapter
3
Disconnecting USB devices
The USB page displays a list of all USB devices that are currently attached to the
storage
USB
cannot
When you plug a USB device into the storage system, the storage system
automatically
click
However, when you want to unplug a USB device from the storage system, you
must first use the Manager to disconnect
potential
via the Manager, you can unplug
system, including the type of device
disks are identified by the names usbdisk1 and usbdisk2. (These names
be
changed.)
detects
Scan to update the display.)
problems with the device. Once the USB device has been disconnected
Managing Your Storage System
it
is, the manufacturer, and the name.
it
and adds that device to the USB page. (You might need to
it.
This prevents data corruption and other
it.
69
To disconnect a USB device:
1
. In
the navigation bar, click Advanced
2
. In
the le
ft
pane, click USB
3
. In
the list of USB devices, select the device(s) that you want to disconnect.
4. Click Disconnect
5
.
When the confirmation message displays, click OK
.
You can now unplug the USB device.
retain, unplug
Note:
If
you inadvertently disconnect a USB device that you want to
it
from the storage system, plug
This reactivates the USB device.
Since the USB device always remains on the Shared
assignmen
ts
are always retained.
.
.
.
it
back in, and then click Scan
.
Fol
ders page, any user
Altos easyStore Manual 69
Page 77

Chapter
3
Changing the system settings
The System page displays the settings that you specified when you initially
configured
date
In local authentication mode, you can change any of these settings at any time. In
Active
the
storage system name. You can also change the administrator name and
password to use for logging in to the Manager
the storage system, such as the storage system name, and the current
and time
Directory authentication mode, you can change any of these settings except
.
Managing Your Storage System
.
70
To change any of the system settings:
1
. In
the navigation bar, click Advanced
2
. In
the le
ft
pane, click System
.
.
Altos easyStore Manual 70
Page 78

Chapter
3
Managing Your Storage System
3
.
Make the desired changes:
To change this
Do this
The storage system name In the Storage system name text box, enter the new
name
to
use for the storage system.
This name can be up to 15 characters long and can
include
letters, numbers, and hyphens.
Note: If you change the name of the storage system, be
sure
to
also change that name in any local hosts files or
on
the DNS server in your network. The storage system
does
not register its name with your DNS server
automatically.
In Active Directory authentication mode, you cannot
The system date, time, or
time
zone
change
In the Date fields, enter or select the desired month, date,
and
the storage system name.
year.
In the Time field, enter or select the desired hour, minute,
and
second.
In the Time zone list, select the desired time zone.
Note: The storage system time does not automatically
Network Time Protocol
(NTP)
server name or IP
address
change
this,
needed.
In the NTP server name or IP address text box, enter the
name
storage
only
to
reflect daylight savings time. To accommodate
you can manually adjust the time and/or time zone as
or IP
address of the NTP server from which the
system should set its time. Yo u can use a name
if it is
resolvable.
The storage system will synchronize its time with the NTP
The administrator name
or
password
server every hour.
In the Administrator name text box, enter the user name
to
use for logging in to the Manager.
In the Password and Confirm password text boxes,
enter the password to use for logging in to the Manager. It
cannot
contain multi-byte words. This means you can only
enter
ASCII character whose code value is less than 128.
The user name and password are case-sensitive.
4. Click Apply
5
.
When the confirmation message displays, click OK
.
.
71
Altos easyStore Manual 71
Page 79

Chapter
3
Changing the network settings
The Network page displays the network settings that were set when you initially
configured
the storage system.
Managing Your Storage System
72
Altos easyStore Manual 72
Page 80

Chapter
3
Managing Your Storage System
You can change these settings at any time.
Note: Changing the IP address or subnet mask can have several effects:
l
Access to the Manager will be temporarily disrupted
Manager using a Web browser and an
new IP address. In addition
local
hosts file or DNS server, you must update the
resources.
l
Users who accessed the shared folders using the previous
disconnected
described
l
Users running DiskSafe Express must restart that application.
recovery
again.
and must access them again using the new
in
“Accessing shared folders”)
was in progress and did not complete successfully, perform the action
, if
you added the storage system’s
. If
you access the
IP
address, you will need to use the
IP
address to a
IP
address in those
IP
address will be
IP
address (as
If a
backup or
You can also configure the storage system to act as a DHCP server. In other words,
the storage system can assign
simplifying
the network configuration of each individual system.
IP
addresses to other computers in your network,
In addition, your storage system can act as an FTP server. This allows all Windows
and
Mac OS X users to use a Web browser to access the public folder. For more
t
informa
ion, refer to “Accessing shared folders using FTP”.
To change any of the network settings:
1
. In
the navigation bar, click Advanced
2
. In
the le
ft
pane, click Network
3
.
Make the desired changes:
To change this
The workgroup to
which
the storage
system
The IP address(es)
used
system
by
belongs
the storage
Do this
In the Workgroup name text box, enter the name of the
workgroup.
This name can be up to 15 characters long.
In the Port 1 group box, either select Get an IP address
automatically
server,
IP address and subnet mask in the subsequent text boxes.
If you select Get an IP address automatically and your
network
system
address
is 192.168.0.101, and the default subnet mask is
255.255.255.0).
.
or
does not have a DHCP server, or if the storage
is
and subnet mask are used. (The default IP address
.
to
obtain the IP address from your DHCP
select Use this IP address and enter the
directly attached to your computer, the default IP
73
Altos easyStore Manual 73
Page 81

Chapter
3
Managing Your Storage System
To change this
The IP address of the
gateway
Do this
If your network includes a gateway, and if the port on the
storage
obtaining
the
(This
number
system uses a specified IP address rather than
one from the DHCP server, enter the IP address of
default router in the Gateway IP address text boxes.
is
typically the same IP address as the port, with the last
being 1.)
If your network does not include a gateway, or if the port
obtains
boxes
server,
server
its IP address from the DHCP server, leave these text
blank. (If the port obtains its IP address from a DHCP
the gateway will obtain its IP address from the DHCP
as
well.)
The DNS server to use If your network includes a DNS server, and if the port on the
storage
obtaining
system uses a specified IP address rather than
one from the DHCP server, enter the primary
IP address in the Preferred DNS server text boxes and the
secondary
boxes.
IP
address in the Alternate DNS server text
If your network does not include a DNS server, or if the port
The DHCP settings
obtains
boxes
server,
DHCP
If you want to use the storage system as a DHCP server, in
the
the
its IP address from the DHCP server, leave these text
blank. (If the port obtains its IP address from a DHCP
the DNS server IP address will be obtained from the
server as well.)
Port 1 group box, select Use this IP address and enter
IP
address and subnet mask in the subsequent text boxes.
Then select the Enable DHCP server check box, enter the
beginning
and
boxes.
IP
address in the Starting IP address text boxes,
enter the last IP address in the Ending IP address text
For example, if the Starting IP address is 192.168.0.103
and
the Ending IP address is 192.168.0.107, the storage
system
192.168.0.104, 192.168.0.105, 192.168.0.106, and
will allocate the IP addresses 192.168.0.103,
192.168.0.107 to the first five computers that try to obtain
their
IP
addresses from the storage system. As soon as one of
those computers shuts down or otherwise loses its
network connection, that IP address will be assigned to the
next
computer that tries to obtain its IP address from the
storage
system.
If you do not want to use the storage system as a DHCP
server,
clear the Enable DHCP server check box. (If Get an
IP
address automatically is selected, you cannot use the
storage
system as a DHCP server.)
74
Altos easyStore Manual 74
Page 82

Chapter
3
To change this
The packet size for
transferring
data
Do this
Specify whether or not to transfer larger data packets
between
network
box.
the storage system and the computers in your
by
selecting or clearing the Jumbo Frames check
If you clear this option, the storage system will use 1514-byte
packets.
If you select this option, you can specify a larger packet size
(from 1514 to 9014 bytes).
Note: Using jumbo frames allows you to transfer data more
The FTP settings
quickly.
network,
(NICs)
specified
jumbo
components.
If you want to use the storage system as an FTP server,
select
However, you can select this option only if your
Ethernet switch, and the network interface cards
on
the computers in your network support the
packet size. To determine whether you can use
frames, refer to the documentation for those
the Enable FTP server check box.
If you do not want to use the storage system as an FTP
server, clear this option.
For information about accessing the storage system using
FTP, refer to “Accessing shared folders using FTP”.
4. Click Apply
5
.
When the confirmation message displays, click OK
Note:
.
If
you changed the
IP
now access the Manager using the new
Managing Your Storage System
.
address of the storage system, you must
IP
address.
75
Altos easyStore Manual 75
Page 83

Chapter
3
Reconfiguring your storage system disks
The Disks page displays information about all the hard disks that are currently
installed
This page includes the following details:
l
l
l
l
in
your storage system:
The disk configuration (that is, whether the disks use a linear or RAID
configuration, and the RAID level)
The overall status of the disks:
n
Normal
n
Degraded
n
Failed
—All the disks are working properly
—One or more disks have failed but all the data is still available.
—The storage system has stopped working properly
The slot where each hard disk resides
The model number, serial number, and size of each hard disk
Managing Your Storage System
.
.
76
Altos easyStore Manual 76
Page 84

Chapter
3
l
The current status of each disk:
n
Linear or RAID n
configuration.
n
New
being
n
Spare
n
Rebuild
replaced)
n
N/A
has failed)
l
The hotplug indicator:
n
RED
n
YELLOW
n
GREEN
Note: Whenever you add or remove a disk from the storage system, you must
click
For detailed information about RAIDs and how adding, removing, or swapping disks
affects the storage system, refer to Appendix B, "Disk Configurations," beginning.
You can change the disk configuration or amount of storage space that is allocated
for shared folders at any time. However, for additional security, you must enter your
administrator
Refresh to update this page
Expanding the shared storage
The disk space on your storage system is divided into two portions. One portion is for
shared folders; the other is for backups of your computer disks. The Storage
Status view on the Home page shows how much disk space is currently allocated for
shared folders, how much is used by backups, and how much is available for either
You can expand the amount of disk space allocated for shared folders (as long as
free
disk space is available), but you cannot reduce
disks
and losing all your data. Therefore,
least amount of space for shared folders until all the computer disks that you plan to
protect have been backed up to the storage system
To expand the amount of disk space allocated for shared folders:
1
. In
the navigation bar, click Advanced
2
. In
the le
Managing Your Storage System
—The disk is working properly as part of the specified
—The disk has been added to the storage system but is not currently
used.
—The disk is acting as a spare disk for the RAID.
ing
—The disk is being rebuilt (for example, when a failed disk is
—The disk is detected but not available for use (for example, when
it
—Removing the disk will cause the RAID to fail.
—Removing the disk will cause RAID degradation.
—Removing the disk will not affect the RAID.
.
password to be able to make these changes.
it
without reconfiguring your
it is
recommended that you allocate the
.
.
ft
pane, click Disks
.
.
77
Altos easyStore Manual 77
Page 85

Chapter
3
3
4. Click Expand Shared Storage
5
6. Click OK
Reconfiguring the disks
7
Managing Your Storage System
. In
the Administrator password text box, enter your password for logging in to
the Manager
.
.
The Expand Shared Storage page displays:
.
Specify how much disk space to add to the space that is currently allocated for
shared
f
olders.
To allocate all available disk space, select Add all available disk space
.
To allocate a specific amount, select Add this much disk space and enter the
desired
number of gigabytes. (The minimum is 1 GB, and the maximum is the total
amount of space currently available. You can specify only whole numbers.)
.
.
When the confirmation message displays, click OK
.
Caution: Changing the disk configuration will delete all user information and all
data on all the disks.
Before you do this, have all the users disconnect from all shared folders (as
described
disks (as described in “Removing protection”).
in
“Disconnecting from shared folders”) and remove protection from all
When you are done, you must re-add all users, create new shared folders, and
have
users once again protect their disks.
78
Altos easyStore Manual 78
Page 86

Chapter
3
Managing Your Storage System
To change the disk configuration:
1
. In
the navigation bar, click Advanced
2
. In
the le
ft
pane, click Disks
3
. In
the Administrator password text box, enter your password for logging in to
the
Manager
.
4. Click Reconfigure Disks
5
.
When the confirmation message displays, click OK
.
.
.
.
The Disk Configuration page displays. (The options that appear on this page
vary
,
depending on the number of hard disks that are currently installed in the
system.)
6
. If
each
To accept the defau
pro
you want to add or remove hard disks, do so one at a time and click Scan after
action
.
lt
disk configuration (which will provide the best level of data
t
ection available for the number of hard disks currently installed), click Next. By
default, a linear disk configuration is used for a single hard disk, RAID 1 is used for
two hard disks, and RAID 5 is used for three or four hard disks.
If
you want to change the disk configuration, select the desired RAID level and
then
click Next. (For detailed information about the different RAID levels, refer to
Appendix
B,
"Disk Configurations.")
79
Altos easyStore Manual 79
Page 87

Chapter
3
Managing Your Storage System
The Disk Space Distribution page displays:
7
. To
accept how the disk space will be proportioned for shared folders and
backups
If
you want to allocate more space for shared folders, select Allocate more space
(only 200 MB will be allocated for shared folders), click Finish
for shared folders and then specify how much space to allocate (either
available disk space or Specified disk space). If
you select Specified
disk space, enter the number of gigabytes to allocate for shared folders (the
minimum is 1 GB). Then click Finish
f
olders later (as long as free disk space is available), but you cannot reduce
without
Note: You can expand the amount of disk space allocated for shared
reconfiguring your disks and losing all your data
If
you plan to back up computer disks to your storage system, it is
recommended
back
up
space
allocated for shared folders. This ensures that adequate space is
available
8
.
When the confirmation message displays, click OK
that you use the minimum amount of space for shared folders,
all the computer disks that you plan to protect, and then expand the
for backups
.
.
.
.
.
All
it
80
Altos easyStore Manual 80
Page 88

Chapter
3
Managing Your Storage System
The screen displays the progress of the process:
When this process is complete, the storage system restarts
9
.
Close the browser window
Af
ter the system has restarted, you can access the Manager and re-create your
users
and shared folders (as described in “Adding users” and “Creating shared
folders”).
.
.
81
Altos easyStore Manual 81
Page 89

Chapter
3
Viewing system status information
When you click Advanced in the navigation bar and click System Status in the lef
pane, you can view many of the operational parameters of your storage system,
including
has been running, the current fan speed, the temperatures of the CPU and disks,
the
IP
network settings”), the
network settings of your port (several of which you can change as described in
“Changing the network settings”), the MAC addresses of your port, and the speed at
which data is being sent and received
To update the information on this page, click Refresh
CPU usage, memory usage, the amount of time that the storage system
address of the gateway (which you can change as described in “Changing the
IP
address(es) of the DNS servers in your network, the
Managing Your Storage System
t
.
.
82
Note: The fan speed changes depending on the temperature of the unit
temperature
of any of the disks reaches or exceeds 55° C (131° F), the storage system shuts
down
of
the CPU reaches or exceeds 85° C (185° F), or
automatically
if
the temperature
.
Altos easyStore Manual 82
. If
the
Page 90

Chapter
3
Logging out of the Manager
When you have finished using the Manager
ensure
To log out:
t
hat unauthorized individuals do not make changes to the storage system.
1
. In
the navigation bar, click Log Out
2
.
When the confirmation message displays, click OK
The Log Out page displays:
3
. To
log back in to the Manager later, click Log
Managing Your Storage System
, it is
recommended that you log out to
.
.
In.
83
Altos easyStore Manual 83
Page 91

Chapter
3
Shutting down the storage system
To shut down the storage system, you can press the power button on the unit
or you can shut the system down remotely using the Manager. To ensure that you
shut down the system accidentally, you must enter your administrator password
don’t
to do this.
Caution:
access the shared folders on the storage system
da
files before you shut down the storage system.
Shutting down the storage system when a backup is occurring will not have any
adverse
powered
recovered can potentially corrupt the user’s operating system, and the user will have
to recover the system disk using the recovery CD (or
protected, re-install the operating system).
To shut down the storage system using the Manager:
1
. In
2
. In
3
. In
4. Click Shut Down
If
you shut down the storage system, users will no longer be able to
ta
might be lost. Be sure to have all users save their changes and close any open
effect; the
on
again. However, shutting down the storage system when a disk is being
backup will resume automatically when the storage server is
the navigation bar, click Advanced
the le
ft
pane, click Shut Down
the Administrator password text box, enter the password for logging in to
the
Manager
.
.
A message displays, indicating that the system is shutting down.
Once the storage system shuts down,
be blank.
appear
If
you subsequently try to access the Manager, an error message will
,
since the storage system will no longer be running
Managing Your Storage System
it
self,
. If
users have shared files open,
, if
the system disk was not
.
.
if
you refresh the browser window
.
, it
will
84
Altos easyStore Manual 84
Page 92

Working with Shared
Folders
Accessing shared folders
Once you have added users and created shared folders (as described in “Adding
users” and “Creating shared folders”), the users need to perform some simple steps to
be able to access those folders. The procedure for doing this varies, depending on the
user’s operating system. Each user can access only those shared folders that the user
is authorized to access.
Windows users
Notes:
l
If t
l
If
If
you’re using Windows, you have two options for accessing shared folders: you
can use My Computer/Windows Explorer to map a drive letter to the shared folder
or you can install the Console and use that utility to map a drive letter to the shared
folder
the storage server or the shared folders;
the computer where you install the Console must be on the same subnet as the
storage
Note:
described
folder is accessible via the Console. To access all other shared folders, you must
use
he storage system uses Active Directory authentication mode, and the
clocks
than
folders. You must adjust the storage system time, time zone, or both to ensure
tha
shared
repeat
My
of
the storage system and the Active Directory server differ by more
five minutes, errors will occur when users try to access the shared
t
they match (as described in “Changing the system settings”)
you change the
f
olders using the previous
the procedures described here using the new
.
With the Console, you don’t have to worry about remembering the name of
system.
If
your storage system uses Active Directory authentication mode (as
in
“Changing the authentication mode”), only the public
Computer/Windows Explorer
4
.
IP
address of the storage system, users who accessed the
IP
address will be disconnected and must
IP
address.
it
displays them automatically. However
.
,
,
85
Altos easyStore Manual 85
Page 93

Chapter
4
Using My Computer/Windows Explorer
To access a shared folder using My Computer/Windows Explorer:
1
.
Open My Computer/Windows Explorer
2
.
From the T
The Map Network Drive dialog box displays:
ools
menu, click Map Network Drive
Working with Shared Folders
.
.
The exact appearance of this dialog box varies, depending on your operating
system.
3
. In
the Drive list, select the drive letter that you want to assign to the shared
.
folder
4
. In
the
Folder
\\storage_system\shared_folder
where storage_system is the name or
shared_folder
system’s
you would enter the following:
\\192.168.0.101\Photos
Note: You can use the storage system name only
the same subnet as the storage system,
address and name to your local hosts file, or
IP
name
with a DNS server in your network.
Alternatively, you can click Browse and select the shared folder from the
Microsoft Windows Network
text box, enter the following
is
the name of the shared folder. For example,
IP
address is 192.168.0.101 and the shared folder name is Photos
:
IP
address of the storage system, and
if
your storage
if
your computer is in
if
you added the storage system’s
if
you manually registered the
.
,
86
Altos easyStore Manual 86
Page 94

Chapter
4
Using the Console
Working with Shared Folders
5
. To
automatically connect to this shared folder each time you log on to Windows,
select Reconnect at
If
you clear this option, you must repeat this procedure each time you want to
access
the shared folder
6. Click Finish
7
. If
prompted, enter your user name and password for accessing this shared
,
folder
and then click OK
Note:
.
If
logon.
.
.
the user name and password for accessing the shared folder are
the same as your Windows user name and password, you are not prompted to
provide a user name and password to access the shared folder
In addition, once you provide your user name and password for accessing
one shared folder, you are not prompted to provide
shared folders to which you have access rights.
other
If the
storage system uses local authentication mode and the guest user has
it
again when you access
access to this shared folder, you can use guest as both the user name and
password
.
You can now access the shared folder from My Computer/Windows Explorer
To access a shared folder using the Console:
1
.
Install the Console (as described in “Installing the Console”).
1. Click Start --> Programs -->
Storage System Console
.
.
.
87
Altos easyStore Manual 87
Page 95

Chapter
4
Working with Shared Folders
As soon as you start the Console,
it
automatically scans the network for storage
systems. This might take a few minutes. As soon as the scan is complete, the
ft
pane displays a tree view of all the storage systems
le
it
found:
has already scanned
Note:
If
you connect a storage system to the network after the Console
it, or if
you change the
IP
address of the storage system, you
must click Discover Storage Systems to scan the network again and update
the
tree in the left pane.
2
. In
the le
ft
pane, double-click the name of the storage system that contains the
shared folders that you want to access.
If
your storage system uses both available ports to connect to the network, you
double-click either name
can
.
88
Altos easyStore Manual 88
Page 96

Chapter
4
Working with Shared Folders
The storage system name expands to display all the available shared folders:
l
l
If
Notes:
All shared folders appear in the left pane. However, you can access only
the
ones that you are authorized to use.
your storage system uses Active Directory authentication mode, you
must physically create a guest account in order to use and create shared
folders.
3
. In
the le
Map Drive Letter
The Map Network Drive dialog box displays:
ft
pane, select the shared folder that you want to access and then click
.
89
The exact appearance of this dialog box varies, depending on your operating
system.
Altos easyStore Manual 89
Page 97

Chapter
Linux
4
users
Working with Shared Folders
4
. In
the Drive list, select the drive letter that you want to assign to the shared
folder
.
5
. To
automatically connect to this shared folder each time you log on to Windows,
select
Reconnect at
If
you clear this option, you must repeat this procedure each time you want to
access
6. Click Finish
7
. If
prompted, enter your user name and password for accessing this shared
folder
,
and then click OK
the shared folder
.
Note:
If
logon.
.
.
the user name and password for accessing the shared folder are
the same as your Windows user name and password, you are not prompted to
provide a user name and password to access the shared folder
.
In addition, once you provide your user name and password for accessing
one shared folder, you are not prompted to provide
shared folders to which you have access rights.
other
If the
guest user has access to this shared folder, you can use guest as both
the user name and password.
it
again when you access
You can now access the shared folder from My Computer/Windows Explorer
.
To access a shared folder on a computer running Linux:
1
.
Create a directory by entering the following command at the command prompt:
mkdir /my_directory
where my_directory is the name of the directory
Be sure to include the full path to the directory (for example,
/mnt/my_directory
2
. If
desired, display a list of all the available shared folders by entering the
following
showmount -e storage_system
command:
where storage_system is the
).
IP
address of the storage system
.
.
90
Altos easyStore Manual 90
Page 98

Chapter
Mac users
Mac OS X
4
Working with Shared Folders
3
.
Mount the desired shared folder by entering the following command:
mount storage_system:/nas/NASDisk-00002/folder /my_directory
where storage_system is the
name
of
the shared folder, and my_directory is the name of the directory tha
you created in step 1.
If
you included a full path when creating the directory, be sure to include the full
path
with this command (for example,
/NASDisk-00002/folder /mnt/my_directory
4
.
Repeat steps 1 through 3 for each shared folder that you want to access.
IP
address of the storage system, folder is the
mount storage_system:/nas
).
t
The procedure for accessing a shared folder on a Mac varies, depending on
whether the Mac is running OS X or an older operating system. (Macs running OS X
access the same shared CIFS folders as Windows users. Mac running older
can
operating
systems can access the same shared NFS folders as Linux users.)
To access a shared folder on a Mac running OS
1
.
From the Go menu, click Connect to Server
2
. In
the Address text box, enter the following and click Connect
smb://storage_system
where storage_system is the name or
Note: You can use the storage system name only
IP
the same subnet as the storage system,
address and name to your local hosts file, or
IP
name
3
. In
access and then click OK
4
.
Enter the user name and password for accessing this shared folder, and then
click
If the
the
with a DNS server in your network.
the Select a share list, select the name of the shared folder that you want to
.
OK.
guest user has access to this shared folder, you can use guest as both
user name and password.
An icon with the name of the shared folder is created on the desktop.
5
.
Repeat steps 1 through 4 for each shared folder that you want to access.
X:
.
:
address of the storage system.
if
your computer is in
if
you added the storage system’s
if
you manually registered the
91
Altos easyStore Manual 91
Page 99

Chapter
4
6
Other Mac operating systems
. To
For information about accessing a shared folder using NFS on a Mac running an
operating
Working with Shared Folders
access the shared folder, double-click the icon on the desktop.
system older than OS
X,
please refer to your Mac documentation
.
92
Altos easyStore Manual 92
Page 100

Chapter
4
Accessing shared folders using FTP
If
you enabled the storage system to act as an FTP server (as described in
“Changing the network settings”), all Windows and Mac OS X users can use a Web
browser to access the public folder
Note: Even
prevent
a
access), all existing Windows and Mac OS X users have full read/write access to
the
public folder when accessing
To access shared folders using FT
1
. At a
computer running Windows or Mac OS
following
ftp://user_name@storage_system
where user_name is the user name as defined on the storage system and
storage_system
ft
p://user1@storage or
the same subnet as the storage system,
address and name to your local hosts file, or
IP
name
You can also use guest as the user name.
2
. If
prompted, enter your user name and password for accessing shared folders,
then click OK
and
If
you used the guest user name, the password is also guest
3
.
Double-click any of the displayed folders or files to open them.
You have full read/write access to all the folders and files in the public folder
and
you can create new ones.
Even
if
browser
in your browser window.)
larger than 2 GB.
if
you changed the access rights to the public folder (for example, to
particular user from accessing
in
the address bar, and press Enter:
is
the name or
ft
p://user1@192.168.0.101).
Note: You can use the storage system name only
with a DNS server in your network.
.
you browse to other websites, you remain logged in until you close the
window. (That is, you can return to the FTP site using the Back button
Note: Files copied to or from the storage system using FTP can be no
Working with Shared Folders
.
it
altogether or to limit a user to read-only
it
via FTP
P:
IP
address of the storage system (for example
.
X,
open a Web browser, enter the
if
your computer is in
if
you added the storage system’s
if
you manually registered the
.
,
93
Altos easyStore Manual 93
 Loading...