

USB 802.11b Wireless LAN Adapter
M73-APO01-700
Installation
Install the Driver & Utility
Note: Always remember to install the Driver
& Utility before you plug USB cable into the
PC’s USB port.
In Windows 98SE/ME
For Windows 98SE users: As you perform the
installation, have your system operating
CD-ROM at hand. You may be asked to insert
the OS CD-ROM for the system to download a
specific driver.
1. Insert the supplied CD-ROM into the
CD-ROM drive. Double click on Setup.exe to
install the Wireless LAN Driver & Utility.
2. In the Welcome screen, click Next.
3. Click Next; Windows will copy all the
necessary files to your system.
4. When Windows prompts you to restart your
computer, select Yes and click OK.
1-1
USB 802.11b Wireless LAN
In Windows 2000
1. In the Welcome screen, click Next.
2. Click Next; Windows will copy all the
necessary files to your system.
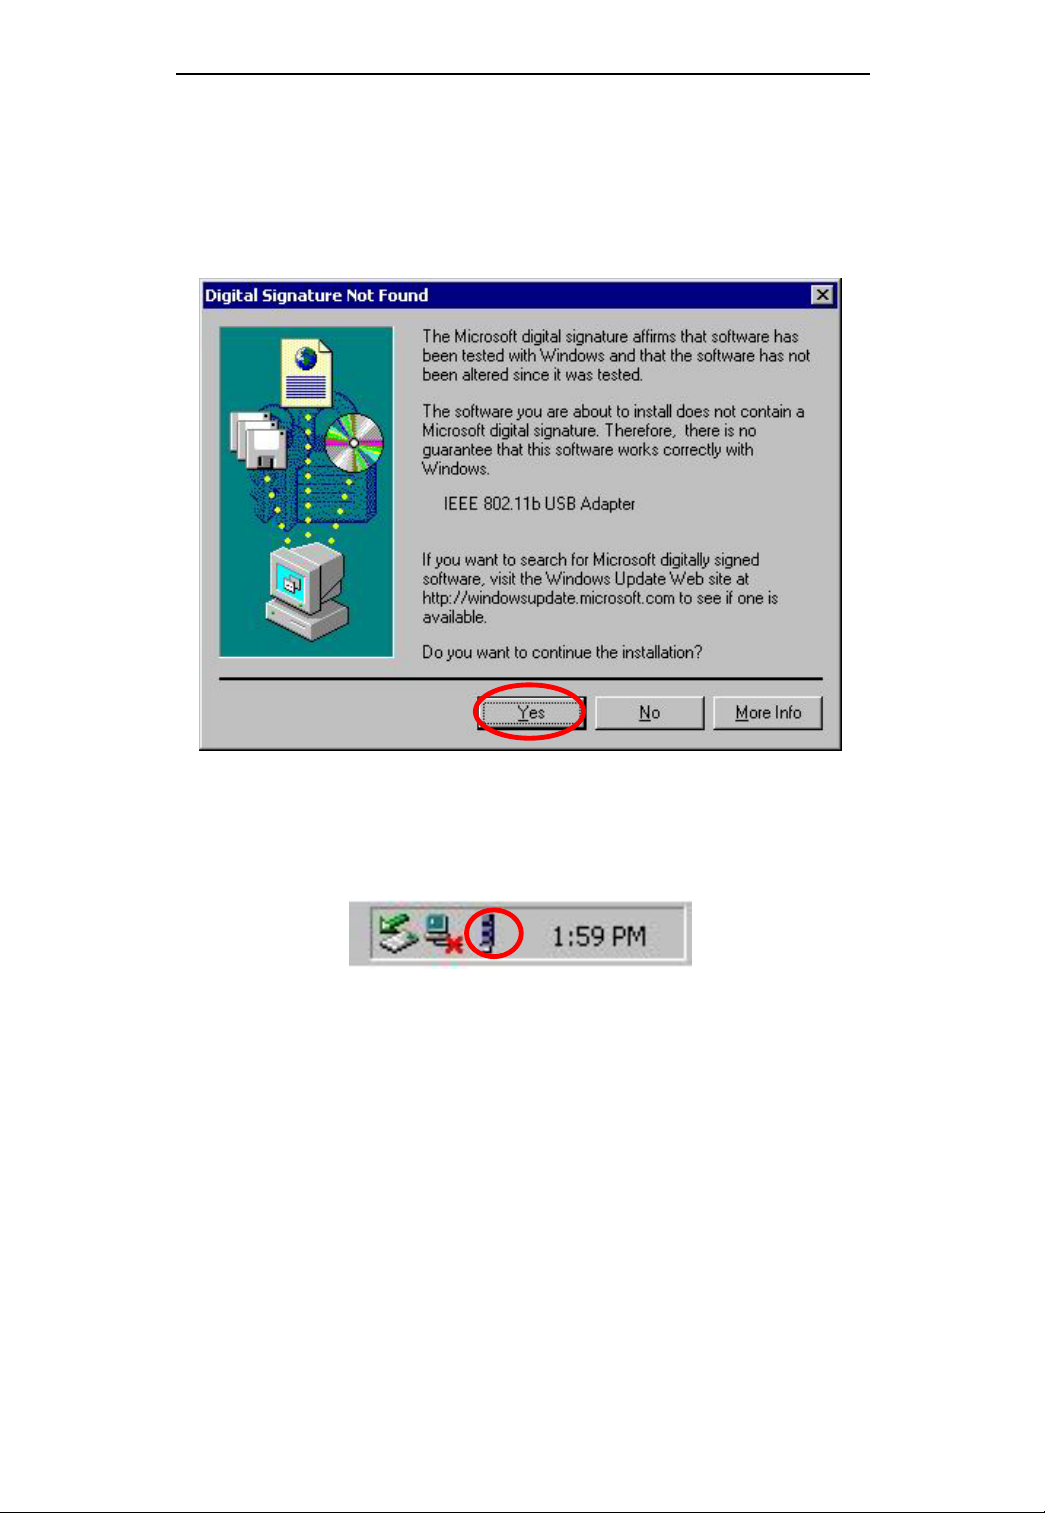
3. In the Digital Signature Not Found window,
click Yes to continue.
4. Restart your computer.
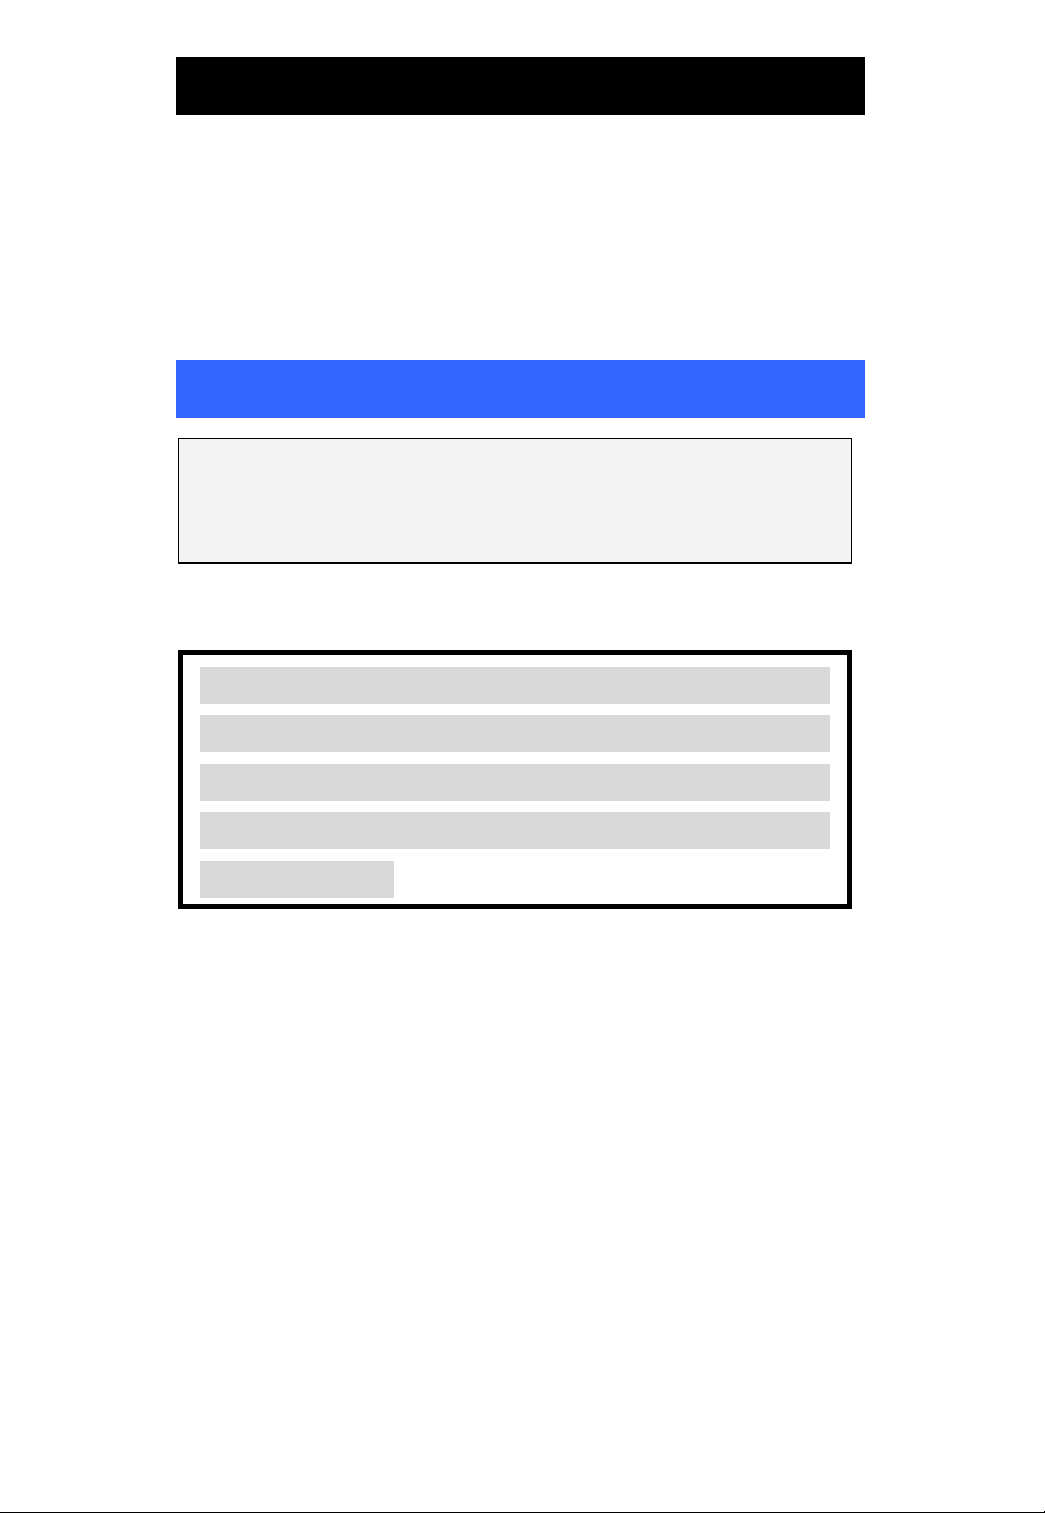
In Windows XP
1. In the Welcome screen, click Next.
2. Click Next; Windows will copy all the
necessary files to your system.
3. Click Continue Anyway to proceed.
1-2
USB 802.11b Wireless LAN
Install the Device
1. Plug the square end (Type B) of USB cable
into the adapter's USB port.
2. Plug the rectangle end (Type A) of USB cable
into the PC's USB port
3. After installing the Wireless USB Adapter,
Windows will automatically detect the new
device. Follow the on-screen instruction to
install.
Note for Windows 2000 users:
During the installation, when the “Digital
Signature Not Found” screen appears, click
“Yes” to continue.
Note for Windows XP users:
During the installation, when Windows prompt
you that this hardware has not passed Windows
Logo testing…, click Continue Anyway.
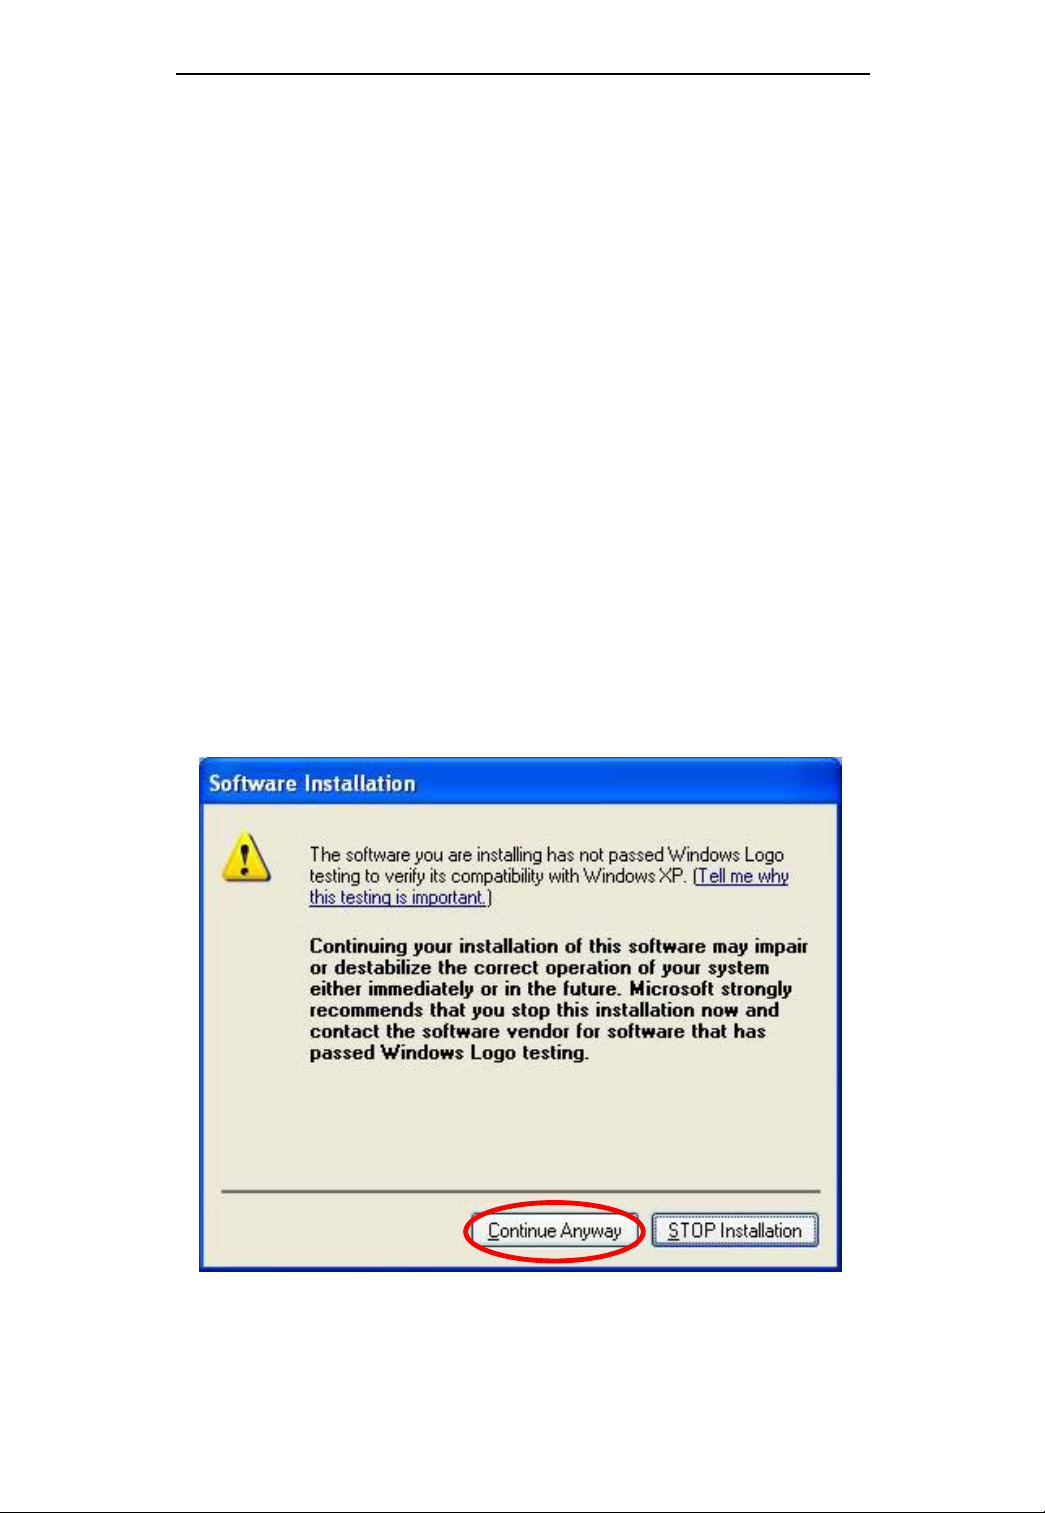
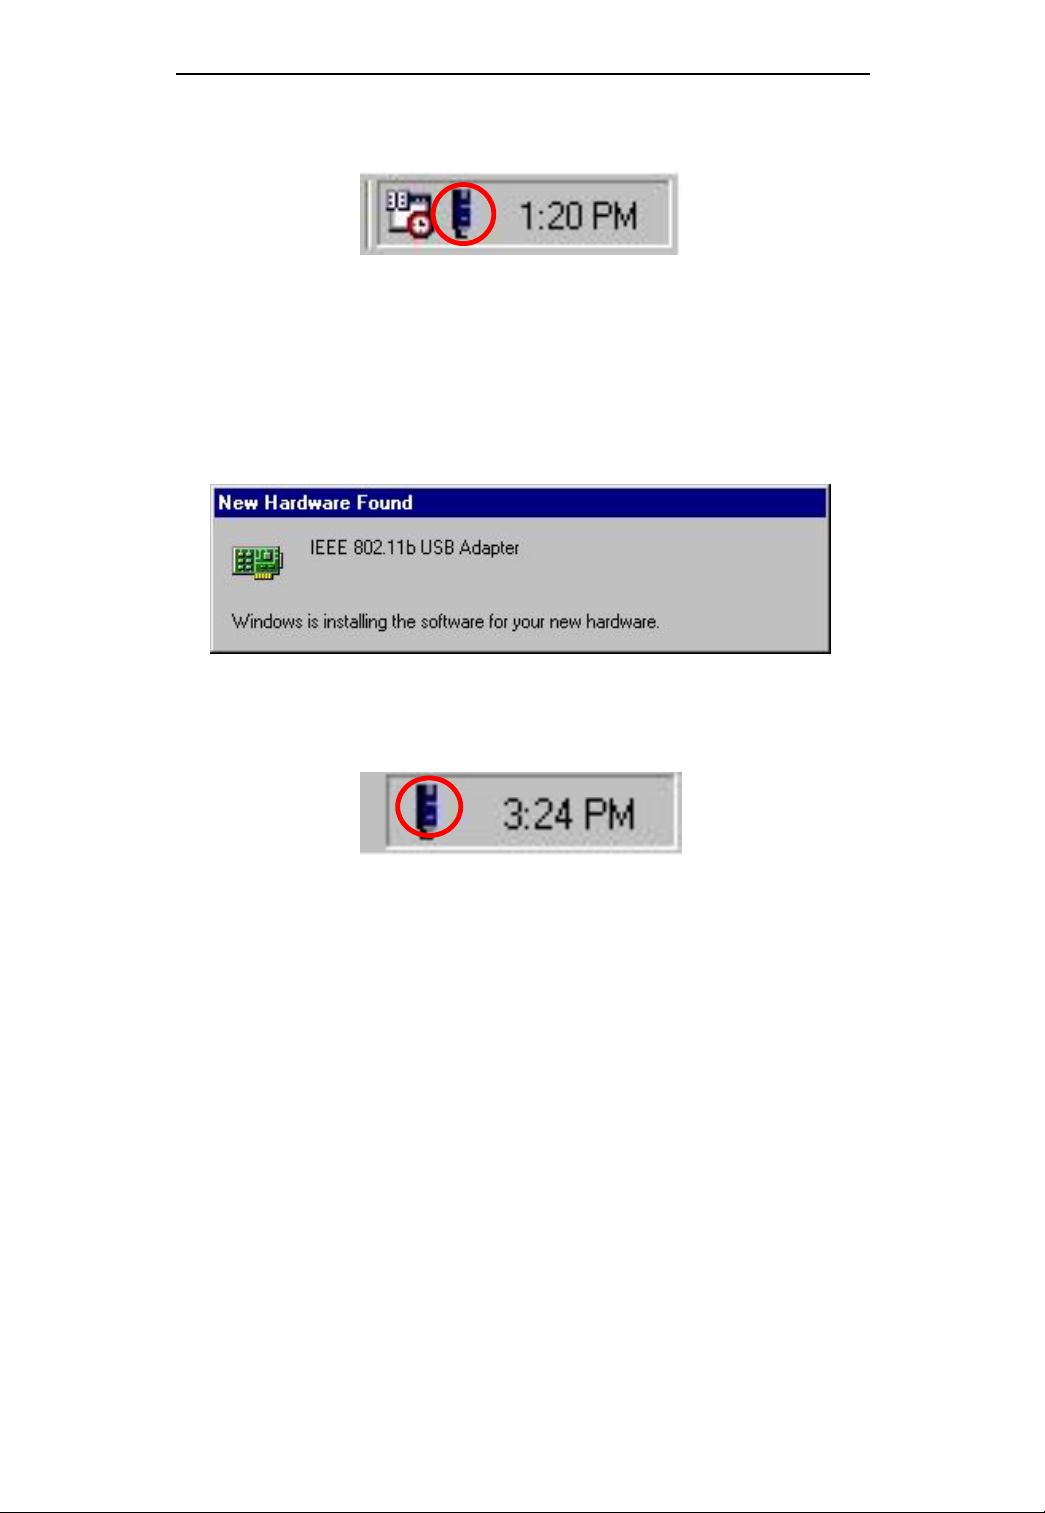
In Windows 98SE
1. Windows will auto-detect the 802.11b USB
Adapter and a “New Hardware Found”
window will show up.
1-3
USB 802.11b Wireless LAN
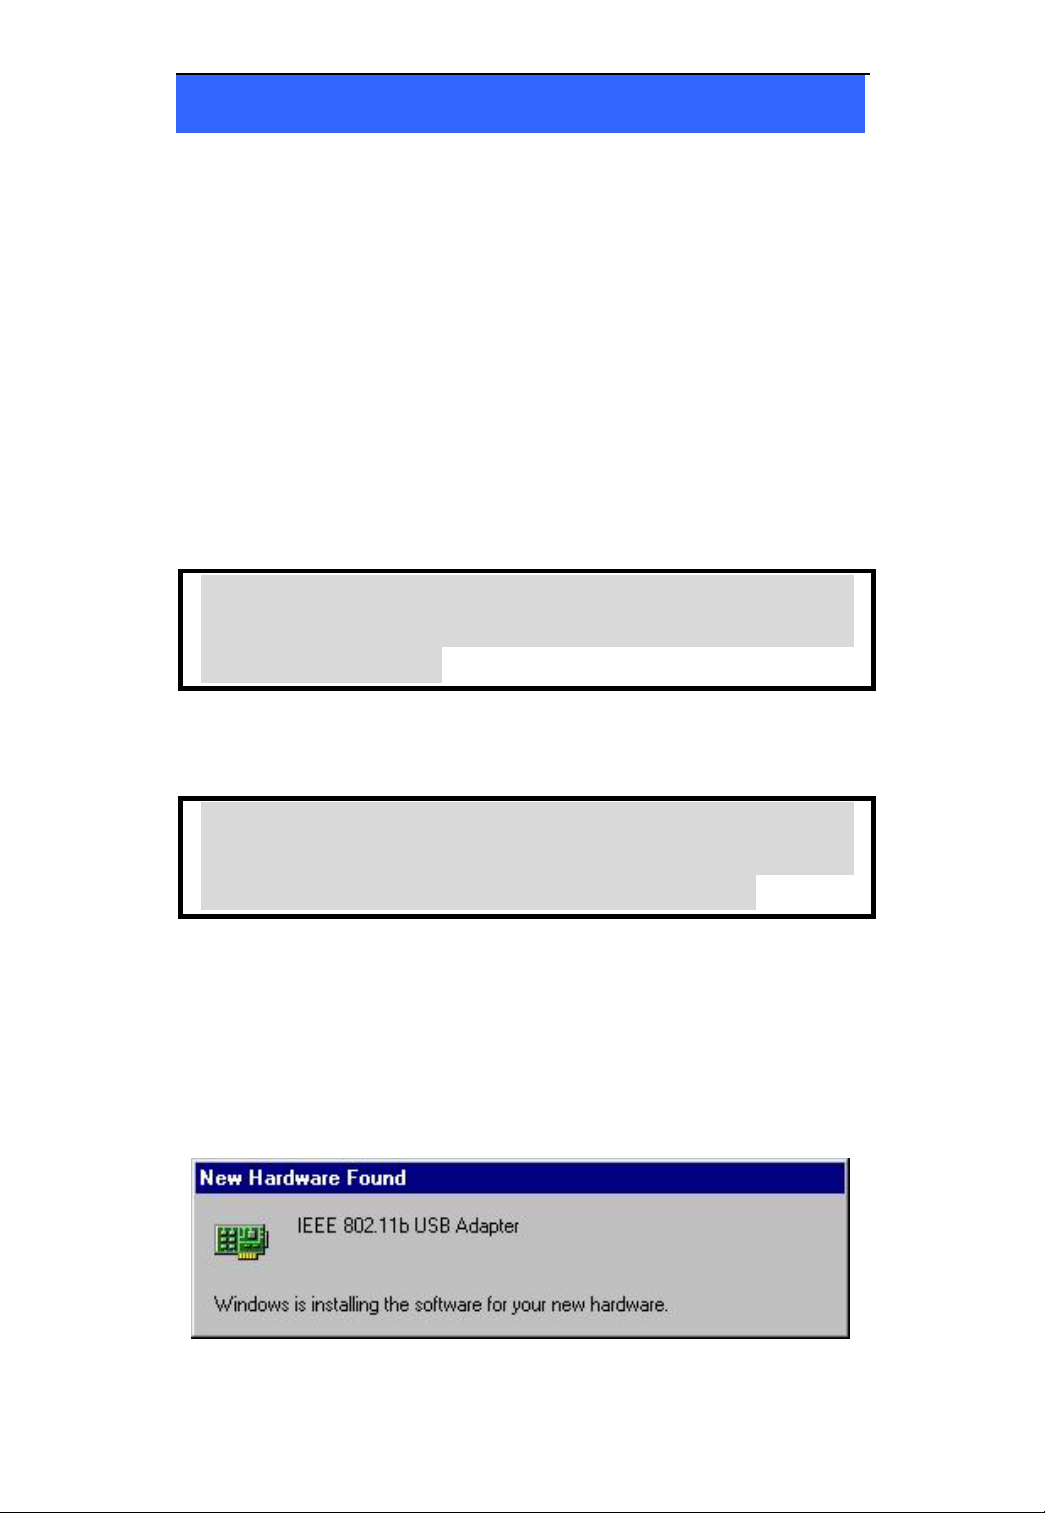
2. Once the “Please insert the disk labeled
‘Windows 98 Second Edition CD-ROM
and then click OK” window appears, click
OK.
3. Select the correct drive and click OK.
’,
4. Windows will copy all the necessary files to
your system.
1-4
USB 802.11b Wireless LAN
5. Windows will auto-detect the 802.11b USB
Adapter promptly as the icon showed below.
In Windows ME
1. Windows will auto-detect the 802.11b USB
Adapter and a “New Hardware Found”
window will show up.
2. Windows will auto-detect the 802.11b USB
Adapter promptly as the icon showed below.
1-5
USB 802.11b Wireless LAN
In Windows 2000
1. In Digital Signature Not Found window, click
Yes to continue.
2. Windows will auto-detect the 802.11b USB
Adapter promptly as the icon showed below.
In Windows XP
1. Windows will auto-detect the 802.11b USB
Adapter and a “Found New Hardware
Wizard” window will show up. Select “Install
the software automatically (recommended)”.
Click Next to continue.
1-6

USB 802.11b Wireless LAN
2. Wait and the Wizard will search for the
802.11b USB Adapter.
3. Click Continue Anyway to proceed.
1-7

USB 802.11b Wireless LAN
4. Click Next; Windows will copy all the
necessary files to your system.
5. Click Finish to complete the installation.
1-8

USB 802.11b Wireless LAN
6. Windows will auto-detect the 802.11b USB
Adapter promptly as the icon showed below.
Configuration
Once the driver and utility has been installed, and
the device is properly connected to your computer,
you can now start using this device with the default
settings. However, if you’d like to change settings
in the utility, you can refer to user manual saved in
the CD-ROM for the corresponding section to
perform more advanced configuration.
1-9

1-1

USB Flash Disk (Optional)
Install Driver
Windows 98/98SE – Install from CD ROM
In Windows 98/98SE, you will need to install the
driver found on the CD that comes with this device.
Run Flash Driver.exe.
1. Follow the on-screen instructions to proceed.
2. Click Finish to complete the installation.
3. After the installing process is finished, remove
the cap from your USB Flash Dish and plug the
USB connector to the USB port on your
computer.
2-1

USB Flash Disk
4. Open My Computer and you will see a newly
added icon; shown on the screen as a
removable disk drive.
Windows ME/2000/XP-No Driver is Required
This device is Plug and Play compliant, therefore,
once you plug it into your Window’s based system,
your system will automatically detect it as a
removable hard disk. You can go to My Computer
to check if there is a newly added icon. If yes, it is
ready for use. If not, you may have to check if the
USB Flash Disk is connected properly to your USB
port.
Removing your USB Flash Disk
Warning: Each time you remove the USB Flash
Disk from your computer, be sure to use the
Unplug/Eject icon
loss or damage to your Flash Disk.
on the taskbar to avoid data
2-2

USB Flash Disk
Manage your USB Flash Disk
Main Menu
1. Load the included CD and open it.
Double-click MYKEY.
2. An USB Flash Disk icon will appear on your
desktop
appear on the bottom right corner of the task
bar on your screen.
3. Right-click the
4.
Click Option. The USB Flash Disk Utility
, a Star icon will also
icon.
.
will appear.
5. The USB Flash Disk Utility consists of four
tabs for management. See the following for
details as how to use and manage this device.
2-3

USB Flash Disk
Disk Manager
Disk Manager is readable only. On this box, you
will know the used/free capacity of your flash disk.
Disk Partition
In this box, you can divide the USB Flash Disk into
two partitions:
Un-protected Disk Space: all data located here is
accessible to anyone who uses your computer or
Flash Disk. When logging out of the protected
area you are automatically redirected to the
Un-protected Disk area.
Protected Disk Space: this area is password
protected.
1. Drag the pointer to adjust the capacity of the
Protected/Un-protected disk.
2-4

USB Flash Disk
2. Press
Create Partition.
3. A warning message appears to advise that all
data on the disk will be erased. You can
cancel this action by clicking Cancel. Or
click OK to continue.
4. Click Cancel to copy your data to a Hard
Disk before creating your prtition. Click OK
to create your partition. Any and all Data
stored on your Flash Disk will be
destroyed.
2-5

USB Flash Disk
Switch between Protected and Un-protected
Disks
Enter the Protected Disk
1. Right click
. Select Login
.
2. You are prompted to enter your password.
The default password is 0000. It is suggested
that you set your own password. If you
forget your password, press Xto get see
your password hint.
2-6

USB Flash Disk
Once you enter the protected disk, the disk icon
shown in My Computer will change from
to , and vise versa.
Enter the Un-protected Disk
1. Right click
. Select Logout
to enter the Un-protected Disk.
Password Manager
Password can be changed in this box. You can also
set a password hint for use if you forget your
password. Default password is set to: 0000
2-7

USB Flash Disk
Change Password
1. Enter the “Old Password”, the default is
“0000”.
2. Enter the “New Password”. (Maximum 4
characters long – use letters or numbers)
3. Confirm password by re-entering the new
password.
4. Enter a hint of your own; this will be helpful
to remind you if you forget your password.
5. Press
Change to continue.
6. Password has been changed message
appears. Click OK.
Password Hint
You can leave the Password Hint blank if you
don’t want to use it.
PC LOCK
Once PC-Lock is enabled, the PC you are presently
using is locked. To unlock this PC, you can only use
this USB Flash Disk.
To enable PC Lock, there are two conditions for
your choice,
2-8

USB Flash Disk
Plug-in USB Flash Disk
This means that you have to plug this USB Flash
Disk into your computer’s USB port in order to
open your PC;
Plug-in USB Flash Disk and Input Password
This means to open the PC, you are required not
only to plug the USB Flash Disk, but also have to
enter your password.
To lock a PC
1. Right click .
2. Select Option PC-Lock Setting.
3. Check Enable PC-Lock.
2-9

USB Flash Disk
4. Select the Unlock Condition that fits your needs.
5. Press
Change.
6. Press Exit.
7. Return to your desktop and right click
again.
8. Move the cursor to PC Lock
You PC is
now locked.
9.
If this function is enabled, your PC will not
respond unless this USB Flash Disk is plugged
in.
To unlock a PC
1. Plug the USB Flash Disk into the locked PC.
2. If the unlock condition is set to Plug-in USB
Flash Disk and Input Password, a password
box will pop up.
3. Enter your password. The PC is now unlocked.
2-10
 Loading...