

Page 1

USB 10M HomePNA
Network Adapter
Quick Installation Guide
M73-APO08-370
Page 2

REGULATORY STATEMENTS
Part15, Class B
This device complies with Part 15 of FCC rules. Operation is
subject to the following two conditions:
1. This device may not cause harmful interface, and
2. This device must accept any interface received,
including interface that may cause undesired operation.
This equipment has been tested and found to comply
with the limits for a Class B digital device, pursuant to
Part 15 of the FCC Rules. These limits are designed to
provide reasonable protection against harmful
interference in a residential installation. This equipment
generates, uses and can radiate radio frequency energy,
and if not installed and used in accordance with the
instructions, may cause harmful interference to radio
communications. However, there is no guarantee that
interference will not occur in a particular installation. If
this equipment does cause harmful interference to radio
or television reception, which can be determined by
turning off and on, the user is encouraged to try to
correct the interference by one or more of the following
measures:
Reorient or relocate the receiving antenna.
Increase the distance between the equipment and
receiver.
Connect the equipment into an outlet on a circuit
different from that to which the receiver is connected.
Changes or modifications not expressly approved by
party responsible for compliance could void the user
authority to operate the equipment.
Page 3

FCC Part 68 Registration
This device complies with FCC Part 68 rules, and the use of
this device is subject to the following restrictions:
The FCC has established rules which permit this device to be
directly connected to the telephone network. Standardized
jacks are used for these connections. This equipment should
not be used on party lines or coin phones.
If this device is malfunctioning, it may also be causing harm
to the telephone network; this device should be
disconnected until the source of the problem can be
determined and until repair has been made. If this is not done,
the telephone company may temporarily disconnect service.
The telephone company may make changes in it's facilities,
equipment, operation and procedures; if such changes affect
the compatibility or use of this device, the telephone
company is required to give adequate notice of the situation
with the FCC.
If the telephone company requests information on what
equipment is connected to their lines, inform them of:
a. The telephone number to which this unit is connected.
b. The Ringer Equivalence Number (REN).
c. The USOC jack required.
d. The FCC Registration number.
Items (b) and (d) are indicated on the label. The Ringer
Equivalence Number (REN) is used to determine how many
devices can be connected to your telephone line. In most
areas, the sum of the REN's of all the devices on any one line
should not exceed 5.0. If too many devices are attached, they
may not ring properly.
Page 4

Introductions
The USB 10M HomePNA Network Adapter is
fully compatible with the Universal Serial Bus
(USB) functionality built in Windows 98/ME,
Windows 2000 and Windows XP. It provides
you the instant connectivity to multiple PCs over
a home's existing telephone lines.
You can share network-enabled printers, transfer
files between computers, play network games,
and moreover - no switches, hubs, or even any
additional cables is required. The network runs
on standard home-grade-telephone wires just like
the ones you use everyday. Plus, it doesn’t
interfere your normal phone use.
Features
Build a network by using your existing
telephone line
10Mbps or 1Mbps transfer rate over
telephone lines
Share Internet access between your PCs
Enable file, data and printer sharing between
your PCs
Microsoft Windows 98, ME, 2000, XP
supported
External USB network adapter with 1 RJ-11
modular telephone port
USB cable included – true plug & play
HomePNA specification 2.0 compliant
Connect up to 25 devices together on your
home phone network
- 1 -
Page 5
System Requirements
A Pentium
computer 166MMX or above.
At least 16 MB of RAM.
One USB port well installed and enabled.
Microsoft Windows 98, Windows ME,
Windows 2000, or Windows XP.
processor-based personal
Specifications
Network Standard
HomePNA specification 2.0
Standard phone wiring
Supported Operating Systems
Windows 98
Windows ME
Windows 2000
Windows XP
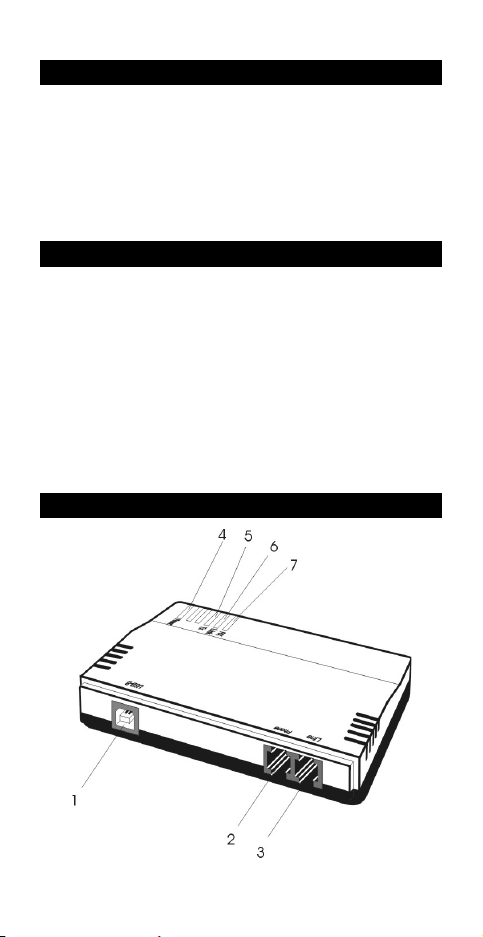
Parts Names and Functions
- 2 -
Page 6

Port Functions
1
2
USB-B
Phone
USB device port.
connects the USB 10M HomePNA
Network Adapter to a phone
setting.
3
Line
connects the USB 10M HomePNA
Network Adapter to a phone jack.
Table 1. Connection Ports
LED Status
4
POWER
glows green when your PC power
is on and the device is well
connected to the USB host port of
your system.
5
TX
blinks amber when transmitting
data.
6
Link
glows green when linked with
other HomePNA compliant
devices.
7
RX
blinks amber when receiving data.
Table 2. Indicator LEDs
- 3 -
Page 7

Hardware Installation
Before getting started
Before installation, make sure the USB port on
your computer is enabled. To learn how to
check this, see the Diagnostics
Getting Hooked Up
1. Locate the USB host port of your system.
Align the USB connector toward the USB
host port, push evenly and steadily until it is
seated.
section.
2. Connect the other end of the USB
connection cable to the device port of your
USB 10M HomePNA Network Adapter
(i.e. USB B Port, refer to the section titled
“Parts Names and Functions” for details).
- 4 -
Page 8

3. Windows will automatically detect the new
hardware device. Perform the following
procedures to install the device driver.
Connecting Telephone Cabling
1. Attach one end of the telephone line to the
USB 10M HomePNA Network Adapter’s
Line port.
2. Connect the other end of the line into a
phone jack in the wall.
3. Connect the USB 10M HomePNA Network
Adapter’s Phone port to a phone setting.
- 5 -
Page 9

Software Installation
Windows 98 Installation
1. Once the USB 10M HomePNA Network
Adapter is well connected, Windows will
detect the new device and prompt you to
insert the network device driver. Click Next.
2. Insert the USB 10M HomePNA Network
Adapter Driver Disk into the floppy disk
drive. Select Search for the best driver for
your device… and click Next.
- 6 -
Page 10
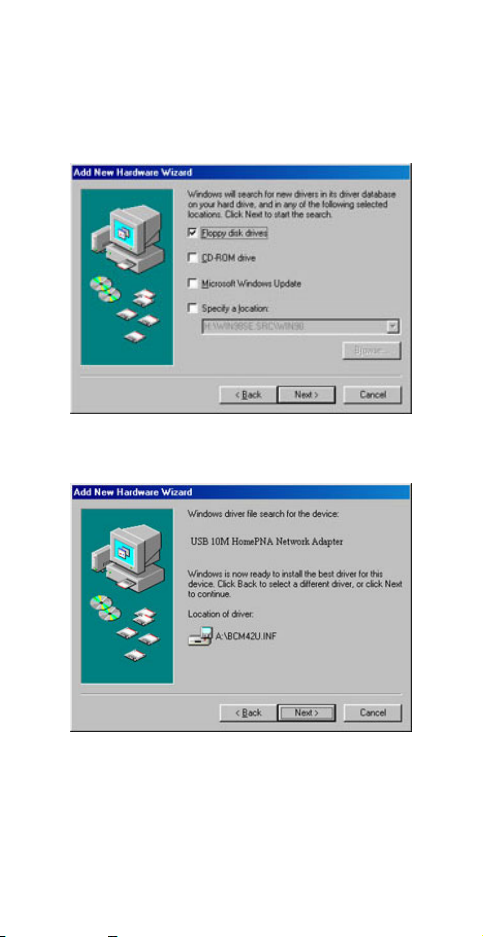
3. Specify Floppy disk drivers and click Next.
Windows will start searching for the
appropriate driver for the network device
installation.
4. Ensure that the file path is correct. Click
Next to continue.
5. Windows will copy the appropriate driver to
your system. If Windows 98 asks you to
supply your original Windows 98
installation CD-ROM, load it on the CDROM drive.
- 7 -
Page 11

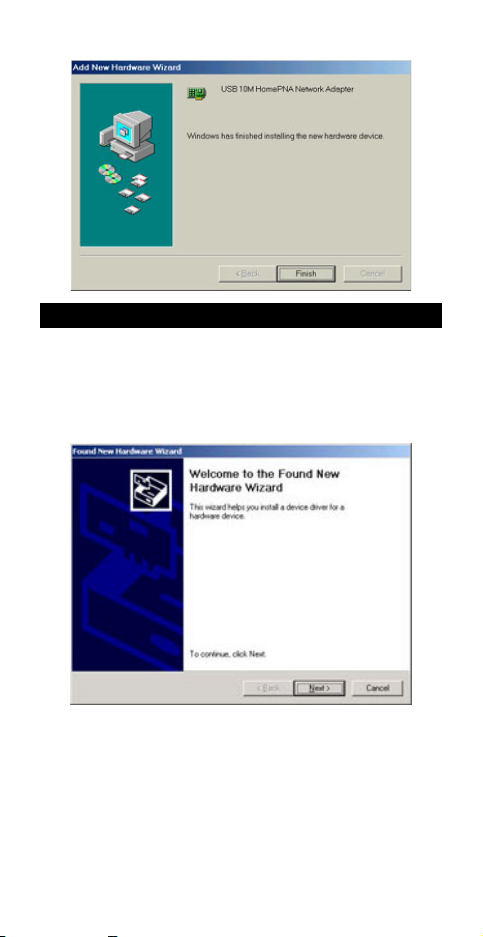
6. Click Finish to complete the software
installation.
Window Me Installation
1. Once the USB Home PhoneLine 1Mbps
Network Adapter is well connected to
your computer, Windows ME will
automatically detect the new device. Select
Specify the Location of the driver… and
click Next.
2. Insert the device driver disk into the floppy
disk drive on your system. Select
- 8 -
Page 12
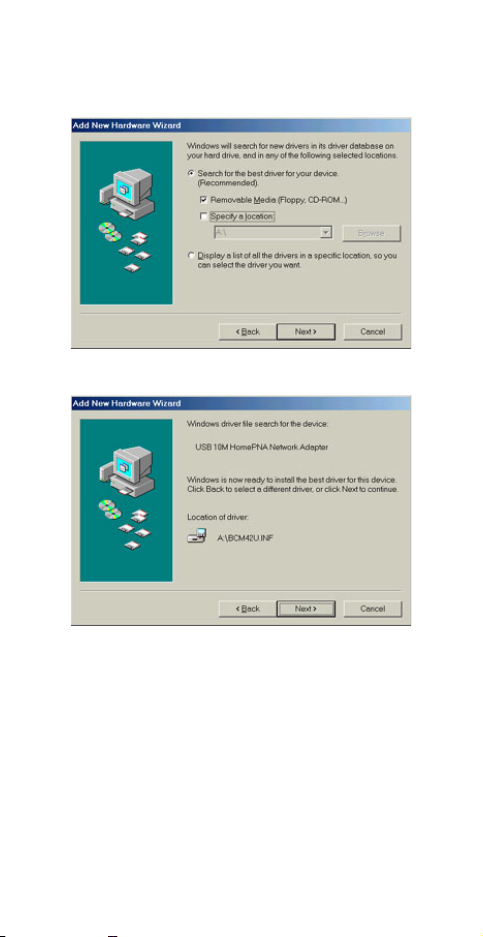
Removable Media (Floppy, CD-ROM…)
and click Next.
3. Click Next to continue.
4. Windows will copy the appropriate driver
to your system. If Windows ME asks you
to supply your original Windows ME
installation CD-ROM, load it on the CDROM drive.
5. Click Finish to complete the software
installation.
- 9 -
Page 13
Windows 2000 Installation
1. Once the USB 10M HomePNA Network
Adapter is well connected, Windows will
detect the new device and prompt you to
insert the network device driver. Click Next.
2. Insert the USB 10M HomePNA Network
Adapter Driver Disk into the floppy disk
drive of your system. Select Search for the
best driver for your device… and click
Next.
- 10 -
Page 14

3. Specify Floppy disk drivers and click Next.
Windows will start searching for the
appropriate driver for the network device
installation.
4. Ensure that the file path is correct. Click
Next to continue.
- 11 -
Page 15

5. Click Yes to continue.
6. Windows will copy the appropriate driver to
your system. If Windows 2000 asks you to
supply your original Windows 2000
installation CD-ROM, load it on the CDROM drive.
7. Click Finish to complete the software
installation.
- 12 -
Page 16
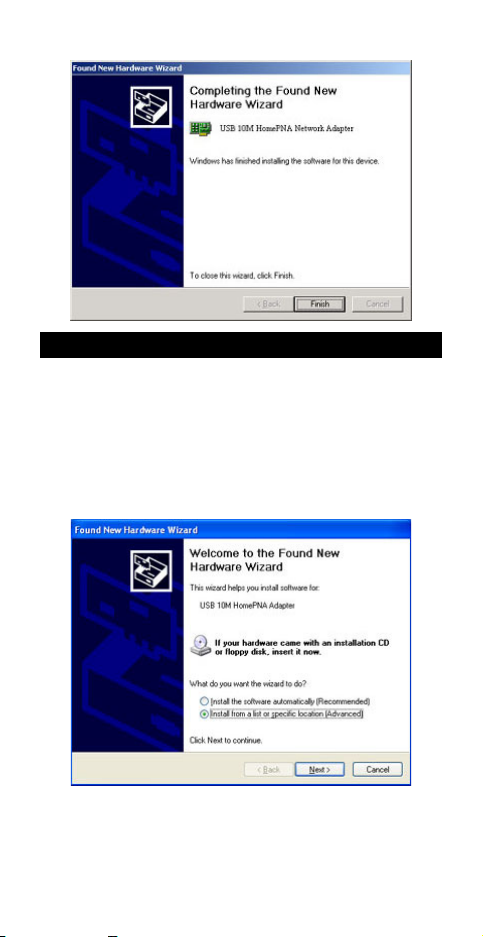
Windows XP Installation
1. Once the USB 10M HomePNA Network
Adapter is well connected, Windows will
detect the new device and prompt you to
insert the network device driver. Click
Install from a list or specific location…
and click next.
2. Insert the USB 10M HomePNA Network
Adapter Driver Disk into the floppy disk
- 13 -
Page 17
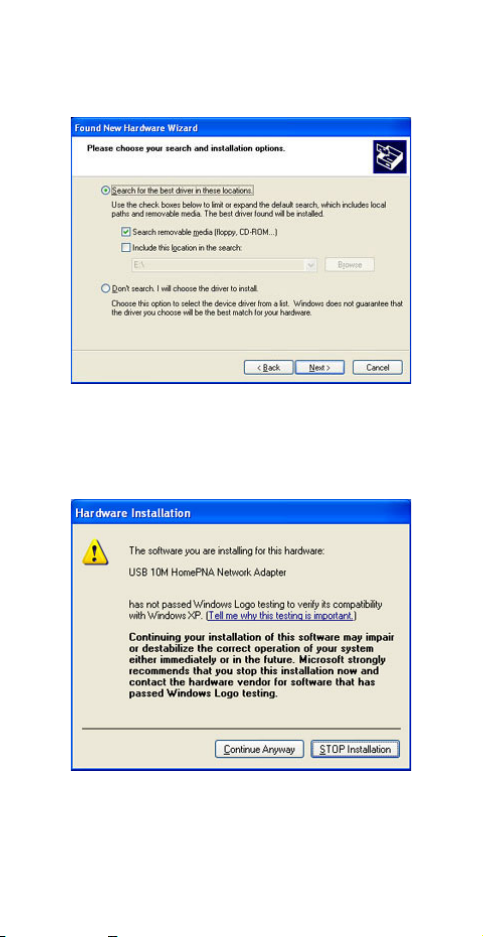
drive of your system. Select Search for
the removable media… and click Next.
3. Windows will start searching for the
appropriate driver for the installation.
When the screen appears as below, click
Continue Anyway to proceed.
4. Wait for seconds while Windows copies
the appropriate driver to your system.
- 14 -
Page 18

5. Click Finish. The software installation for
this network device is now completed.
- 15 -
Page 19

Diagnostics
How should I know if the devices (i.e. Universal
Serial Bus controller, USB 10M HomePNA
Network Adapter) exist and are enabled in my
computer?
Step1
Windows 98/ME
Go to Start Settings Control Panel
System Device Manager.
Windows 2000
Go to Start Settings Control Panel
SystemHardwareDevice Manager.
Windows XP
Go to Start Control Panel System
HardwareDevice Manager.
Step 2
Check if the devices are displayed in the
following Device Manager Window. If not,
consult your computer dealer for technical
support.
- 16 -
Page 20

- 17 - - 17 -
 Loading...