

Page 1

®
ABBYY
FineReader
Version 11
User’s Guide
© 2011 ABBYY. All rights reserved.
Page 2

ABBYY FineReader 11 User’s Guide
Information in this document is subject to change without notice and does not bear any commitment on the part of
ABBYY.
The software described in this document is supplied under a license agreement. The software may only be used or
copied in strict accordance with the terms of the agreement. It is a breach of the "On legal protection of software and
databases" law of the Russian Federation and of international law to copy the software onto any medium unless
specifically allowed in the license agreement or nondisclosure agreements.
No part of this document may be reproduced or transmitted in any from or by any means, electronic or other, for any
purpose, without the express written permission of ABBYY.
© 2011 ABBYY. All rights reserved.
ABBYY, the ABBYY logo, ABBYY FineReader, ADRT are either registered trademarks or trademarks of ABBYY Software
Ltd.
© 1984-2008 Adobe Systems Incorporated and its licensors. All rights reserved.
Protected by U.S. Patents 5,929,866; 5,943,063; 6,289,364; 6,563,502; 6,185,684; 6,205,549; 6,639,593; 7,213,269;
7,246,748; 7,272,628; 7,278,168; 7,343,551; 7,395,503; 7,389,200; 7,406,599; 6,754,382; Patents Pending.
Adobe® PDF Library is licensed from Adobe Systems Incorporated.
Adobe, Acrobat®, the Adobe logo, the Acrobat logo, the Adobe PDF logo and Adobe PDF Library are either registered
trademarks or trademarks of Adobe Systems Incorporated in the United States and/or other countries.
© 1996-2007 LizardTech, Inc. All rights reserved. DjVu® is protected by U.S. Patent No. 6.058.214. Foreign Patents
Pending.
© 2008 Celartem, Inc. All rights reserved.
© 2011 Caminova, Inc. All rights reserved.
Powered by AT&T Labs Technology.
© 2011 University of New South Wales. All rights reserved.
Fonts Newton, Pragmatica, Courier © 2001 ParaType, Inc.
Font OCR-v-GOST © 2003 ParaType, Inc.
© 2002-2008 Intel Corporation.
© 2010 Microsoft Corporation. All rights reserved.
Microsoft, Outlook, Excel, PowerPoint, Windows Vista, Windows are either registered trademarks or trademarks of
Microsoft Corporation i n t h e United States and/or other countries.
© 1991-2008 Unicode, Inc. All rights reserved.
© 2010, Oracle and/or its affiliates. All rights reserved
OpenOffice.org, OpenOffice.org logo are trademarks or registered trademarks of Oracle and/or its affiliates.
JasPer License Version 2.0:
© 2001-2006 Michael David Adams
© 1999-2000 Image Power, Inc.
© 1999-2000 The University of British Columbia
© 1996-2011, Amazon.com, Inc. or its affiliates. All rights reserved.
KINDLE®, KINDLE logo and other Amazon.com graphics, button icons are registered trademarks, trademarks or trade
dress of Amazon in the U.S. and /or ot her countries...
EPUB®, is a registered trademark of the IDPF (International Digital Publishing Forum)
iPad is trademarks of Apple Inc., registered in the U.S. and other countries.
All other trademarks are the property of their respective owners.
2
Page 3

ABBYY FineReader 11 User’s Guide
Contents
Introducing ABBYY F ineReader
What is ABBYY FineReader
What's New in AB BYY Fine Reader 11
................................................................................................ 5
......................................................................... 5
................................................................................ 6
The ABBYY FineReader 11 Interface
The Main Window
Toolbars
Customizing th e ABBYY FineReader Workspac e
The Options Dialog Box
............................................................................................................................ 8
Working with ABBYY FineR eader
ABBYY FineReader Tasks
Managing Automat ed Tasks
ABBYY FineReader Step –by–Step
.............................................................................................................. 7
................................................................................................... 10
.................................................................... 13
................................................................................................. 14
............................................................................................. 20
.................................................................................... 21
................................................................. 7
................................................................. 9
Splitting an ABBYY Fin eReader Document
Taking Int o Accou nt Some o f th e Features of Your Paper Document
Image Acquisiti on Tips
Scanning Tips
Taking P hotos o f Docu ments
Checking and Editing the Recognized Text
Working with Complex–Script Languages
Recommended Fonts
Saving the Result s
.................................................................................................................. 33
Advanced Features
Working in Other Appli cations
.................................................................................................... 31
........................................................................................... 36
....................................................................................................... 54
........................................................................................................... 57
............................................................................................ 72
......................................................................................... 72
....................................................................... 27
...................................................................... 49
........................................................................ 54
............................... 29
Using Area Templates
Recognition with Training
User Languages and Languag e Groups
...................................................................................................... 73
................................................................................................ 73
............................................................................ 76
3
Page 4

ABBYY FineReader 11 User’s Guide
Group Work in a LAN
ABBYY Hot Folder
Appendix
Glossary
Supported Image Form ats
Supported Saving Formats
Languages and T heir Fonts
Regular Expressions
Shortcut Keys
............................................................................................................ 85
.......................................................................................................................... 85
.................................................................................................................. 96
How to Buy an AB BYY Prod uct
About ABBYY
ABBYY Off ic es and Technical Support Cont acts
................................................................................................................. 102
....................................................................................................... 78
............................................................................................................ 79
............................................................................................... 88
.............................................................................................. 91
............................................................................................. 92
........................................................................................................ 94
...................................................................... 102
............................................................. 103
Activating a nd Re gist ering ABBYY FineReader
ABBYY FineReader Acti vation
ABBYY FineReader Regist ration
Privacy Policy
Technical Suppo rt
................................................................................................................ 107
........................................................................................... 108
........................................................................................ 105
..................................................................................... 106
........................................... 105
4
Page 5

ABBYY FineReader 11 User’s Guide
Introducing ABBYY FineReader
This chapter provides an over view of ABBYY Fine Reader and its features.
Chapter Contents
• What Is ABBYY FineReader
• What's New in ABBYY FineReader
What is ABBYY F ineReader
ABBYY FineReader is an opt ical chara cter r ecog niti on ( OCR) system . It is used to co nvert
scanned d ocume nts , PDF docum ent s, a nd ima ge fi les, i nclu ding digital p hotos, into ed itable
formats.
ABBYY FineReader advantages
Fast and ac curat e reco gniti on
• The OCR system used in ABBYY FineReader lets users quickly and accurately recognize and retain
the source formatting of any document (including text on background images, colored text on
colored backgrounds, text wrapped around an image, etc.).
• Thanks to ABBYY' s adaptive document recognition technology (ADRT®), ABBYY FineReader can
analyze and process a document as a whole, instead of page by page. This approach retains the
source document's structure, including formatting, hyperlinks, e–mail addresses, headers and
footers, image and table capti ons, page numbers, and footnote s .
• ABBYY FineReader can recognize documents written in one or several of 189 languages, including
Arabic, Vietnamese, Korean, Chinese, Japanese, Thai, and Hebrew. ABBYY FineReader also features
auto–detection of document languages.
• What's more, ABBYY FineReader is largely immune to printing defects and can recognize texts
printed in virtually any font.
• The program also includes a wide range of options for output data: documents can be saved in a
variety of formats, se nt by e–mail, or transferred to other applications for further processing.
Ease of us e
• ABBYY FineReader's user–friendly and intuitive results–driven interface allows you to use the
program without any additional training. New use r s can master the main functions in almost no time
at all. Users can change the interface language directly in the program.
• ABBYY FineReader Tasks include a list of the most frequently used tasks for converting scanned
documents, PDF, and image files into editable formats, and make it possible to retrieve an e–
document with one mouse–click.
• Seamless integration with Microsoft Office and Windows Explorer lets you recognize documents
directly from Microsoft Outlook, Microsoft Word, Microsoft Excel, and Windows Explorer.
• FineReader also features a Help menu with examples that illustrate how to use the program to
accomplish a number of complex conversion–related tasks.
5
Page 6

ABBYY FineReader 11 User’s Guide
What's New in ABBYY FineReader 11
• Increased processing efficiency
With the new Black–and–White mode, FineReader 11 provides 30% faster processing when you
don't need color. Furthermore, the program effectively takes advantage of multi–core proc essors for
even faster conversion.
• Flexible e–book creation
Scan paper books and convert them to EPUB and FB2 formats to read them on–the–go on your
iPad, tablet or preferred portable device. Or send them directly to your Kindle account. Convert
paper books or articles to appropriate e–book formats to add them to your electronic library or
archive.
• Native support for OpenOffice.org Writer
FineReader 11 recognizes and converts images of documents and PDF files directly to
OpenOffice.org Writer format (ODT), accurately preserving their native layout and formatting. Now
you can easily add documents to your *.odt archive with a few mouse clicks.
• Enhanced user interface
• Enhanced style editor allows you to set up all the style parameters in one friendly window.
All the changes are applied across the entire document at once.
• Organize pages among FineReader documents for better layout retention.
• Launch document conversion immediately when the program starts, with even easier access
to all the basic or advanced conversion tasks.
• Next generation Camera OCR with extended set of powerful image editing tools
FineReader 11 offers a comprehensive range of new powerful image editing tools, including
brightness and contrast sliders and level tools ena b ling you to get more accurate results and
improve image parameters.
• Increased OCR accuracy and layout retention with improved ADRT 2.0
Minimize the time required to edit converted documents thanks to better detection of document
styles, footnotes, headers and footers.
• Optimal PDF output
The three pre–defined image settings for PDF files provide optimal results depending upon your
needs – best quality, compact size or balanced mode.
• New recognition languages* – Arabic, Vietnamese, and Turkmen (Latin alphabet)
• Quickly convert paper business cards into electronic contacts with Business Card Reader
(available only in the Corporate Edition).
*Different se ts of rec ognitio n langua ges may be available i n differen t editio ns of the p roduct .
6
Page 7

ABBYY FineReader 11 User’s Guide
The ABBYY FineReader 11 Interface
ABBYY Fine Reader's user–frie ndly, intuitive, and result s–driven interface makes it easy to use the
program without any a dditional training. It t akes n ew users almost no time at all t o master the
main functions.
ABBYY Fine Reader' s interfa ce can be c ustomize d.
You can customize your worksp ace to s uit your in dividua l needs .
• Change the window position and size
• Set up the the quick access bar for access to the most frequently used commands
• Set up the keyboard shortcuts — you can change the preset key combinations and add your own to
run specific program commands
• Select your preferred interface language, etc.
Chapter Contents
• The Main Window
• Toolbars
• Customizing the ABBYY FineReader Workspace
• The Options Dialog Box
The Main Windo w
When you start AB BYY Fi neReader, its main window opens to gethe r w ith a New Task window
where you can set up and launch a built–in quick task or a custom automated task.
The main wind ow displ ays the A BBYY Fi neReade r docume nt that is curren tly open . For detail s, see
ABBYY FineReader documents.
7
Page 8

ABBYY FineReader 11 User’s Guide
• In the Pages window, you can view the pages of the current FineReader document. There are two
page viewing modes: icons (which shows a small image) or a list of document pages and their
properties. You can toggle between these modes from this window's shortcut menu, from the View
menu, and the Options dialog box (Tools>Options…).
• The Image window displays an image of the current page. You can edit image areas, page images,
and text properties in this window.
• In the Text window, you can view recognized text. You can also check spelling and format and edit
recognized text in the Text window.
• The Zoom window displays an enlarged image of the line or processed image area currently being
edited. While the Image window displays the general page view, the Zoom window provides an
easy way to view the image in greater detail, adjust the area type and position, or compare
uncertain characters with the enlarged image. You can change the image scale in the Zoom window
from the panel
Tip. You can move image s in the Image and Zoom windows with your mouse w hile hold ing down
the space bar.
Window t oggle k eys
• Press CTRL+TAB to toggle between windows
in the bottom part of the window.
• Press ALT+1 to activate the Pages window
• Press ALT+2 to activate the Image window
• Press ALT+3 to activate the Text window
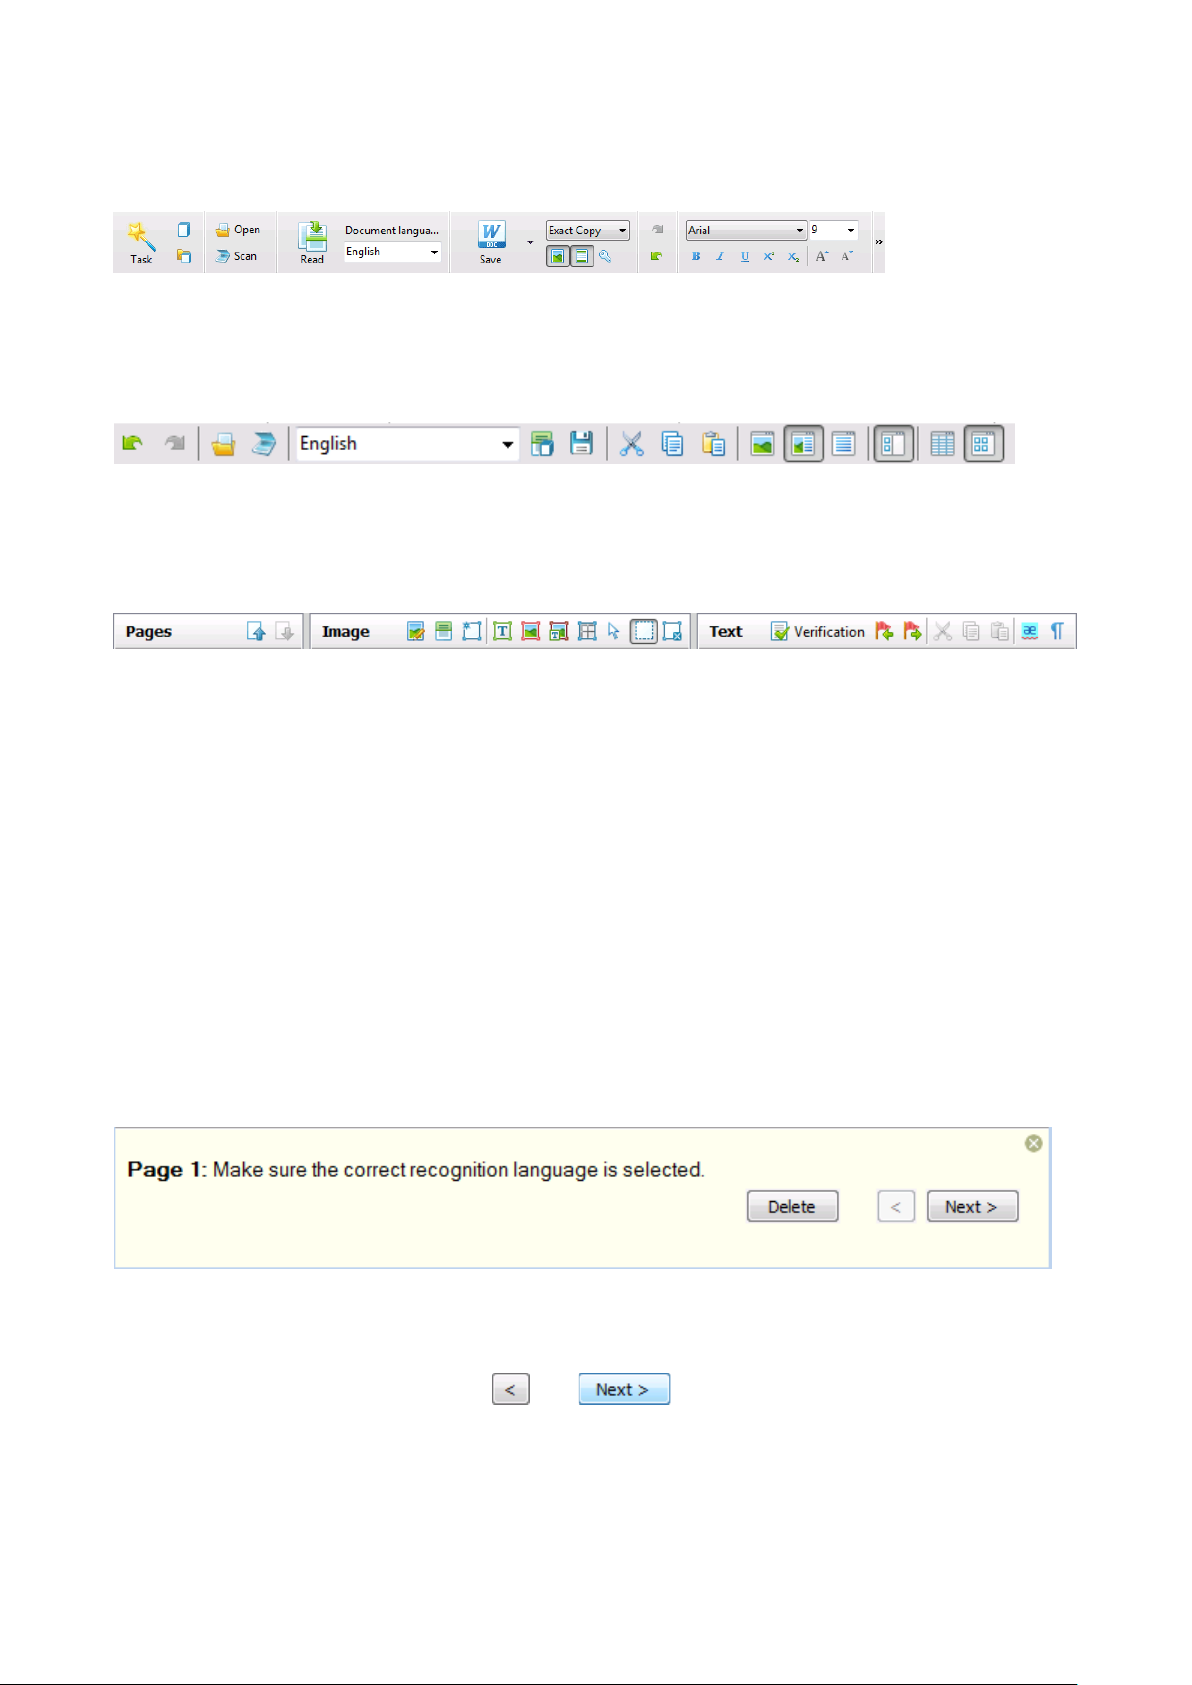
Toolbars
The main wind ow of ABB YY Fine Reader feat ures se veral toolbars . Toolbar buttons provide easy
access to program commands. The same commands can be executed from the program menu or
with keyboar d short cuts.
8
Page 9
ABBYY FineReader 11 User’s Guide
The Ma in Too lbar has a fixed se t of butto ns for all basi c acti ons : ope ning a do cume nt, sca nni ng a
page, opening an image, recogniz ing pages, saving result s, etc.
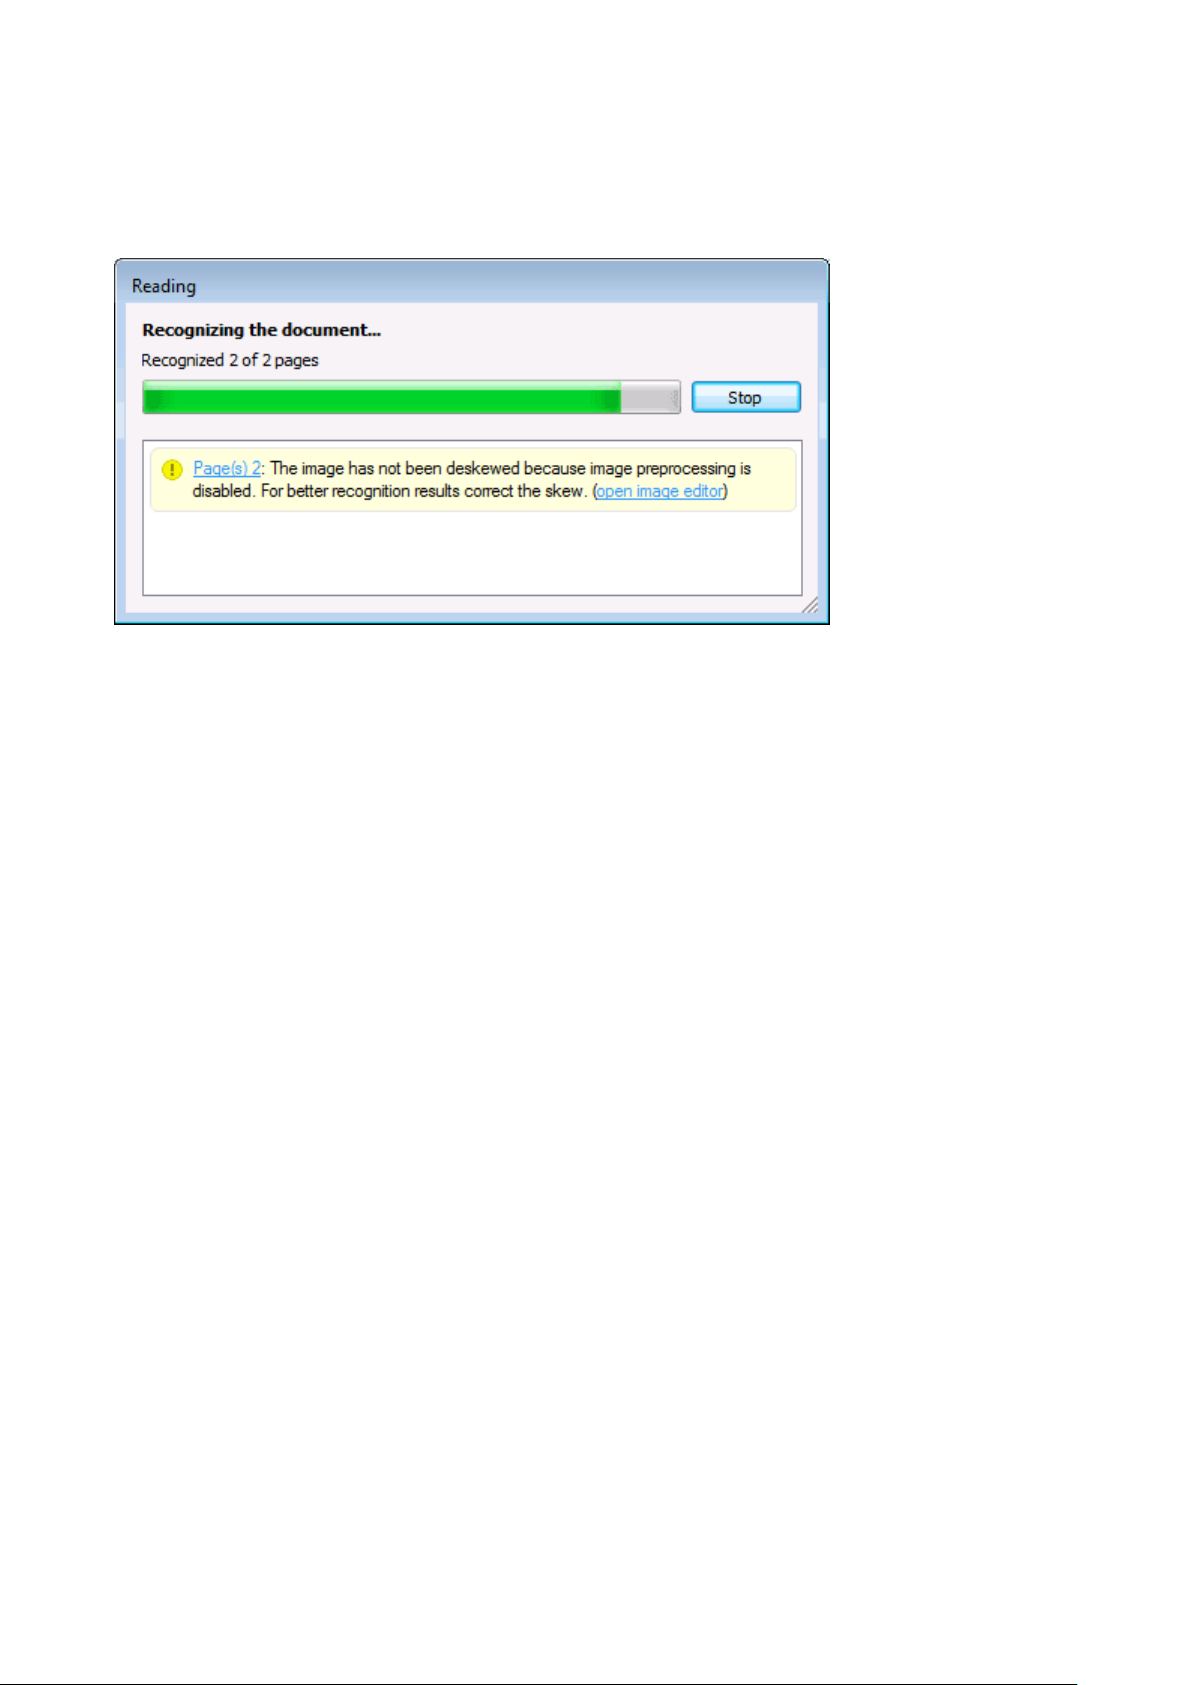
The Quick Access Bar can be c ustom ized by ad ding s peci al b utton s for v irtua lly a ny com ma nd in
the main menu. By default, this bar is not displayed in the main window. To display it, select the
Quick Access Bar under View>Toolbars, or from the main t oolba r's sho rtcut men u.
In the Pages, Image, and Text windows, the toolbars are positioned at the top. The buttons on
the toolba r in t he Pages win dow cann ot be chang ed. The t oolba rs i n the Image and Text window
are fully customiza ble.
To custo mize a t oolbar, i.e. to add or remove a ny of t he butt ons:
1. Open the Customize Toolbars and Shortcuts dialog box (Tools>Customize…).
2. On the Toolbars tab in the Categories field, select the desired category.
Note: Wh en a different category is selected, the commands on the Commands list will
change accor ding t o the set o f comma nds on the main men u.
3. Select a command from the Commands list and click the >> (or<<) button.
The selected command will appear on (or disappear from) the toolbar's command list.
4. In order to save your changes, click the OK button.
5. In order to reset the Quick Access Bar to its default view, click the Reset All button.
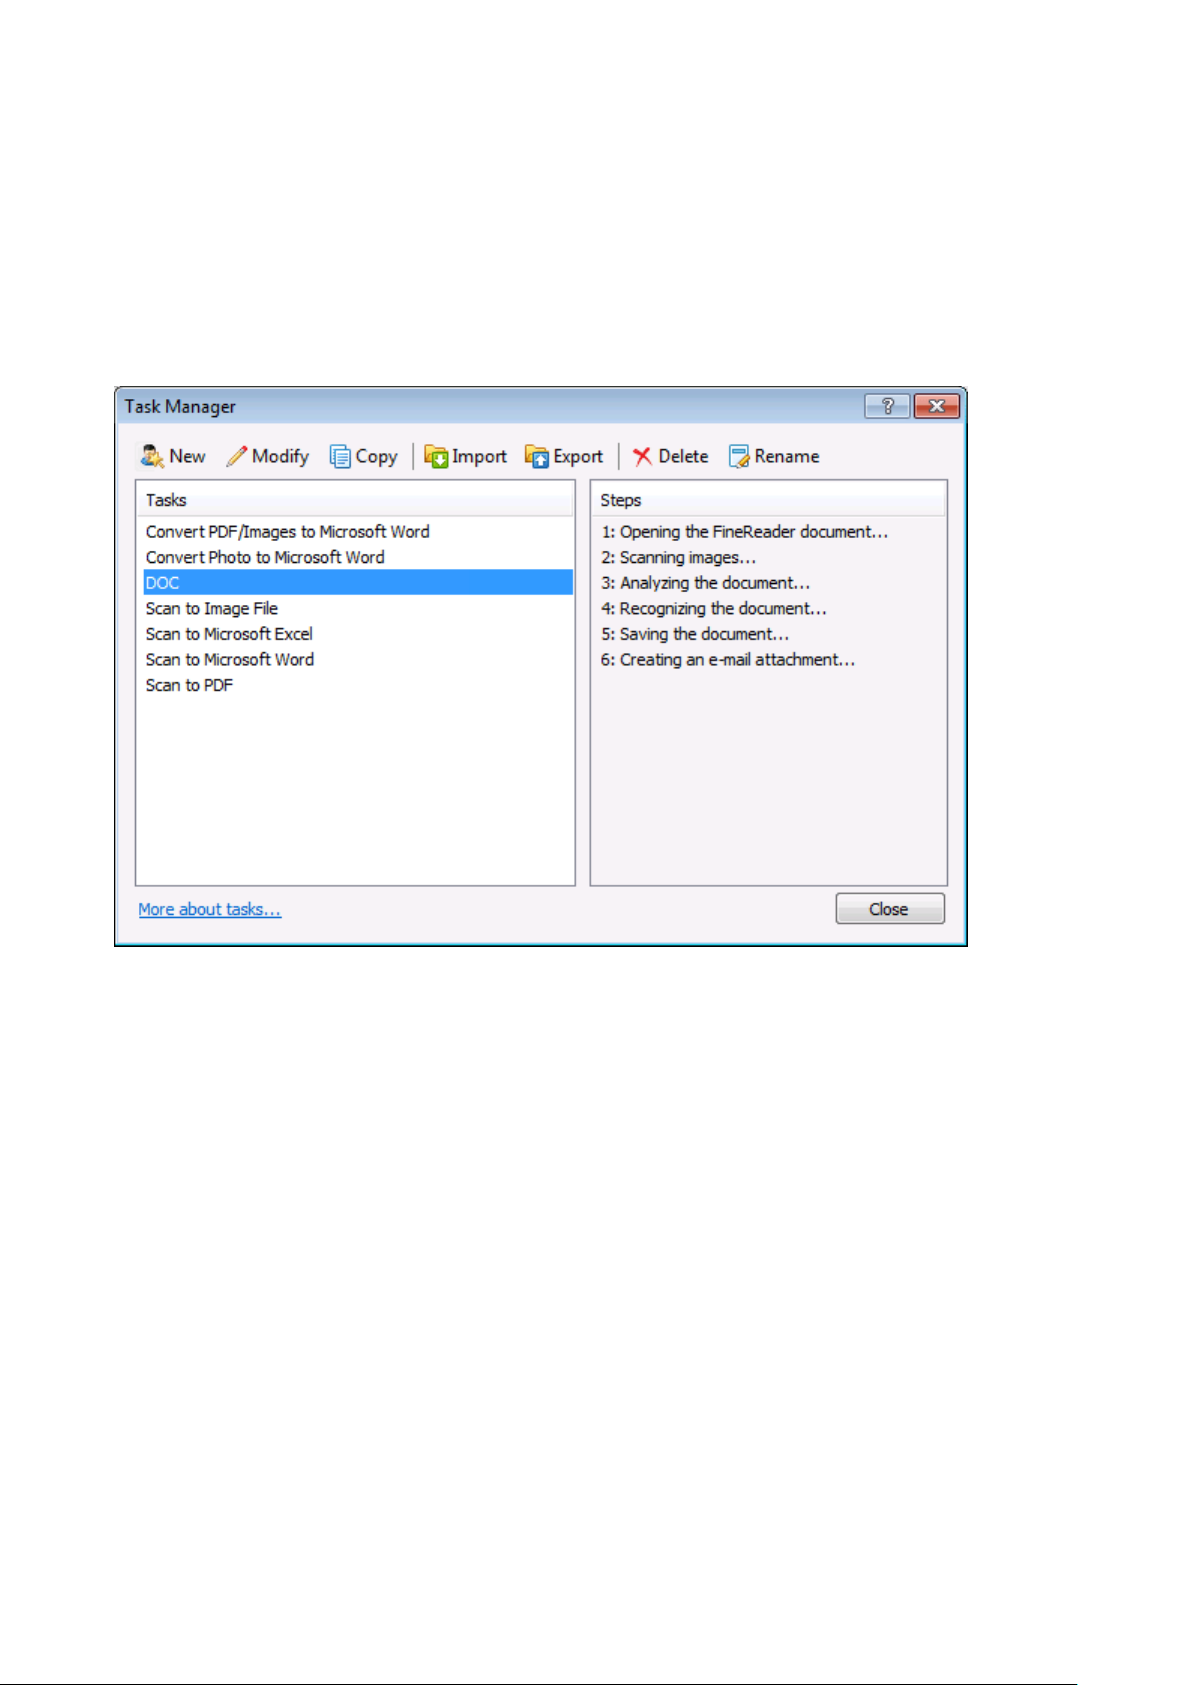
The W arnin gs and Er rors Pan e displays error warn ings and pop–up m essages w hen the pr ogram
is running.
To open a warnings and errors pane, select Show Warnings and Errors Pane o n the View menu
or on the short cut me nu of the ma in toolbar.
Errors and warning s are dis played for the page t hat is c urrently se lected i n the Pages wi ndow. To
scroll the war nings a nd e rror s, use the
and buttons.
Customizing the ABBYY Fi neReader Workspace
Changing FineReader interface
9
Page 10

ABBYY FineReader 11 User’s Guide
• You can temporarily hide the windows you do not use. In order to hide/show wind ows, use the
View menu options or keyboard shortcuts:
• F5 for the Pages window
• F6 for the Image window
• F7 for the Image and Text windows
• F8 for the Text window
• CTRL+F5 for the Zoom window
• You can change the window size by dragging the window spacers with your mouse.
• You can also change the position of t he Pages and Zoom windows. Use the commands in the View
menu or the window shortcut menu.
• You can customize the way warnings and error messages are displayed while the program is
running. The Show Warnings and Errors Pane command in the View menu toggle s the
warnings and errors pane on and off.
• To show/hide the Properties panel in the Image or Text window, right–click anywhere in the
window and then select Properties fr om the shortcut menu. Alternatively, you can click
the bottom of these windows.
/ at
• Some window settings can be customized in Options dialog box on the View tab.
Changing the interface language
The interface langua ge is sel ected when ABB YY FineReade r is inst alled . This la nguage w ill be use d
to write all messages, and the names of dialog boxes, buttons, a nd program menu items will be
displayed i n this lang uag e. You can to ggle betw een t he i nter face la ngua ges in the pro gram as it
runs.
In order to do so, follow these instructio ns:
1. Open the Options dialog box on the Advanced tab (Tools>Options…).
2. Select the desired language from the Interface language drop–down menu.
3. Click the OK button.
4. Restart ABBYY FineReader.
The Options D ialog Box
The Options dial og box co ntains the setti ngs you ca n use to ma nage opti ons for op ening ,
scanning, and saving documents in different formats, customizing t he appearance of program
windows, sele cting your pre ferred l ang uage, and speci fying the sourc e do cume nt's print type ,
program interface language, and more.
Important! The optio ns dialog box i s unde r t he Tools>Options… me nu. It ca n also be accessed
from the optio ns to olbar, dialog boxes for s aving d ata in differe nt format s, t he dia log boxes used t o
open imag es, a nd t he to olbar' s s hort cut me nu.
The dialog box has 6 tabs. Each tab contains options for certain program functions:
• Document
Use this opt ion t o cust omize t he foll owing:
• Document languag es (the languages in which the input document is written)
10
Page 11

ABBYY FineReader 11 User’s Guide
• Document print type
• Color mode
• Document properties (the file name, author, and keywords)
This tab also displays the path to the a ctive ABB YY Fine Reader do cume nt.
• Scan/Open
Use this o pti on to cust omize the g eneral opti ons for aut omate d do cume nt pr oces sing , and
the settings for pre –processing images when scanning and opening documents, such as
activating/deactivating the following:
• Automatic analysis of document layout (identifying layout are as and types)
• Automatic image conversion
• Automatic image pre–processing
• Automatic identification of page orientation
• Automatic separation of facing pages
You can also select your scanne r driver a nd scan ning inte rface.
• Read
This tab c onta ins re cogn itio n op tions :
• "Fast" or "thorough" recognition
• Whether a user pattern should be used for OCR
• Where to store the user patterns and languages
• Which fonts to use in recognized text
• Whether barcodes should be recognized
• Save
This optio n let s yo u sele ct t he form at i n whi ch the outp ut d ocum ent w ill be sa ved:
• RTF/DOC/DOCX/ODT
For details, see Saving in RTF/DOC/DOCX/ODT.
• XLS/XLSX
For details, see Saving in XLS/XLSX.
• PDF
For details, see Saving in PDF.
• PDF/A
For details, see Saving in PDF/A.
• HTML
For details, see Saving in HTML.
• PPTX
For details, see Saving in PPTX.
• TXT
For details, see Saving in TXT.
• CSV
For details, see Saving in CSV.
11
Page 12

ABBYY FineReader 11 User’s Guide
• E–book
See Saving E–Books for details.
• DjVu
See DjVu format for details.
• View
This option c ontai ns:
• Settings for the page view in the Pages (Thumbnails or Details) window
• Options for the Text window, including the option to highlight uncertain characters and
words (and the highlighting color), whether non–printable characters (e.g. line feed) should
be displayed, and what font should be used to display plain text
• Settings for the colors and thickness of borders enclosing various types of areas in the
Image window
• Advanced
Here you can:
• Select verification options for unreliably recognized characters
• Specify whether spaces before and after punctuation marks should be corrected
• View and edit user dictionaries
• Select the language of the FineReader menus and messages
• Specify whether the last ABBYY FineReader document should be opened when you start the
application
• Specify whether d ocument warnings should be displayed in a separate pane
• Select if you wish to participate in ABBYY's software improvement program
• Reset the options to the program defaults
12
Page 13

ABBYY FineReader 11 User’s Guide
Working with ABBYY FineReader
This chapter provides an overview of ABBYY FineReader: how to quickly produce an e–do cum ent i n
a format conveni ent for e diting and use, a nd how to pe rform co mplex a nd nonsta ndard text–
recognition task s.
Chapter Contents
• ABBYY FineReader Tasks
• Common Tasks
• Microsoft Word Tasks
• Adobe PDF Tasks
• E–book Tasks
• Other Quick Tasks
• Custom Automated Tasks
• How to Create a New Automated Task
• Task Steps
• Managing Automated Tasks
• ABBYY FineReader Step–by–Step
• Getting an Image
• Recognition
• Checking and Editing
• Saving OCR Results
• E–mailing OCR Results
• Sending OCR Results to Kindle
• ABBYY FineReader Document
• General
• Working With ABBYY FineReader Documents
• Splitting an ABBYY FineReader Document
• Page Numbering in ABBYY FineReader Documents
• Taking Into Account Some of the Features of Your Paper Document
• Image Acquisition Tips
• Tips for Improving OCR Quality
• Checking and Editing the Recognized Text
• Working with Complex–Script Languages
• Saving the Results in different formats
13
Page 14

ABBYY FineReader 11 User’s Guide
ABBYY FineReader Tasks
Document proce ssi ng wi th AB BYY FineReader often involves the same execution sequence, e.g.,
scanning a nd re cogn izin g a d ocum ent , and t hen s aving the re sult s in a pa rtic ular format . In order
to execute the m ost freque ntly use d tas ks, A BBYY Fine Reader offer s quic k t asks enabl ing yo u to
recog nize t ext w ith only one m ouse clic k.
Quick tasks are launched from the New Task window, which opens by default a fter the applicat ion
loads. If t he New Ta sk window is n ot dis pla yed, cl ick t he ma in to olba r an d the n cli ck the New
Task button.
1. In the New Task window, select the desired task:
• Common Tasks
• Microsoft Word tasks
• Adobe PDF tasks
• E–book tasks
• Other tasks
• My Tasks
2. Select recognized languages from the Document language drop–down menu. Additional options
are available (at the bottom of the window) for automated tasks used to convert data into a
Microsoft Word document or an Adobe PDF document.
3. In the Color mode drop–down list, select full color or black–and–white.
• Full color preserves the original image colors.
• Black–and–white converts images to black–and–white, reducing the size of the ABBYY
FineReader document and speeding up OCR.
Important! Once the doc ument is converte d to bla ck–and–white, you will no t be able to
restore the col ors. To get a color do cume nt, op en t he file wit h colo r ima ges or s can t he
paper document in color mode.
4. Click the appropriate button for your automated task.
14
Page 15
ABBYY FineReader 11 User’s Guide
ABBYY FineReader tasks are executed subject to the settings customized in the Options dialog box
(Tools>Options…).
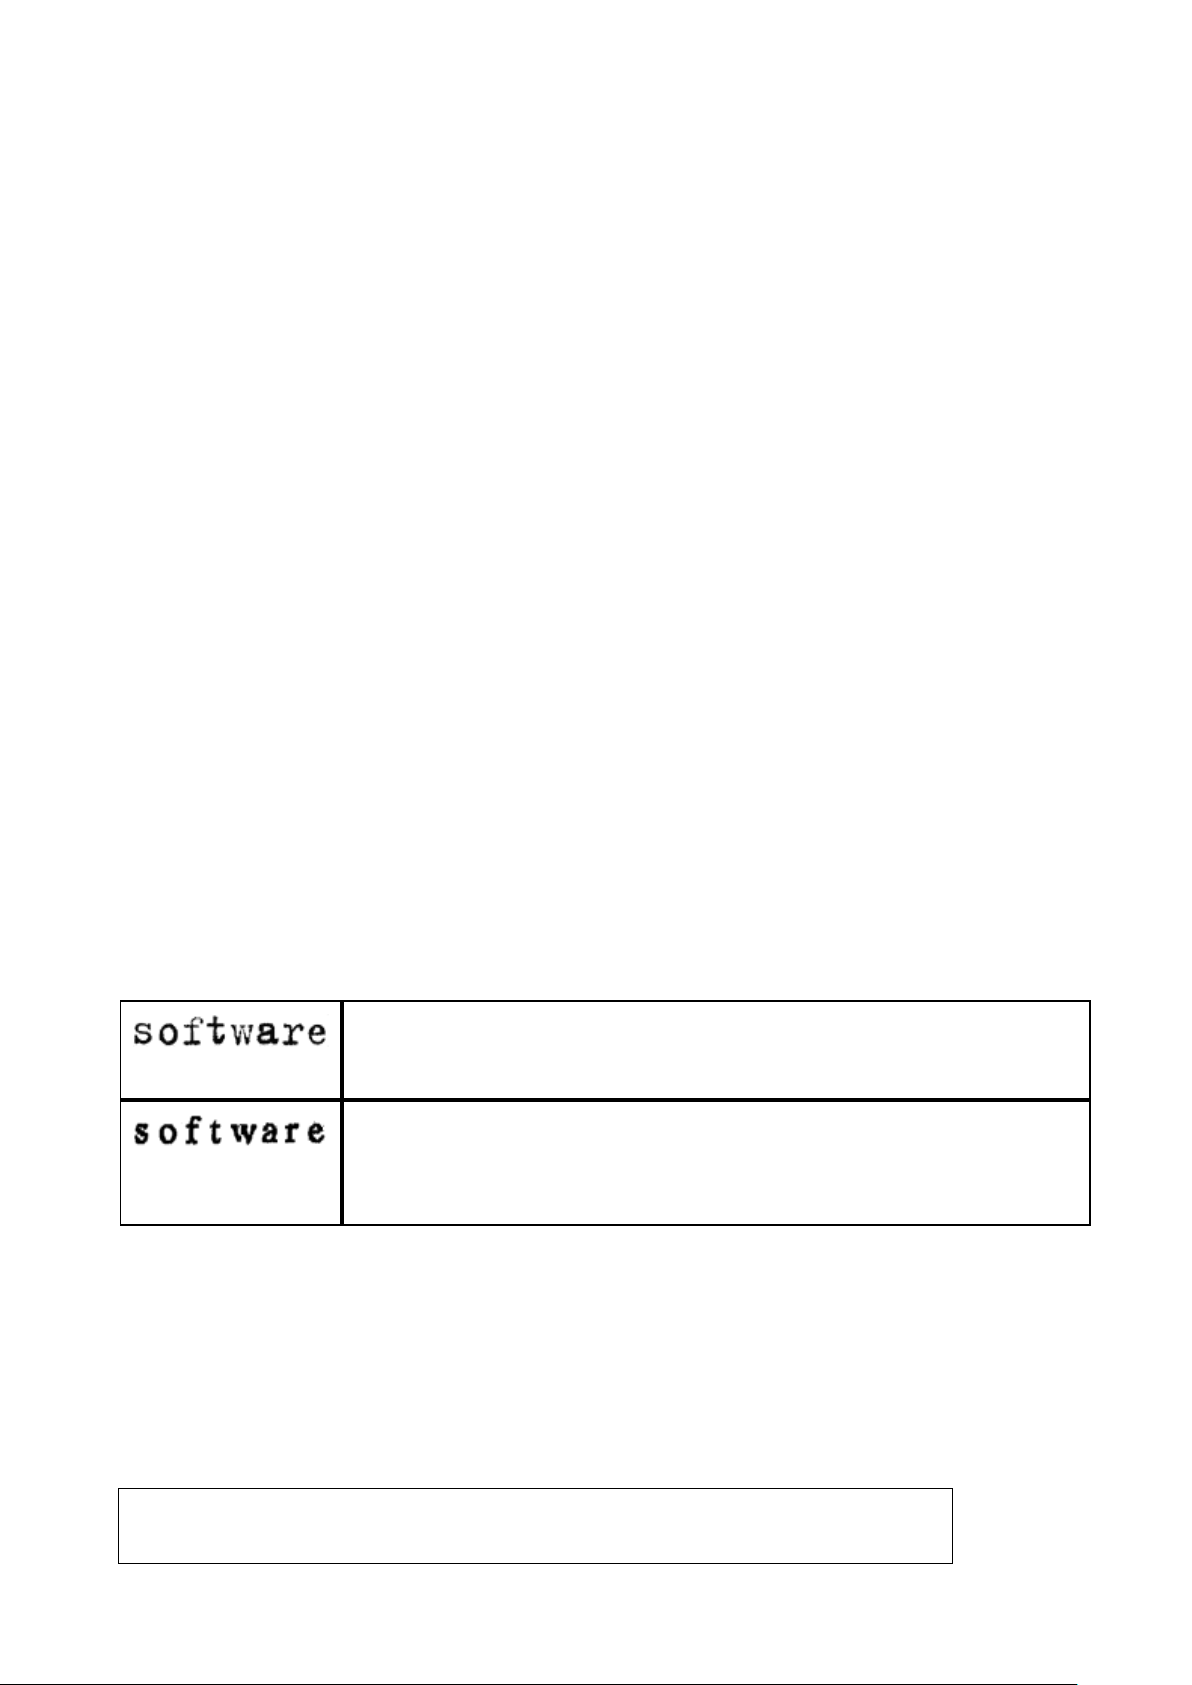
While an a utom ated tas k is ru nnin g, t he scr een shows the task execut ion bar w it h the task
execution i ndi cator, a lis t o f auto mate d tas k ste ps, tips, and warn ings.
Note: I n orde r to re cog nize d ocu ment s wit h co mplex stru cture s, you ca n cus tomi ze an d sta rt ea ch
processing stage manually. For details, see ABBYY FineReader Step–by–Step.
ABBYY FineReader also includes the option to cre ate yo ur ow n cust om aut omate d tas ks wi th t he
steps required for your custom jobs . For details, see Managi ng Automated Tasks.
Common Tasks
Click the Common ta b in the New Tas k window t o acc ess t he q uick t as ks tha t co ver the mos t
frequent u sage scena rios.
1. Select the document languages from the Document language drop–down menu located in the
upper section of the window.
2. In the Color mode drop–down list, select full color or black–and–white.
Important! Once the document is converted to black–and–white, you will not be able to restore
the colors.
3. Click the appropriate button for your task:
• Scan to Microsoft Word scans a paper document and converts it to a Microsoft
Word document
• File (PDF/Image) to Microsoft Word converts PDF documents and images files
to a Microsoft Word document
• Scan and Save Image scans a document and saves the resulting images. Once
the scanning is finished, a dialog box opens prompting you to save the images.
• Scan to PDF scans a paper document and converts it to an Adobe PDF document
• Photo to Microsoft Word converts a digital photo to a Microsoft Word document
• Scan scans a paper document
• Open opens a PDF document or image file
• Create Document… creates a new ABBYY FineReader document
4. As a result, a new document with the recognized text will open in the application you have selected.
When the Scan and Save Image task is completed, the image saving dialog box will open.
15
Page 16

ABBYY FineReader 11 User’s Guide
Important! Whe n you run a qui ck ta sk, da ta ar e co nverted bas ed t he pro gram's curre nt op tio ns. I f
you have change d appli cation op tions, re–run t he tas k to recog nize t ext wi th the new opti ons.
Microsoft Word Tasks
The tasks on the Micr osof t Word tab of t he Ne w Task window w ill help you convert docume nts
to a Microso ft Word docu ment.
1. In the Document language drop–down list at the top of the wind ow, select the document
languages.
2. In the Color mode drop–down list, select full color or black–and–white.
Important! Once the document is converted to black–and–white, you will not be able to restore
the colors.
3. In the bottom part of the window, select the desired conversion settings:
• Document format saving mode
• Keep pictures if you need to retain the images in the target document
• Keep headers and footers if you need to retain the headers and footers in the
target document
4. Click the appropriate button for your task:
• Scan to Microsoft Word if you ne ed to scan and convert a paper document
• File (PDF/Image) to Microsoft Word if you nee d to convert PDF documents and
image files
• Photo to Microsoft Word if you need to convert digital photos
5. When the document processing is complete, a new Microsoft Word document containing the
recognized text will open.
Note: If Microsoft Word is not installed on your computer, clear the Open document after saving
option in the Save As dialog box.
Important! When you run a quick task, data are converted based the program's current options. If
you have change d applic ation op tions, re–run the task to re cogn ize te xt w ith the ne w o ption s.
Adobe PD F Tasks
The tasks on the Adobe P DF ta b in the N ew Task window will help you convert various images to
Adobe PDF format.
1. In the Document language drop–down list at the top part of the window, select the document
languages.
2. In the Color mode drop–down list, select full color or black–and–white.
Important! Once the document is converted to black–and–white, you will not be able to restore
the colors.
3. Select a document saving mode:
• Text and pictures only
This option saves only the recognized text and the associated pictures. The page
will be fully searchable and the size of the PDF file will be small. The appearance of
the resulting document may slightly differ from the original.
• Text over the page image
This option saves the background and pictures of the original document and pl aces
the recognized text over them. Usually, this PDF type requires more disk space than
Text and pictures only. The resulting PDF document is fully searchable. In some
16
Page 17

ABBYY FineReader 11 User’s Guide
cases, the appearance of the resulting document may slightly differ from the
original.
• Text under the page image
This option saves the entire page image as a picture and places the recognized text
underneath. Use this option to create a fully searchable document that looks
virtually the same as the original.
• Page image only
This option saves the exact image of the page. This type of PDF document will be
virtually indistinguishable from the original but the file will not be searchable.
4. From the Picture drop–down list, select the desir ed quality of the pictures in the document.
5. Select PDF or PDF/A.
6. Click the task you wish to use:
• Scan to PDF scans a paper document a nd converts it to Adobe PDF
• File (Image) to PDF, converts a PDF document or an image file to a searchable Adobe
PDF document
• Photo to PDF, converts a digital photo to an Adobe PDF document
7. The resulting PDF document will be opened in a PDF viewing application.
Note: If there is no PDF viewing application installed on your computer, clear the Open document
after saving option in the Save As dialog box.
Important! When you run a quick task, data are converted based the program's current options.
If you have changed application options, re–run the tas k to reco gnize tex t with the new opt ions.
Tip. When savin g your sca nned doc ument t o PDF, you can set pa ssword s to prot ect your P DF
document fro m unaut horize d opening , prin ting, or e diting. For deta ils , see PDF secu rity s etti ngs.
E–book Tasks
Use the ta sks on the E–book tab of the New Ta sk window to convert images to EPUB, FB2, and
HTML, whi ch are wide ly used for ele ctro nic books . The EP UB and FB2 forma ts are base d on XML
and store each e–book in a single file. They are compatible with many e–book r eadi ng ap plica tio ns
and device s.
1. Select the document languages from the Document language drop–down menu located in the
upper section of the window.
2. In the Color mode drop–down list, select full color or black–and–white.
Important! Once the document is converted to black–and–white, you will not be able to restore
the colors.
3. Select a format for your e–book: EPUB, FB2 or HTML.
4. Click the button with the name of the task that you wish to us e:
• Scan to EPUB/FB2/HTML scans a paper document and converts it to an e–book format of
your choice
• File (PDF/Image) to EPUB/FB2/HTML convert s PDF documents and image files
• Photo to EPUB/FB2/HTML conver ts digital photos
5. The document with the recognized text will be opened in the appropriate application.
Note: If there is no e–book reading application installed on your computer, clear the Open
document after saving option in the Save As dialog box.
17
Page 18

ABBYY FineReader 11 User’s Guide
Important! Whe n a b uilt–in tas k is la unc hed, A BBYY Fine Reader use s th e opt ions sele cted at t he
moment of launch. If you adjust the options, launch the task once again to recognize the texts with
these new opti ons.
Other Ta sks
Use the Other tab in the New Task window to access the other quick tasks available in ABBYY
FineReader.
1. In the Document language drop–down list at the top of the window, select the document
languages.
2. In the Color mode drop–down list, select full color or black–and–white.
Important! Once the document is converted to black–and–white, you will not be able to restore
the colors.
3. Click the appropriate button for your task.
• Scan to Other Formats scans a paper d ocument and converts it into any of the
supported formats
• File (PDF/Image) to Other Formats converts a PDF document or image file into
any of the supported formats
• Photo to Other Formats converts a digital photo into any of the supported
formats
4. A new document with the recognized text will be opened.
Important! Whe n you run a qui ck ta sk, da ta ar e co nverted bas ed t he pro gram's curre nt op tio ns. I f
you ha ve cha nge d appl icat ion op tion s, re –run the task to re cogn ize te xt w ith the ne w o ption s.
Tip. If you do not see a task that suits yo ur purpo ses, you ca n create your own aut omate d task.
See Automated Tas ks for detailed instructions.
Custom Automated Tasks
(only ABBYY FineReader Corporate Edition)
Custom automated tasks offer more proce ssing steps than the built –in quick tasks. The steps in a
task corre spon d to t he d ocum ent pr oce ssin g stag es i n ABB YY Fi neRead er.
• How to Create a New Automated Task
• Task Steps
• Managing Automated Tasks
How to Create a New Automated Task
On the My Tasks tab of the N ew Tas k window, you can create your own tasks for your specific
purposes.
1. Click the Create… button. If you already created tasks on this tab, the name of the button should
change to Create / Edit / View Tasks….
Tip. You can also launch the Task Manage r by selecting Tools>Task Manager….
2. On the Task Manager toolbar, click the New button and enter a name for your task.
3. In the left–hand pane of the Task settings, select one of the available steps. The selected step will
be moved to the right–hand pane.
18
Page 19

ABBYY FineReader 11 User’s Guide
4. Select desired options for each step.
Note: Clicking the
dependent on other steps and may not be removed separately. For example, when you
remove an Analyze step, the corre spondin g Read step w ill also be removed.
5. Once you have added all the steps and selected their options, click Finish.
button removes a step from th e task. Some of the steps are
Task Steps
To create your custom automat ed task, select o ne of the act ions available for each step:
1. FineReader document
This is always the f irst step in an automated tas k. Once you select it , it will be mo ved to the
right–hand pane .
Select one of the foll owing com mand s:
• Create new document
A new FineReader will be created when the task is launched.
Specify the options to be used when creating the document, processing images, and
recognizing texts:
• Use the document options selected in the program
when the task is launched
• Use custom document options
• Select existing document
Specify the FineReader document that contains the images to be processed.
• Use open document
Images from the opened FineReader document will be processed.
2. Acquire images
This step is optio nl if at the previo us step yo u selecte d Sel ect exis ting docu ment or Use
open document.
• Open image / PDF
Specify the folder from which ABBYY FineReader will take images when the task is launched.
• Scan
The scanning settings selected in AB BYY FineReader at the time of scanning will be used.
Note:
a. If images are added to a document that already contains images, only the newly
added images will be processed. If a new document is added, all images in the
document will be processed.
b. If an ABBYY FineReader document to be processed contains already recognized
pages and already analyzed pages, the recognized pages will not be processed
anew and the analyzed pages will be recognized.
3. Analyze
At this step, the program analyzes images t o ident ify text are as, picture are as, tab le areas ,
or barcode areas. The Analyze step wi ll be add ed a utoma tica lly w hen t he Read step is
selected.
19
Page 20

ABBYY FineReader 11 User’s Guide
• Analyze the layout automatically, then adjust areas manually
ABBYY FineReader will analyze the images and identify the appropriate areas on them.
• Draw areas manually
ABBYY FineReader will ask you to draw the appropriate areas manually.
• Use an area template
Specify the area template to be used by ABBYY FineReader to analyze the images. For more
about area templates, see Using Area Templates.
4. Read
The options used for recognizing images depend on the options selected at the FineReader
document step.
5. Save / Send
At this step, you ca n select the forma ts to whi ch ABBY Y FineRead er shoul d save the
recognition results. You can also program ABBYY FineReader to send t he result s to a c ertain
application, send t he acquired i mages or text by e –mail, or crea te a cop y of the ABBYY
FineReader do cument . An aut omated task may have more tha n one sav ing step.
Specify the sav ing opt ion s to b e us ed:
• Use the saving options selected in the program when the task starts
• Use custom saving options
• Save document
Here you can specify the name of the file, its format, and the folder where the file should be
stored.
Note: To avoid specifying a new folder each t ime the tas k is launc hed, se lect Create
a time–stamped subfolder.
• Send documen t
Here you can select the application in which to open the resulting document.
• E–mail documen t
Here you can specify the name of the file, its format, and the e–mail address to which the
file should be sent.
• Save images
Here you can specify the name of the file, its format, and the folder where the image file
should be stored.
Note: To save all images to one f ile , selec t Sa ve as one m ulti–page i mage f ile
(only for TIFF a nd P DF).
• E–mail images
Here you can specify the name of the file, its format, and the e–mail address to which the
image file should be sent.
• Save FineReader document
Here you can specify the folder to which the ABBYY Fi neReader document should be saved.
Managing Automated Tasks
An ABBYY FineReader automated task is a set of suc cessi ve steps . Each ste p corres ponds t o one of
the docum ent re cog niti on sta ges. Simi lar a ctio ns c an be a utom ate d usi ng t asks .
Automated task management i ncludes creati ng, editin g, starting, an d deleting custom automated
tasks. Tasks are managed via the Task Ma nager dialog b ox.
20
Page 21
ABBYY FineReader 11 User’s Guide
To open t he Task Manager dialog box, do one of the following:
• In t he New Task window, click the My Tasks tab and then click Create / Edit / View Tasks…
• Select Task Manager… in the Tools menu
• Press CTRL+T
The toolbar at the top o f the Task Manage r contains bu ttons for creatin g, modifyi ng, cop ying,
deleting, im portin g, a nd export ing t asks.
To star t pro cess ing a docum ent in ac corda nce w it h your sele cted task , run the ta sk on the My
Tasks tab of t he New Task window.
ABBYY FineReader Step–by–Step
The proce ss in w hic h doc ument s are adde d to ABB YY Fi neReade r is made up o f four stage s. A n
image is retrieved , recognize d, and checked, a nd the re cognitio n results a re saved. T his sect ion
contains informat ion abo ut each o f the four sta ges.
• Getting an Image
• Recognition
• Checking and Editing
• Saving Results
• E–mailing OCR Results
• Sending OCR Results to Kindle
Getting an Image
21
Page 22

ABBYY FineReader 11 User’s Guide
To begi n the OCR proces s, ABBYY FineReader needs to r etrieve an image o f your document. There
are several ways to create an image, including:
• Scanning your paper document
• Opening an existing image file or PDF d ocument
• Taking a picture of your text
Scanning pa per do cument s
1. Make sure that your scanner is connected and turned on.
Consult yo ur s canne r's d ocum entat ion t o en sure it is set up cor rec tly. Be sure to i nstal l the
software provided wit h your scanner. Some sca nner mode ls mus t be t urne d on before the
computer i s turned o n.
2. Put the page to be scan ned into the scanner. If the scanner is equipped with an automatic
document feeder, you can put multiple pages into the scanner if you need t o process a multi –page
document.
3. Click Scan, or select Scan Pages… from the File menu.
The scanni ng dialo g box will ope n. Sel ect the appropria te setti ngs and s tart scanning . The
scanned pages wil l be added to the Pages window in ABBYY FineReader.
Tip. Typical p rinte d o ff i ce doc umen ts a re bes t sca nned i n grayscale at 300 dpi.
The quality of OCR results depends on the quality of the source document quality and the selected
scanning options. Low image quality may affect recognition results. That's why it is important to
correctly customize scanning settings and account for the features of the input document.
Opening ima ge f ile s and PD F docume nts
You can open file s in PD F format a nd recog nize finis hed image f ile s (for de tails, see Supp orted
Image Formats).
How to open a n ima ge or PDF file :
• In A BB Y Y FineReader, click Open, or select Open PDF File/Image… from the File menu.
In the dial og b ox, sel ect Open image:
1. Select one or more images.
2. Specify the page range for a multi–page document.
3. Enable the Detect page orientation option to automatically detect the page layout when
opening images.
4. Activate the Split facing pages option to automaticall y split dual pages into separate
images when opening images.
5. Enable the Enable image preprocessi ng option to perform automated image
preprocessing when images are opened.
Note: When page images are ope ned or scanned for the f irst time, they are add ed to a new
FineReader docum ent disp layed i n the Pages w indow. Later, when the pa ge images are
opened or scan ned, the y wil l be ad ded to t he bo ttom o f the ope n Fine Reader doc ument .
• In Windows Explorer, right–click the appropriate image file and select Open in ABBYY
FineReader from the shortcut menu.
22
Page 23

ABBYY FineReader 11 User’s Guide
• In Microsoft Outlook, select the e–mail message with the image or PDF attachments you wish to
open, and then click
• In Microsoft Outlook or Windows Expl or er , drag the desired image file into ABBYY FineReader's
main window. The image will be added to the current ABBYY FineReader document.
on the toolbar. In the dialog box that opens, select the files to open.
Note: The author of a PDF file may choose to restrict access to it. For example, the author may
create a password or restrict certain features, such as the ability to extract text and graphics. To
adhere to copyright guidelines, ABBYY FineReader will ask you for a password to open such files.
Ta king a pict ure o f a te xt w ith a came ra
ABBYY FineReader can perform OCR on images created with a digital camera.
1. Take a picture of the text.
Note: G ood q uali ty photos are require d for suc cessful OCR result s.
2. Save the photo to your hard disk.
3. Click the Open button or select Open PDF File/Image… from the File menu.
Recognition
ABBYY Fine Reader use s Optica l Charact er Recogn ition te chnolo gies to c onvert do cumen t image s
into editable text. Before performing OCR, the program analyzes the str ucture of the entire
document and detect s t he area s t hat c ontai n tex t, ba rcode s, im ages , and tab les.
ABBYY Fine Reader doc umen ts ar e by d efaul t rec ognize d a utomat ica lly under cur rent progra m
settings.
Tip. You can disable a utoma tic a nal ysis a nd OC R for newl y adde d im ages from t he Scan/Open tab
of the Options dialog box (Tools>Options…).
To ach ieve the best OCR quality, select the appropriate options for the recognition language ,
recognition mode , and re cognized te xt prin t type.
In some cases, the OCR process can be started manually. For example, if you disabled automatic
recognitio n, m anua lly se le cted a reas on a n ima ge, or cha nged the follo wing setti ngs i n the Options
dialog box (Tools>Options…):
• the recognition language on the Document tab
• the document type on the Document tab
• the color mode on the Document tab
• the recognition options on the Read tab
• the fonts to use on the Read tab
To la unch t he OCR pro cess ma nually :
• Click the Read button on the main toolbar, o r
• Select Read from the Document menu
Tip. To reco gnize the sele cted a rea o r pa ge, use t he appr opr iate o pti ons o n the Page and Areas
menus, or use the sho rtcut me nu.
23
Page 24

ABBYY FineReader 11 User’s Guide
Checking and Editing
Recognition results are displayed in the Text wind ow. Uncertai n characte rs are hig hlight ed in co lor
in this window. This ma kes it eas y to locat e possi ble errors and q uickly c orrect t hem.
You can edit the o utput doc ume nt eit her d ire ctly i n the Text window or w ith the b uilt–in
Verification dialo g box (Tools>Verification…), which lets you browse through uncertain words,
fi nd sp elli ng err ors, add new words to your di ctio nary, and change the dict ionar y la nguag e.
ABBYY FineReader also le ts you adju st the forma tting of recogn ized text.
You can edit reco gnize d te xt in t he Text win dow with t he b utton s on t he ma in to olba r and the Text
Properties pa nel ( via t he sho rtc ut me nu o f the Text>Properties window).
Note: W hen ABBY Y FineReade r performs OCR, it automat ically de tects the doc ument's styles. All of
the selected styles are displayed on the Text P rop ertie s panel. By ed iti ng styl es, yo u ca n easi ly
change the formattin g of th e entire te xt. ABB YY Fi neReader prese rves all styles whe n saving t ext to
RTF/DOC/DOCX/ODT formats.
Saving OCR Results
Recognitio n result s can b e saved t o a file, se nt to anoth er app lication , copied t o the C lipboard, or
e–mailed. You can also send OCR re sult s to Kindl e.c om w here they will be convert ed to the K indl e
format and be come a vailable for dow nload o nto your Kindl e devi ce. You ca n save e ither the ent ire
document, or selected pages only.
Important! Be sure to sel ect the appropria te savi ng optio ns before cl icki ng Save.
To save recognized text:
1. Select the format saving mode on the main toolbar's drop–down menu.
Document Format Savin g Modes .
a. Exact Copy
Produces a document with formatting that corresponds to that of the original.
Recommended for document s with complex formatting, such as promotion booklets. Note,
however, that this option limits the ability to change the text and format of the output
document.
b. Editabl e Co py
Produces a document in which the formatting may differ slightly from that of the original.
Documents produced in this mode are easy to edit.
c. Formatted Text
Retains fonts, font sizes, and paragraphs, but does not retain the exact spacing or locations
of the objects on the page. The text produced will be left–aligned. Texts in right–to–left
scripts will be right–aligned.
Note: Vertical text s will be chan ged to horizontal in this mode.
d. Plain Text
This mode does not retain text formatting.
Important! The list of available optio ns may vary depending on the selected saving format.
2. On the Save tab of the Options dialog box, select the desired saving options and click OK.
3. Click the arrow to the right of the Save button on the main toolbar and select the appropriate
option, or use commands from the File menu.
Note: ABB YY FineReader lets you save page images. For details, see Saving an Image of the Page.
24
Page 25

ABBYY FineReader 11 User’s Guide
E–mailing OCR Results
With ABBYY FineReade r, yo u can e–mail recogn ition re sult s in a ny of the suppo rted forma ts w ith t he
exception o f HT ML.
To send a document:
1. Select E–mail>Document from the File menu.
2. In the dialog box, select:
• the format in w hich the document should be saved
• one of the saving options: save all pages to one file, save each page to a separate file, or
split the document into files based on blank pages
3. Click OK. An e–mail messag e will be created with the attached file(s). Simply specify the recipient
and send the message.
You can also e–mail the images of d ocument pages.
To send page images:
1. On the File menu, cli c k E–mail>Page Images.
2. In the dialog box, select:
• the format in w hich the document should be saved
• Send as multi–page image file if you need to send images as a multi–page file
3. Click OK. An e–mail message will be created with the attached file(s). Simply specify the recipient
and send the message.
Sending OC R Results to Kind le
With ABBYY FineReade r, yo u can e–mail recognition result s to Kindle.com ser ver, w here they will be
converted i nto t he Ki ndle format and available for download onto your Kindle device.
Important! To use this feature , you need a Kin dle a ccou nt on Kind le.c om.
1. Click the arrow next to the Save button on the main tool bar and select Send to Kindle….
2. Specify:
• your Account
• one of the saving options: save all pages to one file, save each page to a separate file, or
split the document into files based on blank pages
3. Click OK.
An e–mail message with an attachment will be created. Send this e–mail message to Kindle.com and
the converted file will soon be available for download onto your Kindle device.
General
A new ABBYY FineReader document is opened b y default when you start ABBYY Fine Reader. You
can either sta rt wo rki ng wit h th is ne w do cument or op en a n exi sting ABB YY Fi neReade r do cume nt.
All document page s are d isplayed i n the Pages window. The pages in t he Pages wi ndow can b e
displayed either as thumbnails or as page icons.
To change the display mode:
• Click View>Pages Win dow. Then select Thumbnails or Details.
25
Page 26

ABBYY FineReader 11 User’s Guide
• On the shortcut menu of the Pages window, select Pages Window and then select either
Thumbnails or Details.
• On the View tab of the Options dialog box (Tools>Options…), in the Pages Window group,
select either Thumbnails or Details.
To open a pag e, c lic k its thum bnail in t he Pages window (in Thumbnails mode ) or double –click its
number (in Details m ode). I n the Image windo w you will see the page image and in t he Text
window you will s ee the r ecognitio n results (if t he docume nt was reco gnized).
Note: W hen o peni ng Fi neRead er do cume nts crea ted in earlier versions o f ABBYY FineReader, the
program attempts to co nvert them into it s new format. As th is convers ion cannot be undo ne, ABB YY
FineReader w ill prom pt you to sa ve the conver ted doc ument un der a new name. Al l recogni zed text
will be lost in the proce ss.
Working with ABBYY FineReade r Doc umen ts
When wor king w ith a n AB BYY FineRead er d ocume nt, you ca n:
• Create a new document
• On the File men u, cli c k New FineReader Document, or
• On the main toolbar, click
• Delete a page from the curr en t document
• In the Pages window, select the page you wish to delete and then select Delete Page
from Document from the Page menu, or
• In the Pages window, right–click the page you wish to delete and then select Delete Page
from Document from the shortcut menu, or
• In the Pages window, select the page you wish to delete and press the DELETE key.
To se lect se veral page s, hold down the C TRL key a nd click e ach of the pages to delete o ne
by one.
• Open a document
At launch, ABBY Y Fine Reade r au tomat ica lly cre ate s a ne w d ocume nt.
Note: I f you w ish A BBY Y Fin eReade r to open t he l ast docum ent on wh ich you were wo rking
in the pre vious ses sion, sele ct Tools>Options…, click the Advanced ta b, and the n select
Open the last used FineReader document when the program starts.
To op en a doc ument :
1. On the File menu, clic k Open FineReader Document…
.
2. In t he Open Document dialog box, select the document to open.
Note: You can als o open an AB BYY Fine Reader do cument directl y from Window s Explore r by
right–clic king the desired docume nt folder (docum ent folders are displa yed as
selecting Open with ABBYY FineReader from the shortcut menu.
• Add images to the current document
• On the File men u, cli c k Open PDF File/Image…
• In the Open Image dialog box, select the desired images and click Open. The image will
be appended to the end of the current document and its copy will be saved in the folder
that stores the document.
) and
26
Page 27

ABBYY FineReader 11 User’s Guide
Note: You can a lso a dd i mage s dire ctly from Wind ows Ex plore r:
• In Windows Explorer, select the desired ima g e files, right–click the selection, and select
Open with ABBYY FineReader from the shortcut menu.
If ABBYY FineReade r is ru nning, the selected files wi ll be adde d to th e curre nt
document . Oth erwi se, A BBYY Fine Reader wil l be la unc hed a nd t he se lecte d file s wi ll
be added to a new document.
• Save the current document
1. On the File menu, clic k Save FineReader Document…
2. In the Save Document dialog box, type in a name for your document and specify a
storage location.
Note: Sa ving a n AB BYY Fine Reader doc ument wil l save the p age im ages , t he re cogniz ed
text, the traine d patt erns , and the user lang uages (if a ny).
• Close the current document
• To close a page of the current document, select the page and then select Close Current
Page from the Document menu.
• To close the entire document, select Close FineReader Document from the File menu.
• Save user patterns and languages
To s ave your user patte rns a nd la nguag es i n one f i le:
1. Select Tools>Options… and click the Read tab.
2. Under User patterns and languages, click the Save to File… button.
3. In t he Save Options dialog box, type in a name for your file and specify a storage location.
This f ile w ill conta in the path to t he folder w here user la nguages, la nguage groups,
dictionaries, and patterns are stored.
• Load user patterns and languages
1. Select Tools>Options… and click the Read tab.
2. Under User patterns and languages, click the Load from File… button.
3. In t he Load Options dialog box, select the file that contains the desired user patterns and
languages and click Open.
Splitting an ABBYY FineReader Document
When proc essi ng larg e n umber s of mult i–page do cume nts, it i s ofte n mor e pra ctical to s can all the
document s first and only then a nal yze a nd re cogni ze t hem. Howe ver, to pres erve t he or igina l
formatting of ea ch pa per docum ent corre ctly, ABBYY Fine Reader must proc ess e ach o f t hem as a
separate FineReader document. ABBYY FineReader offers tools to group scanned page s into
separate do cume nts t o whi ch the y be long .
To sp lit a n ABBYY F ineReader do cument i nto several do cuments :
1. On the File menu, cli c k Split into Several Documents… or sele ct pages in the Pages window,
right–click the selection, and then select Create New Document with Selected Pages….
2. In the Split Docume nt dialog box, click Add document to create the required number of
FineReader documents.
27
Page 28

ABBYY FineReader 11 User’s Guide
3. Move pages from the Pages pane into their appropriate documents displayed in the New
Documents pane using one of the following three methods:
• Select pages a nd drag them with the mouse.
Note: You can also use drag–and–drop to move pages between documents.
• Click the Move button to move the selected pages into the current document displayed in
the New Documents pane or click the Return button to remove the selected pages from
the current document.
• Press the CTRL+RIGHT ARROW to move pages into the current document and
CTRL+LEFT ARROW or DELETE to remove the selected pages from the current
document.
4. Once you are finished moving pages into the new FineReader documents, click the Create All
button to create all documents at once or click the Create button in each of the documents
individually.
Note: You can als o drag–and–drop selected pages from the Pages window int o any ot her ABBY Y
FineReader wind ow. A ne w ABBY Y Fi neReade r do cume nt wi ll be cre ated for th ese p ages .
Numbering Pages in an ABBYY FineRead er Docum ent
All pages in a document are numbered. Page numbers are displayed in the Pages wi ndow next to
the page t hum bnail s.
To ren umber pa ges:
1. In the Pages window, select one or multiple pages.
2. On the shortcut menu of the Pages window, click Renumber Pages….
3. In the Renumber Pages dialog box, cho os e one of the following:
• Renumber pages (cannot be undone)
This changes all page numbers successively, star ting with the selected page.
• Restore original page numbers after duplex scanning
This restores the initial numbering of the source document, if you used the feeder to scan
first all the odd pages and then all the even ones. ABBYY FineReader allows you to restore
the original page numbers after scanning in duplex mode . You can choose between the
normal and the reverse order for even pages.
Important! A minimu m of 3 pages wit h successive numbers must be allotted for
this operation.
• Swap book pages
This option is useful if you scan a book written in a left–to–right script and split the facing
pages, but fail to specify the correct language.
Important! A minimu m of 2 pages wit h successive numbers must be allotted for
this operation, including at least 2 facing pages.
Note: To cancel this operation, select Undo last operatio n .
4. Click OK.
The order of the pages in the Pages window wi ll cha nge to refle ct the ne w numbe ring.
Note:
1. To change the number of one page, click its number in the Pages window a nd enter the new
number in the field.
28
Page 29
ABBYY FineReader 11 User’s Guide
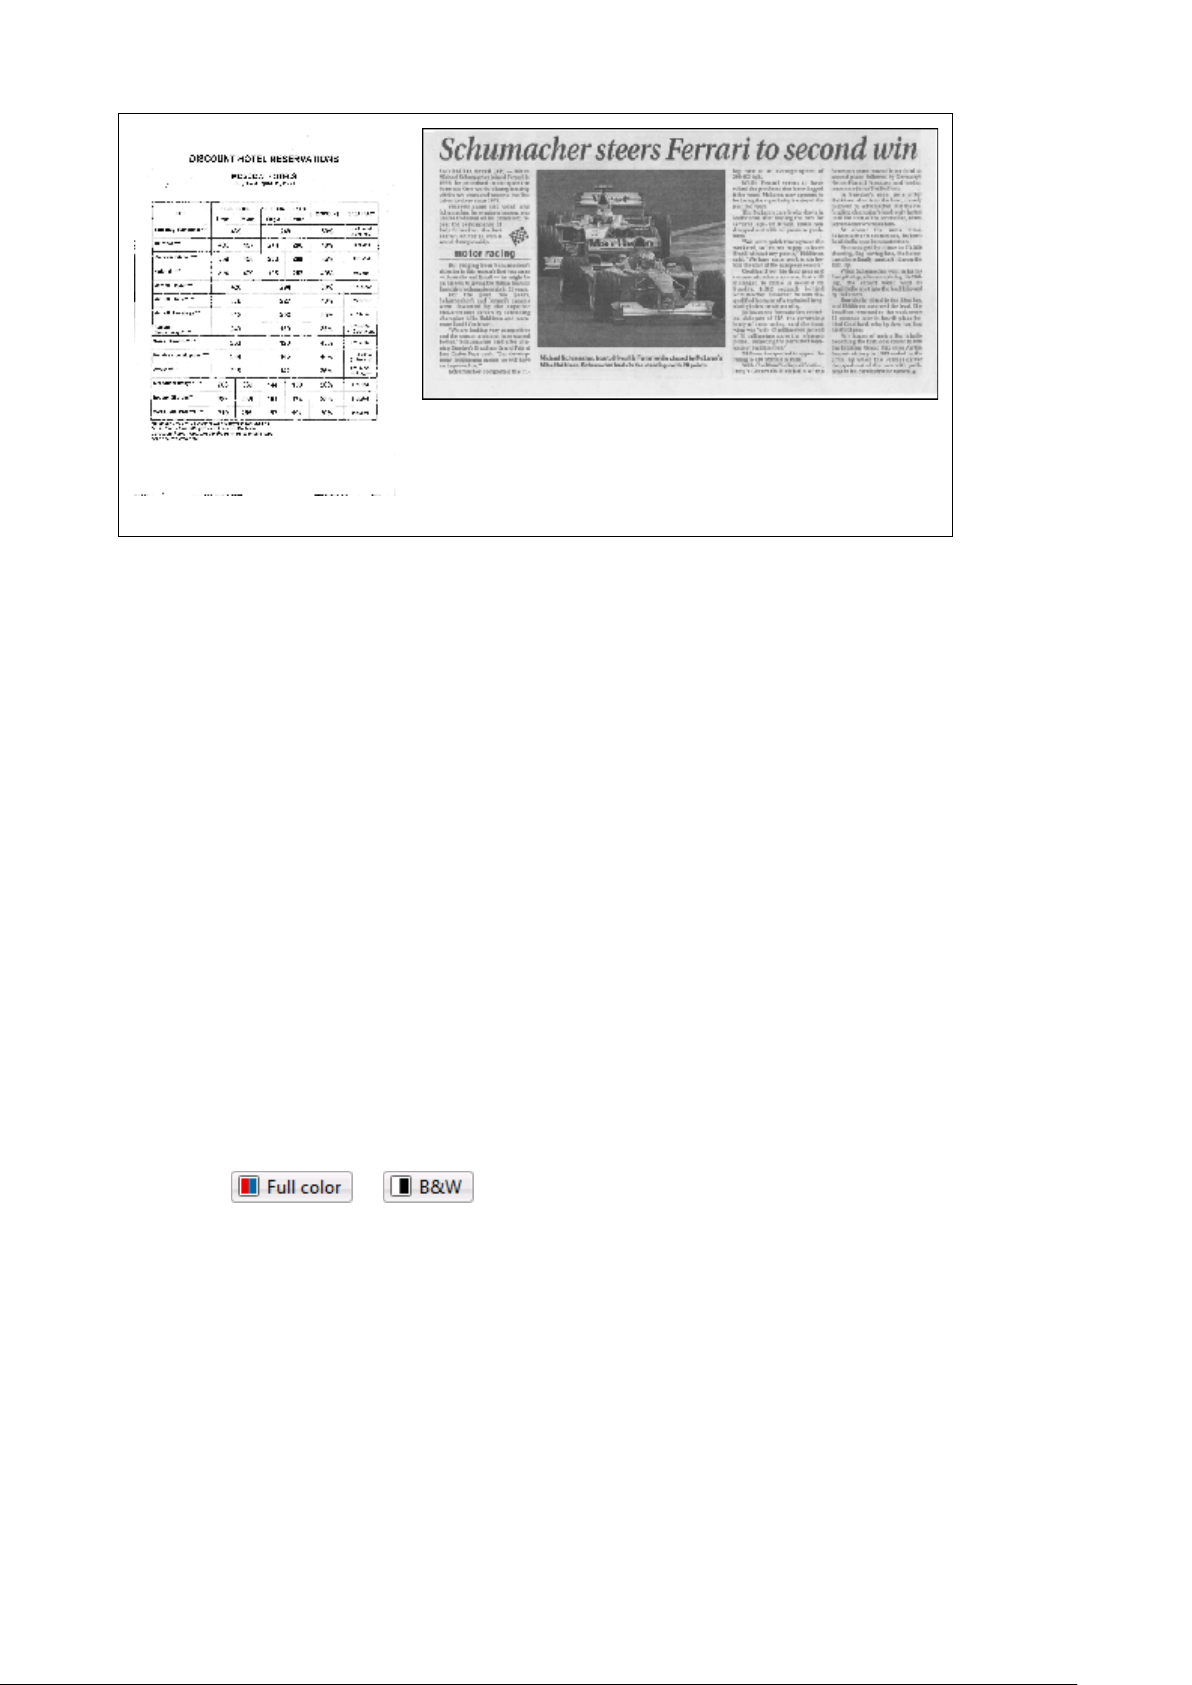
An example of typewritten text. All letters are of equal width (c ompare,
An example of a text pro duced b y a fax machi ne. As you ca n see from t he
Fax
Newspaper
2. In Thumbnails mode, you can change page numbering simply by dragging selected pages to the
desired place in the document.
Taking Into Account Some of the Features of Your Paper Document
OCR quality greatly depends on the q uality of the source imag e. Consider t he following elements t o
ascertain whethe r you wi ll get the scan ning res ults you de sire:
• Document Type
Various devices may be used to produce printed documents, such as typewriters or faxes.
Recognition quality for these documents may vary. This section provides recommendations for
selecting the right print type.
• Print Quality
OCR quality may be greatly impaired by "noise" tha t sometimes occurs on poor quality documents.
This section provides recommendations for scanning these documents.
• Color mode
A document may b e color or black–and–white. More about selecting a color mode for OCR.
• Document Languages
A document may contain text written in multiple languages. This section provides recommend ations
for selecting recognition languages.
Documen t Type
When recognizing typewritten texts or faxes, OCR quali ty can be improved by selecting the
corresponding Document type in the Options d ialog box.
For most docume nts, the program wi ll dete ct the pri nt type aut omati call y. For automatic p rint type
detectio n, the Auto opti on mus t be sele cted und er Do cum ent typ e in the Options dialo g box
(the Tools>Options…> menu, then the Document tab). You can process the document in full–
color or black–and–white mode.
You may also choose to manually select the print type as needed.
for example, "w" and "t"). For texts of this type, select Typewriter.
example, the le tters are not clear in some pla ces, in ad diti on to nois e a nd
distortion. For texts of t his type , sele ct Fax.
Tip. After recognizin g typewritte n texts a nd faxes, b e sure t o select Auto t o pro cess r egul ar
printed do cument s.
Print Quality
Poor–qua lity d ocume nts wit h "no ise" (i.e. rand om bla ck d ots or sp eckle s), blurr ed a nd une ven
letters, or skewed lines and shifted table borders may require specific scanning settings.
29
Page 30
ABBYY FineReader 11 User’s Guide
Poor–qua lity d ocume nts are be st scann ed in grays cale . Whe n sca nning in grayscal e, t he pro gram
will select the optimal b rightne ss value aut omatica lly.
Grayscale s canni ng mo de re tai ns mor e in format ion about the letter s in the scanne d te xt to ach ieve
better OCR res ults w hen recog nizing docume nts of medium to po or qual ity. Yo u can als o corre ct
some of the defects manually using the i mage editing to ols available in the Image Edit or.
Color M ode
If you do not need to pre serve the orig inal col ors of a fu ll–color docume nt, you ca n process the
document in bla ck–and–white mode. This will gre atly red uce the size of th e resulti ng ABBYY
FineReader document and speed up the OCR process. However, processing lo w–contrast ima ges in
black and white ma y result in poor OCR q uali ty. We also do not reco mme nd black and white
processing for phot os, m agazine page s, and text s in C hinese , Japa nese, and Korean.
Note: You can als o speed up recogn ition of color and black–and–whi te do cume nts b y sel ecti ng the
Fast read ing option on the Read t ab o f the Options dia log box. For more about t he reco gnition
modes, see OCR Options.
To sele ct a col or m ode:
• Use the Color mode drop–down list in the New Task window or
• Use the options under Color mode on the Document tab of the Options dialog box
(Tools>Options…) or
• Click
Important! Once the doc ument is converte d to bla ck–and–white, you will no t be able to rest ore
the colors. To get a colo r docume nt, op en the file with colo r imag es or sca n the paper docume nt in
color mode.
or in the Pages window.
Document Languages
ABBYY FineReader recog nizes both mono– a nd m ulti –lingual ( e.g. writt en in t wo l angua ges)
document s. For m ulti –lingual d oc ument s, you mus t sele ct se veral re cog niti on la ngua ges.
To sp ecify a n OCR lang uage for yo ur docum ent, ei ther in t he Docume nt Languages dr op–down list
on the mai n to olbar (or i n the New Tas k window if yo u are using q uic k ta sks), sele ct o ne of the
following:
30
Page 31

ABBYY FineReader 11 User’s Guide
• Autoselect
ABBYY FineReader will automatically select the appr opriate languages from the user–defined list of
languages. To modify this list:
1. Select More languages…
2. In the Language Editor dialog box, select the option Automatically select document
languages from the following list is selected.
3. Click the Specify… button.
4. In the Languages dialog box, select the desired languages.
• A language or a combination of languages
Select a language or a language combination. The list of languages includes the languages most
often used on the computer, as well as English, German, and French.
• More languages…
Select this option if the language you need is not visible in the list.
In the Language Editor dia log box, se lect th e Specify languages manually optio n and
then select the desir ed lang uage or l anguag es by che cking th e appro priate b oxes. If you
often use a par ticula r langua ge comb inati on, you ca n create a new gro up for these
languages.
There are several reaso ns that a language may no t be liste d:
1. The language is not supported by ABBYY FineReader.
2. Yo ur copy of the software product does not support this language.
Image Acquisition Tips
OCR quality depe nds on the qual ity o f the orig inal image and the setti ngs u sed d urin g the sca nning
process. This secti ons provi des re comm enda tion s on s can ning d ocum ents and taki ng pho tos of
documents with a digital camera. There is a lso some advice on correcting d efect s tha t com monl y
occur on scanned images and digital photos.
• Customizing Scanning and Image Op ening Settings
• Selecting the Scanning Interface
Refer to this section more information about scanning with the ABBYY FineReader interface and the
scanner driver interface, the features of the interfaces and how to toggle between them.
• Scanning Recommendations
• Taking Photos of Documents
• Automatic Image Preprocessing
• Editing Images Manually
Customizi ng Sca nning a nd Imag e Open ing Se tting s
ABBYY FineReader lets users m odify global automat ic docume nt proce ssing op tions a nd optio ns for
scanning a nd o peni ng do cume nt pa ges , incl udi ng: act ivati ng/de acti vating aut omat ic do cume nt
analysis a nd re cogn itio n, im age p repro cess ing, and sele ctin g the sca nning inte rface.
The appropriate s ettings ca n be sele cted dire ctly from t he ima ge Open ing or Scanning d ialog b oxes
(when usi ng the AB BYY FineRea der inte rface t o sc an do cume nts) and on th e Scan/Open tab of th e
Options dialog box (Tools>Options…).
31
Page 32

ABBYY FineReader 11 User’s Guide
Important! Any progr am sett ing cha nges made in the Options dial og box re quire re–scanning or
re–opening the image. These step s are required to pro cessyour image under t he new settings.
The following settin gs are a vailable on th e Scan/Open tab of t he Options dialo g box:
• Launching automatic analysis and recognition of the retrieved images
ABBYY Fine Reader is b y defa ult se t t o anal yze a nd re cog nize d ocum ents aut omat icall y.
These setti ngs can be modifie d as neede d. The foll owing options are availabl e:
• Automatically read acquired page images
Document analysis and recognition will be performed automatically.
• Automatically analyze acquired page images
Document analysis will be performed automatically, and recognition will require the user's
attention.
• Do not read and analyze acquired page images automatically
The scanned or opened images will be added to the FineReader document. The user will
have to initiate document analysis and recognition manually. This mode is used for
processing documents with a complex structure.
• Image processing methods
• Enable image preprocessing
Enable image preprocessing if you need to OCR a book or a digital photo of a text
document. When activated, this feature automatically decides what acti on to take depending
on the input image type and applies the correction. Adjustments include removing noise
from digital photos, deskewing, removing motion blur, straightening text lines, and
correcting trapezium distortions.
• Detect page orientation
Enable this feature to automatically detect the orientation of pages added to the FineReader
document.
• Split facing pages
Enable this feature when scanning a facing or opening dual pages. It will automatically split
pages before adding them to the FineReader document.
Note: T he image preprocessin g features are only available in the Imag e Edit or dia log box
(Page>Edit Page Image...) to process the images opened i n FineReader, and are not
available while scanning or openin g document pages . For details, see "Edi ting Images".
• The scanner interface to be used while scanning
Selecting the Scanning Interface
By default, ABBY Y Fi neRea der u ses i ts ow n sca nni ng dia log box to adj ust sca nni ng op tions . If, for
some reaso n, t he AB BYY Fine Reader sca nning dial og b ox is i ncomp atib le w ith yo ur s canne r mo del,
the scan ner's dial og b ox is use d.
1. ABBYY FineReader scanning dialog box
In this ca se, t he ABBYY FineReader int erface is used t o set up sca nning m ode. The followin g
settings are available:
• Resolution, Brightness, and Scanning Mode
• Image preprocessing options:
a. Detect page orientation (enable this feature to automatically detect page orientation
while scanning)
32
Page 33

ABBYY FineReader 11 User’s Guide
b. Split facing pages (enable this feature to automatically split facing pages into separate
images)
c. Enable image preprocessing (enable this feature to perform automatic processing of
scanned images)
• Multi–page document scanning options:
a. Use the Automatic Document Feeder (ADF)
b. Apply auto matic duplex scanning (if supported by the scanner)
c. Set the page scanning delay in seconds
Note: The Use ABBYY FineReader interface option m ay not be availabl e for s ome
scanner models.
2. TWAIN or WIA in terf ace pro vid ed b y th e s can ner
In this ca se, s canni ng o ptio ns are sele cted from the sca nner d river' s dia log box. C ons ult t he
technical docu ment atio n prov ided w it h the s can ner for more in format ion a bout t he d ialo g box a nd
its components.
Important! Con sult t he sca nne r ma nual for pro per s etup. Make sure t o in stal l the softwa re
supplied w ith t he s can ner.
The ABBYY Fine Reade r sca nni ng inte rface is used by de fault.
To c hange t he scann ing inte rface:
1. Open the Options dialog box from the Scan/Open tab (Tools>Options…).
2. Set the toggle switch in the Scanner group to either: Use ABBYY FineReader interface or Use
native interface.
Scanning Tips
You can set the scannin g optio ns in the AB BYY Fi neReader s canni ng dialo g box or in the scanner
driver dialog b ox. See the "Select ing the Scanni ng Inter face" se ction for m ore infor matio n about t he
dialog box.
• Make sure that your scanner is conne cted properly and switched on.
Consult your scanner documentation to ensure it is set up correctly. Be sure to install the software
provided with your scanner. Some scanner models must be switched on before you power up the
computer.
• Place your documents face down on the scanner, making sure they are properly adjusted. Skewed
images may be co nverted incorr ectly.
• Printed documents are best scanned in grayscale at 300 dpi.
Conversion quality depends on the quality of the original document and scanning parameters. Poor
image quality may have an adverse effect on the quality of conversion. Be sure to select the
scanning parameters appropriate for your document.
More information ab out s ome of th e scanni ng options is available in these secti ons:
• Tuning Brightness
• Font is Too Small
• Adjusting Image Resolution
• Scanning Facing Pages
33
Page 34

ABBYY FineReader 11 User’s Guide
Your image looks like this
Recommendations
This image is suitable for OCR.
Tuning B right ness
ABBYY FineReader will display a warning message during scanning if the brightness setting is
incorrect. You may also need to adjust the brightness setting when scanning in black–and–white
mode.
To a djust the brig htness :
1. Click the Scan button.
2. In the dialog box, specify the desired brightness.
Depending on which scanning interface is being used, either the ABBYY FineReader scanning di alog
box or the scanner driver dialog box will open. A medium value of around 50% should suffice in
most cases.
3. Proceed to scan the document.
If the res ulti ng ima ge c onta ins t oo ma ny "t orn" or " glued " le tters, trou bles hoot using the tabl e
below.
characters are "tor n" or very light
characters are distorted, glued together,
or fil led
• Lower the brightness to make the image darker.
• Scan in grayscale . Brightness will b e tuned
automatically.
• Increase the brightness to make the image
brighter.
• Scan in grayscale . Brightness will b e tuned
automatically.
Font is To o Small
For optimal OCR results, scan d ocuments printed in very small font s at hig her resolu tions.
1. Click the Scan button.
2. In the dialog box, specify the desired resolution.
Depending on which scanning interface is being used, either the ABBYY FineReader scanning di alog
box or the scanner driver dial og box will open.
3. Proceed to scan the document.
You may wish to com par e the imag es o f the same doc ument obta ined at d iffere nt re solut ions by
opening t hem i n the Zoom window in Pixel–to–Pixel mode (View>Zoom
Window>Scale>Pixel–to–Pixel).
34
Page 35

ABBYY FineReader 11 User’s Guide
Source image
Recommended resolution
300 dpi for typical texts (printe d in fonts of size 10pt or larger)
400–600 dpi for texts printed i n smalle r fonts ( 9pt or s maller)
Adjusting Image Resolution
OCR quali ty is a ffecte d by t he re solut ion at w hich doc ument s are sca nned. Low re sol ution s ma y
adversely affect the quality of O CR.
We recommend scanning documents at 300 dpi.
Important! For bes t OC R res ults , verti cal a nd horizo ntal re sol utio ns m ust be the sam e.
Setting the res oluti on t oo h igh (o ver 60 0 dp i) incr ease s the rec ognit ion t ime . Incre asin g the
resolution does not yield substan tially impro ved reco gnition r esults. Setting an extreme ly low
resolution (less than 150 dpi) adversely affects OCR quality.
You may need to ad just the r esol utio n of your im ages if:
• The resolution of your image is less than 250 dpi or higher than 600 dpi.
• The resolution of your image is non–standard.
For example, faxes may have a resolution of 204 x 96 dpi.
To adj ust t he res oluti on:
1. Click the Scan button.
2. Depending on the scanning interface used, the ABBYY FineReader interface or the scanner driver
interface will appear.
Choose the desired resolution in the scanning dialog box.
3. Scan the document.
Tip. You can also adjust the resolut ion in the Imag e Edit or (Page>Edit Page Image…).
Scanning Facing Pages
When sca nning facing pa ges fro m a book, both p ages will appear in a single image.
35
Page 36

ABBYY FineReader 11 User’s Guide
To improve OCR quality, split the facing pages into two separate images. The program features a
special m ode t hat a utomatic ally splits two facing pages int o two separate images i n the ABB YY
FineReader do cument .
Scanning faci ng page s or dual p ages:
1. Open the Options dialog box from the Scan/Open tab (Tools>Options…).
2. Check the Split facing pages option in the Image Processing group.
3. Scan the pages.
The automatic splitting option is also available in the image openi ng dia log (File>Ope n PD F
File/Image…) and ABBYY FineReader's scanning dialog box. For details, see Selecting the
Scanning I nter face.
Important! If the image contains text in Chinese or Japanese, use the Edit Image dialog b ox to
split pages manual ly. These types of images are not supp orted by t he automat ic page s plitting
feature.
To split facing pages manually:
1. Open the Edit Image dialog box (Page>Edit Page Image…).
2. Use the options in t he Split group to split the page.
Taking Photos of Documents
• Camera Requirements
• Lighting
• Taking Photos
• When you need to take another photo
Camera Requirements
Your camera should m eet the follow ing re quir eme nts i n ord er to obta in docum ent image s t hat c an
be reliably recog nized.
Recommended camera characteristics
• Image sensor: 5 million pixels for A4 pages. Smaller sensors may be sufficient for taking pictures of
smaller documents such as business cards.
• Flash disable feature
• Manual aperture control, i.e. a va ilability of Av or full manual mode
• Manual focusing
• An anti–shake system or ability to use a t r ip od
• Optical zoom
Minimum requirements
• Image sensor: 2 million pixels for A4 pages
• Variable focal distance. Fixed–focus camera s (lens focused on infinity) should not be used to
photograph documents. These types of camera are commonly built into mobile phones and PDAs.
36
Page 37

ABBYY FineReader 11 User’s Guide
Note: For detailed i nformation about your camera, plea se refer to the doc umentation supplied wi th
your device .
Lighting
Lighting greatly affects the quality of the resulting photo.
Best res ults can be achi eve d wit h bri ght a nd e venly dist ribut ed l ight , pre ferably d aylig ht. O n a
bright sunny day, you can increase t he aperture number to get a sharper picture .
Using flash and additional light sources
• When using ar tificial lighting, use two light sources positioned so as to avoid shadows or glare.
• If there is enough light, turn the flash o ff t o prevent sharp hig hlights and shadows. When using the
flash in poor lighting conditions, be sure to take photos from a distance of approximately 50 cm.
Important! The fla sh mus t not be use d to take p icture s of docum ents pri nted o n glossy
paper. Compare an image with galr e with a go od quality ima ge:
If the image is too dark
• Set a lower aperture value to open up the aperture.
• Se t a higher ISO value.
• Use manual focus, as automatic focus may fail and cause blur.
Compare an image tha t is too dar k with a good qual ity image:
Tak ing Phot os
37
Page 38

ABBYY FineReader 11 User’s Guide
To obta in go od q uality pho tos o f do cume nts, b e su re to posi tion t he c amera corre ctly and follow
these simple recommendations.
• Use a trip od whenever possible.
• The lens should be positioned parallel to the page and look towards the center of the document. The
distance between the camera and the document should be selected so that the entire page fits
within the frame when you zoom in. In most cases this distance will be between 50 and 60 cm.
• Even out the paper document or book pages (especially in the case of thick books). The text lines
should not be skewed by more than 20 degrees, otherwise the text may not be converted properly.
• To get sharper images, focus on a part of the image between the center of the document and one of
its edges.
• Enable the anti–shake system, as longer exposures in poor lighting conditions may cause blur.
• Use the automatic shutter release feature. This will prevent the camera from moving when you press
the shutter release button. The use of automatic shutter release is recommended even if you use a
tripod.
When you need to take another photo
Please make sure that your camera meets the tec hni cal req uire ment s and foll ow t he si mple
recommen datio ns pro vid ed in the " Light ing " and "Taking Photos" s ectio ns.
How to i mpr ove an ima ge, i f:
• the image is too dark and too soft
Solution: Try to use bright er lighting. Otherwise, set a lower aperture value, i.e. open up the
aperture.
• the image is not sharp enough
Solution: Autofocus may not work pro perly in poor lig hting or when taking p ictures from a close
distance. Try using brighter lighting. If this does not help, try focusing the camera manually.
If the image is only slightly blurred, try the Photo Correction tool that is available in the Image
Editor. For more information, see the "Editing Images Manually" section.
• only part of the image is blurry
Solution: Try setting a higher aperture value. Take pictures from a greater distance at maximum
optical zoom. Focus on a point between the center and the edge of the image.
• flash causes glare
Solution: Turn off the flash or try using other light sources and increasing the distance between the
camera and the document.
Automatic Image Preproc essing
OCR quality may be affected by distorted text li nes, document skew, noise, and other de fects
commonl y found on s canne d im ages a nd di git al p hotos .
38
Page 39

ABBYY FineReader 11 User’s Guide
ABBYY FineReader offers an image preprocessing feature to deal with ima ge de fects o f this k ind.
When acti vated, t he im ag e prep roce ssing featur e aut omat ica lly de cide s w hat ac tion to ta ke
depending on t he inp ut i mage type a nd a pplie s th e corre cti on. A djust me nts i nclud e re moving noi se
from digital photo s, des kewing , straight enin g text lines, a nd corre cting trapezi um distor tions.
Note: T hese opera tions can be ver y time co nsuming .
To acti vate a utomat ic pr epro cessi ng w hen i mage s ar e sca nned and opene d:
1. Open the Options dialog box (Tools>Options…).
2. Make sure to check the Enable image preprocessing option on the Scan/Open tab in the
Image Processing group.
Important! The a utomatic pre process ing opt ion may a lso be t oggled i n the image openin g dialog
box (File menu>Open PDF File/Image…) and in the AB BYY FineRead er s canni ng d ialog box. For
more inform atio n, se e Se lecti ng t he Sca nni ng Int erface .
Note: I f the Enable image preprocessing optio n was turne d off whil e sc anni ng or ope ning
images, the image can be proces sed manually usi ng the Edit Image dialog box.
Editing Images Manually
ABBYY FineReader 11 offers automatic image pr eprocessing, which means that th e program decides
if any correction is needed and app lies it to the image.
However, some images m ay require manual edit ing. For example, when only a pa rt of an ima ge
needs to be recognized or if you need t o proces s only som e of the pa ges in a d ocume nt.
To ed it an image:
1. Select Page>Edit Page Image…
39
Page 40

ABBYY FineReader 11 User’s Guide
In the Image Editor, the active page of the current ABBYY Fi neReader d ocume nt is
displayed o n the left and the im age edit ing t ools are s hown on t he rig ht.
2. An overview of the image editing tools:
• Deskew corrects image skew.
• Photo Correction straightens text lines, removes motion blur, and reduces noise.
• Correct Trapezium Distortions corrects perspective distortions.
When you select this tool, a frame with grid lines is superimposed on the image. Drag and
drop the corners of the frame to position them in the corners of the page image. Make sure
that the horizontal grid lines run para llel to the lines of text. Then click Correct This
Image.
• Rotate & Flip rotates the image and flips it left to right or right to left so that the text
appears in the normal reading position (i.e. lines are horizontal and are printed left to right).
• Split splits the image (e.g. facing pages) into separate units.
• Crop is used to crop the unneeded edges of an image.
• Invert enables standard inversion of document colors (dark text against light background).
• Image Resolution changes image resolution.
40
Page 41

ABBYY FineReader 11 User’s Guide
• Brightness & Contrast allows you to select the optimal brightness and contrast values to
improve image quality.
• Levels allows you to adjust the tonal values of the image by selecting the levels for
shadows, highlights, and midtones on a histogram.
To increase image contrast, move the right a nd left sliders on the input levels histogram.
The tone corresponding to the position of the left slider will be assumed to be the blackest
part of the image, a nd the tone corresp onding to the position of the right slider will be
assumed to be the whitest part of the image. The remaining levels between the sliders will
be distributed between level 0 and level 255. Moving the central slider to the right or to the
left will make the image darker or brighter respectively.
To decrease image contrast, adjust the sliders for the output levels.
• Eraser erases a part of the image.
Click the button of the tool you want to use. Most of the tools can be applied either to all of
the pages or only to the selected pages. The pages t o ed it ca n be spe cified using the
Selection drop–dow n lis t of the t ool o r se lected in t he Pages window.
3. Once you are finished editing the image, click Exit Image Editor.
OCR Options
Selecting the rig ht OCR o ptions is crucial for flawle ss and fast OCR. The choice depends not only on
the type and com plexi ty of your pa per doc ument but also on ho w you are pla nning t o use the
electroni c versio n.
OCR options are grouped together on the Read tab o f t he Options dialog box
(Tools>Options…).
Important! ABBY Y Fi neReade r aut omat ical ly re cog nizes t he p ages adde d t o a d ocume nt us ing the
current op tion s. You can tur n o ff auto mati c ana lys is an d OCR of ne wly a dde d ima ges on the
Scan/Open tab of the Options dialog box ( Tools>Options…).
Note: If you change the OCR options after a document has been re cognized, r un the OCR process
again wit h the new opti ons.
On the Read t ab of t he Options d ialog box, you ma y select from th e following opt ions:
• Reading mode
Select a reading mode.
Tw o readin g modes ar e available :
• Thorough reading
This is a default mode. In this mode, ABBYY FineReader analyzes and recognizes both
simple documents and documents with complex layouts, even those with text printed on a
color or raster background and documents with complex tables (including tables with white
grid lines and tables with color cells).
Note: C ompared to t he Fast mode, the Thorough mode takes more time but
ensures better recognit ion quality.
• Fast reading
This mode is recommended for processing large documents with simple layouts and good
quality images.
Select the mod e t hat bes t sui ts your ne eds .
41
Page 42

ABBYY FineReader 11 User’s Guide
• Training
Pattern training is disabled by default. Select the Read with training option to teach ABBYY
FineReader new cha racters when it pe rforms OCR on your pages.
Pattern traini ng is useful for the following types of texts:
• Texts printed in decorative fonts
• Texts which contain special characters (e.g. mathematical symbols)
• Large documents (more than 100 pages) of poor print quality
You can either use the b uilt–in charact er pa tter ns or crea te your own. Se lect th e desired
option unde r Training.
• User patterns and lang uages
You can save user patterns and languages to a file and load previously saved user patterns and
languages.
The user pattern and language file you create stores the path to the fol der wit h your use r
language s, la nguag e gro ups, dict ionar ies, and patter ns.
To save user patterns and languages :
1. Click the Save to File… button
2. In the Save Options dialog box, enter a name for the file and click Save.
To load user patterns and languages:
3. Click the Load from File… button.
4. In the Load Options dialog box, select the desired *.fbt file and click Open.
• Fonts
Here you can select the fonts to be used when saving recognized text.
To se lect fo nts:
1. Click the Fonts button.
2. Select the desired fonts and click OK.
• Other
If your document contains barcodes and you wish them to be converted into strings of letters and
digits rather than saved as pictures, select Look for barcodes. T his option is cleared by default.
If the complex stru cture of a pa per docu ment is not reproduced in the electronic document
Before run ning t he d ocum ent re cog nitio n pro ces s, AB BYY Fine Reader cond ucts an a nalys is of the
logical st ruct ure o f the docu ment and d ete cts ar eas conta ini ng te xt, p ictur es, ta bles , and barc odes .
The program then rel ies on t his a nalys is to ide ntify t he ar eas a nd t he re cogn itio n orde r. This
informatio n hel ps re creat e t he form atti ng of t he o rigina l do cume nt.
By default, ABBYY FineReader is set t o automat ically a nalyze th e docume nt. H owever, very complex
formatting m ay cause i ncorrect detectio n of s ome areas. Correct ing only t he proble m areas is much
faster approach than drawing all of the areas manually.
Layout corre ctio n ca n be per formed b y usi ng t he follow ing t ools a nd c omm ands :
• Manual area adjustment tools on the Image window toolba r.
42
Page 43

ABBYY FineReader 11 User’s Guide
• Shortcut menu commands available by right–clicking the selected area in the Image window or the
Zoom window.
• Commands in the main Areas menu.
Restart the OCR process after ma king the de sired adju stments.
Adjusting Area Shapes and Area Borders
Before recognition , the program analyzes a nd hig hlights di fferent area types, suc h as: Text,
Image, Table and Barcode. Different types of borde r areas are disting uished by different colors.
ABBYY FineReader relies on this analysis to identify areas and the recognition order. This
information helps recreate the original page formatting.
The highl ighte d area is a ctive . Cli ck a n area to ma ke it acti ve. You can use t he Tab key to navigate
through the areas. Each area is numbered. These numbers de termine the order of navigation. By
default, the ordinal numbers of the areas are not displayed in the Image window — this feature is
activated b y sele cti ng the area re–numbering function.
If the text of a n area d oes not f it within its borde rs (th is may happen , for example , if you edit th e
recognized te xt), t he text outs ide t he borde rs o f a non –active area may not be visible on the
screen. Red markers t hat appe ar on t he borde rs of the area wi ll alert you to thi s. Once a n area
becomes act ive, its borde rs wi ll e xpan d to fi t the entir e te xt to the scree n.
The tools for ma rking and editi ng the are as man ually ca n be found i n the Image w indo w and on
the pop–up tool bars for the Text, Image, Backg rou nd Pic tur e, and Table area s (pop–up
toolbars appear next to the acti ve area).
Important! After you have f i nishe d adjust ing the areas, re –l aun ch the OCR proce ss.
Creating a new area
1. Select a tool from the Image window:
draws a Recognition are a
draws a Text area
draws a Picture area
draws a Ba ckgrou nd Pi cture a rea
draws a Table area
2. Use the mouse to draw an area.
New areas can be drawn witho ut se lecti ng a tool from t he Image wi ndow t oolbar. You can simply
draw an area on the ima ge using one of the the follow ing key co mbina tio ns:
• CTRL+SHIFT draws a Text area
• ALT+SHIFT draws an Image area
• CTRL+ALT draws a Table area
• CTRL+SHIFT+ALT draws a Barcode area
You can change t he are a type . Rig ht–click the selecte d area to choose Change Area Type from
the short cut m enu, a nd t hen select the des ired a rea t ype.
Adjusting area b orders
43
Page 44

ABBYY FineReader 11 User’s Guide
1. Place the mouse cursor on the area border.
2. Left–click and drag in the desired direction.
3. Release the mouse button when done.
Note: You can s imult ane ousl y adj ust t he vert ica l and horiz onta l bor ders of th e area by p laci ng the
mouse poi nter on a corn er of the ar ea.
Adding/removing area pa rts
1. Select the
/ tool on the pop–up toolbar for Text, Image or Background Picture areas.
2. Place the mouse cursor inside the area and select part of the image. This segment will be added to
or deleted from the area.
3. Adjust the area border, if necessary.
Notes:
1. These tools may only be applied to Text, Image or Background Picture a reas. You cannot
add/delete a segment in a table or barcode area.
2. The area borders can also be adjusted by adding vertices (splitting points). The resulting segments
can be dragged in any direction using the mouse. To add a new vertex, move the cursor to the
desired point on the border while holding dow n CTRL+SHIFT (this switches the pointer to
crosshairs) and click. A new vertex will appear on the area border.
Selecting one or m ore ar eas
• Select the
, , or tool on the Image window toolbar and click the desired areas while
holding down the CTRL key. To cancel the selection, click the selected area once again.
Moving an area
• Se lect an area and move it while holding down the CTRL key.
Re–n umbering areas
1. Select Order Areas from the Areas menu.
2. Select the areas in the order desired for the output document.
Note: T he areas a re automat ically numbered from left t o right during a utomatic page a nalysis,
regardless of the directio n of the text on the image.
Deleting a n area
• Select the
tool and click the area you wish to delete.
• Select the areas to delete and then click Delete Area from the shortcut menu.
• Select the areas to delete and then press the DELETE key.
To delete a ll areas:
• Select Delete All Areas and Text from the Image window shortcut menu.
Important! Deleting an area from an image that has already bee n recognized will delete a ll of the
text in the corr espo nding Text window.
Changing text orientation
44
Page 45

ABBYY FineReader 11 User’s Guide
Code 3 of 9
Code 128
Check Inte rlea ved
UPC–A
Check Code 3 of 9
EAN 8
Matrix 2 of 5
UPC–E
Code 3 of 9 wit hout
EAN 13
Postnet
PDF417
• Select the desired text orientation from the drop–down Orientation menu on the Area Properties
toolbar (the Area Properties shortcut menu).
For details, see Changing Text Properties.
Changing a rea border colors
1. Open the Options dialog box in the View tab (Tools>Options…).
2. Select the area type under Appearance and choose the color on the Color palette.
Picture N ot Dete cted
Picture areas mark the picture s contai ned in you r docume nt. You can also use picture areas to
select a ny text fragme nts that you wan t trea ted as pi cture s (A BBYY Fi neReade r wi ll not per form
OCR on the se are as) . If t he pr ogram fails t o det ect a pi cture a utom ati cally, use the Picture tool to
draw a pict ure area aro und t he pi cture manually.
1. On the toolbar at the top of the Image window, select
rectangle around the picture on your image.
2. Re–launch the OCR process.
If there is text printed ov er a pict ure in yo ur docume nt, draw a Background Picture area around
this text.
1. In the Image window, select the
Note: If you do not see this tool on the toolbar, add it. See Toolbars for detailed instructions.
2. Start the OCR process.
You can change an exi sting area t o Picture or Background Picture. Right–click the area and
select Change Area Type>Picture or >Background Picture respectively.
tool on the toolbar and draw a frame around the picture.
tool and then use the mouse to draw a
Barcode Not Det ected
Barcode areas mark the barcodes contained in a document. If your document contains a barcode
that you would like t o render a s a se quence o f letters and digit s rather tha n as a n ima ge, sele ct th e
barcode a nd cha nge t he a rea typ e to Barcode.
Note: Barcode recognition is disabled by default. To enable barcode recognition, select
Tools>Options…, cl ick the Read tab and select Look fo r ba rc odes.
To ma ke ABBYY FineReader dete ct barco des:
1. Hold CTRL+SHIFT+ALT and use the mouse to select an area in the Image window or the Zoom
window.
2. Run image recognition.
Barcode types supported by ABBYY FineReader 11:
asterisk
2 of 5
45
Page 46

ABBYY FineReader 11 User’s Guide
Codabar
IATA 2 o f 5
Industrial 2 of 5
Aztec code
Code 93
Interleaved 2
UCC–128
Data
of 5
Note: T he default bar code type is Autodetect, w hich mea ns tha t bar cod e type s are to be dete cted
automatically. However, not all barcode types can be autodetected , and sometimes you may need to
select t he appr opr iate t ype ma nua lly o n the Area Properties panel.
ABBYY FineReader can a utomatica lly detec t the follow ing types of barcode: Co de 3 of 9, Code 93,
Code 128, EAN 8, EAN 13, Postnet, UCC–128, UPC–E, PDF417.
Matrix
Ta ble N ot De te cted
Table areas mark tables or text fragme nts arrang ed in a ta bular form. If t he program fail s to dete ct
a table automatically, use the Table t ool to draw a table area around t he table .
1. Select the
rectangle around the table on your image.
2. Tight–click the table and select Analyze Table Structure from the sho rtcut menu or click the
button on the pop–up toolbar of the Table area.
3. Using the pop–up toolbar, the table shortcut menu, or the commands from the main Areas menu to
edit the results.
4. Re–launch the OCR process.
tool on the toolbar at the top of the Image window and use the mouse to draw a
You can change t he type of a n alre ady r ecog nized area t o Table. This is ac hieved by r ight–clicking
the area and sele cting Change Area Type>Table fr om t he sho rtc ut me nu.
Table Cells Detected Incorrectly
If ABBYY FineReader failed to correctly detect t he row s and col umns in a t able wh ile run ning
automatic ally, you can adjust the la yout ma nually a nd re–run the OCR proc ess.
Editing Tables in the Image window or the Zoom window:
• Use the Areas menu commands and the shortcut menu by right–clicking the selected Table area
to:
• Analyze Table Structure — automatic table structure analysis replaces manually drawing
vertical and horizontal separators in a table.
46
Page 47

ABBYY FineReader 11 User’s Guide
• Split Cells, Merge Cells, and Merge Rows correct of the rows and columns that were
automatically detected in the table.
• Use the pop–up toolbar for the selected table to:
Add a horizontal or vertic al separator, delete table separators, anal yze table structure , split
table cells, or merge ta ble cel ls or rows .
Click the Table area and select t he approp riate t ool from t he pop –up toolb ar:
.
Tip. To toggle separators on or off, select the
Notes:
1. The cell splitting command can only be applied to table cells that were previously merged.
2. To merge or split table cells or rows, select them on the image and then choose the appropriate tool
or menu command.
3. If the table contains vertical text cells, you may need to change the text properties first.
4. If the table cells only contain an image, check the Treat selected cells as picture option on the
Area Properties panel (the >Area Properties shortcut menu).
If the cell contains a combination of image and text, select the image to turn it into a dedicated area
inside the cell.
on the pop–up too lbar.
Adjusting Tex t Area Properties
When per formin g aut oma tic d ocume nt a nalysi s, A BBYY Fine Reader dete cts di ffer en t ar ea ty pes
on docume nt pa ges (such a s tables , images, te xt and bar codes). T he program also a nalyzes the
document st ructur e and ide ntif i es hea dings an d other layout elem ents su ch as hea ders an d footers ,
images and diagram capt ions, etc.
You can manually chang e i ncorre ctl y defi ned pr ope rties in s ome Text and Table areas.
1. Select the area in the Image window or the Zoom window and adjust the properties in the Area
Properties panel of the Image window.
The A rea Pro per ties panel lets you set the follo wing properties :
• Language — For details, see Document languages.
• Function displays the function of the text, i.e. header or footer, heading, etc. (applies only
to Text areas).
• Orientation — For details, see Vertical or Horizontal Text Not Re cognized Properly.
• Print type — For details, see Print Type.
• Inversion — For de tails, see Vertical or Horizontal Text Not Recognized Properly.
• Direction of hieroglyphic text — For details, see Recognizing Documents in Mo re Than
One Language.
Notes:
a. Use
b. Some of the text properties can be modified using the shortcut menu that becomes avail able
2. Re–launch the OCR process after making the necessary chang es.
/ buttons to navigate left and right along the proper ties panel if the Image window
is not wide enough to display the entire properties panel.
when you right–cl ick a Text area.
47
Page 48

ABBYY FineReader 11 User’s Guide
Vertical or Inverted Text Not Recognized Proper ly
A fragment o f rec ogniz ed te xt m ay cont ai n a larg e num ber of err ors if t he orie ntation of the
fragment was detected incorrectly or if the text in the fragment is inverted (i.e. light text is printed
on a dark background).
To solve t his prob lem:
1. In the Image window, select the area or the table cell that contains vertical or inverted text.
2. In the Image window on the Area Properties panel (right –click the area and select Area
Properties to make the panel visible), select:
• Horizontal Script or Vertical Script from the Direction of hieroglyphic text drop–
down list
or
• Inverted from the Inversion drop–down list
3. Re–launch the OCR process.
Paper Document Contains De corative (Non–Standard) Fonts
The Training mo de impro ves OCR q uality on do cumen ts with decorati ve fonts or d ocume nts
containi ng spe cial charac ters (e.g . mat hema tical s ymbols).
In Tra ining mode, a use r patter n is creat ed whi ch can be us ed when perform ing OCR o n the entire
text.
To use a pattern to recognize a document:
1. Open the Options dialog box (Tools>Options…) and then click the Read tab.
2. Under Training, sele ct the Use only user pattern option.
Note: If you sele ct Use built–in a nd use r patt erns, ABBYY FineReader will use both the
user patter ns and it s factory p reset pa tterns for OCR.
3. Click the Pattern Editor… button.
4. In the Pattern Editor dialog box, select the desired patter n and then click OK.
5. In the ABBYY FineReader main window, click the Read button.
Incorrect Font in Reco gnized Text or Some Characte rs Are
Replaced with "?" or "□"
If you see "?" or "□" replacing letters in the Text window, check to see if the fonts sele cted t o
display the rec ogniz ed te xt c ontai n all the chara cters used in yo ur te xt.
You can change t he font in t he rec ognize d t ext w itho ut la unch ing t he O CR pro cess agai n.
To cha nge t he font in a shor t do cume nt:
1. Select a text fragment where some characters are displayed incorrectly.
2. Right–click the selection and sele ct Properties from the shortcut menu.
3. On the Text Properties panel, select the desired font. The font in the selected text fragment will
change accordingly.
To cha nge t he font in a long docume nt w here st yles are used:
48
Page 49

ABBYY FineReader 11 User’s Guide
1. On the Tools menu, click Style Editor…
2. In the Style Editor dialog box, select the desired style and change its font.
3. Click OK. The font in a ll the text frag ments using this style will change accordingly.
Important! If a n AB BYY FineReader docume nt was recognized or edi ted on another com puter, the
text in the do cume nt may be displ ayed i ncorr ectl y on your c ompu ter. If this is t he ca se, m ake s ure
that all the fonts used in this do cument are insta lled on you r machi ne.
Checking and Editing the Recognized Text
Once the OCR process is complete , the recognized text ap pears in the Text wind ow for revi ew a nd
editing. This section provides you with information on working with recognized text.
• Checking the Text in the Text Window
• Checking Spelling
• User Dictionary: Adding and Removing Words
• Using Styles
• Editing Out Confidential Information
• Editing Hyperlinks
• Editing Tables
Checking Text in the Text Window
You can check, ed it, a nd form at re cog nitio n res ult s in th e Text window.
The Text window toolbar in the u pper part of the w indow lets you open th e Verification dialog
box. This dial og box acti vates spel lchec king, wh ich can al so be run by using the spell chec ker
control b utton s in t he Text window.
Use the
characters are not highlighted, c lick the
To check an uncertain word in the Text window:
1. Click the word in t he Text window. In the Image window, the location of the word will be shown,
2. Make changes in the word in the Text window, if necessary.
This met hod is conve nient whe n you need t o com pare the source and res ult ing d ocume nts.
/ buttons to go t o the next /pre vious unce rtai n word or chara cter. If the unce rtai n
button on the toolbar of the Text window.
and, in the Zoom window, you will see the magnified image of the word.
The Main Toolbar provide s access t o the drop –down saving options menu.
The tools for formatting recognized te xt are available on:
• The right–hand side of the Main Toolbar.
• The Text Properties panel (right–click and select Text>Properties).
49
Page 50

ABBYY FineReader 11 User’s Guide
Note: U se the
the Text w indow i s not w ide enoug h to disp lay the entire te xt propert ies pa nel.
/ butto ns to naviga te l eft a nd ri ght alon g the prope rtie s pa nel i f
Spelling–checking with the Verification dialog box
You can c heck t he wo rds wit h unce rtai n cha racter s fro m the Verification dialog box
(Tools>Verification…).
In this dialog box, you can choose t o apply (o r reject) the sug gest ed cha nge s eit her t o the cur rent
occurrence or to all the occurrences of a word in the text.
• Click Ignore to skip the word without making changes.
The highlighting will be removed.
• Click Replace to replace the word with one of the suggested corrections.
• Click Add to place the selected word into the dictionary.
At next use, this word will not be treated as an error.
Tip. To change the spelling check options, click Options…
For character–based lang uages, the program wi ll sugges t simila r–looking characte rs w hen a direct
match is unclear.
50
Page 51

ABBYY FineReader 11 User’s Guide
User Dict ionar y: Addi ng and Remov ing Words
If your text contai ns ma ny special terms , abbrevia tions, an d proper names , adding t hese ter ms to
the user dictionary will improve OCR quality. For each added word, ABBYY FineReader generates all
possible word forms to allow the program to relia bly re cognize it in its various forms ( plural, verb,
etc.).
To add a w ord to the di ctio nary while check ing the sp elling :
• Select Tools>Verification… and click the Add button in the Verification dialog box
or
• In t he Text window, right–click the word and select the Add to Dictionary command
You can also add and remove words w hile v iewing a user dict ionary for a partic ular language .
1. On the Tools menu, click View Dictionaries…
2. In the User Dictionaries dialog box, select the desired language and click View…
3. In the Dictionary dialog box, type a word and click Add… or select a word and click Delete.
The program will notify you if the desired word is already in the dictio nary.
You can import user di ctionari es crea ted in pre vious ver sions of ABBYY Fi neReade r (versi ons 8.0,
9.0, and 10 are sup por ted) .
1. On the Tools menu, click View Dictionaries…, select the desired language, and click View…
2. In the Dictionary dialog box, click the Import… button and select the dictionary file you wish to
import (it must have the extension *.pmd, *.txt, or *.dic).
Using Styles
During te xt re cogn itio n, ABB YY Fi neRea der detects t he styles and formatting used i n the original
document . The se styl es a nd form atti ng are r epro duce d in t he o utp ut do cume nt by crea ting t he
51
Page 52

ABBYY FineReader 11 User’s Guide
appropria te style hi erarchy. If necessary, you can review and ed it the do cumen t styles and create
new styles to format re cogniz ed te xt in t he Text window.
To apply a style to a selected text fragment:
1. Select the desired text fragment in the Text window.
2. Select Properties from the shortcut menu.
3. Select the desired style in the open Text Properties panel from the Style list.
Note. When saving recognized texts in RTF, DOC, DOCX, and ODT formats, a ll styles are preserved.
Changing , creat ing, and mergi ng st yles:
1. On the Tools menu, click Style Editor…
2. In the Style Editor dialog box, select the desired style and adjust its name, font, font size,
character spacing, and scale.
3. To create a new style, click New. The newly created style will be added to the list of existing styles
where you can adjust it.
4. To merge multiple styles into one, select the styles t o merge and click Merge…. In the Merge
Styles dialog box, specify the style into which to merge the selected styles.
5. Click Save to save the changes.
You can navigate b etwee n te xt fragm ent s pri nted in id enti cal sty les. I n t he Styl e Edito r, select the
desired style and click Previ ous F ragme nt or N ext Fragment.
Editing Out Conf idential Information
(ABBYY FineReader Corpora te Edi tion only)
In ABBYY FineReader 11, you can easil y remove conf ident ial informatio n from a recognized text
1. On the Tools menu, click Redacti on Mode or click the
The mouse pointer will change to a marker.
2. In the Text window, use the marker to black out the text you wish to conceal.
Tip. If you bla ck out som e chara cter s by mista ke, yo u ca n und o the last r edact ion by
pressing CTRL+Z o r cl icki ng t he Undo on the main toolbar.
3. Save your document.
The blacke d out text will app ear a s dot s in the outp ut do cume nt. I f the savi ng form at you se lecte d
supports text and ba ckground colors, the se will be black dots again st a bla ck backgrou nd.
Note: Wh en you save a page, the bla cked out ar eas will a ppear as b lack recta ngles in t he output
document.
button on the mai n toolbar.
To swit ch o ff the Redaction mode, either
• Select Tools>Redaction Mode once again or
• Click the
button on the mai n toolbar
Editing Hyperlinks
ABBYY Fine Reader det ect s hype rlin ks and recr eate s thei r de sti natio n addre sse s in the out put
document. Detected hyperlinks are under lined and displayed i n blue.
52
Page 53

ABBYY FineReader 11 User’s Guide
When view ing t he re cog nized docum ent in th e Text window, rest the m ouse point er on a hyperlin k
to view its address. To follow a hyperlink, select Open Hy perli nk from its sh ortcut menu, or press
CTRL and le ft–click the hyper link .
To add , delete or change the text or ad dress of a hyperlink:
1. In the Text window, select the desired hyperlink.
2. To remove a hyperlink, right–click it and select Remove Hyperlink from the shortcut menu.
3. To add or change a hyperli nk, cl ic k Hyperlink… in its shortcut menu, or click
toolbar at the top of the Text window. In the Edit Hyperlink dialog box, you can:
d. Make the necessary text changes in the Text to display field.
e. Select/change the hyperlink type in the Link to group:
• Select Web page to link to an Internet page.
In the Address field, specify the protocol and the URL of the page
(e.g.
http://www.abbyy.com
• Select Local file to link to a file.
Click Browse… to browse for the file to which the hyperlink will
point (e.g. file://D:/MyDocuments/ABBYY FineReaderGuide.pdf).
• Select E–mail address so that the user can send an e –mail
message to the address contained in the hyperlink by simply
clicking the hyperlink.
In the Address field, specify the protocol and the e–mail address
(e.g.
mailto:office@abbyy.com
).
).
on the main
Editing Tables
ABBYY FineReader lets you edit recognized tables i n the Text wi ndow. The foll owi ng opt ions are
available:
1. Split table cells.
Click the left mous e but ton t o se lect a ce ll, a nd t hen se lect Split Table Cells from t he Edit
menu.
Important! This command can only be applied to table cells that have been previously
merged.
2. Merge table cells.
Use the mouse to select the table cells to be merged, and then select Merge Table Cells
from the Edit menu.
3. Merge table rows.
Use the mouse to select the table rows to be merged, and then select Merge Table Rows
from the Edit menu.
4. Delete cell contents.
Select the cell (or a group of cells) with the contents you wish to delete and press the
DELETE key.
Note: By default, the table editing tools are not displayed on the toolbar. You can add buttons to
the toolba r b y usi ng the Customize Toolbars and Shortcuts dialog box (Tools>Customize…).
53
Page 54

ABBYY FineReader 11 User’s Guide
OCR Language
Recommended Font
Arabic
Arial™ Unicode™ MS*
Hebrew
Arial™ Unicode™ MS*
Working with Compl ex–Scr ipt Lang uages
With ABBY Y Fi neReader, you can also reco gnize doc ume nts i n Hebr ew, Yid dish, J apan ese , Chi nese,
Thai, Korean, and A rabic langu age s. Co nside r t he foll owi ng whe n wor king wit h do cume nts in
character–based la nguag es and do cuments in whic h a combi nation o f characte r–based and
European la nguage s is used .
You may need to do the following to recognize these types of documents:
• Installing Additional Languages
• Recommended Fonts
This secti on conta ins tips and guide lines on improving recog nized text quality:
• Disabling Automatic Image Processing
• Recognizing Documents Written in More Than One Language
• Non–European Cha racters Not Displ ayed in the Text Window
• Selecting the Direction of Recognized Text
Installing Additional Languages
To r ecogn ize te xts wr itten in Japa nese, C hinese , Thai , Korean, Arab ic, He brew, or Y iddish you may
need to in stal l the se la nguage s se parate ly.
Note: Mi crosoft W indows Vista a nd Window s 7 support these languages by default .
To install ne w langua ges in Mi croso ft Window s XP:
1. Click Start o n the Control panel.
2. Select Control Panel>Regional and Language Options.
3. On the Language tab, select:
• Install files for complex–script and right–to–left languages
to be able to recognize texts in Hebrew, Yiddish, Arabic, and Thai
• Install files for East Asian languages
to be able to recognize texts in Japanese, Chinese, and Korean
4. Click OK.
Recommended Fonts
The table below lists the recommended fonts for working with Hebrew, Yiddish, Thai, Chinese, and
Japanese texts.
54
Page 55

ABBYY FineReader 11 User’s Guide
Yiddish
Arial™ Unicode™ MS*
Thai
Arial™ Unicode™ MS*
Chinese (Simpli f ie d),
Arial™ Unicode™ MS*
Aharoni
David
Levenim mt
Miriam
Narkisim
Rod
Chinese (Traditional),
Japanese, Korean,
Korean (Hang ul)
* This font is installed together with Microsoft Windows XP and Microsoft Office 2000 or later.
SimSun fonts
For example: SimSun (Founder Extended), SimSun–18030, NSimSun.
Simhei
YouYuan
PMingLiU
MingLiU
Ming(for–ISO10646)
STSong
Disabling Automatic Image Processing
By default, any pages you a dd to an A BBYY Fine Reader docum ent are a utomaticall y recognized.
However, if your document contains a text in a Character–based lang uage combi ned w it h a
European lang uage, we r ecomme nd d isab ling a uto mati c page ori entat ion d etect ion a nd u sing t he
dual page splittin g option only i f all of th e page images h ave the corre ct ori entation (e.g., they
were not s canne d up side dow n).
The D etect page orientation and Split facing pages options can be enabled and disabled
directly i n the ima ge s canni ng an d ope ning dial og b oxes, and from t he Options dialo g box o n the
Scan/Open tab.
Note: To split facing pag es in Arabi c, Hebrew, or Y iddish , be sure to se lect th e corres pondi ng
recognitio n la ngua ge firs t and onl y the n sel ect t he Split facing pages o ptio n. Thi s wi ll en sure t hat
the pages are arrange d in the correct order. You can also restore the o riginal pa ge num bering b y
selecting the Swap boo k pages option. For details, see Numbering Pages in an ABBYY FineReader
Document.
If your docume nt has a complex str ucture, we recommend disa bling automatic anal ysis and OCR for
images and per forming the se operation s manuall y.
55
Page 56

ABBYY FineReader 11 User’s Guide
To disa ble a utoma ti c anal ysis and O CR:
1. Open the Options dialog box (Tools>Options…).
2. Select the Do not read and analyze acquired page images automatically option on the
Scan/Open tab.
3. Click OK.
Recognizing Do cument s Written in More Than O ne Languag e
The instruct ions below wi ll help you process a docume nt writt en in Engl ish and Chinese .
1. Disable the automatic analysis and OCR options.
2. On the main toolbar, select More languages… from the Document Languages drop–down list.
Select Specify languages manually from the Language Editor dialog box and select Chinese
and English from the language list (for details, see Document Languages).
3. Scan or open images after disabling Detect page orientati on . The dual page splitting option
should be used only if all page images have the correct orientation. The pages will be added to the
current ABBYY FineReader document after the command is executed.
Important! When s cannin g, be sure that the pages are pr ope rly ce nter ed on the sca nner's
glass bed. If the skew is too large, t he text may be recognized i ncorrectly.
4. To draw areas on the image manually, use the tools for Adjusting Area Shapes and Area
Borders.
Note: I f the str ucture of your docum ent is si mple, you can laun ch autom atic la yout ana lysis.
Click the
5. If there are areas on the image where text is written in only one language:
a. Select these areas.
b. Select the language of the text area (Chinese or English) on the Area Properties panel.
c. If necessary, select the t ext direction from the Orientation drop–down menu (for details,
d. For texts in character–based languages, the program provides a selection of the text
6. Click Recognize.
(Analysis) button on the to olbar of the Image wi ndow or press CTRL +E.
Important! You can only specify a language for areas of the same type. If you
select bo th text and table areas, you won't be able to specify a language.
see Vertical or Inverted Text Not Recognized Properly).
directions in the Direction of hieroglyphic text drop–down menu (for details, see
Changing Text Properties).
Non–Europ ean Cha racters Not Disp layed in the Text Window
If a character–base d la nguage is displ ayed i ncorr ectl y in t he Text w indo w, you may have sele cted
the Plai n text mode.
To cha nge t he font used in P lain text mode:
1. Open the Options dialog box (Tools>Options…).
2. Go to the View tab.
3. Select Arial Unicode MS from the Font used to display plain text drop–down menu.
4. Click OK.
56
Page 57

ABBYY FineReader 11 User’s Guide
If nothin g has chan ged i n the Text window, refer to: Incorrect Font in Recognized Text or Some
Characters Are Replaced with "?" or "□".
Selecting the Direction of Recognized Text
ABBYY FineReader a utomatic ally de tects te xt direc tion whe n it per forms OC R. If req uired, you can
manually adjust the dire ction o f recognize d text.
1. Go to the Text window.
2. Select one or several paragraphs.
3. Click
Note: For c haracte r–ba sed langu ages, use the Di rec tion of hiero glyph ic tex t option t o sele ct
the text direction before text recognition is performed. For details, see Changing Text Properti es.
on the main toolbar.
Saving the Results
Recognized t exts can b e sa ved to a file , se nt to a not her a ppli catio n wit hou t savi ng th em to dis k,
copied to the C lipboard, or sent by e–mail a s atta chme nts i n a ny of t he supported s aving formats.
• Saving: General
Describes the saving capabilities provided by ABBYY FineReader.
• Document Properties
• Saving text in RTF, DOC, DOCX or ODT for mat
• Saving in XLSX
• Saving in PDF
• Saving in PDF/A
• PDF Security Settings
Explains the security settings available w hen saving in PDF: protecting your document with
passwords that prevent unauthorized o pening, editing, or printing and sele cting an encryption level
compatible with earlier versions of Adobe Acrobat .
• Saving in HTML
• Saving in PPTX
• Saving in TXT
• Saving in CSV
• Saving E–books
• Saving in DjVu
• Saving to Microsoft ShareP oi nt
• Saving an Image of the Page
Describes the procedure that saves your page without performing OCR on it and provides advice on
reducing the size of your images.
Saving: General
The File me nu o ffers yo u a choice of d iffere nt s aving meth ods for the reco gnize d tex t. You can a lso
send the re cog nized text to various appl icat ions.
57
Page 58

ABBYY FineReader 11 User’s Guide
• File>Save FineReader Document
Saves the current ABBYY FineReader document. Both the recognized text and the page images are
saved.
• File>Save Document As
Saves the recognized text on your hard disk in a format of your choice.
• File>Send Document To
Opens the recognized text in an application of your choice. No information is saved on your drive.
• File>Save To Microsoft SharePoint (Corproate Edition only)
Saves the recognized text in a network location: on a website, on an intranet portal, or in an
electronic library.
• File>E–mail
Sends the image or recognized text via e–mail. In the dialog box that opens, select the desired
options for your e–mail attachment and click OK. A new e–mail message will be created with the
image or recognized text attached to it.
• File>Print
Prints the text or the images of the selected pages of the current ABBYY FineReader document.
Supported applications
• Microsoft Word 2000 (9.0), 2002 (10.0), 2003 (11.0), 2007 (12.0), and 2010 (14.0)
• Microsoft Excel 2000 (9.0), 2002 (10.0), 2003 (11.0), 2007 (12.0), and 2010 (14.0)
• Microsoft PowerPoint 2003 (11.0) (with Microsoft Office Compatibility Pack for Word, Excel, and
PowerPoint 2007 formats), 2007 (12.0), and 2010 (14.0)
• Corel WordPerfect 10.0 (2002) , 11.0 (2003), 12.0, 13.0, and 14.0
• Lotus Word Pro 97 and Millennium Edition
• OpenOffice.org 3.0, 3.1
• Adobe Acrobat/Reader (5.0 and later)
Note: To ensure better compatibility, we recommend i nstalling the late st updates and upgrades
available for the above appl ications .
Documen t Proper ties
Document properties contain information about the document (the extended title of the document,
author, s ubject , key words , etc). Do cument proper ties ca n be used to sort your f iles . Additi onall y,
you can search for documents by their properties.
When recognizing PDF–files a nd a n umber o f image type s, ABBYY FineRead er export s the
properties of the source document. You can c hange the m lat er.
To a dd or m odify doc ument prope rties:
• Click Tools>Options…
• Click the Document tab, and, in the Document properties group, specify the title, author,
subject and key words.
Saving text in RTF, DOC, DO CX or ODT format
To sa ve your text in RTF/ DOC /DOC X/ODT:
• In t he drop–down list on the main toolbar, choose a document layout saving mode.
58
Page 59

ABBYY FineReader 11 User’s Guide
• Click File>Save Document As>Microsoft Word 97–2003 Document (to save to ODT format,
choose File>Save Document As>OpenOffice.org Writer Document) or the Save button on
the main toolbar. Click the arrow next to the Save button and choose a saving format from the list.
If there is no suitable format in the list, click Save to Other Formats… , a nd, in the dialog box that
opens, select the desired format.
Tip. Additional saving options are available in the Options dialog box: select Tools>Options…,
click the Save ta b, and the n cli ck the RTF/DOCX/ODT tab.
The saving options on t his tab are grouped i nto the following cate gories:
Retain layout
Depending on how you a re plan ning to us e your ele ctroni c docum ent, sel ect the best opti on belo w:
a. Exact copy
Produces a document that maintai ns the formatting of the original. This o ption is recomme nded for
documents with complex layouts, such as promotion booklets . Note, however, that this option limits
the ability to change the text and formatting of the output document.
b. Editable copy
Produces a document that nearly preserves the original format and text flow but allows easy editing.
c. Formatted text
Retains fonts, font sizes, and paragraphs, but does not retain the exact locations of the objects on
the page or the spacing. The resulting text will be left–aligned (right–to–left texts will be right–
aligned).
Note: Vertical text s will be chan ged to horizontal in this mode.
d. Plain text
Unlike the Formatted text mode, this m ode d oes not r etai n formatt ing.
Default paper size
You can select the pape r size to be used for sav ing in RTF, DO C, DOC X, or ODT format from the
Default paper size drop–down list.
Tip. To ens ure t he rec ognized text fits the paper size, select the Increase paper size t o fit
content option. ABBYY FineReader will automatically select the most suitable paper size when
saving.
Text s ettings
• Keep headers and footers
Retains running titles (headers and footers) in the output text.
• Keep page breaks
Retains the original page arrangement.
• Keep line breaks
Retains the original arrangement into lines.
• Keep line numbers
Retains the original line numbering (if any). The line numbers will be saved in a separate field that
remains unchanged when you edit the text.
Note: This feature is only available if Exact copy or Editable copy is selected.
• Retain text and background colors
Retains the original color of the letters.
59
Page 60

ABBYY FineReader 11 User’s Guide
Note: Word 6.0, 7.0, and 97 (8.0) have a limited text and backgro und color palette,
therefore t he ori gina l do cume nt co lors may b e rep laced wit h the one s availa ble i n the Word
palette. Word 2000 (9.0) or later retains the colo rs of the source doc ument in full.
Picture sett ings
Document s co ntaini ng a large numb er o f pictures are very large. To reduce the size of the f ile,
select the desired option in the Image quality group.
Tip:
• To change the picture saving parameters, click Custom…. In the Custom Picture Settings dialog
box, select the desired parameters and click OK.
• If you d on't wa nt t o kee p pict ure s in t he re cogniz ed te xt, m ake sure t he Keep pictures
option is clear.
Advanced
Some of the more advanced saving options be come available by clicking the Advanced group.
• Highlight uncertain characters
Select this option to edit the recognized text in Microsoft Word rather than in the ABBYY FineReader
Text window. All uncertain characters will be highlighted in the Microsoft Word window.
Tip. You can change the colo r of unce rtain character s on the View tab of the Options
dialog box (Tools>Options…).
• Enable compatibility with other word processors
Produces a docume nt tha t can be o pened an d edit ed in ear lier vers ions of Microso ft Word
and other w ord proc essi ng ap plica tion s tha t su ppo rt the RTF form at.
Saving in XLSX
To save your text in XLS/ XLSX :
• Click File>Save Document As>Microsoft Excel 97–2003 Document or the Save button on
the main toolbar. Click the arrow next to the Save button and choose a saving format from the list.
If there is no suitable format in the list, click Sa ve to Other Formats…, and, in the dialog box that
opens, select the desired format.
Tip. Additional saving optio ns are available in the Options dialog box: select Tools>Options…,
click the Save ta b, and the n cli ck the XLSX tab.
The followi ng o ptio ns are available:
• Ignore text outside ta bl es
Saves only the tables and ignores the rest.
• Convert numeric values to numbers
Converts numbers into the "Numbers" format in the XLS file. Microsoft Excel may perform
arithmetical operations on cells of this format.
• Keep headers and footers
Preserves headers and footers in the output document.
Saving in PDF
To s ave your text in PDF:
• Click File>Save Document As>PDF Document or the Save button on the main toolbar. Click the
arrow next to the Save button and choose a saving format from the list. If there is no suitable
60
Page 61

ABBYY FineReader 11 User’s Guide
format in the list, click Save to Other For mats…, and, in the dialog box that opens, select the
desired format.
Tip. Additional saving options are available in the Options dialog box: select Tools>Options…,
click the Save ta b, and the n cli ck the PDF tab.
The saving options on t his tab are grouped i nto the following cate gories:
Default paper size
From the D efa ult pap er si ze drop–d own list, cho ose t he pa per size to be used for s aving in P DF
format.
Save mode
Depending on h ow you ar e plan ning t o us e yo ur el ectro nic do cum ent, sele ct o ne of the b est opti on
below:
• Text and pictures only
This option saves only the recognized text and the associated pictures. The page will be fully
searchable and the size of the PDF file will be small. The appearance of the resulting document may
slightly differ from the original.
• Text over the page image
This option saves the background and pictures of the original document and pl aces the recognized
text over them. Usually, this PDF type requires more disk space than Text and pictures only. The
resulting PDF document is fully searchable. In some cases, the appearance of the resulting
document may slightly differ from the original.
• Text under the page image
This option saves the entire page image as a picture and places the recognized text underneath.
Use this option to create a fully searchable document that looks virtually the same as the original.
• Page image only
This option saves the exact image of the page. This type of PDF document will be virtually
indistinguishable from the original but the file will not be searchable.
Depending on the save mode you select, some o f the following opti ons will become available:
• Retain text and background colors
Select this option to retain the font color and backgro und when saving in PDF.
• Keep headers and footers
Preserves headers and footers in the output document.
• Enable Tagged PDF (compatible with Adobe Acrobat 5.0 and above)
Select this option to add PDF tags into the output PDF document.
Apart from text and pictures, PDF files can contain information about the document
structure suc h as lo gica l pa rts, pict ures, and table s. T his i nforma tio n is e ncod ed i n PDF tags .
A PDF f ile e quipped with PDF tags m ay be re flowed to f it different s creen siz es an d will
display we ll o n hand held dev ices .
Important! If your recogn ized doc ument co ntain s text in He brew or Y iddish , you cannot
create a tagged PDF file.
• Use Mixed Raster Content
Select this option to retain the visual quality of the text and the pictures in a highly compressed
document.
• Cr eate outlin e
Select thi s op tion if yo u wis h to cre ate a tab le o f cont ent s from the d ocu ment head ings .
61
Page 62

ABBYY FineReader 11 User’s Guide
Image settings
The resul ting fil e m ay be q uite l arge if yo ur te xt c ontai ns a lot o f pict ure s or i f you choos e to s ave
the page i mage toget her wit h the reco gnized te xt. To adjus t the siz e of t he re sult ing file and the
quality of the p ictur es, selec t on e of t he op tion s fro m the Image settings drop–dow n li st:
• Best quality (source image resolution)
Select this option to retain the quality of the pictures or the page image. The original resolution of
the source image will be preserved.
• Balanced
Select this option to reduce the size of the PDF file while keeping the quality of the pictures or page
image at a reasonably high level.
• Compact size
Select this option to obtain a small–sized PDF file. The resolution of the pictures and page image
will be reduced to 150 dpi, affecting their quality.
• Custom…
Select this option to make your own picture and page image settings in the Custom Picture
Settings dialog box.
Tip. If you do not wa nt t o save p icture s i n the recog nized text , ma ke sure the Keep pictures
option is not se lected.
Font settings
When savi ng te xts to PD F, you ca n use eit her Ad obe fonts or W indow s font s in stall ed o n yo ur
machine. To specify the font set to be used, in t he Font drop–down list , se lect one o f the follo wing :
• Use predefined fonts
The PDF file will use these Adobe fonts: Times New Roman, Arial, Courier New.
• Use Windows fonts
The PDF file will use the Windows fonts installed on your computer.
If you don't want to use emb edde d fonts in your PDF–document, make sure t he Embed fonts
option is clear.
Security
You can use passw ords to pr event your PDF d ocum ent fr om una uth orize d ope ning, prin ting or
editing:
• Click the PDF Security Settings… button and in the dialog box, select the desired security
settings.
Saving in PDF /A
Select the PDF/A saving format i f you want to create a PDF –docume nt with full–text search
capabilities that mai ntains visual qu ality or a documen t to be stor ed in an a rchi ve.
To save your text in PDF/A:
• Click File>Save Document As>PDF/A Document or the Save button on the main toolbar. Click
the arrow next to the Save button and choose a saving format from the list. If there is no suitable
format in the list, click Save to Other Formats…, and, in the dialog box that opens, select the
desired format.
Tip. Additional saving optio ns are available in the Options dialog box: select Tools>Options…,
click the Save ta b, and the n cli ck the PDF/A tab.
The saving opt ions on t his tab are grouped int o the followi ng catego ries:
62
Page 63

ABBYY FineReader 11 User’s Guide
Default paper size
From the D efa ult pap er si ze drop–d own list, cho ose t he pa per size to be used for s aving in P DF
format.
Save mode
Depending on how you a re planni ng to use your elec troni c document, select one of the best option
below:
• Text and pictures only
This option saves only the recognized text and the associated pictures. The page will be fully
searchable and the size of the PDF file will be small. The appearance of the resulting document may
slightly differ from the original.
• Text over the page image
This option saves the background and pictures of the original document and pl aces the recognized
text over them. Usually, this PDF type requires more disk space than Text and pictures only. The
resulting PDF document is fully searchable. In some cases, the appearance of the resulting
document may slightly differ from the original.
• Text under the page image
This option saves the entire page image as a picture and places the recognized text underneath.
Use this option to create a fully searchable document that looks virtually the same as the original.
• Page image only
This option saves the exact image of the page. This type of PDF document will be virtually
indistinguishable from the original but the file will not be searchable.
Depending on the save mode you select, some o f the following opti ons will become available:
• Retain text and background colors
Select this option to retain the font color and background when saving in PDF.
• Keep headers and footers
Preserves headers and footers in the output document.
• Enable Tagged PDF (compatible with Adobe Acrobat 5.0 and above)
Select this option to add PDF tags into the output PDF document.
Apart from text and pictures, PDF files can contain information about t he doc ume nt
structure suc h as lo gica l pa rts, pict ures, and table s. T his i nforma tio n is e ncod ed i n PDF tags .
A PDF f ile e quipped with PDF tags m ay be re flowed to f it different s creen sizes and wil l
display we ll o n hand held dev ices .
Important! If yo ur recog nized doc ument contai ns text i n Hebrew or Yiddi sh, you can not
create a tagged PDF file.
• Use Mixed Raster Content
Select this option to retain the visual quality of the text and the pictures in a highly compressed
document.
• Cr eate outlin e
Select thi s op tion if yo u wis h to cr eate a tab le o f cont ent s from the docu ment head ings .
Picture sett ings
The resul ting fil e m ay be q uite l arge if yo ur te xt c ontai ns a lot o f pict ure s or i f you choos e to save
the page image together with the recognized text. To adjust the size o f the resul ting file a nd th e
quality of the p ictur es, selec t on e of t he op tion s fro m the Image settings drop–dow n li st:
63
Page 64

ABBYY FineReader 11 User’s Guide
• Best quality (source image resolution)
Select this option to retain the quality of the pictures or the page image. The original resolution of
the source image will be preserved.
• Balanced
Select this option to reduce the size of the PDF file while keeping the quality of the pictures or page
image at a reasonably high level.
• Compact size
Select this option to obtain a small–sized PDF file. The resolution of the pictures and page image
will be reduced to 150 dpi, affecting their quality.
• Custom…
Select this option to make your own picture and page image settings in the Custom Picture
Settings dialog box.
Tip. If you do not want to save pict ures in the reco gnize d text , m ake s ure the Keep pictures
option is not se lected.
PDF Secur ity Setting s
When you s ave a re cog nized t ext in PD F for mat, you ca n prot ect the conte nts of t he PD F–document
with:
1. a password required to open the document
2. a p assword required to modify or print the document or copy information to another application
3. encoding
Passwords and other PDF security parameters are set in the PD F Security Settings dialog box.
To open it, click the PDF Security Settings… b utto n loca ted on t he bottom of t he Save>PDF tab
of the Options dialog box (Tools>Options…).
Password for ope ning the docume nt
This passwor d prote cts the PDF–docume nt fr om una utho rize d ope ning . The user will be ab le t o
open the doc ument o nly after enteri ng the pas swor d specified by th e author.
To set a pas sword req uired t o ope n t he do cume nt:
1. Select Require password to open document.
2. Click
3. In the Enter Document Open Password dialogue box, enter your password and confirm it.
The password you spec if i ed will be d isplayed as d ots in the Doc um ent Open Pa ssw ord fie ld of
the PD F Security Settings dialogue box.
.
Password for e diti ng a nd pri ntin g the docu ment
This passwor d prote cts the PDF–document from unauthorize d editing a nd print ing as well as
copying information to a nother applicat ion. The user will be a ble to do the describ ed action only
after ent ering the pass word spec ified b y th e aut hor.
To se t a pas sword re quired to a ccess f ile contents:
1. Select Restrict printing and editing the document and its security settings.
2. Click
.
64
Page 65

ABBYY FineReader 11 User’s Guide
3. In the Enter Permissions Password dialogue box, enter your password and confirm it.
The password you spec if i ed will be d isplayed as d ots in the Permissio ns Password f iel d o f the
PDF Security Settings dialogue box.
Next, select the actions you want to allow the users to do with the PDF–doc ument. T hese
restrictions are set in the Permissions settings group.
• Items in the Printing allowed drop–down list let you allow or prohibit document printing.
• Items in the Changes allowed drop–down list let you allow or prohibit document editing.
• If the Enable copying text, pictures, and other content option is selected, the user will be able
to copy the contents of the PDF–document (text and images) to Clipboard. If you want to prohibit
such actions, make sure this option is clear.
• If the Enable text access for screen reader devices option is selected, the user will be
able to make screenshots of the ope ned PDF–document. If you want to prohibit such
actions, make s ure t his o ption is clear. Note that thi s opt ion is onl y availa ble for PD F–
documents with128–bit enco ding or hig her.
Encoding level
Items in the Encryption level drop–down l ist le t yo u set t he e ncod ing typ e for t he p assw ord –
protected PDF–document.
Select one of the encoding levels:
• Low (40 bit) – compatible with Adobe Acrobat 3.0 and above sets a low 40–bit encoding
level based on the RC4 standard.
• High (128 bit) – compatible with Adobe Acrobat 5.0 and above sets a high 128–bit encoding
level based on the RC4 standard, but the users o f earlier Adobe Acrobat versions will not be able to
open such PDF–document.
• Hi gh (1 28–bit A ES) – compatible wi th Ad obe Ac robat 7. 0 an d abo ve sets a hi gh
128–bit encod ing le vel b ased on t he AE S sta ndar d, b ut the use rs o f earl ier Adob e Acr obat
versions will not be able to open s uch PD F–document.
Saving in HTM L
To s ave your text in HT ML:
• In t he drop–down list on the main toolbar, choose a document layout saving mode.
• Click File>Save Document As>HTML Document or the Save button on the main toolbar. Click
the arrow next to the Save button and choose a saving format from the list. If there is no suitable
format in the list, click Save to Other Formats…, and, in the dialog box that opens, select the
desired format.
Tip. Additional saving optio ns are available in the Options dialog box: select Tools>Options…,
click the Save ta b, and the n cli ck the HTML tab.
The saving option s on this ta b are grouped into th e following categorie s:
Retain layout
Depending on h ow you ar e plan ning t o us e yo ur el ectro nic do cum ent, sele ct t he ap propr iate opti on:
• Flexible layout
Produces a document that maintai ns the formatting of the original. The output document can be
easily edited.
65
Page 66

ABBYY FineReader 11 User’s Guide
• Formatted text
Retains fonts, font sizes, and paragraphs, but does not retain the exact locations of the objects on
the page or the spacing. The resulting text will be left–aligned. (Right–to–left texts will be right–
aligned.)
Note: Vertical text s will be chan ged to horizontal in this mode.
• Plain text
This mode does not retain formatting.
Use CSS
Select thi s op tion to sa ve the f i le in HTM L 4 for mat , whi ch al lows mai ntain ing t he do cume nt l ayout
by using a style t able i ncorporate d in the HTML–file.
Save mode
• Keep line breaks
Retains the original arrangement of lines.
• Retain text and background colors
Retains the original color of the letters.
• Keep headers and footers
Preserves headers and footers in the output document.
Picture sett ings
Documents containing a large number of pictures are very large. To reduce the size of the f ile,
select the desired option in the Image quality group.
Tip:
• To change the picture saving parameters, click Custom…. In the Custom Picture Settings dialog
box, select the desired parameters and click OK.
• If you d on't wa nt t o kee p pict ure s in t he re cogniz ed te xt, m ake sure t he Keep pictures
option is clear.
Character encoding
ABBYY Fine Reader det ect s the code page aut omat ical ly. To cha ng e the code page or its type, select
the desired code page or code page type fro m the drop –down list s u nder Char acter encod ing.
Book settings
Adjust B ook s et ting s if you are converting a printed book into electronic form. ABBYY FineReader
can automa tic ally save book chapters into separate HTML files and recrea te links to the m in the
table of c onte nts. You can als o spl it t he do cume nt int o sep arate H TM L f i les b ased on le vel 1 or le vel
2 headings.
Saving in PPTX
To save your text in PPTX:
• Click File>Save Document As>Microsoft PowerPoint Presentation or the Save button on the
main toolbar. Click the arrow next to the Save button and choose a saving format from the list. If
there is no suitable format in the list, click Save to Other Formats…, and, in the dialog box that
opens, select the desired format.
66
Page 67

ABBYY FineReader 11 User’s Guide
Tip. Additional saving options are available in the Options dialog box: select Tools>Options…,
click the Save ta b, and the n cli ck the PPTX tab.
The saving options on t his tab are grouped i nto the following cate gories:
Text s ettings
• Keep line breaks
Retains the original arrangement of lines.
• Wrap text
This option is only available if Keep line breaks is sele cted. All recognized text is fit entirely inside
the text block in the slide.
• Keep headers and footers
Preserves headers and foote rs in the o utput d ocumen t.
Picture sett ings
Documents containing a large number of pictures are very large. To reduce the size of the f ile,
select the desired option in the Image quality group.
Tip:
• To change the picture saving parameters, click Custom…. In the Custom Picture Settings dialog
box, select the desired parameters and click OK.
• If you d on't wa nt t o kee p pict ure s in t he re cogniz ed te xt, m ake sure t he Keep pictures
option is clear.
Saving in TXT
To s ave your text in TX T:
• Click File>Save Document As>Text Document or the Save b utton on the main toolbar. Click
the arrow next to the Save button and choose a saving format from the list. If there is no suitable
format in the list, click Save to Other For mats…, and, in the dialog box that opens, select the
desired format.
Tip. Additional saving optio ns are available in the Options dialog box: select Tools>Options…,
click the Save ta b, and the n cli ck the TXT tab.
The saving options on t his tab are grouped i nto the following cate gories:
Text s ett i ngs
• Keep line breaks
Retains the original arrangement of lines.
• Insert page break character (#12) as page brea k
Saves the original page arrangement.
• Use blank line as paragraph separator
Separates the paragraphs with blank lines.
• Keep headers and footers
Preserves headers and footers in the output document.
Character encoding
ABBYY FineReader detec ts the c ode page a utomatical ly. To change the code page or its typ e, select
the desired code page or code page type fro m the drop –down list s u nder Character encod ing.
67
Page 68

ABBYY FineReader 11 User’s Guide
Saving in CS V
To s ave your text in CSV:
• Cl ick the arrow next to the "Save" button on the main toolba r, or click File>Save Document
As>CSV Document.
Tip. Additional saving optio ns are available in the Options dialog box: select Tools>Options…,
click the Save ta b, and the n cli ck the CSV tab.
The saving options on t his tab are grouped i nto the following cate gories:
Text s ettings
• Ignore text outside ta bl es
Saves only the tables and ignores the rest.
• Insert page break character (#12) as page separator
Saves the original page arrangement.
• Fi eld sep ara tor
Selects t he c haracte r tha t wi ll se parate the data colum ns i n the CSV file.
Character encoding
ABBYY FineReader detec ts the c ode page a utomatical ly. To change the code page or its typ e, select
the desired code page or code page type from t he drop –down list s und er C harac ter en codin g.
Saving E–books
To s ave your text in FB 2 or EPUB :
• On the main toolbar, select Formatted Text from the drop–down list.
• Select File>Save Document As>FictionBook (FB2) or >Electronic Publication (EPUB).
Alternatively, you can use the saving button on the main toolbar. Click the arrow next to the saving
button and select a format. If you do not see the format you need on the list, select Save to Other
Formats… and select the desired format in the Save As dialog box.
Tip. You can select additional saving options on the FB2/EPUB tab of t he Options dialog box
(Tools>Options…>Save>FB2/EPUB).
This tab offers the following opt ions:
Document setti ngs
Here you can specify detailed in formation about the document: its title, authors, and keywords. You
can also e nter a com me nt in t he Annotation field.
Picture sett ings
If your text contai ns very many pict ures, the result ing f i le may be fairly lar ge. The q uality of the
pictures a nd t he siz e of t he r esul ting f il e ca n be t wea ked us ing t he op tion s in t he Picture settings
drop–dow n li st.
Tip.
• To specify your own picture settings, select Custom…. In the Custom Picture Settings dialog
box, make the necessary settings and click OK.
• If you d o not wis h to r eta in any p ict ures, clea r the Ke ep pic tures option.
Retain layout
68
Page 69

ABBYY FineReader 11 User’s Guide
Select a l ayout rete ntion met hod de pend ing o n how you ar e int endi ng t o use t he do cume nt:
• Formatted text
Preserves paragraphs, but does not preserve exact positions of objects and line spacing. You will
get continuous left–aligned text (texts printed in right–to left scripts will be right–aligned).
Note: Any vertical text will be displayed horizontally if this option is selected.
When savi ng to EPUB, you ca n add itio nall y save fonts a nd font siz es b y selecti ng Save
fonts and font sizes.
• Plain text
Does not preserve text formatting.
Use first page as cover
Selecting thi s opt ion w ill p lace t he f ir st pa ge o f th e doc umen t on t he co ver o f the e –book.
Embed fonts
Selecting thi s opt ion w ill e mbed the s aved fonts i nto the e –book.
Saving in DjVu
To s ave your text in DjVu:
• Select File>Save Document As>DjVu Document. Alternatively, you can use the saving but ton
on the main toolbar . Click the arrow next to the saving button and select a format. If you do not see
the format you need on the list, select Save to Other Formats… and select the desired format in
the Save As dialog box.
Tip. You can select additional saving options on the DjVu tab of the Options dialog box
(Tools>Options…>Save>DjVu).
This tab o ffers the follow ing options
Save mode
Select a s aving met hod d epe nding on how you are inte nding t o u se the do cume nt:
• Text under the page image
Saves the image of the page and places the recognized text in a separate invisible layer underneath
the image. Thus, you get a searchable DjVu document that looks almost exactly like the original.
• Page image only
Saves the image of the page. The output document will look almost exactly like the original,
but the te xt i n the doc ument will not be sea rcha ble .
Multiple layers
The DjVu format uses a special compression techniq ue which separates a page image into layers
and applies different compression methods to each of them. By default, ABBYY FineReader will
automatically de termi ne whethe r multi –layer compression must be used on a page ( the Automatic
option is sele cted in th e Multiple layers drop–down list) . You can enable or di sable m ulti–layer
compressi on for a doc ument.
Picture sett ings
If your text contai ns very many pict ures, the result ing f i le may be fairly lar ge. T he qua lity of t he
pictures a nd t he siz e of t he re sult ing fil e ca n be t wea ked usi ng t he op tion s in t he Picture settings
drop–dow n li st.
69
Page 70

ABBYY FineReader 11 User’s Guide
Tip. To specify your ow n pict ure setti ngs, sele ct Custom…. In t he Custom Picture Settings
dialog box, make the necessary settings a nd cl ick OK.
Saving to Microsoft SharePoint
(only for A BBYY FineR eader Corporate Edition)
ABBYY FineReader allows you to save recognized text to a network resource — a we bsit e, a n onli ne
library, etc.
To save recog nized text in Micros oft SharePoint:
1. On the File menu, cli c k Save to Microsoft SharePoint…
2. In the dialog box that opens, specify the file name, the format, the network folder the file will be
saved to, and the file options.
3. Click Save.
Important!
• Make sure you have Microsoft Office SharePoint Portal Server Client Components installed
on your computer and the Web Clie nt is running.
• When working with addresses like http://Server/share, it is impossible to replace a file already
existing in the network.
Saving an Image of the Page
To sa ve o ne or more images:
1. Select the pages in the Pages window.
2. On the File menu, cli c k Save Images…
3. In the Save Images As dialogue box, select the dis k and folder to save the file to.
4. Select a graphical format you want to save the image in.
Important! If you wa nt to save mult iple page s to one fil e, c hoose the TIF format and
select Save as multi–page image file.
5. Specify the file name and click Save.
Tip. When saving, you can select the image format and compression method. Image compression
lets you decrease f ile size. Methods used for image com pression differ by compression rate and
data losse s. Two factors def ine the choice of compre ssion method : the resul ting ima ge qual ity and
file size.
ABBYY FineReader lets you use the following compressi on methods:
• ZIP — provides for no data losses and is used for images containing large sections of one color. For
example, this method is used for screenshots and black–and–white images.
• JPEG — used for gray and color images, for example, photos. This method provides for a high–
density compression but leads to data losses and poor er image quality (blurred outlines and poor
color palette).
• CCITT Group 4 — provides for no data losses and i s used for black–and–white images created in
graphical programs or scanned images. The CCITT Group 4 compression is a widespread
compression method applied to virtually all images.
• Packbits — provides for no data losses and is used for scanned black–and–white images.
70
Page 71

ABBYY FineReader 11 User’s Guide
• LZW — provides for no data losses and is used for grap hics and gray images.
71
Page 72

ABBYY FineReader 11 User’s Guide
Advanced Features
Chapter Contents
• Working in Other Applications
• Using Area Templates
• Recognition with Training
• User Languages and Language Groups
• Group Work in a LAN
• ABBYY Hot Folder
Working in Other Applications
When you i nstal l ABB YY Fi neRead er 11, you ma y choo se t o inte grate t he p rogram with Micr osoft
Off ice a ppli cati ons a nd W indow s Exp lore r. Integratio n mea ns t hat :
• An ABBYY FineReader 11 toolbar will appear in Microsoft Word, Microsoft Excel, and Microsoft
Outlook.
• An ABBYY FineReader 11 option will appear in the supported format shortcut menu in Windows
Explorer.
You will be able to review and e dit re cognition result s using yo ur usual Microsoft O ff ic e tools . You
will also be ab le to lau nch qu ick t asks and cust om aut oma ted t asks and o pen ima ge and P DF fil es
directly from Windows Explorer.
To perfor m O CR o n a do cume nt in a Micr oso ft O ff ice app licat ion :
1. Click
2. In the dialog box, check the options and click Start.
ABBYY Fine Reader wi ll be launc hed, and t he re cog nized text will be o pene d in t he c urren t Mi croso ft
Off ice appl icati on when t he OCR pro cess is compl eted.
To open a n image or P DF file from Wi ndows E xplo rer:
1. Select the Windows Explorer file.
2. Select ABBYY FineReader 11>Open in ABBYY FineReader from the file's shortcut menu.
Note: T his comma nd will appear only if t he program s upports t he sele cted file's format.
ABBYY Fine Reader 11 will launc h an d the sele cted image wi ll be a dded to a new ABBYY FineReader
document. If ABBYY FineReader 11 is already running, the image will be added to the current
ABBYY FineReader document.
button on the ABBYY FineReader 11 bar.
If the ABBYY FineReader 11 panel doesn't appear on the Microsoft Office application toolbar:
• Select ABBYY FineReader 11 from the application toolbar's shortcut menu.
If the ABBYY Fi neRea der 11 option is not availa ble on t he short cut men u, it me ans that ABBYY
FineReader 1 1 integrat ion wit h Microsoft O ffice applica tions wa s disable d d uring cu stom
installation.
To enable integration:
72
Page 73

ABBYY FineReader 11 User’s Guide
1. Go to Add or remove progra ms (Start>Settings>Control Panel).
Note: In Microsoft Windows Vista and Windows 7, this com man d is ca lle d Programs and
Features.
2. In the list of installed programs, select ABBYY FineReader 11 and click Change.
3. In the Custom Installation dialog box, select the appropriate components.
4. Follow the setup instructions.
Using Area Templates
If you are processing a large number o f documents wit h an identical layout (e. g. forms or
question naire s), a naly zing t he l ayout of every page will be very time consuming. To save time, you
can analyze on ly one doc ument in a set of sim ilar doc ument s a nd sa ve the dete cted a reas a s a
template . The n you can us e thi s te mplat e for t he other doc umen ts i n the set.
To create a n area template:
1. Open an image and either let the program analyze the layout automatically or draw the areas
manually.
2. On the Areas menu, cl ic k Save Area Template… In the saving dialog box, provide a name for
your template and click Save.
Important! To be able to use a n area tem plate , yo u must sca n all the d oc ument s in t he se t us ing
the same re sol utio n value.
Applying an area template:
1. In the Pages window, select the pages to which you wish to apply an area template.
2. On the Areas menu, cl ic k Load Area Template…
3. In the Open Area Template dialog box, select the desired area template (area template files have
the *.blk extension).
4. In the same dialog box, next to Apply to, select Selected pages to apply the template to the
selected pages.
Note: Select All pag es to apply the template to all th e pages in t he current AB BYY
FineReader do cument .
5. Click the Open button.
Recognition with Training
The Read with training mode is useful for:
• Texts set in decorative fonts
• Texts that contain unusual characters (e.g. mathematical symbols)
• Long (more than a hundred pages) documents of low print quality
Use the Read with training mode
increase in recog nition q uality wi ll be outwe ighed by con siderably lon ger proc essing tim es . For
details, see Paper D ocument Contains Decorative (N on–Standard) Fonts.
only
if o ne o f the a bove a pplie s. I n ot her i nsta nces , the slig ht
73
Page 74

ABBYY FineReader 11 User’s Guide
• Training User Patterns
Provides instructions on training a user pattern, with additional information on training characters
and ligatures.
• Selecting a User Pattern
Provides instructions on selecting a user pattern, with some additional tips on how to make the right
choice.
• Editing a User Pattern
Provides instructions on viewing the characters in a user patter and changing the font effects.
Training User Patterns
1. Select Tools>Options… and click the Read tab.
2. Under Training, sele ct Use built–in and user patterns or Use only user patterns.
3. Select the Read with training option.
4. Click the Pattern Editor… button.
Note: Pattern training is not supported for Asian languages.
5. In the Pattern Editor dialog box, click New…
6. In the Create Pattern dialog box, type in a name for your new pattern and click OK.
7. Close the Pattern Ed itor and the Options dialog boxes by clicking the OK button in each.
8. On the toolbar at the top of the Image window, click Read.
Now if ABBYY FineReader encounters an unknown character, this character will be displayed in a
Pattern Training dialog box.
9. Teach the program to read new characters and ligatures.
A ligature is a comb inati on of tw o or t hree character s tha t are "glue d t oget her" (for
example, fi, fl , ffi, et c.) and are diffic ult for the pr ogram to separate . In fac t, bette r resul ts
can be obtained by treating them as single com pound c haracte rs.
Note: Words printed in bold or italic type in your text or words in superscript/subscript may
be retaine d in t he re cogn ized text b y sel ecti ng t he c orresp ondi ng op tio ns u nder Effects.
74
Page 75

ABBYY FineReader 11 User’s Guide
To go back to a previously trained character, click the Back button. T he frame wil l jump to
its previo us l ocati on a nd the late st traine d "chara cter imag e – keybo ard cha racter"
correspondence will be removed from the patter n. The Back butt on navig ates betw een
characters of one word and will not navigate between words.
Important!
• You can only train ABBYY FineReader to read the characters included in the alphabet of the
recognition language. To train the program to read characters that cannot be entered from the
keyboard, use a combination of two characters to denote these non–existent characters or copy the
desired character from the Insert Character dialog box (click
• Each pattern may contain up to 1,000 new characters. However, avoid creating too many ligatures,
as this may adversely affect OCR quality.
to open the dialog box).
Selecting a User Pattern
ABBYY FineReader allows you to use patterns to improve OCR quality.
1. On the Tools menu, click Pattern Editor….
2. In the Pattern Editor dialog box, select the desired pattern from the list of available patterns and
click Set Active.
Some important points to remember:
1. Rather than differentiating between some similar yet different characters, ABBYY FineReader
recognizes them as one and the same character. For example, the straight ('), left (‘), and right (’)
quotes will be stored in a pattern as a single character (straight quote). This means that left and
right quotes will never be used in the recognized text, even if you try to train them.
2. For some character images, ABBYY FineReader will select the corresponding keyboard character
based on the surrounding context. For example, an image of a small circle will be recognized as the
letter O if there are letters immediately next to it and as the number 0 if there are digits next to it.
3. A pattern can only be used for document s that have the same font, font size, and resolution as the
document used to create the pattern.
4. To be able to use a pattern later, save it to a file. See Working with a FineReader Document for
details.
5. To recognize texts set in a different font, be sure to disable the user pattern by selecting the Use
only built–in patterns o ption in Tools>Options…>Read.
Editing a User Pattern
You may wish to ed it yo ur new ly cre ate d pa ttern befor e la unchi ng the OCR pro cess . An incorre ctl y
trained pattern may adversely affect OCR quality. A pattern should contain only whole characters or
ligatures . Chara cter s wi th cut edge s a nd chara cter s wi th in corre ct le tter corr espon dence s sh ould be
removed from the pattern.
1. On the Tools menu, click Pattern Editor….
2. In the Pattern Editor dialog box, select the desired pattern and click the Edit… button.
3. In the User Pattern dialog box, select the desired character and click the Properties… button.
In the Properties dialog box, type the letter corresponding to the selected character and select the
desired font effect (bold, italic, superscript, or subscript).
To de lete a ch aracter t hat has been traine d incor rectl y, select the character and clic k the Delete
button.
75
Page 76

ABBYY FineReader 11 User’s Guide
Word as spelt in the user
Possible forms of the word in
User Languag es and Lang uage Groups
You can create and use your own re cog niti on la nguage s an d lan guage gro ups in addi tio n to t he
languages and groups included in the program.
• Creating an OCR Language
This is used to process texts that contain a lot of uncommon elements, such as code numbers.
• Creating a Language Group
This is used to recognize documents written in several languages that are not available from the
predefined language combinations.
Creating an OC R Language
When performing OCR on a docume nt, A BBYY Fine Reader uses some infor mati on abo ut t he
language of the document (this language is to be selected from the Document La ngu ages drop–
down list in t he mai n wi ndow) . I f there are too m any u nusua l ab brevia tio ns or wor ds in t he te xt ,
the program may fail to r ecog nize them corre ctly. If this is the case , you may wi sh t o crea te your
own recog nitio n la ngua ge for this doc ument .
1. On the Tools menu, click Languag e Editor…
2. In the Language Editor dialog box, click New…
3. In the New Languag e or G roup dialog box, select Create a new language based on an
existing one and from the drop–down list below, select the desired language. Click OK.
4. In the Language Properties dialog box, specify the properties of the new OCR language.
a. Language name — Type a name for your OCR language in this field.
b. Source language — The language on which your new OCR language will be based.
(Displays the language you selected in the New Language or Group dialog box. Click the
arrow to the right to select a different language.)
c. Alphabet — Lists the characters of the alphab et of the source language. Click
remove characters.
d. Dictionary — The dictionary that ABBYY FineReader will use to per form OCR on your
document and to check the recognized text. The following options are available:
• None
No dictionary will be used.
• Built–in dictionary
The dictionary supplied with ABBYY FineReader will be used.
• User dictionary
A user dictionary will be used. Click the Edit… button to add words to the dictionary
or to import an existing user dictionary or text file in W indow s ( ANSI) or Unicode
encoding. The words in the text file must be separated by spaces or other non–
alphabetic characters.
to add or
Note: T he words from the user dictionary may occur in texts in the following
capitalizations : 1) lowercase only, 2) uppercase only, 3) first letter
capitalized, 4) as spelt in the user dictionar y. The four possibili ties are
summed up in the table below.
dictionary
texts
76
Page 77

ABBYY FineReader 11 User’s Guide
abc
abc, Abc, ABC
Abc
abc, Abc, ABC
ABC
abc, Abc, ABC
aBc
aBc, abc, Ab c, ABC
• Regular expression
You can use a regular expression to create a new language.
e. Advanced… — Opens the Advanced Language Properties dialog box, where you can
specify more advanced properties for your language:
• Non–letter characters that may occur at the beginning or at the end of words
• Standalone non–letter characters (punctuation marks, etc.)
• Characters to be ignored if they occur inside words
• Prohibited characters that may never occur in tex ts written in this language
• All the characters of the language to be recognized
• Allow Arabic numerals, Roman numerals, and abbreviations
5. Once you have finished creating your new language, select it as the recognition language for your
document.
By default, user languages are saved in the ABBYY FineReader document folder. You can alsosave
all your user language s and pa tterns to one f ile : Sele ct Tools>Options…, click t he Read t ab, an d
then click the Save to File… button.
Creating a Language Group
If you are going t o u se a pa rti cular lang uage com binat ion re gula rly, you may wis h to gr oup t he
languages together for convenience.
1. On the Tools menu, click Languag e Editor….
2. In the Language Editor dialog box, click New….
3. In the New Languag e or G roup dialog box, select Create a new group of languages a nd cli c k
OK.
4. In the Language Group Properties dialog box, type a name for your new group and select the
5. Click OK.
desired languages.
Note: I f you know that you r text w ill not c onta in ce rtai n cha racter s, yo u may w ish t o
explicitly specify these so–cal led pro hibite d charact ers. Spe cifying prohibi ted charact ers ca n
increase both recognition speed and quality. To specify prohibited characters, click the
Advanced… button in the Language Group Properties dialog box. In the Advanced
Language Gr oup Pro per ties dialog b ox, type the proh ibite d cha racte rs i n the Prohibited
characters field.
77
Page 78

ABBYY FineReader 11 User’s Guide
The newly created group will be added to the D ocum ent Lang uag es drop–down list in the main
window.
By default, user language groups are saved in the ABBYY FineReader document folder. You can also
save all your user la nguag es an d patt erns to o ne file : Se lect Tools>Options…, click the Read tab,
and then click the S ave to File… button.
Tip. If you need a part icula r langu age com binati on for a doc ument , you can als o select the desi red
language s dire ctly, without cre ati ng a gr oup.
1. From the Document Languages drop–down list, select More languages…
2. In the Language Editor dialog box, select Specify languages manuall y .
3. Select the desired languages and click OK.
Group Work in a LAN
ABBYY FineReader 11 provi des tools a nd capabi lities for pro cessing do cument s over a loca l area
network (LAN).
• Processing the Same ABBYY FineReader Document on Several LAN Computers
• Using the Same User Languages and Dictionaries on Several Computers
Processing the Same ABBYY FineReader Document on Several LAN Computers
When wor king w ith a n AB BYY FineRead er d ocume nt ove r a networ k, you ca n use all the
functionali ty available in ABBYY FineReader e xcept the Style Editor.
If an ABBYY Fi neReader docume nt is to be used on se veral LAN comp uters sim ulta neousl y, the
following shoul d be t ake n into acc ount:
• A separate copy of ABBYY FineReader 11 should be installed on each computer.
• All the users must have full access to the ABBYY FineReader document.
• Each user may add pages to the document and modify them. If a user adds new pages and
launches the OCR process for them, the program will process the entire document anew. None of
the users will be able to edit the document w hile the processing is underway.
Once the p age backg round cha nges to w hite, all t he to ols i n t he Text wi ndow w ill becom e
available.
• A document page that is being processed by one user is locked for the other users.
• Users may monitor page status in the Pages window, including the computer that is processing the
document, which user has opened a page, whether it has been recognized or edited, etc. To see the
status, switch into the Details view.
• The fonts that are used in the ABBYY FineReader document must be installed on each computer.
Otherwise, the recognized text may be displayed incorrectly.
Using the Same User Langua ges and D ictionar ies on Seve ral Computers
In ABBYY FineReader 11, several users can use the same user language s and dict iona ries
simultane ousl y. Several users can al so ad d wor ds t o the same user dict iona ries when wor king i n th e
LAN.
78
Page 79

ABBYY FineReader 11 User’s Guide
To m ake user d ictiona ries an d language s available to multiple users :
1. Create/open an ABBYY FineReader document and select desired scanning and OCR options for the
document.
2. Specify a folder where user dictionaries will be stored. This folder should be accessible to all network
users.
Note: By default , user di ctionarie s are st ored in % Userpro f ile %\Application
Data\ABBYY\FineReader\11.00\UserDict ionarie s if your c ompute r is runn ing Wind ows
XP and in
%Userprofile%\AppData\Roaming\ABBYY\FineReader\11.00\User Dictionari es if your
computer is running Microsoft Windows Vista or Windows 7.
To spe cify the folder:
1. Select Tools>Options… and on t he Advanced tab of the Options dialog box click the
User Dictionaries… button.
2. Click Browse… and select the folder.
3. Save your user patterns and languages to an *.fbt file:
1. Select Tools>Options… and click the Read tab in the Options dialog box.
2. Under User patterns and languages, click the Save to File… button.
3. In the Save Options dialog box, specify a name for the *.fbt file and a folder where the file
will be stored. This folder should be accessible to all network users.
4. Now when a user creates a new ABBYY FineReader document, they must load the user patterns and
languages from the *.fbt file saved at step 3 and specify the path to the folder created at step 2,
where the user dictionaries are stored.
Important! To be able to access the user dictionaries, patterns, and languages, users must
have read/write permissions for the folders where they are stored.
To view the list of available user lang uages in the Language Editor dialog box (select
Tools>Language Editor… and scroll to User languages).
When a user la nguage is being used by several users, it is available as "read–only," and users will
not be able to change user language properties. However, words can be added to and deleted
from a user di ctio nary t hat is be ing u sed o n se veral LAN com puter s.
When a dictionary is being ed ited by a user, it is available as "read –only" to othe r users, i.e . users
can use t his di ctio nary to per form OCR a nd check spe llin g, but the y ca nnot add or rem ove w ords.
Any change s a us er m akes t o a u ser d icti onar y wil l be come availab le to al l users who have s elected
the folder w here thi s di ctiona ry is stor ed. For the chang es t o com e int o effe ct, us ers w ill nee d to
restart ABBYY Fi neReader.
ABBYY Hot Folder
(ABBYY FineReader 11 Corporate Edition only)
ABBYY FineReader includes ABBYY Hot Fold er, a s ched uling a ge nt wh ich allow s you to se lect a
folder with images and set the time for ABBYY FineReader to process the images contained in the
folder. For example , you can sc hedule your comp uter to re cogniz e image s overnig ht.
To proc es s i mag es in a folder aut omati call y, create a pro cessi ng ta sk for tha t folde r and spe cify t he
image ope ning , OCR , and savin g opt ions. You must al so sp ecify how ofte n ABB YY Fi neReade r
79
Page 80

ABBYY FineReader 11 User’s Guide
should ch eck t he fol der for ne w ima ges (a t re gula r inte rvals or o nly o nce) and set t he start time for
the task.
Important! At the ti me whe n the tas k should s tart, your comp uter mu st be tur ned on and yo u
must be logged on.
• Installing and Starting ABBYY Hot Folder
• Main Window
• Creating a Task
• Changing Task Properties
• Results Log
Installing and Starting ABBYY Hot Folder
By default, ABBYY Hot Folder is i nstalle d on your comput er toget her with ABBYY FineReader 11. If,
during custom installat ion, you chose not to inst all ABBYY Hot Folder, you can insta ll the applicatio n
later by following the instructio ns belo w:
1. On the Windows taskbar, click Start and then select Settings>Control Panel.
2. Double–click the Add or Remove Programs icon i n the Control Panel window.
3. In the list of installed programs, select ABBYY FineReader 11 and then click Change.
4. In the Custom Setup dialog box, select ABBYY Ho t Fold er .
5. Follow the instructions of the setup program.
Starti ng AB BYY Hot F olde r
There are several ways t o start AB BYY Hot Folder:
• Select Start>All Programs>ABBYY FineReader 11 and then select A BB Y Y H ot Fol der or
• In t he ABBYY FineReader 11 main window, select Tools>Hot Folder… or
• Double–click the ABBYY Hot Folder icon on the Windows taskbar (this icon will appear once you
have set up at least one hot folder).
Main Window
Starting ABBYY Hot Folder ope ns the feat ure's mai n wi ndow. Use t he b uttons on t he t oolba r to set
up, copy, delete, and star t folder pro cessing ta sks. You can also view deta iled repor ts for eac h
folder.
80
Page 81

ABBYY FineReader 11 User’s Guide
Status
Description
Running…
The images in the folder are being pro cessed.
Scheduled
You chose to check the hot folder for images only once at start time.
Stopped
Processing has been stopped by t he user.
Completed
Finished processing images in this folder.
Error (see
An error occurred when proces sing images in this folder. AB BYY
To crea te a new t ask, clic k the New button on the toolbar. The ABBYY Hot Folder Wizard will
guide you thro ugh setti ng up a hot folder.
Note:
• By default, task files are stored in %Userprofile%\Local Settings\Application
Data\ABBYY\HotFolder\11.00.
(In Microsoft Windows Vista, Windows 7 in
%Userprofile%\AppData\Local\ABBYY\HotFolder\11.00).
• The results will be saved to the folder you specified when setting up the task. In some cases, to
prevent the loss of already processed files, the program will create a subfolder in the specified folder
and save the subsequent recognition results to this subfolder. The subfolder will be named as
follows:
1. "Hot Folder DD.MM.YYYY HH–MM–SS"
A subfolder with this name is created when you re–run a task.
2. "File name(NUMBER)"
A subfolder with this name is create d if a file with a particular name already exists in the
folder you specified.
• De pending on your versi on of the product, the number of pages that you can recognize within 30
days may be limited to 5,000.
To see message s notifyin g you that t asks ha ve been c omplet ed, cli ck
on the toolbar.
A notification message will be displayed in a pop–up window above the Windows taskbar.
The ABBYY Hot Folder main window displays a list of set–up tasks. For each t ask, the full p ath to
the correspondin g hot folder is disp layed, toge ther wit h its current sta tus and the sche duled
processing time.
Tasks may have the following statuses:
The start t ime is i ndica ted i n the Next S tart Time column.
log)
FineReader di d not com plete t he proces sing tas ks. To find out t he cause
of the err or, select t he failed folder and clic k the Vie w Lo g button on
the toolbar.
You can save any task for future us e:
81
Page 82

ABBYY FineReader 11 User’s Guide
1. Click the
2. Specify the name of the task and the pat h to the task.
3. Click Save.
To loa d a previo usly saved ta sk:
1. Click the
2. Select the desired task and click Open.
button on the toolbar and select Export…
button on the toolbar and click Import…
Creating a Task
To create a task:
1. Either:
• click the New button in ABBYY Hot Fo lder or
• in the main ABBYY FineReader window, click the arrow next to the Save button and select
the Read Document Later… command
A new task will be displayed, with the steps Run once and Open FineReader document
already selected.
2. Select how often the task should be launched:
• Run once (the task will be launched once at the time you specify)
• Recurring (the task will be launched multiple times)
3. Specify the folder or document that contains the images to process.
• Open file from folder allows you to process images in local and network folders.
• Open file from FTP allows you to process images in folders on an FTP server.
If login and password are required in order to access the FTP folder, enter them in the FTP
login and FTP password fields respectively. If no login and password are required, select
the Anonymous connection option.
• Open file from Outlook allows you to process images in your mail box.
• Open FineReader document opens ima g es stored in a FineReader document.
Under Documents, select one of t he t hree op tio ns:
• Create a separate document for each file
• Create a separate document for each folder
• Create one document for all files
4. Click Analyze and read.
• Analyze and read analyzes an image and performs OCR.
• Analyze only analyzes an image.
• Automatically analyze areas detects text, picture, table, and other areas on the image.
• Use template loads a template with pre–configured areas.
• From the Language drop–down list, select the lang ua g e of the texts to be recognized.
82
Page 83

ABBYY FineReader 11 User’s Guide
Note: You can s elec t mo re tha n one lang uage .
• Click the All Document Settings… button to select more options on the Read tab of the
Options dialog box.
5. If required, select the Save FineReader document step.
6. Click Save document and specify the folder where to store the recognition results.
• From the Save as drop–dow n list, select a format for the output files.
Tip. You can have more t han on e sa ving s tep i n or der t o sa ve the re sult s in mult iple
formats.
• In the Folder field, provide the path to the output folder where the recognition results will
be stored.
• In the File name field, enter a name for the output files.
Note: T he appearance o f this dialo g box will vary depending o n the opti ons selecte d at ste p
2.
7. Click OK.
The set–up task will be displayed in the ABBYY Hot Folder main window.
Note:
• By default, task files are stored in %Userprofile%\Local Settings\Application
Data\ABBYY\HotFolder\11.00.
(In Microsoft Windows Vista, Windows 7 in
%Userprofile%\AppData\Local\ABBYY\HotFolder\11.00).
• The results will be saved to the folder you specified when setting up the task. In some cases, to
prevent the loss of already processed files, the program will create a subfolder in the specified folder
and save the subsequent recognition results to this subfolder. The subfolder will be named as
follows:
1. "Hot Folder DD.MM.YYYY HH–MM–SS"
A subfolder with this name is created when you re–run a task.
2. "File name(NUMBER)"
A subfolder with this name is created if a file with a particular name already exists in the
folder you specified.
Important! For task s to start , your com puter must be tur ned on an d you must be logged o n.
Changing Tas k Proper tie s
You can change the prop ertie s of an exist ing tas k.
To change the pr opert ies of an tas k
1. Stop the task whose properties you wish to change.
2. On the ABBYY Hot Folder toolbar , click the Modify button.
3. Make the neces sary changes and click OK.
Results Log
Images in a hot folder are pr ocessed according to your de f i ned se ttings. ABBY Y Hot Folder keeps a
detailed log of all the operations.
The log fi le contains the follow ing informatio n:
83
Page 84

ABBYY FineReader 11 User’s Guide
• The name of the task and its settings
• Errors and warnings (if any)
• Statistics (number of processed pages, number of errors and warnings, number of uncertain
characters)
To enable logging:
• On the ABBYY Hot Folder toolb ar, click
The log will be saved as a T XT file in the same folder that contai ns the file s with re cognized te xt.
To open a log file:
1. In the ABBYY Hot Folder main window, select the task you wish to inspect.
2. Click the View Log button on the toolbar.
Note: Wh en you hover the mouse pointer over the status of the selecte d task, a log fragment is
displayed in a pop–up wind ow.
.
84
Page 85

ABBYY FineReader 11 User’s Guide
Appendix
Chapter Contents
• Glossary
• Supported Image Formats
• Supported Saving Format s
• Languages and The ir Fonts
• Regular Expressions
• Shortcuts
Glossary
A
ABBYY Busi ness Card R eader is a hand y app lica tion that e nab les users to s can b usin ess ca rds,
capture t he co ntact data , an d exp ort the capt ured co ntacts into vario us electr onic forma ts. The
applicati on can al so hand le scans a nd photo s of busi ness card s stored on users ' comput ers.
ABBYY FineReader document is an object create d by ABBYY FineReader to process a pa per
document . It conta ins the ima ges of the docume nt pages, their recog nized text (if any), a nd the
program settings.
ABBYY Hot Fold er is a schedulin g agent w hich all ows you to select a folder wit h image s and
specify t he time for pr oc essin g the ima ges i n thi s fold er. At the s pe cif ied t ime, the images from the
selected folder will be processed automatically.
ABBYY Screenshot Reader is an app lica tion t hat enab les you to create scr een shots and
recognize texts on them.
Abbreviation is a short ened form of a word or phras e used to rep resent the wh ole. For example,
MS–DO S (for Micro soft Di sk Operati ng Syste m), UN ( for United Nation s), et c.
Activation is the process of obtaining a special code from ABBYY which allows the user to use
his/her copy of the software in full mode on a given computer.
Activa tio n c od e is a co de tha t i s issue d by ABBY Y t o eac h user of ABBYY Fi neReade r 11 duri ng
the activati on pr oced ure. An a ctivati on co de is use d to a ctivate ABB YY Fi neReade r o n the com puter
that generated the Prod uct I D.
Active area is a selected area o n an image that can be deleted, moved or modif ied . To make an
area acti ve, cli ck it . T he frame encl osin g an a cti ve are a is b old a nd has sma ll s quar es t hat ca n be
dragged to change the si ze of the area .
Automatic Document Feeder (ADF) is a devi ce that a uto matica ll y feed s doc ument s to a sca nner.
A scanner with an A DF c an s can m ultip le pag es w it hout m anua l int erve ntio n. ABBY Y FineRead er
supports multi –pa ge d ocume nts.
ADRT® (Adaptive Doc umen t Recog niti on Technology) is a te chnol ogy that incr ease s the qual ity o f
conversion of m ulti –page doc ument s. For e xam ple, i t ca n rec ognize suc h st ruct ural ele ment s as
headings, headers and footers, footnotes, page numbering, and signatures.
85
Page 86

ABBYY FineReader 11 User’s Guide
Area is a section of an image enclosed by a frame and containing a certain type o f dat a. Be fore
performing OCR, ABBYY FineReader detects text, picture, table, and bar code areas in order to
determine whi ch se ctio ns o f the image sho uld b e rec ognize d a nd in w hat order.
Area tem pla te is a template t hat contains in formation about the size a nd lo catio n of t he ar eas for
a set of simila r–looking docu ment s.
B
Backgrou nd pic ture area is an im age a rea t hat conta ins a pict ure w ith t ext print ed o ver it .
Barcode area is an image area that contains a barcode.
Brightness is a sca nnin g parame ter t hat ind icate s the co ntrast b etwee n t he bla ck a nd w hite a reas
on an image . Settin g the corr ect bri ghtnes s value in creases r ecogn ition qua lity.
C
Code pag e i s a table t hat est ablis hes corre spond ences betwee n characte rs and the ir codes . Users
can select the charact ers they need from those available in a code page.
Color mo de determines whethe r document color s are to be retai ned. Black–and–white images
produce smaller FineReader documents and are faster t o process.
Compound word is a word made u p of tw o or m ore ste ms (general mean ing). In AB BYY
FineReader, a co mpou nd wor d is a wor d w hich i s not i n th e di ctio nary b ut w hich t he pro gram
thinks may be made up o f two or m ore dict ionary words.
D
Document analysis is a process of id ent ifying the elem ents of t he lo gical str uct ure of a doc umen t
and areas wit h differen t types of da ta. Doc ument analysi s can be car ried o ut automa tica lly or
manually.
Document open passw ord is a password which prevents users from opening a PDF document
unless t hey typ e the pass word spec ified b y the author.
Document options is the set o f op tions that can be se lecte d in the Options dialog box
(Tools>Options). Docume nt opt ions also incl ude u ser l angua ges and patt erns. Doc ument opti ons
can be save d and the n used in o ther ABBY Y Fi neRead er d ocume nts.
Dots per inc h ( dpi) is a measure of image res olution.
Driver is a soft ware pr ogram t hat contr ols a com pute r per ipheral (e. g., a scanner, a monitor, et c).
F
Font effec ts is the appe arance of a font ( i.e. b old, ita lic, under line d, st riket hroug h, sub scri pt,
superscript , sm all caps) .
I
Ignored characters are a ny no n –letter chara cters fou nd in word s (e.g. s yllable charact ers or
stress marks). These characte rs are ig nored duri ng the spe ll che ck.
Inverted image is an image with white characters against a dark background.
L
License Ma nag er is a utility used for managing ABBYY FineReader licenses and activating ABBYY
FineReader 11 Corporate Edition .
86
Page 87

ABBYY FineReader 11 User’s Guide
Ligature is a combi natio n of tw o or m ore charact ers whi ch are "gl ued tog ether " (e.g. f i , fl, ff i) .
These cha racter s are diffic ult for ABB YY FineReade r to sepa rate. Treating them as a single
compound chara cter im pr oves OCR acc uracy.
M
Monospac ed f on t is a font (such as Courier New) in which all characters are equally spaced. For
better OCR results on monospaced fonts, select Tools>Options..., click the Document tab, and
select Typewriter under Document print type.
O
Omnifont system is a recog nitio n sy stem that re cog nizes charac ter s set in a ny font and fo nt siz e
without pr ior t raini ng.
Optional hyphen is a hyphe n ( ¬) tha t ind icat es ex actly wh ere a wor d or word com binati on sho uld
be split i f it o ccur s at t he en d of a line (e .g. "a utoform at" shou ld be spli t int o "a uto –
format"). AB BYY Fine Reader re pla ces a ll hyphens foun d in d icti onar y wor ds wit h op tion al hyp hens.
P
Page layout is the ar rangem ent of te xt, t ables , pi ctures , pa ragraphs , and colum ns o n a pa ge. The
fonts, font size s, font colors , text back ground , and te xt or ientat ion ar e als o part of the page layout.
Page layout analysis is the process of dete cting areas on a pa ge image. Areas can be of si x
types: tex t, pi cture , tabl e, ba rco de, b ackg round pict ure, a nd re cogn itio n are a. Page l ayout anal ysis
can be per forme d aut oma tical ly w hen cl icki ng th e Read button, o r manua lly by t he user p rior to
OCR.
Paradigm is the set of all gramma tical forms of a word .
Pattern is a set of pairs of type "character image – actua l character."
PDF sec ur ity se tti ngs are res trict ion s that pre vent a P DF docum ent fr om be ing opene d, e dite d,
copied or printed. These settings include Document Open Passwords, Permissions Passwords, and
encryption levels.
Permissions P assw ord is a pa sswor d w hich p revent s ot her users from print ing a nd e diti ng a P DF
document unles s the y ty pe the pa ssword spe cified by the aut hor. If som e se curi ty sett ings are
selected for the doc ument , othe r use rs w ill n ot be able to c hang e the se se ttin gs unt il t hey ty pe the
password.
Picture area is a n ima ge ar ea tha t co ntai ns a p ic ture. This type o f are a may e nclo se an act ual
picture or any o ther obje ct tha t sh ould be d isplay ed a s a pi cture (e.g . a section of text).
Primary for m is the "dictionary" form of a word (headwords of dictionary entries are usually given
in heir primary forms).
Print type is a parame ter refle cting h ow the s ource tex t was pr inted (on a laser printer or a sim ilar
device, on a typewriter, etc.). For laser–printed texts, sele ct Auto; for typewritte n text s, sel ect
Typewriter; for faxes, select Fax.
Product ID is a param eter that is a utoma tica lly generat ed o n the basi s of the ha rdwar e
conf ig uratio n whe n act ivatin g ABB YY F ineRead er on a given computer.
Prohibited cha racters — If ce rtain c haracte rs will never occ ur in a text to be recog nized, they
may be incl uded in a list of pr ohib ited chara cters . Spe ci fying pr ohibi ted charact ers incre ases the
speed and quality of OCR .
R
87
Page 88

ABBYY FineReader 11 User’s Guide
Resolution is a scanning parameter measured in dots per inch (dpi). Resolution of 300 dpi should
be used for texts set i n 10 pt fonts and larger, 400 to 600 dpi is preferable for texts of sma ller font
sizes (9 pt an d less).
Recogni tion ar ea is an image ar ea that A BBYY Fine Reader s hould ana lyze aut omat ically.
B ack to Top
S
Scanner is a devi ce for inpu tting image s int o a comp uter.
Scanning mode is a scanning parameter that det ermines w heth er a n ima ge m ust be sca nned in
black and white , grayscale, or c olor.
Separators are symbols that can separa te words (e.g . /, \, dash) and that a re separate d by spa ces
from the words themselves.
Suppor t ID is a unique identifier of a serial number with informati on ab out t he li cense and the
computer on w hich it is used . A sup port ID pr ovid es a dditi onal prote cti on and is checke d by t he
technical supp ort serv ice b efore pr ovidi ng te ch nical suppo rt.
T
Table area is an image area that contains data in table form. When the application reads this type
of area, it draws vertic al and h orizontal separators inside th e area t o form a table. This area is t hen
rendered as a table in the output text .
Tagged PDF is a P DF do cume nt wh ich conta ins i nforma ti on ab out t he d ocument structure, such as
its logica l pa rts, pict ures, and ta ble s. T he str uct ure o f a do cume nt is encod ed i n PDF tags . A P DF
file with s uch tags may be re flowed t o fit di fferent screen size s and w ill dis play well on hand held
devices.
Task Manag er is an AB BYY Fi neReader feature t hat allow s you to run an automa ted ta sk, creat e
and modify auto mated tas ks, a nd del ete cust om a utoma ted t asks whi ch yo u no l onge r use .
Text area is an image area that contai ns text . Note tha t text are as sho uld only co ntai n single –
column te xt.
Training is estab lish ing a corre spo nden ce bet wee n a c haract er im age a nd the c haracte r its elf. (For
details, se e the Recog niti on with Training section.)
U
Uncertain cha racters are characters that may have been recognized by the program incorrectly.
ABBYY Fine Reader hig hlight s uncert ain c haracter s.
Uncertain word s a re words conta ining one or more u ncerta in charact ers.
Unicode is a standard d eveloped by t he Unicode Consorti um (Unicode , Inc.). The standard is a 16–
bit inter nati onal encoding system for processing texts. The standard is easily extended. The
Unicode St anda rd det erm ines t he charac ter e ncod ing, t he pr ope rties , and proc edure s use d in
processin g text s w ritte n in a cert ain l angua ge .
Supported Image Formats
The table below lists the image formats suppor ted in A BBYY Fine Reader 11.
88
Page 89

ABBYY FineReader 11 User’s Guide
Format
Extension
Open
Save
Bitmap
bmp, dib, rle
+
+
Bitmap, Black and White
bmp, dib, rle
+ + Bitmap, Gray
bmp, dib, rle
+ + Bitmap, Color
bmp, dib, rle
+ + DCX
dcx
+ + DCX, Black and W hite
dcx + +
DCX, G ray
dcx + +
DCX, Color
dcx + +
JPEG 2000
jp2, j2k
+
+
JPEG 2000, Gray
jp2, j2k
+ + JPEG 2000, C olor
jp2, j2k
+ + JPEG
jpg, jpeg
+ + JPEG, Gray
jpg, jpeg
+ + JPEG, Color
jpg, jpeg
+
+
JBIG2
jb2, jbi g2
+
+
89
Page 90

ABBYY FineReader 11 User’s Guide
PCX
pcx
+ + PCX, Black and Whit e
pcx + +
PCX, Gray
pcx + +
PCX, Color
pcx + +
PNG
png
+
+
PNG, Black and White
png
+ + PNG, Gray
png
+ + PNG, Color
png
+
+
TIFF
tif, tif f
+ + TIFF, B lack and W hite, Unpac ked
tif, tiff
+ + TIFF, B la ck and Whit e, Pac kbits
tif, tiff
+ + TIFF, B la ck and Whit e, C CITT Group 4
tif, tiff
+ + TIFF, Black and White, ZIP compression
tif, tiff
+
+
TIFF, B lack and W hite, LZW compre ssio n
tif, tiff
+ + TIFF, Gr ay, Unpacked
tif, tiff
+ + TIFF, Gr ay, Packbits
tif, tiff
+
+
TIFF, Gr ay, JPEG compres sion
tif, tiff
+
+
90
Page 91

ABBYY FineReader 11 User’s Guide
TIFF, Gr ay, ZIP compression
tif, tiff
+ + TIFF, Gr ay, LZW compressi on
tif, tiff
+ + TIFF, Color, Unpacked
tif, tiff
+ + TIFF, Color, Packbits
tif, tiff
+ + TIFF, Color, JPEG comp ression
tif, tiff
+
+
TIFF, Color, ZIP compression
tif, tiff
+ + TIFF, Color, LZW compression
tif, tiff
+ + PDF
pdf
+
+
PDF v. 1.6 or earlier
pdf + +
DjVu
djvu, djv
+ + GIF
gif + –
XPS (Microsof t .NET Fr amework 3.0 requir ed)
xps
+ – Windows Me dia P hot o
wdp, wmp
+
–
Supported Saving Formats
ABBYY FineReader can s ave recognized t ext s in any of the followi ng forma ts:
• Microsoft Word Document (*.doc)
• Microsoft Office Word 2007 Document (*.docx)
• Rich Text Format (*.rtf)
• OpenDocument Text (*.odt)
• Adobe Acrobat Document (*.pdf)
91
Page 92

ABBYY FineReader 11 User’s Guide
Language
Font
Abkhaz
Arial Unicode MS
(*)
Adyghian
Arial Unicode MS
(*)
, Lucida Sans Unicode
Agul
Arial Unicode MS
(*)
, Lucida Sans Unicode
Altai
Arial Unico de MS
(*)
, Lucida Sans Unicode
Arabic
Arial Unicode MS
(*)
Armenian (Easter n, Western, Grabar)
Arial Unicode MS
(*)
Avar
Arial Unicode MS
(*)
, Lucida Sans Unicode
Bashkir
Arial Unicode MS
(*)
, Palatino Lin otype
Chechen
Arial Unicode MS
(*)
, Lucida Sans U nicode
Chinese (Simplified), Chinese
Arial Unicode MS
(*)
, SimSun fonts
• HTML Document (*.htm)
• FB2 Document (*.fb2)
• EPUB Document (*.epub)
• Microsoft PowerPoint 2007 Presentation (*.pptx)
• Microsoft Office Excel Comma–Separated Values File (*.csv)
• Text Document (*.txt)
ABBYY FineReader supports Windows, DOS, Mac, and ISO codepages and Unicode encoding.
• Microsoft Excel Worksheet (*.xls)
• Microsoft Office Excel 2007 Workbook (*.xlsx)
• PDF/A (*.pdf)
• DjVu Document (*.djvu)
Languages a nd The ir Fonts
(Traditional)
For example: SimSun (Founder Extended), SimSun–18030,
NSimSun.
Simhei, YouYuan, PMingLiU, MingLiU, Ming(for–ISO10646),
92
Page 93

ABBYY FineReader 11 User’s Guide
STSong
Chuvash
Arial Unicode MS
(*)
Chukchee
Arial Unicode MS
(*)
, Lucida Sans Unicode
Dargwa
Arial Unicode MS
(*)
, Lucida Sans Unicode
Ingush
Arial Unicode MS
(*)
, Lucida Sans Unicode
Gagauz
Arial Unicode MS
(*)
Hausa
Arial Unicode MS
(*)
, Lucida Sans Unicode
Hebrew
Arial Unicode MS
(*)
Japanese
Arial Unicode MS
(*)
, SimSun fonts
Kabardian
Arial Unicode MS
(*)
, Lucida Sans Unicode
Khakass
Arial Unicode MS
(*)
Khanty
Arial Unicode M S
(*)
Korean, Korean (Hangul)
Arial Unicode MS
(*)
, SimSun fonts
Koryak
Arial Unicode MS
(*)
, Lucida Sans Unicode
Lak
Arial Unicode MS
(*)
, Lucida Sans Unicode
Lezgi
Arial Unicode MS
(*)
, Lucida Sans Unicode
For example: SimSun (Founder Extended), SimSun–18030,
NSimSun.
Simhei, YouYuan, PMingLiU, MingLiU, Ming(for–ISO10646),
STSong
For example: SimSun (Founder Extended), SimSun–18030,
NSimSun.
Simhei, YouYuan, PMingLiU, MingLiU, Ming(for–ISO10646),
STSong
93
Page 94

ABBYY FineReader 11 User’s Guide
Mansi
Arial Unicode MS
(*)
, Lucida Sans Unicode
Mari
Arial Unicode MS
(*)
Ossetian
Arial Unicode MS
(*)
Russian (old spe lling)
Arial Unicode MS
(*)
, Palatino Lin otype
Tabasaran
Arial Unicode MS
(*)
, Lucida Sans Unicode
Tajik
Arial Unicode MS
(*)
, Palatino Lin otype
Thai
Arial Unicode MS
(*)
, Aharoni, David, Levenim mt , Miriam ,
Udmurt
Arial Unicode MS
(*)
Vietnamese
Arial Unicode MS
(*)
Zulu
Arial Unicode MS
(*)
, Lucida Sans Unicode
Yakut
Arial Unicode MS
(*)
Yiddish
Arial Unicode MS
(*)
Conventional regular
Any Character
.
c.t — denotes "cat," "cot," e tc.
Character fro m
[]
[b–d]ell — denotes "bell," "cell," "dell," etc.
Narkisim, Rod
Where to find/supplied with
(*)
Micr osoft Off ice 20 00 or later
Regular Expressions
The table below lists the regular expressions that can be used to create a new language.
Item name
expressio n s ymb ol
Usage examples and explanations
94
Page 95

ABBYY FineReader 11 User’s Guide
Group
[ty]ell — de note s "t ell " and "yel l"
Character not
[^]
[^y]ell — denotes "dell," "cell," "tell," but
Or | c(a|u)t — deno tes " cat" and "cut "
0 or More
*
10* — denotes numbers 1, 10, 100, 1000, etc.
1 or More
+
10+ — allows numbers 10, 100, 1000, etc., but
Letter or Digit
[0–9a–zA–Zа–яА–Я]
[0–9a–zA–Zа–яА–Я] — allows any single
Capital Lat in
[A–Z]
Small Latin
[a–z]
Capital Cyrillic
[А–Я]
Small Cyrillic
[а–я]
Digit
[0–9]
Space
\s @ Reserved.
from Group
Matches
Matches
forbids "yell"
[^n–s]ell — denote s "bell," "cell," but forbids
"nell," "oell," "pell ," "qell," "rel l," and "sell"
forbids 1
character
[0–9a–zA–Zа–яА–Я]+ — allows a ny word
Letter
Letter
letter
letter
Note:
1. To use a regular expression symbol as a normal character, precede it with a backslash. For
example, [t–v]x+ stands for tx, txx, txx, etc., ux, uxx, etc., but \[t–v\]x+ stands for [t–v]x, [t–v]xx,
[t–v]xxx, etc.
95
Page 96

ABBYY FineReader 11 User’s Guide
2. To group regular expression elements, use brackets. For example, (a|b)+|c stands for c or any
combinations like abbbaaabbb, ababab, etc. (a word of any non–zero length in which there may be
any number of a's and b's in any order), while a|b+|c stands for a, c, and b, bb, bbb, etc.
Examples
Suppose yo u are reco gniz ing a table wit h t hree c olum ns: t he fir st for the birth date , the se cond for
the name , and t he t hird for the e –mail addre ss. You can create new lang uages , Data and A ddress ,
and specify the foll woing reg ular expre ssion s for them .
Regular e xpress ion f or dat es:
The number denoting a d ay may consist of one digit ( 1, 2, etc.) or two digits ( 02, 12), but it cannot
be zero (00 or 0). The regu lar expressio n for the day should then look li ke this: ((|0)[1 –
9])|([1|2][0–9])|(30)|(31).
The regula r exp ress ion fo r the mont h s hould look like t his : ((| 0)[1 –9])|(10)|(11)|(12).
The regular expre ssion for t he year s hould loo k like this: ([19][0–9][0–9]|([0–9][0–9])|([20][0–
9][0–9]|([0–9][0–9]).
Now all we need to do is com bine all this toget her and separate the n umbers by pe riod (e. g.
1.03.1999). The period is a regular expression symbol, so you must put a backslash (\) be fore it.
The regular expre ssion for t he full date sho uld then lo ok like th is:
((|0)[1–9])|([1|2][0–9])|(30)|(31)\.((|0)[1–9])|(10)|(11)|(12)\.((19)[0–9][0–9])|([0–9][0–
9])|([20][0–9][0–9]|([0–9][0–9])
Regular expression for e–m ail add ress es:
[a–zA–Z0–9_\–\.]+\@[a–z0–9\.\–]+
Shortcut Keys
ABBYY FineReader 11 offers the fol lowing keyb oard short cuts for the most comm only used
commands. You can also create your own key board sh ortcut s.
To crea te a s hort cut :
1. Click Tools>Customize…. The Customize Toolbars and Shortcuts dialog box will open.
2. On the Keyboard Shortcuts tab, in t he Categories field, sele ct a category.
3. In the Commands field, select the command for whic h you want to create keyboard shortcut or
whose shortcut you want to change.
4. Click inside the Press new shortcut key field and then, on your keyboard, press the keys you
want to use as a shortcut for the selected command.
5. Click Assign. The keys you specified will be adde d into the Current shortcut box.
6. Click OK to save the changes.
7. To return shortcuts to their default values, click Reset (for a selected command category) or Reset
All (for all shortcuts).
The File Menu
96
Page 97

ABBYY FineReader 11 User’s Guide
Command
Shortcut
Scan Pages…
CTRL+K
Open PDF File/Image…
CTRL+O
New FineReade r Docum ent
CTRL+N
Open FineRead er Docu ment …
CTRL+SHIFT+N
Save Document A s
CTRL+S
Save Images…
CTRL+ALT+S
Send FineRe ader Doc ume nt by e –mail
CTRL+M
Send page images by e–mail
CTRL+ALT+M
Print Image
CTRL+ALT+P
Print Te xt
CTRL+P
Command
Shortcut
Undo
CTRL+Z
Redo
CTRL+ENTER
Cut
CTRL+X
Copy
CTRL+C
The Edit Men u
CTRL+INSERT
97
Page 98

ABBYY FineReader 11 User’s Guide
Paste
CTRL+V
Clear
DELETE
Select All
CTRL+A
Find…
CTRL+F
Find Next
F3
Replace…
CTRL+H
Command
Shortcut
Show Pages Wind ow
F5
Show Page Image Only
F6
Show Page Image and Page Text
F7
Show Page Text Only
F8
Show Zoom Window
CTRL+F5
Next Window
CTRL+TAB
Previous Window
CTRL+SHIFT+TAB
Properties...
ALT+ENTER
SHIFT+INSERT
The View Menu
The Documen t Menu
98
Page 99

ABBYY FineReader 11 User’s Guide
Command
Shortcut
Read
CTRL+SHIFT+R
Analyze Layo ut
CTRL+SHIFT+E
Go to Next Page
ALT+DOWN ARROW
Go to Previo us Page
A LT+UP ARROW
Go to Page…
CTRL+G
Close Current Page
CTRL+F4
Command
Shortcut
Read Page
CTRL+R
Analyze Page Layout
CTRL+E
Edit Page Image…
CTRL+SHIFT+C
Delete All Areas and Text
CTRL+DELETE
Delete Text
CTRL+SHIFT+DELETE
Page Properties…
ALT+ENTER
Command
Shortcut
PAGE DO W N
PAGE UP
The Page Menu
The Areas Menu
99
Page 100

ABBYY FineReader 11 User’s Guide
Read Area
CTRL+SHIFT+B
Change Area Type to Recognition Area
CTRL+1
Change Area Type to Text
CTRL+2
Change Area Type to Table
CTRL+3
Change Area Type to Picture
CTRL+4
Change Area Type to Barcode
CTRL+5
Change Area Type to Bac kgrou nd Pic ture
CTRL+6
Command
Shortcut
Task Manager…
CTRL+T
Hot Fo ld er…
CTRL+SHIFT+H
View Dictionaries…
CTRL+ALT+D
Language E dit or…
CTRL+SHIFT+L
Pattern Editor…
CTRL+SHIFT+A
Verification…
CTRL+F7
Next Error
SHIFT+F4
Previous Error
SHIFT+F5
Options…
CTRL+SHIFT+O
The Too ls Me nu
100
 Loading...