

Page 1

Optical 4D Mouse
User’s Guide
Ø English Version
Ø Deutsche Version
Ø Version française
Ø Italiano
Ø Versión Española
Ø Nederlandstalige Versie
1-2
3-5
6-8
9-11
12-14
15-17
PDF 檔案以 "FinePrint pdfFactory Pro" 試用版建立 http://www.pdffactory.com
MN-WOP-353-6C
Page 2

—
—
THIS DEVICE COMPLIES WITH PART 15 OF THE FCC RULES. OPERATION IS SUBJECT
ned by turning
equipment into an outlet on a circuit different from that to which the receiver
TO THE FOLLOWING TWO CONDITIONS: (1) THIS DEVICE MAY NOT CAUSE
HARMFUL INTERFERENCE AND (2) THIS DEVICE MUST ACCEPT ANY
INTERFERENCE RECEIVED, INCLUDING INTERFERENCE THAT MAY CAUSE
UNDESIRED OPERATION.
Federal Communications Commission Requirements
The equipment has been tested and found to comply with the limits for Class B Digital Device,
pursuant to part 15 of the FCC Rules. These limits are designed to provide reasonable
protection against harmful interference in a residential installation. This equipment generates,
uses and can radiate radio frequency energy and, if not installed and used in accordance with
the instruction, may cause harmful interference to radio communication. However, there is no
guarantee that interference will not occur in a particular installation. If this equipment does
cause harmful interference to radio or television reception, which can be determi
the equipment off and on, the user is encouraged to try to correct the interference by one or
more of the following measures:
l Reorient of relocate the receiving antenna.
l Increase the separation between the equipment and receiver.
l Connect the
is connected.
l Consult the dealer or an experienced radio/TV technician for help.
This device complies with Part 15 of the FCC Rules. Operation is subject to the following two
conditions:
(1) this device mat not cause harmful interference, and
(2) this device must accept any interference received, including interference that may cause
undesired operation.
The changes or modifications not expressly approved by the party responsible for compliance
could void the user's authority to operate the equipment.
1
PDF 檔案以 "FinePrint pdfFactory Pro" 試用版建立 http://www.pdffactory.com
Page 3
—
—
I
N
N
stall and offers you a host of useful
Installing the Mouse Software
, where “A” is the letter of your floppy disk drive.
NNTTRROODDUUCCTTIIO
I
Congratulations on your purchase! Your new Mouse is easy to in
features. It has two wheels for easy scrolling in all directions no matter what the application. The
vertical wheel allows you to scroll up and down; the horizontal wheel lets you scroll to the left and
right or zoom in and out in a document. You can program the mouse buttons to launch the NetJump
or LuckyJump for a quick start to programs you run frequently. You can even create your own
Command Menu and with one click put all your favorite programs right under the cursor! We have
replaced the tracking ball with an optical sensor that scans your desk 1,500 times per second for
pinpoint accuracy.
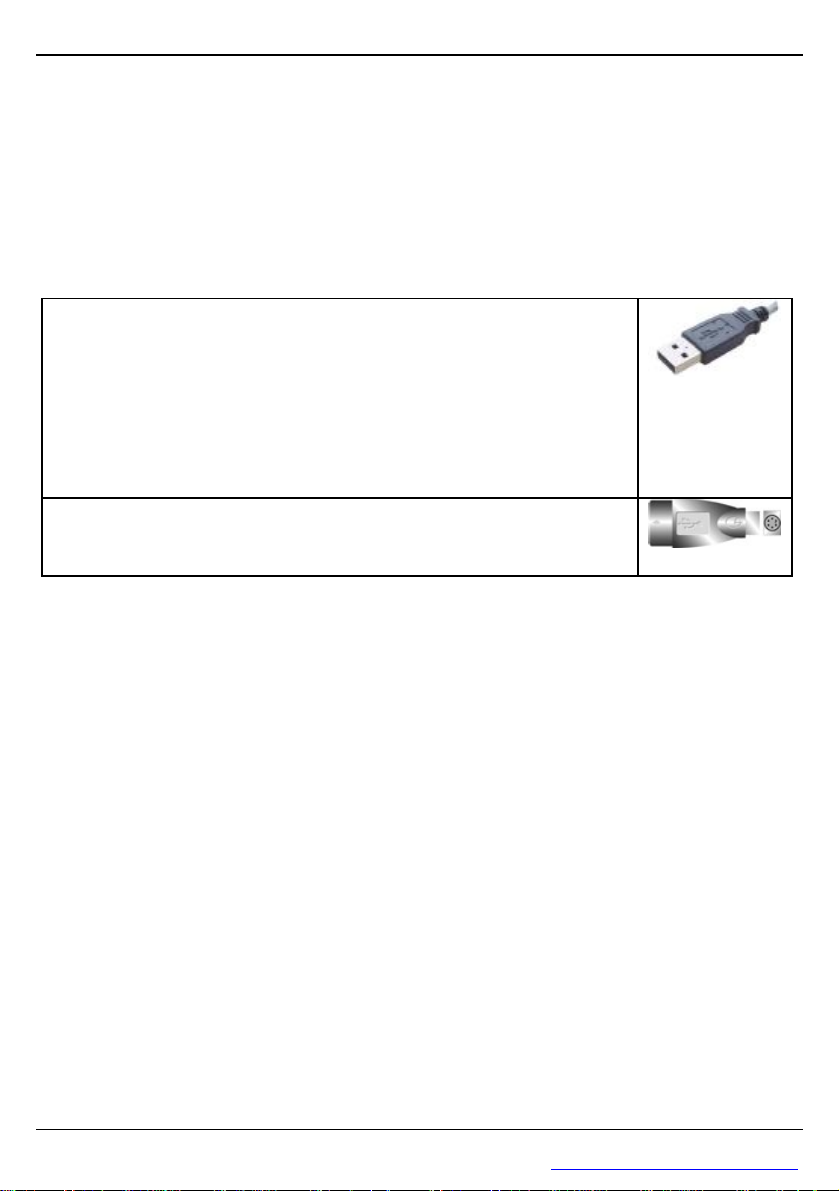
To connect your USB mouse
1. Locate an available USB mouse port on the back of your computer.
2. Insert the USB mouse port connector into the USB mouse port and
tighten the screws.
(Enabled USB IRQ#: If you use USB devices, you may Enable reserves an
IRQ# for the USB to work, Disabled do not allow the USB to have an IRQ#
and therefore prevents the USB from functioning. More details check your
computer BIOS setup.)
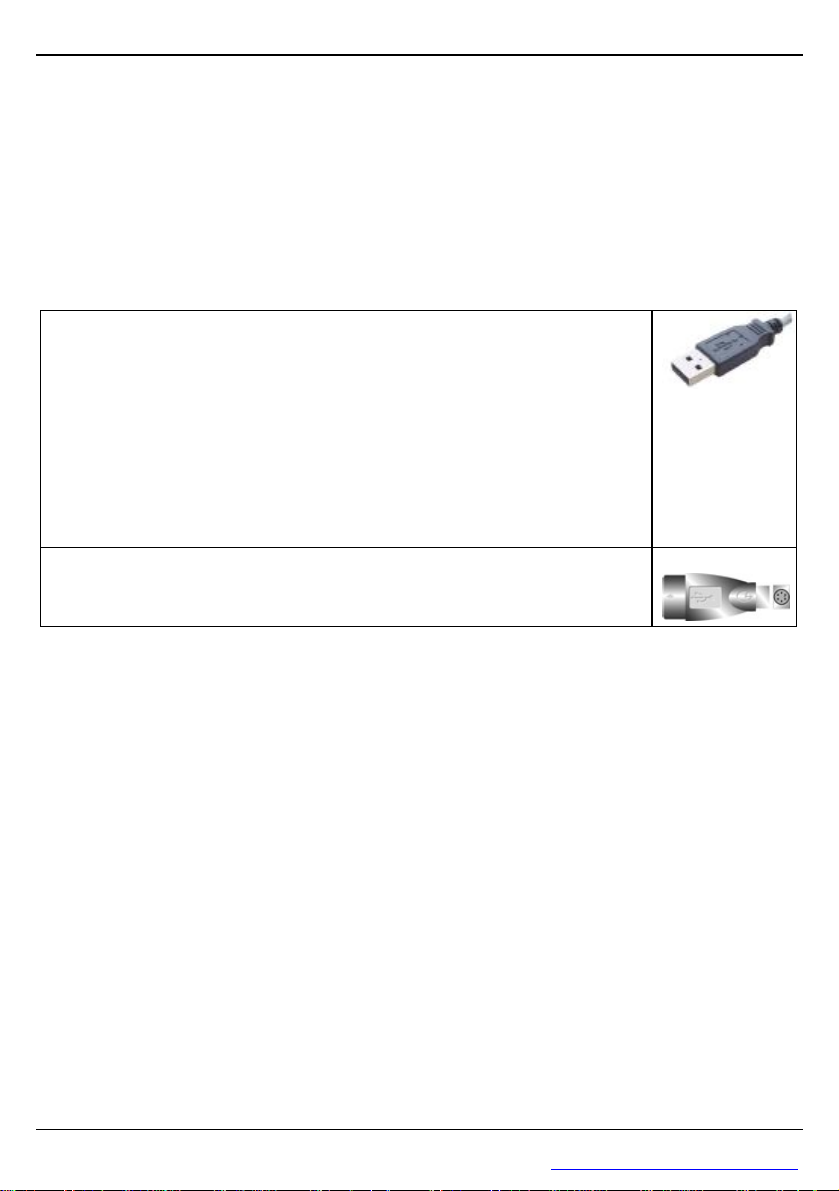
If you want to connect a combo2 mouse to your computer PS2 port, you must
use a USB to PS2 adapter.
Before you can take advantage of the many features your Mouse offers, you must install the driver.
The driver is on the installation diskette that came packaged with your Mouse.
O
Windows®95/98/Me/2000/XP installation
1. Connect the mouse to your computer.
2. Insert the installation diskette into your floppy disk drive.
3. Click the Start button and then click Run.
4. In the Run dialog window, type A:\setup
5. Click OK and follow the instructions on your screen to complete the installation.
2
PDF 檔案以 "FinePrint pdfFactory Pro" 試用版建立 http://www.pdffactory.com
Page 4

—
—
I
!
!
pointing device. See how easy scrolling through long documents or panning in drawing applications
The following table provides
compatible applications
Office 97/2000” option (if you don’t check this
commonly used commands
commands commonly used
W
I
W
With iWheelWorks driver/software installed, your Mouse is transformed into much more than just a
becomes when using the scroll wheels. Office users should love this feature—use the vertical wheel
to scroll through your document then just press the [Ctrl] key and use the same wheel to zoom in for
a close look. It even works in print preview! The third button can be programmed to launch
NetJump or LuckyJump—two customizable toolbars that open all those useful programs that you
need so often with just one click. And, in easy-to-follow steps, create your own Command Menu
and with one click put all your favorite programs right under the cursor!
an overview of the mouse functions.
HHEEEEL
L
W
OORRKKSS DDOOEESS TTHHEE HHEEAAVVYY WWOORRK
W
K
Function Description Here’s how to do it
Vertical
Scroll
Horizontal
Scroll
AutoScroll
Zoom
LuckyJump
NetJump
Lets you scroll up or down
in the current application
window.
Lets you scroll to the left
or right in the current
application window.
Use AutoScroll in Office
97to scroll through large
documents.
Lets you zoom in or out
when using applications
that support zoom
function.
With one click you can
choose from a range of
to launch.
Lets you choose from
for Web browsing.
To scroll up, move the vertical wheel forward;
to scroll down, move the wheel back.
To scroll left, move the horizontal wheel
forward; to scroll right, move the wheel back.
Activate AutoScroll from LuckyJump or
NetJump. The AutoScroll icon appears over
the vertical scrollbar. Move the mouse in the
direction you want to scroll. The farther you
move the AutoScroll icon from the starting
point, the faster the scrolling. To stop
AutoScroll, press any mouse button.
In the Mouse Properties window select the
Wheel tab and check the “Wheel Zoom for
option you can hold the [Ctrl] key while
zooming with either scroll wheel). Then use
the horizontal wheel to zoom in and out.
In the Mouse Properties window select the
Buttons tab and then assign LuckyJump in the
drop-down menu for the desired button.
In the Mouse Properties window select the
Buttons tab and then assign NetJump in the
drop-down menu for the desired button.
Command
Menu
Create your own
Command Menu for
launching all your favorite
programs.
In the Mouse Properties window select the
Settings tab and then click New/Update.
Follow the instructions on your screen.
3
PDF 檔案以 "FinePrint pdfFactory Pro" 試用版建立 http://www.pdffactory.com
Page 5

—
—
Optische 4D-Maus
Benutzerhandbuch
PDF 檔案以 "FinePrint pdfFactory Pro" 試用版建立 http://www.pdffactory.com
4
Page 6
—
—
E
G
G
und abwärts; mit dem horizontalen Rad
Die Maussoftware installieren
en Sie den
Rollmaus
F
Ü
IINNF
Ü
E
Wir bedanken uns bei Ihnen! Ihre neue Maus lässt sich leicht installieren und bietet eine Menge
nützlicher Funktionen. Ihre zwei Räder lassen sich in alle Richtungen rollen, ganz gleich, unter
welcher Anwendung. Mit dem vertikalen Rad rollen Sie aufrollen Sie nach links und rechts oder zoomen ein Dokument ein oder aus. Die Maustasten können
zum Start von NetJump oder LuckyJump programmiert werden, um häufig ausgeführte Programme
schnell auszuführen. Sie können sogar Ihr eigenes Befehlsmenü erstellen und mit einem Klicken alle
Ihre Lieblingsprogramme unter den Cursor setzen! Wir ersetzten den Trackball durch einen
optischen Sensor, der Ihre Mausfläche 1500 Mal pro Sekunde auf höchste Genauigkeit hin abtastet.
n Anschluß der USB-Maus an den Rechner:
1. Suchen Sie auf der Rechnerrückseite nach der USB-Schnittstelle.
2. Schließen Sie den Stecker des Mauskabels an die USB-Schnittstelle
an, und ziehen Sie die Schrauben fest.
Aktivieren des USB-Interrupts: Zum Einsatz von USB-Geräten muß
vielleicht ein Interrupt freigegeben werden. Wenn die USB-Funktion im
BIOS deaktiviert ist, können an die USB-Schnittstelle angeschlossene
Geräte nicht richtig angesprochen werden. Überprüfen Sie die BIOSEinstellungen Ihres Rechners.
Zum Anschluß der Kombinationsmaus an die PS2 Schnittstelle müssen
Sie einen USB-PS2 Zwischenstecker einsetzen.
Bevor Sie den breiten Funktionsumfang Ihrer Maus zu Ihrem Vorteil nutzen können, müss
Treiber installieren. Der Treiber befindet sich auf der Installationsdiskette, die Ihrer 4-Wegbeigefügt ist.
Installation unter Windows®95/ 98/Me/2000/XP
1. Schließen Sie die Maus an Ihren Computer an.
2. Legen Sie die Installationsdiskette in Ihr Diskettenlaufwerk.
3. Klicken Sie die Schaltfläche Start und dann Ausführen an.
4. Geben Sie A:\setup im Dialogfenster Ausführen ein, wobei »A« der Buchstabe Ihres
Diskettenlaufwerks ist.
5. Klicken Sie auf OK und schließen Sie die Installation anhand der Anweisungen auf dem
Bildschirm ab.
HHRRUUN
N
PDF 檔案以 "FinePrint pdfFactory Pro" 試用版建立 http://www.pdffactory.com
5
Page 7

—
—
I
!
!
bol AutoScroll erscheint über dem vertikalen Bildlauf. Ziehen
Erstellen Sie Ihr eigenes
W
I
W
Nach Installation von iWheelWorks-Treibern/Software wird Ihre Maus zu mehr als nur einem
Zeigegerät. Die Rollräder erleichtern das Rollen durch lange Dokumente oder das Schwenken in
Bildbearbeitungen. Office-Benutzer werden diese Funktion lieben—mit dem vertikalen Rad und
durch Drücken der [Strg]-Taste rollen Sie durch lange Dokumente und mit dem gleichen Rad
zoomen Sie es für eine Nahansicht ein. Dies funktionert sogar bei der Druckvorschau! Die dritte
Taste kann zum Start von NetJump oder LuckyJump programmiert werden—zwei definierbare
Leisten, die häufig benutzte, nützliche Programme mit nur einem Klicken öffnen. Und erstellen Sie
anhand leicht nachvollziehbaren Schritten Ihr eigenes Befehlsmenü und setzen Sie mit einem
Klicken Ihre gesamten Lieblingsprogramme unter den Cursor! Die folgende Tabelle zeigt einen
Überblick über die Mausfunktionen.
HHEEEEL
L
W
W
OORRKKSS
Ü
Ü
BBEERRNNIIMMMMTT DDIIEE
S
CCHHWWEERRAARRBBEEIIT
S
Funktion Beschreibung So wird sie ausgeführt
Vertikal
rollen
Horizontal
rollen
AutoScroll
Zoom
LuckyJump
Rollt im aktuellen
Anwendungsfenster
herauf oder herunter.
Rollt im aktuellen
Anwendungsfenster
nach links oder rechts.
Mit AutoScroll rollen
Sie in Office 97kompatiblen Anwendungen durch große
Dokumente.
Hiermit zoom Sie unter
Anwendungen, die
Zoomfunktion
unterstützen, ein oder
aus.
Mit einem Klicken
können Sie aus zehn
Befehlen auswählen.
Zum Heraufrollen drehen Sie das vertikale Rad vorwärts; zum
Herunterrollen drehen Sie dieses Rad rückwärts.
Zum Rollen nach links drehen Sie das horizontale Rad vorwärts;
Zum Rollen nach rechts drehen Sie das horizontale Rad rückwärts.
Aktiviert AutoScroll unter LuckyJump oder NetJump. Das
Sym
Sie die Maus in die Richtung, in die Sie rollen möchten. Je weiter
sich das Symbol AutoScroll vom Startpunkt entfernt, desto
schneller wird gerollt. Um AutoScroll anzuhalten, drücken Sie
eine beliebige Maustaste.
Klicken Sie das Register Rad im Fenster Eigenschaften von
Maus an und wählen Sie die Option »Radzoom unter Office
97/2000 « (wird diese Option nicht angewählt, müssen Sie beim
Zoomen die [Strg]-Taste halten). Zoomen Sie dann mit dem
horizontalen Rad ein und aus.
Klicken Sie das Register Tasten im Fenster Eigenschaften von
Maus an und weisen Sie dann LuckyJump der gewünschten Taste
im eingeblendeten Menü zu.
T
NetJump
Befehlsmenü
Hiermit wählen Sie aus
acht Befehlen aus, die
allgemein zum Stöbern
im Web benutzt
werden.
Befehlsmenü, um alle
Ihre Lieblingsprogramme zu starten.
Klicken Sie das Register Tasten im Fenster Eigenschaften von
Maus an und weisen Sie dann NetJump der gewünschten Taste
im eingeblendeten Menü zu.
Klicken Sie das Register Einstellungen im Fenster Eigenschaf-
ten von Maus an und wählen Sie dann Neu/Aktualisieren.
Folgen Sie den Anweisungen auf dem Bildschirm.
6
PDF 檔案以 "FinePrint pdfFactory Pro" 試用版建立 http://www.pdffactory.com
Page 8

—
—
Souris optique 4D
Guide de l’utilisateur
PDF 檔案以 "FinePrint pdfFactory Pro" 試用版建立 http://www.pdffactory.com
7
Page 9

—
—
I
N
N
Installer le logiciel de la sou
NNTTRROODDUUCCTTIIO
I
Félicitations ! Votre nouvelle souris est facile à installer et offre de nombreuses fonctions très utiles.
Elle a deux molettes pour défiler facilement dans toutes les directions sans tenir compte de
l’application utilisée. La molette verticale permet de défiler de haut et en bas ; la molette horizontale
permet de défiler de gauche à droite ou d’effectuer un zoom sur un document. Vous pouvez
programmer les boutons de la souris pour lancer NetJump ou LuckyJump, pour démarrer les
programmes que vous utilisez fréquemment plus rapidement. Vous pouvez même créer votre propre
menu de commandes et accéder à tous vos programmes préférés avec un simple clic ! La boule de la
souris a été remplacée par un capteur optique qui analyse votre bureau 1500 fois par seconde pour
une précision optimale.
n Pour connecter votre souris USB à un port USB:
1. Repérez un port USB disponible au dos de votre ordinateur.
2. Insérez le connecteur de la souris USB dans le port USB et serrez les vis.
Activer l’IRQ pour l’USB: Si vous utilisez des périphériques USB, vous
devez réserver un IRQ pour l’USB. Si vous n’activez pas un IRQ pour l’UBS,
vous ne pourrez pas utiliser la fonction USB. Contrôlez le manuel BIOS de
votre ordinateur pour plus de détails.
Si vous voulez connecter une souris combinée au port PS2 de votre ordinateur,
utilisez un adaptateurUSB à PS2.
ris
Vous devez installer le pilote de la souris pour pouvoir bénéficier des caractéristiques offertes par
votre souris. Le pilote se trouve sur la disquette d’installation accompagnant votre souris.
Installation sous Windows®95/98/ME/2000/XP
1. Connectez la souris à votre ordinateur.
2. Insérez la disquette d’installation dans votre lecteur de disquettes.
3. Cliquez sur le bouton Démarrer, puis sur Exécuter.
4. Dans la boîte de dialogue Exécuter, tapez A:\setup, « A » étant la lettre du lecteur de disquettes.
5. Cliquez sur OK et suivez les instructions sur l’écran pour compléter l’installation.
O
PDF 檔案以 "FinePrint pdfFactory Pro" 試用版建立 http://www.pdffactory.com
8
Page 10

—
—
D
S
S
et utilisez la même molette pour un zoom avant sur le document. Cela fonctionne aussi dans l’aperçu
IIFFFFEERREENNTTEESS FFOONNCCTTIIOONNSS DDEE LLAA SSOOUURRIISS I
D
Avec le pilote/logiciel de iWheelWorks installé, votre souris est plus qu’un simple périphérique de
pointage. Les molettes de défilement permettent de faire défiler et de visualiser des longs documents
et graphiques dans différentes applications. Si vous travaillez avec Office, vous allez aimer cette
caractéristique — utilisez la molette verticale pour défiler un document, puis pressez la touche [Ctrl]
avant l’impression! Le troisième bouton peut être programmé pour lancer NetJump ou
LuckyJump — deux barres d’outils personnalisées qui ouvrent tous les programmes utiles dont vous
avez besoin avec un seul clic. Et, dans des étapes faciles à suivre, créez votre propre menu de
commandes et avec un clic placez tous vos programmes préférés directement sous votre pointeur. La
table suivante fournit un aperçu général des fonctions de la souris.
I
W
W
HHEEEEL
L
W
OORRK
W
Fonction Description Application
Défilement
vertical
Défilement
horizontal
AutoScroll
Zoom
LuckyJump
Permet de défiler de haut
en bas dans la fenêtre
d’application courante
Permet de défiler de
gauche à droite dans la
fenêtre d’application
courante
Utilisez AutoScroll dans
les applications
compatibles avec Office
97 pour défiler dans de
longs documents.
Permet d’effectuer un
zoom avant ou arrière
dans les applications qui
supportent la fonction de
zoom.
Avec un clic vous pouvez
choisir de lancer une des
dix commandes.
Pour défiler vers le haut, déplacez la molette verticale vers
l’avant ; pour défiler vers le bas, déplacez la molette vers
l’arrière.
Pour défiler vers la gauche, déplacez la molette horizontale vers
l’avant ; pour défiler vers la droite, déplacez la molette vers
l’arrière.
Activez AutoScroll de LuckyJump ou de NetJump. L’icône
AutoScroll apparaît sur la barre de défilement verticale.
Déplacez la souris dans la direction voulue. Déplacez l’icône
AutoScroll plus loin du point de départ pour accélérer la vitesse
de défilement. Pour arrêter AutoScroll, pressez n’importe quel
bouton de la souris.
Dans la fenêtre Propriétés de la souris, sélectionnez l’onglet
Molette et cochez l’option « Molette de zoom pour
Office97/2000» (si vous n’activez pas cette option, vous devez
presser la touche [Ctrl] en effectuant un zoom). Utilisez alors la
molette horizontale pour un zoom avant et arrière.
Dans la fenêtre Propriétés de la souris, sélectionnez l’onglet
Boutons et assignez LuckyJump dans le menu déroulant pour le
bouton désiré.
K
NetJump
Menu de
commandes
Permet de choisir une des
huit commandes
ordinairement utilisées
pour surfer le Web.
Créer votre propre menu
de commandes pour
lancer tous vos
programmes préférés.
Dans la fenêtre Propriétés de la souris, sélectionnez l’onglet
Boutons et assignez NetJump dans le menu déroulant pour le
bouton désiré.
Dans la fenêtre Propriétés de la souris, sélectionnez l’onglet
Paramètres et cliquez sur Nouveau/Mettre à jour. Suivez les
instructions sur l’écran.
PDF 檔案以 "FinePrint pdfFactory Pro" 試用版建立 http://www.pdffactory.com
9
Page 11

—
—
Mouse ottico 4D
Guida dell’utente
PDF 檔案以 "FinePrint pdfFactory Pro" 試用版建立 http://www.pdffactory.com
10
Page 12

—
—
I
E
E
NetJump o LuckyJump è possibile avviare rapidamente gli applicativi che si utilizzano più spesso. Si
un solo clic abbinare al cursore tutti i programmi
Installare il software del mouse
NNTTRROODDUUZZIIOON
I
Congratulazioni per il vostro acquisto! Il vostro nuovo mouse è facile da installare e offre molte utili
funzioni. È dotato di due rotelline per scorrere facilmente in tutte le direzioni, in qualsiasi
applicativo. La rotellina verticale consente lo scorrimento in alto e in basso; con la rotellina
orizzontale, oltre allo scorrimento a destra e a sinistra, si può ingrandire o rimpicciolire qualunque
area in un documento. I pulsanti del mouse sono personalizzabili: selezionando l’apertura di
può persino creare un proprio Menu comandi e con
preferiti! La trackball è stata sostituita con un sensore ottico in grado di eseguire la scansione della
scrivania 1500 volte al secondo, per il massimo della precisione.
n Per collegare il mouse USB a una porta USB:
1. Individuare una porta USB per mouse sul retro del computer.
2. Inserire il connettore USB del mouse nella porta USB per mouse e
stringere le viti.
Attivare un Livello di interrupt (IRQ) per l'USB: Per poter utilizzare
dispositivi USB si deve riservare all'USB un proprio Livello di interrupt nelle
impostazioni del BIOS, selezionando Attiva. Al contrario, se non si vuole
utilizzare l'USB, occorre selezionare Disattiva, non dedicando all'USB un
proprio Livello di interrupt. Per informazioni più dettagliate, fare riferimento
alla configurazione del BIOS del proprio computer.
Se desiderate collegare un mouse combinato alla porta PS2 del computer, é
necessario che utilizziate un adattatore da USB a PS-2.
Per potersi avvantaggiare delle molte funzioni offerte dal mouse, occorre installare il driver. Il driver
si trova nel disco floppy di installazione fornito a corredo del mouse.
Installazione in Windows®95/98/Me/2000/XP
1. Collegare il mouse al computer.
2. Inserire il disco floppy di installazione nell’unità dischi floppy del computer.
3. Fare clic sul pulsante Start (Avvio), quindi fare clic su Esegui.
4. Nella finestra di dialogo Esegui, digitare A:\setup, dove “A” è la lettera dell’unità dischi floppy.
5. Fare clic su OK e seguire le istruzioni sullo schermo per completare l’installazione.
N
PDF 檔案以 "FinePrint pdfFactory Pro" 試用版建立 http://www.pdffactory.com
11
Page 13

—
—
I
!
!
a, si può ingrandire qualsiasi area per esaminarla da vicino. Funziona anche in
applicazioni compatibili
). Quindi utilizzare
W
I
W
Con il driver e il software di iWheelWorks installati, il mouse diventa molto di più di un semplice
dispositivo di puntamento. Scorrere in documenti lunghi o nella visualizzazione panoramica in
applicazioni di disegno è facilissimo con le rotelline. Gli utenti di Office ameranno questa
funzione — usando la rotellina verticale per scorrere nel documento, basta premere il tasto [CTRL]
e, con la stessa rotellin
anteprima di stampa! Il terzo pulsante è programmabile per avviare NetJump o LuckyJump — due
barre strumenti personalizzabili per aprire con un clic del mouse i programmi usati più spesso. Con
una semplice procedura si può creare un proprio Menu comandi e con un clic abbinare al cursore
tutti i programmi preferiti! La tabella seguente elenca le funzioni del mouse.
HHEEEEL
L
W
OORRKKSS FFAACCIILLIITTAA IILL LLAAVVOORRO
W
Funzione Descrizione Procedura
Scorrimento
verticale
Scorrimento
orizzontale
Scorrimento
automatico
Zoom
LuckyJump
NetJump
Per scorrere in alto o in
basso nella finestra
dell’applicazione.
Per scorrere a sinistra o
destra nella finestra
dell’applicazione.
Per lo scorrimento di
grandi documenti in
con Office 97.
Per ingrandire o
rimpicciolire aree in
applicazioni che
supportano la funzione
Zoom.
Per scegliere un
comando, e attivarlo
con un solo clic, fra una
serie di comandi usati
più spesso.
Per scegliere fra i
comandi utilizzati più
spesso per la
navigazione su Internet.
Per scorrere in alto, spingere la rotellina verticale in avanti; per
scorrere in basso, spingere la rotellina indietro.
Per scorrere a sinistra, spingere la rotellina orizzontale in avanti;
per scorrere a destra, spingere la rotellina indietro.
Attivare lo Scorrimento automatico da LuckyJump o NetJump.
Sulla barra di scorrimento verticale appare l’icona relativa.
Muovere il mouse nella direzione di scorrimento desiderata.
All’allontanarsi dell’icona dal punto di partenza, lo scorrimento
diviene più rapido. Per interrompere lo Scorrimento automatico,
premere un pulsante del mouse.
Nella finestra Proprietà mouse selezionare la scheda Rotellina e
barrare l’opzione “Zoom rotellina per Office 97/2000” (se questa
opzione non è selezionata, durante lo scorrimento con qualsiasi
rotellina occorre tenere premuto il tasto [CTRL]
la rotellina orizzontale per ingrandire e rimpicciolire la
visualizzazione.
Nella finestra Proprietà mouse selezionare la scheda Pulsanti,
quindi assegnare LuckyJump nel menu a discesa al pulsante
desiderato.
Nella finestra Proprietà mouse selezionare la scheda Pulsanti,
quindi assegnare NetJump nel menu a discesa al pulsante
desiderato.
O
Menu
comandi
Per creare un Menu
comandi personalizzato
dal quale avviare le
applicazioni preferite.
Nella finestra Proprietà mouse selezionare la scheda
Impostazioni, quindi fare clic su Nuovo/Aggiorna. Seguire le
istruzioni sullo schermo.
PDF 檔案以 "FinePrint pdfFactory Pro" 試用版建立 http://www.pdffactory.com
12
Page 14

—
—
Mouse óptico 4D
Guía del usuario
PDF 檔案以 "FinePrint pdfFactory Pro" 試用版建立 http://www.pdffactory.com
13
Page 15

—
—
I
N
N
Instalació
NNTTRROODDUUCCCCI
I
Le felicitamos por su compra. La instalación del nuevo mouse (ratón) es muy sencilla y le ofrece un
gran número de útiles funciones. Dispone de dos ruedas con las que podrá desplazarse fácilmente en
todas direcciones en cualquier aplicación. La rueda vertical le permite desplazarse hacia arriba y
hacia abajo; con la rueda horizontal podrá desplazarse de izquierda a derecha y utilizar la función de
zoom en los documentos. Puede programar los botones del mouse para iniciar las aplicaciones
NetJump o LuckyJump y lanzar así rápidamente los programas que utilice con más frecuencia.
Incluso podrá crear su propio menú de comandos con un sólo clic para disponer rápidamente de sus
programas favoritos. Hemos sustituido la bola de seguimiento por un sensor óptico que escanea el
escritorio 1.500 veces por segundo para conseguir una precisión óptima.
n Para conectar el mouse USB a un puerto para mouse USB:
1. Busque un puerto para mouse USB libre en la parte posterior del equipo.
2. Inserte el puerto del mouse USB en el puerto para mouse USB y apriete los
tornillos.
Nº de IRQ de USB activado: si utiliza dispositivos USB puede utilizar la opción
que permite reservar un número de IRQ (solicitud de interrupción) para que el
puerto USB se active. Si elige la opción “Disabled” (Desactivado), el puerto USB
no funcionará. Encontrará una información más detallada en la configuración de la
BIOS de su equipo.
Si desea conectar un mouse combinado al puerto de PS2 de su sistema, debe utilizar
un adaptador de USB a PS2.
n del software del mouse
Para poder aprovechar al máximo las funciones del mouse, debe instalar el controlador. El
controlador se encuentra en el disco flexible que se incluye con el dispositivo.
Instalación para Windows®95/ 98/Me/2000/XP
1. Conecte el mouse al equipo.
2. Inserte el disco de instalación en la unidad de disco flexible.
3. Haga clic en el botón Inicio y haga clic en Ejecutar....
4. En el cuadro de diálogo Ejecutar, escriba A:\setup, donde "A" es la letra de la unidad de disco.
5. Haga clic en Aceptar y siga las instrucciones de la pantalla para completar la instalación.
I
Ó
Ó
PDF 檔案以 "FinePrint pdfFactory Pro" 試用版建立 http://www.pdffactory.com
14
Page 16

—
—
I
!
!
e la barra de desplazamiento vertical. Mueva el
lejos mueva el icono desde el punto de partida, más rápido será
W
I
W
Con el controlador/software iWheelWorks instalado, su Mouse se transforma en mucho más que un
simple dispositivo señalador. Compruebe lo fácil que es desplazarse por documentos largos u
obtener ampliaciones en aplicaciones de dibujo usando las ruedas de desplazamiento. Los usuarios
que trabajan en oficinas apreciarán especialmente esta función: use la rueda vertical para desplazarse
por su documento y luego simplemente presione la tecla [Ctrl] y use la misma rueda para ampliar la
vista del mismo. ¡Funciona incluso en el modo de vista preliminar! El tercer botón puede
programarse para iniciar NetJump o LuckyJump, dos barras de herramientas personalizables que
abren mediante un solo clic todos esos útiles programas que necesita tan a menudo. ¡Y, en pasos
fáciles de seguir, cree su propio menú de comandos y, mediante un solo clic, ponga todos sus
programas favoritos justo debajo del cursor! La siguiente tabla proporciona una descripción general
de las funciones del mouse.
HHEEEEL
L
W
OORRKKSS SSEE OOCCUUPPAA DDEELL TTRRAABBAAJJOO DDUURRO
W
Función Descripción Cómo se hace
Desplazamiento
vertical
Desplazamiento
horizontal
Desplazamiento
automático
Zoom
LuckyJump
Le permite desplazarse
hacia arriba o hacia
abajo.
Le permite desplazarse
hacia la izquierda o
hacia la derecha.
Utilice el
desplazamiento
automático en
aplicaciones
compatibles con Office
97 para desplazarse por
documentos.
Le permite ampliar o
reducir la vista en las
aplicaciones que
dispongan de función
de zoom.
Podrá ejecutar 10
comandos con un solo
clic.
Para desplazarse hacia arriba, mueva la rueda hacia adelante;
para desplazarse hacia abajo, muévala hacia atrás.
Para desplazarse hacia la izquierda, mueva la rueda hacia
adelante; para desplazarse hacia la derecha, muévala hacia
atrás.
Puede activar el desplazamiento automático desde LuckyJump
o desde NetJump. Aparecerá el icono Desplazamiento
automático sobr
mouse en la dirección en que desee desplazarse. Cuanto más
el desplazamiento. Para detener el desplazamiento automático,
sólo tiene que presionar un botón.
En Propiedades del mouse, seleccione la ficha Rueda y
active la opción "Zoom de rueda para Office 97/2000,
IE4.x/5.0" (si no activa esta opción, deberá presionar la tecla
Ctrl mientras usa el zoom). Podrá usar la rueda de
desplazamiento para usar el zoom.
En la ventana Propiedades del mouse, seleccione la ficha
Botones y seleccione LuckyJump en el menú desplegable para
asignarlo a uno de los botones.
O
NetJump
Menú de
comandos
Le permite elegir entre
los ocho comandos que
más se suelen utilizar al
navegar por Internet.
Puede crear su propio
menú de comandos para
ejecutar sus programas
favoritos.
En la ventana Propiedades del mouse, seleccione la ficha
Botones y seleccione NetJump en el menú desplegable para
asignarlo a uno de los botones.
En la ventana Propiedades del mouse, seleccione la ficha
Configuración y, a continuación haga clic en
Nuevo/Actualizar. Siga las instrucciones de la pantalla.
15
PDF 檔案以 "FinePrint pdfFactory Pro" 試用版建立 http://www.pdffactory.com
Page 17

—
—
Optische 4D-muis
Gebruikershandleiding
PDF 檔案以 "FinePrint pdfFactory Pro" 試用版建立 http://www.pdffactory.com
16
Page 18

—
—
I
G
G
eeft twee wieltjes waarmee u eenvoudig in alle toepassingen
.
De muissoftware installeren
NNLLEEIIDDIIN
I
Gefeliciteerd met uw aanschaf! Uw nieuwe muis is eenvoudig te installeren en biedt u een groot
aantal nieuwe mogelijkheden. De muis h
in alle richtingen kunt bladeren. Met het verticale wieltje kunt u naar boven en naar beneden
bladeren en met het horizontale wieltje kunt u naar links en rechts bladeren of in- of uitzoomen in
een document. U kunt de muisknoppen programmeren en NetJump of LuckyJump gebruiken om
veelgebruikte programma’s snel te starten. U bent zelfs in staat een eigen opdrachtenmenu maken
zodat u met één muisklik al uw favoriete programma’s onder bereik hebt! De muisbal hebben we
vervangen door een optische sensor die 1500 keer per seconde zijn positie op het bureaublad bepaalt
n Uw USB-muis op een USB-muispoort aansluiten:
1. Zoek naar een beschikbare USB-muispoort op de achterkant van de computer.
2. Sluit de USB-stekker van de muis op de USB-muispoort en draai de
schroeven aan.
IRQ voor USB inschakelen: Als u USB-apparaten gebruikt, moet u in het BIOS
van de computer een IRQ voor USB-apparaten toewijzen. Als u dit nalaat, zal USB
niet functioneren. Raadpleeg voor meer informatie de documentatie van het BIOS
van de computer.
Als u een combomuis op de PS2 poort van de computer wilt aansluiten, moet u een
USB- of een PS2-adapter gebruiken.
Voordat u gebruik kunt maken van de voordelen van de muis, moet u het stuurprogramma
installeren. Dit doet u met de installatiediskette die met de optische muis is geleverd.
Installatie onder Windows®95/98/Me/2000/XP
1. Sluit de muis aan op de computer.
2. Plaats de installatiediskette in het diskettestation.
3. Klik op Start en kies Uitvoeren.
4. Typ in het dialoogvenster Uitvoeren de opdracht A:\setup, waarbij “A” de stationsletter van het
diskettestation is.
5. Kies OK en volg de aanwijzingen op het scherm om de installatie te voltooien.
N
PDF 檔案以 "FinePrint pdfFactory Pro" 試用版建立 http://www.pdffactory.com
17
Page 19

—
—
I
!
!
aanwijzer hebt! In de vogende tabel vindt u een overzicht van de muisfuncties.
toepassingen om door
W
I
W
Wanneer het stuurprogramma en de software van iWheelWorks is geïnstalleerd, is uw muis veel
meer dan een gewoon aanwijsapparaat. Kijk maar hoe gemakkelijk u met de bladerwieltjes door
lange documenten bladert en in tekenprogramma’s inzoomt. Vooral gebruikers van Office zullen
deze functies waarderen: gebruik het verticale wieltje om in een document te bladeren en druk op de
toets [Ctrl] om met hetzelfde wieltje in te zoomen als u een deel van het document beter wilt
bekijken. De derde knop kunt u programmeren als NetJump of LuckyJump: twee aanpasbare
werkbalken waarmee u nuttige programma’s met één klik kunt starten. In een aantal gemakkelijke
stappen maakt u bovendien uw eigen opdrachtenmenu, zodat u met één klik al uw favoriete
programma's onder de
HHEEEEL
L
W
OORRKKSS DDOOEETT HHEETT ZZWWAARREE WWEERRK
W
K
Functie Beschrijving Zo doet u het
Verticaal
bladeren
Horizontaal
bladeren
Automatisch
bladeren
Zoomen
LuckyJump
Naar boven en
beneden bladeren in
het huidige venster
Naar links en rechts
bladeren in het
huidige venster
Gebruik Automatisch
bladeren in Office
97-compatibele
grote documenten te
bladeren.
In- en uitzoomen in
toepassingen die de
zoomfunctie
ondersteunen
Met één muisklik een
opdracht uit een lijst
van tien opdrachten
uitvoeren.
U bladert naar boven door het verticale wieltje naar voren te
roteren en naar achteren door het wieltje naar achteren te
roteren.
U bladert naar links door het horizontale wieltje naar voren te
roteren en naar rechts door het wieltje naar achteren te
roteren.
Activeer Automatisch bladeren vanuit LuckyJump of
NetJump. Het pictogram Automatisch bladeren verschijnt
boven de verticale bladerbalk. Verplaats de muis in de
richting waarin uw wilt bladeren. Hoe verder u het pictogram
van het startpunt verplaatst, hoe sneller u bladert. U stopt met
automatisch bladeren door een muisknop in te drukken.
Kies in het venster Muiseigenschappen de tab Wieltje en
selecteer de optie “Zoomen met wieltje in Office 97/2000”
(als u deze optie niet selecteert, kunt u ook zoomen door de
toets [Ctrl] tijdens het zoomen ingedrukt te houden). Gebruik
vervolgens het horizontale wieltje om in en uit te zoomen.
Klik in het venster Muiseigenschappen op de tab Knoppen
en kies LuckyJump in de keuzelijst voor de gewenste knop.
NetJump
Opdrachten
menu
Kiezen uit acht
opdrachten die
worden gebruikt bij
het browsen op het
Web.
Maak uw eigen
opdrachtenmenu om
uw favoriete
programma’s te
starten.
Klik in het venster Muiseigenschappen op de tab Knoppen
en kies NetJump in de keuzelijst voor de gewenste knop.
Klik in het venster Muiseigenschappen op de tab
Instellingen en kies Nieuw/Bijwerken. Volg de aanwijzigen
op het scherm.
18
PDF 檔案以 "FinePrint pdfFactory Pro" 試用版建立 http://www.pdffactory.com
 Loading...