

Page 1
3B SCIENTIFIC® PHYSICS
Stereo-Zoom Microscope, 45x (115 V, 50/60 Hz) 1013373
Stereo-Zoom Microscope, 45x (230 V, 50/60 Hz) 1013376
Instruction Manual
08/13 ALF
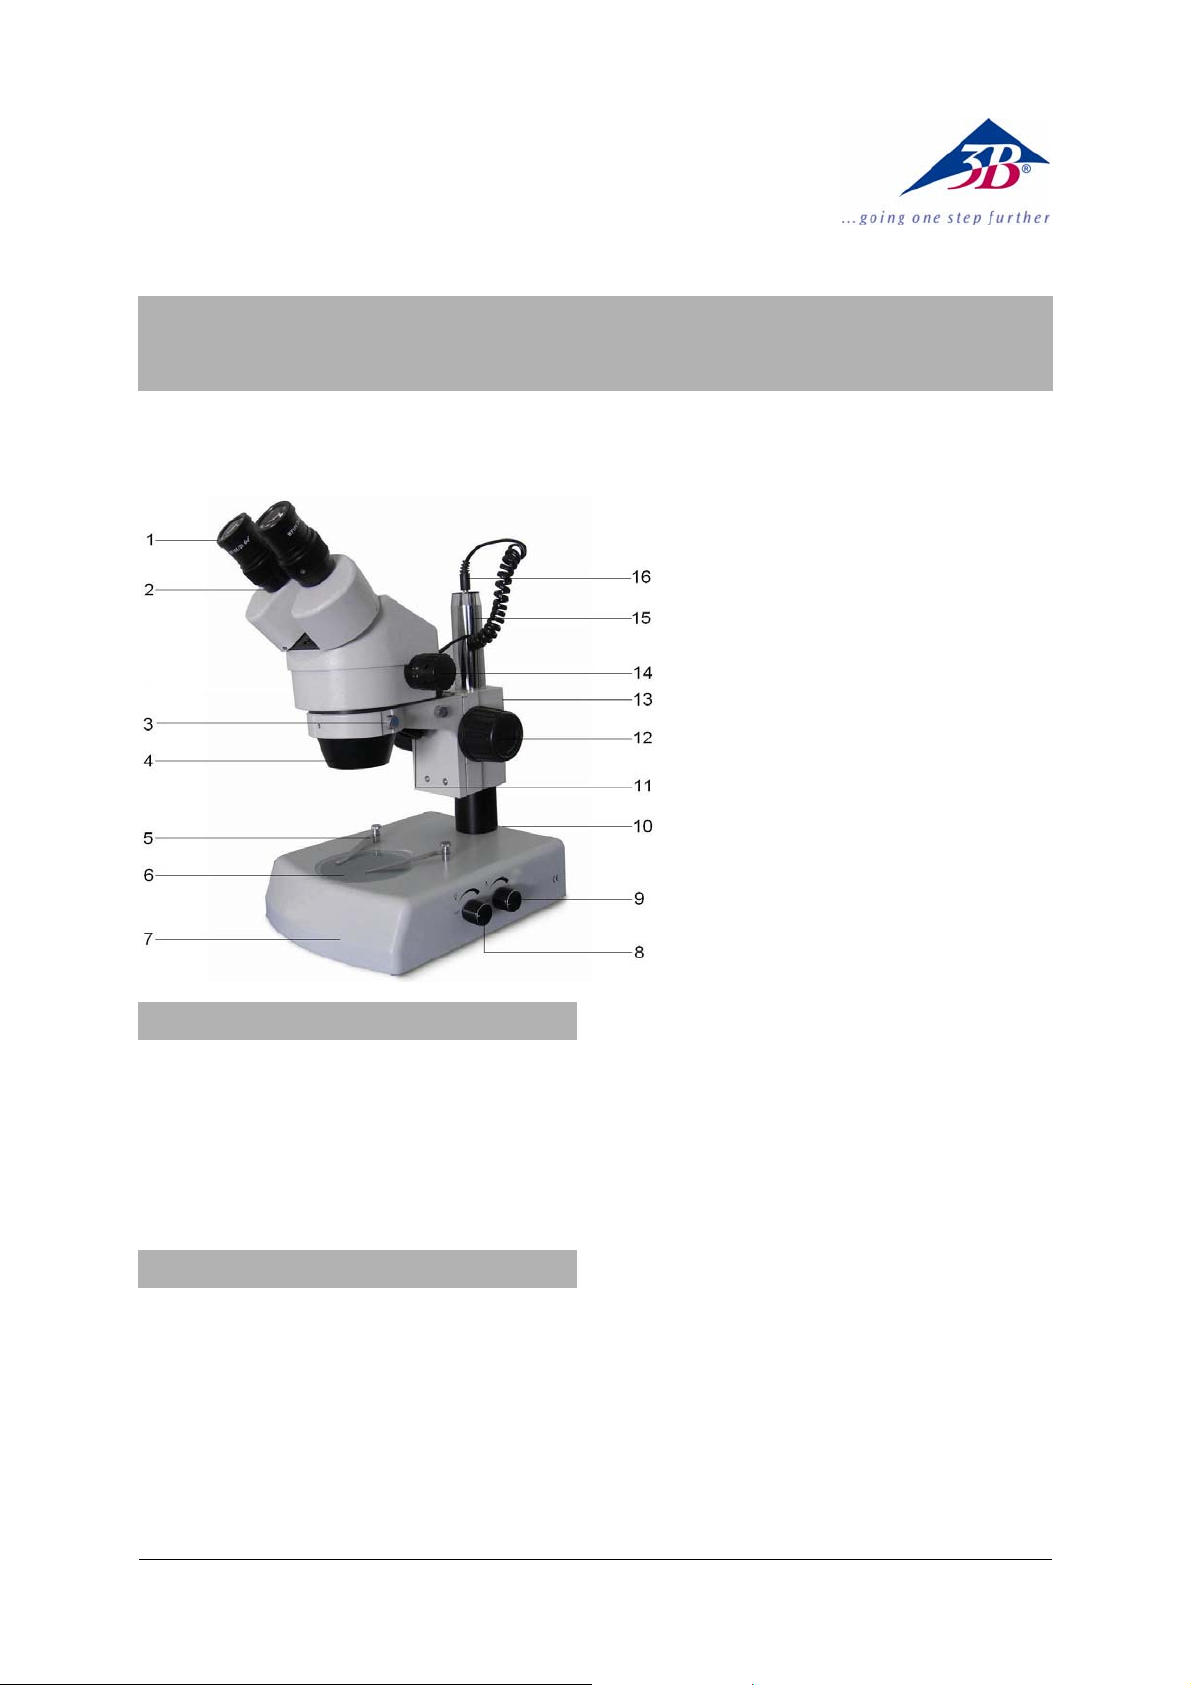
1 Eyepiece
2 Tube
3 Head lock screw
4 Zoom objective
5 Specimen clips
6 Object plate
7 Base
8 Rotary switch for transmitted light
9 Rotary switch for top light
10 Mains switch (not visible)
11 Top light housing
12 Adjustment knob for focusing
13 Lock-screw (not visible)
14 Adjustment knob for zoom objective
15 Pillar
16 Power supply for top light
1. Safety notes
• For power supply use only electrical sockets
with ground contact.
Caution! The Stirling engine becomes hot during
use. Risk of burns!
• Do not touch the lamp during or immediately
after use.
2. Description, technical data
The stereo zoom microscope allows threedimensional viewing of objects in 7x to 45x
magnification.
The microscope 1013373 is for operation with a
mains voltage of 115 V (±10%), and the
1013376 unit is for operation with 230 V (±10%).
Stand: Metal stand, column firmly connected
with base, pinion knobs attached on both sides
of the stand for coarse and fine focusing
Tube: Binocular inclined 45°, interocular distance adjustable between 54 and 75 mm, head
rotatable by 360°
Eyepieces: Pair of wide field eyepieces WF 10x
20 mm, rubber eyepiece cups
Objectives: Zoom objective, 0.7x to 4.5x
Enlargement: 7x to 45x
Diameter of Image Field: 4.4 mm to 28.6 mm
Distance from Specimen: 100 mm
Maximum Height of Object: 80 mm
Object Plate: Base with detachable object
plates (plastic, black/white and glass) 95 mm
diam. and 2 specimen clips
Illumination: Top, transmitted and mixed light
illumination, adjustable 12 V, 15 W halogen
lamp
Power supply: 1013373: 115 V, 50/60 Hz
1013376: 230 V, 50/60 Hz
Dimensions: 250 x 220 x 350 mm³ approx.
Weight: 6kg approx.
1
Page 2
3. Unpacking and assembly
The microscope is packed in a molded styrofoam container.
• Take the container out of the carton remove
the tape and carefully lift the top half off the
container. Be careful not to let the optical
items (objectives and eyepieces) drop down.
• To avoid condensation on the optical compo-
nents, leave the microscope in the original packing to allow it to adjust to room temperature.
• Using both hands (one around the pillar and
one around the base), lift the microscope
from the container and put it on a stable desk.
• Put the head onto the top of the stand and
tighten the head-lock-screw. Insert the eyepieces into the tube.
• Screw the housing for the top light into its
holder and plug the power supply connector
into the socket on the stand pillar.
• Insert the object plate into the stage opening
in the base.
4. Operation
4.2 Changing the lamps
• Turn off the power switch, unplug the mains
plug and let the lamp cool down.
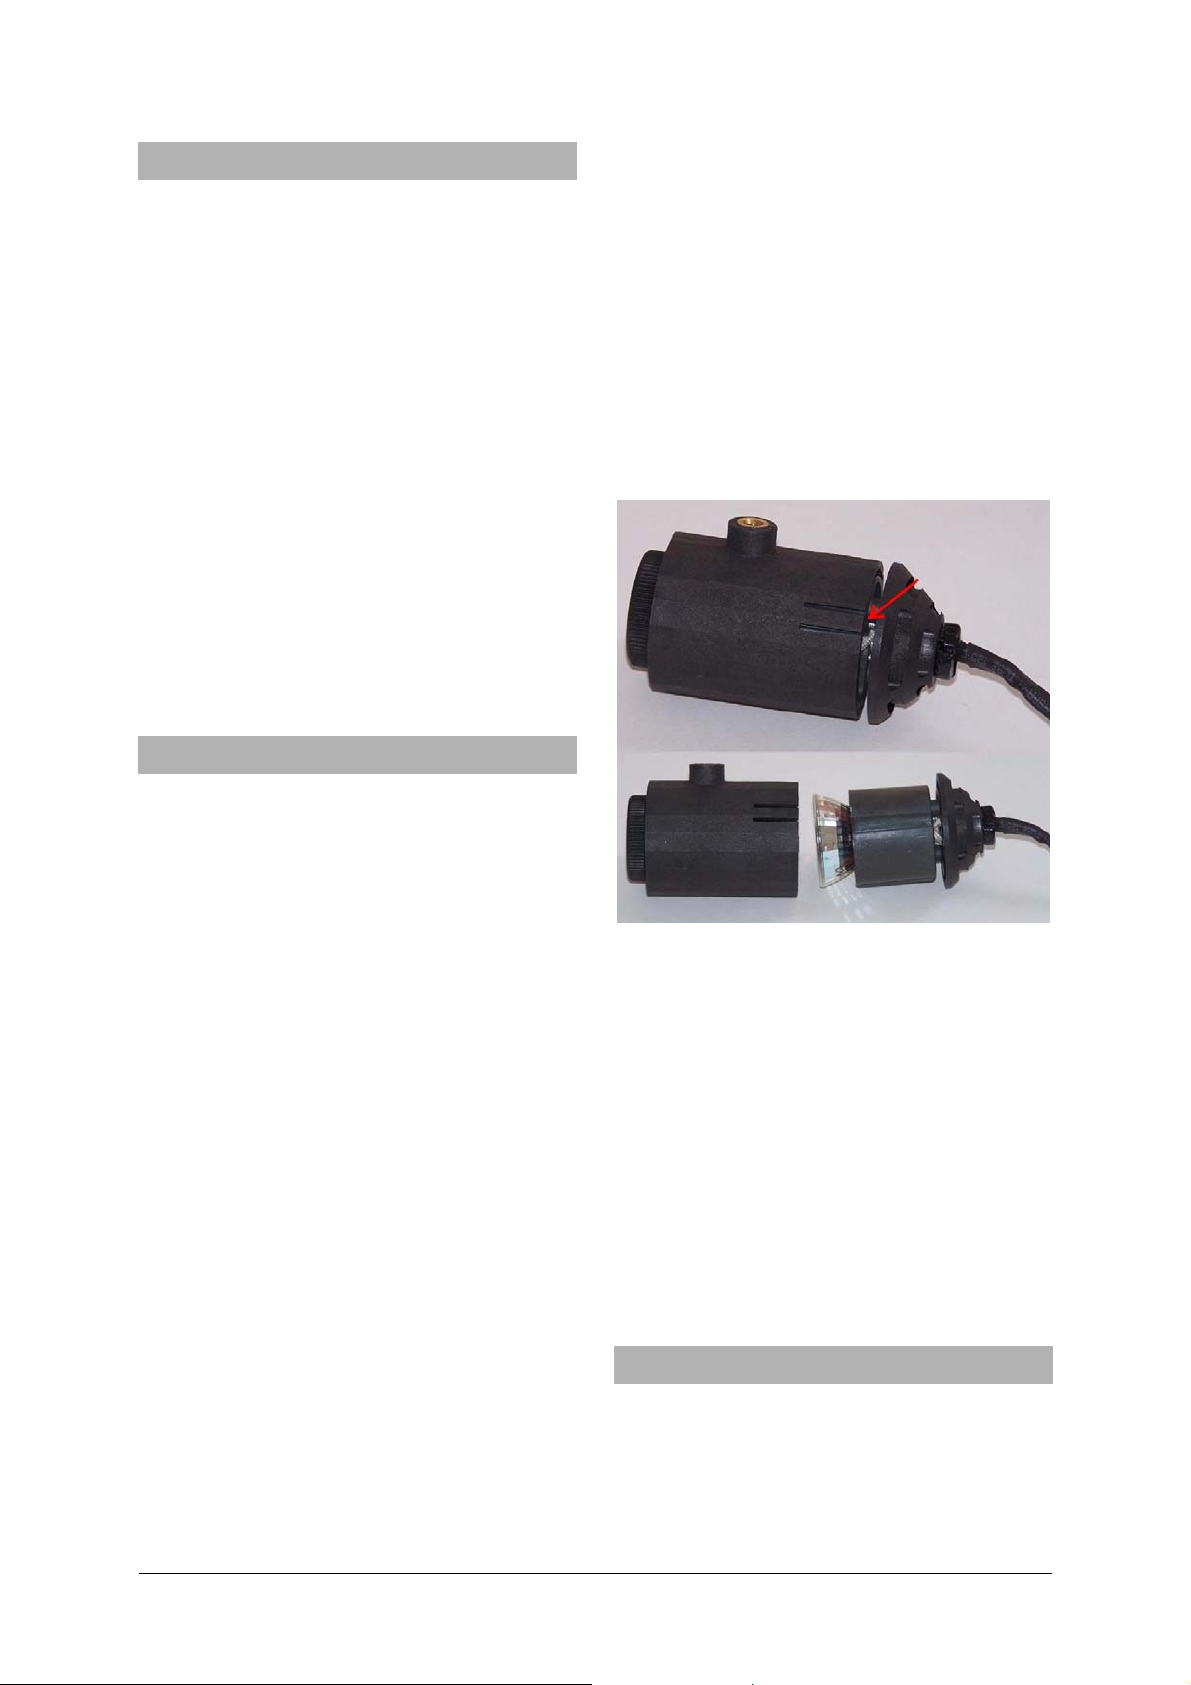
• In order to change the bulb for the top light,
undo the screw at the side, remove the lamp
housing and remove the plug from the stand
pillar.
• Use a flat tool (e.g. screwdriver) to gently (!)
lift the clip and pull the lap socket out of the
housing (see Fig.1).
• Replace the faulty bulb with a new one.
• Screw the lamp housing back into the holder
and connect the power supply again.
4.1 General information
• Set the microscope on a level table.
• Place the object to be observed in the center
of the object plate. Use the clips to fasten it
into place.
• Connect the mains cable to the net and turn
on the switch to get the object illuminated.
• When using transmitted- or mixed-light illu-
mination replace black and white plate with
the glass plate.
• Adjust the interpupillary distance between
the eyepieces by grasping the two prismhousings with both hands and moving them
until one circle of light can be seen.
• Use the knob for the zoom objective to set
the required magnification.
• Focus the object by turning the side knobs.
• It might be necessary to loosen the lock-
screw and raise or lower the entire stereo
head-bracket until the outline of the object is
found in the field of view.
• Be sure to tighten the lock-screw to fix the
height of the stereo head on the pillar.
• Always turn off the light immediately aft er use.
• Be careful not to spill any liquids on the mi-
croscope.
• Do not mishandle or impose unnecessary
force on the microscope.
• Do not wipe the optics with your hands.
• Do not attempt to service the microscope yourself.
Fig. 1 Changing the bulb in the top light
• To change the lamp of bottom light remove
the cover from the base opening.
• Replace the defect the lamp by a new one.
• Remount the cover.
4.3 Changing the fuse
• Turn off the power switch and unplug the
mains plug.
• Unscrew the fuse holder on the back of the
stand base with a screwdriver.
• Replace the fuse and reinsert the holder in
its socket.
5. Storage, cleaning, disposal
• Keep the microscope in a clean, dry and
dust free place.
• When not in use always cover the micro-
scope with the dust cover.
• Do not expose it to temperatures below 0°C
and above 40°C and a max. relative humidity of over 85%.
2
Page 3

Always unplug the mains plug before clean-
-
y
c
•
ing or maintenance.
• Do not clean the unit with volatile solvents or
abrasive cleaners.
• Do not disassemble objective or eyepieces
to attempt to clean them.
• Use a soft linen cloth and some ethanol to
clean the microscope.
• Use a soft lens tissue to clean the optics.
• The packaging should be disposed of at
local recycling points.
• Should you need to dis
pose of the equipment itself, never throw it awa
in normal domesti
waste. Local regulations
for the disposal of electrical equipment will apply.
3B Scientific GmbH • Rudorffweg 8 • 21031 Hamburg • Germany • www.3bscientific.com
Subject to technical amendments
© Copyright 2013 3B Scientific GmbH
Page 4

 Loading...