

Page 1

Prestige 304
Broadband Sharing Gateway
with 4-Port Switch
Quick Start Guide
Version 3.50
October 2001
Page 2
Prestige 304 Broadband Sharing Gateway with 4-Port Switch
Introduction
About Your Prestige 304 Broadband Sharing Gateway with 4-Port
Switch
The Prestige 304 is a dual Ethernet Broadband Sharing Gateway with 4-Port
Switch with integrate d network management feature s designed fo r multicomputer homes and home offices to access the Internet via cable or xDSL
modem.
By using NAT (SUA), the Prestige304 provides not only ease of installation and
Internet access, but allows multiple users to access the Internet for the cost of
only one account. The included four-port 10/100Mbps auto-negotiating Ethernet
LAN switch lets you connect up to four computers directly without the
additional cost of a hub.
The embedded web configurator provides easy network management and is
totally independent of your operating system.
Packaging List
The following items come with your Prestige 304.
! This Quick Start Guide
! One 5 VDC power adapter
! One Supporting CD (includes a User's Guide and Support Notes)
! One straight-through Ethernet cable
Hardware Installation
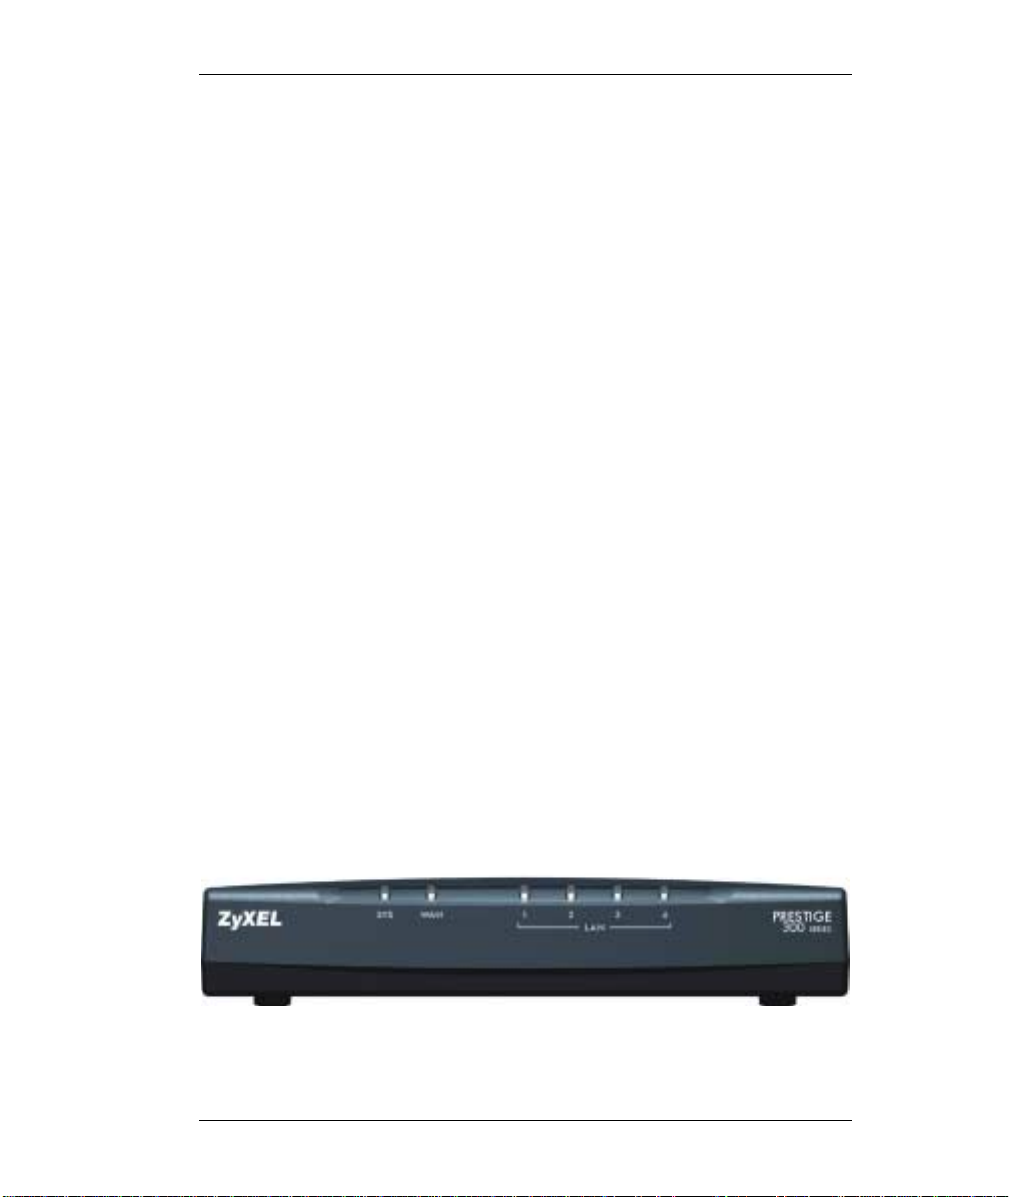
The Front Panel
The LEDs on the front panel indicate the operational status of the Prestige.
2
Page 3
Prestige 304 Broadband Sharing Gateway with 4-Port Switch
Description of LEDs
LED COLOR STATUS DESCRIPTION
On The Prestige is receiving power.
SYS Green
WAN Green
Green
LAN
1,2,3,4
Orange
Flashing The Prestige is performing a self-test.
Off The Prestige is not receiving power.
On The WAN link is connected.
Flashing The 10M WAN link is sending/receiving
packets.
Off The WAN link is not ready or has failed.
On The Prestige is connected to a 10M LAN.
Flashing The 10M LAN is sending/receiving packets.
Off The 10M LAN is not connected.
On The Prestige is connected to a 100Mbps
LAN.
Flashing The 100M LAN is sending/receiving packets
Off The 100M LAN is not connected.
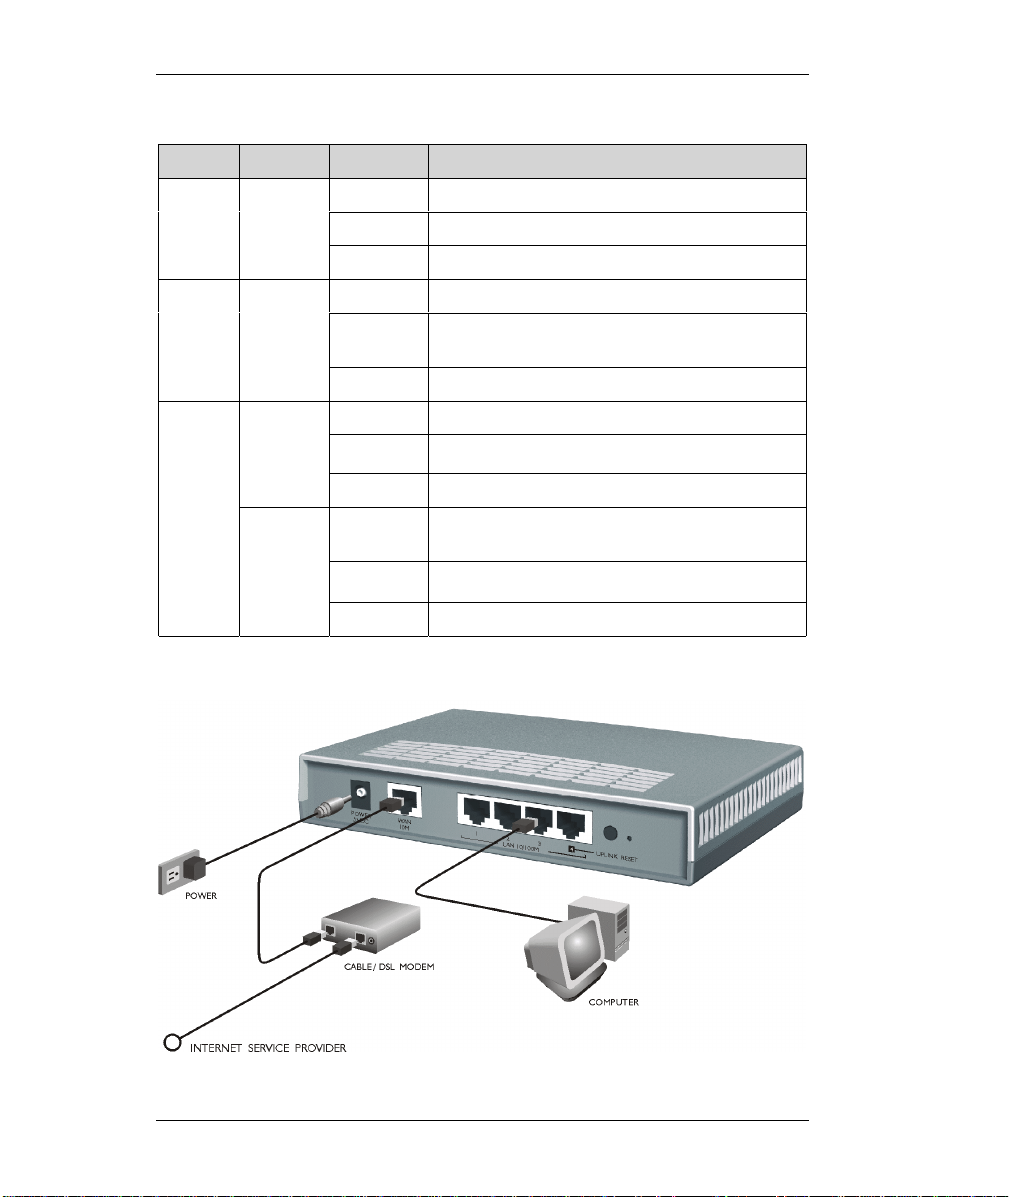
Rear Panel and Connections
3
Page 4

Prestige 304 Broadband Sharing Gateway with 4-Port Switch
WAN 10M Port
Connect the WAN port on the Prestige to the Ethernet port on the cable or xDSL
modem using the Ethernet cable that came with your modem. The Ethernet port
on a cable modem is sometimes labeled "PC" o r "Wo r kstation" .
LAN 10/100M Ports
When the Prestige is on and properly connected to a
computer or a hub, the corresponding LAN LED on the
front panel turns on.
For more than four computers, use an external hub.
LAN 10/100M
PORT NUMBER
1 straight-through crossover
2 straight-through crossover
3 straight-through crossover
4 UPLINK button
“on” (pushed in)
UPLINK
4
“off” (out)
button
TYPE OF ETHERNET CABLE FOR CONNECTING THE
PRESTIGETO A …
COMPUTER HUB
straight-through crossover
crossover straight-through
POWER 5VDC Port
Use only the included 5 VDC power adapter or one with the
same specifications.
Connect the female end of the power adapter to the port labeled POWER
5VDC on the rear panel of your Prestige.
Additional Installation Requirements
1. A computer(s) with an installed Ethernet NIC (Network Interface Card).
2. A cable/xDSL modem and an ISP account.
4
Page 5

Prestige 304 Broadband Sharing Gateway with 4-Port Switch
Turning on Your Prestige
Plug the male end of the power adapter into a power outlet. The SYS LED turns
on. The WAN and the LAN LED(s) turn on after the system tests are complete,
if the WAN and LAN ports are properly connected.
RESET Button
If you forget your password or cannot access the Prestige, use the RESET
button on the rear panel of the Prestige to reinstall the configuration (rom) file.
Uploading the configuration file replaces the current configuration file with the
default configuration file and deletes all customer-made Prestige configurations.
The following are Prestige factory defaults:
• IP address: 192.168.1.1
• Password: 1234
Using the RESET Button
1. Use a pointed object to press the RESET button fo r five seconds, then
release it.
2. If the LAN LEDs flash within 30 seconds, the factory defaults have been
restored and the Prestige restarts. Otherwise, go to step 3.
3. Turn the Prestige off.
4. While pressing the RESET button, turn the Prestige on.
5. Continue to hold t he RESET button for about 30 seconds. The Prestige
restarts.
6. Release the RESET button and wait about te n seconds for the Prestige to
finish restarting.
5
Page 6

Prestige 304 Broadband Sharing Gateway with 4-Port Switch
Preparing Your Network
Since most Internet/network-related protocols are dependent on TCP/IP, you
need to install and configure TCP/IP on your computer before you can access
the Internet.
Windows 95/98/Me/NT/2000, Macintosh OS 7 and later operating systems and
all versions of UNIX/LINUX include the software components you need to
install and use TCP/IP on your computer.
After the appropriate TCP/IP components are installed, configure the TCP/IP
settings in order to "communicate" with your network. The P r estige assigns
these facto ry default values if you configure TCP/IP using DHCP:
• IP address: between 192.168.1.33 and 192.168.1.64
• Subnet Mask: 255.255.255.0
• Default Gateway: 192.168.1.1 (the Prestige)
Do not assign an arbitrary IP address or subnet mask to
your computer, if you do, you will not be able to access the
Internet.
Windows 95/98/Me
Installing TCP/IP Components
1. Click Start in the task bar (usually in the screen’s lower left-hand corner).
2. Click Settings and then Control Pa nel.
3. In the Control Panel window, double-click the Network icon.
The Network window displays a list of installed components. You need a
network adapter, the TCP/IP protocol and Client for Microsoft Networks.
If you need the adapter:
a. In the Network window, click Add.
b. Select Adapter and then click Add.
c. Select the manufacturer and model of your network adapter and then click
OK.
6
Page 7

Prestige 304 Broadband Sharing Gateway with 4-Port Switch
If you need TCP /IP :
a. In the Network window, click Add.
b. Select Protocol and then click Add.
c. Select Microsoft from the list of manufacturers.
d. Select TCP/IP from the list of network protocols and then click OK.
If you need Client fo r Micr o so ft Net wo r ks :
a. Click Add.
b. Select Client and then click Add.
c. Select Microsoft from the list of manufacturers.
d. Select Client for Microsoft Networks from the list of network clients and
then click OK.
e. Restart your computer so the changes you made take effect.
Configuring TCP/IP
Configuring Dynamic TCP/IP Propert ies
1. In the Network windo w, click the TCP/IP entry to select it and click the
Properties button.
2. In the TCP/IP Properties window, select Obtain an IP address
automatically.
3. Click the WINS Configuratio n tab and select Disable WINS Resolution.
4. Click the Gateway tab. Highlight any installed gate ways and clic k the
Remove button until there are none listed.
5. Click the DNS Configuration tab and select Disable DNS.
6. Click OK to save and close the TCP/IP Properties window.
7. Click OK to close the Network window. Insert the Windows CD if
prompted.
8. When the drivers are updated, you will be asked if you want to restart your
computer. Make sure your Prest ige is on be fore clicking Yes at the prompt.
Configuring Static TCP/IP Properties
1. In the Network windo w, click the TCP/IP entry to select it and click the
Properties button.
7
Page 8

Prestige 304 Broadband Sharing Gateway with 4-Port Switch
2. In the TCP/IP Properties window, select Specify an IP address.
3. Type your information into the IP Address and Subnet Mask fields.
4. Click the Gateway tab. Highlight any installed gate ways and clic k the
Remove button until there are none listed. Type your gateway address in
the New gateway field and click Add.
5. Click the DNS Configuration tab and select Enable DNS. Make sure all
the fields in this tab are correct.
6. In the TCP/IP Properties window, click OK.
7. In the Network window, clic k OK.
8. Restart your computer if prompted, making sure that your Prestige is turned
on first.
V erifying TCP/IP Properties
1. In the taskbar, click Start and then Run.
2. In the Run window, type "winipcfg" and then click OK. The IP
Configuration window opens and l ists information such as your computer's
IP address, subnet mask and default gateway.
3. Select your network adapter.
4. When using DHCP, the default TCP/IP values assigned by the Prestige
(shown earlier) are now displayed.
Windows NT/2000
Installing TCP/IP Components
TCP/IP should already be installed on Windows NT and 2000 systems.
Configuring TCP/IP
Configuring Dynamic TCP/IP Propert ies
1. Click Start in the task bar (usually at the lower left-hand corner of the
screen).
2. Click Settings and then Control Panel.
3. In the Control Panel window, double-click the Network and Dial-up
Connections icon.
4. Right-click the Local Area Connections icon and click Properties.
8
Page 9

Prestige 304 Broadband Sharing Gateway with 4-Port Switch
5. Select the Internet Protocol (TCP/IP) entry and click the Properties
button.
6. Select Obtain an IP address automatically and click the Advanced
button.
7. Select any installed gateways and clic k Remove until there are none listed.
8. Click the WINS tab and select any WINS addresses. Click Remove until
there are none listed.
9. Click the DNS tab and select any DNS addresses. Click Remove until there
are none listed.
10. Click OK to save and close the Advanced TCP/IP Settings window.
11. Click OK to close the Internet Protocol (TCP/IP) Properties window.
Restart your computer if prompted, making sure that your Prestige is turned
on first.
Configuring Static TCP/IP Properties
1. In the Network and Dial-up Connect ions window, click the TCP/IP entry
to select it and click the Properties button.
2. In the TCP/IP Properties window, select Use the following IP Address.
3. Type your information into the following fields: IP address, Subnet mask,
Default gateway, Preferred DNS server, Alternate DNS server
(optional).
4. Click OK to save and close the Internet Protocol (TCP/IP) Properties
window.
5. Click OK to close the Local Area Connection Properties window.
6. Restart your computer if prompted, making sure that your Prestige is turned
on first.
V erifying TCP/IP Properties
1. In the taskbar, click Start, Programs, Accessories and then Command
Prompt.
2. In the Command Pro mpt window, type "ipconfig" and then press
[ENTER]. The window will display information abo ut your connection-
specific DNS suffix, IP Address, Subnet Mask and Default Gateway.
9
Page 10

Prestige 304 Broadband Sharing Gateway with 4-Port Switch
Macintosh
Installing TCP/IP Components
TCP/IP should already be installed on Macintosh OS 7 and later systems.
Configuring TCP/IP Properties
1. Click the Apple icon (located in the upper left corner of your screen), select
Control Panels and then TCP/IP.
2. From the "Connect Via" box, select Ethernet.
3. For dynamically assigned settings select Using DHCP Server from the
"Configure" box; fo r statically (manually) assigned settings see the
following:
a. From the "Configure" box, select Manually.
b. Enter your IP Address in the IP Address box.
c. Enter your Subnet mask in the Subnet mask box.
d. Enter the IP address of your Prestige in the Router address box.
e. To use a name server, enter its address in the Name server address
box.
4. Close the TCP/IP Control Panel.
5. Click Save if prompted, to save changes to your configuration.
6. Restart your computer, making sure that your Prestige is turned on first.
Verifying TCP/IP Properties for the Macintosh
After your Macintosh is configured and has restarted, go back to the TCP/IP
Control Panel. When using DHCP, t he default TCP/IP values assigned by the
Prestige (shown earlier) are now displayed.
10
Page 11

Prestige 304 Broadband Sharing Gateway with 4-Port Switch
Your Internet Account
Contact an ISP (Internet Service Provider) for an Internet access account. For a
single user account, the ISP supplies you with TCP/IP configuration
information. Typically this information is dynamically (automatically) assigned
via DHCP, but dependi ng on your ISP and your network conf iguratio n, you may
need to enter some of the following information manually.
FIELD DESCRIPTION YOUR INFO
System Name Name of the Pres tige (Optional).
Domain Name Your domain name (Optional)
Encapsulation Ethernet, PPPoE, or PPTP.
Service Type (Ethernet
encapsulation)
Service Name (PPPoE
Encapsulation)
User Name (N/A with
Ethernet St andard)
Password (N/A with Ethernet
Standard)
Login Server IP Address
(Only Ethernet with Road
Runner encap sulation)
Idle Timeout (PPPoE/PPTP
only)
My IP Address (PPTP) WAN Ethernet port IP address.
Server IP Address (PPTP) IP address of the PPTP server.
Connection ID/Name (PPTP) Enter the connection ID or name if
WAN IP Address
(if given)
Standard, RR-Toshiba, RRManager, or RR-Telstra. (RR =
RoadRunner)
The PPPoE service name if the ISP
supplies one.
The user name assigned by your
ISP.
Enter the password associated with
the user name above.
Enter the RoadRunner
authentication server IP address if
given one.
The time lapse in seconds before
you automati cally disconn ect from
the PPPoE/PPTP server.
your DSL modem requires it.
IP Address
IP Subnet Mask
Gateway IP Address
DNS Server Address Server
Assignment (if given)
Primary DNS server
Secondary DNS server
11
Page 12

Prestige 304 Broadband Sharing Gateway with 4-Port Switch
Using the Web Configurator
Web Configurator Login
The web configurator provides user-friendly setup for your Prestige.
Step 1. Launch your web browser and enter 192.168.1.1 as the URL.
Step 2. Enter "1234" (default) as the password and click Login. In some
versions, the default password appears automatically - if this is the
case, just click Login. You should see a screen asking you to change
your passwor d (highly re commended).
Step 3. Either enter a new password (and retype it to confirm) and click
Login or click Ignore.
Step 4. You should now see the MAIN MENU screen.
You are now in the web configurator.
Follow the instructions in the MAIN MENU to navigate screens or use the
icon (located in the upper right portion of most screens) for online HTML
help.
Click WIZARD SETUP for initial configuration.
Click ADVANCED for further configuration and setting up advanced features.
Click MAINTENANCE to vie w information about your Prestige or upgrade
configuration or firmware files.
Click LOGOUT at any time to exit the web configurator.
If you forget your password, refer to the previous RESET Button section to see
how to reset the default configuration file.
12
Page 13

Prestige 304 Broadband Sharing Gateway with 4-Port Switch
Troubleshooting
PROBLEM CORRECTIVE ACTION
None of the
LEDs turn on
when you turn
on the
Prestige.
Cannot
access the
Prestige from
the LAN.
Cannot ping
any computer
on the LAN.
Cannot get a
WAN IP
address from
the ISP.
Cannot
access the
Internet.
Make sure that you have the correct 5 VDC power adapter connected
to the Prestige and plugged in to an appropriate power source.
If the error persists, you may have a hardware problem. In this case,
you should contact your vendor.
Check your Ethernet cable type and connections. Refer to the
Panel and Connections
Make sure your NIC (Network Interface Card) is installed and
functioning properly.
If all of the 10/100M LAN LEDs are off, check the cables between the
Prestige and your computer or hub.
Verify that the IP address and the subnet mask of the Prestige and the
computers are on the same subnet.
The WAN IP is provided after the ISP verifies the MAC address, host
name or user ID.
Find out the verification method used by your ISP and configure the
corresponding fields.
If the ISP checks the WAN MAC Address, click
DHCP Table
then
it to the ISP.
If the ISP does not allow you to use a new MAC, click
WAN
and then the
WAN. ZyXEL recommends that you configure this menu even if your
ISP presently does not require MAC address authentication.
If the ISP checks the host name, enter your computer’s name (refer to
Wizard Setup
the
field in the first screen of the
If the ISP checks the user ID, click
tab. Check your service type, user name, and password.
Check the Prestige’s connection to the cable/xDSL device.
Check whether your cable/xDSL device requires a crossover or
straight-through Ethernet cable.
ADVANCED
Click
section for details.
to display the Prestige's WAN MAC address. Send
MAC
tab. Clone the MAC from the LAN as the
section in the User’s Guide) in the
and then
WIZARD SETUP
ADVANCED, WAN
WAN
and verify your settings.
MAINTENANCE
.
Rear
and
ADVANCED
System Name
ISP
and the
,
13
 Loading...