

ZyWALL USG 2000
Unified Security Gateway
Default Login Details
LAN Port P1
IP Address http://192.168.1.1
User Name admin
Password 1234
www.zyxel.com
Firmware Version 2.11
Edition 1, 2/2009
www.zyxel.com
Copyright © 2009
ZyXEL Communications Corporation


About This User's Guide
About This User's Guide
Intended Audience
This manual is intended for people who want to want to configure the ZyWALL
using the web configurator.
How To Use This Guide
•Read Chapter 1 on page 31 chapter for an overview of features available on the
ZyWALL.
•Read Chapter 3 on page 47 for web browser requirements and an introduction
to the main components, icons and menus in the ZyWALL web configurator.
•Read Chapter 4 on page 59 if you’re using the wizards for first time setup and
you want more detailed information than what the real time online help
provides.
• It is highly recommended you read Chapter 5 on page 101 for detailed
information on essential terms us ed in the ZyWALL, what prerequisites are
needed to configure a feature and how to use that feature.
• It is highly recommended you read Chapter 6 on page 119 for ZyWALL
application examples.
• Subsequent chapters are arranged by menu item as defined in the web
configurator. Read each chapter carefully for detailed information on that menu
item.
• To find specific information in this guide, use the Contents Overview, the
Table of Contents, the Index, or search the PDF file. E-mail
techwriters@zyxel.com.tw if you cannot find the information you require.
Related Documentation
•Quick Start Guide
The Quick Start Guide is designed to show you how to make the ZyWALL
hardware connections, rack mounting an d access the web configur ator wizards.
(See the wizard real time help for information on configuring each screen.) It
contains a connection diagram, default settings, handy checklists and
information on setting up your network and configuring for Internet access.
•CLI Reference Guide
The CLI Reference Guide explains how to use the Command-Line Interface (CLI)
to configure the ZyWALL.
Note: It is recommended you use the web configurator to configure the ZyWALL.
ZyWALL USG 2000 User’s Guide
3

About This User's Guide
• Web Configurator Online Help
Click the help icon in any screen for help in configuring that screen and
supplementary information.
• Support Disc
Refer to the included CD for support documents.
• ZyXEL Web Site
Please refer to www.zyxel.com
product certifications.
for additional support documentation and
User Guide Feedback
Help us help you. Send all User Guide-related comments, questi ons or suggestions
for improvement to the following address, or use e-mail instead. Thank you!
The Technical Writing Team,
ZyXEL Communications Corp.,
6 Innovation Road II,
Science-Based Industrial Park,
Hsinchu, 300, Taiwan.
E-mail: techwriters@zyxel.com.tw
Customer Support
In the event of problems that cannot be solved by using this manual, you should
contact your vendor. If you canno t contact your vendor, then contact a ZyXEL
office for the region in which you bought the device. See ht t p ://www.zyxel.com/
web/contact_us.php for contact information. Please have the following information
ready when you contact an office.
4
• Product model and serial number.
•Warranty Information.
• Date that you received your device.
• Brief description of the problem and the steps you took to solve it.
Disclaimer
Graphics in this book may differ slightly from the product due to differences in
operating systems, operating system versions, or if you installed updated
firmware/software fo r y our dev ice. Ev ery effort has been made to ensur e that the
information in this manual is accurate.
ZyWALL USG 2000 User’s Guide

Document Conventions
Document Conventions
Warnings and Notes
These are how warnings and notes are shown in this User’s Guide.
Warnings tell you about things that could harm you or your device.
Note: Notes tell you other important information (for example, other things you may
need to configure or helpful tips) or recommendations.
Syntax Conventions
• The ZyWALL USG 2000 may be referred to as the “ZyWALL”, the “device”, the
“system” or the “product” in this User’s Guide.
• Product labels, screen names, field labels and field choices are all in bold font.
• A key stroke is denoted by square brackets and uppercase text, for example,
[ENTER] means the “enter” or “ret urn” key on your keyboard.
• “Enter” means for you to type one or more characters and then press the
[ENTER] key. “Select” or “choose” means for you to use one of the predefined
choices.
• A right angle bracket ( > ) within a screen name denotes a mouse click. For
example, Maintenance > Log > Log Setting means you first click
Maintenance in the navigation panel, then the Log sub menu and finally the
Log Setting tab to get to that screen.
• Units of measurement may denote the “metric” value or the “scientific” value.
For example, “k” for kilo may denote “1000” or “1024”, “M” for mega may
denote “1000000” or “1048576” and so on.
• “e.g.,” is a shorthand for “for instance”, and “i.e.,” means “that is” or “in other
words”.
ZyWALL USG 2000 User’s Guide
5
Document Conventions
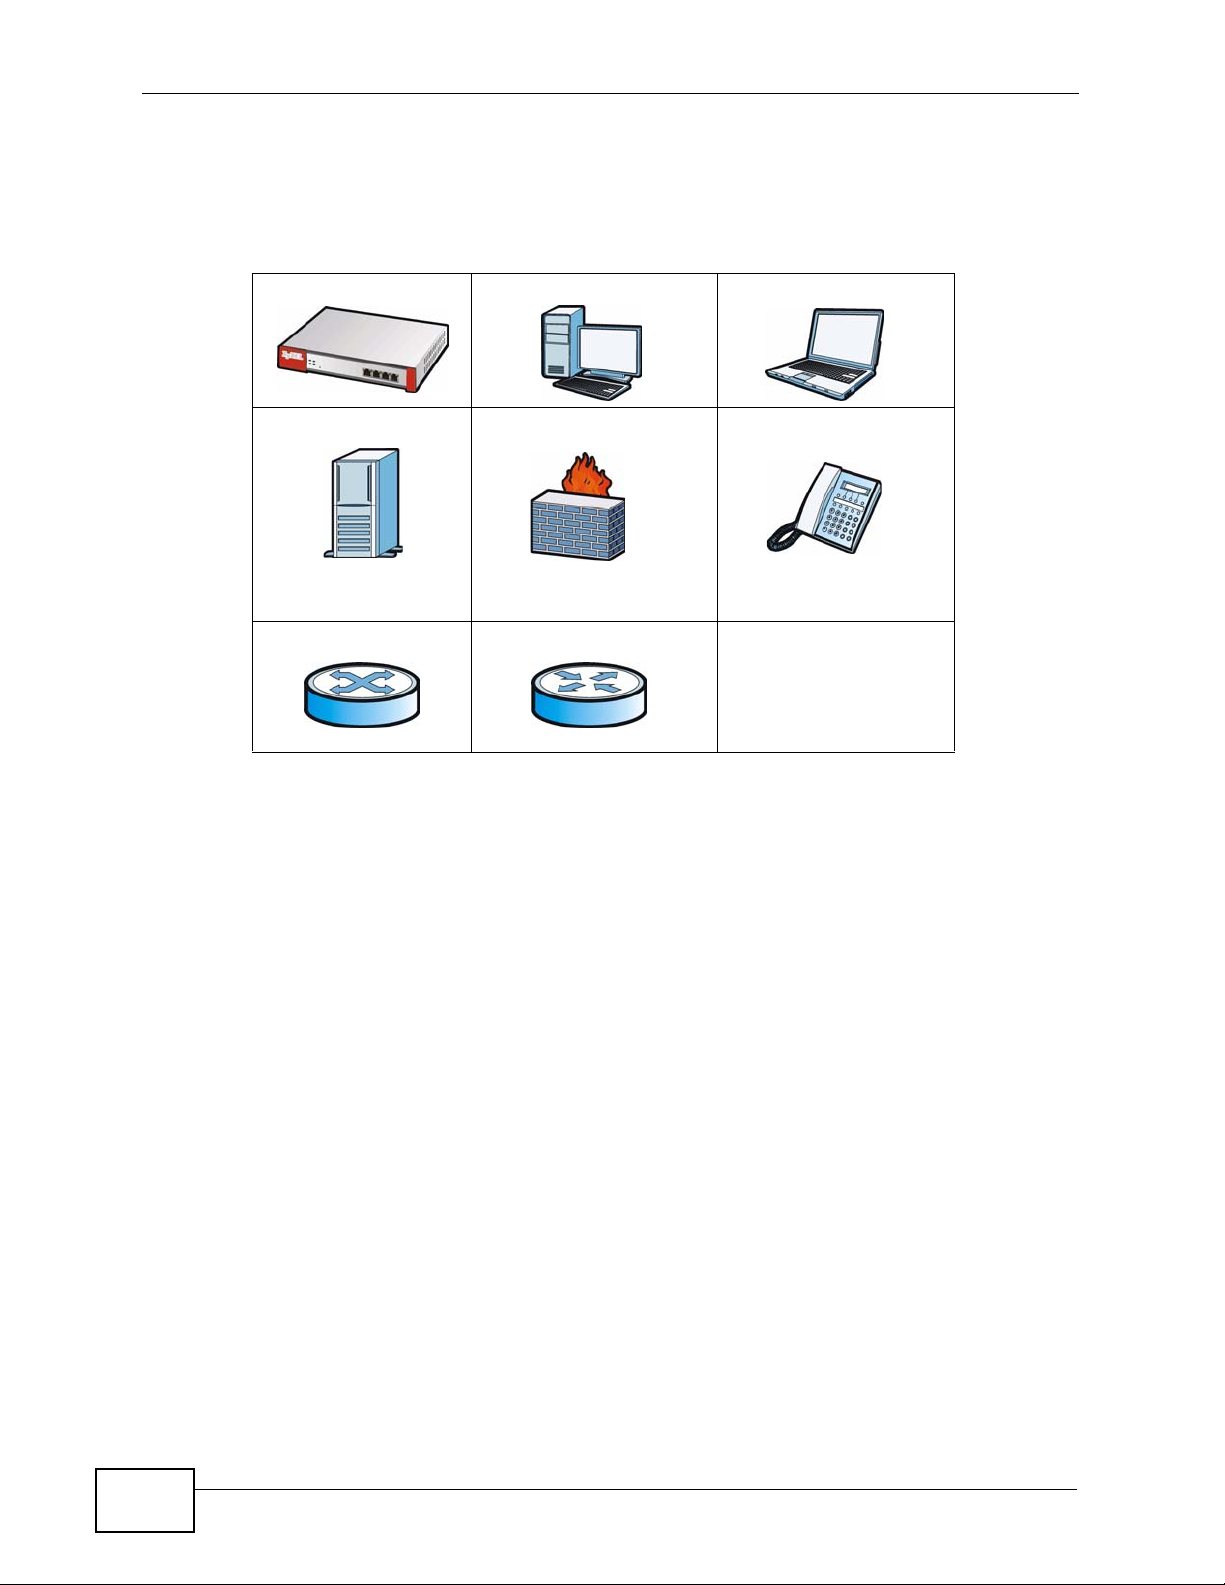
Icons Used in Figures
Figures in this User’s Guide may use the following generic icons. The ZyWALL icon
is not an exact representation of your device.
ZyWALL Computer Notebook computer
Server Firewall Telephone
Switch Router
6
ZyWALL USG 2000 User’s Guide

Safety Warnings
Safety Warnings
• Do NOT use this product near water, for example, in a wet basement or n ear a swimming
pool.
• Do NOT expose your device to dampness, dust or corrosive liquids.
• Do NOT store things on the device.
• Do NOT install, use, or service this device during a thunderstorm. There is a remote risk
of electric shock from lightning.
• Connect ONLY suitable accessories to the device.
• Do NOT open the device or unit. Opening or removing covers can expose you to
dangerous high voltage points or other risks. ONLY qualified service personnel should
service or disassemble this device. Please contact your vendor for further information.
• Make sure to connect the cables to the correct ports.
• Place connecting cables carefully so that no one will step on them or stumble over them.
• Always disconnect all cables from this device before servicing or disassembling.
• Caution: This unit has more than one power supply cord. Disconnect two power supply
cords before servicing to avoid electric shock. (has multiple power cords, e.g., chassisbased Ethernet switch. Make sure you specify the correct number of power cords in both
the English and the French that follows)
• Attention: Cet appareil comporte plus d'un cordon d'alimentation. Afin de prévenir les
chocs électriques, debrancher les deux cordons d'alimentation avant de faire le
dépannage.
• Use ONLY an appropriate power adaptor or cord for your device. Connect it to the right
supply voltage (for example, 110V AC in North America or 230V AC in Europe).
• Do NOT remove the plug and connect it to a power outlet by itself; always attach the plug
to the power adaptor first before connecting it to a power outlet.
• Do NOT allow anything to rest on the power adaptor or cord and do NOT place the
product where anyone can walk on the power adaptor or cord.
• Do NOT use the device if the power adaptor or cord is damaged as it might cause
electrocution.
• If the power adaptor or cord is damaged, remove it from the device and the power
source.
• Do NOT attempt to repair the power adaptor or cord. Contact your local vendor to order a
new one.
• Do not use the device outside, and make sure all the connections are indoors. There is a
remote risk of electric shock from lightning.
• CAUTION: RISK OF EXPLOSION IF BATTERY (on the motherboard) IS REPLACED BY AN
INCORRECT TYPE. DISPOSE OF USED BATTERIES ACCORDING TO THE INSTRUCTIONS.
Dispose them at the applicable collection point for the recycling of electrical and
electronic equipment. For detailed information about recycling of this product, please
contact your local city office, your household waste disposal service or the store where
you purchased the product.
• Do NOT obstruct the device ventilation slots, as insufficient airflow may harm your
device.
Your product is marked with this symbol, which is known as the WEEE mark. WEEE
stands for Waste Electronics and Electrical Equipment. It means that used electrical
and electronic products should not be mixed with general waste. Used electrical and
electronic equipment should be treated separately.
ZyWALL USG 2000 User’s Guide
7

Safety Warnings
8
ZyWALL USG 2000 User’s Guide

Contents Overview
Contents Overview
Getting Started .......................................................................................................................29
Introducing the ZyWALL ............................................................................................................ 31
Features and Applications ......................................................................................................... 39
Web Configurator ............................................. ... ... ... .... ............................................. ... ... .......... 47
Wizard Setup ............................................................................................................................. 59
Configuration Basics .............. ... ... ............................................................................................ 101
Tutorials ....................................................................................................................................119
Status ............................................................... ...................... ....................... ........................... 149
Registration ............................................................................................................................. 165
Signature Update .....................................................................................................................171
Network .................................................................................................................................179
Interface .................................... ....................... ...................... ....................... ........................... 181
Trunks .................................................... .......................................... ........................................ 239
Policy and Static Routes ..........................................................................................................249
Routing Protocols ....................................................................................................................263
Zones .................................. ................... ................... .................... ................... ........................ 275
DDNS ...................................................................................................................................... 279
Virtual Servers ......................................................................................................................... 287
HTTP Redirect ........................................................................................................................ 301
ALG ......................................................................................................................................... 305
IP/MAC Binding ....................................................................................................................... 313
Firewall ..................................................................................................................................319
Firewall .................................................................................................................................... 321
VPN ........................................................................................................................................337
IPSec VPN ................... ... .............................................. ... ... ... .... ... ... ........................................ 339
SSL VPN ................................................................................................................................. 379
SSL User Screens ................................................................................................................... 391
SSL User Application Screens ................................................................................................ 399
SSL User File Sharing ............................................................................................................. 401
L2TP VPN ................................................................................................................................ 409
L2TP VPN Example .................................................................................................................415
Application Patrol ................................................................................................................443
Application Patrol .....................................................................................................................445
ZyWALL USG 2000 User’s Guide
9

Contents Overview
Anti-X ....................................................................................................................................471
Anti-Virus ................................................................................................................................. 473
IDP .......................................................................................................................................... 489
ADP ........................................................................................................................................ 523
Content Filtering ..................................................................................................................... 543
Content Filter Reports ............................................................................................................. 567
Anti-Spam ................................................................................................................................ 575
Device HA .............................................................................................................................591
Device HA ............................................................................................................................... 593
Objects ..................................................................................................................................611
User/Group .............................................................................................................................. 613
Addresses ............................................................................................................................... 629
Services ................................. ....................................................... ........................................... 635
Schedules ................................. ................................................. .............................................. 641
AAA Server ............................................................................................................................. 647
Authentication Method ................................. ................................................. ... ... .... ................. 659
Certificates ................................... ....................... ....................... ...................... ........................ 663
ISP Accounts ......................................... ... ... .... ... ... ..................................................................685
SSL Application ....................................................................................................................... 689
System ..................................................................................................................................695
System ................................................................................................................................... 697
Maintenance, Troubleshooting, & Specifications .............................................................747
File Manager ........................................................................................................................... 749
Logs ........................................................................................................................................761
Reports ................................................................................................................................... 775
Diagnostics ............................................................................................................................. 793
Reboot ..................................................................................................................................... 795
Troubleshooting ..................................................... .................................................................. 797
Product Specifications ............................................................................................................. 803
Appendices and Index .........................................................................................................809
10
ZyWALL USG 2000 User’s Guide

Table of Contents
Table of Contents
About This User's Guide..........................................................................................................3
Document Conventions............................................................................................................5
Safety Warnings ........................................................................................................................7
Contents Overview ...................................................................................................................9
Table of Contents....................................................................................................................11
Part I: Getting Started............................................................................ 29
Chapter 1
Introducing the ZyWALL ........................................................................................................31
1.1 Overview and Key Default Settings .....................................................................................31
1.2 Front Panel ......................................... ... .... ............................................. ... ... .... ... ... ............. 32
1.2.1 Dual Personality Interfaces ........................................................................................ 32
1.2.2 Front Panel LEDs .......................................... ............................................................. 35
1.3 Management Overview .......... .... ... ... ................................................ .... ... .............................36
1.4 Starting and Stopping the ZyWALL ............................ ... ................................................ .... ... 37
Chapter 2
Features and Applications.....................................................................................................39
2.1 Features ............................................. ... .... ... ............................................. ... .... ... ... .............39
2.2 Packet Flow ........................................ ............................................. .... ... ... ... .... ... ... .............41
2.2.1 Interface to Interface (Through ZyWALL) ...................................................................42
2.2.2 Interface to Interface (To/From ZyWALL) ................................................ ...................42
2.2.3 Interface to Interface (From VPN Tunnel) .................................................................. 42
2.2.4 Interface to Interface (To VPN Tunnel) .......................................................................42
2.3 Applications .................................................. ... ... .... ... ... ... .... ................................................ 43
2.3.1 VPN Connectivity ............. ............................................. ... ... ... .... ... ... .......................... 43
2.3.2 SSL VPN Network Access ........ ... .... ... ... ... .... ... ... ............................................. ... .... ... 43
2.3.3 User-Aware Access Control ....................................................................................... 45
2.3.4 Multiple WAN Interfaces ................... ... ... ... .... ... ... ....................................................... 45
2.3.5 Device HA .................... .... ............................................. ... ... ... .... ... ... ... ....................... 46
Chapter 3
Web Configurator....................................................................................................................47
ZyWALL USG 2000 User’s Guide
11

Table of Contents
3.1 Web Configurator Requirements ......................................................................................... 47
3.2 Web Configurator Access ....................................................................................................47
3.3 Web Configurator Main Screen ........................................................................................... 49
3.3.1 Title Bar .................................. ... ............................................. .... ... ... .......................... 50
3.3.2 Navigation Panel .......... .... ... ... ... ................................................................................. 50
3.3.3 Main Window .......................... ... ............................................. .... ... ... ... .... ... ... .............55
3.3.4 Message Bar ... .... ... ... ... .............................................. ... ... ... ... .... ... .............................55
Chapter 4
Wizard Setup...........................................................................................................................59
4.1 Wizard Setup Overview ....................................................................................................... 59
4.2 Installation Setup, One ISP ................................................................................................. 60
4.3 Step 1 Internet Access ........................................... ... ..........................................................62
4.3.1 Ethernet: Auto IP Address Assignment ......................................................................62
4.3.2 Ethernet: Static IP Address Assignment .................... ... ... ... ... .... ... ... ... .... ... ... ... ... .... ... 63
4.3.3 Step 2 Internet Access Ethernet ................................................... ... ... .... ... ... ... .......... 64
4.3.4 PPPoE: Auto IP Address Assignment ........................................................................ 66
4.3.5 PPPoE: Static IP Address Assignment ...................................................................... 68
4.3.6 Step 2 Internet Access PPPoE ..................................................................................69
4.3.7 PPTP: Auto IP Address Assignment .......................................................................... 71
4.3.8 PPTP: Static IP Address Assignment ......................................................................... 74
4.3.9 Step 2 Internet Access PPTP ................... .... ... ... ... .... ... ... ... ... .................................... 75
4.3.10 Step 4 Internet Access - Finish ............................................................................... 77
4.4 Device Registration .......................................................................................................... 77
4.5 Installation Setup, Two Internet Service Providers .............................................................. 80
4.5.1 Internet Access Wizard Setup Complete ................................................................... 83
4.6 VPN Setup .......................... ... .... ... ... ... ............................................. .... ... ... ... .... ... ................ 84
4.7 VPN Wizards ......................................................................................................................85
4.7.1 VPN Express Wizard ..................................................................................................85
4.8 VPN Express Wizard - Scenario ......................................................................................... 86
4.8.1 VPN Express Wizard - Policy Setting ........................................................................ 88
4.8.2 VPN Express Wizard - Summary ....................................................................... .... ... 89
4.8.3 VPN Express Wizard - Finish .................................................................................... 90
4.8.4 VPN Advanced Wizard ........................ ... ... ................................................................. 91
4.8.5 VPN Advanced Wizard - Advanced Settings ............................................................ 94
4.8.6 VPN Advanced Wizard - Phase 2 ............................................................................. 96
4.8.7 VPN Advanced Wizard - Summary ........................................................................... 98
4.8.8 VPN Advanced Wizard - Finish ................................................................................. 99
Chapter 5
Configuration Basics............................................................................................................101
5.1 Object-based Configuration .......................................................................... .... ... ... ........... 101
5.2 Zones, Interfaces, and Physical Ports ............................................................................... 102
12
ZyWALL USG 2000 User’s Guide

Table of Contents
5.2.1 Interface Types .................................................... ... .... ... ... ... ... .... ... ... ........................ 102
5.2.2 Default Interface and Zone Configuration ................................................................103
5.3 Terminology in the ZyWALL ................... .... ... ... ... .... ............................................. ... ... ... .... . 104
5.4 Feature Configuration Overview ....................................................................................... 105
5.4.1 Feature ...................................... ... .... ... ... ... .... ... ............................................. ... ... ..... 105
5.4.2 Interface .................... ... .............................................. ... ... ... ... .... ... ... ........................ 106
5.4.3 Trunks ............. .... ... ............................................. ... .... ... ... ........................................ 106
5.4.4 IPSec VPN ................ ... .... ... ... ... ... .... ............................................. ... ... .... ... ... ... ... .....107
5.4.5 SSL VPN ...... ... .... ... ... ............................................. .... ... ... ........................................107
5.4.6 L2TP VPN .............................................................. .... ... ... ... ... .... ... ........................... 107
5.4.7 Zones ............................................................ ... ... ... ............................................. ..... 108
5.4.8 Device HA .................... .... ............................................. ... ... ... .... ... ... ... .....................108
5.4.9 DDNS ..... ............................................. ... ... .... ... ............................................. ... ... ..... 108
5.4.10 Policy Routes ......................................................................................................... 108
5.4.11 Static Routes ...........................................................................................................110
5.4.12 Firewall ....................................................................................................................110
5.4.13 Application Patrol ....................................................................................................111
5.4.14 Anti-Virus .................................................................................................................111
5.4.15 IDP ..........................................................................................................................112
5.4.16 ADP .........................................................................................................................112
5.4.17 Content Filter ...........................................................................................................112
5.4.18 Anti-Spam ................................................................................................................113
5.4.19 Virtual Server (Port Forwarding) .................................................... ... .... ... ... ... ... .... ..113
5.4.20 HTTP Redirect ........................................................................................................114
5.4.21 ALG .........................................................................................................................115
5.5 Objects ............................................ ... ... .............................................. ... ... ... .... ... ...............115
5.5.1 User/Group ....................... ... ............................................. ... ... .... ... ... ... ......................116
5.6 System Management and Maintenance .............................................................................116
5.6.1 DNS, WWW, SSH, TELNET, FTP, SNMP, Dial-in Mgmt, Vantage CNM .......... ... ...... 116
5.6.2 File Manager ....................... ... ... ... .............................................................................117
5.6.3 Licensing Registration ............................... .... ............................................................117
5.6.4 Licensing Update ................................................... .... ... ... ... ... .... ... ... ... ......................118
5.6.5 Logs and Reports ......................................................................................................118
5.6.6 Diagnostics ................ ... .... ... ... ... ... .............................................. ... ... ... .... ..................118
Chapter 6
Tutorials.................................................................................................................................119
6.1 How to Configure Interfaces, Port Grouping, and Zones . .... ... ............................................ 119
6.1.1 Configure a WAN Ethernet Interface ............................. ... ... ... .... ... ... ... .... ... ... ... ... .... . 120
6.1.2 Configure Zones ........................... .... ... ... ... .... ... ... ... ................................................. . 120
6.1.3 Configure Port Grouping .......................................................................................... 121
6.2 How to Configure Load Balancing ..................................................................................... 122
6.2.1 Set Up Available Bandwidth on Ethernet Interfaces ................................................ 123
ZyWALL USG 2000 User’s Guide
13

Table of Contents
6.2.2 Configure the WAN Trunk ........................................................................................ 123
6.3 How to Set Up an IPSec VPN Tunnel ................................................................................ 124
6.3.1 Set Up the VPN Gateway ......................................................................................... 125
6.3.2 Set Up the VPN Connection ..................................................................................... 125
6.3.3 Set Up the Policy Route for the VPN Tunnel ............................................................ 126
6.3.4 Configure Security Policies for the VPN Tunnel ...................................... ................. 128
6.4 How to Configure User-aware Access Control .................................................................. 128
6.4.1 Set Up User Accounts .............................................................................................. 128
6.4.2 Set Up User Groups ................................................................................................. 129
6.4.3 Set Up User Authentication Using the RADIUS Server ............................. ... ... ... .....129
6.4.4 Set Up Web Surfing Policies With Bandwidth Restrictions ...................................... 131
6.4.5 Set Up MSN Policies ................................................................................................ 133
6.4.6 Set Up Firewall Rules ............................................................................................... 134
6.5 How to Configure Service Control ..................................................................................... 135
6.5.1 Allow HTTPS Administrator Access Only From the LAN ......................................... 135
6.6 How to Allow Incoming H.323 Peer-to-peer Calls .................................................. ... ... .... . 138
6.6.1 Turn On the ALG .............................. ... ............................................. ... .... ... ... ...........139
6.6.2 Set Up a Virtual Server Policy For H.323 .................................................................139
6.6.3 Set Up a Firewall Rule For H.323 ............................................................................ 140
6.7 How to Use Active-Passive Device HA ............................................................................. 141
6.7.1 Before You Start ........................ ............................................. .... ... ... ... .... ... .............. 1 42
6.7.2 Configure Device HA on the Master ZyWALL ........................ .................................. 1 43
6.7.3 Configure the Backup ZyWALL ................................................................................ 144
6.7.4 Deploy the Backup ZyWALL .................................................................................... 145
6.7.5 Check Your Device HA Setup .................................................................................. 146
6.8 How to Allow Public Access to a Server ............................................................................146
6.8.1 Create the Address Objects ................................................... .... ... ........................... 146
6.8.2 Configure a Virtual Server ........................................................................................ 147
Chapter 7
Status.....................................................................................................................................149
7.1 Overview ............. ............................................. ... .... ... ... ... .... .............................................. 149
7.1.1 What You Can Do in the Status Screens ..................................................................149
7.2 The Status Screen ............................................................................................................. 150
7.2.1 The CPU Usage Screen ........................................................................................... 155
7.2.2 The Memory Usage Screen ................... ... .... ... ... ... .... .............................................. 156
7.2.3 The Session Usage Screen .......................................................... ........................... 157
7.2.4 The VPN Status Screen ...... ... ... ............................................................................... 158
7.2.5 The DHCP Table Screen ..........................................................................................159
7.2.6 The Port Statistics Screen ................ ... ... ... .... ... ... ... .... .............................................. 160
7.2.7 The Port Statistics Graph Screen .................. ... ... ... ................................................. . 161
7.2.8 The Current Users Screen ..................... ... .... ... ... ... .... ... ... ........................................ 162
7.2.9 The SEM Status Detail Screen ................................................................................. 162
14
ZyWALL USG 2000 User’s Guide

Table of Contents
Chapter 8
Registration...........................................................................................................................165
8.1 Overview ............. ............................................. ... .... ... ... ... .... .............................................. 165
8.1.1 What You Can Do in the Registration Screens ........................................................ 165
8.1.2 What you Need to Know About Service Registration .............................. ................. 1 65
8.2 The Registration Screen ....................................................................................................167
8.3 The Service Screen ................................... ............................................. ... ... .... ... ... ... ........169
Chapter 9
Signature Update..................................................................................................................171
9.1 Overview ............. ............................................. ... .... ... ... ... .... .............................................. 171
9.1.1 What You Can Do in the Update Screens ........................ ........................................ 171
9.1.2 What you Need to Know About Signature Updates ................................ ... ... ... ... .... . 171
9.2 The Antivirus Update Screen .............................................................................................172
9.3 The IDP/AppPatrol Update Screen ............................... ....................... ...................... ........ 173
9.4 The System Protect Update Screen .. ... ............................................................................ 175
Part II: Network..................................................................................... 179
Chapter 10
Interface.................................................................................................................................181
10.1 Interface Overview ........................................................................................................... 181
10.1.1 What You Can Do in the Interface Screens ................................................. ... ... .... . 181
10.1.2 What You Need to Know About Interfaces .............................................................182
10.2 Interface Status Screen ...................................................................................................185
10.3 Port Grouping ................................................................................................................. 188
10.3.1 Port Grouping Overview .................... .......................................... ........................... 188
10.3.2 Port Grouping Screen ............................................................................................ 189
10.4 Ethernet Summary Screen .............................................................................................. 190
10.4.1 Ethernet Edit .........................................................................................................191
10.5 The Static DHCP Screen ................................................................................................. 198
10.6 The PPP Interfaces ........................................................................................................ 198
10.6.1 PPPoE/PPTP Overview ......................................................................................... 199
10.6.2 PPPoE/PPTP Interfaces Overview ........................................................................ 199
10.6.3 PPP Interface Summary ......................................................................................... 200
10.6.4 PPP Interface Add/Edit ......................................................................................... 202
10.7 Cellular Configuration Screen (3G) ................................................................................. 205
10.7.1 Cellular Add/Edit Screen ......................... ............................................................... 208
10.8 Cellular Status Screen ..................................................................................................... 212
10.9 VLAN Interfaces ............................................................................................................. 214
10.9.1 VLAN Overview ...................................................................................................... 214
ZyWALL USG 2000 User’s Guide
15

Table of Contents
10.9.2 VLAN Interfaces Overview .......................... ........................................................... 216
10.9.3 VLAN Summary Screen ............. .... ... ..................................................................... 216
10.9.4 VLAN Add/Edit ...................................................................................................... 217
10.10 Bridge Interfaces .......................................................................................................... 222
10.10.1 Bridge Overview ................................................................................................... 222
10.10.2 Bridge Interface Overview ....................................................................................223
10.10.3 Bridge Summary .................................................................................................. 224
10.10.4 Bridge Add/Edit .............................. ... ... .... ... ... ... .... ... ... ... ... .... ... ........................... 225
10.11 Auxiliary Interface .............................................................. ........................................... 230
10.11.1 Auxiliary Interface Overview ............ ..................................................................... 230
10.11.2 Auxiliary .................... .... ... ... ... ... .............................................. ... ... ... .... ... ... ...........231
10.12 Virtual Interfaces ...........................................................................................................233
10.12.1 Virtual Interfaces Add/Edit .................................................................................... 233
10.13 Interface Technical Reference ....................................................................................... 235
Chapter 11
Trunks....................................................................................................................................239
11.1 Overview .......................................................................................................................... 239
11.1.1 What You Can Do in the Trunk Screens ................................................... .............. 239
11.1.2 What You Need to Know About Trunks .................................................................. 240
11.2 The Trunk Summary Screen ............................................................................................243
11.3 Configuring a Trunk ........................................................................................................245
11.4 Trunk Technical Reference .............................................................................................. 246
Chapter 12
Policy and Static Routes......................................................................................................249
12.1 Policy and Static Routes Overview .................................................................................. 249
12.1.1 What You Can Do in the Policy and Static Route Screens .....................................250
12.1.2 What You Need to Know About Policy and Static Routing .....................................250
12.2 Policy Route Screen ........................................................................................................ 251
12.2.1 Policy Route Edit Screen ....................................................................................... 253
12.3 IP Static Route Screen ....................................................................................................257
12.3.1 Static Route Add/Edit Screen ................................................................................. 258
12.4 Policy Routing Technical Reference ................................................................................ 259
Chapter 13
Routing Protocols .................................................................................................................263
16
13.1 Routing Protocols Overview ............................................................................................ 263
13.1.1 What You Can Do in the RIP and OSPF Screens ............. ... .... ... ........................... 263
13.1.2 What You Need to Know About Routing Protocols ................................................ 263
13.2 The RIP Screen ... ... .... ... ... ... .... ... ... ... ... ................................................. ... ... .... ... ..............264
13.3 The OSPF Screen ............... .... ... ... ................................................ .... ... ... ........................265
13.3.1 Configuring the OSPF Screen .................................. ......... .......... .......... ......... ........ 269
ZyWALL USG 2000 User’s Guide

Table of Contents
13.3.2 OSPF Area Add/Edit Screen .................................................................................271
13.4 Routing Protocol Technical Reference ............................................................................ 273
Chapter 14
Zones .....................................................................................................................................275
14.1 Zones Overview ...............................................................................................................275
14.1.1 What You Can Do in the Zones Screens ................................................................ 275
14.1.2 What You Need to Know About Zones ................................................................... 276
14.2 The Zone Screen ..................................... ... ................................................ .... ... ..............277
14.3 Zone Add/Edit ................................................................................................................. 278
Chapter 15
DDNS......................................................................................................................................279
15.1 DDNS Overview .............................................................................................................. 279
15.1.1 What You Can Do in the DDNS Screens ............................................................... 279
15.1.2 What You Need to Know About DDNS ................................................................... 279
15.2 The DDNS Screen ...........................................................................................................280
15.2.1 The Dynamic DNS Add/Edit Screen ...................................................................... 282
15.3 The DDNS Status Screen ................................................................................................285
Chapter 16
Virtual Servers.......................................................................................................................287
16.1 Virtual Servers Overview ................................................................................................. 287
16.1.1 What You Can Do in the Virtual Server Screens ....................................................287
16.1.2 What You Need to Know About Virtual Servers ..................................................... 287
16.2 The Virtual Server Screen ............................................................................................... 288
16.2.1 The Virtual Server Add/Edit Screen ....................................................................... 289
16.3 NAT 1:1 and NAT Loopback Examples ........................................................................... 292
Chapter 17
HTTP Redirect......................................................................................................................301
17.1 Overview .......................................................................................................................... 301
17.1.1 What You Can Do in the HTTP Redirect Screens .................................................. 301
17.1.2 What You Need to Know About HTTP Redirect ............................. ........................302
17.2 The HTTP Redirect Screen ............................................................................................. 303
17.2.1 The HTTP Redirect Edit Screen ............................................................................. 304
Chapter 18
ALG ........................................................................................................................................305
18.1 ALG Overview ................................................................................................................. 305
18.1.1 What You Can Do in the ALG Screen ....................................................................305
18.1.2 What You Need to Know About ALG ..................................................................... 306
18.1.3 Before You Begin ...................................................................................................308
ZyWALL USG 2000 User’s Guide
17

Table of Contents
18.2 The ALG Screen .............................................................................................................. 308
18.3 ALG Technical Reference ................................................................................................ 310
Chapter 19
IP/MAC Binding.....................................................................................................................313
19.1 IP/MAC Binding Overview ............................................................................................... 313
19.1.1 What You Can Do in the IP/MAC Binding Screens .................................. ... ... ... .... . 313
19.1.2 What You Need to Know About IP/MAC Binding ................................................... 314
19.2 IP/MAC Binding Summary ............................................................................................... 314
19.2.1 IP/MAC Binding Edit ............................................................................................... 315
19.2.2 Static DHCP Edit .................................................................................................... 316
19.3 IP/MAC Binding Exempt List ........................................................................................... 317
19.4 IP/MAC Binding Monitor .................................................................................................. 317
Part III: Firewall .................................................................................... 319
Chapter 20
Firewall...................................................................................................................................321
20.1 Overview .......................................................................................................................... 321
20.1.1 What You Can Do in the Firewall Screens ............................................................. 321
20.1.2 What You Need to Know About the Firewall ..........................................................322
20.1.3 Firewall Rule Example Applications ....................................................................... 324
20.1.4 Firewall Rule Configuration Example ..................................................................... 326
20.2 The Firewall Screen ................. ... ... ... ... ................................................. ... ... .... ................. 328
20.2.1 Configuring the Firewall Screen ............................... .............................................. 329
20.2.2 The Firewall Edit Screen ............................................................. ... ... .... ... ... ... ... .... . 333
20.3 The Session Limit Screen ................................................................................................334
20.3.1 The Session Limit Edit Screen ............................................................................... 336
Part IV: VPN.......................................................................................... 337
Chapter 21
IPSec VPN..............................................................................................................................339
21.1 IPSec VPN Overview .......................................................................................................339
21.1.1 What You Can Do in the IPSec VPN Screens ........................................................ 340
21.1.2 What You Need to Know About IPSec VPN ........................................................... 340
21.1.3 Before You Begin ...................................................................................................341
21.2 The VPN Connection Screen .......................................................................................... 341
21.2.1 The VPN Connection Add/Edit (IKE) Screen ......................................................... 343
21.2.2 The VPN Connection Add/Edit Manual Key Screen .............................................. 350
18
ZyWALL USG 2000 User’s Guide

Table of Contents
21.3 The VPN Gateway Screen .............................................................................................. 354
21.3.1 The VPN Gateway Add/Edit Screen ...................................................................... 355
21.4 The VPN Concentrator Screen ........................................................................................ 363
21.4.1 The VPN Concentrator Add/Edit Screen .............................. .... ... ... ... .... ... ... ... ........364
21.5 The SA Monitor Screen ..................................................................................................366
21.6 IPSec VPN Background Information ............................................................................... 367
Chapter 22
SSL VPN.................................................................................................................................379
22.1 Overview .......................................................................................................................... 379
22.1.1 What You Can Do in the SSL VPN Screens ..........................................................379
22.1.2 What You Need to Know About SSL VPN .............................................................. 379
22.2 The SSL Access Privilege Screen ................................................................................... 381
22.2.1 The SSL Access Policy Add/Edit Screen .............................................................. 383
22.3 The SSL VPN Connection Monitor Screen ...................................................................... 385
22.4 The SSL Global Setting Screen .................. ... ... ................................................. ... ... ... .... . 386
22.4.1 How to Upload a Custom Logo .............................................................................. 387
22.5 Establishing an SSL VPN Connection ............................................................................. 388
Chapter 23
SSL User Screens.................................................................................................................391
23.1 Overview .......................................................................................................................... 391
23.1.1 What You Need to Know About the SSL User Screens ......................................... 391
23.2 Remote User Login ..........................................................................................................392
23.3 The SSL VPN User Screens ................................................ ... ... ... .... ... ... ... .... ... ... ... ........395
23.4 Bookmarking the ZyWALL ............................................................................................... 396
23.5 Logging Out of the SSL VPN User Screens ....................................................................396
Chapter 24
SSL User Application Screens ............................................................................................399
24.1 SSL User Application Screens Overview ........................................................................ 399
24.2 The Application Screen ...................................................................................................399
Chapter 25
SSL User File Sharing ..........................................................................................................401
25.1 Overview .......................................................................................................................... 401
25.1.1 What You Need to Know About the SSL VPN File Sharing ................................... 401
25.2 The Main File Sharing Screen ......................................................................................... 402
25.3 Opening a File or Folder ................................... ....................................................... ........402
25.3.1 Downloading a File ...................................... ......... ....... ......... .......... .......... ......... ..... 404
25.3.2 Saving a File ..........................................................................................................405
25.4 Creating a New Folder ......................... ....................... ....................... ...................... ........405
25.5 Renaming a File or Folder ............................................................................................... 406
ZyWALL USG 2000 User’s Guide
19

Table of Contents
25.6 Deleting a File or Folder ..................................................................................................406
25.7 Uploading a File ............................. ....................... ...................... ....................... .............. 407
Chapter 26
L2TP VPN...............................................................................................................................409
26.1 Overview .......................................................................................................................... 409
26.1.1 What You Can Do in the L2TP VPN Screens ......................................................... 409
26.1.2 What You Need to Know About L2TP VPN ....................... ................................ ..... 4 09
26.2 L2TP VPN Screen ............... .... ... ... ................................................ .... ... ... .........................411
26.3 L2TP VPN Session Monitor Screen ................................................................................ 412
Chapter 27
L2TP VPN Example...............................................................................................................415
27.1 L2TP VPN Example ....................... ... ... .... ... ... ... .... ... ... ................................................ .... . 415
27.2 Configuring the Default L2TP VPN Gateway Example .................................................... 416
27.3 Configuring the Default L2TP VPN Connection Example ................................................417
27.4 Configuring the L2TP VPN Settings Example .................................................................418
27.5 Configuring the Policy Route for L2TP Example ............................................................. 419
27.6 Configuring L2TP VPN in Windows XP and 2000 ........................................................... 420
27.6.1 Configuring L2TP in Windows XP .......................................................................... 420
27.6.2 Configuring L2TP in Windows 2000 ....................................................................... 426
Part V: Application Patrol.................................................................... 443
Chapter 28
Application Patrol.................................................................................................................445
28.1 Overview .......................................................................................................................... 445
28.1.1 What You Can Do in the Application Patrol Screens .............................................. 445
28.1.2 What You Need to Know About Application Patrol ................................................ 446
28.1.3 Application Patrol Bandwidth Management Examples ........................................... 450
28.2 Application Patrol General Screen ..................................................................................454
28.3 Application Patrol Applications ........................................................................................ 455
28.3.1 The Application Patrol Edit Screen ........................................................................ 456
28.3.2 The Application Patrol Policy Edit Screen ............................................................. 459
28.4 The Other Applications Screen ........................................................................................ 462
28.4.1 The Other Applications Add/Edit Screen ................................................................ 464
28.5 Application Patrol Statistics .............................................................................................466
28.5.1 Application Patrol Statistics: General Setup ................... ... ... .... ... ... ... .... ... ... ........... 467
28.5.2 Application Patrol Statistics: Bandwidth Statistics ....... ........................................... 468
28.5.3 Application Patrol Statistics: Protocol Statistics ..................................................... 469
20
ZyWALL USG 2000 User’s Guide

Table of Contents
Part VI: Anti-X....................................................................................... 471
Chapter 29
Anti-Virus...............................................................................................................................473
29.1 Overview .......................................................................................................................... 473
29.1.1 What You Can Do in the Anti-Virus Screens ..........................................................473
29.1.2 What You Need to Know About Anti-Virus ............................................................. 474
29.1.3 Before You Begin ...................................................................................................476
29.2 Anti-Virus Summary Screen ............. ................................................. ... ... ... .... ... ... ... ... .... . 476
29.2.1 Anti-Virus Policy Add or Edit Screen ......................................................................479
29.3 Anti-Virus Black List .........................................................................................................481
29.4 Anti-Virus Black List or White List Add/Edit ..................................................................... 482
29.5 Anti-Virus White List ...... ... ... .... ... ... ... ... .... ... ... ... ................................................. ... ... ... ..... 484
29.6 Signature Searching ........................................................................................................ 485
29.7 Anti-Virus Technical Reference ........................................................................................ 487
Chapter 30
IDP.........................................................................................................................................489
30.1 Overview .......................................................................................................................... 489
30.1.1 What You Can Do Using the IDP Screens .................................. ... ... .... ... ... ........... 489
30.1.2 What You Need To Know About IDP ...................................................................... 489
30.1.3 Before You Begin ...................................................................................................490
30.2 The IDP General Screen ................................................................................................. 491
30.2.1 Configuring IDP Policies ........................................................................................ 493
30.3 Introducing IDP Profiles ................................................................................................. 494
30.3.1 Base Profiles ..........................................................................................................494
30.4 The Profile Summary Screen .......................................................................................... 495
30.5 Creating New Profiles ...................................................................................................... 496
30.5.1 Procedure To Create a New Profile ........................................................................ 496
30.6 Profiles: Packet Inspection ............................................................................................. 498
30.6.1 Policy Types ........................................................................................................... 501
30.6.2 IDP Service Groups ...............................................................................................502
30.6.3 Profile > Query View Screen .................................................................................. 504
30.6.4 Query Example ...................................................................................................... 505
30.7 Introducing IDP Custom Signatures ............................................................................... 506
30.7.1 IP Packet Header ...................................................................................................507
30.8 Configuring Custom Signatures ..................... ....................... ...................... ..................... 508
30.8.1 Creating or Editing a Custom Signature ................................................................ 510
30.8.2 Custom Signature Example ........................................... ... ..................................... 516
30.8.3 Applying Custom Signatures ..................................................................................519
30.8.4 Verifying Custom Signatures .................................................................................. 519
30.9 IDP Technical Reference ................................................................................................. 520
ZyWALL USG 2000 User’s Guide
21

Table of Contents
Chapter 31
ADP .......................................................................................................................................523
31.1 Overview .......................................................................................................................... 523
31.1.1 ADP and IDP Comparison ..................................................................................... 523
31.1.2 What You Can Do Using the ADP Screens ...........................................................523
31.1.3 What You Need To Know About ADP ..................................................................... 523
31.1.4 Before You Begin ...................................................................................................524
31.2 The ADP General Screen ........................ ................................................... ..................... 5 25
31.2.1 Configuring ADP Policies ............................... ........................................................ 526
31.3 The Profile Summary Screen .......................................................................................... 527
31.3.1 Base Profiles ..........................................................................................................528
31.3.2 Configuring The ADP Profile Summary Screen .....................................................528
31.3.3 Creating New ADP Profiles ............................ ........................................................ 529
31.3.4 Traffic Anomaly Profiles ........................................................................................ 529
31.3.5 Protocol Anomaly Profiles ................................... .... ... ... ... ..................................... 532
31.3.6 Protocol Anomaly Configuration ............................................................................. 532
31.4 Technical Reference ........................................................................................................534
Chapter 32
Content Filtering..................................................................................................................543
32.1 Overview .......................................................................................................................... 543
32.1.1 What You Can Do in the Content Filter Screens ............................... ..................... 543
32.1.2 What You Need to Know About Content Filtering .................................................. 543
32.1.3 Before You Begin ...................................................................................................545
32.2 Content Filter General Screen .................... ....................................................... ..............546
32.3 Content Filter Policy Add or Edit Screen ......................................................................... 549
32.4 Content Filter Profile Screen ..........................................................................................550
32.5 Content Filter Categories Screen ................................................................................... 550
32.6 Content Filter Customization Screen .............................................................................. 561
32.7 Content Filter Cache Screen ........................................................................................... 563
32.8 Content Filter Technical Reference ................................................................................. 566
Chapter 33
Content Filter Reports..........................................................................................................567
33.1 Overview .......................................................................................................................... 567
33.2 Viewing Content Filter Reports ............................................. ........................................... 567
Chapter 34
Anti-Spam..............................................................................................................................575
22
34.1 Overview .......................................................................................................................... 575
34.1.1 What You Can Do in the Anti-Spam Screens ................................. ........................575
34.1.2 What You Need to Know About Anti-Spam ............................................................575
34.2 Before You Begin ............................................................................................................. 578
ZyWALL USG 2000 User’s Guide

Table of Contents
34.3 The Anti-Spam General Screen ....................................................................................... 578
34.3.1 The Anti-Spam Policy Add or Edit Screen ................................................ .............. 579
34.4 The Anti-Spam Black List Screen .................................................................................... 581
34.4.1 The Anti-Spam Black or White List Add/Edit Screen .............................................. 583
34.4.2 Regular Expressions in Black or White List Entries ............................................... 584
34.5 The Anti-Spam White List Screen ....................................................................................585
34.6 The DNSBL Screen ......................................................................................................... 586
34.6.1 The DNSBL Add/Edit Screen ............................ ..................................................... 588
34.7 The Anti-Spam Status Screen .........................................................................................589
Part VII: Device HA............................................................................... 591
Chapter 35
Device HA.............................................................................................................................593
35.1 Overview .......................................................................................................................... 593
35.1.1 What You Can Do in the Device HA Screens ......................................................... 593
35.1.2 What You Need to Know About Device HA ............................................................ 593
35.1.3 Before You Begin ...................................................................................................594
35.2 Device HA General ..........................................................................................................595
35.3 The Active-Passive Mode Screen ................................................................................... 596
35.3.1 Configuring Active-Passive Mode Device HA ........................................................598
35.4 Configuring an Active-Passive Mode Monitored Interface ............................................... 601
35.5 The Legacy Mode Screen ............................................................................................... 602
35.6 Configuring the Legacy Mode Screen ........ ... ... .... ... ............................................. ... ... .... . 603
35.7 The Legacy Mode Add/Edit Screen ................................................................................. 605
35.8 Device HA Technical Reference ...................................................................................... 608
Part VIII: Objects...................................................................................611
Chapter 36
User/Group............................................................................................................................613
36.1 Overview .......................................................................................................................... 613
36.1.1 What You Can Do Using The User/Group Screens ............................................... 613
36.1.2 What You Need To Know About User/Groups ............................................. .......... . 613
36.2 User Summary Screen .................................................................................................... 616
36.2.1 User Add/Edit Screen ........................... .......... .......... ......... .......... .......... ......... ........ 616
36.3 User Group Summary Screen ......................................................................................... 619
36.3.1 Group Add/Edit Screen .......................................................................................... 620
36.4 Setting Screen ................................................................................................................ 620
36.4.1 Force User Authentication Policy Add/Edit Screen ................................................624
ZyWALL USG 2000 User’s Guide
23

Table of Contents
36.4.2 User Aware Login Example ............... ... ... .... ... ........................................................ 625
36.5 User /Group Technical Reference ................................................................................... 626
Chapter 37
Addresses.............................................................................................................................629
37.1 Overview .......................................................................................................................... 629
37.1.1 What You Can Do Using The Addresses Screens ................................ .................629
37.1.2 What You Need To Know About Addresses /Groups ............................................. 629
37.2 Address Summary Screen ....................... ........................................................................ 629
37.2.1 Address Add/Edit Screen ....................................................................................... 631
37.3 Address Group Summary Screen ............................... ....................... ......................... ..... 632
37.3.1 Address Group Add/Edit Screen ............................................................................ 633
Chapter 38
Services.................................................................................................................................635
38.1 Overview .......................................................................................................................... 635
38.1.1 What You Can Do in the Services Screens ....................................... ..................... 635
38.1.2 What You Need to Know About Protocols ................................ .............................. 635
38.2 The Service Summary Screen ....................... .......................... .......................... .............. 636
38.2.1 The Service Add/Edit Screen ............................ ..................................................... 638
38.3 The Service Group Summary Screen ........................ ... .... ... ... ... ... .... ... ... ... .... ................. 6 38
38.3.1 The Service Group Add/Edit Screen ...................................................................... 640
Chapter 39
Schedules..............................................................................................................................641
39.1 Overview .......................................................................................................................... 641
39.1.1 What You Can Do in the Schedule Screens ........................................................... 641
39.1.2 What You Need to Know About Schedules ....................... ..................................... 641
39.2 The Schedule Summary Screen ...................................................................................... 642
39.2.1 The One-Time Schedule Add/Edit Screen ............................................................. 643
39.2.2 The Recurring Schedule Add/Edit Screen ............................................... ... ... ... .... . 644
Chapter 40
AAA Server...........................................................................................................................647
40.1 Overview .......................................................................................................................... 647
40.1.1 Directory Service (AD/LDAP) Overview ............................ ... .... ... ... ... .... ... .............. 6 47
40.1.2 RADIUS Server Overview ......................................................................................648
40.1.3 ASAS ...................................................................................................................... 648
40.1.4 What You Can Do Using The AAA Screens ...........................................................648
40.1.5 What You Need To Know About AAA Servers .......................................................649
40.2 Active Directory or LDAP Default Server Screen ....................... ... .... ... ... ... .... ... ... ... ... .... . 649
40.2.1 Configuring Active Directory or LDAP Default Server Settings ... ... ... .... ... ... ... ... .... . 651
40.3 Active Directory or LDAP Group Summary Screen ......................................................... 652
24
ZyWALL USG 2000 User’s Guide

Table of Contents
40.3.1 Creating an Active Directory or LDAP Group ......................................................... 653
40.4 Configuring a Default RADIUS Server ............................................................................. 654
40.5 Configuring a Group of RADIUS Servers ....................................................................... 655
40.5.1 Adding a RADIUS Server Member ......................................................................... 656
Chapter 41
Authentication Method.........................................................................................................659
41.1 Overview .......................................................................................................................... 659
41.1.1 What You Can Do Using The Auth. Method Screens ............................... ... ... ... .... . 659
41.1.2 Before You Begin ...................................................................................................659
41.1.3 Example: Selecting a VPN Authentication Method ................................................ 659
41.2 Viewing Authentication Method Objects ..........................................................................660
41.3 Creating an Authentication Method Object ...................................................................... 661
Chapter 42
Certificates ............................................................................................................................663
42.1 Overview .......................................................................................................................... 663
42.1.1 What You Can Do in the Certificate Screens .........................................................663
42.1.2 What You Need to Know About Certificates ........................................................... 663
42.1.3 Verifying a Certificate .............................................................................................665
42.2 The My Certificates Screen ............................................................................................. 667
42.2.1 The My Certificates Add Screen ............................................................................ 668
42.2.2 The My Certificates Edit Screen ........... ............................................. .... ... ... ... ... .... . 673
42.2.3 The My Certificates Import Screen ........................................................................ 676
42.3 The Trusted Certificates Screen ..................................................................................... 677
42.3.1 The Trusted Certificates Edit Screen .................................................................... 678
42.3.2 The Trusted Certificates Import Screen ................................................................682
42.4 Certificates Technical Reference ..................................................................................... 683
42.4.1 OCSP .....................................................................................................................683
Chapter 43
ISP Accounts.........................................................................................................................685
43.1 Overview .......................................................................................................................... 685
43.1.1 What You Can Do in the ISP Account Screens ...................................................... 685
43.2 ISP Account Summary .................................................................................................... 685
43.2.1 ISP Account Edit ................................................................................................... 686
Chapter 44
SSL Application ....................................................................................................................689
44.1 Overview .......................................................................................................................... 689
44.1.1 What You Can Do in the SSL Application Screens ............................... ... ... ... ... .... . 689
44.1.2 What You Need to Know About SSL Application Objects ...................................... 689
44.1.3 Example: Specifying a Web Site for Access .......................................................... 690
ZyWALL USG 2000 User’s Guide
25

Table of Contents
44.2 The SSL Application Screen .......................... ... .... ... ... ... .... ... ... ... ... .... ... ... ... .... ... ... ... ... .... . 691
44.2.1 Creating/Editing a Web-based SSL Application Object ......................................... 691
44.2.2 Creating/Editing a File Sharing SSL Application Object ........................... ............. . 693
Part IX: System..................................................................................... 695
Chapter 45
System.................................................................................................................................697
45.1 Overview .......................................................................................................................... 697
45.1.1 What You Can Do In The System Screens ............................................................ 697
45.2 Host Name ....................................................................................................................... 698
45.3 Date and Time ................................................................................................................ 698
45.3.1 Pre-defined NTP Time Servers List ............................................. ... ... .... ... ... ... ... .... . 701
45.3.2 Time Server Synchronization ................................................................................. 702
45.4 Console Port Speed ......................................................................................................... 703
45.5 DNS Overview ................................................................................................................. 703
45.5.1 DNS Server Address Assignment .......................................................................... 703
45.5.2 Configuring the DNS Screen ................................ .......................................... ........ 704
45.5.3 Address Record .................................................................................................... 706
45.5.4 PTR Record ........................................................................................................... 707
45.5.5 Adding an Address/PTR Record ............................................................................ 707
45.5.6 Domain Zone Forwarder ............... ............................................. ... ... .... ................. 707
45.5.7 Adding a Domain Zone Forwarder ................................. ........................................ 7 08
45.5.8 MX Record ............................................................................................................709
45.5.9 Adding a MX Record ..............................................................................................709
45.5.10 Adding a DNS Service Control Rule ................................................................... . 709
45.6 WWW Overview ..............................................................................................................710
45.6.1 Service Access Limitations .....................................................................................711
45.6.2 System Timeout ......................................................................................................711
45.6.3 HTTPS ....................................................................................................................711
45.6.4 Configuring WWW .................................................................................................. 712
45.6.5 Service Control Rules ............................................................................................ 716
45.6.6 Customizing the WWW Login Page ....................................................................... 716
45.6.7 HTTPS Example ....................................................................................................720
45.7 SSH .............................................................................................................................. 728
45.7.1 How SSH Works ......................................................... ... ... ... .... ... ... ........................ 729
45.7.2 SSH Implementation on the ZyWALL ..................................................................... 730
45.7.3 Requirements for Using SSH ................................................................................. 730
45.7.4 Configuring SSH ....................................................................................................730
45.7.5 Secure Telnet Using SSH Examples ...................................................................... 732
45.8 Telnet .............................................................................................................................. 734
26
ZyWALL USG 2000 User’s Guide

Table of Contents
45.8.1 Configuring Telnet .................................................................................................. 734
45.9 FTP ................................................................................................................................. 735
45.9.1 Configuring FTP .....................................................................................................736
45.10 SNMP ........................................................................................................................... 737
45.10.1 Supported MIBs ................................................................................................... 739
45.10.2 SNMP Traps ......................................................................................................... 739
45.10.3 Configuring SNMP ............................................................................................... 739
45.11 Dial-in Management ..... ... ... .... ... ................................................ ... .... ..............................741
45.11.1 Configuring Dial-in Mgmt ........................... ... ... ................................................ .... . 742
45.12 Vantage CNM ...............................................................................................................743
45.12.1 Configuring Vantage CNM ................................................................................... 743
45.13 Language Screen .........................................................................................................744
Part X: Maintenance, Troubleshooting, & Specifications................. 747
Chapter 46
File Manager.........................................................................................................................749
46.1 Overview .......................................................................................................................... 749
46.1.1 What You Can Do in the File Manager Screens ..................................................... 749
46.1.2 What you Need to Know About the File Manager .................................................. 749
46.2 The Configuration File Screen .............................. ...................................................... .....752
46.3 The Firmware Package Screen ...................................................................................... 756
46.4 The Shell Script Screen .......................... ....................................................... .................758
Chapter 47
Logs ......................................................................................................................................761
47.1 Overview .......................................................................................................................... 761
47.2 What You Can Do In The Log Screens ............................................................................ 761
47.3 View Log Screen ................................................... ........................................................... 761
47.4 Log Setting Screens ....................................................................................................... 764
47.4.1 Log Setting Summary ............................................................................................. 765
47.4.2 Edit System Log Settings ......................................................................................766
47.4.3 Edit Remote Server Log Settings .......................................................................... 770
47.4.4 Active Log Summary Screen ................................ ............. .......... ............. ............. . 771
Chapter 48
Reports .................................................................................................................................775
48.1 Overview .......................................................................................................................... 775
48.1.1 What You Can Do in the Report Screens .......................................... ..................... 775
48.2 The Traffic Statistics Screen ............................................................................................ 775
48.3 The Session Monitor Screen .......................................................................................... 778
ZyWALL USG 2000 User’s Guide
27

Table of Contents
48.4 The Anti-Virus Report Screen .......................................................................................... 781
48.5 The IDP Report Screen .................... ... .... ........................................................................ 783
48.6 The Content Filter Report Screen ............................................................ ... .... ................. 785
48.7 The Anti-Spam Report Screen ......................................................................................... 787
48.8 The Email Daily Report Screen ....................................................................................... 790
Chapter 49
Diagnostics...........................................................................................................................793
49.1 The Diagnostics Screen .................................................................................................. 793
Chapter 50
Reboot....................................................................................................................................795
50.1 Overview .......................................................................................................................... 795
50.1.1 What You Need To Know About Reboot ................................................................ 795
50.2 The Reboot Screen .........................................................................................................795
Chapter 51
Troubleshooting....................................................................................................................797
51.1 Resetting the ZyWALL .....................................................................................................799
51.2 Changing a Power Module ............ ... ... .... ... ... ................................................. ... ... ........... 800
51.3 Getting More Troubleshooting Help ................................................................................. 802
Chapter 52
Product Specifications.........................................................................................................803
Part XI: Appendices and Index ........................................................... 809
Appendix A Log Descriptions...............................................................................................811
Appendix B Common Services.............................................................................................871
Appendix C Displaying Anti-Virus Alert Messages in Windows............................................875
Appendix D Importing Certificates........................................................................................881
Appendix E Open Software Announcements.......................................................................887
Appendix F Legal Information ..............................................................................................933
Index.......................................................................................................................................937
28
ZyWALL USG 2000 User’s Guide

PART I
Getting Started
Introducing the ZyWALL (31)
Features and Applications (39)
Web Configurator (47)
Configuration Basics (101)
Tutorials (119)
Status (149)
Registration (165)
Signature Update (171)
29

30

CHAPTER 1
Introducing the ZyWALL
This chapter gives an overview of the ZyWALL. It explains the front panel ports,
LEDs, introduces the management methods, and lists different ways to start or
stop the ZyWALL.
1.1 Overview and Key Default Settings
The ZyWALL is a comprehensive security device designed for medium to large
organizations. Its flexible configuration helps network administrators set up the
network and enforce security policies efficiently. In addition, the ZyWALL provides
excellent throughput, making it an ideal solution for reliable, secure service.
The ZyWALL’s security features include VPN, firewall, anti-virus, content filtering,
IDP (Intrusion Detection and Prevention), ADP (Anomaly Detection and
Protection), and certificates. It also provides bandwidth management, Instant
Messaging (IM) and Peer to Peer (P2P) control, NAT, port forwarding, policy
routing, DHCP server and many other powerful features. Flexible configuration
helps you set up the network and enforce security policies efficiently. See Chapter
2 on page 39 for a more detailed overview of the ZyWALL’s features.
The front panel physical Gigabit Ethernet ports (labeled P1, P2, P3, and so on)
are mapped to Gigabit Ethernet (ge) interfaces. By default P1 is mapped to ge1,
P2 is mapped to ge2 and so on. By default ge1 is the LAN interface, ge2 and ge3
are combined as the WAN_TRUNK. The Ethernet management interface can only
be accessed from the LAN side by default. The default LAN IP address is
192.168.1.1; the default administrator login user name and password are “admin”
and “1234” respectively. P7 and P8 are GbE dual personality interfaces. A dual
personality interface includes one Gigabit port and one slot for a mini-GBIC
transceiver (SFP module) with one port active at a time.
ZyWALL USG 2000 User’s Guide
31

Chapter 1 Introducing the ZyWALL
1.2 Front Panel
Figure 1 ZyWALL USG 2000 Front Panel
1.2.1 Dual Personality Interfaces
The ZyWALL’ s dual personality interfaces are 1000Base-T/mini-GBIC combo ports.
For each interface you can connect either to the 1000Base- T port or the mini-GBIC
port. The mini-GBIC ports have priority over the 1000Base-T ports. This means
that if a mini-GBIC port and the corresponding 1000Base-T port are connected at
the same time, the 1000Base-T port will be disabled.
1.2.1.1 1000Base-T Ports
The 1000Base-T auto-negotiating, auto-crossover Ethernet ports support 100/
1000 Mbps Gigabit Ethernet so the speed can be 100 Mbps or 1000 Mbps. The
duplex mode can be both half or full duplex at 100 Mbps and full duplex only at
1000 Mbps.
An auto-negotiating port can detect and adjust to the optimum Ethernet speed
(100/1000 Mbps) and duplex mode (full duplex or half duplex) of the connected
device.
An auto-crossover (auto-MDI/MDI-X) port automatically works with a straightthrough or crossover Ethernet cable.
Default Ethernet Settings
The factory default negotiation settings for the Ethernet ports on the ZyWALL are:
• Speed: Auto
•Duplex: Auto
• Flow control: On (you cannot configure the flow control setting, but the Z yW ALL
can negotiate with the peer and turn it off if needed)
1.2.1.2 Mini-GBIC Slots
These are slots for Small Form-Factor Pluggable (SFP) transceivers. A transceiver
is a single unit that houses a transmitter and a receiver. Use a transceiver to
32
ZyWALL USG 2000 User’s Guide

Chapter 1 Introducing the ZyWALL
connect a fiber-optic cable to the ZyWALL. The ZyWALL does not come with
transceivers. You must use transceivers that comply with the Small Form-Factor
Pluggable (SFP) Transceiver MultiSource Agreement (MSA). See the SFF
committee’s INF-8074i specification Rev 1.0 for details.
You can change t ransceivers while the ZyWALL is operating. You can use different
transceivers to connect to devices with different types of fiber-optic connectors.
• Type: SFP connection interface
• Connection speed: 1 Gigabit per second (Gbps)
To avoid possible eye injury, do not look into an operating fiberoptic module’s connectors or fiber-optic cable.
Transceiver and Fiber-optic Cable Installation
Use the following steps to install a mini GBIC transceiver (SFP module).
1 Insert the transceiver into the slot with the exposed section of PCB board facing
down.
Figure 2 Transceiver Installation Example
2 Press the transceiver firmly until it clicks into place.
Figure 3 Installed Transceiver
ZyWALL USG 2000 User’s Guide
33

Chapter 1 Introducing the ZyWALL
3 Push the end of the fiber-optic cable firmly into the transceiver until it locks into
place. When the other end of the fiber-optic cable is connected, check the LEDs to
verify the link status.
Figure 4 Installing the Fiber-optic Cable
Fiber-optic Cable and T ransceiver Removal
Use the following steps to remove a mini GBIC transceiver (SFP module).
1 Press down on the top of the fiber-optic cable where it connects to the transceiver
to release it. Then pull the fiber-optic cable out.
Figure 5 Removing the Fiber-optic Cable Example
2 Open the transceiver’s latch (latch styles vary).
Figure 6 Opening the Transceiver’s Latch Example
34
ZyWALL USG 2000 User’s Guide

3 Pull the transceiver out of the slot.
Figure 7 Transceiver Removal Example
1.2.2 Front Panel LEDs
The following table describes the LEDs.
Table 1 Front Panel LEDs
LED COLOR STATUS DESCRIPTION
PWR1, PWR2 Off Both power modules are turned off, not receiving
Green On The power module is operating.
Red On The power module has malfunctioned. Turn the
SYS Off The ZyWALL is turned off.
Green On The ZyWALL is ready and operating normally.
Red On The ZyWALL is malfunctioning.
AUX Off The AUX port is not connected.
Orange On The AUX port has a dial-in management connection.
Green On The AUX port has a dial backup connection.
CARD Green Off Reserved for future use. There is no card in the
HDD This LED is reserved for future use.
Chapter 1 Introducing the ZyWALL
power, or not functioning.
power module off, wait a few minutes, and turn the
power module back on (see Section 1.4 on page 37).
If the LED shines red again, then please contact your
vendor.
Flashing The ZyWALL is self-testing.
Flashing The AUX port is sending or receiving packets for the
dial-in management connection.
Flashing The AUX port is sending or receiving packets for the
dial backup connection.
CARD SLOT.
On There is a card in the CARD SLOT.
ZyWALL USG 2000 User’s Guide
35

Chapter 1 Introducing the ZyWALL
Table 1 Front Panel LEDs (continued)
LED COLOR STATUS DESCRIPTION
P1~P8 Green Off There is no traffic on this port.
Flashing The ZyWALL is sending or receiving packets on this
port.
Orange Off There is no connection on this port.
On This port has a successful link.
LNK Orange Off The Ethernet link is down.
On The Ethernet link is up.
ACT Green Off The system is not transmitting/receiving Ethernet
traffic.
Blinking The system is transmitting/receiving Ethernet traffic.
1.3 Management Overview
You can use the following ways to manage the ZyWALL.
Web Configurator
The web configurator allows easy ZyWALL setup and management using an
Internet browser. This User’s Guide provides information about the web
configurator.
Figure 8 Managing the ZyWALL: Web Configurator
Command-Line Interface (CLI)
36
The CLI allows you to use text-based commands to configure the ZyWALL. You can
access it using remote management (for example, SSH or Telnet) or via the
console port. See the Command Reference Guide for more information about the
CLI.
ZyWALL USG 2000 User’s Guide

Chapter 1 Introducing the ZyWALL
Console Port
You can use the console port to manage the ZyWALL using CLI commands. See
the Command Reference Guide for more information about the CLI.
The default settings for the console port are as follows.
Table 2 Console Port Default Settings
SETTING VALUE
Speed 115200 bps
Data Bits 8
Parity None
Stop Bit 1
Flow Control Off
1.4 Starting and Stopping the ZyWALL
Here are some of the ways to start and stop the ZyWAL L.
Table 3 Starting and Stopping the ZyWALL
METHOD DESCRIPTION
Connecting the
power
Rebooting the
ZyWALL
Using the RESET
button
Using the
shutdown
command
Disconnecting the
power
A cold start occurs when you turn on the power to the ZyWA LL. The
ZyWALL powers up, checks the hardware, and starts the system
processes.
A warm start (without powering down and powering up again)
occurs when you use the Reboot button in the Reboot screen or
when you use the
data to the local storage, stops the system processes, and then does
a warm start.
If you press the RESET button, the ZyWALL sets the configuration
to its default values and then reboots.
The
shutdown command writes all cached data to the local storage
and stops the system processes. It does not turn off the power.You
have to turn the power off and on manually to start the ZyWALL
again. You should use this command before you turn off the
ZyWALL.
Power off occurs when you turn off the power to the ZyWALL. The
ZyWALL simply turns off. It does not stop the system processes or
write cached data to local storage.
reboot command. The ZyW ALL writes all cached
Note: It is recommended you use the shutdown command before turning off the
ZyWALL.
When you apply configuration files or running shell scripts, the ZyWALL does not
stop or start the system processes. However, you might lose access to network
ZyWALL USG 2000 User’s Guide
37

Chapter 1 Introducing the ZyWALL
resources temporarily while the ZyWALL is applying configuration files or run ni ng
shell scripts.
38
ZyWALL USG 2000 User’s Guide

CHAPTER 2
Features and Applications
This chapter introduces the main features and applications of the ZyWALL.
2.1 Features
The ZyWALL’s security features include VPN, firewall, anti-virus, content filtering,
IDP (Intrusion Detection and Prevention), ADP (Anomaly Detection and
Protection), and certificates. It also provides bandwidth management, NAT, port
forwarding, policy routing, DHCP server and many other powerful features.
The rest of this section provides more information about the features of the
ZyWALL.
High Availability
To ensure the ZyWALL provides reliable, secure Internet access, set up one or
more of the following:
• Multiple WAN ports and configure load balancing between these ports.
• An auxiliary (backup) Internet connection.
• A backup ZyWALL in the event the master ZyWALL fails (device HA).
Virtual Private Networks (VPN)
Use IPSec, SSL, or L2TP VPN to provide secure communication between two sites
over the Internet or any insecure network that uses TCP/IP for communication.
The ZyWALL also offers hub-and-spoke IPSec VPN.
Flexible Security Zones
Many security settings are made by zone, not by interface, port, or network. As a
result, it is much simpler to set up and to change security settings in the ZyWALL.
You can create or remove zones, and you can assign each network, VLAN, or
interface to any zone.
ZyWALL USG 2000 User’s Guide
39

Chapter 2 Features and Applications
Firewall
The ZyWALL’ s firew all is a stateful inspection firew all. The Z yWALL rest ricts access
by screening data packets against defined access rules. It can also inspect
sessions. For example, traffic from one zone is not allowed unless it is ini tiated by
a computer in another zone first.
Intrusion Detection and Prevention (IDP)
IDP (Intrusion Detection and Protection) can detect malicious or suspicious
packets and respond instantaneously. It detects pattern-based attacks in order to
protect against network-based intrusions. See Section 30.6.1 on page 501 for a
list of attacks that the ZyWALL can protect against. You can also create your own
custom IDP rules.
Anomaly Detection and Prevention (ADP)
ADP (Anomaly Detection and Prevention) can detect malicious or suspicious
packets and respond instantaneously. It can detect:
• Anomalies based on violations of protocol standards (RFCs – Requests for
Comments)
• Abnormal flows such as port scans.
The ZyWALL’s ADP protects against network-based intrusions. See Section 31.3.4
on page 529 and Section 31.3.5 on page 532 for more on the kinds of attacks that
the ZyWALL can protect against. You can also create your own custom ADP rules.
Bandwidth Management
Bandwidth management allows you to allocate network resources according to
defined policies. This policy-based bandwidth allocation helps your network to
better handle applications such as Internet access, e-mail, Voice-over-IP (VoIP),
video conferencing and other business-critical applications.
Content Filter
Content filtering allows schools and businesses to create and enforce Internet
access policies tailored to the needs of the organization.
You can also subscribe to category-based content filtering that allows your
ZyWALL to check web sites against an external database of dynamically-updated
ratings of millions of web sites. You then simply select categories to block or
monitor, such as pornography or racial intolerance, from a pre-defined list.
40
ZyWALL USG 2000 User’s Guide

Chapter 2 Features and Applications
Anti-Virus Scanner
With the anti-virus packet scanner, your ZyWALL scans files transmitting through
the enabled interfaces into the network. The ZyWALL helps stop threats at the
network edge before they reach the local host computers.
Anti-Spam
The anti-spam feature can mark or discard spam. Use the white list to identify
legitimate e-mail. Use the black list to identify spam e-mail. The ZyWALL can also
check e-mail against a DNS black list (DNSBL) of IP addresses of servers that are
suspected of being used by spammers.
Application Patrol
Application patrol (App. Patrol) manages instant messenger (IM), peer-to-peer
(P2P) applications like MSN and BitTorrent. You can even control the use of a
particular application’s individual features (like text messaging, voice, video
conferencing, and file transfers). Application patrol has powerful bandwidth
management including traffic prioritization to enhance the performance of delaysensitive applications like voice and video. You can also use an option that gives
SIP priority over all other traffic. This maximizes SIP traffic throughput for
improved VoIP call sound quality.
2.2 Packet Flow
This section lists the order in which the ZyWALL applies its features and checks.
The following is the key used to describe the packet flow in the ZyWALL.
Table 4 Packet Flow Key
Ethernet The interface on which the packet is received or sent
VLAN Virtual LAN
Encap The PPPoE or PPTP encapsulation used
ALG Application Layer Gateway
DNAT Destination NAT
Routing Routing includes policy routes, interface routing, static routes and load
balancing for example.
FW Firewall (Through ZyWALL)
zFW Firewall (To ZyWALL)
IDP Intrusion Detection and Protection
ZyWALL USG 2000 User’s Guide
41

Chapter 2 Features and Applications
Table 4 Packet Flow Key
ADP Anomaly Detection and Protection
AP Application Patrol
AS Anti-spam
CF Content Filtering
SNAT Source NAT
IPSec D/E VPN Decryption/Encryption
BWM Bandwidth Management
RM Remote Management (System)
AV Anti-Virus
2.2.1 Interface to Interface (Through ZyWALL)
Ethernet -> VLAN -> Encap -> ALG -> DNAT-> Routing -> FW -> IDP -> AP-> CF
-> AV -> AS -> SNAT -> BWM -> Encap -> VLAN -> Ethernet
2.2.2 Interface to Interface (To/From ZyWALL)
To: Ethernet -> VLAN -> Encap -> ALG -> DNA T -> R outing -> zFW -> ADP -> RM
From: RM -> Routing -> BWM -> Encap -> VLAN -> Ethernet
2.2.3 Interface to Interface (From VPN Tunnel)
This example shows the flow from a VPN tunnel though the ZyWALL, not to the
ZyWALL or to another VPN tunnel (VPN concentrator).
Ethernet -> VLAN -> Encap -> ALG -> DNAT-> Routing -> zFW -> IPSec D ->
ALG -> AC -> DNAT-> Routing -> FW -> IDP -> AP -> CF -> AV -> AS -> SNAT > BWM -> Encap -> VLAN -> Ethernet
2.2.4 Interface to Interface (To VPN Tunnel)
This example shows the flow to a VPN tunnel from a source other than the
ZyWALL or another VPN tunnel (VPN concentrator).
Ethernet -> VLAN -> Encap -> ALG -> DNAT-> Routing -> FW -> IDP -> AP -> CF
-> AV -> AS -> SNAT -> IPSec E -> Routing -> BWM -> Encap -> VLAN ->
Ethernet
42
ZyWALL USG 2000 User’s Guide

2.3 Applications
These are some example applications for your ZyWALL. See also Chapter 6 on
page 119 for configuration tutorial examples.
2.3.1 VPN Connectivity
Set up VPN tunnels with other companies, branch offices, telecommuters, and
business travelers to provide secure access to your network. You can also set up
additional connections to the Internet to provide better service.
Figure 9 Applications: VPN Connectivity
Chapter 2 Features and Applications
2.3.2 SSL VPN Network Access
You can configure the ZyWALL to provide SSL VPN network access to remote
users. There are two SSL VPN network access modes: reverse proxy and full
tunnel.
2.3.2.1 Reverse Proxy Mode
In reverse proxy mode, the ZyWALL is a proxy that acts on behalf of the local
network servers (such as your web and mail servers). As the final destination, the
ZyWALL appears to be the serv er to remote users. This provides an added layer of
protection for your internal servers.
ZyWALL USG 2000 User’s Guide
43

Chapter 2 Features and Applications
With reverse proxy mode, remote users can easily access any web-based
applications on the local network by clicking on links or entering the provided URL.
You do not have to install additional client software on the remote user computers
for access.
Figure 10 Network Access Mode: Reverse Proxy
2.3.2.2 Full Tunnel Mode
In full tunnel mode, a virtual connection is created for remote users with private
IP addresses in the same subnet as the local network. This allows them to access
network resources in the same way as if they were part of the internal network.
Figure 11 Network Access Mode: Full Tunnel Mode
44
ZyWALL USG 2000 User’s Guide

2.3.3 User-Aware Access Control
Set up security policies that restrict access to sensitive information and shared
resources based on the user who is trying to access it.
Figure 12 Applications: User-Aware Access Control
Chapter 2 Features and Applications
2.3.4 Multiple WAN Interfaces
Set up multiple connections to the Internet on the same port, or set up multiple
connections on different ports. In either case, you can balance the loads between
them.
Figure 13 Applications: Multiple WAN Interfaces
ZyWALL USG 2000 User’s Guide
45

Chapter 2 Features and Applications
2.3.5 Device HA
Set up an additional ZyWALL as a backup gateway to ensure the default gateway
is always available for the network.
Figure 14 Applications: Device HA
46
ZyWALL USG 2000 User’s Guide

CHAPTER 3
Web Configurator
The ZyWALL web configurator allows easy ZyWALL setup and management using
an Internet browser.
3.1 Web Configurator Requirements
In order to use the web configurator, you must
• Use Internet Explorer 6.0 or later, Netscape Navigator 7.2 or later, or Firefox
1.0.7 or later
• Allow pop-up windows (blocked by default in Windows XP Service Pack 2)
• Enable JavaScripts (enabled by default)
• Enable Java permissions (enabled by default)
• Enable cookies
The recommended screen resolution is 1024 x 768 pixels.
3.2 Web Configurator Access
1 Make sure your ZyWALL hardware is properly connected. See the Quick Start
Guide.
ZyWALL USG 2000 User’s Guide
47

Chapter 3 Web Configurator
2 Open your web browser, and go to http://192.168.1.1. By default, the ZyWALL
automatically routes this request to its HTTPS server, and it is recommended to
keep this setting. The Login screen appears.
Figure 15 Login Screen
3 Type the user name (default: “admin”) and password (default: “1234”).
If your account is configured to use an ASAS auth entication server, use the OTP
(One-Time Password) token to generate a number. Enter it in the One-Time
Password field. The number is only good for one login. You must use the token to
generate a new number the next time you log in.
4 Click Login. If you logged in using the default user name and password, the
Update Admin Info screen (Figure 16 on page 48) appears. Otherwis e, the main
screen (Figure 17 on page 49) appears.
Figure 16 Update Admin Info Screen
48
ZyWALL USG 2000 User’s Guide

Chapter 3 Web Configurator
5 The screen above appears every time you log in using the default user name and
default password. If you change the password for the default user account, this
screen does not appear anymore.
Follow the directions in this screen. If you change the default password, the Login
screen (Figure 15 on page 48) appears after you click Apply. If you click Ignore,
the main screen appears.
Figure 17 Main Screen
A
C
B
D
3.3 Web Configurator Main Screen
As illustrated in Figure 17 on page 49, the main screen is divided into these parts:
• A - title bar
• B - navigation panel
ZyWALL USG 2000 User’s Guide
49

Chapter 3 Web Configurator
• C - main window
• D - status bar
3.3.1 Title Bar
The title bar provides some icons in the upper right corner.
The icons provide the following functions.
Table 5 Title Bar: Web Configurator Icons
ICON DESCRIPTION
Help: Click this icon to open the help page for the current screen.
Wizards: Click this icon to open one of the web configurator wizards.
See Chapter 4 on page 59 for more information.
Console: Click this icon to open the console in which you can use the
command line interface (CLI).
Site Map: Click this icon to display the site map for the web configurator.
You can use the site map to go directly to any menu item or any tab in
the web configurator.
About: Click this icon to display basic information about the ZyWALL.
Logout: Click this icon to log out of the web configurator.
3.3.2 Navigation Panel
Use the menu items on the navigation panel to open screens to configure Z yW ALL
features. The following tables describe each menu item.
Table 6 Navigation Panel Summary
LINK TAB FUNCTION
Status Use this screen to look at the ZyWALL’s general device
information, system status, system resource usage, licensed
service status, and interface status.
Licensing
Registration Registration Use this screen to register the device and activate trial services.
Service Use this screen to look at the licensed service status and to
upgrade licensed services.
Update Anti-Virus Use this screen to schedule anti-virus signature updates and to
update signature information immediately.
IDP/AppPatrol Use this screen to schedule IDP signature updates and to update
signature information immediately.
System Protect Use this screen to schedule system-protect signature updates and
to update signature information immediately.
50
ZyWALL USG 2000 User’s Guide

Chapter 3 Web Configurator
Table 6 Navigation Panel Summary (continued)
LINK TAB FUNCTION
Network
Interface Interface
Summary
Ethernet Use this screen to manage Ethernet interfaces and virtual Ethernet
Port Grouping Use this screen to configure physical port groups.
VLAN Use this screen to create and manage VLAN interfaces and virtual
Bridge Use this screen to create and manage bridges and virtual bridge
PPPoE/PPTP Use this screen to create and manage PPPoE and PPTP interfaces.
Auxiliary Use this screen to manage the AUX port.
Trunk Use this screen to create and manage trunks for load balancing
Routing Policy Route Use this screen to create and manage routing policies.
Static Route Use this screen to create and manage IP static routing
RIP Use this screen to configure device-level RIP settings.
OSPF Use this screen to configure device-level OSPF settings, including
Zone Use this screen to configure zones used to define various policies.
DDNS Profile Use this screen to define and manage the Z yW ALL’ s DDNS domain
Status Use this screen to view the status of the ZyWALL’s DDNS domain
Virtual
Server
HTTP
Redirect
ALG Use this screen to configure SIP, H.323, and FTP pass-through
Firewall Use this screen to create and manage level-3 traffic rules.
VPN
IPSec VPN VPN
Connection
VPN Gateway Use this screen to configure IKE tunnels.
Concentrator Use this screen to configure VPN concentrators (hub-and-spoke
SA Monitor Use this screen to monitor current IPSec VPN tunnels.
Use this screen to see information about all of the ZyWALL’s
interfaces and their connection status.
interfaces.
VLAN interfaces.
interfaces.
and link HA.
information.
areas and virtual links.
names.
names.
Use this screen to set up and manage port forwarding rules.
Use this screen to set up and manage HTTP redirection rules.
settings.
Use this screen to configure IPSec tunnels.
VPN).
ZyWALL USG 2000 User’s Guide
51

Chapter 3 Web Configurator
Table 6 Navigation Panel Summary (continued)
LINK TAB FUNCTION
SSL VPN Access
Privilege
Connection
Monitor
Global Setting Use this screen to configure the ZyWALL’s SSL VPN settings that
L2TP VPN L2TP Over
IPSec
Session
Monitor
AppPatrol General Use this screen to enable or disable traffic management by
Common Use this screen to manage traffic of the most commonly used web,
Instant
Messenger
Peer to Peer Use this screen to manage peer-to-peer traffic.
VoIP Use this screen to manage VoIP traffic.
Streaming Use this screen to manage streaming traffic.
Other Use this screen to manage other kinds of traffic.
Statistics Use this screen to view bandwidth usage and traffic statistics for
Anti-X
Anti-Virus General Use this screen to turn anti-virus on or off, set up anti-virus
Black/White
List
Signature Use these screens to search for signatures by signature name or
IDP General Use this screen to look at and manage IDP bindings.
Profile Use this screen to create and manage IDP profiles.
Custom
Signatures
ADP General Use this screen to look at and manage ADP bindings.
Profile Use this screen to create and manage ADP profiles.
Content
Filter
General Use this screen to create and manage content filter policies.
Filter Profile Use this screen to create and manage the detailed filtering rules
Cache Use this screen to manage the URL cache in the ZyWALL.
Use this screen to configure SSL VPN access rights for users and
groups.
Use this screen to monitor current SSL VPN connection.
apply to all connections.
Use this screen to configure L2TP Over IPSec VPN settings.
Use this screen to monitor current L2TP Over IPSec VPN sessions.
application and see registration and signature information.
file transfer and e-mail protocols.
Use this screen to manage instant messenger traffic.
the protocols that the ZyWALL is managing.
policies and check the anti-virus engine type and the anti-virus
license and signature status.
Use this screen to set up anti-virus black (blocked) and white
(allowed) lists of virus file patterns.
attributes and configure how the ZyWALL uses them.
Use this screen to create, import, or export custom signatures.
for content filtering policies.
52
ZyWALL USG 2000 User’s Guide

Chapter 3 Web Configurator
Table 6 Navigation Panel Summary (continued)
LINK TAB FUNCTION
Anti-Spam General Use these screens to turn anti-spam on or off and manage anti-
spam policies.
Black/White
List
DNSBL Use these screens to have the ZyWALL check e-mail against DNS
Status Use this screen to see how many mail sessions the ZyWALL is
Device HA General Use this to configure device HA global settings, and see the status
Active-Passive
Mode
Legacy Mode Use these screens to use legacy mode device HA with other
Object
User/Group User Use this screen to create and manage users.
Group Use this screen to create and manage groups of users.
Setting Use this screen to manage default settings for all users, general
Address Address Use this screen to create and manage host, range, and network
Address Group Use this screen to create and manage groups of addresses.
Service Service Use this screen to create and manage TCP and UDP services.
Service Group Use this screen to create and manage groups of services.
Schedule Use this screen to create one-time and recurring schedules.
AAA Server Active
Directory-
Default
Active
Directory-
Group
LDAP-Default Use this screen to configure the default LDAP settings.
LDAP-Group Use this screen to create and manage groups of LDAP servers.
RADIUS-
Default
RADIUS-Group Use this screen to create and manage groups of RADIUS servers.
Auth.
Method
Certificate My Certificates Use this screen to create and manage the ZyWALL’s certificates.
Trusted
Certificates
ISP Account Use this screen to create and manage ISP account information for
Use these screens to set up a black list to identify spam and a
white list to identify legitimate e-mail.
Black Lists.
currently checking and DNSBL statistics.
of each interface monitored by device HA.
Use these screens to configure (the new) active-passive mode
device HA.
ZyWALLs that already have device HA setup using a firmware
version earlier than 2.10.
settings for user sessions, and rules to force user authentication.
(subnet) addresses.
Use this screen to configure the default Active Directory settings.
Use this screen to create and manage groups of Active Directory
servers.
Use this screen to configure the default RADIUS settings.
Use these screens to create and manage ways of authenticating
users.
Use this screen to import and manage certificates from trusted
sources.
PPPoE/PPTP interfaces.
ZyWALL USG 2000 User’s Guide
53

Chapter 3 Web Configurator
Table 6 Navigation Panel Summary (continued)
LINK TAB FUNCTION
SSL
Application
System
Host Name Use this screen to configure the system and domain name for the
Date/Time Use this screen to configure the current date, time, and time zone
Console
Speed
DNS Use this screen to configure the DNS server and address records
WWW Use this screen to configure HTTP, HTTPS, and general
SSH Use this screen to configure the SSH server and SSH service
TELNET Use this screen to configure the telnet server settings for the
FTP Use this screen to configure the FTP server settings for the
SNMP Use this screen to configure SNMP communities and services.
Dial-in
Mgmt.
Vantage
CNM
Language Use this screen to select the language of the ZyWALL’s web
Maintenance
File Manager Configuration
File
Firmware
Package
Shell Script Use this screen to manage and run shell script files for the
Log View Log Use this screen to look at log entries.
Log Setting Use this screen to configure the system log, e-mail logs, and
Use these screens to create SSL web application or file sharing
objects.
ZyWALL.
in the ZyWALL.
Use this screen to set the console speed.
for the ZyWALL.
authentication.
settings for the ZyWALL.
ZyWALL.
ZyWALL.
Use this screen to configure settings for an out of band
management connection through a modem connected to the AUX
port.
Use this screen to configure and allow your ZyWALL to be
managed by the Vantage CNM server.
configurator screens.
Use this screen to manage and upload configuration files for the
ZyWALL.
Use this screen to look at the current firmware version and to
upload firmware.
ZyWALL.
remote syslog servers.
54
ZyWALL USG 2000 User’s Guide

Chapter 3 Web Configurator
Table 6 Navigation Panel Summary (continued)
LINK TAB FUNCTION
Report Traffic
Statistics
Session Use this screen to display the status of all current sessions.
Anti-Virus Use this screen to collect and display statistics on the viruses that
IDP Use this screen to collect and display statistics on the intrusions
Anti-Spam Use this screen to start or stop data collection and view spam
Email Daily
Report
Diagnostics Use this screen to have the ZyWALL collect diagnostic information.
Reboot Use this screen to restart the ZyWALL.
Use this screen to collect traffic information and display basic
reports about it.
the ZyWALL has detected.
that the ZyWALL has detected.
statistics.
Use this screen to configure where and how to send daily reports
and what reports to send.
3.3.3 Main Window
The main window shows the screen you select in the menu. It is discussed in the
rest of this document.
Right after you log in, the Status screen is displayed. See Chapter 7 on page 149
for more information about the Status screen.
3.3.4 Message Bar
The message bar displays configuration status information. Check the message
bar after you click Apply or OK to verify that the configuration has been updated.
Figure 18 Message Bar
ZyWALL USG 2000 User’s Guide
55

Chapter 3 Web Configurator
3.3.4.1 Warning Messages
Click the up arrow to view the ZyWALL’s current warning messages. These
warning messages display in a popup window, such as the following.
Figure 19 Warning Messages
Click Refresh Now to update the screen. Close the popup window when you are
done with it.
Click Clear Warning Messages to remove the current warning messages from
the window.
56
ZyWALL USG 2000 User’s Guide

3.3.4.2 CLI Messages
Click CLI to look at the CLI commands sent by the web configurator. These
commands appear in a popup window, such as the following.
Figure 20 CLI Messages
Chapter 3 Web Configurator
Click Change Display Style to show or hide the index numbers for the
commands (the commands are more convenient to copy and paste without the
index numbers).
Click Refresh Now to update the screen. For example, if you just enabled a
particular feature, you can look at the commands the web configurator generated
to enable it. Close the popup win dow when you are done with it.
See the Command Reference Guide for information about the commands.
ZyWALL USG 2000 User’s Guide
57

Chapter 3 Web Configurator
58
ZyWALL USG 2000 User’s Guide

CHAPTER 4
Wizard Setup
This chapter provides information on configuring the Wizard setup screens in the
web configurator. See the feature-specific chapters in this User’s Guide for
background information.
4.1 Wizard Setup Overview
Note: Use the wizards only for initial configuration starting from the default
configuration.
The web configurator's setup wizards help you configure Internet and VPN
connection settings.
Note: Changes you make in an installation or VPN wizard may not be applied if you
have already changed the ZyWALL’s configuration.
In the ZyWALL web configurator, click the Wizard icon to open the Wizard
Setup Welcome screen. The following summarizes the wizards you can select:
• INSTALLATION SETUP, ONE ISP
Click this link to open a wizard to set up a single Internet connection for Gigabit
Ethernet port 2. This wizard creates matching ISP account settings in the
ZyWALL if you use PPPoE or PPTP. See Section 4.2 on page 60.
• INSTALLATION SETUP, TWO ISP
Click this link to open a wizard to set up Internet connections for Gigabit
Ethernet (ge) interfaces 2 and 3. See Section 4.5 on page 80. You can connect
one interface to one ISP (or network) and connect the other to a second ISP (or
network). You can use the second WAN connection for load balancing to
increase overall network throughput or as a backup to enhance network
reliability (see Load Balancing Algorithms on page 241 for more on load
balancing).
This wizard creates matching ISP account settings in the ZyWALL if you use
PPPoE or PPTP. This wizard also creates a WAN trunk.
ZyWALL USG 2000 User’s Guide
59

Chapter 4 Wizard Setup
•VPN SETUP
Use VPN SETUP to configure a VPN connection. See Section 4.6 on page 84.
Figure 21 Wizard Setup Welcome
4.2 Installation Setup, One ISP
The wizard screens vary depending on what encapsulation type you use. Refer to
information provided by your ISP to know what to enter in each field. Leave a field
blank if you don’t have that information.
60
ZyWALL USG 2000 User’s Guide

Chapter 4 Wizard Setup
Note: Enter the Internet access information exactly as your ISP gave it to you.
Figure 22 Internet Access: Step 1
The following table describes the labels in this screen.
Table 7 Internet Access: Step 1
LABEL DESCRIPTION
ISP Parameters
Encapsulation Choose the Ethernet option when the WAN port is used as a regular
Ethernet.
Otherwise, choose PPPoE or PPTP for a dial-up connection according to
the information from your ISP.
WAN IP
Address
Assignments
WAN Interface This is the interface you are configuring for Internet access.
Zone Select the security zone to which you want this interface and Internet
connection to belong.
IP Address
Assignment
Next Click Next to continue.
Select Auto If your ISP did not assign you a fixed IP address.
Select Static If the ISP assigned a fixed IP address.
ZyWALL USG 2000 User’s Guide
61

Chapter 4 Wizard Setup
4.3 Step 1 Internet Access
Encapsulation: Choose the Ethernet option when the WAN port is used as a
regular Ethernet. Otherwise, choose PPPoE or PPTP for a dial-up connection
according to the information from your ISP.
WAN Interface: This is the interface you are co nf ig uring for Internet access.
Zone: Select the security zone to which you want this interface and Internet
connection to belong.
IP Address Assignment: Select Auto If your ISP did not assign you a fixed IP
address.
Select Static If the ISP assigned a fixed IP address.
4.3.1 Ethernet: Auto IP Address Assignment
If you select Auto as the IP Address Assignment in the previous screen, the
following screen displays. Click Next to apply the configuration settings.
Figure 23 Ethernet Encapsulation: Auto: Finish
You have set up your ZyWALL to access the Internet.
62
Note: If you have not already done so, you can register your ZyWALL with
myZyXEL.com and activate trials of services like IDP.
ZyWALL USG 2000 User’s Guide

You can click Next and use the following screen to perform a basic registration
(see Section 4.4 on page 77). If you want to do a more detailed registration or
manage your account details, click myZyXEL.com.
Alternatively, click Close to exit the wizard.
4.3.2 Ethernet: Static IP Address Assignment
If you select Static as the IP Address Assignment, the following screen
displays.
Figure 24 Ethernet Encapsulation: Static
Chapter 4 Wizard Setup
The following table describes the labels in this screen.
Table 8 Ethernet Encapsulation: Static
LABEL DESCRIPTION
ISP Parameters
Encapsulation This displays the type of Internet connection you are configuring.
WAN IP
Address
Assignments
WAN Interface This displays the identity of the interface you configure to connect with
your ISP.
Zone This field displays to which security zone this interface and Internet
connection will belong.
ZyWALL USG 2000 User’s Guide
63

Chapter 4 Wizard Setup
Table 8 Ethernet Encapsulation: Static (continued)
LABEL DESCRIPTION
IP Address Enter the IP address that your ISP gave you. This should be a static,
IP Subnet
Mask
Gateway IP
Address
First DNS
Server
Second DNS
Server
Next Click Next to continue.
The ZyWALL applies the configuration settings.
public IP address.
Enter the subnet mask for the IP address.
Enter the IP address of the router through which this WAN connection
will send traffic (the default gateway).
DNS (Domain Name System) is for mapping a domain name to its
corresponding IP address and vice versa. The DNS server is extremely
important because without it, you must know the IP address of a
computer before you can access it. The ZyWALL uses a system DNS
server (in the order you specify here) to resolve domain names for VPN,
DDNS and the time server.
Enter the DNS server IP addresses.
4.3.3 Step 2 Internet Access Ethernet
You do not configure this screen if you selected Auto as the IP Address
Assignment in the previous screen.
Note: Enter the Internet access information exactly as given to you by your ISP.
WAN Interface: This is the number of the interface that will connect with your
ISP.
Zone: This is the security zone to which this interface and Internet connection will
belong.
IP Address: Enter your (static) public IP address.
IP Subnet Mask: Enter the subnet mask for this WAN connection's IP address.
Gateway IP Address: Enter the IP address of the router through which this WAN
connection will send traffic (the default gateway).
DNS Server: The Domain Name System (DNS) maps a domain name to an IP
address and vice versa. Enter a DNS server's IP address(es). The ZyWALL uses
64
ZyWALL USG 2000 User’s Guide

Chapter 4 Wizard Setup
these (in the order you specify here) to resolve domain names for VPN, DDNS and
the time server.
Figure 25 Ethernet Encapsulation: Static: Finish
You have set up your ZyWALL to access the Internet.
Note: If you have not already done so, you can register your ZyWALL with
myZyXEL.com and activate trials of services like IDP.
You can click Next and use the following screen to perform a basic registration
(see Section 4.4 on page 77). If you want to do a more detailed registration or
manage your account details, click myZyXEL.com.
Alternatively, click Close to exit the wizard.
ZyWALL USG 2000 User’s Guide
65

Chapter 4 Wizard Setup
4.3.4 PPPoE: Auto IP Address Assignment
If you select Auto as the IP Address Assignment in the previous screen, the
following screen displays after you click Next.
Figure 26 PPPoE Encapsulation: Auto
The following table describes the labels in this screen.
Table 9 PPPoE Encapsulation: Auto
LABEL DESCRIPTION
ISP Parameters
Encapsulation This displays the type of Internet connection you are configuring.
Service Name Type the PPPoE service name given to you by your ISP. PPPoE uses a
service name to identify and reach the PPPoE server. You can use
alphanumeric and -_
long.
User Name Type the user name given to you by your ISP. You can use alphanumeric
and -_
Password Type the password associated with the user name above. Use up to 64
ASCII characters except the [] and ?. This field can be blank.
Retype to
Confirm
Nailed-Up Select Nailed-Up if you do not want the connection to time out.
Idle Timeout Type the time in seconds that elapses before the router automatically
Type your password again for confirmation.
disconnects from the PPPoE server. The default time is 100 seconds.
@$./ characters, and it can be up to 31 characters long.
@$./ characters, and it can be up to 64 characters
66
ZyWALL USG 2000 User’s Guide

Chapter 4 Wizard Setup
Table 9 PPPoE Encapsulation: Auto (continued)
LABEL DESCRIPTION
WAN IP
Address
Assignments
WAN Interface This displays the identity of the interface you configure to connect with
your ISP .
Zone This field displays to which security zone this interface and Internet
connection will belong.
IP Address The ISP will assign your WAN IP address automatically
Next Click Next to continue.
The ZyWALL applies the configuration settings.
Figure 27 PPPoE Encapsulation: Auto: Finish
You have set up your ZyWALL to access the Internet.
Note: If you have not already done so, you can register your ZyWALL with
myZyXEL.com and activate trials of services like IDP.
You can click Next and use the following screen to perform a basic registration
(see Section 4.4 on page 77). If you want to do a more detailed registration or
manage your account details, click myZyXEL.com.
Alternatively, click Close to exit the wizard.
ZyWALL USG 2000 User’s Guide
67

Chapter 4 Wizard Setup
4.3.5 PPPoE: Static IP Address Assignment
If you select Static as the IP Address Assignment, the following screen
displays.
Figure 28 PPPoE Encapsulation: Static
The following table describes the labels in this screen.
Table 10 PPPoE Encapsulation: Static
LABEL DESCRIPTION
ISP Parameters
Encapsulation This displays the type of Internet connection you are configuring.
Service Name Type the PPPoE service name given to you by your ISP. PPPoE uses a
service name to identify and reach the PPPoE server. You can use
alphanumeric and -_
long.
User Name Type the user name given to you by your ISP. You can use alphanumeric
and -_
Password Type the password associated with the user name above. Use up to 64
ASCII characters except the [] and ?. This field can be blank.
Retype to
Confirm
Nailed-Up Select Nailed-Up if you do not want the connection to time out.
Idle Timeout Type the time in seconds that elapses before the router automatically
Type your password again for confirmation.
disconnects from the PPPoE server. The default time is 100 seconds.
@$./ characters, and it can be up to 31 characters long.
@$./ characters, and it can be up to 64 characters
68
ZyWALL USG 2000 User’s Guide

Chapter 4 Wizard Setup
Table 10 PPPoE Encapsulation: Static (continued)
LABEL DESCRIPTION
WAN IP
Address
Assignments
WAN Interface This displays the identity of the interface you configure to connect with
your ISP .
Zone This field displays to which security zone this interface and Internet
connection will belong.
IP Address Enter your WAN IP address in this field.
DNS (Domain Name System) is for mapping a domain name to its corresponding IP
address and vice versa. The DNS server is extremely important because without it, you
must know the IP address of a computer before you can access it. The ZyWALL uses a
system DNS server (in the order you specify here) to resolve domain names for VPN,
DDNS and the time server.
First DNS
Server
Second DNS
Server
Next Click Next to continue.
Enter the DNS server's IP address(es) in the field(s) to the right.
Leave the field as 0.0.0.0 if you do not want to configure DNS servers.
If you do not configure a DNS server, you must know the IP address of a
machine in order to access it.
4.3.6 Step 2 Internet Access PPPoE
Note: Enter the Internet access information exactly as given to you by your ISP.
4.3.6.1 ISP Parameters
Type the PPPoE Service Name from your service provider.
Type the User Name given to you by your I SP.
Type the Password associated with the user name.
Select Nailed-Up if you do not want the connection to time out. Otherwise, type
the Idle Timeout in seconds that elapses befo re t he rou ter automatically
disconnects from the PPPoE server.
4.3.6.2 WAN IP Address Assignments
You do not configure this section if you selected Auto as the IP Address
Assignment in the previous screen.
WAN Interface: This is the number of the interface that will connect with your
ISP.
Zone: This is the security zone to which this interface and Internet connection will
belong.
ZyWALL USG 2000 User’s Guide
69

Chapter 4 Wizard Setup
IP Address: Enter your (static) public IP address.
DNS Server: The Domain Name System (DNS) maps a domain name to an IP
address and vice versa. Enter a DNS server's IP address(es). The ZyWALL uses
these (in the order you specify here) to resolve domain names for VPN, DDNS and
the time server.
Figure 29 PPPoE Encapsulation: Static: Finish
You have set up your ZyWALL to access the Internet.
Note: If you have not already done so, you can register your ZyWALL with
myZyXEL.com and activate trials of services like IDP.
You can click Next and use the following screen to perform a basic registration
(see Section 4.4 on page 77). If you want to do a more detailed registration or
manage your account details, click myZyXEL.com.
Alternatively, click Close to exit the wizard.
70
ZyWALL USG 2000 User’s Guide

4.3.7 PPTP: Auto IP Address Assignment
If you select Auto as the IP Address Assignment in the previous screen, the
following screen displays.
Figure 30 PPTP Encapsulation: Auto
Chapter 4 Wizard Setup
The following table describes the labels in this screen.
Table 11 PPTP Encapsulation: Auto
LABEL DESCRIPTION
ISP Parameters
Encapsulation This displays the type of Internet connection you are configuring.
User Name Type the user name given to you by your ISP. You can use
Password Type the password associated with the user name abov e. Use up to 64
Retype to
Confirm
Nailed-Up Select Nailed-Up if you do not want the connection to time out.
Idle Timeout Type the time in seconds that elapses before the router automatically
PPTP
Configuration
ZyWALL USG 2000 User’s Guide
alphanumeric and -_
characters long.
ASCII characters except the [] and ?. This field can be blank.
Type your password again for confirmation.
disconnects from the PPTP server.
@$./ characters, and it can be up to 31
71

Chapter 4 Wizard Setup
Table 11 PPTP Encapsulation: Auto (continued)
LABEL DESCRIPTION
Base Interface This displays the identity of the Ethernet interface you configure to
Base IP Address Type the (static) IP address assigned to you by your ISP.
IP Subnet Mask Type the subnet mask assigned to you by your ISP (if given).
Server IP Type the IP address of the PPTP server.
Connection ID Enter the connection ID or connection name in this field. It must follow
connect with a modem or router.
the "c:id" and "n:name" format. For example, C:12 or N:My ISP.
This field is optional and depends on the requirements of your DSL
modem.
You can use alphanumeric and -_
characters long.
WAN IP Address
Assignments
WAN Interface This displays the identity of the interface you configure to connect with
your ISP .
Zone This field displays to which security zone this interface and Internet
connection will belong.
IP Address Enter your WAN IP address in this field.
DNS (Domain Name System) is for mapping a domain name to its corresponding IP
address and vice versa. The DNS server is extremely important because without it, you
must know the IP address of a computer before you can access it. The ZyWALL uses a
system DNS server (in the order you specify here) to resolve domain names for VPN,
DDNS and the time server.
First DNS Server
Second DNS
Server
Next Click Next to continue.
Enter the DNS server's IP address(es) in the field(s) to the right.
Leave the field as 0.0.0.0 if you do not want to configure DNS servers.
If you do not configure a DNS server, you must know the IP address of
a machine in order to access it.
: characters, and it can be up to 31
72
ZyWALL USG 2000 User’s Guide

The ZyWALL applies the configuration settings.
Figure 31 PPTP Encapsulation: Auto: Finish
Chapter 4 Wizard Setup
You have set up your ZyWALL to access the Internet.
Note: If you have not already done so, you can register your ZyWALL with
myZyXEL.com and activate trials of services like IDP.
You can click Next and use the following screen to perform a basic registration
(see Section 4.4 on page 77). If you want to do a more detailed registration or
manage your account details, click myZyXEL.com.
Alternatively, click Close to exit the wizard.
ZyWALL USG 2000 User’s Guide
73

Chapter 4 Wizard Setup
4.3.8 PPTP: Static IP Address Assignment
If you select Static as the IP Address Assignment, the following screen
displays.
Figure 32 PPTP Encapsulation: Static
74
The following table describes the labels in this screen.
Table 12 PPTP Encapsulation: Static
LABEL DESCRIPTION
ISP Parameters
Encapsulation This displays the type of Internet connection you are configuring.
User Name Type the user name given to you by your ISP. You can use
alphanumeric and -_@$./ characters, and it can be up to 31
characters long.
Password Type the password associated with the user name abov e. Use up to 64
ASCII characters except the [] and ?.
Retype to
Confirm
Nailed-Up Select Nailed-Up if you do not want the connection to time out.
Type your password again for confirmation.
ZyWALL USG 2000 User’s Guide

Chapter 4 Wizard Setup
Table 12 PPTP Encapsulation: Static (continued)
LABEL DESCRIPTION
Idle Timeout Type the time in seconds that elapses before the router automatically
disconnects from the PPTP server.
PPTP
Configuration
Base Interface This displays the identity of the Ethernet interface you configure to
connect with a modem or router.
Base IP Address Type the (static) IP address assigned to you by your ISP.
IP Subnet Mask Type the subnet mask assigned to you by your ISP (if given).
Server IP Type the IP address of the PPTP server.
Connection ID Enter the connection ID or connection name in this field. It must follow
the "c:id" and "n:name" format. For example, C:12 or N:My ISP.
This field is optional and depends on the requirements of your DSL
modem.
You can use alphanumeric and -_
characters long. This field can be blank.
WAN IP Address
Assignments
WAN Interface This displays the identity of the interface you configure to connect with
your ISP .
Zone This field displays to which security zone this interface and Internet
connection will belong.
IP Address Enter your WAN IP address in this field.
DNS (Domain Name System) is for mapping a domain name to its corresponding IP
address and vice versa. The DNS server is extremely important because without it, you
must know the IP address of a computer before you can access it. The ZyWALL uses a
system DNS server (in the order you specify here) to resolve domain names for VPN,
DDNS and the time server.
First DNS Server
Second DNS
Server
Next Click Next to continue.
Enter the DNS server's IP address(es) in the field(s) to the right.
Leave the field as 0.0.0.0 if you do not want to configure DNS servers.
If you do not configure a DNS server, you must know the IP address of
a machine in order to access it.
4.3.9 Step 2 Internet Access PPTP
: characters, and it can be up to 31
Note: Enter the Internet access information exactly as given to you by your ISP.
4.3.9.1 ISP Parameters
Type the User Name given to you by your I SP.
Type the Password associated with the user name.
ZyWALL USG 2000 User’s Guide
75

Chapter 4 Wizard Setup
Select Nailed-Up if you do not want the connection to time out. Otherwise, type
the Idle Timeout in seconds that elapses befo re t he rou ter automatically
disconnects from the PPTP server.
4.3.9.2 PPTP Configuration
Base Interface: This is the identity of the Ethernet interface you configure to
connect with a modem or router.
Type a Base IP Address (static) assigned to you by your ISP.
Type the IP Subnet Mask assigned to you by yo ur ISP (if given).
Server IP: Type the IP address of the PPTP server.
Type a Connection ID or connection name. It must follow the “c:id” and
“n:name” format. For example, C:12 or N:My ISP. This field is optional and
depends on the requirements of your broadband modem or router.
4.3.9.3 WAN IP Address Assignments
You do not configure this section if you selected Auto as the IP Address
Assignment in the previous screen.
WAN Interface: This is the connection type on the interface you are configuring
to connect with your ISP.
Zone: This is the security zone to which this interface and Internet connection will
belong.
IP Address: Enter your (static) public IP address.
DNS Server: The Domain Name System (DNS) maps a domain name to an IP
address and vice versa. Enter a DNS server's IP address(es). The ZyWALL uses
these (in the order you specify here) to resolve domain names for VPN, DDNS and
the time server.
76
ZyWALL USG 2000 User’s Guide

The ZyWALL applies the configuration settings.
Figure 33 PPTP Encapsulation: Static: Finish
Chapter 4 Wizard Setup
4.3.10 Step 4 Internet Access - Finish
You have set up your ZyWALL to access the Internet.
Note: If you have not already done so, you can register your ZyWALL with
myZyXEL.com and activate trials of services like IDP.
You can click Next and use the following screen to perform a basic registration
(see Section 4.4 on page 77). If you want to do a more detailed registration or
manage your account details, click myZyXEL.com.
Alternatively, click Close to exit the wizard.
4.4 Device Registration
Use this screen to register your ZyWALL with myZXEL.com and activate trial
periods of subscription security features if you have not already done so.
Note: You must be connected to the Internet to register.
This screen displays a read-onl y user name and password if the Z yWALL is already
registered. It also shows which trial services are activated (if any). You can still
ZyWALL USG 2000 User’s Guide
77

Chapter 4 Wizard Setup
select the unchecked trial service(s) to activate it after registration. Use the
Registration > Service screen to update your service subscription status.
Figure 34 Registration
78
ZyWALL USG 2000 User’s Guide

Chapter 4 Wizard Setup
The following table describes the labels in this screen.
Table 13 Registration
LABEL DESCRIPTION
Device Registration If you select existing myZyXEL.com account, only the User
Name and Password fields are available.
new myZyXEL.com
account
existing
myZyXEL.com
account
UserName Enter a user name for your myZyXEL.com account. The name
Check Click this button to check with the myZyXEL.com database to
Password Enter a password of between six and 20 alphanumeric characters
Confirm Password Enter the password again for confirmation.
E-Mail Address Enter your e-mail address. You can use up to 80 alphanumeric
Country Code Select your country from the drop-down box list.
Trial Service
Activation
IDP/AppPatrol
Anti-Virus
If you haven’t created an account at myZyXEL.com, select this
option and configure the following fields to create an account and
register your ZyWALL.
If you already have an account at myZ yXEL.com, select this option
and enter your user name and password in the fields below to
register your ZyWALL.
should be from six to 20 alphanumeric characters (and the
underscore). Spaces are not allowed.
verify the user name you entered has not been used.
(and the underscore). Spaces are not allowed.
characters (periods and the underscore are also allowed) without
spaces.
You can try a trial service subscription. After the trial expires, you
can buy an iCard and enter the license key in the Registration
Service screen to extend the service.
Select the check box to activate a trial. The trial period starts the
day you activate the trial.
Content Filter
Close Click Close to exit the wizard.
Next Click Next to save your changes back to the ZyWALL and activate
ZyWALL USG 2000 User’s Guide
the selected services.
79

Chapter 4 Wizard Setup
Figure 35 Registration: Registered Device
4.5 Installation Setup, Two Internet Service Providers
This wizard allows you to configure two interfaces for Internet access through
either two different Internet Service Providers (ISPs) or two different accounts
with the same ISP.
80
ZyWALL USG 2000 User’s Guide

Chapter 4 Wizard Setup
The configuration of the following screens is explained in Section 4.2 on page 60
section. Configure the First WAN Interface and click Next.
Figure 36 Internet Access: Step 1: First WAN Interface
ZyWALL USG 2000 User’s Guide
81

Chapter 4 Wizard Setup
After you configure the First WAN Interface, you can configure the Second
WAN Interface. Click Next to continue.
Figure 37 Internet Access: Step 3: Second WAN Interface
82
ZyWALL USG 2000 User’s Guide

Chapter 4 Wizard Setup
After you configure the Second WAN Interface, a summary of configuration
settings display for both WAN interfaces.
Figure 38 Internet Access: Finish
Note: You can register your ZyWALL with myZyXEL.com and activate trials of
services like IDP.
Use the myZyXEL.com link if you do already have a myZ yXEL.co m account. If y ou
already have a myZyXEL.com account, you can click Next and use the following
screen to register your ZyWALL and activate service trials (see Section 4.4 on
page 77).
Alternatively, click Close to exit the wizard.
4.5.1 Internet Access Wizard Setup Complete
Well done! You have successfully set up your ZyWALL to access the Internet.
ZyWALL USG 2000 User’s Guide
83

Chapter 4 Wizard Setup
4.6 VPN Setup
The VPN wizard creates corresponding VPN connection and VPN gateway settings,
a policy route and address objects that yo u can use lat er in configuring more VPN
connections or other features.
Click VPN SETUP in the Wizard Setup We lcome screen (Figure 21 on page 60) to
open the following screen. Use it to select which type of VPN settings you want to
configure.
Figure 39 VPN Wizard: Wizard Type
84
The following table describes the labels in this screen.
Table 14 VPN Wizard: Step 1: Wizard Type
LABEL DESCRIPTION
Express Use this wizard to create a VPN connection with another ZLD-based
ZyWALL using a pre-shared key and default security settings.
Advanced Use this wizard to configure detailed VPN security settings such as using
certificates. The VPN connection can be to another ZLD-based ZyWALL or
other IPSec device.
Next Click Next to continue.
ZyWALL USG 2000 User’s Guide

4.7 VPN Wizards
A VPN (Virtual Private Network) tunnel is a secure connection to another computer
or network.
Use the Express wizard to create a VPN connection with another ZLD-based
ZyWALL using a pre-shared key and default security settings.
Use the Advanced wizard to configure detailed VPN security settings such as
using certificates. The VPN connection can be to another ZLD-based ZyWALL or
other IPSec devices.
4.7.1 VPN Express Wizard
Click the Express radio button as shown in Figure 39 on page 84 to display the
following screen.
Figure 40 VPN Express Wizard: Step 2
Chapter 4 Wizard Setup
ZyWALL USG 2000 User’s Guide
85

Chapter 4 Wizard Setup
The following table describes the labels in this screen.
Table 15 VPN Express Wizard: Step 2
LABEL DESCRIPTION
Rule Name Type the name used to identify this VPN connection (and VPN gateway).
Site-to-site Choose this if the remote IPSec router has a static IP address or a domain
Site-to-site
with Dynamic
Peer
Remote
Access
(Server Role)
Remote
Access
(Client Role)
Back Click Back to return to the previous screen.
Next Click Next to continue.
You may use 1-31 alphanumeric characters, underscores(_), or dashes (), but the first character cannot be a number. This value is case-sensitive.
name. This ZyWALL can initiate the VPN tunnel.
Choose this if the remote IPSec router has a dynamic IP address. Only the
remote IPSec router can initiate the VPN tunnel.
Choose this to allow incoming connections from IPSec VPN clients. The
clients have dynamic IP addresses and are also known as dial-in users.
Only the clients can initiate the VPN tunnel.
Choose this to connect to an IPSec server. This ZyWALL is the client (dialin user) and can initiate the VPN tunnel.
4.8 VPN Express Wizard - Scenario
Rule Name: Type the name used to identify this VPN connection (and VPN
gateway). Y ou may use 1-31 alphanumeric char acters, underscores (_), or dashes
(-), but the first character cannot be a number. This value is case-sensitive.
Select the scenario that best describes your intended VPN connection.
• Site-to-site - Choose this if the remote IPSec router has a static IP address or a
domain name. This ZyWALL can initiate the VPN tunnel.
• Site-to-site with Dynamic Peer - Choose this if the remote IPSec router has a
dynamic IP address. Only the remote IPSec router can initiate the VPN tunnel.
• Remote Access (Server Role) - Choose this to allow incoming connections from
IPSec VPN clients. The clients have dynamic IP addresses and are also known as
dial-in users. Only the clients can initiate the VPN tunnel.
86
ZyWALL USG 2000 User’s Guide

Chapter 4 Wizard Setup
• Remote Access (Client Role) - Choose this to connect to an IPSec server. This
ZyWALL is the client (dial-in user) and can initiate the VPN tunnel.
Figure 41 VPN Express Wizard: Step 3
The following table describes the labels in this screen.
Table 16 VPN Express Wizard: Step 3
LABEL DESCRIPTION
Secure
Gateway
Pre-Shared
Key
Local Policy
(IP/Mask)
If Any displays in this field, it is not configurable for the chosen scenario.
If this field is configurable, enter the WAN IP address or domain name of
the remote IPSec router (secure gateway) to identify the remote IPSec
router by its IP address or a domain name.
Type your pre-shared key in this field. A pre-shared key identifies a
communicating party during a phase 1 IKE negotiation. It is called "preshared" because you have to share it with another party before you can
communicate with them over a secure connection.
Type from 8 to 31 case-sensitive ASCII characters or from 16 to 62
hexadecimal ("0-9", "A-F") characters. Precede hexadecimal characters
with “0x”.
Both ends of the VPN tunnel must use the same pre-shared key. You will
receive a PYLD_MALFORMED (payload malformed) packet if the same preshared key is not used on both ends.
Type a static local IP address that corresponds to the remote IPSec
router's configured remote IP address (the remote IP address of the other
ZyWALL).
To specify IP addresses on a network by their subnet mask, type the
subnet mask of the LAN behind your ZyWALL.
ZyWALL USG 2000 User’s Guide
87

Chapter 4 Wizard Setup
Table 16 VPN Express Wizard: Step 3 (continued)
LABEL DESCRIPTION
Remote
Policy (IP/
Mask)
Back Click Back to return to the previous screen.
Next Click Next to continue.
If Any displays in this field, it is not configurable for the chosen scenario.
If this field is configurable, type a static local IP address that corresponds
to the remote IPSec router's configured local IP address (the local IP
address of the other ZyWALL).
To specify IP addresses on a network by their subnet mask, type the
subnet mask of the LAN behind the remote gateway.
4.8.1 VPN Express Wizard - Policy Setting
The Policy Setting specifies which devices can use the VPN tunnel. Local and
remote IP addresses must be static.
Local Policy (IP/Mask): Type the IP address of a computer on your network.
You can also specify a subnet. This must match the remote IP address configured
on the peer IPSec device.
Remote Policy (IP/Mask): Type the IP address of a computer behind the peer
IPSec device. You can also specify a subnet. This must match the local IP address
configured on the peer IPSec device.
Figure 42 VPN Express Wizard: Step 4
88
ZyWALL USG 2000 User’s Guide

The following table describes the labels in this screen.
Table 17 VPN Express Wizard: Step 4
LABEL DESCRIPTION
Summary
Rule
Name
Secure
Gateway
PreShared
Key
Local
Policy
Remote
Policy
Configuration
for Remote
Gateway
This is the name of the VPN connection (and VPN gateway).
This is the WAN IP address or domain name of the remote IPSec router. If
this field displays 0.0.0.0, only the remote IPSec router can initiate the
VPN connection.
This is a pre-shared key identifying a communicating party during a phase
1 IKE negotiation.
This is a (static) IP address and Subnet Mask on the LAN behind your
ZyWALL.
This is a (static) IP address and Subnet Mask on the network behind the
remote IPSec router.
These commands set the matching VPN connection settings for the
remote gateway. If the remote gateway is a ZLD-based ZyWALL, you can
copy and paste this list into its command line interface in order to
configure it for the VPN tunnel.
Chapter 4 Wizard Setup
You can also use a text editor to sa ve these commands as a shell script file
with a “.zysh” filename extension. Then you can use the file manager to
run the script in order to configure the VPN connection.
See the commands reference guide for details on the commands displayed
in this list.
Save Click Save to store the VPN settings on your ZyWALL.
4.8.2 VPN Express Wizard - Summary
This summary of VPN tunnel settings is read-only.
Name: Identifies the VPN gateway policy.
Secure Gateway: IP address or domain name of the peer IPSec device.
Pre-Shared Key: VPN tunnel password.
Local Policy: IP address and subnet mask of the computers on the network
behind your ZyWALL that can use the tunnel.
Remote Policy: IP address and subnet mask of the computers on the network
behind the peer IPSec device that can use the tunnel.
ZyWALL USG 2000 User’s Guide
89

Chapter 4 Wizard Setup
You can copy and past e the Configuration for Remote Gateway commands into
another ZLD-based ZyWALL’s command line interface.
Figure 43 VPN Express Wizard: Step 6
Note: If you have not already done so, use the myZyXEL.com link and register your
ZyWALL with myZyXEL.com and activate trials of services like IDP.
Alternatively, click Close to exit the wizard.
4.8.3 VPN Express Wizard - Finish
Now you can use the VPN tunnel.
Note: If you have not already done so, you can register your ZyWALL with
myZyXEL.com and activate trials of services like IDP.
You can click Next and use the following screen to perform a basic registration
(see Section 4.4 on page 77). If you want to do a more detailed registration or
manage your account details, click myZyXEL.com.
Alternatively, click Close to exit the wizard.
90
ZyWALL USG 2000 User’s Guide

4.8.4 VPN Advanced Wizard
Click the Advanced radio button as shown in Figure 39 on page 84 to di splay the
following screen.
Figure 44 VPN Advanced Wizard: Step 2
Chapter 4 Wizard Setup
The following table describes the labels in this screen.
Table 18 VPN Advanced Wizard: Step 2
LABEL DESCRIPTION
Rule Name Type the name used to identify this VPN connection (and VPN gateway).
You may use 1-31 alphanumeric characters, underscores(
), but the first character cannot be a number. This value is case-sensitive.
Site-to-site Choose this if the remote IPSec router has a static IP address or a domain
name. This ZyWALL can initiate the VPN tunnel.
Site-to-site
with Dynamic
Peer
Remote
Access
(Server Role)
Remote
Access
(Client Role)
Back Click Back to return to the previous screen.
Next Click Next to continue.
Choose this if the remote IPSec router has a dynamic IP address. Only the
remote IPSec router can initiate the VPN tunnel.
Choose this to allow incoming connections from IPSec VPN clients. The
clients have dynamic IP addresses and are also known as dial-in users.
Only the clients can initiate the VPN tunnel.
Choose this to connect to an IPSec server. This ZyWALL is the client (dialin user) and can initiate the VPN tunnel.
_), or dashes (-
ZyWALL USG 2000 User’s Guide
91

Chapter 4 Wizard Setup
There are two phases to every IKE (Internet Key Exchange) negotiation – phase 1
(Authentication) and phase 2 (Key Exchange). A phase 1 exchange establ ishes an
IKE SA (Security Association).
Figure 45 VPN Advanced Wizard: Step 3
The following table describes the labels in this screen.
Table 19 VPN Advanced Wizard: Step 3
LABEL DESCRIPTION
Phase 1
Setting
Secure
Gateway
My Address
(interface)
Negotiation
Mode
If Any displays in this field, it is not configurable for the chosen scenario.
If this field is configurable, enter the WAN IP address or domain name of
the remote IPSec router (secure gateway) in the field below to identify the
remote IPSec router by its IP address or a domain name. Set this field to
0.0.0.0 if the remote IPSec router has a dynamic WAN IP address.
Select an interface from the drop-down list box to use on your ZyWALL.
Select Main for identity protection. Select Aggressive to allow more
incoming connections from dynamic IP addresses to use separate
passwords.
Note: Multiple SAs (security associations) connecting through a
secure gateway must have the same negotiation mode.
92
ZyWALL USG 2000 User’s Guide

Chapter 4 Wizard Setup
Table 19 VPN Advanced Wizard: Step 3 (continued)
LABEL DESCRIPTION
Encryption
Algorithm
Authenticatio
n Algorithm
Key Group You must choose a key group for phase 1 IKE setup. DH1 (default) refers
SA Life Time
(Seconds)
When DES is used for data communications, both sender and receiver
must know the same secret key, which can be used to encrypt and decrypt
the message or to generate and verify a message authentication code.
The DES encryption algorithm uses a 56-bit key. Triple DES (3DES) is a
variation on DES that uses a 168-bit key. As a result, 3DES is more
secure than DES. It also requires more processing power, resulting in
increased latency and decreased throughput. AES128 uses a 128-bit key
and is faster than 3DES. AES192 uses a 192-bit key and AES256 uses a
256-bit key. Select Null to have no encryption.
MD5 (Message Digest 5) and SHA1 (Secure Hash Algorithm) are hash
algorithms used to authenticate packet data. The SHA1 algorithm is
generally considered stronger than MD5, but is slower. Select MD5 for
minimal security and SHA1 for maximum security.
to Diffie-Hellman Group 1 a 768 bit random number. DH2 refers to DiffieHellman Group 2 a 1024 bit (1Kb) random number. DH5 refers to DiffieHellman Group 5 a 1536 bit random number.
Define the length of time before an IKE SA automatically renegotiates in
this field. The minimum value is 60 seconds.
A short SA Life Time increases security by forcing the two VPN gateways
to update the encryption and authentication keys. However, every time
the VPN tunnel renegotiates, all users accessing remote resources are
temporarily disconnected.
NAT Tr av ersal Select this check bo x to enable NAT traversal. NAT traversal allows y ou to
set up a VPN connection when there are NAT routers between the two
IPSec routers.
Note: The remote IPSec router must also have NAT traversal
enabled. See Chapter 21 on page 339 for more information.
Dead Peer
Detection
(DPD)
Authenticatio
n Method
Pre-Shared
Key
Select this check box if you want the ZyWALL to make sure the remote
IPSec router is there before it transmits data through the IKE SA. If there
has been no traffic for at least 15 seconds, the ZyWALL sends a message
to the remote IPSec server. If the remote IPSec server responds, the
ZyWALL tr ansmits the data. If the rem ote IPSec server does not respond,
the ZyWALL shuts down the IKE SA.
Type your pre-shared key in this field. A pre-shared key identifies a
communicating party during a phase 1 IKE negotiation. It is called "preshared" because you have to share it with another party before you can
communicate with them over a secure connection.
Type from 8 to 31 case-sensitive ASCII characters or from 16 to 62
hexadecimal ("0-9", "A-F") characters. Precede hexadecimal characters
with “0x”.
Both ends of the VPN tunnel must use the same pre-shared key. You will
receive a PYLD_MALFORMED (payload malformed) packet if the same preshared key is not used on both ends.
ZyWALL USG 2000 User’s Guide
93

Chapter 4 Wizard Setup
Table 19 VPN Advanced Wizard: Step 3 (continued)
LABEL DESCRIPTION
Certificate Use the drop-down list box to select the certificate to use for this VPN
tunnel. You must have certificates already configured in the My
Certificates screen. Click Certificate under the Object menu to go to
the My Certificates screen where you can view the ZyWALL's list of
certificates.
Back Click Back to return to the previous screen.
Next Click Next to continue.
4.8.5 VPN Advanced Wizard - Advanced Settings
Phases: IKE (Internet Key Exchange) negotiation has two phases. A phase 1
exchange establishes an IKE SA (Security Association) and phase 2 (Key
Exchange) uses the SA to negotiate SAs for IPSec.
Note: Multiple SAs connecting through a secure gateway must have the same
negotiation mode.
Negotiation Mode: Select Main for identity protection. Select Aggressive to
allow more incoming connections from dynamic IP addresses to use separate
passwords.
Proposal: 3DES and AES use encryption. The longer the AES key , the higher the
security (this may affect throughput). Null uses no encryption.
Authentication Algorithm: MD5 gives minimal security. SHA-1 gives higher
security.
Key Group: DH5 is more secure than DH1 or DH2 (although it may affect
throughput).
SA Life Time: Set how often the ZyWALL renegotiates the IKE SA. A short SA Life
Time increases security, but renegotiation temporaril y disconnects the VPN tunnel.
NAT Traversal: Select this if the VPN tunnel must pass through NAT (there is a
NAT router between the IPSec devices).
Use Dead Peer Detection (DPD) to have the ZyWALL make sure the r e mote
IPSec router is there before transmitting data through the IKE SA. If the remote
IPSec server does not respond, the ZyWALL shuts down the IKE SA.
94
ZyWALL USG 2000 User’s Guide

Chapter 4 Wizard Setup
Phase 2 in an IKE uses the SA that was established in phase 1 to negot iate SAs for
IPSec.
Figure 46 VPN Advanced Wizard: Step 4
The following table describes the labels in this screen.
Table 20 VPN Advanced Wizard: Step 4
LABEL DESCRIPTION
Phase 2 Setting
Active Protocol Select the security protocols used for an SA.
Both AH and ESP increase ZyWALL processing requirements and
communications latency (delay).
Encapsulation Tunnel is compatible with NAT, Transport is not.
Tunnel mode encapsulates the entire IP packet to transmit it
securely. Tunnel mode is required for gateway services to provide
access to internal systems. Tunnel mode is fundamentally an IP
tunnel with authentication and encryption. Transport mode is used
to protect upper layer protocols and only affects the data in the IP
packet. In Transport mode, the IP packet contains the security
protocol (AH or ESP) located after the original IP header and options,
but before any upper layer protocols contained in the packet (such as
TCP and UDP).
ZyWALL USG 2000 User’s Guide
95

Chapter 4 Wizard Setup
Table 20 VPN Advanced Wizard: Step 4 (continued)
LABEL DESCRIPTION
Encryption
Algorithm
SA Life Time
(Seconds)
Perfect Forward
Secret (PFS)
When DES is used for data communications, both sender and
receiver must know the same secret key, which can be used to
encrypt and decrypt the message or to generate and verify a
message authentication code. The DES encryption algorithm uses a
56-bit key. Triple DES (3DES) is a variation on DES that uses a 168bit key. As a result, 3DES is more secure than DES. It also requires
more processing power, resulting in increased latency and decreased
throughput. AES128 uses a 128-bit key and is faster than 3DES.
AES192 uses a 192-bit key and AES256 uses a 256-bit key. Select
Null to have no encryption.
Define the length of time before an IKE SA automatically renegotiates
in this field. The minimum value is 60 seconds.
A short SA Life Time increases security by forcing the two VPN
gateways to update the encryption and authentication keys. Howeve r,
every time the VPN tunnel renegotiates, all users accessing remote
resources are temporarily disconnected.
Perfect Forward Secret (PFS) is disabled (None) by default in phase 2
IPSec SA setup. This allows faster IPSec setup, but is not so secure.
Select DH1, DH2 or DH5 to enable PFS. DH1 refers to DiffieHellman Group 1 a 768 bit random number. DH2 refers to DiffieHellman Group 2 a 1024 bit (1Kb) random number. DH5 refers to
Diffie-Hellman Group 5 a 1536 bit random number (more secure, yet
slower).
Policy Setting
Local Policy (IP/
Mask)
Incoming
Interface
Remote Policy
(IP/Mask)
Property
Nail Up Select this if you want the ZyWALL to automatically renegotiate the
Next Click Next to continue.
Type a static local IP address that corresponds to the remote IPSec
router's configured remote IP address.
To specify IP addresses on a network by their subnet mask, type the
subnet mask of the LAN behind your ZyWALL.
Select an interface from the drop-down list box to have packets
encrypted by the remote IPSec router to enter the ZyWALL via this
interface.
Type a static local IP address that corresponds to the remote IPSec
router's configured local IP address.
To specify IP addresses on a network by their subnet mask, type the
subnet mask of the LAN behind the remote gateway.
IPSec SA when the SA life time expires.
4.8.6 VPN Advanced Wizard - Phase 2
Active Protocol: ESP is compatible with NAT, AH is not.
Encapsulation: Tunnel is compatible with NAT, Transport is not.
96
ZyWALL USG 2000 User’s Guide

Chapter 4 Wizard Setup
Proposal: 3DES and AES use encryption. The longer the AES key , the higher the
security (this may affect throughput). Null uses no encryption.
Local Policy (IP/Mask): Type the IP address of a computer on your network.
You can also specify a subnet. This must match the remote IP address configured
on the peer IPSec device.
Incoming Interface: The peer IPSec device connects to the ZyWALL via this
interface.
Remote Policy (IP/Mask): Type the IP address of a computer behind the peer
IPSec device. You can also specify a subnet. This must match the local IP address
configured on the peer IPSec device.
Nail Up: Select this to have the ZyWALL automatically renegotiate the IPSec SA
when the SA life time expires.
This read-only screen shows the status of the current VPN setting. Use the
summary table to check whether what you have configured is correct.
Figure 47 VPN Advanced Wizard: Step 5
ZyWALL USG 2000 User’s Guide
97

Chapter 4 Wizard Setup
The following table describes the labels in this screen.
Table 21 VPN Advanced Wizard: Step 5
LABEL DESCRIPTION
Summary
Rule
Name
Secure
Gateway
PreShared
Key
Local
Policy
Remote
Policy
Remote
Gateway CLI
This is the name of the VPN connection (and VPN gateway).
This is the WAN IP address or domain name of the remote IPSec router. If
this field displays 0.0.0.0, only the remote IPSec router can initiate the
VPN connection.
This is a pre-shared key identifying a communicating party during a phase
1 IKE negotiation.
This is a (static) IP address and Subnet Mask on the LAN behind your
ZyWALL.
This is a (static) IP address and Subnet Mask on the network behind the
remote IPSec router.
These commands set the matching VPN connection settings for the
remote gateway. If the remote gateway is a ZLD-based ZyWALL, you can
copy and paste this list into its command line interface in order to
configure it for the VPN tunnel.
You can also use a text editor to sa ve these commands as a shell script file
with a “.zysh” filename extension. Then you can use the file manager to
run the script in order to configure the VPN connection.
See the commands reference guide for details on the commands displayed
in this list.
Save Click Save to store the VPN settings on your ZyWALL.
4.8.7 VPN Advanced Wizard - Summary
This summary of VPN tunnel settings is read-only.
Name: Identifies the VPN connection (and the VPN gateway).
Secure Gateway: IP address or domain name of the peer IPSec device.
Pre-Shared Key: VPN tunnel password.
Local Policy: IP address and subnet mask of the computers on the network
behind your ZyWALL that can use the tunnel.
Remote Policy: IP address and subnet mask of the computers on the network
behind the peer IPSec device that can use the tunnel.
98
Copy and paste the Remote Gateway CLI commands into another ZLD-based
ZyWALL’s command line interface.
Click Save to save the VPN rule.
ZyWALL USG 2000 User’s Guide

4.8.8 VPN Advanced Wizard - Finish
Now you can use the VPN tunnel.
Figure 48 VPN Wizard: Step 6: Advanced
Chapter 4 Wizard Setup
Note: If you have not already done so, you can register your ZyWALL with
myZyXEL.com and activate trials of services like IDP.
You can click Next and use the following screen to perform a basic registration
(see Section 4.4 on page 77). If you want to do a more detailed registration or
manage your account details, click myZyXEL.com.
Alternatively, click Close to exit the wizard.
ZyWALL USG 2000 User’s Guide
99

Chapter 4 Wizard Setup
100
ZyWALL USG 2000 User’s Guide
 Loading...